
Insert a table

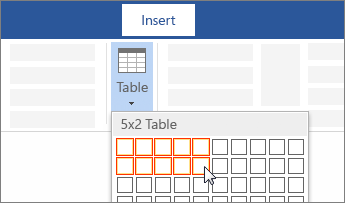
For a basic table, click Insert > Table and move the cursor over the grid until you highlight the number of columns and rows you want.
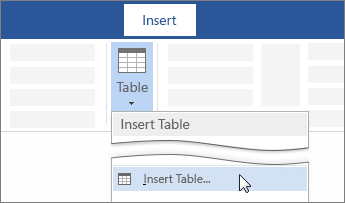
For a larger table, or to customize a table, select Insert > Table > Insert Table.
Tips:
-
If you already have text separated by tabs, you can quickly convert it to a table. Select Insert > Table, and then select Convert Text to Table.
-
To draw your own table, select Insert > Table > Draw Table.
Need more help?
Want more options?
Explore subscription benefits, browse training courses, learn how to secure your device, and more.
Communities help you ask and answer questions, give feedback, and hear from experts with rich knowledge.
Insert and Edit a Table with Multiple Columns and Rows in Word
by Avantix Learning Team | Updated August 23, 2022
Applies to: Microsoft® Word® 2013, 2016, 2019, 2021 and 365 (Windows)
You can create a table in a Word document in 4 easy ways using the Ribbon. A table is a grid made up of columns and rows that intersect to form cells. You can insert text, numbers and images in a table. Once you have inserted a table, you can easily add and resize columns and rows and change table formatting.
It’s best to avoid using Draw Table to create a table since the table may not be created in a consistent way.
Note: Buttons and Ribbon tabs may display in a different way (with or without text) depending on your version of Word, the size of your screen and your Control Panel settings. For newer versions of Word, Ribbon tabs may appear with different names. For example, the Table Design tab may appear as Table Tools Design.
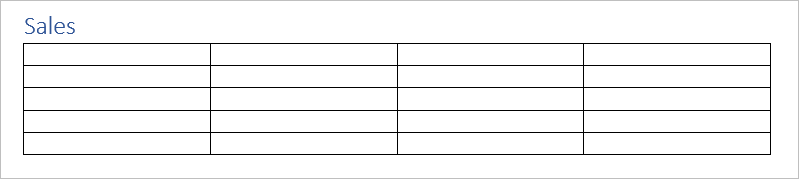
In the following example, a table with 4 columns and 5 rows has been inserted in a Word document:
Recommended article: 10 Microsoft Word Shortcuts for Moving Around in Tables
Do you want to learn more about Microsoft Word? Check out our virtual classroom or in-person classroom Word courses >
Create a table using the Table Grid
To insert a table using Insert Table and select columns and rows in the Table Grid:
- Click in the Word document where you want to insert a table.
- Click the Insert tab in the Ribbon.
- Click Table in the Tables group. A drop-down menu appears with a Table Grid.
- Hover over the grid until the number of columns and rows you want is selected.
- Click in the highlighted area of the grid to insert a table.
To insert a table, select cells in the Table Grid as follows:

Create a table using the Insert Table dialog box
To insert a table using the Insert Table dialog box:
- Click in the Word document where you want to insert a table.
- Click the Insert tab in the Ribbon.
- Click Table in the Tables group. A drop-down menu appears.
- Select Insert Table. A dialog box appears.
- Enter the number of columns and rows you want to create.
- Select the desired options below AutoFit behavior (typically Fixed column width: Auto).
- Click OK.
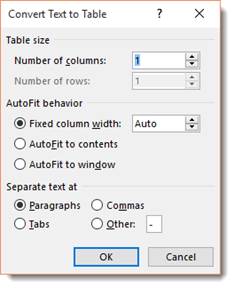
The Insert Table dialog box appears with options to select the number of columns and rows:

Create a table using Quick Tables
To insert a table using Quick Tables:
- Click in the Word document where you want to insert a table.
- Click the Insert tab in the Ribbon.
- Click Table in the Tables group. A drop-down menu appears.
- Select Quick Tables. A gallery appears.
- Click the table you want to insert.
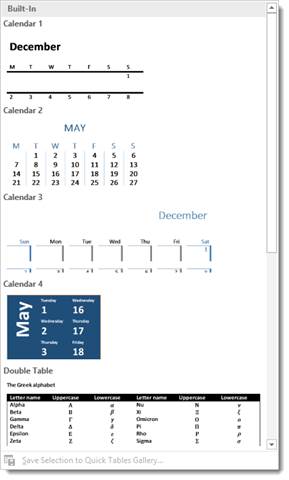
Quick Tables appear in the Table drop-down menu:

Create a table by converting text to a table
If you have used tabs or other delimiters in paragraphs, you can convert the data into a table (if the delimiters are entered consistently). Wherever you have pressed Enter or Return to create a new paragraph, Word will create a new table row. You can use various delimiters to separate data but the most common are tabs, spaces or commas.
To convert delimited data to a table:
- Select the text that you want to convert.
- Click the Insert tab in the Ribbon.
- Click Table in the Tables group. A drop-down menu appears.
- Select Convert Text to Table. A dialog box appears.
- Enter the number of columns if necessary and ensure a delimiter is selected in the Separate text at area.
- Under AutoFit behavior, choose how you want your table to appear. Word chooses a width for the table columns by default. If you want a different column width, choose AutoFit to contents or AutoFit to window.
- Click OK.
In the Convert Text to Table dialog box, enter the number of columns as well as the delimiter:

Show table gridlines
Gridlines show the cell boundaries of a table on screen if table borders are not applied. Gridlines appear only on the screen and are not printed.
Gridlines are not visible when you view a document in a Web browser or in Print Preview.
To show table gridlines in a Word document:
- Click in a table.
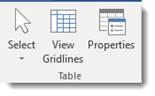
- Click the Table Layout or Table Tools Layout tab in the Ribbon.
- In the Table group, check View Gridlines.
View Gridlines appears on the Table Tools Layout or Table Layout tab in the Ribbon:

Move around in a table
You can use the following keys to move from one cell to another in a table:
- Tab to move to the next cell to the right.
- Shift-Tab to move to the cell to left.
- Ctrl-Tab to tab within a cell.
Add a row or a column
To add a row in a table:
- Click in a cell that is located above or below where you want to add a row.
- Click the Table Layout or Table Tools Layout tab in the Ribbon.
- To add a row above the cell you clicked in, click Insert Above in the Rows and Columns group. To add a row below the cell you clicked in, in the Rows and Columns group, click Insert Below.
The commands to insert rows or columns appear on the Table Tools Layout or Table Layout tab in the Ribbon:

You can also right-click in a row and choose Insert from the drop-down menu and insert options from the sub-menu.
If you click in the last cell in a table and press Tab, Word will automatically add a row.
To add a column in a table:
- Click in a cell that is located to the right or left of where you want to add a column.
- Click the Table Layout or Table Tools Layout tab in the Ribbon.
- To add a column to the left of the cell you clicked in, click Insert Left in the Rows and Columns group. To add a column to the right of the cell you clicked in, in the Rows and Columns group, click Insert Right.
You can also right-click in a row and choose Insert from the drop-down menu and insert options from the sub-menu.
Delete a column or row
To delete a row or column:
- Select the row or column (drag over the cells or click to the left of a row or above a column when the arrow appears).
- Click the Table Layout or Table Tools Layout tab in the Ribbon.
- In the Rows & Columns group, click Delete. A drop-down menu applears.
- Click Delete Rows or Delete Columns as appropriate.
You can also right-click in a row or column and choose Delete from the drop-down menu and delete options from the sub-menu.
Change column width
To change column width:
- Select the column or columns you want to change.
- Click the Table Layout or Table Tools Layout tab in the Ribbon.
- Click Properties in the Table group. You can also right-click and choose Properties from the drop-down menu. A dialog box appears.
- Click the Column tab.
- Check Preferred Width.
- Type the new measurement for the column width. For example, typer 1.0″ or click the up and down arrows.
- Click OK.
The Table Properties dialog box appears as follows with the Column tab selected:

You can also drag the right line of a column to resize it.
Change row height
To change row height:
- Select the row or rows you want to change.
- Click the Table Layout or Table Tools Layout tab in the Ribbon.
- Click Properties in the Table group. You can also right-click and choose Properties from the drop-down menu. A dialog box appears.
- Click the Row tab.
- Check Specify Height.
- Type the new measurement for the row height. For example, type 1.0″ or click the up and down arrows.
- Specify row height as At Least or Exactly.
- Click OK.
The Table Properties dialog box appears as follows with the Row tab selected:

You can also drag the bottom line of a row to resize it.
Distribute rows and columns evenly
To distribute rows and columns evenly:
- Select the entire table by clicking the four-arrows that appear on the top left of the table.
- Click the Table Layout or Table Tools Layout tab in the Ribbon.
- Click Distribute Rows and / or Distribute Columns in the Cell Size group.
Apply a table style
To apply a table style:
- Click in the table.
- Click the Table Design or Table Tools Design tab in the Ribbon.
- Click a table style or click the More arrow to display the Table Styles gallery and click a style.
Table Styles gallery appears on the Table Tools Design or Table Design tab in the Ribbon:

To learn more about working with table styles, check out the article How to Format Microsoft Word Tables Using Table Styles (Ultimate Guide).
Subscribe to get more articles like this one
Did you find this article helpful? If you would like to receive new articles, JOIN our email list.
More resources
4 Ways to Delete a Table in Word
How to Make Columns in Word (Newspaper-style)
How to Insert Formulas and Functions in Word Tables
How to Keep a Microsoft Word Table Together on One Page
How to Delete a Page in Word (Remove Blank or Extra Pages)
Related courses
Microsoft Word: Intermediate / Advanced
Microsoft Excel: Intermediate / Advanced
Microsoft PowerPoint: Intermediate / Advanced
Microsoft Word: Long Documents Master Class
Microsoft Word: Styles, Templates and Tables of Contents
Microsoft Word: Designing Dynamic Word Documents Using Fields
VIEW MORE COURSES >
Our instructor-led courses are delivered in virtual classroom format or at our downtown Toronto location at 18 King Street East, Suite 1400, Toronto, Ontario, Canada (some in-person classroom courses may also be delivered at an alternate downtown Toronto location). Contact us at info@avantixlearning.ca if you’d like to arrange custom instructor-led virtual classroom or onsite training on a date that’s convenient for you.
Copyright 2023 Avantix® Learning
Microsoft, the Microsoft logo, Microsoft Office and related Microsoft applications and logos are registered trademarks of Microsoft Corporation in Canada, US and other countries. All other trademarks are the property of the registered owners.
Avantix Learning |18 King Street East, Suite 1400, Toronto, Ontario, Canada M5C 1C4 | Contact us at info@avantixlearning.ca

You’ve done the hard work in the laboratory, taking precise measurements and recording them diligently. Now comes the time to write up your results.
But how should you do this? Is there not some kind of clear, simple and visually striking way to present your data in a Microsoft Word document? Friend, you’ve come to the right place.
In today’s blog post, we run through the basics of adding (and formatting) charts and tables in Microsoft Word.
Adding a Chart or Graph
Microsoft Word enables adding charts and graphs of many kinds in your document, from simple pie charts to 3D surface graphs. To do this, simply:
- Place the cursor where you want your chart to appear
- Go to “Insert” on the main ribbon and select “Chart” from the “Illustrations” section

- In the new window, pick the type of chart you want in your document and click “OK”
- Your chart will now appear in the position selected and an Excel spreadsheet window will open (called “Chart in Microsoft Word”)
- Edit the values and labels in the Excel window to reflect the data required for your chart

- To change the chart title, simply double click and type (you can also add a caption by right clicking on the chart and selecting “Insert Caption…)


You can customize your chart further via the buttons that appear when you click on the chart (options include layout, chart elements, chart style, colors and the data you wish to be visible).
Linking Excel and Word
Alternatively, if you already have an Excel spreadsheet containing a chart, you can copy and paste this to a Microsoft Word document using the “Paste Special…” option on the “Home” tab (to select this, click the small arrow at the bottom of the normal “Paste” button).
Find this useful?
Subscribe to our newsletter and get writing tips from our editors straight to your inbox.
To do this, open the Excel spreadsheet in question and copy the relevant chart. Next, select “Paste Special.” You can then add the chart to your Word document by selecting “Paste link” and “Microsoft Excel Chart Object”.
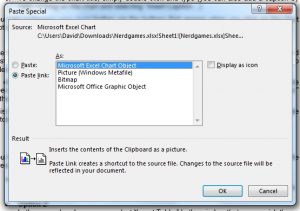
This links the chart in the Word document to the one in the original spreadsheet. It will then update automatically if the values in the spreadsheet are changed.
Adding a Table
You have various options for adding tables to a Microsoft Word document, so we’ll stick to the three simplest here.
- Option 1
Go to “Insert” and select “Table.” This opens a dropdown menu with a grid. You can then pick the number of columns and rows required.

- Option 2
In the same dropdown menu, select “Insert Table.” In the window that opens, pick the number of columns and rows required. - Option 3
Draw your own! In the “Table” menu on the “Insert” tab, select “Draw Table.” This lets you draw and edit tables by hand
If you click on an existing table, you can edit its design and layout via the “Table Tools” tab that appears on the ribbon.
Many documents present some data in the form of figures or tables. Creating tables is often more efficient than describing the data in the paragraph text, especially when the data is numerical or large. The tabular data presentation makes it easier to read and understand.
A table is a collection of information or data, usually represented by horizontal rows and vertical columns. Each column and each row can have a header. Some tables have only column headings or only row headings. The box at the junction of each column and row is a cell that contains data such as text, numeric information, or images. Some cells can be merged or split (see more about formatting tables). E.g.:

Microsoft Word has many features that make working with tables simple and convenient.
Create a table
There are several ways how to insert or create a table:
- Create a blank table of up to 10 columns and 8 rows,
- Create a blank table with more than 10 columns or more than 8 rows,
- Create a blank table manually (Draw a table),
- Create a table using predefined templates (Quick Tables),
- Create a table from the existing data (Convert Text to Table),
- Insert a Microsoft Excel spreadsheet.
To create a blank table in a Word document, do the following:
1. Place your cursor where you want to insert the table.
2. On the Insert tab, in the Tables group, click the Table button:

3. Do one of the following:
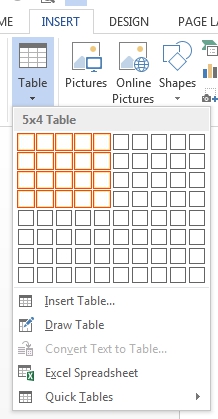
Create a blank table of up to 10 columns and 8 rows
- To create a table of up to 10 columns and 8 rows, move the cursor right (to select columns) and down (to select rows) the grid to select as many cells as you need. E.g., the table of 5 columns and 3 rows (selected cells will turn orange):

Click on a cell in the grid with the expected number of rows and columns (or press Enter) to insert an empty table to fit the width of the text (paragraph).
The table has the specified number of single-line text rows in the current paragraph and equal-width columns. E.g., the table of 3 rows and 5 columns:


Create a blank table with more than 10 columns or more than 8 rows
- To create a table with more than 10 columns or more than 8 rows, do one of the following:
- Create a table with exactly 10 columns or 8 rows, then add as many columns or rows as you need (see below how to customize table).
- Click the Insert Table… option:
In the Insert Table dialog box:

- In the Table size group, specify the number of columns and rows,
- In the AutoFit behavior group, specify the width of the table and its columns:
- Select the Fixed column width option to customize width in the appropriate field: select Auto (used by default) or specify width. E.g., 0.75″:

- Select the AutoFit contents option to adjust cell sizes to the document content. E.g.:

- Select the AutoFit to window option to adjust the table’s width to the document content width. E.g.:

- Select the Remember dimension for new tables check box if you want to create tables with the same options later. Word will remember your customization.


Create a blank table manually
- To manually create an empty table, click the Draw Table option:
After clicking that option, the cursor changes to the pencil
 that allows drawing cells directly in the Word document to create a table:
Click anywhere in a document but the table itself by the pencil to stop drawing a table.
Notes:
- To draw additional lines, select a table, then on the Table Layout tab, in the Draw group, click the Draw Table button:

- If you draw a line in the wrong position, click the Eraser button in the Draw group of the Table Layout tab:
- We recommend displaying the rulers or gridlines to help you place the lines correctly.
- To draw additional lines, select a table, then on the Table Layout tab, in the Draw group, click the Draw Table button:


Create a table using predefined templates
To create a table using predefined Word templates of tables and calendars, do the following:
1. Place your cursor where you want to insert the table.
2. On the Insert tab, in the Tables group, click the Table dropdown list, then select Quick Tables list:

3. From the Quick Tables gallery, select the template you prefer.
For example:

Create a table from the existing data
To create a table from the existing data in a document data (either as regular text or as a tabbed list), do the following:
1. Select the document data you want to shape into a new table.
2. On the Insert tab, in the Tables group, click the Table dropdown list, then select Convert Text to Table…:

3. In the Convert Text to Table dialog box:

- In the Table size group, specify the number of columns,
- In the AutoFit behavior group, specify whether the width of the columns should be fixed (see details above),
- In the Separate text at group, select the character that separates text into columns in the selected text: paragraph marks, commas, tabs, or some other character.
E.g.:

Insert a Microsoft Excel spreadsheet
Note: It is possible to insert a Microsoft Excel spreadsheet in a document. To do so, on the Insert tab, in the Tables group, click the Table dropdown list, then select Excel Spreadsheet:

Word opens the Excel spreadsheet where you can enter the data. You can use Excel features such as functions and formulas to create or manipulate the data. Note that it is not a Word table.
Add rows and columns
To add a row and a column to a table, do the following:
1. Position the cursor:
- to a cell in a row above or below which you need to insert a row,
- to a cell in a column left or right which you need to insert a column.
2. Do one of the following:
- Click the Insert dropdown list in the Mini toolbar:

- On the Table Layout tab, in the Rows & Columns group:

- Click the Insert Above button to insert a row above the row with the cursor,
- Click the Insert Below button to insert a row below the row with the cursor,
- Click the Insert Left button to insert a column left to the column with the cursor,
- Click the Insert Right button to insert a column right to the column with the cursor.
- Right-click and select the Insert list:


Notes:
- To insert rows or columns, move the mouse over the table or left of the table until you see the Insertion indicator, then click the icon:
 and
and
- You can choose the option Insert -> Insert Cells… from the popup menu; Word opens the Insert Cells dialog box:

After selecting the option and clicking the OK button, Word adds an entire row or column, not a cell. Word just moves cells according to the selection.
 and
and 

Delete a table element
To delete a table element, do the following:
1. Select the cell, multiple cells, the entire column or multiple columns, the entire row, or multiple rows.
2. Do one of the following:
- Click the Delete dropdown list in the Mini toolbar:

- On the Table Layout tab, in the Rows & Columns group, click the Delete dropdown list, then select one of the options:


3. Select one of the proposed options:
- Delete Cells… opens the Delete Cells dialog box, in which select the option you need:
- Delete Columns
- Delete Rows
- Delete Table

Note: You can select the element you want to delete, right-click on the selection and select the appropriate item in the popup menu. For example, if the entire table is selected or the column is selected:
 and
and

Convert a table into text
To convert a table into text in Word, follow the next steps:
1. Click anywhere in the table.
2. On the Layout tab, in the Format group, click the Convert to Text button:

3. In the Convert Table to Text dialog box, select the charter to separate cells data in the text:

4. Click OK.

Creating tables is usually reserved for Microsoft Excel, but you can work with tables in Word as well. You can also create tables and copy and paste them to a Word document, but most of the formatting must be done in Excel. Some elements that copy over from Excel don’t format well in Word, so it can be more convenient and easier to create simple tables directly in Word and then format them using Word controls.
Table Basics
Before you create a table, you should understand properties of tables which are universal across all applications. Tables are made up of rows and columns. If you look at an Excel spreadsheet, you see that columns run vertical with letters for labels. Rows run horizontally and have numerical labels. Excel’s spreadsheet layout is the same as the way Word lays out its tables.
The intercept between a row and a column is called a «field» or a «cell.» This is where your data is entered. You can have as many rows and columns as you need, but one limitation of Word is that a table is limited to the height and width of the document. With Excel, you can span several columns and rows, and you can just scroll through them to view data. Rows that span more than one Word document can span multiple pages, but you are limited to the number of columns by the width of the document. Any additional columns will either get cut off or shown on a new page, which makes the document hard to read. Therefore, if you have large tables, it might be better to use Microsoft Excel instead.
Inserting a Table
The table controls in Word are found in the «Insert» ribbon tab.
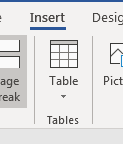
(The «Insert» tab and «Table» button)
Initially, you need to insert a table with default formatting and then you can format table cells with the colors, fonts and borders that match the aesthetics of your document content.
To insert a new table, click the «Table» button and look at the dropdown options.
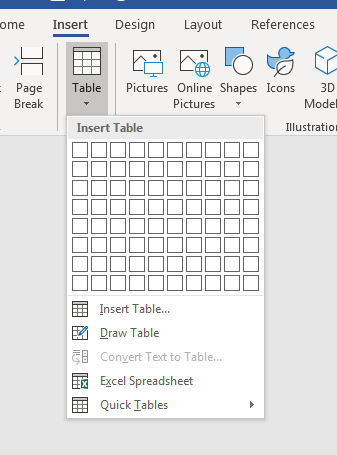
(Table dropdown options)
Notice the squares in the dropdown menu. The squares indicate the number of fields that you want to add to the table. You can always add more fields after you’ve inserted a table, but inserting the number of rows, columns and fields from this menu make it easier to get started when you know the number of cells that you need. In the menu, click the cells that you want to add to the table and Word creates them on the document.
In this example, a table with four columns and three rows is created. Word automatically sets the table’s width to the margins on the page and evenly distributes the width and height of cells. You can format these cells after it’s inserted including width and height of cells.
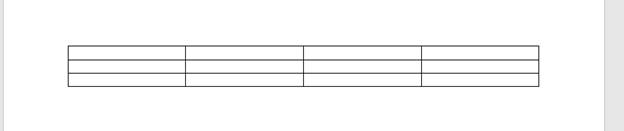
(Word’s automatic table formatting default settings)
After you create table cells, you can add content to them. In this example, a list of customers is created. The first row is typically used to create headers, so they have special formatting to indicate to readers that the information stored in these cells aren’t data but headings.

(Table with data filled out)
In the above example, notice that there are handles on the upper-left and lower-right corners. These handles can be used to move the table or resize the entire table size. Note that using the handles on the corners resizes the entire table’s width and height, not individual cells. To resize individual columns and rows, hover your mouse over the borders shown around each cell. The cursor changes and prompts you to resize columns (if you hover the mouse over vertical borders) or resize rows (if you hover the mouse over a horizontal line).
We want to format the content in the header row, and you can do this by clicking the cell and using the automatic context window that opens when a cell is highlighted and you hover the mouse over the content.
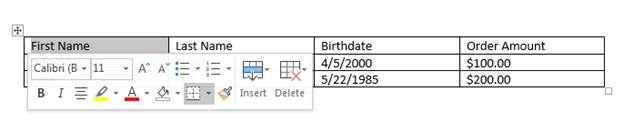
(Format context window for a table cell)
In the context window, you’ll notice that most of the options are the same «Font» controls and options covered in previous chapters. On the right side of the context window is the functions that allow you to insert a new row or column or delete the current cell. First, click the «B» button to make text in the «First Name» header cell set to bold formatting. You don’t have to format cells one-by-one. You can also highlight multiple cells and click formatting controls to make changes to several cells at once.
After you change the text in each cell, you have the option to format other table properties including boarders and backgrounds. Word has several border options including styles and colors. You can find these styles by clicking the upper-left corner hand and selecting border styles.
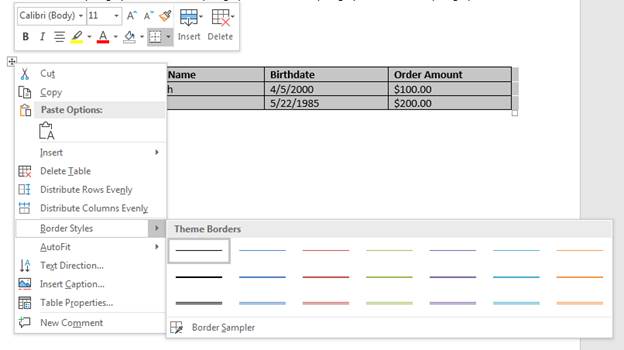
(Table border styles)
Notice that you have several color options with line thickness and double-lined borders as well. If you click the «Border Styles» option, a menu opens at the top of your Word window that displays several preset styles.

(Border styles menu)
Notice that the styles show a preview including header styles that make the first row stand out, and then preset colored borders. You can use the right side of the menu to choose your own border shading and colors, and you can adjust the thickness of the lines that surround each cell. For this example, a preset is chosen and all cells in the table are formatted.

(Purple formatted preset for a table)
After you enter data, you might decide that you need to add a new row or column to your table. When you add a new element, the new row or column takes the same styles, colors, fonts and borders as the current table, so you won’t need to re-style these new cells.
You find the context menu to add new rows and columns by right clicking the upper-left handle again.
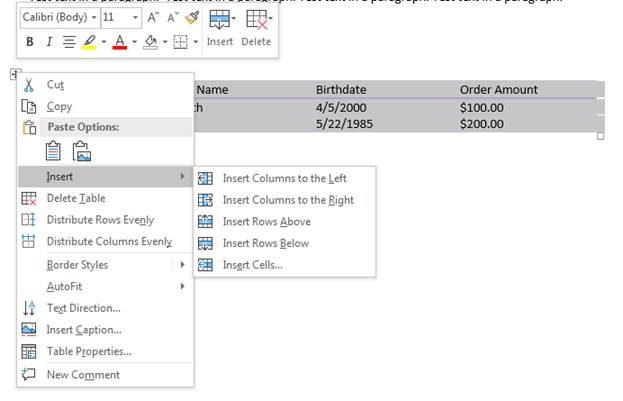
(Insert table options)
Notice that you can specify the position where the new row or table will display. For instance, if you want to insert a row below the current ones, choose «Insert Rows Below.» Because three rows are highlighted in the example image, three new rows are created in the table. You’ll notice that these new rows have the same color borders, and when you type any content into the cells, the same format will be applied as the previous cells.
You can use the same method to delete rows, and you’ll notice that the context menu also has the option to delete the entire table. Should you delete the table and change your mind, remember that you can use the «Undo» button at the top-left of the main Word window. This will return the table to the document along with its formatting and content.
Many of the table properties available in the context menu are also available from the «Table Properties» window. Right click the table and choose «Table Properties.»
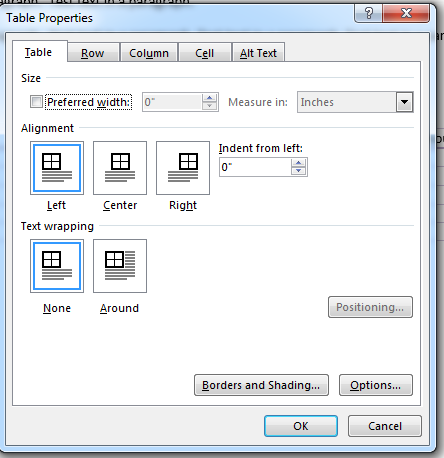
(Table properties window)
You can set the size of the table and many of the properties for rows, columns and cells in this window. The alignment option determines the way a table is formatted within a paragraph. This property is similar to the way text wraps around an image illustrated in the last chapter. You can also set alternative text that displays should the user be unable to view your table. This is done in the «Alt Text» tab.
If you find working with tables in Word too difficult, remember that you can always use Microsoft Excel and copy and paste the table to your document. Word’s table controls are useful for small simple tables, but anything that requires formulas and complex calculations should be done in Excel.
Drawing a Table
If you know your table is not going to be uniform (regularly sized columns and rows), you can «draw» a table. This is particularly helpful when using tables to create complex page layouts.
To do this, click the Table button and select Draw Table. Your mouse pointer will transform into a pencil tool and you’ll be able to draw individual cells anywhere in your document. You can even draw cells within cells.
Click and hold the left mouse button, drag the cell into the desired size and shape, and then release. It’s that simple.
Selecting parts of tables
To select part of a table, simply click inside the upper left cell that represents the first cell you want to select. Hold the left mouse button down and drag across the remaining cells you want to select.
Adding Text to a Table
Adding text to a table is as easy as clicking into a cell and then typing. You will be able to change any attributes of that text, too, and even apply a Quick Style.
Position Text within a Cell
Just like in an ordinary document, you can choose whether to center text within a cell, or whether to align it right or left, or toward the top or the bottom. Go to the Alignment group under the Table Layout tab.
To reach the Table Layout tab, click the box above the left top corner of the table. This selects the table.

The Alignment group is pictured below.
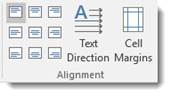
Using the graphics on the left as guides, select how you want text positioned within cell in your table.
NOTE: You can format the text position for just one cell, multiple cells (by selecting the cells), or the entire table (by selecting the table).
Converting Text into a Table
You can convert text into a table. This is especially handy if you’ve already written information that you think would be more effectively conveyed in a table.
To do this, you’ll have to carve up the text into columns and rows using commas and new paragraphs. That’s how you tell Word to separate the text into individual cells. Simply place a comma between the text you want to put into a column and place a paragraph where you want to begin a new row. An example of the text might look like this:

Now select the text, click the Tables button under the Insert tab. From the dropdown menu, choose «Convert Text To Table.»

You can now specify the number of columns, as well as how to separate text. You can separate text into cells by paragraphs, commas, tabs, etc.
We chose two columns and to separate text at commas.
Look at the example below to see the final result.

Quick Tables
Word comes with a group of table templates for you to use and quickly customize to fit your needs. You can access them by clicking the Tables tool and choosing Quick Tables. Scroll through the templates and choose the one that best suits your needs. As with other kinds of tables, Word automatically inserts Quick Tables wherever the cursor is positioned in the document.
Once the Quick Table has been created, click the template text and start typing to replace it… You can also create your own Quick Tables by selecting a table that you’ve created and clicking the Save to Quick Table Gallery button at the bottom of the Quick Table menu.
Formatting Tables with the Table Tools
Whenever you create or select a table, the Table Tools will open automatically over the Design and Layout tabs in the tool bar. It allows you to easily apply table styles, borders, and shading attributes and more. Below is an example of the Design and Layout tools available for tables.

The Design tab (shown above) lets you customize the look and appearance of your table.
Let’s look at the Table Style Options group. But first, look at our table below:

In the Table Style Options group, we see that Header Row, First Column, and Banded Rows are checked.
Let’s learn what all these options mean so you can decide what you want checked – and what you don’t.
-
A Header Row is the first row in a table that contains headings (labels) for all the columns, as shown our table above.
-
When First Column is checked, it means the first column is also headers or labels. Same goes for the Last Column.
-
You can also choose to have banded rows or columns. Banded Rows formats even and odd rows differently so they are easier to read. If you choose Banded Columns, it formats even and odd columns differently.
-
Total Row means to create a row for mathematical totals.
In the Table Styles group, you can pick a new table style or apply shading to your table by clicking the Shading button.
In the Borders group, you can use Border Styles add borders to rows and columns to customize the look of your table.
Now, let’s click the Layout tab.

The Layout tab, when associated with the Table Tools, allows you to easily insert rows and columns, and format text and objects within cells. You can also create new margins for your cells. We’ll learn all about margins in just a few lessons.
Selecting Cells, Rows, and Columns
Selecting cells, rows, and columns in Word is easy.
To select a cell, click within the cell so the mouse cursor is blinking.
Go to the table Format tab, then the Table group. Click Select>Select Cell
To select a row, click in the first cell in a row go to Select>Select Row.
To select a column, click the first cell in a column, then go to Select>Select Column.
The Border Painter Tool
The Border Painter tool was a feature added in Word 2013. It makes applying different widths and borders to your table easier than ever before. To find the tool, select your table and go to the Table Tools Design tab.

To use the border painter, first apply formatting to some borders in your table, then click the Border Painter button. Click on any border to apply the formatting. You can also click and drag the mouse to apply it to a whole line.
Border Sampler
The Border Sampler works with the Border Painter tool. The Border Sampler is located at the bottom of the Border Styles Gallery. To access it, click the Border Styles button in the Borders group under the Table Tools Design tab.

Simply click on Boarder Sampler. An eyedropper will appear. Click on a table border that you want to sample. Word then switches to the Border Sampler. You can apply the same formatting somewhere else in the table.
Adjusting the Width of Individual Columns
There are several ways to adjust the width of individual columns:
1. Position your mouse pointer over the edge of the column and then drag it to the desired width.
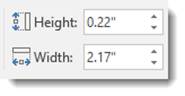
2. Select the column, then go to the Table Tools Layout tab, then the Cell Size group. Enter in a new width (in inches)
Adjusting Width of All Columns
To fix the width of all of the columns at once, select the entire table and use the Width box under the Layout tab to adjust the columns to the desired size.
You can also use the Distribute Columns button to make all of the columns the same size.
Adjust rows in the same way, except use the Height field.
Adding Rows and Columns
There are two ways to add a new row or column to a table.
You can select a cell, row, or column and right click on it, then select Insert from the menu.
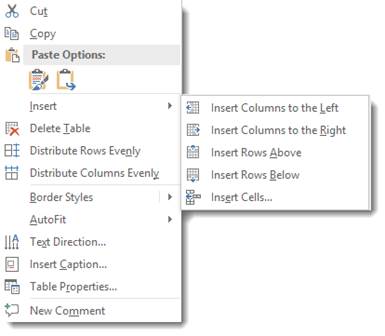
You can then choose to:
-
Insert Columns to the Left
-
Insert Columns to the Right
-
Insert Rows Above
-
Insert Rows Below
-
Insert Cells
In addition, you can also select a cell, row, or column, then go to the Table Tools Layout tab. Choose an option from the Rows & Columns group.
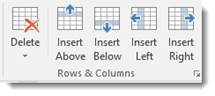
You can also add rows or columns simply by mousing over a row or column.
Look at the snapshot below.

When we moused over the row, look at the little plus sign that appeared.

Click the plus sign to add a row.
For columns, move to the top or bottom of the column and the plus sign will appear.
Deleting Cells, Rows or Columns
To delete a Cell, Row or Column, simply select it, navigate to the Layout tab, go to the Delete group, then select if you want to delete cells, rows, or columns, or the entire table from the dropdown menu.
You will then have the option of deleting a cell, a row, a column, or the entire table. You can also delete cells, rows and columns by right-clicking inside a cell. In the menu select Delete Cells. Click the appropriate command and click Ok.
Merging Cells and Splitting Cells
To merge cells, drag your mouse over the cells while holding the left mouse button to select them. In the Layout tab, select the Merge Cells button from the ribbon. It looks like this:

The Merge Cells button is located in the Merge group on the ribbon. Alternatively, select the cells you’d like to merge and click the right mouse button. Select the Merge Cells from the menu.
To split a cell, select it by clicking on it, then click the Split Cell button on the ribbon.

This button is also found in the Merge group. Choose the number of rows and columns you’d like to split the cell into then click OK.
Split a table by clicking the Split Table button. It looks like this:

The Split Table button is located in the Merge group under the Table Tools Layout tab.
Doing Math in a Table
You can do math in tables in much the same way that you do in spreadsheets and Excel. However, Word’s math commands are simpler, so they’re easier to use.
For this example, let’s do a sum.
To figure out a sum of values in a table, create the table and add the values you want to add. You can put values in rows or columns. You should go ahead and do the layout and design for your table at this time. Just make sure the last cell in the row or column (wherever you’re doing your values) is empty.
Now, click in the cell where you want to place the mathematical formula.
Go to the table Layout tab.
Go to the Data group. Click the Formula button.

Select Sum from the Paste Function menu, then click OK.

30
30 people found this article helpful
Working With Tables in Microsoft Word
Use tables to align columns and rows of text
Updated on October 31, 2019
Aligning text in a word processing document can be tedious when it’s done with tabs and spaces. With Microsoft Word, insert tables in a document to align columns and rows of text with ease. Learn how to work with tables in Word.
Instructions in this article apply to Word for Microsoft 365, Word 2019, Word 2016, Word 2013, and Word 2010.
Insert Table Method
Using the menu, you can either select or type the desired number of columns and rows.
-
Open a Word document and select the location where you want to place the table.
-
Go to the Insert tab.
-
In the Tables group, select Table.
-
Select Insert Table.
To make a quick and basic table, drag across the grid to select the number of columns and rows for the table.
-
In the Insert Table dialog box, enter the number of columns and rows you want in the table.
-
In the Autofit Behavior section, enter a width measurement for the columns. Or, leave the field set to autofit to generate a table the width of the document.
-
Select OK. The blank table appears in the document.
-
To add or delete rows or columns, select Insert > Table.
-
To change the width or height of the table, drag the lower-right corner of the table.
When you select the table, the Table Design and Layout tabs appear on the ribbon. Use the tabs to apply a style or make changes to the table.
Draw Table Method
Drawing a table in Word gives you more control over a table’s proportions.
-
With a Word document open, go to the Insert tab.
-
Select Table.
-
Select Draw Table. The cursor turns into a pencil.
-
Drag down and across the document to draw a box for the table. The dimensions can be modified later if needed.
-
Click inside the box and draw a vertical line for each column and a horizontal line for each row you want in your completed table.
-
Style the table using the Table Design and Layout tabs.
Enter Text in a Table
No matter which of these methods you use to draw a blank table, you enter text in the same way. Select a cell and type. Use the tab key to move to the next cell or the arrow keys to move up and down or sideways within the table.
For more advanced options, or if you have data in Excel, embed an Excel spreadsheet in a Word document in place of a table.
Convert Text to Table
If there’s text in a document that you want to use in a table, insert separator characters, such as commas or tabs, to indicate where to divide the text into table columns. For example, in a list of people’s names and addresses, insert a tab between each name and corresponding address to make it easy to create a table.
-
Open the Word document containing the text you want to convert into a table and select that text.
-
Go to the Insert tab.
-
Select Table.
-
Select Convert Text to Table.
-
In the Convert Text to Table dialog box, change the default settings if needed.
-
Select OK to create the table.
-
To revert the table to text, go to the Layout tab and select Convert to Text.
Thanks for letting us know!
Get the Latest Tech News Delivered Every Day
Subscribe
This tutorial shows three ways to insert tables in Microsoft Word so you can choose the method that is most appropriate for your content:
- Create a table from the Table menu (best for general use)
- Create a table from the Table dialog box (offers the most sizing options)
- Insert a Quick Table (fastest setup)
Note that you can also draw a custom table and create a table by importing a spreadsheet from Excel. We will cover those advanced topics in separate tutorials.
Don’t miss the five tips for working with tables at the bottom of this tutorial:
- How to delete a table
- How to resize an entire table
- How to resize individual rows and columns
- How to add rows and columns
- How to add color to a table
This tutorial is also available as a YouTube video showing all the steps in real time.
Watch more than 200 other writing-related software tutorials on my YouTube channel.
The images below are from Word for Microsoft 365.The steps are the same in Word 2021, Word 2019, and Word 2016 and similar for Word 2013 and Word 2010. However, your interface may look slightly different in those older versions of the software.
This method is appropriate for most users who want to create a basic table for general use.
- Place your cursor where you want to insert the table.
- Select the Insert tab in the ribbon.

- Select the Table button in the Tables group.

- Move your pointer across and down the grid to select the number of cells (organized as rows and columns) needed in your table.
The selected cells will turn orange.

- Click the selected (orange) part of the grid or press Enter on your keyboard to insert the table.
Method 2: Create a Table from the Table Dialog Box
This method provides advanced sizing options.
- Place your cursor where you want to insert the table.
- Select the Insert tab in the ribbon (see figure 1).
- Select the Table button in the Tables group (see figure 2).
- Select Insert Table from the drop-down menu.

- Enter the number of rows and columns in the Insert Table dialog box.

- Select an AutoFit behavior:
-
- Fixed column width can be set to Auto or a specific width between 1/100 inch and twenty-two inches using the increment arrows.
- AutoFit to contents adjusts cell sizes to the content.
- AutoFit to Window adjusts the width of the table to the viewer’s Word window or browser window.

- (Optional Step) Check Remember dimensions for new tables if you want to create the same size table in the future.

- Select the OK button to close the Insert Table dialog box and insert your new table.

Method 3: Insert a Quick Table
Quick Tables are prebuilt tables and calendars you can modify for your own use.
- Place your cursor where you want to insert the table.
- Select the Insert tab in the ribbon (see figure 1).
- Select the Table button in the Tables group (see figure 2).
- Select Quick Tables from the drop-down menu.

- Select a table from the gallery.

- Add your own content by typing over or deleting the table’s example text.
Now let’s look at some tips for working with tables.
Five Tips for Working with Tables in Word
The following tips cover the basics of working with tables. We will dive into this topic in much greater detail in a separate tutorial.
Tip 1: How to Delete a Table
- Select the table selector, which looks like crossed arrows, to select the entire table. You may have to hover your pointer over the table to reveal the table selector.

- Right-click the table.
- Select Delete Table from the shortcut menu.

Tip 2: How to Resize an Entire Table
- Click and hold the resizing handle in the bottom right of the table. You may need to hover your pointer over the table to reveal the handle.

- Drag the table to the size you want and then release the handle.
Tip 3: How to Resize Individual Rows and Columns
- Hover your pointer over a row or column border until your pointer becomes two lines with two arrows.
Note that the pointer in figure 14 is enlarged to make it easier to see. Your pointer will be smaller.

- Click and hold as you drag the border to resize the row or column.
Tip 4: How to Add Rows and Columns
- Right-click inside a cell.
- Select Insert from the shortcut menu.

- Select the location of your new row or column:
-
- Insert Columns to the Left
- Insert Columns to the Right
- Insert Rows Above
- Insert Rows Below
- Insert Cells

If you select Insert Cells, a dialog box will appear asking where you want to insert your new cells. Note that regardless of your answer, you will be inserting an entire row or column, not an individual cell.

Tip 5: How to Add Color to a Table
- Select the table selector, which looks like crossed arrows, to select the entire table (see figure 11). You may need to hover your pointer over the table to reveal the table selector.
- Select the Table Design tab in the ribbon. (Note that this tab only appears in the ribbon when a table is selected.)

- Select the down arrow in the Table Styles group.

- Select one of the styles from the gallery.

Alternatively, you can use the shading menu to add custom colors to individual rows and columns.

Pro Tip: For even more customization, add a background image to your table. Then, save your customized table as a template for reuse in future documents, as shown in “How to Save Tables as Templates in Microsoft Word.”
Related Resources
How to Create and Customize Charts in Microsoft Word
How to Save Tables and Figures as Images in Microsoft Word (PC & Mac)
How to Insert Figure Captions and Table Titles in Microsoft Word
How to Change the Style of Table Titles and Figure Captions in Microsoft Word
How to Update Table and Figure Numbers in Microsoft Word
How to Create and Update a List of Tables or Figures in Microsoft Word
How to Export PDF Tables from Adobe Acrobat to Excel (PC & Mac)
How to Write Table Titles
How to Write Figure Captions for Graphs, Charts, Photos, Drawings, and Maps
How to Reference Tables and Figures in Text
Updated February 27, 2023
Microsoft Word or MS-WORD is a graphical word processing program that users can type with. It allows the users to type and save documents very similar to other word processors. There are many versions of MS-word in market, which the user can install as per te. In this tutorial, we will learn about the tables in MS-Word.
Tables in MS Word are made up of rows and columns with an organized arrangement of text. These tables can be used to align numbers in columns and then various operations can be performed on them. Tables can also be used to create page layouts. Rows in a table are series of data banks laid out horizontally in a table or spreadsheet. Columns are vertical series of cells in a chart, table, or spreadsheet.
How to Create a Table?
Tables in MS Word can be created in the following two ways:
1. Using the Grid
2. Using Table Dialogue Box
Using the Grid
Following are the steps of creating a table using the Grid provided in MS Word:
Step 1: Go to the Insert tab and click on the Table button.

Step 2: In the dropdown menu, select the number of rows and columns from the Grid.

Using Table Dialogue Box
Following are the steps of creating a table using Table Dialogue Box in MS Word:
Step 1: Go to the Insert tab and click on the Table button.
Step 2: Under the grid, you will see an Insert Table button. Click on it.

Step 3: In the Insert Table Dialogue box, mention the number of rows and number of columns as per the requirement and click on OK button.

How to Modify a Table?
We can also edit/modify a table to make it more creative. Multiple operations can be performed on a table like changing the layout, splitting of cells, merging the cells, applying borders, etc. Here, we will see some of the operations performed on a table in MS Word.
Changing Layout of a Table
Changing the layout of a table can be done with the help of the following steps:
Step 1: Select the table for which the layout is to be changed. Go to the design tab.

Step 2: Click on the dropdown menu to get various different types of layouts for your table.

Step 3: Select any layout as per the need.

Splitting the Cell
Splitting of a cell can be done with the help of the following steps:
Step 1: Select the cell that you want to split into multiple cells. Then go to the Layout tab and click on the Split Cells button.

Step 2: In the dialogue box, mention the new dimensions as per the requirement.

Step 3: Click on the Ok button.

Merging the Cells
Merging of various cells can be done by the following steps:
Step 1: Select all the cells that are to be merged into a single cell. Then go over the layout tab, and you will see a Merge Cell button.

Step 2: Now click on the Merge Cell button and the selected cells will be merged.

Applying Borders and Styles on a Table
Borders and styles can also be applied to a table in a similar way as the layout of a table is changed. Go through the following steps to do the same:
Step 1: Select the entire table and go over the design tab.

Step 2: Select the style that you want to apply to your table.

Converting Text to a Table
MS Word allows the conversion of existing text into a table with the help of the following steps:
Step 1: Select the text that is to be converted into the table. Now go to the Insert Tab and you will see a Table button.

Step 2: Click on the Insert Table button and in the drop-down menu, click on the Convert Text to Table button.

Step 3: In the dialogue box, mention the dimensions of the required table and other data that is required.

Step 4: Click on the OK button and the selected text will be converted to a Table.

Inserting Images in a Table
MS Word allows adding images inside the table cells. To insert an image in a table, go through the following steps:
Step 1: Select the cell in which you want to add the Image. Go to the Insert tab and select the Pictures button.

Step 2: You can either choose a picture from your device or select one online.
Step 3: Choose a picture from the browser window and click on the Insert button.

Step 4: Selected Image will be added in the cell selected.

Performing Calculations in a Table
Mathematical calculations can also be performed on the values present in the table. Microsoft provides various formulas to perform these operations. By default, the sum of the values lying in the rows to the left or column lying above are calculated by Word. Following are the steps to do the same:
Step 1: Select the cell in which the result of the mathematical operations is required.

Step 2: Now go to the Layout tab and select the formula button.

Step 3: In the dialogue box, define the formula for the mathematical operation, the default formula is the sum of the values to the left or above.

Step 4: After defining the formula, click on the OK button to apply the formula on the cells given in the formula.

![]()
Download Article
![]()
Download Article
A good table in your document can help make your data stand out to your readers, and adding a table in Word is a snap. You have a variety of options for customizing your table’s look at functionality, and you can even choose from existing templates to make inserting tables completely painless. Follow this guide to learn how.
Steps
-

1
Open Word or the document where you wish to put a table. You can insert tables into any version of Word.
-
2
Position the cursor on the area where you want the table to be inserted. Click the “Table” button that is located under the “Insert” tab. In Word 2003, click the “Insert” menu and then select “Table”.
- For best formatting results, place the table between paragraphs or on its own line.
Advertisement
-
3
Choose your method of inserting your table. In Word 2007, 2010, and 2013, you have a few different choices when it comes to inserting a table into your document. A dialog box appears when you click the “Insert” button which allows you select from the following methods:
- Use the Grid to make a table. You may insert the table by using the grid where the squares represent the number of rows or columns you can have on your table. Simply drag your mouse over the grid and click after highlighting the number of squares needed.
- Open the “Insert Table” menu. This menu allows you to specify the number of rows and columns that you want your table to have, as well as the width of the columns. You can set the width to AutoFit to your cell’s contents or have a fixed width. Click “OK” to insert the table.
- Insert an Excel spreadsheet. Click on Excel Spreadsheet if you want to insert a table which allows you to manipulate data like Excel (for example: formulas and filters). Click outside the table if you want to work on the document itself.
- Use prebuilt table templates. On newer versions of Word you can click “Quick Table” if you want to use built-in table templates. Simply replace the sample data with your own.


Advertisement
Add New Question
-
Question
Why do I need bullets and numbering?

To simplify points and paragraphs, bullets are used. If you are writing a long passage, numbering comes in handy. They are also used to make a document look neat.
-
Question
What is the use of table?
Mainly to display data in a neat, organized way. You may or may not have any personal use for a table, but they are often used in scientific papers or business documents to list a set of data.
-
Question
How do I change the size of the columns?
Hover your mouse over the bars separating columns, and your mouse cursor should change into a double arrow symbol (↔) or similar. Click on the bar, and drag it to the left or right. You can also right-click on the same, and select «Table Properties» from the menu that comes up. You should be able to change the size of the columns in the new window that comes up.
See more answers
Ask a Question
200 characters left
Include your email address to get a message when this question is answered.
Submit
Advertisement
Video
-
Additionally, you may draw a table by clicking “Table” on the “Insert” tab and then selecting the “Draw Table” command.
Thanks for submitting a tip for review!
Advertisement
About This Article
Thanks to all authors for creating a page that has been read 270,137 times.