
Apply styles

Try it!
Styles give your document a consistent, professional look.
-
Select the text you want to format.
Tip: If you place your cursor in a paragraph, the style is applied to the whole paragraph. If you select specific text, only the selected text is formatted.
-
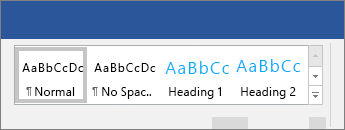
On the Home tab, point to a style to preview it.

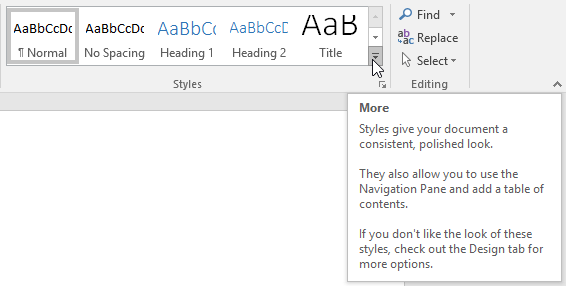
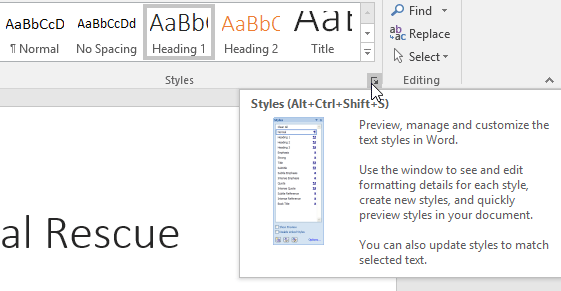
If you don’t see a style you want, click the More button
to expand the gallery. -
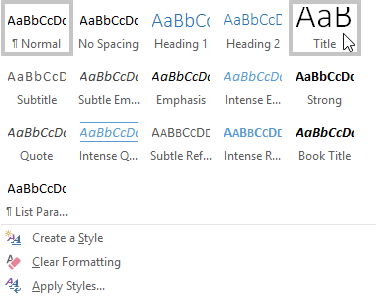
Select a style.
 to expand the gallery.
Using Headings allows you to move parts of the document around by using View > Navigation Pane and then moving the listed headings up or down in the doc. Headings also can be used in creation of a table of contents.
Note: If you need a different look, go to Design > Themes and select a new one. Each Theme has its own set of Styles.
Want more?
Use the Navigation pane in Word
Apply themes
Customize or create new styles in Word
Insert a table of contents
Need more help?
Want more options?
Explore subscription benefits, browse training courses, learn how to secure your device, and more.
Communities help you ask and answer questions, give feedback, and hear from experts with rich knowledge.
Word for Microsoft 365 Outlook for Microsoft 365 Word 2021 Outlook 2021 Word 2019 Outlook 2019 Word 2016 Outlook 2016 Word 2013 Outlook 2013 Word 2010 Word 2007 More…Less
You can use styles to quickly apply a set of formatting choices consistently throughout your document. If you want formatting choices that are not available from the built-in styles and themes available in Word, you can modify an existing style and customize it to suit your needs. You can change the formatting (such as font size, color, and text indentation) in styles applied to titles, headings, paragraphs, lists, and so on. You can also select formatted text in your document to create a new style in the Styles gallery.
The styles covered in this article are located in the Styles gallery, a visual menu located on the Home tab. To apply a style, simply select the text you want to format, and then click the style you want in the Styles gallery. To learn more, see Apply a style to text in Word.

Modify an existing style
You can modify an existing style in the Styles gallery in two ways:
-
Modify a style by updating it to match formatting in your document
-
Modify a style manually in the Modify Style dialog box
Modify a style by updating it to match formatting in your document
If you have text in your document that already has a style applied, you can change the formatting of that text and apply it to the style in the Styles gallery.
-
Select text in your document that has the style applied, such as Heading 1.
When you select text that has a style applied, that style is highlighted in the Styles gallery.
-
Format the selected text with the new attributes that you want.
For example, you might want to change the point size for the Heading 1 style from 16 points to 14 points.
-
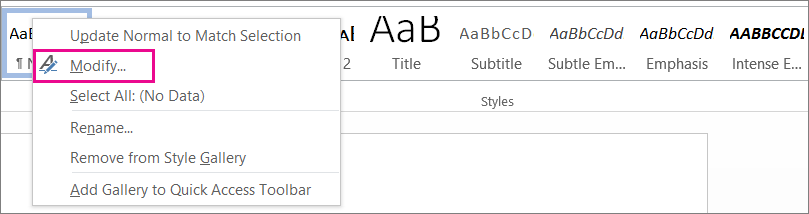
On the Home tab, in the Styles group, right-click the style that you want to change, and then click Update [Style Name] to Match Selection.
Note: All text with the style that you changed will automatically change to match the new style that you defined.
Modify a style manually in the Modify Style dialog box
You can modify a style directly in the Styles gallery, without using the text in your document.
-
On the Home tab, right-click any style in the Styles gallery and click Modify.
-
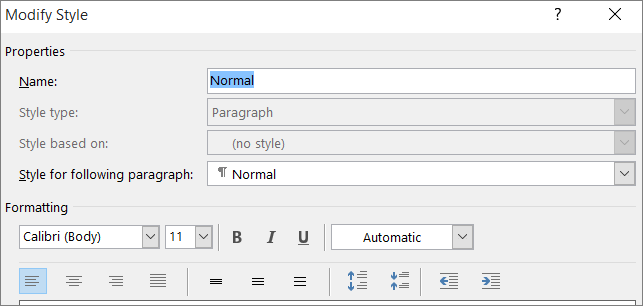
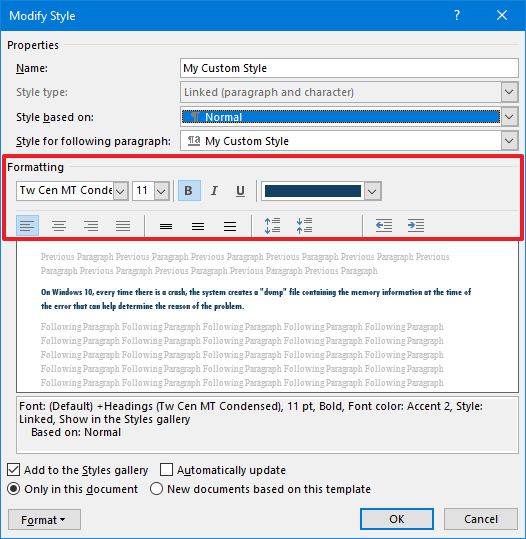
In the Formatting section, make any formatting changes you want, such as font style, size, or color, alignment, line spacing, or indentation.
-
Choose whether the style change applies to the current document or to all future documents.

Create a new style based on document formatting
You can select formatted text in your document to create a new style that you add to the Styles gallery.
-
Right-click the text on which you want to base a new style.
-
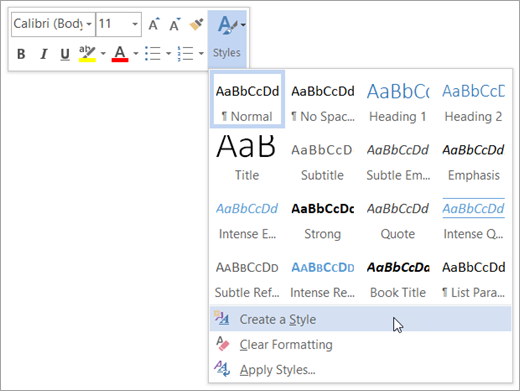
In the mini toolbar that appears, click Styles, and then click Create a Style.
-
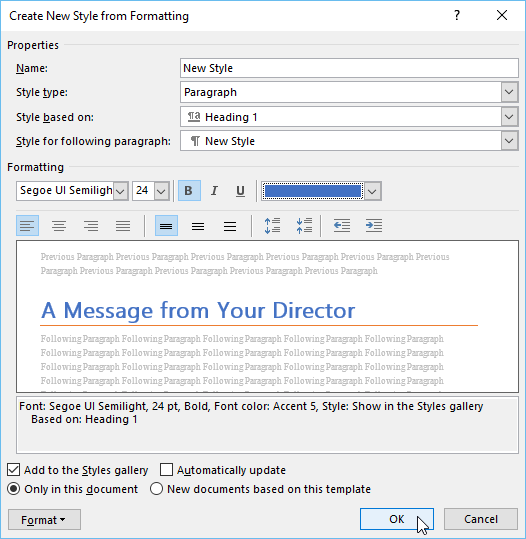
In the Create New Style from Formatting dialog box, give your style a name and click OK.
Your new style will now appear in the Styles gallery.
Note: If you want your new style to appear in all new Word documents, right-click it in the Styles gallery, click Modify, and then select New documents based on this template at the bottom of the dialog box.
-
Right-click the text on which you want to base a new style, point to Styles, and then click Save Selection as a New Quick Style.
-
In the Create New Style from Formatting dialog box, give your style a name and click OK.
Your new style will now appear in the Styles gallery.
Note: If you want your new style to appear in all new Word documents, right-click it in the Styles gallery, click Modify, and then select New documents based on this template at the bottom of the dialog box.
See also
Apply a style to text in Word
Need more help?
Want more options?
Explore subscription benefits, browse training courses, learn how to secure your device, and more.
Communities help you ask and answer questions, give feedback, and hear from experts with rich knowledge.
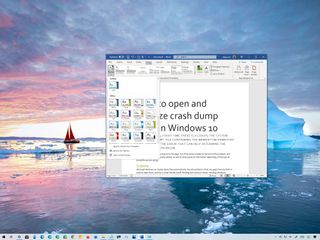
(Image credit: Windows Central )
Although you can style every part of a Microsoft Word document individually with unique fonts and colors, it is not a convenient approach since you have to repeat the steps many times, consuming more time and increasing the chances of mistakes, and this is when styles and themes can come in handy.
In the Office apps, styles are collections of fonts, text sizes, and colors that you can apply to different parts of the document (titles, subheadings, quotation, etc.). On the other hand, themes are collections of styles that you can use to format the entire document quickly.
When you use styles and themes, you will still be using a few steps, but it is a more organized way to format a document on Windows 10, and you will really see the benefit when you need to make changes since updating the format can be as easy as selecting a new theme or style.
In this Windows 10 guide, we will walk you through the steps to change the look and feel of Word documents using the style and themes settings whether you use Office from Microsoft 365 or Office 2019.
- How to use styles in Word
- How to use themes in Word
How to use styles in Word
To change the overall look of a Word document, use these steps:
- Open the Word app.
- Under the «New» section, click the Blank document option (or open an existing document).
- Create the document’s content.
- Select with the mouse the text you want to apply a different format – for example, the title.
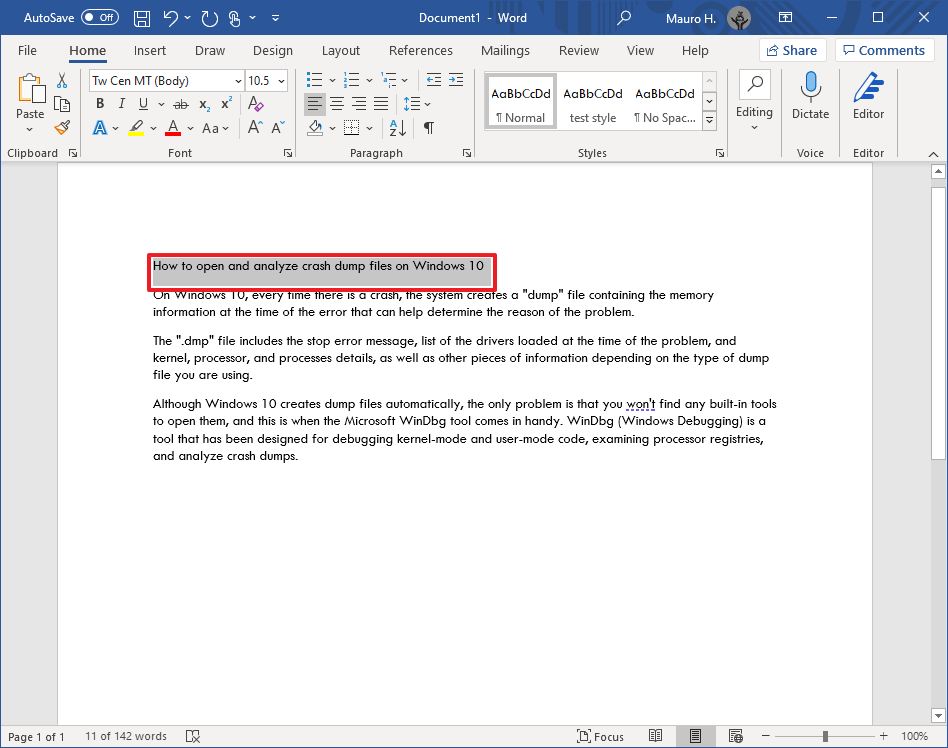
- In the «Home» tab, under the «Styles» section, select the content type to style.Quick note: When selecting a style, make sure to apply it to the correct formating. For example, if you choose the title, then the style should be «Title.» For the subtitle, select the «Subtitle» style and the rest of the headings using «Heading» 1 through 9 accordingly. And don’t worry about the colors. You will customize these when applying a theme. Also, to view all the available elements, click the More button in Styles’s bottom-right corner.

- Continue applying the styling for subtitles, headings, quotes, and anything else you want to format.Quick tip: You can always click and hold the Ctrl key and use the mouse pointer to select the same parts of the document, including the same stying, for instance, all the subtitles (headings).
Once you complete the steps, the document will be formatted with the styling you selected, and when you make changes to the style, the formatting will change automatically for all the same parts of the document.
In addition to selecting from the predefined settings, you can also create new or modify existing elements to style documents with custom settings.
Create new style element
To create a custom style element in Microsoft Word, use these steps:
- Open the Word app.
- Click the Open option.
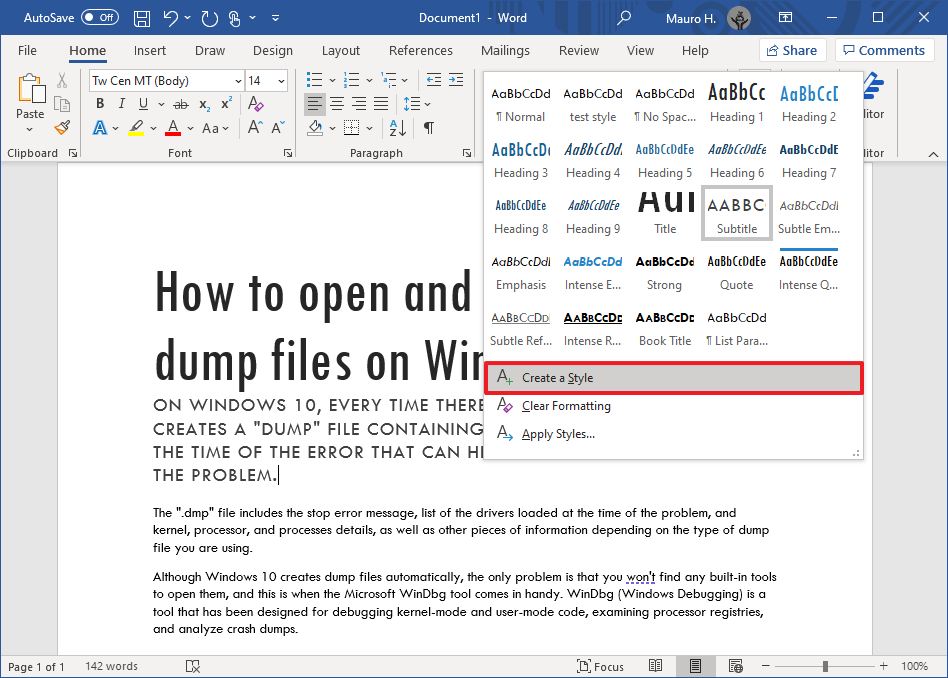
- In the «Home» tab, under the «Styles» section, click the More (down-arrow button) menu.
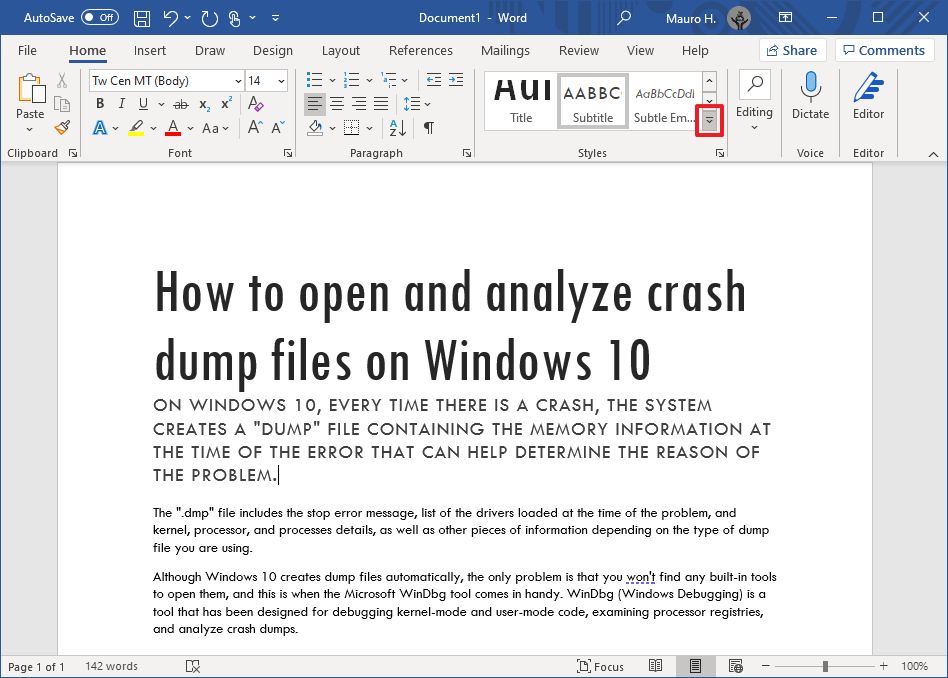
- Click the Create a style option.
- Specify a name for the style.
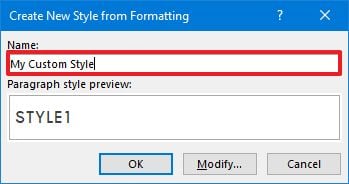
- Click OK button.
After you complete the steps, the new element will appear in the Styles menu.
Modify style elements
To modify a new or existing style element, use these steps:
- Open the Word app.
- Click the Open option.
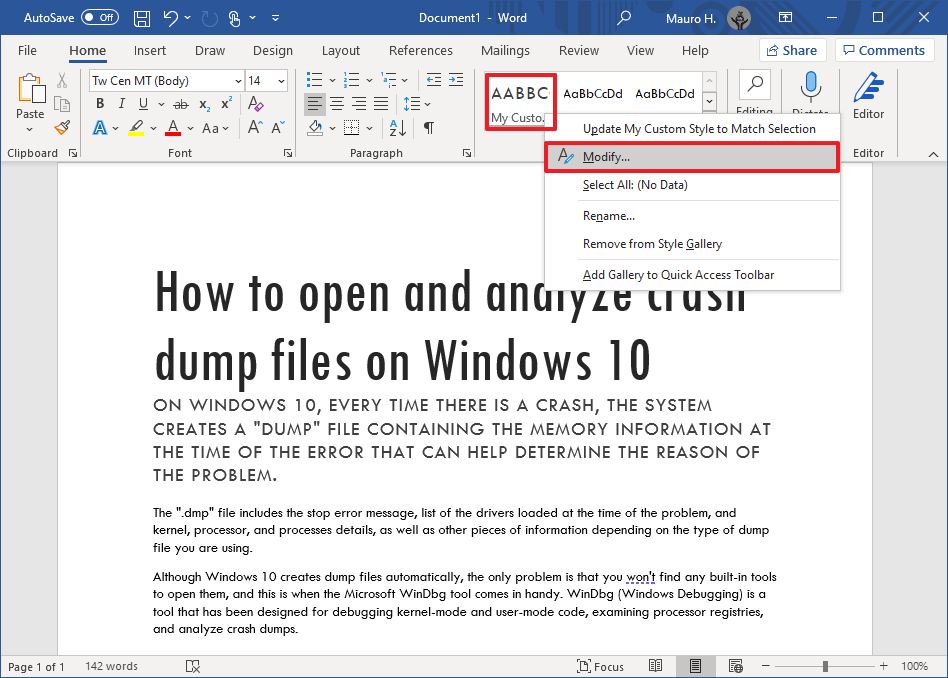
- In the «Home» tab, under the «Styles» section, right-click the style and select the Modify Option.
- Customize the style name and formatting settings (for example, font, size, color, aligment, etc.) as necessary.
- Click the OK button.
Once you complete the steps, the new styling changes will apply to the element.
 Get subscribed
Microsoft 365 gives you full access to all the Office apps and perks, such as 1TB OneDrive storage and Skype minutes. You can also install Word, Excel, PowerPoint, Outlook, and other apps on up to five devices, and depending on the subscription, you can share the account with up to five people.
How to use themes in Word
After applying the style, you can use themes to give the document a different look and feel with colors and a combination of fonts.
To apply a theme to a Microsoft Word document, use these steps:
- Open the Word app.
- Click the Open option.
- Select the document you already styled to open it.
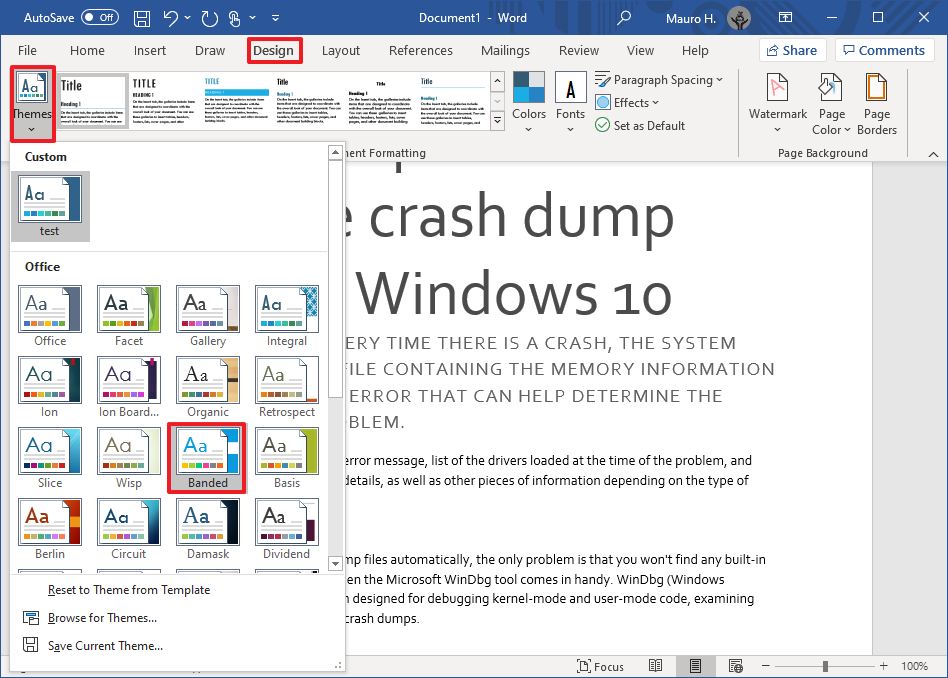
- Click the Design tab.
- Click the Themes button.
- Roll the mouse pointer over the themes to see a live preview of each available theme.
- Click the theme you want for the document.
- (Optional) Use the «Document Formatting» section to select another version of the theme with different combinations of fonts and colors.
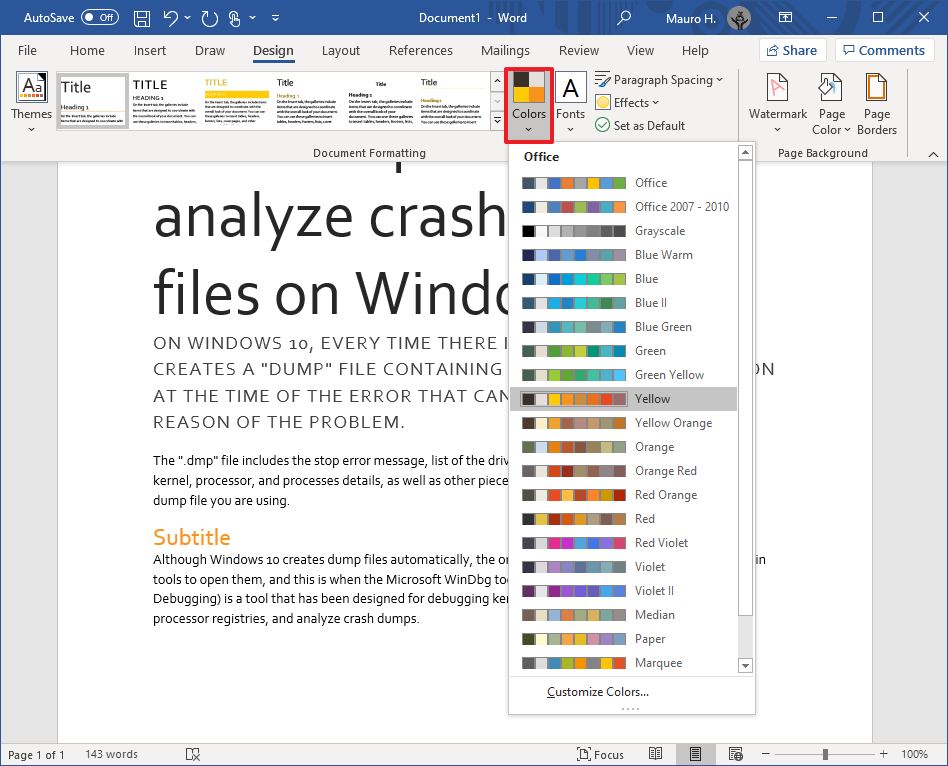
- (Optional) Click the «Colors» menu to select a different color scheme.
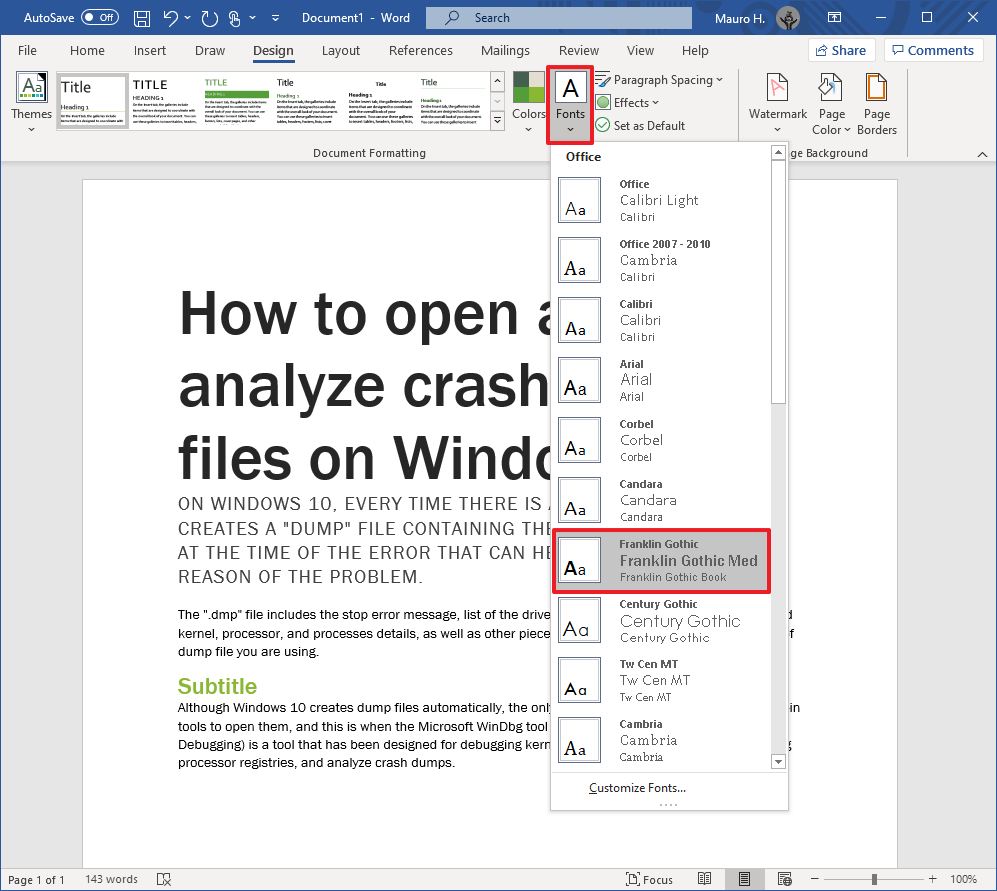
- (Optional) Click the «Fonts» menu to select a different combination of fonts.Quick note: As you open the menu, the top font is one for the title, the one in the middle is for the subheadings, and the one at the bottom is for the content.
After you complete the steps, the content will incorporate the new colors and fonts available through the theme you selected.
Set theme as the default
To set a theme as the default for Word, use these steps:
- Open the Word app.
- Click the Open option.
- Select the document you already styled to open it.
- Click the Design tab.
- Customize the formatting of the document with colors, fonts, spacing, and effects.
- Click the Set as Default button.
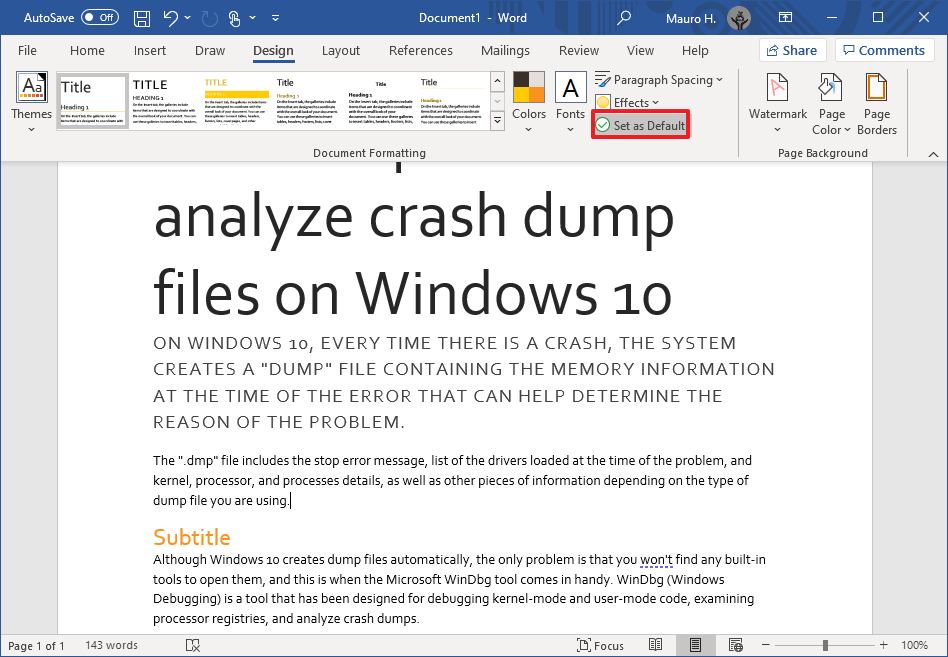
- Click the OK button.
Once you complete the steps, the theme will be available as the default for every new document. However, it won’t apply to the document automatically. Instead, it will be the default theme in the «Style» section, in the «Home» tab.
Create a new theme template
To create a new theme for Microsoft Word documents, use these steps:
- Open the Word app.
- Click the Open option.
- Select the document you already styled to open it.
- Click the Design tab.
- Use the «Document Formatting» section to select a format.
- Click the «Colors» menu to select a color scheme.
- Click the «Fonts» menu to select a combination of fonts.
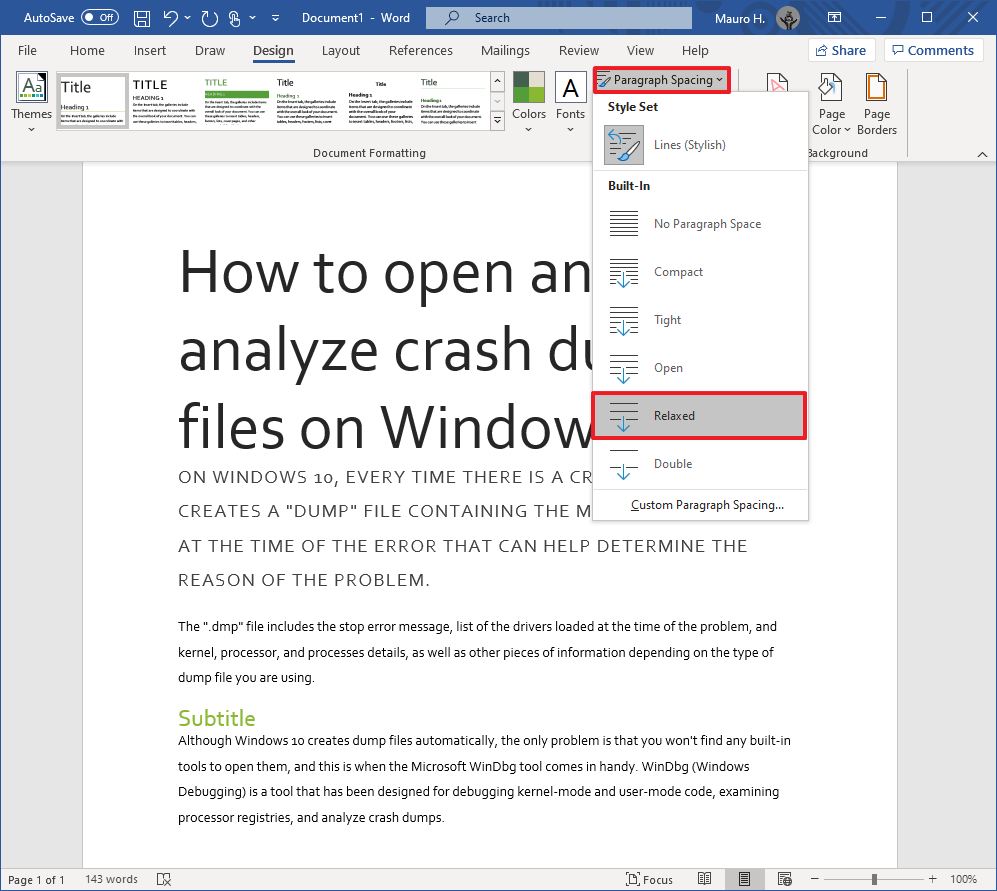
- Click the «Paragraph Spacing» menu and select one of the predefined options.Quick tip: You can also click the Custom Paragraph Spacing option to create a new style.
- (Optional) Click the «Effects» menu and select the effect you want to use when inserting objects.
- Click the «Themes» menu and choose the Save Current Theme option.
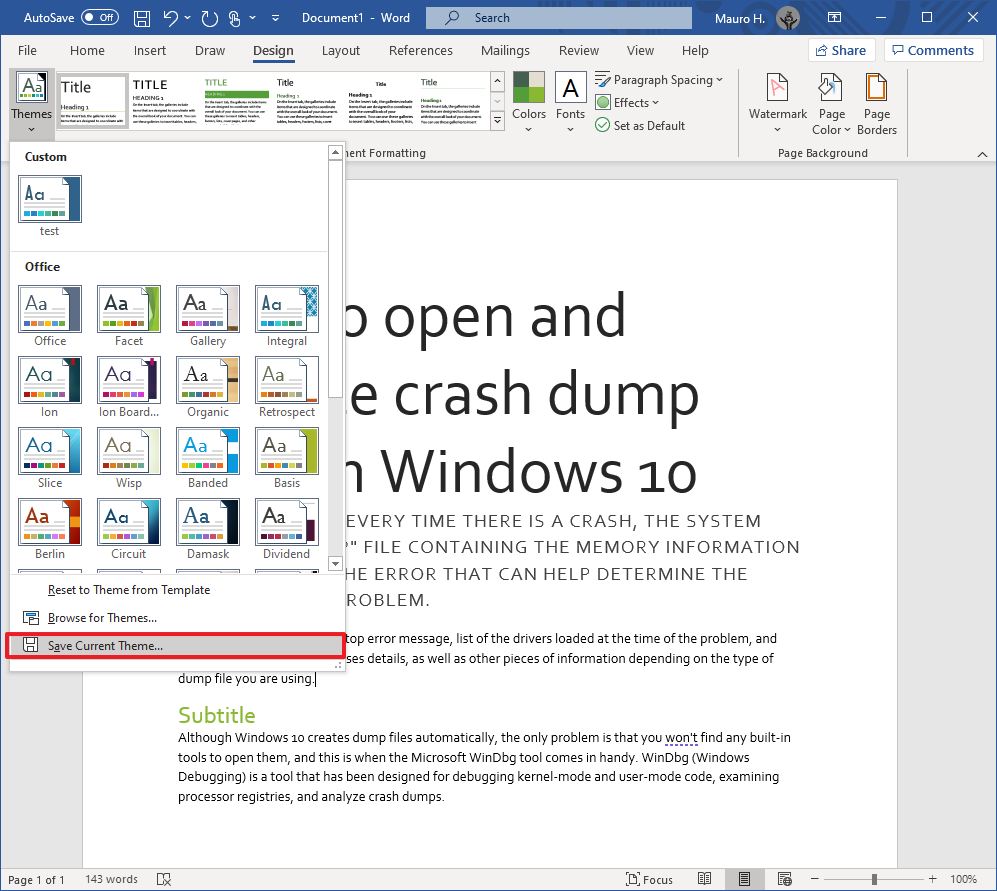
- Confirm a name for the theme.
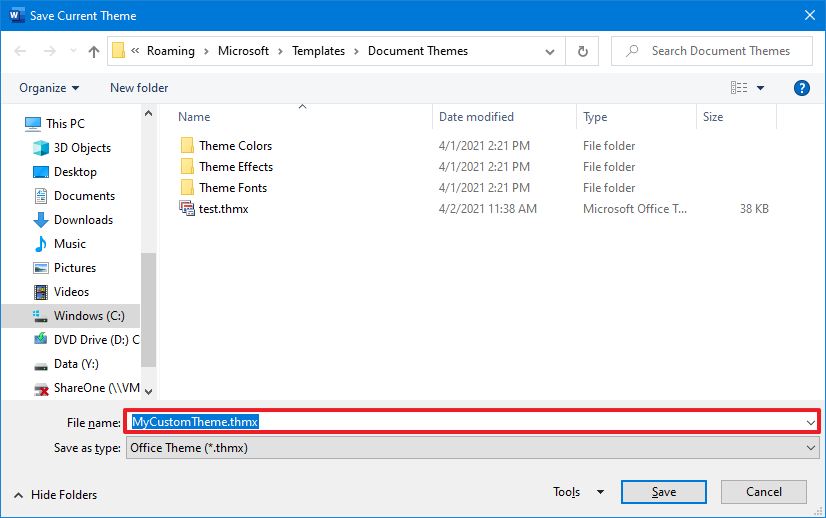
- Click the Save button.
After you complete the steps, the new theme will be available from the «Themes» menu in the «Custom» section.
More Windows 10 resources
For more helpful articles, coverage, and answers to common questions about Windows 10, visit the following resources:
- Windows 10 on Windows Central – All you need to know
- Windows 10 help, tips, and tricks
- Windows 10 forums on Windows Central
All the latest news, reviews, and guides for Windows and Xbox diehards.
Mauro Huculak is technical writer for WindowsCentral.com. His primary focus is to write comprehensive how-tos to help users get the most out of Windows 10 and its many related technologies. He has an IT background with professional certifications from Microsoft, Cisco, and CompTIA, and he’s a recognized member of the Microsoft MVP community.
Lesson 29: Applying and Modifying Styles
/en/word2016/smartart-graphics/content/
Introduction
A style is a predefined combination of font style, color, and size that can be applied to any text in your document. Styles can help your documents achieve a more professional look and feel. You can also use styles to quickly change several things in your document at the same time.
Optional: Download our practice document.
Watch the video below to learn more about using styles in Word.
To apply a style:
- Select the text you want to format, or place your cursor at the beginning of the line.
- In the Styles group on the Home tab, click the More drop-down arrow.
- Select the desired style from the drop-down menu.
- The text will appear in the selected style.


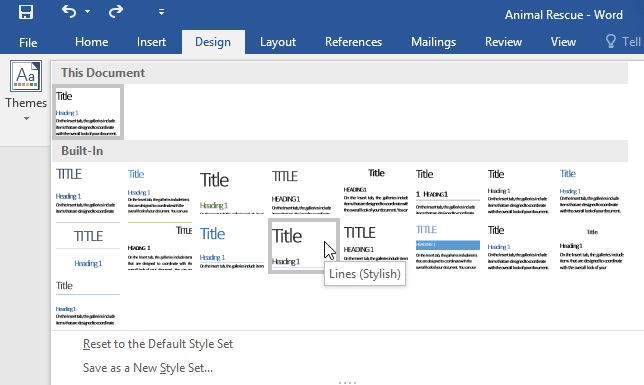
To apply a style set:
Style sets include a combination of title, heading, and paragraph styles. Style sets allow you to format all elements in your document at once instead of modifying each element separately.
- From the Design tab, click the More drop-down arrow in the Document Formatting group.
- Choose the desired style set from the drop-down menu.
- The selected style set will be applied to your entire document.


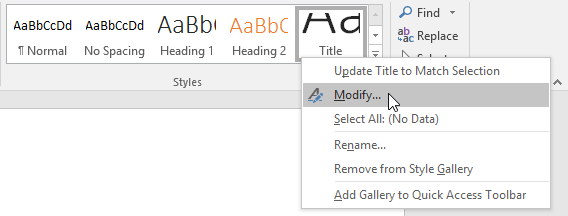
To modify a style:
- In the Styles group on the Home tab, right-click the style you want to change and select Modify from the drop-down menu.
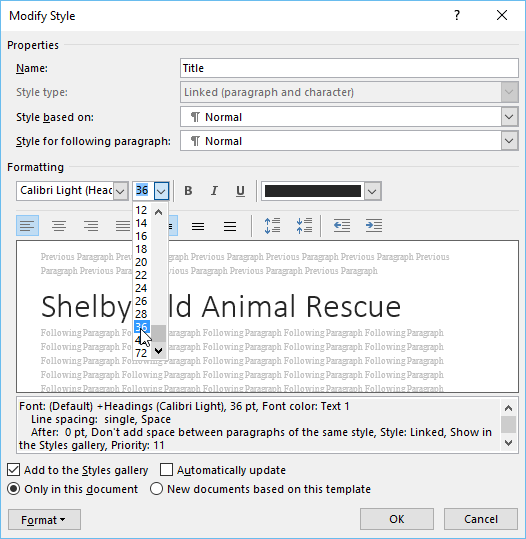
- A dialog box will appear. Make the desired formatting changes, such as font style, size, and color. If you want, you can also change the name of the style. Click OK to save your changes.
- The style will be modified.

When you modify a style, you’re changing every instance of that style in the document. In the example below, we’ve modified the Normal style to use a larger font size. Because both paragraphs use the Normal style, they’ve been updated automatically to use the new size.
To create a new style:
- Click the arrow in the bottom-right corner of the Styles group.
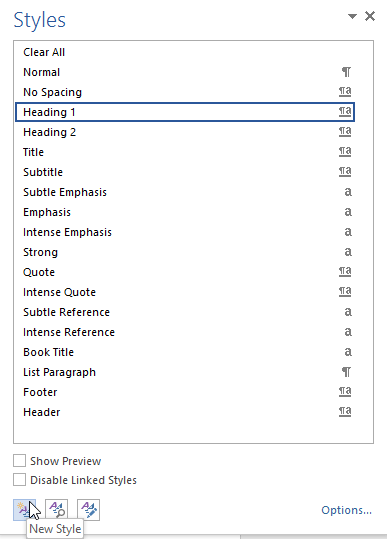
- The Styles task pane will appear. Select the New Style button at the bottom of the task pane.
- A dialog box will appear. Enter a name for the style, choose the desired text formatting, then click OK.
- The new style will be applied to the currently selected text. It will also appear in the Styles group.

You can also use styles to create a table of contents for your document. To learn how, review our article on How to Create a Table of Contents in Microsoft Word.
Challenge!
- Open our practice document. If you already downloaded our practice document, be sure to download a fresh copy by clicking the link again.
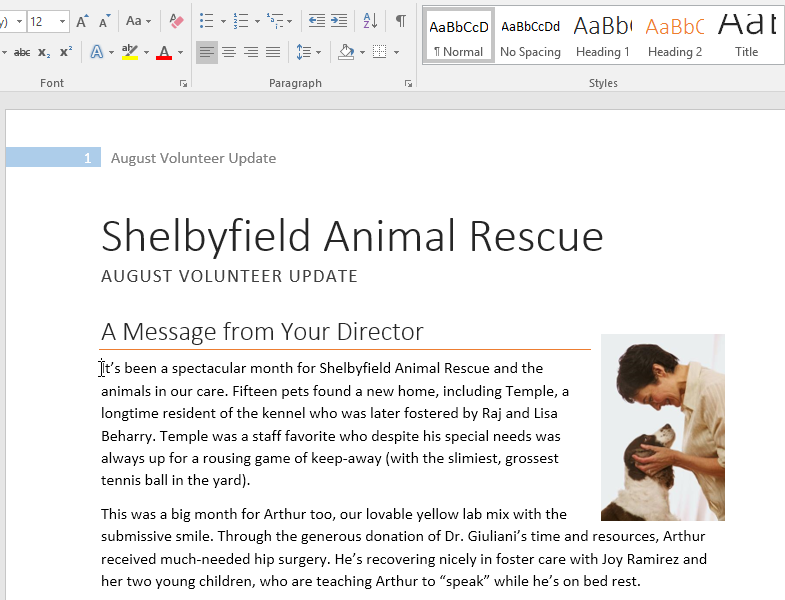
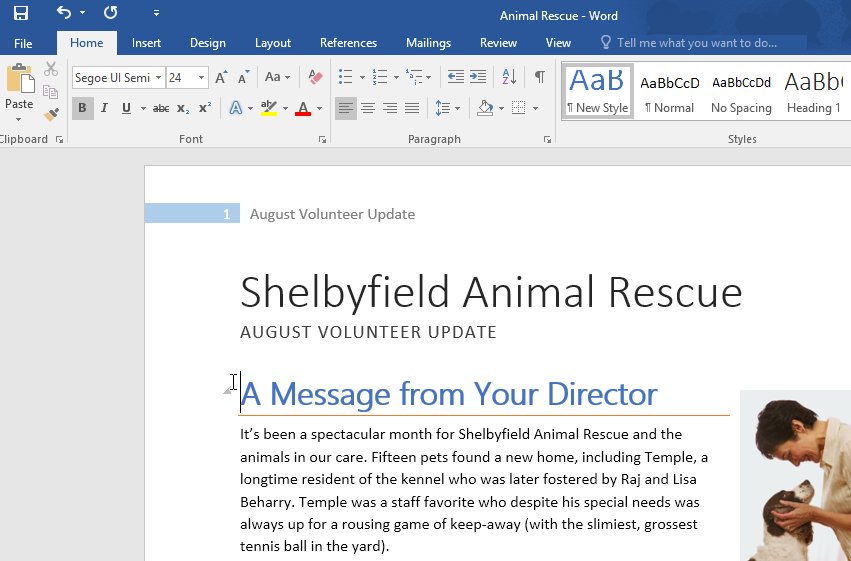
- On page 1, select the first line of text Shelbyfield Animal Rescue and change the style to Title.
- Select the second line that says August Volunteer Update and change the style to Heading 1.
- Select the third line that says A Message From Your Director and change the style to Heading 2.
- In the Design tab, change the style set to Casual.
- Modify the Normal style so the font is Cambria and the font size is 14 pt.
- When you’re finished, the first page of your document should look like this:

- Optional: Modify the Heading 3 style any way you want. You can change the font, font size, color, and more. This heading appears throughout the document, so try to choose formatting that complements the body text.

/en/word2016/mail-merge/content/
Here at RedLine, we work with Word every day, so I figured it was high time for—drum roll, please—a Microsoft Word Styles Tutorial.
You might be wondering what Word Styles are and what purpose they serve. Well, you’re in the right spot.
Read on for our full Microsoft Word Styles tutorial or click below to skip right to a specific section.
I: Introduction
II: Applying Styles
III: Modifying Styles
IV: Creating Your Own Styles
V: Next Steps
Once you finish this tutorial, learn how to work with a table of contents in Word.
Microsoft Word Styles Tutorial
I: Introduction
Definition
Throughout this guide, I’ll be using Styles (uppercase) and styles (lowercase). So what’s the difference?
- Styles refers only to the Microsoft Word feature that deals with text formatting attributes.
- styles refers to formatting attributes, too, but in a general sense. For example, I might talk about good heading styles to use in your Word doc (or a Publisher or InDesign file, for that matter).
Benefits to Using Styles in MS Word
The Styles pane appears in the Home tab. This prominent position should give you a clue as to how important the folks at Microsoft think it is.
Here are four reasons why you should use Styles in Microsoft Word:
- You’ll save a lot of time, especially in long documents.
- You can automatically generate a table of contents based on your headings.
- Your formatting will be much more consistent than if you were to set text attributes manually.
- You can use them in Word templates for consistency across documents.
II: Applying Styles
Understanding Heading Hierarchy
No how-to article—especially a detailed Microsoft Word Styles tutorial—would be any good if it didn’t help you do something. So in this section you’ll learn how to apply styles in MS Word.
My example here is an outline for an article about household pets.
My article has different sections (see Figure 1), such as Section 1: Dogs and Cats and Section 2: Hamsters, Gerbils, and Guinea Pigs. These are my level-1 headings, which I’ll call H1 heads for short.

Figure 1. All headings are in a logical order but have not yet been formatted.
Within each section are more specific sections. In the section on dogs and cats, for example, I’ve got a subsection called Dogs and another subsection called Cats. These are my H2 heads, because they fit logically as “children” under the “parent” category above them.
Then, under each of those sections, I’ve listed even more specific subsections: Short-Haired Breeds and Long-Haired Breeds under Dogs, for example. These are my H3 heads.
Finally, under those sections, the content is more specific still: Beagle, Bloodhound, Irish Terrier, and so on. They fit logically under Short-Haired Breeds and are H4 heads.
I’m talking about my content (the words and ideas) here, not how it’s formatted (font, color, etc.). But it’s important to spend time on this concept because it will inform your formatting choices.
In fact, any self-respecting Microsoft Word Styles tutorial should have at least a bit of information on why you should use styles in the first place: it makes reading easier!
Using Word’s Built-In Styles
This hierarchy of headings displays content to your reader in a logical, sequential way. And the formatting that you’ll apply will reflect that, from broadest (biggest) to most specific (smallest).
MS Word comes prepackaged with a Styles pane in the Home tab. In it you’ll find little windows with labels such as “Title,” “Heading 1, “Heading 2,” “Normal,” etc. You’ll also see dummy text that shows what each Style looks like.
Let’s start applying Word Styles to our example text. (Mine may not look like yours—I’ve styled and restyled these elements several times.)
First, I’ll apply the “Heading 1” Style to the headings that are uppermost in the hierarchy.
Put your cursor anywhere within the line of text that you want to style and then click on “Heading 1.”
Use Word’s built-in styles to format your H1 heads.
Then, I’ll do the same for my H2, H3, and H4 heads using “Heading 2,” “Heading 3,” and “Heading 4,” respectively.
Again, put your cursor in the text to which you want to apply a style and click the style you want.
All headings, from H1 to H4, have been styled.
Pro tip: Use shortcut keys, not mouse clicks, to quickly apply styles in your Word doc.
III: Modifying Styles
What if you’re like me and you don’t like Word’s built-in styles? Then change them!
To modify a style, right-click it in the Styles pane and select “Modify”.
Right-click on the style you wish to change and select “Modify.”
MS Word lets you modify all attributes of a style, including typeface, font color and size, paragraph spacing, and tabs.
A “Modify Style” window will open. Here, you can change the global attributes for that style, including format, font, paragraph, tabs, and so on.
One of the most useful features in Styles is the ability to set a shortcut key. Instead of clicking multiple times with your mouse, you can set a key combination (Ctrl + 1, for example) for the H1 style.
Then, to format all of the H1 heads in your document, you only have to hit Ctrl + 1.
(In the reports that RedLine formats—some of which are over 100 pages—this is a big time saver, so we set up shortcut keys for the most common page elements.)
In my example, I’ve changed the color of the H1 style from blue to dark grey.
Modifying the color of any style changes all instances of that style in your document.
Pro tip: Any change that you make to a style will change all instances of that style throughout your document. (So if there’s any attribute of that style that you don’t want to apply elsewhere, then either create a new style or change the formatting manually.)
IV: Creating Your Own Styles
The next section in our Microsoft Word Styles tutorial has to do with creating your own styles. Moreover, you can base these new styles on existing styles.
Why Create a New Style?
For example, let’s say that you have a long document consisting of a main report and several annexes. For consistency, the headings in the document should be styled the same regardless of whether they appear in the main report or in an annex.
But you may not want your annex headings to populate the table of contents. What you can do is create two separate styles that look identical but that have different names.
How to Create a New Style in MS Word
I’ll use the same document as before. This time, though, it has ballooned from a feature article into a downloadable resource guide for would-be pet owners, so I’ll need a table of contents (TOC).
However, I don’t want every single heading within the annex to appear in the TOC. Solution? Create a new style.
In my example, I’m creating a new style specifically for headings in the annex. The first one is based on the Heading 2 style, so I put my cursor in the text that reads Dogs (it’s styled as an H2) and then click on the “Styles Pane” button (Figure 7). (In Office 2016 for Mac, this appears to the right of the Quick Styles pane.)
Figure 7. Open MS Word’s Styles Pane to create a new style.
Then, within Properties, I change the name of the style from “Heading 2” to “Heading 2 Annex” (Figure 8). Again, it looks like Heading 2—same typeface, same color, same spacing, etc. But now I can control whether it appears in the table of contents.
Figure 8. Give a descriptive name to your new style.
Pro tip: Click within your “template style” (the style on which your new style is based) before you create the new style. This will automatically base the new style on the highlighted style.
V. Next Steps
Well, you’ve reached the end of this little Microsoft Word Styles tutorial.
Download the dummy article I “wrote” for this post to see how the different headings are styled. Then try the following for yourself:
- Apply a style: Put your cursor in a heading and click a different style in the Styles pane to see what happens.
- Modify a style: Pick any style in the document and modify it. (For example, change the color of the H3 heads from red to blue.)
- Create a new style: Create a style called “Heading 3 Annex”. (It will look identical to Heading 3; it will just have a different name.)
This may not be the only Microsoft Word Styles tutorial you’ve read, but I hope it’s been helpful. (Feel free to ask me questions in the comments if you need help on a specific problem.)
If you need help styling your reports, let us know. The majority of our report formatting work is in MS Word. Thanks for reading!
If you’d like to read more content about Microsoft Word, see how to work with nonbreaking spaces.