
Word for Microsoft 365 Word 2021 Word 2019 Word 2016 Word 2013 Word 2010 Word 2007 More…Less
Underline words and the spaces between them
The quickest way to underline text is to press Ctrl+U and start typing. When you want to stop underlining, press Ctrl+U again.
You can also underline text and spaces in several other ways.
|
What do you want to do? |
Example |
|---|---|
|
Underline words and the spaces between them |
|
|
Underline words, but not the spaces between them |
|
|
Change the underline style and color |
|
|
Use a double underline |
|
|
Underline blank spaces |
|
|
Remove underlining |
text without underline |


-
Select the text that you want to underline.
-
Go to Home > Underline. Or press Ctrl+U.

Underline words, but not the spaces between them
-
Select the text that you want to underline.
-
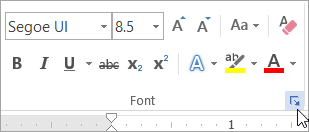
Go to Home and select Font dialog box launcher
.
-
Go to Font and select Words only in the Underline style drop-down list.
 .
.
Change the underline style and color
-
Select the text that you want to underline.
-
Go to Home and select Font dialog box launcher
.Tip: You can also use the keyboard shortcut Ctrl+D.
-
Use the Underline style drop-down list to select an underline style.
Use the Underline color drop-down list to change the color of the line.
Use a double underline
-
Select the text that you want to underline.
-
Go to Home and select Font dialog box launcher
.
-
Select double underline in the Underline style drop-down list.
Underline blank spaces
You can underline blank spaces by pressing Shift+Hyphen (-), but it is difficult to line up the underlines — if you are creating a fill-in form, for example. Also, if the AutoFormat option for changing underscore characters into border lines is turned on, pressing Shift+Hyphen (-) three or more times in a row will result in a line that extends the width of the paragraph, which may not be what you want.
A better way to underline blank spaces for a printed document is to use the Tab key and apply the underline formatting to the tab characters.
When you want to create an underline in an online form, insert table cells with the bottom border turned on.
Underline blank spaces for a printed document
To underline blank spaces for a printed document, use the Tab key and apply the underline formatting to the tab characters.
-
Go to Home > Show/Hide ¶ so that you can see the marks that indicate spaces and tab stops.
-
Press the Tab key.
-
Select the tab characters that you want to underline. A tab character looks like a small arrow.
-
Do one of the following:
-
Press Ctrl+U to apply a simple underline.
-
To apply a different style of underline, go to Home and select Font dialog box launcher
.Select Underline style to choose a different underline style.
-

Underline blank spaces for an online document
To create an underline in an online document or form, insert a table cell with the bottom border turned on. This method ensures that when someone types on the line, the line stays in place.
-
Click or tap where you want to insert a blank underline.
-
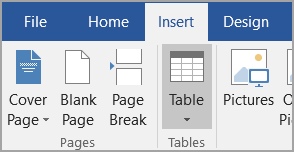
Go to Insert > Table.
-
Select the upper-left box to insert a 1×1 Table.
If you want to add introductory text, such as a name or Social Security Number, before the underline, insert a 2×1 Table.
To change the length of the line, move the pointer over the end of the table until it becomes a resize pointer
, and then move the arrow right or left to lengthen or shorten the line. -
Click or tap in the table (or in the second table cell if you created a 2×1 table).
-
The Table Tools appear. On the Design tab, select Borders > Borders and Shading.
-
Under Setting, select None.
-
Under Style, select the line type, color, and width that you want.
-
In the diagram under Preview, click or tap between the lower margin markers to add the bottom border. Make sure only the bottom line is displayed.
Note: If you prefer to view the table without the light gray gridlines that do not print, select the table, go to Layout next to the Table Design tab and select View Gridlines.
If you used a 2×1 table to make room for introductory text, you can type the text before the line.
 , and then move the arrow right or left to lengthen or shorten the line.
Remove underlining
To remove single underlining from words and spaces, select the underlined text and press Ctrl+U.
To remove other styles of underlining, press Ctrl+U twice.
Need more help?
Want more options?
Explore subscription benefits, browse training courses, learn how to secure your device, and more.
Communities help you ask and answer questions, give feedback, and hear from experts with rich knowledge.

Underlining seems like a simple enough task in Microsoft Word, but many times there’s more involved. You can underline words, spaces, words with spaces, and words without spaces. We’ll show you several ways to use underline in Word.
Many people reserve underlining for web links while others find it a good way to emphasize text in a document. Along with the options for underlining words and spaces, you can format it as a double, bold, or dotted line and remove an underline you’ve added. Let’s walk through it all!
Underline Words With Spaces
The most uncomplicated way to underline in Word is words with spaces. You may have a phrase, sentence, or paragraph you want to underline.
Select the text and then apply the underline one of these ways:
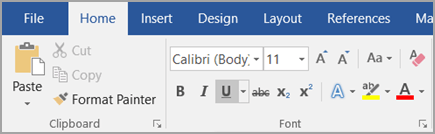
- Click the Underline button in the Font section of the Home tab.
- Press Ctrl+U on Windows or Control+U on Mac.

Underline Words Without Spaces
Underlining words without spaces takes a little more work, especially for sentences and paragraphs. You can select each word, one at a time, and then apply the underline as described above using the Underline button or keyboard shortcut. But there’s a faster way!
Select the text you want to underline, including the spaces. Right-click and pick “Font.”
In the Underline Style drop-down box, choose “Words Only.” You can see a preview at the bottom of the dialog box confirming that only the words are underlined and not the spaces. Then, click “OK.”
You should have your phrase, sentence, or paragraph with underlines only below the words.
Underline Only Spaces
Maybe you’re creating a document such as a printable form where you want to underline spaces to make a blank line. You’d think that inserting several spaces and applying the underline to them would be the way to go. Unfortunately, it doesn’t work. Here are two ways to underline spaces.
RELATED: How to Overline Text in Word
Method One: Use Tab Stops
You can use the default tab stops in Word which are 0.5 inches with each press of the Tab key. If you prefer, you can set up your own tab stops.
Press the Tab key the number of times necessary to cover the length you need. Then, select all of the tab stops you just inserted by dragging your cursor through them.
Click the Underline button in the ribbon or use a keyboard shortcut. You’ll then see your line, or underlined spaces.
Method Two: Use a Table
Another way to create underlined spaces is by inserting a table and adjusting the borders. Go to the Insert tab and select the Table drop-down arrow. Choose the first square which is the one-by-one table.
When the table appears, it should stretch the width of your document. If not, drag the right side so that it does. Right-click and choose “Table Properties.”
Click “Borders and Shading” at the bottom of the Table tab.
On the right side of the dialog box, click to remove the top and side borders, leaving only the bottom border. Click “OK” to apply the change.
You’ll then have a single line as your “underlined spaces.”
Change the Underline Format
You have a few different ways to change the format for your underline. You can pick a double underline, a bolder line, or a dotted line in a variety of styles. And you can change the line before or after you apply the underline to your text or spaces.
RELATED: How to Add a Dotted Line in a Microsoft Word Document
To change the line style at the time you apply the underline, select the text you want to underline. If you’ve already applied the underline, select all of the underlined text. Then, do one of the following.
Click the arrow next to the Underline button in the Font section of the Home tab. Select the line style you want to use.
Right-click the selected text and pick “Font.”Choose the line in the Underline Style drop-down box and click “OK.”
If you used the table method above to underline spaces, select the table and head back to Table Properties > Borders and Shading. Then, use the options in the Style drop-down box.
How to Remove an Underline
Removing an underline is as easy. Select the underlined text and click the Underline button in the Font section on the Home tab. This deselects the Underline button and removes the underline from your text.
Alternatively, you can use the shortcut Ctrl+U on Windows or Control+U on Mac.
Another way to remove an underline is to select the underlined text, right-click, and choose “Font.” Choose “None” in the Underline Style drop-down box and click “OK.”
If you inserted a table for underlined spaces, you can remove the table by right-clicking it and choosing “Delete Table.”
Knowing how to apply, format, and remove underlines in your Word documents is important if that’s your preferred method of emphasizing text. But you can also highlight text or apply a format like bold or italics.
READ NEXT
- › How to Adjust and Change Discord Fonts
- › BLUETTI Slashed Hundreds off Its Best Power Stations for Easter Sale
- › Google Chrome Is Getting Faster
- › Mozilla Wants Your Feature Suggestions for Thunderbird
- › Expand Your Tech Career Skills With Courses From Udemy
- › The New NVIDIA GeForce RTX 4070 Is Like an RTX 3080 for $599
Creating underline to certain sentence in Word 2016 can highlight the information you want to emphasize. Here I gathered 4 simple and pratical ways that can underline specific text in Word , let’s have a quick look.
1. Use Shortcut key to Underline Text
It may be the best known way of adding underline in Word. Select the content you want to emphasize, press Ctrl+U to underline it.

2. Underline Text with Font
Select the text, click the U symbal in Home tab. Or you can click the small black triangle next to it and choose the style of underline.

3. Underline Text with Table Border
1. Select the text, click the small black triangle next to Borders in Home.

2. But the underline created in this way will take up an entire line. For better result, you can click Insert tab and create a new table in the first place.

3. Input the content in the table, and resize it to adapt the text.

4. Right click the table and select Table Properties.

5. Click Borders and Shading.

6. Choose the style you like and disable the other three borders in Preview, then click OK.

6. Now you can see the result. Underline created in this way will be farther to the character than created by Ctrl+U.

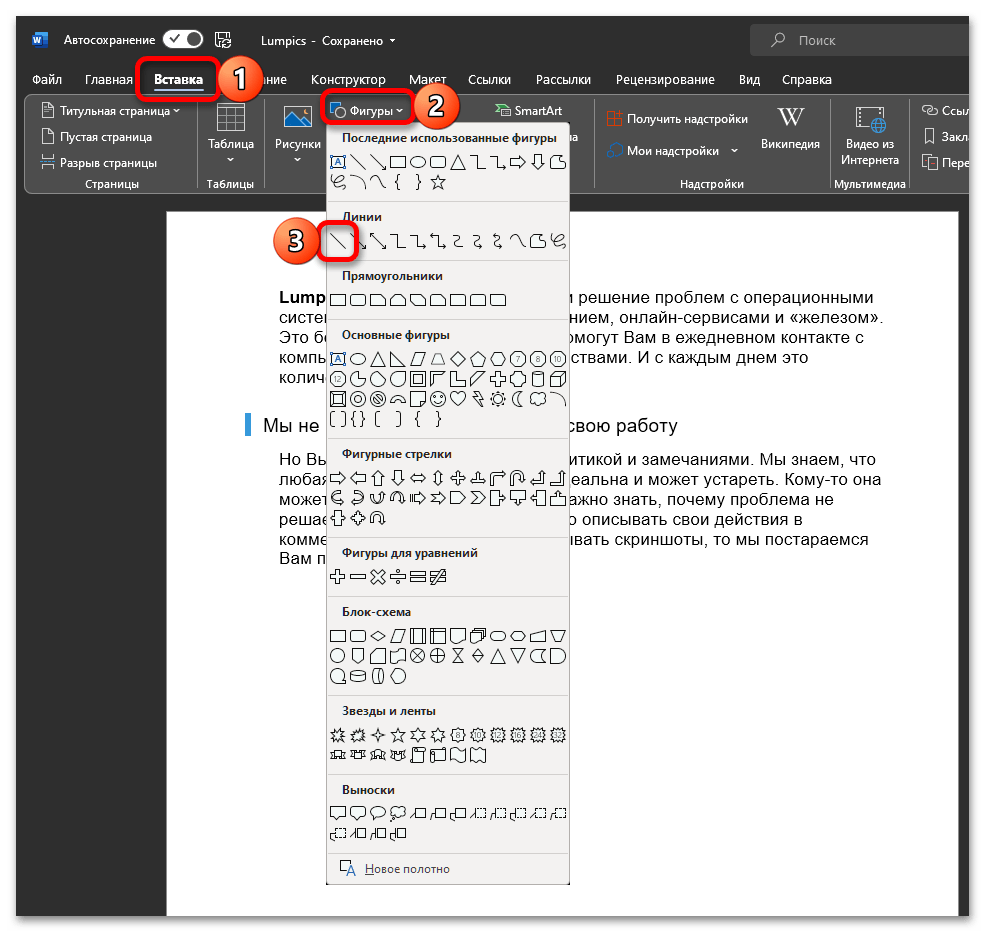
4. Underline Text with Shapes
1. Click Insert – Shapes. Choose the straight line icon in Lines.

2. Underline the text directly. You can also choose the color of underline in Drawing Tools. If you feel difficult to draw a straight line, then press Shift key at the same time.

Copyright Statement: Regarding all of the posts by this website, any copy or use shall get the written permission or authorization from Myofficetricks.
Содержание
- Способ 1: Табуляция
- Способ 2: Пробелы
- Способ 3: Символ
- Способ 4: Таблица
- Способ 5: Фигура
- Вопросы и ответы

Способ 1: Табуляция
Одним из наиболее простых способов подчеркивания без текста в Microsoft Word является использование символов табуляции.
- Установите курсор в том месте документа, где требуется сделать подчеркивание. Нажмите клавишу «Tab» столько раз, чтобы это соответствовало желаемой длине будущего подчеркивания (при этом, если подчеркнуть требуется несколько пустых строк, лучше сначала создать одну, а затем скопировать ее нужное количество раз на следующие).

Читайте также: Табуляция в Майкрософт Ворд
- Выделите с помощью мышки проставленную табуляцию.
- Нажмите на кнопку «Подчеркнутый», расположенную на верхней панели в группе инструментов «Шрифт» вкладки «Главная». Вместо этого можете воспользоваться клавишами «Ctrl+U».


В документе Word появится подчеркивание, соответствующее по своему размеру количеству проставленных вами символов табуляции. Если требуется изменить вид используемой линии, разверните меню кнопки «Ч» и выберите предпочтительный вариант (предварительно потребуется выделить нужную область).

Читайте также: Как сделать подчеркивание в Ворде
Способ 2: Пробелы
По аналогии с предыдущим способом, подчеркивание без текста можно сделать и с помощью пробелов, но здесь есть два нюанса: либо потребуется использовать символ «неразрывный пробел», либо поставить точку сразу за последним пробелом обычным.
Введите нужное количество пробелов и поставьте точку или используйте клавиши «Ctrl+Shift+Пробел», чтобы ввести пробел неразрывный. Выделите эту часть документа и примените к ней подчеркивание.

Читайте также: Как сделать неразрывный пробел в Microsoft Word
Способ 3: Символ
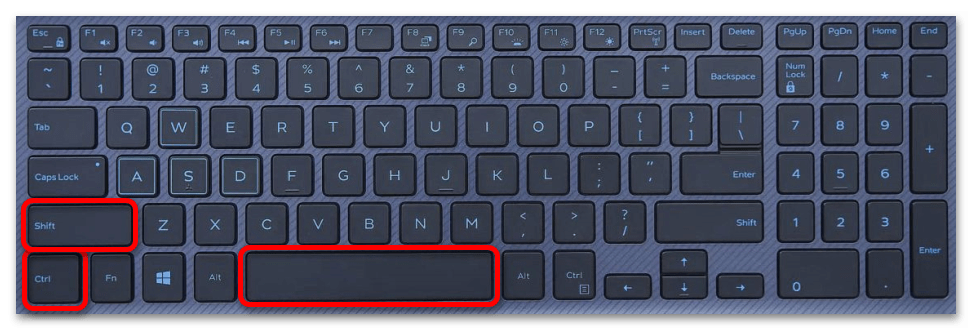
Наверное, самый очевидный способ подчеркивания без текста в Ворде заключается в использовании соответствующего символа на клавиатуре. Просто нажмите клавиши «Shift» + «–» нужное количество раз («–» – клавиша в верхнем цифровом блоке, расположенная сразу за цифрой «0»).
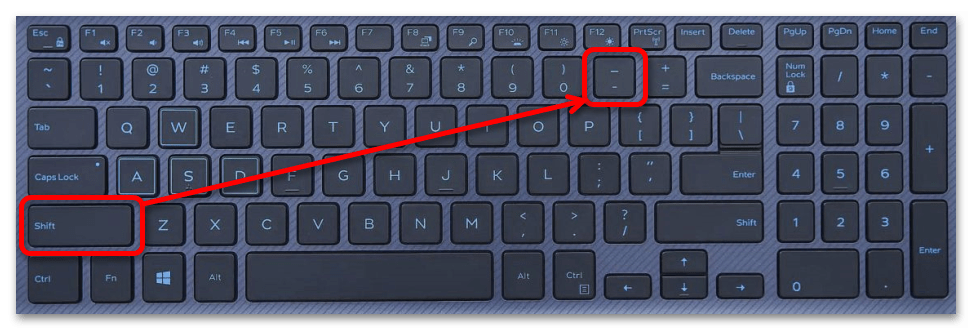
Визуально такое подчеркивание не будет отличаться от рассмотренного выше варианта начертания, однако располагается оно немного ниже относительно строки, как раз на толщину одной такой линии.


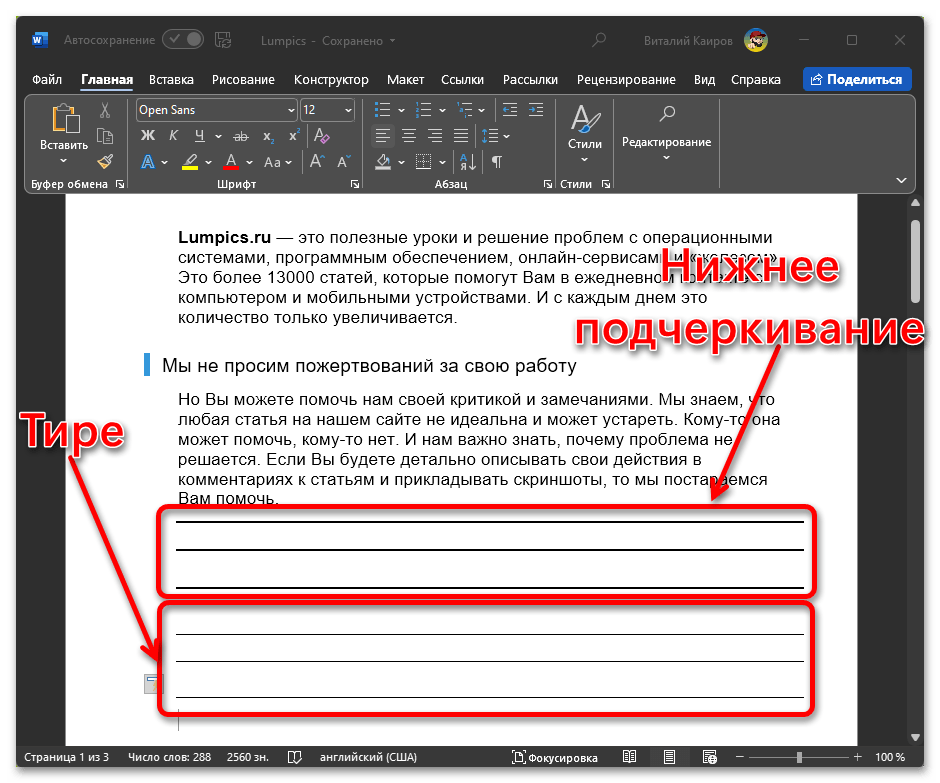
Если же вам требуется подчеркнуть сразу несколько линий, можно воспользоваться встроенной в Microsoft Word функцией автозамены, которая срабатывает после ввода трех одинаковых символов и нажатия клавиши «Enter».
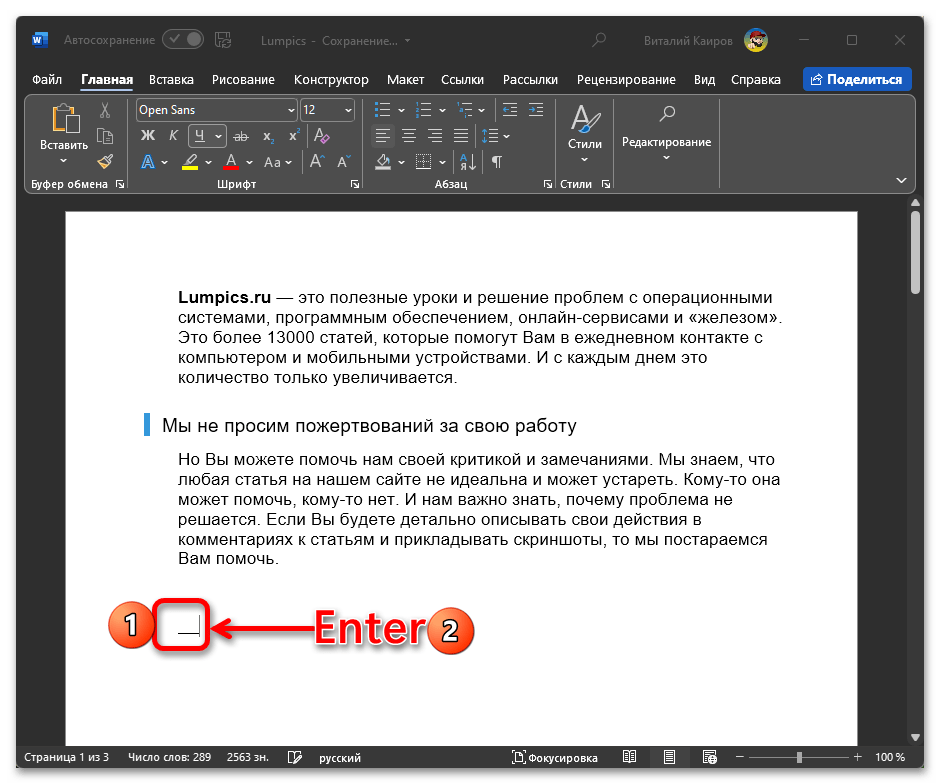
Вы можете вводить как минус (тире, дефис), используя клавишу «–», так и именно нижнее подчеркивание, с помощью сочетания «Shift» + «–» – во втором случае линия получится более жирной.

Какой бы из символов вы не использовали для создания подчеркивания без текста, в результате это получаются строки, между которых можно писать текст.
Способ 4: Таблица
Еще один способ решения нашей задачи – создание таблицы размером в одну ячейку с последующим скрытием всех ее границ, кроме нижней, и изменением размера.
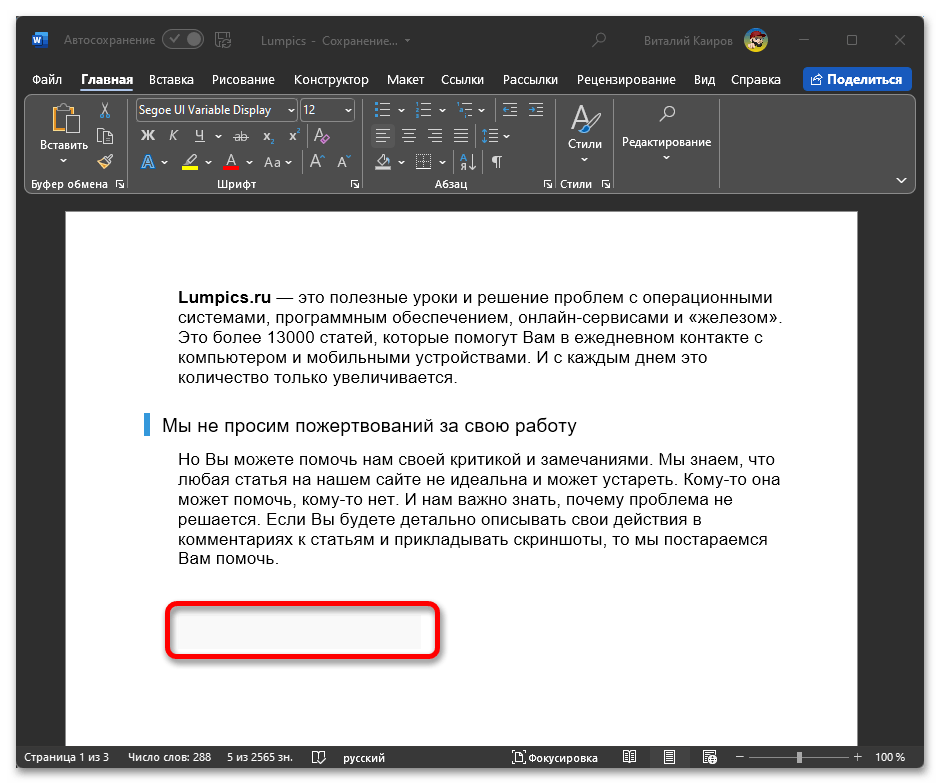
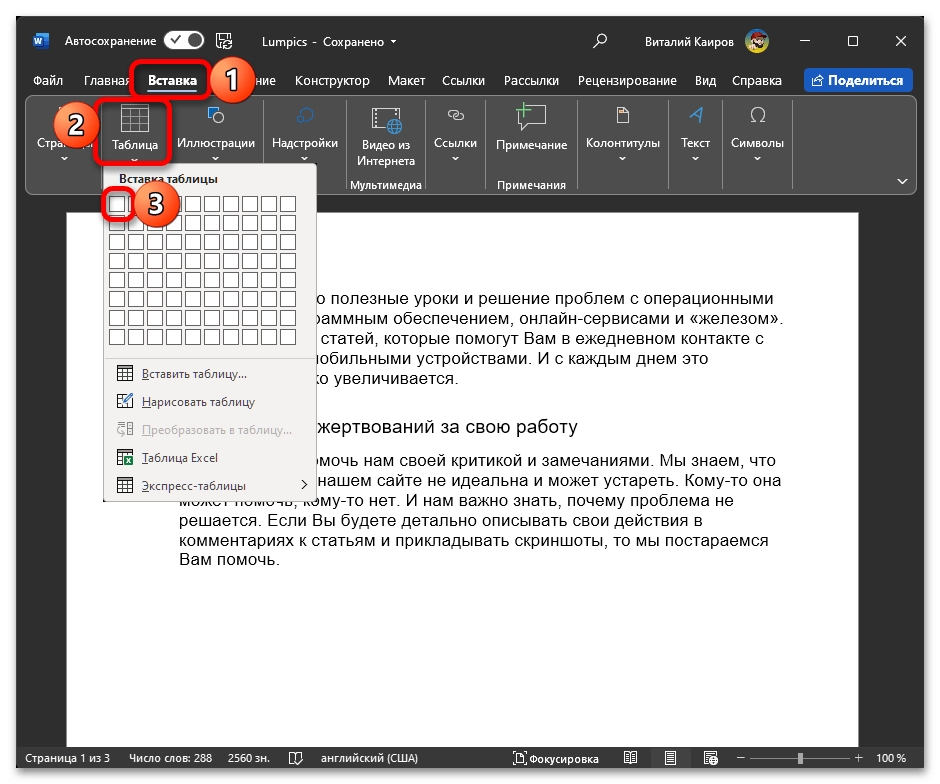
- Перейдите во вкладку «Вставка», разверните меню кнопки «Таблица», наведите курсор на одну (первую) ячейку и кликните по ней.
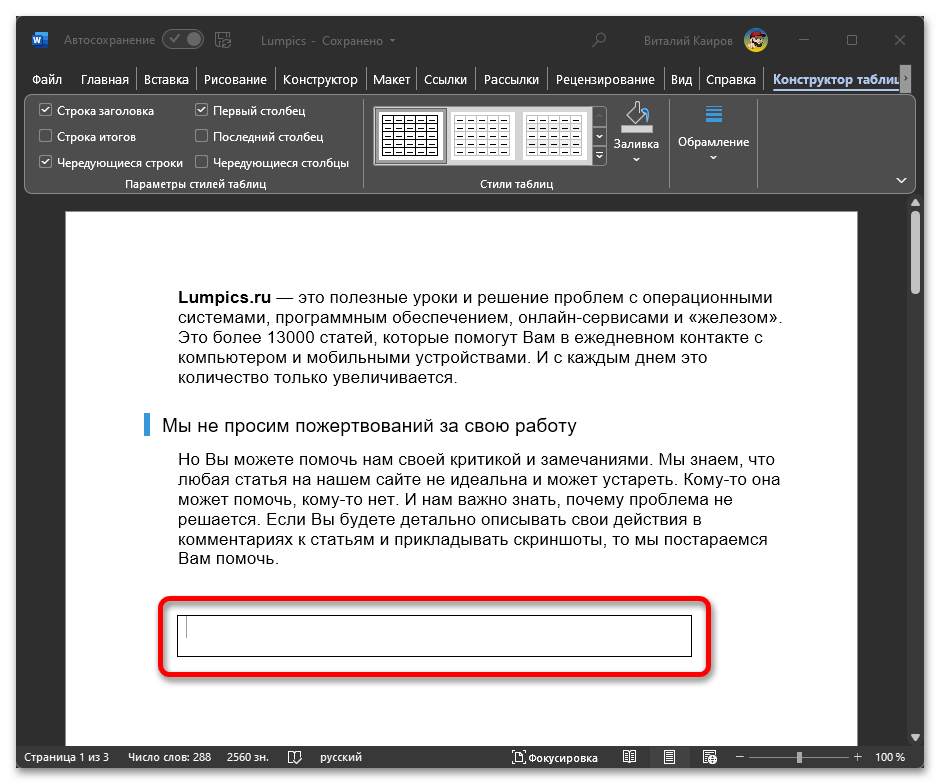
- Растяните созданную таким образом рамку до нужного размера.
Читайте также: Как изменить размер таблицы в Ворде
- Кликните по ней для выделения и перейдите во вкладку «Конструктор таблиц». Разверните меню кнопки «Границы» и выберите в нем сначала «Нет границ», а затем «Нижняя граница».
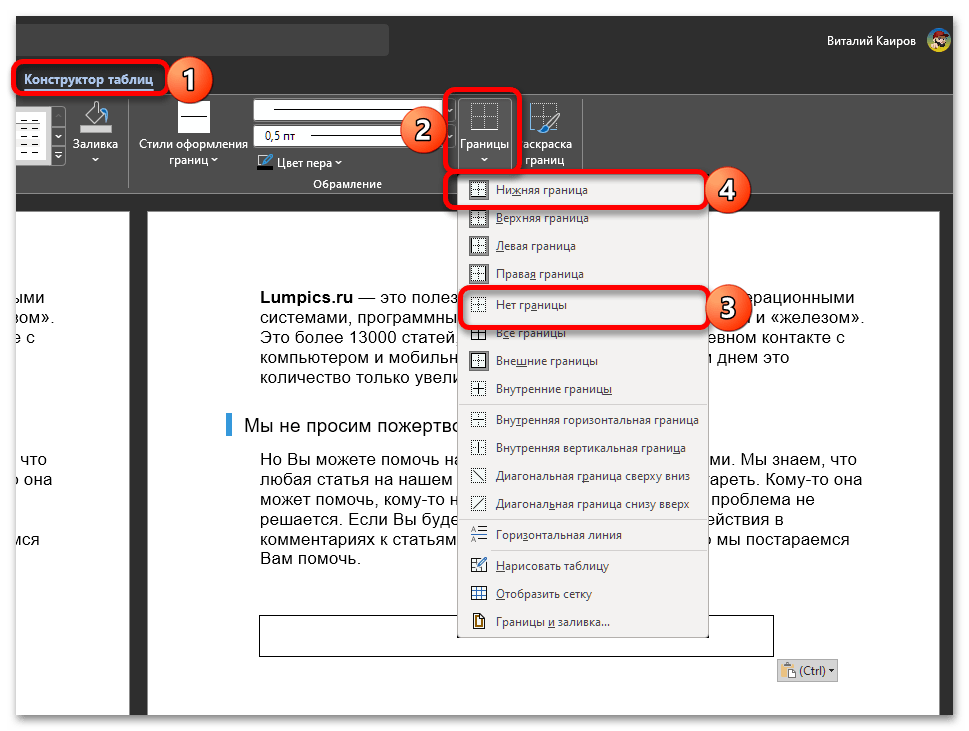
Читайте также: Как скрыть границу таблицы в Word
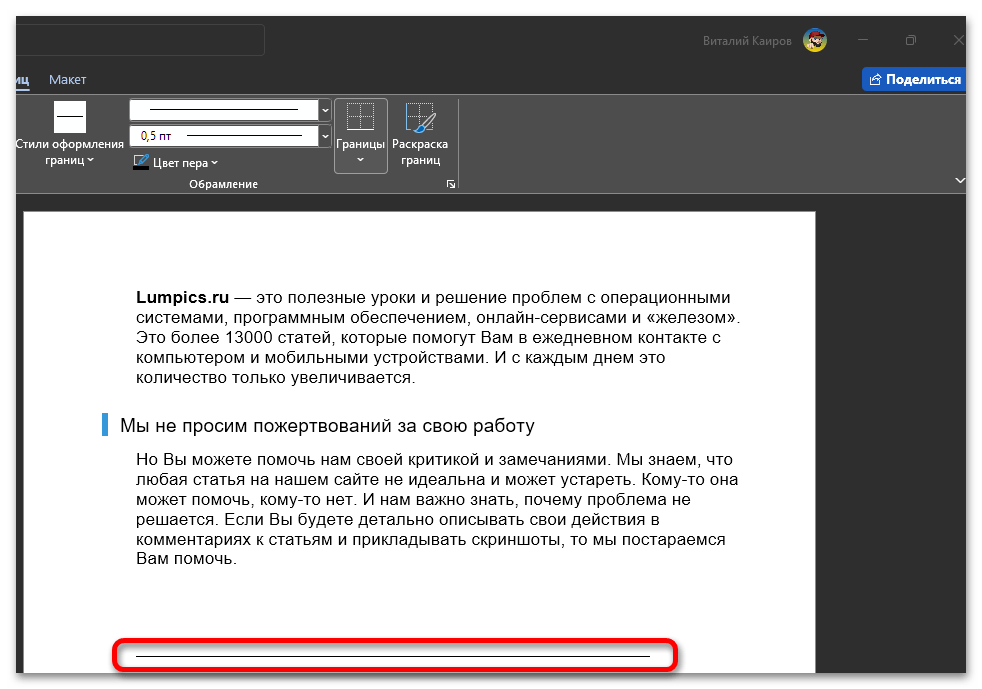
В результате мы получим подчеркивание, созданное из ячейки таблицы, у которой будут скрыты все границы, кроме нижней.
Читайте также: Как сделать таблицу в Майкрософт Ворд
Способ 5: Фигура
Последний вариант создания подчеркивания без текста заключается в рисовании горизонтальной линии. Для этого:
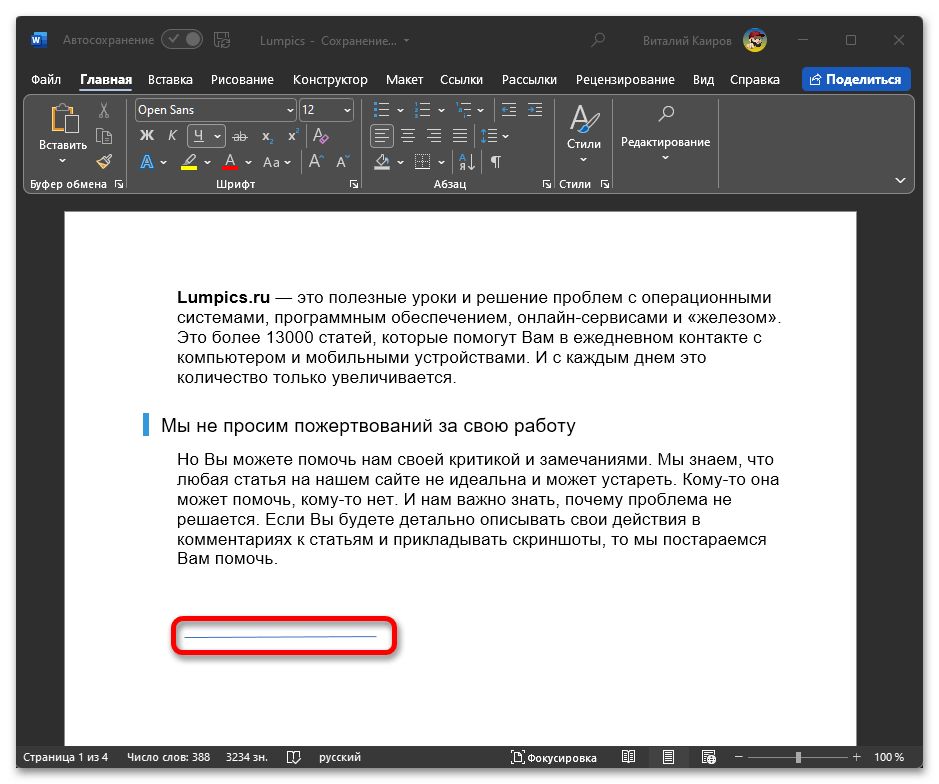
- Перейдите во вкладку «Вставка», разверните меню кнопки «Фигуры» и выберите в нем обычную линию.
- Зажмите клавишу «Shift», чтобы будущая линия была горизонтальной, нажмите левую кнопку мышки (ЛКМ) для обозначения начала подчеркивания и проведите вправо до его завершения, после чего отпустите ЛКМ.
- Если это потребуется, выделите нарисованную фигуру, перейдите во вкладку «Формат фигуры», измените ее цвет, толщину, вид и другие параметры на свое усмотрение.

Читайте также: Как нарисовать линию в Microsoft Word
Еще статьи по данной теме:
Помогла ли Вам статья?
In this guide, you will learn how to underline text in Word, Excel, and PowerPoint.
There are three different ways to underline text:
- The underline shortcut (recommended)
- The underline command
- The Font dialog box
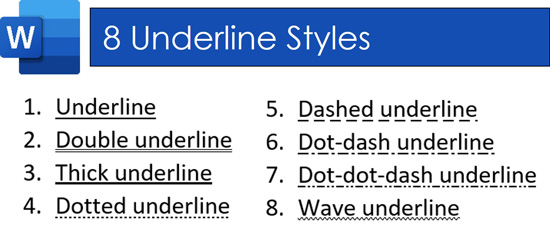
While these all accomplish the same task, the Font dialog box gives you the most underlining options in Word, Excel, and PowerPoint. As you can see in the picture below, there are 8 underline styles in Word, 16 styles in PowerPoint, and 4 styles in Excel.

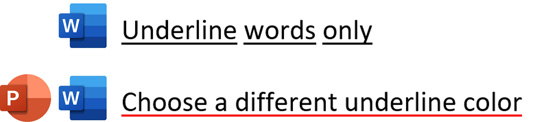
It’s worth noting that in Microsoft Word you can underline words only. And in Word and PowerPoint, you can change the color of your underline (compared to your text)t, as pictured below.
As you can see, there are a lot of options for underlining text in the Microsoft Office Suite depending on which program you are working in. Below, I’ve broken out each one into its own section so you can navigate directly to the underline style you are trying to create.
As most of the time you will probably just want to add a single underline to your text, the shortcut is the fastest way to do this.
1. The Underline Text Shortcut
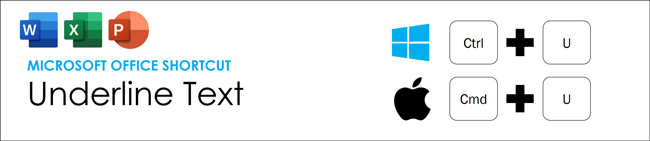
The fastest way to underline text in the Microsoft Office Suite (or any word processing program), is Ctrl+U on a PC and Cmd+U on a Mac.
Using the shortcut once applies the underline effect. Using the shortcut a second time removes the underline effect.
Note: Ctrl+U only allows you to add a single, solid underline to your text. If you want to double underline your text, or create a dashed underline effect, you need to use the underline style options discussed below.
2. The Underline Command
The underline command gives you more options than the Ctrl+U shortcut discussed above as it includes a ‘more options’ area.
To expand your knowledge and learn how to double underline text in Word using keyboard shortcuts, read our guide here.
A. Using the Underline command
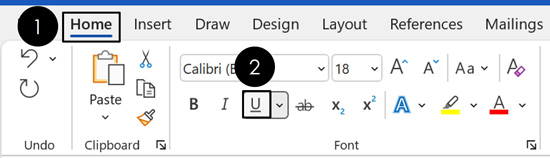
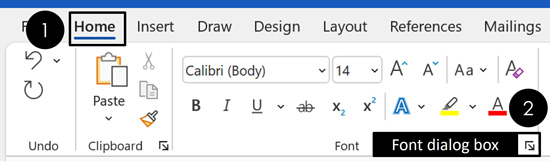
Another fast way to underline text in Word, Excel, and PowerPoint is to simply click the Underline command on the Home tab in the Ribbon.
Simply select the text you want to underline and click the command to add your underline. Clicking the command a second time removes the underline effect.
B. Using the Underline command style options in Word
The Underline command in Word is a two-part button. While clicking the button on the left underlines your text (discussed above), clicking the downward facing arrow on the right gives you additional line style options to choose from.
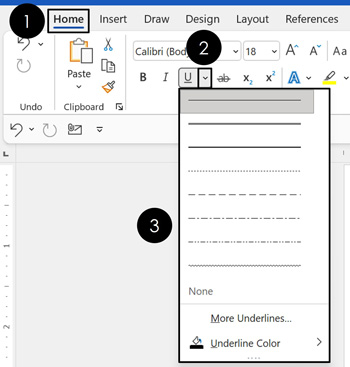
To choose a different underline style in Word, simply select your text and then follow these steps:
- Navigate to the Home tab
- Click the Underline style arrow
- Choose an underline style
There are a total of eight underline styles in Word you can choose from, as pictured below. To see the additional options in Excel and PowerPoint, you will need to use the Font dialog box discussed next.
Note: If you do not select your text first, the underline style you choose will be applied to whatever text you type next. To stop underling your text, simply click the command a second time or hit Ctrl+U on your keyboard.
3. Underlining text using the Font dialog box
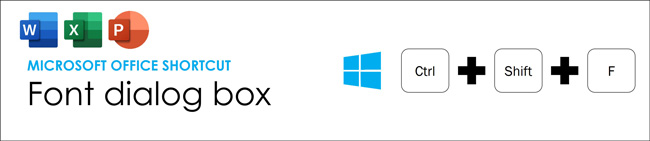
There are multiple ways to open the Font dialog box. The simplest (and fastest way) is to use the Font dialog box shortcut. This shortcut works in Word, Excel, and PowerPoint, so it’s a triple dipper shortcut.
Another way to open the Font dialog box is to click the diagonal facing arrow in the corner of the Font group. Clicking this arrow accomplishes the same task.
As a speed training tip – although there is no difference between using the shortcut and clicking the diagonal facing arrow, as the shortcut is significantly faster, I recommend learning the Ctrl+Shift+F shortcut.
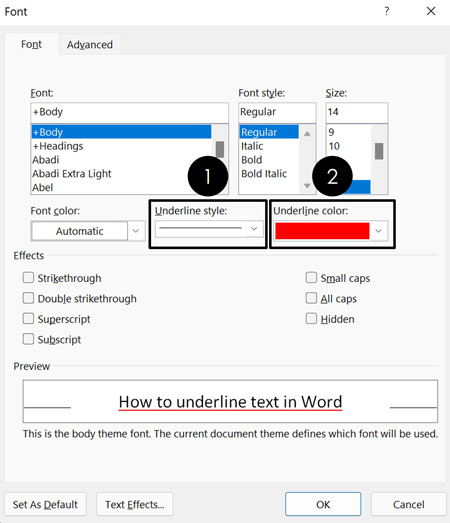
As you can see in the picture above, inside the Font dialog box, you can:
- Choose your underline style
- Choose your underline color
The Font dialog box is also where you can access a number of other text effects like strikethrough, double strikethrough, etc. As you will see in the next section, the Font dialog box is also the trick to underlining words only in Microsoft Word.
To expand your knowledge and learn the strikethrough shortcut to quickly cross out text in Word, Excel, and PowerPoint, read our guide here.
How to Underline Words Only in Word
Microsoft Word includes the ability to underline words only. This means that you do not need to select the words individually and apply the underline to create the desired effect.
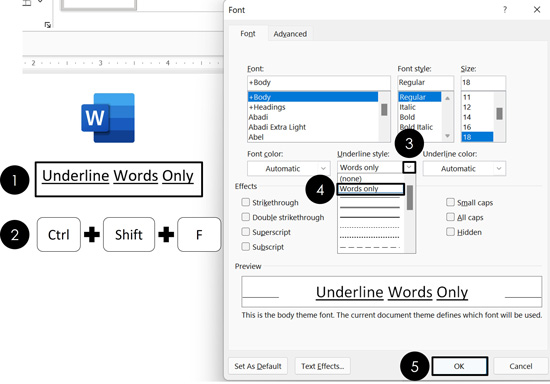
To underline your words only in Word, simply:
- Select your text
- Open the Font dialog box (Ctrl+Shift+F)
- Open the Underline style options
- Select Words Only
- Click OK
Doing so creates the ‘underline words only’ effect, without you having to manually do it yourself. You can also change the color of your underlines as you will see in the next section.
Note: This Words Only underline option does not exist in PowerPoint or Excel. If you want to create the same effect in these programs, you will need to underline your words individually, or take a screenshot of your text in Word and use it in the other programs.
How to Change the Color of Your Underlined Text
In Word and PowerPoint, you can also choose an underline color that is different from your text. This does not work in Microsoft Excel.
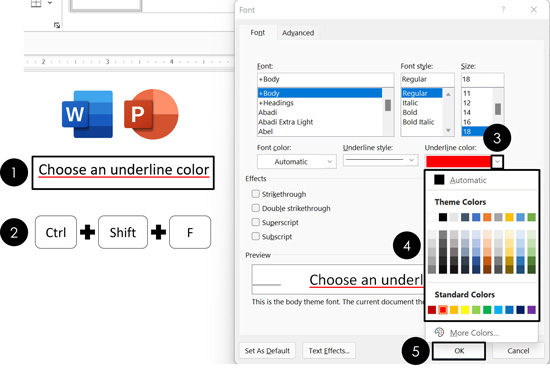
To change the color of your underlined text, simply:
- Select your text
- Open the Font dialog box (Ctrl+Shift+F)
- Open the Underline color options
- Choose an underline color (I picked red)
- Click OK
When picking an underline color that is different than your font color, it is best not to pick colors that are hard to read. See some examples below.
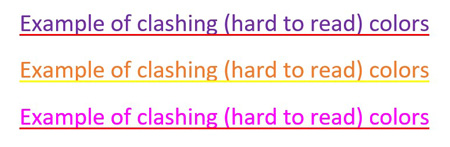
If your font is black, you can use almost any color for your underline. To make your document look more professional, I recommend picking an underline color that complements your logo or other design elements within your document.
Conclusion
Those are the different ways to underline text in the Microsoft Office Suite.
For most of your underlining text needs, I recommend learning and using the Ctrl+U keyboard shortcut. It’s faster than the other methods discussed above but does not provide the extra options like changing the underline color or underlining words only.
If you enjoyed the depth of this guide and want to learn more about our speed training courses and resources, visit us here.