
Excel for Microsoft 365 Word for Microsoft 365 Outlook for Microsoft 365 PowerPoint for Microsoft 365 Excel 2021 Word 2021 Outlook 2021 PowerPoint 2021 Excel 2019 Word 2019 Outlook 2019 PowerPoint 2019 Excel 2016 Word 2016 Outlook 2016 PowerPoint 2016 Excel 2013 Word 2013 Outlook 2013 PowerPoint 2013 More…Less
The Insert Caption feature in Word makes it easy to systematically add captions to pictures in a document.
In other Office apps, such as PowerPoint, you manually add a text box near the image and then group the text box and image. See the instructions below. If you have multiple pictures in a series, you have to manually number them.
Word
-
Click the picture you want to add a caption to.
-
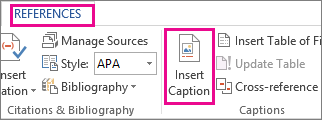
Click References > Insert Caption.

-
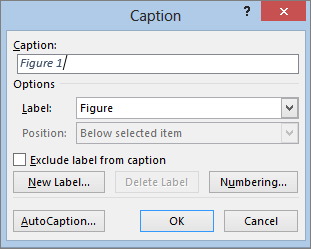
To use the default label (Figure), type your caption in the Caption box.
Tip: You can also create your own default caption label by clicking New Label, and then adding your caption in the Label box. Word automatically numbers the new labels for you.
All other Office apps
-
Use Insert > Text Box to draw a box near the picture. (See add a text box for additional details.)
-
Click inside the text box and type the text you want to use for a caption.
-
Select the text. On the Home tab, use the Font options to style the caption as you want.
-
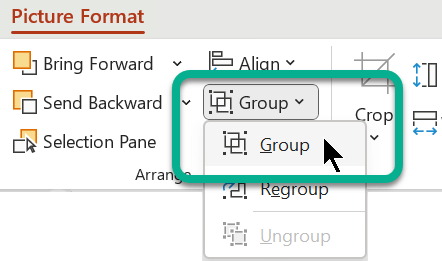
Use Ctrl+click to select the picture and text box, and then on the Picture Format tab, in the Arrange group, select Group > Group.
See Also
Group or ungroup objects
Need more help?
Word
- Click the picture you want to add a caption to.
- Click References > Insert Caption.
- To use the default label (Figure), type your caption in the Caption box.
Contents
- 1 How do I keep pictures and captions together in Word?
- 2 How do I add a caption to a photo in Word 2010?
- 3 How do I add alt text to my images?
- 4 Where do picture captions go?
- 5 How do you caption a picture?
- 6 How do you reference a caption in Word?
- 7 How do I label my photos?
- 8 How do I add alt text to an image in Word?
- 9 How do I add alt text to an object in Word?
- 10 How do I insert alt text in Word?
- 11 How do you caption art?
- 12 How do I add captions to photos in Windows 10?
- 13 Why do we use caption in Word?
- 14 What is an example of a caption?
- 15 How do you caption a photo in a research paper?
- 16 What should I caption a photo of myself?
- 17 How do you hyperlink a caption in Word?
- 18 How do I change the caption style in Word?
- 19 How do you caption in LaTeX?
- 20 How do I annotate a picture in Word?
How do I keep pictures and captions together in Word?
Option 1: Use a Text Box
- Make sure the figure is in-line (not floating).
- Make sure the title or caption is not in a text box. That is, it has to be ordinary text.
- Select both the figure and the title or caption.
- Insert the Text Box.
- Note: The Text Box will stay on the same page as the paragraph to which it is anchored.
How do I add a caption to a photo in Word 2010?
How to Insert a Caption in Word 2010
- Open your document.
- Select the image to caption.
- Click References.
- Click Insert Caption.
- Enter the caption, then click OK.
How do I add alt text to my images?
To add alt text to a picture, shape, chart, or SmartArt graphic, right-click on the object and choose Format Picture. In the Format Picture panel, choose the Layout and Properties icon. Then choose Alt Text. Add a title for your object, then a description.
Where do picture captions go?
Captions should be placed close to the picture and far enough from the body copy.
How do you caption a picture?
- Choose a Photo Caption That Fits the Platform.
- Use a Conversational Tone and Present Tense.
- Decide on the Purpose of Your Caption.
- Know Who Your Audience Is.
- Identify the Main People in Your Photo.
- Use a Quote or Lyrics Wisely.
- Add Value with Your Photo Caption.
- Create Involvement With Your Photo Caption.
How do you reference a caption in Word?
From the References tab, in the Captions group, select Cross-reference . In the Cross-reference dialog box, select the reference type and other options. In the For which caption section, select the item you want to reference and select Insert .
How do I label my photos?
1. Right-click the image that you want to label and click the option Format Picture. 2.In the Format Picture window, click this icon.
- Click the picture you want to add a caption to.
- Click References > Insert Caption.
- To use the default label (Figure), type your caption in the Caption box.
How do I add alt text to an image in Word?
To add alternative text to an image in Word: Insert the picture you want to use into the document. Right-click the picture, and then, in the menu that pops up, click Format Picture. Click the arrow next to Alt Text to expand the alternative text options.
How do I add alt text to an object in Word?
Add alt text
- Do one of the following: Right-click the object and select Edit Alt Text. Select the object.
- In the Alt Text pane, type 1-2 sentences in the text box to describe the object and its context to someone who cannot see it. Tip: Save time and add an alt text generated by the system to the object.
How do I insert alt text in Word?
To add alt text in Word, open your document and select the object to which you want to add the alternative text. Right-click the object. From the menu that appears, select “Edit Alt Text.” Alternatively, you may select the “Alt Text” option found in the “Accessibility” group of the object’s “Format” tab.
How do you caption art?
The most standard information included on artwork labels is:
- The artist’s name. This one is pretty straightforward!
- The title of the work.
- The date of the artwork.
- The size of the artwork.
- 4.a The duration of the work.
- The medium of the artwork.
- The price or the credit listing.
- Additional information.
How do I add captions to photos in Windows 10?
Add Text to Photos in Windows 10
Right-click a photo in Windows Explorer and select “Microsoft Paint.” Then click the “A” text box icon in the Tools section of the ribbon. Enter the text you want and adjust its size, color and font style. To move the text box, place the cursor on its border and drag it.
Why do we use caption in Word?
The “Caption” options in Microsoft Word allow you to label images, diagrams, charts, illustrations and figures so your reader can quickly identify what they mean, as well as enabling use of the “dynamic” list functions offered by Microsoft Word.
What is an example of a caption?
An example of a caption is a descriptive title under a photograph. An example of a caption are the words at the bottom of a television or movie screen to translate the dialogue into another language or to provide the dialogue to the hard of hearing.A title or heading, as of a document or article.
How do you caption a photo in a research paper?
Here are some tips on using captions:
- A figure caption is centered under the figure; a table caption is centered above the table (if a caption is more than one line, make it left justified).
- A Figure and its caption should appear on the same page.
- All captions should start with a capitalized word and end with a period.
What should I caption a photo of myself?
Cute Captions for Pictures of Yourself
- Be a nice person.
- I’m a rock star!
- I’m a friendly human.
- Let life surprise you.
- I’m shining like the stars.
- My smile shimmers like the sun.
- We all shine on.
- Never dull your shimmer for somebody else.
How do you hyperlink a caption in Word?
Create a hyperlink to a location on the web
- Select the text or picture that you want to display as a hyperlink.
- Press Ctrl+K. You can also right-click the text or picture and click Link on the shortcut menu.
- In the Insert Hyperlink box, type or paste your link in the Address box.
How do I change the caption style in Word?
How to Change the Style of Individual Table Titles and Figure Captions
- Select the Home tab in the ribbon (see figure 1).
- Select all or part of the table title or figure caption text that you want to change.
- Use the options in the Font and Paragraph groups to select new style options, just as you would regular body text.
How do you caption in LaTeX?
It is always good practice to add a caption to any figure or table. Fortunately, this is very simple in LaTeX. All you need to do is use the caption{”text”} command within the float environment.
How do I annotate a picture in Word?
To annotate an image in Word, insert the image in a document, then draw a shape over the image.
- Go to the Insert tab and select Pictures.
- In the Insert Picture dialog box, select the file folder that contains the image.
- Choose the image, then select Insert.
When you have too many images in the document, it is necessary to insert captions to them, which could make the document more organized and enhance the connection between text and images. So how can we achieve it? Here’s a simple guide to insert a caption for an image.
1. Select the image you want to insert a caption for, and go to References tab, then click Insert Caption, which is in Captions section.

2. When Caption dialog box appears, click New Label and type a caption you prefer in New Label pop-up box, then hit OK when you are done. Here I take Must-see attraction as an example.

3. The caption you typed in Step 2 will automatically be entered into Caption box and Label box, and the sequence numbers will also be generated automatically. You could also choose the position where the caption is placed: Above selected item or Below selected item, by selecting option from the related drop-down list.

4. Now check out the example below. Microsoft Word will renumber captions appropriately if you insert a new image in the same document.

Copyright Statement: Regarding all of the posts by this website, any copy or use shall get the written permission or authorization from Myofficetricks.

If you’re writing a long Word document containing a lot of images, you may want to add captions to those images. You can then reference the images by their number in the text as well as generate a Table of Figures.
To add a caption, select a picture in your document and click the References tab.

In the Captions section, click Insert Caption.
NOTE: You can also right-click on the image and select Insert Caption from the popup menu.
On the Caption dialog box, select the Label you want (Caption, Equation, Figure, or Table) and the Position related to the image (Above selected item or Below selected item). To change the numbering on the caption, click Numbering.
In the Caption Numbering dialog box, select the format for the number on the caption and click OK. If you’re using Chapter headings, you can include the chapter numbers in your captions using the Caption Numbering dialog box.
In the Caption edit box, enter a separator, such as a period after the Label and number. Then, enter your caption title.
The caption is added to the image in the default Caption style.
If you want to change the style of the caption, you can easily do so. For example, we decided we wanted the caption centered under the image. Click the Home tab.
Use the character and paragraph formatting tools to format the caption the way you want it.
To apply these changes to the Caption style for all other captions, click the button in the lower, right corner of the Styles section on the Home tab.
In the list of styles, move the mouse over the Caption style name and click the down arrow that displays on the right. Select Update Caption to Match Selection from the drop-down menu.
To close the Styles window, click the X in the upper, right corner of the window.
Now, all captions you add to images in this document will be formatted the same way.
READ NEXT
- › This New Google TV Streaming Device Costs Just $20
- › The New NVIDIA GeForce RTX 4070 Is Like an RTX 3080 for $599
- › Google Chrome Is Getting Faster
- › BLUETTI Slashed Hundreds off Its Best Power Stations for Easter Sale
- › HoloLens Now Has Windows 11 and Incredible 3D Ink Features
- › How to Adjust and Change Discord Fonts
How-To Geek is where you turn when you want experts to explain technology. Since we launched in 2006, our articles have been read billions of times. Want to know more?
In the editing of Word documents, different chapters will have different picture numbers. These numbers are not manually entered by us, but should be automatically generated by Word, and should also be able to directly reference the image directory. The following is a detailed description of Word’s multi-level list settings.
1. Generate levels of titles.

You can see the headings of each level in the style. Here is an article:

This is a paragraph of text, each title has a different level, the top three font is the first level title we want to set, the blue font is the second level we want to set title,
1 At this point we mouse click on the line of the third word;
2 Move the mouse to title 1 Right mouse button Select: Update title 1 to match the selection.
At this point, our third font has become a level 1 title and this format is recorded in title 1. Next time we want to set a level one title, directly select the text and click on the title. 1 Yes, other levels of titles and so on.
We can select the outline view in the view ribbon to see more clearly the level of each title we set.
2. Give the title number.
After we have sorted the title order, we can number the title.
1 Move the mouse to the corresponding title in the menu bar style and right click, click Modify;
2Click the «Format» in the lower left corner of the Modify Style dialog box, find the «Number» in it and click it;
3Set the numbering format you want.
At this point we will automatically number our title.

4. Document section.
Insert a page break before each chapter:

Note the next section in the section break.
At this point you can see the page breaks we inserted in the outline view, or delete them.
After inserting the page break, our page number will be scrambled (each section will be renumbered), then double click on our page number

Check the page number label: Continue the previous section, so that our page numbers are connected.
5. Insert a caption into the picture.
In the menu bar reference, find the reference:

Select the image of the corresponding caption in our chapter and click on the caption.

Create a new label (the so-called label is the one in front of the number, such as the new label «map» here). You can enter the required label yourself.
number (that is, the number of the figure, such as 2-1, but the chapter number is set here, that is, 2, 1 is determined by the number of our figure, for example, there are 20 in the second chapter. Figure, number is from 2-1 until 2-20) Click to enter, check «Include chapter number». The «chapter start style» is based on which level of the title number of our chapter is based on the previous example. If it is a first-level title, then the picture is 1.1-5. If it is a second-level title, then the picture is 1.1.1-5.