
Word for Microsoft 365 Outlook for Microsoft 365 PowerPoint for Microsoft 365 Word 2021 Outlook 2021 PowerPoint 2021 OneNote 2021 Word 2019 Outlook 2019 PowerPoint 2019 Word 2016 Outlook 2016 PowerPoint 2016 OneNote 2016 Word 2013 Outlook 2013 PowerPoint 2013 OneNote 2013 Office for business Office 365 Small Business Word 2010 Outlook 2010 PowerPoint 2010 OneNote 2010 More…Less
Speak is a built-in feature of Word, Outlook, PowerPoint, and OneNote. You can use Speak to have text read aloud in the language of your version of Office.
Text-to-speech (TTS) is the ability of your computer to play back written text as spoken words. Depending upon your configuration and installed TTS engines, you can hear most text that appears on your screen in Word, Outlook, PowerPoint, and OneNote. For example, if you’re using the English version of Office, the English TTS engine is automatically installed. To use text-to-speech in different languages, see Using the Speak feature with Multilingual TTS.
To learn how to configure Excel for text-to-speech, see Converting text to speech in Excel.
Add Speak to the Quick Access Toolbar
You can add the Speak command to your Quick Access Toolbar by doing the following in Word, Outlook, PowerPoint, and OneNote:
-
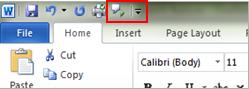
Next to the Quick Access Toolbar, click Customize Quick Access Toolbar.

-
Click More Commands.
-
In the Choose commands from list, select All Commands.
-
Scroll down to the Speak command, select it, and then click Add.
-
Click OK.
Use Speak to read text aloud
After you have added the Speak command to your Quick Access Toolbar, you can hear single words or blocks of text read aloud by selecting the text you want to hear and then clicking the Speak icon on the Quick Access Toolbar.
Learn more
Listen to your Word documents with Read Aloud
Listen to your Outlook email messages with Read Aloud
Converting text to speech in Excel
Dictate text using Speech Recognition
Learning Tools in Word
Hear text read aloud with Narrator
Using the Save as Daisy add-in for Word
Need more help?
Modern Word has a powerful ‘Speech to Text’ option ‘Dictate’ which works a lot better than similar options in the past.
If you’d tried and been disappointed with dictating into Word, it’s time to give it another try.
Dictate is only available to Microsoft 365 subscribers with Office 365 software for Windows, Mac, iPhone, iPad and Android devices. In this article we’ll look at how Dictate works in Word and Outlook for Windows. It’s much the same on other platforms which we’ll look at separately.
Dictation in Word 365 (and Outlook 365) is cloud based. It’s being improved regularly and isn’t as dependant on the speed of your computer.
It’s also context sensitive, using whole spoken phrases to work out the right words (instead of the old method which converted each spoken word individually).
Another improvement is microphones, especially in laptops, which now pick up speech with better fidelity.
Microphone setup
Make sure Windows and Office can ‘hear’ you.
A microphone in a laptop or webcam should be enough in most cases. Wireless microphones may work. If you’re in a noisy area, a headset with mic close to the mouth might be necessary. Dictate needs to ‘hear’ your voice clearly without distracting background noise. Try using an old smartphone as a microphone if there’s no in-built microphone.
Go to Settings and search for ‘Speech’ and choose Speech Settings.
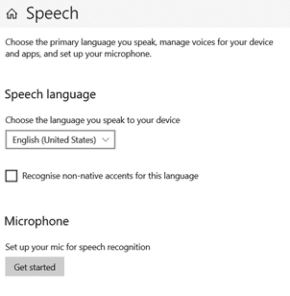
Choose a language. Though this setting has no effect in Office Dictation, it’s probably best to select the right one.
Get Started – click that button to go through a wizard to select, setup and test your microphone. The wizard is intended for using Cortana or Windows 10 voice commands but also serves to get a mic ready for Word.
Dictate in Word has no settings or microphone controls of its own. It only works with the default microphone in Windows.
Dictate Setup
With a default microphone setup and working try Dictate. It’s on the Home tab.
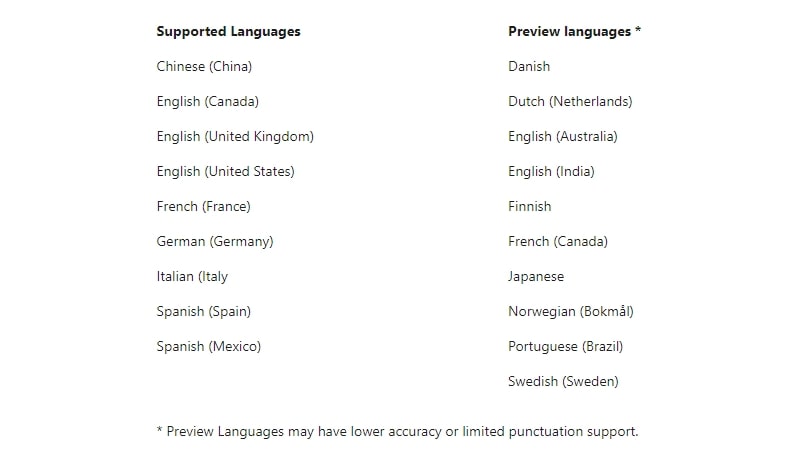
Pull down the list and choose your spoken language. ‘Preview’ languages aren’t fully developed but should work fairly well.

Does language selection matter for dialects? Probably, though Peter’s Australian accent worked just as well with the setting on English US, UK, Canada or Australia.
We’d be interested to hear from French speakers about their experience with French (France) vs. French (Canada). Or Spanish speakers with the Spain or Mexico variants. Can people from Portugal effectively use the Portuguese (Brazil) option?
Dictation Start
Click the Dictate button, wait a second until the button changes with a red dot.

Whatever you say now will be heard and turned into text.
Punctuation
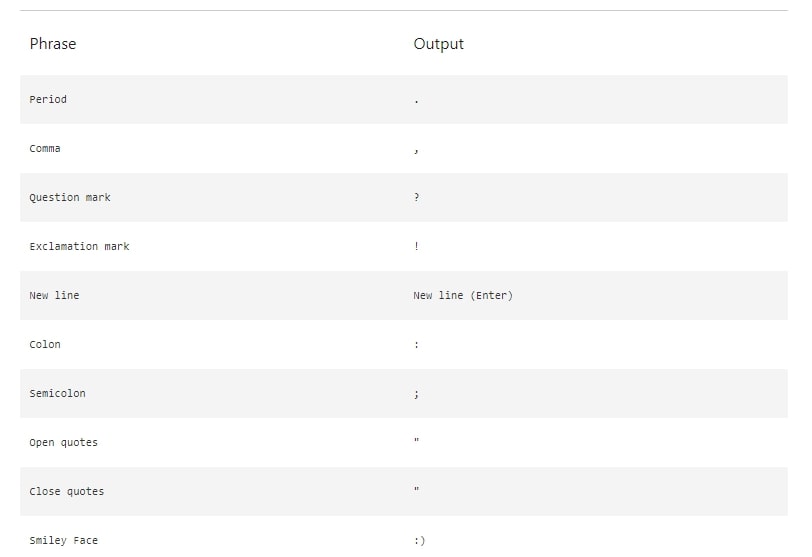
Dictate has Automatic punctuation where the following words insert the symbol of that name.
- Period or Full Stop
- Comma
- Question mark
- Exclamation point or Exclamation mark
- New line or New paragraph
- Semicolon
- Colon
- Hyphen
- Open quote or Open quotes
- Close quote or Close quotes
There are more spoken punctuation phrases and symbols available.
Speaking becomes typing
Dictate seems to work better than the last time we tried it. You can switch between typing and speaking which makes it easier to edit the text and fix any ‘bludners’ as you go along.
We tried the same test as back in 2017 when Dictate was an add-on to Word. It’s a famous standup routine …

Compare this with our 2017 test. Dictate works a bit better now but it’s hardly perfect. Punctuation is handled more consistently; the only glitch was that Peter didn’t know that ‘dash’ wasn’t an accepted punctuation word (it’s ‘hyphen’).
“Your mileage may vary” Give Dictate a try to see how well it works for you. Does the error rate outweigh the convenience of dictating?
Privacy
Microsoft now addresses privacy concerns with this statement.
“This service does not store your audio data or transcribed text.
Your speech utterances will be sent to Microsoft and used only to provide you with text results.”
That’s good, as far as it goes. Laws in various countries, including the USA, mean Microsoft can be compelled to monitor and handover data from any customer. That can happen without notice to the customer or even a court warrant.
Troubleshooting
The most common problem with Dictate is the microphone setup. Click the Dictate button, start talking but no typing appears.
Dictate in Word or Outlook has no controls to choose a microphone. Use Windows to select the microphone.
Right-click on the speaker icon on the status bar and choose Sound | Recording. Right click on your preferred microphone and choose ‘Set as Default Device’ and ‘Set as Default Communication Device”

Turn your smartphone into a webcam – iPhone, iPad or Android
Easier ways to setup and test Skype
No nonsense guide to fixing Windows audio problems – speakers
- You can use speech-to-text on Microsoft Word through the «Dictate» feature.
- With Microsoft Word’s «Dictate» feature, you can write using a microphone and your own voice.
- When you use Dictate, you can say «new line» to create a new paragraph and add punctuation simply by saying the punctuation aloud.
- If you’re not satisfied with Word’s built-in speech-to-text feature, you can use a third-party program like Dragon Home.
- Visit Business Insider’s Tech Reference library for more stories.
While typing is certainly the most common way to create and edit documents in Microsoft Word, you’re not limited to using a keyboard.
Word supports speech-to-text, which lets you dictate your writing using voice recognition.
Speech-to-text in Word is convenient and surprisingly accurate, and can help anyone who has issues typing with a typical keyboard.
You can use speech-to-text in Microsoft Word in the same way on both Mac and PC.
Check out the products mentioned in this article:
Apple Macbook Pro (From $1,299.00 at Apple)
Acer Chromebook 15 (From $179.99 at Walmart)
How to use speech-to-text on Word using Dictate
Make sure you have a microphone connected to your computer. This can be built-in, like on a laptop, or a separate mic that you plug into the USB or audio jack.
It doesn’t matter which type you use, though the best kind of mic to use is a headset, as it won’t need to compete with as much background noise as a built-in microphone.
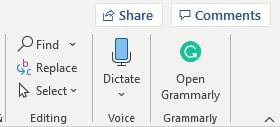
1. In Microsoft Word, make sure you’re in the «Home» tab at the top of the screen, and then click «Dictate.»
Dave Johnson/Business Insider
2. You should hear a beep, and the dictate button will change to include a red recording light. It’s now listening for your dictation.
Dave Johnson/Business Insider
3. Speak clearly, and Word should transcribe everything you say in the current document. Speak punctuation aloud as you go. You can also say «New line,» which has the same effect as pressing the Enter or Return key on the keyboard.
4. When you’re done dictating, click «Dictate» a second time or turn it off using your voice by saying, «Turn the dictate feature off.»
You can still type with the keyboard while Dictate is on, but if you click outside of Word or switch to another program, Dictate will turn itself off.
Want to change languages? You can click the downward arrow on the Dictate button to choose which of nine or so languages you want to speak. You might also see additional «Preview Languages,» which are still in beta and may have lower accuracy.
Dave Johnson/Business Insider
Speech-to-text alternatives
You’re not limited to using the Dictate feature built into Word. While not as popular as they once were, there are several commercial speech-to-text apps available which you can use with Word.
The most popular of these, Dragon Home, performs the same kind of voice recognition as Word’s Dictate, but it also lets you control Word, format text, and make edits to your text using your voice. It works with nearly any program, not just Word.
Related coverage from Tech Reference:
-
How to use speech-to-text on a Windows computer to quickly dictate text without typing
-
You can use text-to-speech in the Kindle app on an iPad using an accessibility feature— here’s how to turn it on
-
How to use text-to-speech on Discord, and have the desktop app read your messages aloud
-
How to use Google text-to-speech on your Android phone to hear text instead of reading it
-
2 ways to lock a Windows computer from your keyboard and quickly secure your data
Dave Johnson
Freelance Writer
Dave Johnson is a technology journalist who writes about consumer tech and how the industry is transforming the speculative world of science fiction into modern-day real life. Dave grew up in New Jersey before entering the Air Force to operate satellites, teach space operations, and do space launch planning. He then spent eight years as a content lead on the Windows team at Microsoft. As a photographer, Dave has photographed wolves in their natural environment; he’s also a scuba instructor and co-host of several podcasts. Dave is the author of more than two dozen books and has contributed to many sites and publications including CNET, Forbes, PC World, How To Geek, and Insider.
Read more
Read less
Master the skill of speech to text in Microsoft Word and you’ll be dictating documents with ease before you know it. Developed and refined over many years, Microsoft’s speech recognition and voice typing technology is an efficient way to get your thoughts out, create drafts and make notes.
Just like the best speech to text apps that make life easier for us when we’re using our phones, Microsoft’s offering is ideal for those of us who spend a lot of time using Word and don’t want to wear out our fingers or the keyboard with all that typing. While speech to text in Microsoft Word used to be prone to errors which you’d then have to go back and correct, the technology has come a long way in recent years and is now amongst the best text-to-speech software.
Regardless of whether you have the best computer or the best Windows laptop, speech to text in Microsoft Word is easy to access and a breeze to use. From connecting your microphone to inserting punctuation, you’ll find everything you need to know right here in this guide. Let’s take a look…
How to use speech to text in Microsoft Word: Preparation
The most important thing to check is whether you have a valid Microsoft 365 (opens in new tab) subscription, as voice typing is only available to paying customers. If you’re reading this article, it’s likely your business already has a Microsoft 365 enterprise subscription. If you don’t, however, find out more about Microsoft 365 for business via this link (opens in new tab).
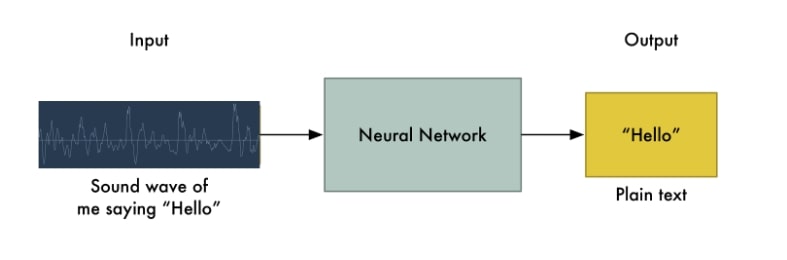
The second thing you’ll need before you start voice typing is a stable internet connection. This is because Microsoft Word’s dictation software processes your speech on external servers. These huge servers and lighting-fast processors use vast amounts of speech data to transcribe your text. In fact, they make use of advanced neural networks and deep learning technology, which enables the software to learn about human speech and continuously improve its accuracy.
These two technologies are the key reason why voice typing technology has improved so much in recent years, and why you should be happy that Microsoft dictation software requires an internet connection.
Once you’ve got a valid Microsoft 365 subscription and an internet connection, you’re ready to go!
Step 1: Open Microsoft Word
Simple but crucial. Open the Microsoft Word (opens in new tab) application on your device and create a new, blank document. We named our test document “How to use speech to text in Microsoft Word — Test” and saved it to the desktop so we could easily find it later.

Step 2: Click on the Dictate button
Once you’ve created a blank document, you’ll see a Dictate button and drop-down menu on the top right-hand corner of the Home menu. It has a microphone symbol above it. From here, open the drop-down menu and double-check that the language is set to English.
One of the best parts of Microsoft Word’s speech to text software is its support for multiple languages. At the time of writing, nine languages were supported, with several others listed as preview languages. Preview languages have lower accuracy and limited punctuation support.
Step 3: Allow Microsoft Word access to the Microphone
If you haven’t used Microsoft Word’s speech to text software before, you’ll need to grant the application access to your microphone. This can be done at the click of a button when prompted.
It’s worth considering using an external microphone for your dictation, particularly if you plan on regularly using voice to text software within your organization. While built-in microphones will suffice for most general purposes, an external microphone can improve accuracy due to higher quality components and optimized placement of the microphone itself.
Step 4: Begin voice typing
Now we get to the fun stuff. After completing all of the above steps, click once again on the dictate button. The blue symbol will change to white, and a red recording symbol will appear. This means Microsoft Word has begun listening for your voice. If you have your sound turned up, a chime will also indicate that transcription has started.
Using voice typing is as simple as saying aloud the words you would like Microsoft to transcribe. It might seem a little strange at first, but you’ll soon develop a bit of flow, and everyone finds their strategies and style for getting the most out of the software.
These four steps alone will allow you to begin transcribing your voice to text. However, if you want to elevate your speech to text software skills, our fifth step is for you.
Step 5: Incorporate punctuation commands
Microsoft Word’s speech to text software goes well beyond simply converting spoken words to text. With the introduction and improvement of artificial neural networks, Microsoft’s voice typing technology listens not only to single words but to the phrase as a whole. This has enabled the company to introduce an extensive list of voice commands that allow you to insert punctuation marks and other formatting effects while speaking.
We can’t mention all of the punctuation commands here, but we’ll name some of the most useful. Saying the command “period” will insert a period, while the command “comma” will insert, unsurprisingly, a comma. The same rule applies for exclamation marks, colons, and quotations. If you’d like to finish a paragraph and leave a line break, you can say the command “new line.”
These tools are easy to use. In our testing, the software was consistently accurate in discerning words versus punctuation commands.
Summary
Microsoft’s speech to text software is powerful. Having tested most of the major platforms, we can say that Microsoft offers arguably the best product when balancing cost versus performance. This is because the software is built directly into Microsoft 365, which many businesses already use. If this applies to your business, you can begin using Microsoft’s voice typing technology straight away, with no additional costs.
We hope this article has taught you how to use speech to text software in Microsoft Word, and that you’ll now be able to apply these skills within your organization.
Во время создания документа Word вы можете попробовать печатать голосом в Ворд, просто диктуя текст без использования клавиш клавиатуры компьютера. Для многих пользователей голосовой набор в Ворде — очень полезная и востребованная функция текстового редактора.
В некоторых случаях легче напечатать тест голосом в Ворде, чем использовать обычный классический метод набора с клавиатуры. Например, в том случае если вы хотите дать своим пальцам отдохнуть, или вы по разным причинам испытываете затруднения с обычным способом ввода. Набор голосом в Word может вам в этом помочь.
Содержание:
- Как записывать в Ворд голосом в Word для Microsoft 365
- Голосовой ввод Ворд онлайн
- Как печатать голосом в Ворде с помощью средства Windows 11
- Как в Ворде набирать голосом: несколько советов
- Выводы статьи
- Голосовой ввод текста в Word (видео)
На самом деле, в зависимости от вашей скорости печати, вы можете быстрее произнести текст, чем набрать его с клавиатуры. Кроме того, вам даже не нужно дополнительное оборудование: для этого подойдет встроенный или подключенный микрофон вашего компьютера.
Голосовой набор текста в Word отлично подходит для создания набросков и черновиков. Этот метод подходит для ведения заметок или просто для выражения ваших мыслей. Возможно, вам не нравится печатать. Нет необходимости в клавиатуре, когда вы можете диктовать все, что вам нужно для ввода текста.
Если вы используете текстовый процессор Microsoft Word на компьютере с операционной системой Windows, у вас есть несколько вариантов распознавания голоса, с помощью которых вы можете напечатать текст голосом в Ворде.
Преобразовать голос в текст в Ворде можно несколькими способами:
- В приложении или на сервисе Word для Microsoft
- Бесплатно в Word онлайн в Интернете.
- С помощью функции голосового ввода Windows.
Чтобы набирать текст голосом необходимо соблюдать следующие условия:
- На компьютере должен быть встроенный в ноутбук или подключенный к вашему устройству внешний микрофон.
- Обеспечено подключенное соединение с Интернетом.
- Наличие подписки на Microsoft 365 для использования одноименного приложения на компьютере.
- На ПК должна быть установлена Windows 11, чтобы вы могли воспользоваться системным средством, если у вас нет подписки на Microsoft
В этом руководстве мы расскажем, как в Ворде включить голосовой ввод несколькими способами: используя встроенные инструменты в Word для Microsoft 365 и Word Online, или с помощью системного средства Windows 11 в обычном редакторе Microsoft Word.
Как записывать в Ворд голосом в Word для Microsoft 365
Этот метод работает в Word для Microsoft 365, на который у вас должна быть подписка. В обычных версиях Microsoft Office функция диктовки отсутствует.
Чтобы использовать в Ворд голосовой ввод текста, вам потребуется микрофон и подключение к сети.
Ввод текста голосом в Word на ПК с Windows выполняется следующим образом:
- Войдите в Microsoft 365 на своем устройстве.
- Поместите курсор мыши в то место, откуда вы хотите начать диктовать.
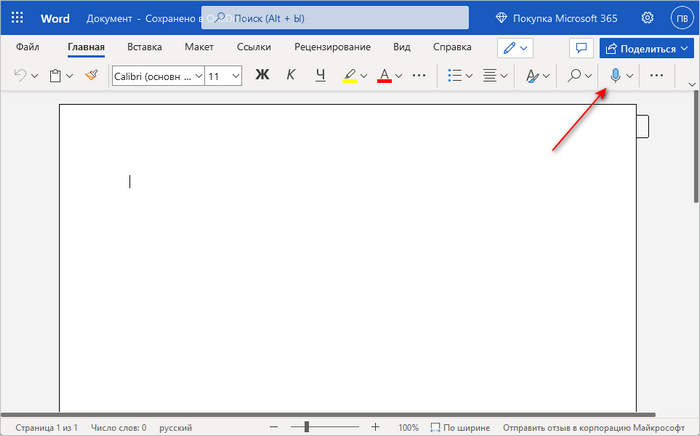
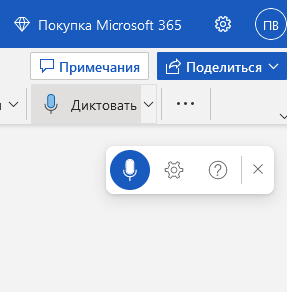
- Перейдите во вкладку «Главная» и нажмите на кнопку «Диктовать».

- В нижней части экрана появится окно, в котором написано «Слушаю…» с активным микрофоном, потому что диктовка текста Ворд уже включена.

- Начните говорить четко и в обычном темпе, чтобы текст появился на экране.
Вы можете остановить в Word ввод голосом в любой момент, нажав на кнопку микрофона, после чего он станет неактивным. Чтобы продолжить в Word запись голосом, снова нажмите на значок микрофона, там будет надпись «Нажмите микрофон, чтобы продолжить».
Чтобы завершить работу с диктовкой текста закройте окошко внизу экрана.
Голосовой ввод Ворд онлайн
Вы можете бесплатно использовать голосовой набор в Ворде в онлайн версии Microsoft Office. Не все пользователи знают, что у них есть возможность использовать бесплатные версии офисных приложений непосредственно из браузера.
Несмотря на то, что это несколько урезанные версии, их возможностей хватает в большинстве случаев. Веб-приложения доступны в Интернете из облачного хранилища OneDrive или электронной почты Outlook.com с помощью учетной записи Майкрософт.
Выполните следующие действия в Word онлайн:
- Сначала убедитесь, что к компьютеру подключен микрофон. Он может быть встроенным на ноутбуке, или внешним микрофоном, который вы подключаете к USB- или аудио разъему своего компьютера.
- В Word Online откройте новый пустой документ или существующий файл, который необходимо предварительно загрузить в облако OneDrive.
- На вкладке «Главная» в верхней части экрана справа нажмите «Диктовать».
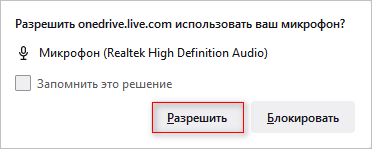
- В открывшемся сообщении разрешите использовать ваш микрофон нажав на кнопку «Разрешить». Можно поставить галку в пункте «Запомнить это решение», чтобы в следующий раз микрофон использовался автоматически.
- Вы услышите звуковой сигнал, а кнопка диктовки окрасится синим индикатором записи в плавающем окне, которое можно перемещать по документу. Голосовой набор Word готов к использованию, он слушает вашу речь.
- Говорите четко, а ваш голос сразу преобразуется в текст в Word Online. Инструмент должен расшифровать все, что вы говорите и напечатать текст в текущем документе.
Во время диктовки произносите знаки препинания вслух. Вы также можете сказать «новая строка». Это будет иметь тот же эффект, что и нажатие клавиши «Enter» на клавиатуре.
- Когда вы закончите диктовать, снова нажмите на значок «Диктовать». Затем вы услышите звуковой сигнал, оповещающий вас о том, что голосовой набор текста в Ворде отключен.
Вы по-прежнему можете печатать с клавиатуры, когда набор голосом в Ворде включен. Но если вы щелкнете мышью за пределами окна документа Word или переключитесь на другую программу, то запись текста с голоса в Word автоматически отключается.
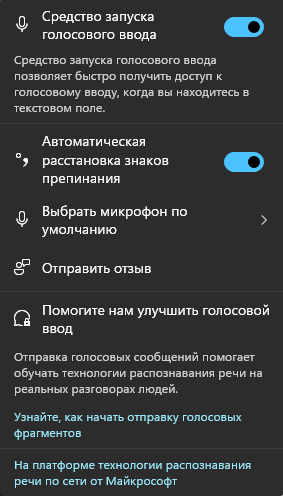
Нажмите на кнопку «Параметры диктофона» (шестеренку), чтобы войти в настройки. Здесь можно выбрать язык речи, микрофон, включить автоматическую расстановку знаков препинания, фильтровать фразы деликатного характера.

Как печатать голосом в Ворде с помощью средства Windows 11
Сейчас мы рассмотрим голосовой набор в Ворде на компьютере, работающим в операционной системе Windows 11 без использования сторонних программ. В специальные возможности Windows 11 встроена функция голосового ввода.
Интегрированная служба распознавания голоса будет работать в любом приложении Windows, включая Microsoft Word. Функция «Распознавание речи Windows» не поддерживается для русского языка.
Проделайте следующее:
- Откройте файл Word, а затем переместите курсор мыши в ту часть документа, которую вы сейчас редактируете.
- Переключите раскладку клавиатуры на русский язык.
- Нажмите на клавиши «Win» + «H».
- В нижней части экрана откроется окно с надписью «Прослушивание…». Это окно можно перемещать по экрану компьютера в любое место.
- Инструмент готов к использованию, начните говорить.

- После завершения набора текста, нажмите на микрофон еще раз, чтобы отключить голосовую диктовку.
Функция набора голосом отключается если нажать на любую клавишу клавиатуры, после открытия окна другого приложения или по щелчку мышью за пределами окна текущего документа Word.
Нажмите на значок «Параметры» (шестеренка) в окне диктофона, чтобы перейти к настройкам. Здесь можно отключить средство запуска голосового ввода, включить автоматическую расстановку знаков препинания, выбрать микрофон по умолчанию.
Как в Ворде набирать голосом: несколько советов
Вы должны понимать, что средство голосового ввода работает не идеально, часто набранный текст необходимо подредактировать или исправить.
Проявляйте терпение, когда пробуете эту функцию в первый раз. Диктовка текста в Word требует практики, но она окупается — лучше всего читать абзацы из книги, чтобы научиться слышать свой голос и видеть, как на экране появляется напечатанный текст.
Попробуйте произносить знаки препинания в Word, например, «точка», «запятая», «новая строка», «новый абзац». Имейте в виду, что пока не все знаки препинания поддерживаются при голосовом вводе на русском языке.
После произнесения «удалить это» из текста удаляется последнее произнесенное высказывание. Скажите «удалить», чтобы удалить последнее набранное слово.
Выводы статьи
В некоторых случаях во время работы с текстовым редактором Microsoft Word пользователям необходимо знать, как в Ворде записать текст голосом. С помощью диктовки вы сможете набирать текст на странице документа Word. Существует несколько способов голосового набора текста с помощью встроенных средств приложения или операционной системы Windows, которые можно использовать без применения стороннего программного обеспечения.
Голосовой ввод текста в Word (видео)
Похожие публикации:
- Режим чтения Word: как включить или как убрать
- Как убрать пустую страницу в Ворде — 6 способов
- Как удалить примечание в Ворде — 5 способов
- Как вставить GIF в Word — 3 способа
- Встроенный переводчик Word: перевод текста документа