
Print a worksheet or workbook
You can print entire or partial worksheets and workbooks, one at a time, or several at once. And if the data that you want to print is in a Microsoft Excel table, you can print just the Excel table.
You can also print a workbook to a file instead of a printer. This is useful when you need to print the workbook on a different type of printer from the one that you originally used to print it.
Before you print
Before you print anything in Excel, remember that there are many options available for an optimal print experience. For more information, see Printing in Excel.
Important: Some formatting, such as colored text or cell shading, may look good on the screen but not look how you expect when it prints on a black-and-white printer. You may also want to print a worksheet with gridlines displayed so that the data, rows, and columns stand out better.
Print one or several worksheets
-
Select the worksheets that you want to print.
-
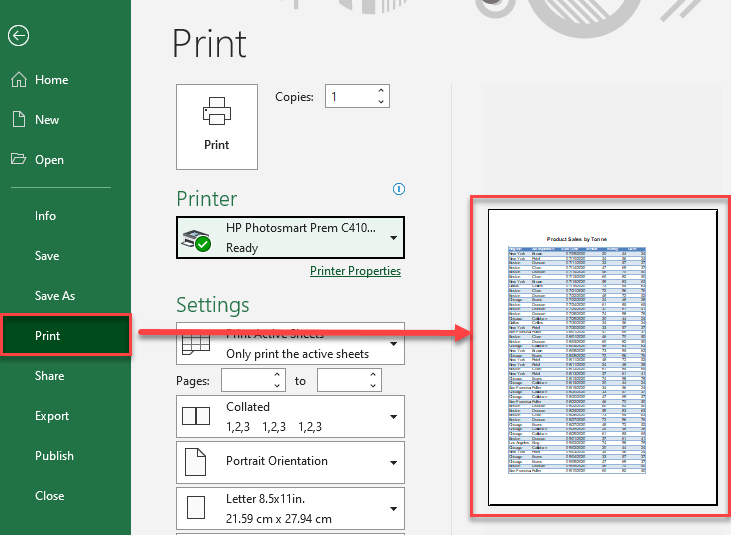
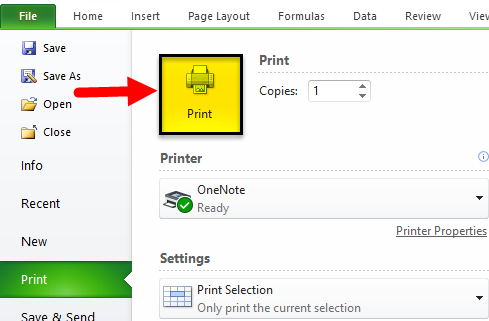
Select File > Print, or press CTRL+P.
-
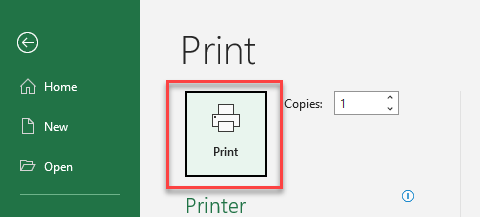
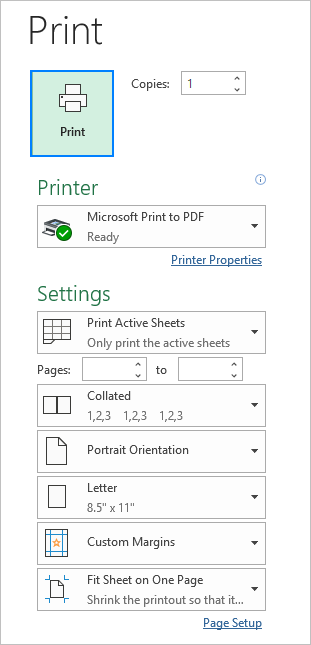
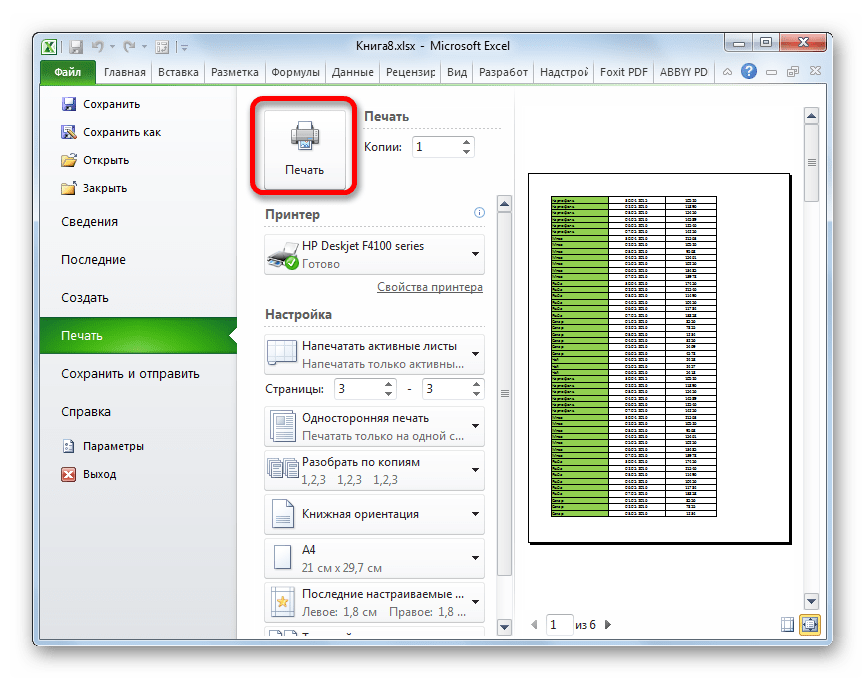
Select the Print button or adjust Settings before you select the Print button.
Print one or several workbooks
All workbook files that you want to print must be in the same folder.
-
Select File > Open.
-
Hold down CTRL click the name of each workbook to print, and then select Print.
Print all or part of a worksheet
-
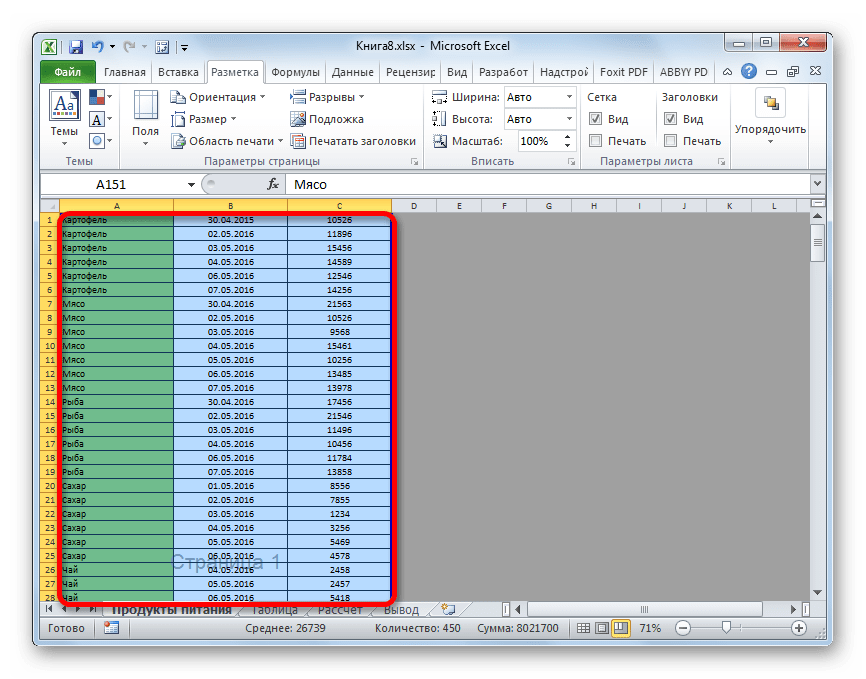
Click the worksheet, and then select the range of data that you want to print.
-
Select File, and then click Print.
-
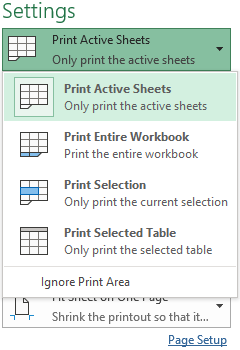
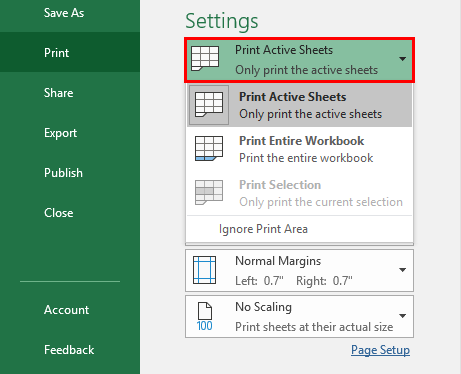
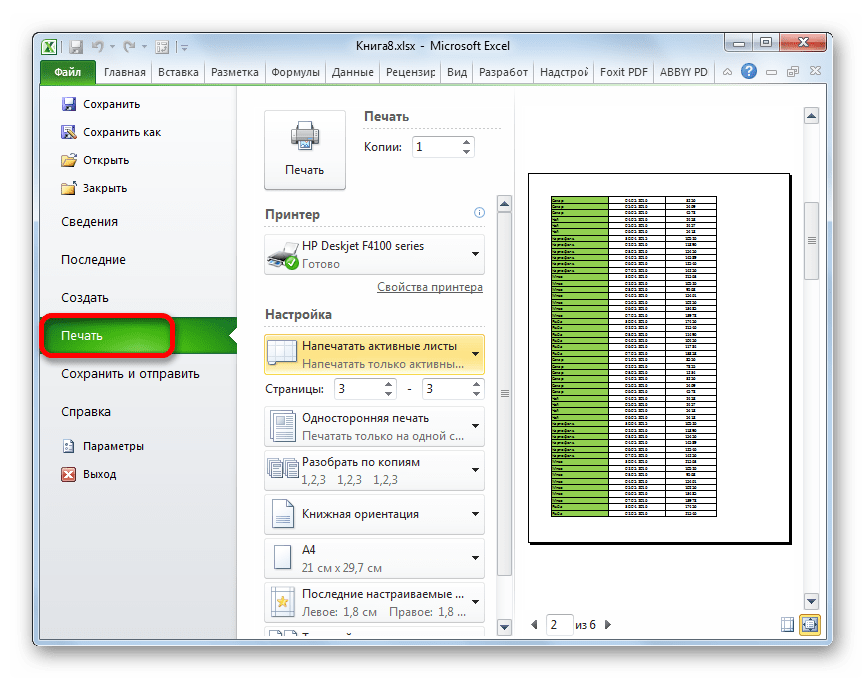
Under Settings, select the arrow next to Print Active Sheets and select the appropriate option.

-
Select Print.
Note: If a worksheet has defined print areas, Excel will print only those print areas. If you don’t want to print only the defined print area, select the Ignore print area check box. Learn more on setting or clearing a print area.
Print an Excel table
-
Select a cell within the table to enable the table.
-
Select File, and then select Print.
-
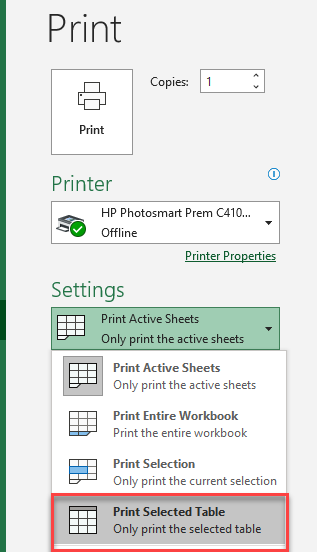
Under Settings, select the arrow next to Print Active Sheets and select Print Selected Table.
-
Select Print.
Print a workbook to a file
-
Select File, and then select Print, or press Ctrl+P.
-
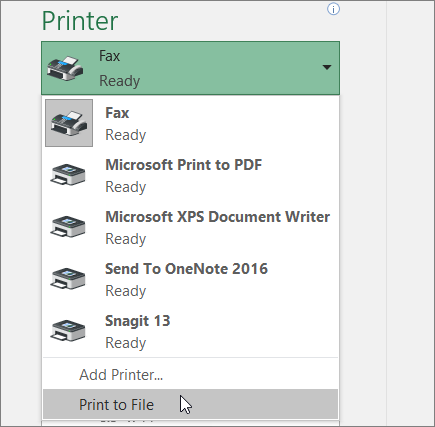
Under Printer, select Print to File.
-
Select Print.
-
In the Save Print Output As dialog box, enter a file name and then select OK. The file will be saved in your Documents folder
Important: If you print the saved file on a different printer, the page breaks and font spacing may change.
Print a worksheet
For best results with printing your worksheet, use the Print command in Excel for the web, not your browser’s Print command. You can print the entire worksheet or just the cells you want.
If you want to print a range of cells, select them. To print the entire worksheet, don’t select anything.
-
Select File > Print > Print.
-
If you selected a range of cells, but decide to print the entire worksheet, switch to Entire Workbook before you hit Print.
Change a selected print area
In Excel for the web, you can either specify an area you want to print or print an entire worksheet. If you select a print area, but decide to change the specified area, here’s how you can preview your changes:
-
On the worksheet, click and drag to select the cells you want to print.
-
Select File > Print > Print.
-
To print only the selected area, in Print Options, select Current Selection.
-
If the print preview shows what you want printed, select Print.
To change the print selection, close print preview by clicking on the X, and repeat the previous steps.
To print the entire worksheet, select File > Print > Print. Make sure Entire Workbook is selected.
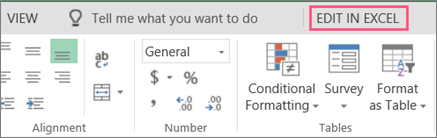
If you have the Excel desktop application, you can set more print options. Select Open in Excel and select multiple print areas on a worksheet.
Print a worksheet that has hidden rows and columns
In Excel for the web, when you print a worksheet with hidden rows or columns those hidden rows and columns won’t be printed. If you want to include the hidden rows and columns, you’ll need to unhide them before you print the worksheet.
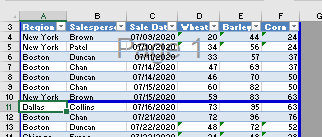
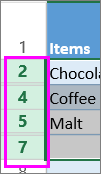
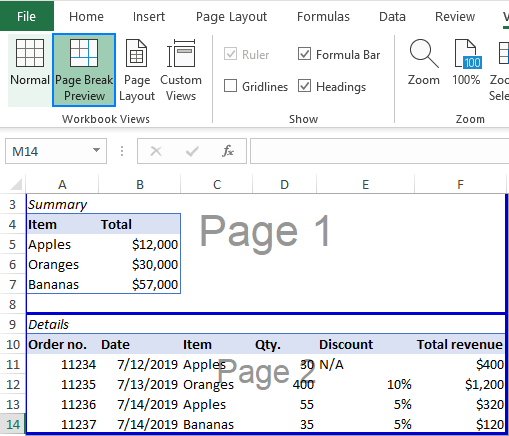
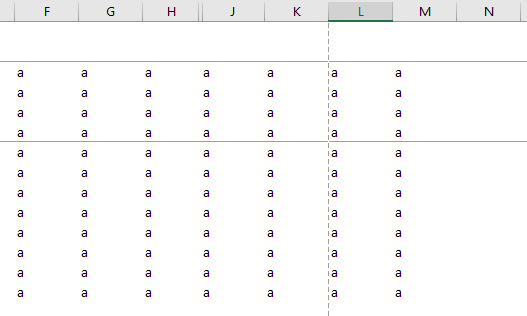
You can tell if rows or columns are hidden either by the missing header labels or by the double lines as shown in this picture.
Here’s how you can unhide rows or columns:
-
Select the range of headers surrounding the hidden rows or columns. In this example, select all row headers between 2 and 7 to unhide rows 3 and 6.
-
Right-click the selection and pick Unhide Rows (for columns, pick Unhide Columns).
-
Select File > Print.
-
Select Print for a print preview.
-
In the Print Options box, make sure Entire Sheet is selected, and select Print.
Note: The row and column labels don’t show in print preview and the printout.
Print a workbook
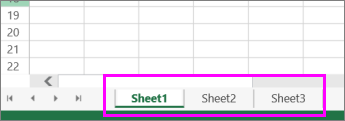
If your Excel for the web workbook has only one worksheet, you can just print the worksheet. But if the workbook has multiple worksheets you’ll need to go to each worksheet by selecting its sheet tab, and then print that worksheet.
Not sure if the workbook has any hidden worksheets? Here’s how you can verify:
-
Right-click any sheet tab.
-
If the Unhide option is available, the workbook has one or more hidden worksheets. Select Unhide to show and unhide the worksheets.
-
When you unhide a worksheet, the sheet tab in the worksheet becomes available. Select the sheet tab and print the worksheet.
Print a table
Sometimes you want to print only part of a worksheet, like a table. You can do this in Excel for the web as long as the table has less than 10,000 cells. For worksheets more than 10,000 cells you have to use the Excel desktop app.
To print a table:
-
To select all the cells in the table, select the first cell and scroll to the last cell.
If your table has a lot of columns, instead of scrolling, select the first cell, press and hold the Shift key and select the last cell.
-
Select File > Print > Print.
-
Select Current Selection if it isn’t already selected, and then select Print.
-
If you like the print preview, select Print. If not, close the view and make any required changes.
Learn how you can print a table with gridlines.
Print page numbers on a worksheet
You can’t insert, view or print page numbers in Excel for the web. However, if you have the Excel desktop application, you can add page numbers either at the top (headers) or at the bottom (footers) of the worksheet and print it.
Use the Open in Excel button to open the workbook and, add page numbers in the Page Layout view, and then print the worksheet from Excel. Here’s how:
-
Select Open in Excel and insert page numbers on worksheets.
-
Print the worksheet.
See also
-
Preview worksheet pages before you print.
-
Print gridlines in a worksheet
-
Print rows with column headers on top of every page.
Need more help?
You can always ask an expert in the Excel Tech Community or get support in the Answers community.
Need more help?
Want more options?
Explore subscription benefits, browse training courses, learn how to secure your device, and more.
Communities help you ask and answer questions, give feedback, and hear from experts with rich knowledge.
See all How-To Articles
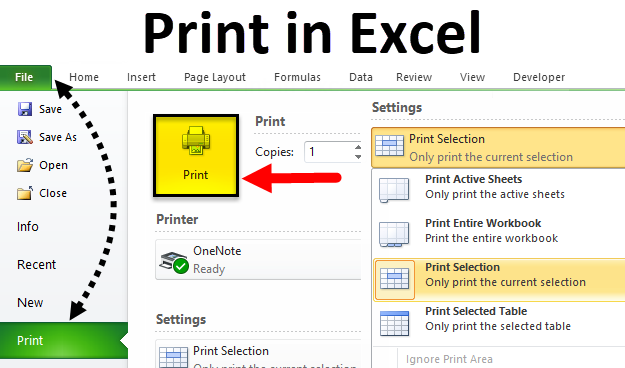
This tutorial demonstrates how to print in Excel and Google Sheets.
Printing in Excel can be a fast and simple process with many options and features available to help you setup your worksheet or workbook correctly and to print successfully. If you know that your worksheet is already set up in the way that you want it to appear, the fastest way to print is to use the Quick Print command in the Quick Access Toolbar.

Print in Excel: Quick Guide
Most of the time, you’ll need to change or confirm a few things before printing.
- First, ensure that you have a printer connected that is online and ready to print with the right size of paper inserted correctly.
- Then, set up your print area, the range of cells that you wish to print. If you wish to print your entire worksheet, make sure that worksheet is selected.
- Check that you are in the correct orientation – either landscape or portrait – and make sure your margins and paper size are correct.
- Check your page breaks. This can be done in Page Break Preview.
- Set any print titles that you might need. Print titles are any rows you want repeated at the top of each page and/or any columns you want repeated at the left of each page. Check or select them correctly.
- Ensure that your headers and footers are set up correctly.
- Finally, in the Ribbon, go to File > Print to view your worksheet in Print Preview. Click Print if everything looks good.
Let’s have a look at the points above (plus a few more!) in more detail below.
Print a Worksheet
- Select the sheet you wish to print, and then in the Ribbon, go to File > Print or press CTRL + P.
- The selected sheet is shown in Print Preview. To print only the active sheet, click the Print.
Print a Workbook
- From anywhere within your workbook, in the Ribbon, go to File > Print or press CTRL + P.
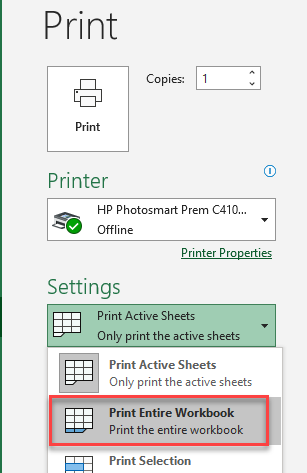
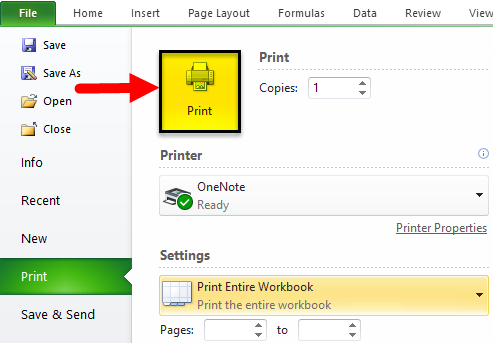
- The active sheet in your workbook is shown in Print Preview. Under Settings, click the down arrow next to the default option and choose Print Entire Workbook.
- Click Print to print your workbook.
Print Part of a Worksheet
- Select the cells in your worksheet that you wish to print, and then in the Ribbon, go to File > Print (or press CTRL + P).
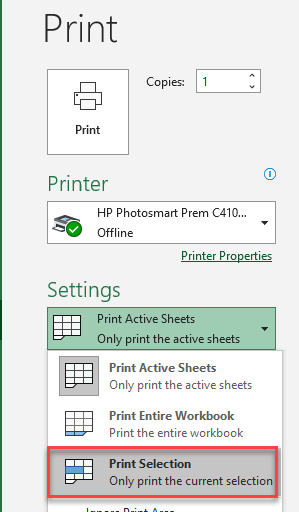
- The active sheet is then shown in Print Preview. Under Settings, click the down arrow next to the default option and choose Print Selection. Print Preview updates to show only the selected cells.
- Click Print to print your selection.
Print a Table
- Select the table you wish to print, and then in the Ribbon, go to File > Print or press CTRL + P.
- The active sheet in your workbook is shown in Print Preview. In the Settings section, click the down arrow next to the default print option and click Print Selected Table. Your print preview changes to show the selected table.
- Click Print to print your selection.
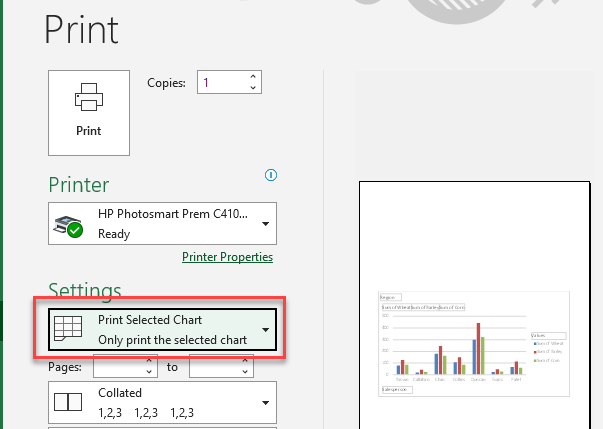
Print a Chart
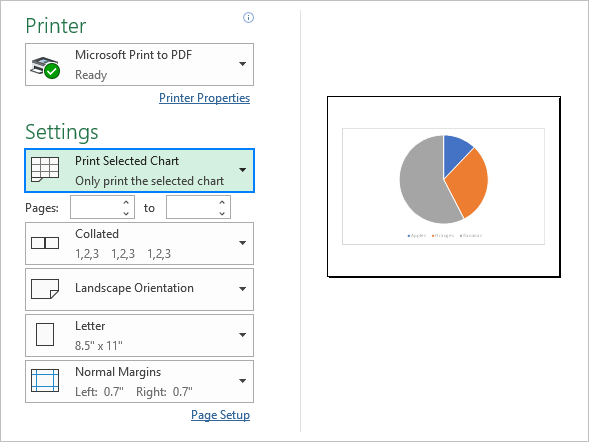
- Select the chart that you wish to print, and then in the Ribbon, go to File > Print (or press CTRL + P).
- Under Settings section, choose Print Selected Chart.
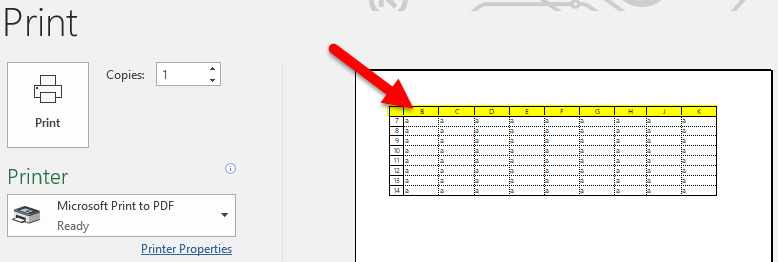
Print to PDF
- From anywhere within your workbook, in the Ribbon, go to File > Print (or press CTRL + P).
- In the Printer Section, choose Microsoft Print to PDF.
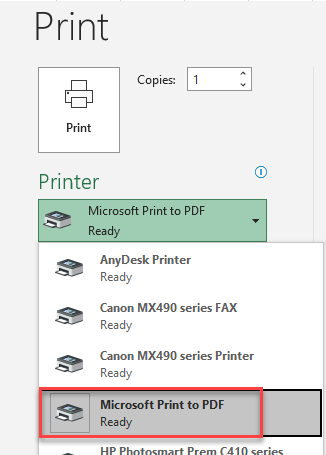
- Click the Print button to Print to PDF.
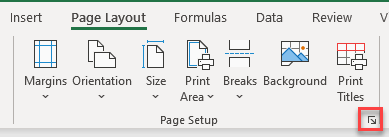
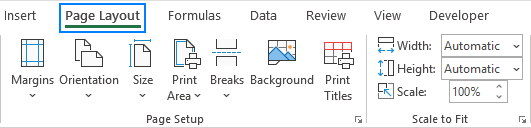
Page Layout
The Page Setup group in the Page Layout tab of the Ribbon enables you to set up the way your worksheet is printed.
You can either use the buttons in the group or you can open the Page Setup dialog box by clicking on the small arrow in the bottom-right corner of the group.
Margins
- In the Ribbon, go to Page Layout > Page Setup > Margins.
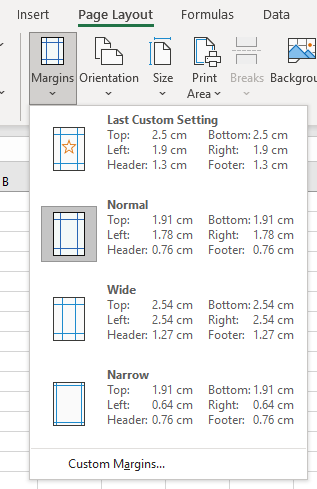
- You can choose one of the preset options available or click Custom Margins… at the bottom of the list to open the Page Setup dialog box.
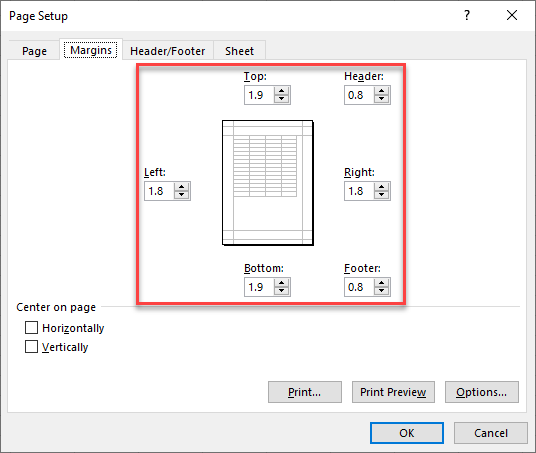
- You can set the left, right, top, and bottom margins, as well as the space reserved for headers and footers. Adjust the margins by using the up and down arrows for each side, and then click OK.
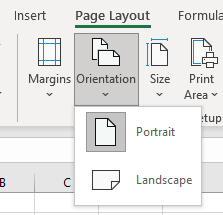
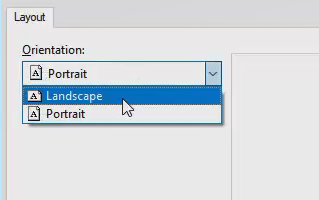
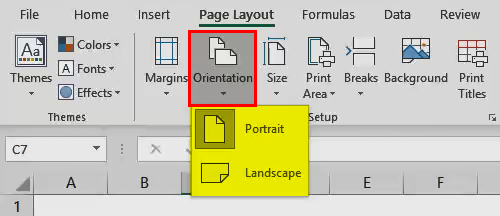
Orientation
In the Ribbon, go to Page Layout > Page Setup > Orientation to change the orientation of your worksheet when printed.
Size
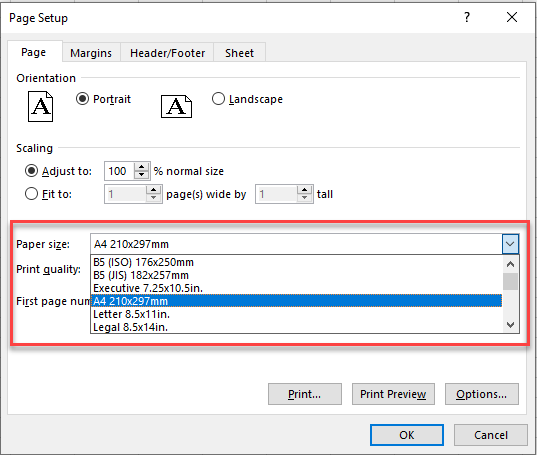
- In the Ribbon, go to Page Layout > Page Setup > Size to change the paper size of your worksheet when printed.
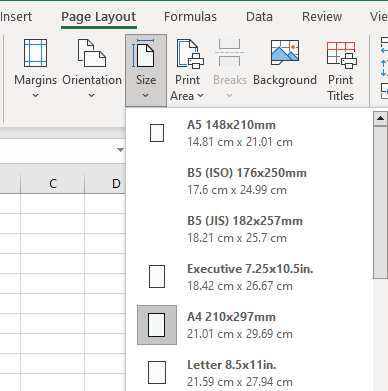
- For a size not already on the list, click More Paper Sizes… at the bottom.
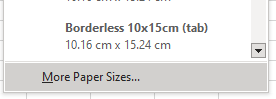
- This opens the Page Setup dialog box. Select the page size you want from the Paper size drop down.
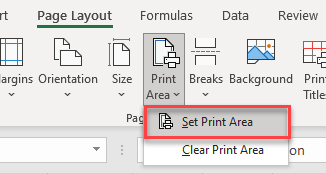
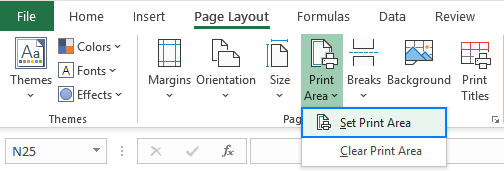
Print Area
- Select the range within your worksheet that you wish to print, and then in the Ribbon, go to Page Layout > Page Setup > Print Area > Set Print Area.
- To reset print areas, so that all populated cells would print, click Clear Print Area from the same menu.
Breaks
- Click in the cell in your worksheet where you want to insert a page break, and then in the Ribbon, go to Page Layout > Page Setup > Breaks > Insert Page Break.

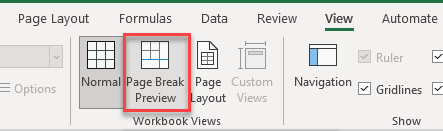
- To view page breaks in your workbook, you need to be in Page Break Preview. In the Ribbon, go to View > Workbook Views > Page Break Preview.
OR
In the bottom-right corner of your worksheet, click the Page Break Preview icon to switch to Page Break Preview.

- Your worksheet displays the changes, and you can see the page break you inserted.
- To get rid of the page break, click Remove Page Break.
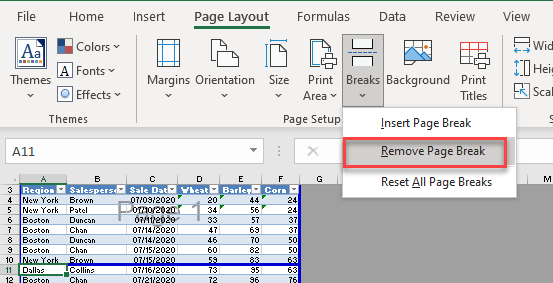
- To reset all the page breaks to their defaults, click Reset All Page Breaks.
Print Titles
- In the Ribbon, go to Page Layout > Page Setup > Print Titles.

- You can repeat rows or columns at the top of each page that you print –To repeat a specific row, click in the Rows to repeat at top box, and then select the rows you wish to repeat.
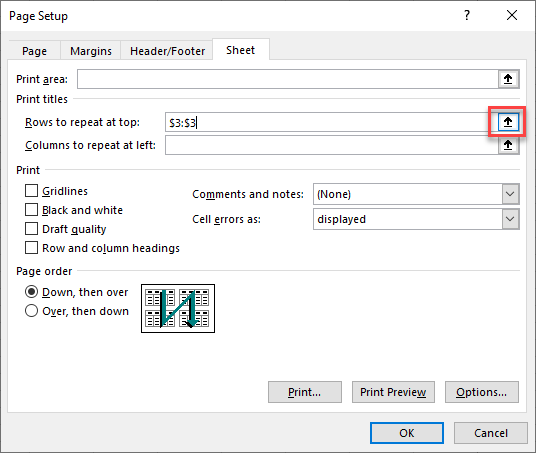
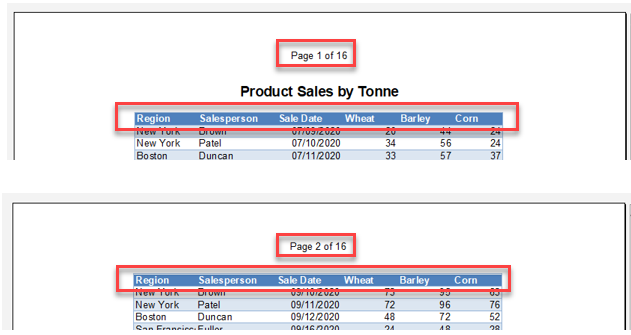
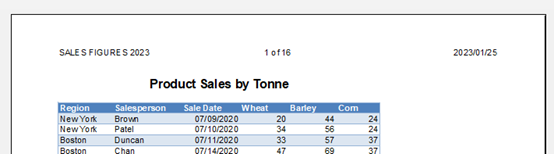
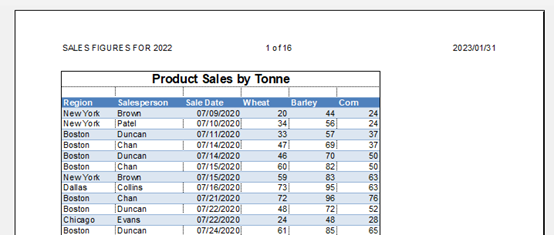
- When you click Print Preview from the Page Setup dialog box, you can see that the row you selected is repeated on each page.
Print Preview
Select the sheet you wish to print, and then in the Ribbon, go to File > Print (or press CTRL + P). The selected sheet is shown in Print Preview.
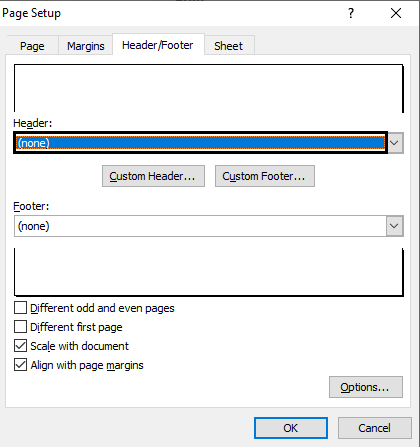
Headers and Footers
- In the Ribbon, go to Page Layout > Page Setup and click the small arrow in the bottom-right corner of the group.
- Click on the Header/Footer tab. Under Header, choose from the options provided.
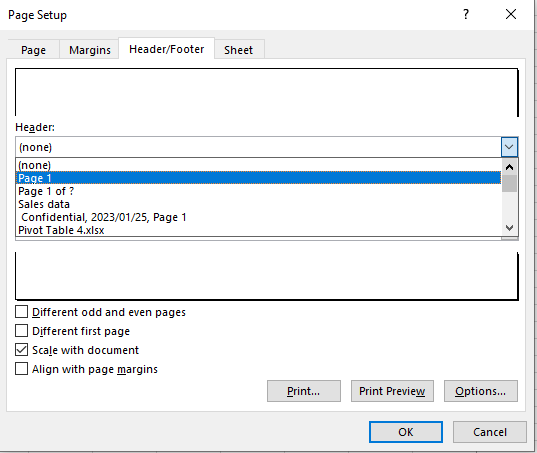
-
- Click OK to set the header. Note that you can only see the header in Print Preview.
- The footer can be set and customized in the same way.
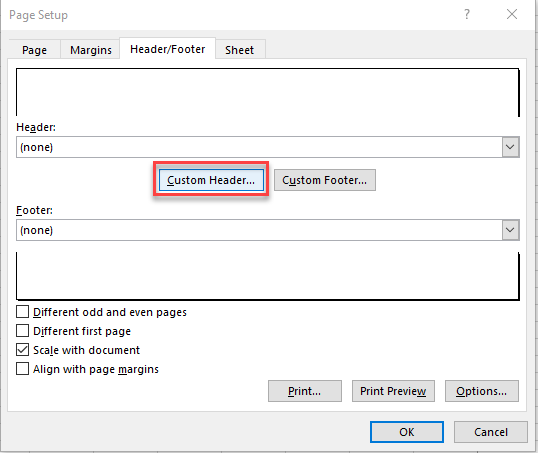
Custom Header
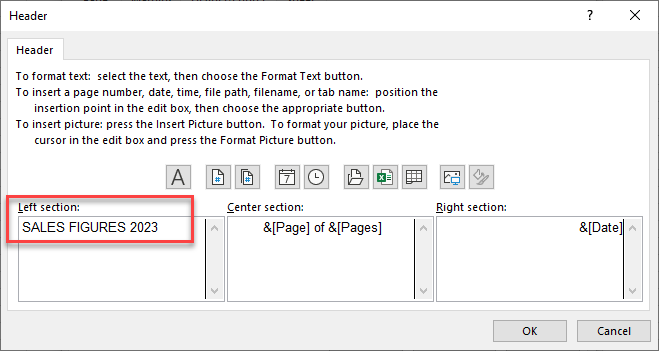
- If you wish to type in your own header, click Custom Header…
- Here, you can customize the left, center, and right sections of the printed page. The buttons along the top of these sections let you insert built-in options with a single click – options like the page number, name of the file, time and date, etc.
Click the information you want in each section.
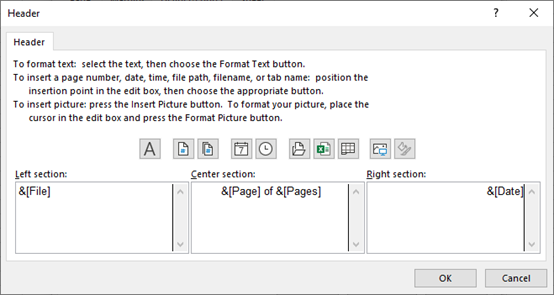
Alternatively, you can type a custom header into each section.
Print Gridlines
- In the Ribbon, go to Page Layout > Page Setup and click the small arrow in the bottom-right corner of the group.
- Click on the Sheet tab, and then tick the Gridlines box under Print.
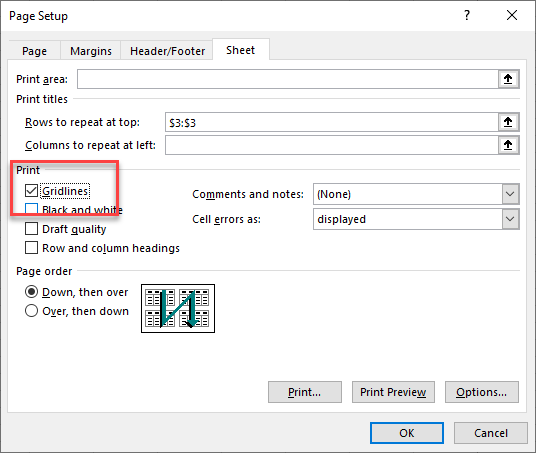
- When you click Print Preview, you can see that gridlines are visible along with the worksheet data, and therefore would be printed.
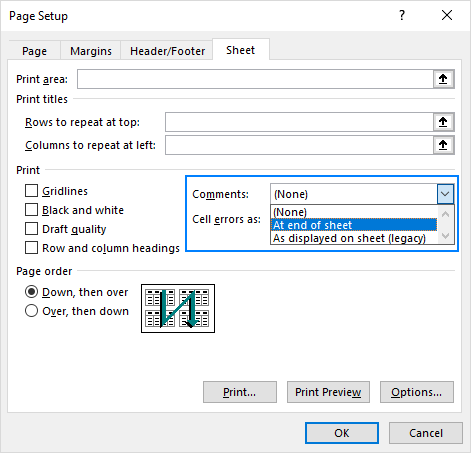
Print Comments and Notes
- In the Ribbon, go to Page Layout > Page Setup and click the small arrow in the bottom-right corner of the group.
- Click on the Sheet tab, and then choose from the Comments and notes drop down.

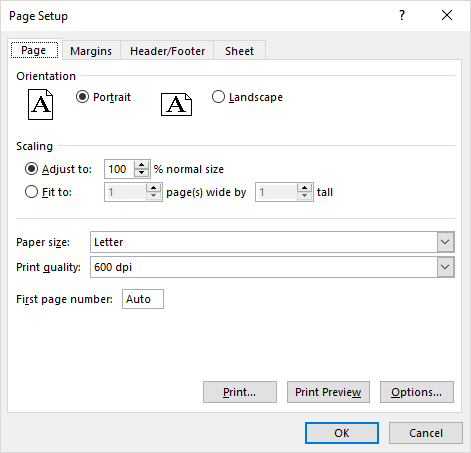
Change Page Resolution
- In the Ribbon, go to Page Layout > Page Setup and click the small arrow in the bottom-right corner of the group.
- In the Page tab, adjust the page resolution, if necessary, by choosing from the Print quality drop down. DPI stands for dots per inch; 600dpi prints at a higher quality than 300 dpi.
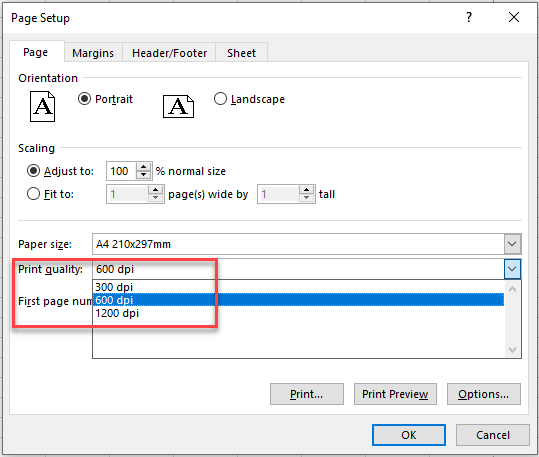
- Click OK to return to Excel.
Print with VBA
All options described above can also be achieved through VBA coding.
- In the VBE, create a module and type in the following macro.
Sub PrintSheet()
     ActiveWindow.SelectedSheets.PrintOut
End Sub- This prints all pages of the active sheet.
Print in Google Sheets
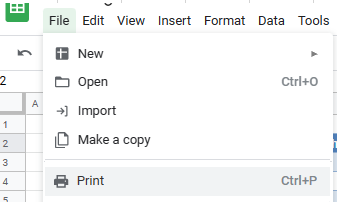
As in Excel, Print and Print Preview are reached by clicking the Print button in Google Sheets.
- In the Menu, go to File > Print.
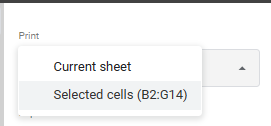
- This takes you to Print Settings, where you can set what you wish to print, be it your entire workbook, individual worksheet, table, chart, or selected cells.
- From the menu on the right side of the screen, choose to print the Current sheet or Selected cells.
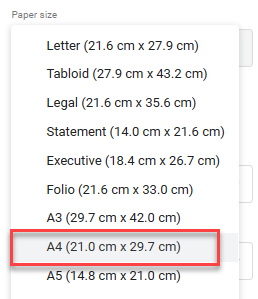
- Google Sheets sets the default paper size based on the printer that you have connected to your PC. Should you wish to set a custom paper size for your worksheet, choose that Paper size.
- The worksheet can be scaled from this menu by choosing a preset Scale or using a custom percentage.

- Margins can be adjusted to Normal, Narrow, or Wide.
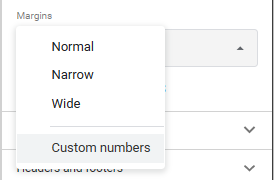
- Alternatively, click Custom numbers and type in the margins manually.
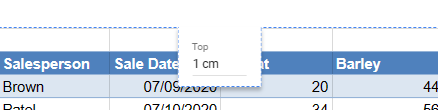
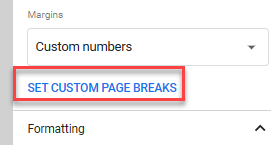
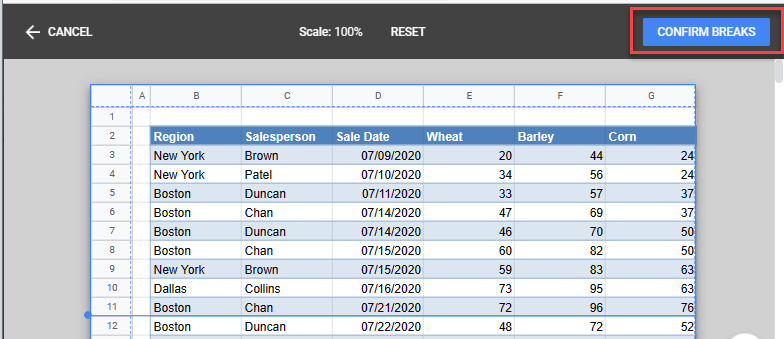
- Google Sheets automatically inserts page breaks for you where your worksheet flows over to more than one page. If desired, change these page breaks by clicking SET CUSTOM PAGE BREAKS to add your own breaks.
- Drag the page break to where you want it to be placed.
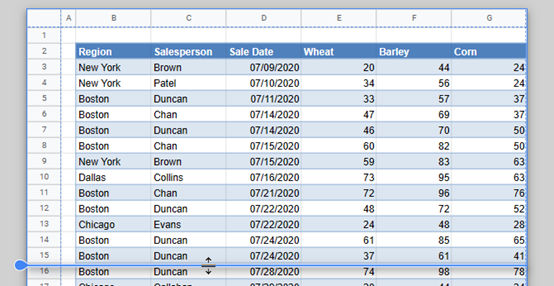
- Click Confirm Breaks to confirm your page breaks.
- Any page breaks that you have inserted can be toggled on or off by clicking the button to right of Custom page breaks. If you toggle this slider off, any custom page breaks are reset.
Alternatively, you can click EDIT to change the page breaks.
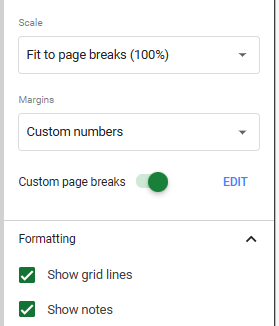
- Switch gridlines and notes on or off by ticking or unticking those options under Formatting.
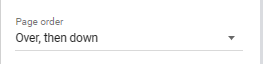
- Adjust printing order in the Page order drop down. Choose between Over, then down or Down, then over.
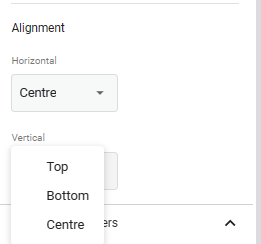
- Change the Alignment for both Horizontal and Vertical layout by choosing from each drop down.
- Customize the header and footer by ticking the information you want to include from the Headers and footers.
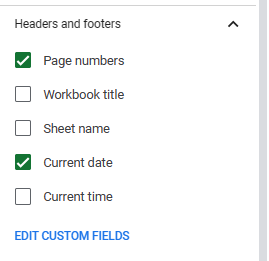
- Click EDIT CUSTOM FIELDS to change the page headers and footer directly enabling custom text or fields to be added to your headers and footers. As with Excel, you can customize the left, center, and right sections of the header and footer.
![]()
- Once you have customized the options in Print Settings, click Next to send the spreadsheet to print. The sheet appears in Print Preview.
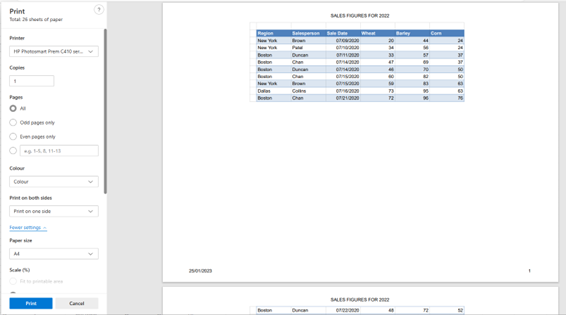
- Select the printer, the number of copies, the pages to print, whether to print in color or black and white (depending on your printer), and the paper size.
- Click Print to print the worksheet.
More Printing Tutorials
| Add a Page Border | |
| Add a Watermark | |
| Center Worksheets Horizontally and Vertically | |
| Delete Unwanted or Blank Pages | |
| Display and Print Formulas | |
| Hide Page Breaks | |
| Insert a Page Number | |
| Insert and Remove Page Breaks | |
| Make Graph Paper | |
| Print a Background Image | |
| Print All Tabs in a Workbook | |
| Print Comments | |
| Print Gridlines on a Blank Sheet | |
| Print Only Selected Cells | |
| Print Row Numbers and Column Headings | |
| Print Selected Worksheets on One Page | |
| Print Selected Worksheets Without Print Preview | |
| Print Two Sheets on One Page | |
| Remove Watermarks | |
| Set the Print Area | |
| Page Layout | yes |
| Add Element to Display Current Date in the Header | |
| Change Orientation to Landscape | |
| Create Cover Page | |
| Define Print Titles on Every Page | |
| Format the Header and Footer | |
| Insert or Remove Headers and Footers | |
| Make a Header Only on the First Page | |
| Make a Sheet Fit on One Page | |
| What is the Page Setup Function? |
Содержание
- Print a sheet or workbook
- Print a partial sheet, an entire sheet, or an entire workbook
- Print several sheets at once
- Print selections from several sheets at once
- Print several workbooks at once
- Print an Excel table
- Other print options
- See also
- Print a partial sheet, an entire sheet, or an entire workbook
- Print several sheets at once
- Print selections from several sheets at once
- Print several workbooks at once
- Print an Excel table
- Print a worksheet or workbook
- Before you print
- Print one or several worksheets
- Print one or several workbooks
- Print all or part of a worksheet
- Print an Excel table
- Print a workbook to a file
- Print a worksheet
- Change a selected print area
- Print a worksheet that has hidden rows and columns
- Print a workbook
- Print a table
- Print page numbers on a worksheet
- How to print Excel spreadsheet: tips and guidelines for perfect printouts
- How to print Excel spreadsheet
- Choose what to print: selection, sheet or entire workbook
- Print selection / range
- Print entire sheet(s)
- Print entire workbook
- Print Excel table
- How to print the same range in multiple sheets
- How to print Excel spreadsheet on one page
- Print to file – save the output for later use
- Print preview in Excel
- Excel print options and features
- Excel print area
- How to add a print button to Excel Quick Access Toolbar
- How to insert page breaks in Excel
- How to print formulas in Excel
- How to print a chart in Excel
- How to print gridlines in Excel
- How to print titles in Excel
- How to print comments in Excel
- How to print address labels from Excel
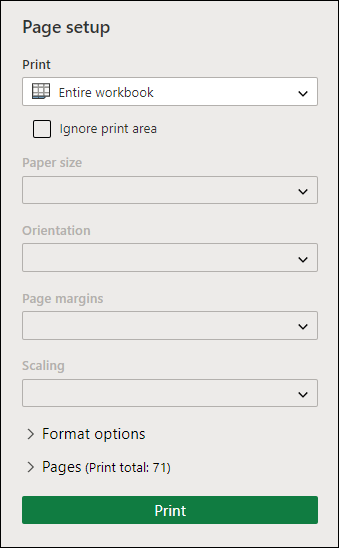
Print a sheet or workbook
You can print entire or partial sheets and entire workbooks, one at a time or several at once. You can also print selections of several sheets at the same time. If the data that you want to print is in an Excel table, you can print just the Excel table.
Print a partial sheet, an entire sheet, or an entire workbook
Do one of the following:
To print a partial sheet, click the sheet, and then select the range of data that you want to print.
To print the entire sheet, click the sheet or the sheet tab.
To print a workbook, click any of its sheets.
On the File menu, click Print.
On the Printer menu, select the printer that you want.
The default is to print all active sheets. To change what is printed, select Show Details.
In the Print drop-down menu, select the option that corresponds to what you want to print ( Selection, Active Sheets, or Entire Workbook) and then select Print.
Print several sheets at once
Select the sheets that you want to print.
Two or more adjacent sheets
Click the tab for the first sheet. Then, hold down SHIFT and click the tab for the last sheet that you want to select.
Two or more nonadjacent sheets
Click the tab for the first sheet. Then, hold down COMMAND and click the tabs of the other sheets that you want to select.
All sheets in a workbook
Hold down CONTROL and click a sheet tab, and then click Select All Sheets on the shortcut menu.
Note: When multiple sheets are selected, [Group] appears in the title bar at the top of the sheet. To cancel a selection of multiple sheets in a workbook, click any unselected sheet. If no unselected sheet is visible, hold down CONTROL and click the tab of a selected sheet, and then click Ungroup Sheets on the shortcut menu.
On the File menu, click Print.
On the Printer menu, select the printer that you want.
Select Show Details.
In the Print drop-down menu, select Active Sheets, and then select Print.
Print selections from several sheets at once
On each sheet, select the range of data that you want to print.
On the File menu, click Print.
Select Show Details.
In the Print drop-down menu, select Selection, and then select Print.
Print several workbooks at once
Note: All of the workbook files that you want to print must be in the same folder.
On the File menu, click Open.
For adjacent files, hold down SHIFT and select the name of each workbook that you want to print. Or, for nonadjacent files, hold down COMMAND and select the name of each workbook that you want to print.
On the File menu, click Print.
Print an Excel table
Click a cell within the table to activate the table.
On the File menu, click Print.
Select Show Details.
In the Print drop-down menu, select Selection, and then select Print.
Other print options
Select Show Details in the Print dialog box to print to a PDF file, or to set which pages to print, paper handling options, margins, and scaling.
The Page Layout tab in the ribbon includes more options for page setup and printing, including page orientation, paper size and whether to print gridlines and headings.
See also
Print a partial sheet, an entire sheet, or an entire workbook
Do one of the following:
To print a partial sheet, click the sheet, and then select the range of data that you want to print.
To print the entire sheet, click the sheet or the sheet tab.
To print a workbook, click any of its sheets.
On the File menu, click Print.
On the Printer pop-up menu, select the printer that you want.
Next to Print What, click the option that corresponds to what you want to print ( Selection, Active Sheets, or Entire Workbook) and then click Print.
Print several sheets at once
Select the sheets that you want to print.
Two or more adjacent sheets
Click the tab for the first sheet. Then, hold down SHIFT and click the tab for the last sheet that you want to select.
Two or more nonadjacent sheets
Click the tab for the first sheet. Then, hold down CONTROL and click the tabs of the other sheets that you want to select.
All sheets in a workbook
Hold down CONTROL and click a sheet tab, and then click Select All Sheets on the shortcut menu.
Note: When multiple sheets are selected, [Group] appears in the title bar at the top of the sheet. To cancel a selection of multiple sheets in a workbook, click any unselected sheet. If no unselected sheet is visible, hold down CONTROL and click the tab of a selected sheet, and then click Ungroup Sheets on the shortcut menu.
On the File menu, click Print.
On the Printer pop-up menu, select the printer that you want.
Next to Print What, click Active Sheets, and then click Print.
Print selections from several sheets at once
On each sheet, select the range of data that you want to print.
On the File menu, click Print.
Next to Print What, click Selection, and then click Print.
Print several workbooks at once
Note: All of the workbook files that you want to print must be in the same folder.
On the File menu, click Open.
Hold down CONTROL and click the name of each workbook that you want to print.
On the File menu, click Print.
Print an Excel table
Click a cell within the table to activate the table.
On the File menu, click Print.
Next to Print What, click Selection, and then click Print.
Tip: The Layout tab in the ribbon includes more options for page setup and printing, including page orientation and headers and footers.
Источник
Print a worksheet or workbook
You can print entire or partial worksheets and workbooks, one at a time, or several at once. And if the data that you want to print is in a Microsoft Excel table, you can print just the Excel table.
You can also print a workbook to a file instead of a printer. This is useful when you need to print the workbook on a different type of printer from the one that you originally used to print it.
Before you print
Before you print anything in Excel, remember that there are many options available for an optimal print experience. For more information, see Printing in Excel.
Important: Some formatting, such as colored text or cell shading, may look good on the screen but not look how you expect when it prints on a black-and-white printer. You may also want to print a worksheet with gridlines displayed so that the data, rows, and columns stand out better.
Print one or several worksheets
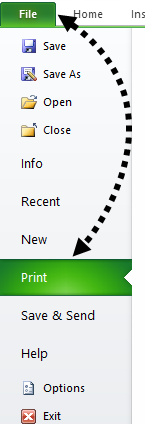
Select File > Print, or press CTRL+P.
Select the Print button or adjust Settings before you select the Print button.
Print one or several workbooks
All workbook files that you want to print must be in the same folder.
Select File > Open.
Hold down CTRL click the name of each workbook to print, and then select Print.
Print all or part of a worksheet
Click the worksheet, and then select the range of data that you want to print.
Select File, and then click Print.
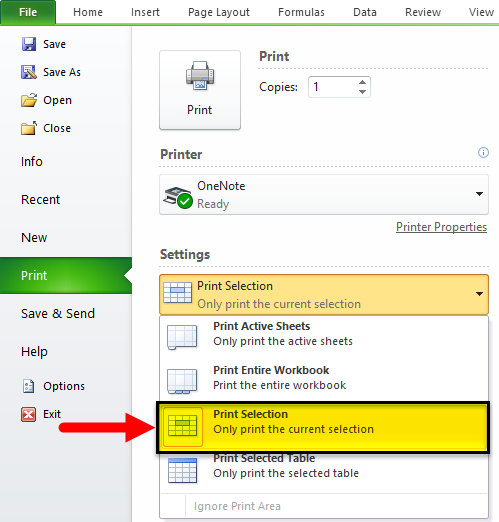
Under Settings, select the arrow next to Print Active Sheets and select the appropriate option.
Note: If a worksheet has defined print areas, Excel will print only those print areas. If you don’t want to print only the defined print area, select the Ignore print area check box. Learn more on setting or clearing a print area.
Print an Excel table
Select a cell within the table to enable the table.
Select File, and then select Print.
Under Settings, select the arrow next to Print Active Sheets and select Print Selected Table.

Print a workbook to a file
Select File, and then select Print, or press Ctrl+P.
Under Printer, select Print to File.
In the Save Print Output As dialog box, enter a file name and then select OK. The file will be saved in your Documents folder
Important: If you print the saved file on a different printer, the page breaks and font spacing may change.
Print a worksheet
For best results with printing your worksheet, use the Print command in Excel for the web, not your browser’s Print command. You can print the entire worksheet or just the cells you want.
If you want to print a range of cells, select them. To print the entire worksheet, don’t select anything.
Select File > Print > Print.
If you selected a range of cells, but decide to print the entire worksheet, switch to Entire Workbook before you hit Print.
Change a selected print area
In Excel for the web, you can either specify an area you want to print or print an entire worksheet. If you select a print area, but decide to change the specified area, here’s how you can preview your changes:
On the worksheet, click and drag to select the cells you want to print.
Select File > Print > Print.
To print only the selected area, in Print Options, select Current Selection.
If the print preview shows what you want printed, select Print.
To change the print selection, close print preview by clicking on the X, and repeat the previous steps.
To print the entire worksheet, select File > Print > Print. Make sure Entire Workbook is selected.
If you have the Excel desktop application, you can set more print options. Select Open in Excel and select multiple print areas on a worksheet.
Print a worksheet that has hidden rows and columns
In Excel for the web, when you print a worksheet with hidden rows or columns those hidden rows and columns won’t be printed. If you want to include the hidden rows and columns, you’ll need to unhide them before you print the worksheet.
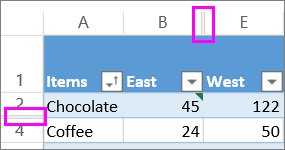
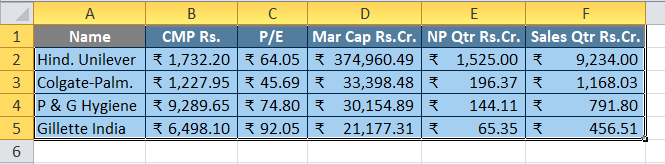
You can tell if rows or columns are hidden either by the missing header labels or by the double lines as shown in this picture.
Here’s how you can unhide rows or columns:
Select the range of headers surrounding the hidden rows or columns. In this example, select all row headers between 2 and 7 to unhide rows 3 and 6.
Right-click the selection and pick Unhide Rows (for columns, pick Unhide Columns).
Select File > Print.
Select Print for a print preview.
In the Print Options box, make sure Entire Sheet is selected, and select Print.
Note: The row and column labels don’t show in print preview and the printout.
Print a workbook
If your Excel for the web workbook has only one worksheet, you can just print the worksheet. But if the workbook has multiple worksheets you’ll need to go to each worksheet by selecting its sheet tab, and then print that worksheet.
Not sure if the workbook has any hidden worksheets? Here’s how you can verify:
Right-click any sheet tab.

If the Unhide option is available, the workbook has one or more hidden worksheets. Select Unhide to show and unhide the worksheets.
When you unhide a worksheet, the sheet tab in the worksheet becomes available. Select the sheet tab and print the worksheet.
Print a table
Sometimes you want to print only part of a worksheet, like a table. You can do this in Excel for the web as long as the table has less than 10,000 cells. For worksheets more than 10,000 cells you have to use the Excel desktop app.
To print a table:
To select all the cells in the table, select the first cell and scroll to the last cell.
If your table has a lot of columns, instead of scrolling, select the first cell, press and hold the Shift key and select the last cell.
Select File > Print > Print.
Select Current Selection if it isn’t already selected, and then select Print.

If you like the print preview, select Print. If not, close the view and make any required changes.
Print page numbers on a worksheet
You can’t insert, view or print page numbers in Excel for the web. However, if you have the Excel desktop application, you can add page numbers either at the top (headers) or at the bottom (footers) of the worksheet and print it.
Use the Open in Excel button to open the workbook and, add page numbers in the Page Layout view, and then print the worksheet from Excel. Here’s how:
Источник
How to print Excel spreadsheet: tips and guidelines for perfect printouts
 by Svetlana Cheusheva, updated on March 15, 2023
Learn how to print Excel spreadsheets exactly the way you want — print selection, sheet or entire workbook, on one page or multiple pages, with proper page breaks, gridlines, titles, and a lot more.
Living in a digital world, we still need a printed copy every now and then. At first sight, printing Excel spreadsheets is super easy. Just click the Print button, right? In reality, a well-organized and beautifully formatted sheet that looks great on a monitor is often a mess on a printed page. This is because Excel worksheets are designed for comfortable viewing and editing on screen, not to fit on a sheet of paper.
This tutorial aims to help you get perfect hard copies of your Excel documents. Our tips will work for all versions of Excel for Office 365, Excel 2019, Excel 2016, Excel 2013, Excel 2010 and lower.
How to print Excel spreadsheet
For starters, we will provide high-level instructions on how to print in Excel. And then, we will have a closer look at the most important and useful features.
To print an Excel worksheet, this is what you need to do:
- In your worksheet, click File >Print or press Ctrl + P . This will get you to the Print Preview window.
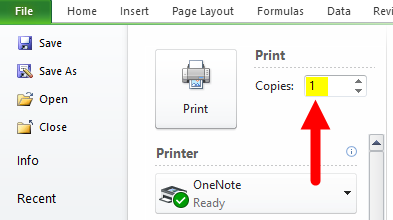
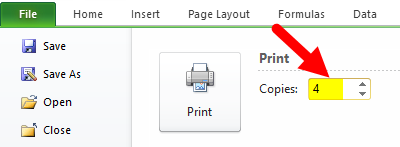
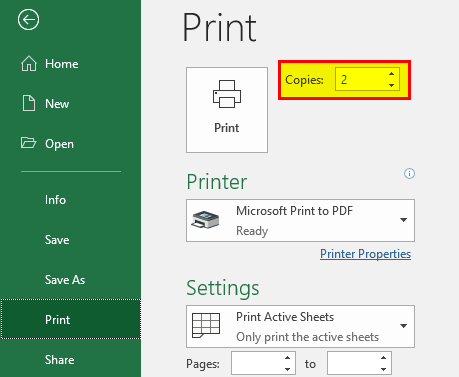
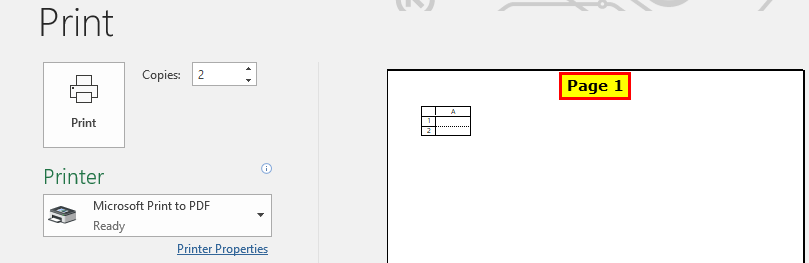
- In the Copies box, enter the number of copies you want to get.
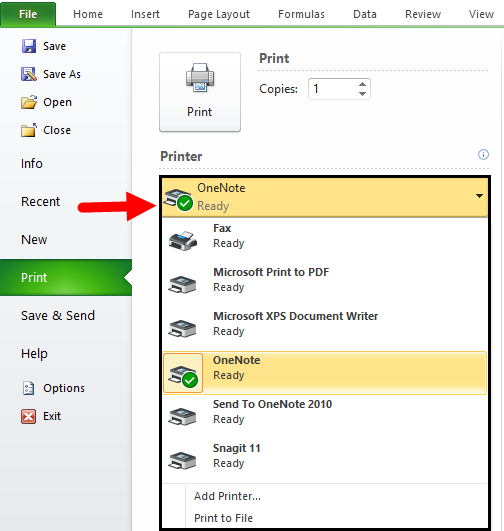
- Under Printer, choose which printer to use.
- Under Settings, specify exactly what to print and configure the page margins, orientation, paper size, etc.
- Click the Print button.
Choose what to print: selection, sheet or entire workbook
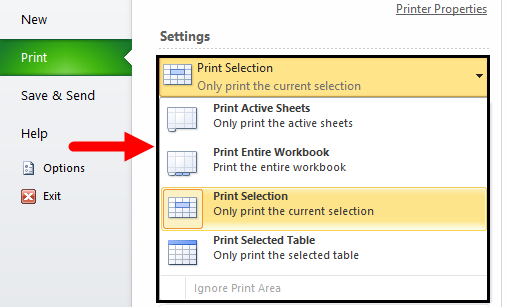
To tell Excel which data and objects should be included in the printout, under Settings, click the arrow next to Print Active Sheets, and choose one of these options:
Below you will find a brief explanation of each setting shown in the screenshot above and how to correctly use them.
Print selection / range
To print only a specific range of cells, highlight it on the sheet, and then choose Print Selection. To select non-adjacent cells or ranges, hold the Ctrl key while selecting.
Print entire sheet(s)
To print the entire sheet that you currently have open, pick Print Active Sheets.
To print multiple sheets, click on the sheet tabs while holding the Ctrl key, and then choose Print Active Sheets.
Print entire workbook
To print all sheets in the current workbook, select Print Entire Workbook.
Print Excel table
To print out an Excel table, click any cell within your table, and then choose Print Selected Table. This option appears only when the table or its part is selected.
How to print the same range in multiple sheets
When working with identically structured worksheets, such as invoices or sales reports, you will obvious want to print the same rage in all the sheets. Here’s the fastest way to do this:
- Open the first sheet and select the range to print.
- While holding the Ctrl key, click on other sheet tabs to be printed. To select adjacent sheets, click the first sheet tab, hold the Shift key and click the last sheet tab.

Tip. To make sure Excel is going to print the data you want, check the number of pages at the bottom the Preview section. If you selected just one range per sheet, the number of pages should match the number of selected sheets. If two or more ranges are selected, each will be printed on a separate page, so you multiply the number of sheets by the number of ranges. For full control, use the right and left arrows to go through each printable page preview.

Tip. To set the print area in multiple sheets, you can use these Print Area macros.
How to print Excel spreadsheet on one page
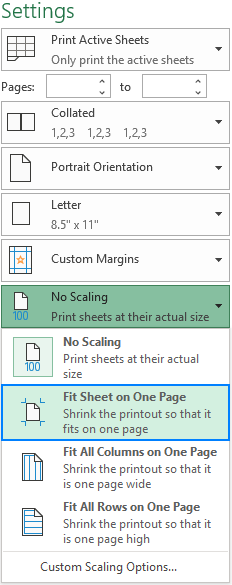
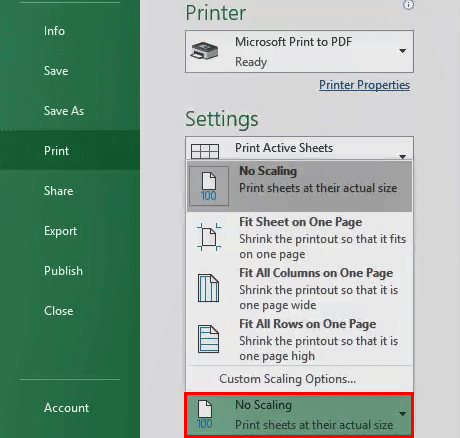
By default, Excel prints sheets at their actual size. So, the bigger your worksheet, the more pages it will take. To print an Excel sheet on one page, choose one of the following Scaling options that reside at the end of the Settings section in the Print Preview window:
- Fit Sheet on One Page – this will shrink the sheet so that it fits on one page.
- Fit All Columns on One Page – this will print all the columns on one page while the rows may be split across several pages.
- Fit All Rows on One Page – this will print all the rows on one page, but the columns may extend to multiple pages.
To remove scaling, choose No Scaling in the list of options.
Please be very careful when printing on one page – in a huge sheet, your printout may become unreadable. To check how much scaling will actually be used, click Custom Scaling Options… . This will open the Page Setup dialog box, where you look at the number in the Adjust to box:
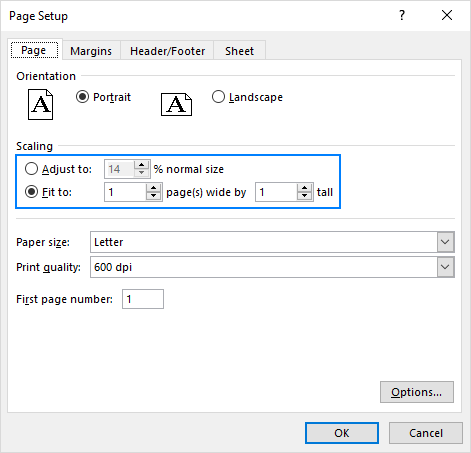
If the Adjust To number is low, a printed copy will be difficult to read. In this case, the following adjustments might be useful:
- Change page orientation. The default Portrait orientation works well for worksheets that have more rows than columns. If your sheet has more columns than rows, change the page orientation to Landscape.
- Adjust margins. The smaller the margins, the more room there will be for your data.
- Specify the number of pages. To print an Excel spreadsheet on a predefined number of pages, on the Page tab of the Page Setup dialog, under Scaling, enter the number of pages in both Fit to boxes (wide and tall). Please note that using this option will ignore any manual page breaks.
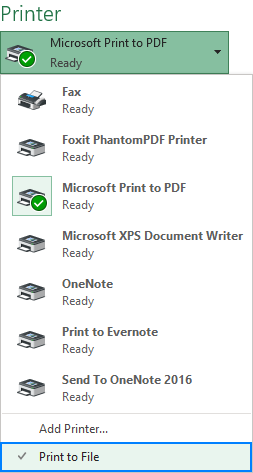
Print to file – save the output for later use
Print to File is one of the most rarely used Excel print features underestimated by many. In short, this option saves output to a file instead of sending it to a printer.
Why would you want to print to file? To save time when additional printed copies of the same document are needed. The idea is that you configure the print settings (margins, orientation, page breaks, etc.) only once and save the output to a .pdf document. Next time you need a hard copy, simply open that .pdf file and hit Print.
Let’s have a look at how that works:
- On the Page Layout tab, configure the required print settings and press Ctrl + P .
- In the Print Preview window, open the Printer drop-down list, and select Print to File.
- Click the Print button.
- Choose where to save a .png file containing the output.
Print preview in Excel
It’s always a good idea to preview outputs before printing to avoid unexpected results. There are a couple of ways to access print preview in Excel:
- Click File >Print.
- Press the print preview shortcut Ctrl + P or Ctrl + F2 .
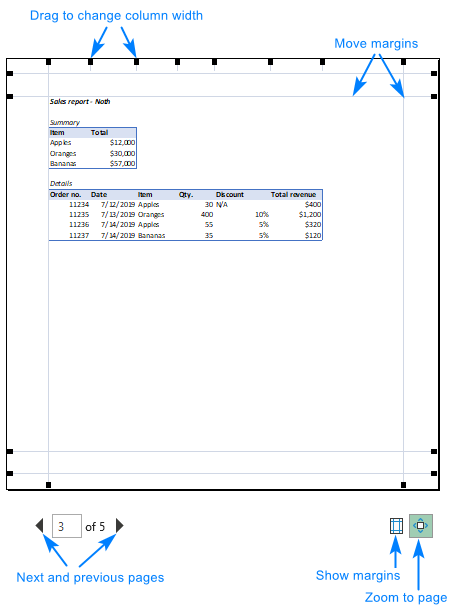
Excel Print Preview is an extremely helpful tool in terms of saving your paper, ink and nerves. It not only shows exactly how your worksheets will look on paper, but also allows making certain changes directly in the preview window:
- To preview the next and previous pages, use the right and left arrows at the bottom of the window or type the page number in the box and hit Enter . The arrows only appear when a selected sheet or range contains more than one printed page of data.
- To display page margins, click the Show Margins button in the bottom-right corner. To make the margins wider or narrower, simply drag them using the mouse. You can also adjust the column width by dragging the handles at the top or bottom of the print preview window.
- Though Excel Print Preview does not have a zoom slider, you can use a common shortcut Ctrl + scroll wheel to do a little zooming. To get back to the original size, click the Zoom to Page button in the lower-right corner.
To exit Print Preview and return to your worksheet, click the arrow in the top-left corner of the Print Preview window.
Excel print options and features
The most frequently used print settings are available in the Print Preview window discussed above. Even more options are provided on the Page Layout tab of the Excel ribbon:
Apart from configuring page margins and paper size, here you can insert and remove page breaks, set print area, hide and show gridlines, specify the rows and columns to repeat on each printed page, and more.
Advanced options for which there is no space on the ribbon are available in the Page Setup dialog box. To open it, click the dialog launcher  in the Page Setup group on the Page Layout tab.
Note. The Page Setup dialog box can also be opened from the Print Preview window. In this case, some of the options, for example Print area or Rows to repeat at top, may be disabled. To enable these features, open the Page Setup dialog from the Page Layout tab.
Excel print area
To ensure that Excel prints a specific part of your spreadsheet and not all the data, set the print area. Here’s how:
- Select one or more ranges that you want to print.
- On the Page Layout tab, in the Page Setup group, click Print Area >Set Print Area.
The Print Area setting is saved when you save the workbook. So, whenever you print this particular sheet, a hard copy will only include the print area.
How to add a print button to Excel Quick Access Toolbar
If you frequently print in Excel, it may be convenient to have the Print command on the Quick Access Toolbar. For this, just do the following:
- Click the Customize Quick Access Toolbar button (the down arrow at the far-right of the Quick Access toolbar).
- In the list of the displayed commands, select Print Preview and Print. Done!
How to insert page breaks in Excel
When printing a huge spreadsheet, you can control how the data is split over multiple pages by inserting page breaks. Here’s how it works:
- Click on the row or column that you want to move to a new page.
- On the Page Layout tab, in the Page Setup group, click Breaks>Insert Page Break.
A page break is inserted. To visually see what data falls on different pages, switch to the View tab and enable Page Break Preview.
If you’d like to change the position of a certain page break, move it wherever you want by dragging the break line.
How to print formulas in Excel
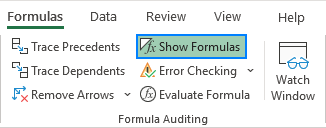
To get Excel to print formulas instead of their calculated results, you just need to show formula in a worksheet, and then print it as usual.
To have it done, switch to the Formulas tab, and click the Show Formulas button in the Formula Auditing group.
How to print a chart in Excel
To print only a chart without worksheet data, select the chart of interest and press Ctrl + P . In the Print Preview window, you will see a chart preview on the right and the Print Selected Chart option selected under Settings. If the preview looks as desired, click Print; otherwise adjust the settings:
- To print all the contents of a sheet including the chart, press Ctrl + P without selecting anything on the sheet, and make sure the Print Active Sheets option is chosen under Settings.
- It’s not possible to adjust the scaling of a chart in the Print Preview window. If you wish the printed chart to fit the full page, resize your graph to make it bigger.
How to print gridlines in Excel
By default, all worksheets are printed without gridlines. If you want to print Excel spreadsheet with lines between your cells, here’s what you need to do:
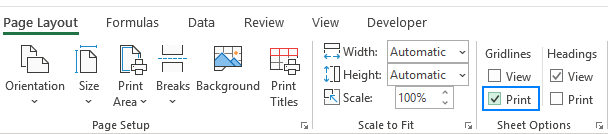
- Switch to the Page Layout tab.
- in the Sheet Options group, under Gridlines, check the Print box.
What to change the printed gridlines color? The detailed instructions can be found in How to make Excel print gridlines.
How to print titles in Excel
In a multi-page Excel sheet, understanding what this or that data means can be tricky. The Print Titles feature lets you show the column and row headers on every printed page, which will make reading a printed copy a lot easier.
To repeat header row or header column on every printed page, carry out these steps:
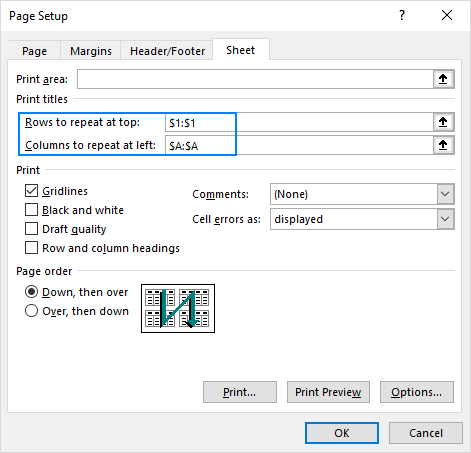
- On the Page Layout tab, in the Page Setup group, click Print Titles.
- On the Sheet tab of the Page Setup dialog box, under Print titles, specify which rows to repeat at top and/or which columns to repeat at left.
- When done, click OK.
In case your notes are no less important than the spreadsheet data, you may want to get comments on paper too. For this, do the following:
- On the Page Layout tab, in the Page Setup group, click the dialog launcher (a small arrow in the lower-right corner of a group).
- In the Page Setup window, switch to the Sheet tab, click the arrow next to Comments and choose how you want them printed:
How to print address labels from Excel
To print mailing labels from Excel, use the Mail Merge feature. Please be prepared that it may take you a while to get the labels right on the first try. The detailed steps with a lot of useful tips can be found in this tutorial: How to make and print labels from Excel.
Источник
Excel Print (Table of Contents)
- Introduction to Print in Excel
- How to Set Printing Properties in Excel?
- Print Settings
Introduction to Print in Excel
Print in Excel is used to print out the data therein spreadsheet but to the width that is allowed for selected and available pages in printer setting. We can print the current sheet, active sheet, entire workbook, any selected table, or any customized range of worksheets. When we are about to print, we should have all the necessary columns under the print preview section. We can even give the border using print gridlines without actually bordering the data in the worksheet.
Print Command (Keyboard shortcut):
Press Ctrl+P and then click the Print button (or press Enter) to print the workbook.
How to Set Printing Properties in Excel?
To set printing properties in excel is very easy. Let us understand this by looking at the following examples.
You can download this Print Excel Template here – Print Excel Template
Example #1
How to Print entire workbook with N number of copies in MS Excel
Step 1: Go to Excel Sheet, which a user wants to print. Open the File menu bar and click on print

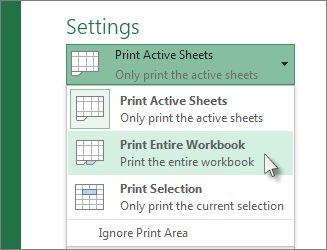
Step 2: Now Print setting will open, then under the Setting section, select ‘Print Entire workbook’

Step 3: Now click on the number of copies needed by the user
Step 4: To print the workbook, click on the print button.
Summary: As the user has given instruction in print command, it will print that no of pages with an entire workbook.
Example #2
How to Print selected area workbook with the page orientation in MS Excel
Step 1: Go to Excel Sheet, which a user wants to print, and select the area that needs to be printed.
Step 2: Open the File menu bar and click on the Print tab.
Step 3: Now Print setting will open, then under the Setting section, select ‘Print selection’
Step 4: Now click on the orientation of the page needed by the user.
Step 5: Click on the print button to print the workbook as per the setting.
Summary: As per the given instruction in the print command, it will print with the selected area only in landscape orientation.

Print Settings
Multiple Copies: If a user wants to print more than one copy, he just needs to count how many copies he wants to print in the Copies section.
Select Printer: There are multiple options to save the workbook; as per the users need; he can select options in the added printer, save as PDF, OneNote, XPS document writer, send FAX or add any new printer.
Print selection: This option will print only the current selection in the print command.
Print Active sheets: This option will print only the active sheet in the workbook.
Print Entire Workbook: This option will print all the workbook pages.
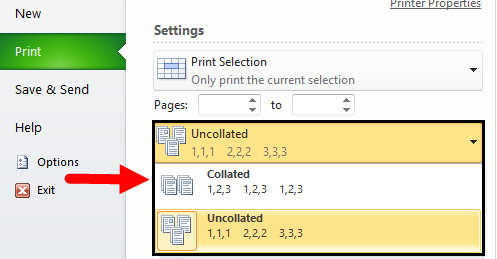
Collated: If a user’s workbook contains multiple pages, then there is an option to switch between Collated and Uncollated for a print command.
For example, if the user wants to print 10 copies from a workbook, Collated prints the entire first copy and then the entire second copy.
Or if the user is selecting Uncollated prints 10 copies of page 1, 10 copies of page 2, etc.
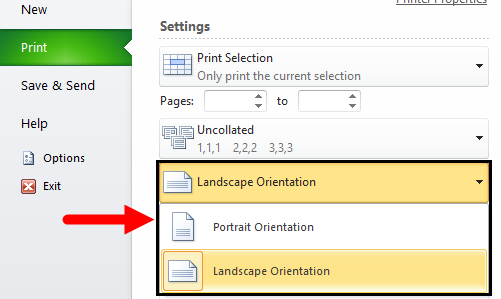
Orientation: A user can switch between Portrait Orientation (best when more rows but fewer columns on a page) and Landscape Orientation (best when more columns but fewer rows on a page).
Page Margins: If a user wants to adjust the page margins, he can do so by following the below steps.
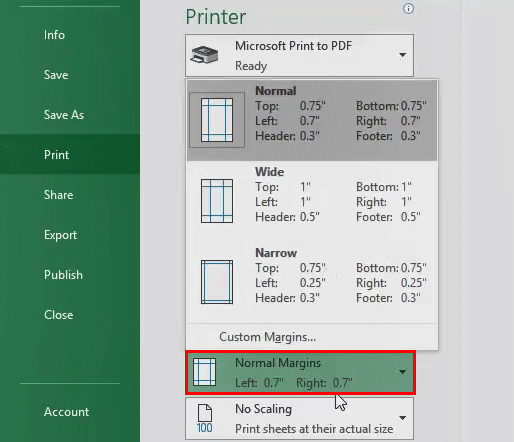
Step 1 – By selecting one of the pre-defined margins (Normal, Wide, or Narrow) from the Margins drop-down list.
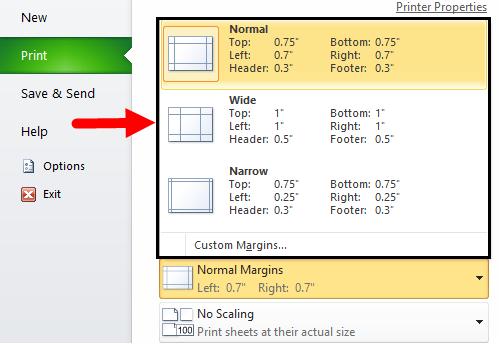
Step 2 – Or click the ‘Show Margins’ icon at the bottom right of the window. Now a user can drag the lines to change the page margins manually.
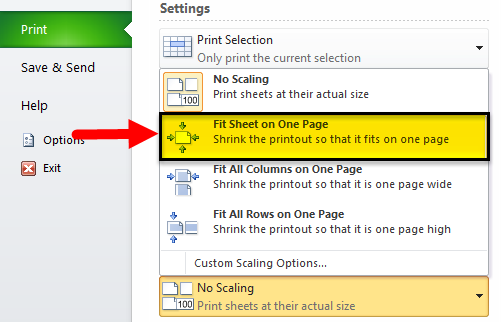
Scaling: If a user wants to fit more and more data on a single page, then he can fit the sheet on one page. To get these settings, he needs to follow the below process.
- Select ‘Fit Sheet on One Page’ from the Scaling drop-down list.
Limitation of Excel Print
- Excel doesn’t warn a user when your printout becomes unreadable.
- It is very challenging to adjust the margins from the Preview Pane.
- When a user prints a worksheet or a table without gridlines, it will be very difficult to distinguish cell boundaries.
Things to Remember About Excel Print
- If a user does not want to print some page, then he can do from settings where he will get an option of the page, and he can give. Ex- 2 to 10 (Here home page will not be printed)
- In the Print setting, a user can ignore the print area selection as per his requirement.
- If a user sets any print area in excel, then only that area will be printed, which the user has selected, and a print area will be saved when a user will save the workbook.
- A user can also shrink the printout to one page wide or one page high. He just needs to select Custom Scaling Options and need to manually enter a scaling percentage or fit the printout to a specific number of pages wide and tall. Be careful.
- Under the Header/Footer tab, a user can determine what will be in the header part and what will be in the footer of each of the pages of the printout.
- Suppose a user doesn’t want a header or a footer. Select the first option, “none”, from the list of the predetermined options.
Recommended Articles
This has been a guide to Print in excel. Here we have discussed how to Print the entire excel workbook with N number of copies and print a selected area workbook with the page orientation with printing settings and properties along with practical examples. You can also go through our other suggested articles –
- Print Gridlines in Excel
- Excel Print Area
- Print Comments in Excel
- VBA Print
How to Print in Excel?
Printing in Excel is simple as printing a sheet or a piece of data. While we can print the entire worksheet in one print, we also have options to print only a certain amount of data or a certain table. In addition, we have different print options available in the “Print” tab from the “File” section, such as print the active workbook, print the selected area,” or print a number of pages.
Print is one of the most common tasks performed in Excel. It is a print of a specific selection on a worksheet, a print area (one or more range of cells), or a range of data.
Table of contents
- How to Print in Excel?
- Top 12 Useful Tips to Consider Before Taking a Print in Excel
- #1- Check Whether the Printer is Connected or Not
- How to Connect & Add a Printer?
- #2 – Printing a Worksheet Either in Landscape or Portrait Orientation
- #3 – Setting a Print area
- #4 – Page Breaks in a Worksheet
- #5 – Page Layout & Print Preview
- #6 – Number of Spreadsheet Report Copies
- #7 – Collate the Pages of Each Copy (Either collated or Uncollated)
- #8 – Change the Paper Size Based on your Requirement
- #9 – Change the Page Margins from the Default Normal Margins to Either Wide or Narrow
- #10 – Scaling options
- #11 – Addition of Headers and Footers in a Worksheet
- #12 – Print resolution or Print quality for a worksheet.
- #1- Check Whether the Printer is Connected or Not
- Things to Remember
- Recommended Articles
- Top 12 Useful Tips to Consider Before Taking a Print in Excel
Top 12 Useful Tips to Consider Before Taking a Print in Excel
Let us look at how to print with multiple options and criteria.
#1- Check Whether the Printer is Connected or Not
Once your printer is installed, ensure it is connected to your computer. Then, you can join or add a printer in Excel using the “File” and “Print” options.
How to Connect & Add a Printer?
- In Excel, click on the “File” > “Print” option.
- The printer dropdown menu appears, and click “Add Printer.”
Set your default printer
- Open the “Devices” and “Printers” dialog box.
- In the “Search” box, type “Devices and Printers,” then click “Devices and Printers.”
- Under “Printers,” right-click the printer you want as your default printer and click “Set as default printer.”
#2 – Printing a Worksheet Either in Landscape or Portrait Orientation
By default, print worksheets in portrait orientation (also called taller than wide). However, it has options for you, where you can change the page orientation to landscape mode based on a worksheet-by-worksheet basis to improve the outlook.
The below-mentioned steps can do it. But, initially, you must select the worksheet or worksheets for which you want to change the orientation.
You can apply page orientation to multiple or adjacent sheets by clicking the tab for the first sheet. Then, hold down the “Shift” key while you click the tab for the last sheet or other sheets you want to select.
#3 – Setting a Print area
Set a print area where you can define or develop a print area for selected data. In “Print Area” option allows you to choose specific cells on a worksheet that can be printed off separately from the rest of the page based on the selection.
The print area can be done by the procedure below, open an Excel worksheet containing data, and highlight the cells you want to take a printout. Next, click the “Print Area” option on the “Page Layout” tab. Then, in the “Page Setup” section, select “Set Print Area.”
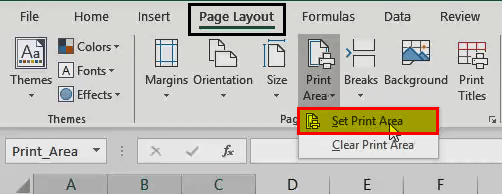
It will save the print area once you save the workbook. Now, whenever you want to take a printout of that worksheet, it will consider only printing the data defined in the print area. Therefore, it is better to clear the print area once you have taken the printout. The below-mentioned steps can do the print area: go to the “Page Layout” tab -> “Print Area” > “Clear Print Area.”

#4 – Page Breaks in a Worksheet
If the document will print over or contains multiple pages, you can control its layout by adding page breaks or deleting page breaks in a worksheet.

Usually, by default, Excel inserts automatic page breaks based on the paper size, scale options, margin settings, and the positions of any manual page breaks you insert.
You can adjust the page breaks if you want to print out an exact number of pages.
In”Page Break Preview,” by default, dashed lines are page breaks that are automatically added. At the same time, solid lines are page breaks that are added manually.
#5 – Page Layout & Print Preview
You have an option to print with or without gridlines in the printed data.
Under the “Page Layout” tab, in the “Gridlines” heading of “Sheet” options, ensure to select the checkbox of “Print.”

Now, when you take a printout of your document, you may get lines between the cells.

Under the “Page Layout” tab, under the heading of “Sheet” options, if you want row numbers and column alphabet to appear, you can select the checkbox of “Print.” Then, when you take a printout of your document, it will appear in the top and left corners.
#6 – Number of Spreadsheet Report Copies
Suppose, if you want to take a printout, “1” copy by default appears. You can make multiple copies by clicking on the arrows next to the copies box. You can take a printout on both sides of the paper or a single side based on the printer you use.
#7 – Collate the Pages of Each Copy (Either collated or Uncollated)
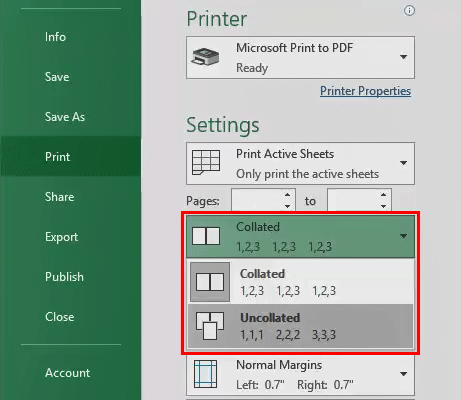
If Excel contains multiple pages, you can switch between “Collated” and “Uncollated” options. E.g., if you want to take a printout of 3 copies, “Collated” may print the entire first copy, then the whole second copy, and the later third one, etc. In comparison, “Uncollated” prints three copies of page 1, three copies of page 2, and later three copies of page 3.
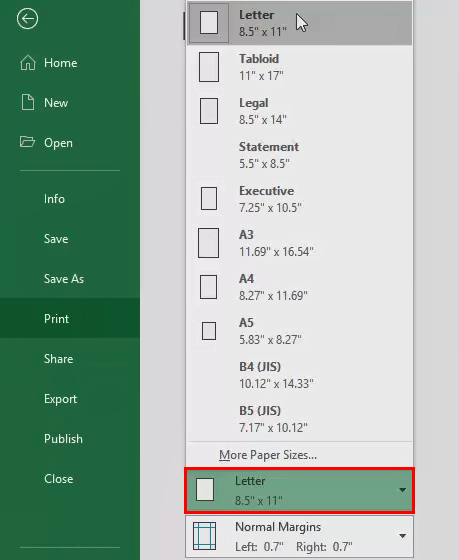
#8 – Change the Paper Size Based on your Requirement
#9 – Change the Page Margins from the Default Normal Margins to Either Wide or Narrow
#10 – Scaling options
Suppose you miss out last rows or columns on a single page, then you can consider “Width,” “Height,” and “Scale” options in “Print” options or the “Scale to Fit” group in the “Page Layout” tab to change these settings.
#11 – Addition of Headers and Footers in a Worksheet
Consider row or column headers on top of every page or not (a header appears at the top of every printed page, whereas a footer appears at the bottom of every printed page).

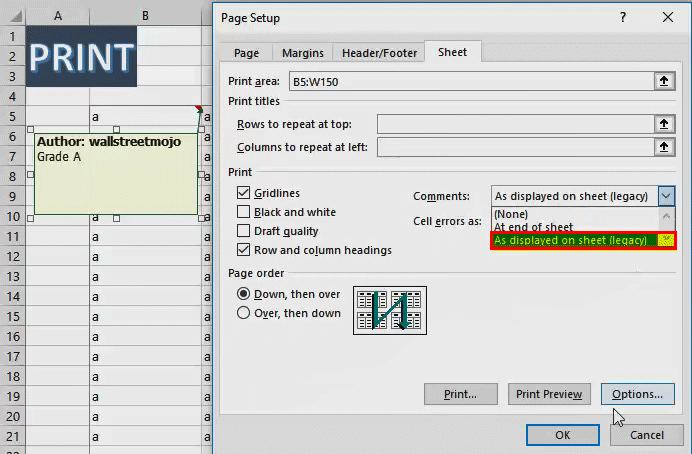
Here, we have selected Page 1 as a header. Under the “Header” option of “Page Setup,” we can observe at the top of the page when we check the print preview in excelPrint preview in Excel is a tool used to represent the print output of the current page in the excel to see if any adjustments need to be made in the final production. Print preview only displays the document on the screen, and it does not print.read more. We can customize it based on the choice.
Similarly, under the “Footer” option of “Page Setup,” we have selected “wallstreetmojo.com”
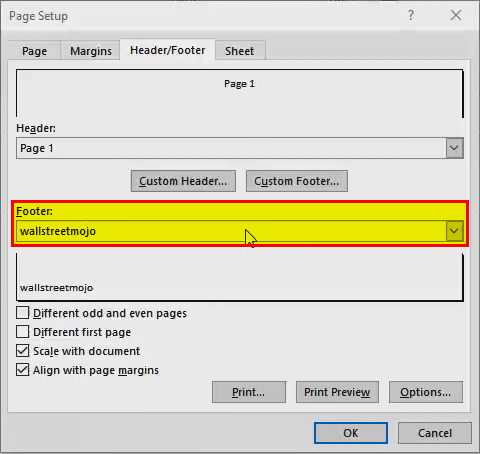
You can observe it at the bottom of the page when we check the print preview. We can customize it based on the choice.

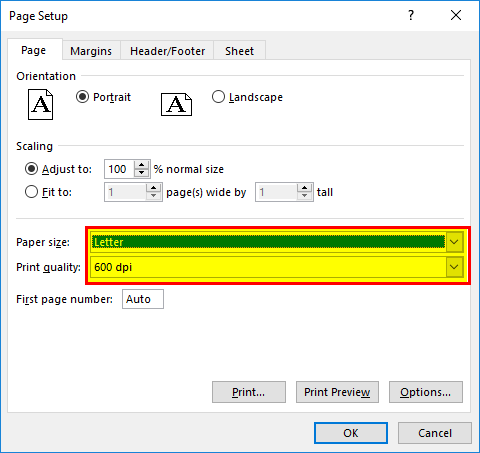
#12 – Print resolution or Print quality for a worksheet.
It depends on the type of printer you use. However, it will appear in the “Print quality” option under the “Page Setup” window.
Things to Remember
- In Excel, we can also take a print of Excel comments. For that, we must select “As displayed on sheet” under the “Comments” section of the sheet in page setup”Toread more.
- Later you can check the “Print Preview” Excel option, where the comment section appears at the specific cell.
- Various print-out options
You can take a printout of an entire worksheet or workbook or make a selection.
Recommended Articles
This article is a guide to Print in Excel. Here, we provide the top 12 useful tips to print an Excel sheet like a pro, including page break, page area, Excel print preview, header and footers in Excel, margins, and more. You may learn more about excel from the following articles –
- Print in VBA
- Print Labels From Excel
- Print Comments in Excel
- Print Titles in Excel
- Find Links in Excel
Содержание
- Вывод документа на принтер
- Способ 1: печать всего документа
- Способ 2: распечатка диапазона указанных страниц
- Способ 3: печать отдельных страниц
- Вопросы и ответы

Зачастую конечной целью работы над документом Excel является его распечатка. Но, к сожалению, не каждый пользователь знает, как выполнить данную процедуру, особенно если нужно вывести на печать не все содержимое книги, а только определенные страницы. Давайте разберемся, как производить распечатку документа в программе Excel.
Читайте также: Печать документов в MS Word
Вывод документа на принтер
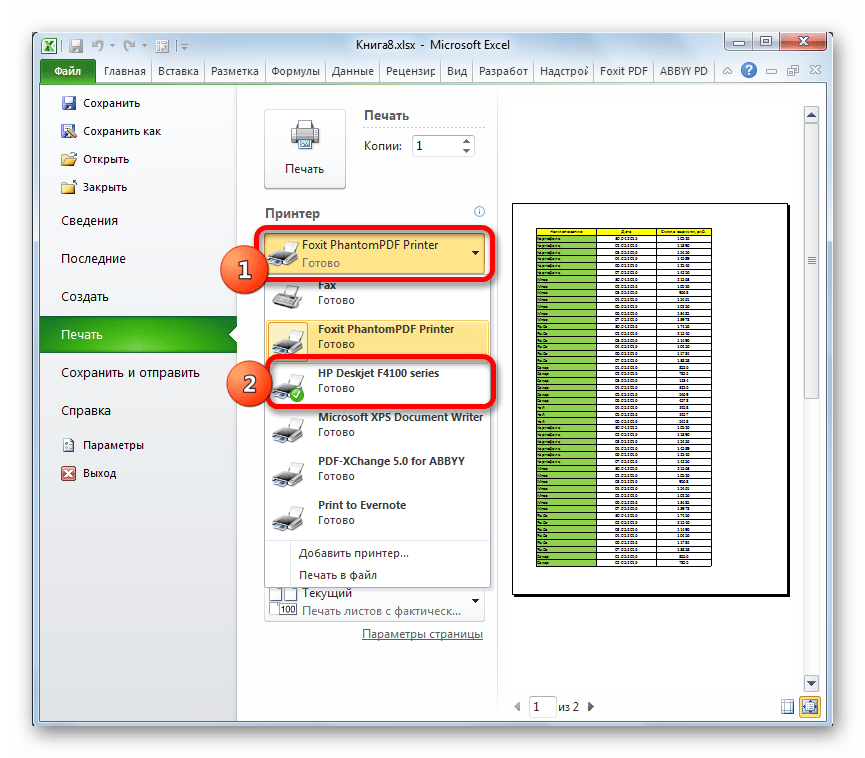
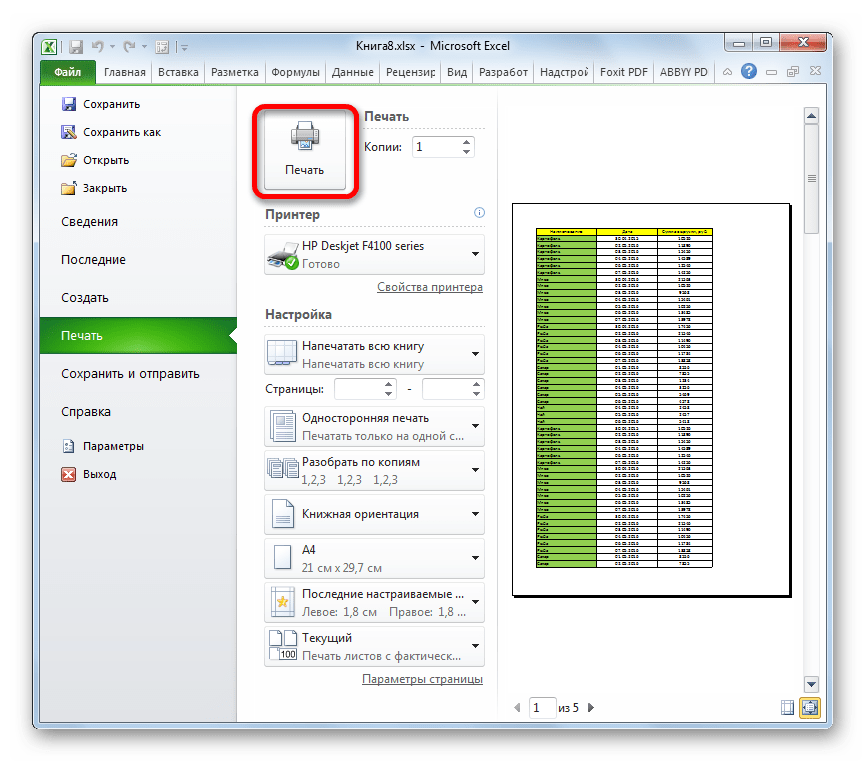
Прежде, чем приступать к распечатке любого документа, следует убедиться, что принтер правильно подключен к вашему компьютеру и произведена необходимая его настройка в операционной системе Windows. Кроме того, наименование устройства, на котором вы планируете производить печать должно отображаться через интерфейс Эксель. Для того, чтобы убедиться в правильности подключения и настройки, перейдите во вкладку «Файл». Далее переместитесь в раздел «Печать». В центральной части открывшегося окна в блоке «Принтер» должно отображаться наименование того устройства, на котором вы планируете распечатывать документы.
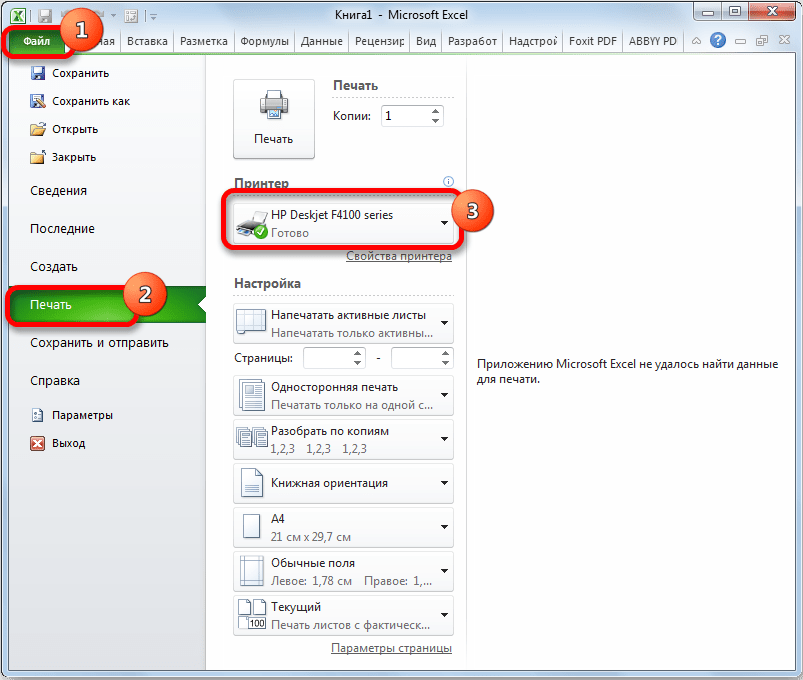
Но даже, если устройство правильно отображается, это ещё не гарантирует, что оно подключено. Данный факт означает только то, что оно правильно настроено в программе. Поэтому перед выполнением распечатки убедитесь, что принтер включен в сеть и подсоединен к компьютеру посредством кабеля или беспроводных сетей.
Способ 1: печать всего документа
После того, как подключение проверено, можно приступать к распечатке содержимого файла Excel. Проще всего распечатать документ целиком. С этого мы и начнем.
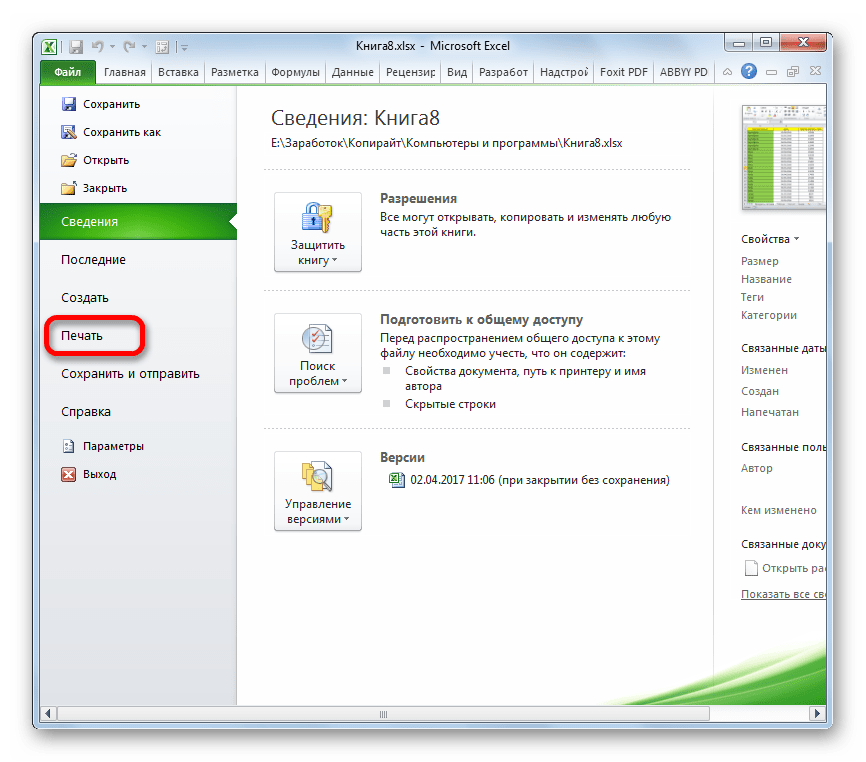
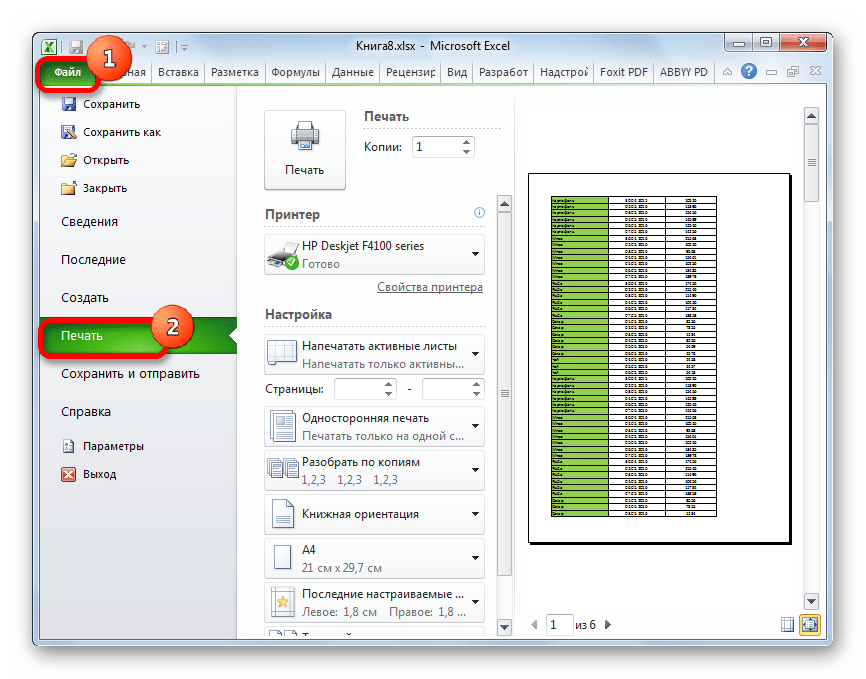
- Переходим во вкладку «Файл».
- Далее перемещаемся в раздел «Печать», нажав на соответствующий пункт в левом меню открывшегося окна.
- Запускается окно распечатки. Далее переходим к выбору устройства. В поле «Принтер» должно отображаться наименование именно того устройства, на котором вы планируете производить печать. Если там отображается наименование другого принтера, нужно кликнуть по нему и из выпадающего списка выбрать удовлетворяющий вас вариант.
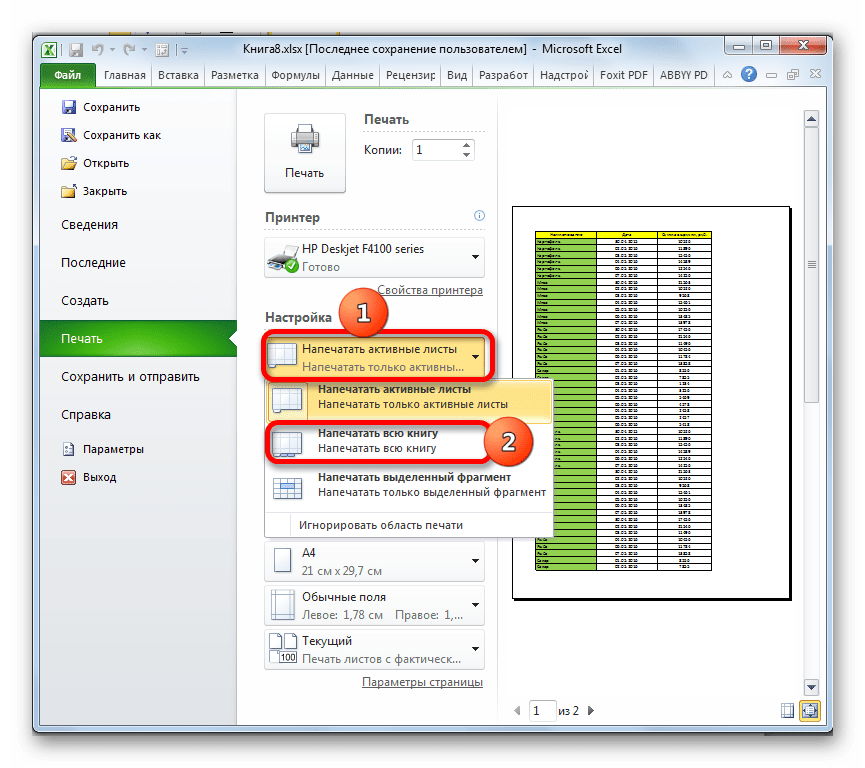
- После этого перемещаемся к блоку настроек, расположенному ниже. Так как нам нужно распечатать все содержимое файла, кликаем по первому полю и выбираем из открывшегося списка пункт «Напечатать всю книгу».
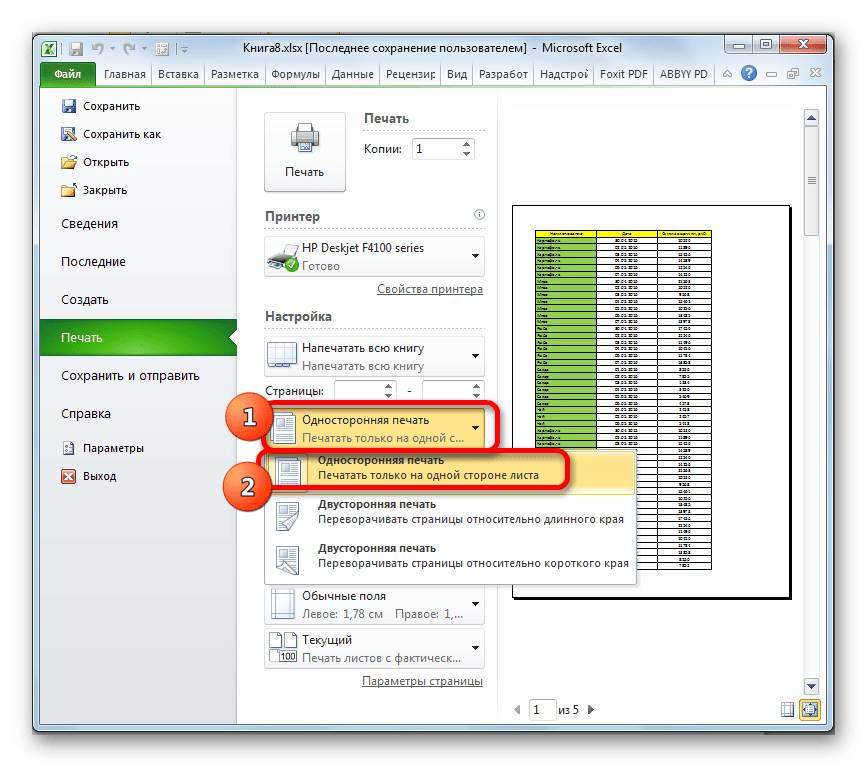
- В следующем поле можно выбрать, какой именно тип распечатки производить:
- Односторонняя печать;
- Двусторонняя с переворотом относительно длинного края;
- Двусторонняя с переворотом относительно короткого края.
Тут уже нужно производить выбор в соответствии с конкретными целями, но по умолчанию установлен первый вариант.
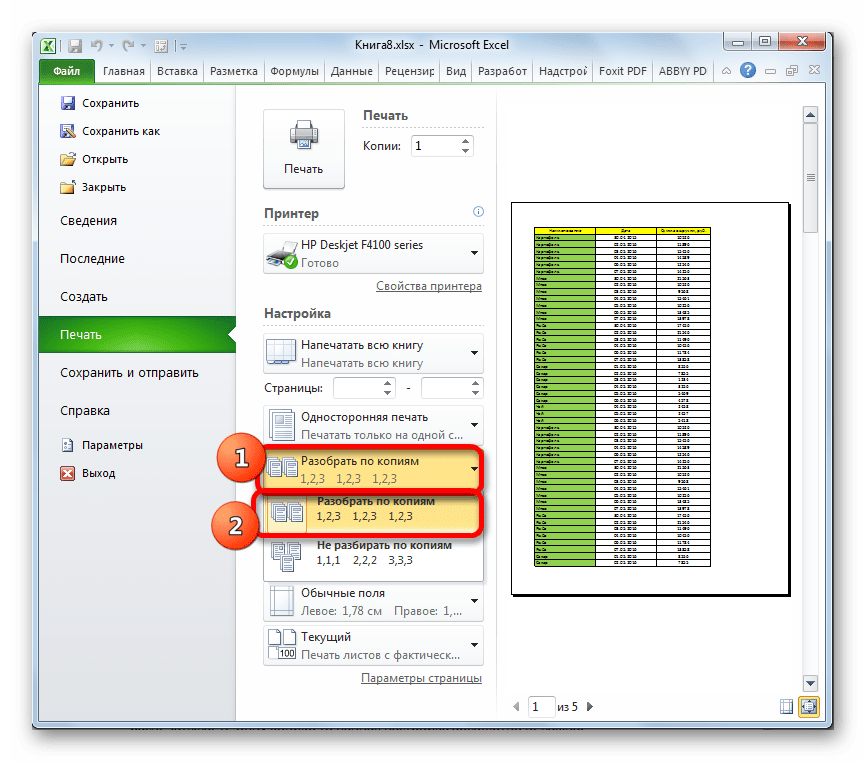
- В следующем пункте предстоит выбрать, разбирать нам по копиям печатаемый материал или нет. В первом случае, если вы распечатаете несколько копий одного и того же документа, сразу на печать пойдут все листы по порядку: первой копии, затем второй и т.д. Во втором случае принтер распечатает сразу все экземпляры первого листа всех копий, потом второй и т.д. Этот параметр особенно пригодится в том случае, если пользователь печатает много копий документа, и значительно облегчит сортировку его элементов. Если же вы распечатываете одну копию, то данная настройка абсолютно неважна для пользователя.
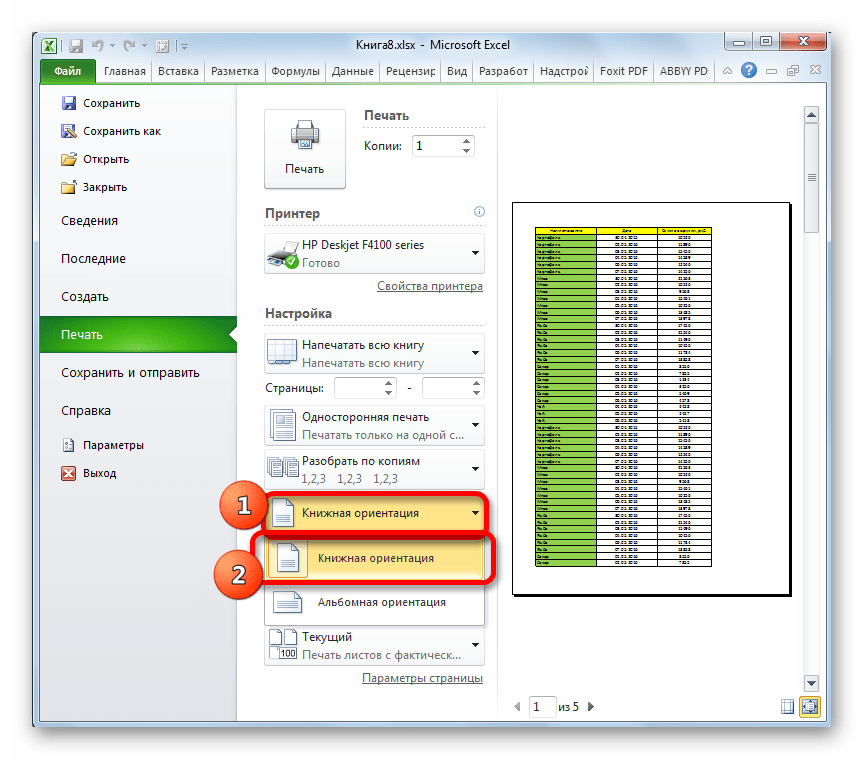
- Очень важной настройкой является «Ориентация». В этом поле определяется, в какой ориентации будет производиться печать: в книжной или в альбомной. В первом случае высота листа больше её ширины. При альбомной ориентации ширина листа больше высоты.
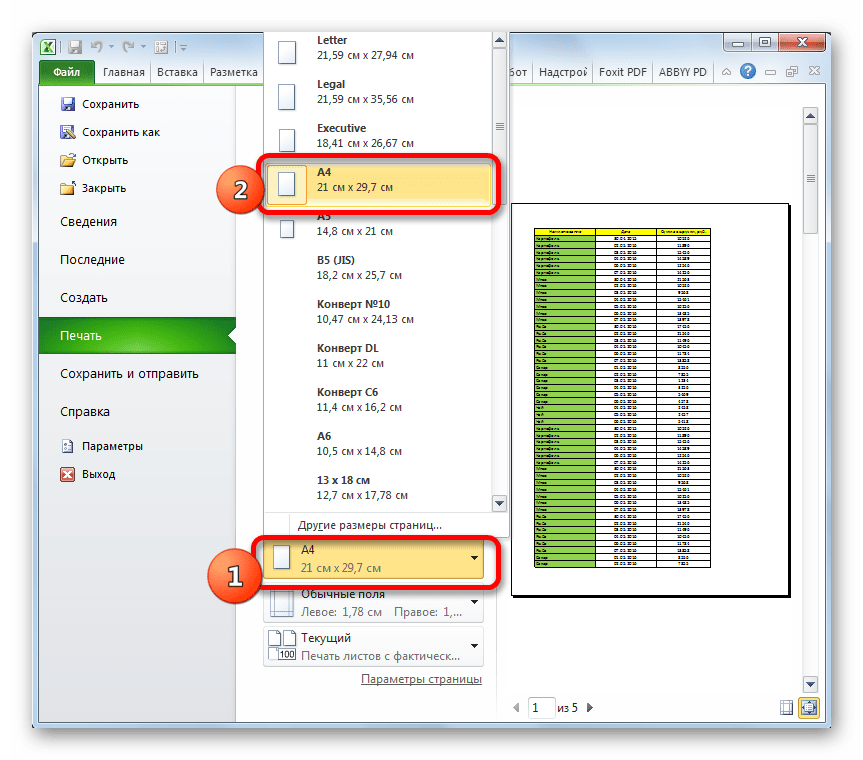
- В следующем поле определяется размер печатаемого листа. Выбор данного критерия, в первую очередь, зависит от размера бумаги и от возможностей принтера. В большинстве случаев используют формат A4. Он и выставлен в настройках по умолчанию. Но иногда приходится использовать и другие доступные размеры.
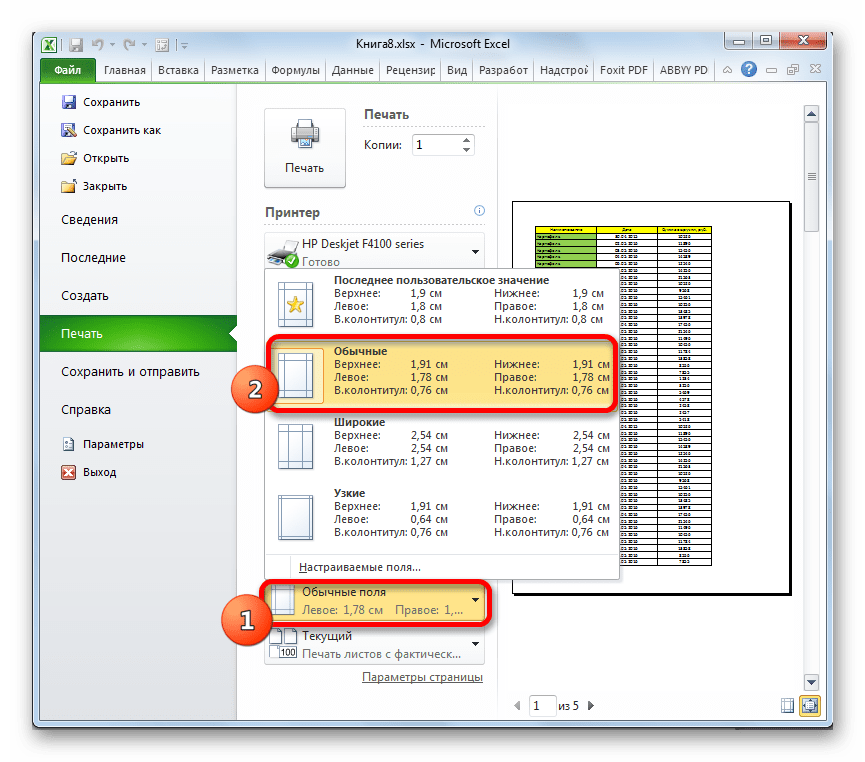
- В следующем поле можно установить размер полей. По умолчанию применяется значение «Обычные поля». При этом виде настроек размер верхнего и нижнего полей составляет 1,91 см, правого и левого – 1,78 см. Кроме того, существует возможность установки следующих видов размеров полей:
- Широкие;
- Узкие;
- Последнее пользовательское значение.
Также, размер поля можно задать вручную, как это сделать мы поговорим ниже.
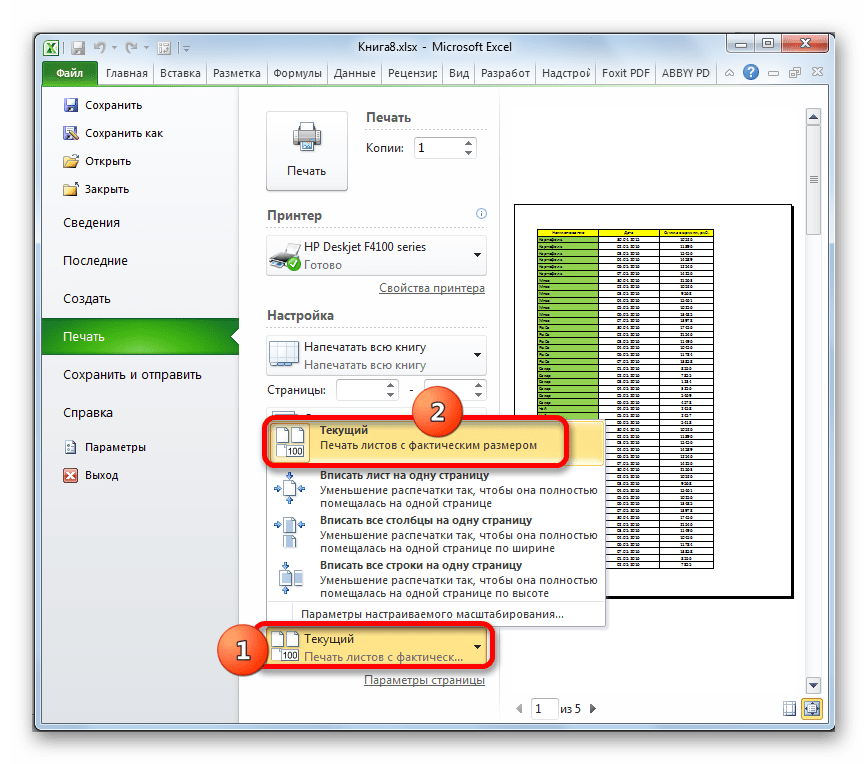
- В следующем поле настраивается масштабирование листа. Возможны такие варианты выбора этого параметра:
- Текущий (распечатка листов с фактическим размером) – по умолчанию;
- Вписать лист на одну страницу;
- Вписать все столбцы на одну страницу;
- Вписать все строки на одну страницу.
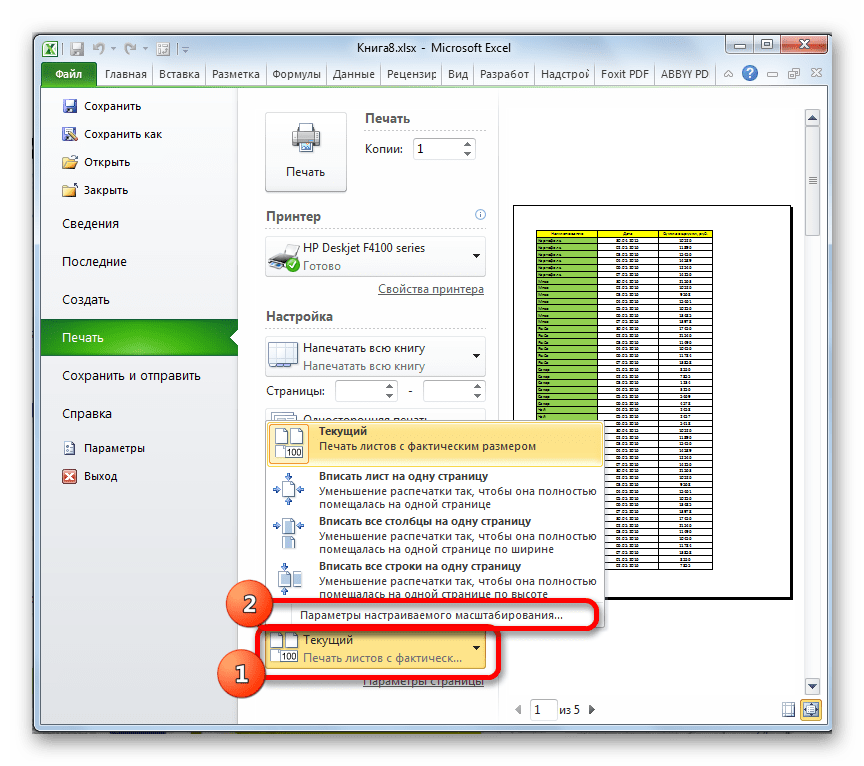
- Кроме того, если вы хотите установить масштаб вручную, задав конкретную величину, а, не пользуясь вышеуказанными установками, то можно перейти по пункту «Параметры настраиваемого масштабирования».

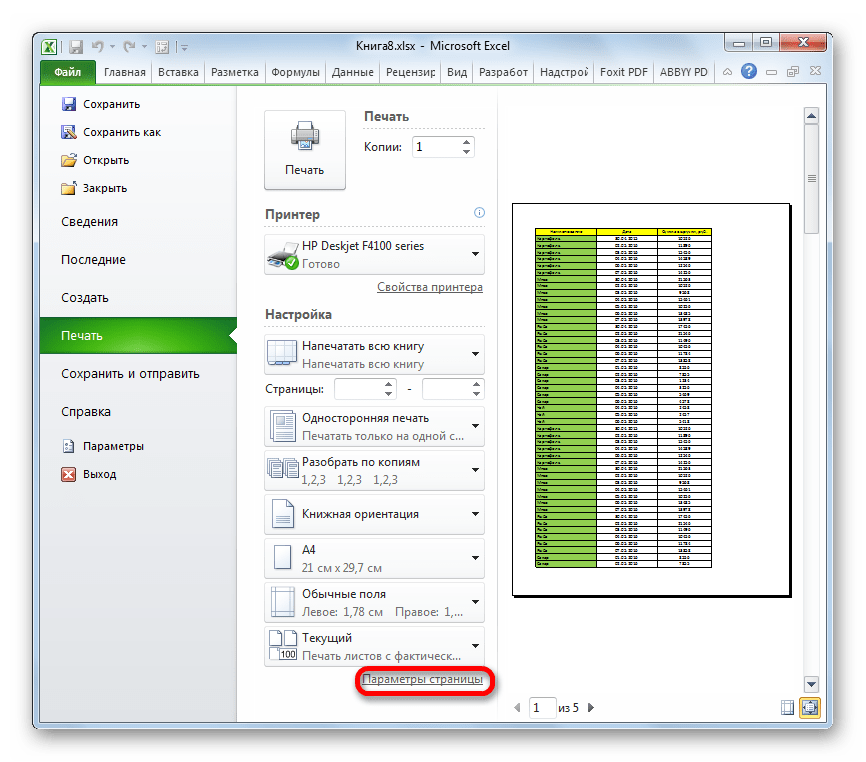
Как альтернативный вариант можно нажать на надпись «Параметры страницы», которая размещена в самом низу в конце перечня полей настроек.
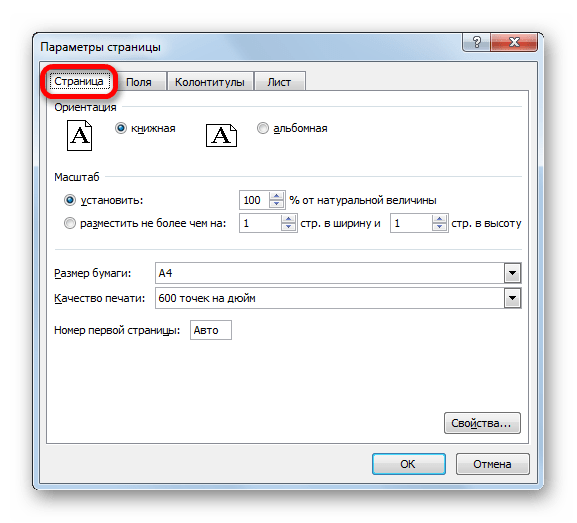
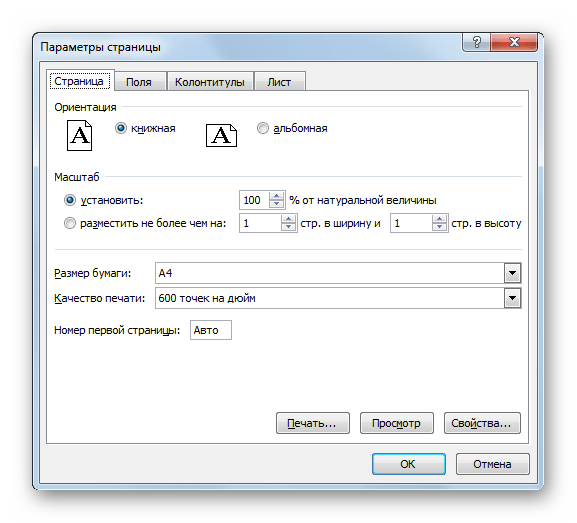
- При любом из вышеуказанных действий происходит переход в окно, именуемом «Параметры страницы». Если в вышеуказанных настройках можно было производить выбор между предустановленными вариантами настроек, то тут пользователь имеет возможность сам настроить отображение документа, как он захочет.
В первой вкладке данного окна, которая называется «Страница» можно настроить масштаб, указав его точную величину в процентах, ориентацию (книжная или альбомная), размер бумаги и качество печати (по умолчанию 600 точек на дюйм).
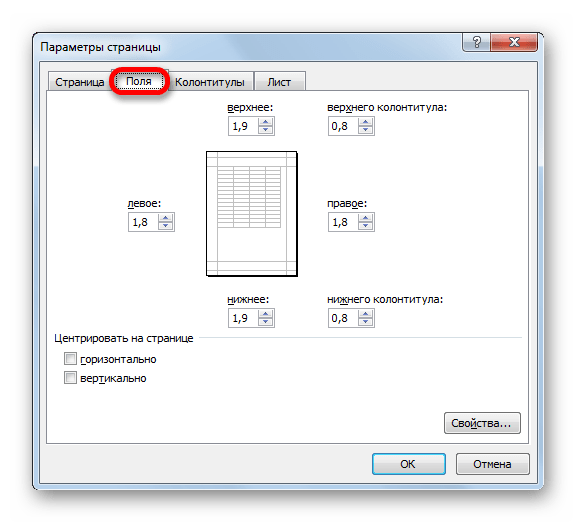
- Во вкладке «Поля» производится точная настройка величины полей. Помните, мы об этой возможности говорили чуть выше. Тут можно задать точные, выраженные в абсолютных величинах, параметры каждого поля. Кроме того, тут же можно установить горизонтальное или вертикальное центрирование.
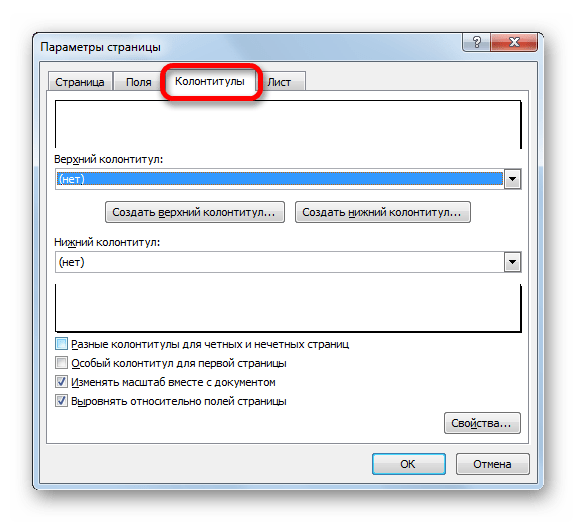
- Во вкладке «Колонтитулы» можно создать колонтитулы и настроить их расположение.
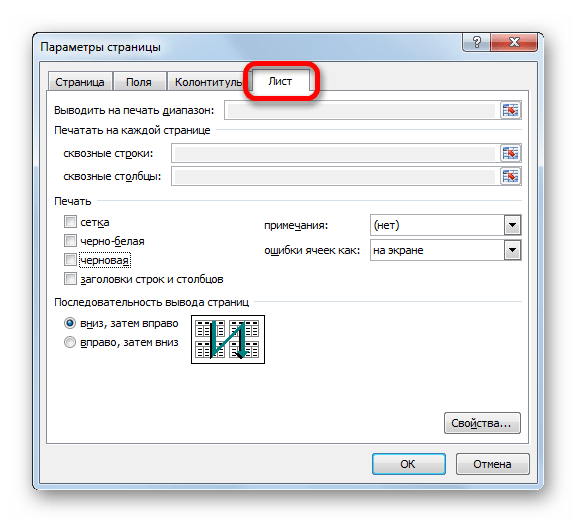
- Во вкладке «Лист» можно настроить отображение сквозных строк, то есть, таких строк, которые будут распечатываться на каждом листе в определенном месте. Кроме того, тут же можно настроить последовательность вывода листов на принтер. Имеется также возможность вывести на печать саму сетку листа, которая по умолчанию не распечатывается, заголовки строк и столбцов, и некоторые другие элементы.
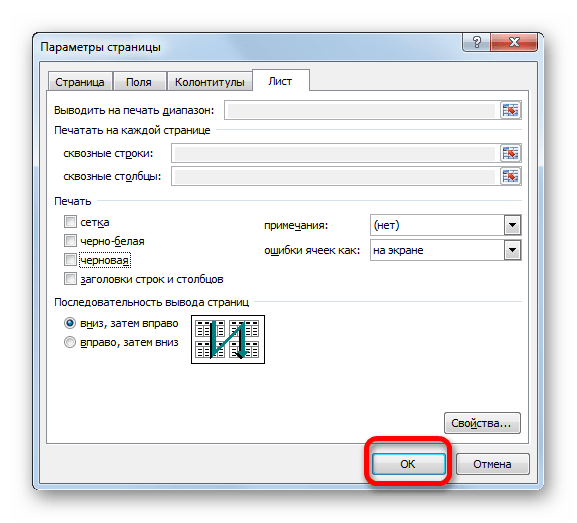
- После того, как в окне «Параметры страницы» завершены все настройки, не забываем нажать на кнопку «OK» в его нижней части для того, чтобы сохранить их для распечатки.
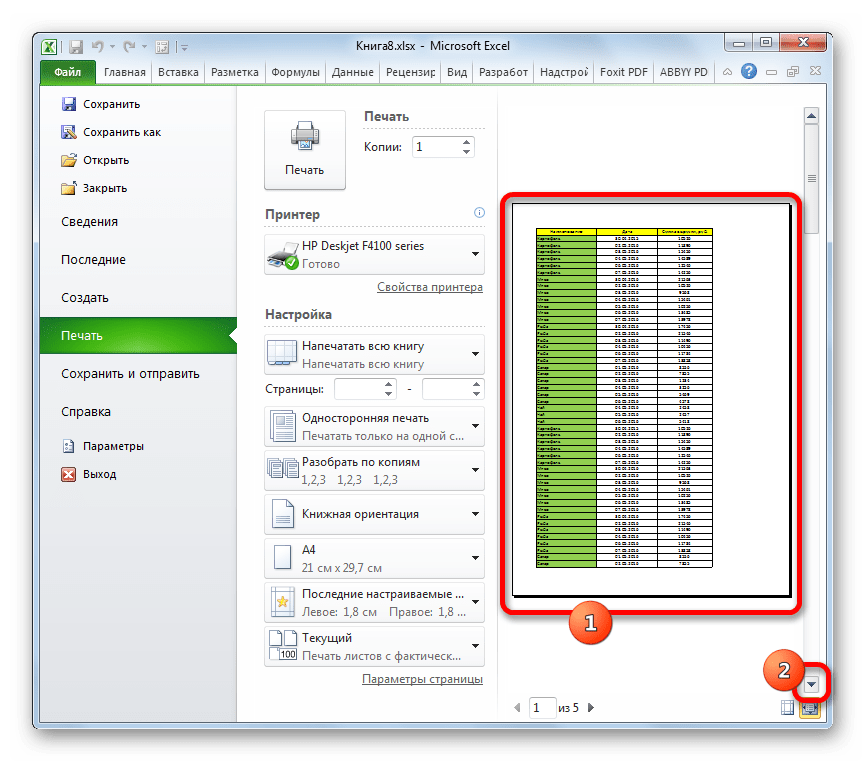
- Возвращаемся в раздел «Печать» вкладки «Файл». В правой части открывшегося окна расположена область предпросмотра. В ней отображается та часть документа, которая выводится на принтер. По умолчанию, если вы не производили никаких дополнительных изменений в настройках, на печать должно выводиться все содержимое файла, а значит, в области предпросмотра должен отображаться весь документ. Чтобы убедиться в этом, можно прокрутить полосу прокрутки.
- После того, как те настройки, которые вы считаете нужным установить, указаны, жмем на кнопку «Печать», расположенную в одноименном разделе вкладки «Файл».
- После этого все содержимое файла будет распечатано на принтере.


Существует и альтернативный вариант настроек печати. Его можно осуществить, перейдя во вкладку «Разметка страницы». Элементы управления отображением печати размещены в блоке инструментов «Параметры страницы». Как видим, они практически те же, что и во вкладке «Файл» и управляются по таким же принципам.

Для перехода в окно «Параметры страницы» нужно нажать на пиктограмму в виде косой стрелки в нижнем правом углу одноименного блока.
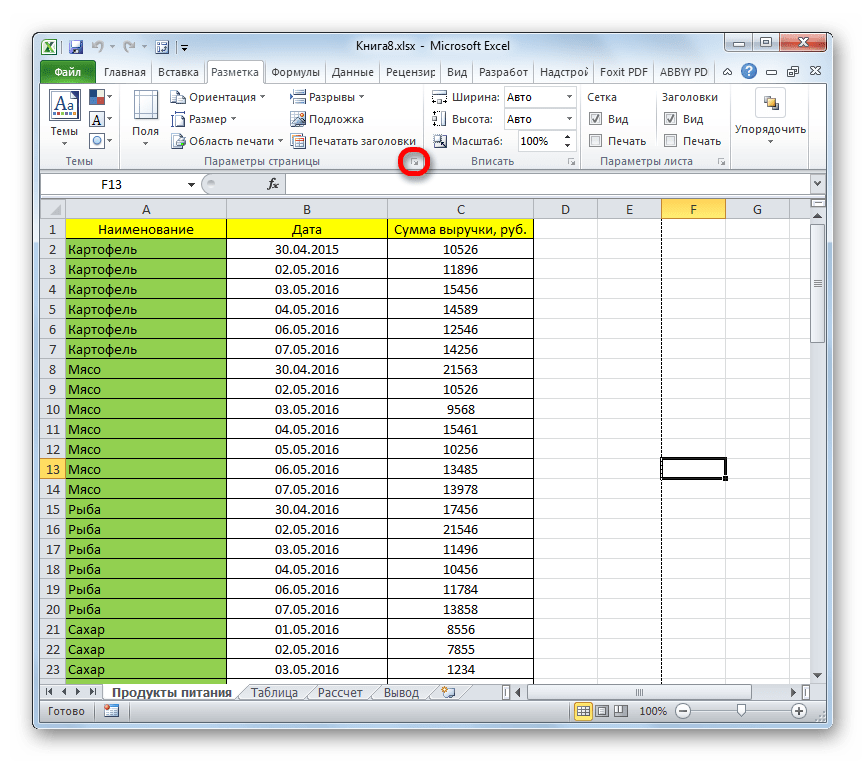
После этого будет запущено уже знакомое нам окно параметров, в котором можно производить действия по вышеуказанному алгоритму.
Способ 2: распечатка диапазона указанных страниц
Выше мы рассмотрели, как настроить печать книги в целом, а теперь давайте рассмотрим, как это сделать для отдельных элементов, если мы не хотим печатать весь документ.
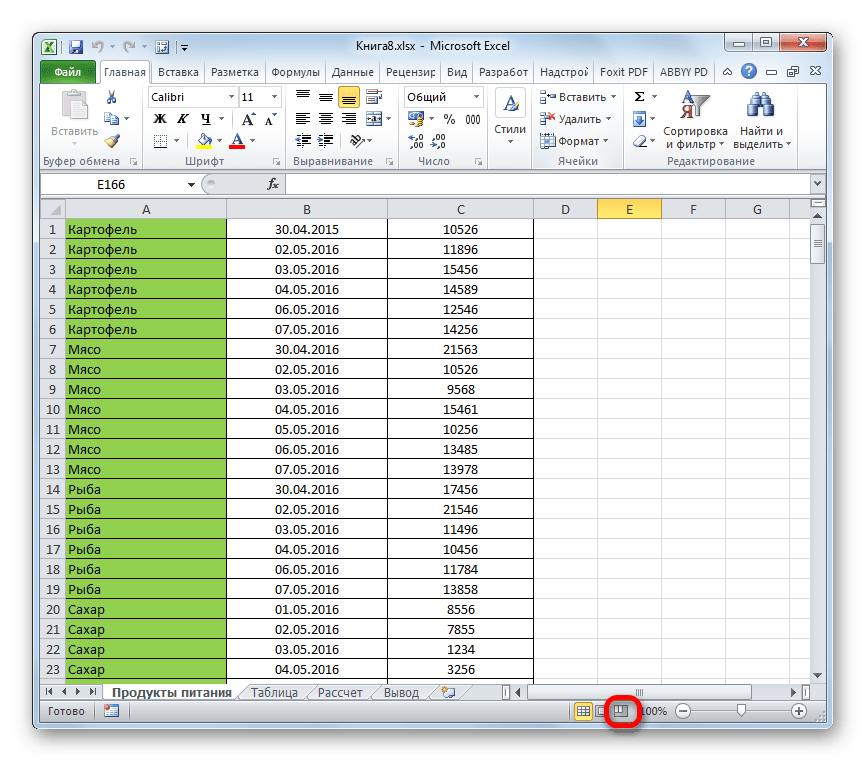
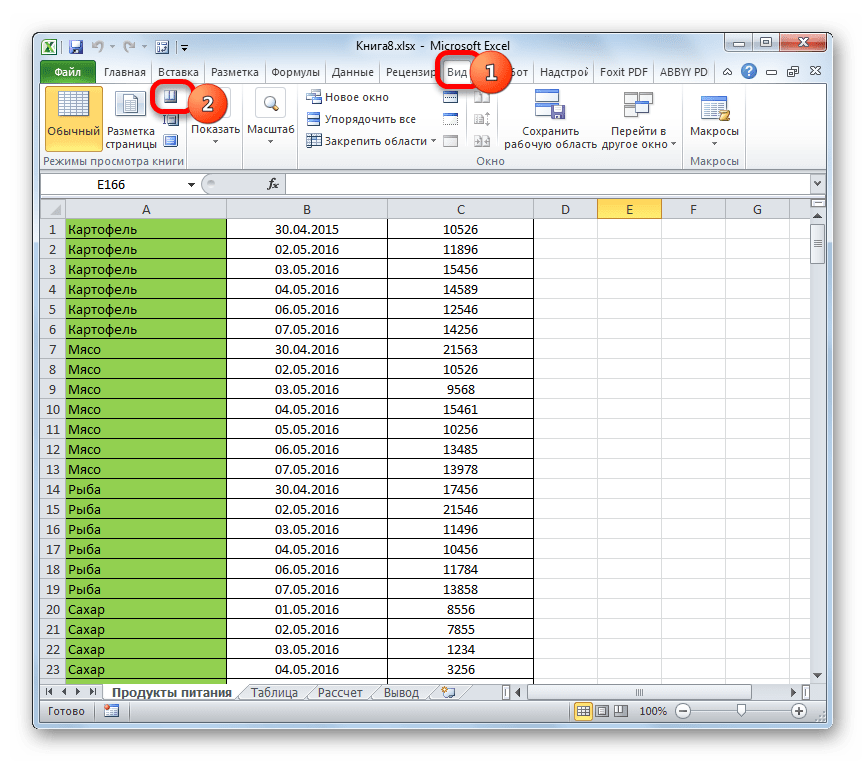
- Прежде всего, нам нужно определить, какие именно страницы по счету нужно распечатать. Для выполнения данной задачи следует перейти в страничный режим. Это можно сделать, кликнув по пиктограмме «Страничный», которая размещена на строке состояния в правой её части.

Также существует другой вариант перехода. Для этого нужно переместиться во вкладку «Вид». Далее кликаем по кнопке «Страничный режим», которая размещена на ленте в блоке настроек «Режимы просмотра книги».
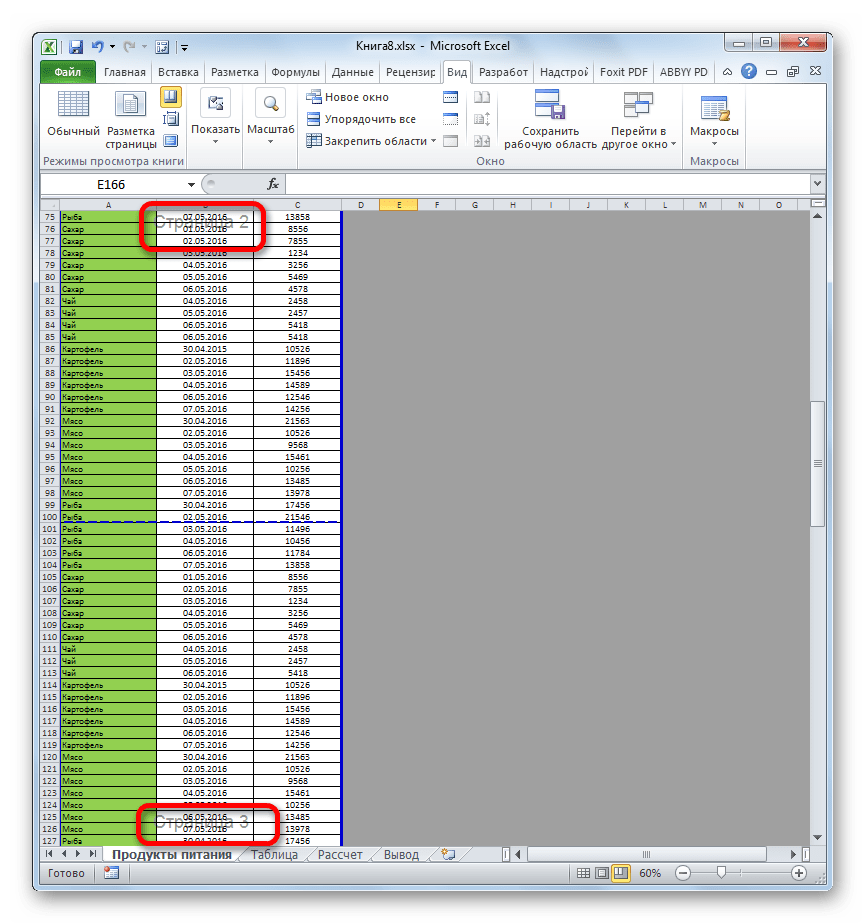
- После этого запускается страничный режим просмотра документа. Как видим, в нем листы отделены друг от друга пунктирными границами, а их нумерация видна на фоне документа. Теперь нужно запомнить номера тех страниц, которые мы собираемся распечатать.
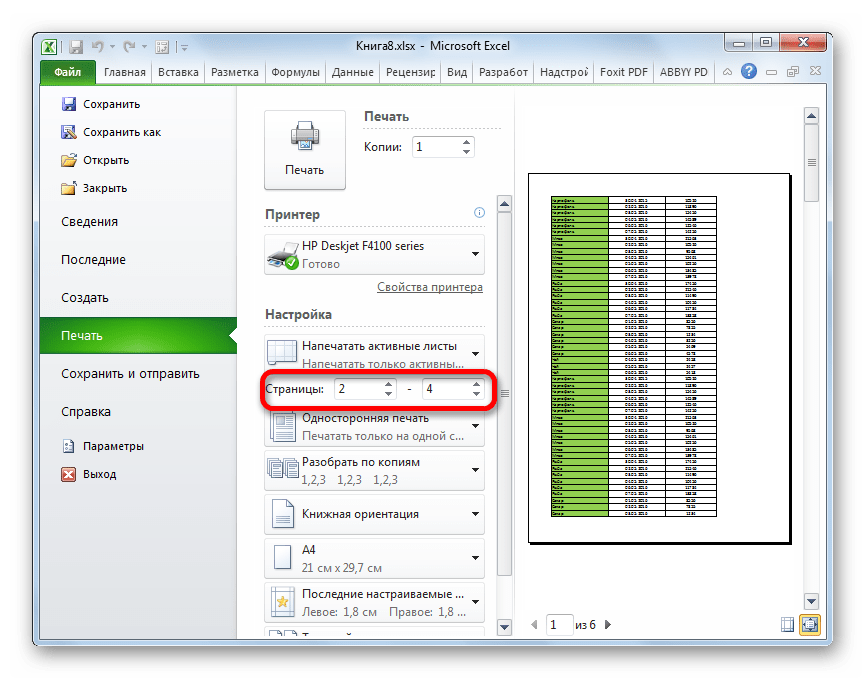
- Как и в предыдущий раз, перемещаемся во вкладку «Файл». Потом переходим в раздел «Печать».
- В настройках имеется два поля «Страницы». В первом поле указываем первую страницу того диапазона, который хотим распечатать, а во втором – последнюю.

Если вам нужно распечатать только одну страницу, то в обоих полях нужно указать её номер.
- После этого выполняем при необходимости все те настройки, о которых шел разговор при использовании Способа 1. Далее жмем на кнопку «Печать».
- После этого принтер выполняет печать указанного диапазона страниц или одиночного листа, заданных в настройках.

Способ 3: печать отдельных страниц
Но что делать, если нужно распечатать не один диапазон, а несколько диапазонов страниц или несколько отдельных листов? Если в Ворде листы и диапазоны можно задать через запятую, то в Экселе такого варианта не существует. Но все-таки выход из данной ситуации есть, и он заключается в инструменте, который называется «Область печати».
- Переходим в страничный режим работы Excel одним из тех способов, о которых шел разговор выше. Далее зажимаем левую кнопку мыши и выделяем диапазоны тех страниц, которые собираемся распечатать. Если нужно выделить большой диапазон, то кликаем сразу по его верхнему элементу (ячейке), затем переходим к последней ячейке диапазона и кликаем по ней левой кнопкой мыши с зажатой клавишей Shift. Таким способом можно выделить сразу несколько последовательно идущих страниц. Если мы кроме этого хотим распечатать и ряд других диапазонов или листов, то производим выделение нужных листов с зажатой кнопкой Ctrl. Таким образом, все нужные элементы будут выделены.
- После этого перемещаемся во вкладку «Разметка страницы». В блоке инструментов «Параметры страницы» на ленте кликаем по кнопке «Область печати». Затем появляется небольшое меню. Выбираем в нем пункт «Задать».
- После этого действия опять переходим во вкладку «Файл».
- Далее перемещаемся в раздел «Печать».
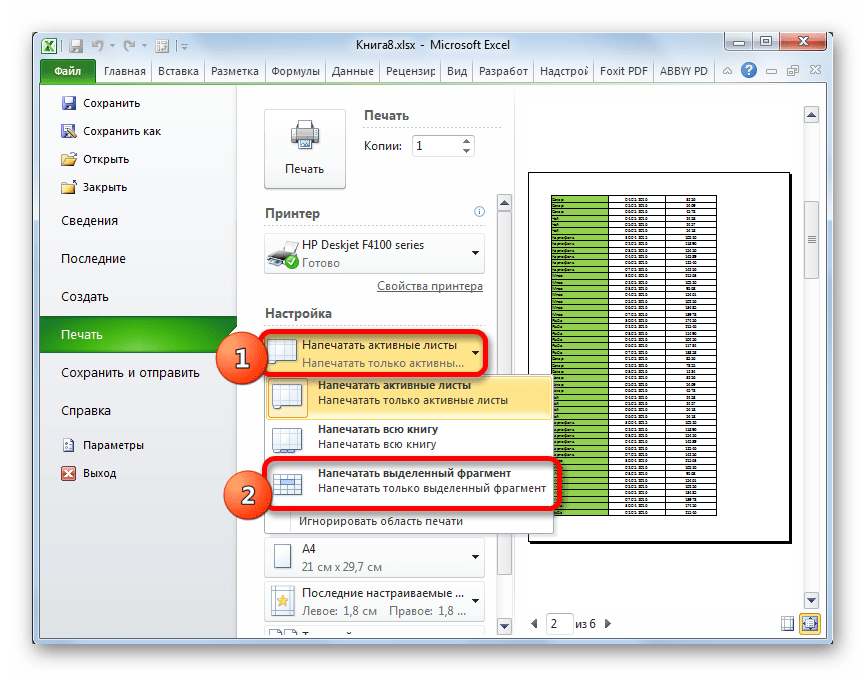
- В настройках в соответствующем поле выбираем пункт «Напечатать выделенный фрагмент».
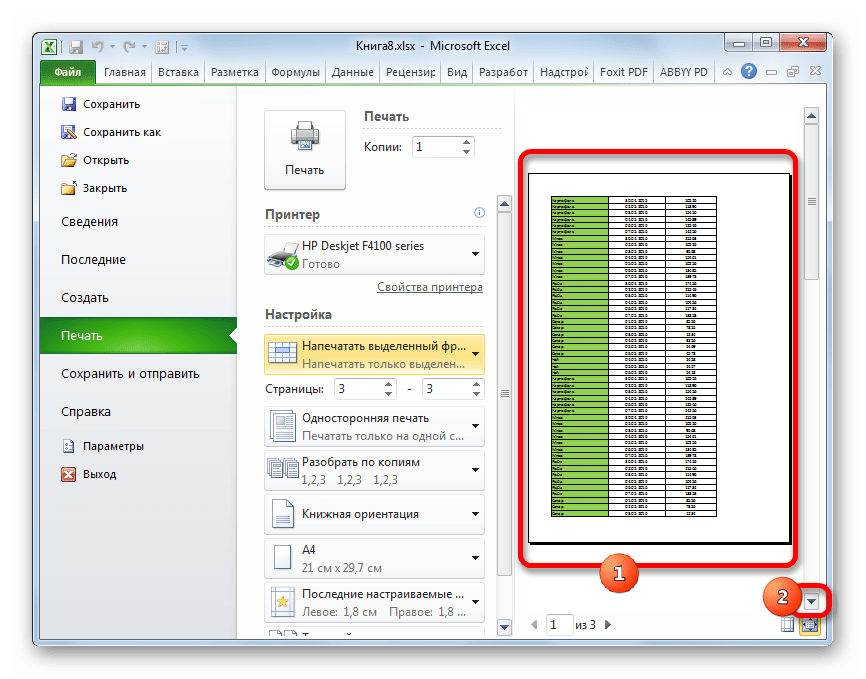
- При необходимости производим и другие настройки, которые подробно описаны в Способе 1. После этого в области предпросмотра смотрим, какие именно листы выводятся на печать. Там должны присутствовать только те фрагменты, которые нами были выделены на первом шаге данного способа.
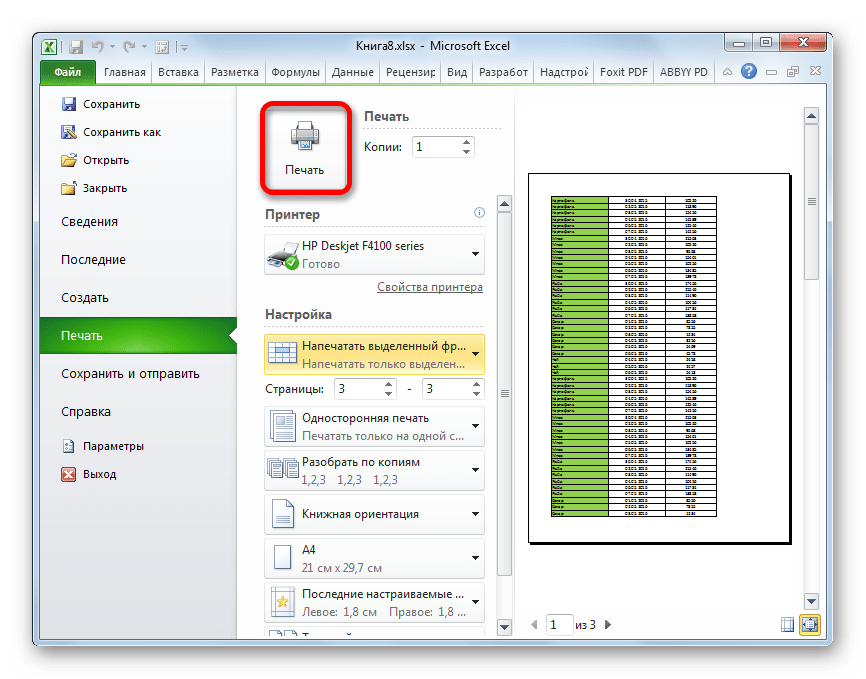
- После того, как все настройки введены и в правильности их отображения вы убедились в окне предпросмотра, жмем на кнопку «Печать».
- После этого действия выделенные листы должны быть распечатаны на подключенном к компьютеру принтере.

Кстати, этим же способом с помощью установки области выделения можно производить печать не только отдельных листов, но и отдельных диапазонов ячеек или таблиц внутри листа. Принцип выделения при этом остается тем же, что и в описанной выше ситуации.
Урок: Как задать область печати в Excel 2010
Как видим, для того, чтобы настроить печать нужных элементов в Экселе в том виде, в котором вы того желаете, нужно немного повозиться. Полбеды, если нужно распечатать весь документ, но если требуется произвести печать отдельных его элементов (диапазонов, листов и т.д.), то начинаются трудности. Впрочем, если вы знакомы с правилами распечатки документов в этом табличном процессоре, то сможете с успехом решить поставленную задачу. Ну, а о способах решения, в частности при помощи установки области печати, как раз и рассказывает данная статья.
We might live in a digital world, but there are times when you just need to print an Excel spreadsheet. Whether you need to share data with someone who won’t have a computer accessible or you need a collection of handouts for the office, follow this easy tutorial to learn how to print an excel spreadsheet or workbook.
These instructions apply to Excel 2019, 2016, 2013, 2010, and Excel for Microsoft 365.
If you are looking to print labels from within Excel, check out our guide specifically designed to help you out with the task.
Excel Spreadsheet Print Options
Before diving into your Excel print menu, let’s take a moment to understand some of the common options that will be available, no matter if you opt to use a Mac or Windows PC for the process.
Print Selection: When printing your Excel document, you can choose exactly what you would like to print. You can choose between all active sheets, the entire workbook, or select a print area by highlighting it. To highlight a selection in your workbook, simply select the upper rightmost cell, then click and drag to highlight the remainder of your selection.
Collated: This setting tells the printer in which order you would like your document printed. If you are printing multiple copies of data from Excel, the collated setting will print each set of documents together, while the uncollated setting will print all the first pages together, then all the second pages together, and so on.
Orientation: You can select to have your document printed in either a portrait (tall) or landscape (wide) orientation. If the majority of your data runs vertically, select the portrait option, otherwise we recommend selecting landscape.
Page Size: This denotes the size of the paper within your printer. You will need to know this size before printing, the average paper is typically known as letter-sized paper and is 8.5 x 11 inches.
Margins: Need a bit of spacing around your document when it prints? Excel will print documents with a narrow margin by default, but you can adjust this selection if needed.
Scaling: Your spreadsheet may not fit on a single piece of paper, as a result, you have four options for printing: fit sheet on one page, no scaling — print spreadsheet at actual size, fit all columns on one page, and fit all rows on all page. Select the best option based on your data.
Gridlines and Headings: While this particular setting isn’t located within the Print menu, it allows you to decide whether you want guidelines and headings to show when printing — follow this separate guide to learn more.
Not sure how a setting will adjust your document? Keep your eyes on the print preview window when adjusting options to see how your document changes.
Print an Excel Spreadsheet (Windows)
Follow these steps once you are ready to print your document from your Windows PC running Microsoft Excel.
-
If you want to only print a selection of your document, highlight it now.
Otherwise, continue to step 2.
-
Select the File tab, then select the Print option.
-
Adjust the print Settings as needed, using the above guide to assist your selections.
If desired, adjust the Copies setting to the number of copies you will need to print.
-
Once ready to print, select the Print button to print your document.
Print an Excel Spreadsheet (Mac)
Follow these steps once you are ready to print your document from your macOS machine running Microsoft Excel.
-
If you want to only print a selection of your document, highlight it now.
Otherwise, continue to step 2.
-
Select the File menu, then select the Print option.
-
Adjust the print Settings as needed, using the above guide to assist your selections.
If desired, adjust the Copies setting to the number of copies you will need to print.
-
Once ready to print, select the Print button to print your document.
Having Trouble With Your Printer?
If you’re following the above instructions and your printer doesn’t seem to be cooperating, view our guide on troubleshooting your printer. Whether you have a paper jam, connection issues, or are low on ink, the above guide can help get your Excel document printed without trouble.
Thanks for letting us know!
Get the Latest Tech News Delivered Every Day
Subscribe
Print a Worksheet | What to Print | Multiple Copies | Orientation | Page Margins | Scaling
This chapter teaches you how to print a worksheet and how to change some important print settings in Excel.
Print a Worksheet
To print a worksheet in Excel, execute the following steps.
1. On the File tab, click Print.
2. To preview the other pages that will be printed, click ‘Next Page’ or ‘Previous Page’ at the bottom of the window.

3. To print the worksheet, click the big Print button.

What to Print
Instead of printing the entire worksheet, you can also print the current selection.
1. First, select the range of cells you want to print.
2. Next, under Settings, select Print Selection.

3. To print the selection, click the big Print button.
Note: you can also print the active sheets (first select the sheets by holding down CTRL and clicking the sheet tabs) or print the entire workbook. Use the boxes next to Pages (see first screenshot) to only print a few pages of your document. For example, 2 to 2 only prints the second page.
Multiple Copies
To print multiple copies, execute the following steps.
1. Use the arrows next to the Copies box.
2. If one copy contains multiple pages, you can switch between Collated and Uncollated. For example, if you print 6 copies, Collated prints the entire first copy, then the entire second copy, etc. Uncollated prints 6 copies of page 1, 6 copies of page 2, etc.

Orientation
You can switch between Portrait Orientation (more rows but fewer columns) and Landscape Orientation (more columns but fewer rows).

Page Margins
To adjust the page margins, execute the following steps.
1. Select one of the predefined margins (Normal, Wide or Narrow) from the Margins drop-down list.
2. Or click the ‘Show Margins’ icon at the bottom right of the window. Now you can drag the lines to manually change the page margins.

Scaling
If you want to fit more data on one page, you can fit the sheet on one page. To achieve this, execute the following steps.
1. Select ‘Fit Sheet on One Page’ from the Scaling drop-down list.

Note: you can also shrink the printout to one page wide or one page high. Click Custom Scaling Options to manually enter a scaling percentage or to fit the printout to a specific number of pages wide and tall. Be careful, Excel doesn’t warn you when your printout becomes unreadable.