
Excel for Microsoft 365 Excel 2021 Excel 2019 Excel 2016 Excel 2013 Excel 2010 Excel 2007 More…Less
By default, Excel names worksheets Sheet1, Sheet2, Sheet3 and so on, but you can easily rename them.

3 ways to rename a worksheet
-
Double-click the sheet tab, and type the new name.
-
Right-click the sheet tab, click Rename, and type the new name.
-
Use the keyboard shortcut Alt+H > O > R, and type the new name.
Important:
Worksheet names cannot:
-
Be blank .
-
Contain more than 31 characters.
-
Contain any of the following characters: / ? * : [ ]
For example, 02/17/2016 would not be a valid worksheet name, but 02-17-2016 would work fine.
-
Begin or end with an apostrophe (‘), but they can be used in between text or numbers in a name.
-
Be named «History». This is a reserved word Excel uses internally.
Rename a workbook
If you want to rename a workbook, first locate it in Windows Explorer, then you can press F2, or right-click and select Rename, then type the new name.
If your workbook is already open, then you can go to File > Save As to save the workbook with a different name. This will create a copy of the existing workbook.
Need more help?
You can always ask an expert in the Excel Tech Community or get support in the Answers community.
See Also
Insert or delete a worksheet
Video: Move or copy worksheets
Quick start: Print a worksheet
Group worksheets
Protect a worksheet
Need more help?
Содержание
- Get sheet name only
- Related functions
- Summary
- Generic formula
- Explanation
- Workbook path
- TEXTAFTER function
- MID + FIND function
- How to Rename a Sheet in Excel (4 Easy Ways + Shortcut)
- Rename Sheets with a Simple Double Click
- Rename Sheets with a Keyboard Shortcut
- Rename Sheets Using the Format Option in the Ribbon
- Rename Sheets Using VBA – Add Prefix/Suffix to All Sheet Names in One Go
- Sheet Naming Rules in Excel
- How to Get the Sheet Name in Excel? Easy Formula
- Get Sheet Name Using the CELL Function
- Alternative Formula to Get Sheet Name (MID formula)
- Fetching Sheet Name and Adding Text to it
Get sheet name only

Summary
To get the name of the current worksheet (i.e. current tab) you can use a formula based on the CELL function together with the TEXTAFTER function. In the example shown, the formula in E5 is:
The result is «September» the name of the current worksheet in the workbook shown. In older versions of Excel which do not provide the TEXTAFTER function, you can use an alternate formula based on the MID and FIND function. Both approaches are explained below.
Generic formula
Explanation
In this example, the goal is to return the name of the current worksheet (i.e. tab) in the current workbook with a formula. This is a simple problem in the latest version of Excel, which provides the TEXTAFTER function. In older versions of Excel, you can use an alternative formula based on the MID and FIND functions. Both formula options rely on the CELL function to get a full path to the current workbook. Read below for a full explanation.
Workbook path
The first step in this problem is to get the workbook path, which includes the workbook and worksheet name. This can be done with the CELL function like this:
With the info_type argument set to «filename», and reference set to cell A1 in the current worksheet, the result from CELL is a full path as a text string like this:
Notice the sheet name begins after the closing square bracket («]»). The problem now becomes how to extract the sheet name from the path? The best way to do this depends on your Excel version. Use the TEXTAFTER function if available. Otherwise, use the MID and FIND functions as explained below.
TEXTAFTER function
In Excel 365, the easiest option is to use the TEXTAFTER function with the CELL function like this:
The CELL function returns the full path to the current workbook as explained above, and this text string is delivered to TEXTAFTER as the text argument. Delimiter is set to «]» in order to retrieve only text that occurs after the closing square bracket («]»). In the example shown, the final result is «September» the name of the current worksheet in the workbook shown.
MID + FIND function
In older versions of Excel that do not offer the TEXTAFTER function, you can use the MID function with the FIND function to extract the sheet name:
The core of this formula is the MID function, which is used to extract text starting at a specific position in a text string. Working from the inside out, the first CELL function returns the full path to the current workbook to the MID function as the text argument:
We then need to tell MID where to start extracting text. To do this, we use the FIND function with a second call to the CELL function to locate the «]» character. We want MID to start extracting text after the «]» character, so we use the FIND function to get the position, then add 1:
The result from the above snippet is returned to the MID function as start_num. For the num_chars argument, we hard-code the number 255*. The MID function doesn’t care if the number of characters requested is larger than the length of the remaining text, it simply extracts all remaining text. The final result is «September» the name of the current worksheet in the workbook shown.
*Note: In Excel user interface, you can’t name a worksheet longer than 31 characters, but the file format itself permits worksheet names up to 255 characters, so this ensures the entire name is retrieved.
Источник
How to Rename a Sheet in Excel (4 Easy Ways + Shortcut)
Using multiple worksheets in an Excel workbook is an easy way to keep your data organized. For example, you can have different sheets for different regions, or for different months/year, or different projects, etc.
And when working with multiple sheets, you may sometimes need to change their names.
In this Excel tutorial, I will show you some simple ways to rename a sheet in Excel (including a keyboard shortcut).
And in case you want to rename all the sheets as one go (such as adding a prefix or suffix to all the sheets), check out the section on using VBA to do this (it’s not complicated).
So let’s get started!
This Tutorial Covers:
Rename Sheets with a Simple Double Click
Using a mouse is the easiest way to change the name of a sheet in Excel.
Below are the steps to rename a sheet using the mouse double-click:
- Place your cursor over the sheet tab that you want to rename
- Double-click on it. This will put the sheet name in the edit mode
- Enter the name of the sheet that you want
- Hit the Enter key (or click anywhere in the worksheet)

If you want to rename multiple sheets, you need to do these above steps for all the sheets.
Also, if you want to add a prefix/suffix to the sheet name, you the arrow keys to move the cursor when you’re in the edit mode in the tab. Once you have the cursor where you want to add the text, enter in manually.
Rename Sheets with a Keyboard Shortcut
If you prefer using the keyboard and don’t want to switch to a mouse just to rename a sheet, you can also use the following keyboard shortcut (for Windows).
You need to press these keys one after the other in a succession.
While this is not one of the easy keyboard shortcuts, once you get used to it, you may find it a better way to rename sheets in Excel.
Rename Sheets Using the Format Option in the Ribbon
You can also access the option to rename sheets through the Excel ribbon:
- Click the Home tab
- In the Cell group, click on the ‘Format’ option
- Click on the Rename Sheet option. This will get the sheet name into edit mode

- Enter the name that you want for the sheet

This method would only allow you to change the name of the current sheet. To change the name of some other sheet, you first need to activate it and then use the above steps.
While this method exists, I always prefer using the mouse double-click technique to change the name of the sheet.
Rename Sheets Using VBA – Add Prefix/Suffix to All Sheet Names in One Go
Sometimes, you may have a need to add a prefix or a suffix to all the sheets in your workbook.
While you can do this manually (using the methods shown above) if you only have a few worksheets. But in case you have a lot many, this could be tedious and error-prone.
In such a case, you can use a simple VBA code in the immediate window to get this done in a snap.
Below is the VBA code that will add the prefix “2020 – ‘ in front of all the sheet names:
The above code uses a VBA loop (the For Next loop) to go through each sheet in the workbook and change the name by adding the specified prefix.
Below are the steps to use this VBA macro code in Excel:
- Right-click on any of the sheet tabs
- Click on View Code. This will open the Visual Basic Editor backend
- In the VB Editor window, click on the ‘View’ option in the menu and then click on Immediate Window. This will make the immediate window show up. You don’t need to do this in case the immediate window is already visible.
- Copy and paste the above line of code in the immediate window
- Place the cursor at the end of the line
- Hit the Enter key


As soon as you hit the Enter key, the code is executed and it adds the specified prefix in all the sheet names.
Note that this will rename all the sheets – visible as well as hidden.
Similarly, if you want to add a suffix to all the sheet names, you can use the below code:
You can even go a step further and also change the name of some specific sheets (let’s say only the ones where the text 2020 appears). This can easily be done by editing the code.
Sheet Naming Rules in Excel
When renaming a sheet in Excel, there are some naming rules you need to follow:
- A sheet name can be a maximum of 31 characters in length.
- You can not leave a sheet name blank.
- You can not have two sheets of the same name.
- You can not begin or end the sheet name with an apostrophe (‘). However, you can use it in the middle somewhere in the sheet name
- You can not use the following characters while renaming the sheet in Excel: [ ] / ? : *
- This means that you can’t have a sheet name with a date that uses a forward slash. For example, 01/01/2020 isn’t a valid sheet name but 01-01-2020 is valid.
- You can not name the sheet History (as it’s used internally by Excel)
I hope you found this Excel tutorial useful.
You may also like the following Excel tips and tutorials:
Источник
How to Get the Sheet Name in Excel? Easy Formula
When working with Excel spreadsheets, sometimes you may have a need to get the name of the worksheet.
While you can always manually enter the sheet name, it won’t update in case the sheet name is changed.
So if you want to get the sheet name, so that it automatically updates when the name is changed, you can use a simple formula in Excel.
In this tutorial, I will show you how to get the sheet name in Excel using a simple formula.
This Tutorial Covers:
Get Sheet Name Using the CELL Function
CELL function in Excel allows you to quickly get information about the cell in which the function is used.
This function also allows us to get the entire file name as a result of the formula.
Suppose I have an Excel workbook with the sheet name ‘Sales Data’
Below is the formula that I have used in any cells in the ‘Sales Data’ worksheet:

As you can see, it gave me the whole address of the file in which I am using this formula.
But I needed only the sheet name, not the whole file address,
Well, to get the sheet name only, we will have to use this formula along with some other text formulas, so that it can extract only the sheet name.
Below is the formula that will give you only the sheet name when you use it in any cell in that sheet:

The above formula will give us the sheet name in all scenarios. And the best part is that it would automatically update in case you change the sheet name or the file name.
Note that the CELL formula only works if you have saved the workbook. If you haven’t, then it would return a blank (as it has no idea what the workbook path is)
Wondering how this formula works? Let me explain!
The CELL formula gives us the whole workbook address along with the sheet name at the end.
One rule it would always follow is to have the sheet name after the square bracket (]).
Knowing this, we can find out the position of the square bracket, and then extract everything after it (which would be the sheet name)
And that’s exactly what this formula does.
The FIND part of the formula looks for ‘]’ and return it’s position (which is a number that denotes the number of characters after which the square bracket is found)
We use this position of the square bracket within the RIGHT formula to extract everything after that square bracket
One major issue with the CELL formula is that it’s dynamic. So if you use it in Sheet1 and then go to Sheet2, the formula in Sheet1 would update and show you the name as Sheet2 (despite the formula being on Sheet1). This happens as the CELL formula considers the cell in the active sheet and gives the name for that sheet, no matter where it is in the workbook. A workaround would be to hit the F9 key when you want to update the CELL formula in the active sheet. This will force a recalculation.
Alternative Formula to Get Sheet Name (MID formula)
There are many different ways to do the same thing in Excel. And in this case, there is another formula that works just as well.
Instead of the RIGHT function, it uses the MID function.
Below is the formula:
This formula works similarly to the RIGHT formula, where it first finds the position of the square bracket (using the FIND function).
It then uses the MID function to extract everything after the square bracket.
Fetching Sheet Name and Adding Text to it
If you’re building a dashboard, you may want to not just get the name of the worksheet, but also append a text before or after it.
For example, if you have a sheet name 2021, you may want to get the result as ‘Summary of 2021’ (and not just the sheet name).
This can easily be done by combining the formula we saw above with the text we want before it using the ampersand operator.
Below is the formula that will add the text ‘Summary of ‘ before the sheet name:

The ampersand operator (&) simply combines the text before the formula with the result of the formula. You can also use the CONCAT or CONCATENATE function instead of an ampersand.
Similarly, if you want to add any text after the formula, you can use the same ampersand logic (i.e., have the ampersand after the formula followed by the text that you want to append).
So these are two simple formulas that you can use to get the sheet name in Excel.
I hope you found this tutorial useful.
Other Excel tutorials you may also like:
Источник
Keeping your spreadsheet organized is important!
A well organized spreadsheet can make a big difference for someone looking at it for the first time.
This can lead to less time required to comprehend and use the file properly with fewer errors.
Naming sheets appropriately is an integral part of a properly organized spreadsheet.
In this post, I’ll show you 7 ways you can use to rename the sheets in your workbooks.
Video Tutorial
Rules for Sheet Names
There are limits to what you can name a sheet.
If you try to name a sheet History, then you will get the above warning message letting you know it is a reserved name and can’t be used.
This isn’t the only limitation. There are some other conventions and characters that aren’t allowed when naming a sheet.
Here is a list of all the rules you will need to follow when naming your sheets.
- A sheet can’t be named History.
- A sheet name can’t be left blank.
- Sheet names can’t be longer than 31 characters.
- Sheet names can’t contain any of these characters
[ ] / ? * : - Sheet names can’t begin or end with an apostrophe character.
Fortunately, these rules aren’t extremely restrictive and most users won’t ever have any issues. Usually, the only rule that anyone comes up against is the maximum length of 31 characters.
Keep your sheet names short and you won’t have any issues!
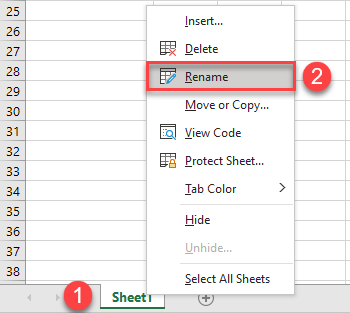
Rename a Sheet Using the Right Click Menu
When you right-click on any of the sheet tabs in a workbook, there are a variety of options available including the ability to rename a sheet from this menu.
Right-click on the sheet you would like to rename then select Rename from the options.
The current sheet name will become highlighted and you can type your new name and press the Enter key to confirm.
Pros
- This is easy to perform and only requires two mouse clicks once you know about it.
Cons
- You need to discover the right-click menu exists before you can use it!
Rename a Sheet Using a Double Left Click
This is the quickest and easiest way of them all.
Once you learn about this mouse trick to rename your sheets, it will likely be your preferred method.
Double left-click on the sheet tab which you would like to rename.
Pros
- The quickest way to rename a sheet.
- Double click to rename is a fairly common mouse shortcut across various tools.
Cons
- None.
Rename a Sheet from the Home Tab
It’s a bit hidden, but there is a command in the Home tab for renaming a sheet.
Make sure the sheet you want to rename is the active sheet ➜ go to the Home tab ➜ click on Format in the Cell section ➜ select Rename Sheet from the options.
Unfortunately, this command is too hidden to be of any use. It’s not very intuitive that it is grouped in a button labelled Format.
Pros
- None
Cons
- Not easily discovered.
Rename a Sheet Using a Keyboard Shortcut
Unfortunately, there isn’t a dedicated keyboard shortcut for renaming a sheet.
But we can take advantage of the Alt hotkey shortcuts.
Alt + H + O + R will get you to the Rename Sheet command in the Home tab.
Pressing the Alt key will activate the hotkeys in the ribbon. Then pressing H will select the Home tab. Pressing O will select the Format command and then pressing R will select the Rename Sheets option from the Format command.
Pros
- You can use the keyboard to rename a sheet.
Cons
- Hard to remember.
Rename a Sheet Using the Accessibility Menu
This will only work if you haven’t already renamed the sheet from the default name of Sheet1, Sheet2, Sheet3, etc…
Having unnamed sheets represents an accessibility issue because anyone that relies on a screen reader won’t be able to tell what is in a sheet based on those generic default sheet names.
Unnamed sheets will get flagged as an accessibility issue when you run the accessibility checker and you will then be able to rename them.
Go to the Review tab and click on the Check Accessibility command.
This will run a check on the entire workbook and a window pane will open up with the inspection results.
There is a section called Default Sheet Names which can be expanded to show all the sheets which have not been renamed.
Click on the downward chevron icon to the right of any sheet name then choose Rename Sheet from the options.
This will highlight the sheet name and you can start typing your new name and press Enter when done.
Pros
- Good as a final check if you have created a large workbook with dozens of sheets.
Cons
- Hidden sheets do not show up in the inspection results.
- Not a practical way of renaming sheets.
Rename a Sheet Using the Navigation Pane
A great feature of Microsoft Word is the navigation pane which allows you to see all the headings and subheadings in your word document. You can click on any of the headings and instantly be taken to its location in your document.
Excel also now has a very similar navigation pane feature. The Excel Navigation Pane will show you a list of various objects like sheets, pivot tables, named ranges, etc. You can click on any the listed objects and Excel will take you to their location in the workbook.
Open the Navigation Pane by going to the View tab and clicking on the Navigation button in the Show section of the ribbon.
This will open up the Navigation pane which lists all the sheets in the workbook. Right-click on any of the sheets and choose Rename from the menu options.
This will open up Rename input box where you can type your new name. Press the Ok button to change the name.
This might be a handy option if you’ve already got the navigation pane open because you are already using it to navigate. Otherwise, it’s not worth the effort of opening the navigation pane just to rename a sheet.
One thing to note about this method is it’s the only manual method that you can use to rename a sheet that’s not active.
Pros
- You can rename a sheet that is not the active sheet.
Cons
- Need to have the navigation pane open.
Rename a Sheet Using VBA
If you want to rename your sheets programmatically, then VBA might be the solution for you.
Suppose you wanted to change all the sheet names in your workbook to upper case. Using the previous methods would require a lot of tedious work as you would have to rename each sheet individually.
This is where a programmatic solution is best!
Sub UpperCaseSheets()

For i = 1 To Worksheets.Count
    Sheets(i).Name = UCase(Sheets(i).Name)
Next i

End Sub
Press Alt + F11 to open the visual basic editor then go to the Insert tab and select Module from the options.
Paste the above code into the module window.
The above code will loop through each sheet in the workbook and change the sheet name to upper case.
This will even rename any sheets that are hidden without needing to unhide them first.
You can run this code from Excel by going to the Developer tab and selecting the Macro command then pressing the Run button.
Pros
- You can rename sheets without selecting them first.
- You can rename all sheets with one click.
- You can rename any hidden sheets in the workbook without unhiding them.
Cons
- You need to be comfortable with VBA.
- You will need to save the workbook in the macro enabled xlsm format.
Rename a Sheet Using Office Scripts
Office scripts is another way you can automate a task in Excel, but it’s only available in business and enterprise versions of Excel online.
Open Excel Online and go to the Automate tab and click on New Script.
function main(workbook: ExcelScript.Workbook) {
	// get all worksheet objects into ws
	let ws = workbook.getWorksheets();

	//loop through each sheet in ws and change the name to uppercase
	for (let i = 0; i < ws.length; i++) {
		ws[i].setName(ws[i].getName().toUpperCase());
	}

};
This will open up the Code Editor where you can paste in the above code. Press the Run button to execute the code.
The above code will get all the worksheets in the workbook and loop through each and rename it upper case text.
This will make quick work of all the sheets in the workbook, including any hidden sheets.
Pros
- You can rename sheets without selecting them first.
- You can rename all sheets with one click.
- You can rename hidden sheets without unhiding them first.
Cons
- You need to be comfortable with the TypeScript programming language.
- Office Scripts are only available in Excel online business and enterprise plans.
Conclusions
Renaming sheets is a task you will have to do again and again in Excel.
There are a lot of easy options for this!
There are even ways to automate this for situations that require naming or renaming a large number of sheets.
Do you have a method for renaming your sheets that’s not mentioned? Let me know in the comments!
About the Author
John is a Microsoft MVP and qualified actuary with over 15 years of experience. He has worked in a variety of industries, including insurance, ad tech, and most recently Power Platform consulting. He is a keen problem solver and has a passion for using technology to make businesses more efficient.
Using multiple worksheets in an Excel workbook is an easy way to keep your data organized. For example, you can have different sheets for different regions, or for different months/year, or different projects, etc.
And when working with multiple sheets, you may sometimes need to change their names.
In this Excel tutorial, I will show you some simple ways to rename a sheet in Excel (including a keyboard shortcut).
And in case you want to rename all the sheets as one go (such as adding a prefix or suffix to all the sheets), check out the section on using VBA to do this (it’s not complicated).
So let’s get started!
Rename Sheets with a Simple Double Click
Using a mouse is the easiest way to change the name of a sheet in Excel.
Below are the steps to rename a sheet using the mouse double-click:
- Place your cursor over the sheet tab that you want to rename
- Double-click on it. This will put the sheet name in the edit mode
- Enter the name of the sheet that you want
- Hit the Enter key (or click anywhere in the worksheet)
If you want to rename multiple sheets, you need to do these above steps for all the sheets.
Also, if you want to add a prefix/suffix to the sheet name, you the arrow keys to move the cursor when you’re in the edit mode in the tab. Once you have the cursor where you want to add the text, enter in manually.
Related: Increase Excel Tab Numbering as You Create a Copy
Rename Sheets with a Keyboard Shortcut
If you prefer using the keyboard and don’t want to switch to a mouse just to rename a sheet, you can also use the following keyboard shortcut (for Windows).
ALT + O + H + R
You need to press these keys one after the other in a succession.
While this is not one of the easy keyboard shortcuts, once you get used to it, you may find it a better way to rename sheets in Excel.
Pro Tip: In case you want to move to the next sheet, you can use the keyboard shortcut Control + PageUp/PageDown (hold the Control key and then press the PageUP key to move to the next sheet or PageDown key to move to the previous sheet.
Rename Sheets Using the Format Option in the Ribbon
You can also access the option to rename sheets through the Excel ribbon:
- Click the Home tab
- In the Cell group, click on the ‘Format’ option
- Click on the Rename Sheet option. This will get the sheet name into edit mode

- Enter the name that you want for the sheet
This method would only allow you to change the name of the current sheet. To change the name of some other sheet, you first need to activate it and then use the above steps.
While this method exists, I always prefer using the mouse double-click technique to change the name of the sheet.
Rename Sheets Using VBA – Add Prefix/Suffix to All Sheet Names in One Go
Sometimes, you may have a need to add a prefix or a suffix to all the sheets in your workbook.
While you can do this manually (using the methods shown above) if you only have a few worksheets. But in case you have a lot many, this could be tedious and error-prone.
In such a case, you can use a simple VBA code in the immediate window to get this done in a snap.
Below is the VBA code that will add the prefix “2020 – ‘ in front of all the sheet names:
For Each sh In Worksheets: sh.Name = "2020 - " & sh.Name: Next sh
The above code uses a VBA loop (the For Next loop) to go through each sheet in the workbook and change the name by adding the specified prefix.
Below are the steps to use this VBA macro code in Excel:
- Right-click on any of the sheet tabs
- Click on View Code. This will open the Visual Basic Editor backend

- In the VB Editor window, click on the ‘View’ option in the menu and then click on Immediate Window. This will make the immediate window show up. You don’t need to do this in case the immediate window is already visible.

- Copy and paste the above line of code in the immediate window

- Place the cursor at the end of the line

- Hit the Enter key
As soon as you hit the Enter key, the code is executed and it adds the specified prefix in all the sheet names.
Note that this will rename all the sheets – visible as well as hidden.
Similarly, if you want to add a suffix to all the sheet names, you can use the below code:
For Each sh In Worksheets: sh.Name = sh.Name & " - 2020": Next sh
You can even go a step further and also change the name of some specific sheets (let’s say only the ones where the text 2020 appears). This can easily be done by editing the code.
Sheet Naming Rules in Excel
When renaming a sheet in Excel, there are some naming rules you need to follow:
- A sheet name can be a maximum of 31 characters in length.
- You can not leave a sheet name blank.
- You can not have two sheets of the same name.
- You can not begin or end the sheet name with an apostrophe (‘). However, you can use it in the middle somewhere in the sheet name
- You can not use the following characters while renaming the sheet in Excel: [ ] / ? : *
- This means that you can’t have a sheet name with a date that uses a forward slash. For example, 01/01/2020 isn’t a valid sheet name but 01-01-2020 is valid.
- You can not name the sheet History (as it’s used internally by Excel)
I hope you found this Excel tutorial useful.
You may also like the following Excel tips and tutorials:
- How to Unhide Sheets in Excel (All In One Go)
- How to Get the Sheet Name in Excel?
- How to Sort Worksheets in Excel using VBA (alphabetically)
- Combine Data From Multiple Worksheets into a Single Worksheet in Excel
- How to Compare Two Excel Sheets
- Count Sheets in Excel (using VBA)
- How to Change the Color of the Sheet Tab in Excel
See all How-To Articles
In this tutorial, you will learn how to rename a worksheet in Excel and Google Sheets.
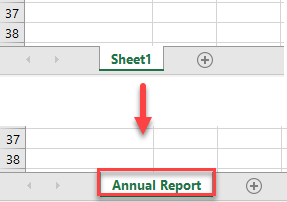
Rename a Worksheet in Excel
There are a few easy ways to manually change a worksheet name in Excel.
To learn how to use VBA to rename worksheets with a macro, see VBA Get Sheet Name / Rename Sheet.
Use the Ribbon to Rename a Sheet
1. To rename a worksheet, in the Ribbon go to Home > Format > Rename Sheet.

2. After that, the sheet name will be in Edit mode. Type in the new name for your worksheet in the left bottom corner of the Excel file.
3. When you’re done, just press ENTER or click anywhere in the worksheet, and your worksheet is renamed.
Right-Click to Rename a Sheet
1. To rename a worksheet, rest the cursor on the sheet name in the bottom left corner of the Excel window, right-click on the name, and choose Rename from the menu.
2. After that, Edit mode for the sheet name appears. Type in the new name and press ENTER when done.
As a result, you have a sheet with a new name.
Double-Click to Rename a Sheet
Another way to rename a worksheet is to put the cursor on the original sheet name, double-click it, and then enter a new name.
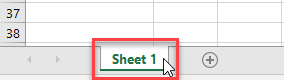
As a result, you will have a worksheet with a different name.
Use a Keyboard Shortcut to Rename a Sheet
If you prefer using the keyboard, you could change the name of the sheet with a shortcut. To do that, press ALT + O > H > R (one after the other).
Rename a Worksheet in Google Sheets
Right-Click
1. In the bottom left corner, right-click on the sheet name (or click on the arrow next to the sheet name), and choose Rename from the menu.
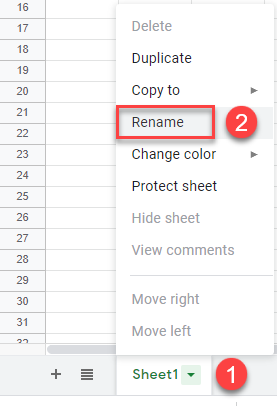
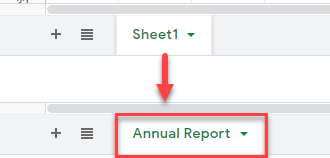
2. After that, Edit mode for the sheet name appears. Type in a new name for the worksheet and press ENTER.

As a result, your sheet has a new name.
Double-Click
Alternatively, place the cursor on the sheet name and double-click it. This brings you to Edit mode, so see Step 2 above.

The result is the same as with right-clicking.
