
When you move or copy rows and columns, by default Excel moves or copies all data that they contain, including formulas and their resulting values, comments, cell formats, and hidden cells.
When you copy cells that contain a formula, the relative cell references are not adjusted. Therefore, the contents of cells and of any cells that point to them might display the #REF! error value. If that happens, you can adjust the references manually. For more information, see Detect errors in formulas.
You can use the Cut command or Copy command to move or copy selected cells, rows, and columns, but you can also move or copy them by using the mouse.
By default, Excel displays the Paste Options button. If you need to redisplay it, go to Advanced in Excel Options. For more information, see Advanced options.
-
Select the cell, row, or column that you want to move or copy.
-
Do one of the following:
-
To move rows or columns, on the Home tab, in the Clipboard group, click Cut
 or press CTRL+X.
 -
To copy rows or columns, on the Home tab, in the Clipboard group, click Copy
or press CTRL+C.
-
-
Right-click a row or column below or to the right of where you want to move or copy your selection, and then do one of the following:
-
When you are moving rows or columns, click Insert Cut Cells.
-
When you are copying rows or columns, click Insert Copied Cells.
Tip: To move or copy a selection to a different worksheet or workbook, click another worksheet tab or switch to another workbook, and then select the upper-left cell of the paste area.
-
 or press CTRL+X.
 or press CTRL+C.
Note: Excel displays an animated moving border around cells that were cut or copied. To cancel a moving border, press Esc.
By default, drag-and-drop editing is turned on so that you can use the mouse to move and copy cells.
-
Select the row or column that you want to move or copy.
-
Do one of the following:
-
Cut and replace
Point to the border of the selection. When the pointer becomes a move pointer, drag the rows or columns to another location. Excel warns you if you are going to replace a column. Press Cancel to avoid replacing. -
Copy and replace Hold down CTRL while you point to the border of the selection. When the pointer becomes a copy pointer
, drag the rows or columns to another location. Excel doesn’t warn you if you are going to replace a column. Press CTRL+Z if you don’t want to replace a row or column. -
Cut and insert Hold down SHIFT while you point to the border of the selection. When the pointer becomes a move pointer
, drag the rows or columns to another location. -
Copy and insert Hold down SHIFT and CTRL while you point to the border of the selection. When the pointer becomes a move pointer
, drag the rows or columns to another location.
Note: Make sure that you hold down CTRL or SHIFT during the drag-and-drop operation. If you release CTRL or SHIFT before you release the mouse button, you will move the rows or columns instead of copying them.
-
 , drag the rows or columns to another location. Excel warns you if you are going to replace a column. Press Cancel to avoid replacing.
 , drag the rows or columns to another location. Excel doesn’t warn you if you are going to replace a column. Press CTRL+Z if you don’t want to replace a row or column.
Note: You cannot move or copy nonadjacent rows and columns by using the mouse.
If some cells, rows, or columns on the worksheet are not displayed, you have the option of copying all cells or only the visible cells. For example, you can choose to copy only the displayed summary data on an outlined worksheet.
-
Select the row or column that you want to move or copy.
-
On the Home tab, in the Editing group, click Find & Select, and then click Go To Special.
-
Under Select, click Visible cells only, and then click OK.
-
On the Home tab, in the Clipboard group, click Copy
or press Ctrl+C. . -
Select the upper-left cell of the paste area.
Tip: To move or copy a selection to a different worksheet or workbook, click another worksheet tab or switch to another workbook, and then select the upper-left cell of the paste area.
-
On the Home tab, in the Clipboard group, click Paste
or press Ctrl+V.If you click the arrow below Paste
, you can choose from several paste options to apply to your selection.
 or press Ctrl+V.
Excel pastes the copied data into consecutive rows or columns. If the paste area contains hidden rows or columns, you might have to unhide the paste area to see all of the copied cells.
When you copy or paste hidden or filtered data to another application or another instance of Excel, only visible cells are copied.
-
Select the row or column that you want to move or copy.
-
On the Home tab, in the Clipboard group, click Copy
or press Ctrl+C. -
Select the upper-left cell of the paste area.
-
On the Home tab, in the Clipboard group, click the arrow below Paste
, and then click Paste Special. -
Select the Skip blanks check box.
-
Double-click the cell that contains the data that you want to move or copy. You can also edit and select cell data in the formula bar.
-
Select the row or column that you want to move or copy.
-
On the Home tab, in the Clipboard group, do one of the following:
-
To move the selection, click Cut
or press Ctrl+X. -
To copy the selection, click Copy
or press Ctrl+C.
-
-
In the cell, click where you want to paste the characters, or double-click another cell to move or copy the data.
-
On the Home tab, in the Clipboard group, click Paste
or press Ctrl+V. -
Press ENTER.
Note: When you double-click a cell or press F2 to edit the active cell, the arrow keys work only within that cell. To use the arrow keys to move to another cell, first press Enter to complete your editing changes to the active cell.
When you paste copied data, you can do any of the following:
-
Paste only the cell formatting, such as font color or fill color (and not the contents of the cells).
-
Convert any formulas in the cell to the calculated values without overwriting the existing formatting.
-
Paste only the formulas (and not the calculated values).
Procedure
-
Select the row or column that you want to move or copy.
-
On the Home tab, in the Clipboard group, click Copy
or press Ctrl+C.
-
Select the upper-left cell of the paste area or the cell where you want to paste the value, cell format, or formula.
-
On the Home tab, in the Clipboard group, click the arrow below Paste
, and then do one of the following:-
To paste values only, click Values.
-
To paste cell formats only, click Formatting.
-
To paste formulas only, click Formulas.
-
When you paste copied data, the pasted data uses the column width settings of the target cells. To correct the column widths so that they match the source cells, follow these steps.
-
Select the row or column that you want to move or copy.
-
On the Home tab, in the Clipboard group, do one of the following:
-
To move cells, click Cut
or press Ctrl+X. -
To copy cells, click Copy
or press Ctrl+C.
-
-
Select the upper-left cell of the paste area.
Tip: To move or copy a selection to a different worksheet or workbook, click another worksheet tab or switch to another workbook, and then select the upper-left cell of the paste area.
-
On the Home tab, in the Clipboard group, click the arrow under Paste
, and then click Keep Source Column Widths.
You can use the Cut command or Copy command to move or copy selected cells, rows, and columns, but you can also move or copy them by using the mouse.
-
Select the cell, row, or column that you want to move or copy.
-
Do one of the following:
-
To move rows or columns, on the Home tab, in the Clipboard group, click Cut
or press CTRL+X. -
To copy rows or columns, on the Home tab, in the Clipboard group, click Copy
or press CTRL+C.
-
-
Right-click a row or column below or to the right of where you want to move or copy your selection, and then do one of the following:
-
When you are moving rows or columns, click Insert Cut Cells.
-
When you are copying rows or columns, click Insert Copied Cells.
Tip: To move or copy a selection to a different worksheet or workbook, click another worksheet tab or switch to another workbook, and then select the upper-left cell of the paste area.
-
Note: Excel displays an animated moving border around cells that were cut or copied. To cancel a moving border, press Esc.
-
Select the row or column that you want to move or copy.
-
Do one of the following:
-
Cut and insert
Point to the border of the selection. When the pointer becomes a hand pointer, drag the row or column to another location -
Cut and replace Hold down SHIFT while you point to the border of the selection. When the pointer becomes a move pointer
, drag the row or column to another location. Excel warns you if you are going to replace a row or column. Press Cancel to avoid replacing. -
Copy and insert Hold down CTRL while you point to the border of the selection. When the pointer becomes a move pointer
, drag the row or column to another location. -
Copy and replace Hold down SHIFT and CTRL while you point to the border of the selection. When the pointer becomes a move pointer
, drag the row or column to another location. Excel warns you if you are going to replace a row or column. Press Cancel to avoid replacing.
Note: Make sure that you hold down CTRL or SHIFT during the drag-and-drop operation. If you release CTRL or SHIFT before you release the mouse button, you will move the rows or columns instead of copying them.
-
 , drag the row or column to another location
Note: You cannot move or copy nonadjacent rows and columns by using the mouse.
-
Double-click the cell that contains the data that you want to move or copy. You can also edit and select cell data in the formula bar.
-
Select the row or column that you want to move or copy.
-
On the Home tab, in the Clipboard group, do one of the following:
-
To move the selection, click Cut
or press Ctrl+X. -
To copy the selection, click Copy
or press Ctrl+C.
-
-
In the cell, click where you want to paste the characters, or double-click another cell to move or copy the data.
-
On the Home tab, in the Clipboard group, click Paste
or press Ctrl+V. -
Press ENTER.
Note: When you double-click a cell or press F2 to edit the active cell, the arrow keys work only within that cell. To use the arrow keys to move to another cell, first press Enter to complete your editing changes to the active cell.
When you paste copied data, you can do any of the following:
-
Paste only the cell formatting, such as font color or fill color (and not the contents of the cells).
-
Convert any formulas in the cell to the calculated values without overwriting the existing formatting.
-
Paste only the formulas (and not the calculated values).
Procedure
-
Select the row or column that you want to move or copy.
-
On the Home tab, in the Clipboard group, click Copy
or press Ctrl+C.
-
Select the upper-left cell of the paste area or the cell where you want to paste the value, cell format, or formula.
-
On the Home tab, in the Clipboard group, click the arrow below Paste
, and then do one of the following:-
To paste values only, click Paste Values.
-
To paste cell formats only, click Paste Formatting.
-
To paste formulas only, click Paste Formulas.
-
You can move or copy selected cells, rows, and columns by using the mouse and Transpose.
-
Select the cells or range of cells that you want to move or copy.
-
Point to the border of the cell or range that you selected.
-
When the pointer becomes a
, do one of the following:
 , do one of the following:
|
To |
Do this |
|---|---|
|
Move cells |
Drag the cells to another location. |
|
Copy cells |
Hold down OPTION and drag the cells to another location. |
Note: When you drag or paste cells to a new location, if there is pre-existing data in that location, Excel will overwrite the original data.
-
Select the rows or columns that you want to move or copy.
-
Point to the border of the cell or range that you selected.
-
When the pointer becomes a
, do one of the following:
|
To |
Do this |
|---|---|
|
Move rows or columns |
Drag the rows or columns to another location. |
|
Copy rows or columns |
Hold down OPTION and drag the rows or columns to another location. |
|
Move or copy data between existing rows or columns |
Hold down SHIFT and drag your row or column between existing rows or columns. Excel makes space for the new row or column. |
-
Copy the rows or columns that you want to transpose.
-
Select the destination cell (the first cell of the row or column into which you want to paste your data) for the rows or columns that you are transposing.
-
On the Home tab, under Edit, click the arrow next to Paste, and then click Transpose.
Note: Columns and rows cannot overlap. For example, if you select values in Column C, and try to paste them into a row that overlaps Column C, Excel displays an error message. The destination area of a pasted column or row must be outside the original values.
See also
Insert or delete cells, rows, columns
Shift Key | Insert Cut Cells | Magic Move
To move columns in Excel, use the shift key or use Insert Cut Cells. You can also change the order of all columns in one magic move.
Shift Key
To quickly move columns in Excel without overwriting existing data, press and hold the shift key on your keyboard.
1. First, select a column.

2. Hover over the border of the selection. A four-sided arrow appears.
![]()
3. Press and hold the Shift key on your keyboard.
4. Click and hold the left mouse button.

5. Move the column to the new position.

6. Release the left mouse button.
7. Release the shift key.
Result:

To move multiple columns in Excel without overwriting existing data.
8. First, select multiple columns by clicking and dragging over the column headers.

9. Repeat steps 2-7.
Result:

Note: in a similar way, you can move a single row or multiple rows in Excel.
Insert Cut Cells
If you prefer the old-fashioned way, execute the following steps.
1. First, select a column.
2. Right click, and then click Cut.

3. Select a column. The column will be inserted before the selected column.

4. Right click, and then click Insert Cut Cells.

Result:

Note: in a similar way, you can move multiple columns, a single row or multiple rows.
Magic Move
Finally, you can change the order of all columns in one magic move. Are you ready?
1. Select row 1.
2. Right click, and then click Insert.

3. Use the first row to indicate the new order of the columns (Sales, Quarter, Country, Last Name).
4. Select the data.

5. On the Data tab, in the Sort & Filter group, click Sort.

The Sort dialog box appears.
6. Click Options.

7. Click Sort left to Right and click OK.

8. Select Row 1 from the ‘Sort by’ drop-down list and click OK.

9. Delete row 1.
Result:

Note: this technique is pretty impressive if you need to rearrange the order of many columns.
![]()
Download Article
An easy guide to rearranging columns in your Excel spreadsheet
![]()
Download Article
- Using the Mouse
- Using Commands
- Expert Q&A
- Tips
|
|
|
Need to quickly move an entire column in Microsoft Excel? Luckily, it’s a pretty easy procedure. You can select, click and drag columns with your mouse. Or, use the cut and paste commands. This wikiHow article will show you how to select and move columns in Excel on Windows or Mac.
Things You Should Know
- On Windows or Mac, select the column, then click and drag the border of the selection to a new location.
- On Windows, select the column, then press Ctrl + x to cut the column. Right-click the column to the right of the new destination and select “Insert Cut Cells.”
- To move multiple adjacent columns, press Ctrl (Windows) or Cmd (macOS). Then, click the column letters above the columns you want to move.
-
1
Click the letter above the column you want to move. This selects the column. In this method, you’ll use the mouse to drag the column to a new position. This works on Windows and macOS.
- This method only works for a single column. To move multiple columns, use cut and paste commands (see next method).
- Moving columns is a great way to set up your spreadsheet for a Vlookup or Sum formula.
- For general spreadsheet tips, check out our guide on making a spreadsheet in Excel.
-
2
Hover the mouse over the border of the selected column. The cursor will turn into four arrows (Windows) or a hand (macOS).[1]
- The cursor will turn into a hand in the web app version of Excel.
Advertisement
-
3
Drag the column to the desired location. Click and drag the selected column to the location where you want to move it, and then release the mouse button. This will cut and replace the column.
- If you want to copy and replace columns instead of just moving them, hold down Ctrl (Windows) or ⌥ Option (macOS) while dragging and dropping.
- Holding ⇧ Shift will cut and insert the columns.
- Holding Ctrl+⇧ Shift will copy and insert the columns.


Advertisement
-
1
Click the letter above the column you want to move. This selects the column. The commands method only works on the Windows version of Excel.
- To move more than one (adjacent) column at the same time, hold down Ctrl as you click each column letter.
- Formatting your spreadsheet can significantly improve your Excel experience.
-
2
Press Ctrl+X. This “cuts” the data in the column, which really just selects it and adds it to the clipboard.
- The column data will remain in its place until you paste it into its new location.
- You can also cut the column by clicking the scissors icon on the Home tab. It’s in the “Clipboard” section near the top-left corner of the app.
- If you cut the wrong column, press Esc to return the data to its original location.
-
3
Right-click the letter above the column to the right of where you want to move the data. A drop-down menu will open.
- When you insert your copied data, it’ll be to the left of the column you right-click.
-
4
Click Insert Cut Cells on the right-click menu. Excel will insert the cut column to the left of the one on which you right-clicked.
- If you want to undo the pasted column, press Ctrl+Z.
- Alternatively, you can click the drop-down icon next to the Insert button on the Home toolbar at the top, and select Insert Cut Cells or Insert Cells here. This will insert and move your data the same way.


Advertisement
Add New Question
-
Question
columns a and b suddenly disappeared from excel. how to retrieve?

Kyle Smith is a wikiHow Technology Writer, learning and sharing information about the latest technology. He has presented his research at multiple engineering conferences and is the writer and editor of hundreds of online electronics repair guides. Kyle received a BS in Industrial Engineering from Cal Poly, San Luis Obispo.
wikiHow Technology Writer
Expert Answer
The columns might be hidden! Try selecting the adjacent column (c) and right-clicking that column. Select Unhide from the pop-up menu.
-
Question
see column B and K at the same time
Kyle Smith is a wikiHow Technology Writer, learning and sharing information about the latest technology. He has presented his research at multiple engineering conferences and is the writer and editor of hundreds of online electronics repair guides. Kyle received a BS in Industrial Engineering from Cal Poly, San Luis Obispo.
wikiHow Technology Writer
Expert Answer
There are a few ways to go about this! You can freeze columns A and B to keep them on the screen at all times. Alternatively, hide some or all columns between B and K so that they’re closer together. You could also move column K next to B using this guide’s method above.

Ask a Question
200 characters left
Include your email address to get a message when this question is answered.
Submit
Advertisement
-
Looking for money-saving deals on Microsoft Office products like Excel? Check out our coupon site for tons of coupons and promo codes on your next subscription.
Thanks for submitting a tip for review!
Advertisement
About This Article
Article SummaryX
1. Click the column letter.
2. Hover the mouse over the selection’s edge until the cursor changes.
3. Click and drag the column to a different location.
Did this summary help you?
Thanks to all authors for creating a page that has been read 190,819 times.
Is this article up to date?
There are three ways to move a column; the easiest is to highlight and drag-and-drop the column where you want it
Updated on November 12, 2022
What to Know
- The easiest way to move a column in Excel is to highlight it, press Shift, and drag it to the new location.
- You can also use cut & paste or do Data Sort to rearrange columns from the Data tab.
- Columns that are part of a merged group of cells will not move.
This article covers how to move a column in Excel using the mouse, cut and paste a column, and rearrange columns using the Data Sort function. These instructions apply to Microsoft Excel 2019 and 2016 as well as Excel in Office 365.
Move Columns Using Your Mouse
There are several ways to rearrange the columns in an Excel worksheet, but one is easier than all the others. It just takes a highlight and a drag-and-drop motion. Here’s how to move columns in Excel using your mouse.
-
In the worksheet where you want to rearrange columns, place your cursor over the top of the column you want to move. You should see your cursor change to an arrow. When it does, click to highlight the column.
-
Next, press and hold the Shift key on the keyboard and then click and hold on the right or left border of the column you want to move and drag it to the right or left.
As you drag your cursor across the columns, you’ll see the borders darken to indicate where the new column will appear. When you’re happy with the location, release the mouse click.
-
You column will be moved to the location indicated by the darker border.
Move a Column in Excel With Cut and Paste
The next easiest way to move a column in Excel is to cut and paste the column from the old location to the new. This works much as you would expect it.
-
Highlight the column you want to move, and then press Ctrl + X on your keyboard to cut the column from its current location. You’ll see the «marching ants» around the column to indicate it has been cut from its current location.
-
Next, highlight a column to the right of where you want to move the cut column to, and right-click. In the menu, select Insert Cut Cells.
-
The new column is inserted to the left of the selected column.
Move Columns Using a Data Sort
Moving columns with a data sort is probably not the easiest way to move things around if you only have one or two columns that need to be moved, but if you have a large spreadsheet and you want to change the order of numerous columns, this little trick could be a major time saver.
This method will not work if you have Data Validation in place on your existing columns. To proceed, you’ll need to remove data validation. To do so, highlight the cells with data validation, select Data Validation > Settings > Clear All, and click OK.
-
To start, you need to add a row to the very top of your spreadsheet. To do this, right-click the first row and select Insert from the context menu.
-
A new row is inserted above your top row. This row must be at the top of the page, above all other header rows or rows of information.
Go through your spreadsheet and number the columns in the order you want them to appear in the spreadsheet by entering a number in the new top row. Be sure to number every column you’re using.
-
Next, select all the data in the spreadsheet that you want to rearrange. Then on the Data tab, in the Sort & Filter group, click Sort.
-
In the Sort dialog box, click Options.
-
In the Sort Options dialog box, click the radio button next to Sort left to right and then click OK.
-
You’re returned to the Sort dialog box. In the Sort By drop down menu select Row 1 and then click OK.
-
This should sort your columns according to the numbers you listed in that first row. Now you can right click the first row and select Delete to get rid of it.
FAQ
-
How do I unhide columns in Excel?
To unhide any single column in Excel, use the keyboard shortcut Ctrl+Shift+0. (You must select at least one column on either side of a hidden column or columns to unhide them.) You can also go to the Home tab > Cells group, select Format > Visibility > Hide & Unhide, and then select Unhide Columns.
-
How do I add columns in Excel?
To add columns in Excel, right-click the top of the column and select Insert. You can also go to the Home tab > Cells group and select Insert > Insert Sheet Columns.
-
How do I combine two columns in Excel?
To combine two columns in Excel, insert a new column near the two columns (A2 and B2 in this example) you want to combine. Select the first cell below the heading of the new column (C2) and enter =CONCATENATE(A2,» «,B2) into the formula bar. This combines the data in cell A2 with the data in cell B2, with a space between them.
Thanks for letting us know!
Get the Latest Tech News Delivered Every Day
Subscribe

Ready to hone your skills in working with Excel spreadsheets for a more organized workflow? Start with learning how to move columns in Excel. This especially helps with columns containing large swaths of data.
Columns, rows, and cells are perhaps the three most recognizable features of Excel. They provide the window in which to view, calculate, and organize your information. Further, they make moving your info around very easy. We will show you two ways to work with columns in your Excel spreadsheet. You’ll also learn how you can move columns in Excel without losing large swaths of data.
How to Move Columns in Excel: The Cut or Copy Method
Understanding how to move columns in Excel with this method is very easy. Cut or copy is arguably the most widely used editing function across all platforms. Within Excel, it is particularly useful.
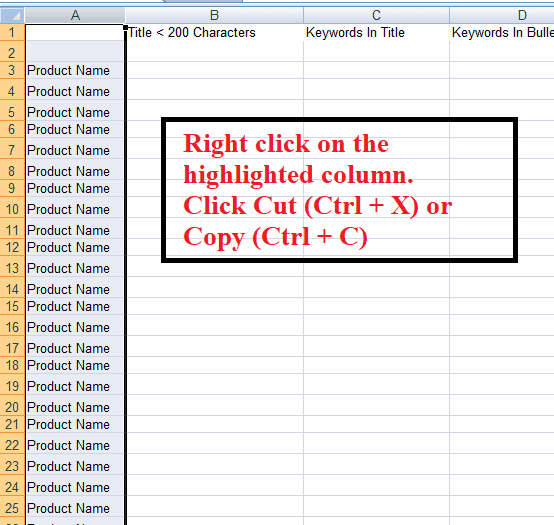
To move a single column of data, click the header of the target column.
- With your mouse hovering over the selected column, right-click and select either Cut or Copy from the menu.
- The keyboard shortcut for highlighting an entire column is Control Spacebar. For the move functions, you can use shortcut Control X for cut and Control C for copy.
- Be mindful of the difference between Cut and Copy. When you cut a selection, you are removing it from its original location and placing in another part of your spreadsheet or workbook.
- Copying a selection of information creates a duplicate of that data for you to place elsewhere.
- When you are ready to place your column, select the heading of the column to the right of where you want it to go.
If you cut column D and want it inserted after column A, then you would select column B, right-click and choose Insert Cut Cells from the pop-up.
Note that the insert function will shift your data to the right to make room for the new column.
You can also use the paste function to place your column in its new location. But doing so will replace the old data with the new.
How to Move Columns in Excel: Replace Data in One Column with Data from Another
Going back to our previous example, here’s how to move columns in Excel when replacing data in one column with data from another.
- Select column B, right-click and choose Paste from the pop-up.
- Cut, copy, insert and paste can all be used with a single column or a range of columns depending on your needs.
- If trying to move multiple columns, i.e., Column A and Column D, this will only work with the copy function. The cut function is unable to perform this task.
- You can also select columns within your spreadsheet and move those as necessary without needing to select the column headers. Be mindful that this will alter your sheet in a specific area as opposed to the top to bottom change that occurs in the above examples.
How to Move Columns in Excel: Drag and Drop
Another efficient method to use when you need to move columns in Excel is to drag and drop. This is relatively easy to complete although it may take a couple of attempts before you can do it efficiently.
- First, highlight the column you are moving. You can also perform this task using just a section of data.
- Along either edge of the highlighted column, hover your mouse until the cursor changes to four small arrows and click and hold the mouse button.
- Note that depending on your version of Excel and if you are using a Mac, the four arrows may alternatively be a small hand symbol.
- Hold down the Shift button and then pull the column towards its intended destination. A thin line will appear to help guide you before placing the column.
- Once you reach the end location, just let go of the mouse button first and then the shift key. The column will drop into place.
The shift key is vital in drag and drop as it directs Excel to insert the columns. If you perform the same steps above without the shift key, the column you are moving will replace the info in the destination column.
Excel will prompt you with a warning message before you complete the drop.
What Happens When You Move Columns in Excel
With both techniques above, when you move a column, you also move all of the data within each cell of the column.
Formats, formulas, and values all maintain their original integrity regardless of which procedure you use.
Additionally, although we focused on columns, these instructions will also work when you need to move rows within your Excel spreadsheet.
Are There Other Ways How to Move Columns in Excel?
There are a few other ways to move columns in Excel, but they typically require the use of a plug-in or creating a Macro. This is doable, but requires more advanced knowledge, so you should proceed with columns.
Plug-ins can create more headaches by adding unnecessary toolbars and duplicate functions to an already robust program. Macros may be potentially useful in some circumstances. But these tend to be highly specific and are usually best used by those with an in-depth knowledge of Excel.
Troubleshooting on How to Move Columns in Excel
There are very few issues you can run into when moving columns, with the main one being choosing Copy instead of Cut as your initial move method.
Thankfully, Excel will prompt you before any data is changed with the following pop-up:
Do you want to replace the contents of the selected cells?
This is a common message when pasting information, so it comes in handy should you use the drag and drop method without holding the shift key.
With the drag and drop option, it is essential to be careful when selecting either edge of the column you want to move.
If you see a clear, block plus sign instead of the four-arrow cursor, the highlight cursor is active. A black, block plus sign means the single cell drag and drop tool is active. When these tools are active, they can create some issues that could require correction of your data.
Conclusion
There are a lot of helpful tools when working in Excel. The ability to move columns is undoubtedly one of them. It doesn’t matter whether it’s a full data set from top to bottom or a simple ten-row column. Excel makes it a cinch to get your info where it needs to be.
![]()