
-
Place your cursor at the spot where you want to insert the symbol.
-
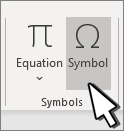
Go to Insert > Symbol.

-
Select a checkmark symbol to insert or do the following
-
Select More Symbols.
-
Scroll up or down to find the checkmark you want to insert.
-
Different font sets often have different symbols. Use the Font selector above the symbol list to pick the font you want.
-
-
Double-click the symbol to insert it into your document.
-
Select Close.
Tip: If you want to make your checkmark larger or smaller, select it and use the Font Size setting.
-
Place your cursor at the spot where you want to insert the checkmark.
-
Go to Insert > Advanced Symbol > Symbols.
-
Choose the checkmark symbol that you want.
-
Select Insert.
-
Select Close
-
1
Open the Word document. You can double-click the document’s name to open it in Word. Alternatively, open Word (it’s in the Windows menu on a PC and the Applications folder on a Mac), click File, click Open, then select the document.
-
2
Click the Review tab. It’s at the top of the screen.
Advertisement
-
3
Click Track Changes. It’s also at the top of the screen. Look for the sheet of paper icon with a yellow pencil. Now all future changes to the document will appear as colored markup.
- For example, if you delete something you’ve typed, it won’t actually disappear. Instead, it’ll will appear crossed-out. Newly typed text will be underlined.[1]
- Click Track Changes again to turn off further markups.
- For example, if you delete something you’ve typed, it won’t actually disappear. Instead, it’ll will appear crossed-out. Newly typed text will be underlined.[1]


Advertisement
Ask a Question
200 characters left
Include your email address to get a message when this question is answered.
Submit
Advertisement
Thanks for submitting a tip for review!
About This Article
Article SummaryX
1. Open the document.
2. Click Review.
3. Click Track Changes.
Did this summary help you?
Thanks to all authors for creating a page that has been read 66,469 times.
Is this article up to date?
While editing a document in Word, you can emphasize some important contents that you want others to notice by adding specific symbols, such as underline, overline and highlight color. If you’ve tried all these methods and want something new, you can also use Emphasis mark, which looks like dots under each of the characters.
First, select the text you want to emphasis and right-click it to choose Font… in the menu.

Then the Font window will pop out.

Click the small arrow under Emphasis mark and select “.” in the drop-down menu. Click OK to add it to your document.

Now the selected text is emphasized by the dot marks.

Copyright Statement: Regarding all of the posts by this website, any copy or use shall get the written permission or authorization from Myofficetricks.
In a printed document, characters such as spaces, tabs and paragraph marks are invisible. However, Word lets you display such formatting marks on the screen. Formatting marks are also known as nonprinting characters or codes.
In this article you will learn how the formatting marks work and why they are useful.
Latest updated 22-Oct-2019. Video renewed in order to work without using Adobe Flash Player.
The basics about formatting marks
Some of the basic formatting marks
When formatting marks are turned on, you will see spaces, tabs, paragraph marks and other formatting marks on the screen. Some of the basic formatting marks are illustrated below.

Keyboard shortcut
Ctrl+Shift+8 can be used to turn formatting marks on and off.
You can also turn formatting marks on and off by clicking the pilcrow symbol ¶ on the Home tab of the Ribbon (found in the Standard toolbar in Word 2003).
Where to find the options for formatting marks:
- Word 2010 and later versions: File > Options > Display
- Word 2007: Office button > Word Options > Display
- Word 2003: Tools > Options > View tab
For an introduction to the formatting marks and for information about how to turn them on and off, view the video below.
View video — see how formatting marks work
Note that the video below was originally made using Word 2003. The formatting marks work the same way in Word 2007 and later versions of Word. Information about where to find options for formatting marks in Word 2007 and later versions has been added in the video. You will also find that information in written text in this article.
Visible formatting marks help you keep track of formatting
Many users who are not familiar with formatting marks get confused if they by incident turn on the formatting marks. However, if you need to control the formatting of documents down to the last detail, visible formatting marks are a must.
It may take some time getting used to work with visible formatting marks but it is well worth the effort.
About display of text boundaries
In addition to the formatting marks, the video illustrates how the option Text boundaries works. In Word 2003, Word 2007 and Word 2010, you can turn on text boundaries to have dotted lines shown around margins. This is very useful for layout purposes. Unfortunately, Word 2013 and newer Word versions display text boundaries as dotted lines around each paragraph instead which makes the option very little useful in those versions of Word.
Where to find the option for text boundaries:
- Word 2010 and later versions: File > Options > Advanced > Show document content group > Show text boundaries
- Word 2007: Office button > Word Options > Advanced > Show document content group > Show text boundaries.
- Word 2003: Tools > Options > View tab > Text boundaries
-
Log in
-
Join
Watch in our app
Open in app