
Some of the best stories in history have words that the authors made up themselves. Think about Harry Potter and the words “muggle” and “squib.” Think about the Lord of the Rings. J. R. R. Tolkien not only created words, he created languages.
Have you ever thought about creating a new word to use in your story? Here are two ways to create a new word.

A very fidgety gosfij. Photo by jurvetson
The Randomizer Approach
One way to create a new word is to use what I like to call “The Randomizer Approach.”
Take 26 pieces of paper and write down one letter of the alphabet on each piece of paper; all twenty-six letters of it. Now close your eyes and point to five different letters. If you want a longer word, point to more than five letters. Make sure you have some vowels.
Now write down those letters on a different piece of paper and mix them around until it forms a word you like. Pretend that you’re creating a whole new word in the dictionary and write up a definition for your word. Be creative. Use your imagination. Here’s an example:
“Gosfij. Noun. A fidgety goose.”
Voila! You have a brand new word to use in your stories!
The Mush Approach
Another way to create a word is by using what I call “The Mush Approach.”
Pick any two words—you can choose two words that you like or you can flip through the dictionary and pick two random words to use. Take the two words and pretend you’re cutting them each in half. Use a half from each word and put them together. Create a definition for your word. Here’s another example from a different word I made up:
Sizzle + Bubble = Sizbub
Sizbub. Noun. A magical creature that tends to use lots of onomatopoeias while in conversation.
And there you have it! You’ve just made another word. (Joe here: This trick is also called portmanteau, but I like “The Mush Approach” better, don’t you?)
Need more grammar help? My favorite tool that helps find grammar problems and even generates reports to help improve my writing is ProWritingAid. Works with Word, Scrivener, Google Docs, and web browsers. Also, be sure to use my coupon code to get 25 percent off: WritePractice25
Coupon Code:WritePractice25 »
PRACTICE
Use one of these techniques to create a new word.
Then write for fifteen minutes using that word as often as possible in your story. Make sure your readers understand what your word means.
Have fun!

Joe Bunting
Joe Bunting is an author and the leader of The Write Practice community. He is also the author of the new book Crowdsourcing Paris, a real life adventure story set in France. It was a #1 New Release on Amazon. Follow him on Instagram (@jhbunting).
Want best-seller coaching? Book Joe here.
![]()
Download Article
![]()
Download Article
For fans of the game Balderdash, a board game that combines fibbing and the formation of new words, creating a new word of your own may seem like a breeze. For others, making your mark on the English language probably feels a bit daunting or downright challicult (challenging + difficult). However, you will be surprised to learn that with a bit of inspiration and a lot of fun, you will be on your way to creating a brifect (brilliant + perfect) word in no time!
-

1
Start with a portmanteau. If you’ve tried your hand at creating a word from scratch but haven’t had much luck, you may want to consider a portmanteau. A portmanteau is a word or morpheme whose form and meaning are derived from a blending of two or more distinct forms (as smog from smoke and fog) [1]
.- Write down some of your favorite words on a piece of paper. Spend some time mixing and matching the words together. You’ll be surprised by all of the wonderful words you come up with.
-
2
Borrow from other languages. There are a plenty of words to choose from when you expand your search to those found in other languages. Loanwords, or borrowings, are words that are adopted into a native language from a different source language. Such borrowings have shaped the English language almost from its beginnings [2]
- Buy or borrow a Spanish, French, German or Italian dictionary. Highlight some of your favorite words and then write them down on a sheet of paper. You’ll want to modify the words slightly, as the intention isn’t to use the same word but to create your own.
- Rent a movie in a different language. Don’t use the captions and listen as the actors speak. Have a pen and paper on hand and write down what you think the words are that are being spoken.
Advertisement
-
3
Turn an object into a verb. «Google (it)» has quite literally been transformed from a company name, into a verb. There is no shortage of objects or nouns that can also be repurposed with a bit of imagination.[3]
- To start, try spotting objects around your house and use them in a sentence as a verb. Don’t expect everything to catch on, but over time, you may find one that will be a hit.
-
4
Take suggestions from a small child. Inspiration for new words can be found in surprising places. One such place is in your own family. Young children, who are learning how to speak, often don’t get it right on the first try. They create their own language as they navigate the English language.
- Ask your young child what their favorite word is. If they are able to write, have them write it down. Otherwise, do your best to spell out what they are saying.
- Listen to the babbling of your baby. You’ll be surprised how many words you come up with in a short amount of time.


Advertisement
-
1
Understand how words are created. This will give you a basis for making up your own word. English words are formed in several ways. Although one way is to create them from scratch, other words have been formed by imitating sounds. Similarly, there are many more words, often in quite common use, that have arisen over time because someone has not heard the word correctly. [4]
- Next time you don’t understand someone correctly, turn a potentially embarrassing situation, into a learning opportunity by creating a new word.
- Find inspiration at home. Listen to sounds naturally found around your home. You may be surprised by how many words you can come up with just by turning off the TV and listening to the environment. Open up your window and let in the sounds from outside.
-
2
Hyphenate two word phrases (think of «see you,» which became, «cya!»). You may need to do a bit of tweaking to the spelling, as was done with «cya,» but try to think of phrases you can combine in to one word.[5]
- Write down some of your favorite two or even three word phrases. See if you can create one word.
-
3
Have fun brainstorming! More than anything, creating a made up word is supposed to be fun. Don’t worry about taking yourself too seriously. If you discover a great new word, share it with your friends and family and have fun using the word together.
- To spread the word (pun intended), try using the word in a sentence, but be consistent.
- Your new word will also need a definition, so have one on hand in case others ask you about it. This will help them understand how to use the word as it was intended.


Advertisement
Word Help
Add New Question
-
Question
Is it easy to make a new word?

It’s easy to make up a word if you want, but it’s not going to be easy to get it into the dictionary.
-
Question
How many words can you make?
As many as your heart desires.
-
Question
Where can you submit it?
Greenycric
Community Answer
You could send it to Oxford Dictionary or another dictionary. They will tell you if it’s suitable.

See more answers
Ask a Question
200 characters left
Include your email address to get a message when this question is answered.
Submit
Advertisement
-
Once your word has been created, don’t use it too much. Use it when it makes sense, and explain it if someone asks what it means. The more you use it in the right scenario, the more you will notice your friends using it!
-
If you are going to create many monikers, then make up your own dictionary of made-up words. You never know, one of your words may appear in a real one one day!
Show More Tips
Thanks for submitting a tip for review!
Advertisement
-
Don’t worry about skipping steps; the point is just to have fun.
-
Most scholarly dictionaries consider words to be neologisms or protologisms unless they are in widespread use over some period of time. Don’t submit made-up words where they’re not wanted.
Advertisement
References
About This Article
Article SummaryX
To create your own made-up word, try combining 2 words which already exist to create a word with a new meaning. Use words in your native language or combine words from different languages. You can even get inspiration from young children, who often make up their own words. If you’re still having trouble, try coming up with the meaning of the word first, then make up a sound that seems to fit that definition. Read on to learn how to turn an object into a verb!
Did this summary help you?
Thanks to all authors for creating a page that has been read 547,126 times.
Reader Success Stories
-

«This helped me very much, now I can make words easily. Thanks, wikiHow. I will make words and say them to my family…» more
Did this article help you?
Microsoft Word is packed with so many features that you can produce pretty much whatever you want with it. But these features don’t always result in the kind of beautiful, high-quality, and professional document designs that you may expect.
It’s one thing to know everything about Microsoft Word, all of its intricacies and quirks and functions—it’s something else entirely to know what makes a great document. Here, we’ll show you how to format a Word document to make it look professional.
1. Keep It Simple, Less Is More
Want to know how to make a Word document look good? Just keep it simple, and take advantage of the hidden features that Microsoft Word comes with. If you remember one thing from this article, let it be this, and you’ll be able to make the right design decisions in the future!
When writing a document, the content should be the main focus. Document formatting guidelines exist to make that content easier to read and digest.
Eliminate the temptation to introduce eye-catching elements that only serve to distract. Maximize whitespace. Keep your wording tight and revise any wordy sentences or paragraphs. Simple and minimal rules overall.
2. Choose a Context-Appropriate Typeface

Your first big design decision should be which typeface you’re going to use. Traditional knowledge says that serif fonts are easier to read in printed documents, whereas sans-serif fonts are better on the eyes when read on a digital screen.
Good examples of serif fonts include Garamond, Georgia, Hoefler Text, and Palatino, while good examples of sans-serif fonts include Arial, Gill Sans, Helvetica, and Lucida Sans.
Skip Comic Sans if you want to avoid one of the most common presentation design mistakes. And whatever you end up using, stick to the same typeface throughout to make your Word document professional. If desired, you can use a different typeface for headings.
3. Use Standard Font Size and Color
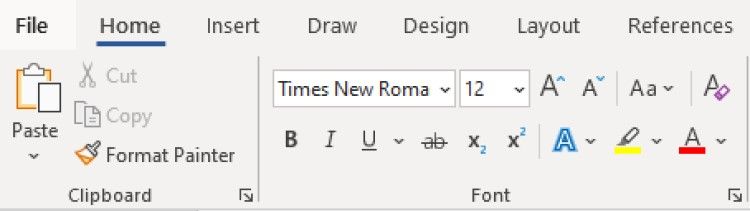
You can’t learn how to format a word document to look professional without paying attention to the look of the text. Business and academic papers generally use 12-point font sizes, which produce the most readable paragraphs when used in combination with the guidelines discussed below for page size, margins, and line spacing.
Some information-dense reports may sometimes go down to 10-point font size, but never less than that.
In general, it’s best to keep your hands off of anything related to colors, especially for printed documents. You’ll have to pay more for the color ink, and it won’t carry over if the document ever gets copied. For digital documents, reserve colored text for critical warnings and the like. Prefer to emphasize using bolded and italic text.
4. Use Standard Page Size and Margins
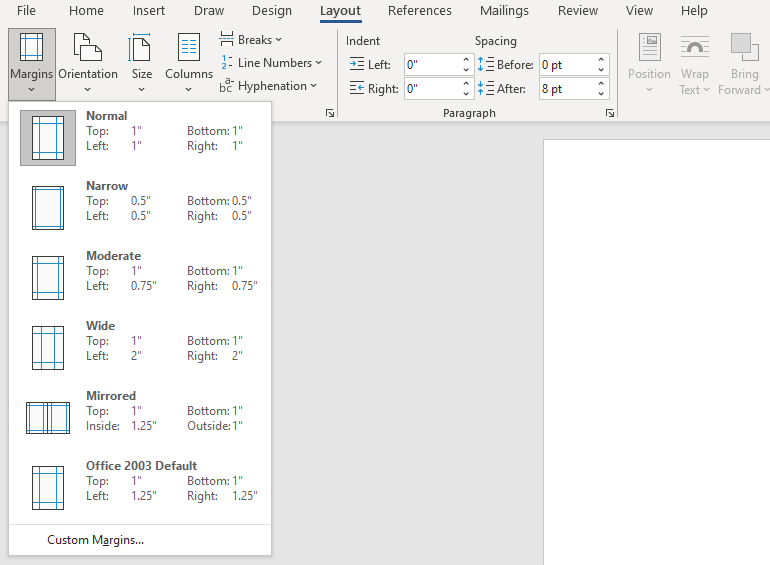
Nearly all office documents are formatted to the same page size as they are printed for standard 8½» x 11″ pages, known as US Letter size (also known as A4 elsewhere, which is 210mm x 297mm). This is the only size that’s guaranteed to be available regardless of which printer you use.
As for margins, most style manuals and style guides call for a 1″ margin on all sides of the page, which produces the best readability for line lengths and allows for written annotations if necessary. In Word, you can select Normal under Margins to do so. However, if the document is going to be bound in a binder, you may want to use Custom Margins to increase the side margins to 1½» to accommodate the rings.
5. Align Paragraphs to the Left
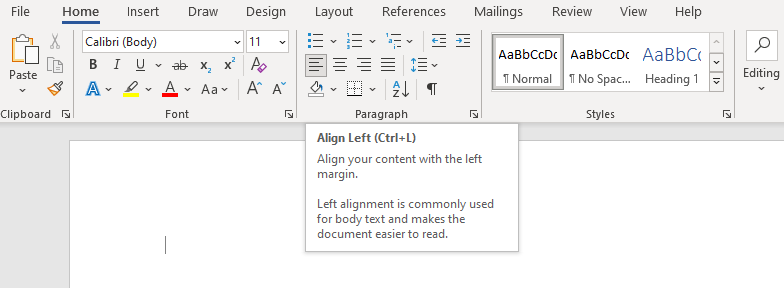
You may be tempted to use justified alignment because that’s what’s used in newspapers, novels, and some textbooks, but it’s the wrong choice for office and academic documents. Why is it important to make a document formal? Without formality, your document becomes unreadable.
What you want is left alignment for text. This produces jaggedness on the right side of paragraphs, but it keeps letter spacing as intended by whatever typeface you’re using, and that means optimal legibility.
Otherwise, you may end up with typographic rivers, which are extremely distracting and simply look ugly. This is something you certainly want to avoid when you want to make your Word document look professional.
6. Indent the First Lines of Paragraphs
Paragraphs should have no extra spacing between them, and the first lines of paragraphs should be indented to make each paragraph stand out. The only exception is for paragraphs that directly follow a section heading, which can be left unindented because the surrounding context makes it clear that it’s its own paragraph.
To make a document look professional, a general rule of thumb is to have the indent size the same as the font size. Make sure you use Word’s paragraph styling features to handle the indents rather than using the Tab key!
7. Place Images Between Paragraphs
Inserting images is a part of designing your Word document. It may be okay to place images inside a paragraph and allow the surrounding text to flow around it, and if your organization follows this document formatting guideline, then go ahead and do that.
But generally speaking, it can damage readability, especially in data-driven reports. The safest option, particularly for graphs, charts, and tables, is to put images in between paragraphs and keep them center aligned. That way, your images help to make your document attractive, but they are never vying for attention with the surrounding text. It also helps captions to stand out.
8. Choose Context-Appropriate Line Spacing
To format a document to look professional, the right choice for line spacing (the whitespace that separates a line of text from the next line of text) really depends on what kind of document you’re writing.
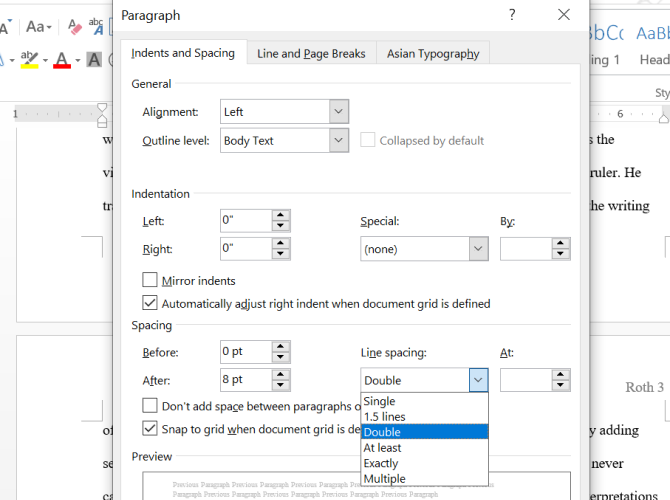
Academic papers should first follow any academic style guides in place, then prefer double-spacing if no style guide exists. Business and office documents tend to be single-spaced to minimize the number of pages needed when printing, but digital documents may be easier to read if spaced at somewhere between 120-150 percent.
9. Break Up Text With Headings and Lists
The longer the document, the more important headings become. Would you rather read a 20-page report that’s nothing but a wall of text from end to end? Or a 30-page report that’s organized into proper sections, subsections, and headings? It’s highly likely you’ll prefer the latter.
Lists are also good for breaking up walls of text and drawing eyes to important points. In Word, use Numbering to create numbered lists when counting a set of items (e.g., «the five attributes of a successful entrepreneur») or when providing step-by-step instructions. Otherwise, use Bullets to make bulleted lists.
Just be sure to avoid overusing lists, which detracts readability from your Word document design. This is especially important when it comes to using Word to format a screenplay.
10. Separate Sections With Breaks
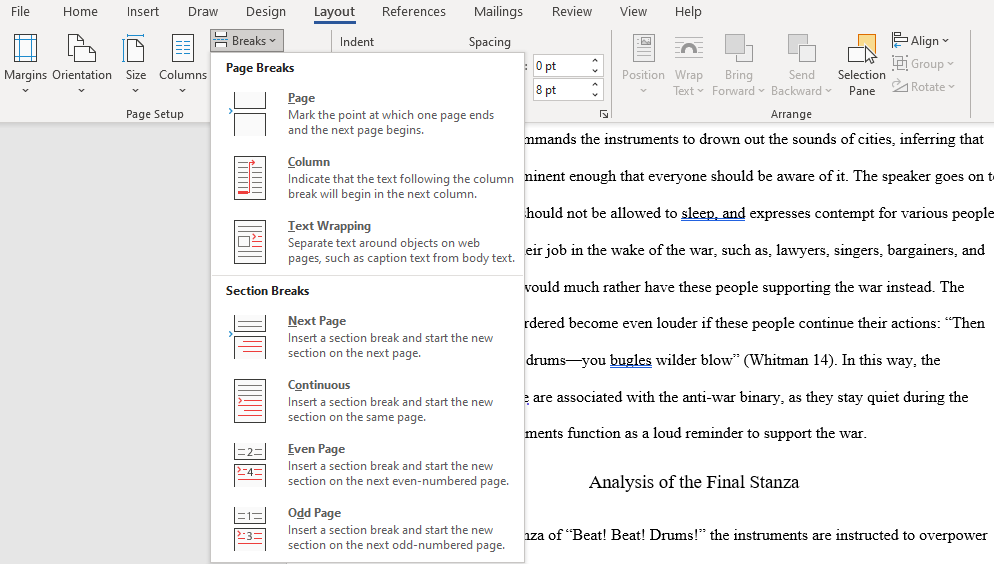
When you want to learn how to make your report look professional, you need to get acquainted with section breaks. In Microsoft Word, section breaks allow you to differentiate certain pages with changes in orientation, columns, headers, footers, page numbers, and more. Section breaks come in four forms:
- Next Page: Start the next section on the following page.
- Continuous: Start the next section on the current page.
- Even Page: Start the next section on the next even page.
- Odd Page: Start the next section on the next even page.
If your document is large enough to need chapters, this is the best way to format them in a clean way. Each chapter should be made with a Next Page section break, or the Even Page or Odd Page section breaks if you’re going to place it within a binder. We’ve shown how to remove page breaks if needed, too.
Learn How to Format a Word Document to Look Professional
Unless your organization or school requires a specific layout and format, you can skip the hard work of setting up your own template and just download one instead. This helps you quickly achieve a professional document design.
‘How come a teacher teaches, but a doctor doesn’t doct? Why can’t I say ‘My aunt is a cooker’?! What do you mean ‘increase is a noun?’… Word formation has never been easy for students. No clear logic behind it, complicated patterns, loads of irregularities — you name it. However, this part of language just cannot be ignored, both for the sake of accuracy and fluency.
Teenagers need to be good at word formation more than anyone else. In addition to fluency and accuracy, they have one more thing to think about — exams. Not only Cambridge exams include tasks that focus on word formation, but also the Russian State Exam and 9th-grade exam do. So, what can we do to help our students out?
Noticing
Noticing is the first step to success. When you come across a word with a distinctive prefix or suffix, stop for a couple of questions.
Development:
- What part of speech is that?
- How do you know?
- What other words ending in -ment can you name?
Team A and Team B, you have 2 minutes. Let’s check how many -ment words you can remember.
You might want to give teens some extra time to google for 5 more words with the same pattern to add to the list. They can tell about their choice in pairs. You might find this source useful.
This way, teenagers will get a better idea of parts of speech and some, though few, general rules behind word formation.
Generalising
General understanding of word class is, of course, crucial to learning a language. Introduce your teens to parts of speech despite all the possible complaints that they are having enough of that at Russian language classes. Generalising gives some basis and confidence.
When you teach the concepts of word formation, it also makes sense to start with those affixes whose meaning will be generally clear for students. Teach common patterns first, like:
re- means ‘again, back’. Repeat, redo, renovate.
il- means ‘not’ and generally stands before ‘l’. Illegal, illogical.
There is a wide variety of lists of prefixes and suffixes which can be used as reference materials or self-study guides. You might find some at Cambridge Dictionary website or just choose the one you find suitable for your learners.
Practice
Categorizing
To start with, why don’t you do a categorization task? Collect the vocabulary from a coursebook unit and write or print it on little cards. Stick the cards around the classroom. On the whiteboard, write the names of the parts of speech. Set the time limit for your students to walk around and collect the words under the proper headings. It will raise teens’ awareness of the parts of speech and give them a chance to get up from their chairs, which is also beneficial.
One more alternative for this task is a grabbing game when you have the word cards on the table and tell your students ‘Grab all adjectives!’. A person with the most number of correct cards wins the round.
Tables
Word formation is a skill that, ideally, should be practised throughout the whole course or year. One more little task for your teens to do is filling the tables which can look like this:

You prepare them beforehand and can draw students’ attention to any target vocabulary you need. The number of words in a card also depends on your needs. It can be done at the beginning of a lesson, as part of the homework, individually or in pairs.
Call my Bluff
Let’s check if your teens can fool each other! Ask them to write examples of real word formation and make up two or three wrong alternatives, e.g.for example “performance”, “performation” and “performent”. Then they read the words out to another group which should spot the real word.
While you practise high-level exams like FCE or CAE, students can work in groups and fill the gaps with a mix of the right and wrong answers. After that, ask them to exchange the papers with another group and think which options are right and which should be corrected.
Jenga
Have you ever played Jenga in class? Jenga is a board game in which players take turns removing one block at a time from a tower. Each block removed is then placed on top of the tower, creating a taller and more unstable structure. It can be a great addition to your revision class or just a final 15-minute touch of a regular lesson.
With a pencil, write one word on each wooden brick. The students’ task will be not just to have fun but also to make as many words as they can from the one written on the brick. If they get one with ‘appear’, they can go like ‘appearance’ and ‘disappear’. You can develop your own system of extra points for every extra word or well-made example.

Pass the ball
This kids game can be easily used in a teenage class. Name an affix and ask students to pass the ball naming words that go with it. If you say ‘-ful’, the round might look like ‘helpful – tactful – careful – beautiful’ etc. Change the affix after each round.
Teaching teenagers parts of speech and word formation skills is not easy but useful for a number of reasons. It raises students’ awareness of how the language works and helps build vocabulary faster. What’s more, it improves fluency as teens get more confidence using words in sentences. It can even be good fun. Try it out!