
WORDS RELATED TO TO-DO LIST
- agenda.
- calendar.
- docket.
- frame.
- lineup.
- order of the day.
- program of operation.
- schedule.
Contents
- 1 How do I make a to-do list in Word?
- 2 Is there a to-do list template in Word?
- 3 What is the best Microsoft program to make a checklist?
- 4 How do I create a to-do list in Office 365?
- 5 How do you create a checklist?
- 6 How do I make a pretty list in Word?
- 7 How do you make a book list in Excel?
- 8 How do you enter check boxes in Word?
- 9 How do I make a monthly checklist?
- 10 How do I do a checklist in Excel?
- 11 Does Office 365 have a To Do list?
- 12 How do I create a To Do list in office?
- 13 Is Microsoft to do list free?
- 14 What is a good checklist?
- 15 What is checklist and example?
- 16 How do you use checklists?
- 17 What is a multi level list?
- 18 What is a list style in Word?
- 19 What is a list in MS Word?
- 20 What does ARC stand for books?
How do I make a to-do list in Word?
Create a print only list
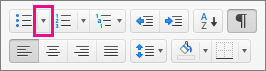
- Go to Home and select the down arrow next to the Bullets button.
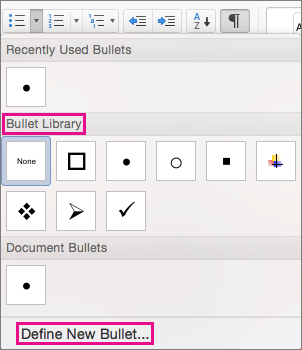
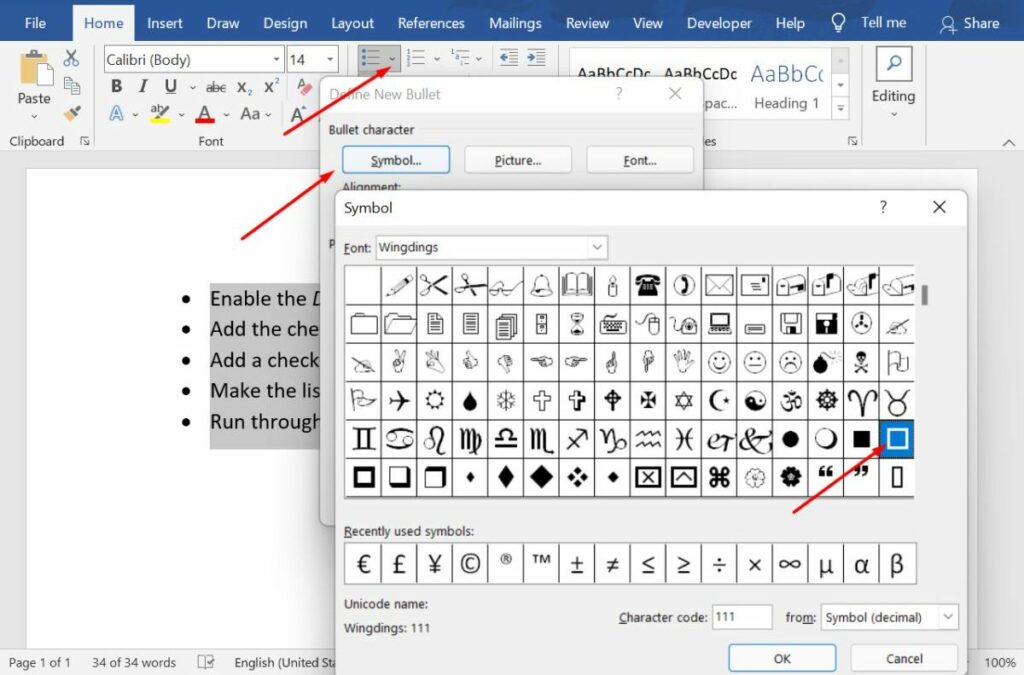
- In the drop down menu, select Define New Bullet.
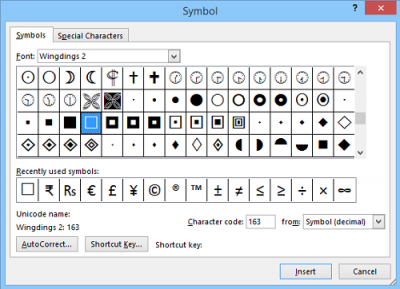
- Select Symbol and find a box character. If you don’t initially see one, change Font to Wingdings or Segoe UI Symbol.
- Select OK twice, and create your list.
Is there a to-do list template in Word?
Organize your tasks with this accessible to-do list template. This to-do list template for Word allows you to mark each item’s priority, due date, what to do, who to contact, steps in progress, and done fields for each entry. Use this task list template as is, or customize it with a variety of style and color options.
What is the best Microsoft program to make a checklist?
Users can create two different kinds of checklists using Microsoft Word – checklists with check boxes and check marks instead of bullets or numbers (this is the recommended kind of checklist for users looking to create a checklist and then print it out so that they can check off the items on it by hand) and lists that
How do I create a to-do list in Office 365?
Office 365 To Do List
- Switch the preview on and click save.
- Next browse to your phones app store and install the Microsoft To-Do mobile app and launch it.
- Ok lets start adding task for the day!
- Add as many tasks as you need.
- Next lets see how to add tasks in general which can later be assigned a due date.
How do you create a checklist?
How to create your checklist
- Step 1: Do a “brain dump”
- Step 2: Organize and prioritize tasks.
- Step 3: Put them on your to-do list.
- Step 4: Check off each item as you complete it.
- Step 5: Continue adding items as they come up.
How do I make a pretty list in Word?
Use SmartArt to create a more interesting bulleted list in Word
- With the insertion point positioned where you want the list to appear, click the Insert tab.
- Click SmartArt in the Illustrations group.
- Choose list in the left pane.
- Select one of the list options by selecting it and clicking OK.
How do you make a book list in Excel?
Click “File” and “New” in Excel 2013. Search for “book collection” and pick “Book Collection List.” If you prefer, you can lay out your own spreadsheet from scratch instead, but using the template automates most of the formatting and column design, and still allows for customization.
How do you enter check boxes in Word?
Just position your cursor in the document where you want a check box, switch to the “Developer” tab, and then click the “Check Box Content Control” button. You should see a check box appear wherever you placed your cursor.
How do I make a monthly checklist?
How to Create a Monthly Checklist
- Step 1: Brainstorm a list of everything that you have to get done for the month.
- Step 2: Separate your brainstorm list into two lists: Must Do’s and Nice to Do’s.
- Step 3: Transfer your to-do list to a monthly calendar, printable checklist, or app.
How do I do a checklist in Excel?
Add the checkboxes and advanced formatting.
- Enable the Developer Tab. To create a checklist, you must enable the Developer tab on the ribbon.
- Enter the Checklist Items Into Your Spreadsheet. Enter your to-do list, one item per cell.
- Add the Checkboxes. Click in the cell into which you want to insert the checkbox.
Does Office 365 have a To Do list?
Microsoft To Do is a task management tool that comes with Office 365.To Do has “Smart Lists” and suggestions based on tasks and flagged emails from other applications across Office 365, including OneNote, Planner, and Outlook.
How do I create a To Do list in office?
Create a task
- Select New Items > Task or press Ctrl+Shift+K.
- In the Subject box, enter a name for the task.
- If there’s a fixed start or end date, set the Start date or Due date.
- Set the task’s priority by using Priority.
- If you want a pop-up reminder, check Reminder, and set the date and time.
- Click Task > Save & Close.
Is Microsoft to do list free?
Microsoft To Do is available for free, and syncs across iPhone, Android, Windows 10, and the web.
What is a good checklist?
Gawande says a good checklist is precise, efficient, and easy to use even in the most difficult situations. It should provide reminders of only the most important steps, rather than trying to spell out everything—after all, a checklist can’t do your job for you. And above all, a checklist should be practical.
What is checklist and example?
The definition of a checklist is a list of things that can be checked off as completed or noted. An example of a checklist is when you have ten things to do for work and you make a list of all of them and you check them off as you accomplish each of them. noun. 13.
How do you use checklists?
You can use the checklists for the following tasks:
- Carrying out activities in which it is important that no step is forgotten and / or tasks must be done in an established order.
- Carrying out inspections where it must be recorded what the inspected points were.
- Verify or examine articles.
What is a multi level list?
Word’s multilevel list feature takes bullets and numbering to the next step. It makes creating sublists or subpoints in a list easy. An example of a multilevel list is an outline where the first level uses a Roman numeral and the next level uses a capital letter.
What is a list style in Word?
A list style is a style that contains various levels of formatting. When you apply a list style the formatting that is applied depends on its level. The level of a paragraph is determined by the value of the left indent. The default bullet and numbering buttons apply a list style.
What is a list in MS Word?
A list in Microsoft Word is a series of items preceded by a bullet or number. You can apply bullets or numbers to a list, as well as modify the bullet type or numbering format to suit the requirements of the document.
What does ARC stand for books?
Advanced Reader Copy
A Note: For those unfamiliar with the term, ARC stands for Advanced Reader Copy. These are early copies of forthcoming books, in physical or electronic form, distributed by publishers for readers to review prior to release.
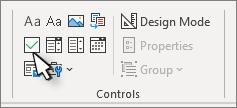
Show the Developer tab
If the developer tab isn’t already visible, see Show the Developer tab.
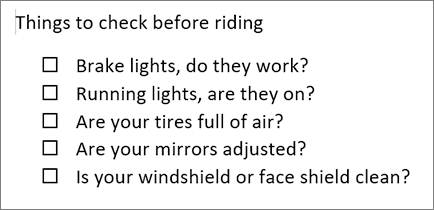
Make your list
-
Type the list.
-
Go to Developer and select the Check Box Content Control at the beginning of the first line.

-
To change the default X to something else, see Make changes to checkboxes.
-
Copy and paste the check box control at the beginning of each line.
-
Select a checkbox to put an X (or other character) in the check box.
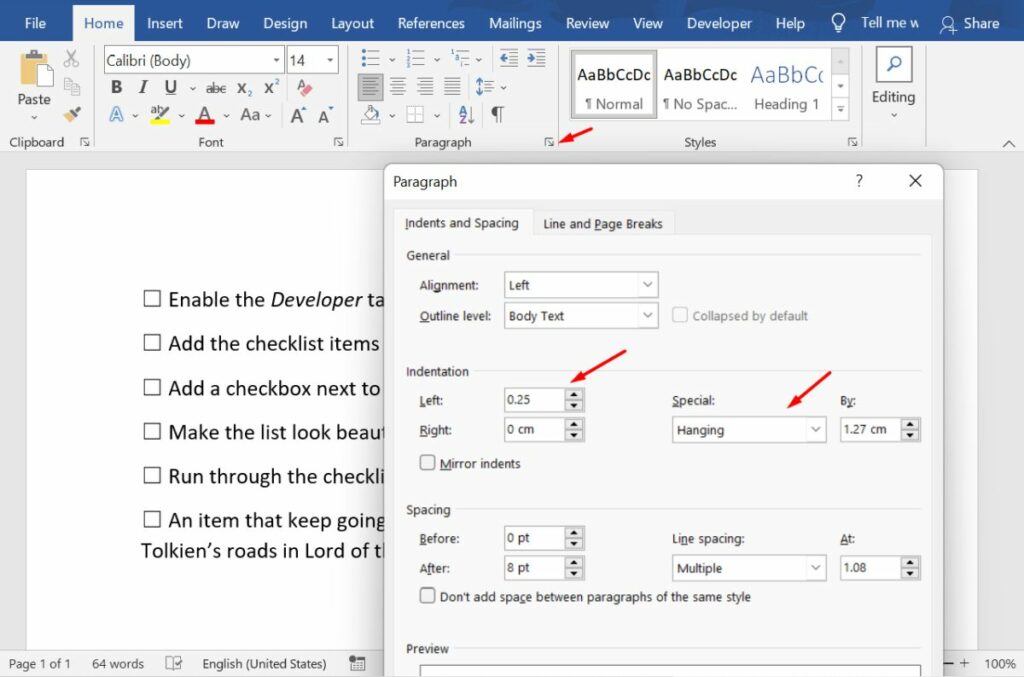
Add hanging indentation
If some list items are more than one line long, use hanging indents to align them.
-
Select the list. Bullets or numbers won’t look selected.
-
Go to Home and select the Paragraph dialog box launcher
. -
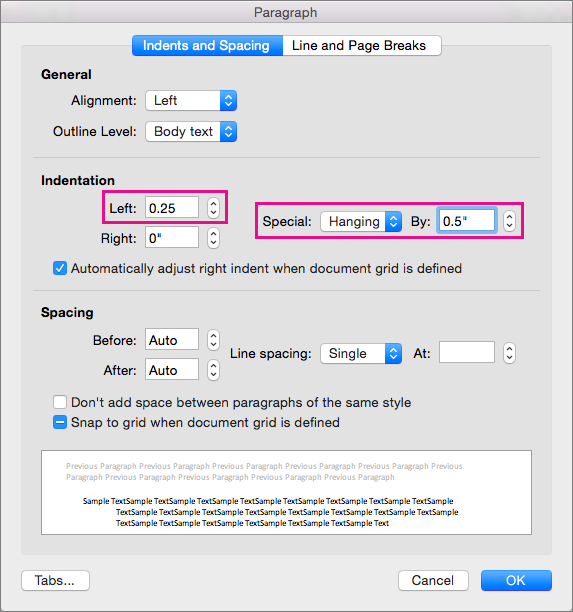
Under Indentation, in the Left box, type 0.25.
-
Under Special, choose Hanging.
-
For By, Word sets a default value of 0.5 inches. Change this if you want your additional lines indented differently.
-
Select OK when finished.
 .
.Lock the text and controls to prevent changes
-
Select the list and checkboxes.
-
Go to Developer >Group > Group.
To unlock the list, select the list and choose Group > Ungroup.
Create a print only list
-
Go to Home and select the down arrow next to the Bullets button.
-
In the drop down menu, select Define New Bullet.
-
Select Symbol and find a box character. If you don’t initially see one, change Font to Wingdings or Segoe UI Symbol.
-
Select OK twice, and create your list.

Make a checklist you can check off in Word
To create a list that you can check off in Word, add content controls for checkboxes to your document.
Show the Developer tab
For more info if the developer tab isn’t already visible in Word, see Show the Developer tab.
Make your list
-
Create your list.
-
Place you cursor at the start of the first line.
-
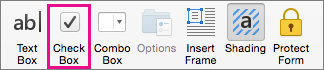
Go to the Developer tab, and then click Check Box.
-
If you want a space after the check box, press Tab or Spacebar.
Use a Tab character if you want to format the list item with hanging indentation, like Word applies to bulleted lists.
-
Select and copy (⌘ + C) the check box and any tabs or spaces.
-
Place the cursor at the start of the each list item, and paste (⌘ + V ) the copied check box and characters.
-
Paste the checkbox at the start of each line in your list.
Add hanging indentation
If some of the list items are longer than one line, use hanging indentation to align them.
-
Select the list.
-
Go to Format and select Paragraph.
-
Under Indentation, type 0.25 in the Left box.
-
In the Special list, choose Hanging.
For By, Word sets a default value of 0.5 inches. Change this if you want your additional lines indented differently.
Make a print only check list
You can replace the bullets or numbers in a list with another symbol, such as a box can be checked on a printed version of your document.
-
Select the entire list.
-
Select Home and select the arrow next to Bullets.
-
Select Define New Bullet.
-
Select Bullet, and choose a symbol from the table of symbols.
For more choices, in the Font box choose a symbol font, such as Wingdings.
-
Select a symbol to use, such as an open box (
) or a three-dimensional box (). -
Select OK, and then select OK again.
 ) or a three-dimensional box (
 ).
).Word for the web supports only the on-paper form of checklist.
-
Write your list, and then select it.
-
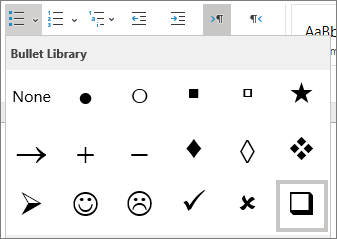
On the Home tab, choose the down-arrow next to the Bullets list to open the bullet library, and then choose the checkbox symbol.
Download PC Repair Tool to quickly find & fix Windows errors automatically
With Microsoft Office applications, you can create a simple To Do list or make a checklist in Microsoft Word and check off items electronically. The underlying trick for doing so is very simple and takes not more than few minutes. The result looks something like the illustration below.
Having said that, if you just need a checklist that you print, you can make a list where each item has a box that you check off on paper.
You can use boxes that you can check off in Word. For doing so, you first have to insert the check box form field into your document. Here’s how you do it!
Open a Word document, go to the “Insert” tab and choose “Symbol”
Next, from the symbol drop down list choose “More symbols”.

Then, the “Symbol” window shows up. Here you can select the check box and click on the “Insert” button. This ends part 1. I am saying so because in this part you cannot check the box. You need to do a bit of more manual work. That completes the second part.
Activate the Developer tab
Developer tab in the ‘Ribbon menu’ of Word supplies the option for checking the box in Word. Use the following procedure for it.
Assuming you have the Word file opened, right-click anywhere on the Ribbon and choose the “Customize Ribbon” option.
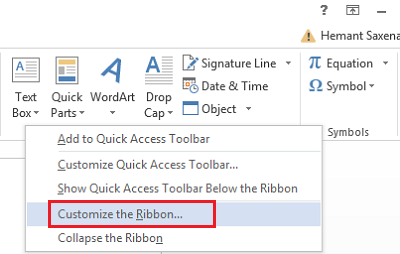
Next, select the “Developer” option within the “Customize the Ribbon” drop-down list and hit “OK”.
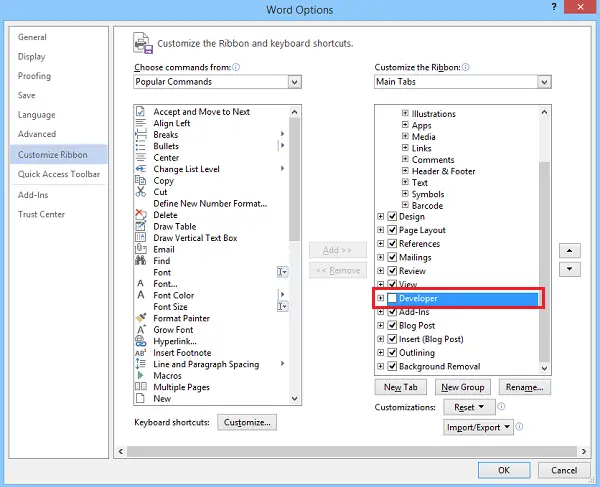
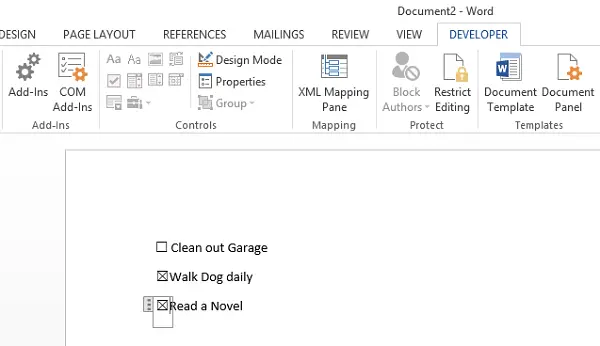
You should find the Developer tab added to the ribbon. Click on the “Developer” tab and use a customized bulleted list or a content control to insert checkboxes into a Word document.

Double click against any to-do/don’t-dos, followed by a single left-click to check the box.
That’s it!
Please note, that if you cannot check off an item electronically, it might be formatted for printing only or the document might be locked.
How do you create a checklist in Word?
To create a checklist in Microsoft Word, you can go through the aforementioned steps. Although there is no direct option, you need to create the checkboxes by adding regular boxes. For that, you can take the help of the Symbol option. Here you can find several symbols, including the checkbox.
How do you make a checklist column in Word?
To make a checklist column in Word, you need to insert the checkboxes first. To do that, follow the above-mentioned steps. Then, you can place all the checkboxes in order and use the bullet point option. Alternatively, you can insert a table and place one checkbox in one column.
See this post if you would like to know how to create a Checklist in Excel.

A post-graduate in Biotechnology, Hemant switched gears to writing about Microsoft technologies and has been a contributor to TheWindowsClub since then. When he is not working, you can usually find him out traveling to different places or indulging himself in binge-watching.
Writing down your tasks on a to-do list is a great way to keep everything in check. By ticking each of the scheduled tasks, you can track your progress and in many ways, reducing the probability of not finishing the job. Hence, you could be more productive.
One particular way to create a simple checklist is by using Microsoft Word, then print it out before you can tick each finished task with a pen. The problem is the fact that normal bullet points don’t have a specific area to let you mark each line.
But, by modifying the bullet icon, now you can. See the guide below to create a checklist in Microsoft Word (any versions).
1. First, make a normal list like this.

2. Then, select the list or just place the cursor on it.

3. Go to Home > Bullets > Define New Bullet…

4. Click on Symbol…

5. On the Font, find and select Wingdings 2.

6. Select this square icon and hit OK.

7. Click OK to confirm.

8. Now the checklist is ready to print!

Or you can adjust the spacing to make it look neater.

The square follows the size of the text. If you need to make it larger, just increase the font size and the squares will go bigger as well. I hope that helps!
A checklist makes it easy to keep track of your tasks in Microsoft Word. Here are 3 ways to create them!
Microsoft Word is a great place to keep your to-do list. Its integrations with the rest of Microsoft Office let you link to any apps you might need. There are three ways to create checklists in Microsoft Word.
1. Use Dynamic Checkboxes
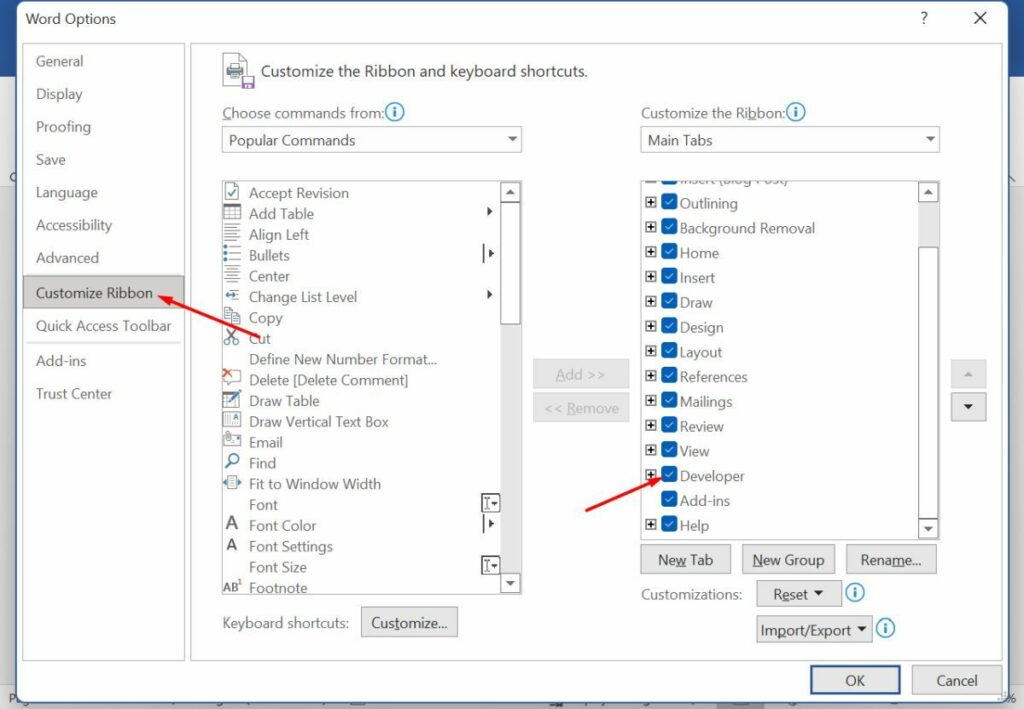
The Desktop version of Microsoft Word includes a checkbox that you can toggle on and off. To enable it, go to File > Options > Customize Ribbon.

Then, check Developer in the right-hand list. You may need to scroll down to find it.

With the Developer tab enabled, write your list items in the document. Put each one on a different line. Lastly, open the Developer tab and click on the Checkbox button.
Make sure the cursor is set where you want the box to appear. Once you’ve added the first one, you can copy and paste it. Click a checkbox to toggle it.
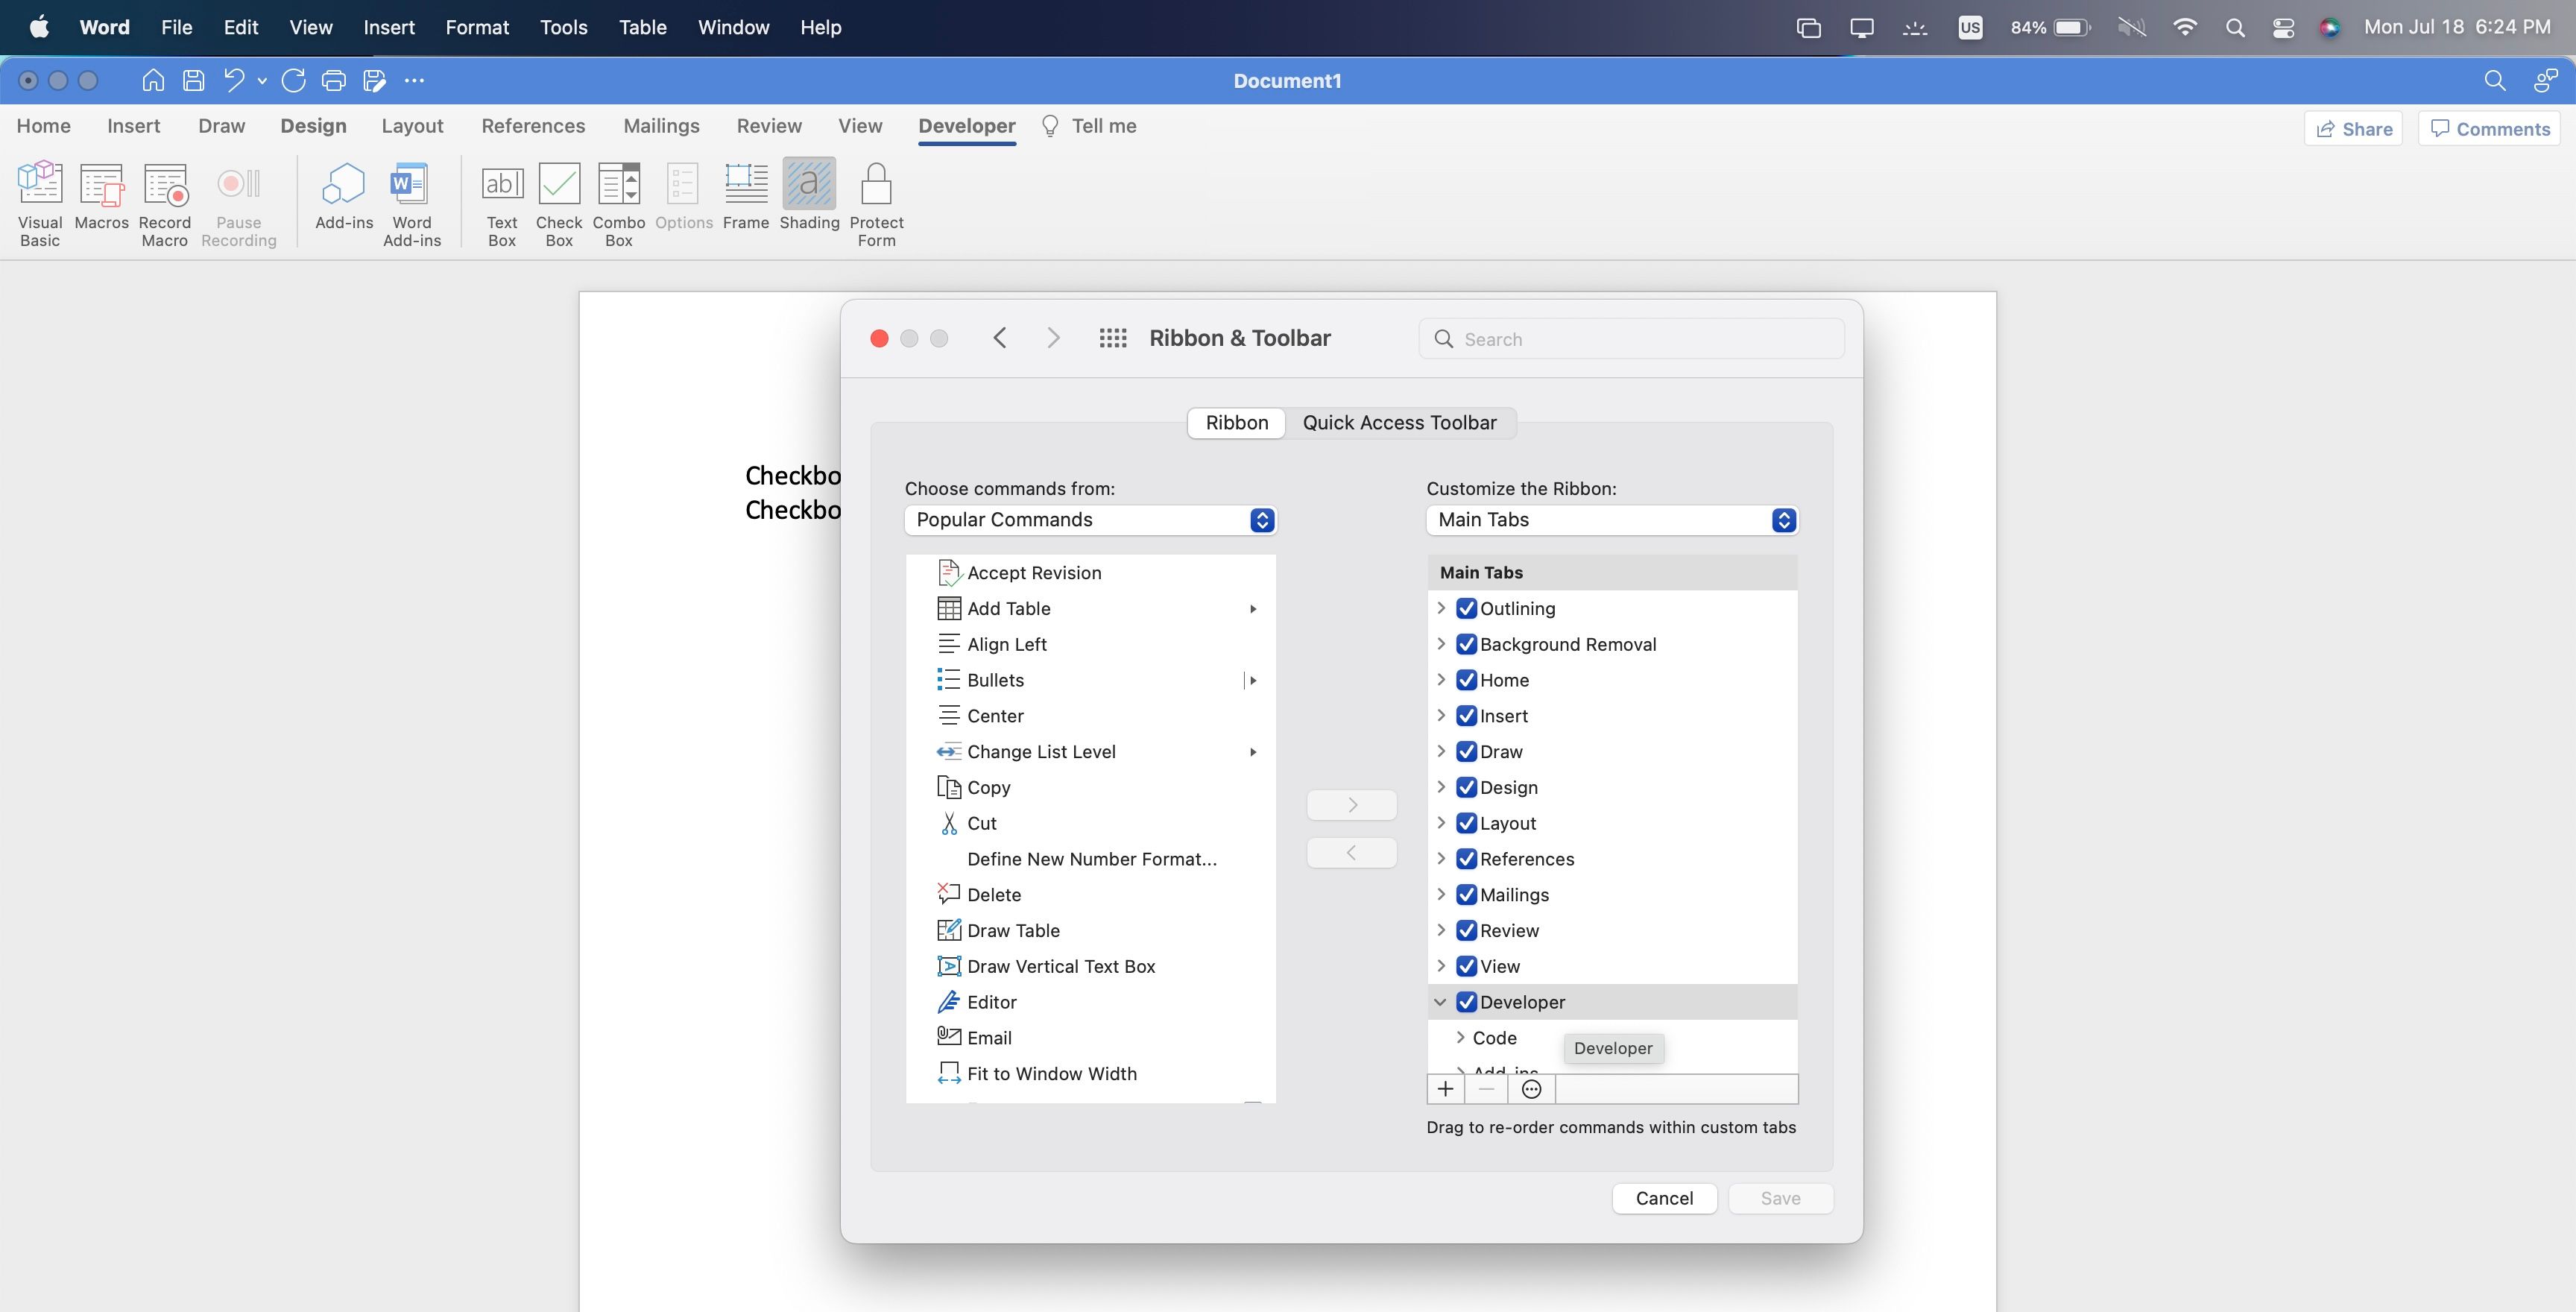
For macOS, go to Word > Preferences to open the Word settings window. You can also use the keyboard shortcut “Command + ,”. Then, in the Ribbon & Toolbar section, check the box next to Developer under the “Main Tabs” list.
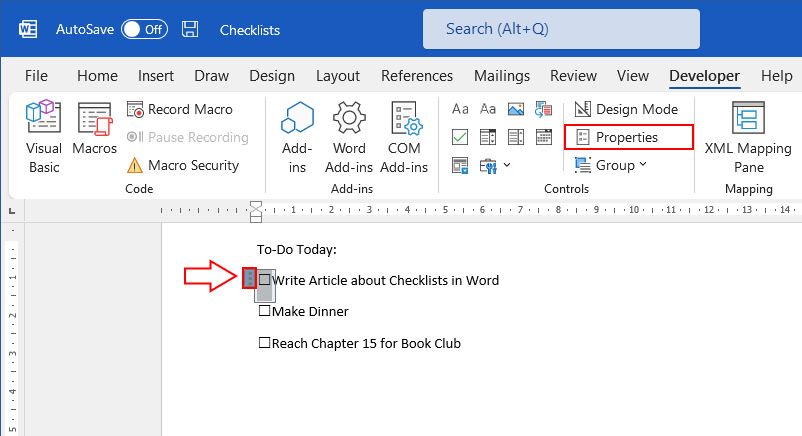
You can change the checkbox style to look different. Select the checkbox and then choose Properties from the Developer tab.
At the bottom of the dialogue window, you will see options to Change the Checked and Unchecked symbols. You can select from Microsoft’s library of symbols, or import your own.
2. Use Custom Bullets
Word can also make pen-and-paper checklists for you. Create a printable checklist using bulleted lists. There are lots of ways to customize a list in Word, but in this case, we only want to change the symbol.
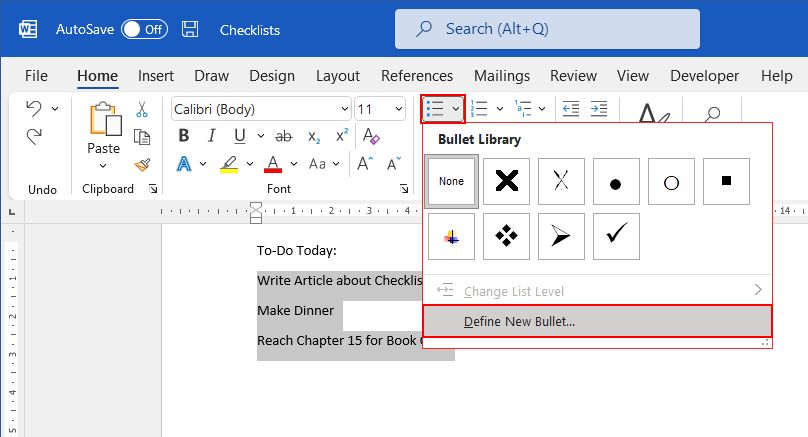
Start by writing your list items, with each one on a new line. Then select them and open the bulleted list dropdown menu. Select Define New Bullet.
In the Define New Bullet dialogue, you can select symbols, pictures, or font characters. After selecting, you can change the size using the Increase Font Size option in the Home tab.
3. Use Tables
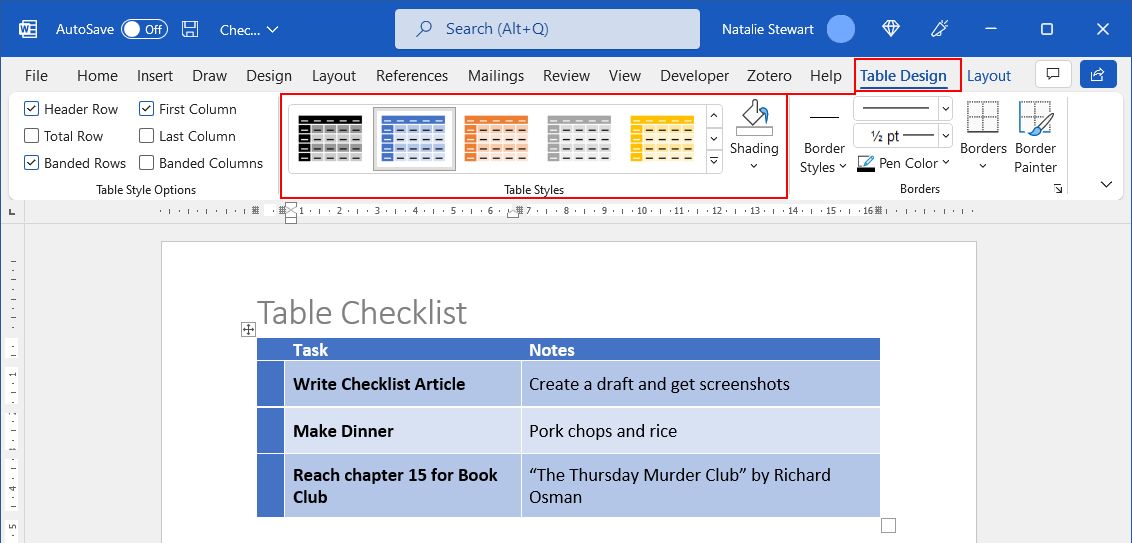
Tables allow greater customization. Normal lists only allow two ways to mark a checkbox: done, and not done. In tables, you can include options to say a task is partway finished, postponed, canceled, and more.
First, go to the Insert tab and add a Table. Give it as many rows as you have tasks, plus one for a header. You need at least two columns, but you can add a third for notes if you want. Click and drag the vertical lines to adjust column sizes.
If you want to print the checklist, you’re done. If you want to use it on your computer, there is one more step.
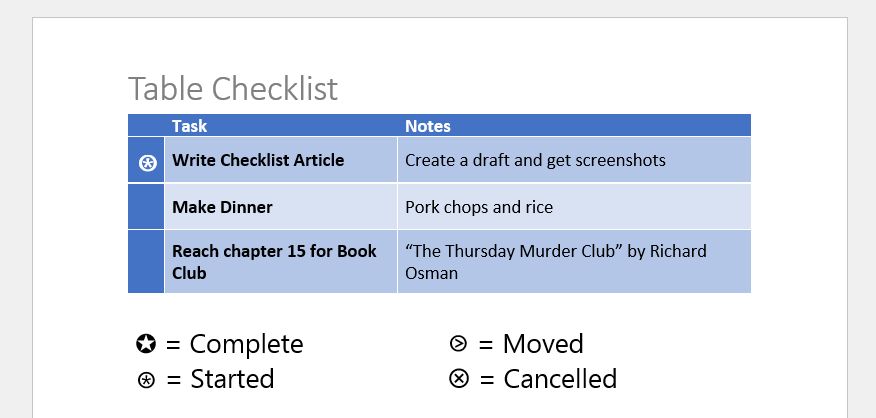
For digital use, you can choose shorthand symbols. Click outside the table and paste in the symbols you want to use. Make a note of what each one means. You could search through Word’s menu, but it’s simpler to copy and paste from a library like Unicode Table.
Now you can copy and paste the appropriate symbol into your task list. This is much faster and more consistent than recording progress with typed words.
Organize Your Tasks in Microsoft Word
Checklists are a simple and intuitive way to track your tasks. If you use Microsoft Office, storing your to-do list in Word is not your only option. Microsoft OneNote also has tons of options for managing your tasks!
A checklist is a simple, yet powerful tool to manage your work and improve task completion quality.
There are a number of checklist tools and templates available today. However, sometimes you may need to create a really simple checklist. And signing up for an app or downloading it may seem like a lot of work.
In such situations, Microsoft Word can help.
It’s a powerful text editing software. And almost everyone can use it.
In this article, we’ll show you two ways to make a checklist in Word. Here’s what we’ll cover:
Let’s dive in.
How to make a checklist in Word 2010?
Use this method if you want to create a clickable checklist in MS Word.
The obvious advantage is that you can share a soft copy of the Word document with your team. As they run the checklist, they can check off each item on the list. This is particularly useful if your team is working from home.
The disadvantage of this method is that it works only with Microsoft Word 2010 and up.
It’s also not backward compatible. This means documents created in older versions of Word cannot be edited in Word 2010 to add checklists. However, in older versions of Word, you can create a printable checklist (learn how towards the end of this article).
Now that you know if this method works for you, let’s dive into the steps.
1. Enable the “Developer” ribbon tab
The Developer tab hosts the checkbox control that we need to create a clickable checklist. But, by default, this tab is not visible on the ribbon menu.
To enable the Developer tab:
- Open the Word Options dialog box by navigating to File → Options.
- Click on the Customize Ribbon option.
- Finally, check the Developer checkbox in the Main Tabs control.
With these steps, the Developer tab should now be visible in your Word document’s ribbon menu.
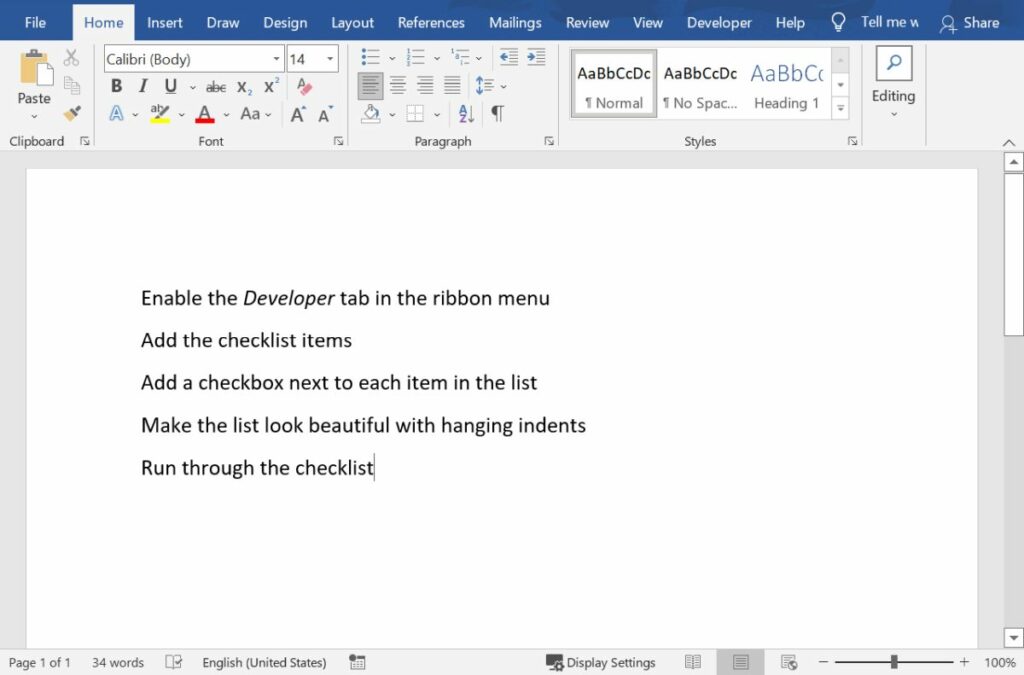
2. List down your checklist items
Next, type the list of items for your checklist in the Word document. You don’t need any special formatting for these items.
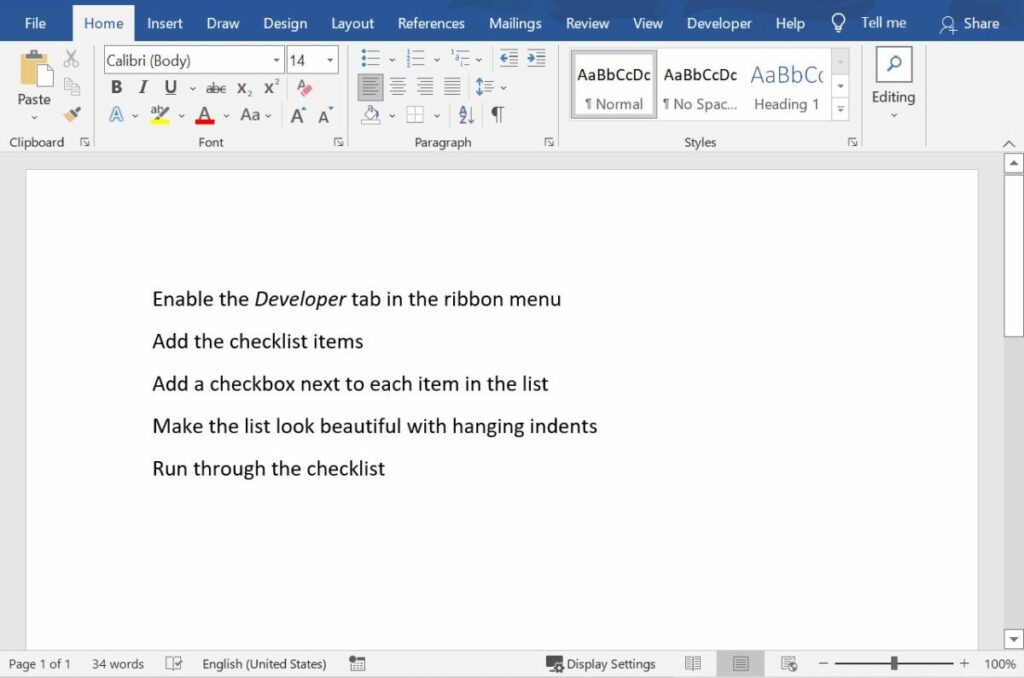
Items in this list can be as simple as your daily to-do list, your team’s task list, or even a process checklist.
3. Add a checkbox next to each item
Once your task list is ready, the next step is to add a checkbox next to each item.
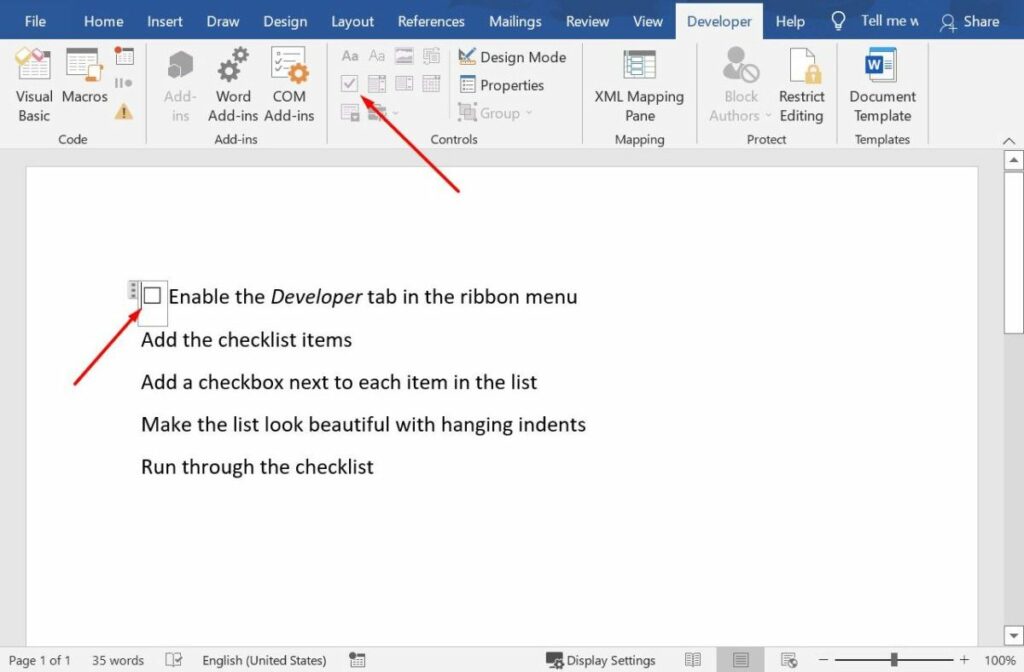
To add a checkbox:
- Place your cursor at the start of a checklist item.
- Navigate to the Developer tab in your ribbon menu.
- Click on the checkbox to place it.
- Repeat the above steps or simply copy-paste the checkbox control for each item in the list.
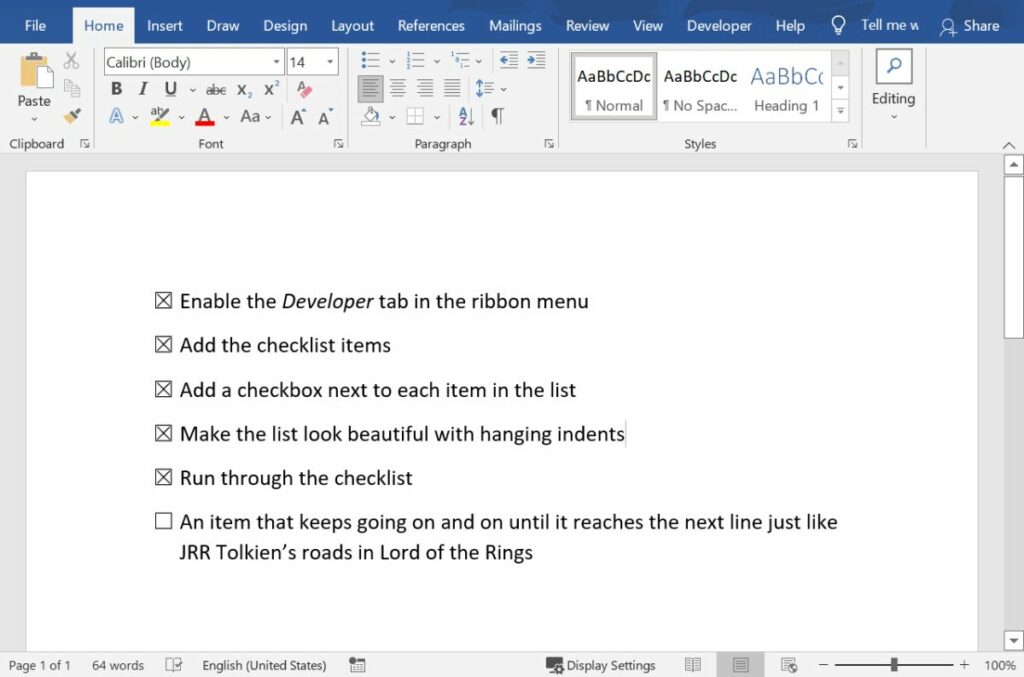
4. Make your checklist look pretty with hanging indents
Some list items may long enough to wrap onto the next line. This makes your list looks clumsy. You can easily fix it with hanging indents.
To set up hanging indents:
- Open the Paragraph Options dialog from the home menu by clicking on the tiny arrow in the bottom-right corner.
- Set the Indentation → Left property to 0.25 and the Indentation → Special property to Left.
Note that you may have to adjust the Indentation → By property to a suitable value depending on your font.
5. Run through your checklist
Now all you have to do is ask your teammates to run through the checklist by clicking on the checkbox.
You can also change the checkboxes from an X to a checkmark or other characters from the Developer → Properties menu.
How to make a checklist in Word on Mac devices?
You can follow the exact same steps outlined above on Mac devices as well. The only difference is how you enable the Developer tab in the ribbon menu.
To enable the Word Developer tab on Mac devices:
- Open the Ribbon and Toolbar Options dialog by navigating to Word → Preferences → Ribbon and Toolbar.
- Check the Developer checkbox in the Main Tabs control.
How to make a print-only checklist in MS Word?
If you’re using Microsoft Word 2007 or before, you can only create a printable checklist. Print-only checklists are great for simple personal to-do lists where you don’t have to collaborate with others.
Let’s look at the steps to create one:
1. Write down your checklist items
Start with your list. Type the list of your to-do items in the Word document.
2. Turn the checklist into an unordered list
Next, turn your items into an unordered list.
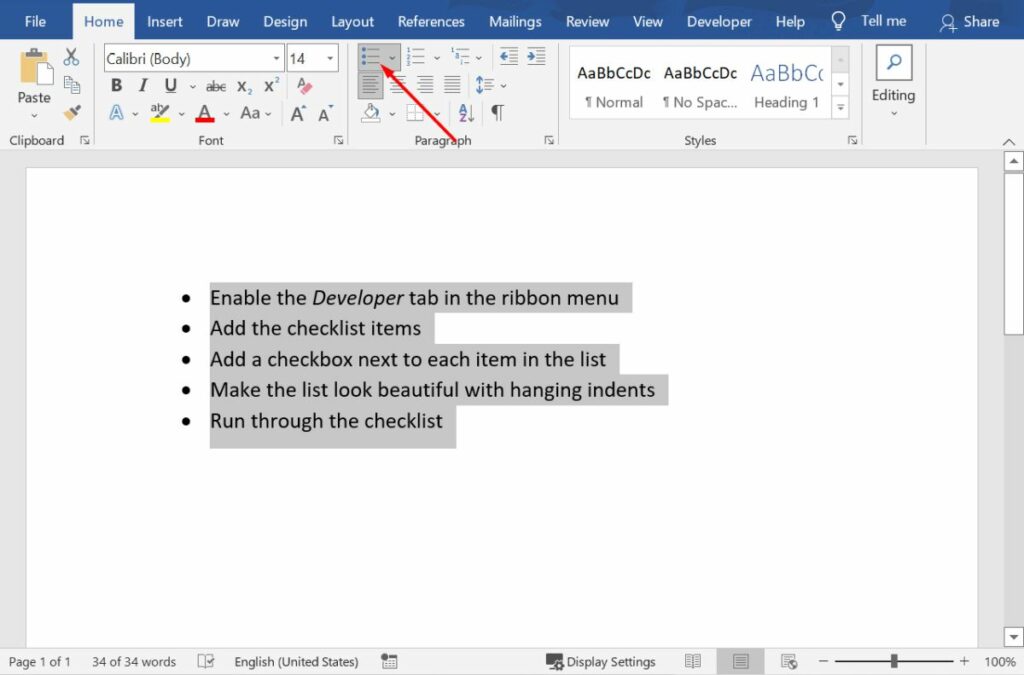
To create an unordered list of your checklist items:
- Select all items.
- Click on the Home → Bullets button in the Home tab of your ribbon menu.
3. Format the bullets to look like checkboxes
Finally, we need to make the bullet list look like a checklist.
To change the bullets into boxes:
- Click on the dropdown arrow next to the Home → Bullets button.
- Select Define New Bullet.
- Select Symbol and find a box character. If the box character isn’t available with your font, select the Wingdings font.
- Click Ok twice to see your checklist.
The only way to run this checklist is to print it out and check off items with a pen or a pencil.
Pros and cons of Word checklists
Perhaps, by now, you have already realized that MS Word checklists come with their own advantages and limitations. Here’s a quick summary:
Advantages of Word checklists
- Easy to create
- Easily accessible as every office has access to Microsoft Word
Disadvantages
- Not shareable—particularly if you’re working from home
- Difficult to collaborate and check who’s checking off what, in case of a big team
To get around this at work, consider using one of the many checklist apps available today.
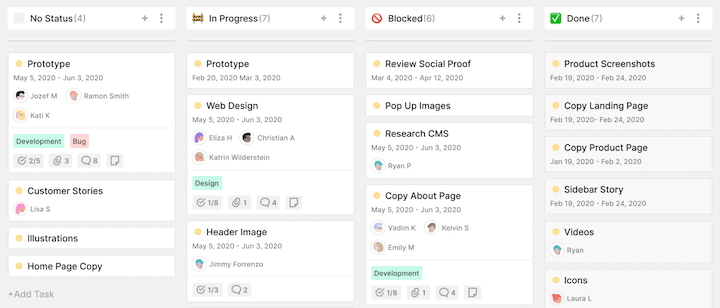
Toggl Plan is one such app. It’s a beautifully simple work management tool that helps you and your team deliver work on time without the last-minute rush.
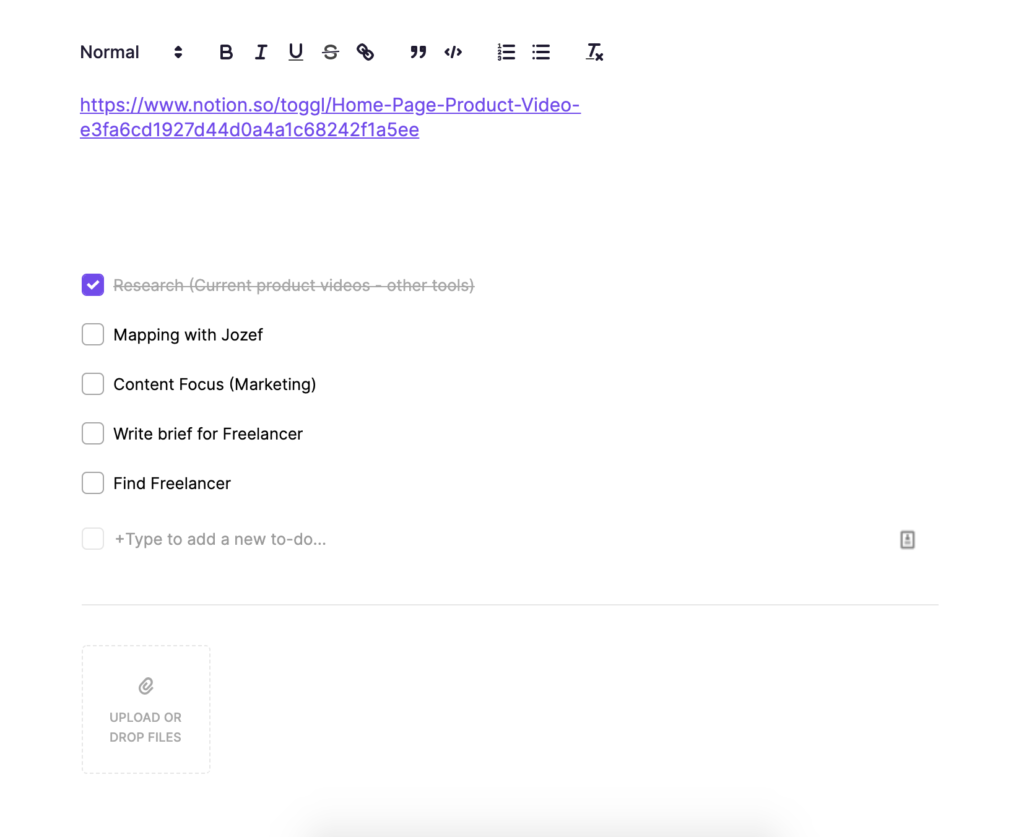
With Toggl Plan you can plan your tasks on a timeline or use a simple task board. You can attach files, add comments, and other details right on the task itself. Plus you can attach a checklist to each task to improve task completion quality.
Try Toggl Plan for free now.

Jitesh is an SEO and content specialist. He manages content projects at Toggl and loves sharing actionable tips to deliver projects profitably.
If you are trying to be productive and organized, you probably use checklists. They are made for any purpose and any event. Many applications allow you to create checklists. But what if you want to create your personalized one? In this article, you will find how to create a checklist in Word documents using bullets or fillable fields.

Why use checklists
A checklist is a list of all the tasks you need to do, the information you want to learn, or things you need to take somewhere. On such lists, you can check the tasks and the extent: not started, in progress, done, need help, etc. Regardless of the purpose and content of the checklist, it helps to:
- Keep everything in mind. Because of the large amount of information, small details and things can just get forgotten. The best way to avoid this is to write everything down on a checklist.
- Be organized. While making a to-do list, you can range your tasks properly in advance. For example, you can stop by the store on your way home, so you don’t have to go there on purpose.
- Save your resources. Being well organized, you save time and money. Shopping with a checklist prevents impulse buying and therefore helps you save money.
Checklists can be completely different: to-do lists, daily cleaning checklists, shopping lists, travel checklists, birthday party planning checklists, habits trackers, etc. The apps Friday, Todoist, Trello, Toggl Plan, Google Tasks, and others allow tracking the tasks and making checklists. However, users often want to create their personal checklists or visually arrange things as they see fit. In this case, it is possible to make a checklist in Word documents.
Let’s see how to create a checklist in Word documents using ONLYOFFICE Document Editor.
How to create a checklist in Word documents using bullets
A bullet is a standard tool to create checklists in your document. It can be used as a sort of checkbox. However, checklists created this way are suitable for working in paper form. You can make a checklist with bullets, print it out, and then mark your tasks by hand. Place it near your workplace so that they are always in plain sight.
To create a checklist in Word using bullets, follow these simple steps.
Step 1: Write the things you need to do.
Step 2: Add bullets.
Highlight your list. Go to the Home tab —> Click the arrow near Bullets —> Select Bullets. It is better to use ones with blank space in the checklists.
Step 3. Make the bullets more visible. Click the arrow near Bullets —> Choose List Settings and change the size of the bullets. Click OK.
In this case, the bullets will be larger, and it will be more comfortable to check them after completing the task.
Now the list is ready. Save it and print it out, then stick it in a visible place.
How to make a checklist in Word document with fillable fields
To make checklists that can be filled out digitally, you can use fillable fields. ONLYOFFICE allows you to do it directly in the text editor. Watch the video about ONLYOFFICE forms and their functionality:
Now let’s make a fillable template for the checklist using the ONLYOFFICE forms.
Step 1. Create a blank document in .docxf format. This is a format that supports adding fillable forms.
Step 2. Add fields for the day.
Since we are creating a completely fillable checklist, we will first create fields where the user can select the day of the week.
Go to the Form tab —> Select Combo Box.
The field will appear where the cursor is. Then, set it up in the right-side toolbar. In the placeholder, we specify Day of the week. And in the tip, Select a day of the week. The tip will appear on the screen when the user hovers over the field.
In the Value Options field, add days of the week. To do this, enter each option in the field below, and press Plus, so all the options that the user can select will appear in the list.
In the Combo Box, the user can also add his own option. This is useful if the to-do list relates to a birthday or party, for example.
Step 3. Create fields for tasks.
Now let’s make fields where you can enter tasks. Go to the Form tab —> Select text field.
As in the previous step, fill in Placeholder and Tip in the right-side toolbar. Then check Fixed size field. Resize the box manually, like an ordinary shape.
Now that one field is ready, we can copy and paste it for the other tasks.
Step 4. Add checkboxes.
When your task is completed, it should be marked. To do this, let’s add checkboxes to our checklist.
Place the cursor where you want to add a checkbox. Then, go to the Form tab —> Checkbox. Add all other checkboxes in the same way.
Our checklist will reflect the degree of completion of the task, so we will create two more columns of checklists. Also, we will add the name for each column: Not started, In progress, Completed.
In the Form tab, you can also change the color of the field and format it to your taste. Go to Highlight Settings and change the color.
Now the checklist is ready. Save it in OFORM format to fill it out online. Or choose PDF format to fill the checklist in any software.
Get the ready-to-use template for a checklist, or visit our library to find more document forms:
GO TO LIBRARY