
Many regular documents in Microsoft Word won’t use fonts much larger than 20 pt. But when you are making a flyer or a banner, you might need really big text.
Our tutorial below will show you a simple way to go above the seeming 72 pt font limit that Word appears to have in place.
How to Use Really Big Font Sizes in Word
- Open your document.
- Select the text to resize.
- Choose the Home tab.
- Click inside the Font size field and delete the current value.
- Type your desired font size and press Enter.
Our guide continues below with additional information about using font sizes bigger than 72 pt in Microsoft Word, including pictures of these steps.
Microsoft Word includes a lot of options that let you customize the way your text looks. Whether you want to make small caps in Word, or italicize your text, Word makes it possible to do so.
When you are making certain types of documents with Microsoft Word, you might feel like your design choices are being limited by the seemingly small “maximum” font size of 72pt.
However, this isn’t the actual maximum size of the text that you can use in your document, it is merely the smallest listed size.
This can be an issue when you are using things like cursive fonts that might be very small or thin and require much larger font styles.
It may not seem like it, but the field that is displaying the font size is something into which you can type a value.
This allows you to use any font size that you want (with a value between 0 and 1638) for your document purposes.
So you can go bigger than the 72 pt font size that is listed in Word 2013. You can also use the same technique if you want to go lower than 8 pt font sizes, too.
How to Go Bigger than 72 pt Fonts in Word 2013 (Guide with Pictures)
The steps in this article were performed in Microsoft Word 2013. The result of completing these steps is that text in your document can use a bigger font size than the 72 that is available from the dropdown menu. You are able to use larger font sizes up to a max of 1638 pt.
Step 1: Open your document in Word 2013.
Step 2: Select the text for which you want to increase the font size.
If you haven’t added the text yet you can skip this step.

Step 3: Click the Home tab at the top of the window.

Step 4: Click inside the Font Size field in the Font section of the ribbon, delete the current value, enter your new font size, then press Enter on your keyboard.
Note that this can make your text very large. If you attempt to enter a font size greater than 1638 you will get an error notification.
Frequently Asked Questions
What is the largest font size in Microsoft Word?
You can use font sizes up to 1638 pt in Microsoft Word.
For anything larger than 72 pt you will need to use the steps above where you manually enter the desired point size in the Size field on the Home tab.
What is the largest font size in Google Docs?
If you are also using Google’s word-processing software you can make a similar adjustment there with the same steps.
However, the largest font in Google Docs is 400 pt.
How do I increase the page size in Microsoft Word?
Once you start using larger font sizes in your documents you will probably find that they don’t fit too well on letter or legal-sized paper.
You can change paper sizes in Microsoft Word by selecting the layout tab at the top of the window, clicking the Size button in the Page Setup group, then choosing one of the options there.
You could also elect to choose the More Paper Sizes option, then click the Paper size dropdown menu and select Custom size at the bottom of the list.
You can then manually enter your own paper size if you need something other than the default options listed.
You can use a similar technique to make very large text in Photoshop, too. It can be very helpful with high-definition images where the 72 pt listed maximum is way too small.

Matthew Burleigh has been writing tech tutorials since 2008. His writing has appeared on dozens of different websites and been read over 50 million times.
After receiving his Bachelor’s and Master’s degrees in Computer Science he spent several years working in IT management for small businesses. However, he now works full time writing content online and creating websites.
His main writing topics include iPhones, Microsoft Office, Google Apps, Android, and Photoshop, but he has also written about many other tech topics as well.
Read his full bio here.
Updated: 12/31/2020 by

To increase or decrease the font size of text in Microsoft Word, follow these steps.
- Highlight the text that you want to make bigger or smaller.
- To increase the font size, press Ctrl+]. (Press and hold the Ctrl, then press the right bracket key.)
- To decrease the font size, press Ctrl+[. (Press and hold the Ctrl, then press the left bracket key.)
Tip
The keyboard shortcuts above are verified to work in Microsoft Word 2010 through Word 2019. If you cannot get the shortcuts to work, make sure you are pressing and holding the Ctrl key down when you press the left or right bracket key. Each time you press a bracket key, the text increases or decreases one point in size.
Create an account to follow your favorite communities and start taking part in conversations.
Posted by4 years ago
Archived
![]()
i know its with # but sometimes it doesnt work infact most of the time none of that shit works from me
This thread is archived
New comments cannot be posted and votes cannot be cast
![]()
level 1
place a hashtag at the start of your sentences
or two of them!
level 2
oh I did it
Just testing it don’t mind me
level 2
Two of them?! What is this madness?!
level 1
Hashtags in front of the sentence affect the look
One Hashtag
Two Hashtags
Three Hashtags
Four Hashtags
Five Hashtags
Six Hashtags
About Community

A subreddit to ask questions (and get answers) about Reddit Tech Support.
-

1
Open your Word document. Double-click the document in which you want to bend a word or phrase.
-
2
Select a word or phrase. Click and drag your mouse cursor across the word or phrase that you want to bend.
Advertisement
-
3
Click the Insert tab. It’s at the top of the Word window. The Insert toolbar will appear at the top of the window.
-
4
Click WordArt. This option is in the «Text» section of the toolbar. Clicking it prompts a drop-down menu.
-
5
Select a WordArt appearance. Click one of the icons in the WordArt drop-down menu to set it as your selected text’s appearance.
-
6
Click Text Effects. It’s in the «WordArt Styles» section of the Format tab that opens. A drop-down menu will appear.
- If this tab doesn’t automatically open after applying a WordArt appearance to your selected text, click the Format tab before proceeding.
-
7
Select Transform. This option is in the drop-down menu. Selecting it prompts a pop-out menu.
-
8
Click a curved option. You should see four curved options in the «Follow Path» section of the drop-down menu. Click the one you want to use to apply it to your selected text.[1]
- If you want to bend your text around a circular object, click the Rotate option (e.g., the circular text with no word in the middle) in this drop-down menu.
-
9
Adjust your WordArt’s appearance. If you want to change the size and/or curvature of your WordArt word or phrase, do the following:
- Click and drag in or out any of the white dots to shrink or enlarge the word or phrase.
- Click and drag the yellow dot to adjust the curvature of the word or phrase.
-
10
Save your changes. When you’re done adjusting the text, click File and then click Save to save your changes to the document.


Advertisement
Add New Question
-
Question
How do I start a title in MS Word with small letters, gradually increasing the size of the letters to the end of the title?

You have to individually increase the size of the writing by using the «Larger Word» pull-down bar. This is in the Home section of the app.
-
Question
How do I bend heading text in MS Word?
It’s done the same way, just follow the article’s methods.
-
Question
How do I curve a word more/less in MS Word?
Use the yellow dot. The yellow dot is used for adjusting shapes in Word and PowerPoint.
Ask a Question
200 characters left
Include your email address to get a message when this question is answered.
Submit
Advertisement
Video
-
You can also bend words in other Microsoft Office products such as PowerPoint.
Thanks for submitting a tip for review!
Advertisement
-
Applying WordArt to a word or phrase will affect nearby text. For this reason, it’s best to use WordArt on things like titles and headings rather than on a word or phrase in the middle of a paragraph.
Advertisement
About This Article
Thanks to all authors for creating a page that has been read 367,253 times.
Is this article up to date?
- By manually selecting the periods
- Using the Find Tool
- Using the Replace Tool
Method 1: Manually Select the Periods
This method is most suitable if you’re simply dealing with a few sentences where you want periods bigger. Note that this method proves to be the most cumbersome among the three.
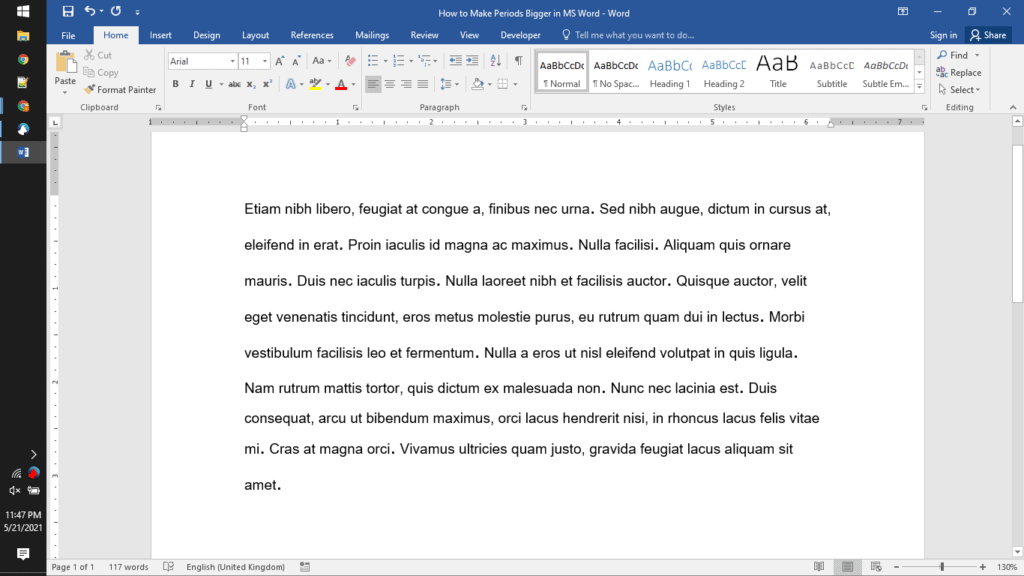
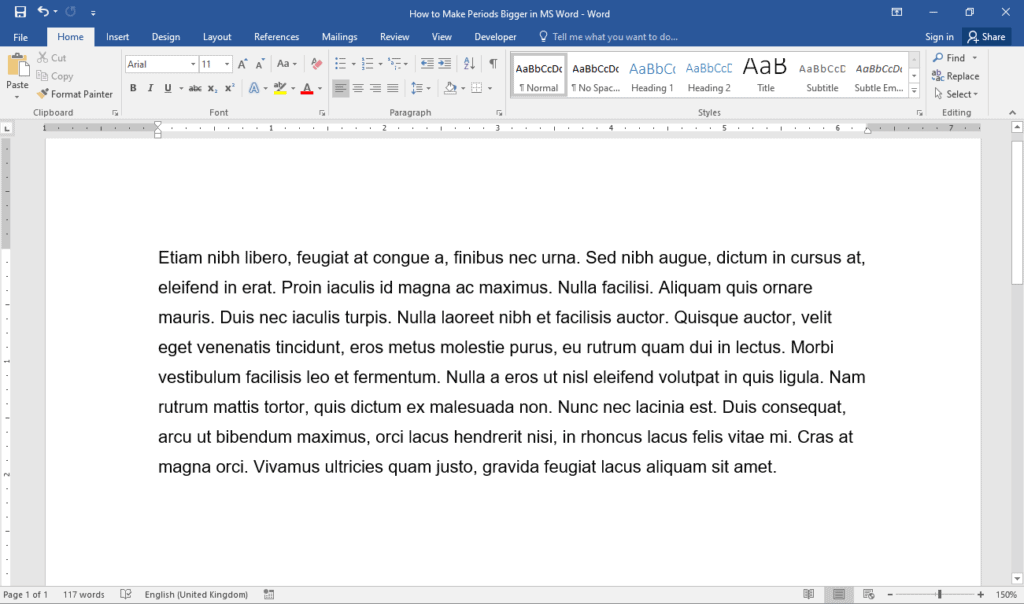
Step 1: Open up a Word document.

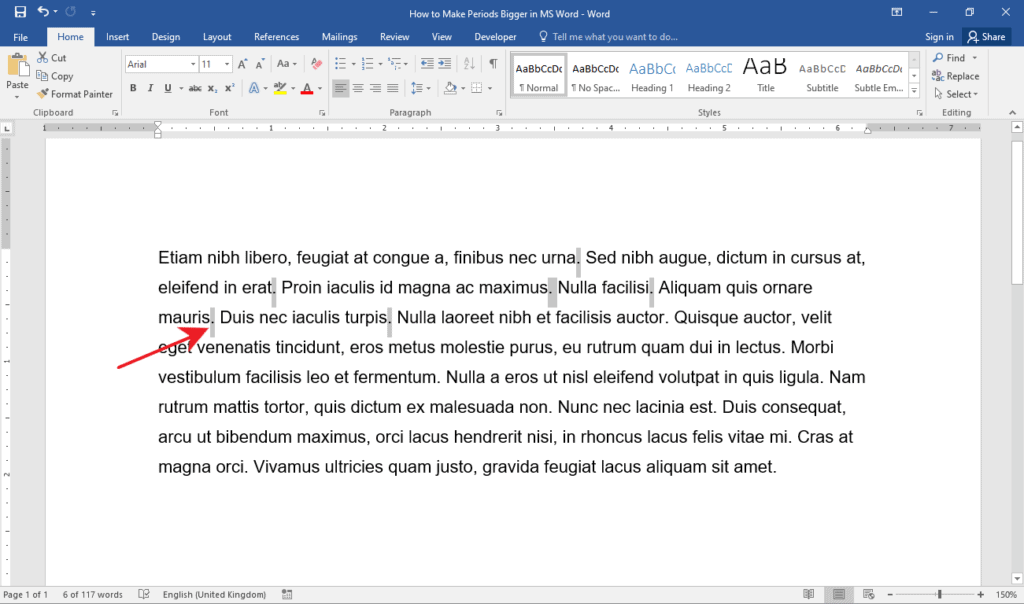
Step 2: Select the periods.
Once your document is ready, start selecting the periods by highlighting them while holding the CTRL key.
If you accidentally select something else, simply hold down the CTRL key and select it again.
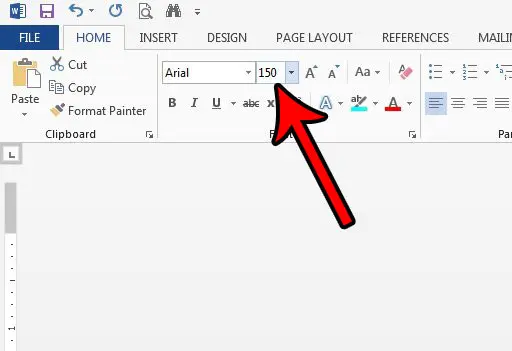
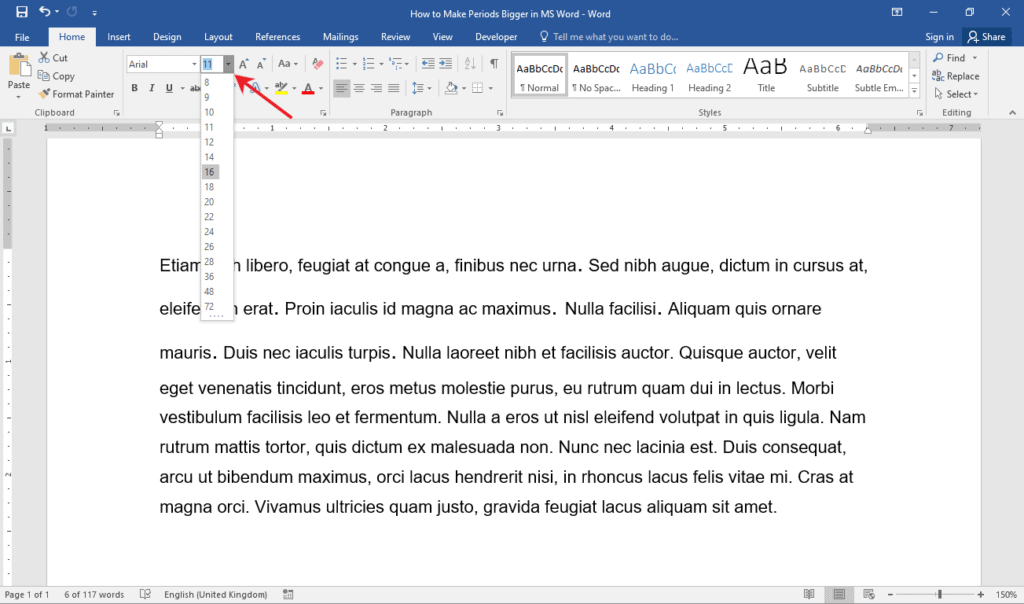
Step 3: Change the font size of the periods.
With the periods highlighted, click the Font Size drop-down button to select your desired font size.
Method 2: Using the Find Tool
This method is most suitable when you want to apply different font sizes to the periods in your document.
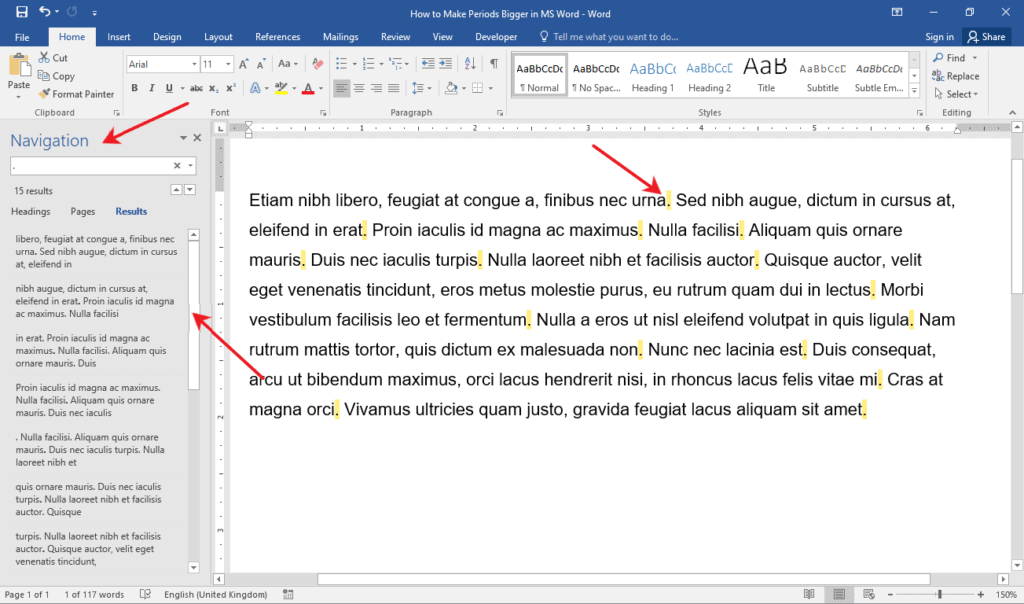
Step 1: Open your Word document.
Step 2: Access the Find tool.
- To access the Find tool, we’ll need to launch the Navigation Pane.
- Simply press CTRL + F on your keyboard.
- This will display the Navigation Pane on the left side of your window.

Step 3: Highlight all periods.
In the Navigation Pane, type in a period in the Search field. This will automatically highlight all periods in your document. Also, you’ll see a list of parts of the document where the periods were found.
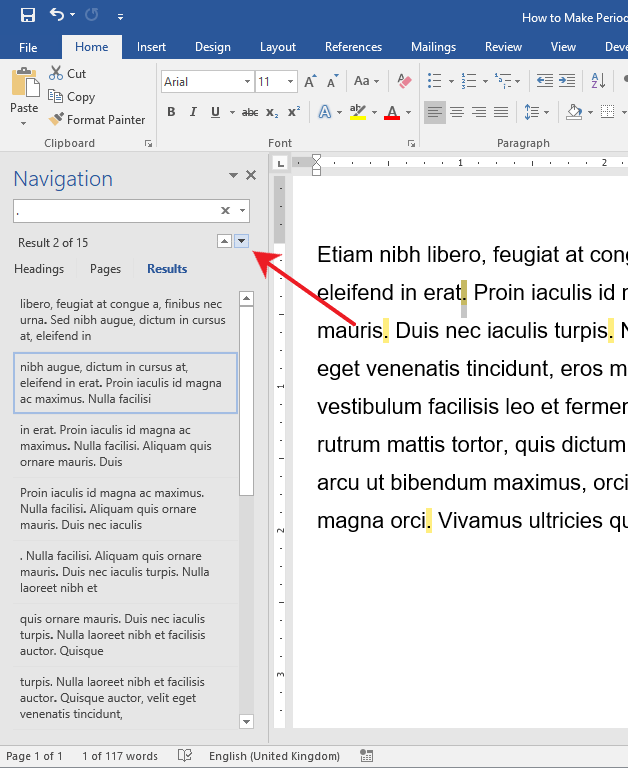
Step 4: Change the font size of the periods.
Click on each item on the list to select the corresponding period.
Then, change the font size of the period by clicking the Font Size drop-down button and selecting your preferred size.

Click the next one on the list to proceed. Alternatively, you can click the arrow down button to go to the next period.
Method 3: Using the Find and Replace Tool
The Find and Replace tool allows you to easily locate all periods and change their font size at once. This isparticulary suitable when you want all the periods to be in the same font size.
Step 1: Open your Word document.

Step 2: Launch the Find and Replace dialogue box.
Now that your document is ready, click the Replace button found at the rightmost part of the Home tab.
This will display the Find and Replace dialogue box in the middle of your window.
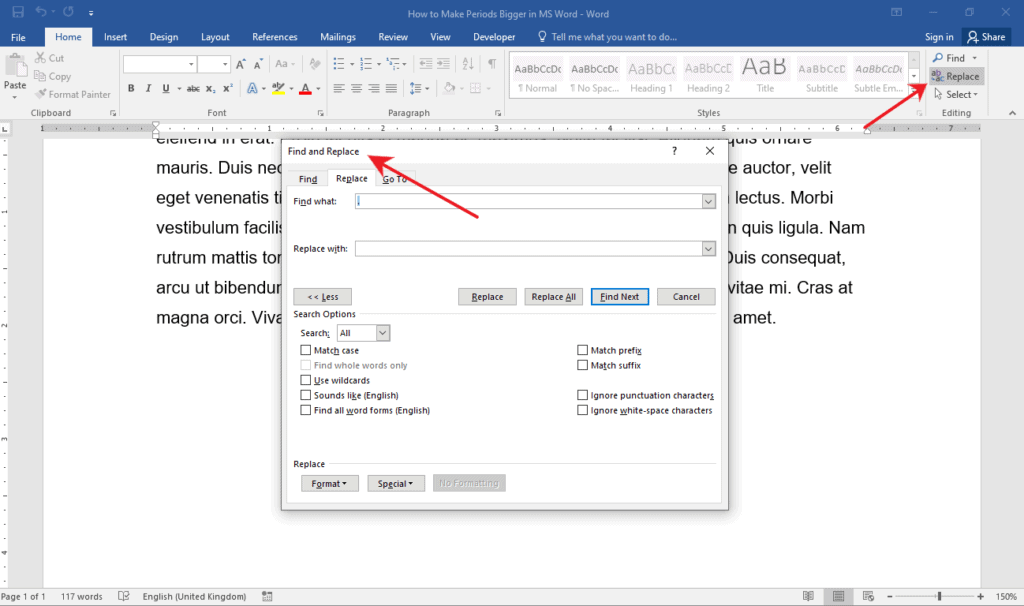
Step 3: Change the font size of the periods.
On the dialogue box, type in a period for both the Find what and the Replace with fields.
Then, click the More>> button to view more options.

Among the options, click the Format button at the bottom of the dialogue box and select the Font option.
This will launch the Replace Font dialogue box on the right side of your window.
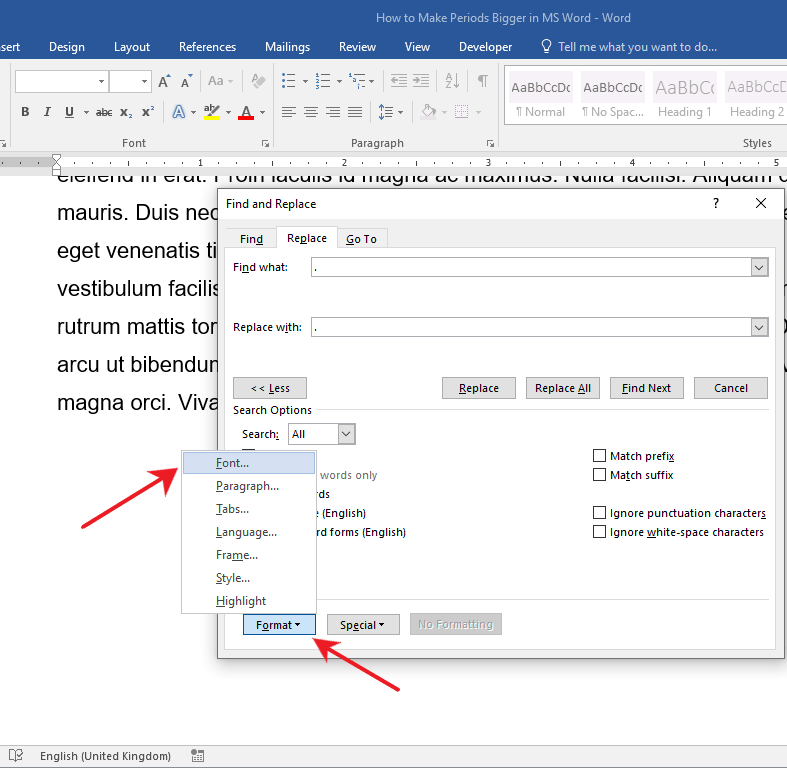
On the Replace Font dialogue box, select the font size that you prefer under the Size group.

Click the OK button to proceed. Otherwise, click the Cancel button.
You’ll know you did it correctly when you see the “Font: __ pt” remark below the Replace with field.
Finally, click the Replace button to make periods bigger one by one. Click the Replace All button to make all the periods bigger at once.

Conclusion
We hope you’ve found this article helpful!