
![]()
Download Article
Step-by-step guide to inserting pictures in Word
![]()
Download Article
- Windows
- Mac
- Web App
- Video
- Q&A
- Tips
|
|
|
|
|
Whether you’re working on a hefty research project or a friendly holiday greeting card, adding images to your Word document can really add value to your project. Whether you want to insert a picture from your computer or find one online, it’s easy to add photos in Word. This wikiHow teaches you how to insert an image into a Microsoft Word document using Windows, a Mac, and the free web version of Word.
Things You Should Know
- Use the Insert tab on Windows, Mac, and the web app to add a picture.
- Select Pictures > This Device to use an image on your computer.
- Click the image to resize and reformat it.
-

1
Click the place in your document where you want to insert the picture. Word’s insertion cursor, a vertical blinking bar, will appear at this point. When you insert the image, its bottom-left corner will be at this point.
- This method works for all modern versions of Word beginning with Word 2016. You can also use it as a guide for earlier versions of Windows, although there will be fewer tools and features.
- Changing the background is done through a different method, using the Design tab.
-
2
Click the Insert tab. It’s near the top of Word between «Home» and «Draw» (or «Home» and «Design» in some versions).
Advertisement
-
3
Click the Pictures tool. It’s in the «Illustrations» section of the toolbar running along the top of Word. Some location options will appear. If you’re using Word 2019 or later, a menu will expand. If you’re using Word 2016 or earlier, your file browser will appear.
-
4
Select the type of image you want to insert. You can choose an image on your computer, a stock image from Microsoft, or an image from the internet.
- Word 2019 or later:
- Click This Device if the picture is on your computer.
- Click Stock Images to select a free stock image from Microsoft’s collection.
- Click Online Pictures to use Bing’s image search to find photos on the web.
- If the photo is on your OneDrive, select Online Pictures and click OneDrive at the bottom-left corner.
- Word 2016:
- If the picture is on your computer, simply navigate to it in the file browser.
- If you want to search for a photo online or insert one from Facebook, Flickr, or your OneDrive, close the file browser and click the Online Pictures icon next to the «Pictures» in the toolbar. You can then select an image from Bing image search, Flickr, or Facebook.
- If the picture is on your OneDrive, click Online Pictures instead of Pictures and click Browse next to «OneDrive.»
- Word 2019 or later:
-
5
Select the image you want to insert. When you find the picture, click it once to select it.
- If you’re selecting from stock images or online images, you can click multiple pictures to add more than one.
- If you’re choosing files from your computer and want to add more than one picture, hold the Ctrl button down as you click each image.
-
6
Click Insert. It’ll be near the bottom-right corner of the window no matter where you’ve selected your image(s). You’re done! Continue to the next steps for formatting information, or print the document when you’re ready.
-
7
Resize the picture. If you want to change the picture’s size, click it once to select it, and then drag any of the corner circles in or out.[1]
- You can also specify the size if you want. Double-click the picture to open the Picture Format tab at the top, and then set your desired measurements next to «Height» and «Width.»
-
8
Use the curved arrow at the top of the picture to rotate it. It’s above the dot at the top-center part of the picture. To rotate, place the mouse cursor over the curved arrow, and then click and drag the cursor left or right until you’re satisfied.
-
9
Double-click the picture to access more editing tools. This opens the «Picture Format» (2019 and later) or «Format» (2016) tab at the top of Word. On this tab, you can:
- In the «Arrange» panel in the top-right area, click Wrap Text to choose how to situate the picture in blocks of text. You can also set alignment preferences here. Wrapping the text is a good way to get your document formatted exactly the way you want.
- To crop the picture, click the Crop tool in the «Size» panel at the top-right corner.
- The «Adjust» panel near the top-left corner has additional tools for background removal, color effects, and corrections.
- To add a border or effect around the picture, select one of the «Picture Styles» at the center of the Format bar, or choose any of the other options in the section to have more control over the style.


Advertisement
-
1
Click the place in your document where you’d like to insert a picture. This places the cursor at that location.
-
2
Click the Insert tab. It’s at the top of Word between the «Home» and «Design» or «Home» and «Draw» tabs.
-
3
Click the Pictures icon. It’s on the toolbar that runs along the top of Word. Look for an icon of a green mountain with a yellow sun between «Tables» and «Shapes.»
-
4
Click Photo Browser or Picture from File. If you want to browse images in your Mac’s Photos app, use Photo Browser. To select an image file using Finder, choose Picture from File.
-
5
Insert the picture into the document. If you’re using the Photo Browser option, simply drag the photo into your document. If you’re using Picture from File, select the image and click Insert.
-
6
Resize the picture. If you want to increase or reduce the picture’s size, click the image to select it, and then do one of the following:
- To maintain the picture’s proportions so it doesn’t stretch or warp, hold down the Shift key as you drag any of the sizing handles (the circles) inward or outward.[2]
- To keep the image’s center in place as you resize, hold down the Option key as you drag the handles.
- You can also specify a size. Double-click the Picture to open the Picture Format tab, then enter your desired measurements next to «Height» and «Width.»
- To maintain the picture’s proportions so it doesn’t stretch or warp, hold down the Shift key as you drag any of the sizing handles (the circles) inward or outward.[2]
-
7
Drag the curved arrow at the top of the picture to rotate it. It’s above the dot at the top-center edge of the picture. Just place the mouse cursor over the curved arrow, and then click and drag it left or right until it’s correct.
-
8
Double-click the picture to access more editing tools. This opens the «Picture Format» tab at the top of Word, which has a bunch of editing features, including the ability to remove the background and add styles.
- Click Corrections near the top-left corner to correct lighting and color problems.
- Click Artistic Effects to play around with filters, and Transparency to make the picture more see-through.
- To crop the picture, click the Crop tool next to the height and width controls.
- Click Wrap Text to choose how to situate the picture in blocks of text, and use Align and Position to ensure correct placement.
- Click Quick Styles to choose pre-styled borders, shadows, and other options.


Advertisement
-
1
Click the place in your document where you’d like to insert a picture. This places the cursor at that location.
- If it’s your first time using Office Online on the web, go to https://www.office.com, sign in with your Microsoft account, and select Word to get started.
-
2
Click Insert. This opens the Insert tab.
-
3
Click Pictures. This opens a drop down options menu.
-
4
Select a picture type. There are four options to choose from:
- This Device — choose a picture on your computer
- OneDrive — choose an image from your OneDrive
- Stock Images — insert a stock image or sticker
- Bing Pictures — search Bing for an image
-
5
Select an image. If you choose the This Device option, you’ll be prompted to select an image from your computer. Click it to select it.
-
6
Click Open. This is in the bottom right corner of the image selection window. This will confirm your selected image and insert it into the document.
-
7
Resize the picture. If you want to change the picture’s size, click it once to select it, and then drag any of the corner circles in or out.
- You can also specify the size if you want. Double-click the picture to open the Picture tab at the top, and then set your desired measurements next to «Height» and «Width.»
-
8
Use the curved arrow at the top of the picture to rotate it. It’s above the dot at the top-center part of the picture. To rotate, place the mouse cursor over the curved arrow, and then click and drag the cursor left or right until you’re satisfied.
-
9
Double-click the picture to access more editing tools. This opens the «Picture» tab at the top of the Word web app. On this tab, you can:
- In the «Arrange» panel in the top-right area, click Wrap Text to choose how to situate the picture in blocks of text. You can also set alignment preferences here.
- To crop the picture, click the Crop tool in the «Image Size» panel at the top-right corner.
- To add a border or effect around the picture, select one of the «Picture Styles» at the center of the bar, or choose any of the other options in the section to have more control over the style.


Advertisement
Add New Question
-
Question
How do I take screenshots?

On a Mac, shift command 3 to screenshot the whole screen. If you want to take a screenshot of a certain area on the screen, press shift command 4. On a Windows PC, press control and print screen at the same time, then you can paste the image into Paint or Microsoft Word.
-
Question
When I insert several photos on an age in a Word document, the photos often won’t stay in place. How do I stop the photos from bumping each other around?
You can right-click the image, hold the cursor over the «Wrap Text» menu option, and select an option from the list that is NOT «In Line with Text» (usually selected by default), such as «Tight» or «Behind/In Front of Text.» Then you should be able to move the image freely around the page.
-
Question
How do I format images in a Word document?
Try double-tapping the photo. A photo format menu should come up on the right side.
See more answers
Ask a Question
200 characters left
Include your email address to get a message when this question is answered.
Submit
Advertisement
Video
-
Adding photos to your Word document increases its size.
-
Other photo modification features available in newer versions of Microsoft Word include the ability to add borders, cutout styles, shadows, beveled edges, glows, and drop shadows.
-
When you crop a picture, the actual cropped part of the picture is hidden, not removed; unless you check the «Delete Cropped Areas of Pictures» box in the «Compression Settings» dialog box. Any compressed pictures with their cropped areas deleted cannot be restored to their original appearance.
Show More Tips
Thanks for submitting a tip for review!
Advertisement
About This Article
Article SummaryX
1. Click the place you want to insert the image.
2. Click the Insert tab.
3. Click Pictures.
4. Choose a location.
5. Select the image and click Insert.
6. Double-click the picture to open editing and format tools.
Did this summary help you?
Thanks to all authors for creating a page that has been read 650,203 times.
Is this article up to date?
Table of Contents:
- Image to Text Converter
- How to extract text from images?
- Features offered by Image to Text
- Why Prepostseo Image to Text Converter?
- Use Picture to Text converter – Why it is important?
- Frequently Asked Questions (FAQs)
Image to Text Converter
Image to Text is a free online tool that lets you copy text from images accurately. It features the latest optical character recognition (OCR) technology to accurately convert photos into text.
It can extract text from any image format such as:
- PNG
- JPG
- BMP
- GIF
- JPEG
- TIFF
Jpg to text tool can extract text from images, official documents, screenshots of web pages, or any image with a few characters.
To convert an image to text using the above tool, follow the steps below:
- Upload the image using the Upload Picture button. If you want to crop the image, you can use our crop image
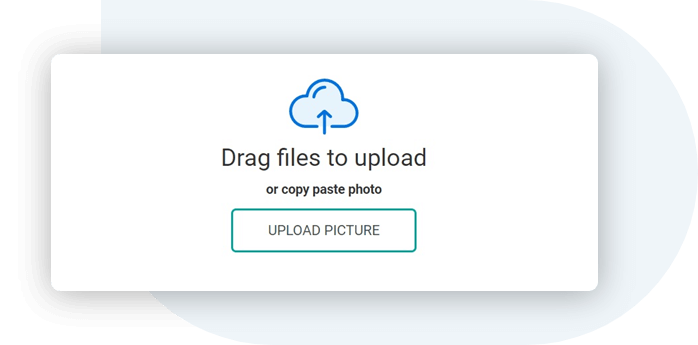
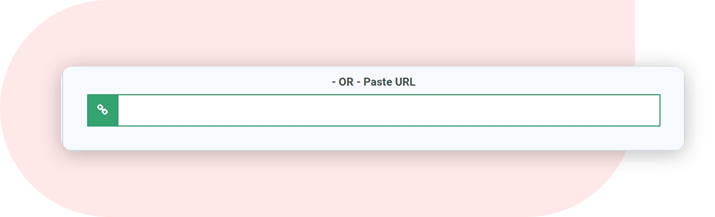
- Or paste the URL of the image.
- Click the Submit button to get a text from uploaded images.
- Hooray! You got it right.
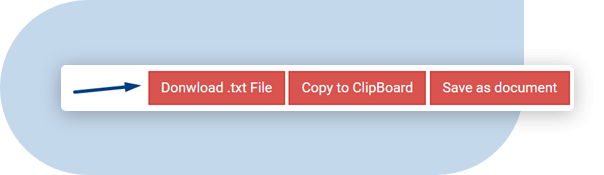
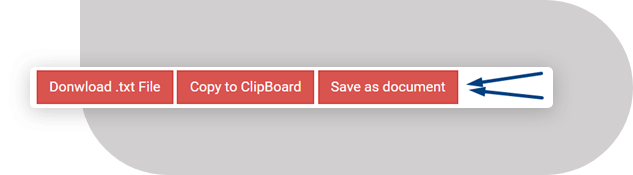
You will get the text in the container where you can copy the text to the clipboard, download the text as a .txt file, or save it as a document. - If you want to convert an image that includes text from other languages, you can choose another language from the side panel.
You can also convert pdf images to text online using this photo to text converter.
Features offered by Image to Text
The Following key features of our picture to text converter make it a competitive and perfect tool to copy text from images.
Let’s explore some of the classic features of this image to text app.
1. Extract text from low-resolution images
Students often take photos of book pages and notes for exams. These pictures are usually blurred due to poor camera quality.
Our online text extractor can take out text from low-resolution and blurry images as well with high accuracy.
2. Identify math equations
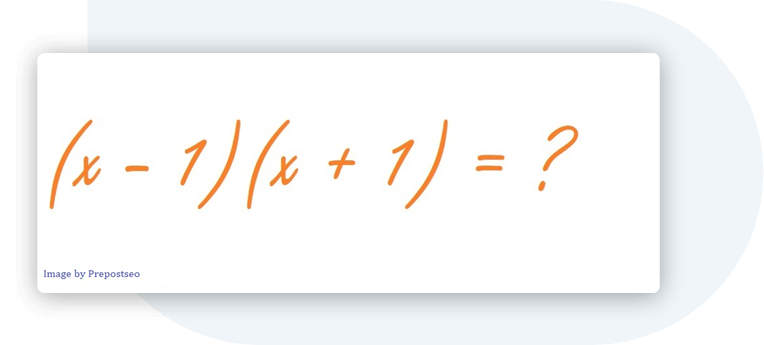
You may have some pictures of algebraic or geometric formulas if you are a math geek. The good news is, this picture to text converter not only gets simple text for you but also extracts complex mathematical equations like a pro.
3. Free of cost
You can upload as many scanned books, notes, images, and photos as you want.
Our free pic to text converter extracts correct text each time without asking you to sign up or paid subscription.
4. Trustworthy and secure
You are safe and secure with us. We always aim and promise to keep your data safe and secure. We adhere to our policy that we will neither pass your data to any third party nor it will be stored in our database.
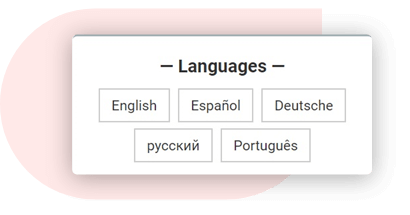
5. Multiple language support
This online OCR tool provides multilingual support. It can translate images into text in more than 30 languages.
It supports Multiple languages including English, Spanish, Dutch, Russian, Portuguese, Czech, Swedish, Polish, Netherlands, French, Indonesian, Romania, Thai, Italian, Georgian, Dansk, Korean, Filipino, Turkish, and Arabic.
6. Extract text via URL
Apart from uploading, a picture can be converted to text by inserting the URL of the pic into the URL box.
This feature is very useful when you browse the Internet and come across an image that contains the text.
7. Download the text file
Data can be lost or misplaced if not saved appropriately. You can directly download converted text as a file instead of copying the text.
This feature saves time and important data in the local storage of your device.
8. Copy to the clipboard
You can copy the converted text to the clipboard and paste it into the desired file or directory.
9. Convert the image to a word file
After converting a photo to text, you can save the output directly to a Microsoft Word file by using Save as Document feature.
This way, you can convert images to text in Microsoft Word and can use it for further purposes.
10. Accessible from any device
This jpeg to text converter can be used on a mobile device and performs the text conversion perfectly. You can access this tool from any device by using the web browser.
Why Prepostseo Image to Text Converter?
Here are the best reasons that make our tool unique:
| 💡 Formats | JPG, PNG, JPEG, GIF, and more |
| 🎯 Result | Highly accurate |
| 💲 Price | Fremium |
| 🌐 Languages | 20+ Languages supported |
| ✔️ Save | Time and Money |
| 🥰 Improves | Work Efficiency and Productivity |
- Convert images, scanned documents, and photos to editable text
- No registration or personal data required
- No installation required
- 100% free of charge
- Exact image to text conversion
- Save your time and money
- Save you from retyping
Use Picture to Text converter – Why it is important?
There are millions of reasons to use text extractor tools, some of which are:
-
Save time & efforts
Productivity needs more time and with this picture to text converter, you can save your precious time by converting scanned images into editable text, saving time and reducing errors from manual typing.
-
Boost your business
You can extract text from all your business documents and store it in one place. This data can be used to create analysis and audit reports.
-
Extract content from social media
You may encounter interesting images on your social media accounts such as Facebook, Instagram, Twitter, etc. These media files can be converted to text and you can use this text wherever you need.
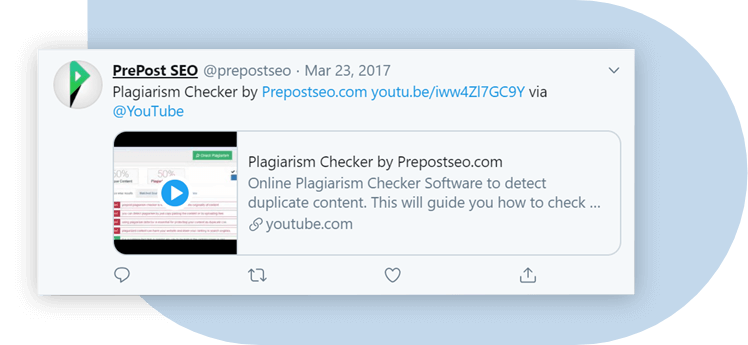
Whenever you wish to send any of that to your friends in text form, you can simply generate the text from social media images using this OCR tool.
Frequently Asked Questions (FAQs)
How do I extract text from JPEG?
You can use our Jpg to word converter to extract text from a JPEG, OR follow the steps below:
- Go to the Prepostseo image to text tool.
- Upload a JPEG image and hit Submit.
- Download or copy the text using the relevant buttons.
Tip: you can also use imagetotext.info to extract text from image.
How do I convert handwritten notes to text?
Follow the steps below to convert handwritten notes to text:
- Take a picture of the note using a camera.
- Go to the Prepostseo image to text tool
- Upload the image and click Submit.
- Copy the text or download the file into your device.

on
May 21, 2021, 8:21 AM PDT
How to fill text with a picture in Word
Using this simple technique for filling text with an image, you can create unique textual designs in Microsoft Word. Here’s how.

Microsoft Word isn’t a desktop publishing app, but it has a lot of design features that anyone can use to create professional looking documents, flyers, brochures and more. For instance, when you have a fun message, you might try filling text with an image. Doing so lets you create unique content with an eye toward design, instead of ordinary text. In this article, I’ll show you how to use a SmartArt text shape to achieve this look—text filled with an image.
SEE: 69 Excel tips every user should master (TechRepublic)
I’m using Microsoft 365, but you can use older versions. You can create your own document or work with the demonstration downloadable .docx file. The browser version will display filled text, but you can’t create it in the browser.
1. Add SmartArt shape
When working with shapes, you can use the Fill property with just about any photo or drawing. Ordinary text doesn’t have a Fill property as shapes do.
Instead of using ordinary text, we’ll use a SmartArt text shape. You don’t need to put a lot of thought into which shape, though. We need only one shape that displays text. We will end up deleting some pieces and resizing the one that’s left. The demonstration document uses Landscape orientation, but that’s not necessary.
SEE: Windows 10: Lists of vocal commands for speech recognition and dictation (free PDF) (TechRepublic)
Now, let’s insert a SmartArt text shape as follows:
- Click the Insert tab and in the Illustrations group, click SmartArt.
- Choose the first or second List shape, as shown in Figure A. Stay away from shapes with lots of bells and whistles because that’s all stuff you’ll have to delete anyway. The resulting shape is also shown. As you can see there are five shapes that you can use to display text. We only need one.
- Select four of the shapes and delete them. The remaining shape will fill the shape (Figure B).
- At this point, you have a larger shape box and a text box. Resize so they both stretch from the left to the right border.
Figure A

Figure B

Now that we have the SmartArt text shape, let’s add and format the text. Remember, we’re working with a text shape or box, not ordinary text.
2. Add and format the text
This step gives you lots of opportunities to be as creative or subtle as you like. The document’s mood will help dictate your choices. To follow along, enter TechRepublic into the text shape. Select the text and set the font size to 110 and click Bold. You can change the font if you like, but I didn’t. As shown in Figure C, you now have formatted text, ready to fill with a picture or drawing.
Figure C

3. Fill the text
Filling text is simple. The bigger issue is choosing the right picture. The sky really is the limit, but let the picture enhance your document’s content. Now, let’s fill the text with a picture as follows:
- Select the text.
- On the contextual Format tab, click the Text Fill dropdown in the WordArt Styles group.
- In the resulting dropdown, choose Picture.
- In the resulting dialog, enter “Bubbles” as a search term.
- From the picture files, choose anything—I choose the circled graphic in Figure D.
- Click Insert.
Figure D

The picture fills the text, as you can see in Figure E, but it’s not effective because of the background. Let’s get rid of it. With the shape (not the text) selected, click the Shape Fill dropdown in the Shape Styles group (on the contextual Format tab). Choose No Fill. Figure F shows the filled text with no background.
Figure E

Figure F

I chose a colorful pattern, just for the fun of it. You’ll want to experiment a bit until you get the hang of it. The technique is easy to implement, but make sure the filled text enhances your document instead of distracting viewers.
Also See
-
How to make fewer mistakes and work more efficiently using predictive text in Microsoft 365
(TechRepublic) -
How to use the many text wrapping options in Microsoft Word
(TechRepublic) -
Microsoft 365: A cheat sheet
(TechRepublic) -
Zoom vs. Microsoft Teams, Google Meet, Cisco WebEx and Skype: Choosing the right video-conferencing apps for you (free PDF)
(TechRepublic) -
Checklist: Securing Windows 10 systems
(TechRepublic Premium) -
Everything you need to know about the Microsoft Exchange Server hack
(ZDNet) -
Must-read coverage: Windows 10
(TechRepublic on Flipboard)
-
Microsoft
-
Software
Have you ever wondered (and I just know you have) how all those bloggers, graphic designers, Etsy shop owners, and others create printables or graphics with images or words that are filled with a cute picture? I mean, not just a word that’s colorful, but one that is filled in with an actual picture, like glitter, wood grain, a watercolor doodle, or some other cool design?
Well, you’re in luck because I’m sharing all the details on how to quickly and easily create this effect using one of Photoshop’s most powerful but often overlooked tools: the clipping mask!
Sounds fancy, I know, but don’t be intimidated!

[There are affiliate links below, and big thanks to FontBundles.net for sponsoring today’s post!]
Used in This Tutorial:
- Photoshop Elements
- Fonts from The Majestic Font Bundle
- Twenty Nine Regular: “love”
- Twenty Nine Ornaments (dingbat font): drawn heart shape
- Watercolor picture file
Step 1: Create New File
First, open up Photoshop (I use Photoshop Elements because it’s the cheaper but just as awesome version of the full non-Element variety). Create a new file by going to File > New > Blank File, and designate your desired specifications. Also make sure you’re on Expert mode at the top.
TIP: If you are planning on printing out your creation, make sure you have a large (i.e. at least 300 pixels/inch) resolution….bigger is better! If you’re going to use your design solely online for things like blogging graphics or Etsy shop listings, a resolution of 72 should be fine.

Step 2: Add Text and/or Image
Next, add your text or image/dingbat/shape (whatever you want to be filled). Simply click on the Text Tool (the green ‘T’) from the left menu, choose your font from the menu at the bottom, click anywhere on your work zone to create a text box, then type away.
You’ll notice a new layer will pop up over on the right in the Layers Menu.

I like to go ahead and add all my elements at the beginning then get to fine tuning later (just a personal preference), and with this particular design, I’ll be using an image from a dingbat font too. It is actually what will be filled with my upcoming picture, and the ‘love’ text will be added on top. I know, a tad confusing, but stay with me!
Once added, the ‘love’ word and the newly added heart dingbat are now separate text layers on the right.
NOTE: The layer on the right for the heart shape shows its name as ‘q’. That’s because this is a dingbat font, and the letter q is the keystroke I used to get the heart. You can rename the layer if you’d like, but I usually don’t bother unless I’m making a birthday chalkboard poster and have dozens of dingbat layers….that can get quite confusing! For more on dingbats and how to use them, check this or this out!

Speaking of Fonts….The Majestic Font Bundle!
If you’re a faithful reader, you know I’m a HUGE font addict. I have literally thousands (thousands!) of them. Few things make my crafty heart happier than scoring awesome premium fonts at great savings. Who doesn’t like high quality at a good deal, amiright?
Well, the folks over at FontBundles.net are back with another amazing package this month: The Majestic Font Bundle!
This bundle includes all of the following:
- 40 premium fonts for only $29 (that’s over a 95% savings!)
- Over 10,300 extra glyphs!
- All fonts work with any software on Macs or PCs (Photoshop, Illustrator, Silhouette Studio, and more)
- Full commercial license….so you’re free to sell all those creations you knock out!
- Lifetime download guarantee and quick email support

As you can see in the screenshots from above, I’m using a font from The Majestic Font Bundle called Twenty Nine. I love that hand-drawn, scribbly, marker look.
The ‘love’ word is in the regular Twenty Nine font, while the heart shape is part of the bonus Twenty Nine Ornaments dingbat font….gotta love a bonus!

{Pssst, see above how ‘C’est La Vie’ is in pink watercolor and ‘Heavenly’ is filled in with gold glitter?? That was done using clipping masks, just like we’re going over in this tutorial!}
Ok now, back to it!
Step 3: Add Picture You Want to Use as Filler & Adjust Layer Arrangement
Next, add a new layer with the picture that you want to use as the filler for your word or image. I’ll be using a peachy watercolor file, but you can use pretty much any picture you’d like….so many options!
IMPORTANT: Pay attention to your layer arrangement here because you need your filler (picture) to be directly ON TOP of your word/image. The filler layer needs to be above the fillee layer (yes, I make up my own words).
Since I wanted the watercolor to fill the heart, I made sure my layers were arranged appropriately (watercolor on top).

Step 4: Create Clipping Mask & Adjust Placement/Scale
Now comes the fun part….the clipping mask! Sounds really fancy, huh?
To make things easier, I first turned off my ‘love’ layer and made it hidden by clicking on its tiny little eye-ball (you can see it above the pink arrow). Once it’s turned off, the eyeball will have a red slash line through it. We’ll come back to it in just a moment.
To create a clipping mask:
- Make sure your layer arrangement is correct (picture layer directly above word/image layer)
- Click on and select your picture layer at the top
- Right-click on the layer and select ‘Create Clipping Mask’

That’s it! Once you’ve done that, all the parts of your picture that were outside of your word/image will now be clipped, or no longer visible, but the inside portion will remain. As you can see, my heart is now filled with the watercolor picture.
And don’t worry….our next step is to make sure the entire shape gets filled in, so the remaining black portions will soon vanish. I won’t leave ya hanging!
NOTE: Looking back at your Layers Menu, you can easily tell if a clipping mask has been applied to a layer. The preview image will now be indented a smidgeon to the right and a tiny downward blue arrow and white box will appear to the left of it. Also, the layer it’s applied to will now be underlined. And if you ever want to remove a clipping mask, just right-click the layer again and select “Release Clipping Mask.”

Step 5: Make Final Layer Adjustments
Sometimes the clipping mask will leave parts of your word/image unfilled, depending on your picture and initial sizing. Fear not!
This can easily be remedied by adjusting the size or scale of your picture. Just click on and slide one of the tiny boxes along the edge of the picture’s bounding box, or move the entire layer around until you’re happy with its placement. You can of course alternatively change the size of the word/image too.
After increasing the size of my watercolor layer, my (digital) heart is now completely filled with peachy goodness.

To start finalizing my design, I then selected both the watercolor and heart layers at the same time, adjusted their sizes, and rotated them a tad to the left.

Almost finished, promise!
Remember the very first thing I added to my design, the ‘love’ word? Well, I haven’t forgotten about it.
This last remaining element was finished by first clicking on its little eyeball so it became visible again (no more red slash). Then I changed the text color from black to white in the Text Menu, and moved the layer to the top in the Layers Menu. This would place the word above the watercolor heart.

The Final Design
And here’s how my design looks once printed and framed! Pretty nice, huh? And it was so easy to knock out too.

Another {Simpler} Example
Here’s another, more straight-forward example. This time I just applied a clipping mask to a word, sans dingbat or other shape.
I used a super cool font called Ipsum, also part of The Majestic Font Bundle….the hand-scripted, rough around the edges look is so great with watercolor.

In Photoshop, you can see how easy it is by looking at the Layers Menu on the right. It’s just the text layer with the watercolor picture layer above it, and the clipping mask applied. That’s it!

Another cute, colorful, and simple (but still interesting) design. Can’t beat it.

There are countless ways to play around with the clipping mask tool. Use the Shape Tool with basic shapes, have fun creating custom gifts with kids’ photos, display vacation or other memorable keepsakes, personalize your home decor, make 100% custom blog or Etsy shop mockups or graphics, etc. It’s so versatile and you can create some truly stunning designs!
Oh, and don’t forget to check out The Majestic Font Bundle to score some awesome fonts at a huge deal….but you only have until the end of June, so hurry!
FontBundles.net also offers great FREE premium fonts, but just like with the monthly bundles, you gotta grab them while they’re available!

If You Enjoyed This….
Make sure you check out my Project Gallery for lots of other tutorials and crafty creations, including more posts where I share my love for fonts, as well as a whole section dedicated to Photoshop and other kinds of digital fun!
Here’s just a sampling:


Thanks so much for stopping by! Stay crafty!

Word for Microsoft 365 Word for the web Word 2021 Word 2019 Word 2016 Word 2013 More…Less
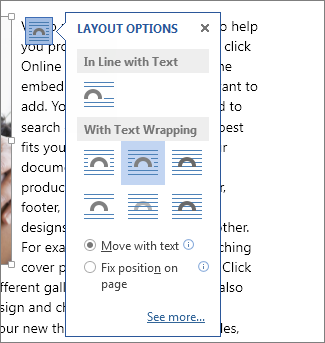
Moving or repositioning a picture on page in Word is as simple as dragging it with your mouse. But sometimes it doesn’t work. The key to getting the results you want is to select Layout Options.

-
Select a picture.
-
Select the Layout Options icon.
-
Choose the layout options you want:
-
To bring your picture in front of the text and set it so it stays at a certain spot on the page, select In Front of Text (under With Text Wrapping), and then select Fix position on page.
-
To wrap text around the picture but have the picture move up or down as text is added or deleted, select Square (under With Text Wrapping), and then select Move with text.
-
For or more information and examples of text wrapping, see Wrap text around pictures in Word
The picture is probably behind another object, like a block of text:
To select the picture, use the Selection pane:
-
Select Home > Select > Selection Pane.
-
In the Selection pane, select the picture.
To move a picture a tiny amount, select the picture, then hold down the Ctrl key and press an arrow key.
To move several objects at the same time, group them together:
-
Select the first object.
-
Hold down the Ctrl key and select the other objects.
-
Right-click one of the objects, point to Group, and then select Group.
Tip: If you are unable to group or multi-select pictures, it’s possible that the layout of your picture is inline with text. If so, please refer to Open Layout Options to change the picture layout to any option under With Text Wrapping.
For absolute control over the alignment and positioning of a picture, use the Layout box to set alignment relative to margins or columns, absolute position in inches, or relative position by percentage. This comes in handy when you want to place a picture a certain distance from something else, like a page margin.
-
Select the picture.
-
Select the Layout Options icon.
-
Select See more, and then make alignment and position adjustments on the Position tab.
If you can’t select any of the position options on the Position tab, select the Text Wrapping tab, and then select any option except the In line with text option.
If you have more than one picture that you want to overlap on a page, you can enable this in the Layout box.
-
Select a picture.
-
Select the Layout Options icon.
-
Select See more.
-
On the Position tab, in the Options group at the bottom, select the Allow overlap check box.
-
Repeat for each picture for which you want to enable overlapping.
In addition to aligning and positioning pictures on a page, you can also align pictures to each other, or to other objects on the page. Although picture-to-picture alignment is not available from the Layout Options icon or the Layout dialog box, it’s a common task that you might do while working with picture positioning and alignment.
-
Hold down the Ctrl key and select each object that you want to align.
-
Go to Picture Format or Picture Tools Format > Align, and then choose an option, such as Center, Top, or Bottom.
An object anchor  indicates where a picture or object is located in relation to the text in your document. Anchors do not appear for inline pictures; inline objects are tied to the place within the text where they were inserted and are treated like any text character—»in line with text.»
All other wrapping options (Square, Tight, Through, Top and Bottom, Behind Text, In Front of Text) are anchored to a particular place in the document; the anchor indicates the paragraph with which the object is associated. Select a picture, and then select the Layout Options icon to find out how your picture is inserted.
Notes: If you select a picture and it’s not inline with text, but you don’t see an object anchor, you can ensure that anchors are shown in two ways:
-
Show formatting marks On the Home tab, in the Paragraph group, select Show/Hide ¶.
-
Always show anchors Select File > Options > Display, and then select Object anchors.
Because anchors are simply a visual indication of a picture’s relative position on a page, they cannot be removed. However, by trying different text wrapping options, you should find all the flexibility you need in positioning a picture, regardless of its anchor.
For or more information and examples of text wrapping, see Wrap text around pictures in Word.
If you want to ensure that an image stays put even if the text around it is deleted, you can lock its anchor:
-
Select the picture.
-
Select the Layout Options icon.
-
Select See more, and then select Lock anchor.
Note: Because anchors are not used for pictures placed In Line with Text, anchor locking and all other positioning options are unavailable for inline images.
See also
Wrap text around pictures in Word
Rotate a text box, shape, WordArt, or picture in Word
Group or ungroup shapes, pictures, or other objects
If you inserted a picture into your document while using Word for the web, you can cut and paste it to move it within a document, and you can apply paragraph formatting, like vertical spacing and centering, to it. However, you cannot move a picture that was inserted while using the desktop version of Word if the picture has text wrapping or a fixed position on the page.
If you find that you cannot make changes to a picture, and you have the desktop version of Word, select Open in Word to open your document in Word and make changes to its layout.
When you are done, press Ctrl+S to save your document to its original location. You can then open the document again in Word for the web, and continue editing. Word for the web will retain the layout settings that you applied in the desktop version of Word.
Need more help?
Want more options?
Explore subscription benefits, browse training courses, learn how to secure your device, and more.
Communities help you ask and answer questions, give feedback, and hear from experts with rich knowledge.