
i puzzle time image by Christopher Hall from Fotolia.com
Despite the rise of the video game, many people still like to play simple games on paper. There are many different kinds, but one of the most popular is called the «word find» puzzle. In this puzzle, words are hidden inside a rectangular array of letters. The object is to find these words and circle them. Some of these puzzles come with the words listed on the side so you know what to look for, while others expect you to find the words without hints. If you want to make your own «word find» puzzle, you easily can do so using Microsoft Word.
Step 1
Select «Table» from the menu in Microsoft Word and click «Insert Table.» In the dialog box that pops up, enter as many columns and rows as you want. The number of columns is the number of letters you want going across the puzzle and the number of rows is the number of letters you want going down the puzzle. Click «OK.»
Step 2
Hover the cursor arrow over the lines separating the cells. Drag them together to make each cell just large enough to hold one letter.
Step 3
Click inside the first cell of the first row. In the options at the top, choose the font type and size you want and type in the first letter of the puzzle. Continue typing in the letters for that row, placing one or two words within the set of letters..
Step 4
Repeat Step 3 for the other rows, but in those rows create words downward as well. As a variation, enter words backwards or diagonally, although this takes more planning.
Step 5
Select «File» and click «Save.» Name your file and save it. To print your puzzle, select «File» and click «Print.»
Writer Bio
Daniel Ketchum holds a Bachelor of Arts from East Carolina University where he also attended graduate school. Later, he taught history and humanities. Ketchum is experienced in 2D and 3D graphic programs, including Photoshop, Poser and Hexagon and primarily writes on these topics. He is a contributor to sites like Renderosity and Animotions.
How do I make a game tree in Word?
How to make a decision tree using the shape library in MS WordIn your Word document, go to Insert > Illustrations > Shapes. A drop-down menu will appear.Use the shape library to add shapes and lines to build your decision tree.Add text with a text box. Go to Insert > Text > Text box. Save your document.
How do you create a tree diagram in Word?
2:10Suggested clip 58 secondsHow Do I Create a Tree Diagram in Word – YouTubeYouTubeStart of suggested clipEnd of suggested clip
How do I make a diagram in Word 2010?
2:49Suggested clip 115 secondsHow to create a Flow Chart in Microsoft Word 2010 – YouTubeYouTubeStart of suggested clipEnd of suggested clip
How do you make a decision tree for free?
Simply head on over to www.canva.com to start creating your decision tree design. You don’t need to download Canva, just create an account and log in. If you want to design on the go, download our iPhone and iPad apps from the App Store or our Android app from Google Play for free.
Is there a template for a family tree?
Our selection of printable family tree templates can be downloaded for free in PDF and Microsoft Word file formats. You can use any of the blank family tree templates to make your own version for your family members. A common way of visually showing the relationship between generations is to use a family tree.
How do I make a large family tree chart?
Gather information about your family. Write down what you know, ask family members to fill in the gaps, and find pictures and documents. Draft a family tree outline. Compile all of the information you have and create an outline. Add information to each leaf. Distribute your family tree diagram.
How do you make a family tree on pages?
How to Make a Family TreeClick on the “Pages” icon.Choose from the list of templates that you want to use in order to make your form.Click Choose to open a new document by using the template you selected.
How do you make a family tree on numbers?
How to Make a Family TreeClick on the Launchpad icon and open it.Next, click on the Numbers icon.Click on the type of document you want to create by choosing from the list you’ll see on the left.Click on the template and search for ones specifically for family trees.
How do you draw a line in Pages on a Mac?
Add lines and arrows in Pages on MacClick in the toolbar, then in the Basic category, click a line. Options include a straight line with or without endpoints, or a line with editing points to create a curved line.Click to select an existing line on a page.
How do I make a diagram in pages?
Launch Pages and open a blank document. Click on the “Shapes” button in your toolbar, or click “Insert” and then “Shape” and select a shape. Adjust the size of the shape by clicking and dragging on any of the points. Select your shape by clicking on it and type the information you’d like it to contain.
What software is best for flowcharts?
As a web-based platform, Lucidchart can be used with Ma, PC or Linux systems using Chrome, Firefox, and Safari. It also offers both iOS and Android apps. Lucidchart also integrates with G Suite, Atlassian, Slack, Salesforce, and Microsoft Office, allowing users to easily integrate it into their workflows.
How do I put text in a shape in pages?
Add and align text inside a shape in Pages on MacAdd a new shape and begin typing, or click an existing shape to select it, then type. To align the text in the shape, select the shape, then in the Format sidebar, click the Text tab.
How do you type inside a shape?
Right-click anywhere in your shape and click the “Add Text” command. This places an insertion point in the shape where you can type your text. Once you’ve added whatever you want to write, the “Format” tab has tools you can use to give your text a little pop with things like text styles and shading.
![]()
Download Article
![]()
Download Article
Whether you’re teaching a classroom full of kids or you just want to hand out a crossword puzzle to your friends, using Microsoft Word is an easy way to create your own. In this article, we’ve detailed how to format your crossword puzzle and make it look professional. We’ve also provided some tips and tricks that you can use while writing your crossword puzzle to make it the best it can be.
-

1
Create a table with 2 columns and 10 to 12 rows. Open up Microsoft Word and click “Insert” at the top of the toolbar. Then, hit “Table,” and select one with 2 columns and 10 to 12 rows (depending on how many hints you’re going to create). Toggle the left row until it’s super small—the left row of the table only needs to fit a single number, while the right row is going to hold all of your hints.[1]
- Keep this table in landscape mode so you can read and write your hints easily.
-
2
Add your hints to the right columns. Make your hints specific, and don’t forget to keep track of which answers they go with! If you want to, you can add the answers in with the hints for now, since you’ll be editing them later. Type your hints into the right row of the table, but leave the left one blank for now.[2]
- If you wrote your hints out ahead of time, you can simply copy and paste them into this new table.
Advertisement
-
3
Insert a 10 x 10 table into the document. Scroll down to a new page and click “Insert” again, then select “Table.” This time, pick a table with 10 rows and 10 columns. When you can see the table in your document, toggle the grid so that the height and the width are exactly the same.[3]
- In standard crossword puzzles, the height and width are the same, which is why it’s important to do this step now.
-
4
Add your answers to the 10 x 10 table. Now it’s time to create your crossword! Take a look at your hints again and strategically place your answers into the grid. You can add them both horizontal and vertical, and don’t be afraid to cross some over each other! This could take a little while, since you’re creating the puzzle part of your crossword puzzle.[4]
- Answers can cross over each other if they both contain the same letter. For instance, if the word “banana” is going across and “apple” is going down, you could make the “a” in “apple” the same as one of the a’s in “banana.”
-
5
Assign each answer a number, then match the number to the hints. In your answer grid, add a number to the first letter of each answer so you know where it starts. Then, write the number that correlates with each answer next to each of your hints. That way, you’ll keep track of which answer goes where in your puzzle.[5]
- You can make the numbers smaller by highlighting the number and then hitting “Ctrl,” “Shift,” “Plus” at the same time.
-
6
Divide your hints into 2 separate text boxes. In your toolbar, click “Insert,” then “Textbox.” Add 2 text boxes right next to each other, and label one “Down” and one “Across.” Then, divide your hints into the separate boxes based on which way their answers go.[6]
-
7
Delete the unnecessary cells in the answer table. Highlight the entire 10 x 10 table, then select “No border.” Highlight one of the letters in the answers, then click Select > Select text with similar formatting. Click the borders option again in the toolbar, then select “All borders.” This will create a grid that perfectly fits your crossword puzzle without any unnecessary boxes.[7]
- Unfortunately, on Microsoft Word, you can’t create a traditional look with black boxes surrounding the answers.
-
8
Delete your answers and drag the hint text boxes up to the grid. Blank your crossword puzzle out by deleting each letter in the grid. Drag your text boxes up so everything fits on one page, and arrange them however you’d like to. Once you’ve done that, your crossword puzzle is ready to print![8]
- To print your crossword puzzle, hit “Ctrl” and “P” at the same time.


Advertisement
-
1
Download a free template to skip the formatting. There are tons of different Microsoft Word templates you can use for crossword puzzles for free. EclipseCrossword and Crossword Labs are 2 of the most popular ones, and you can add them to your Microsoft Office in no time. Hit “download” and wait for them to load onto your computer before you start making your puzzle.[9]
- You can also search for templates in Microsoft Word. If you don’t have any templates already downloaded, you can find ones that you want right in Word. Open up a new document, then click “File,” and “new.” Then, type crossword into the search bar.
-
2
Enter your list of words and hints. Crossword makers do most of the work for you, but you still have to write them out. Once you come up with a list of hints and words you’d like to use, go ahead and type them into the relevant spaces. Then, your crossword will be formatted for you, and all you have to do is print it out![10]
-
3
Scroll through different puzzle formats to pick your favorite. If you don’t like the format that your crossword maker spit out at first, feel free to change it up. You can pick a traditional-looking crossword with black squares instead of blanks, or you can go for a more modern version with colorful spots in the middle.[11]
- You might also be able to decorate your crossword puzzle with fun stickers or logos.


Advertisement
-
1
Pick an exciting theme. It’s much easier to come up with answers and hints if your crossword puzzle has a general theme that you can stick to. Before you start creating, sit down and think of a fun, relevant theme that you can model your crossword after. Make it relevant to your audience, and pick something broad that you can create a lot of hints for.[12]
- Some fun themes include toys and games, 90’s nostalgia, fruits and vegetables, pop culture, insects, plants, or sports.
-
2
Create fun hints that make you think. When it’s time to think of the hints, feel free to get creative. You don’t want your hints to be too easy (unless you’re making a crossword puzzle for young kids), but you also don’t want your audience to be stumped. As you write out your hints, try to read them on their own and think about whether or not you’d be able to guess the answer based on your hints alone.[13]
- For instance, if your answer was “banana,” you might write, “A fruit, yellow and curved.”
- If the answer was “lunch,” your hint might be, “The thing you eat after breakfast.”
- If your answer was “cold,” you might write, “The inside of your freezer.”
-
3
Consider the age of your audience. A crossword puzzle for 8 year olds will be much different than a crossword puzzle for older adults. Younger children don’t have the life experience that older adults do, so they may need easier hints and simpler words. You should also keep in mind the specific audience you’re handing out your crossword puzzle to: a group of biologists might enjoy a crossword puzzle full of scientific terms, while a group of writers might love a puzzle full of obscure words.[14]
-
4
Check out a daily crossword puzzle for inspiration. If you subscribe to a newspaper or do crossword puzzles online, you can get some inspiration from people who write crossword puzzles for a living. Check out how they write each hint and how long all their answers are. You should also take note of how tough the hints are and how long it takes you to solve the puzzle. The more crosswords you write, the better you’ll get![15]
- The New York Times has a fairly famous daily crossword puzzle that you can play online.


Advertisement
Add New Question
-
Question
How can I retrieve a Word document that wasn’t saved?

Spike Baron
Network Engineer & Desktop Support
Spike Baron is the Owner of Spike’s Computer Repair based in Los Angeles, California. With over 25 years of working experience in the tech industry, Spike specializes in PC and Mac computer repair, used computer sales, virus removal, data recovery, and hardware and software upgrades. He has his CompTIA A+ certification for computer service technicians and is a Microsoft Certified Solutions Expert.
Network Engineer & Desktop Support
Expert Answer
If you’re in a corporate environment, a back-up copy of your document is saved to the Exchange Server of recent files, where you can recover it. Unfortunately, that option isn’t usually available for home users. In that case, you’ll need to use software like Recuva.

Ask a Question
200 characters left
Include your email address to get a message when this question is answered.
Submit
Advertisement
-
If you’re ever stumped on writing a hint for a word, try looking it up in the dictionary for inspiration.
Thanks for submitting a tip for review!
Advertisement
References
About This Article
Thanks to all authors for creating a page that has been read 22,715 times.
Is this article up to date?
Create your own word games and logic puzzles to test friends, students, and strangers with these free websites.

Do you know what’s more fun than playing word games and logic puzzles? Creating your own games to test friends and strangers, which you can do with these free websites.
Puzzles have been scientifically proven to be good for your brain in various ways, including building memory, improving problem-solving skills, and enhancing your mood. The next step in the journey is to make your own games and quizzes. And it’s easier than ever with several free sites offering ways to create your own custom puzzle.
1. My Wordle (Web): Make Your Own Wordle Game
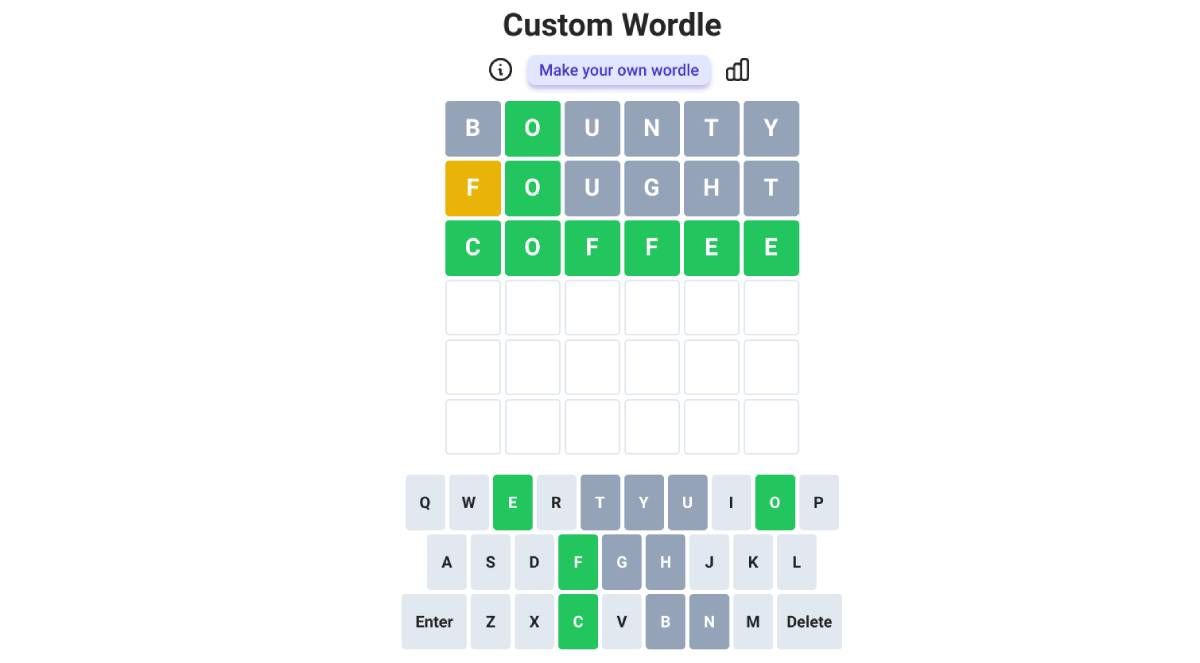
Who knew a simple 5-letter word guessing game would take the internet by storm? But Wordle has gone viral, with people posting their daily scores as emojis on every type of social media. Well, you can now make your own Wordle to test your friends with this simple app.
Visit the web page, and you’ll be prompted to type in a 5-letter or 6-letter word, which then generates a custom URL you can share with friends. In fact, the rest of the rules are the same as Wordle. Recipients have to guess the correct word in five attempts (or six in the case of a six-letter word). Wrong letters turn grey, correct letters turn yellow if on the wrong tile, and green if on the right tile.
Like the original, the app also generates shareable emojis of your winning turn. You can view your solving percentage statistics at any point, as long as you’re using the same browser each time. And no one needs to sign up to use the site.
2. ProProfs (Web): Create Your Own Word Games for Free
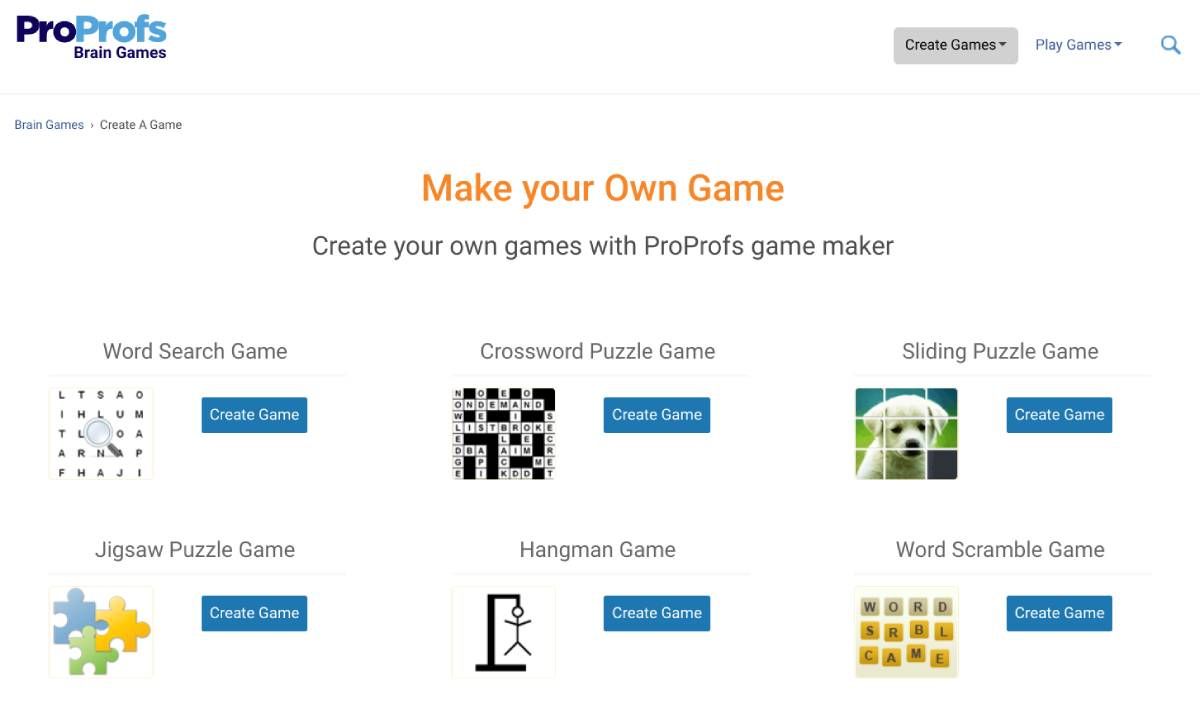
ProProfs is a simple website to create your own word games that anyone can play. Unlike several other free online puzzle makers, ProProfs doesn’t limit how many puzzles you can make at a time or how many people can play it.
Currently, you can create seven types of puzzles on ProProfs:
- Word Search: List all the words you want, set a time limit, and give it a description for participants to begin their word search.
- Crossword: Simply add the intended word and the hint for it. ProProfs will figure out the placement of the tiles.
- Sliding puzzle: Add an image, choose how many pieces to break it up in, and ProProfs will create an online sliding puzzle where players unjumble the scrambled piece.
- Jigsaw: A standard jigsaw puzzle maker where you can add the original image.
- Hangman: Add a list of words for a five-chance words of Hangman.
- Word Scramble: Add a word and a hint for players to solve an anagram and guess the original
- Brain Teasers: A multimedia quiz where you can add an image and a text question (as well as a hint), and then an image and text answer.
While the variety is great, ProProfs doesn’t offer a lot of customization in the games. It’s probably ideal for teachers to make games for students rather than adults trying to challenge other adults.
3. Maze Generator (Web): Create a Custom Maze as Big as You Want
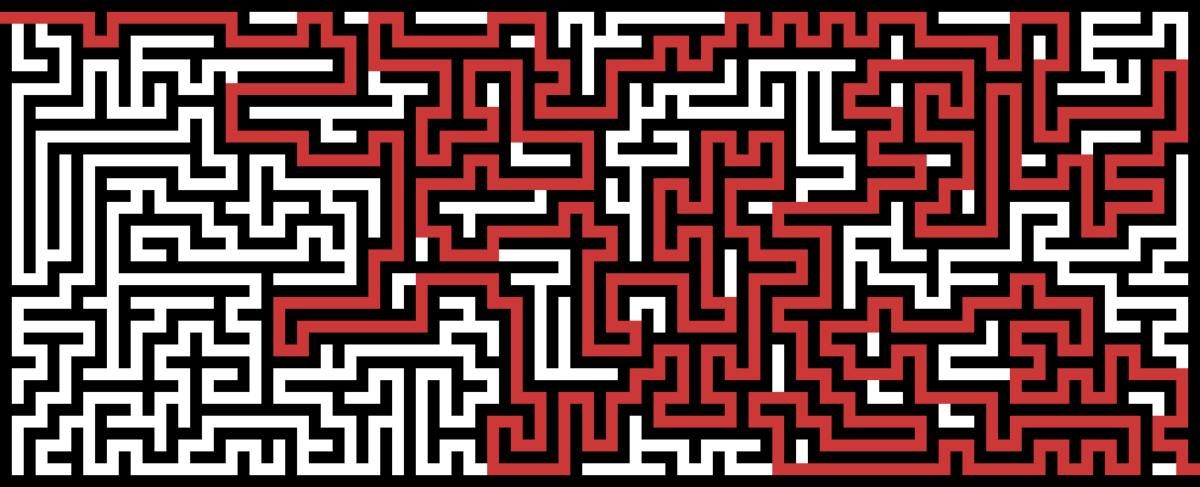
Who doesn’t love solving a maze puzzle? It’s one of those activities you start doing as a kid, and you can continue doing as an adult. But naturally, you want it to be more difficult. Maze Generator will let you create a custom maze as large and as difficult as you want.
Four main factors determine the difficulty and size of your maze. Columns and rows define how wide and how tall the maze will be. In general, a 20×20 grid is moderately challenging for an adult, but if you really want to push yourself, try a 50×50 grid. Next, choose your entry and exit points (corners, left and right, or top and bottom).
The fourth point of difficulty comes with a bias, which determines how the maze walls will be laid. So, for instance, if you want a lively challenge, you could set top and bottom entries, horizontal bias, and really crank up the columns. Plus, you can customize the background color, the maze color, and the thickness of the walls. And yes, you can download and print it for free.
4. My Word Search and Crossword Hobbyist (Web): Best Custom Word Search and Crossword Makers
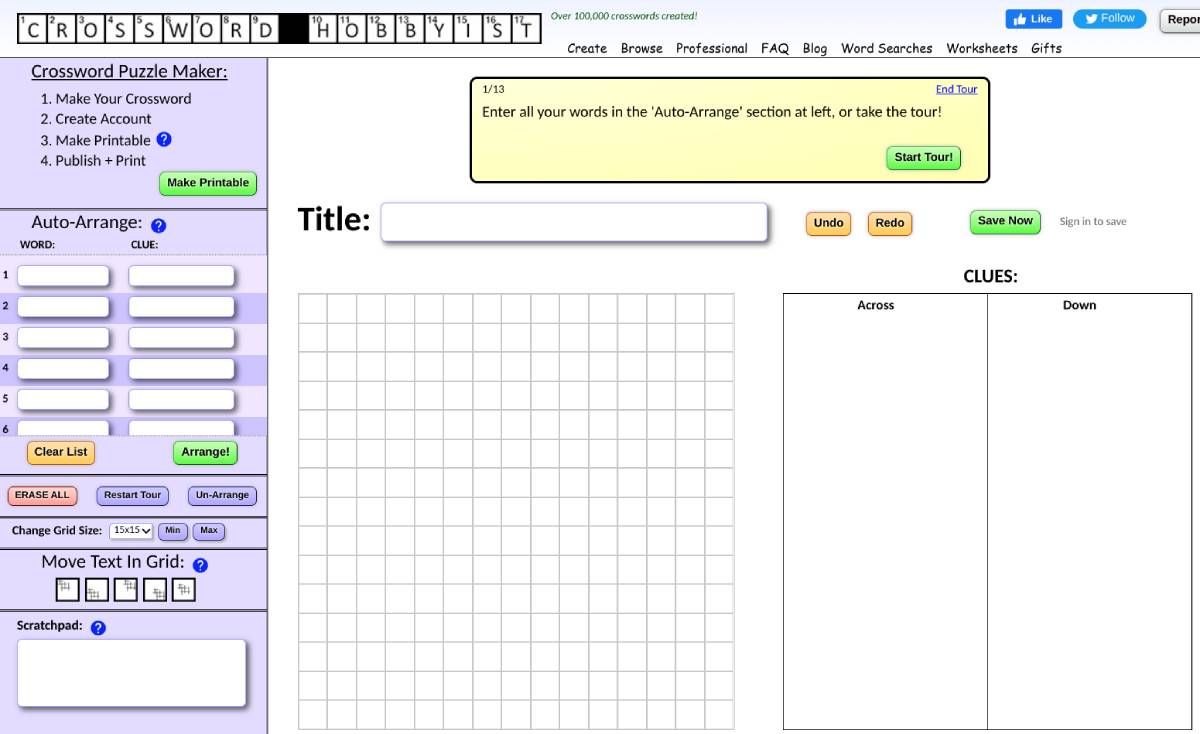
While ProProfs lets you make your own word search or crossword puzzle, it’s a really basic version that doesn’t offer much customization. The best word game makers on the internet are My Word Search (MWS) and Crossword Hobbyist (CH), both from the same developers. They’re free for 30 days, after which you’ll have to buy a premium version (but there’s a discount to buy them together).
MWS has some really funky options, like choosing different puzzle shapes such as a flower, snowman, spiral, and other shapes apart from the usual square. You can set the puzzle size and the directions in which the words will appear. Once that’s set, just add your list of words, and you’re good to go.
Crossword Hobbyist makes crosswords in two ways. You can type your words and clues and have it auto-arrange for you, or you can set a grid and type directly in it. Registered users can also save their progress in any crossword, which is essential for crossword lovers. You’ll also be able to preview your crossword as you make it, and adjust on the go.
5. PuzzleScript (Web): Make Your Own Sokoban-Type Tile Puzzle Game
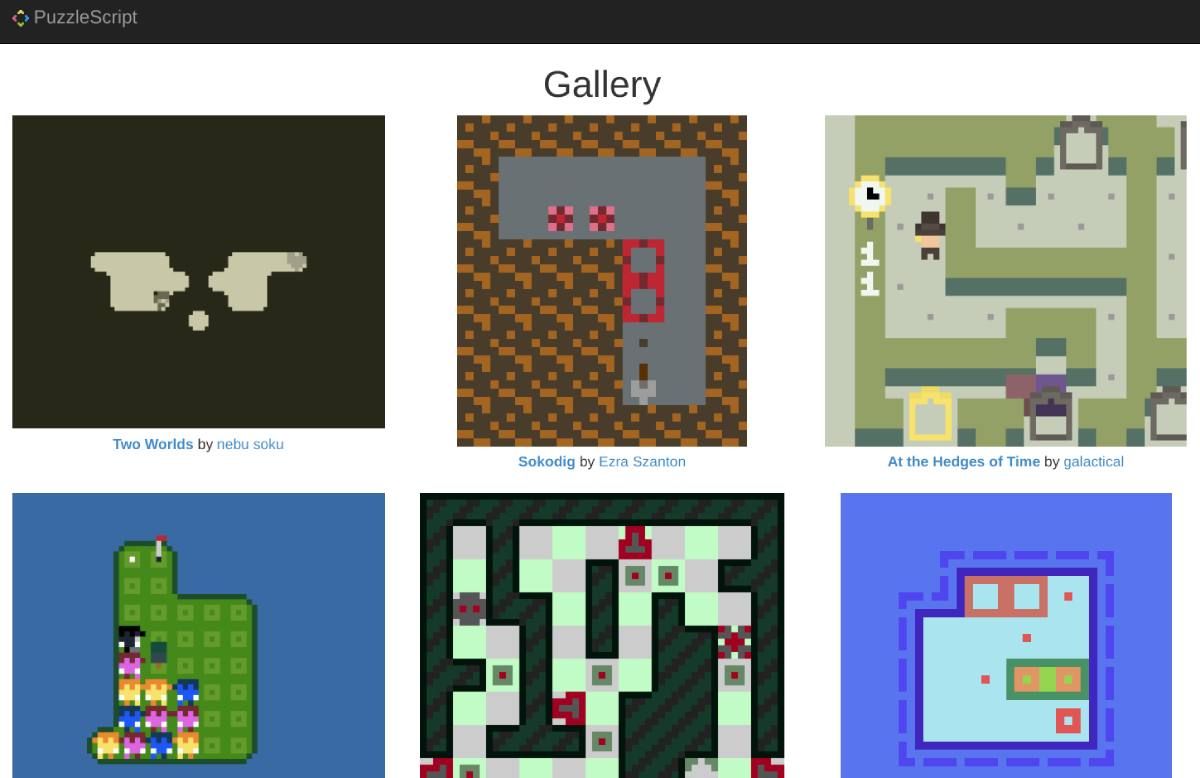
Sokoban is one of Japan’s oldest and most popular puzzle video games. The simple puzzle is about the player pushing crates to their designated place in a warehouse, but each level makes this more difficult. With PuzzleScript, anyone can make their own version of a Sokoban-type tile-based puzzle game with little to no coding knowledge.
Check the PuzzleScript How To section to learn the basic commands for all the ways in which your player can interact with the tile. It’s a pretty simple way to move crates either by pushing or pulling, which you can then use in the PuzzleScript editor. The engine also adds a few extra game features like an eyeball, a block, a sumo wrestler, a sprite, a kitty, and a fruit. Use them how you want to create a custom game.
You can check the gallery of games made with the PuzzleScript engine for inspiration and even import their code to start as a base for your game. It’s one of the easiest ways to create your own puzzle video game for free.
Don’t Be Oversmart
Whether you’re making a crossword puzzle or a maze, it’s tempting to try to do the hardest logic puzzle to challenge your players. But resist this and instead, choose a difficulty level less than what you think your players will enjoy. The key to making a great puzzle is not to make it impossible to solve but solvable after some thought and effort.
Welcome back to our 3-part tutorial series that shows you how to make a letter / word game with UIKit – in this case, a game of anagrams!
If you successfully followed through the first part of this series, you should now have your game board showing up onscreen. So far, you’ve learned how to kick-start your UIKit game, how to plan your controllers and how to connect your views, and have also started implementing the game elements.
Now you’ll take on the gameplay itself and grant the user some special powers, like dragging the tiles around and dropping them onto the targets at the top of the screen. A heads-up-display with a timer and score ticker will keep the player’s ego in check.
Time to grab your UIKit and get back to work!
Getting Started: Your Epic Goal
When you run the completed project from Part 1 of this tutorial, you should see something like this:

In this second part of the tutorial series, you’ll aim for developing a fully playable version of the game. When you’re finished, the user will be able to drag the tiles and drop them on the correct targets, where they will “stick” to the spot. When all tiles have been placed on the correct targets, the player will win that puzzle.
There will also be a timer – the player will have a limited amount of time to finish each puzzle – and a score display that will increase and decrease in real time, according to the player’s actions.
You’ll achieve these epic goals by taking on these smaller steps:
- Make the tiles draggable.
- Make the tiles notify the game controller when they are dropped somewhere.
- Implement handling of tile drops in the game controller.
- Check if the player has won after each successful tile placement.
- Create a separate view layer to contain elements like score readouts and menus. It’s usually best to keep these arranged in their own view, rather than including them in the same view as the actual gameplay elements.
- Add a level timer and a player score. This is a game, after all!
All right! You’ve been debriefed. Now back to the code!
Drag Those Tiles
You might already be familiar with how to handle touch events with UIKit. If you are, there’s nothing different about handling touches in a UIKit game. You just need to implement the touch delegate methods in TileView. Before your tiles can receive touch events, however, you need to enable them.
Inside TileView.m, add the following line to initWithLetter:andSideLength:, just after the line that reads _letter = letter;:
    // enable user interaction
    self.userInteractionEnabled = YES;
This instructs iOS to send this object events when a touch occurs within the object’s bounds. By default, this is set to NO for a UIImageView (which this class derives from), so you have to set it to YES manually.
Next, you need to add the dragging code. To accomplish this, you are going to take the following strategy:
- When the user touches down on a tile, figure out the offset within the tile of where their finger lies.
- When the user drags, you’ll set the center of the tile to the new position of their finger – except you’ll shift the tile by the offset you computer earlier to account where within the tile the user’s finger is.
Let’s try this out. Still in TileView.m, change the @implementation line to look like this:
@implementation TileView
{
    int _xOffset, _yOffset;
}
You’ll use _xOffset and _yOffset to keep track of the distance between the center of the tile and the initial placement of the user’s finger when the touch began.
To actually drag the tiles, add the following touch handling methods to TileView.m, just above the @end:
#pragma mark - dragging the tile
//1
-(void)touchesBegan:(NSSet *)touches withEvent:(UIEvent *)event
{
    CGPoint pt = [[touches anyObject] locationInView:self.superview];
    _xOffset = pt.x - self.center.x;
    _yOffset = pt.y - self.center.y;
}

//2
-(void)touchesMoved:(NSSet *)touches withEvent:(UIEvent *)event
{
    CGPoint pt = [[touches anyObject] locationInView:self.superview];
    self.center = CGPointMake(pt.x - _xOffset, pt.y - _yOffset);
}

//3
-(void)touchesEnded:(NSSet *)touches withEvent:(UIEvent *)event
{
    [self touchesMoved:touches withEvent:event];
}
Here’s what’s going on in the above code, step-by-step:
- When a touch is detected, you fetch its location within the tile’s superview (that is, the view that contains the tile). You calculate and store the distance from the touch to the tile’s center.
- When the player moves their finger, you move the tile to that location, but you adjust the location by the offsets you stored in
_xOffsetand_yOffset. This keeps the tile from centering itself under the player’s finger as soon as they start moving it – you want it to feel like the user’s dragging a particular point within the tile. - When the player lifts their finger, you make one last call to
touchesMoved:withEvent:to make sure the tile’s position is set to the touch’s final location. You could have just typed the same code here as intouchesMoved:withEvent:, but it’s better to avoid repeating code where possible to make maintenance easier.
All right! Build and run the project and have fun playing around with the game tiles.

Cool – you’re already one step closer to your goal.
Hey, Game Controller! A Tile Is Dropping!
In order to make the game controller accept notifications from tiles when they are dropped somewhere on the board, you’ll make the game controller a delegate to all tiles. The tiles will then invoke a method on their delegate when the player drops them. Therefore, get ready to get some experience with the delegation pattern!
Switch to TileView.h and, just below the #import statement at the top, add a forward declaration for the TileView class:
@class TileView;
You always need to do this when you declare the class’s delegate protocol in the interface file. You need to pre-define the class so you can use the class name in the protocol, and afterwards you can create the class interface.
Now go on with declaring a protocol with a single method:
@protocol TileDragDelegateProtocol <NSObject>
-(void)tileView:(TileView*)tileView didDragToPoint:(CGPoint)pt;
@end
TileDragDelegateProtocol requires one method – the one that handles a finished drag and drop operation.
Now scroll down a bit and inside the interface, add a property to store the delegate:
@property (weak, nonatomic) id<TileDragDelegateProtocol> dragDelegate;
All right! That should be enough declarations – time to add the code. Switch to TileView.m and at the end of touchesEnded:withEvent: add:
if (self.dragDelegate) {
    [self.dragDelegate tileView:self didDragToPoint:self.center];
}
Totally easy, right? You check whether the dragDelegate property is set, and if so, you just call the delegate’s tileView:didDragPoint: method, passing it self and self.center.
Now you need to make GameController conform to your new protocol and actually do something with this information.
Handling Tile Drops
Open up GameController.h and add the following import:
#import "TileView.h"
Now make the class conform to the TileDragDelegateProtocol protocol:
@interface GameController : NSObject <TileDragDelegateProtocol>
Move on to GameController.m and add the initial implementation of the delegate method:
//a tile was dragged, check if matches a target
-(void)tileView:(TileView*)tileView didDragToPoint:(CGPoint)pt
{
    TargetView* targetView = nil;

    for (TargetView* tv in _targets) {
        if (CGRectContainsPoint(tv.frame, pt)) {
            targetView = tv;
            break;
        }
    }
}
This code loops over all objects in _targets and, for each of the target views, checks if the given drag point is within the target’s frame.
Ha! The simple if statement effectively checks if the tile’s center point was dropped within the target – that is, whether the tile was dropped on a target. And because the point passed to this method is the tile’s center, the method will not succeed if only a small portion of the tile is within the target.
If a tile is found to be within a target, the matching target is saved to targetView.
Now go on and check whether the letter has been dragged to the correct target to make the anagram. Add at the end of the same method:
//1 check if target was found
if (targetView!=nil) {

    //2 check if letter matches
    if ([targetView.letter isEqualToString: tileView.letter]) {

        //3
        NSLog(@"Success! You should place the tile here!");

        //more stuff to do on success here

        NSLog(@"Check if the player has completed the phrase");
    } else {
        //4
        NSLog(@"Failure. Let the player know this tile doesn't belong here.");

        //more stuff to do on failure here
    }
}
Now to break this down step-by-step:
- Check whether the tile was dropped on a target. If it wasn’t,
targetViewwill still benil - Compare the tile’s letter with the target’s letter to see if they match.
- If the letters do match, you will do various bits of processing. For now, you just print some messages to the console.
- If the letters do not match, you want to indicate that to the user. Again, for now just use a log statement until you’ve verified that the logic is working correctly.
OK, build and run the project and try dragging some tiles onto targets.
If everything went well, there shouldn’t be any difference compared to what you saw last time you ran the project. But why no print statements? That’s a good question! Can you figure out why the tiles don’t react to being dropped on the targets?
I hope you figured it out. :] The new method you added to GameController is never even called because you didn’t actually set the dragDelegate property of the tiles. Doh! In GameController.m, just after [tile randomize]; in dealRandomAnagram, add the following line:
tile.dragDelegate = self;
Run the project again and you will see your success/failure statements printed to the console when you drag a tile onto a target. Now that you know the right things are happening at the right times, you can make it do something more fun than printing to the console!
Inside GameController.m, add the following method:
-(void)placeTile:(TileView*)tileView atTarget:(TargetView*)targetView
{
    //1
    targetView.isMatched = YES;
    tileView.isMatched = YES;

    //2
    tileView.userInteractionEnabled = NO;

    //3
    [UIView animateWithDuration:0.35
                          delay:0.00
                        options:UIViewAnimationOptionCurveEaseOut
                     //4
                     animations:^{
                       tileView.center = targetView.center;
                       tileView.transform = CGAffineTransformIdentity;
                     }
                     //5
                     completion:^(BOOL finished){
                       targetView.hidden = YES;
                     }];
}
Here’s what’s happening above:
- You set the
isMatchedproperty on both thetargetViewandtileView. This will help you later when you check to see if the user has completed the phrase. - Disable user interactions for this tile. The user will not be able to move a tile once it’s been successfully placed.
- Create an animation that will last for 35 hundredths of a second. By passing in
UIViewAnimationOptionCurveEaseOut, UIAnimation will automatically calculate an ease-out animation. Rather than making changes in even increments across the given time, it will do larger changes in the beginning and smaller changes toward the end, slowing down the animation. - This block defines the changes that should occur during the animation. In this case, you move the tile so its center is on the target’s center, and you set the tile’s transform to
CGAffineTransformIdentity. The identity transform is basically no transform. This effectively undoes any changes you’ve made to scale and rotation. In this case, it straightens out the tile. - When the animation is complete, you hide
targetView. This isn’t absolutely necessary, sincetargetViewwill be completely behindtileView. But in general, if you know you have a view object that will not be visible, it’s more efficient to hide it so that its parent view knows it’s safe to skip it for certain types of processing.
Inside tileView:didDragToPoint in GameController.m, replace the NSLog statement that begins with “Success!” with the following:
[self placeTile:tileView atTarget:targetView];
Now handle what happens when the player puts a tile on an incorrect target. Still inside tileView:didDragToPoint in TileView.m, replace the NSLog statement that begins with “Failure” with the following code:
    //1
    //visualize the mistake
    [tileView randomize];

    //2
    [UIView animateWithDuration:0.35
                          delay:0.00
                        options:UIViewAnimationOptionCurveEaseOut
                     animations:^{
                         tileView.center = CGPointMake(tileView.center.x + randomf(-20, 20),
                                                       tileView.center.y + randomf(20, 30));
                   } completion:nil];
There are only two major things happening here:
- You randomize the tile to demonstrate to the player that it does not match the target.
- You create an animation that does some extra offsetting by a random value to the tile center’s x and y positions.
Build and run the project. This time, instead of just statements printed to your console, you will see the tiles slide onto the target positions when dropped in the correct place, and sliding away when placed in the wrong place. Cool!

You’re ready to check if the user has finished the current game. Inside GameController.m, add the following:
-(void)checkForSuccess
{
    for (TargetView* t in _targets) {
        //no success, bail out
        if (t.isMatched==NO) return;
    }

    NSLog(@"Game Over!");
}
The above code loops through the _targets array and checks to see if ANY TargetView is not yet matched. If it finds an unmatched target, then the game is still not over and it bails out of the method.
If all the TargetViews are matched, then your log statement “Game Over!” appears in the console. Later, you will do some more interesting things here.
Inside tileView:didDragToPoint in GameController.m, replace the NSLog statement that begins with “Check for” with the following code:
  //check for finished game
  [self checkForSuccess];
Build and run the app and complete a puzzle. You should see your log statement printed to the console when you are finished. Great!
Creating a HUD
HUD’s up!
Your game could use some controls and readouts. You might ask, “Should I add these elements to the gameView?”
No. The gameView is for all gameplay elements. You generally want to put elements like the score, time readouts and player controls onto their own view layer. This allows you to more easily do many types of things, like hide them when the game is paused, or maintain fixed sizes and locations for these controls while simultaneously zooming in on some area of the game board.
This separate layer is often called a heads-up-display, or HUD. It will be easier to test your HUD layer if you have something to display in it, so first you will make a label to display the game timer.
Create a new Objective-C class file in Anagrams/Classes/views named StopwatchView, and make it a subclass of UILabel. This will be a simple custom label that displays the remaining time in the format “[minutes]:[seconds]”.
Open up StopwatchView.h and add this single method to its interface:
-(void)setSeconds:(int)seconds;
Inside StopwatchView.m, add the implementation of setSeconds::
//helper method that implements time formatting
//to an int parameter (eg the seconds left)
-(void)setSeconds:(int)seconds
{
    self.text = [NSString stringWithFormat:@" %02.f : %02i", round(seconds / 60), seconds % 60 ];
}
The above code isn’t fancy. It just sets the label’s text property to the mm:ss format.
Inside the same file, find the comment in initWithFrame: that reads “//Initialization code”. Just below that comment, add the following line of code:
self.backgroundColor = [UIColor clearColor];
This just makes the label’s background transparent. You will add more here later.
Now that you have a label to display, you need a HUD layer to hold it. Create a new file in Anagrams/Classes/views for an Objective-C class named HUDView that subclasses UIView.
In HUDView.h, add the following:
//at the top
#import "StopwatchView.h"

//inside the interface declaration
@property (strong, nonatomic) StopwatchView* stopwatch;
+(instancetype)viewWithRect:(CGRect)r;
For now, you’ll have a single property that holds a timer, as well as a custom convenience factory method that you’re about to implement.
Switch to HUDView.m and replace its contents with the following:
#import "HUDView.h"
#import "config.h"

@implementation HUDView

+(instancetype)viewWithRect:(CGRect)r
{
    //create the hud layer
    HUDView* hud = [[HUDView alloc] initWithFrame:r];

    //the stopwatch
    hud.stopwatch = [[StopwatchView alloc] initWithFrame: CGRectMake(kScreenWidth/2-150, 0, 300, 100)];
    hud.stopwatch.seconds = 0;
    [hud addSubview: hud.stopwatch];

    return hud;
}

@end
The factory method creates a new HUDView and initializes its stopwatch property with a new StopwatchView with 0 seconds remaining.
Now you have a reference to the timer view in the stopwatch property and can go about implementing the logic behind it. But first, get that timer on the screen! You haven’t checked your progress in a while.
First add a HUDView property to the game controller. Inside GameController.h, add:
//at the top
#import "HUDView.h"

//along the rest of the class properties
@property (weak, nonatomic) HUDView* hud;
Next create the HUD layer in your ViewController – the same spot where you create the game layer. Switch to ViewController.m and at the top, import your new view class:
#import "HUDView.h"
Now inside viewDidLoad, find the line self.controller.gameView = gameLayer; and just below it, add the HUD to the window’s view and the game controller:
//add one layer for all hud and controls
HUDView* hudView = [HUDView viewWithRect:CGRectMake(0, 0, kScreenWidth, kScreenHeight)];
[self.view addSubview:hudView];

self.controller.hud = hudView;
You create a new HUD layer view as big as the screen and you add it to the view controller’s view. Then you also assign it to the game controller’s hud property.
OK, build and run again and have a look at your new HUD layer!

Um, that stinks. Before you move on with the functionality, now is probably a good time to talk about….
The Art of Gamification
The fact you are using UIKit to create a game does not mean that you also have to use vanilla UIKit components. To make a game more “game-like”, you will want to use fonts, buttons and other controls that look like they belong in a game and not in a spreadsheet program.
For example, compare the two fonts below:

If you think the first font rendered above is more exciting, in a game context at least, perhaps you should hire a graphic designer. :] Long story short, choose an appropriate font for your game. You’re not likely to excite players with a game menu rendered in Arial or Verdana.
Note: Then why did you go for good old Verdana when you created the tile view? On tiles, it makes sense to have maximum readability. Players shouldn’t get confused about which letters they’re seeing.
I’ve included a fun font for you in the project. To use it, first open up config.h and add these font definitions:
#define kFontHUD [UIFont fontWithName:@"comic andy" size:62.0]
#define kFontHUDBig [UIFont fontWithName:@"comic andy" size:120.0]
Some of you probably will ask, “Isn’t it faster to put the font definition in the code? Why should it be in a separate file?”
The answer is convenience. Imagine your graphic designer finds a much cooler font for your game. If you already have font assignments sprinkled all over the game code, replacing them will be a pain.
What’s more, abstracting the font size is a very good idea. That’s why you have two definitions – one for a big font and one for normal-sized font. This makes it a lot easier to change the font size in all HUDs throughout your game with a single line change.
Now import config.h at the top of StopwatchView.m:
#import "config.h"
In the same file, inside initWithFrame:, add the following line of code just after where you set the background color:
self.font = kFontHUDBig;
This sets the label’s font to kFontHUDBig, which you just defined in config.h.
Build and run again to behold your new, game-ready label!

Nice! However… if you try to drag the tiles around you will notice they don’t drag anymore…

Well… actually, that’s fine. It’s all because of how you normally have layers ordered in a game setup.
As illustrated in the schema below, you will always have the game controls, score, time, etc. on top, so that they are always visible. Under the controls you will have all the objects that move – heroes, word tiles, and so on. And usually at the very back you will have the background – whether static or parallax, it does not matter.

You have exactly the same setup so far, and since the HUD layer is on top of everything, it swallows all touches. Fear not! You can easily turn off the user’s interaction with the HUD layer, thus allowing the user to touch the tiles in the underlying game objects layer.
Disable touch handling in the HUDView factory method. Switch to HUDView.m and in the viewWithRect: method after HUDView* hud = [[HUDView alloc] initWithFrame:r];, add the code to disable touches:
hud.userInteractionEnabled = NO;
Now it’s fixed forever!
Build and run the game again, and you’ll see that you can have your timer and drag tiles, too! Sweet victory!

Adding a Level Timer
Implementing the game timer is incredibly simple. Remember that you already load the total game time in seconds from the level config file. You haven’t used this data yet, but now you will.
Add the timer to the game controller. Go to GameController.m and add the following two private variables in the same section where you declared _targets and _tiles:
    //stopwatch variables
    int _secondsLeft;
    NSTimer* _timer;
_secondsLeft will store the number of seconds left to complete the level. It will be decreased every second by _timer.
Now you need three new helper methods:
- One to start the timer when the tiles are displayed on the board.
- One to stop the timer in case the player solves the puzzle or the time is up.
- One to fire each second and update the HUD.
Add them one at a time to the game controller. First add the following method to initialize the new variables and start the timer:
-(void)startStopwatch
{
    //initialize the timer HUD
    _secondsLeft = self.level.timeToSolve;
    [self.hud.stopwatch setSeconds:_secondsLeft];

    //schedule a new timer
    _timer = [NSTimer scheduledTimerWithTimeInterval:1.0
                                     target:self
                                   selector:@selector(tick:)
                                   userInfo:nil
                                    repeats:YES];
}
You initialize _secondsLeft with the initial remaining time stored in the level, and update the stopwatch label to display this time. You also schedule a new NSTimer that will invoke tick: each second (you haven’t added this method yet).
Add stopStopwatch to stop the timer:
//stop the watch
-(void)stopStopwatch
{
    [_timer invalidate];
    _timer = nil;
}
Calling invalidate on the timer stops it, and then you set it to nil because it is no longer needed.
Now define tick:, which will be called once a second while _timer is running.
//stopwatch on tick
-(void)tick:(NSTimer*)timer
{
    _secondsLeft --;
    [self.hud.stopwatch setSeconds:_secondsLeft];

    if (_secondsLeft==0) {
        [self stopStopwatch];
    }
}
It does nothing more than decrease the amount of seconds left by one, then update the stopwatch label with the new value. If the number of seconds remaining hits 0, it calls stopStopwatch. That’s all!
The only step left is to actually start the timer when the game starts! At the end of dealRandomAnagram, add:
//start the timer
[self startStopwatch];
All right, another feature is in! Build and run again to see the timer ticking down when the game starts:

Wait, don’t forget that you need to stop the timer if the player completes the phrase. At the end of checkForSuccess, add the following call:
//stop the stopwatch
[self stopStopwatch];
Hmm, what else can you add to your fancy new HUD?
Keeping Score, Fair and Square
When making a game you want to have a separate class just to keep the game data for the current player session. This class will store such things as the player’s current score, remaining number of lives and progress through the game. In a more complicated game, you could have this data also sorted per user, which might require a simple database of some sort.
For this tutorial, your game will have a simple class to keep the score between games, but not between app restarts.
Create a new class in Anagrams/Classes/models named GameData that subclasses NSObject. Inside GameData.h, add the following property to the interface:
//store the user's game achievement
@property (assign, nonatomic) int points;
The points property will store the player’s current score.
Inside GameData.m, add the following method:
//custom setter - keep the score positive
-(void)setPoints:(int)points
{
    _points = MAX(points, 0);
}
A setPoints: method would have been created automatically when the compiler synthesized the points property, but you want a custom version that ensures the value is never negative. You don’t want the player to have fewer than zero points, right? So you pass points and 0 to the MAX macro, which returns the greater value of its two arguments. Thus, if you pass setPoints: a negative number, it will assign 0 to _points.
That’s all you need for your simple GameData class. But if your game evolves, this class will also become more complicated.
OK, it’s time to decide where in the game the player will receive or lose points.
There are two point-events so far in the gameplay:
- When a tile is dropped on a correct target, award the player with points.
- When a tile is dropped on a wrong target, subtract some points from the current score.
This way, to get the most points possible out of the current anagram, the player will have to solve it without making any mistakes.
Challenge: You can also award points upon puzzle completion, and subtract points when the player fails to complete a puzzle in time. How would you implement that yourself?
Hook the score-keeping into the game controller logic by adding the following import and property inside GameController.h:
// with the other imports
#import "GameData.h"

// with the other properties
@property (strong, nonatomic) GameData* data;
This gives you access to a GameData object to store the score.
Now switch to GameController.m. You need to initialize the self.data property. To do that, add the following custom init:
//initialize the game controller
-(instancetype)init
{
    self = [super init];
    if (self != nil) {
        //initialize
        self.data = [[GameData alloc] init];
    }
    return self;
}
For now, this just initializes the GameController and assigns a new GameData object to its data property. You will add more here in Part 3 of this tutorial.
In the same file, add the following code inside tileView:didDragToPoint:, just below the comment that reads “//more stuff to do on success here”:
//give points
self.data.points += self.level.pointsPerTile;
Luckily the level config file already includes the points per title for every level of difficulty, so all you do here is increment the current score by that number.
To handle errors, add the following code in the same method, just below the comment that reads “//more stuff to do on failure here”:
//take out points
self.data.points -= self.level.pointsPerTile/2;
Here, you do the opposite and subtract points. But there’s no point (ha, ha) in being too tough on the player – if they drop the tile on the wrong target, only half of what they receive for a matching one is subtracted from the current score.
All right! Keeping score – check.
Note: The GameData class is quite naïve as it is. Your own UIKit game will likely have some other game data you need to track, requiring you to adjust the class as you wish. A few possible features deserve an honorable mention:
- You might want to add Game Center integration to your game, which will forward the score from
GameDatato Apple’s Game Center. More on Game Center. - You might want to persist the score by saving it to the
NSUserDefaultsor a keychain. More on secure storage of data with a keychain. - If you would like to store the game data to a keychain or persist it to a file, you might find using the JSONModel library super useful. It allows you to convert your model data to a JSON string, which is easily storable in a keychain or a text file.
Adding the Score to the HUD
Games are all about achievements and score, so there’s no sense in keeping the player’s score behind the scenes. You need to put it upfront, right on the HUD layer.
It will be a bit boring, though, if the score label were to instantly update from, say, 500 to 750. It’s a lot more fun to have the score label rapidly cycle through 500, 501, 502, etc all the way up to 700 – it just a little polish to provide an awesome game experience.
In Anagrams/Classes/views, create a new Objective-C file for the class CounterLabelView and make it a subclass of UILabel. Switch to CounterLabelView.h and add the following code to the interface:
@property (assign, nonatomic) int value;

+(instancetype)labelWithFont:(UIFont*)font frame:(CGRect)r andValue:(int)v;
-(void)countTo:(int)to withDuration:(float)t;
Here’s what you need to know about the above:
-
valueis a property that will hold the score currently shown on the label. -
labelWithFont:frame:andValue:is a class method that will return a newCounterLabelViewinitialized with the given frame, font and value. -
countTo:withDuration:will animate the label’s text, counting up or down to/from the current value to the one provided. The animation will have the given duration in seconds.
Now open up CounterLabelView.m. You can safely delete the pre-defined methods – you won’t need them. Then add two private variables to the class, like so:
@implementation CounterLabelView
{
    int endValue;
    double delta;
}
Basically, each delta time (in seconds), you’ll increment (or decrement) the label one point, until you reach endValue.
Start with the easier stuff and add the factory method, which is pretty straightforward:
//create an instance of the counter label
+(instancetype)labelWithFont:(UIFont*)font frame:(CGRect)r andValue:(int)v
{
    CounterLabelView* label = [[CounterLabelView alloc] initWithFrame:r];
    if (label!=nil) {
        //initialization
        label.backgroundColor = [UIColor clearColor];
        label.font = font;
        label.value = v;
    }
    return label;
}
In the above code, you create a new instance of CounterLabelView with the given frame, then you set its background to transparent and its font and value properties to the given font and value.
Another easy task is to overwrite the value setter so that it will update both the property and the text being displayed by the label. Add the following method:
//update the label's text
-(void)setValue:(int)value
{
    _value = value;
    self.text = [NSString stringWithFormat:@" %i", self.value];
}
Now add the following helper method:
//increment/decrement method
-(void)updateValueBy:(NSNumber*)valueDelta
{
    //1 update the property
    self.value += [valueDelta intValue];

    //2 check for reaching the end value
    if ([valueDelta intValue] > 0) {
        if (self.value > endValue) {
            self.value = endValue;
            return;
        }
    } else {
        if (self.value < endValue) {
            self.value = endValue;
            return;
        }
    }

    //3 if not - do it again
    [self performSelector:@selector(updateValueBy:) withObject:valueDelta afterDelay:delta];
}
There are three things happening in this method:
- You update the
self.valueproperty by thevalueDeltathat was passed to the method, which will be either 1 or -1. - You check whether you are counting up or down, and then perform the appropriate check to see if you’ve reached the final value. If counting up, you check to see if the current value is greater than
endValue; if counting down, you check to see if it is less thanendValue. If you reach the final value, you just bail out of the method. - If you reach this stage, it means the
endValuewas not yet reached. Here you schedule another execution of this same method afterdeltaseconds.
updateValueBy: will keep calling itself and updating the label’s text until it reaches the value stored in endValue.
Now it’s time to implement countTo:withDuration:, which is the method that initially calls updateValueBy: to get the counter rolling. Add the following method:
//count to a given value
-(void)countTo:(int)to withDuration:(float)t
{
    //1 detect the time for the animation
    delta = t/(abs(to-self.value)+1);
    if (delta < 0.05) delta = 0.05;

    //2 set the end value
    endValue = to;

    //3 cancel previous scheduled actions
    [NSObject cancelPreviousPerformRequestsWithTarget:self];

    //4 detect which way counting goes
    if (to-self.value>0) {
        //count up
        [self updateValueBy: @1];
    } else {
        //count down
        [self updateValueBy: @-1];
    }
}
This method is the most complicated one you’ve added thus far, so let’s go over it carefully.
- Here you calculate the
deltatime between calls toupdateValueBy:. To do so, you do the following:- You find how many values the label needs to count through by calling
abs(to-self.value). For example, if the current score is 50 and you want it to go to 65, you’ll get the value 15. If the current value is 65 and you want to go to 50, you’ll get the same value of 15. - You add 1 to the above value just in case it turned out to be zero. You do this because in the next step you’ll be dividing by this value, and dividing by zero is a no-no.
- You divide the total time for the animation,
t, by the number of values you need to count through. This gives you a value fordelta. - Finally, if
deltais less than 0.05 seconds, you increase it to 0.05. This just keeps the animation from moving too quickly, which wouldn’t look as nice.
- You find how many values the label needs to count through by calling
- You set the
endValueyou are counting towards. - You cancel any scheduled operations for the class, because you will schedule some others in a moment and don’t want them overlapping.
- Finally, you have an
ifstatement that callsupdateValueBy:, passing either 1 or -1 and thus counting either up or down, depending on the current label value and the end value.
Nice – and you’re just about done!
Now you need to add the new counter label to the HUD and animate it from the game controller. Switch to HUDView.h and update it like so:
//with the other imports
#import "CounterLabelView.h"

//with the other property
@property (strong, nonatomic) CounterLabelView* gamePoints;
This property will store the HUD’s CounterLabelView.
Inside HUDView.m, add the following to viewWithRect:, just before the return statement at the end of the method:
//"points" label
UILabel* pts = [[UILabel alloc] initWithFrame:CGRectMake(kScreenWidth-340,30,140,70)];
pts.backgroundColor = [UIColor clearColor];
pts.font = kFontHUD;
pts.text = @" Points:";
[hud addSubview:pts];

//the dynamic points label
hud.gamePoints = [CounterLabelView labelWithFont:kFontHUD frame:CGRectMake(kScreenWidth-200,30,200,70) andValue:0];
hud.gamePoints.textColor = [UIColor colorWithRed:0.38 green:0.098 blue:0.035 alpha:1] /*#611909*/;
[hud addSubview: hud.gamePoints];
This code looks a bit longer than you might expect, but it’s nothing fancy. You create one label that reads «Points:», using the same font you used for the timer (but the smaller size this time). Then you create one CounterLabelView label with an initial value of 0.
Build and run the project to enjoy your new and shiny HUD:

If you try playing, you’ll find that the score is not updated, ever. Well, that’s a bit boring and anticlimactic, after all your work! Luckily, it’s easy to fix.
Remember the two places where you change the score? In GameController.m, find self.data.points += self.level.pointsPerTile; and add the following just below it:
[self.hud.gamePoints countTo:self.data.points withDuration:1.5];
This will make the score label count up to the just-updated score value, and it’ll do that in about 1.5 seconds.
Then look for the line self.data.points -= self.level.pointsPerTile/2; and add the following just below it:
[self.hud.gamePoints countTo:self.data.points withDuration:.75];
This updates the label, but does it in about .75 seconds. Since the penalty values are half the success values, making the duration half as much will make the counter appear to change values at the same pace, whether it’s going up or down.
And that’s all! Build and run again:

Oh, sweet joy! The score label counts up and down as you drop tiles on the targets. Your game is really coming together!
Where to Go from Here?
You can download all of the source code up to this point by clicking this link.
Woot, your game is starting to take its final shape and is almost fully-playable. You’ve done well to make it this far.
If you think you’ve progressed a lot in this part of the tutorial, just wait for Part 3, where you’ll add even more cool effects and interactivity, including those promised explosions!
While you’re waiting, let us know how it’s going for you so far in the forums.