
Insert a header or footer

-
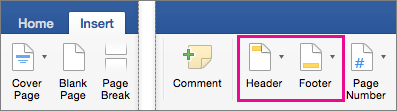
Go to Insert > Header or Footer.
-
Choose the header style you want to use.
Tip: Some built-in header and footer designs include page numbers.
-
Add or change text for the header or footer. For more info on things you can do with headers, see Edit your existing headers and footers. To edit a header or footer that’s been already created, double-click on it.
-
To eliminate a header—like deleting it on the title page—select it and then check the Different First Page box.
-
Select Close Header and Footer or press Esc to exit.
To delete, select Insert > Header (or Footer) > Remove Header (or Remove Footer).
Add a standard or customized header or footer
-
Go to Insert > Header or Footer.

-
Choose from a list of standard headers or footers, go to the list of Header or Footer options, and select the header or footer that you want.
Or, create your own header or footer by selecting Edit Header or Edit Footer.
-
When you’re done, select Close Header and Footer or press Esc.
Important:
Office for Mac 2011 is no longer supported. Upgrade to Microsoft 365 to work anywhere from any device and continue to receive support.
Upgrade now
-
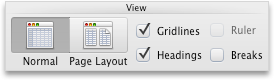
On the Layout tab, under View, click Page Layout.
-
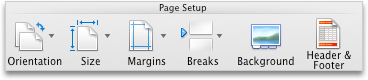
On the Layout tab, under Page Setup, click Header & Footer.
-
Choose from a list of standard headers or footers by going to the Header or Footer pop-up menu, and clicking the header or footer that you want.
Or, create your own header or footer by clicking Customize Header or Customize Footer and following the instructions.
Note: When you customize your header or footer, you can add images, page numbers, date, time, sheet name, file name and path, and more.
-
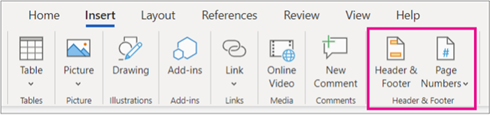
Go to Insert > Header & Footer.
-
Add or header or footer text.
-
Use the Options menu for additional customization.
-
To exit, select Close Header and Footer or press Esc.
-
To delete, select Insert > Header (or Footer) > Remove Header (or Remove Footer).
For more on headers and footers, see Headers and footers in Word.
Need more help?
![]()
Download Article
![]()
Download Article
This wikiHow teaches you how to create your own custom headers and footers in Microsoft Word. You can start with one of Word’s pre-made header and footer templates or start yours from scratch. Both headers and footers can include custom text, page numbers, images, and special formatting.
Things You Should Know
- Click Insert > Header or Footer > Edit Header or Edit Footer.
- Create your header. You can add page numbers, date, and logos. Then, hit Close Header & Footer to preview it on the document.
- Double click the header or footer to make edits or change the settings.
-
1
Click the Insert tab. It’s at the top of Word.
- If you’ve already inserted a header or footer and want to edit it, simply double-click it now.
-
2
Click Header or Footer. It’s in the «Header & Footer» panel at the top of Word. A menu will expand.
- On the menu, you’ll see different header and footer styles that you can use as a starting point—all are fully editable. You can select one of these now to add it to your document if you’d like. To edit the header or footer after placing it, just double-click it on the page.
- You can also browse more pre-made headers and footers by clicking More Headers from Office.com.
Advertisement
-
3
Click Edit Header or Edit Footer. Depending on the option you selected, you’ll see the link at the bottom of the menu. This opens a Design tab in the toolbar that’s specifically for creating custom headers and footers.
- Every time you double-click a header or footer to edit it, the Design tab (Windows) or Header & Footer tab (Mac) will automatically open.
-
4
Click Page Number to add page numbering. You can select from a number of numbering styles and locations from the menu.
- Click the Format Page Numbers menu to choose a different number format, such as roman numerals. You can also choose to add other numbering elements here, such as chapter numbers and headings.[1]
- Click the Format Page Numbers menu to choose a different number format, such as roman numerals. You can also choose to add other numbering elements here, such as chapter numbers and headings.[1]
-
5
Add text to the header or footer. If you’d like to add specific text, such as your name, to the header or footer, you can easily type it at the desired location. If you chose one of Word’s pre-made header or footer templates, you can edit the placeholder text by clicking the text and typing over it.
-
6
Insert other features into the header or footer. The «Insert» panel on the Design or Header & Footer tab contains a bunch of different features you can add to your header or footer:
- Date & Time: This allows you to select a date and/or time format to place in the header or footer.
-
Document Info: Use this option to include certain information about your document in the header or footer, such as the document’s title, author name, and file path.[2]
- Quick Parts: Quick Parts are reusable text and properties that you can add to any part of your document, including headers and footers.
-
Pictures or Online Pictures: You can use either of these options to place an image into your header or footer.[3]
For best results, stick to a small image, such as a decorative horizontal bar or logo.
-
7
Click Close Header & Footer. It’s the red-and-white «X» icon on the far right side of the Design tab. This closes the header and footer editor, which shows you how it will really look on your document.
- If you added a header and want to add a footer as well (or vice-versa), return to the Insert tab and select Header or Footer as necessary.


Advertisement
-
1
Double-click the header or footer. If you don’t want the header or footer you created to appear on the first page (or until a certain page you specify), use this method. Start by double-clicking the header or footer on the first page to open it for editing.
-
2
Check the box next to «Different First Page.» It’s in the Options panel on the Design tab (PC) or Header & Footer tab (Mac), which opens automatically. This removes the header or footer from the first page, making the second page of your document the new Page 1.
- If you’d like, you can select Different Odd & Even Pages to place different headers/footers on even and odd pages. For example, if you want odd pages to contain the title of your document and even pages to display a page number.
- The Show Document Text option just toggles the actual text of your document on or off so can see what the header or footer looks like without the document.
-
3
Click Close Header & Footer. It’s the red-and-white «X» icon on the far right side of the Design or Header & Footer tab. This saves your changes.


Advertisement
Add New Question
-
Question
How can I put my name in a footer on the left on every page and put the page number on the right, having it change on each page?

Malsha Ranawaka
Community Answer
There are pre-designed footers like this available. If this is not in your list, simply select a footer design that has two text fields on the left and right. Then go to «edit footer» mode and put the name on the left. Select the text field on the right. In the «Header & Footer Tools» tab, select «Quick Parts.» From the dropdown, select «Fields.» This will open a dialog box. Select «Page» from the field names list. Select a page number format and click «OK.» You will get an updating page number field on the right.
-
Question
How do I insert a line above the footer?
Malsha Ranawaka
Community Answer
Go to Edit Footer, and place your cursor somewhere in the first line of words you have in the footer. Select the «Home» tab. In the «Paragraph» section, select the «Borders» dropdown. From the dropdown menu, select «Top Border», and you will get a border above the footer.
-
Question
How do I edit a horizontal line in MS Word 2007?
Malsha Ranawaka
Community Answer
Double click on the line, or right click it and select «Format Horizontal Line» to get the dialog box with edit options.

See more answers
Ask a Question
200 characters left
Include your email address to get a message when this question is answered.
Submit
Advertisement
Video
-
Browse through Microsoft Word’s collection of templates before you start adding your own header and footer to documents. The pre-set templates can save you a lot of time.
Thanks for submitting a tip for review!
Advertisement
About This Article
Article SummaryX
1. Click the Insert tab.
2. Click Header or Footer.
3. Click a header or filter option, or select Edit Header/Footer to start from scatch.
4. Click Page Number to add automatic numbering.
5. Add text.
6. Insert dates, document info, quick parts, and/or images.
7. Click Close Header & Footer.
Did this summary help you?
Thanks to all authors for creating a page that has been read 324,489 times.
Is this article up to date?
A footer refers to the bottom margin of your document. Microsoft offers you the ability to place text (or images) in the footer, by doing so this will be repeated across all pages.
Footers are most commonly used to insert page numbers or details about the document such as the authors name, documents title, date created or even a company logo.
An alternative to using a Footer to add page numbers is to do so manually. Although this does work, this method will create more work as text is inserted or removed from your Word Document. As text is changed, it may drop to the next page taking your manually inserted page number with it.
With the footer function in place, Microsoft will automatically manage the page numbers for you, so you can add new text without having to then update the page numbers as well. Handy right?
Just remember, although Word will automatically update your page numbers, it will not automatically update the table of contents to match these. Our blog on how to update your table of context can be found here.
In this post, we will show you how to add a Footer to your Microsoft Word document in just 4 quick steps.
Adding a Footer in Microsoft Word
- Open Microsoft Word
- Click the Insert tab
- Find and Click Footer
- Under the Footer menu, select the style of Footer you would like to add
- By clicking on your preferred style of footer, Microsoft will then add this footer to your document
Once you have selected the style of Footer this will become visible across every page of your document. To update the footer, simply place your curser over the footer and click.
Searching for better way to collaborate and track changes in Microsoft Word?
When collaborating in Microsoft Word, tracking your changes is a must.
Without tracked changes, there is no way for future readers to know what changes were made where and who made them. This is why Microsoft added the ‘Tracked Changes’ feature to Word, which is great when you remember to turn it on…
We’re not sure why we always seem to forget, but we do and we’re pretty sure you may as well. So you go ahead and start making a few minor changes to the document without noticing that tracked changes aren’t on until your halfway through your 18-page document and bugger…now you have to re-read the first 9 pages that you’ve already reviewed and try to remember what you changed.

Some of your changes will be easy to find, it’s the small or ones related to punctuation that are more challenging.
The other issue with Microsoft’s tracked changes is also related to an author not turning them on, but this time maybe not by mistake. An author can quickly jump into your document and make a minor edit without you knowing, because Word will only track the changes you ask it to you may end up progressing on with the document oblivious to the sneaky little change made by your colleague 3 versions ago.
There are so many things that could go wrong because of this if someone changes a legal document or draft contract agreement and you don’t notice, that could have huge ramifications down the line. So, it’s not only your time that is being lost when you honestly forget to turn tracked changes on, but it also becomes a huge risk to your company if you can’t control every edit made, or at least know its there.

To save us all from ourselves and our sometimes sneaky colleagues, you can employ the help of a collaboration tool such as Simul Docs.
Simul was built for Word, with collaboration in mind.
It knows that when you open a document and start making changes you probably want them tracked, so Simul tracks changes automatically. Because of the automatic tracked changes feature, it is impossible for any changes to be made in your document without you knowing about it.
Each change made will have an except of decline button sitting next to it, similar to what you see in Microsoft Words track changes feature. You can quickly review any changes made in that version and accept any you like and decline any that aren’t quite right.

On top of that, your colleagues can also leave comments or notes within the document to give you additional information such as ‘once Jane has reviewed this and added her changes I will take another look’. This comments feature can also be used in Simul to start an in the document conversation thread, allowing you to type short messages between you collaborating team members about the document (or after-work drinks, there are no limits here) while keeping everything in the same place. Living in the document, as they should.

Once you have finished collaborating and you are ready to save and send your document, Simul has all of the features you need to share via whichever tool or source you prefer.
Save your document as a word file or PDF, thats easy.
Share it via a direct link, email or a cloud system such as GoogleDrive, OneDrive, Dropbox and more.

If you share the document in word formate with someone outside of your organisation, they too can edit and make changes using Simul so you can continue collaborating without worrying about moving the document in and out of the software.
With Simul offering so many cool features that truly make collaborating easy, we wouldn’t be surprised if you share it with someone outside of your organisation and they quickly become Simul Docs converts too.
Easy collaboration is addictive. Once you’ve tried it you’ll never go back.

This tutorial shows how to insert headers and footers in Microsoft Word. We’ll also look at how to edit and delete existing headers and footers.
Quick Links:
- How to Insert Headers and Footers
- How to Edit Headers and Footers
- How to Delete Headers and Footers
If you want to insert page numbers in headers or footers, please see “How to Add Page Numbers in Microsoft Word.”
If you want to insert headers or footers in specific chapters or sections, please see “How to Insert Headers and Footers on Specific Pages in Microsoft Word (PC & Mac).”
This tutorial is available as a YouTube video showing all the steps in real time.
Watch more than 200 other writing-related software tutorials on my YouTube channel.
The images below are from Word for Microsoft 365. These steps will also work in Word 2021, Word 2019, Word 2016, Word 2013, and Word 2010. However, your interface may look slightly different in those earlier versions of the software.
Please note that Word provides many ways to work with headers and footers. Therefore, this tutorial is limited to the steps I believe will be the most useful for the majority of people.
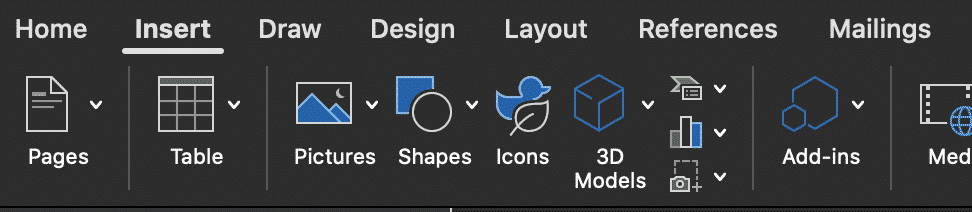
- Select the Insert tab in the ribbon.

- Select the Header or Footer button in the Header & Footer group.

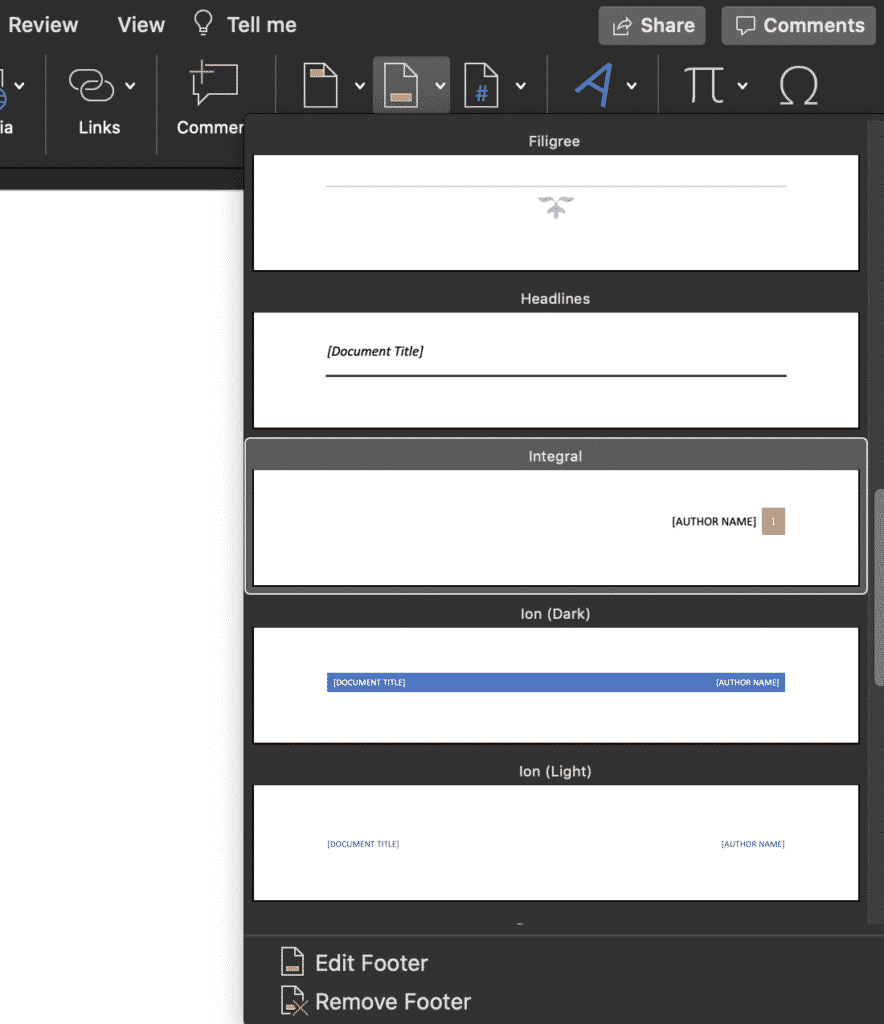
- Select a built-in style from the drop-down menu.

After you select a style, Word will automatically switch from the Insert tab to the Header & Footer tab. This tab only appears when you are working with headers or footers.
- Select the placeholder text, and then type your header or footer information over the placeholder text.
Alternatively, select Date & Time in the Insert group to insert an automatically updating date and time.

- (Optional) Select Different First Page in the Options group to create a different header or footer or no header or footer on the first page.
5.a. Type the information into the First Page Header space. You can also select the Header or Footer button to select a built-in style (see figure 3).
5.b. Leave the space blank if you don’t want a header or footer on the first page.

- (Optional) Select Different Odd & Even Pages in the Options group to create different headers or footers on odd and even pages.

6.a. Select the Next and Previous buttons in the Navigation group to toggle between odd and even pages.
6.b. Type the information into the Odd Page Header and Even Page Header spaces. You can also select the Header or Footer buttons to choose different built-in styles for odd and even pages (see figure 3).

- (Optional) Enter new numbers into the Header from Top and Footer from Bottom text boxes in the Position group to customize the amount of space above the header or below the footer.

Pro Tip: Tabs for Headers and Footers
Tabs placed on the ruler while working on headers or footers won’t appear on the ruler for the body content after you close the Header & Footer tab.

- Select the Close Header & Footer button when you are finished.

The Header & Footer tab will no longer be visible.
- Double-click the header or footer to open the Header & Footer tab. Alternatively, you can right-click the header or footer and select the Edit Header or Edit Footer button.

- The Header & Footer tab will open, and your cursor will automatically move into the header or footer space where you can make adjustments, as necessary.
- Double-click the header or footer you want to delete (i.e., First Page, Odd Pages, or Even Pages). Alternatively, you can right-click the header or footer and select the Edit Header or Edit Footer button (see figure 11).
- Select the Header or Footer button in the Header & Footer tab. (Note that these buttons are in a different location in the Header & Footer tab than in the Insert tab.)

- Select Remove Header or Remove Footer from the drop-down menu.

This method will only delete the type of header or footer that you selected. For example, if your document has different headers on odd and even pages and you selected a header on an odd page, only the odd page headers will be deleted. However, if your document has the same header on every page, all the headers will be removed.
Related Resources
How to Add Headers and Footers to PDFs in Adobe Acrobat
How to Insert Footnotes and Endnotes in Microsoft Word
How to Insert Citations in Microsoft Word
Updated January 21, 2023
The footer is the part of a document found at the bottom margin of each page. It usually contains information like the page number that appears throughout your document. Footers can also help keep documents organized and look more professional.
Corporate and academic standards typically call for more than just one footer in a document.
The cover page, the appendices, and other pages in different orientations can all have different footers.
MS Word offers more than one way to add different footers on each page.

- Using preset footer options
- By inserting section breaks
Method 1: Using the Preset Footer Options
Step 1: Open up a Word file.

Step 2: Access the footer section.
Once our document is opened, go to the Insert tab and click the footer drop-down menu. Then, select the Edit footer option found at the bottom of the menu.

Alternatively, you can double-click the bottom margin of your document to access the footer section.

Step 3: Access the footer design tools.
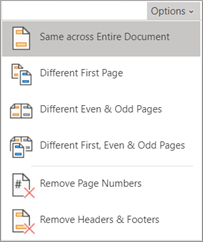
Now that the footer section is enabled, you’ll be directed to the Header & Footer Design tab. You’ll see two unticked checkboxes from the Options group: Different First Page and Odd & Even Pages checkboxes.

If you want the first page to have a different footer from the rest of your document, tick the Different First Page checkbox.

On the other hand, tick the checkbox next to Odd & Even Pages if you want the odd-numbered pages to have a different footer from the even-numbered pages.

Step 4: Add your content into your footer.
You can now start adding your text or object in the footer section. Once finished, simply double-click outside the footer section to go back to the main text.
You can also press the Close Header and Footer button.
Method 2: By Inserting Section Breaks
Section breaks mark the point at which a part of your document ends and another one starts. They help organize the different parts of your document to easily configure different footers for each page.
Here’s how you can create section breaks in your document.
Step 1: Open up an MS Word file.

Step 2: Create section breaks.
Once our document is ready, click at the start of the page that you want in a different footer. Then, move your cursor to the upper left part of your window and click the Layout tab. After that, click the Breaks drop-down menu. Finally, select the Next Page option in the selection.
For this example, we want the second paragraph with a different footer. So, we’ll insert section breaks before and after this paragraph. We’ll place our cursor right at the start of the second paragraph and insert the section break.

Now, place your cursor at the end of the section and repeat the process. You’ll notice that MS Word moved the section to a separate page.
Step 3: Access the footer section.
Now that our section is set up, go to the Insert tab and click the Footer drop-down menu. Then, select Edit Footer from the list of options.

Alternatively, you can simply double-click the bottom margin of the page to access the footer section.

Step 4: Unlink the section footer.
To make this successfully work, we’ll need to break the connection between the footer in the current section and the previous one. So, with your cursor still inside the footer section, click on the Link to Previous button found on the Header & Footer Design tab.

You can now insert your content in the footer section. Take note that you’ll have to repeat the same process for each page that you want to have a different footer.
To go back to the main text, simply double-click outside the footer or click on the Close Header and Footer button.
There you have it! You’ve just inserted section breaks to have a different footer on each page in MS Word.
Conclusion
We hope you’ve found this article helpful!