
Change page orientation to landscape or portrait

Change orientation of whole document
-
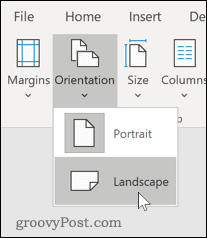
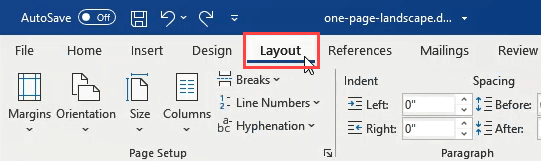
To change the orientation of the whole document, select Layout > Orientation.
-
Choose Portrait or Landscape.

Change part of a document to landscape
-
Select the content that you want on a landscape page.
-
Go to Layout, and open the Page Setup dialog box.

-
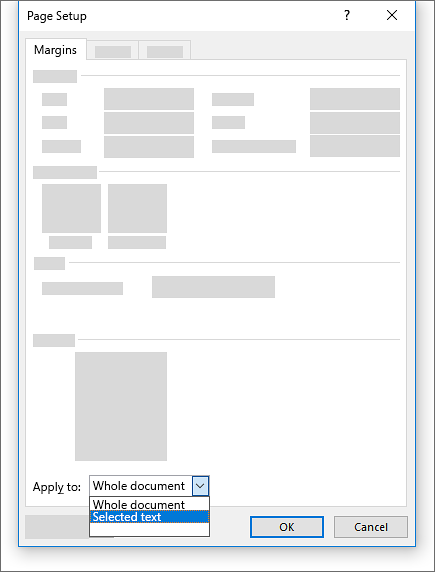
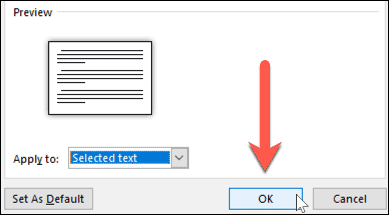
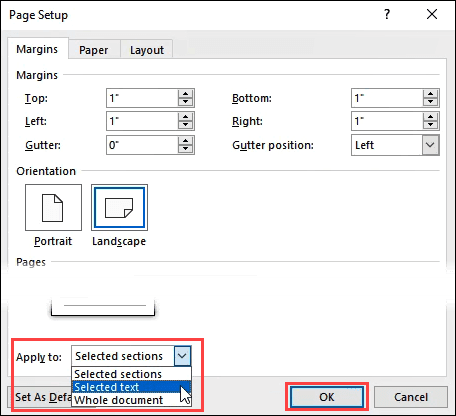
Select Landscape, and in the Apply to box, choose Selected text.
Need more help?

If you’re creating a Word document with multiple page layouts, you may wish to make a single page landscape. Here’s how.
Photo Credit — iStockPhoto
When you’re creating Word documents, you have two-page layout options available—landscape or portrait. Portrait mode is the default option, but you can switch to landscape mode instead if you want your text sideways.
If you want to use both types of layouts in Word, you’ll need to use a few workarounds using section breaks and Word’s own page formatting options to do so. Here’s how.
If you want to quickly make one page landscape in Word, here’s what you’ll need to do:
- Open your Word document and place the blinking cursor at the start of the page you wish to change to landscape mode.
- Click on the Layout menu in the ribbon bar.
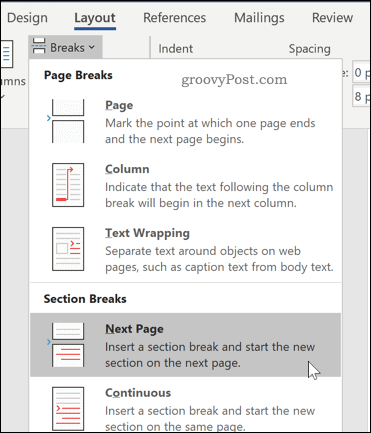
- Select Breaks > Next Page in the Section Breaks section. This will insert a section break and push your text onto a new page.

- In the Layout menu, press Orientation > Landscape. This will switch the current page and all the following pages to landscape mode.

- You’ll now need to turn the remaining pages back to portrait mode. Scroll down to the next page, then place the blinking cursor at the start of the page.
- Press Layout > Breaks > Next Page to insert a new section break.
- Click on Orientation > Portrait to switch the pages to portrait mode.


If you followed the steps correctly, you should now have one single landscape page, with all other pages remaining in portrait mode.
How to Make Specific Text Landscape in Word
If you don’t want all of the text on your page to appear on the landscape page, you can choose to make a landscape page that only contains specific text.
- To do this, start by highlighting the text that you want to appear on the landscape page.

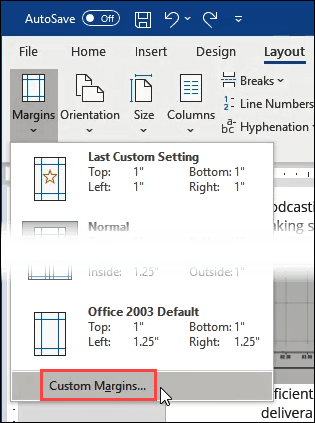
- In the Layout menu, click on Margins, then select the Custom Margins… option at the bottom of the drop-down menu.

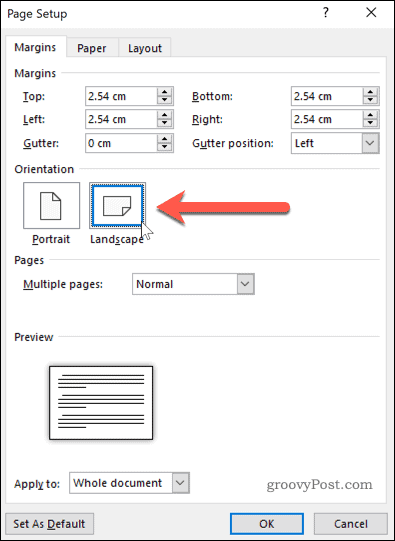
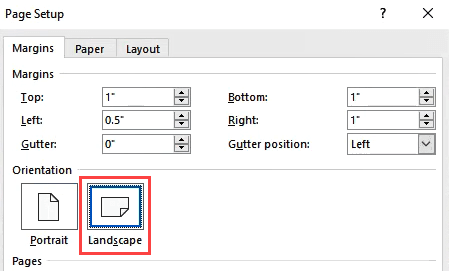
- In the Page Setup window, click on the Landscape option in the Margins tab, under the Orientation section.

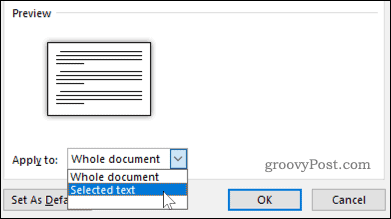
- In the Apply to box, choose Selected Text.

- Click OK to confirm the settings you’ve selected.


You should now have a landscape page that contains the text you previously highlighted, creating a section break that uses a different page layout to the rest of your Word document.
You can use this method to turn an entire page landscape—to do this, select all of the text on the page before you start and repeat the steps above to complete the change.
Formatting Microsoft Word Documents
Now that you know how to make a single page landscape in Word, you can start creating documents with as many combinations of landscape and portrait pages as you want. This is where learning how to rearrange pages in Word might just come in handy.
If you’re looking for other ways to take your Word documents further, why not learn how to insert an Excel table into Word. For academic documents, you may wish to create a table of contents in Word to keep your document organized.
![]()

Select the text on the page you want to be landscape in your document, then go to the Layout tab and open the «Page Setup» window. Set the orientation to «Landscape,» and pick «Selected Text» in the drop-down menu.
By default, Microsoft Word orients its pages in portrait view. While this works fine in most situations, you may have a single page that would look better in landscape view. Here are two ways to make one page landscape in Word.
Change One Page to Landscape With Page Setup
The quickest and easiest way to convert a page from portrait to landscape in Word is to select the content and turn only that page. This method works with text, images, tables, and other items you have on the page.
RELATED: Tables and Other Formatting Controls
Select all items on the page. If you have text, drag your cursor through all of it. If you have an image, table, chart, or another type of object, simply select it.

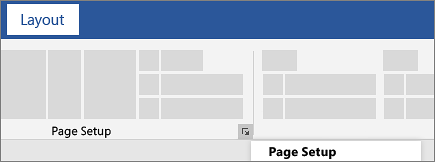
Go to the Layout tab and click the arrow on the bottom right corner of the Page Setup section of the ribbon. This opens the Page Setup dialog box.
Confirm that you’re on the Margins tab. Below Orientation, choose “Landscape.” Then at the bottom, click the Apply To drop-down box and choose “Selected Text.” Click “OK.”
When the dialog box closes, you will see your page turn to landscape view.
Make One Page Landscape by Inserting a Break
While the above method is the simplest, you may run into difficulties if you have different types of items on your page. For instance, you might have an image or table with text wrapped around it.
Although you can select all the content on the page, it may display on more than one page when you change the orientation. Luckily, there is another way to make one page landscape in these situations using a section break.
Place your cursor at the start of the page you want to change before any text or items.
Go to the Layout tab, click the Breaks drop-down arrow, and choose “Next Page.” This inserts a section break in your document.
Stay on the Layout tab, click the Orientation drop-down arrow, and pick “Landscape.” This changes the current and all subsequent pages to landscape view.
To return the remaining pages to portrait view, go to the next page and place your cursor at the beginning of the content.
Go to the Layout tab, click the Breaks drop-down arrow, and choose “Next Page.” This inserts another break in your document.
Now on the Layout tab, click the Orientation drop-down arrow and pick “Portrait.”
You’ll then see the remaining pages turn back to portrait view, leaving the one page you chose in landscape view.
If you use Google Docs as well as Microsoft Word, you can change the page orientation in Google Docs just as easily.
READ NEXT
- › 7 Reasons to Use Your Monitor in Portrait Mode
- › Universal Audio Volt 2 Review: A Workhorse Audio Interface With Vintage Charm
- › Why One Ultrawide Is Better Than Two Monitors
- › The Best DNS Servers for Secure Browsing
- › Get to Your Windows 11 Desktop: 7 Fastest Methods
- › Why the Right-Click Menu in Windows 11 Is Actually Good
- › Google+ Will Come to a Final End on July 5, 2023
How-To Geek is where you turn when you want experts to explain technology. Since we launched in 2006, our articles have been read billions of times. Want to know more?
Word offers two choices for orienting your pages in a document. You can orient them either as portrait or as landscape. While portrait is the default option, you can switch to the landscape mode anytime.
Your document may have many small tables and charts in it. You can make the document look uniform by using portrait-oriented pages. But what if one of the tables or charts is large, and it does not fit on one portrait-oriented page? You may need to turn that page in the document into landscape orientation to show the large table or chart.
2 ways to make a Single Page Landscape in Word
- By introducing breaks and changing the orientation
- Using the Page Setup menu
Let us see how.
Method #1: Introduce breaks and change the orientation
Step #1: Open the Word document
Open the Word document.
Click on the View tab on the top menu bar to change the ribbon.
In the Zoom section, click on Multiple Pages.

Click the Zoom Out button on the slider at the bottom right-hand corner of Word window.

Click again on the Zoom Out button, until at least 3 pages are visible in the window.
Navigate to the page for which you want to change the orientation.
Position the document such that this page is in the middle of the three pages displayed.

Step #2: Introduce a Continuous Section Break
Place the cursor at the beginning of the page that you want to change.
Click on the Layout tab on the top menu bar to change the ribbon.
Click on the small triangle next to Breaks. This will open the Breaks menu.
Under Section Breaks, click on Continuous.

Step #3: Change orientation of page
Under the Layout tab, In the Page Setup section, click on the small triangle below the Orientation icon.
This will open two choices:
- Portrait
- Landscape

Click on Landscape.
Word will modify the page and all the following pages to landscape orientation.

Step #4: Change orientation of the rest of the pages
Place the cursor at the beginning of the next page.
Introduce a continuous section break as in Step #2.
Under the Layout tab, click on the small triangle below the Orientation icon. This will offer two choices:
- Portrait
- Landscape

Click on Portrait.
Word will modify the page and all the following pages to portrait orientation.

Method #2: Use the Page Setup menu
Step #1: Open the Word document
Open the Word document.
Click on the View tab on the top menu bar to change the ribbon.
In the Zoom section, click on Multiple Pages.

Click the Zoom Out button on the slider at the bottom right-hand corner of Word window.

Click again on the Zoom Out button, until at least 3 pages are visible in the window.
Navigate to the page for which you want to change the orientation. Position the document such that this page is in the middle of the three pages displayed.

Step #2: Open the page setup menu
Place the cursor at the beginning of the page that you want to change.
Click on the Layout tab on the top menu bar to change the ribbon.
Click on the down arrow next to Page Setup. This will open the Page Setup menu.

Step #3: Setup the page
In the Page Setup menu, click on the Margins tab.
Under Orientation, click on Landscape.
Under Preview, click on the down arrow next to Apply to:.
This will open three choices:
- This section: Apply the chosen orientation to the section under the cursor.
- This point forward: Apply the chosen orientation to all sections beyond the cursor.
- Whole document: Apply the chosen orientation to all sections in the document.
Click on This section.
Click on Ok to close the Page Setup menu.

Word changes the orientation of one page to landscape, while all other pages remain in portrait orientation.

Conclusion
Now you know how to make a one-page landscape in a document. You can also combine portrait and landscape pages in a Word document.
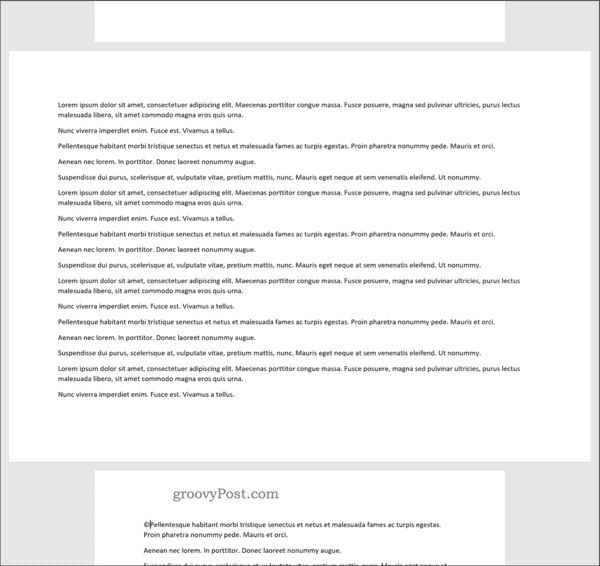
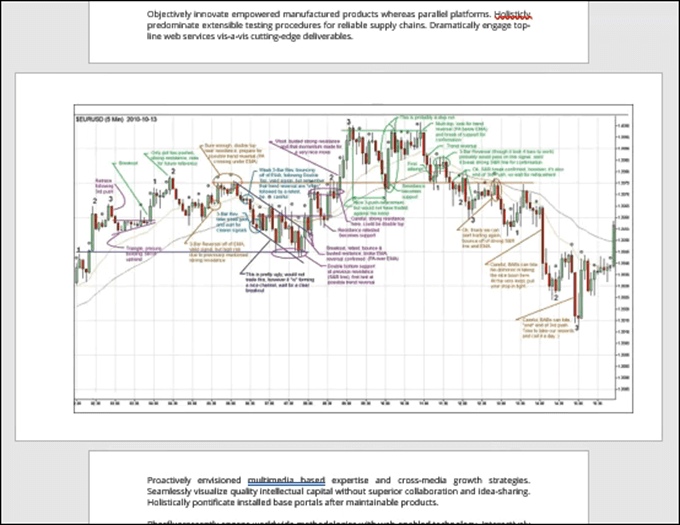
Have you ever been putting together an essay or report and wanted to include a large image? Maybe a nice graph or chart? The answer is to put it on a page in landscape, or horizontal, layout. So you try that, but then all the pages go to landscape.
Here’s the fastest, easiest way to make one page landscape in Word.

Also, feel free to check out the video we posted to our YouTube channel below, where we walk you through the same steps as in this article, just with an accent!
HOW TO MAKE A SINGLE PAGE LANDSCAPE: In Word
The Point & Click Way To Make One Page Landscape In Word
- Select the image or text that we want to be on a landscape-oriented page.

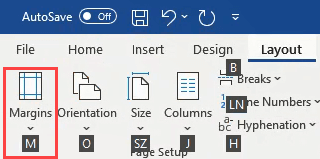
- Click on the Layout tab.
- Click on the down arrow under the Margins button.
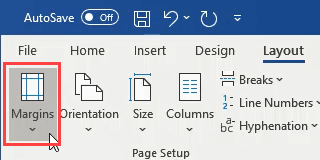
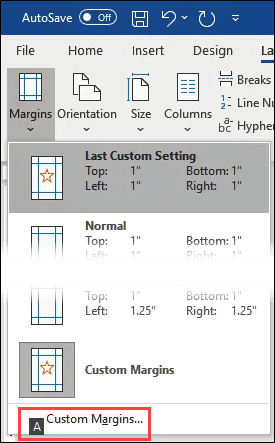
- Click on Custom Margins…
- In the middle of the Page Setup window, click on the Landscape button.

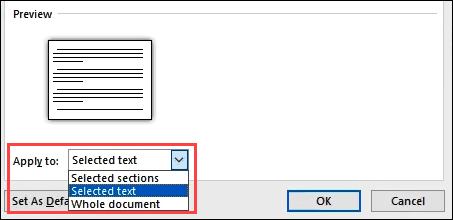
- At the bottom of the Page Setup window, in the Apply to: select box, change it to Selected Text. Click OK.
The selected image or text will now be on its own landscape-oriented page. Resize the chart for the best fit and we have a beautiful report.
As simple as that is, it can be done more quickly using keyboard shortcuts. Let’s go through how to use keyboard shortcuts to make the one-page landscape in Word.
The Fastest Way To Make One Page Landscape In Word
How much faster is this method? I timed myself using the point-and-click method and the shortcut keys-only method. Once I had practiced the shortcut keys a few times, it took less than 30 seconds, whereas the point-and-click method took closer to a minute.
Using shortcut keys to do your most frequent tasks not only saves time, but it can also save your health. Much peoples wrist pain from work is caused by using the mouse. The other added bonus is you’ll look like a superstar at work. You’ll be doing things in seconds when others take minutes.
Even though it may look like there’s more work, it’s just broken down to be very precise. A lot of people have never used shortcut keys in this way and we don’t want them getting frustrated and giving up because we missed anything.
- Select the image or text that we want to be on a landscape-oriented page.

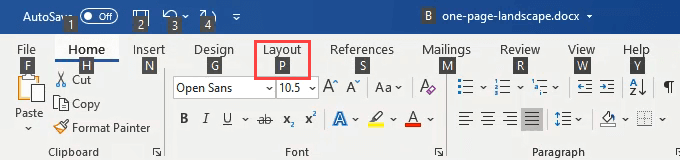
- Press the Alt key then press P to take us from the Home tab to the Layout tab.
- Press the M key to open the Margins button dropdown.
- Press the A key to choose the Custom Margins… and open the Page Setup window.
- Press Alt + S to choose Landscape orientation.
- Press Alt + Y to choose the Apply to: field, then tap the down arrow key once to choose Selected Text. Tap the Enter key once to set Selected Text as the choice, then tap Enter again to apply the setting.
The Page Setup window will close and the text or image will now be on a landscape layout page.

If you like how much faster the shortcut keys were, take a look at our other articles showing the magic of shortcut keys. You’ll wonder how you survived without these top 10 keyboard shortcuts for Windows 10. If you wish there was a shortcut for something, you also might be able to create custom keyboard shortcut for it in Windows 10.
Got some great shortcuts to share? Or questions about other ways to do tough things in Office or Windows? Pop it in the comments below. We’re all here to learn.