
Add and format text
To add text, place the cursor where you want and start typing.

Format text
-
Select the text you want to format.
To select a single word, double-click it. To select a line of text, click to the left of it.
-
Select an option to change the font, font size, font color, or make the text bold, italic, or underline.

Copy formatting
-
Select the text with the formatting you want to copy.
-
Click Format Painter
, and then select the text you want to copy the formatting to.Tip: Double-click Format Painter if you want to copy the formatting in more than one place.
 , and then select the text you want to copy the formatting to.
See Also
Create a bulleted or numbered list
Change the line spacing in Word
Apply styles
Apply themes
Select text
Need more help?
Want more options?
Explore subscription benefits, browse training courses, learn how to secure your device, and more.
Communities help you ask and answer questions, give feedback, and hear from experts with rich knowledge.
Содержание
- Выбор шрифта и типа написания текста
- Выделение заголовка
- Выравнивание текста
- Изменение интервалов
- Добавление маркированных и нумерованных списков
- Дополнительные операции
- Вопросы и ответы
![]()
Мы уже неоднократно писали об инструментах для работы с текстом в MS Word, о тонкостях его оформления, изменения и редактирования. О каждой из этих функций мы рассказывали в отдельных статьях, вот только для того, чтобы сделать текст более привлекательным, удобным для чтения, понадобится большинство из них, причем, выполненных в правильном порядке.
Урок: Как добавить новый шрифт в Ворд
Именно о том, как правильно выполнить форматирование текста в документе Microsoft Word и пойдет речь в данной статье.
Выбор шрифта и типа написания текста
О том, как изменять шрифты в Ворде мы уже писали. Вероятнее всего, вы изначально набирали текст в понравившемся шрифте, выбрав подходящий размер. Более подробно о том, как работать со шрифтами, вы можете узнать в нашей статье.
Урок: Как изменить шрифт в Word

Выбрав подходящий шрифт для основного текста (заголовки и подзаголовки пока что не торопитесь изменять), пройдитесь по всему тексту. Возможно, некоторые есть фрагменты нужно выделить курсивом или полужирным шрифтом, что-то нужно подчеркнуть. Вот пример того, как может выглядеть статья на нашем сайте.
Урок: Как подчеркнуть текст в Ворде
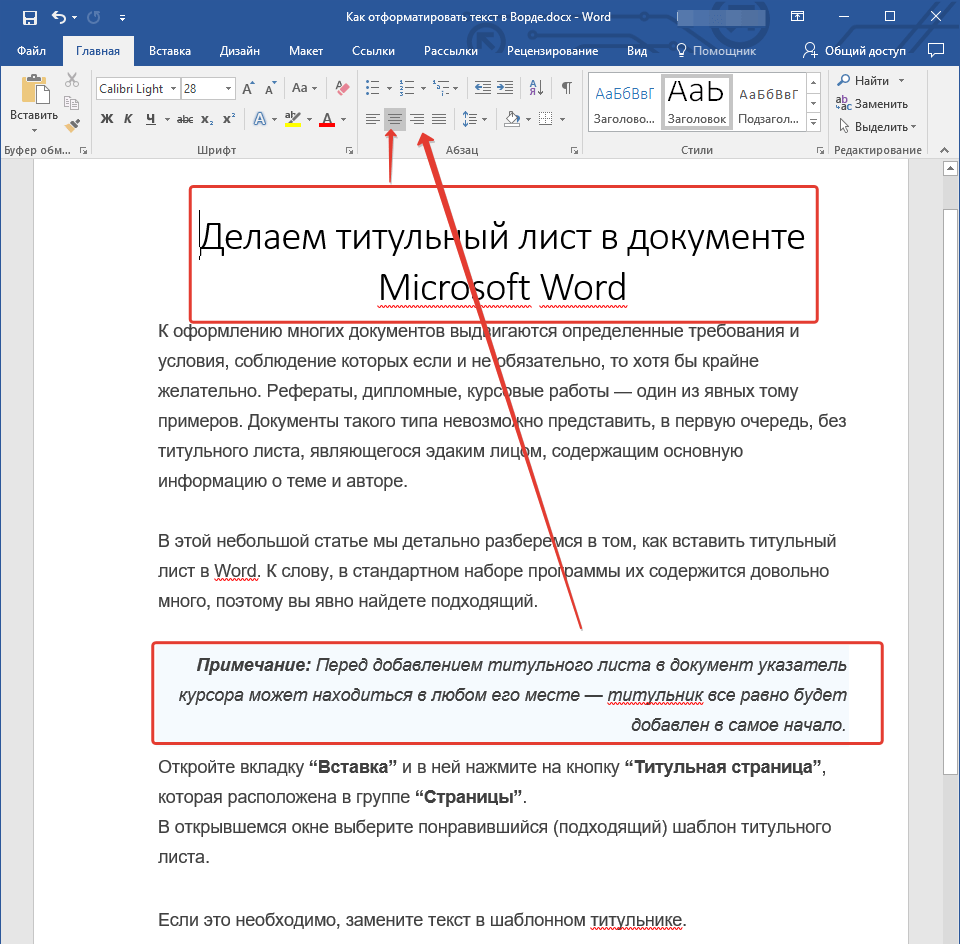
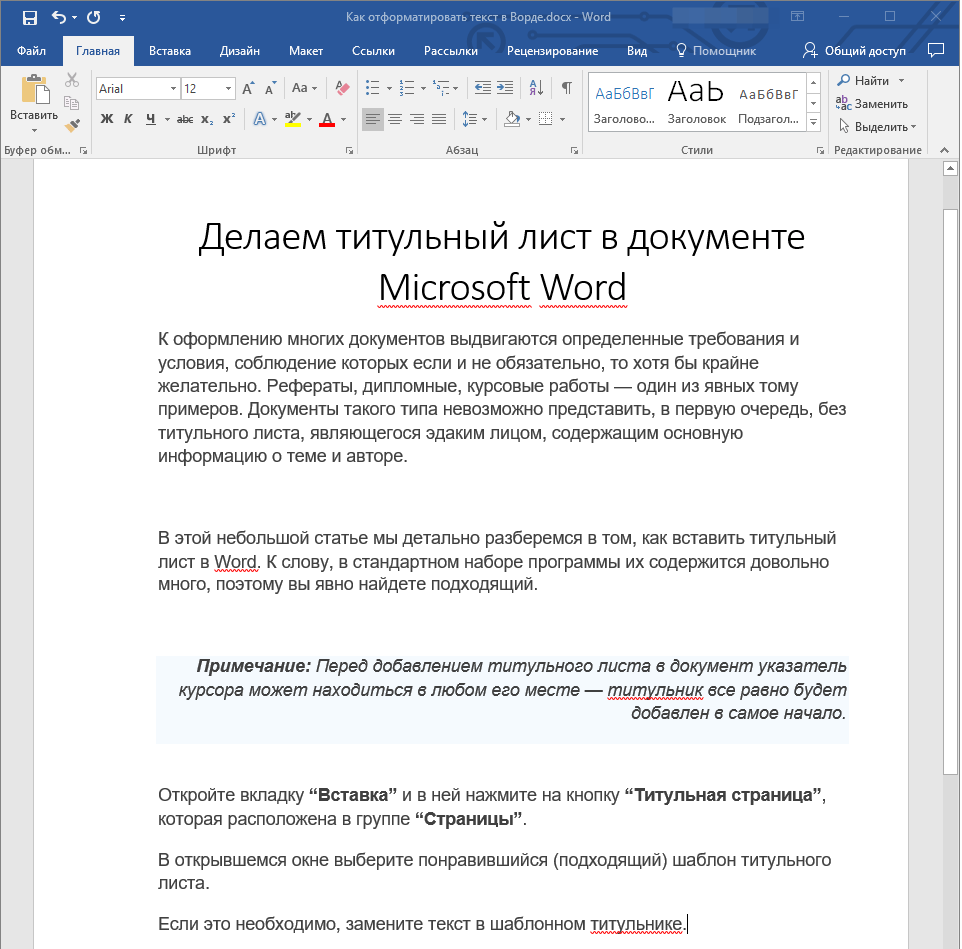
Выделение заголовка
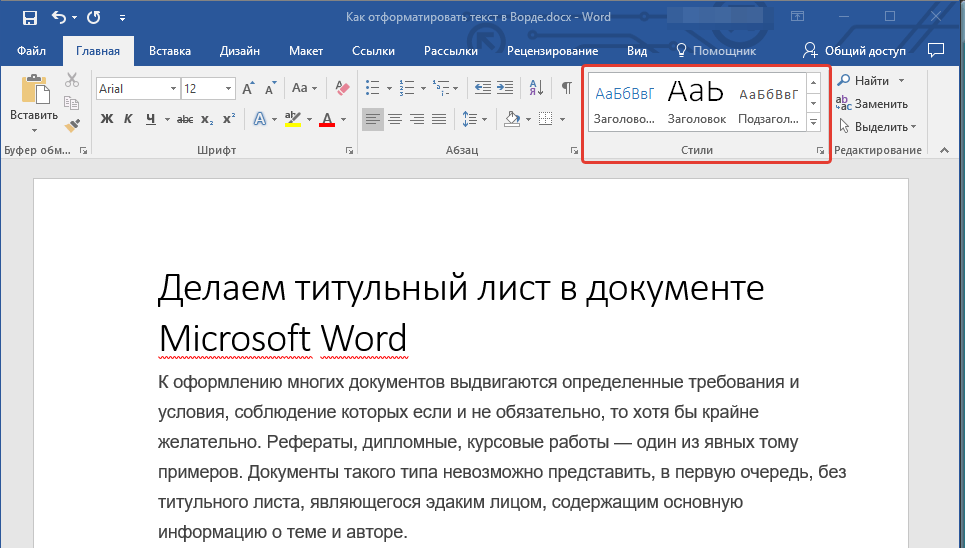
С вероятностью в 99,9% у статьи, которую вы хотите отформатировать, есть заголовок, и, скорее всего, подзаголовки в ней тоже имеются. Конечно же, их нужно отделить от основного текста. Сделать это можно с помощью встроенных стилей Word, а более подробно с тем, как работать с этими инструментами, вы можете ознакомиться в нашей статье.
Урок: Как сделать заголовок в Ворде
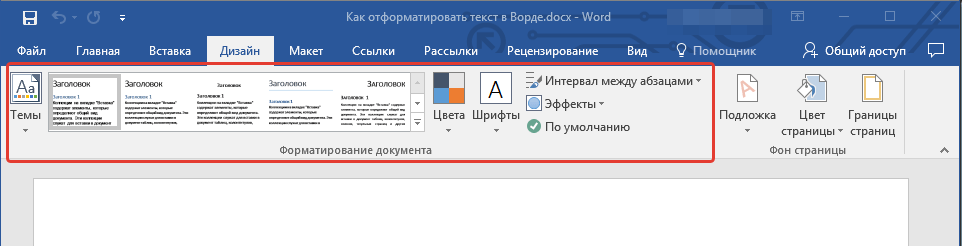
Если вы используете последнюю версию MS Word, дополнительные стили для оформления документа вы можете найти во вкладке “Дизайн” в группе с говорящим названием “Форматирование текста”.

Выравнивание текста
По умолчанию текст в документе выравнивается по левому краю. Однако, если это необходимо, вы можете изменить выравнивание всего текста или отдельно выделенного фрагмента так, как вам это необходимо, выбрав один из подходящих вариантов:
Урок: Как выровнять текст в Ворде
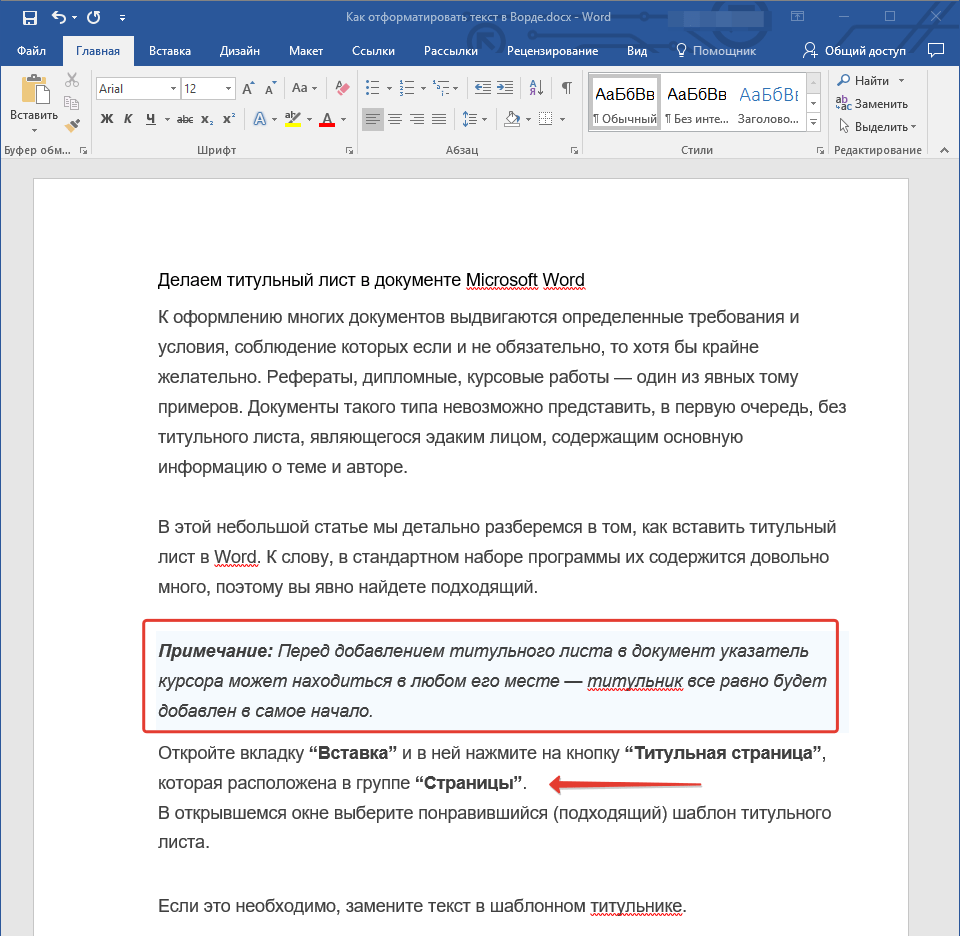
Инструкция, представленная на нашем сайте, поможет вам правильно расположить текст на страницах документа. Выделенные красным прямоугольником фрагменты текста на скриншоте и связанные с ними стрелки показывают, какой стиль выравнивания выбран для данных частей документа. Остальное содержимое файла выровнено по стандарту, то есть, по левому краю.
Изменение интервалов
Расстояние между строчками в MS Word по умолчанию составляет 1,15, однако, его всегда можно изменить на большее или меньшее (шаблонное), а также вручную задать любое подходящее значение. Более подробную инструкцию касательно того, как работать с интервалами, изменять и настраивать их вы найдете в нашей статье.
Урок: Как изменить межстрочный интервал в Ворде

Помимо интервала между строками, в Word также можно изменить и расстояние между абзацами, причем, как до них, так и после. Опять-таки, вы можете выбрать шаблонное значение, которое вас устраивает, или задать собственное вручную.
Урок: Как изменить интервал между абзацами в Ворде
Примечание: Если заголовок и подзаголовки, которые имеются в вашем текстовом документе, оформлены с помощью одного из встроенных стилей, интервал определенного размера между ними и следующими абзацами задается автоматически, а зависит он от выбранного стиля оформления.
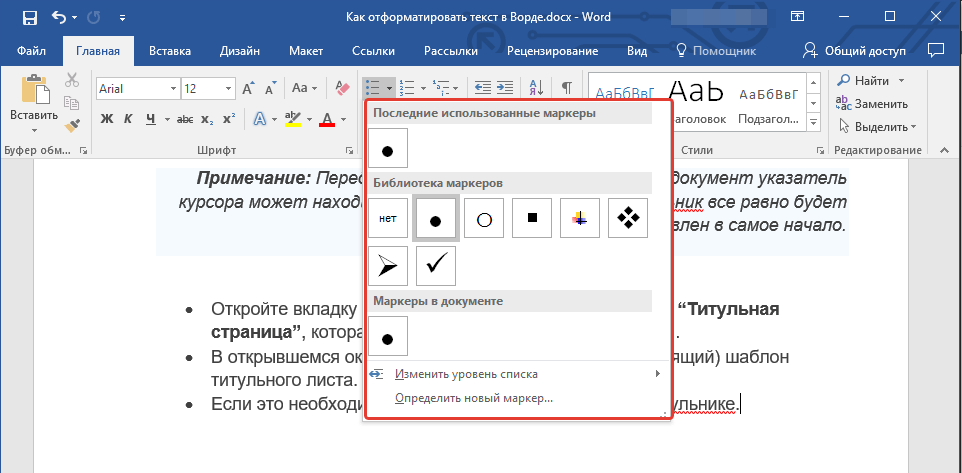
Добавление маркированных и нумерованных списков
Если в вашем документе содержатся списки, незачем нумеровать или уж тем более маркировать их вручную. В Microsoft Word для этих целей предусмотрены специальных инструменты. Они, как и средства для работы с интервалами, расположены в группе “Абзац”, вкладка “Главная”.

1. Выделите фрагмент текста, который необходимо преобразовать в маркированный или нумерованный список.

2. Нажмите одну из кнопок (“Маркеры” или “Нумерация”) на панели управления в группе “Абзац”.
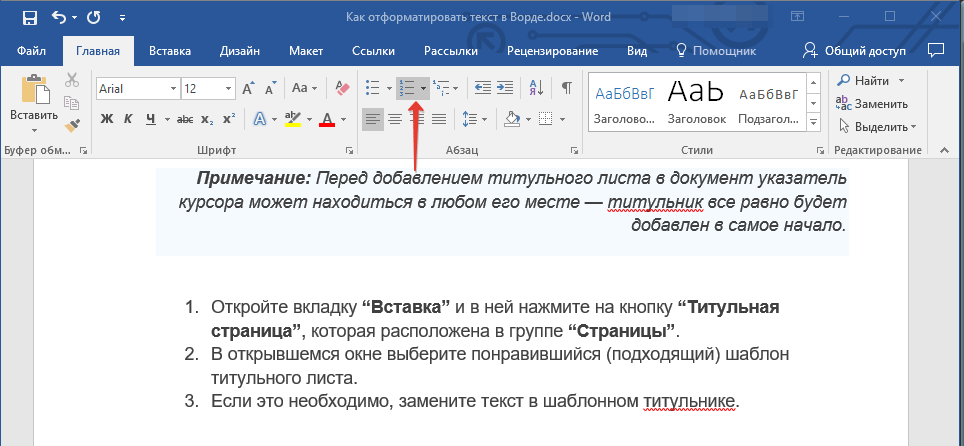
3. Выделенный фрагмент текста преобразуется в красивый маркированный или нумерованный список, в зависимости от того, какой из инструментов вы выбрали.
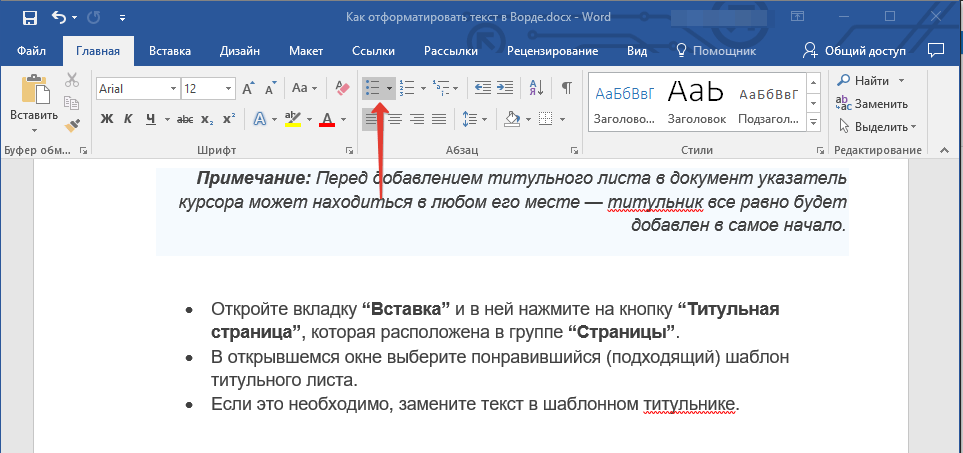
- Совет: Если развернуть меню кнопок, отвечающих за списки (для этого нужно нажать на небольшую стрелочку справа от значка), вы можете увидеть дополнительные стили оформления списков.
Урок: Как в Ворде сделать список в алфавитном порядке
Дополнительные операции
В большинстве случаев того, что мы уже описали в данной статье и остальном материале по теме форматирования текста более, чем достаточно для оформления документов на должном уровне. Если же вам этого будет мало, либо же вы просто пожелаете внести какие-то дополнительные изменения, коррективы и т. д. в документ, с большой вероятность, вам будут очень полезны следующие статьи:
Уроки по работе с Microsoft Word:
Как сделать отступы
Как сделать титульный лист
Как пронумеровать страницы
Как сделать красную строку
Как сделать автоматическое содержание
Табуляция
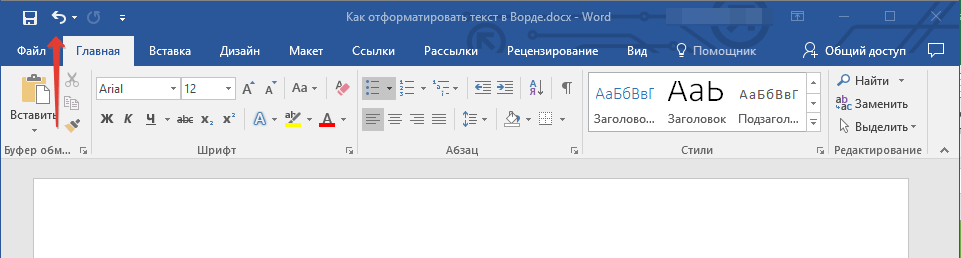
- Совет: Если во время оформления документа, при выполнении той или иной операции по его форматированию, вы допустили ошибку, ее всегда можно исправить, то есть, отменить. Для этого просто нажмите на закругленную стрелку (направленную влево), расположенную возле кнопки “Сохранить”. Также, для отмены любого действия в Ворде, будь то форматирование текста или любая другая операция, можно использовать комбинацию клавиш “CTRL+Z”.
Урок: Горячие клавиши в Word
На этом мы смело можем закончить. Теперь вы точно знаете, как отформатировать текст в Ворде, сделав его не просто привлекательным, а хорошо читабельным, оформленным в соответствии с выдвигаемыми требованиями.
![]()
Download Article
Learn the basics of formatting a Microsoft Word document
![]()
Download Article
- Formatting the Layout
- Formatting Text
- Adding Pictures, Graphs, & Tables
- Using a Formatted Template
- Saving in Other Formats
- Q&A
|
|
|
|
|
Microsoft Word is the world’s most popular word processing app. Depending on what kind of legal, formal, or personal paper you’re writing, each has its own formatting guidelines. Fortunately, Microsoft Word makes it easy to format the layout, text, and other objects in your document. If you’re new to using Microsoft Word, don’t worry. You can be formatting your document like a pro in no time. This wikiHow guide will teach you simple ways to format a Word document on your PC or Mac computer.
Things You Should Know
- You can find most of the formatting tools you’ll need in the Ribbon menu at the top of your document.
- If you don’t want to do all the formatting from scratch, try using one of Word’s premade templates.
- Save your document in different file formats using the Save a Copy or Save As menu.
-
1
Explore the Word user interface. You can access most of Word’s formatting tools from the Menu Bar or the Ribbon at the top of the window. You can modify which tools are visible using the View menu.
- The Menu Bar is the area at the top of the screen where you will find File, Edit, View, and other important menu commands.
- The Ribbon is at the top of your workspace and contains icons, menus, and shortcuts to common tasks.
-
2
Align your document. Different types of documents call for different text alignments. You can choose whether to align your entire document to the left, right, or at the center on the Home tab by clicking the Alignment buttons in the «Paragraph» section.
- These are the buttons that look like a small version of a document, with small black lines arranged according to their button’s alignment function.
- You can also adjust alignment by selecting the text and objects you want to align, right-clicking the selection, and choosing Paragraph. Select your preferred alignment from the Alignment menu under the General header.
- You can either set the alignment for the whole document or just a selected piece of text.
Advertisement
-
3
Set the line spacing of your document. Need to change your document to single or double-space? You can adjust the spacing of your entire document, or for selected text.
- If you haven’t begun typing or adding content to your Word document, click the Home tab, click the «Line and Paragraph Spacing» icon (a row of lines with vertical arrows to the left of the lines pointing up and down, and select an option.
- If your document already has text or other content, press Ctrl + A (PC) or Cmd + A (Mac) to select everything in the document, right-click the selection, and choose Paragraph. You can then choose your desired spacing from the «Line Spacing» menu.
- For a single-spaced document, choose 1.0. For double-spacing, choose 2.0.
- Many professional documents, like college essays and cover letters, should be double-spaced.
-
4
Adjust the page orientation. If you need to write the document in a different orientation, click the Layout tab at the top of Word, select Orientation, and choose either Portrait or Landscape.
-
5
Change the size of the paper. If you need to print the document on a specific paper size, click the Layout tab, click Size, and then select your desired size from the drop-down list.
- This will change the virtual size of the document you’re writing as well as the actual size of the printout.
-
6
Adjust the headers and footers. A header contains details that will appear on every page of the paper, such as page numbers, your name, or the document title.
- To set the header of your document, double-click on the topmost part of the page, and the header field will appear. You can also click the Insert tab and select Header.
- Footers are just like headers. All text in the footer will appear at the bottom of each page of your document. To set the footer, double-click on the bottommost part of the page, and the footer field will appear. You can also use the Footer button on the Insert tab.
- You can also format your headers and footers by selecting the View tab and clicking Header and Footer on the list. This action will open the headers and footers on your page and allow you to edit them.
-
7
Insert page or section breaks with the Breaks menu. Go to the Layout tab in the and click Breaks if you want to start a new page or section in your document. You can choose from a variety of types of breaks, including Page, Column, and Section. This is a very useful tool if you need to format different sections of your document in different ways.[1]
- For example, you can use section or page breaks to help you format your page numbers so that the numbering restarts with each new section.
-
8
Adjust the margin size with the Margins tool. Click the Margins button in the Layout tab and select a margin from the pre-defined margin settings listed on the drop-down list.
- If you want to use your own margin measurements, click Custom Margins at the very bottom of the drop-down list to set your own.
-
9
Add columns to split your text vertically on the page. If you need to create a newspaper-like document, you can do so by adjusting the format of the document to columns. Click the Layout tab, select the Columns option, and choose the number and alignment of columns from the drop-down list.
- The Columns button looks like a rectangle with two vertical columns of blue lines on it.
- If you want to create one, two, or three columns, you can do so from the preset options. If you’d like to create more, you’ll need to choose More Columns from the bottom of the dropdown menu.
- Note that this column option is different from the columns you get when you insert items like tables on your document.
-
10
Add bullets and numbers to make lists. Highlight the text that you would like to be numbered or bulleted and click the Numbering or Bullets button on the Home tab of the Ribbon.
- These buttons can be found side by side on the Ribbon, near the alignment buttons. The Numbering button displays three small lines with numbers to the left of the lines and the Bullets button displays three small lines with bullet points to the left of the lines.
- There’s also a third button that allows you to create more elaborate multi-level list styles, which is useful for formatting outlines.
-
11
Experiment with document styles. All documents have standard built-in styles (for example, Normal, Title, Heading 1). The default style for text is Normal. The template that a document is based on (for example, Normal.dotx) determines which styles appear on the Ribbon and on the Styles tab. You can see the current style presets for your document in the Home tab of the Ribbon.
- Before you apply a style, you can see all of the available styles and preview how they will appear when applied.
- On the Home tab, click a style to apply it to selected text.
- Click the Styles Pane button (the arrow pointing down and to the right) to view and select from advanced Style options.
- By default, Word applies a paragraph style (for example, Heading 1) to the entire paragraph. To apply a paragraph style to part of a paragraph, select only the specific part that you wish to modify.
-
12
Reveal hidden formatting symbols if you’re having trouble. Word documents often contain hidden code that can cause frustrating problems when you’re trying to modify your formatting. For instance, an invisible extra paragraph mark or section break can create unwanted spaces between paragraphs or lines of text. To see formatting symbols that are normally hidden so you can delete or modify them, you can click the ¶ button in the Home tab, or try one of the following:[2]
- On Windows, open File, select Options, and click Display. Tick the box next to Show all formatting marks.
- In Word for Mac, open the Word menu, then Preferences, then View. Check the box next to All in the Show Non-Printing Characters section of the View menu.
-
13
Use the View menu to change your view of the document. The View menu can let you change how your document looks in Word without actually making changes to the format. For example, Print Layout will show approximately what your document will look like when it’s printed out, while Web Layout will display the whole document in one long chunk without any page breaks.
- The View menu also lets you zoom in and out on your document.
- You can also change your view with the buttons and zoom slider at the bottom right side of the document pane, or with the View tab in the Ribbon.


Advertisement
-
1
Change the font face. On the Home tab, you will a drop-down menu containing a list of fonts to choose from. Use your mouse to select the text you want to change, then choose a font from the list.
-
2
Change font size and color. Also on the Home tab, you can change the size, color, and highlighting for your font. Select the text you want to format, then choose your options.
- By default, they will be set to the size and font associated with your document’s current Style settings. For example, if you’re using Word’s default template, the Normal style will use Calibri as the default font and 12 pt. as the default text size.
- Always consider the formatting guidelines of the document you are writing when choosing the font style and size.
- The standard font for most college and professional papers is Times New Roman font, text size 12.
-
3
Make text bold, underlined, or italicized. Besides setting the font style and size, you can also adjust the emphasis of words and lines in your document. Near the font and text size menus, you will see the Bold, Italics, and Underline buttons.
- Just click the buttons to make your text bold, underlined, or italicized.
- In this section, you can also find special text formatting options such as Strikethrough, Subscript, and Superscript.
-
4
Highlight text on the page. If you would like to change the background color behind selected text, similar to using a highlighter on a printed page, click the Text Highlight icon, which is a pen above a colored line.
- You can also add special text effects with the Text Effects button, which looks like a capital A with a glowing blue border.


Advertisement
-
1
Drag an image into your document. This is a quick way to add a picture to your Word document. Simply select an image on your desktop and drag and drop it into the document window. Make sure your image is placed exactly where you want it before you drop it.
- You can also insert an image by going to the Insert tab, then clicking Pictures. Select one of the options to browse for images on your computer, the web, or Word’s gallery of stock photos.
- You can also insert graphics or other media (such as video or audio clips) using the Shapes, Icons, or 3D Models, and Media buttons.
-
2
Enable text wrapping. Text wrapping changes the layout of your document, allowing the text to flow around the image no matter where it is placed. To turn on text wrapping:
- Right-click (or ctrl-click, on a Mac) on the image and hover over Wrap Text. Select the alignment that best suits your document. You will see a preview as you hover over each option.
- To change the location of the image in the document, select the image and then hold the Ctrl key. While holding the key, use the arrow keys to move the picture around the document.
- When you right-click or ctrl-click your image, you’ll also see an option in the context menu to add a caption under your image.
-
3
Edit your image in the Picture Format tab. Once you insert your image, you can select it to open a new Picture Format tab in the ribbon. From there, you can choose from a variety of tools, such as:
- Making corrections or adding artistic filters to the image
- Adding style effects, such as a drop shadow or frame, to the picture
- Entering alt text
- Tweaking the position of your image or changing the text-wrap settings
-
4
Add a graph or chart in the Insert tab. Click the Insert tab on the Ribbon, and then click the Chart option. Choose your preferred type of graph, such as a pie or bar chart, from the dropdown menu.
- Depending on the type of chart or graph you choose, Word may automatically launch Excel and create a new spreadsheet, where you can enter data for your chart.
-
5
Modify your graph. When you choose a graph type, a new tab will appear in the Ribbon menu called Chart Design. Navigate to that tab with the chart selected to make changes to the look of your graph or chart, or choose the Edit in Excel button to make changes to the data in your chart.
-
6
Use the Table tool to insert a table. If you want to add a table to your document, head over to the Insert tab and click the Table button. A menu will pop open where you can either scroll over a grid of squares to select your number of rows and columns, or select an option like Insert Table or Draw Table.
- Insert Table opens a pop-up menu where you can specify parameters like the number of rows and columns and whether or not the contents of the table autofit your document window.
- The Draw Table tool allows you to draw the table with your mouse directly in the document.
- Once you start creating a table, you’ll see several new table editing tools in the Layout tab.


Advertisement
-
1
Choose a template from the New Documents pane. Templates are a great way to create a nice-looking document without having to do all the formatting from scratch. To use one, open Word and select New from the side menu to create a new document, or select New from Template from the File menu. Click one of the templates on the screen to select it.[3]
- If you don’t see a template you like, use the Search bar at the top of the window to find one that fits your needs. For instance, use keywords like “flyer,” “resume,” or “research paper” to find different styles of templates.
-
2
Click Create to open the template. The template will open as a new document.
-
3
Select text within the template to modify it. Word templates are simply preformatted documents with text, graphics, and other elements already in place. To add your own text, select text anywhere on the document and type in your own. The new text will have the same format as whatever text you selected and replaced. You can also click on a blank area of the document and start typing to add new text.
- To select a single word, double-click it. You can select longer pieces of text by clicking and dragging your mouse, or positioning your cursor at the start of the selection and holding down Shift while pressing the Right Arrow key.
- You can also select and move, delete, or replace other elements in the template, such as images, graphs, or tables.
-
4
Modify your template with the Styles pane. Templates use styles to create their distinctive looks. If you want to change the look of the template, click the Styles button in the Home tab of the ribbon toolbar. Click the down arrow next to any of the style elements and select Modify Style… to make changes.
- You can also make any other types of changes you like using the rest of the tools in the ribbon menu or Format menu.
-
5
Save your modified template as a document. When you’ve made the changes you want to the template, save it the same way you would any other Microsoft Word document.


Advertisement
-
1
Click the file menu and select Save a Copy…. If you want to save a document as a file type other than .DOCX, you can do so with the Save a Copy function.
- If it’s a brand-new document that you haven’t already saved, select Save As… instead.
-
2
Open the File Format dropdown menu. You’ll see this menu at the bottom of the Save a Copy or Save As window.
-
3
Select the format you want from the menu. In addition to common formats like .DOC, .DOCX, .TXT and .RTF, you can also save your document as a PDF, an XML file, or a macro-enabled Word file.
- Check out the list of file formats that are supported in word here.


Advertisement
Add New Question
-
Question
What is Microsoft publishing?

UK_Gamer05
Community Answer
Publisher is a tool for making posters, leaflets, booklet,s etc. It’s for when you need to create something that isn’t a standard document.
-
Question
How do I move from page one to page two of a Word document?
UK_Gamer05
Community Answer
In Word 2016, on the insert tab, either select insert new page or page break.
Ask a Question
200 characters left
Include your email address to get a message when this question is answered.
Submit
Advertisement
Thanks for submitting a tip for review!
Tip
- Unless free-handedly writing your paper, consult the guidelines of your document first before adjusting its format.
- Besides the header, footer, and page layout formats (which affect the entire document), all the other formatting tools can be applied only on specific parts of the document.
About This Article
Thanks to all authors for creating a page that has been read 309,741 times.
Is this article up to date?
Whether you’re a one-person business operating out of your kitchen, or a billion-dollar company on Wall Street, the expectation is the same. Your business documents must be the paragon of professionalism and competence.


This expectation shouldn’t be a cause for worry. With applications like Microsoft Word you can create professional-looking documents with your own computer. Through the years, Word has become more powerful, yet more intuitive. Anyone with basic computer skills can use Word to create well-designed documents.
In this article, you’ll learn how to format text in Word to make your business documents easier to read and understand. You’ll also pick up tips on how to make sure your formatting doesn’t look amateurish—even if you’re getting started with Word.
Formatting Text in Word
Formatting text in Microsoft Word refers to controlling how text appears in your document. This includes the size, color, and font of the text. It also covers text alignment, spacing, and letter case.
Microsoft Word styles make it easy to change and apply styles throughout a document. A “style” is a set of formatting settings applied to a specific kind of text.
For example, you can set up a style for headings that’s bold, 14 points, aligned left, and uses the Tahoma font. This means all text in your document with the heading style will be formatted the same way. You don’t have to manually format each heading in your document.
In this post, you’ll see how to use MS Word styles.
How to Format Text in Word
To show you how to format text in Word, we’ll walk through formatting a completely unformatted business document file.
This is what my marketing report looks like without any formatting in Word:


As you can see, it’s plain and boring. Nobody would be inspired to read it, let alone act on the findings of the report!
Some basic Word text formatting can fix that.
1. How to Apply Typographic Emphasis
1. For starters, let’s use typographic emphasis (bold, italic, underline) to make the report title stand out.
To do this, select the text you want to emphasize. Click on the bold button on the Microsoft Word ribbon.


Note that the ribbon also has the buttons to apply italic, underline, strikethrough, and other formatting effects for text. Follow the same steps to apply those effects.
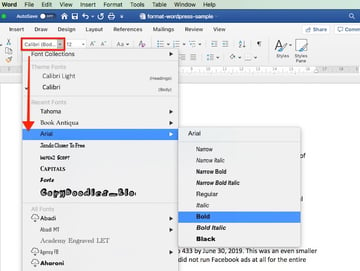
2. Now, let’s change the font, font size, and color of the title.
Again, select the text. Click the drop-down arrow on the font section of the ribbon, then select the font you want to apply. In this case, I’m using Arial bold.


3. To change the font size, highlight the text. Click the drop-down arrow on the font size indicator on the ribbon. Click on the font size of your choice.


Or, after highlighting the text, you can type the font size into the font size indicator on the ribbon. This is especially useful when the font size you want isn’t available in the font size selector.


4. You can also use the Increase Font Size or Decrease Font Size buttons on the ribbon to quickly change the font size.


5. We can easily change the font color as well.
Highlight the text, then click the down arrow beside the Font Color selector. Click on the color of your choice.


Choose More Colors… if you wish to apply a custom color.
2. How to Change Capitalization in Word
Microsoft Word also allows you to easily and quickly change the capitalization of your text. For example, if we want to make the title all uppercase, we don’t have to retype it.
Highlight the title, then click the Change Case button on the ribbon.


Or, highlight the text, go to Format > Change Case…


… then click on the radio button for the case you want to apply. Click OK.


Now the title is looking much better. It’s the most prominent part of the document and commands the reader’s attention. However, we can still improve its readability.
3. How to Format Paragraphs
One way to make your document easier to read is by increasing white space around lines and paragraphs.
1. To adjust the line spacing, select the text. Click on the arrow on the Line and Paragraph Spacing button. Select the line spacing you wish to apply.


2. To change the spacing around a paragraph, select the paragraph. Click on the arrow on the Line and Paragraph Spacing button > Line Spacing Options…. Then, type the amount of spacing before and after the paragraph. (Tip: You can adjust other settings from this dialog box as well.)
For the title, I’ll add a generous amount of space after the paragraph, to set it apart from the rest of the document.


3. Finally, let’s change the alignment of the title. Select the text, click on either the Align Left, Center Text, Align Right, or Justify button on the ribbon. Since this is a title, let’s use Center Text.


These simple formatting effects make the title stand out from the rest of the document.
4. How to Work With MS Word Styles
As much as Word makes it easy to format text, if you need to apply formatting effects on the entire document, the process becomes tedious.
Word solves that through styles. MS Word Styles allow you to define a set of formatting commands and apply them automatically to every item in the document with that style.
Let’s look at a specific example:
1. How to Modify a Paragraph Style
Let’s follow the steps above to define a style for the main headings of the report with the following characteristics:
- Font: Arial
- Size: 14 points
- Color: Blue-grey
- Typographic Emphasis: Bold
- Case: Capitalize each word
- Alignment: Left
- Line spacing: Single
- Paragraph spacing: 6 pts before paragraph, 0 pts after paragraph
It would look like this:


One way to apply this exact formatting on every main heading is to modify the existing Heading 1 style in our document. Place your cursor anywhere in the main heading. Go to Styles, right-click on Heading 1, then choose Update Heading 1 to Match Selection.


You can also modify any style by going to Format > Style…. The Style dialog box opens.


Select the style you want to modify from the Style list. This gives you a preview of the paragraph and character, as well as a description of the current style settings of the selected style.
Click Modify…. The Modify Style dialog box pops up.


Change the text and paragraph format settings. You can control the font, font size, font color, typographic emphasis, alignment, and spacing. When you’re done, click OK.
2. How to Apply a Paragraph Style
Now, go to each main heading in the document and apply the Heading 1 style to it. Place the cursor on a heading, go to Styles > Heading 1.


The selected text instantly takes on the formatting of Heading 1.


3. How to Create a List Paragraph Style
You can also create a new paragraph style from scratch, instead of modifying an existing one. To demonstrate, let’s create a list-type paragraph style.
1. Go to Format > Style…. Fill in the Properties section of the dialog box that opens. For Style based on, you may wish to use one of the pre-existing list styles as a starting point.


2. Next, change the formatting options. The box below gives you a preview of what the list paragraph would look like with those settings. There’s also a summary of the formatting properties you’ve specified.


You also have the option to do the following for this style:
- Add to template. Adds the style you’re creating to the document template.
- Add to Quick Style list. Shows the new style to the Quick Style list, making it quickly accessible from the ribbon.
- Automatically update. Automatically updates the style when you manually format a paragraph with that style.
When you’re happy with the settings you’ve made, click OK. Notice how the new Bullet style you created is now included in the Quick Style popup.


Once the bullet style is applied, our list now looks like this:


4. How to Use Character Styles in Microsoft Word
You can also define a style to an individual word or a block of text, rather than a paragraph. In the next example, I’d like to apply a character style for every URL in the document.
1. Select the text. Then, go to Format > Styles…. From the Style dialog, click New…. The Create New Style from Formatting dialog opens.


2. Give the new character style a name. For Style type, choose Character. Then, make the formatting settings you want to apply to this character. Note that you can’t change alignment and spacing for a character style. The preview box shows you a sneak peek of the text based on the settings you specified.


3. When you’re done, click OK.


To apply the character style, place your cursor in a word or select a set of words. Go to Format > Style…. Find the character style you wish to apply. Click Apply.


Tip: To quickly find the MS Word styles you’ve created, for List, choose User-defined styles.
5. How to Use Table Styles in Word
We can also define a table style to provide a consistent look to the tables in our document.
1. Create the table. Go to Insert > Table…, then indicate the number of columns and rows you need in your table (you can always add or remove these later). Click OK.


2. Add your text to the table. If necessary, click and drag any of the borderlines to adjust the width or a column, or the height of a row.
3. To apply a table style, click anywhere on the table, then go to Table Design. The Table Design ribbon appears.


4. Click on the down-arrow for table styles to display the table styles gallery.


5. Click on any style to apply it to your table.


Expand the table styles gallery again to change the existing style, clear the style you applied, or create your own table style.
Discover Great Microsoft Word Templates for 2020
Some experts say it’s a good idea to set up your formatting styles in Word first before typing or copying the text into the document. One quick way to do this is by starting with a Microsoft Word template. Templates come pre-formatted by professional designers to look current and impressive.
You can find thousands of Word templates for all kinds of business documents in Envato Elements.


For a small monthly subscription fee, you get unlimited downloads of all the templates at Elements. You also have unlimited access to everything else in the Elements catalog:
- presentation templates
- web templates
- fonts
- photos
- graphics
- other digital assets
Use as many of these assets as you want, as often as you want, without paying more. This makes Elements a terrific source for all the creative assets you need to create remarkable marketing and communication materials.
You can also pay as you go at GraphicRiver. This marketplace also offers a huge library of templates for Microsoft Word and other digital assets for all your marketing and communication needs. The difference is, you only pay each time you use an item. This can be a very economical option.
Below are some of the best print templates for Word available on Envato Elements and GraphicRiver:
After downloading any of these Microsoft Word templates, you can apply what you’ve learned about formatting text in Word. This way, you can personalize the template so that it aligns with your visual branding and preferences. You now know how to take any Word template and make it your own!
5 Top FAQs on Formatting Text in Microsoft Word
Below are some of the questions that come up as people format text in Word.
1. How Do You Make a Word Document Easier for the Reader to Scan?
Your primary goal when formatting text in Word is to make it easy for people to scan, read, and understand the content of the document. The different formatting options in Word help you achieve this:
- Use typographic emphasis like bold, italics, and underline to emphasize specific text and add variety to your document.
- Break up the document into sections with headings and sub-headings to help the reader scan and navigate their way through it.
- Use either bulleted or numbered lists where appropriate to shorten paragraphs and make lists easier to comprehend.
- Set up line and paragraph spacing so that there’s plenty of white spaces throughout the document.
2. How Many Fonts Should I Use in a Word Document?
It’s easy—and fun—to apply different fonts in Word. Too easy, in fact, that you could end up overwhelming your reader and making your document look like someone played with the formatting.
Avoid this by sticking to a maximum of two different fonts in a single document. For instance, you could choose a sans serif font for your title and headings, and a serif font for all other text. You could even use one font for the entire document, relying on typographical emphasis and color to distinguish different types of text from each other.
3. Why Should I Use Microsoft Word Text Styles?
Use Microsoft Word text styles because they let you apply formatting settings globally throughout your document. This is important in long documents, where formatting each line or paragraph is too onerous. With text styles, you only need to determine what style you want for each piece of text. Word will do the rest.
4. How Can I Make My Document Formatting Consistent?
Using MS Word styles, as you’ve learned in this article, is an easy way to make your document formatting consistent. You decide and set how you want each type of text to be formatted. Then you can apply those styles consistently through your entire document.
Beyond Microsoft Word styles, also make sure that the recurring parts of your document are consistent as well. These include your headers and footers, for example. You must also be consistent with the placement of images: Do they have borders? Are they always within the document’s margins or do they bleed to the edge of the page?
When you use a Word template, these design decisions are already made for you. So, if you want a consistent design without all the hard work, then starting with a template for Word is the way to go.
5. How do You Copy text into Word without also copying junk code?
When you copy text from one application and paste it into Word, you run the risk of also copying the underlying formatting code for it. This code or set of formatting commands is invisible so you won’t know you’re copying it inadvertently. This can mess up your formatting in Word. Soon, you’ll be pulling your hair wondering why Word won’t “follow” your commands.
To avoid this grief, make sure you strip all formatting when you copy and paste the text into Word. Here’s how: Copy the text. In Word, click Edit > Paste and Match Style.


That’s all there is to it!
Using Microsoft Word, Style Your Business Document for Maximum Impact
You’ve learned how to format a document in Word to make it easier to scan and read. Good formatting is also essential to make sure the final document represents you and your business in a favorable light.
You’ve seen how doable formatting is, even if you’re starting from scratch with completely unformatted text. You’ve also discovered that you can rely on professional designers to make the formatting decisions for you by starting with a template for Word.
For unlimited downloads of print templates for Word at a fixed subscription fee, look to Envato Elements. Here, you can also have your fill of fonts, icons, photos, and other design assets you’ll need without having to pay more. Or, get your premium Word templates from GraphicRiver on a pay-per-use basis. You also get a wide range of choices without having to commit to a subscription.
With Microsoft Word styles and formatting tools, there’s no more excuse to have poorly designed business documents. Make your next business document one you’ll be proud of.
Просмотров 4.7к.
Формально текстовый редактор не вынуждает форматировать текст документов. Требования выдвигают образовательные учреждения, рабочие регламенты и требования различных служб, а потому не помешает выяснить, как пользоваться коллекцией доступных настроек в Word (оформление шрифта, выравнивание текста, добавление абзацев, интервалов и списков) и с помощью каких инструментов документы становятся наглядными и оформленными.
Содержание
- Что такое форматирование
- Размер, ориентация листа, поля – настройка страницы
- Каким шрифтом писать
- Выбор шрифта
- Тип шрифта
- Выделяем заголовки
- Выравниваем текст
- Корректируем интервал
- Добавляем маркированные и нумерованные списки
- Вставляем формулы и символы
- Номера страниц
- Вывод
Что такое форматирование
Под форматированием документов специалисты из Microsoft подразумевают полноценную разметку каждой страницы, настройку межстрочного интервала, добавление полужирного начертания, оформление таблиц, рисунков и списков. Если текст выглядит читабельным и информативным (абзацы, заголовки, отступы), то оформление уже настроено. Если же документ напоминает бесконечные письмена на белоснежном холсте, то разобраться в деталях не помешает.
Размер, ориентация листа, поля – настройка страницы
Базовые параметры страницы в Microsoft World задаются через тематический раздел «Макет», представленный на панели быстрого доступа в верхней части интерфейса. После перехода слева отобразятся распространенные инструменты для настройки оформления:
- Поля. Левый пункт контекстного меню. При наведении курсора отображает коллекцию заранее подготовленных шаблонов, включая «Обычные», «Средние», «Узкие», «Широкие» и «Зеркальные» настройки. Рядом с каждым выбором отображается соответствующий образец. Если ранее подготавливались собственные поля, то сверху отобразится еще и пункт «Последнее пользовательское значение».

Кроме заранее подготовленных шаблонов с заданными размерами в Word доступны и «Настраиваемые поля»: разработчики разрешают ввести подходящие значения в вручную, а заодно определиться с положением переплета.

Выбранные настройки применяются к документу целиком, отдельным страницам или будущим работам, если нажать на кнопку «По умолчанию» (в последнем случае текстовый редактор сменит действующие настройки шаблона).
- Ориентация. Центральный пункт контекстного меню «Параметры страницы». Разрешают переключаться между классической «книжной» ориентацией на «альбомную» и наоборот.

Выбранный шаблон применяется ко всем страницам документа и меняет положение и оформление уже подготовленного текста и добавленных иллюстраций в автоматическом режиме, а потому разработчики рекомендуют задавать настройки до подготовки новой информации.
- Размер. Находится справа от «Ориентации». По умолчанию выбирает формат «A4», но разрешает подготовить конверты или выбрать шаблон в виде письма. Как и в случае с полями предусмотрена возможность настроить размеры бумаги с точностью до 10 миллиметров.

Применяются настройки или ко всему документу сразу или к какой-то конкретной странице.
Каким шрифтом писать
Оформление документа начинается с выбора подходящего шрифта: и речь необязательно о Times New Roman и полужирном начертании, но и о подчеркивании, эффектах и подстрочном и надстрочном написании. А потому обо всем по порядку.
Выбор шрифта
Шрифты в Word выбираются через раздел панели быстрого доступа «Главная»: рядом с буфером обмена появится тематический блок, предназначенный для выбора подходящего оформления для текста. Способов сменить начертание несколько – воспользоваться поисковой строкой и ввести название для подходящего шрифта или вызвать контекстное меню (стрелочка вниз) и пролистать вниз или вверх.

Если перед выбором выделить фрагмент документа и наводить курсор на позиции доступной библиотеки, то появится возможность еще до применения изменений просмотреть будущее оформление.
Тип шрифта
Кроме выбора шрифта в Word предстоит разобраться и с дополнительными параметрами: цветом добавляемого текста, выделением информации, габаритами, положением на странице и начертанием.

Каждый из перечисленный параметров выбирается через тематический раздел «Шрифт», расположенный на вкладке «Главная».
Выделяем заголовки
Формально оформление заголовков меняется по схожему с текстом сценарию: достаточно выделить фрагмент подготовленного материала, а после воспользоваться разделом «Шрифт». Но 14 шрифт, Times New Roman и полужирное начертание не превратят разрозненные слова в заголовок с точки зрения семантики и своеобразного статуса.
При работе с заголовками отталкиваться предстоит от раздела «Стили», расположенного в «Главном» меню на панели быстрого доступа в верхней части интерфейса.

Подготовленных шаблонов со стилями предостаточно: некоторые применяются к абзацам, другие предназначены для разметки заголовков в зависимости от значимости в тексте (порядок схож с тегами из HTML – от H1 до H6).
Выбранный стиль добавляет и специальные настройки оформления, которые разработчики разрешают свободно переназначать уже через знакомую вкладку «Шрифт».
Способов проверить добавились ли настройки для заголовков несколько: через «Поиск» (CTRL + F) или через автоматически собираемое «Оглавление» в разделе «Ссылки».

Если стили применены корректно, то информация выстроится в соответствии с правилами семантики и значимости в тексте.
Выравниваем текст
Документы в Microsoft Word по умолчанию выравниваются по левому краю, но, если обратиться к разделу «Абзац», расположенному на панели быстрого доступа в верхней части интерфейса, то появится шанс поменять расположение текста на странице.

Дополнительных вариантов три: по центру, по правому краю или по ширине. Какой из вариантов выбрать зависит непосредственно от документа: те же рефераты, доклады и дипломные работы выравниваются по ширине, а статьи – по левому краю.
Корректируем интервал
Расстояние между строками Microsoft Word для каждого документа в автоматическом режиме задает в формате «Множитель» со значением 1.15.

При необходимости параметр настраивается через контекстное меню «Абзац»

Кроме междустрочного (одинарный, двойной, точный), применяемого к конкретному тексту или документу целиком, в Word предусмотрены и интервалы «Перед» и «После», разрешающие в типографических пунктах (ТП), задать дополнительное расстояние для конкретных строк. Параметр часто применяется для заголовков.
Добавляем маркированные и нумерованные списки
Списки в Word добавляются через вызываемое контекстное меню раздела «Абзац»: достаточно нажать на «Маркеры», «Нумерацию» или «Многоуровневый список» и текстовый редактор сразу предложит выбрать подходящее оформление из доступных вариантов.

Если перед оформлением списка выделить текст, то система автоматически расставит маркеры и представит информацию в более наглядном виде.
Альтернативный способ подготовить список – начать новую строку с символа «-» (без кавычек и на английской раскладке) или «1.» и нажать на пробел. Word автоматически сформирует список и предложит подготовить пункты в ручном режиме.
Вставляем формулы и символы
Уравнения в Microsoft Word добавляются через раздел «Вставка», контекстное меню «Символы», пункт «Уравнение».

После разметки места под будущую формулу разработчики разрешают или добавить новую информацию вручную (на панели быстрого доступа появится коллекция операторов, математических знаков и прочих обозначений, включая дроби, индексы, и корни) или перенести из того же Excel. Вне зависимости от выбора информация займет положенное место на странице и заметно прибавит в читабельности.
Номера страниц
Нумерация страниц в Word оформляется через раздел «Вставка», категория «Колонтитулы»: после вызова меню «Номер страницы» предстоит выбрать куда добавить цифры – сверху, снизу, на полях или в том месте, где находится курсор.

Вывод
Форматирование текста в документах Word реализовано наглядно и полноценно: разработчики разрешают выбирать шрифты, переводить текст в списки, добавлять нумерацию страниц и подготавливать новые заголовки по правилам семантики.
Проблемы и сложности возникнут лишь с некоторыми дополнительными параметрами, вроде тех же формул – порой редактор некорректно переносит информацию из сети и заставляет вручную разбираться в деталях.
Once you have written your basic document you can spruce it up with a just few clicks.
The process for formatting text is:
1. Select the text you want to format.
2. Apply the formatting.
Most of the tools that you need to make your document look professional are on the Home ribbon. They are collected together into the Font group.
Here’s a quick breakdown and each of these will be covered in this post.

2. Changing the font
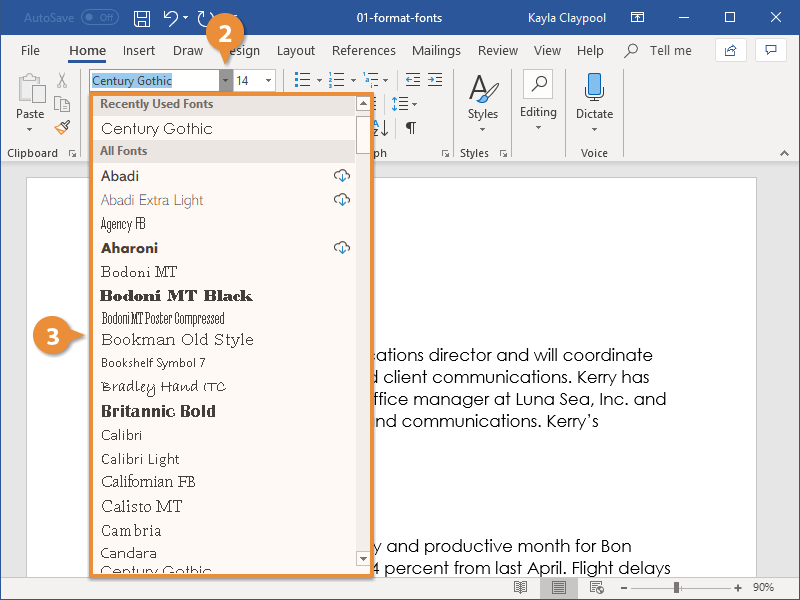
The font is the name given to the text style — what the text looks like. Many newspapers and magazines use a font like Times New Roman for a formal look but there are other simpler fonts available like Calibri.
To change the font:
1. Select the text you want to apply the font to.
2. Single-left-click the Home tab.
3. Single-left-click the Font drop-down list then single-left-click the font you want to use.

A sample of some popular fonts are provided below.
![]()
![]()
![]()
![]()
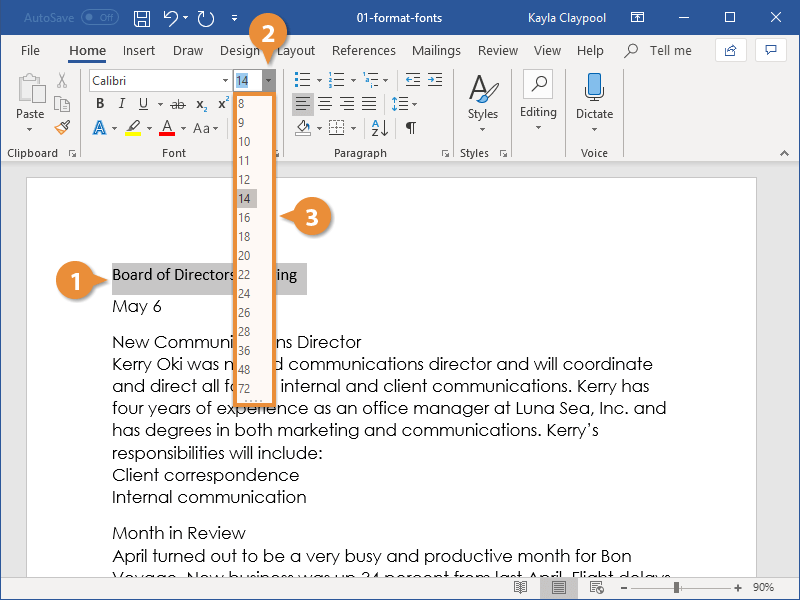
3. Changing the font size
To change the size of your selected text:
1. Single-left-click the Home tab
2. Click the Font Size drop-down list on the Font group.
3. Choose a font size.

You can also click one of the two ‘A‘ icons, situated next to the font size drop down list.
![]()
The first A increases the text size by one standard size.
The second A decreases the text size by one standard size.
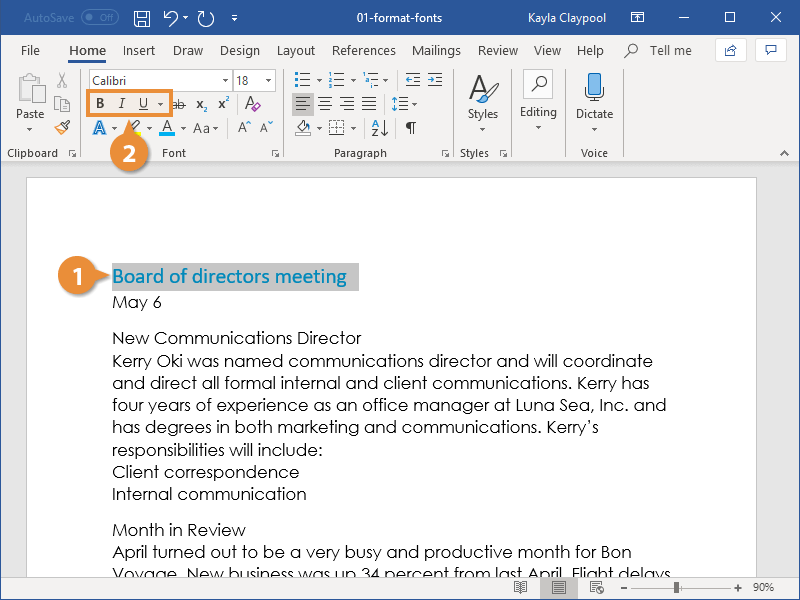
4. Adding bold, italic or underline for emphasis
To apply emphasis to a word or phrase, bold and italic are the quickest techniques to use. Here is a comparison:
- Regular text
- Bold text
- Italic text
- Underlined text
- Bold italic underlined text
There are 3 standard icons that you will find in every Microsoft Office program.
![]()
- To bold a selection of text, click the B icon, or press Ctrl B on the keyboard..
- To italicise a selection of text, click the I icon, or press Ctrl I on the keyboard..
- To underline a selection of text, click the U icon, or press Ctrl U on the keyboard..
To change the underline style:
1. Click the drop-down arrow next to the U icon.
2. Select the underline type that you want – single, double, thick, dotted, dashed etc.

To change the underline colour:
3. Click Underline Color (at the bottom of the menu).
4. Choose a colour from the palette.
5. Changing the font colour
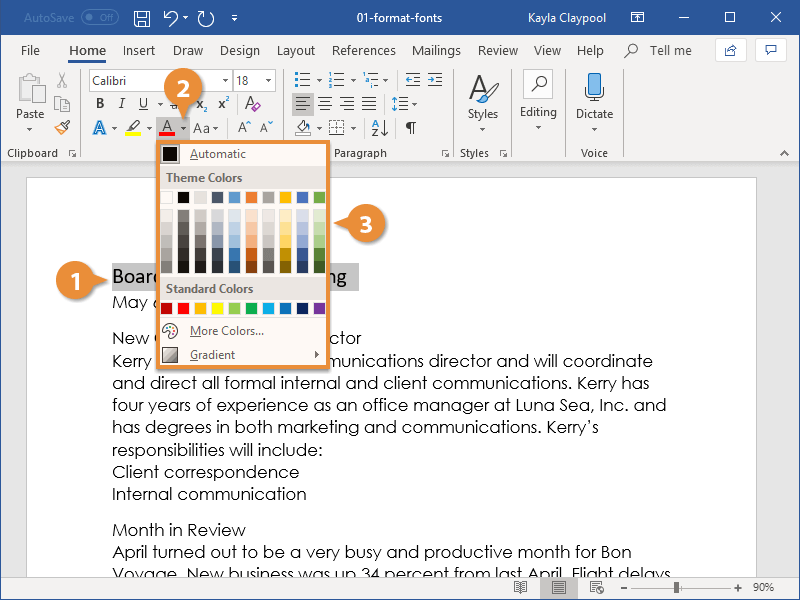
To change the colour of your text
1. First, select the text that you want to change the colour for.
2. Single-left-click the Home tab.
3. Single-left-click the Font drop-down list in the Font group.
4. Single-left-click a colour from the palette.

Paragraph formatting tools in Microsoft Word
6. Striking through the text
Strikethrough puts a line through your text like this.
This is an example of text that has been struck through.
You can use this when you need to keep the text for historical reasons but clearly mark it as out of date, obsolete, no longer stocked of one of many other reasons.
To apply strikethrough to your text:
1. Select the text.
2. Single-left-click the Home tab.
3. Single-left-click the Strikethrough icon in the Font group.
![]()
7. Superscripting or subscripting text
Superscripted text is little text that sits above the baseline, e.g. 360o, 42 or 16th.
Subscripted text is little text that sits below the baseline, e.g. H2O, CO2, H2SO4.
![]()
To apply superscript:
1. Select the text.
2. Single-left-click the Home tab.
3. Single-left-click the Superscript icon in the Font group.
4. The keyboard short cut is Ctrl Shift +.
To apply subscript:
1. Select the text.
2. Single-left-click the Home tab.
3. Single-left-click the Subscript icon in the Font group.
4. The keyboard short cut is Ctrl Shift =.
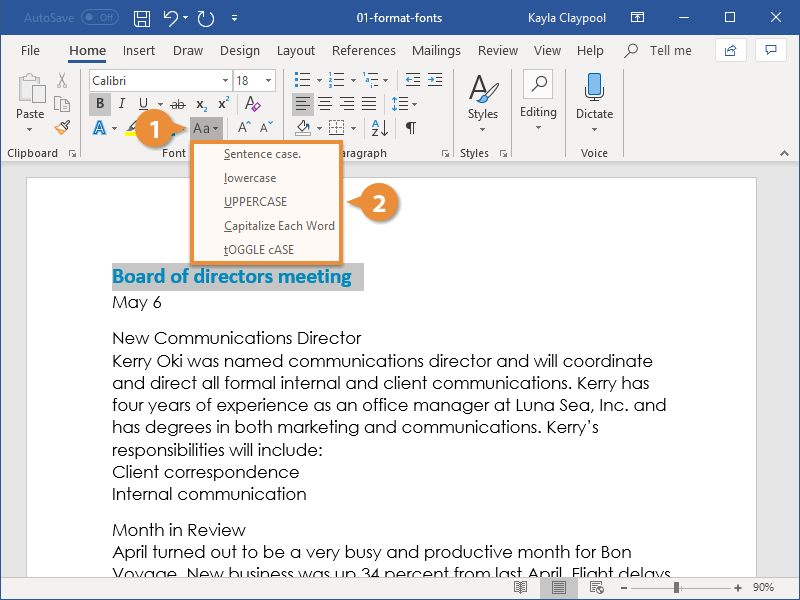
8. Changing the case
UPPER CASE WORDS stand out on a page. Some people describe it as SHOUTING. To change the case of your text:
1. Single-left-click the Home tab.
2. Click the Aa icon in the Font group.
3. Choose from Sentence case, lower case, UPPER CASE, Capitalise Each Word and tOGGLE cASE

Pressing Shift F3 cycles through the UPPERCASE, lowercase and Capitalise Each Word options. The other two options are not included in the cycle.
Here are what the different case options mean:
Sentence Case
Capitalise the first letter of the first word in the sentence.
lowercase
Make all the selected text lower case (i.e. un-capitalise everything).
UPPERCASE
CAPITALISE all selected text.
Capitalise Each Word
Capitalise the first letter of EVERY word.
tOGGLE cASE
Convert UPPER CASE letters to lower case and convert lower case letters to UPPER CASE.
The Toggle Case feature seems like an odd one and under normal circumstances you would never use it.
However, back in the day (gee, I sound old) guys like me who look at their keyboard as they type and only look up once every 30 minutes used to curse loudly when we found our CAPS LOCK had been on the whole time!
You may still stumble across an old legacy document where the case is all screwed up. If you do, you canquickly fix it with Toggle Case.
Fast forward to today.
Microsoft Word detects when the CAPS LOCK is on. After typing something in reverse case, as soon as you press space or ENTER, Word corrects the incorrect case and turns the CAPS LOCK off. Whatever you type next is in correct case.
10. Highlighting text
Just as you would take a highlighter pen to highlight certain portions of text in a book or report, you can add highlight to any section of text in Microsoft Word. Highlighting attracts attention.
Perhaps you have prepared a document for somebody and need to point out the important sections.
Perhaps you are reviewing somebody else’s work (or even your own) and want to mark sections to revisit later.
There are 2 ways to use the highlighter tool.
Method 1 (for a one-off highlight):
1. Select the text you want to highlight.
2. Single-left-click the Home tab.
3. Click the ab Highlight icon in the Font group (to use default yellow).
4. If you want to choose your own highlight colour, click the drop-down arrow on the icon, then choose one of the highlight colours in the palette. Stick with the lighter colours.

Method 2 (for multiple highlights)
1. Single-left-click the Home tab.
2. Double-left-click the ab Highlight icon in the Font group.
3. The regular mouse pointer will change to a highlighter icon.
4. Select the first portion of text that you wish to highlight. The highlight is added but the highlighter tool is still active.
5. Select as many other portions of text as you want.
6. When you are done, press Escape or single-left-click the the ab Highlight icon again

Reset highlighted text
1. Select the highlighted text.
2. Single-left-click the Home tab.
3. Click the drop-down arrow on the ab Highlight icon in the Font group and choose No Color.
11. Creating a pretty title or heading
WordArt is a feature that has been around for many years. The conventional way to create WordArt is to choose the tools from the Insert ribbon, choose a style, type some text and then play with the settings.
In Word, there is a second tool that lets you select some existing text and apply WordArt Styling to it.
Here’s the process:
- Select your text (normally a title or heading).
- Click the blue A icon (called Text Effects and Typography).
- Select one of the thumbnail images from the gallery to apply the effect to your text.
- You can switch the style at any time.
 tool in Word")
- Using the options underneath, you can also change the outline (colour, thickness and style), shadows, reflection and glow settings. You don’t have to stick with the default settings in the main gallery.
 settings in Word")
Here are some samples of text effects and typography:
 in Word")
12. Key Takeaways
- The most commonly used text formatting tools in Word are found on the Home ribbon in the Font group.
- To access even more text formatting tools in Word, click the launcher icon in the bottom-right corner of the Font group (on the Home ribbon). This displays the Font dialog which not only displays the tools found on the ribbon but also additional tools.
- Common text formatting includes the font, font size, font colour, empasis tools like bold, italic and underline, strikethrough, superscript, subscript, WordArt and the highlighter tool.
13. what next?
I hope you found plenty of value in this post. I’d love to hear your biggest takeaway in the comments below together with any questions you may have.
Have a fantastic day.


About the author
Jason Morrell
Jason loves to simplify the hard stuff, cut the fluff and share what actually works. Things that make a difference. Things that slash hours from your daily work tasks. He runs a software training business in Queensland, Australia, lives on the Gold Coast with his wife and 4 kids and often talks about himself in the third person!
SHARE
Lesson 6: Formatting Text
/en/word/text-basics/content/
Introduction
Formatted text can draw the reader’s attention to specific parts of a document and emphasize important information. In Word, you have several options for adjusting text, including font, size, and color. You can also adjust the alignment of the text to change how it is displayed on the page.
Optional: Download our practice document.
Watch the video below to learn more about formatting text in Word.
To change the font size:
- Select the text you want to modify.
- On the Home tab, click the Font Size drop-down arrow. Select a font size from the menu. If the font size you need is not available in the menu, you can click the Font Size box and type the desired size, then press Enter.
- The font size will change in the document.

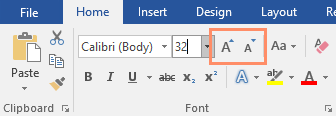
You can also use the Grow Font and Shrink Font commands to change the font size.
To change the font:
By default, the font of each new document is set to Calibri. However, Word provides many other fonts you can use to customize text.
- Select the text you want to modify.
- On the Home tab, click the drop-down arrow next to the Font box. A menu of font styles will appear.
- Select the font style you want to use.
- The font will change in the document.

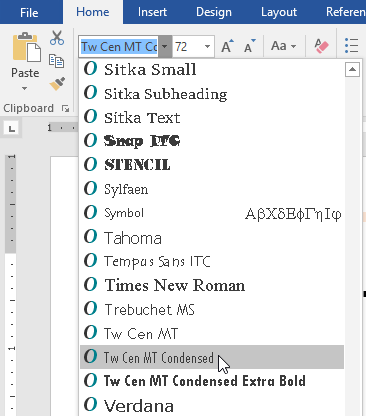
When creating a professional document or a document that contains multiple paragraphs, you’ll want to select a font that’s easy to read. Along with Calibri, standard reading fonts include Cambria, Times New Roman, and Arial.
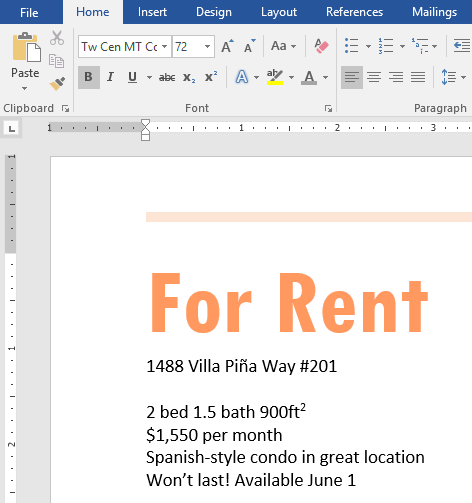
To change the font color:
- Select the text you want to modify.
- On the Home tab, click the Font Color drop-down arrow. The Font Color menu appears.
- Select the font color you want to use. The font color will change in the document.
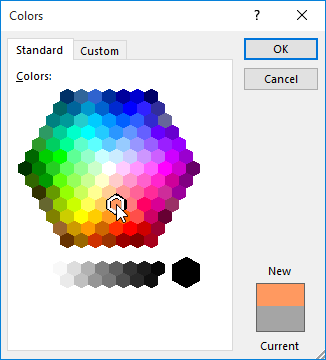
Your color choices aren’t limited to the drop-down menu that appears. Select More Colors at the bottom of the menu to access the Colors dialog box. Choose the color you want, then click OK.
To use the Bold, Italic, and Underline commands:
The Bold, Italic, and Underline commands can be used to help draw attention to important words or phrases.
- Select the text you want to modify.
- On the Home tab, click the Bold (B), Italic (I), or Underline (U) command in the Font group. In our example, we’ll click Bold.
- The selected text will be modified in the document.
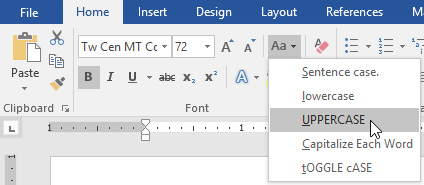
To change text case:
When you need to quickly change text case, you can use the Change Case command instead of deleting and retyping text.
- Select the text you want to modify.
- On the Home tab, click the Change Case command in the Font group.
- A drop-down menu will appear. Select the desired case option from the menu.
- The text case will be changed in the document.


To highlight text:
Highlighting can be a useful tool for marking important text in your document.
- Select the text you want to highlight.
- From the Home tab, click the Text Highlight Color drop-down arrow. The Highlight Color menu appears.
- Select the desired highlight color. The selected text will then be highlighted in the document.


To remove highlighting, select the highlighted text, then click the Text Highlight Color drop-down arrow. Select No Color from the drop-down menu.
If you need to highlight several lines of text, changing the mouse into a highlighter may be a helpful alternative to selecting and highlighting individual lines. Click the Text Highlight Color command, and the cursor changes into a highlighter. You can then click and drag the highlighter over the lines you want to highlight.
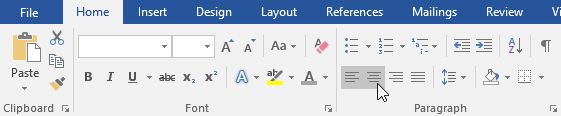
To change text alignment:
By default, Word aligns text to the left margin in new documents. However, there may be times when you want to adjust text alignment to the center or right.
- Select the text you want to modify.
- On the Home tab, select one of the four alignment options from the Paragraph group. In our example, we’ve selected Center Alignment.
- The text will be realigned in the document.
Click the arrows in the slideshow below to learn more about the four text alignment options.
-
Align Text Left: This aligns all selected text to the left margin. The Align Text Left command is the most common alignment and is selected by default when a new document is created.
-
Center: This aligns text an equal distance from the left and right margins.
-
Align Text Right: This aligns all selected text to the right margin.
-
Justify: Justified text is equal on both sides. It lines up equally to the right and left margins. Many newspapers and magazines use full justification.


You can use Word’s convenient Set as Default feature to save all of the formatting changes you’ve made and automatically apply them to new documents. To learn how to do this, read our article on Changing Your Default Settings in Word.
Challenge!
- Open our practice document.
- Scroll to page 2.
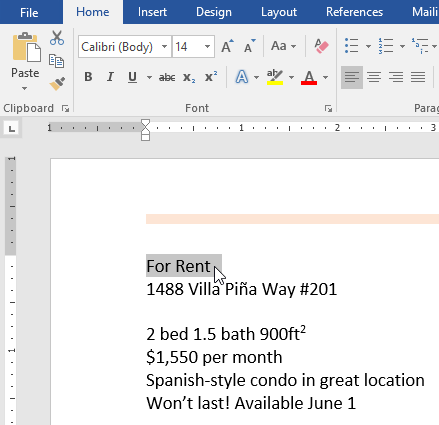
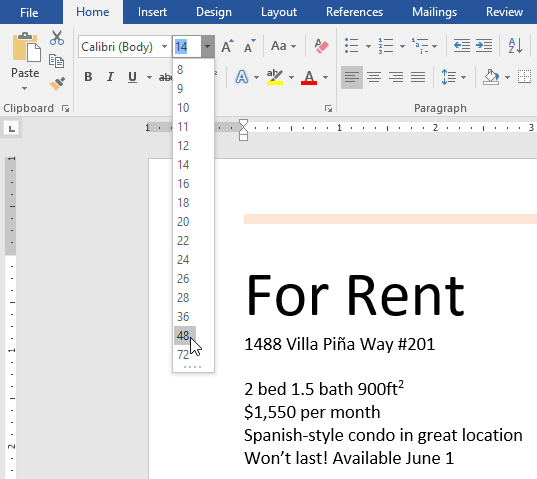
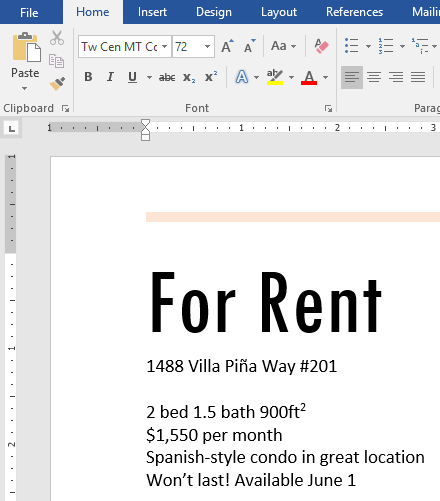
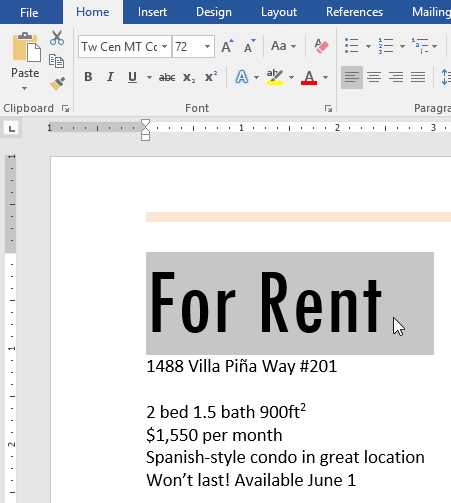
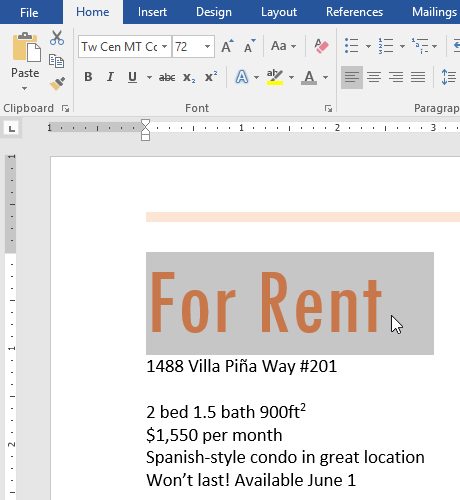
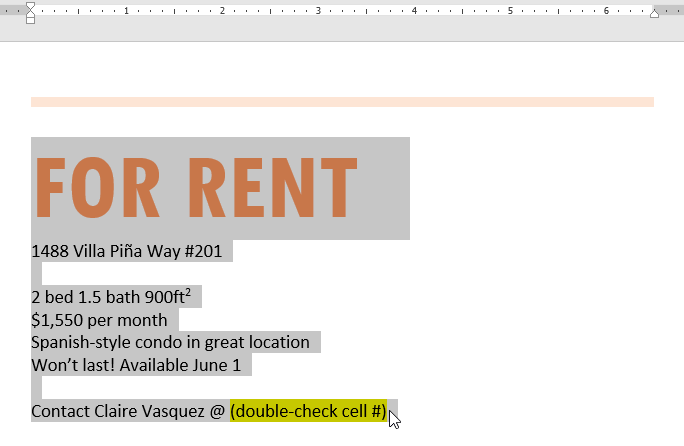
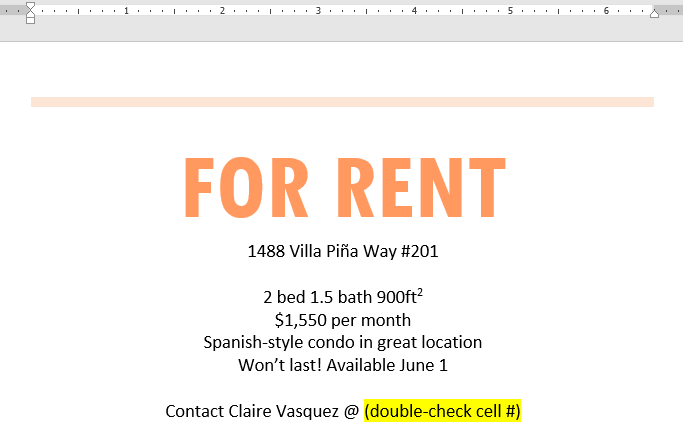
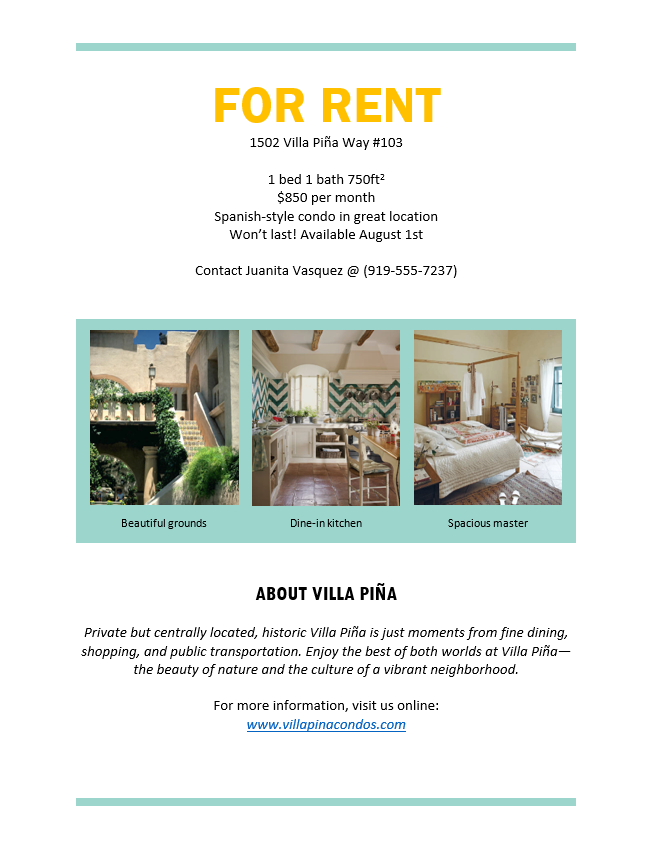
- Select the words For Rent and change the font size to 48 pt.
- With the text still selected, change the font to Franklin Gothic Demi. Note: If you don’t see this font in the menu, you can select a different one.
- Use the Change Case command to change For Rent to UPPERCASE.
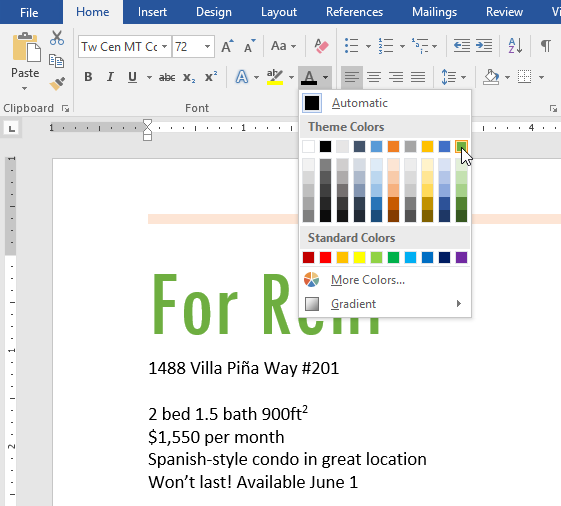
- Change the color of the words For Rent to Gold, Accent 4.
- Remove the highlight from the phone number (919-555-7237).
- Select all of the text from For Rent to (919-555-7237) and Center Align.
- Italicize the text in the paragraph below About Villa Piña.
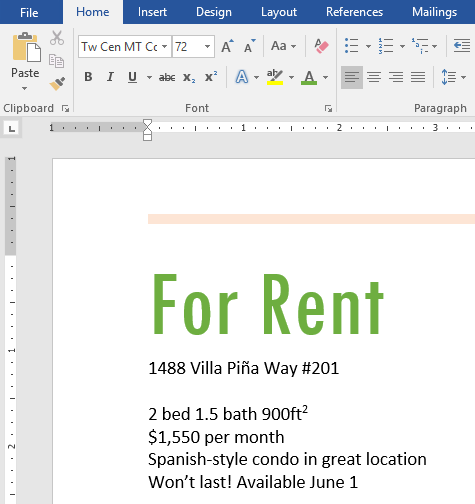
- When you’re finished, your page should look like this:
/en/word/using-find-and-replace/content/
Everyone who works with text documents in theoffice editor Word, knows that the readability and appearance of the typed text often plays a primary role in the perception of the material and the document as a whole. For this, the so-called formatting is used. Next, we will show how to format the text in the «Word» using several simple rules. These tips will be useful to everyone without exception, and the created document will look more presentable.
What does it mean to «format the text in the Word»?
Let’s start the very concept of text formatting. What it is? Roughly speaking, this is the design of the material in such a way that it is easily perceived visually when reading.
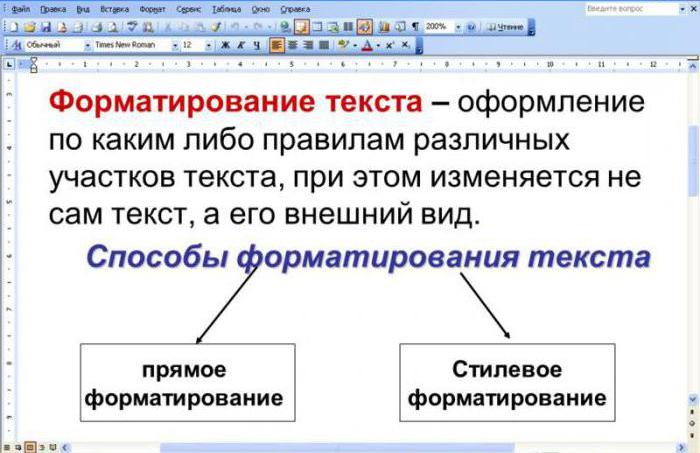
Agree, because small or too largeletters perceive not all. The same goes for the moments when, for example, some main theses are not highlighted, and the reader can simply lose the main idea of the content. All sorts of bizarre fonts can also make the text completely unreadable, not to mention the use of color design or fills (if this is absolutely not necessary) and the absence of paragraphs when the text turns out to be «crumpled».
How correctly to format the text in the «Word» and what to look for first of all?
So, what are the tools for design in the editor? Speaking about how to format the text in the «Word», among the fundamental principles of processing can be identified the following:
- Font design (type, size, register, intervals between letters and symbols, color, fill, etc.);
- text alignment on the page;
- setting paragraphs and indents;
- assignment of document page parameters;
- Text processing with the creation of additional design elements (headers, columns, headers, footers, lists).
Working with Fonts
Let’s start with the simplest — setting parametersfonts. How to format the text in Word using this toolkit? Very simple. To do this, in the editor (if you do not take into account the sections of the main menus of the main panel), all the necessary tools are placed on the toolbar and placed in a special section with buttons and drop-down menus.

In principle, the question of how to formatthe text in the «Word» 2007, 2003, 2010, 2013 or 2016, in all versions is solved quite simply. To start, select the desired font from the drop-down list (for example, Times New Roman), then set the font size from the same list (it is better to use 12 or 14).
After that, pressing the selection buttons, you canset its type (bold, italic, underlined, strikethrough). Slightly to the right there are buttons for changing the color of the font itself or its background fill. To get involved in the use of such design is not worth it, but it is used only in extreme cases, when it is necessary to emphasize the importance of content. The same applies to the previous settings.
Align text
The next step is to set text alignment options. By default, the editor is left-aligned. But this position of the text for reading is not always convenient.

There are four main buttons on the toolbar for setting the alignment:
- on the left;
- in the center;
- on the right;
- on the width.
Alignment at the edges or at the center is usuallyIt is used in case of creating «caps» or setting a place, say, for signing in a contract. The most convenient is alignment in width, in which the first and last letters of each line are located at the same distance from the edge of the page, not counting the paragraphs. How to format the text in width in Word? Yes, just select the desired fragment and press the corresponding button. It can also be clicked if text input is only supposed to be done (an empty string).
Indentation
Now you need to select paragraphs or redlines. In the simplest case, when typing text from a red line, you can use the tab key (Tab), which by default is usually set to a horizontal indentation of 1.25 cm.

You can change it and additional parameters by moving the slider in the form of triangles and corners on the horizontal ruler (but only if the corresponding mode of document display is active).
Pay attention to the view buttons locatedon the panel on the right side of it. To quickly set vertical intervals, you can use the preset view settings (for example, without interval, normal, headings, etc.).

In the case where it is required to apply strictlycertain parameters, in Word versions 2010 and higher, you need to use the «Layout» menu and the section for setting the interval between paragraphs. Here you can specify all the indented indents manually. Particular attention should be paid to the menu line spacing. Many users, who at one time were typing in the diploma, know that the requirements indicate a one and a half interval, which can be selected from the drop-down list or set the value yourself.
Page settings
Another point in the consideration of howformat the text in Word, is associated with setting the parameters of the page itself, access to which in the latest versions of the editor can be accessed through the design menu with a choice of fields, orientation or sheet size.

Usually, when creating documents,A4 sheet format with a book (vertical) orientation. If you select the desired values, these parameters can be changed at your discretion. As for setting the fields, going back to the question about the design of the thesis, you need to set the left margin of 3 cm, the right margin — 2 cm, the upper one and the lower one — 1.5 cm. If there are no requirements, as such, the default values can be left untouched or changed them, depending on their preferences.
In the design section for the page, you can applysetting borders and background, changing the color or applying special themes (unless the document was created or opened in the compatibility mode with saving the file in the DOC format of older versions of the editor, and not in the DOCX format of the current version of the program).
Headers, lists, columns and headers and footers
You can easily select the headings by using the buttons on the main panel, where you can select the desired view from several built-in templates.

When creating lists, specialbuttons for setting markers, numbering, or multi-level lists. For each, a drop-down menu is provided, in which you can select a specific template or configure the list display options yourself.
Header and footer in which the text you typedisplayed on each page, can be set from the insert menu (upper or lower). Their parameters can also be changed. There are also tools for inserting page numbers, notes, links, etc. (if this is stipulated by the structure of the document).
Formatting by pattern
Finally, assume that you have formatted the piece of text you need, or a specific section. In the editor there is an interesting possibility of using formatting according to the sample.

The button for its application is on the panel, ifthe main menu is used. It’s enough just to select the desired text fragment, click on the button (it will turn into a brush with a pointer), then move the cursor to another fragment and press the left mouse button. After that, the format will be applied without changing the text content of the fragment.
Note: you can also use all sorts of templates, styles and many other tools that were not discussed in detail here, since the emphasis was on manual formatting.
One way to change the appearance of text in a document is by changing its font type. A font is a set of letters, numbers, and punctuation symbols designed around a shared appearance. A font will have variations for size and styles, such as bold and italics.
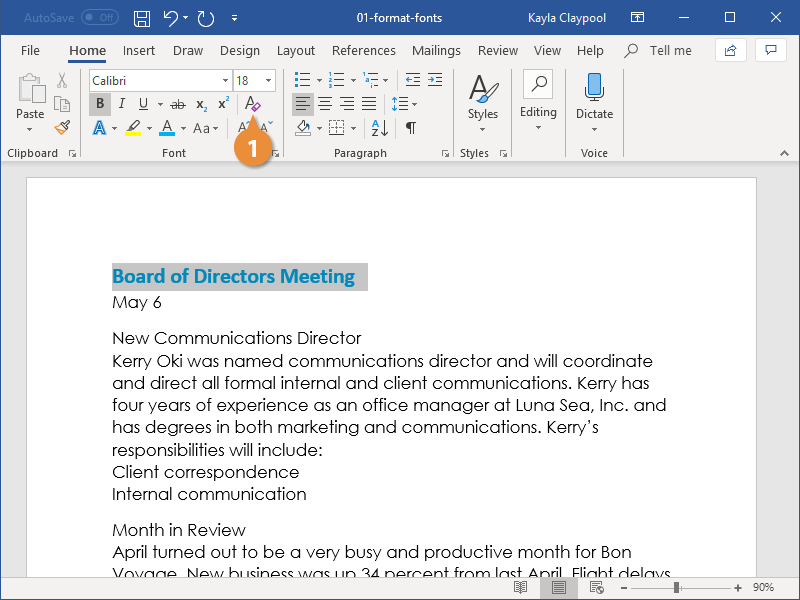
Change the Font
Changing a font itself will have the greatest effect on the appearance of text.
- Select the text you want to change.
- Click the Font list arrow on the Home tab.
- Select a new font from the list.
You can also click the Font list arrow on the Mini Toolbar that appears when text is selected.
The text is now set in the selected font.
When changing fonts, be sure to choose the right font for the tone of your document. Don’t use casual script fonts in a professional document, and also avoid using too many fonts at once.
| Font Type | Examples | Description |
|---|---|---|
| Serif | Times New Roman, Garamond, Cambria, Georgia, Palatino | Serifs are small details at the ends of some letter strokes, meant to improve legibility. Suitable for both header and body text. |
| Sans Serif | Arial, Calibri, Helvetica, Verdana, Trebuchet MS | Sans serif fonts lack the small details at ends of letter strokes, leading to a plainer look. Suitable for both header and body text. |
| Script | Brush Script, Zapfino, Lucida Handwriting | These fonts are meant to mimic handwriting, either calligraphic or casual. Useful in very specific designs, but unsuitable for body text and most headers. |
| Monospace | Courier New, Consolas, American Typewriter | All letters and symbols use the exact same amount of space. Useful when displaying computer code, or when precise horizontal alignment between lines is important. |
Change the Font Size
Changing the font size helps differentiate between titles, headers, and body text.
- Select the text.
- Click the Font Size list arrow on the Home tab.
- Select a font size.
The font size changes.
Click the Increase Font Size or Decrease Font Size buttons to increase or decrease by one point at a time.
Font size is measured in points (pt) that are 1/72 of an inch. The larger the number of points, the larger the font.
Change the Font Color
You may need to change font color to make text stand out, comply with brand standards, or add visual appeal.
- Select the text you want to change.
- Click the Font Color list arrow.
You can also click the Font Color list arrow on the Mini Toolbar.
- Select a new color.
If you don’t like any of the available theme colors, select More Colors to display the Colors dialog box.

Apply Bold, Italic, or an Underline
In addition to changing font type, size, and color, you can also enhance the text further by using other features in the Font group like bold, italic, or underline.
- Select the text you want to change.
- Select Bold, Italics, or Underline.
Shortcuts:
- To bold: Ctrl + B
- To italicize: Ctrl + I
- To underline: Ctrl + U
The effect is applied.
Change the Case
If you want to change the case of a block of text, you don’t need to retype the whole thing. You can easily change the case of selected text with the Change Case menu.
- With the text selected, click the Change Case button.
- Select a case option:
- Sentence case
- lowercase
- UPPERCASE
- Capitalize Each Word
- tOGGLE cASE
Clear Formatting
If you change your mind and want to remove all formatting from text, you can easily clear all formatting at once.
- With the text selected, click Clear All Formatting.
The extra formatting is removed, and the text is reset to the default style.

FREE Quick Reference
Click to Download
Free to distribute with our compliments; we hope you will consider our paid training.