
Word 2016 is designed to help you create professional-quality documents. Word can also help you organize and write documents more efficiently.
When you create a document in Word, you can choose to start from a blank document or let a template do much of the work for you. From then on, the basic steps in creating and sharing documents are the same. And Word’s powerful editing and reviewing tools can help you work with others to make your document great.
Start a document
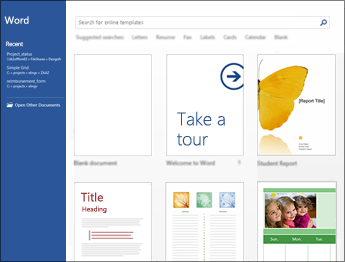
It’s often easier to create a new document using a template instead of starting with a blank page. Word templates come ready-to-use with pre-set themes and styles. All you need to do is add your content.
Each time you start Word, you can choose a template from the gallery, click a category to see more templates, or search for more templates online.
For a closer look at any template, click it to open a large preview.
If you’d rather not use a template, click Blank document.
Open a document
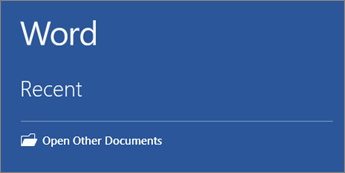
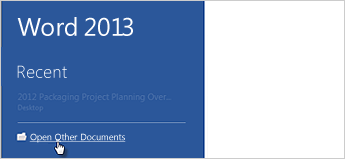
Every time you start Word, you’ll see a list of your most recently used documents in the left column. If the document you’re looking for isn’t there, click Open Other Documents.
If you’re already in Word, click File > Open and then browse to the file’s location.
When you open a document that was created in earlier versions of Word, you see Compatibility Mode in the title bar of the document window. You can work in compatibility more or you can upgrade the document to use Word 2016.
Save a document
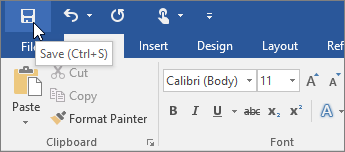
To save a document for the first time, do the following:
-
On the File tab, click Save As.
-
Browse to the location where you’d like to save your document.
Note: To save the document on your computer, choose a folder under This PC or click Browse. To save your document online, choose an online location under Save As or click Add a Place. When your files are online, you can share, give feedback and work together on them in real time.
-
Click Save.
Note: Word automatically saves files in the .docx file format. To save your document in a format other than .docx, click the Save as type list, and then select the file format that you want.
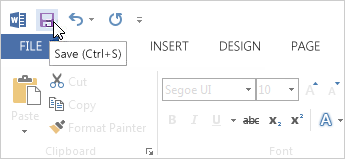
To save your document as you continue to work on it, click Save in the Quick Access Toolbar.
Read documents
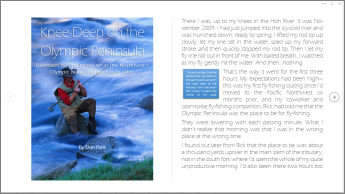
Open your document in Read Mode to hide most of the buttons and tools so you can get absorbed in your reading without distractions.
-
Open the document you want to read.
Note: Some documents open in Read Mode automatically, such as protected documents or attachments.
-
Click View > Read Mode.
-
To move from page to page in a document, do one of the following:
-
Click the arrows on the left and right sides of the pages.
-
Press page down and page up or the spacebar and backspace on the keyboard. You can also use the arrow keys or the scroll wheel on your mouse.
-
If you’re on a touch device, swipe left or right with your finger.
Tip: Click View > Edit Document to edit the document again.
-
Track changes
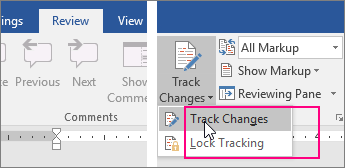
When you’re working on a document with other people or editing a document yourself, turn on Track Changes to see every change. Word marks all additions, deletions, moves, and formatting changes.
-
Open the document to be reviewed.
-
Click Review and then on the Track Changes button, select Track Changes.

Read Track changes to learn more.
Print your document
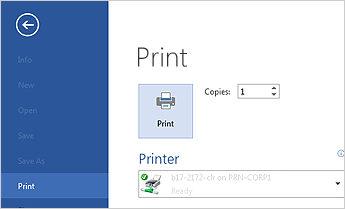
All in one place, you can see how your document will look when printed, set your print options, and print the file.
-
On the File tab, click Print.
-
Do the following:
-
Under Print, in the Copies box, enter the number of copies you want.
-
Under Printer, make sure the printer you want is selected.
-
Under Settings, the default print settings for your printer are selected for you. If you want to change a setting, just click the setting you want to change and then select a new setting.
-
-
When you’re satisfied with the settings, click Print.
For details, see Print a document.
Beyond the basics
For more on the fundamentals of using Word, see What’s new in Word 2016.
Top of Page
With Word for the web, you use your web browser to create, view, and edit the personal documents that you store on OneDrive. If your organization or college has a Microsoft 365 plan or SharePoint site, start using Word for the web by creating or storing documents in libraries on your site.Save changes
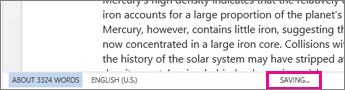
Word saves your changes automatically. Look on the status bar at the bottom left corner of Word for the web. It will either show Saved or Saving.
Share documents online
Because your document is online, you can share it by sending a link instead of an email attachment. People can read it in their web browser or mobile device.
Click File > Share > Share with People.

Comment in the browser
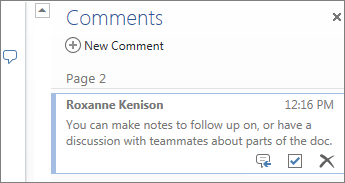
A comment balloon shows where comments have been made in the doc.

Reply to comments, and check off items you’ve addressed.
Edit in the browser
If you try to type in the document and nothing happens, you’re probably in Reading view. Switch to Editing view: click Edit Document > Edit in Word for the web.

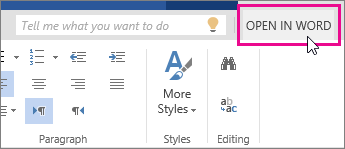
Type and format text, add pictures, adjust the layout of the page, and more. For more advanced editing, click Open in Word.
Work together on the same doc
To work together in Word for the web, you edit a document as you normally would. If others are also editing it, Word for the web alerts you to their presence. You can see everyone who is currently working in the document by clicking in the ribbon.

Clicking on an author’s name jumps you to where they’re working in the doc. And you’ll see the changes they make as they’re happening. They can be working in Word for the web, Word 2010 or later, or Word for Mac 2011.
Add a header or footer
Go to Insert > Header & Footer to add headers and footers to your document.
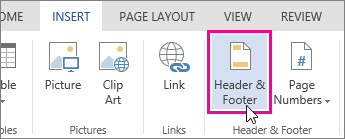
Click Options to choose how you’d like them to appear.

Add page numbers
Click Insert > Page Numbers and then choose from the gallery where you’d like the page numbers to appear.
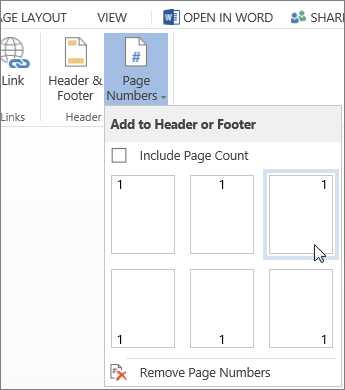
Select Include Page Count to show the current page number along with the total number of pages (page X of Y).
Find and replace text
Quickly search for every occurrence of a specific word or phrase in your document by clicking Home > Find (or type Ctrl+F). Results appear next to your document so you can see the term in context. Clicking on a search result jumps you to that occurrence.
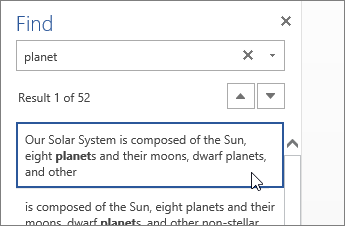
Click Replace (or type Ctrl+H) to find and replace text.
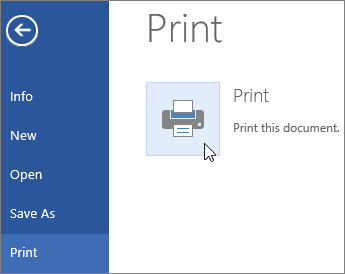
Print in Word for the web
Go to File > Print. Word for the web creates a PDF preview of your document that keeps all the layout and formatting of your document. Send the PDF to your printer and it will print the way you expect.
Microsoft Word 2013 is a word-processing program designed to help you create professional-quality documents. Word helps you organize and write your documents more efficiently.
Your first step in creating a document in Word 2013 is to choose whether to start from a blank document or to let a template do much of the work for you. From then on, the basic steps in creating and sharing documents are the same. Powerful editing and reviewing tools help you work with others to make your document perfect.
Choose a template
It’s often easier to create a new document using a template instead of starting with a blank page. Word templates are ready to use with themes and styles. All you need to do is add your content.
Each time you start Word 2013, you can choose a template from the gallery, click a category to see the templates it contains, or search for more templates online. (If you’d rather not use a template, just click the Blank document.)
For a closer look at any template, just click it to open a large preview.
Top of Page
Open a document
Every time you start Word, you’ll see a list of your most recently used documents in the left column. If the document you’re looking for isn’t there, click Open Other Documents.
If you’re already in Word, click File > Open and then browse to the file’s location.
When you open a document that was created in earlier versions of Word, you see Compatibility Mode in the title bar of the document window. You can work in compatibility more or you can upgrade the document to use features that are new or enhanced in Word 2013.
Top of Page
Save a document
To save a document for the first time, do the following:
-
Click the File tab.
-
Click Save As.
-
Browse to the location where you’d like to save your document.
Note: To save the document on your computer, choose a folder under Computer or click Browse. To save your document online, choose a location under Places or Add a Location. When your files are online, you can share, give feedback and work together on them in real time.
-
Click Save.
Note: Word automatically saves files in the .docx file format. To save your document in a format other than .docx, click the Save as type list, and then select the file format that you want.
To save your document as you continue to work on it, click Save in the Quick Access Toolbar.
Top of Page
Read documents
Open your document in Read Mode to hide most of the buttons and tools so you can get absorbed in your reading without distractions.
-
Open the document you want to read.
Note: Some documents open in Read Mode automatically, such as protected documents or attachments.
-
Click View > Read Mode.
-
To move from page to page in a document, do one of the following:
-
Click the arrows on the left and right sides of the pages.
-
Press page down and page up or the spacebar and backspace on the keyboard. You can also use the arrow keys or the scroll wheel on your mouse.
-
If you’re on a touch device, swipe left or right with your finger.
Tip: Click View > Edit Document to edit the document again.
-
Top of Page
Track changes
When you’re working on a document with other people or editing a document yourself, turn on Track Changes to see every change. Word marks all additions, deletions, moves, and formatting changes.
-
Open the document to be reviewed.
-
Click Review and then on the Track Changes button, select Track Changes.

Read Track changes to learn more.
Top of Page
Print your document
All in one place, you can see how your document will look when printed, set your print options, and print the file.
-
Click the File tab and then click Print.
-
Do the following:
-
Under Print, in the Copies box, enter the number of copies you want.
-
Under Printer, make sure the printer you want is selected.
-
Under Settings, the default print settings for your printer are selected for you. If you want to change a setting, just click the setting you want to change and then select a new setting.
-
-
When you’re satisfied with the settings, click Print.
For details, see Print and preview documents.
Beyond the basics
Go beyond the basics with your documents by creating a table of contents or saving a document as a template.
Top of Page
Important:
Office 2010 is no longer supported. Upgrade to Microsoft 365 to work anywhere from any device and continue to receive support.
Upgrade now
In this article
-
What is Word?
-
Find and apply a template
-
Create a new document
-
Open a document
-
Save a document
-
Read documents
-
Track changes and insert comments
-
Print your document
What is Word?
Microsoft Word 2010 is a word-processing program, designed to help you create professional-quality documents. With the finest document-formatting tools, Word helps you organize and write your documents more efficiently. Word also includes powerful editing and revising tools so that you can collaborate with others easily.
Top of Page
Find and apply a template
Word 2010 allows you to apply built-in templates, to apply your own custom templates, and to search from a variety of templates available on the web.
To find and apply a template in Word, do the following:
-
On the File tab, click New.
-
Under Available Templates, do one of the following:
-
To use one of the built-in templates, click Sample Templates, click the template that you want, and then click Create.
-
To reuse a template that you’ve recently used, click Recent Templates, click the template that you want, and then click Create.
-
To use your own template that you previously created, click My Templates, click the template that you want, and then click OK.
-
To find a template on Office.com, under Office.com Templates, click the template category that you want, click the template that you want, and click Download to download the template from Office.com to your computer.
-
Note: You can also search for templates on Office.com from within Word. In the Search Office.com for templates box, type one or more search terms, and then click the arrow button to search.
Top of Page
Create a new document
-
Click the File tab and then click New.
-
Under Available Templates, click Blank Document.
-
Click Create.
For more information about how to create a new document, see Create a document.
Top of Page
Open a document
-
Click the File tab, and then click Open.
-
In the left pane of the Open dialog box, click the drive or folder that contains the document.
-
In the right pane of the Open dialog box, open the folder that contains the drawing that you want.
-
Click the document and then click Open.
Top of Page
Save a document
To save a document in the format used by Word 2010 and Word 2007, do the following:
-
Click the File tab.
-
Click Save As.
-
In the File name box, enter a name for your document.
-
Click Save.
To save a document so that it is compatible with Word 2003 or earlier, do the following:
-
Open the document that you want to be used in Word 2003 or earlier.
-
Click the File tab.
-
Click Save As.
-
In the Save as type list, click Word 97-2003 Document. This changes the file format to .doc.
-
In the File name box, type a name for the document.
-
Click Save.
For more information about how to create a document that is compatible with Word 2003 or earlier versions, see Create a document to be used by previous versions of Word.
Top of Page
Read documents
-
Open the document that you want to read.
-
On the View tab, in the Document Views group, click Full Screen Reading
-
To move from page to page in a document, do one of the following:
-
Click the arrows in the lower corners of the pages.
-
Press PAGE DOWN and PAGE UP or SPACEBAR and BACKSPACE on the keyboard.
-
Click the navigation arrows at the top center of the screen.
Tip: Click View Options, and then click Show Two Pages
to view two pages, or screens, at a time.
-
 to view two pages, or screens, at a time.
For more information about how to view documents, see Read documents in Word.
Top of Page
Track changes and insert comments
-
To turn on change tracking, on the Review tab, in the Tracking group, click Track Changes.
-
To insert a comment, on the Review tab, in the Comments group, click New Comment.
For more information about how to track changes made while revising, see Track changes and insert comments.
Top of Page
Print your document
-
Click the File tab and then click Print.
-
Do the following:
-
Under Print, in the Copies box, enter the number of copies that you want to print.
-
Under Printer, make sure that the printer that you want is selected.
-
Under Settings, the default print settings for your printer are selected for you. If you want to change a setting, click the setting you want to change and then select the setting that you want.
-
-
When you are satisfied with the settings, click Print.
For more information about how to print a file, see Preview and print a file.
Top of Page
![]()
Download Article
![]()
Download Article
This wikiHow teaches you how to edit a Microsoft Word document’s page layout, change its design theme, and make basic style edits on the text, using a computer.
-
1
Open the Word document you want to edit. Find the document you want to edit, and double-click on its name to open the text file.
-
2
Click the Layout tab at the top. This button is located above the toolbar ribbon in the upper-left corner of your document. It will open your layout tools on the toolbar ribbon.
Advertisement
-
3
Click the Margins menu on the top-left. This is the first option on the Layout ribbon. It will open your document’s margin options on a drop-down menu.
-
4
Select the document margin you want to use. You can use Normal, Narrow, Moderate, Wide, or Mirrored margins.
- Click a margin option to see what it looks like.
- You can see the exact margin indent values below each option.
- If you don’t like any of the options here, click Custom Margins at the bottom, and manually enter the margin indent values you want to use.
-
5
Select a paragraph or section to customize margin and spacing. You can manually customize the margin indent and spacing options of a paragraph or section in your text without affecting the overall margins of your document.
-
6
Fill out the Indent and Spacing values on the toolbar. You can find these sections in the middle of the Layout ribbon.
- Indent will allow you to customize the selected region’s margins from left and right.
- Spacing will allow you to make the space above or below the selected region larger or smaller.
-
7
Click the Orientation menu next to Margins. This will open your document’s page orientation options on a drop-down menu.
-
8
Select Portrait or Landscape on the menu. Click one of the options here to change your document’s page orientation.
-
9
Click the Size menu next to Orientation. This will open a list of available paper size configurations you can use for your document.
-
10
Find and select the paper size you want to use. This will help you accurately preview your document’s print output on the paper size you’re planning to use.
-
11
Click the Columns next to Size. This option allow you to create multiple text columns in your text document.
- You can select a paragraph or section in your document and apply your columns here if you want to use different numbers of columns in different parts of your text.
-
12
Select the number of columns you want to use. Click a column option on the drop-down menu to apply it to the selected part of your text.
- Two and Three will create multiple, equal-sized columns.
- Left and Right will create two columns, and make one of them wider than the other one.
- If you want to manually customize your column number, size, and spacing, click More Columns at the bottom.


Advertisement
-
1
Click the Design tab at the top. You can find it between Insert and Layout above the toolbar ribbon in the upper-left corner. It will open your design tools on the ribbon.
-
2
Click the Themes button. This is the first option on the Design toolbar in the upper-left corner. It will open your document theme options on a drop-down menu.
-
3
Select a theme on the drop-down menu. Click on a theme to see different design variations of it.
- When you select a theme, related design variations will be listed next to it on the Design ribbon.
-
4
Click the Colors button. This button is located towards the right-hand side of the toolbar ribbon. It will open a drop-down menu of different color palettes you can use.
-
5
Select a color palette. Click the color palette you want to use. This will filter the themes on the toolbar ribbon, and restrict the selection to the selected color palette.
-
6
Click the Fonts button. This will open a list of all the available fonts you can use for your text.
-
7
Select the font you want to use in your document. This will filter the themes on the ribbon, and only show themes with your selected font.
-
8
Click a design theme on the toolbar ribbon. Find an interesting design and click on it to apply the theme to your document.
- Some themes will change all the heading and spacing stylings in your document whereas some other will do as little as only changing your font.


Advertisement
-
1
Click the Home tab on the top-left. This button is in the upper-left corner of your document. It will open your text styling tools on the toolbar ribbon.
-
2
Select the text you want to format. You can select a word, sentence, paragraph or section in your document.
- If you want to select the entire document, press Control+A on Windows, or ⌘ Command+A on Mac.
-
3
Click the
icon next to the Font field. This will open a list of all your available font options.
-
4
Select a font on the menu to apply it. Clicking a font here will change the selected text to this font.
-
5
Enter a number into the Font Size field. This field shows the current size of your text next to the Font field.
- You can manually enter a size here, or click the
icon and select a size on the menu.
- You can manually enter a size here, or click the
-
6
Select an alignment position for your text. The alignment buttons look like aligned, centered, and justified paragraph icons in the middle of the Home toolbar.
- You can align your text left, center it, align it right, or justify it.
-
7
Click the Line and Paragraph Spacing button. This button looks like a paragraph icon with two blue arrows next to it. It will open your spacing options on a drop-down menu.
-
8
Select the spacing option you want to use. You can set your spacing at different common values like 1.0, 1.5, or 2.0.
- If you want to double-space your text, select 2.0 here.


Advertisement
Ask a Question
200 characters left
Include your email address to get a message when this question is answered.
Submit
Advertisement
Thanks for submitting a tip for review!
About This Article
Thanks to all authors for creating a page that has been read 21,296 times.
Is this article up to date?
Click Edit Document > Edit in Word for the web to make changes to a document.
To make changes to your document, switch to Editing view, where you can add and delete content and do other things, such as:
- Add tables and pictures.
- Apply styles.
- Adjust formatting.
- Edit headers and footers.
Contents
- 1 How do I enable editing on a Word document?
- 2 Why can’t I edit my Microsoft Word document?
- 3 How do I unlock a Word document that is locked for editing?
- 4 How do I edit a read only document in Word?
- 5 Why can’t I write on my Word document?
- 6 What are the editing tools in MS Word?
- 7 How do I edit a Word document online?
- 8 Why is a Word document locked for editing?
- 9 How do you unlock a Word document on a laptop?
- 10 Why Microsoft Word selection is locked?
- 11 How do I get rid of edit marks in Outlook?
- 12 How do I change a file from read only to edit?
- 13 Why do my Word documents open in read only?
- 14 How do I edit a Word template?
- 15 Why can’t I edit in Onedrive?
- 16 Where is editor in Word?
- 17 How do I edit a word document in Office 365?
- 18 How do you edit someone else’s word document?
- 19 Can you unlock a Word document without the password?
How do I enable editing on a Word document?
Enable editing in your document
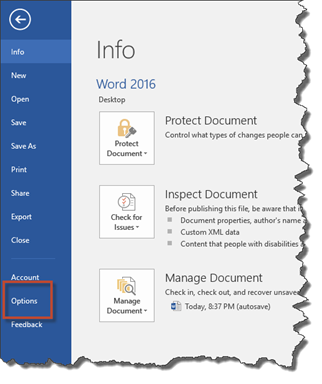
- Go to File > Info.
- Select Protect document.
- Select Enable Editing.
Why can’t I edit my Microsoft Word document?
If you cannot edit your Word document, it’s probably protected with a password. In case you don’t want to enter the password every time you access the document, you’ll need to disable document protection, and delete the password.
How do I unlock a Word document that is locked for editing?
Resolution
- Save all your work, and then quit all programs.
- Press CTRL+ALT+DELETE to open the Windows Security dialog box.
- Click Task Manager, and then click the Processes tab.
- Click Winword.exe, and then click End Process.
- In the Task Manager Warning dialog box, click Yes.
How do I edit a read only document in Word?
Remove read only
- Click the Microsoft Office Button. , and then click Save or Save As if you have previously saved the document.
- Click Tools.
- Click General Options.
- Clear the Read-only recommended check box.
- Click OK.
- Save the document. You might need to save it as another file name if you have already named the document.
Why can’t I write on my Word document?
If text is not appearing on your screen, there is a good chance that Number Lick has been turned on by mistake. To check this, locate your “Num Lock” key, which often is the same button as “F11” on your keyboard. Press the key and then try typing. Text should appear on your screen.
What are the editing tools in MS Word?
Many of the editing toolbar icons look and function the same as the editing icons in Microsoft applications.
Editing Tools
- Format text.
- Insert/edit an image.
- Insert/edit a link.
- Paste content.
- Insert an emoticon.
- View and edit HTML.
- Page preview.
How do I edit a Word document online?
How do I edit a Word document online? To edit, click Edit Document in the top left corner and select Edit in Word Online. The document will then open in the editor and allow you to make changes to the document.
Why is a Word document locked for editing?
The file might be locked because: The file is shared and another user is currently editing it. An instance of the Office app is running in the background with the file already opened. The file has been marked as Final and can no longer be updated.
How do you unlock a Word document on a laptop?
Simply pressing control + shift + F11 keys simultaneously should unlock the locked fields.
Why Microsoft Word selection is locked?
As per your description, in Office 365 the two most common causes of the “selection is locked” message are one is unactivated version of Office( Office is in reduced functionality mode) and second a document that is protected in some other way.
How do I get rid of edit marks in Outlook?
Turn specific formatting marks on or off
- From a new email message, select File > Options > Mail > Editor Options > Display.
- Check or uncheck the formatting marks you want to see on the screen.
How do I change a file from read only to edit?
Read-only Files
- Open Windows Explorer and navigate to the file you want to edit.
- Right-click the file name and select “Properties.”
- Select the “General” tab and clear the “Read-only” check box to remove the read-only attribute or select the check the box to set it.
Why do my Word documents open in read only?
The content is in protected view
This is also commonly the case with email attachments or files you’ve downloaded. To help protect your computer, files from these potentially unsafe locations are opened in Protected View. By using Protected View, you can read a file and see its contents while reducing the risks.
How do I edit a Word template?
Edit templates
- Click File > Open.
- Double-click This PC. (In Word 2013, double-click Computer).
- Browse to the Custom Office Templates folder that’s under My Documents.
- Click your template, and click Open.
- Make the changes you want, then save and close the template.
Why can’t I edit in Onedrive?
If the issue persists, you may try the following steps: Open the Word client and go to File -> Options. Select Trust Center Settings in the Trust Center tab. Untick all the options in the Protected View tab.
Where is editor in Word?
Look for Editor on the Home tab. For more information about Editor in Word for Microsoft 365, see Check grammar, spelling, and more in Word.
How do I edit a word document in Office 365?
Login to your Email in Office 365, and click on OneDrive and select the document you wish to edit. This will open your OneDrive document in the Read Only version. To edit, click Edit Document in the top left corner and select Edit in Word Online.
How do you edit someone else’s word document?
How to Co-Edit a Document in Word 2016
- Save your Word document to OneDrive or a SharePoint Online.
- Click the Share button in Word and then enter one or more email addresses of people you want to share with.
- Set their permissions to “Can edit” (selected by default).
Can you unlock a Word document without the password?
Re-open the modified Rich-Text file in Word, go to “Review”, “Restrict Editing” and click on “Stop Protection” (german version: “Überprüfen” – “Bearbeitung Einschränken” – “Schutz aufheben”). Uncheck all tick-boxes. Done. You’ve unprotected your Word file without ever knowing the password.
- Free Courses
- Microsoft Word
- How to Edit a Word Document

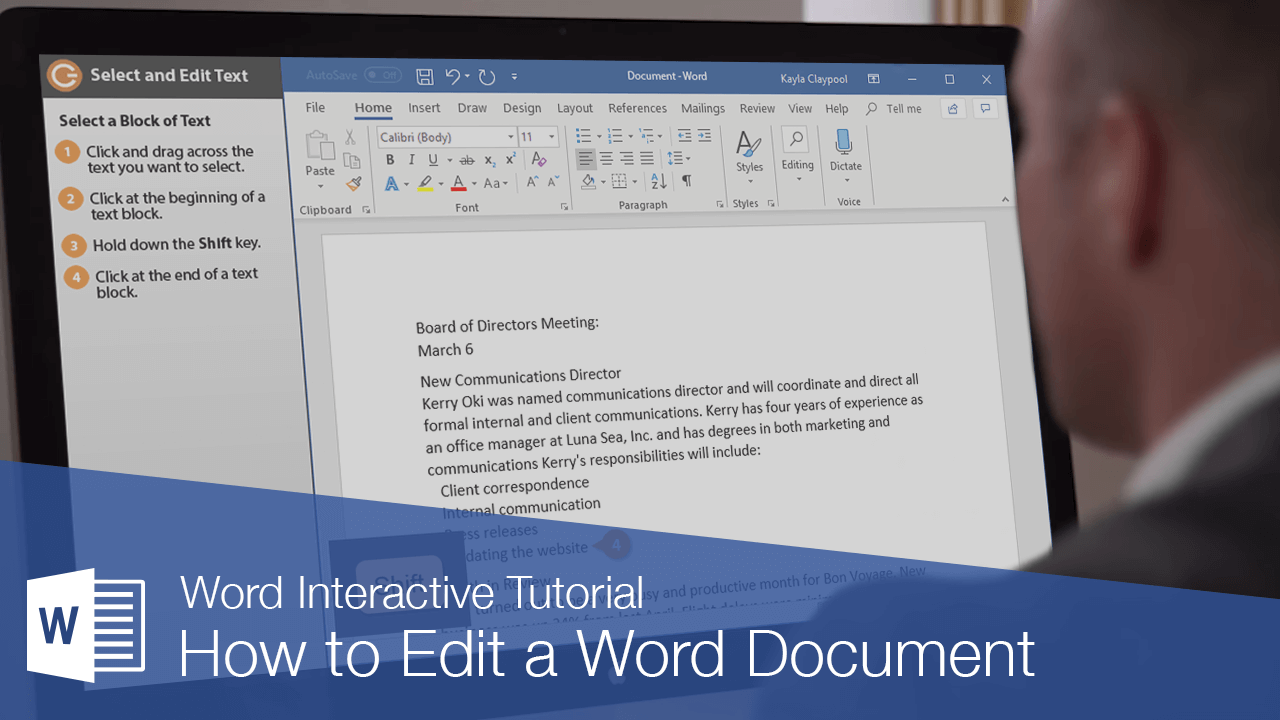
How to Select and Edit Text in Word
The greatest advantage of using a word processor is how easy it is to edit text throughout a document. One quick and easy way to edit text is by selecting it and then typing over it to replace it.
Select Text
Selecting text is a very important skill in Word. Whenever you want to edit or format text, you first need to select it. There are multiple ways to select text, letting you select a small amount to entire paragraphs at once.
- Click and drag across the text you want to select.
You can select any amount of text with this method, from a single character to your entire document.
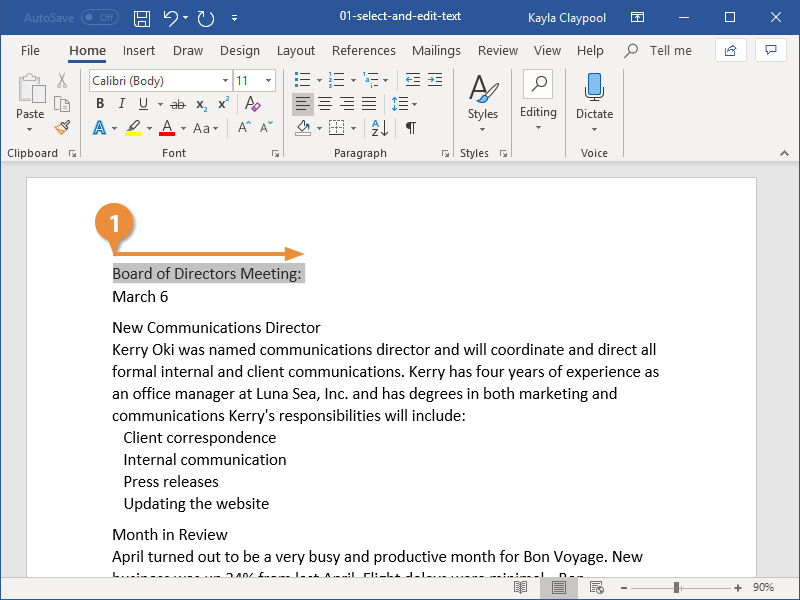
Here are some other ways to select text you’ll find useful:
- Press and hold down the Shift key, and move the insertion point either with your mouse or the arrow keys to select text.
- Double-click a single word to select it.
- Press the Ctrl key and click in a sentence to select it.
- Triple-click in a paragraph, or double-click in the left margin next to a paragraph, to select it.
- Click in the left margin to select an entire line, or click and drag in the left margin to select multiple lines.
- Press Ctrl + A to select everything in the document.

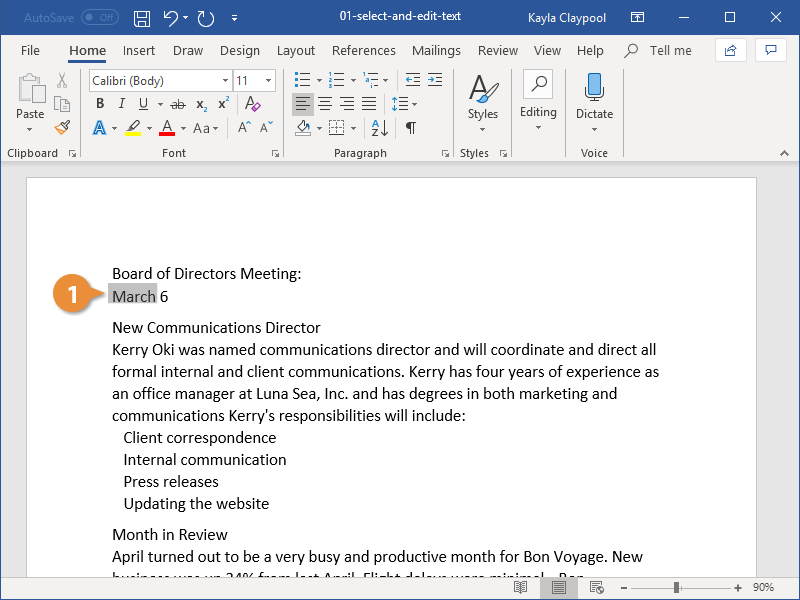
Edit Text
- Select the text you want to replace, then start typing the new text.

FREE Quick Reference
Click to Download
Free to distribute with our compliments; we hope you will consider our paid training.
While there’s no doubt that you will use Microsoft Word 2016 to type text into a document, you will also be using Word to edit the text in a document. When you edit text, you change it, format it, move it from one place in the document to another, or cut chunks out of the document completely.
Selecting Text
The first step in editing text that appears on the screen in Word is to learn how to select it for editing. You can always click within a document to move the cursor to change text, or use Backspace and Delete to remove text. However, this can be time consuming. What if you want to remove a whole chunk of text? Or what if you want to move one paragraph to another location? Well, by selecting text, you can delete or move entire paragraphs or pages. You can also format your document. You can change the font size, color, style, or any number of other things. Being able to select text in Word 2016 is mandatory, even for the absolute beginner.
Whenever you select text in Word, the text appears highlighted, as shown below.

Selecting text is easy and done in three easy steps.
- Move the cursor to the beginning of the text that you want to select.
- Click and hold in the left button on your mouse.
- Drag it over the text you want to select. It will highlight the selected text, as shown above. Simply release the mouse button when you are finished selecting text.
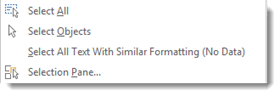
If you want to select the entire document, simply click on the Home tab and click Select on the far right in the Editing group.
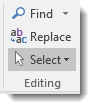
Click the downward arrow beside Select and choose Select All.
This will highlight all your text for formatting. Also note that you can select objects or text with similar formatting as your selected text when clicking on ‘Select.’
Cutting Text
Once you’ve selected text, there are several things that you can do with it. Naturally, you can select text to format it. Perhaps you want to change the font type or size. We’ll cover how to do that later.
However, you can also cut selected text from a document as a way to either delete it from one location, then paste it elsewhere in the same or different document.
If you’d like to remove text from one location in the document to paste into another location, use the Cut command.
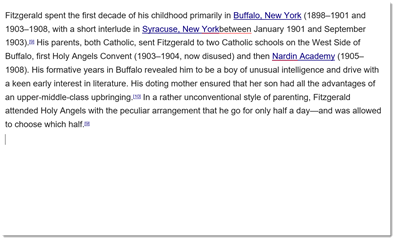
For example, below is an excerpt of the biography of F. Scott Fitzgerald.
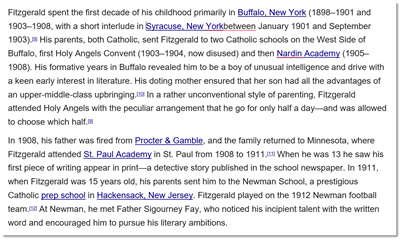
Let’s say we want to reverse the two paragraphs. In other words, we want the second paragraph to be the first paragraph.
We will use the Cut feature in Word to accomplish this.
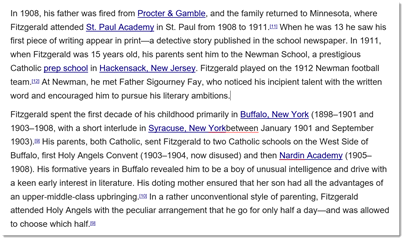
1. Select the text or object to be cut and copied. We’ve selected the second paragraph.
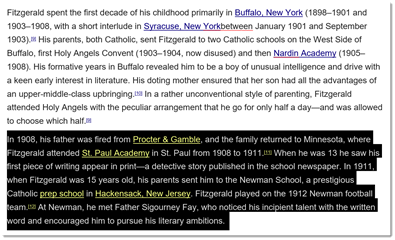
2. Click the Cut icon  in the Clipboard group under the Home tab. As you can see below, the paragraph is now cut from the document.
3. Now, click on the area in the document where you want to «paste» the text that you just cut. Using our example, it’s before the first paragraph. Once you see the cursor, go to the Ribbon. Under the Home tab, click Paste in the Clipboard group.
Delete and Cut should not be used interchangeably. When you cut an object, it is copied to the Clipboard. When you delete an object, it is simply removed from the document and the only way to restore it is by clicking the Undo Typing button. To delete text, select the text, then click Delete on your keyboard.
Copying Text
Once you select text, you can also copy it. Copying text means you copy the text you’ve selected, then you can paste it somewhere else in the document – or in another document. When you copy text, the text you’ve copied remains in the document.
There are three ways to copy text and objects to the clipboard.
1. Select the text or object to be copied and click the copy icon  in the Clipboard group under the Home tab.
2. Select the text or object to be copied, position the mouse pointer over it and right click. Then select Copy from the menu.
3. Select text or object to be copied and hit CTRL + C.
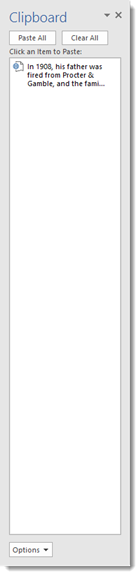
The Clipboard
Whenever you copy anything in Word, it is automatically sent to the Clipboard. The Clipboard does just as its name implies. It holds the text that you copy and paste for you to use. The Clipboard and its associated tools can be found on the Home tab at the far left end of the ribbon. The Clipboard group looks like this:
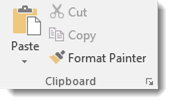
Click the arrow at the bottom of the Clipboard group to see its contents.
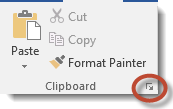
The clipboard will open as a long window to the left of your document. It can only hold 24 objects. When a 25th object is added, the first copied item is removed. To empty the Clipboard, click the Clear All button at the top of the Clipboard menu.
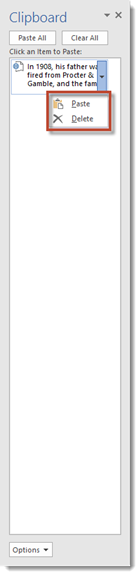
You can remove individual items from the clipboard by moving the mouse pointer over the item, then clicking the arrow button that appears to the right of the object. In the dropdown menu, select Delete.
Paste
The Paste command allows you to copy an object from one location in the document to another, or from another Office Program into Word 2016. You can use the Cut or Copy feature to move an item to the clipboard, then use Paste to place it elsewhere into a document.
There are three ways to Paste text or an object into a document:
1. Move the cursor to the point in your document where you want to place the item and click the Paste icon. It looks like this:

2. Move the mouse pointer to the place you wish to insert the item and click the right mouse button. Select one of the paste options from the dropdown menu. We’ll discuss the options in just a minute.

3. Move the cursor to the point in your document where you wish to place the item and press CTRL + V.
Ordinarily, Word pastes the most recently copied item. To paste an object that was copied earlier, position the cursor at the point in your document you wish to paste the item, then open the clipboard and click the item you wish to paste. You can also move the mouse pointer over the item to be pasted, and click the arrow that appears to the right of that item. Then select a paste option.
Paste Options is what you see when you right click your mouse to paste into a document. See below.
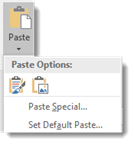
You also see Paste Options when you click the downward arrow below Paste on the Ribbon.
Paste Options allows you to specify the method of pasting that you want to use. This will be important if you want to keep or remove formatting for the selected text.
Let’s explain what we mean. Let’s say for example, that we want to paste a paragraph of this article into another article with a different font size, or into another document with a different font. Word 2016 gives us the option of preserving formatting, making the formatting match the area of the document where we paste our text, or pasting text only and not any images that we cut or copied.
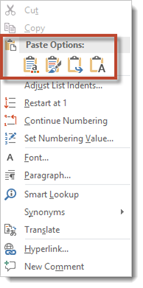
Again, Paste Options only appears when you right click your mouse to paste – unless you select your Paste option from the Ribbon. Once you’ve copied or cut selected text, then right click, you’ll see this:
These are your paste options:
 Paste using original formatting of pasted text.
 Merge formatting. Paste using the formatting of the majority of the text in the document.
 Allows you paste text only. Any graphics or images will not be pasted, only text.
 Paste using the formatting of the destination text, or the text where you paste into.
 Paste a Picture.
Inserting Text
You can insert text anywhere in a document simply by moving the cursor to the desired location and typing.
Word automatically moves all text to the right of the cursor over as you type. However, if you’d rather replace the text as you type, Word 2016 gives you two options:
- Select the text you’d like to replace and start typing. This deletes the highlighted text and positions the cursor in its place.
- Use Overtype Mode. To turn on overtype mode, click on the File tab, then select Options.
You will then see this dialogue box.
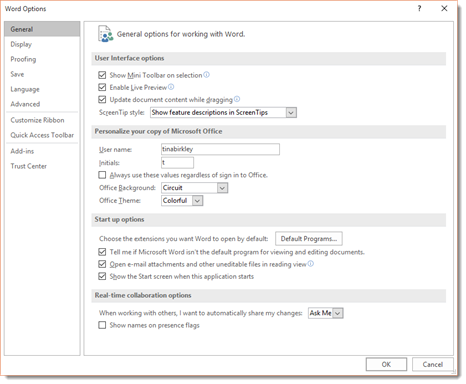
Click on Advanced in the left column.
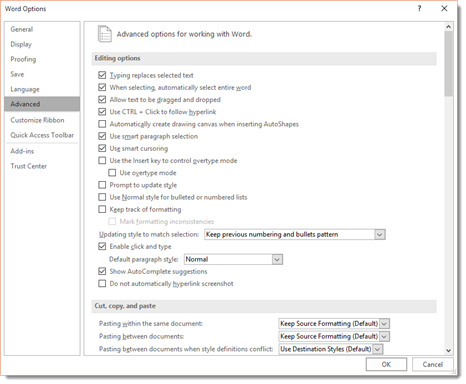
Put a Checkmark beside «Use the Insert key to control overtype mode» or the «Use overtype mode» box.

If you select the «Use the Insert key to control overtype mode» box, you can toggle overtype mode on or off by pressing the Insert key.
If you select only «Use overtype mode» you must manually turn it off by deselecting it.
AutoCorrect
AutoCorrect automatically corrects some errors you make. For example, by default, Microsoft Word will start the first letter of every new paragraph with a capital letter. It also may recognize certain words and make corrections for you without ever having to use Spell. However, you can customize AutoCorrect to find and correct certain errors — or to leave certain «errors» alone.
To customize AutoCorrect, click on the File tab, then click Options on the left.
Click Proofing in the column on the left.
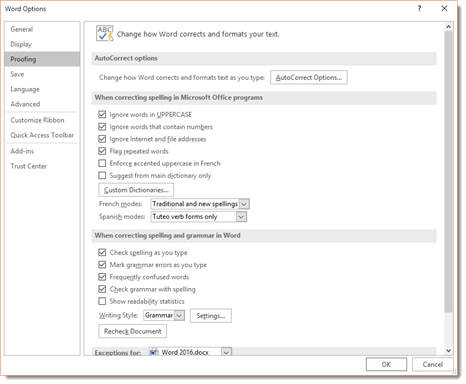
Next, click the AutoCorrect Options button. The screen you will see will look like the one below.
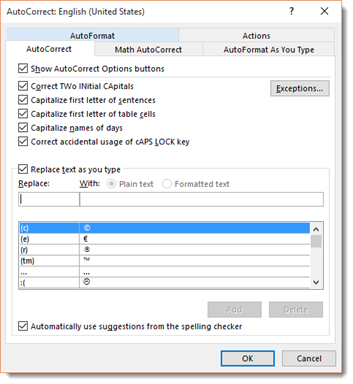
Click on the AutoCorrect options button, and you can specify words or even math that you want Word to correct as you type.
As you can see, by default, Word will automatically turn: (into a smiley face emoticon: J. It will also create a trademark symbol ™. These are default corrections that Word makes for you. You can add your own too.
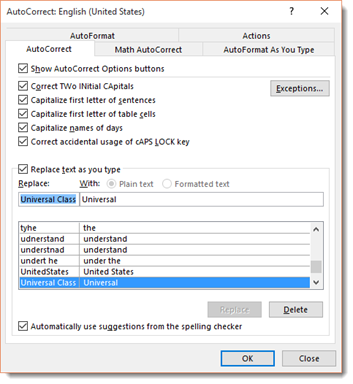
To add your own, type in what word or symbols you will enter in that you want Word to automatically correct. We’re going to type «Universal Class» and have it replaced by «Universal.» We’re doing this to have uniformity in our documents. Click the Add button when you’re finished.
Now, let’s click the Math AutoCorrect tab in the dialogue box.
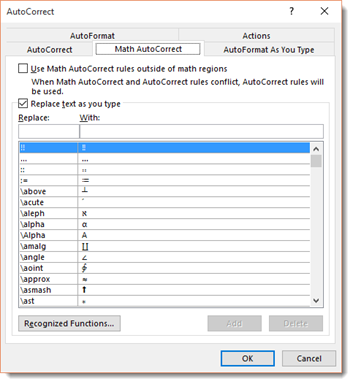
However, you can set AutoCorrect for mathematics just as you would with text.
Undo and Redo
But let’s say you accidently delete something or deleted it and then decided that you want it back. You grit your teeth and start to grumble, trying to remember the exact wording. It’s a lost cause, right? Wrong. The makers of Word anticipated this problem and supplied an easy solution. The Undo button!
The Undo button is on the Quick Access Toolbar. It looks like this:  . You can click the downward arrow beside the Undo button to determine how many steps backward you want to take with your undo.
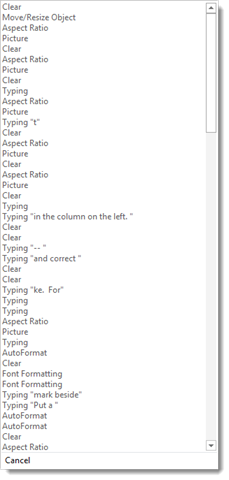
If you scroll down the list above to the bottom to AutoFormat, everything above AutoFormat will be undone too. You can undo up to 100 actions.
The Redo button is to the right of the Undo button. It looks like this:  . The redo button allows you redo an action that you just undid or to repeat the last action. If Word cannot redo the last action, the button will be faded.
Hyphenation
Word 2016 can hyphenate words at the end of lines for you, or you can choose to do it yourself. By default, hyphenation is turned off, which means Word won’t hyphenate words that are at the end of a line. Instead, it will just move the word to the next line.
To use the hyphenation feature in Word 2016, click on the Layout tab, then go to the Page Setup group on the ribbon. You’ll see Hyphenation, as shown below.
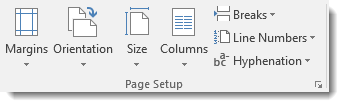
If you click the downward arrow beside Hyphenation, you’ll see that None is selected. This means no hyphenation (default.)
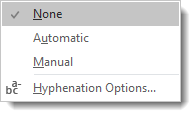
If you want Word to hyphenate words for you, select Automatic. This means that Word 2016 will hyphenate words that appear at the end of a line rather than moving it down to the next line to keep your text within the margins. Word will use its settings to decide how to hyphenate words. Just keep in mind, it does NOT mean Word will hyphenate words such as ‘how-to.’ It won’t.
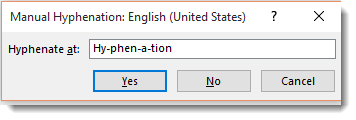
You can also select Manual. This box will pop up and ask you to specify how you want words hyphenated. Word will search your text for words that can be hyphenated and ask you how you wanted hyphenated. See the snapshot below:
You can also set options to tell Word the maximum amount of space to allow between the word and the right margin. This is called the Hyphenation Zone. To set the amount of space yourself, go to Hyphenation, click the downward arrow, then click on Hyphenation Options.
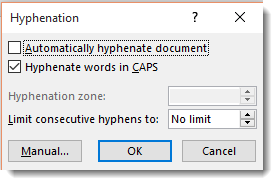
In this window, you can also select to automatically hyphenate the entire document, hyphenate words that are in CAPS, and manually set hyphens as we just learned to do.