
Drawing in Excel (Table of Contents)
- Drawing in Excel
- Examples
Drawing in Excel
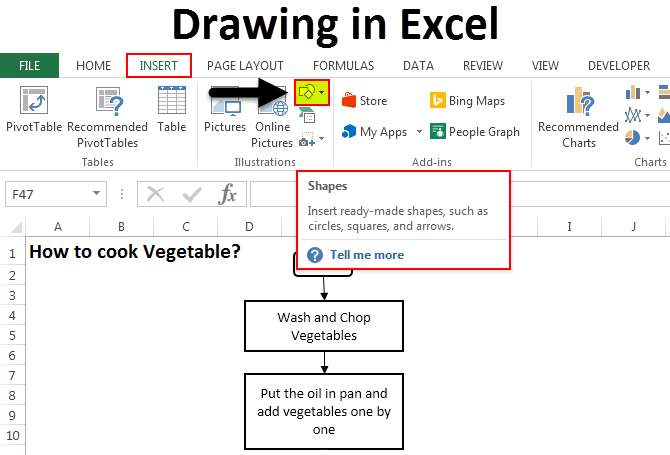
In Excel, we have different tools and functions for drawing, and all are available in the Insert menu ribbon’s illustration section. There are Shapes, Text Boxes, Smart Art Graphics, and Pictures. To draw anything in Excel, we can choose any shape or design from Shapes. If we go in Shapes, we have Lines, Rectangles, Arrows, Stars, etc. To draw anything from shapes in Excel, select any of the shapes we want to draw, hold left-click drag, draw the Shape in the size we want, and then release the key to get the final drawing.
Examples of Drawing in Excel
You can download this Drawing Excel Template here – Drawing Excel Template
Example #1
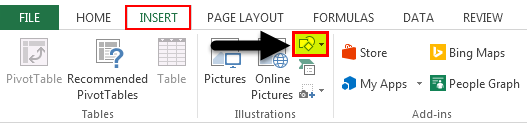
We will see all kinds of shapes with their use and application. To select a drawing, go to the Insert menu and select the Shape option ( highlighted ), as shown in the below screenshot.
Once you click on Shape (highlighted as shown above), you will get a drop-down list with all available shapes and figures.
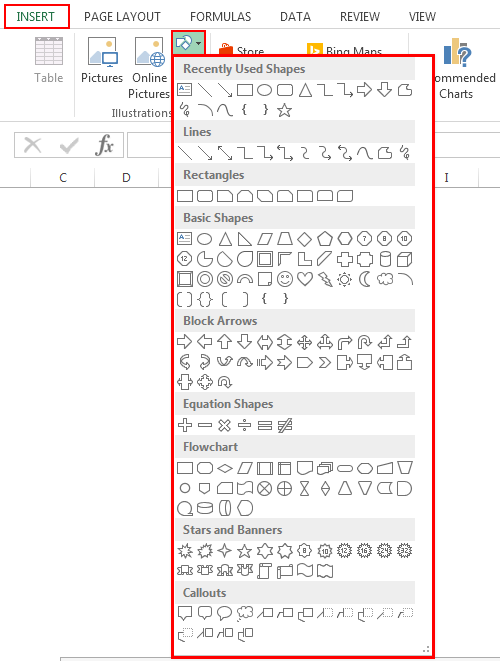
As we can see, the types of shapes mentioned are in the screenshot given above. Now, let’s take one category at a time. Select any shape from the menu by clicking on it and draw it anywhere in excel. Once drawn, you can change its orientation and size as well as per your need.
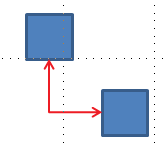
- Lines – Very first defined category of Shapes are Lines. It has Line, Arrow, and Line Arrow, Elbow connectors, Curvy Lines in different forms. Lines are used for connecting one cell or destination with the other one.
![]()
- Rectangles – A rectangle, as we know, is a shape with opposite sides equal to each other. Rectangles are mainly used for showing a process where something is happening.
![]()
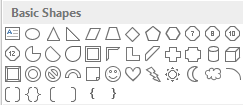
- Basic Shapes – Basic Shapes has different type of 2D and 3D shapes.
The first Shape is Text Box, which is used for entering text or headlines. This is followed by circles, Triangles, and shapes with multiple arms/sides, which can be used for decision-making mainly—followed by Cubes, Cylinders which are used for showing data storage.
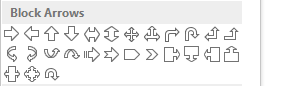
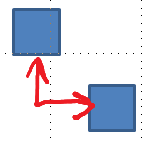
- Block Arrow – Block Arrows are used for giving direction to any process. It can be one-way or multi-way. Block Arrows can be used for direction along with entering the text.
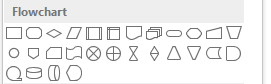
- Flowchart – A flowchart creates a process map or flow that defines the process steps from start to end.
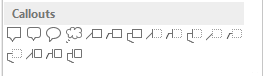
- Callouts are used to mention important notes, comments, or remarks. It calls out the value or comments important to any reference process step.
Example #2
In this example, we will draw a flow chart using some shapes. We will consider an example of cooking, where we will implement the shapes we learned in the above example.
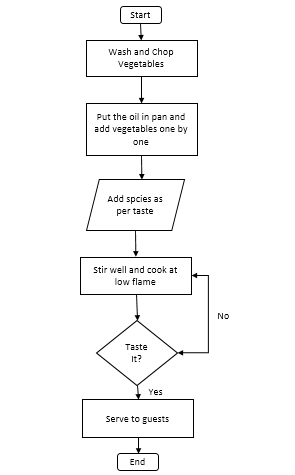
The above-shown process flow chart is the Process Flow of Cooking Vegetables. Below are the terms and use of shapes given;
- Process Start and End box call Terminator is used to terminate or end the process.
- The rectangle represents the process; in our Flow Chart, Washing and Cutting vegetables and putting them in the pan is a process.
- The parallelogram is used to represent the data flow. Here in our Flow Chart, we are adding spices to the flow of data.
- A diamond shape box is used to represent the decision. In our Flow Chart, Tasting the cooked vegetable shows decisions with the answers YES and NO, which shows whether the vegetable is cooked or not.
- Arrows are used as connectors, connecting one process step to another.
Pros of Excel Drawing
- Excel drawing makes data professional, even if basic shapes are used.
- Using Shapes in Excel instead of MS Word is very user-friendly. So it is recommended to use Shapes for drawing in MS Excel only.
- Connecting the shapes together is also easy.
Cons of Excel Drawing
- Although it is beneficial for making data or presentations look good, using shapes consumes a lot of time in Excel. If used in Microsoft Visio, a separate tool provided by Microsoft, it is specially used to create charts with more defined shapes.
Things to Remember
- Always connect the shapes with each other by putting shapes closer so that connecting points will get activated.
- Once done using Shapes, group all the shapes together so that they will not get dispersed whenever you change the worksheet or paste it into another sheet.
Recommended Articles
This has been a guide to how to draw in Excel. Here we discuss the Drawing tool in Excel and how to use the Drawing tool, along with practical examples and a downloadable excel template. You can also go through our other suggested articles –
- Excel Combo Box
- Bubble Chart in Excel
- Scrollbar in Excel
- Excel Drawing a line
To draw anything from shapes in Excel, select any of the shapes we want to draw, hold left-click drag, draw the shape in the size we want, and then release the key to get the final drawing.
Contents
- 1 Is there a drawing tool in Excel?
- 2 Can you free draw in Excel?
- 3 How do you draw a cell in Excel?
- 4 Does scribble work in Excel?
- 5 How do I write in Excel?
- 6 What is the draw tab in Excel?
- 7 How do I draw a line in an Excel column?
- 8 How do I draw a line in an Excel cell?
- 9 How do I draw a line in an Excel table?
- 10 How do you draw 3D in Visio?
- 11 Where can I find pen in Excel?
- 12 Where is the action pen in Excel?
- 13 Can I use Apple pen in Excel?
- 14 How do you type in a cell in Excel without it clicking?
- 15 How do I write text in an Excel formula?
- 16 How do I write numbers in Excel?
Is there a drawing tool in Excel?
Whether you use a digital pen, touchscreen, or mouse, the drawing features in Office can help you add notes, create shapes, edit text, and more. The Draw tab is available in Word, Excel, and PowerPoint.
Can you free draw in Excel?
Drawing in excel means making a shape in excel, now excel has provided us with many tools for drawing, some of them are the predefined drawings or predefined shapes and also there is option for free form of drawing where user can design a drawing by using mouse, this is available in the shapes in the insert tab of
How do you draw a cell in Excel?
Draw cell borders
- Click Home > the Borders arrow .
- Pick Draw Borders for outer borders or Draw Border Grid for gridlines.
- Click the Borders arrow > Line Color arrow, and then pick a color.
- Click the Borders arrow > Line Style arrow, and then pick a line style.
- Select cells you want to draw borders around.
Does scribble work in Excel?
Yes, you are right. Excel app for iOS can recognize the shapes created by scribble feature, but the scribble option itself isn’t available since Features of the app may vary depending on the device.
How do I write in Excel?
Enter text or a number in a cell
- On the worksheet, click a cell.
- Type the numbers or text that you want to enter, and then press ENTER or TAB. To enter data on a new line within a cell, enter a line break by pressing ALT+ENTER.
What is the draw tab in Excel?
The draw tab allows you to make drawing edits within a spreadsheet. This tab is found on the Excel ribbon and is not always enabled. To enable this tab for more functionality, start by clicking the file tab.
How do I draw a line in an Excel column?
To Draw a line in excel, follow these steps:
- In the Insert tab under illustrations, click on shapes.
- When the dialog box appears to go to the line section,
- Select any type of line from the various given options to draw a connection.
How do I draw a line in an Excel cell?
Answer: Select the cells that you wish to draw the border around. Right-click and then select “Format Cells” from the popup menu. When the Format Cells window appears, select the Border tab. Next select your line style and the borders that you wish to draw.
How do I draw a line in an Excel table?
Open a Spreadsheet
- Open a Spreadsheet.
- Launch Excel.
- Highlight Desired Cell.
- Position the cursor in a single cell you want to have grid lines.
- Click “Borders” Menu.
- Click the “Home” tab if it’s not enabled.
- Click “All Borders”
- Click the “All Borders” button to display grid lines on the single cell.
How do you draw 3D in Visio?
Microsoft Visio has several three-dimensional templates. To find them, on the File tab, click New, enter “3D” into the search field, and choose the template that best fits your needs: Block Diagram. Directional Map 3D.
Where can I find pen in Excel?
You define the pens you want to have, and they are then available in Word, Excel, and PowerPoint.
- On the Draw tab of the Ribbon, tap a pen to select it.
- Tap again to open the menu of Thickness and Color options for the pen.
- A Pencil texture is also available:
- On the touch screen, begin writing or drawing.
Where is the action pen in Excel?
pen toolbox
You find the Action Pen on the right end of the pen toolbox. Just select it and start editing. This replaces the old Ink Editor button that you had on the Draw tab in Word. Tip: If you have a touch-enabled device, like a Microsoft Surface, you can also tap the Action Pen and just use your finger to edit.
Can I use Apple pen in Excel?
The pencil tool allows you to draw and shade with your Apple pencil, just like drawing with an actual pencil.One aspect of this drawing feature that is so exciting is you can use it inside Microsoft Excel. The same Draw tab appears at the top in the navigation bar inside Excel.
How do you type in a cell in Excel without it clicking?
You can press the F2 key to get into the editing mode of a cell without double clicking it. It is easy to operate, you just need to select the cell you want to edit and press the F2 key, and the cursor will be located at the end of the cell value, then you can edit the cell immediately.
How do I write text in an Excel formula?
How to add text to the beginning of cells
- In the cell where you want to output the result, type the equals sign (=).
- Type the desired text inside the quotation marks.
- Type an ampersand symbol (&).
- Select the cell to which the text shall be added, and press Enter.
How do I write numbers in Excel?
Available number formats in Excel
- Press CTRL + 1 and select Number.
- Right-click the cell or cell range, select Format Cells… , and select Number.
- Select the dialog box launcher next to Number and then select Number.
Содержание
- How To Draw In Excel Sheet?
- Is there a drawing tool in Excel?
- Can I free draw in Excel?
- How do you add a draw?
- How do you draw a line in Excel?
- How do you draw shapes in Excel?
- How do you draw 3D in Excel?
- Can I handwrite in Excel?
- Does scribble work in Excel?
- Can you make isometric paper in Excel?
- How do you draw 3D in Visio?
- How do you draw in docs?
- How do I enable drawing in Word?
- Where is drawing tool in Word?
- How do I draw a line in an Excel cell?
- How do you draw a line within a cell in Excel?
- How do I draw a rectangle in Excel?
- How To Draw In Excel?
- Is there a drawing tool in Excel?
- Can you free draw in Excel?
- How do you draw a cell in Excel?
- Does scribble work in Excel?
- How do I write in Excel?
- What is the draw tab in Excel?
- How do I draw a line in an Excel column?
- How do I draw a line in an Excel cell?
- How do I draw a line in an Excel table?
- How do you draw 3D in Visio?
- Where can I find pen in Excel?
- Where is the action pen in Excel?
- Can I use Apple pen in Excel?
- How do you type in a cell in Excel without it clicking?
- How do I write text in an Excel formula?
- How do I write numbers in Excel?
- Draw and write with ink in Office
- Write, draw, or highlight text
- Convert ink to text or shapes
- More features
How To Draw In Excel Sheet?
To draw anything from shapes in Excel, select any of the shapes we want to draw, hold left-click drag, draw the shape in the size we want, and then release the key to get the final drawing.
Whether you use a digital pen, touchscreen, or mouse, the drawing features in Office can help you add notes, create shapes, edit text, and more. The Draw tab is available in Word, Excel, and PowerPoint.
Can I free draw in Excel?
Drawing in excel means making a shape in excel, now excel has provided us with many tools for drawing, some of them are the predefined drawings or predefined shapes and also there is option for free form of drawing where user can design a drawing by using mouse, this is available in the shapes in the insert tab of
How do you add a draw?
Add a drawing to a document
- Click in your document where you want to create the drawing.
- On the Insert tab, in the Illustrations group, click Shapes.
- When you find the shape you want to insert, double-click to insert it automatically, or click and drag to draw it in your document.
How do you draw a line in Excel?
Draw a line without connection points
- On the Insert tab, in the Illustrations group, click Shapes.
- Under Lines, click any line style you like.
- Click one location in the document, hold and drag your pointer to a different location, and then release the mouse button.
How do you draw shapes in Excel?
Add a shape in Excel, Outlook, Word, or PowerPoint
- On the Insert tab, click Shapes.
- Click the shape you want, click anywhere in the workspace, and then drag to place the shape. To create a perfect square or circle (or constrain the dimensions of other shapes), press and hold Shift while you drag.
How do you draw 3D in Excel?
Add 3D models
To insert 3D models in Word, Excel, or PowerPoint for Windows Mobile go to the Insert tab of the ribbon and select 3D Models. The pane will open. Select one, or more, images and click Insert.
Can I handwrite in Excel?
In addition to our general Drawing Tools, we are bringing intelligent tools, optimized for core experiences to each app. Now, the Action Pen in Excel will help you handwrite directly in the cells to allow you to jot down data with ink that gets automatically converted to Excel data.
Does scribble work in Excel?
Yes, you are right. Excel app for iOS can recognize the shapes created by scribble feature, but the scribble option itself isn’t available since Features of the app may vary depending on the device.
Can you make isometric paper in Excel?
Create 3D Drawings in Excel
Simple three dimensional drawings can be made with ease in Excel, using the isometric grid lines as a guide.Use the lines on the isometric grid to draw shapes.
How do you draw 3D in Visio?
Microsoft Visio has several three-dimensional templates. To find them, on the File tab, click New, enter “3D” into the search field, and choose the template that best fits your needs: Block Diagram. Directional Map 3D.
How do you draw in docs?
What to Know
- Open a document in Google Docs. Place the cursor where you want the drawing to appear.
- Select Insert > Drawing. Choose New to open the Drawing window.
- Choose a drawing type from the Actions menu. Options include word art, shapes, arrows, callouts, and equations.
How do I enable drawing in Word?
Right-click the Ribbon and select Customize the Ribbon. Check the box next to Draw, then click OK. The Draw tab will now be available in the Ribbon.
Click View > Toolbars > Drawing. The Drawing toolbar is displayed or hidden. The Drawing toolbar contains a collection of icon buttons that allows the user to draw shapes and images in the document.
How do I draw a line in an Excel cell?
Answer: Select the cells that you wish to draw the border around. Right-click and then select “Format Cells” from the popup menu. When the Format Cells window appears, select the Border tab. Next select your line style and the borders that you wish to draw.
How do you draw a line within a cell in Excel?
How to Draw a Diagonal Line Through a Cell in Excel
- Open a Blank workbook in Excel.
- Right click the cell and select Format Cells.
- Click OK.
- Now type the text you want at the top of your diagonal line and press Alt + Enter to move to a new line.
- Type the text on the bottom, and then press enter.
How do I draw a rectangle in Excel?
If we go in Shapes, we have Lines, Rectangles, Arrows, Stars, etc. To draw anything from shapes in Excel, select any of the shapes we want to draw, hold left-click drag, draw the shape in the size we want, and then release the key to get the final drawing.
Источник
How To Draw In Excel?
To draw anything from shapes in Excel, select any of the shapes we want to draw, hold left-click drag, draw the shape in the size we want, and then release the key to get the final drawing.
Whether you use a digital pen, touchscreen, or mouse, the drawing features in Office can help you add notes, create shapes, edit text, and more. The Draw tab is available in Word, Excel, and PowerPoint.
Can you free draw in Excel?
Drawing in excel means making a shape in excel, now excel has provided us with many tools for drawing, some of them are the predefined drawings or predefined shapes and also there is option for free form of drawing where user can design a drawing by using mouse, this is available in the shapes in the insert tab of
How do you draw a cell in Excel?
Draw cell borders
- Click Home > the Borders arrow .
- Pick Draw Borders for outer borders or Draw Border Grid for gridlines.
- Click the Borders arrow > Line Color arrow, and then pick a color.
- Click the Borders arrow > Line Style arrow, and then pick a line style.
- Select cells you want to draw borders around.
Does scribble work in Excel?
Yes, you are right. Excel app for iOS can recognize the shapes created by scribble feature, but the scribble option itself isn’t available since Features of the app may vary depending on the device.
How do I write in Excel?
Enter text or a number in a cell
- On the worksheet, click a cell.
- Type the numbers or text that you want to enter, and then press ENTER or TAB. To enter data on a new line within a cell, enter a line break by pressing ALT+ENTER.
What is the draw tab in Excel?
The draw tab allows you to make drawing edits within a spreadsheet. This tab is found on the Excel ribbon and is not always enabled. To enable this tab for more functionality, start by clicking the file tab.
How do I draw a line in an Excel column?
To Draw a line in excel, follow these steps:
- In the Insert tab under illustrations, click on shapes.
- When the dialog box appears to go to the line section,
- Select any type of line from the various given options to draw a connection.
How do I draw a line in an Excel cell?
Answer: Select the cells that you wish to draw the border around. Right-click and then select “Format Cells” from the popup menu. When the Format Cells window appears, select the Border tab. Next select your line style and the borders that you wish to draw.
How do I draw a line in an Excel table?
Open a Spreadsheet
- Open a Spreadsheet.
- Launch Excel.
- Highlight Desired Cell.
- Position the cursor in a single cell you want to have grid lines.
- Click “Borders” Menu.
- Click the “Home” tab if it’s not enabled.
- Click “All Borders”
- Click the “All Borders” button to display grid lines on the single cell.
How do you draw 3D in Visio?
Microsoft Visio has several three-dimensional templates. To find them, on the File tab, click New, enter “3D” into the search field, and choose the template that best fits your needs: Block Diagram. Directional Map 3D.
Where can I find pen in Excel?
You define the pens you want to have, and they are then available in Word, Excel, and PowerPoint.
- On the Draw tab of the Ribbon, tap a pen to select it.
- Tap again to open the menu of Thickness and Color options for the pen.
- A Pencil texture is also available:
- On the touch screen, begin writing or drawing.
Where is the action pen in Excel?
pen toolbox
You find the Action Pen on the right end of the pen toolbox. Just select it and start editing. This replaces the old Ink Editor button that you had on the Draw tab in Word. Tip: If you have a touch-enabled device, like a Microsoft Surface, you can also tap the Action Pen and just use your finger to edit.
Can I use Apple pen in Excel?
The pencil tool allows you to draw and shade with your Apple pencil, just like drawing with an actual pencil.One aspect of this drawing feature that is so exciting is you can use it inside Microsoft Excel. The same Draw tab appears at the top in the navigation bar inside Excel.
How do you type in a cell in Excel without it clicking?
You can press the F2 key to get into the editing mode of a cell without double clicking it. It is easy to operate, you just need to select the cell you want to edit and press the F2 key, and the cursor will be located at the end of the cell value, then you can edit the cell immediately.
How do I write text in an Excel formula?
How to add text to the beginning of cells
- In the cell where you want to output the result, type the equals sign (=).
- Type the desired text inside the quotation marks.
- Type an ampersand symbol (&).
- Select the cell to which the text shall be added, and press Enter.
How do I write numbers in Excel?
Available number formats in Excel
- Press CTRL + 1 and select Number.
- Right-click the cell or cell range, select Format Cells… , and select Number.
- Select the dialog box launcher next to Number and then select Number.
Источник
Draw and write with ink in Office
On a touch-enabled device, draw with your finger, a digital pen, or a mouse.
Available inking features depend on the type of device you’re using and which version of Office you’re using.
Please start by choosing your version of Office:
- Which version of Office for Windows are you using?
- Microsoft 365
- Office 2019
- Office 2016, 2013
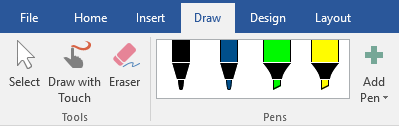
If your device is touch-enabled, the Draw tab is turned on automatically. Otherwise, turn it on by selecting File > Options > Customize Ribbon > Draw.
Write, draw, or highlight text
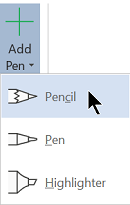
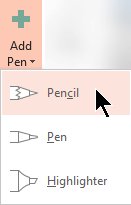
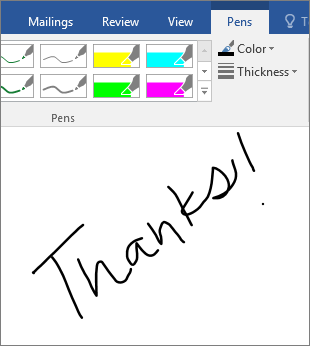
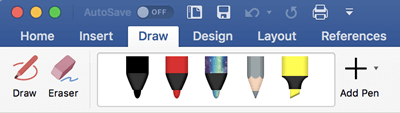
The new pen set is customizable and portable. You define the pens you want to have, and they are then available in Word, Excel, and PowerPoint.
On the Draw tab of the Ribbon, tap a pen to select it.
In Word, you must be in Print layout to draw with ink. If the Draw tab is grayed out so that you can’t select a pen, go the View tab and select Print Layout.
In Outlook, first tap the body of the message and insert a drawing canvas  ; then you can select a pen to draw with.
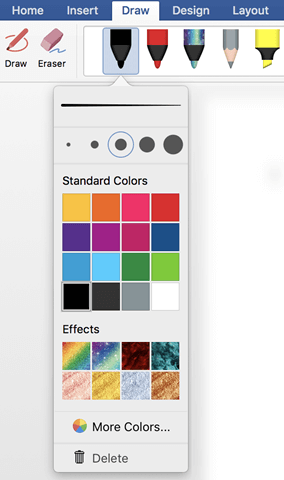
Tap again to open the menu of Thickness and Color options for the pen. Select your preferred size and color.
There are five pen thickness settings ranging from .25 mm to 3.5 mm. Select a thickness or use the plus or minus sign to make your pen thicker or thinner.
Sixteen solid colors are available on the menu, with more available when you tap More Colors.
Eight effects are also available: Rainbow, Galaxy, Lava, Ocean, Rose Gold, Gold, Silver, and Bronze.
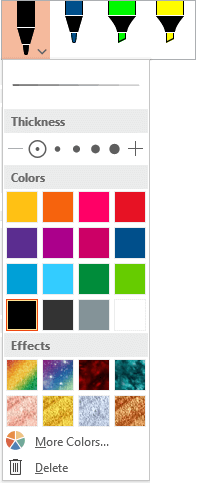
A Pencil texture is also available:
When you draw with the Pencil texture while using a supported digital stylus, you can tilt the stylus to get a «shading» effect, just like you would get with a real pencil.
On the touch screen, begin writing or drawing.
Once you have drawn an ink shape, it behaves like any shape that you are used to working with in Office. You can select the shape, then you can move or copy it, change its color, pivot its position, and so on.
To stop inking and select your annotations, press the Esc key.
Convert ink to text or shapes
More features
Select a heading below to open it and see the detailed instructions.
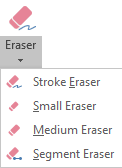
Under Draw > Tools, tap the Eraser.
(In PowerPoint for Microsoft 365, you can choose from different sizes of erasers. Word has three eraser options. Tap the down arrow on the Eraser button to pick the eraser that you want.)
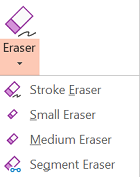
With your pen or finger, drag the eraser over the ink you want to remove.
With the Segment Eraser in PowerPoint, you can simply tap a segment of ink or drag across it to remove it (rather than having to thoroughly wipe away the entire segment). Dragging across segments is an easy way to erase several at once.
Some active pens, such as the Surface pen, have an eraser that you can also use to erase digital ink.
All apps include a Draw tool  on the Draw tab of the Ribbon for switching between inking mode and selection mode.
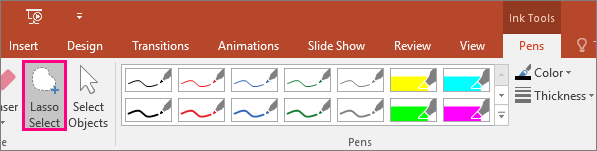
There is also an ink selection tool, Lasso Select,  or
or  for specifically for selecting objects drawn with ink. It’s most useful when you have a mixture of standard and ink objects and you only want to select an ink object.
Applies only to Word, PowerPoint, and Excel:
To select part of a drawing or words written in ink, use the Lasso Select tool. (This tool can’t select non-ink objects—that is, shapes, pictures, etc.)
Under Draw > Tools on the Ribbon, tap Lasso Select or .
With your pen or finger, drag to draw a circle around the part of the drawing or word that you want to select. A faded, dashed selection region appears around it, and when you’re done, the portion you lassoed is selected. Then you can manipulate that object as you wish: move it, change its color, and so on.

In both Excel and PowerPoint, with a digital pen, you can select an area without even tapping the selection tool on the ribbon. Use the supported digital pen button to Lasso Select ink without visiting the ribbon. Then you can use the pen to move, resize, or rotate the ink object.
On the File menu, select Options, and then select Advanced.
In the Pen section, select the box next to Use pen to select and interact with content by default.
This setting only applies to the app in which you make it, so, for example, you can have automatic inking turned on in Visio and turned off in Word.
Источник
Adblock
detector
On a touch-enabled device, draw with your finger, a digital pen, or a mouse.
Available inking features depend on the type of device you’re using and which version of Office you’re using.
Please start by choosing your version of Office:
|
|
If your device is touch-enabled, the Draw tab is turned on automatically. Otherwise, turn it on by selecting File > Options > Customize Ribbon > Draw. |
Write, draw, or highlight text
The new pen set is customizable and portable. You define the pens you want to have, and they are then available in Word, Excel, and PowerPoint.
-
On the Draw tab of the Ribbon, tap a pen to select it.

In Word, you must be in Print layout to draw with ink. If the Draw tab is grayed out so that you can’t select a pen, go the View tab and select Print Layout.
In Outlook, first tap the body of the message and insert a drawing canvas
; then you can select a pen to draw with. -
Tap again to open the menu of Thickness and Color options for the pen. Select your preferred size and color.
-
There are five pen thickness settings ranging from .25 mm to 3.5 mm. Select a thickness or use the plus or minus sign to make your pen thicker or thinner.
-
Sixteen solid colors are available on the menu, with more available when you tap More Colors.
-
Eight effects are also available: Rainbow, Galaxy, Lava, Ocean, Rose Gold, Gold, Silver, and Bronze.
-
-
A Pencil texture is also available:
When you draw with the Pencil texture while using a supported digital stylus, you can tilt the stylus to get a «shading» effect, just like you would get with a real pencil.
-
On the touch screen, begin writing or drawing.
Once you have drawn an ink shape, it behaves like any shape that you are used to working with in Office. You can select the shape, then you can move or copy it, change its color, pivot its position, and so on.
-
To stop inking and select your annotations, press the Esc key.
Convert ink to text or shapes
Word or Excel: See Convert ink to shapes in Office
PowerPoint: See Convert ink to text or shapes in PowerPoint for Microsoft 365.
More features
Select a heading below to open it and see the detailed instructions.
-
Under Draw > Tools, tap the Eraser.
(In PowerPoint for Microsoft 365, you can choose from different sizes of erasers. Word has three eraser options. Tap the down arrow on the Eraser button to pick the eraser that you want.)
-
With your pen or finger, drag the eraser over the ink you want to remove.
With the Segment Eraser in PowerPoint, you can simply tap a segment of ink or drag across it to remove it (rather than having to thoroughly wipe away the entire segment). Dragging across segments is an easy way to erase several at once.
Some active pens, such as the Surface pen, have an eraser that you can also use to erase digital ink.
All apps include a Draw tool on the Draw tab of the Ribbon for switching between inking mode and selection mode.
There is also an ink selection tool, Lasso Select, or for specifically for selecting objects drawn with ink. It’s most useful when you have a mixture of standard and ink objects and you only want to select an ink object.
Applies only to Word, PowerPoint, and Excel:
To select part of a drawing or words written in ink, use the Lasso Select tool. (This tool can’t select non-ink objects—that is, shapes, pictures, etc.)
-
Under Draw > Tools on the Ribbon, tap Lasso Select
or . -
With your pen or finger, drag to draw a circle around the part of the drawing or word that you want to select. A faded, dashed selection region appears around it, and when you’re done, the portion you lassoed is selected. Then you can manipulate that object as you wish: move it, change its color, and so on.
In both Excel and PowerPoint, with a digital pen, you can select an area without even tapping the selection tool on the ribbon. Use the supported digital pen button to Lasso Select ink without visiting the ribbon. Then you can use the pen to move, resize, or rotate the ink object.
-
On the File menu, select Options, and then select Advanced.
-
In the Pen section, select the box next to Use pen to select and interact with content by default.
This setting only applies to the app in which you make it, so, for example, you can have automatic inking turned on in Visio and turned off in Word.

|
If your device is touch-enabled, the Draw tab is turned on automatically. Otherwise, turn it on by selecting File > Options > Customize Ribbon > Draw. |
Write, draw, or highlight text
The new pen set is customizable and portable. You define the pens you want to have, and they are then available in Word, Excel, and PowerPoint.
-
On the Draw tab of the Ribbon, tap a pen to select it.
In Word, you must be in Print layout to draw with ink. If the Draw tab is grayed out so that you can’t select a pen, go the View tab and select Print Layout.
-
Tap again to open the menu of Thickness and Color options for the pen. Select your preferred size and color.
-
There are five pen thickness settings ranging from .25 mm to 3.5 mm. Select a thickness or use the plus or minus sign to make your pen thicker or thinner.
-
Sixteen solid colors are available on the menu, with more available when you tap More Colors.
-
-
A Pencil texture is also available:
When you draw with the Pencil texture while using a supported digital stylus, you can tilt the stylus to get a «shading» effect, just like you would get with a real pencil.
-
On the touch screen, begin writing or drawing.
Once you have drawn an ink shape, it behaves like any shape that you are used to working with in Office. You can select the shape, then you can move or copy it, change its color, pivot its position, and so on.
-
To stop inking and select your annotations, either to modify or move them, pick Select
on the Draw tab.
Convert ink to text or shapes
See Convert ink to text or shapes in PowerPoint for Microsoft 365.
More features
Select a heading below to open it and see the detailed instructions.
-
Under Draw > Tools, tap the Eraser.
(In PowerPoint for Microsoft 365, you can choose from four erasers. Tap the down arrow on the Eraser button to pick the eraser that you want.)
-
With your pen or finger, drag the eraser over the ink you want to remove.
With the Segment Eraser in PowerPoint, you can simply tap a segment of ink or drag across it to remove it (rather than having to thoroughly wipe away the entire segment). Dragging across segments is an easy way to erase several at once.
Some active pens, such as the Surface pen, have an eraser that you can also use to erase digital ink.
When you’ve been drawing with ink, you can use Stop Inking  on the Draw tab to change the mouse pointer back to a standard selection tool
  . The selection tool can select digital ink drawings and any other kind of objects.
PowerPoint and Excel also have an ink selection tool, Lasso Select,  specifically for selecting objects drawn with ink. It’s most useful when you have a mixture of standard and ink objects and you only want to select an ink object.
Applies only to PowerPoint and Excel:
To select part of a drawing or words written in ink, use the Lasso Select tool. (This tool can’t select non-ink objects—that is, shapes, pictures, etc.)
-
Under Draw > Tools on the Ribbon, tap Lasso Select
. -
With your pen or finger, drag to draw a circle around the part of the drawing or word that you want to select. A faded, dashed selection region appears around it, and when you’re done, the portion you lassoed is selected. Then you can manipulate that object as you wish: move it, change its color, and so on.
In both Excel and PowerPoint, with a digital pen, you can select an area without even tapping the selection tool on the ribbon. Use the supported digital pen button to Lasso Select ink without visiting the ribbon. Then you can use the pen to move, resize, or rotate the ink object.
-
Select File > Options > Advanced.
-
In the Pen section, select the box next to Use pen to select and interact with content by default.
This setting only applies to the app in which you make it. So, for example, you can have automatic inking turned on in Visio and turned off in Word.
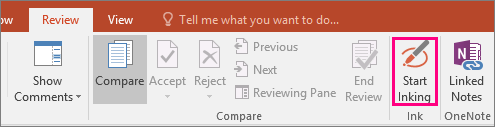
Find the drawing tools
Go to the Review tab and select Start Inking to display the Ink Tools and Pens tab.
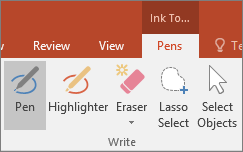
Write or draw
-
Under Ink Tools >Pens choose Pen.
-
To change the ink color and stroke width, point to the color and width (0.35mm — 0.5mm) you want.
-
On the touch screen, begin writing or drawing.
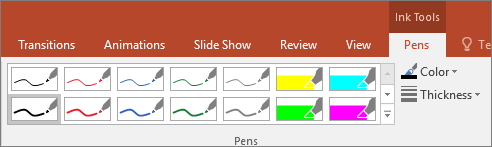
Highlight text
-
Under Ink Tools, on the Pens tab, click Highlighter, and then pick a highlight color.
-
Point and drag your pen or finger over the text that you want to highlight.
You can highlight text in Excel, Word, and Outlook, but PowerPoint doesn’t support highlighting text.

Delete whole written words or ink drawings
-
Under Ink Tools, on the Pens tab, click the arrow below Eraser, and then pick an eraser size.
-
With your pen or finger, select the word or ink drawing that you want to erase.

Drawing in OneNote
If you’re using OneNote and want to draw, see these other articles:
 OneNote for Windows 10: Write notes and draw in OneNote
 OneNote: Draw and sketch notes on a page
Extra features in PowerPoint
Select parts of an ink drawing or written words (PowerPoint only)
To select part of a drawing or some written words, use the Lasso tool. (You cannot use the Lasso tool to select non-ink objects (shapes, pictures, etc.).
-
Under Ink Tools, on the Pens tab, click Lasso Select.
-
With your pen or finger, drag to draw a circle around the part of the drawing or word that you want to select. A faded, dashed selection region appears around it, and when you’re done, the portion you lassoed will be selected.
Delete parts of an ink drawing or parts of written words (PowerPoint only)
-
Under Ink Tools, on the Pens tab, click the arrow below Eraser, and then pick an eraser size.
-
With your pen or finger, select parts of the ink drawing or text that you want to erase.
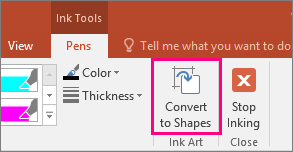
Convert ink drawings to shapes (PowerPoint only)
You can convert ink drawings on a touch screen into common shapes.
-
Under Ink Tools > Pens, select Convert to Shapes.
-
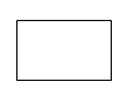
With a pen or your finger, draw a shape on the slide, and PowerPoint automatically converts your drawing to the shape that looks most like it.
To stop converting shapes, click Convert to Shapes again.
Which shapes can PowerPoint convert?
When you create an ink drawing, PowerPoint can convert it to the shape that is most like it.
|
Ink drawing |
Corresponding shape |
|---|---|
|
Rectangle
|
Rectangle
|
|
Square
|
Rectangle with all sides equal
|
|
Diamond
|
Diamond
|
|
Parallelogram
|
Parallelogram
|
|
Trapezoid
|
Trapezoid
|
|
Irregular quadrilateral
|
Closed freeform shape with four sides
|
|
Regular pentagon
|
Pentagon with all sides equal
|
|
Regular hexagon
|
Hexagon with all sides equal
|
|
Ellipse
|
Ellipse
|
|
Circle
|
Ellipse with shape height and width equal
|
|
Single-headed arrow
|
Arrow
|
|
Double-headed arrow
|
Double arrow
|
|
Arrows connecting two shapes
|
Arrow connectors
|
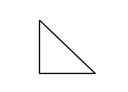
|
Right triangle
|
Triangle with right angle
|
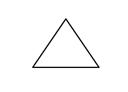
|
Equilateral triangle
|
Triangle with all sides equal
|
|
Isosceles triangle
|
Triangle with two equal sides
|
|
Irregular triangle
|
Closed freeform with three sides. |


For more information about using Office with Windows touch devices, see the following:
-
Office Touch Guide
-
Read documents in Word
Write, draw, or highlight text
 On the Mac, these features are only available in Microsoft 365 and Office 2019 for Mac.
-
On the Draw tab of the Ribbon, tap a pen to select it.
-
Tap again to open the menu of Thickness and Color options for the pen. Select your preferred size and color.
-
There are five pen thickness settings ranging from .25 mm to 3.5 mm. Select a thickness to make your pen thicker or thinner.
-
Sixteen solid colors are available on the menu, with more available when you tap More Colors.
-
Eight effects are also available: Rainbow, Galaxy, Lava, Ocean, Rose Gold, Gold, Silver, and Bronze.
-
-
A Pencil texture is also available:
When you draw with the Pencil texture while using a supported digital stylus, you can tilt the stylus to get a «shading» effect, just like you would get with a real pencil.
-
Once you have drawn an ink shape, it behaves like any shape that you are used to working with in Office. You can select the shape, then you can move or copy it, change its color, pivot its position, and so on.
-
To stop inking and select your annotations, press the Esc key.
Touch drawing with a trackpad
Rather than drawing ink with your mouse, you can draw on a trackpad with your finger. See Use your trackpad for «touch» drawing for more information.
Erase ink
-
Under Draw > Tools, tap the Eraser.
(In PowerPoint for Microsoft 365 for Mac, you can choose from different sizes of erasers. Word has three eraser options (version 16.28 or newer). Tap the down arrow on the Eraser button to pick the eraser that you want.)
-
With your mouse, pen, or finger, drag the eraser over the ink you want to remove.
Additional procedures
Select a heading below to open it and see the detailed instructions.
PowerPoint and Excel also have an ink selection tool, Lasso Select, specifically for selecting objects drawn with ink. It’s most useful when you have a mixture of standard and ink objects and you only want to select an ink object.
Applies only to PowerPoint and Excel:
To select part of a drawing or words written in ink, use the Lasso Select tool. (This tool can’t select non-ink objects—that is, shapes, pictures, etc.)
-
Under Draw > Tools on the Ribbon, tap Lasso Select
. -
With your mouse, pen, or finger, drag to draw a circle around the part of the drawing or word that you want to select. A faded, dashed selection region appears around it, and when you’re done, the portion you lassoed is selected. Then you can manipulate that object as you wish: move it, change its color, and so on.
-
On the PowerPoint, Word, or Excel menu, select Preferences > Authoring and Proofing Tools > General.
-
In the Pen section, clear the box next to Use pen to select and interact with content by default.
This setting only applies to the current app. So, for example, you can have automatic inking turned on in Excel and turned off in Word.
Basic inking tools
Word for iOS, Excel for iOS, and PowerPoint for iOS all come with basic inking options on the Draw tab: a selection tool, a draw-with-touch tool, a stroke eraser, pens, multiple ink colors, and ink thickness options:

 If you’re working in OneNote on your iPad, see Handwrite, draw, and sketch.
Draw or write
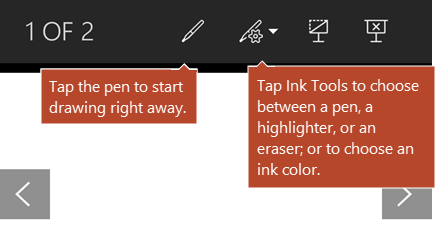
By default, Draw with Mouse or Touch (or «Inking mode») is turned on when you are using a mobile device. Just tap the Draw tab, select a pen  , and you can begin drawing ink on a slide.
To change the settings on a pen:
-
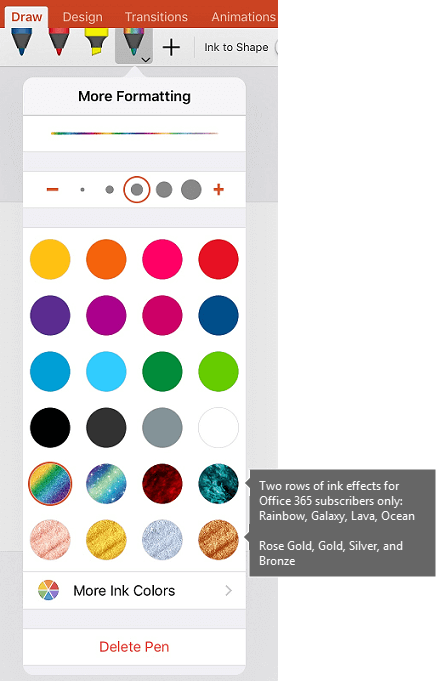
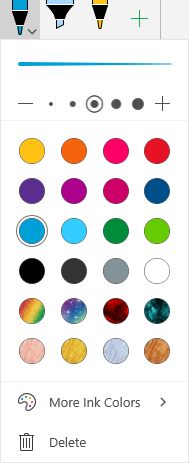
Tap again to open the menu of thickness and color options for the pen. Select your preferred size and color:
-
There are five pen thickness settings ranging from .25 mm to 3.5 mm. Select a thickness or use the plus or minus sign to make your pen thicker or thinner.
-
Sixteen solid colors are available on the menu, with more available when you tap More Ink Colors.
-
(For Microsoft 365 subscribers only) Eight effects are also available: Rainbow, Galaxy, Lava, Ocean, Rose Gold, Gold, Silver, and Bronze.
A Pencil texture is now available:
The Apple Pencil is sensitive to pressure, which allows you to vary line thickness. It’s also sensitive to tilt, which allows you to create shading, as you can with a tilted lead pencil.
-
-
On the touch screen, begin writing or drawing.
Once you have drawn an ink shape, it behaves like any shape that you are used to working with in Office. You can select the shape, then you can move or copy it, change its color, pivot its position, and so on.
-
To stop inking and select your annotations, either to modify or move them, turn off Draw with Touch on the Draw tab. Turning off this feature also keeps you from making accidental ink marks when your hand touches the screen.

Watch a video overview of the inking features in iPhone and iPad:

2:47
Select
On an iOS device, Inking mode is turned on when you have selected a pen or highlighter on the Draw tab. Otherwise, you are in Select mode, and you can tap to select an object.
(If you’re using an Apple Pencil on an iPad Pro device, you can make Select mode the default by going to app settings.)
PowerPoint and Excel have an ink selection tool, Lasso Select,  specifically for selecting objects drawn with ink. It’s most useful when you have a mixture of standard and ink objects on a slide and you only want to select an ink object.
To select part of a drawing or words written in ink in PowerPoint or Excel, use the Lasso Select tool:
-
On the Draw tab on the Ribbon, tap Lasso Select
. -
With your pen or finger, drag to encircle the ink that you want to select.
A faded, dashed selection region appears as you drag, and when you’re done, the portion you’ve lassoed is selected. Then you can manipulate that object as you wish: move it, copy it, delete it, and so on.
Erase
-
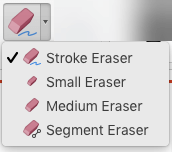
On the Draw tab, tap the Eraser.
Word has three erasers to choose from—a stroke eraser, a small eraser, or a medium eraser. Tap the down arrow on the Eraser button to pick the eraser that you want.
PowerPoint has those three erasers plus one more: With the Segment Eraser, you can simply tap a segment of ink or drag across it to remove it (rather than having to thoroughly wipe away the entire segment). Dragging across segments is an easy way to erase several at once.
-
Drag the eraser over the ink you want to remove.
Switch tools with the new Apple Pencil
Office for iOS supports the 2nd-generation Apple Pencil and its double-tap gesture. By default, the double-tap gesture switches from the current tool to the eraser, but the System settings on your device allow you to choose a different behavior for this gesture. This feature is available to Microsoft 365 subscribers in Word, Excel, and PowerPoint on iPad version 2.22.19020201 and later.
Turn off automatic inking
-
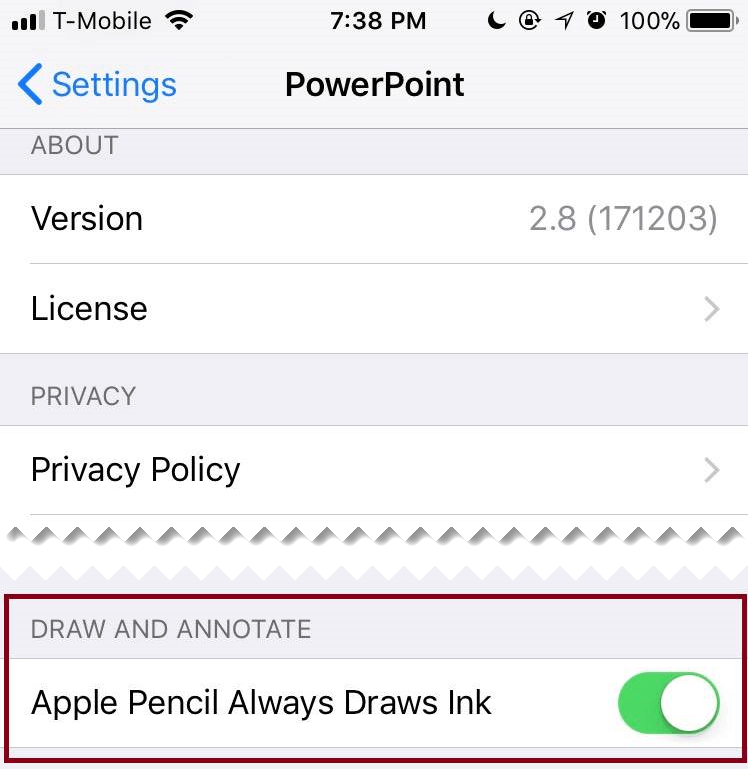
Open the Settings app from the home screen of your iOS device.
-
Scroll through the list of apps at the bottom of the Settings page to find your Microsoft 365 app, and tap to open its Settings.
-
In the app settings on the right side, at the bottom under Draw and Annotate, toggle Apple Pencil Always Draws Ink.
For more information, see Turn off automatic inking on iOS.
Convert ink drawings to standard shapes in PowerPoint
In PowerPoint, you can convert ink drawings on a touch screen into common shapes:
-
Ensure that Draw with Mouse or Touch
is turned on. -
Tap Ink to Shapes
-
With a pen or your finger, draw a shape on the slide. When you finish drawing, PowerPoint automatically converts your drawing to the shape that looks most like it.
To stop converting shapes, tap Ink to Shapes again.
 is turned on.
Basic inking tools
Word for Android, Excel for Android, and PowerPoint for Android all come with basic inking options on the Draw tab: a selection tool, a draw-with-touch tool, a stroke eraser, pens, ink colors and a color wheel, and ink thickness options:

Draw or write
By default, Draw with Mouse or Touch (or «Inking mode») is turned on when you are using a mobile device. Just tap the Draw tab, select a pen  , and you can begin drawing ink on a slide.
Select
On an Android device, Inking mode is turned on when you have selected a pen or highlighter on the Draw tab. Otherwise, you are in Select mode, and you can tap to select an object.
PowerPoint and Excel have an ink selection tool, Lasso Select, specifically for selecting ink drawings. It’s most useful when you have a mixture of standard and ink objects and you only want to select an ink object.
To select part of a drawing or words written in ink in PowerPoint or Excel, use the Lasso Select tool.
-
On the Draw tab on the Ribbon, tap Lasso Select
. -
With your pen or finger, drag to encircle the ink that you want to select.
A faded, dashed selection region appears as you drag, and when you’re done, the portion you’ve lassoed is selected. Then you can manipulate that object as you wish: move it, copy it, delete it, and so on.
Erase
-
On the Draw tab, tap the Eraser.
(In PowerPoint, you can choose from three erasers—a stroke eraser, or a small or medium eraser. Tap the down arrow on the Eraser button to pick the eraser that you want.)
-
Drag the eraser over the ink you want to remove.
Some active pens, such as the Surface pen, have an eraser that you can also use to erase digital ink without having to select an eraser from the Ribbon.
Convert ink drawings to standard shapes in PowerPoint
In PowerPoint, you can convert ink drawings on a touch screen into common shapes:
-
Ensure that Draw with Mouse or Touch
is turned on. -
Tap Ink to Shapes
-
With a pen or your finger, draw a shape on the slide. When you finish drawing, PowerPoint automatically converts your drawing to the shape that looks most like it.
To stop converting shapes, tap Ink to Shapes again.
Annotate with ink while showing a presentation
In PowerPoint, you can add ink markings to a slide while you are presenting:
Basic inking tools
Word Mobile, Excel Mobile, and PowerPoint Mobile all come with basic inking options on the Draw tab: a selection tool, a draw-with-touch tool, a stroke eraser, pens, multiple ink colors, and ink thickness options:

If you’re working in OneNote for Windows 10, see Write notes and draw in OneNote for Windows 10.
Draw or write
By default, Draw with Touch (or «Inking mode») is turned on when you are using a mobile device. Just tap the Draw tab, select a pen  , and you can begin drawing ink on a slide.
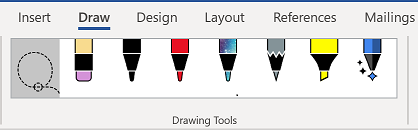
The Draw tab in Word Mobile, Excel Mobile, and PowerPoint Mobile for Windows 10 is similar to the desktop versions of each app. Before you can use the drawing features, be sure to update to the latest version of Windows 10. To do this, select the Windows button in the lower-left corner of your screen, and select Settings > Update & security > Windows Update. Click Check for updates to get the latest updates.
To change the settings on a pen:
-
Tap again to open the menu of thickness and color options for the pen. Select your preferred size and color:
-
There are five pen thickness settings ranging from .25 mm to 3.5 mm. Select a thickness or use the plus or minus sign to make your pen thicker or thinner.
-
Sixteen solid colors are available on the menu, with more available when you tap More Ink Colors.
-
Eight effects are also available: Rainbow, Galaxy, Lava, Ocean, Rose Gold, Gold, Silver, and Bronze.
-
-
On the touch screen, begin writing or drawing.
Once you have drawn an ink shape, it behaves like any shape that you are used to working with in Office. You can select the shape, then you can move or copy it, change its color, pivot its position, and so on.
-
To stop inking and select your annotations, either to modify or move them, turn off Draw with Touch on the Draw tab. Turning off this feature also keeps you from making accidental ink marks when your hand touches the screen.
Select
Inking mode is turned on when you have selected a pen or highlighter on the Draw tab. Otherwise, you are in Select mode, and you can tap to select an object.
PowerPoint Mobile and Excel Mobile also have an ink selection tool, Lasso Select, , specifically for selecting objects drawn with ink. It’s most useful when you have a mixture of standard and ink objects and you only want to select an ink object.
To select part of a drawing or words written in ink in PowerPoint or Excel:
-
On the Draw tab on the Ribbon, tap Lasso Select
. -
With your pen or finger, drag to encircle the ink that you want to select.
A faded, dashed selection region appears as you drag, and when you’re done, the portion you’ve lassoed is selected. Then you can manipulate that object as you wish: move it, copy it, delete it, and so on.
Erase
-
On the Draw tab, tap the Eraser.
(In PowerPoint, you can choose from three erasers—a stroke eraser, or a small or medium eraser. Tap the down arrow on the Eraser button to pick the eraser that you want.)
-
Drag the eraser over the ink you want to remove.
Convert ink drawings to standard shapes in PowerPoint
In PowerPoint, you can convert ink drawings on a touch screen into common shapes:
-
Ensure that Draw with Mouse or Touch
is turned on. -
Tap Ink to Shapes
-
With a pen or your finger, draw a shape on the slide. When you finish drawing, PowerPoint automatically converts your drawing to the shape that looks most like it.
To stop converting shapes, tap Ink to Shapes again.
Open the Draw tab on Windows 10 Mobile phones
Here’s how to see the Draw tab in Word, Excel, and PowerPoint on Windows 10 Mobile phones.
-
Select the More button
in the lower-right corner of the screen. -
Pick the Draw tab.
 in the lower-right corner of the screen.
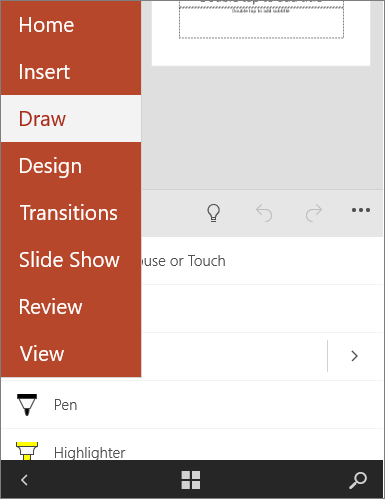
Write, draw, or highlight text in PowerPoint
-
On the Draw tab of the ribbon tap a pen to select it.
-
If you want to customize the pen tap the drop arrow next to the pen on the ribbon and select the thickness, and color, you want.
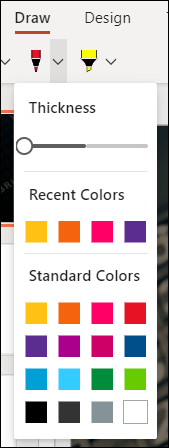
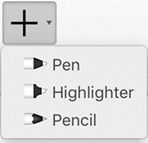
The Draw menu lets you have two separate pens available, plus a highlighter.
Stop inking
After you’ve drawn what you want, you can stop inking and return to selection mode by pressing the Esc key.
Erase ink
Select the eraser from the pens gallery on the Draw tab, then swipe your cursor across the ink you want to erase. This is a stroke eraser, which means it will erase entire ink strokes at a time.
See Also
Languages supported for ink-to-text conversion
Turn off automatic inking on Windows or iOS
Drawing in Excel means making a shape in Excel. Now, Excel has provided us with many tools for drawing. Some of them are the predefined drawings or predefined shapes, and also, there is an option for a free form of drawing where the user can design a drawing by using a mouse. It is available in the “Shapes” in Excel’s “Insert” tab.
Table of contents
- How to Use Drawing Tool in Excel?
- Benefits
- Tip and Tricks for Inserting Excel Drawing Tools
- Recommended Articles
- We must first go to the “Insert” tab in the Excel toolbar.

- Then, choose a drawing object which we want.
If we want to insert a shape, we must click on “Shapes.”

Draw an object which we want to draw in Excel

Next, we must click on the format to customize our drawing, e.g., color, borderline, object size, effects, etc.

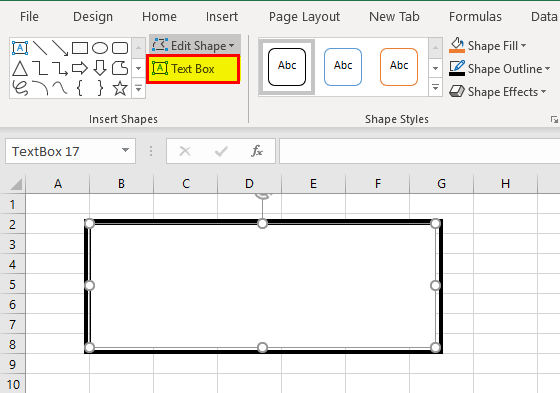
- Suppose we want to add a text box to any object.
If you want to add some text to any of the drawings, we must go to “Insert” and select the “Text Box”:

Click the “Text Box,” draw the text box horizontal or vertical, and write in that box. Finally, click the “Enter” key.

If we want to change the color of the text or customize the text box, we need to go to “Format” and click on “Shape Styles.”

- As shown below, this one is the final rectangular box with customization in color.


Benefits
- We can make your data more attractive using the drawing tool in Excel.
- It is easy to insert the shapes and charts in Excel.
- It is very easy to customize the object as per the requirement.
- We can insert multiple objects as much as required, with no limit.
- We can easily rotate and flip the shapes using the rotate command in the “Arrange” group under the “Format” tab.
- It is easy to add text to a shape.
- If we want to prepare any chart, it helps us connect the shapes with the help of lines.
Tip and Tricks for Inserting Excel Drawing Tools
- We can easily add text to all the shapes we create in an Excel sheet.
- We can utilize the vast number of drawing objects accessible on the “Insert” tab of the ribbon.
- Excel does not restrain us from just numbers and content in your worksheets. We can likewise include diverse kinds of shapes.
- Excel enables us to flip drawing objects either on a level plane or vertically.
- Drawing objects can be layered over one another practically any way we want if we need to change the request in which those drawing objects are layered.
- Need to fill a drawing object with various sorts of impacts? Excel offers a few effects to make our drawing objects “pop.”
Recommended Articles
This article has been a guide to the Drawing Tool in Excel. We discuss inserting drawing objects in Excel with practical examples, tips and tricks, and a downloadable Excel template. You may learn more about Excel from the following articles: –
- Text Box in VBA
- Border in Excel
- TIME Excel Function
- Using Name Range in Excel
- Status Bar in Excel
Reader Interactions