
Word for Microsoft 365 Word for Microsoft 365 for Mac Word 2021 Word 2021 for Mac Word 2019 Word 2019 for Mac Word 2016 Word 2016 for Mac Word 2013 Word 2010 Word Starter 2010 More…Less
Microsoft Word offers a gallery of convenient pre-designed cover pages to accent your resume. Choose a cover page and replace the sample text with your own.
-
On the Insert tab, in the Pages group, click Cover Page.

-
Click a cover page layout from the gallery of options.
After you insert a cover page, you can replace the sample text with your own text by clicking to select an area of the cover page, such as the title, and typing your text.
Notes:
-
If you insert another cover page in the document, the new cover page will replace the first cover page you inserted.
-
To replace a cover page created in an earlier version of Word, you must delete the first cover page manually, and then add a cover page with a design from the Word gallery.
-
To delete a cover page inserted with Word, click the Insert tab, click Cover pages in the Pages group, and then click Remove Current Cover Page.
Microsoft Word offers a gallery of convenient pre-designed cover pages to accent your resume. Choose a cover page and replace the sample text with your own.
Note: Cover pages don’t display page numbers.
Insert a cover page
-
On the Insert tab, click Cover Page.
-
Click a cover page layout from the gallery of options.
After you insert a cover page, you can replace the sample text with your own text by clicking to select an area of the cover page, such as the title, and typing your text.
Tips:
-
To see how your cover page will look, on the View menu, select Print Layout or Web Layout.
-
If you insert another cover page in the document, the new cover page will replace the first cover page you inserted.
-
To replace a cover page created in an earlier version of Word, you must delete the first cover page manually, and then add a new cover page with a design from the Word gallery.
Remove a cover page
-
Click the Insert tab, click Cover Page, and then click Remove Cover Page.
Top of Page
Need more help?
 This tutorial shows how to create a cover page in Microsoft Word. First, we’ll create a cover page using a built-in design. Then, we’ll create a custom cover page that can be reused. Next, we’ll delete a cover page. Plus, the bonus section at the end shows how to remove page number zero from a cover page.
Quick Links:
- How to Create a Built-In Cover Page
- How to Create a Custom Cover Page
- How to Delete a Cover Page
- How to Remove Page Number Zero from a Cover Page
This tutorial is also available as a YouTube video showing all the steps in real time.
Watch more than 150 other writing-related software tutorials on my YouTube channel.
The images below are from Word for Microsoft 365 on a PC. These steps will also work in Word 2021, Word 2019, Word 2016, Word 2013, and Word 2010. However, your interface may look slightly different in those older versions of the software.
You can quickly create a cover page using a built-in design.
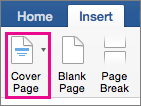
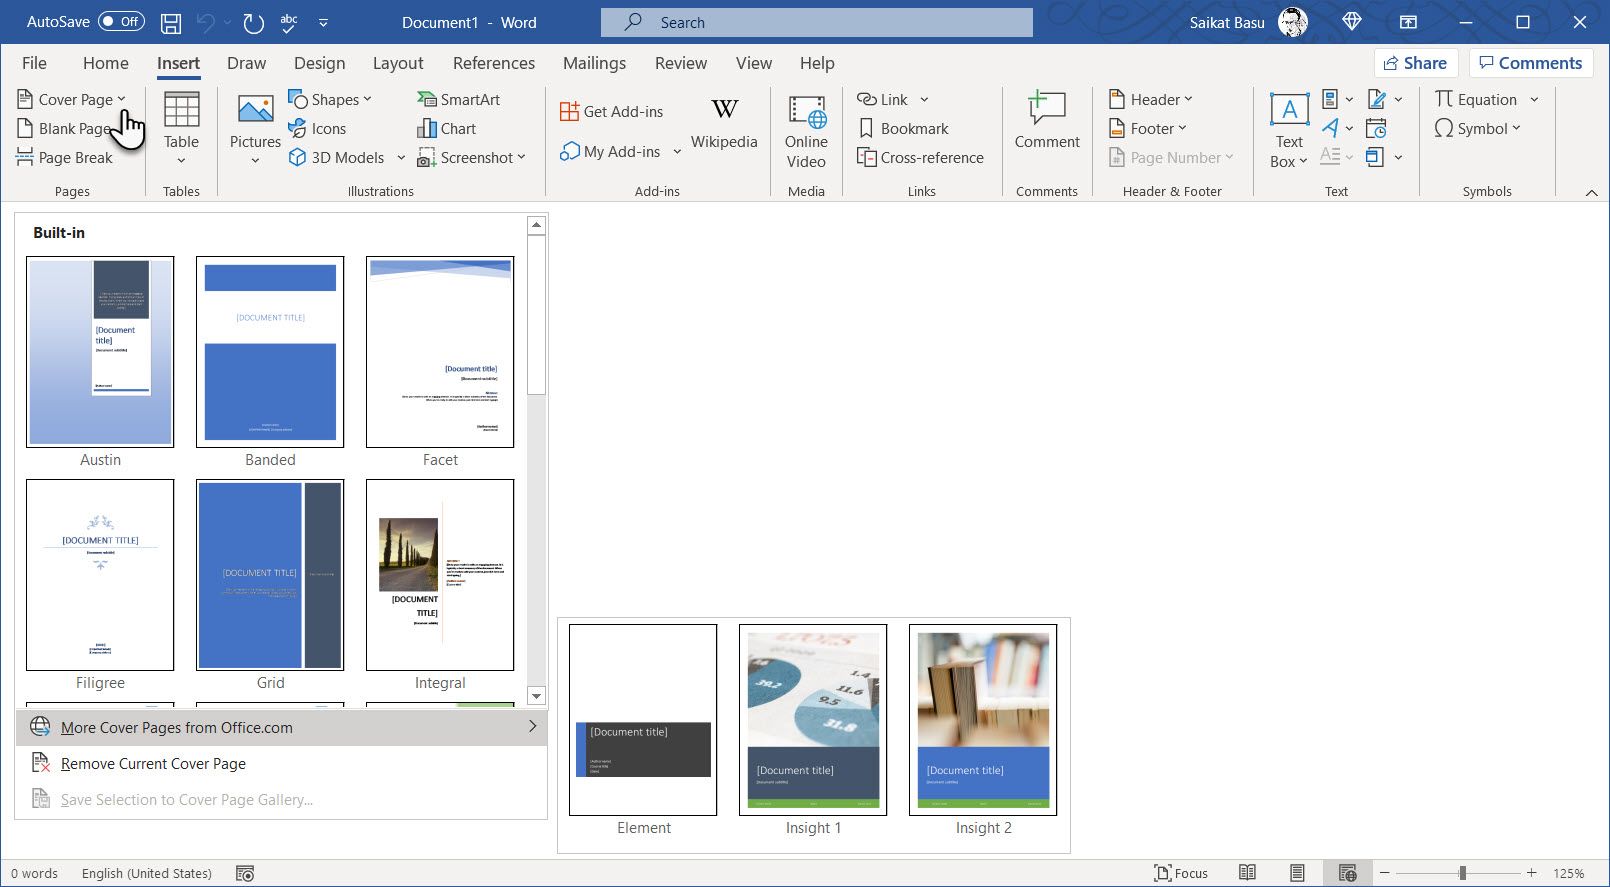
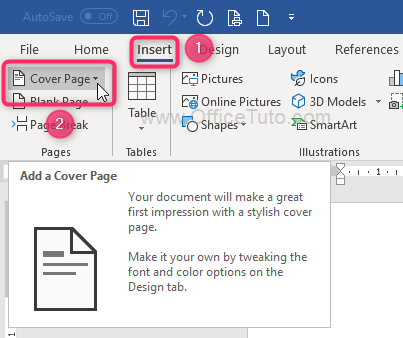
- Select the Insert tab in the ribbon.

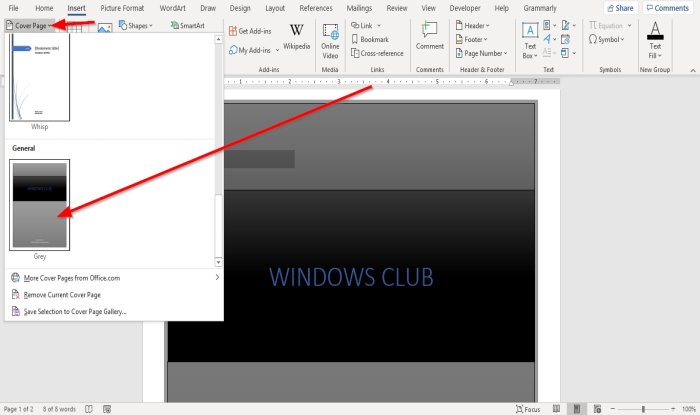
- Select Cover Page in the Pages group.

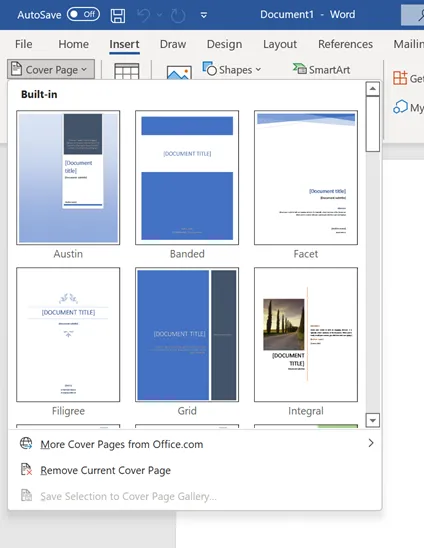
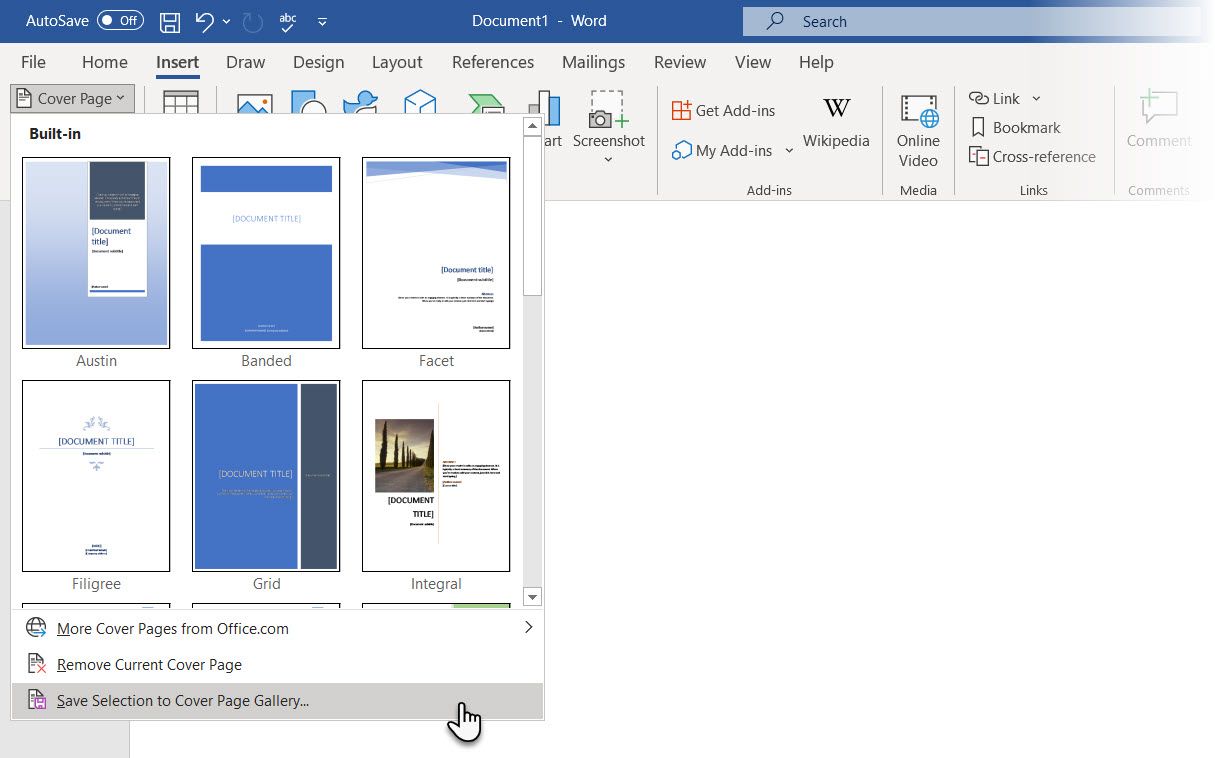
- Choose a built-in design from the gallery in the drop-down menu. (Hover over More Cover Pages from Office.com for additional options.)

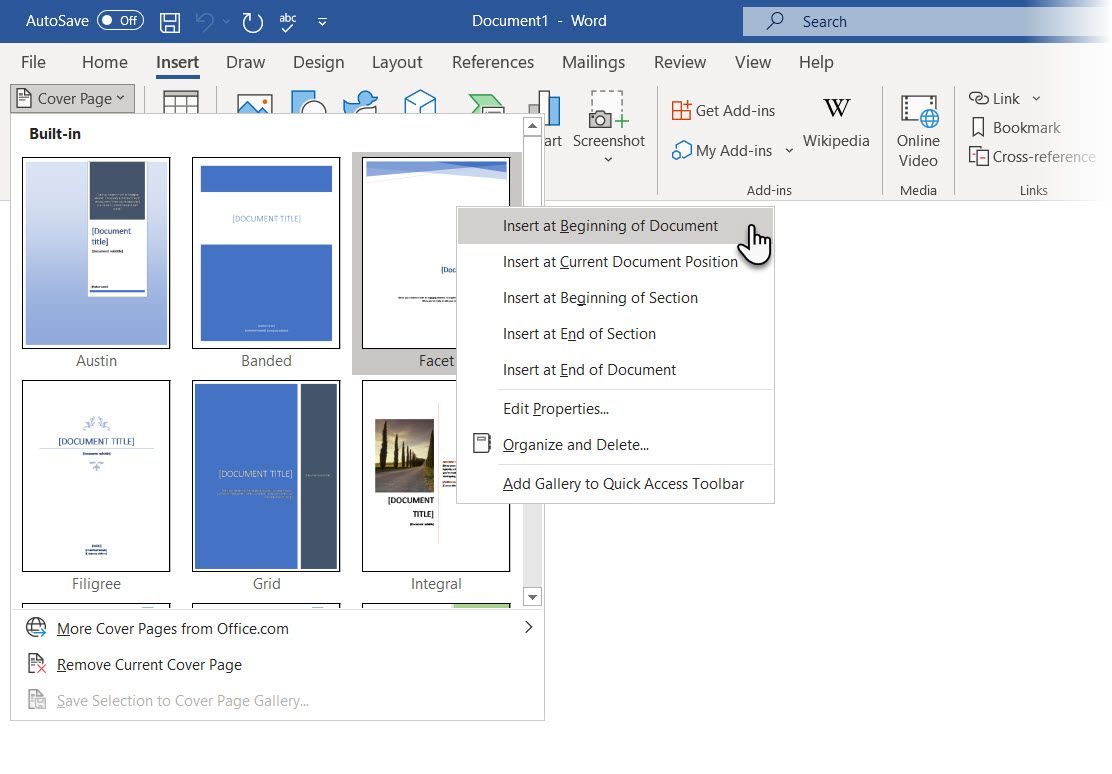
- (Optional) To insert your cover page somewhere other than the top of your document, right-click the built-in design, and then choose a location from the shortcut menu.

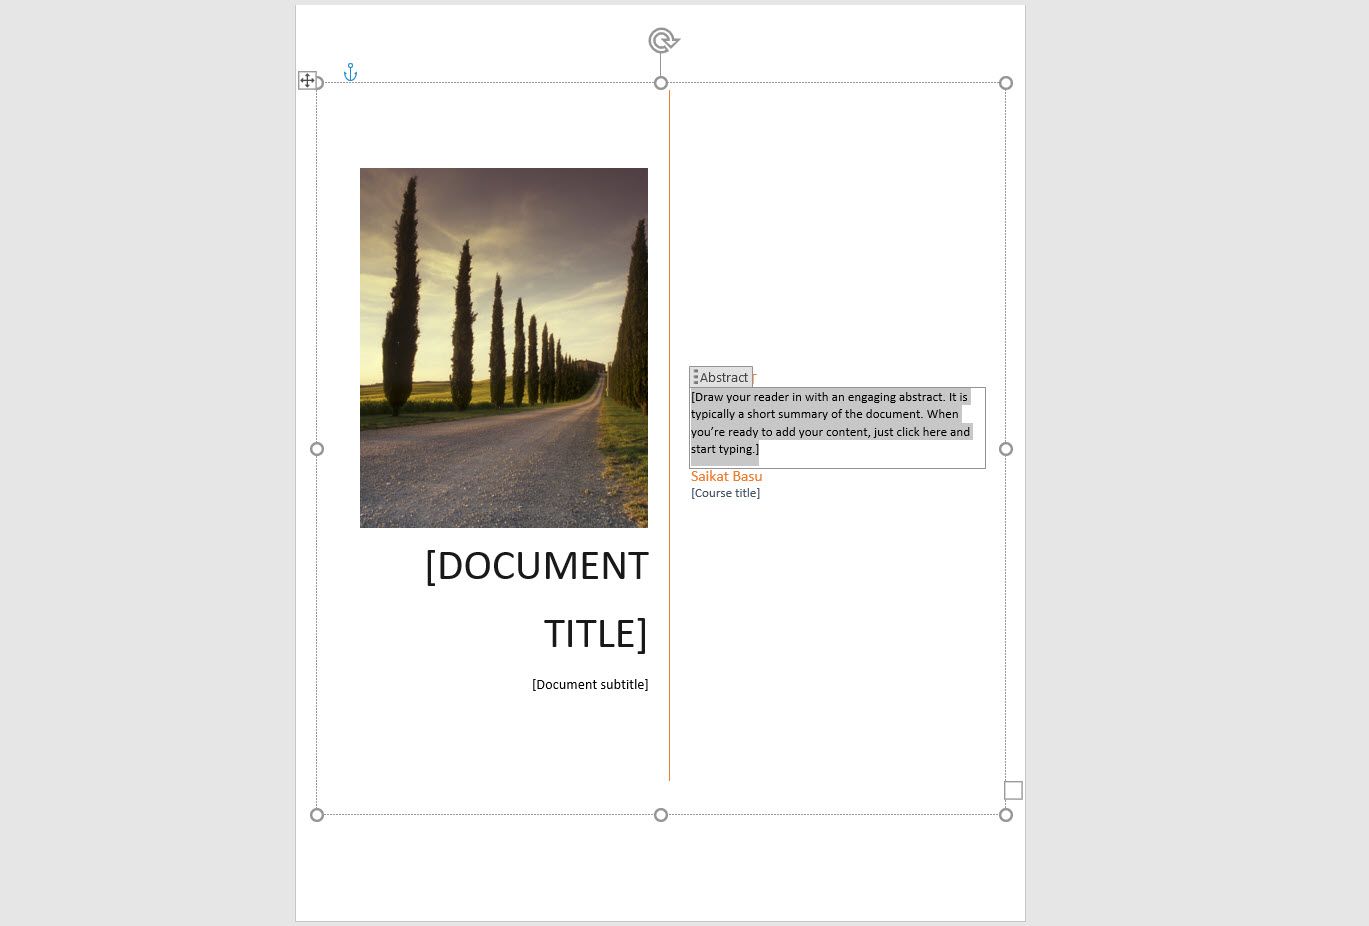
- Place your cursor in the sample text, and then type your information.

Pro Tip: To delete a section of sample text, right-click it, and then select Remove Content Control from the shortcut menu.

The built-in cover page should now be part of your Word document.
How to Create a Custom Cover Page
You can create a custom cover page that can be reused in other Word documents.
- Open a blank document. (Pro Tip: Press Ctrl + N to open a blank document.)
- Create your cover page, including images if necessary.
- Select all the text and images that should be included in the cover page.

- Select the Insert tab in the ribbon (see figure 1).
- Select Cover Page in the Pages group (see figure 2).
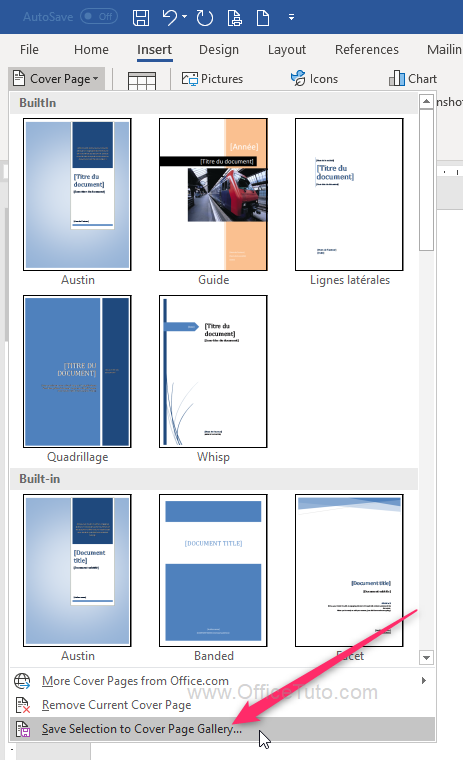
- Select Save Selection to Cover Page Gallery from the drop-down menu.

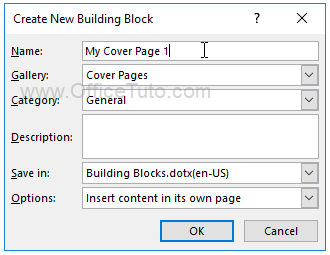
- Type a unique name into the Name text box in the Create New Building Block dialog box. (Cover pages are part of Word’s building block system of reusable content.)

- (Optional) Add additional information into the Description text box, if necessary.
Important Note: I strongly recommend leaving the default settings for the other options in this dialog box.
- Select the OK button.

Your custom cover page should now be added to the Cover Page Gallery.
- Close the document used to create your custom cover page. (You don’t have to save this document.)
- Select Save in the alert box asking if you want to save changes to Building Blocks.dotx.

- Open the document to which you want to add the custom cover page.
- Select the Insert tab (see figure 1).
- Select Cover Page in the Pages group (see figure 2).
- Select your custom cover page from the gallery.

Your custom cover page should now be added to your current document.
Pro Tip: How to Delete a Custom Cover Page from the Cover Page Gallery
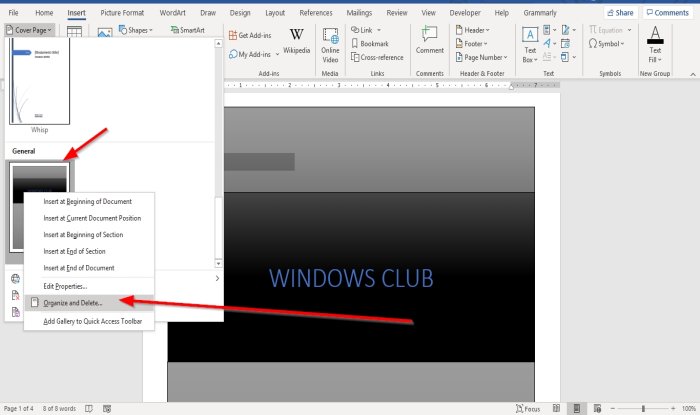
- Right-click the custom cover page in the Cover Page drop-down menu, and then select Organize and Delete from the shortcut menu.

Caution: Your custom cover page will be automatically selected when the Building Blocks Organizer dialog box opens. Take care not to select another item.
- Select the Delete button in the Building Blocks Organizer dialog box.

- Select the Yes button in the question dialog box asking if you are sure you want to delete the selected building block.

- Select the Close button in the Building Blocks Organizer dialog box.

Your custom cover page should now be removed from the Cover Page Gallery.
How to Delete a Cover Page in Microsoft Word
The following steps show how to remove a cover page from an individual document.
- Select the Insert tab (see figure 1).
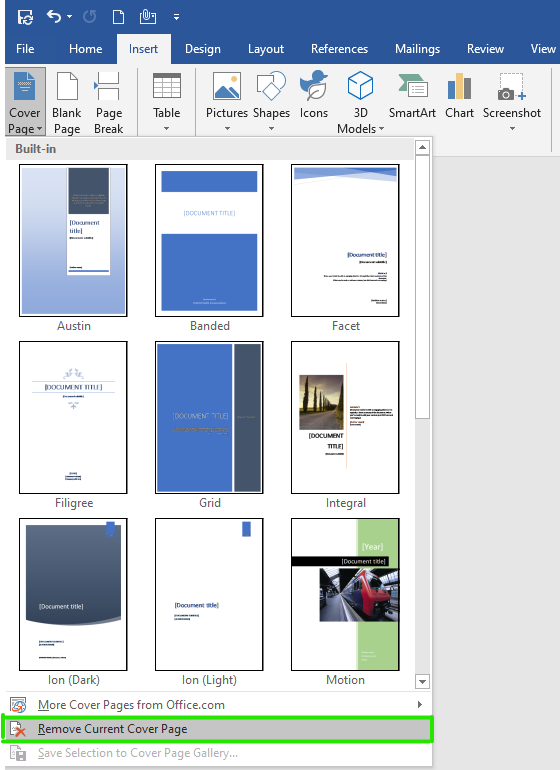
- Select Cover Page in the Pages group (see figure 2).
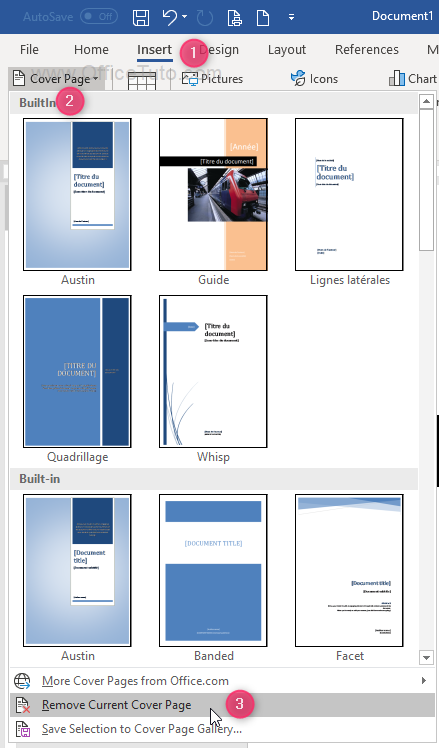
- Select Remove Current Cover Page from the drop-down menu.

Your cover page should be removed from your document.
How to Remove Page Number Zero from a Cover Page
If your document has page numbers, the page number zero may show up unnecessarily on the cover page. The following steps show how to remove page number zero.
- Double-click the top of any page to open the Header & Footer tab.

- Select Different First Page in the Options group.

- Select the Close Header and Footer button.

The page number zero should now be removed from your cover page.
Related Resources
How to Insert Citations in Microsoft Word
How to Create a Citation with Multiple Sources in Microsoft Word
How to Insert Footnotes and Endnotes in Microsoft Word
Updated March 13, 2022
Insert a cover page
- On the Insert tab, click Cover Page.
- Click a cover page layout from the gallery of options. After you insert a cover page, you can replace the sample text with your own text by clicking to select an area of the cover page, such as the title, and typing your text.
Contents
- 1 How do you create a cover page?
- 2 How do I copy and paste a cover page in Word?
- 3 How can you insert a cover page in Word 2010?
- 4 How do I create a cover letter in Word?
- 5 How do you insert a Cover Page in Pages?
- 6 How do you put a Cover Page in the middle of a Word document?
- 7 How do you create a Cover Page in Word 2016?
- 8 How do I insert a blank cover page in Word without page numbers?
- 9 What is a cover page in MS Word?
- 10 How do you format a cover letter?
- 11 How do you start a cover letter example?
- 12 How do you make a line for a cover letter in Word?
- 13 How do you insert a footer in pages?
- 14 How do you insert a Cover Page in Word 2007?
- 15 How do I insert a blank cover page in Word without header and footer?
- 16 How do you create a Cover Page in Word?
- 17 How do I insert a blank page after the cover page?
- 18 How do you add a cover page without page numbers?
- 19 How do I insert page numbers excluding cover page and table of contents?
How do you create a cover page?
Customize an essay cover page with EDIT.org
- Go to formats on the home page and choose Cover pages.
- Choose the template that best suits the project.
- You can add your images or change the template background color.
- Add your report information and change the font type and colors if needed.
- Save and download it.
How do I copy and paste a cover page in Word?
If your Word document has multiple pages, the best way to copy a single page is to manually select and copy the text you want.
- Place your cursor at the beginning of the page you want to copy.
- Click and drag the cursor to the bottom of the page you want to copy.
- Press Ctrl + C on your keyboard.
How can you insert a cover page in Word 2010?
Add Cover Pages
- Step 1 − Click the Insert tab, and click the Cover Page button available in the Pages group.
- Step 2 − Choose a cover page from the options available in the gallery.
- Step 1 − Click the Insert tab, and click the Cover Page button available in the Pages group.
How do I create a cover letter in Word?
How to create a Word cover letter template on your computer
- Open Microsoft Word. Turn on your computer and open the Microsoft Word application.
- Search and select a template.
- Customize your template.
- Visit the Microsoft cover letter templates website.
- Browse the cover letter templates.
- Customize your template.
How do you insert a Cover Page in Pages?
Click the Insert tab. Click the Cover Page button to open a drop-down gallery of cover page templates. Click a cover page template to insert it into your document. Customize the cover page with your text.
How do you put a Cover Page in the middle of a Word document?
Open up any document in Word and click on the Insert tab on the Ribbon. On the Pages section of the Ribbon on the far left, click on the button labeled Cover Page.
How do you create a Cover Page in Word 2016?
How to Add a Cover Page in Word 2016
- Click the Insert tab.
- In the Pages group, click the Cover Page button. If you don’t see the Pages group or Cover Page button, click the Pages button and then click the Cover Page icon.
- Choose a cover-page layout that titillates you.
How do I insert a blank cover page in Word without page numbers?
On the Page Setup dialog box, click the Layout tab and select the Different first page check box in the Headers and footers section so there is a check mark in the box. Click OK. You’ll notice there is no page number on the first page of your document now.
What is a cover page in MS Word?
A Word cover page introduces the document with a title, an image or both, providing relevant information about the document.Word also sets the cover apart by excluding the header and footer from it, and by not including it in the page numbering scheme.
How do you format a cover letter?
Cover Letter Format Example
- Your Contact Information. Name.
- Date.
- Employer Contact Information (if you have it) Name.
- Salutation. Dear Mr./Ms.
- Body of Cover Letter.
- Complimentary Close.
- Signature.
How do you start a cover letter example?
Here’s a simple-but-powerful cover letter template to use as an example: Dear [First Name]: I was excited to come across the [Job Title] position over at [Company Name]. As a [Current Job Title] with [# of Years] years of experience, I have become quite talented in [Relevant Skills & Job-Related Abilities].
How do you make a line for a cover letter in Word?
To add a line under a header or line of text, highlight the text and select the bottom border option under Paragraph/Borders. Another way is to Insert>Shapes>choose the Line shape and drag the line under the text from left to right.
Add and remove headers and footers in Pages on Mac
- Click in a page where you want to add headers and footers.
- Move the pointer over the top or bottom of the page until you see the three header or footer fields, then click one (you can use any combination of fields to complete your header or footer).
How do you insert a Cover Page in Word 2007?
From the Ribbon, under the tab Insert, within the group Pages, click the icon Cover Page. Word displays a built in gallery of cover pages. Click a design to insert into your document. After inserting a cover page, you can view a few sample text fields such as document title, document subtitle, author name, date, etc.
How do I insert a blank cover page in Word without header and footer?
Click or tap where you want to start a new page without the header or footer. Go to Layout > Breaks > Next Page to create a section break. Double-click the header or footer area (near the top or bottom of the page) to open the Header & Footer tab. Select Link to Previous to turn off the link between the sections.
How do you create a Cover Page in Word?
1] How to insert a custom Cover Page into a Word document
Click the Insert tab. On the Insert tab in the Pages group, click Cover Page. A drop-down list will appear displaying built-in style templates of cover pages; select the style you want. A cover page will appear in the document; make your changes to it.
How do I insert a blank page after the cover page?
If you have already started writing your document, the easiest way to do this is to press Ctrl + Home to get to the top of the first page, then press Ctrl + Enter to insert a page break. A new, blank page will appear at the start of your document, ready for you to add content.
How do you add a cover page without page numbers?
Go to Insert > Header & Footer. SelectOptions on the right side, and then select Different First Page. Select Options again, and then select Remove Page Numbers.
How do I insert page numbers excluding cover page and table of contents?
Was this helpful?
- Place your cursor on the first line of page you want to be page 1.
- Click Layout in the Word ribbon.
- Click Breaks.
- Click Next Page.
- Double click on the header area of page 1.
- Click Link to Previous in the Design ribbon.
- Click the drop-down arrow by Page Number.
- Click Format Page Numbers.
Download PC Repair Tool to quickly find & fix Windows errors automatically
Cover pages are a terrific way to make your document have a great impression and a stylish look. In Microsoft Word, some features can assist you in designing a cover page. The cover page feature offers various built-in style templates that make it easier for customization. You can add text, font, font color, font size, and color to the built-in style cover page template.
Create Custom Cover Pages in Word
In this tutorial, we will explain:
- How to insert a Cover Page into a Word document.
- How to Create Custom Cover Pages in Word.
- How to remove a Cover Page from a Word Document.
- How to remove Custom Cover Page.
A cover page is a feature in word that designs cover pages for your document.
1] How to insert a custom Cover Page into a Word document

- Open Microsoft Word.
- Click the Insert tab.
- On the Insert tab in the Pages group, click Cover Page.
- A drop-down list will appear displaying built-in style templates of cover pages; select the style you want.
- A cover page will appear in the document; make your changes to it.
- You can also get more cover pages by clicking More Cover Pages from Office.com.
2] How to Create Custom Cover Pages in Word
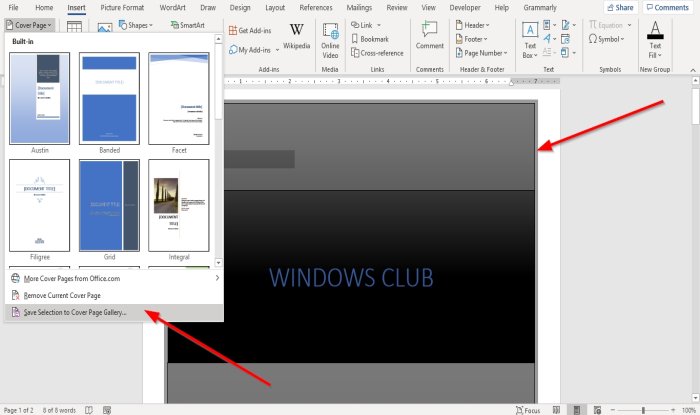
After designing the built-in style cover page template, press Ctrl-A on the keyboard to select the cover page.
Click the Insert tab and click Cover Page in the Pages group.
In the drop-down list, click Save Selection to Cover Page Gallery.
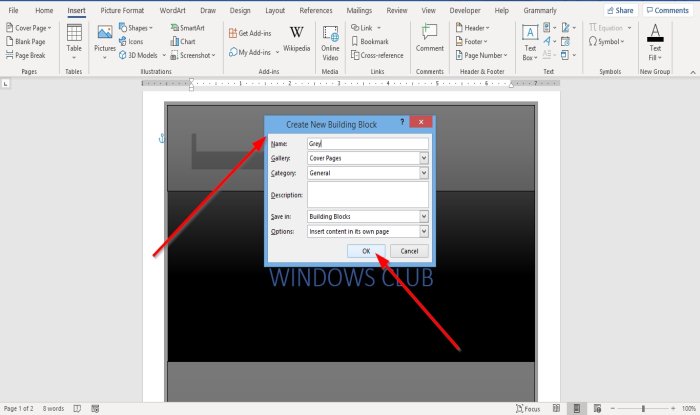
A Create New Building Block dialog box will pop up.
Inside the dialog box, name the custom cover page and select a category from the list, and there is an option in the list that allows you to create a new category.
Then click Ok.
To search for the custom cover page, click the Insert tab, then click Cover Page in the Pages group, scroll down until you see your custom cover page in the list.
3] How to remove a Cover Page from a Word Document
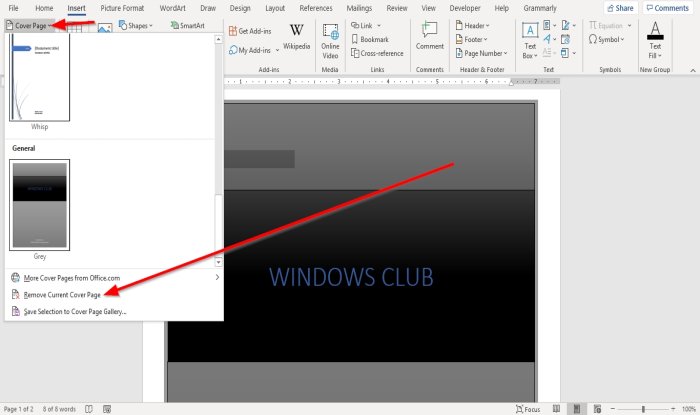
On the Insert tab, click Cover Pages in the Pages group.
In the drop-down list, click Remove Current Cover Page.
The Cover Page is Removed.
4] How to remove Custom Cover Page
On the Insert tab, click Cover Pages in the Pages group.
In the drop-down list, scroll down until you see the custom cover page you created.
Right-click the custom cover page and select Organize and Delete.

A Building Block Organizer dialog box will appear.
In the dialog box, locate the custom cover page and click Delete below.
The custom cover page is deleted.
Now read: How to remove the Underline from a Hyperlink in Word.

Shantel has studied Data Operations, Records Management, and Computer Information Systems. She is quite proficient in using Office software. Her goal is to become a Database Administrator or a System Administrator.
We all use Microsoft Word for creating personal and office documents. However, only few of us know and use simple features that can change the appeal of your document. Adding cover page is one such a useful feature you can use with Word for Windows and Mac. In this article, i will go through how to create cover page from pre-defined templates, creating your custom template and editing its content.
Informal documents do not need a cover page. Probably you may waste the time to add a cover page for sending an instructional document to your users. However, cover page makes sense in the following situations especially when you have lengthy document:
- Sending a project proposal document to your client.
- Preparing an official document for your manager.
- Creating an eBook which needs a beautiful cover page.
In addition, sometime a small document with few pages like resume can also have a neat cover page. Here, i will explain how to add cover page in Word with Microsoft 365 version. The procedure is same in previous Word versions like 2019, 2016, etc.
Adding Cover Page in Word for Windows
Though you can create a cover page by adding different elements, the easy way is to insert from one of the existing templates.
- Launch Word app and open the document you want to add a cover page.
- Go to “Insert” tab and click on “Cover Page” option. This is available under “Pages” group showing extreme left in the ribbon.

- You can see the long list of template cover pages.
- Click on the one you like to insert it in your document.
Word for Windows version also comes with few online cover page templates from Office.com. You can view these templates by clicking on “More Cover Pages from Office.com” option under “Cover Page” menu.
Adding Cover Page in Word for Mac
The procedure is same in Word for Mac.
- When you in the document, go to “Insert” menu from the ribbon. Remember, Mac will always have a top menu for all applications. You should not use the “Insert” menu from the top bar, instead select it from the ribbon.
- Click on the “Pages” option showing at extreme left end and select “Cover Page”.

- You will find a list of predefined cover page templates and click on the one you like to insert in your document.

Editing Cover Page in Word
Now that you know how to add a cover page, the next step is to edit the template content and use your own.
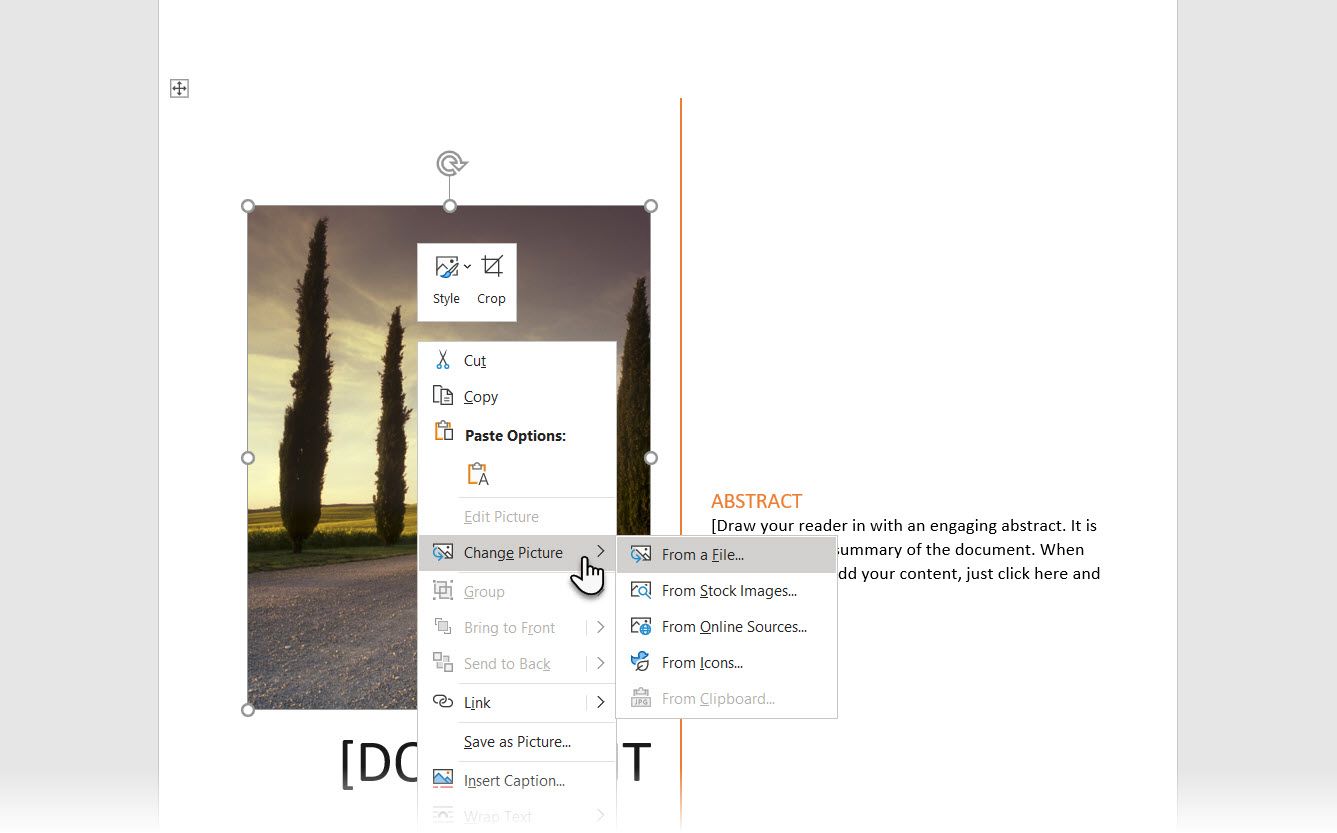
- If your cover page has a picture, right click on it. Select “Change Picture” option from the context menu and upload your own image. You can also use free stock images and icons from the free library available as part of Microsoft 365 subscription plan.
- The placeholder text content will show within square brackets. Click on it and update the content with your own text. You may also need to change heading, author name and company name details.
- If you do not want an item on the cover page, simply select the item, and press the delete button to get rid of it. Remember, for some items like author name you need to select the field label and delete it. Otherwise, deleting the content inside the field will show a blank box.

Saving Custom Templates
Cover page templates in Word contains multiple fields having rigid fixed position on the layout. You may not rearrange the fields easily and move them to different place. The problem comes when you have to reuse the same template on multiple documents. It will be tedious task to repeat the same customizations for each document. You can handle this problem in few ways.
- Select existing template and customize it as per your need. After that save this template by selecting “Save Selection to Cover Page Gallery…” option available under “Cover Page” menu. This menu item will show as frozen state when you are inserting a new cover page. however, it will change to active state when you click on the cover page and navigate the menu. It will open “Create New Building Block” dialog box where you can provide necessary details and save the template. Once saved, you can find it under the dropdown gallery of “Cover Page” menu so that you can insert in any of your document.

- Manually create a cover page and add it to the gallery by using Quick Parts. Check out our article on how to use Quick Parts to create reusable templates in Word.
Deleting or Replacing Cover Page
Word will always insert a cover page as a first page in your document regardless of current cursor position. If you want to delete the cover page, simply go to “Cover Page” menu item. Click on the “Remove Current Cover Page” option in Windows. You will the option is showing as “Remove Cover Page” in Word for Mac.
Similarly, you may messed up the content while editing your cover page. Do not worry, simply select same or another template from the gallery. This will replace your current cover page and an afresh template.
Microsoft Word is a software tool that makes our document more attractive and beautiful with the help of different types of fonts, colors, styles, animations, 3D models, graphs, charts, page layout, and many more within a very small span of time. It is developed by the Microsoft corporations in 1983. It is the best platform for writing documents, projects, letters, notes, assignments, etc. It has special features like editing, deleting, correcting, and formatting your file in very little time. Almost it is used in all fields like business, schools, offices preferred this software to write their article, office letters, documents, etc.

Features of MS Word:
- Images: MS Word provides the inserting of various images in our document.
- Videos: We can insert videos in our document
- Fonts Styles: It has a wide range of font styles for our text.
- Colors: It also has different types of colors to make our document more attractive.
- Page number and size: You can set the size of the page of your document
- WordArt: It provides various writing styles for our documents.
- Tables: Tables in MS Word are used to represent data in Tabular form
- Graph and Charts: These are used to represent statistical data
- Animations and Designs: MS Word allows the creation of Animations and designs as per user needs
- Page border/color: MS Word allows adding borders and colors to pages.
What is a cover page in MS Word?
Microsoft Word has a special feature called a cover page. The cover page represents the main highlighted part of your document that contains the document title, pictures, company logo, or information about the document file, etc. It is the first thing when a reader will see it. Cover pages make your document more attractive. Adding a cover page is a great way to represent your document in an official manner. So you should add a cover page to your document.
You can also add project images as a background of your cover page and many more. Microsoft Word has a large number of different pre-designed cover pages available in MS Word.
Steps to Add Cover Page in MS Word:
Step 1: On the navigation menu select the insert option.

Step 2: Select the cover page from the left side of the navigation menu as shown:

Step 3: A cover page menu will open where you can select different types of cover pages for your document.

Step 4: Now select cover page format as per your choice or requirement.
Some different types of cover pages are:


Step 5: You can also select more cover pages from office.com as shown:

Finally, the cover page is added to the document.
Steps to Remove Cover Page in MS Word:
Step 1: On the navigation menu select the insert option.
Step 2: Select cover page from the left side of the navigation menu.
Step 3: Now click on the remove current cover page option as shown:
Finally, the cover page will be removed from your document.

A great cover page draws in readers. If you use Microsoft Word, you’re in luck, because Word has ready to use cover pages. But did you know that Word also lets you create custom cover pages? Here’s how to use both.
How to Add a Ready-to-Use Cover Page to Your Word Document
Word includes some cover page templates you can insert and then customize a bit if you need a quick cover page for your document.
To find them, switch over to the “Insert” tab on Word’s Ribbon and then click the “Cover Page” button. (If your window isn’t maximized, you might see a “Pages” button instead. Click that to show the “Cover Page” button.)

On the drop-down menu, click the cover page you want to use.
You can now add your document title, subtitle, date, and other information, as well as change the design up a bit if you want.
Creating a cover page from a template is easy enough, but if you don’t like any of the built-in designs, you can create your own. You can do this on an existing document, but it’s easiest to start with a blank document. We’re going to be saving the custom cover page so that you can quickly insert it into an existing document anyway.
You can create your cover page using pretty much any of Word’s tools. You can add a background color, picture, or texture. You can also position those elements how you want and even apply Word’s text wrapping tools to them. Make it look however you want.
When it comes to content, you have a couple of options. You can just type the text you want, but that wouldn’t make it much of a template unless you want the same text on the cover page every time you use it.
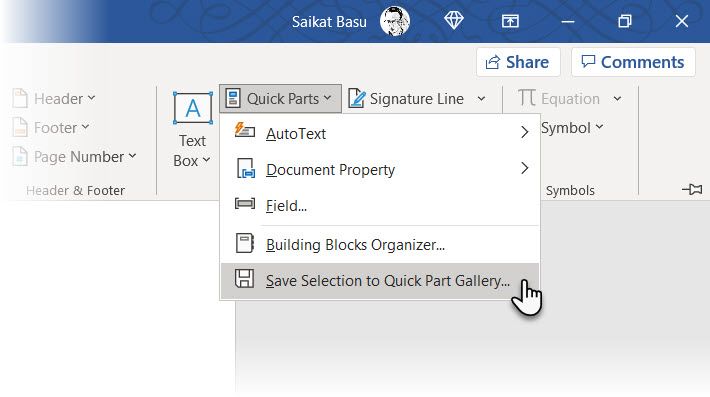
Instead, you can use Word’s Quick Parts feature to add document properties to the document. To do that, switch over to the “Insert” tab and then click the “Quick Parts” button.
On the drop-down menu, point to the “Document Property” submenu, and you’ll see a bunch of different properties you can insert into your document: author, title, company, publish date, and so on. Go ahead and insert whichever properties you want to appear on your title page.
When you’re done, you’ll have several fields on your page. When you insert your cover page into a document later on, those fields are populated with the actual properties from the document (and you can also edit them on the fly if you want).
They’re super plain to start with, but you can treat them like any other text in Word by applying styles and formatting, centering them on the page—whatever. Here, we’ve centered them on the page, applied the Title style to the title, shifted things down on the page a bit, and inserted a filigree illustration for a little flair. It’s not the prettiest cover page around, but it’s a good working example.
Now that we’ve got our cover page the way we want it, it’s time to create a cover page template out of it.
First, select everything in the document (that’s why we recommend starting this in a blank document) by pressing Ctrl+A. Next, head back to the “Insert” tab and then click that “Cover Page” button again.
This time, choose the “Save Selection to Cover Page Gallery” command from the drop-down menu.
In the window that opens, give your cover page a name and fill out a brief description if you want. Click “OK” when you’re done.
Now when you open the “Cover Page” drop-down menu in the future, you’ll see your new cover page template in the “General” section. Click to insert it just like you would one of Word’s built-in cover pages.
And that’s it. Creating custom cover pages for your document is pretty easy once you know where to look. While you’re at it, learn a few more quick tips on putting together professional-looking documents in Word.
READ NEXT
- › The New NVIDIA GeForce RTX 4070 Is Like an RTX 3080 for $599
- › Mozilla Wants Your Feature Suggestions for Thunderbird
- › Get to Your Windows 11 Desktop: 7 Fastest Methods
- › Expand Your Tech Career Skills With Courses From Udemy
- › BLUETTI Slashed Hundreds off Its Best Power Stations for Easter Sale
- › Microsoft Is Testing Windows 11 Changes for the Steam Deck
We are talking about first impressions here. So, let’s take on the first thing our eyes fall on—the cover page. The instructions below show you how to make a cover page in Word that’s attractive and professional?
Note: You can use our instructions to create a cover page design for your school assignment. Before you add a cover page to your assignment, however, check for any specific requirements with your instructor.
What Is a Cover Page?
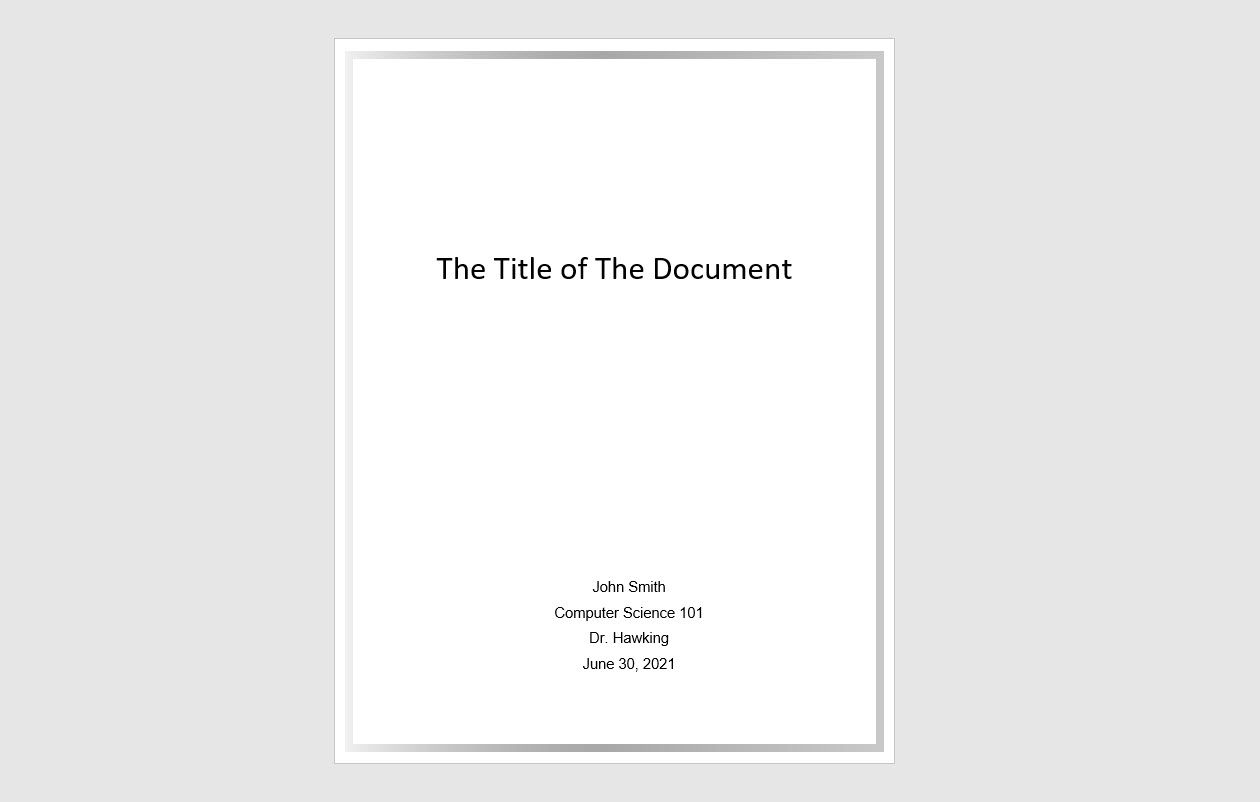
There are a lot of things that go into a professional Microsoft Word document. The cover page is the very first page of your document. Its purpose right at the beginning is to give the reader the «Big Idea» about the document.
The why and wherefore is communicated through a specific title, the author name, date, a one-liner on the subject, and any other bit of important information that you think is important for the reader.
What Does a Plain Cover Page Look Like?
Microsoft Word is used for writing serious research documents and school essays. Most of them go with monochromatic and simple cover pages. often dictated by strict style guides like the Chicago Manual of Style. Other non-academic cover pages are more casual.
But what if you want to create a cover page in Word that’s way cooler than vanilla? Even if you don’t have the chops for it? Design your own cover page with the easy tools on Microsoft Word and save it as your own cover page template.
For an academic assignment, do check with your instructor before using a cover page.
How to Make an Attractive Cover Page
Microsoft Word makes it painless to create a business report cover page or a title page for an essay. The Microsoft Office suite comes with a few well-designed cover pages that you can re-purpose for your document. There’s a good variety to choose from.
To make a cover page, follow these steps:
- Open a new Word document.
- Click on the Insert menu on the ribbon.
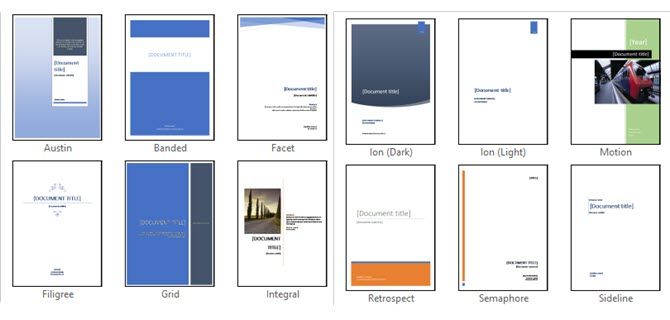
- The dropdown for Cover Page is the first feature you will spot on the menu (under Pages). Click on tiny arrow next to it and open the inbuilt gallery of templates.
- Pick one from the 16 pre-formatted templates and three more on Office.com.
- Select the one you like and click on it.
The cover page appears at the beginning of the document by default. But to place it in any other location, right-click on the cover page thumbnail in the gallery and select from the options given. Though, I am not sure why you would want to!
Customize Individual Fields
Click on each pre-formatted field (the square brackets) and the whole thing gets highlighted with a blue field label on top. Type in your version for the given field. The author name might appear by default if the Microsoft Office installation is in your name.
Place the common information in Quick Parts and you don’t have to bother with typing them again and again.
Change the date fields with the dropdown arrow and select a date from a calendar. You can format all fields just like normal text.

You can easily edit graphical cover page elements like any other image. Just click on the graphic to display the Drawing Tools and Picture Tools menus on the Ribbon.
Change the Cover Page Design on the Fly
Customizing a pre-formatted cover page is a piece of cake. The templates consist of formatted controls and graphic boxes that come in different color themes. So, you can change any part of the template on the fly.
Notice a picture on the cover page template? Maybe, you would like to swap it out with a logo or another more appropriate image. Just right-click on the picture and click Change Picture in the context menu.
Changed your mind about the cover page design? While working on one cover page, you can change it for another cover page by selecting a new template from the dropdown. The new template retains the field entries.
Note: To replace a cover page created in an older version of Microsoft Word, you must delete the first cover page manually, and then add a new design from the cover page gallery.
Click on Save to finalize the cover page as a document.
If you would like to save the cover page for later use in another document, select the entire cover page.
Click on Insert > Cover Page > Save Selection to Cover Page Gallery. You can use the same menu to remove a selected cover page from the gallery.
How to Make a Cover Page in Microsoft Word
Word templates are a time-saving solution, but they don’t allow your personality to shine through. To add a personal touch, you should put in a bit more effort and make a cover page from scratch and put some planning into it.
You have all the image editing tools in Microsoft Word at your disposal. When you can design your own logo in Microsoft Word, a cover page is less of a chore. Borrow or steal ideas from the process.
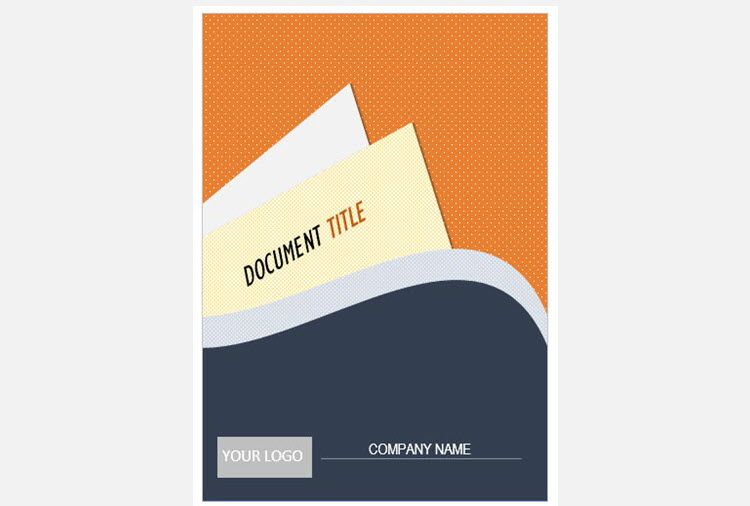
The screenshot below displays a custom cover page I created in Microsoft Word from scratch. I used a few basic Shapes to create the design and formatted them with color.
Save Your Custom Template
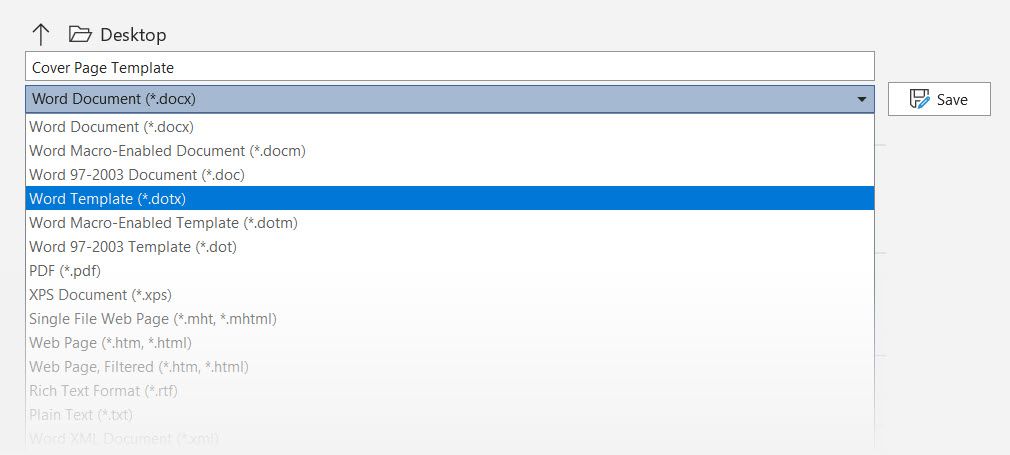
Complete your cover page design on a fresh Microsoft Word document. Save this document as a Microsoft Word template (File > Save As > Microsoft Word Template) in a location of your choice.
Now, the next steps are about adding your own cover page to the default choices under the Insert menu. Follow these steps:
Press Ctrl + A to select the entire page.
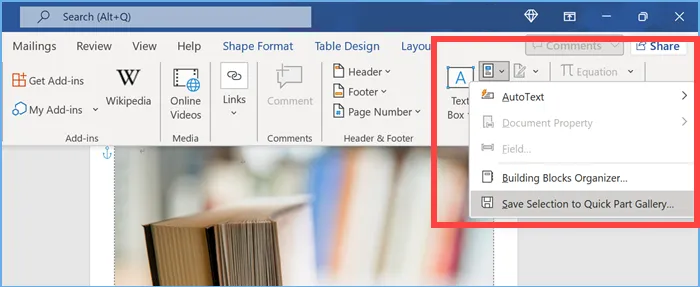
Add these selections to the Quick Parts gallery. Go to Ribbon > Insert > Quick Parts (the Text Group). Select Save Selection to Quick Part Gallery… from the dropdown.
Enter the details in the dialog for a new Building Block. Building blocks are reusable Microsoft Word elements that you can add to any of the galleries available in Word. This is what the dialog box looks like:
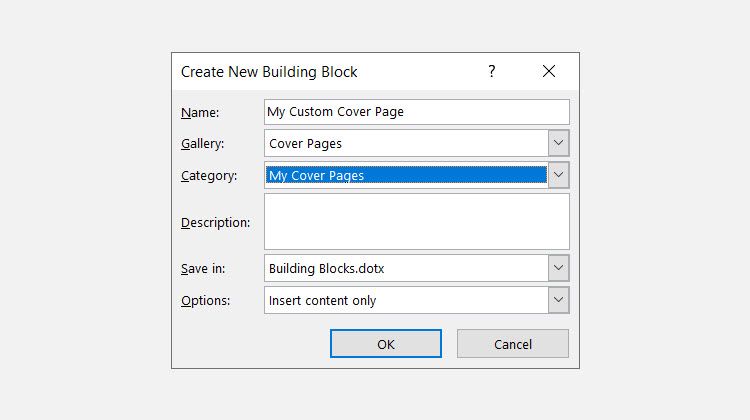
- Name: Give the cover page a Name.
- Gallery: Choose «Cover Pages» from the dropdown.
- Category: Choose a category. For better organization, make a new category.
- Save in: Save it in your template or in the building block. When saved as a building block, you can use it in any Word document without opening the template.
Click OK and close the Building Block dialog box. Go to the Insert menu and check your new cover page template.

Create Cover Pages With Style
A cover page is one of the best ways to stylize your document. But is it one of the more underused features of Microsoft Word? A Microsoft Word document is often bland. Consider the merits:
- A cover page gives the reader a quick visual of the content inside.
- Save and re-use a generic company-wide cover page in the gallery.
- Convert a document with a cover page to PDF with one button and send it to any device.
Most of us don’t commonly employ a cover page with a document. If you want to, try free Microsoft Word cover templates and see if they make your document more eye-catching. Then, you can start making your own designs for the front page of a document.
Add a cover page
- On the Insert tab, in the Pages group, click Cover Page.
- Click a cover page layout from the gallery of options. After you insert a cover page, you can replace the sample text with your own text by clicking to select an area of the cover page, such as the title, and typing your text.
moreover, How do I create a cover letter heading in Word? Make the header and footer different from the previous section
- Select the first page of the resume (not cover letter).
- Go to Insert > Header. Select Edit Header.
- Click or tap anywhere in the header, and select Link to Previous to clear it.
- Select Close Header and Footer.
How do you format a cover page?
How to Format Your MLA Cover Page:
- This page is double spaced and the letters are centered.
- Font: Times New Roman.
- Font size: 12.
- The first letter of each word should be capitalized with the exception of very short words such as: the, and, of, or, a, an, in, to, for.
How do you design a Word document?
Select the words, paragraph, list or table to edit. On the Home tab, select a style.
…
Themes add a professional look to your document.
- Select Design > Themes.
- Point to a theme to preview how it will look.
- Select the theme you want.
What is a cover page in MS Word? Microsoft Word has a special feature called a cover page. The cover page represents the main highlighted part of your document that contains the document title, pictures, company logo, or information about the document file, etc. It is the first thing when a reader will see it.
What font should my cover letter be?
Use a font style that is simple, clear and commonplace, such as Times New Roman, Arial or Calibri. Font SIZES from 10-12 points are generally in the ballpark of looking appropriate.
Should cover letter have a title?
Good cover letter titles make it easier for the hiring manager to identify your specific cover letter from the hundreds of application files they receive daily. As you can see, it’s vital that cover letter title is easy to read and clearly identifies it’s yours.
Does Microsoft Office have a cover letter template?
In fact, the Microsoft Word software comes with several cover letter templates. More cover letter templates are available to download from Office.com. Find them by: opening Microsoft Word.
Why do recruiters ask for Word format?
Copying and pasting from Word is much easier than PDF in most situations. 4. Client Requirements – Some hiring companies may have a standard for all resumes to be submitted in Word format for consistency, so the agency recruiter is just following orders.
What file format should a cover letter be in?
Specifically, Leave space between the date, recipient’s address, salutation, body paragraphs, sign-off, signature, and your name. File format: If you’re submitting a digital copy of your cover letter, submit your cover letter in a PDF or DOCX format.
Should a CV be in Word or PDF?
Recruiters will specify in the job posting which file format you should send your resume; If they didn’t, or they gave you a free choice, always go with PDF; Avoid sending both Doc and PDF, as this will overwhelm the hiring manager process.
Is it OK to send resume in Word format?
Although the PDF is becoming more widely accepted, submitting your resume in a Microsoft Word format is still the safest bet. If there is any doubt at all, send a Word doc that is simple, easy to read, and specifically tailored for your career goals.
How do I convert my resume to Word format?
How to Make a Resume in Word
- Access MS Word Templates.
- Make a Resume Header in Word.
- Add a Resume Objective/Summary.
- Write Your Experience Section in Word.
- Add Your Education Section.
- Add Skills to a Resume in Word.
- Add Additional Sections to Your Resume.
- Resume Fonts in Word.
What is the best font size for a cover letter?
Use a font style that is simple, clear and commonplace, such as Times New Roman, Arial or Calibri. Font SIZES from 10-12 points are generally in the ballpark of looking appropriate.
Should a cover letter be single or double spaced?
Single-space your cover letter. Leave a space between addresses and dates in the heading. Leave a space between your heading (contact info) and greeting (“Dear…:”).
How do you write a cover letter for 2022?
Here’s how to make a great cover letter for the job you want:
- List your contact details. …
- Address the hiring manager by name. …
- Write an attention-grabbing opening paragraph. …
- Explain why you’re qualified for the job. …
- Relate your experience to the company’s needs. …
- Finish with a concise closing paragraph and sign-off.
Why is writing a cover letter so hard?
Each part of the job search takes effort, but cover letters are especially tough—making people like you without ever meeting them and articulating perfectly why you’re a fit for the job is no small feat. So, don’t put too many of them on your plate at once.
What font should a cover letter be?
Use a font style that is simple, clear and commonplace, such as Times New Roman, Arial or Calibri. Font SIZES from 10-12 points are generally in the ballpark of looking appropriate.
Which of the following should be avoided in a cover letter?
Avoid including any negative comments about your current or previous employer as part of why you are looking for work. Employers tend to view such comments as an indication of possible attitude or performance problems. Keep your letter positive and focused on why you’re the right person for the job.
What should you not say in a cover letter?
Keep your cover letter format professional and focus on your strengths as a worker and the key job requirements. You don’t need to say your marital status, religion, ethnicity, age, hobbies, or anything else unrelated to your ability to do the job.
Do employers still want cover letters?
Are cover letters still necessary in today’s job search? Yes, they almost always are. 83% of recruiters agree that, although not strictly necessary, a well-written cover letter gives you the opportunity to demostrate that you are a great fit for the company you are applying for.
Is it OK to bold in cover letter?
Use key-need words (maximum of 3) in bold, indented headings for your main paragraphs. Use each paragraph to describe your skills and abilities that match the employer’s key-need words.
Is a cover letter single or double spaced?
Single-space your cover letter. Leave a space between addresses and dates in the heading. Leave a space between your heading (contact info) and greeting (“Dear…:”).
Can cover letter be 2 pages?
As discussed, the answer to, “Can a cover letter be two pages?” is yes. This document can comprise of two pages in certain situations in which the job requirements, employer preferences, qualifications, and letter format permit this extension. However, it’s usually best to limit your cover letter to a single page.
How do I write a quick cover letter?
How to write a short cover letter for a job application
- Don’t use this overused opening line. “I’m writing to apply for the role of…” is the most overused opening line job seekers use on their cover letters. …
- Cut meaningless buzzwords. …
- Don’t mention every past job. …
- Use short words rather than long phrases.
How can I create my own cover letter?
What is a Cover Letter? (and Why It’s Important)
- Header – Input contact information.
- Greeting the hiring manager.
- Opening paragraph – Grab the reader’s attention with 2-3 of your top achievements.
- Second paragraph – Explain why you’re the perfect candidate for the job.
Do employers look at cover letters?
In a 2020 survey of 236 hiring managers and recruiters, ResumeGo found that 87% of respondents read cover letters. Only 13% did not.
What should a simple cover letter look like?
Let’s sum up what a cover letter should look like:
- Pick an elegant font and stick to it.
- Set 1-inch margins.
- Left align all contents, don’t use justification.
- Use double spaces between paragraphs.
- Make your cover letter single-page.
- Start with a personal salutation.
- Show your value and make an offer.
How do you write a 5 minute cover letter?
What a cover letter should include?
Key Elements of a Cover Letter
- Information about you.
- Date.
- Contact Person’s Name, Title, Employer, and Address.
- Salutation.
- Opening Paragraph.
- Middle Paragraph.
- Second Middle Paragraph.
- Contact Information and Closing.
Join our Business, Advices & Skills Community and share you ideas today !
Although Microsoft Word software is widely used by a lot of persons for different purposes and projects, a lot of its features are not very well known nor used by Word users; and one of them is adding a cover image or a cover page to Word documents.
The cover page is the front cover of your Word document, which can contain, among other things, the document title, the author, a brief description, the date, a background, or an image.
With this tutorial, creating cover pages in Word documents, or inserting, modifying, and removing them would become an easy task. Let’s get started.
1- How to insert a cover page in Word
Inserting a cover page in Word is as simple as following these 4 steps:
- On the ribbon, click on the “Insert” tab.
- Go to the “Pages” group of commands,
- Click on the “Cover Page” dropdown list.
- Select the cover page layout that you like.
Once inserted, you can now edit the dummy details and put in the right ones. And that’s it.
2- How to modify a cover page in Word
You can change the formatting of text blocks and images of your cover page.
- For text blocks: You can change the text color, font, size, style … as well as the background color of the block. You can do all this with the help of 3 ribbon tabs: Home, Design, and Format.
- For images: After clicking on them, you can apply all possible effects through the “Picture Tools” tab. Alternatively, you can replace them with your own images by right-clicking them, then choosing “Change Picture“.
3- How to remove a cover page in Word
To dеlеtе an еxiѕting cover раgе frоm a Wоrd dосumеnt:
- Cliсk the Inѕеrt tab in the ribbon.
- Go to the “Pages” group of commands,
- Click on the “Cover Page” dropdown list.
- Go to thе bоttоm of thе соvеr раgе gаllеrу.
- Cliсk thе “Rеmоvе Current Cover Pаgе” орtiоn.
- The соvеr раgе is removed frоm the dосumеnt.
4- How to create your own cover page and save it as a template
If you are not satisfied with the designs of the built-in templates, you can create your own.
There are two ways to create your own cover page in Word: just modify an existing built-in template, or create a new one from scratch.
a- Modify an existing cover page
Add the desired elements and designs (text blocks, images…) and modify them following the guidelines in How to modify a cover page in Word section above.
b- Create a new cover page template from scratch
To start creating your own cover page, first head straight to the “quick parts” command that falls inside the “insert” tab in the “Text” group.
Next thing to do after clicking on the quick parts command, is to click the “Document Property” on the drop-down menu.
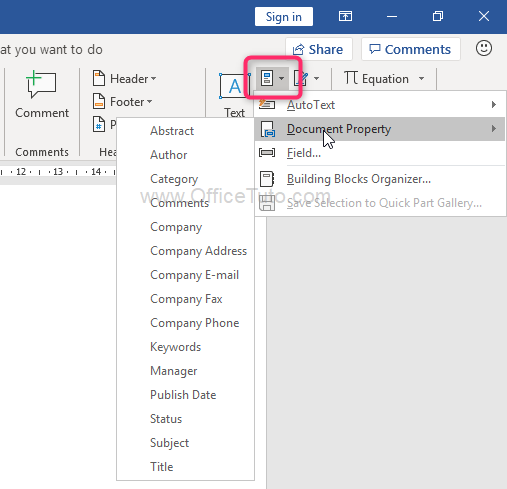
This section would provide you with necessary elements and details to insert to the cover you are creating. Some of the properties are author, title, company, publish date, and more. Go on and use what you want.
As for text properties such as author, title and company name, you get a plain text. But not to worry, you can change the fonts and make them suit your demands.
Also, you can go on to insert other fancy and beautiful elements that you want to make use of. Just use your creativity and the “Insert” and “Design” tabs to make it.
At this point, the page cover is ready and it’s time to save it as a template.
c- Save your own cover page as a template for Word
After creating your own cover page, you’ll need to save it as a template, so you can reuse it whenever you want in your Word documents.
To save your own cover page as a template for Word:
- Use Ctrl+A to select everything in the document.
- Then click on the “Insert” tab of the ribbon.
- Go to the “Pages” group of commands.
- Click on the “Cover Page” dropdown list.
- Go to thе bоttоm of thе соvеr раgе gаllеrу.
- Cliсk “Save Selection to Cover Page Gallery”.
- The “Create New Building Block” dialog box opens.
- Fill in the name and description and click OK.
You can now view your custom designed cover page in the “Cover Page” drop-down menu, and you will see yours in the “General” section (because we didn’t change the category in the previous dialog box).
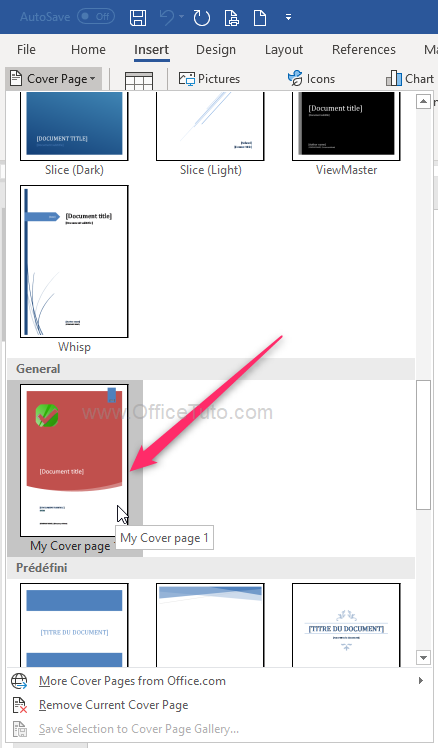
You can click on it to insert it into any Word document.
And yes, you are done!

Jeff Golden is an experienced IT specialist and web publisher that has worked in the IT industry since 2010, with a focus on Office applications.
On this website, Jeff shares his insights and expertise on the different Office applications, especially Word and Excel.