
Design and edit in Word
Use Styles
Styles templates apply a consistent font, font size, font color, and spacing to headings, paragraphs, and titling throughout your document.
-
Select the words, paragraph, list or table to edit.
-
On the Home tab, select a style.
If you don’t see the style you want, click the More button
 to expand the gallery.
 to expand the gallery.

Apply Themes
Themes add a professional look to your document.
-
Select Design > Themes.
-
Point to a theme to preview how it will look.
-
Select the theme you want.

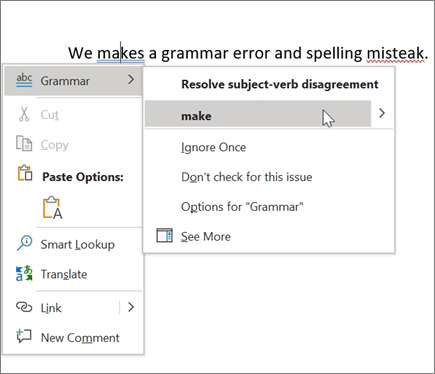
Check spelling and grammar
Word marks misspelled words with a red squiggly underline and grammar mistakes with a blue double underline.
-
Right-click the word.
-
Select a correction, or select Ignore.
Note: Spelling and grammar check work a little differently in newer versions of Word and Microsoft 365. For more, see Editor — your writing assistant.
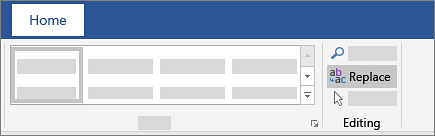
Find and replace text
-
Select Home > Replace.
-
For Find what, enter a word or phrase to search. For Replace with, enter the new text.
-
Select Find next, and then select:
-
Replace to replace the first instance, or
-
Replace all to replace all instances.
-
Next:
Collaborate in Word
Need more help?
Once you have written your basic document you can spruce it up with a just few clicks.
The process for formatting text is:
1. Select the text you want to format.
2. Apply the formatting.
Most of the tools that you need to make your document look professional are on the Home ribbon. They are collected together into the Font group.
Here’s a quick breakdown and each of these will be covered in this post.

2. Changing the font
The font is the name given to the text style — what the text looks like. Many newspapers and magazines use a font like Times New Roman for a formal look but there are other simpler fonts available like Calibri.
To change the font:
1. Select the text you want to apply the font to.
2. Single-left-click the Home tab.
3. Single-left-click the Font drop-down list then single-left-click the font you want to use.

A sample of some popular fonts are provided below.
![]()
![]()
![]()
![]()
3. Changing the font size
To change the size of your selected text:
1. Single-left-click the Home tab
2. Click the Font Size drop-down list on the Font group.
3. Choose a font size.

You can also click one of the two ‘A‘ icons, situated next to the font size drop down list.
![]()
The first A increases the text size by one standard size.
The second A decreases the text size by one standard size.
4. Adding bold, italic or underline for emphasis
To apply emphasis to a word or phrase, bold and italic are the quickest techniques to use. Here is a comparison:
- Regular text
- Bold text
- Italic text
- Underlined text
- Bold italic underlined text
There are 3 standard icons that you will find in every Microsoft Office program.
![]()
- To bold a selection of text, click the B icon, or press Ctrl B on the keyboard..
- To italicise a selection of text, click the I icon, or press Ctrl I on the keyboard..
- To underline a selection of text, click the U icon, or press Ctrl U on the keyboard..
To change the underline style:
1. Click the drop-down arrow next to the U icon.
2. Select the underline type that you want – single, double, thick, dotted, dashed etc.

To change the underline colour:
3. Click Underline Color (at the bottom of the menu).
4. Choose a colour from the palette.
5. Changing the font colour
To change the colour of your text
1. First, select the text that you want to change the colour for.
2. Single-left-click the Home tab.
3. Single-left-click the Font drop-down list in the Font group.
4. Single-left-click a colour from the palette.

Paragraph formatting tools in Microsoft Word
6. Striking through the text
Strikethrough puts a line through your text like this.
This is an example of text that has been struck through.
You can use this when you need to keep the text for historical reasons but clearly mark it as out of date, obsolete, no longer stocked of one of many other reasons.
To apply strikethrough to your text:
1. Select the text.
2. Single-left-click the Home tab.
3. Single-left-click the Strikethrough icon in the Font group.
![]()
7. Superscripting or subscripting text
Superscripted text is little text that sits above the baseline, e.g. 360o, 42 or 16th.
Subscripted text is little text that sits below the baseline, e.g. H2O, CO2, H2SO4.
![]()
To apply superscript:
1. Select the text.
2. Single-left-click the Home tab.
3. Single-left-click the Superscript icon in the Font group.
4. The keyboard short cut is Ctrl Shift +.
To apply subscript:
1. Select the text.
2. Single-left-click the Home tab.
3. Single-left-click the Subscript icon in the Font group.
4. The keyboard short cut is Ctrl Shift =.
8. Changing the case
UPPER CASE WORDS stand out on a page. Some people describe it as SHOUTING. To change the case of your text:
1. Single-left-click the Home tab.
2. Click the Aa icon in the Font group.
3. Choose from Sentence case, lower case, UPPER CASE, Capitalise Each Word and tOGGLE cASE

Pressing Shift F3 cycles through the UPPERCASE, lowercase and Capitalise Each Word options. The other two options are not included in the cycle.
Here are what the different case options mean:
Sentence Case
Capitalise the first letter of the first word in the sentence.
lowercase
Make all the selected text lower case (i.e. un-capitalise everything).
UPPERCASE
CAPITALISE all selected text.
Capitalise Each Word
Capitalise the first letter of EVERY word.
tOGGLE cASE
Convert UPPER CASE letters to lower case and convert lower case letters to UPPER CASE.
The Toggle Case feature seems like an odd one and under normal circumstances you would never use it.
However, back in the day (gee, I sound old) guys like me who look at their keyboard as they type and only look up once every 30 minutes used to curse loudly when we found our CAPS LOCK had been on the whole time!
You may still stumble across an old legacy document where the case is all screwed up. If you do, you canquickly fix it with Toggle Case.
Fast forward to today.
Microsoft Word detects when the CAPS LOCK is on. After typing something in reverse case, as soon as you press space or ENTER, Word corrects the incorrect case and turns the CAPS LOCK off. Whatever you type next is in correct case.
10. Highlighting text
Just as you would take a highlighter pen to highlight certain portions of text in a book or report, you can add highlight to any section of text in Microsoft Word. Highlighting attracts attention.
Perhaps you have prepared a document for somebody and need to point out the important sections.
Perhaps you are reviewing somebody else’s work (or even your own) and want to mark sections to revisit later.
There are 2 ways to use the highlighter tool.
Method 1 (for a one-off highlight):
1. Select the text you want to highlight.
2. Single-left-click the Home tab.
3. Click the ab Highlight icon in the Font group (to use default yellow).
4. If you want to choose your own highlight colour, click the drop-down arrow on the icon, then choose one of the highlight colours in the palette. Stick with the lighter colours.

Method 2 (for multiple highlights)
1. Single-left-click the Home tab.
2. Double-left-click the ab Highlight icon in the Font group.
3. The regular mouse pointer will change to a highlighter icon.
4. Select the first portion of text that you wish to highlight. The highlight is added but the highlighter tool is still active.
5. Select as many other portions of text as you want.
6. When you are done, press Escape or single-left-click the the ab Highlight icon again

Reset highlighted text
1. Select the highlighted text.
2. Single-left-click the Home tab.
3. Click the drop-down arrow on the ab Highlight icon in the Font group and choose No Color.
11. Creating a pretty title or heading
WordArt is a feature that has been around for many years. The conventional way to create WordArt is to choose the tools from the Insert ribbon, choose a style, type some text and then play with the settings.
In Word, there is a second tool that lets you select some existing text and apply WordArt Styling to it.
Here’s the process:
- Select your text (normally a title or heading).
- Click the blue A icon (called Text Effects and Typography).
- Select one of the thumbnail images from the gallery to apply the effect to your text.
- You can switch the style at any time.
 tool in Word")
- Using the options underneath, you can also change the outline (colour, thickness and style), shadows, reflection and glow settings. You don’t have to stick with the default settings in the main gallery.
 settings in Word")
Here are some samples of text effects and typography:
 in Word")
12. Key Takeaways
- The most commonly used text formatting tools in Word are found on the Home ribbon in the Font group.
- To access even more text formatting tools in Word, click the launcher icon in the bottom-right corner of the Font group (on the Home ribbon). This displays the Font dialog which not only displays the tools found on the ribbon but also additional tools.
- Common text formatting includes the font, font size, font colour, empasis tools like bold, italic and underline, strikethrough, superscript, subscript, WordArt and the highlighter tool.
13. what next?
I hope you found plenty of value in this post. I’d love to hear your biggest takeaway in the comments below together with any questions you may have.
Have a fantastic day.


About the author
Jason Morrell
Jason loves to simplify the hard stuff, cut the fluff and share what actually works. Things that make a difference. Things that slash hours from your daily work tasks. He runs a software training business in Queensland, Australia, lives on the Gold Coast with his wife and 4 kids and often talks about himself in the third person!
SHARE
Most folks go through life doing things in inefficient ways. For tasks you complete once in a blue moon, efficiency doesn’t really matter. But when you do something frequently, finding the most effective and efficient method is worthwhile.
Styling text in Microsoft Word is one of those things. If you edit Word documents regularly, you’ll want to know how to style them correctly. Using the appropriate built-in Style tools often resolves a percentage of the “problems” users have with Word. It also makes your documents easier to edit and improves the user experience. Styling correctly also lets you structure long documents for easy navigation by author and reader.
Using and Adjusting Existing Styles in Microsoft Word
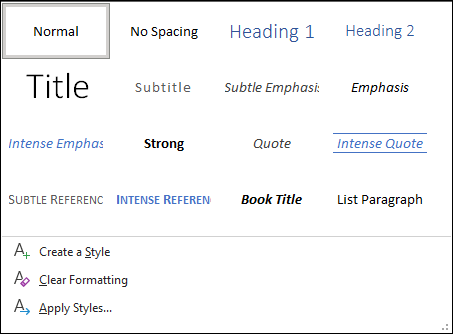
We’ll be doing a lot of our work in the “Styles” pane which is found in the “Home” ribbon.

Applying existing styles
The built-in styles are perfectly serviceable. You can apply them just by clicking.
1. Select the text you want to change. Selecting the text you want to modify will always be the first step for any text-styling task.

2. Click on the appropriate style icon in the “Styles” pane.

Modifying styles
Most users don’t want to be limited to the built-in styles. While there are other styles available in the Design menu of the ribbon, users can make their own. Making a new style from scratch is a pain: you’re better off modifying an existing style. You’ll use the same method for updating your own styles as you tweak them.
1. Apply the matching style you want to change.

2. Make the appropriate changes to the text with the direct styling tools.

3. Right-click on the style you applied and choose “Update [Style] to Match Selection.”

This will change the style to match and automatically sync that change to every other instance of the Style in your document. It will also update the Style’s preview icon.

Advanced Options
You can also apply some advanced styling options to your Styles, making them more useful and functional. All of these changes can be propagated across styles by modifying existing styles, as shown in the previous step. Here are a few choice examples.
Add space below a heading without Return
Most of the time you want a little space between your headings and your body copy. Don’t use the Return key to make it! Apply that space in the Paragraph menu.
1. Select the heading you want to add space after.
2. Open the Paragraph Options by clicking on the tiny arrow in the lower-right of the Paragraph ribbon pane.

3. Adjust the value in the “Spacing After” box. You can also use the “Line spacing” tool next to it for less nuanced control.

Add a horizontal rule
Add a page-width underline to your text.
1. Select the text you want to underline.
2. Click the “Borders” icon in the Paragraph ribbon menu.

3. Click “Bottom border” in the dropdown menu.

Expand letter spacing
Give your text some breathing room, which is useful for headings.
1. Select the appropriate text to change.
2. Open Font Options by clicking on the tiny arrow in the lower-right of the Font ribbon pane.

3. Click on the “Advanced” tab.

4. Click the dropdown next to “Spacing” and choose “Expanded.”

5. Adjust the point value until satisfied.

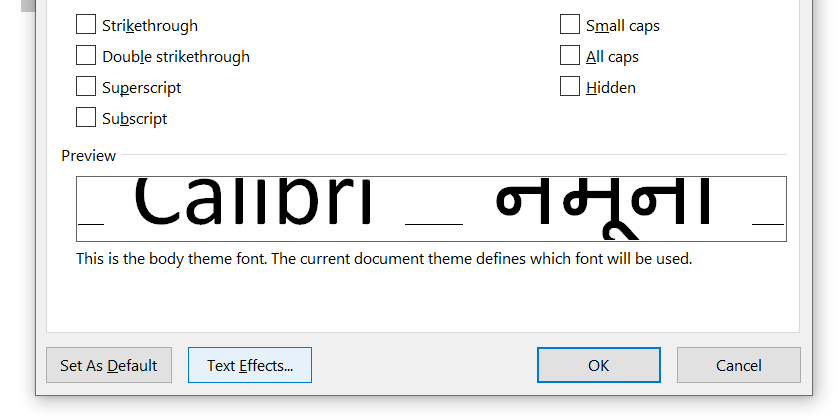
Create an all-caps style
Headings often look nice set in all caps. You can apply this in the same Font Options menu you just visited.
1. Click on the “Font” tab in the “Font Options” menu, if necessary.
2. Tick the “All Caps” box.

Saving and Sharing Style Templates
Once you’ve created a set of styles that you like, you can save it as part of a template. Save the file as a template (.dotx), then create a new file with that template. These files can also be shared among users. Learn more about templates in our guide.
Applying Your Styles by Default
To apply your own styles for every new document you create, modify the Normal template.
1. In Word, click “File -> Open.”
2. Click the “Browse” button.

3. Paste “%APPDATA%MicrosoftTemplates” into the address bar and press “Enter.”

4. Open the file named “Normal.dotm.” Make the changes to fonts, margins and other styling details.

5. When done, delete all the text (and white space), and choose “File -> Save.”
If you totally mess things up, delete your “Normal.dotm” file. Word will replace it with a fresh one using the application’s defaults.
Conclusion
Make sure you apply your styles appropriately: the style names aren’t meaningless! They also create the structure of your document. Headings with higher numbers are nested “inside” headings with lower numbers in outlining terms. For example, using “Heading 1” for the most important heading(s), “Heading 2” for secondary headings and so on. Careful use lets you generate a Table of Contents, zoom through long documents with the Navigation Pane and much, much more.

Alexander Fox
Alexander Fox is a tech and science writer based in Philadelphia, PA with one cat, three Macs and more USB cables than he could ever use.
Subscribe to our newsletter!
Our latest tutorials delivered straight to your inbox
![]()
Download Article
![]()
Download Article
Most people who use Microsoft Word for designing creative printouts know about the WordArt feature and it’s many features. If you don’t know about it yet, follow the directions in this article to help you achieve these same techniques to make your printouts look spectacular.
Steps
-
1
Open your Microsoft Word document, with whatever method you prefer to open the program with.
-
2
Decide in which document, you’d like to start adding/using the WordArt feature in. You can either start a new document, or open an existing document, depending on where you would like to add the WordArt to.
Advertisement
-
3
Locate the place that you’d like to insert your first WordArt piece of text on your page.
- Type the previous text.
- You can either continue on that line (rarely used), or press enter to start a new line.
-
4
Open your menu toolbar. For quick access if this toolbar isn’t available, press and release Alt on your keyboard.
-
5
Click the «Insert» option from this toolbar.
-
6
Click the «Picture» button.This should open a drop-down list.
-
7
Click the «WordArt» option from the drop-down that results. This should open a new window, along with adding a toolbar to the display window, that you can later move into a position on the screen near all the toolbars at the top of the screen. For now, you’ll be concentrated on the dialog box that Microsoft Word brought up when you clicked the option to Insert a new piece of WordArt.
-
8
Click to select the WordArt style that looks the best to you.
-
9
Click the «OK» button. This will open a new dialog box that will help you type the text you want to be inserted to become a piece of WordArt.
-
10
Type your text using proper formatting (such as correct capitalization, grammar, etc.). The text «Your text here» is automatically selected, which means as soon as you start typing, the former pre-filled text will be removed in place for the text you will type.
-
11
Select alternate formatting (bold, italic, font size, font type) from the buttons above the box you type your stuff in.
-
12
Learn how to move your WordArt text. This can be achieved for most viewers by clicking to select and either centering the text like most centering of any other text, or, for some versions (2007 and up) by right-clicking and dragging the text to a new location.
-
13
Learn how to color your WordArt text. Use the same styles to color other text, as you would for this WordArt text. Just be sure the WordArt piece has been selected, before you begin to select your color. If you do end up selecting your color, you’ll be selecting a font color for any additional text near the insertion «I» point on the screen.
- Learn how to copy the piece of WordArt to an alternate location, if you’d like. Use the Copy and Paste technique to copy and paste the item from one area to another, through the use of Windows clipboard (which is where all copy and pasted items are temporarily stored).


Advertisement
Add New Question
-
Question
What is Microsoft Word insert?

Microsoft Word «insert» is used to insert any element or object into a document.
Ask a Question
200 characters left
Include your email address to get a message when this question is answered.
Submit
Advertisement
Video
-
The steps in this article are based on the 2003 version of Microsoft Word.
-
You can also select the text in the original page. You then can select the style, and it will pre-fill the words for you into the boxes.
Show More Tips
Thanks for submitting a tip for review!
Advertisement
Things You’ll Need
- Microsoft Word program
- computer mouse and keyboard
About This Article
Thanks to all authors for creating a page that has been read 115,428 times.
Reader Success Stories
-

«What helped me was the ‘Create Word Art’ video was graphic/demonstrative. It put ‘here/now’ words and directions…» more
Is this article up to date?
The mere sight of pages of plain text can make your eyelids start to droop. Unformatted Word documents signal to the reader that this will be a dry and dull read. Nobody wants to endure that kind of boredom.
Microsoft Word contains several tools that can make your text more beautiful with aesthetic fonts and subtle effects. Overdoing it can fill your document with distractions, but a sensible approach to design and decoration adds important visual interest to sustain your reader’s attention.
Here are some font styles and effects to make your text stand out in Microsoft Word.
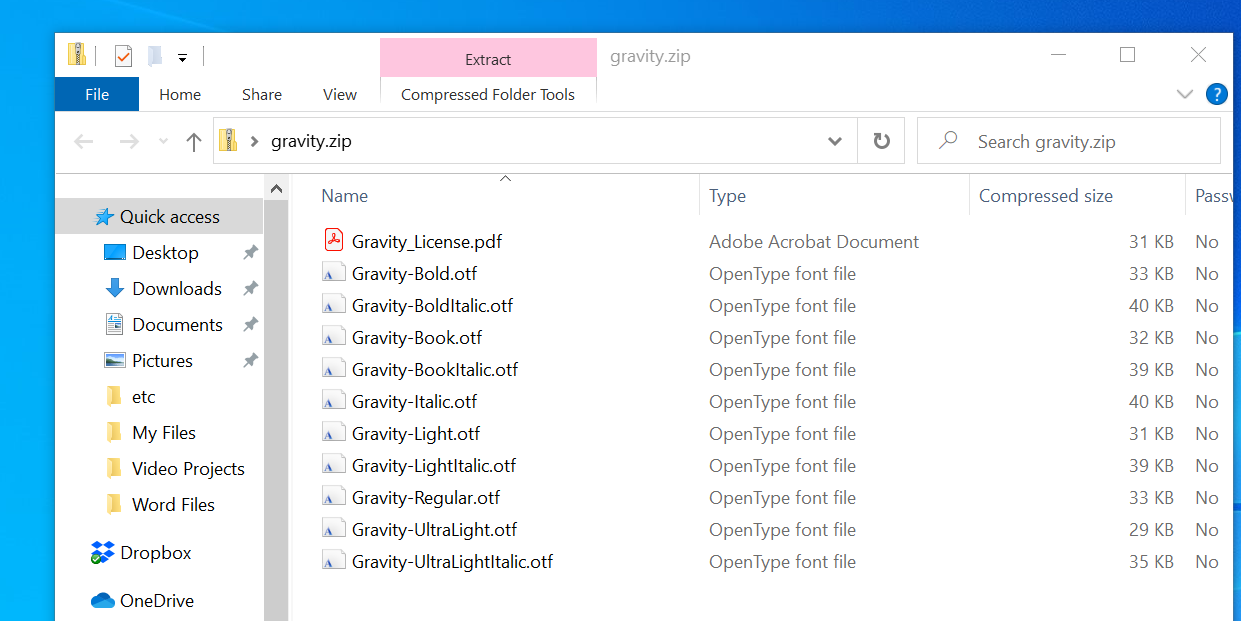
1. Install Your Own Aesthetic Fonts for Microsoft Word
One of the easiest ways to spice up text in Word is to introduce some new fonts. You can find plenty of free fonts online, but it’s worth taking a moment to consider whether you want to use the OTF or the TTF format before you start your search.
Most fonts are downloaded as a .ZIP file, so first extract that archive if necessary. Depending on the font, you might receive just one file or several with additions to their name like bold, light, and expanded.
These are slightly tweaked versions of the font with amended dimensions—they can be very useful if you’re looking for perfection, but most users will be well served by the normal version alone.
To install a font in Windows 10, all you need to do is double-click the OTF or TTF file and Windows Font Viewer will open automatically. You’ll see a full preview of the character set and if you have administrator privileges you can click Install to make the font available across your system.
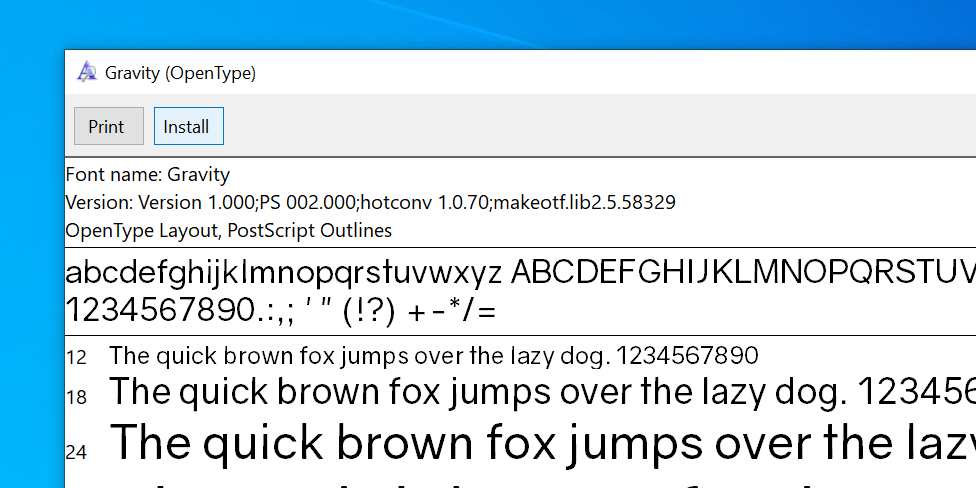
Then simply select your aesthetic new font from the format options inside Microsoft Word.
2. Add a Simple Shadow
A drop shadow is a classic graphic design technique you can use to make text stand out. Word offers a few different ways to achieve this, and you can use the Text Effects and Typography menu to do it.
First, type out your desired text and format its size and font to your specifications—you’ll need to decide on how you want it to look before you create your shadow. Select your text using the mouse, click the Text Effects and Typography icon (the bluish A button), and then select Shadow followed by Shadow Options.
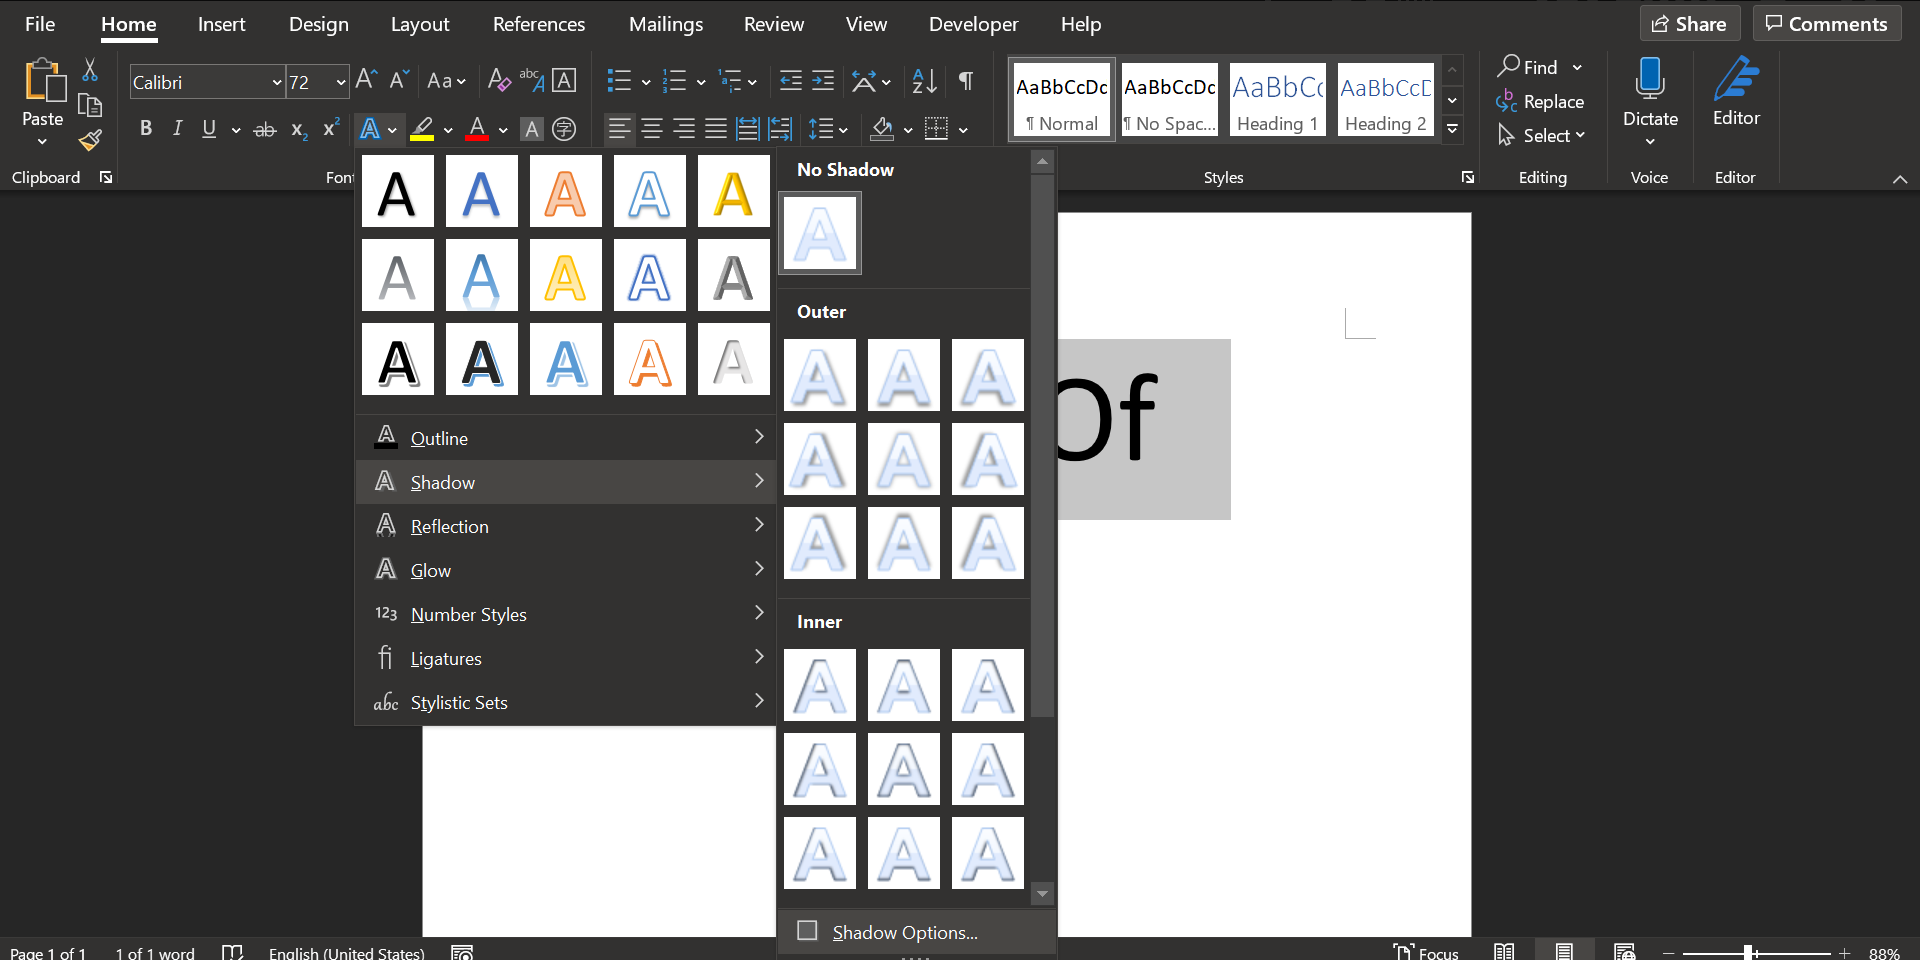
A new menu will open on the right letting you customize the shadow. Either click the Presets option and choose one of the many shadow options or adjust various settings for yourself to create a customized shadow.
You’ll see the live preview on the left of the shadow menu.
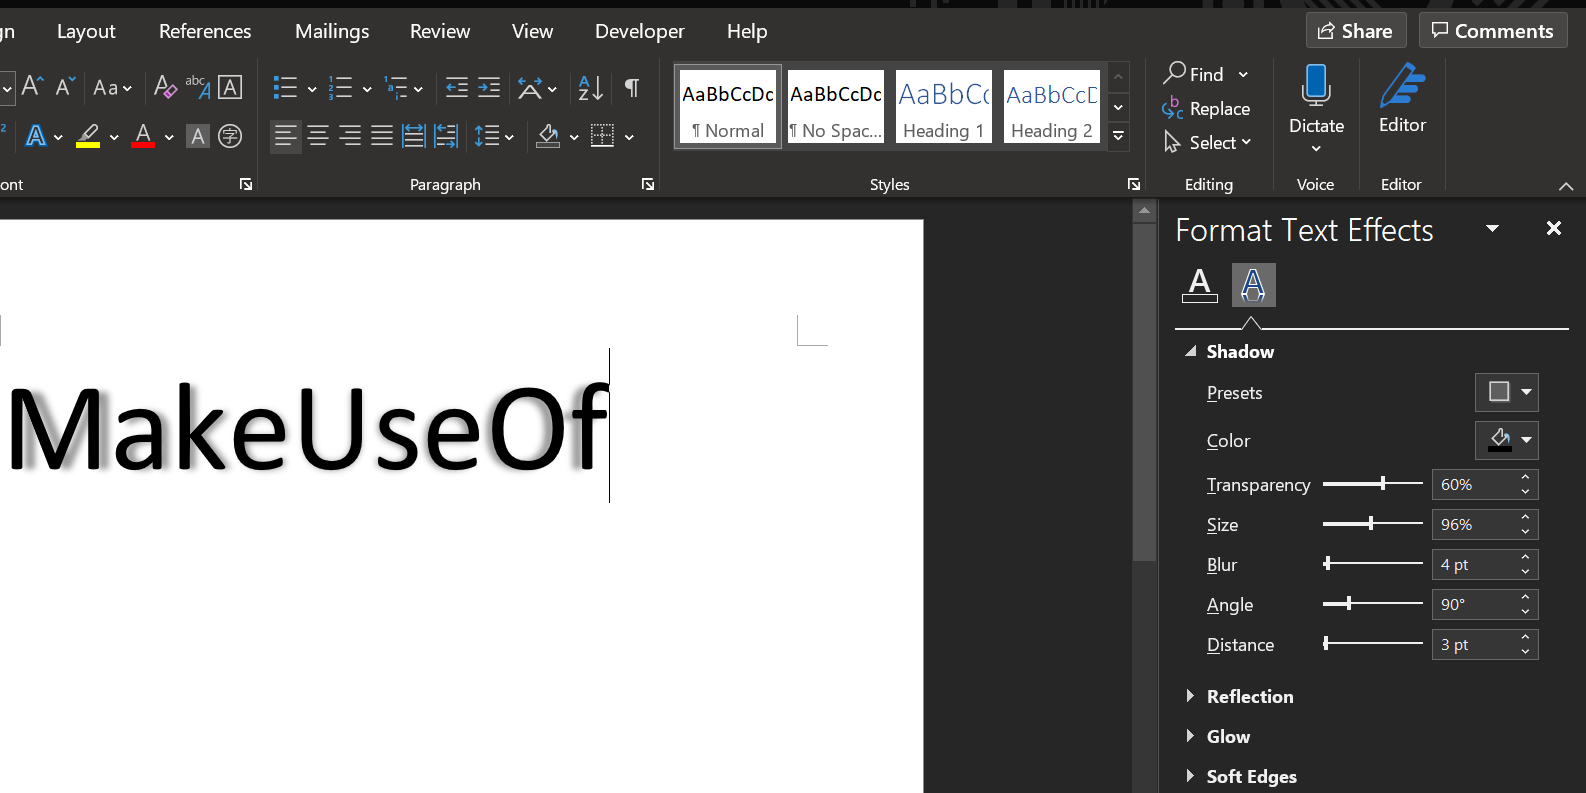
Keep changing the options until the shadow looks the way you want. You can then click the X icon in the top-right corner of the shadow menu to close it. Word saves the changes to your text automatically.
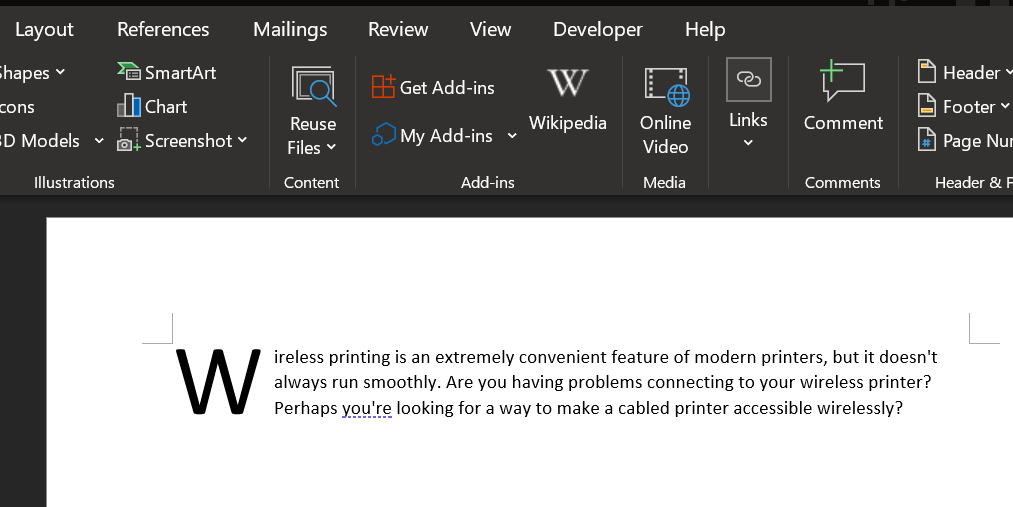
3. Add a Drop Cap
A drop cap is an oversized first letter of a paragraph, often found in old novels. Microsoft Word can outfit your document with this attention-grabbing visual flourish in a matter of seconds, giving you the means of adding interest to a large block of text, or simply calling to mind a classical era.
Head to the Text section of the Insert tab and find the Drop Cap dropdown. You’ll be able to create a very simple drop cap by selecting either Dropped or In margin here, but for the best results, you will need to click Drop Cap Options, while your cursor is in the paragraph you’re looking to add the feature to.
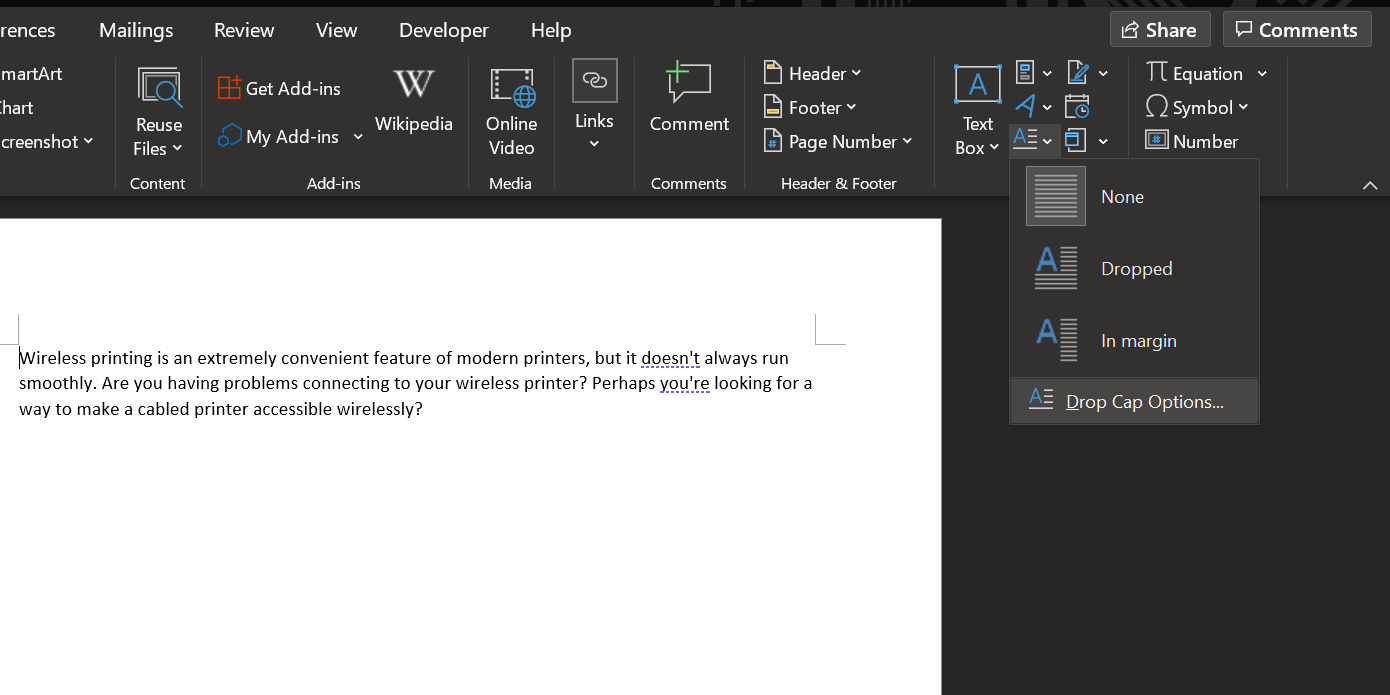
Select Dropped and adjust the Distance from text to 0.2 cm (0.08 inches). You may need to tweak the amount, depending on the font you’re using and the scale you’re working at, but the drop cap can sometimes look awkward in comparison to standard line spacing when it’s left at 0.
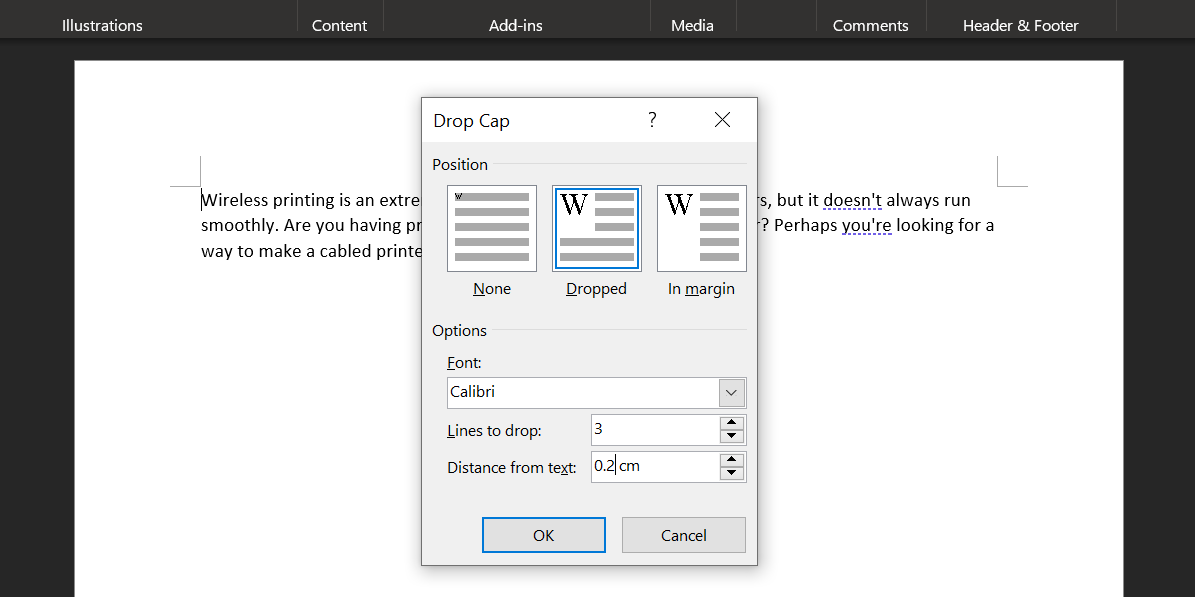
Your choice of font will be key to the overall effect. A stark sans font can work well if your primary aim is an eye-catching look, but a more traditional drop cap can be attained with a showier serif typeface.
4. Use Text Effects
Used carelessly, the Text Effects available in Microsoft Word can easily call to mind the worst excesses of WordArt. However, as long as you don’t overdo it, these effects can give your document some real visual punch.
To access the Text Effects menu, head to the Home tab and click the pop-out button in the Fonts section.
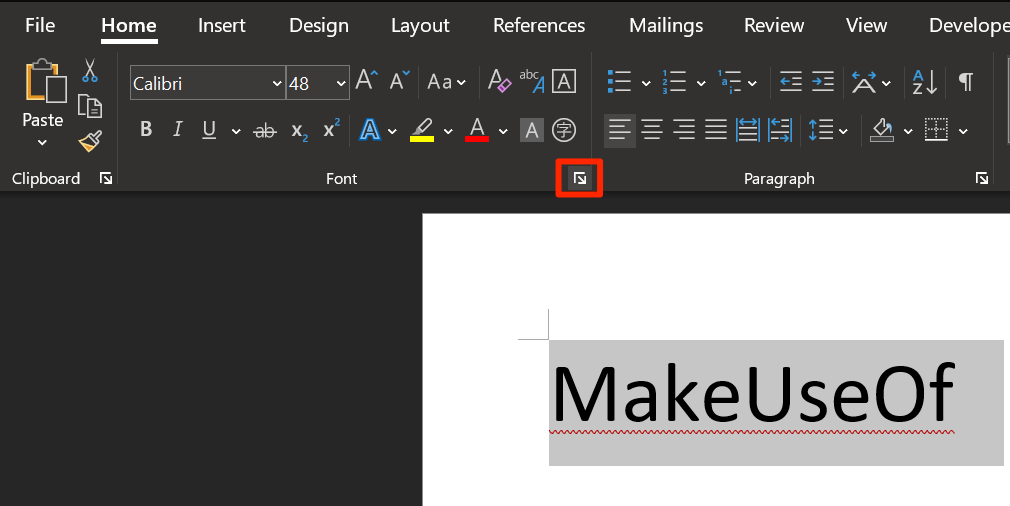
Then click the Text Effects button in the window that opens up.
Text Fill
The Text Fill option is a great way of adding some color to a piece of text. Solid fill will just apply a single hue to your selection, which can be done with far less fuss, but the Gradient fill option offers plenty more nuance for any budding graphic designers.
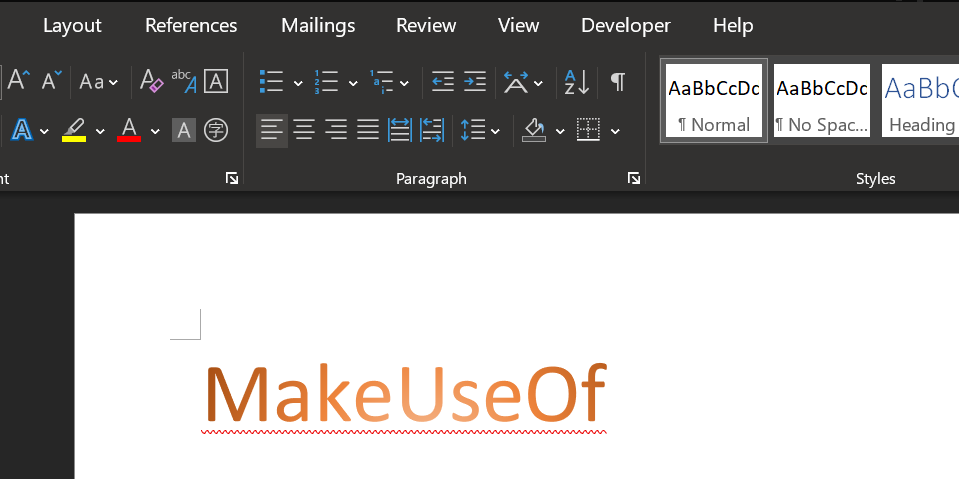
As well as several presets, the Gradient fill menu can be used to hone in on a specific color blend to fill your text with. You can add and remove gradient stops using the two buttons to the far end of the color line, then adjust individual colors by clicking on their corresponding stop and tinkering with the Color dropdown situated directly below.
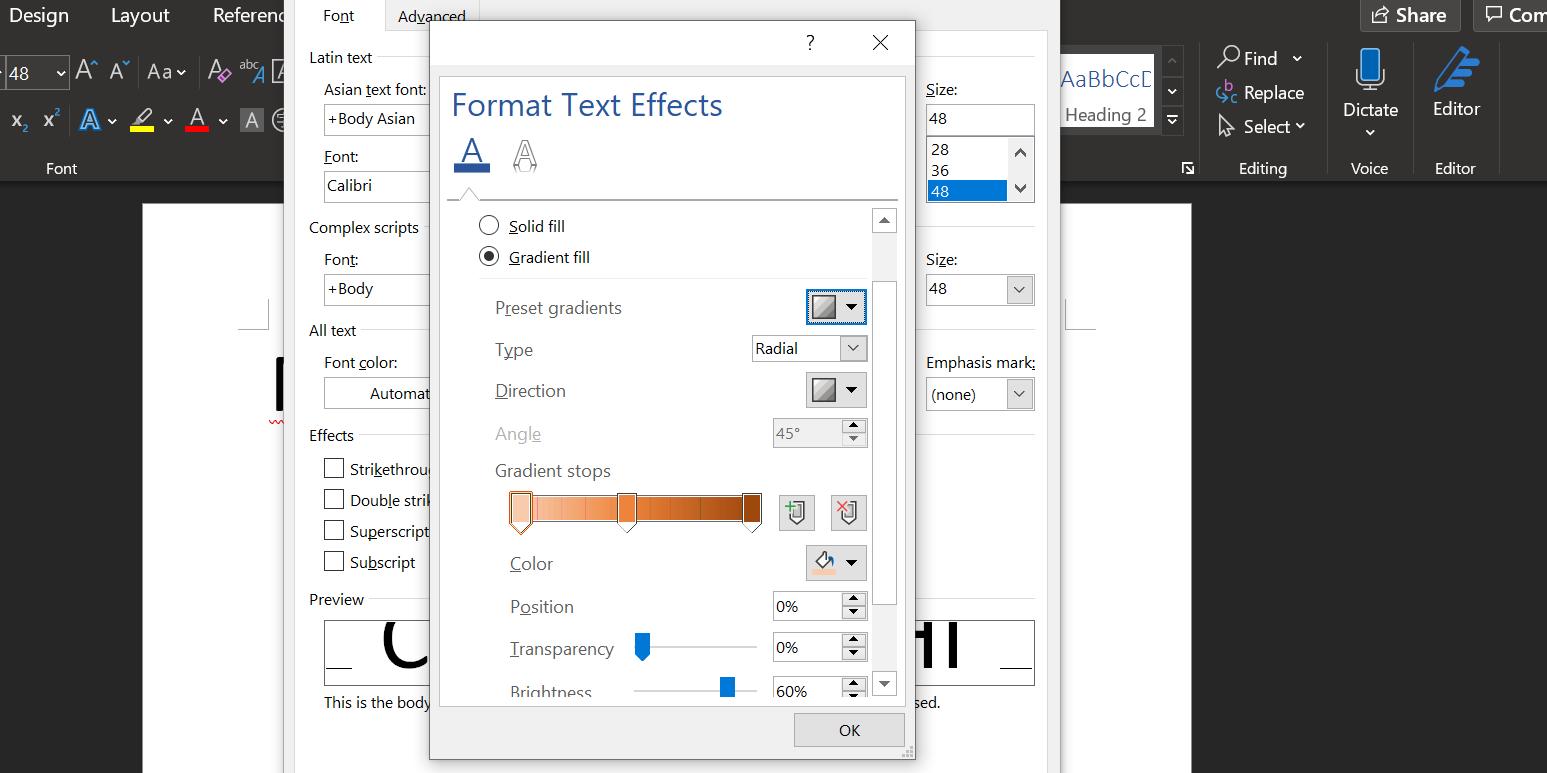
You can get some great effects using a gradient fill, but it’s crucial that you carefully choose your colors to make sure they work well together. Remember to choose colors and color combinations based on your intended audience.
Text Outline
You can also use Text Effects to add an outline to your text, which can really help the words stand out against a background. To get started, head to the Text Effects menu once again, but this time click on the Text Outline dropdown.
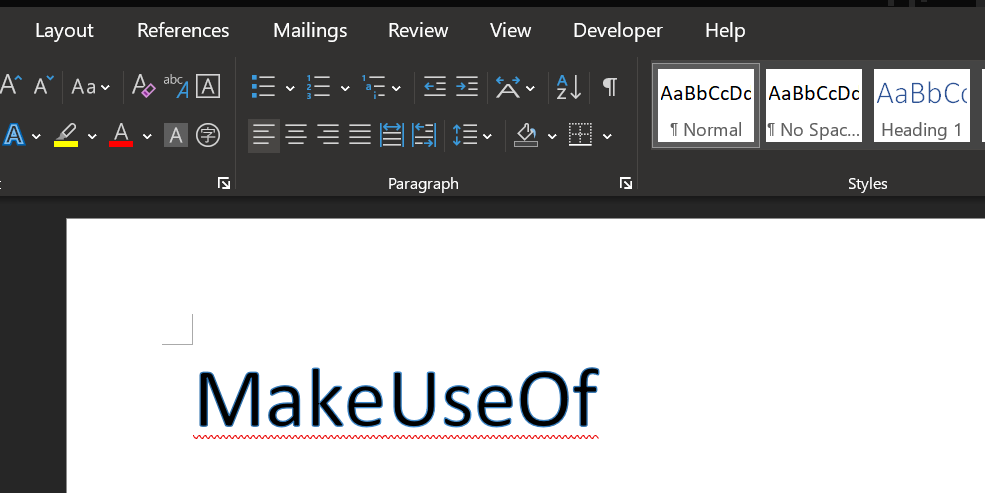
You’ll see Solid line and Gradient line options, just as you did on the Fill section of the menu earlier.
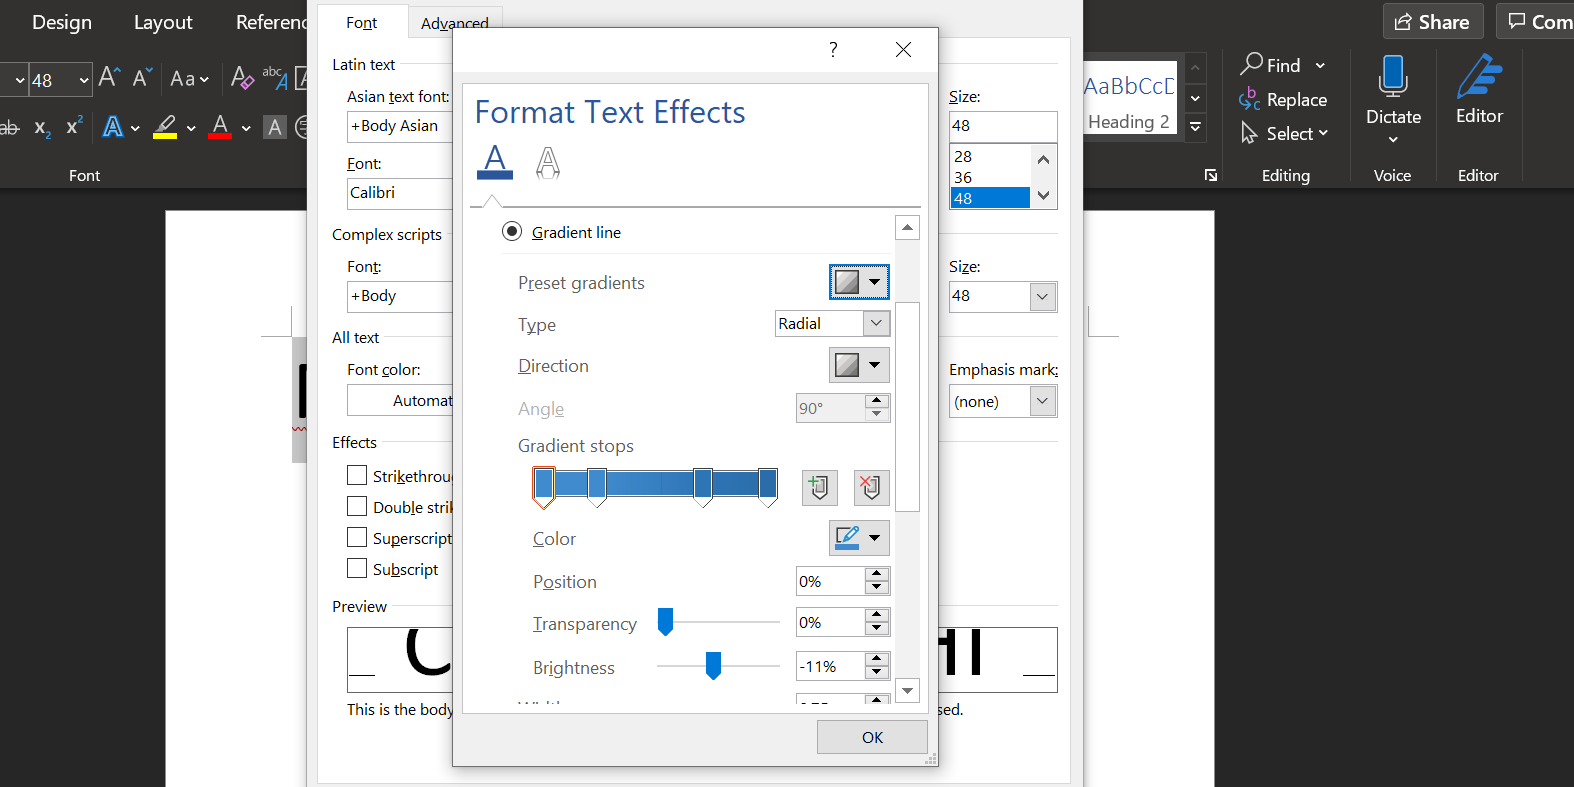
Setting up the color gradient works exactly as above, although obviously the results will be a bit more subtle because only the outline will be affected, rather than the text itself. Use the Width field to adjust how thick the outline is until you’re happy with the results.
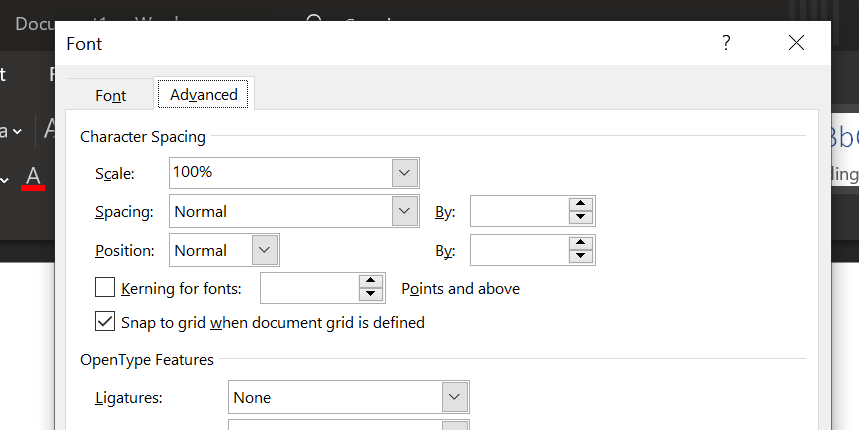
5. Adjust Your Character Spacing
Adjusting the space between individual characters of text may seem like a minor tweak, but it can have a powerful impact on its overall appearance and even its readability.
The most important thing to remember when adjusting character spacing is that less is more. A lot of care and attention goes into font design, so it’s not always wise to make your own modifications. However, sometimes a small piece of prominent text like a title needs some alterations before it looks correct.
To get started, ensure that you have your text set up to your specifications in terms of size and font—adjustments to character spacing should be the final step toward perfecting your text. Once you’re ready, highlight the area you want to tweak and click the pop-out button on the Font section of the Home tab.
Head to the Advanced tab of the window that opens up and look for the Character Spacing section. Here, you can use the Spacing dropdown to switch between Expanded and Condensed to move characters further apart or closer together. Use the input field to the right to specify how drastically you want to alter the spacing
Once you’ve experimented with these controls a little bit, you should be able to use these options to fine-tune your text. For instance, certain fonts might work better if the characters are grouped close together, particularly if the typeface is based on handwriting or calligraphy.

Alternatively, you can expand the character spacing of some text to make it wide enough to fill a space without increasing its height. This technique is particularly effective when combined with more minimalist fonts.
Make Your Text Flow in Word
With good formatting, your text not only looks more pleasing, but it also offers anchors for the eyes and helps a reader flow through the document.
There plenty more design rules for Microsoft Word that you can follow to give your documents a professional touch. These rules are worth learning if you spend quite a bit of your time with Word.