
![]()
Download Article
![]()
Download Article
Want to cross out words, letters, or entire sentences in Microsoft Word? We’ll show you how to use strikethrough to cross out any text in your Microsoft Word document using a computer, Android, iPhone, iPad, or Windows tablet.
Things You Should Know
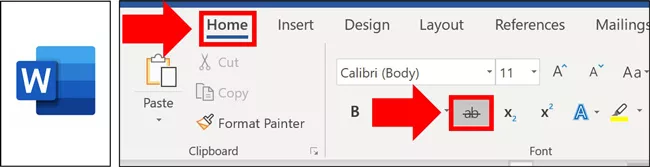
- The strikethrough option is located in the Home tab at the top of Word.
- You can apply a double-line strikethrough using the Font panel’s additional options.
- To remove a strikethrough, highlight the text and click the strikethrough icon. Alternatively, select ‘Clear Formatting’ to remove it.
-

1
Highlight the text you want to strike out. You can do this by clicking and dragging the mouse cursor over the word or phrase.
- Although there is no keyboard shortcut for striking through text, it’ll only take a few seconds to apply the formatting.
-
2
Click the Home tab. If you’re not already on the Home tab, you’ll need to click Home at the top of Word to go there now.
Advertisement
-
3
Click the strikethrough icon. This icon looks like «
ab
» (or «
abc
» in some versions) with a horizontal line through both letters. You’ll see it up near the rest of your font options, such as the options to make words bold and italic. Clicking this icon will cross out all selected text.
- To remove the strikethrough effect, highlight the word or phrase again, and then click the ab icon.
-
4
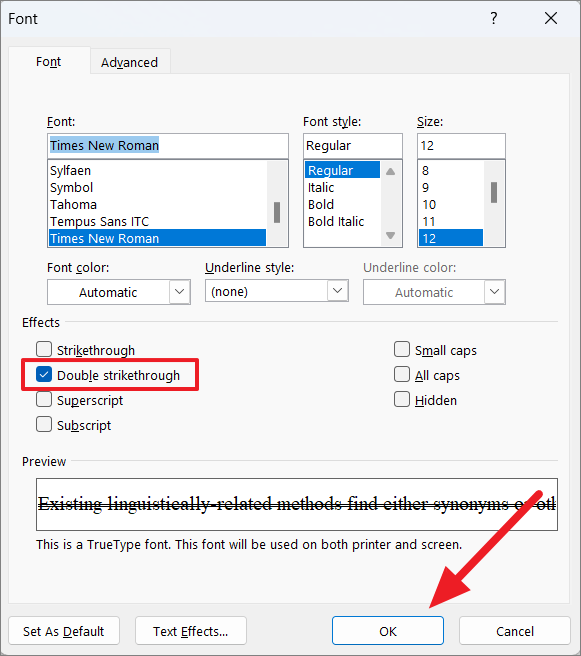
Apply double-line strikethrough (optional). If you want to cross out the selected word or phrase with two lines instead of one, you can use the double-line strikethrough effect.[1]
Here’s how:- With the word or phrase highlighted, click the small down-arrow on the «Font» panel at the top of the screen.
- Check the box next to «Double strikethrough.»
- Click OK.


Advertisement
-
1
Select the text you want to strike out. To do this, just tap and hold one of the words you want to cross out, and then drag either side of the selection bars until all of the desired text is highlighted.
-
2
Tap the strikethrough icon (Android and Windows tablets only). If you see an icon that has lowercase «
ab
» with a horizontal line crossing through it, you can tap that icon to immediately strike through the selected text. If not, skip to the next step.
-
3
Tap the text formatting icon. It’s the icon of a capital «A» that has three horizontal dots beneath it.[2]
You’ll see this option at the top of the screen if you didn’t see a crossed-out «ab
» icon.
-
4
Tap Strikethrough. This crosses out the selected text.
- If you want to remove the strikethrough effect, select the text again, and then tap the ab icon (if you see it) or tap the text formatting icon and select Clear Formatting.


Advertisement
Ask a Question
200 characters left
Include your email address to get a message when this question is answered.
Submit
Advertisement
Video
Thanks for submitting a tip for review!
About This Article
Article SummaryX
1. Highlight the word or phrase with your mouse cursor.
2. Click the Home tab.
3. Click the icon of a crossed-out «ab.»
Did this summary help you?
Thanks to all authors for creating a page that has been read 395,619 times.
Is this article up to date?
In this post you’ll learn how to strikethrough text (or cross out text) in Microsoft Word, Excel, and PowerPoint.
Each software works a little bit differently: PowerPoint and Word both have the strikethrough command available in the Ribbon. In addition, for the Microsoft Office programs, if you navigate through the Font dialog box (or Format Cells dialog box in Excel) you get a bunch of other useful text effect options.
If you want to strikethrough text outside of the Microsoft Office suite (like inside a YouTube comment), you can check out the post by Online Sense here.
How to strikethrough text in Word
There are two ways you can strikethrough text in Microsoft Word.
Neither one is better nor worse, it just depends on the number of features you want to get access to. The Font dialog box method below gives you the most text formatting effects.
1. Use the strikethrough command in the Ribbon
To use the Ribbon in Word to create the strikethrough effect, simply:
- Select the text you want to cross out
- Navigate to the Home tab
- Click the Strikethrough command
Note: If you are using the strikethrough effect to show edits and make comments, a better method is to use Microsoft Word’s built-in Comments command. To learn how to add comments in Word, read our guide here.
2. Use the Font dialog box strikethrough command
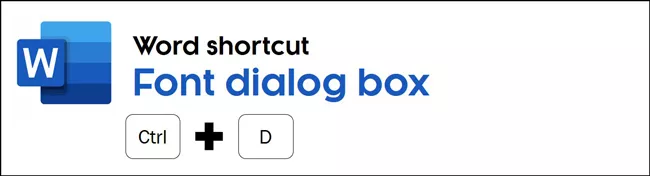
The fastest way to open the Font dialog box in Microsoft Word is with the Ctrl+D keyboard shortcut. If you don’t want to memorize a new shortcut, you can alternatively open it from the Home tab.
- Select the text you want to cross out
- Go to the Home tab
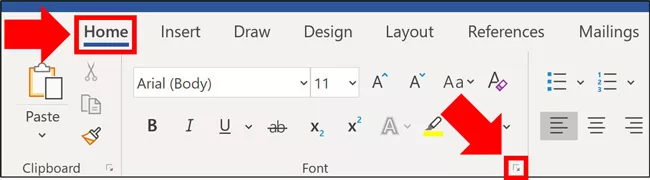
- Click the downward facing arrow in the Font group
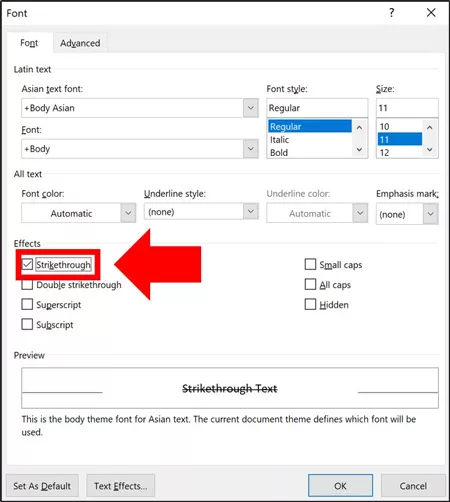
- Select Strikethrough (pictured below)
- Click OK
As pictured below, you have a variety of additional text formatting options inside the Font dialog box. To see an example of these different text features, read below.
3. Text effect options in Word
Checking the box creates the crossed out text effect. To remove the text effect, simply open the Font dialog box again and un-check the box.
These options in Word are quite different than what you will find if you migrate to Google docs. To expand your knowledge and learn how to strikethrough on Google docs, read our guide here.
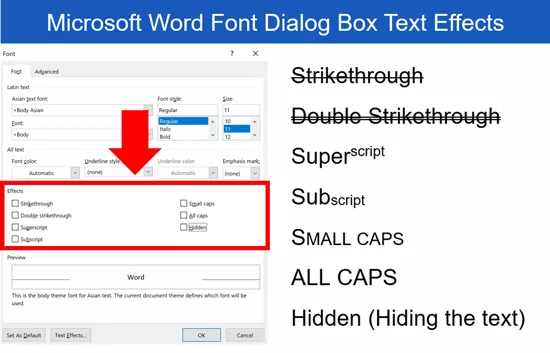
The advantage of using the Font dialog box is that it gives you seven other text effect options (as you can see in the picture above). Here are the keyboard shortcuts for each one:
- Strikethrough: Alt + K
- Double Strikethrough: Alt+L
- Superscript: Alt+P
- Subscript: Alt+B
- Small caps: Alt+M
- All caps: Alt+A
- Hidden: Alt+H
To expand your knowledge and learn how to use the Font dialog box to underline words only and change the underline color of your underline, read our guide here.
Note: To learn all the strikethrough shortcuts for Word, Excel, and PowerPoint, see our guide here.
How to do a strikethrough in Excel
There are 4 different ways you can strikeout text in Excel using the Format Cells dialog box.
The reason that there are so many options in Excel is that you can leverage cell borders to create the diagonal cross-out text effect (described below). But first, let’s start with the basics.
![]()
1. Strikethrough text in Excel
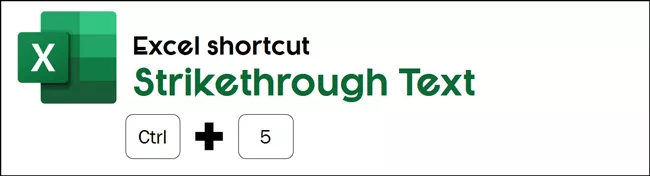
The fastest way to create the strikeout text effect in Excel is to use the Ctrl+5 keyboard shortcut. Simply select your text (or the cell with your text in it) and hit Ctrl+5.
Hitting the Ctrl+5 shortcut once applies the text effect. Hitting the shortcut a second time removes the text effect.
If you don’t want to memorize the shortcut, you can also access the strikethrough command through the Format Cells dialog box.
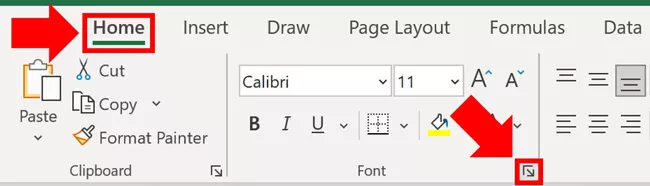
- Select the cells you want to strikeout in your spreadsheet
- Select the Home tab
- Click the downward facing arrow in the Font group
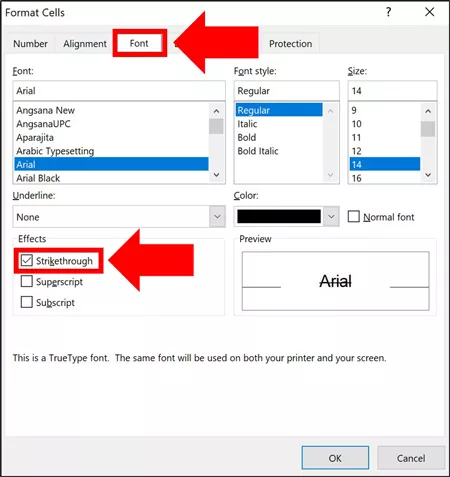
- On the Font tab select Strikethrough (see image below)
- Click OK
Just like any other program, applying the effect once strikes out your text. Applying the effect a second time removes it.
Also please note that the Format Cells dialog box is where you access the Superscript and Subscript commands. To learn more about this, read our guide here.
2. How to diagonally strikethrough text in Excel
In this example, we are going to create a diagonal strikethrough and use the Format Cells keyboard shortcut.
- Select the cells you want to strikeout in your spreadsheet
- Hit Ctrl + 1 to open the Format Cells dialog box (or use the Ribbon command discussed above)
- Navigate to the Border tab
- Add the diagonal lines (picture below )
- Click OK
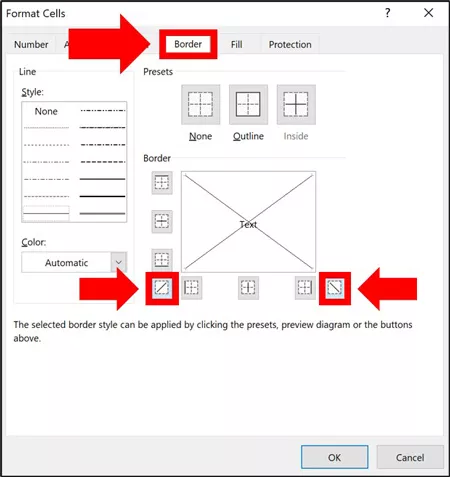
Applying a diagonal border once applies the effect to your cell. Applying it a second time removes it.
So if you later want to remove this diagonal crossed out effect, simply navigate back to the Format Cells dialog box (Ctrl + 1), navigate to the Border section and re-apply the diagonal cell borders.
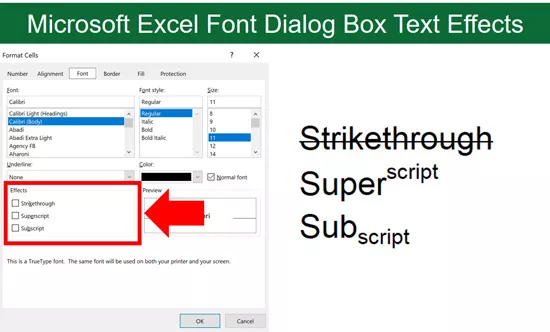
3. Other text effect options in Excel
Inside the Format Cells dialog box in Excel, there are 3 other text effects you can apply to your text (as pictured above):
- Strikethrough: Alt + K
- Superscript: Alt + E
- Subscript: Alt + B
To expand your knowledge and learn how to copy and paste formatting in Excel, see the section on the Paste Special shortcut inside our guide here.
How to strikethrough text in PowerPoint
There are two different ways to cross out text in PowerPoint.
You can either use the strikethrough command in the Ribbon or use the Font dialog box. Which method is best depends on how many text effect options you want to apply.
1. Use the strikethrough command in the Ribbon
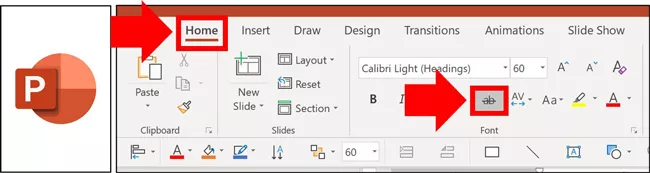
- Select the text you want to cross out
- Navigate to the Home tab
- Click the Strikethrough command
To later remove the crossed-out text effect, simply reapply the strikethrough command or select your text and hit Ctrl + Spacebar on your keyboard to wipe out the text formatting.

2. Use the strikethrough command in the Font dialog box
The fastest way to open the Font dialog box in PowerPoint is to use one of the following three shortcuts (they all do the same thing):
- Ctrl+T
- Ctrl+Shift+P
- Ctrl+Shift+F
If any of the above shortcuts do not work for you, check out our guide here.
If you don’t want to memorize one of the above keyboard shortcuts (which I highly recommend doing), you can also access the Font dialog box from your Ribbon as follows:
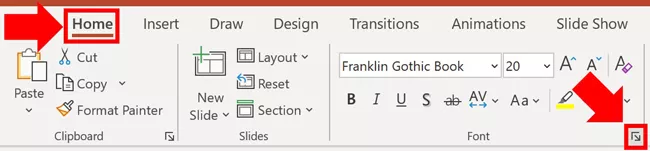
- Select the text you want to cross out
- Click the downward-facing arrow in the in Font group
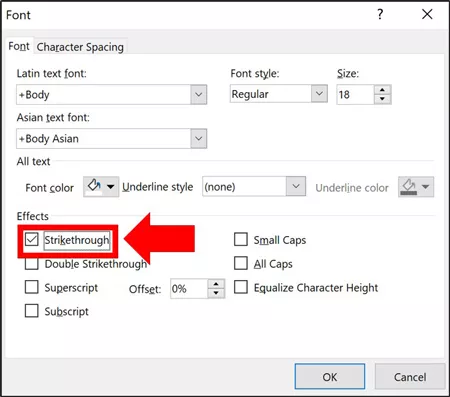
- Select Strikethrough (pictured below)
- Click OK
If you want to apply the Double Strikethrough effect, you have to go through the Font dialog box in PowerPoint.
Using the Font dialog box you do not get a live preview of the effect. After selecting the effect(s) you want, click OK to see it applied to your text.
3. Text effect options in PowerPoint
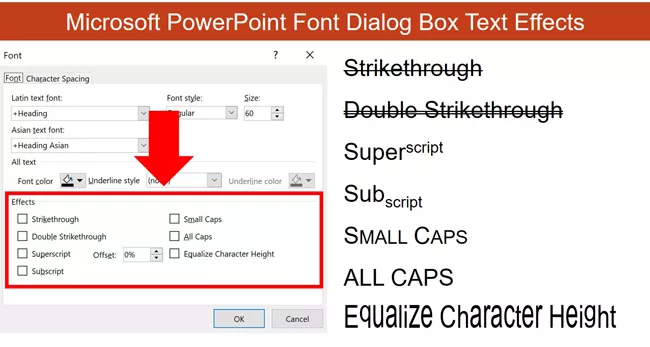
In addition to the strikethrough command, the Font dialog box in PowerPoint gives you 6 other text effects you can apply to your text (as pictured below).
- Strikethrough: Alt + K
- Double Strikethrough: Alt + L
- Superscript: Alt + P
- Subscript: Alt + B
- Small Caps: Alt + M
- All Caps: Alt + A
- Equalize Character Height: Alt + Q
Conclusion
As you can see, there are a variety of ways you can strikethrough text in the Microsoft Office suite.
And while it’s easiest to access the command through the Ribbon in Word and PowerPoint, the Font dialog boxe give you the most text effect options to work with.
If you enjoyed this article, you can learn more about our online courses and presentation resources here.
What’s Next?
Apply or Remove Strikethrough Using Shortcuts in Word
by Avantix Learning Team | Updated March 14, 2021
Applies to: Microsoft® Word® 2010, 2013, 2016, 2019 and 365 (Windows)
You can apply strikethrough to text in Word to cross out or create a line through text. This can be effective to show that something has been removed or deleted. Although you can use Strikethrough on the Home tab in the Ribbon or use the Font dialog box, you can also write your own Strikethrough keyboard shortcut in Microsoft Word.
Recommended article: How to Insert a Line in Word (3+ Ways)
Do you want to learn more about Microsoft Word? Check out our virtual classroom or live classroom Word courses >
What is strikethrough?
Strikethrough is a character format that can be applied to text where a line appears through the selected text. Because it’s a format, it can be removed easily. The most common way to apply strikethrough is to select the text and then click Strikethrough in the Font group on the Home tab in the Ribbon (as an ab with a line through it):

You can also press Alt > H > 4 (Alt, then H and then 4).
Using keyboard shortcuts to access the Font dialog box
To access the Font dialog box using a keyboard shortcut and then apply Strikethrough:
- Select the text you want to strikethrough.
- Press Ctrl + D. The Font dialog box appears.
- Press Alt + K to select Strikethrough (note that k is the underlined letter).
- Press Enter.
Below is the Font dialog box:

Adding Strikethrough to the Quick Access Toolbar
You can also add Strikethrough to the Quick Access Toolbar and then access it using Alt.
It’s usually easier to work with the Quick Access Toolbar if you display it below the Ribbon. If the Quick Access Toolbar is above the Ribbon, click the down arrow to the right of the Quick Access Toolbar and select Show Below the Ribbon from the drop-down menu.
To add Strikethrough to the Quick Access Toolbar:
- Right-click Strikethrough in the Font group on the Home tab in the Ribbon. A drop-down menu appears.
- Select Add to Quick Access Toolbar.
- Click the down arrow to the right of the Quick Access Toolbar and select More commands from the drop-down menu. The Options dialog box appears.
- In the list of commands on the right side of the dialog box, click Strikethrough.
- Click the up arrow that appears on the far right until the button appears at the top of the list (you can move it to the second position, third position, etc.).
- Click OK.
- Press Alt. Key tips appear on the Quick Access Toolbar. If you have moved Strikethrough to the first position, press 1 to apply it. If you have moved Strikethrough to the second position, press 2 to apply it and so on. These are sequential shortcuts, so press Alt and then the number.
Creating a custom keyboard shortcut
You can also create your own keyboard shortcuts in Microsoft Word by customizing the keyboard. This is a great way to create a strikethrough shortcut.
In Microsoft Word (unlike Excel and PowerPoint), you can use File Options to customize your keyboard (note the Customize command at the bottom of the Customize Ribbon category):

To create your own keyboard shortcut for Strikethrough using File Options:
- Click the File tab in the Ribbon.
- Click Options. A dialog box appears.
- In the left panel, click Customize Ribbon.
- In the panel on the right, beside Keyboard Shortcuts, click Customize. The Customize Keyboard dialog box appears.
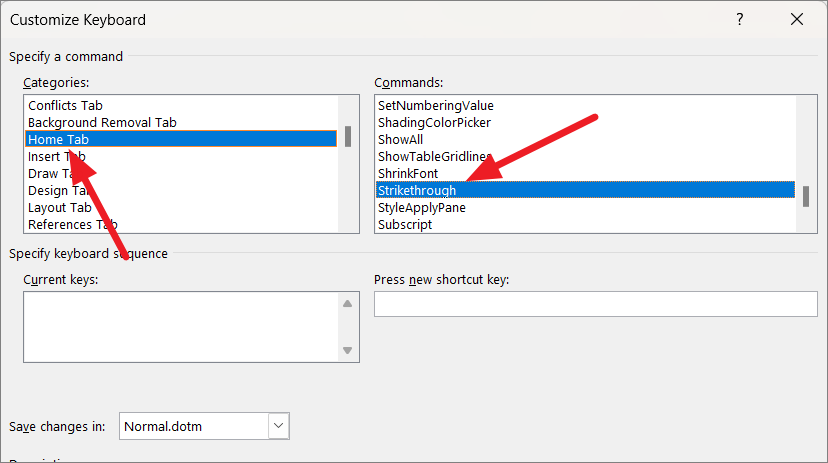
- Under Categories, click Home Tab.
- Under Commands, click Strikethrough.
- Click in the box below Press new shortcut key.
- Press the keys you want to assign (at the same time). You can press Ctrl + Alt + a letter so that it is less likely to have a conflict with a previously assigned shortcut. You don’t want to reassign common shortcuts such as Ctrl + P. In this case, you could press Ctrl + Alt + S.
- Click Assign.
- Beside Save changes in, select Normal (to save the changes globally). Normal is the default global template.
- Click Close.
- Click OK in the Options dialog box.
Now you can select text and use the keyboard shortcut you assigned (such as Ctrl + Alt + S) to apply strikethrough. Strikethrough is a toggle, so you can use the same shortcut to remove strikethrough.
Below is the Customize Keyboard dialog box:

You can assign keyboard shortcuts to many other commands using this strategy.
Because the keyboard assignments are typically saved in the Normal template, when you exit Word, be sure to save the Normal template when prompted.
Subscribe to get more articles like this one
Did you find this article helpful? If you would like to receive new articles, join our email list.
More resources
How to Generate Random Text in Word
How to Hide Comments in Word (or Display Them)
How to Insert Greek Letters or Symbols in Word (6 Ways)
How to Superscript or Subscript in Microsoft Word (with Shortcuts)
3 Strikethrough Shortcuts in Excel to Cross Out Text or Values in Cells
Related courses
Microsoft Word: Intermediate / Advanced
Microsoft Excel: Intermediate / Advanced
Microsoft PowerPoint: Intermediate / Advanced
Microsoft Word: Long Documents Master Class
Microsoft Word: Styles, Templates and Tables of Contents
Microsoft Word: Designing Dynamic Word Documents Using Fields
VIEW MORE COURSES >
Our instructor-led courses are delivered in virtual classroom format or at our downtown Toronto location at 18 King Street East, Suite 1400, Toronto, Ontario, Canada (some in-person classroom courses may also be delivered at an alternate downtown Toronto location). Contact us at info@avantixlearning.ca if you’d like to arrange custom instructor-led virtual classroom or onsite training on a date that’s convenient for you.
Copyright 2023 Avantix® Learning
Microsoft, the Microsoft logo, Microsoft Office and related Microsoft applications and logos are registered trademarks of Microsoft Corporation in Canada, US and other countries. All other trademarks are the property of the registered owners.
Avantix Learning |18 King Street East, Suite 1400, Toronto, Ontario, Canada M5C 1C4 | Contact us at info@avantixlearning.ca
A Strikethrough, also known as strikeout is a font effect where text is crossed out with a horizontal line (like this) to indicate that text is no longer required/valid or error in the text. It is often used to delete the text without actually removing it from the document. You can strikethrough a word, group of characters, sentences, lines, and paragraphs in MS Word.
Strikethrough can be useful when you are collaborating on a document with someone and you want to show that a particular section should be removed from the text or is not important. You will often see strikethrough to show price change on labels.
There are several ways to use strikethrough on Microsoft Word, including via Ribbon, Ribbon guide shortcuts, font window and shortcuts, Quick Access Toolbar shortcut, custom keyboard shortcut, and using shapes.
Strike Out Text Using Strikethrough Button from the Ribbon
The easiest method to strikethrough a text in Microsoft Word is using the dedicated Strikethrough button from the Ribbon. Here’s how you can do that:
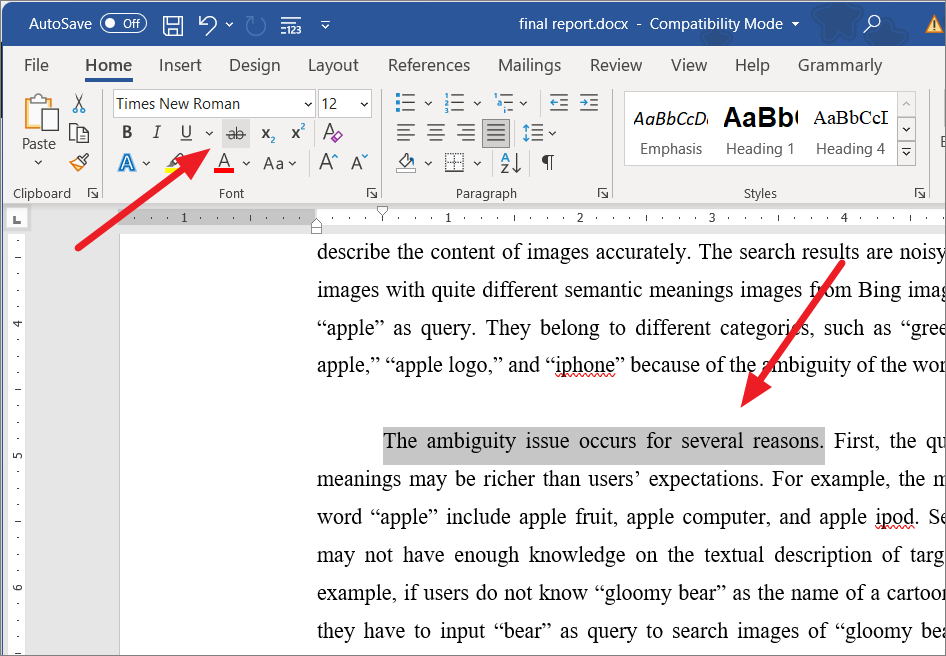
First, open the Word document and select the text you want to strikethrough. Then, under the Home tab, click the ab button with a line across (Strikethrough) like this: ab or abc from the Font section.
Use your Ribbon Guide shortcuts
You can also use Word’s Ribbon guide shortcuts to access the same strikethrough button from the Ribbon.
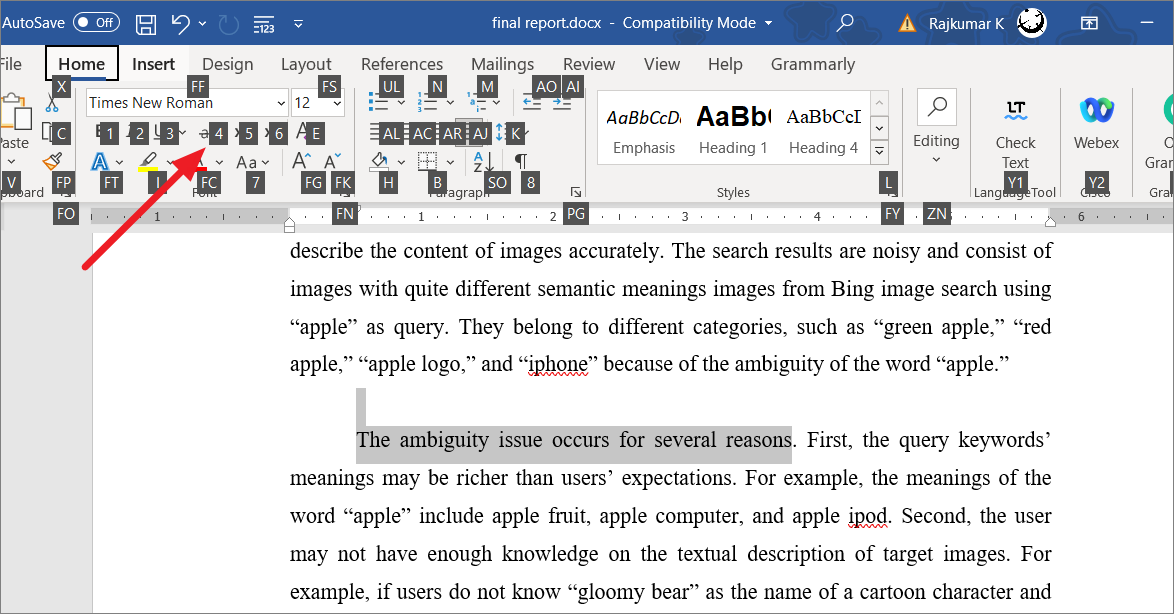
Select the text you want to strike out, then press these shortcut keys one after the other: Alt,H,4.
As soon as you type Alt, Word will enable guide shortcuts for ribbon. When you press H, it will switch to the Home tab, then click 4 to enable strikethrough.
Either way, the selected text will be quickly crossed out as shown below.

To remove the strikethrough, simply select the struck-out text and click the ‘Strikethrough’
Use the Font Dialog box to Cross Out Text
The Font Dialog box is another way to add strikethrough to text in MS Word. In some cases the Strikethrough option is not available in the Ribbon, you can access it from the Font window.
First, select the text you want to strikethrough, then click the small Diagonal Arrow in the bottom right corner of the Font group under ‘Home’ tab. Or press the Ctrl+D.
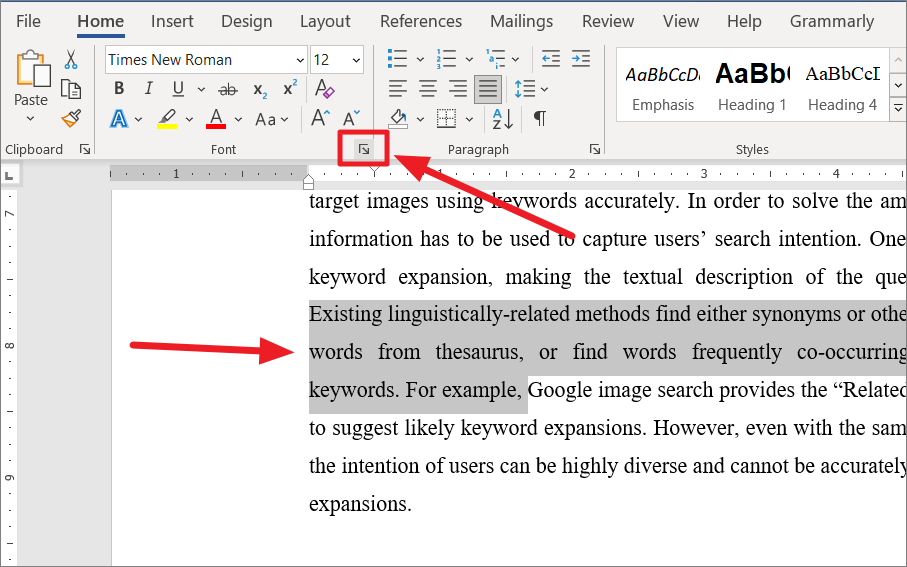
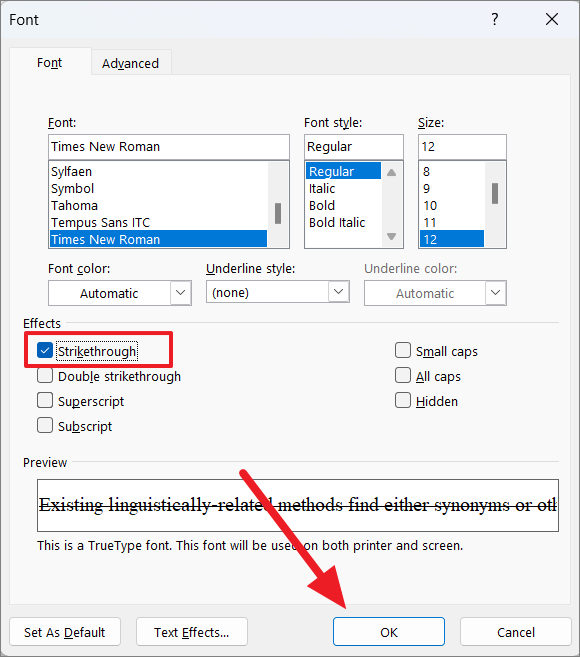
When the Font window opens, check the ‘Strikethrough’ option under the Effects section and click ‘OK’ or simply press Alt+K.
Add Double Strikethrough using Font dialog box
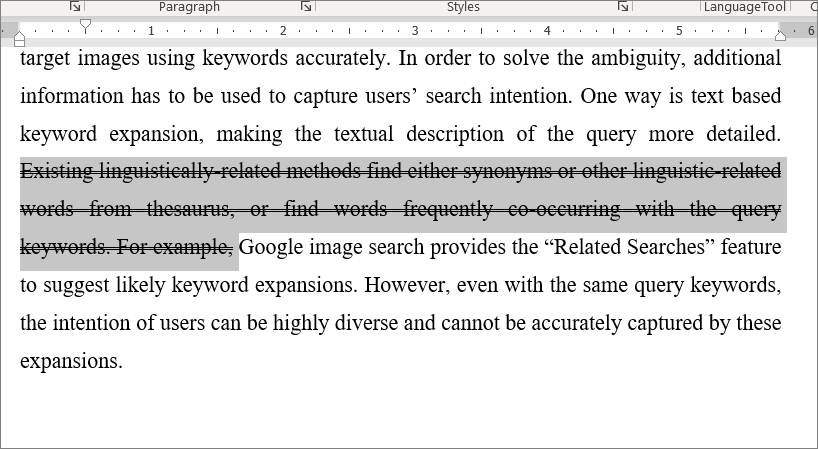
Select the text you want to double strike out, then open the Font dialog windows using the above steps (Ctrl+D). From the Font window, click the ‘Double strikethrough’ to check it, and click ‘OK’ to add double strikethrough.
As shown below, the selected text will be double strikethrough.
Create a Custom Keyboard Shortcut to Strikethrough
The default Strikethrough shortcut key requires you to press Alt, then H, then 4 sequentially, which may be a bit difficult and needs more time to access the option. If you are not comfortable using the provided shortcuts for accessing strikethrough, you can create your own shortcut in Microsoft Word by customizing the keyboard. Follow these steps to create a custom keyboard shortcut for Strikethrough.
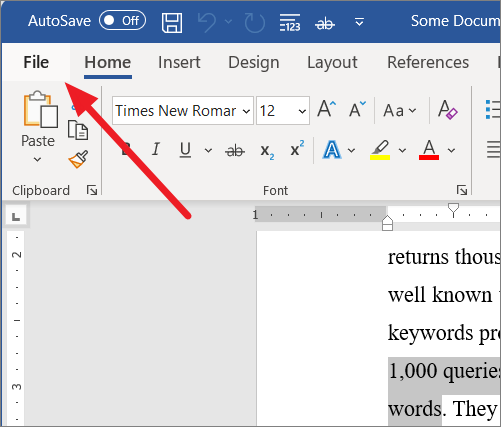
On the top left corner MS Word window, click on the ‘File’ tab.
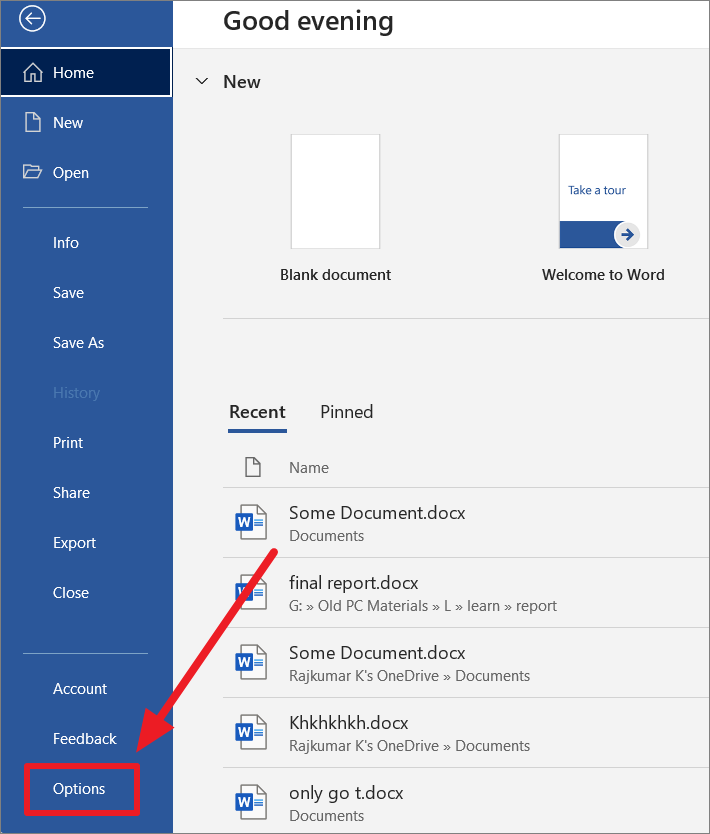
Then, click on ‘Options’ in the bottom left corner of the backstage view.
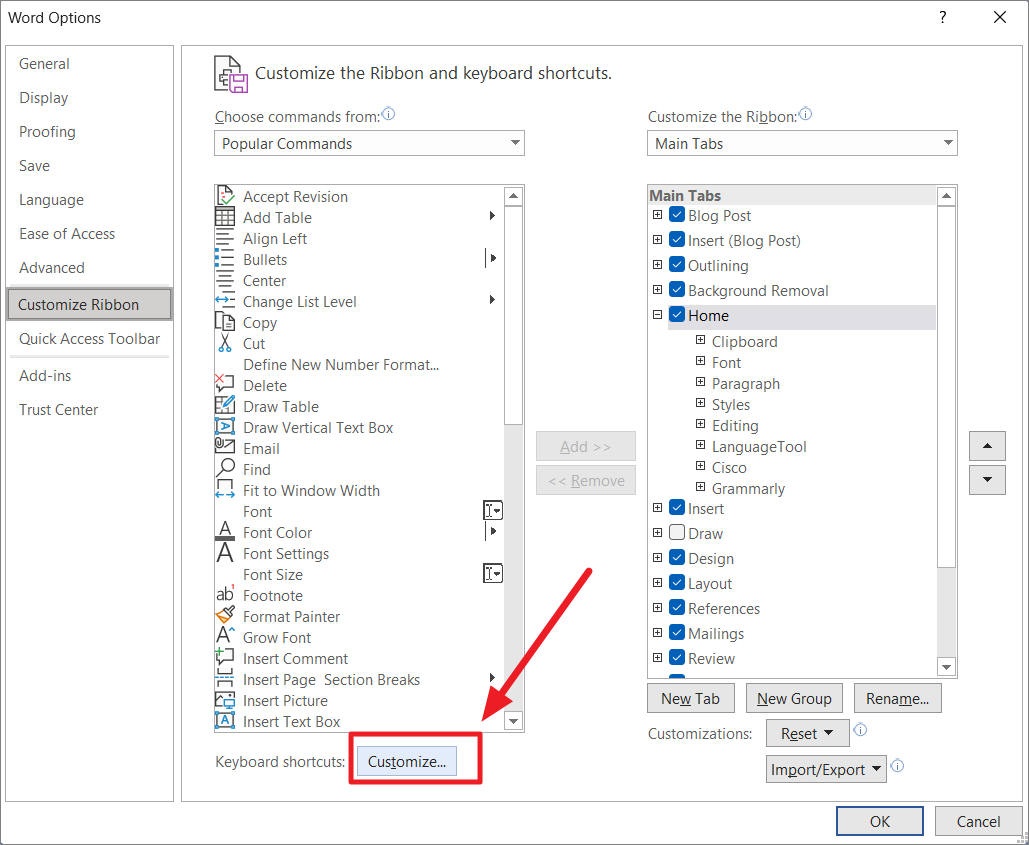
In the Word Options window, click on ‘Customize Ribbon’ from the panel on the left.
Now, on the right, click the ‘Customize’ button next to Keyboard Shortcuts at the bottom window.
Another dialog window called Customize Keyboard will appear. Here, scroll down and select ‘Home tab’ under Categories and choose ‘Strikethrough’ under Commands.
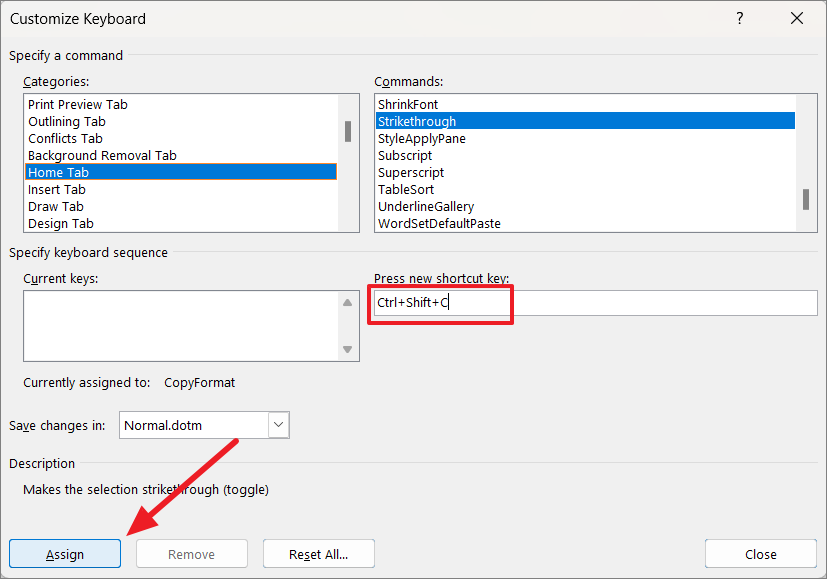
Next, click in the box below ‘Press new shortcut key:’. And hit the keys (simultaneously) you want to assign as the shortcut. It is recommended to assign three key shortcuts to avoid conflict with other common shortcuts. Here, we have entered Ctrl+Shift+C, but you can enter any other shortcuts. After entering the shortcut keys, click the ‘Assign’ button at the bottom left corner to confirm it.
Then, click the ‘Close’ button to close the window.
Now, you can select the text and press your custom keyboard shortcut to quickly strikethrough the selected text.
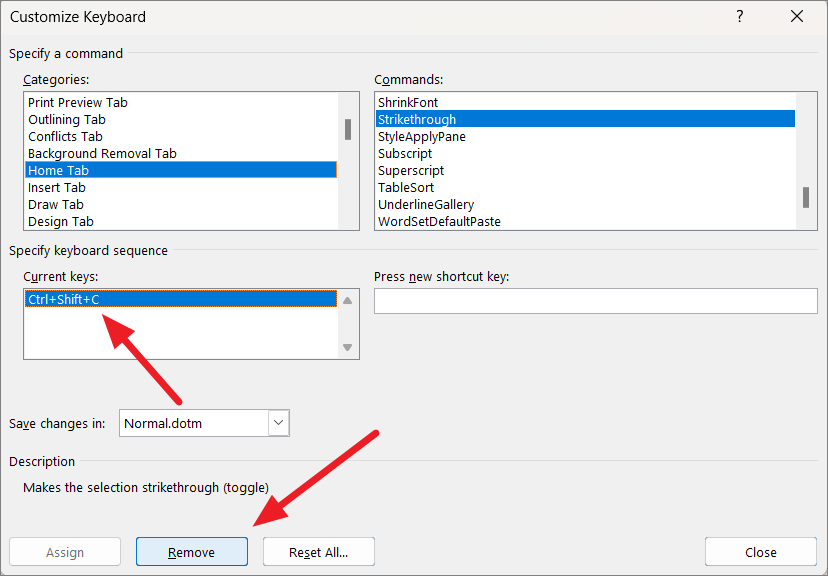
To remove the shortcut keys, go back to the Customize Keyboard window using the same above steps. Then, select ‘Home tab’ under Categories and choose ‘Strikethrough’ under Commands. After that, select the shortcut keys under ‘Current Keys:’ and click the ‘Remove’ button to delete the shortcut.
Add Strikethrough to the Quick Access Toolbar
If the Strikethrough button is unavailable in the Ribbon, you can add Strikethrough to the Quick Access Toolbar and then quickly access it.
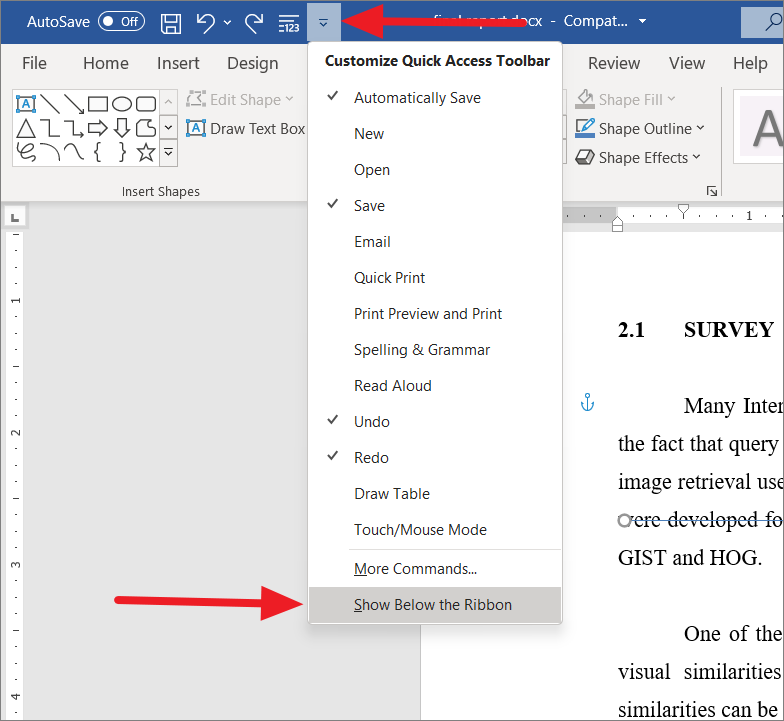
Quick Access Toolbar is the small tool above right above the ribbon. If you want to move the Quick Access Toolbar below the ribbon, click the small down arrow button to the right of the Quick Access Toolbar and select ‘Show Below the Ribbon’ from the drop-down.
To add Strikethrough to the Quick Access Toolbar, follow these instructions:
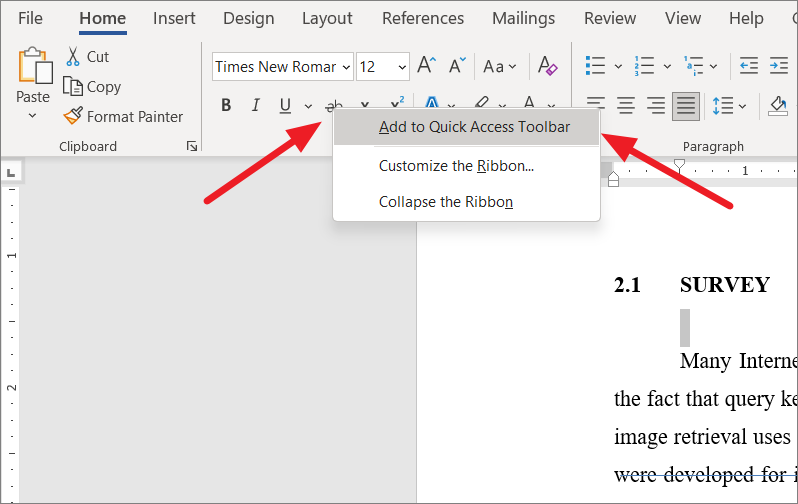
If the Strikethrough button is available in the Ribbon, right-click ‘Strikethrough’ in the Font group on the ‘Home’ tab in the Ribbon. From the drop-down, select ‘Add to Quick Access Toolbar’.
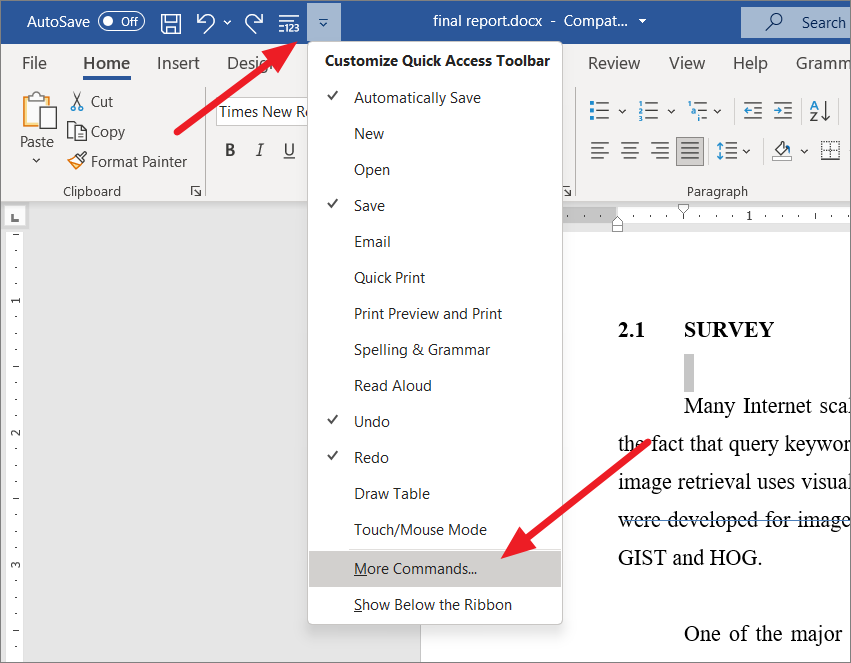
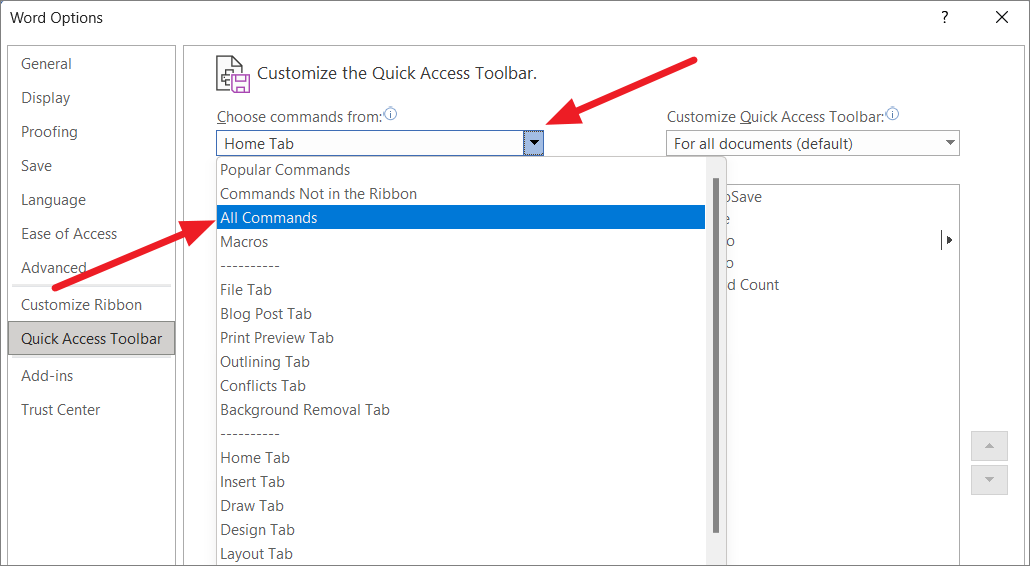
If the Strikethrough option is not available in the Ribbon, click the down arrow to the right of the Quick Access Toolbar and select ‘More Commands…’ from the drop-down menu. Or, go to the ‘File’ tab, select ‘Options’, and then click ‘Quick Access Toolbar’ in the Word Options window.
On the right side, choose ‘All Commands…’ from the ‘Choose commands from:’ drop-down.
From the list of commands on the left side box, select the ‘Strikethrough’ command and click the ‘Add >>’ button in the middle to add it to the right-side box.
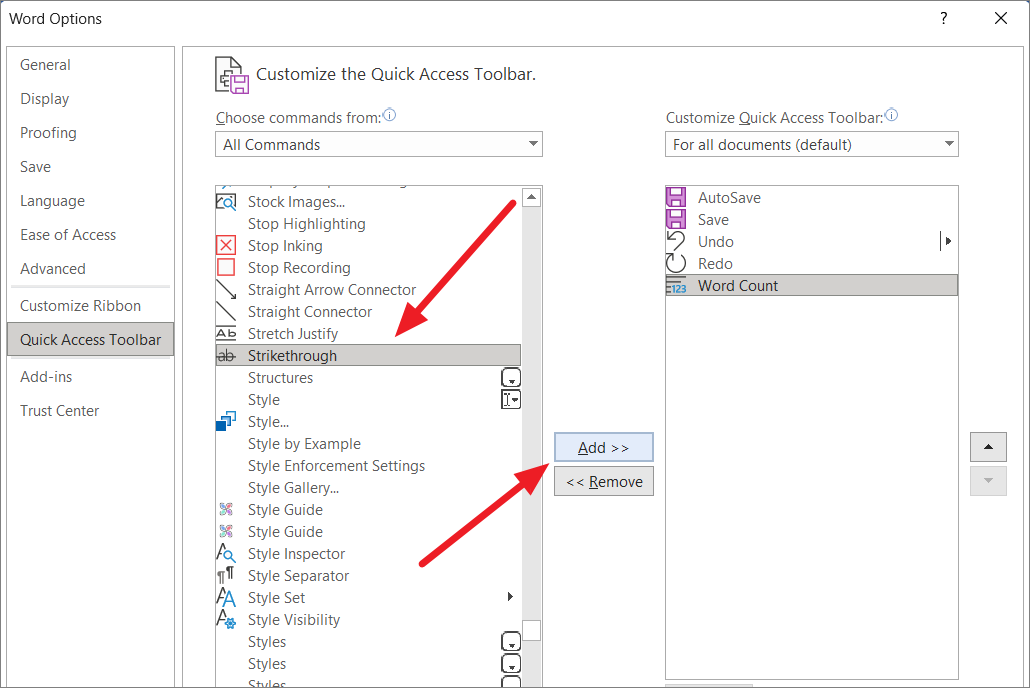
Then, click ‘OK’ to save the changes.
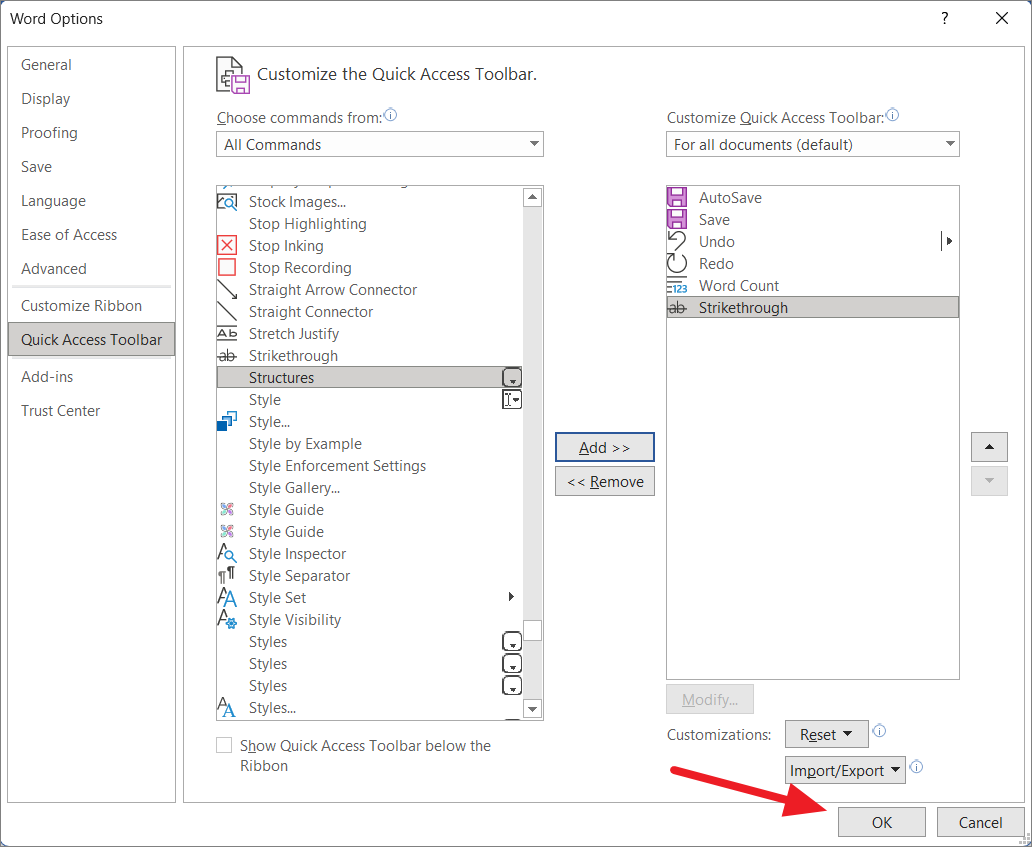
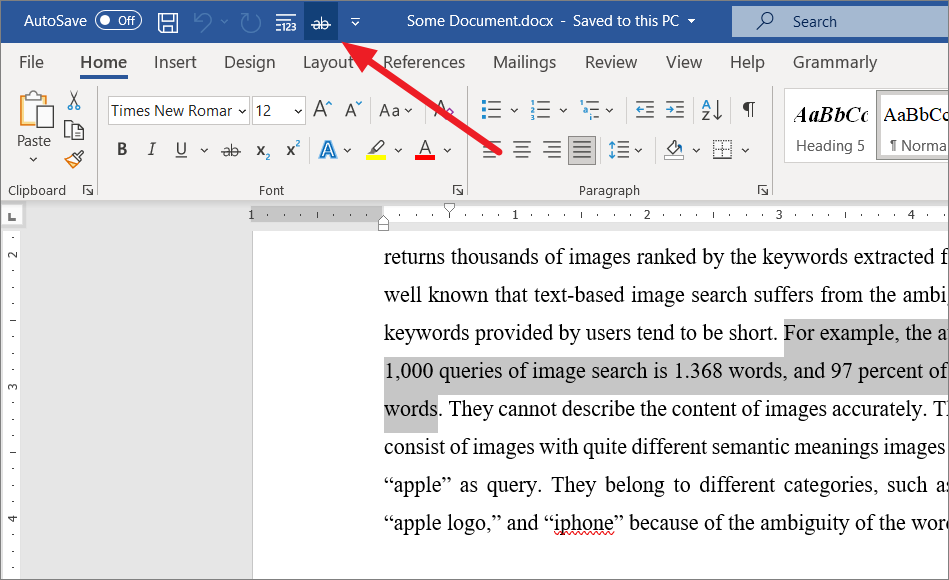
Now, you can quickly access the Strikethrough shortcut from the Quick Access Toolbar at the top.
Put a Line Through a Text Using Shapes
You can also put a line through text using created line shape. You can insert a line from the Shapes feature and use it to strikethrough any number of text. With the created line, you can even strike across an entire paragraph or page. Here’s how you can do that:
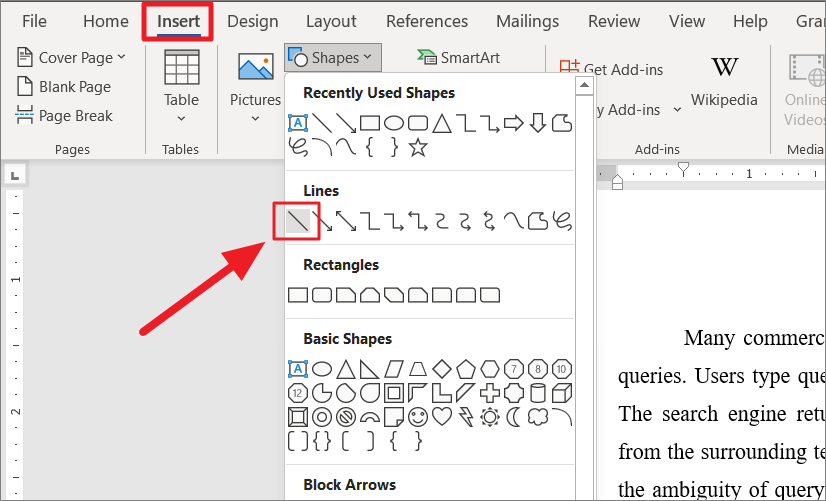
First, open the document where you want to strikethrough text. Go to the ‘Insert’ tab in the Ribbon. Then, click the ‘Shape’s drop-down button from the Illustrations group and select the ‘Line’ shape in the Line section.
Then, draw a line over the text you want to strike out by holding and moving the across the text.
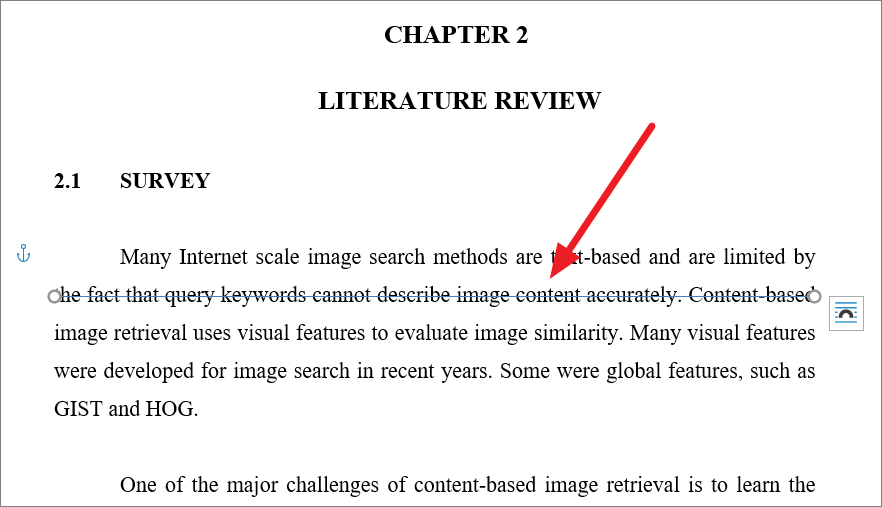
You can also create a diagonal cross-out line across a passage or an entire page using the same method.

This method creates a customizable strikethrough on text. After drawing a cross-out line across text, you change the color, width, and design of the line.
You can select the inserted line, and change the line color, outline, and effects from the Shape Styles group under the ‘Shape Format’ tab.
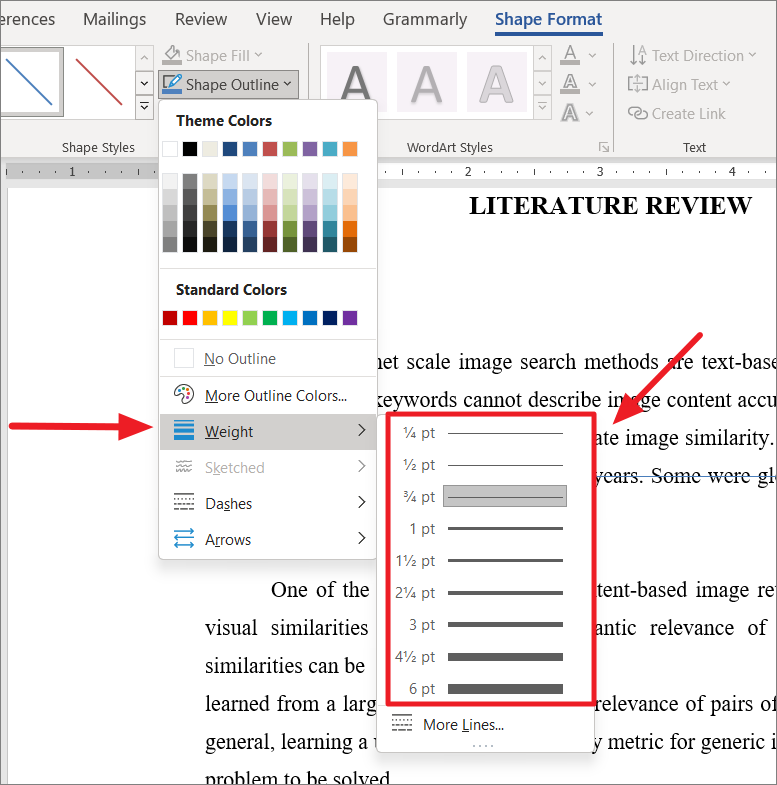
To change the width of the line, select the line, and click the ‘Shape Outline’ drop-down button from the Shape Format tab.

Then, select ‘Weight’ from the drop-down menu and choose a line width from the sub-menu.
To change the color of the line, click the ‘Shape Outline’ menu and choose a color from the Theme Colors section.

You can change the line into dashes or arrows using the ‘Dashes’ and ‘Arrows’ options from the Shape Outline menu.
That’s it.
Now we will tell you how to cross out the word inThe Vorda. After all, working in the specified text editor gives the user great opportunities. Thanks to the application, you can make various manipulations with the text. We will describe one of them now.
How to cross out the word in the Word: instruction

To start, we type in the Microsoft Word programnecessary to us text. It should be noted that for the crossed out text in the Word is a special designation. We have this function to use. If there is no «abc strikeout» button in the toolbar, place the cursor on the blank field of the toolbar. Click the right mouse button and in the resulting tool window select the «Settings …» section. Further, in order to understand how to cross out the word in a Word, we need to select the «Commands» section in the appeared settings window. Next, go to the left column of the «Categories» and find the «Format» item. Let’s pay attention to the right column of the «Team», because there appeared a list of opportunities corresponding to this category. Move the slider down and find the notation «abc Strikethrough». We put the cursor on the icon, click with the left mouse button, and then, while holding it, drag the symbol to the toolbar field. You can choose the right place for you.
How to use

Now you know how to cross out the word in the word,because the toolbar from now on fixed the designation of the command, which allows you to cross out the signs, words and letters. However, we will talk about some more points. So, in our printed text choose the word to be struck out. Select it. Click on the symbol «abc Strikethrough» in the toolbar. All the word that interests us is crossed out.
Type the text

Next, we’ll discuss how to write with a crossed out font. Based on specific goals in writing individual blocks of necessary text or an inscription, it is better to use different variants in font design. Thanks to this content will look expressive, and your reader will be much harder to make a mistake in understanding the semantic load of the inscription. One way to achieve a correct understanding of the written text can be called using a crossed out font. If you use the text editor «Word», it is enough to activate the function, which was discussed above, and go to the material set. If you are interested in a similar feature in the Photoshop graphics editor, click on the text layer selected for such processing, then expand the «Window» section in the program menu. You must select the «Symbol» line in order to open a special panel. In it, you can make changes to text parameters on the selected layer. The second bottom row on this panel has pictograms, each of which depicts the Latin letter «T» in various spellings. In this case, the crossed out letter in this list is in last place. Pressing the rightmost pictogram, you will get the desired result. Now you know how to cross out the word in the Word.
</ p>>