
If you frequently create a certain type of document, such as a monthly report, a sales forecast, or a presentation with a company logo, save it as a template so you can use that as your starting point instead of recreating the file from scratch each time you need it. Start with a document that you already created, a document you downloaded, or a new Microsoft template you customized.
Save a template
-
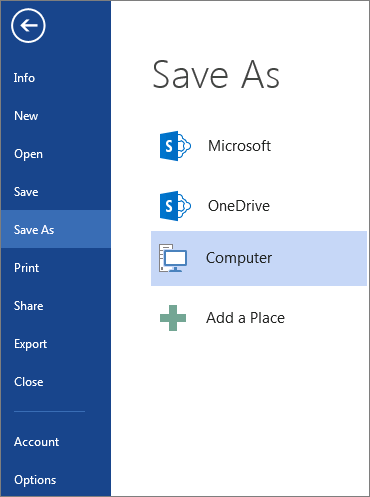
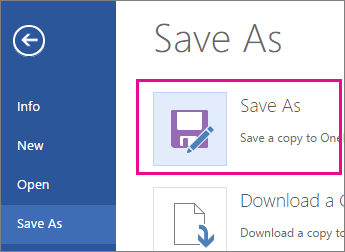
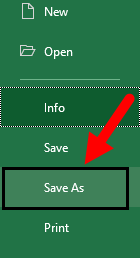
To save a file as a template, click File > Save As.
-
Double-click Computer or, in Office 2016 programs, double-click This PC.

-
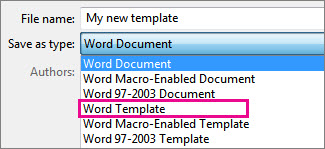
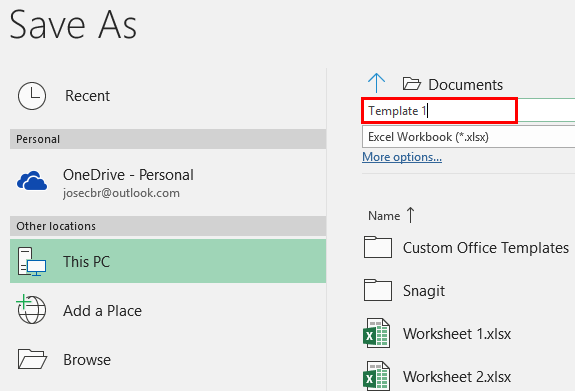
Type a name for your template in the File name box.
-
For a basic template, click the template item in the Save as type list. In Word for example, click Word Template.
If your document contains macros, click Word Macro-Enabled Template.
Office automatically goes to the Custom Office Templates folder.
-
Click Save.
Tip: To change where your application automatically saves your templates, click File > Options > Save and type the folder and path you want to use in the Default personal templates location box. Any new templates you save will be stored in that folder, and when you click File > New > Personal, you’ll see the templates in that folder.
Edit your template
To update your template, open the file, make the changes you want, and then save the template.
-
Click File > Open.
-
Double-click Computer or This PC.
-
Browse to the Custom Office Templates folder that’s under My Documents.
-
Click your template, and click Open.
-
Make the changes you want, then save and close the template.
Use your template to make a new document
To start a new file based on your template, click File > New > Custom, and click your template.
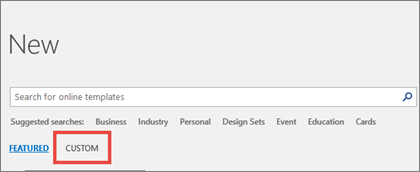
Note: If you’re using Office 2013, this button may say Personal instead of Custom.
Use your templates from earlier versions of Office
If you made templates in an earlier version of Office, you can still use them in Office 2013 and 2016. The first step is to move them into the Custom Office Templates folder so your application can find them. To move your templates quickly, use the Fix it tool.
Word
-
Open the Word document that you want to save as a template.
-
On the File menu, click Save as Template.
-
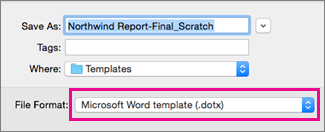
In the Save As box, type the name that you want to use for the new template.
-
(Optional) In the Where box, choose a location where the template will be saved.
-
Next to File Format, click Microsoft Word template (.dotx), or, if your document contains macros, click Microsoft Word Macro-Enabled template (.dotm).
-
Click Save.
Unless you select a different location, the template is saved in /Users/username/Library/Group Containers/UBF8T346G9.Office/User Content/Templates.
To change where Word automatically saves your templates, on the Word menu, click Preferences, and then under Personal Settings, click File Locations. Under File Locations, select User templates from the list, and then click Modify. Type the new folder and path you want to use, and Word will save any new templates in that folder.
You can customize an existing template to make it even more useful. Add static information to the existing template, and then save the file again (as a template).
-
On the File menu, click New from Template.
-
Click a template that is similar to the one you want to create, and then click Create.
Note: If you can’t find a template, you can search for it based on keywords in the Search All Templates box.
-
Add, delete, or change any text, graphics, or formatting, and make any other changes that you want to appear in all new documents that you base on the template.
-
On the File menu, click Save as Template.
-
In the Save As box, type the name that you want to use for the new template.
-
(Optional) In the Where box, choose a location where the template will be saved.
-
Next to File Format, click Microsoft Word template (.dotx), or, if your template contains macros, click Microsoft Word Macro-Enabled template.
-
Click Save.
Unless you select a different location, the template is saved in /Users/username/Library/Group Containers/UBF8T346G9.Office/User Content/Templates.
To change where Word automatically saves your templates, on the Word menu, click Preferences, and then under Personal Settings, click File Locations. Under File Locations, select User templates from the list, and then click Modify. Type the new folder and path you want to use, and Word will save any new templates in that folder.
To start a new document based on your template, on the File menu, click New from Template, and then select the template you want to use.
-
In the Finder, open /Users/username/Library/Group Containers/UBF8T346G9.Office/User Content/Templates.
-
Drag the templates that you want to delete to the Trash.
PowerPoint
-
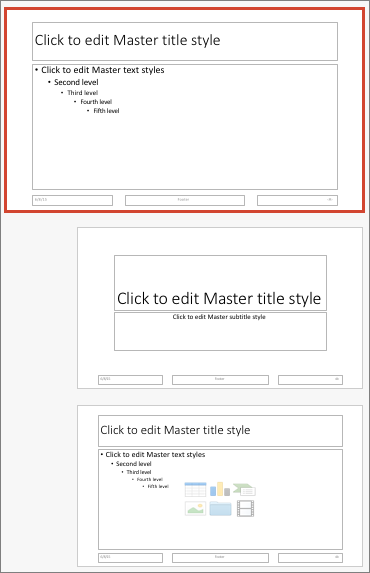
Open a blank presentation, and then on the View tab, click Slide Master.
The slide master is the largest slide image at the top of the slide thumbnail list. Associated layouts are positioned beneath it.
-
To make changes to the slide master or layouts, on the Slide Master tab, do any of these:
-
To add a colorful theme with special fonts, and effects, click Themes, and pick a theme.
-
To change the background, click Background Styles, and pick a background.
-
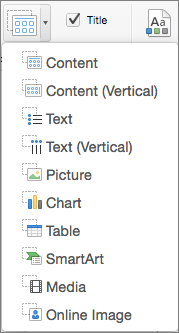
To add a placeholder for text, picture, chart, and other objects, in the thumbnail pane, click the slide layout that you want to hold the placeholder. From Insert Placeholder, pick the type of placeholder you want to add, and drag to draw the placeholder size.
-

-
Open the presentation that you want to save as a template.
-
On the File tab, click Save as Template.
-
In the Save As box, type the name that you want to use for the new template.
-
(Optional) In the Where box, choose a location where the template will be saved.
-
Next to File Format, click PowerPoint Template (.potx), or, if your presentation contains macros, click PowerPoint Macro-Enabled Template (.potm).
-
Click Save.
Unless you select a different location, the template is saved in /Users/username/Library/Group Containers/UBF8T346G9.Office/User Content/Templates.
You can customize an existing template to make it even more useful. Add static information to the existing template, and then save the file again (as a template).
-
On the File menu, click New from Template.
-
Click a template that is similar to the one you want to create, and then click Create.
Note: If you can’t find a template, you can search for it based on keywords in the Search All Templates box.
-
Add, delete, or change any text, graphics, or formatting, and make any other changes that you want to appear in all new presentations that you base on the template.
-
On the File menu, click Save as Template.
-
In the Save As box, type the name that you want to use for the new template.
-
(Optional) In the Where box, choose a location where the template will be saved.
-
Next to File Format, click PowerPoint Template (.potx), or, if your template contains macros, click PowerPoint Macro-Enabled Template (.potm).
-
Click Save.
Unless you select a different location, the template is saved in /Users/username/Library/Group Containers/UBF8T346G9.Office/User Content/Templates.
To start a new presentation based on a template, on the File menu, click New from Template, and then select the template you want to use.
-
In the Finder, open /Users/username/Library/Group Containers/UBF8T346G9.Office/User Content/Templates.
-
Drag the templates that you want to delete to the Trash.
Excel
-
Open the workbook that you want to save as a template.
-
On the File menu, click Save as Template.
-
In the Save As box, type the name that you want to use for the new template.
-
(Optional) In the Where box, choose a location where the template will be saved.
-
Next to File Format, click Excel Template (.xltx), or, if your workbook contains macros, click Excel Macro-Enabled Template (.xltm).
-
Click Save.
Unless you select a different location, the template is saved in /Users/username/Library/Group Containers/UBF8T346G9.Office/User Content/Templates.
You can customize an existing template to make it even more useful. Add static information to the existing template, and then save the file again (as a template).
-
On the File menu, click New from Template.
-
Click a template that is similar to the one you want to create, and then click Create.
Note: If you can’t find a template, you can search for it based on keywords in the Search All Templates box.
-
Add, delete, or change any content, graphics, or formatting, and make any other changes that you want to appear in all new workbooks that you base on the template.
-
On the File menu, click Save as Template.
-
In the Save As box, type the name that you want to use for the new template.
-
(Optional) In the Where box, choose a location where the template will be saved.
-
Next to File Format, click Excel Template (.xltx), or, if your template contains macros, click Excel Macro-Enabled Template (.xltm).
-
Click Save.
Unless you select a different location, the template is saved in /Users/username/Library/Group Containers/UBF8T346G9.Office/User Content/Templates.
To start a new workbook based on a template, on the File menu, click New from Template, and then select the template you want to use.
-
In the Finder, open /Users/username/Library/Group Containers/UBF8T346G9.Office/User Content/Templates.
-
Drag the templates that you want to delete to the Trash.
See also
Differences between templates, themes, and Word styles
Word
-
Open the document.
-
Add, delete, or change any text, graphics, or formatting, and make any other changes that you want to appear in all new documents that you base on the template.
-
On the File menu, click Save As.
-
On the Format pop-up menu, click Word Template (.dotx).
-
In the Save As box, type the name that you want to use for the new template, and then click Save.
Unless you select a different location, the template is saved in /Users/username/Library/Application Support/Microsoft/Office/User Templates/My Templates.
-
On the File menu, click Close.
To organize templates, use the Finder to create a new folder in /Users/username/Library/Application Support/Microsoft/Office/User Templates/My Templates, and then save your template in the new folder.
Note: If you are using Mac OS X 7 (Lion), the Library folder is hidden by default. To show the Library folder, in the Finder, click the Go menu, and then hold down OPTION.
You can customize an existing template to make it even more useful. Add static information to the existing template, and then save the file again (as a template).
-
On the Standard toolbar, click New from template
. -
In the left navigation pane, under TEMPLATES, click All.
Note: If you can’t find a template, you can search for it based on keywords in the Search box.
-
Click a template that is similar to the one that you want to create, and then click Choose.
-
Add, delete, or change any text, graphics, or formatting, and make any other changes that you want to appear in all new documents that you base on the template.
-
On the File menu, click Save As.
-
On the Format pop-up menu, click Word Template (.dotx).
-
In the Save As box, type the name that you want to use for the new template, and then click Save.
Unless you select a different location, the template is saved in /Users/username/Library/Application Support/Microsoft/Office/User Templates/My Templates.
To organize templates, use the Finder to create a new folder in /Users/username/Library/Application Support/Microsoft/Office/User Templates/My Templates, and then save your template in the new folder.
Note: If you are using Mac OS X 7 (Lion), the Library folder is hidden by default. To show the Library folder, in the Finder, click the Go menu, and then hold down OPTION.
 .
.-
On the Standard toolbar, click New from template
. -
In the left navigation pane, under TEMPLATES, click My Templates.
Note: If you created folders to organize your templates, the folders are displayed under My Templates. You need to click the folder to see the templates.
-
Click the template that you created, and then click Choose.
-
In the Finder, open /Users/username/Library/Application Support/Microsoft/Office/User Templates/My Templates.
Note: If you are using Mac OS X 7 (Lion), the Library folder is hidden by default. To show the Library folder, in the Finder, click the Go menu, and then hold down OPTION .
-
Drag the templates that you want to delete to the Trash.
PowerPoint
-
Open the presentation that you want to create the new template from.
-
Add, delete, or change any text, graphics, or formatting, and make any other changes that you want to appear in all new presentations that you base on the template.
-
On the File menu, click Save As.
-
On the Format pop-up menu, click PowerPoint Template (.potx).
-
In the Save As box, type the name that you want to use for the new template, and then click Save.
Unless you select a different location, the template is saved in /Users/username/Library/Application Support/Microsoft/Office/User Templates/My Templates.
To organize templates, use the Finder to create a new folder in /Users/username/Library/Application Support/Microsoft/Office/User Templates/My Templates, and then save your template in the new folder.
Note: If you are using Mac OS X 7 (Lion), the Library folder is hidden by default. To show the Library folder, in the Finder, click the Go menu, and then hold down OPTION.
You can customize an existing template to make it even more useful. Add static information to the existing template, and then save the file again (as a template).
-
On the Standard toolbar, click New from template
. -
In the left navigation pane, under TEMPLATES, click All.
Note: If you can’t find a template, you can search for a template based on keywords in the Search box.
-
Click a template that is similar to the one that you want to create, and then click Choose.
-
Add, delete, or change any text, graphics, or formatting, and make any other changes that you want to appear in all new documents that you base on the template.
If you want to make one change to replicate it in several slide layouts, rather than changing each layout or slide individually, you can edit slide masters.
-
On the File menu, click Save As.
-
On the Format pop-up menu, click PowerPoint Template (.potx).
-
In the Save As box, type the name that you want to use for the new template, and then click Save.
Unless you select a different location, the template is saved in /Users/username/Library/Application Support/Microsoft/Office/User Templates/My Templates.
To organize templates, use the Finder to create a new folder in /Users/username/Library/Application Support/Microsoft/Office/User Templates/My Templates, and then save your template in the new folder.
Note: If you are using Mac OS X 7 (Lion), the Library folder is hidden by default. To show the Library folder, in the Finder, click the Go menu, and then hold down OPTION.
-
On the Standard toolbar, click New from template
. -
In the left navigation pane, under TEMPLATES, click My Templates.
Note: If you created folders to organize your templates, the folders are displayed under My Templates. You need to click the folder to see the templates.
-
In the right navigation pane, you can select the colors, font, and slide size for the template.
-
Click the template that you created, and then click Choose.
-
In the Finder, open /Users/username/Library/Application Support/Microsoft/Office/User Templates/My Templates.
Note: If you are using Mac OS X 7 (Lion), the Library folder is hidden by default. To show the Library folder, in the Finder, click the Go menu, and then hold down OPTION .
-
Drag the templates that you want to delete to the Trash.
Excel
-
Open the workbook that you want to create the new template from.
-
Add, delete, or change any text, graphics, or formatting, and make any other changes that you want to appear in all new documents that you base on the template.
-
On the File menu, click Save As.
-
On the Format pop-up menu, click Excel Template (.xltx).
-
In the Save As box, type the name that you want to use for the new template, and then click Save.
Unless you select a different location, the template is saved in /Users/username/Library/Application Support/Microsoft/Office/User Templates/My Templates.
To organize templates, use the Finder to create a new folder in /Users/username/Library/Application Support/Microsoft/Office/User Templates/My Templates, and then save your template in the new folder.
Note: If you are using Mac OS X 7 (Lion), the Library folder is hidden by default. To show the Library folder, in the Finder, click the Go menu, and then hold down OPTION.
You can customize an existing template to make it even more useful. Add static information to the existing template, and then save the file again (as a template).
-
On the Standard toolbar, click New from template
. -
In the left navigation pane, under TEMPLATES, click All.
Note: If you can’t find a template, you can search for a template based on keywords in the Search box.
-
Click a template that is similar to the one that you want to create, and then click Choose.
-
Add, delete, or change any text, graphics, or formatting, and make any other changes that you want to appear in all new documents that you base on the template.
-
On the File menu, click Save As.
-
On the Format pop-up menu, click Excel Template (.xltx).
-
In the Save As box, type the name that you want to use for the new template, and then click Save.
Unless you select a different location, the template is saved in /Users/username/Library/Application Support/Microsoft/Office/User Templates/My Templates.
To organize templates, use the Finder to create a new folder in /Users/username/Library/Application Support/Microsoft/Office/User Templates/My Templates, and then save your template in the new folder.
Note: If you are using Mac OS X 7 (Lion), the Library folder is hidden by default. To show the Library folder, in the Finder, click the Go menu, and then hold down OPTION.
-
On the Standard toolbar, click New from template
. -
In the left navigation pane, under TEMPLATES, click My Templates.
Note: If you created folders to organize your templates, the folders are displayed under My Templates. You need to click the folder to see the templates.
-
Click the template that you created, and then click Choose.
-
In the Finder, open /Users/username/Library/Application Support/Microsoft/Office/User Templates/My Templates.
Note: If you are using Mac OS X 7 (Lion), the Library folder is hidden by default. To show the Library folder, in the Finder, click the Go menu, and then hold down OPTION .
-
Drag the templates that you want to delete to the Trash.
See also
Modify a slide master
Customize how Excel starts in Excel for Mac
Differences between templates, themes, and Word styles
If you think of your current document as a template, you can save it with a different name to create a new document that’s based on the current one. Whenever you want to create a document like that, you’ll open your document in Word for the web, go to File > Save As, and create a document that’s a copy of the one you started with.
On the other hand, if you’re thinking of the kind of templates you see by going to File > New, then no: you can’t create those in Word for the web.
Instead, do this:
If you have the Word desktop application, use the Open in Word command in Word for the web to open the document in Word on your desktop.

From there, create a template. When you go to File > New in the Word desktop application, you’ll be able to use your template for new documents. And if you store the documents online, you can edit them in Word for the web.
See Also
Microsoft Templates and Themes
Download free, pre-built templates
Free background templates for PowerPoint
Edit templates
Creating Excel templates helps you avoid cumbersome, repetitive tasks and allow you to focus on the real deal. These templates can be standard and already present in MS Excel for their readymade use. You can create your template and utilize them later.
Table of contents
- Create Excel Templates
- How to Select Standard Excel Template?
- How to Create a Custom Excel Template?
- How to use the Created Excel Template?
- Things to Remember
- Recommended Articles
How to Select Standard Excel Template?
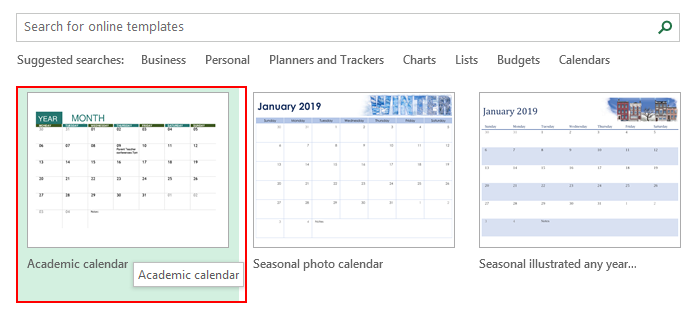
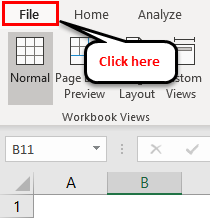
First, we must open an Excel workbook and Go to File >- New >-
We may see a similar screen to the below screenshot.
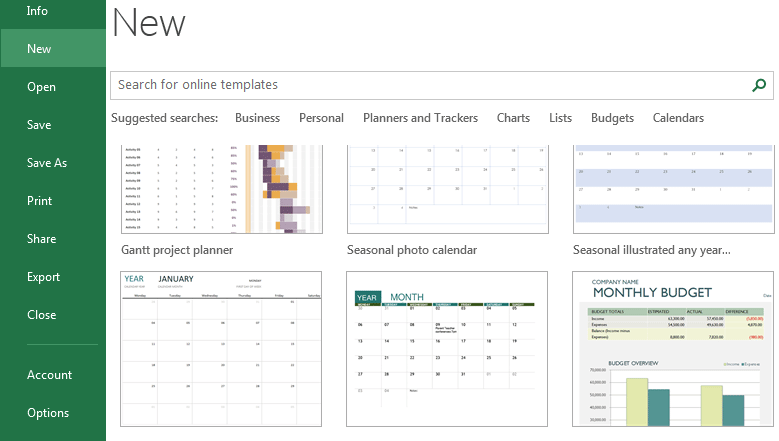
It allows us to select from some predefined options divided by various categories. Then, you can choose the one relevant to your requirement and double click on it to use that template. For example, suppose we select the “Academic calendar” (any year) and double-click on it.
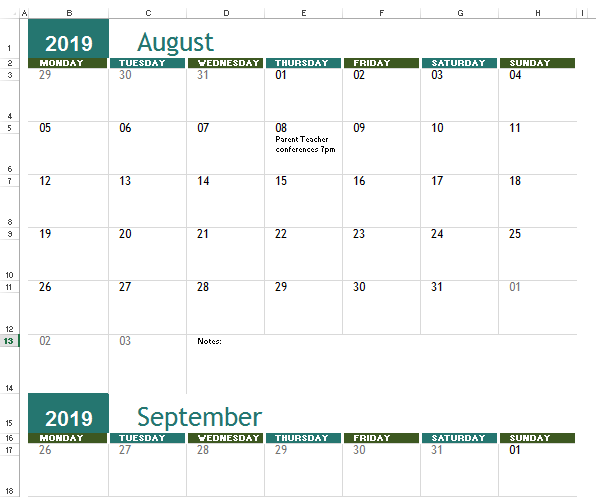
We may see a screenshot like the one below. We can see here that we can change the year and start using it for a different year than the one in which it was built, giving us the flexibility to use it whenever we want.
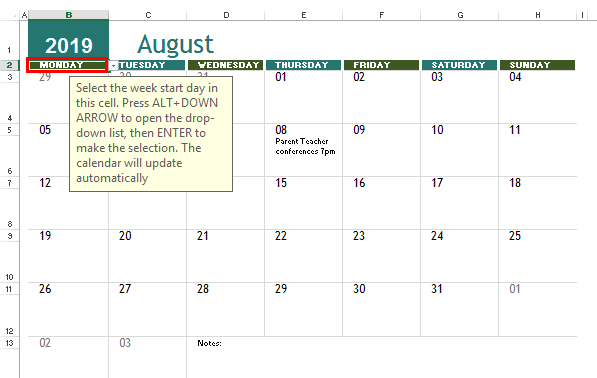
Here, we will need to make another change: “select the week start day” for a month. The screenshot is below.
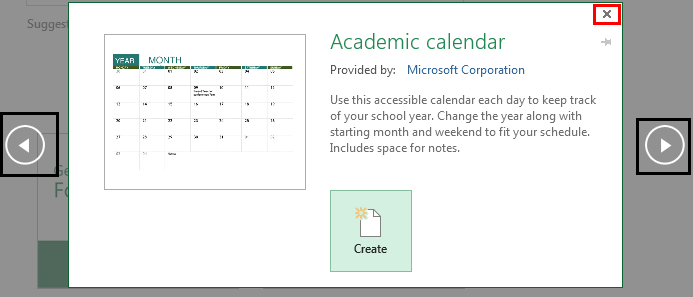
However, if we want to see a preview first and then decide if we wish to select that template or not, do a single click.

If satisfied with it, we must click on the “Create” button to proceed with it. Otherwise, we need to close it by clicking on the “X” symbol in the dialog box and proceeding again. We can also move forward and backward to select the required one among the standard templates by clicking on the two symbols on the side of the dialog box (marked above in black).
Like this, in any template that we choose, there will be some things that we need to tweak to reuse for our purposes.
How to Create a Custom Excel Template?
It will be like the way copies are done from the original piece. We take the utmost care in implementing the changes in the original work, making sure all the formatting, headers, placeholders, etc., are perfectly done. Please devote a sufficient amount of time here, as it will replicate anything and everything (example, style, formatting, graphics, etc.) related to this workbook in its entirety.
What changes can be saved when we create a custom template?
It can save anything we can do in a workbook in a template. Some of these include:
- Data Validation in ExcelThe data validation in excel helps control the kind of input entered by a user in the worksheet.read more (selecting values from a list).
- Having a macro button.
- We can format some cells as we like (e.g., cells highlighted in yellow).
- Protect a range of cells from making any changes to it.
- Hide certain rows and columns, charts, images, excel hyperlinks, etc.
- Merge certain cells in excelMerging a cell in excel refers to combining two or more adjacent cells either vertically, horizontally or both ways. Merging excel cells is specifically required when a heading or title has to be centered over an area of a worksheet.read more or wrap excel textWrap text in Excel belongs to the “Formatting” class of excel function that does not make any changes to the value of the cell but just change the way a sentence is displayed in the cell. This means that a sentence that is formatted as warp text is always the same as that sentence that is not formatted as a wrap text.read more in some.
- Change the cell type to a specific format (e.g., date format in a cell)
- Freeze Excel cells so that header columns are always visible.
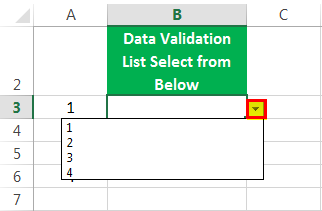
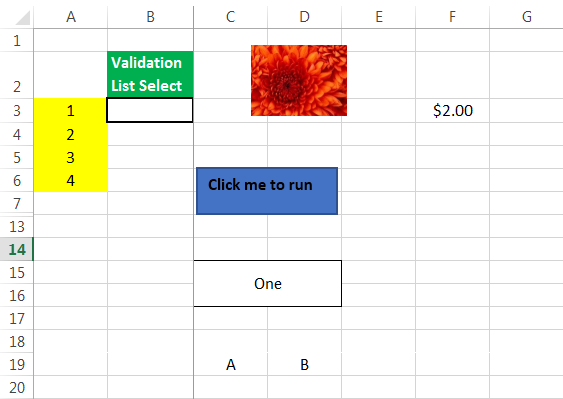
In the below screenshot, we have shown some of these examples in an Excel template we have created.

- Cell B3 will only take inputs from a pre-specified list. (Go to cell B3, then go to the “Data” tab. Select “Data Validation”).

In the drop-down, we must select the first one, “Data Validation.”

- Then make the following changes as shown in the below screenshot.

As a result, a drop-down list is created.
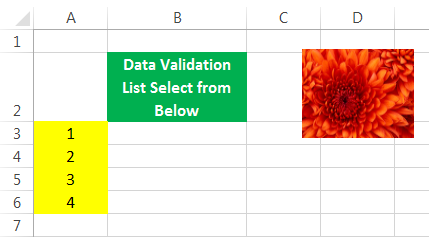
- Cells A3 to A6 will be highlighted in yellow. (We need to select Cell “A3:A6”, go to “Home Tab,” then click on “Fill Color”)
- The image will be there at the place shown (For this, we must go to the cell where we want to insert the picture, then go to the “Insert” tab, click on “Pictures,” and then upload the image where it is stored on your computer).
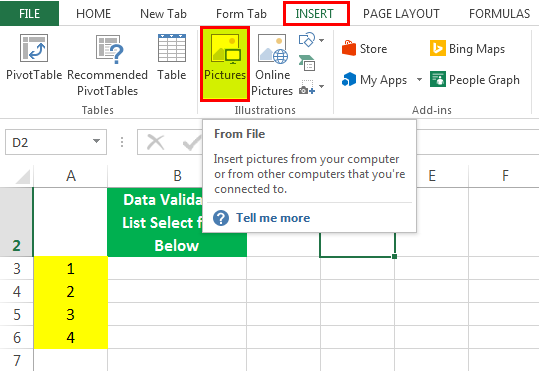
A picture is uploaded to that cell.
- A button is present, which will run the required macro on clicking. (We must go to the cell where we want to place the button, then go to the “Insert” tab, and go to “Shapes.”)

- Then, we must choose the “Shapes”; Right-click on it to select “Edit Text” if we want to write anything in it.
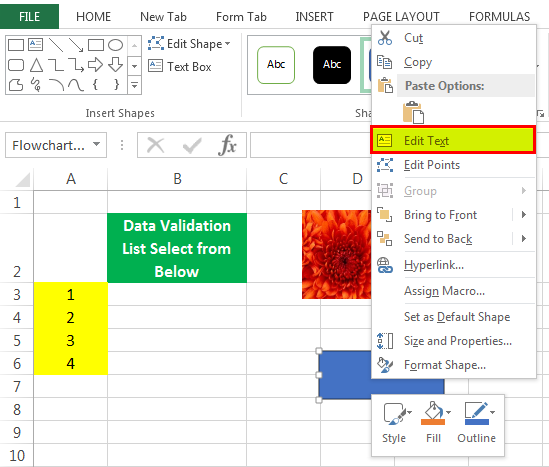
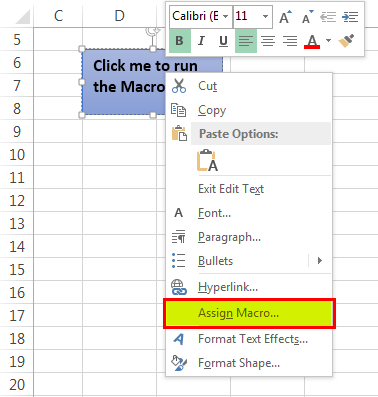
Then, we need to write, “Click me to run the Macro.”

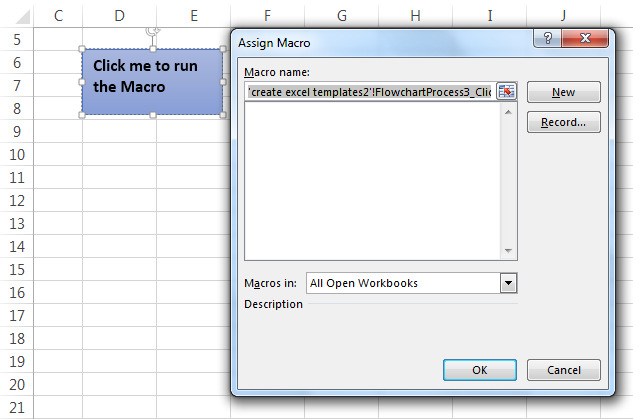
- Once done, right-click again and choose “Assign Macro.”
As a result, it will open a dialog box wherein we can assign the relevant macro we wrote in VBA.
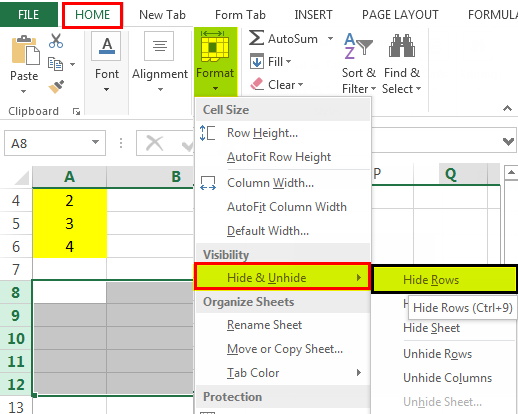
- Rows from 8 to 12 are hidden. (For this, we must, select rowsTo select a row, press shift+space on your keyboard.read more 8 to 12).

Then, we need to go to the “Home” tab, then go to “Format,’” then to “Visibility,” then to “Hide & Unhide,” and then “Hide Rows.”
Similarly, in the above screenshot, apart from the ones mentioned above, we can see:
- Cell F2 will always be in currency format. (For this, we must go to cell J2, do “Ctrl+1,” then change the type to “Currency”)
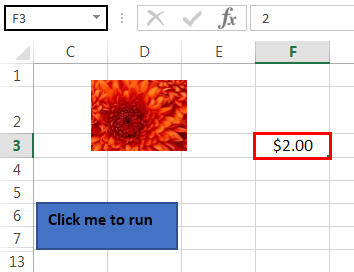
- Cells C15: D16 are merged into one. (For this, we need to select cell C15: D16 and then click on “Merge & Center in Excel“)
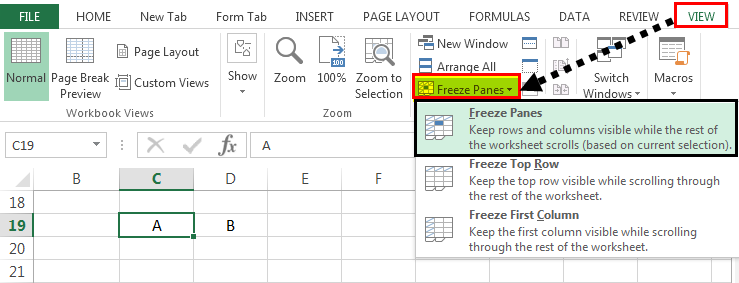
- A worksheet is a freeze at cellFreezing cells in excel is when we move up or down in the sheet, we freeze desired cells, not to be moved. To freeze cells in excel, select the cells to freeze. Then, in the View tab of the windows section, click on freeze panes.read more C19 so that despite scrolling down, contents on row 19 will always be visible. We can use this when we always want to see the headers in our worksheet. (For this, we must go to cell N20, then go to the “View” tab and click on “Freeze Panes.”
The output is shown below.
Now, assuming we have done everything that needs to be done in our workbook, we will show you the process that needs to be followed to save this created template and utilize it the next time.
How to use the Created Excel Template?
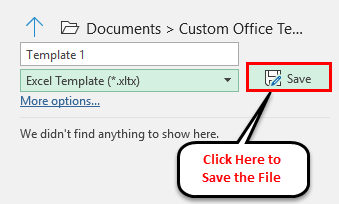
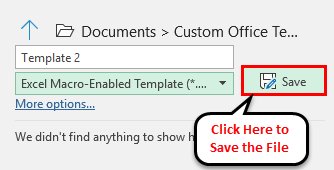
Once we have created our templates and are made the changes to the workbook or worksheet, we must click “Save As Type,” and we can save it in the format “Excel Template” (*.xltx)’ if there is no macro. (Using Office 2016). However, if a macro is present, we must use the format “Excel Macro-Enabled Template” (*.xltm).
The screenshot is shown below:
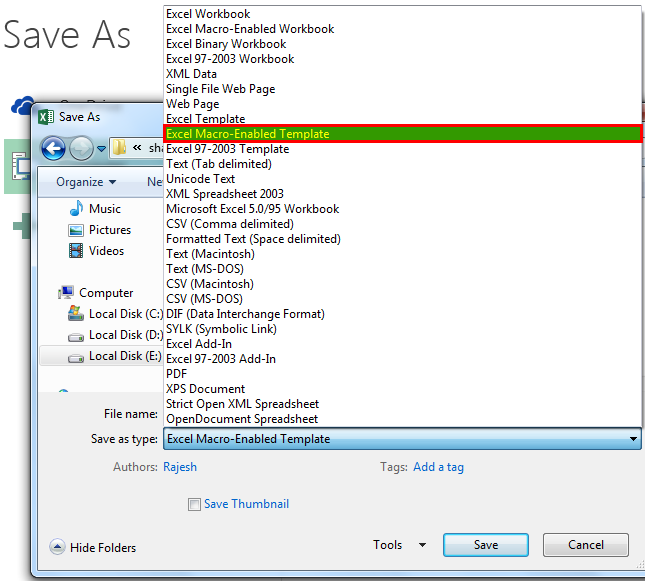
We saved it as ‘xltm’ since there was a macro present.
- Now that we have saved the created Excel template, we can utilize it like the way we showed when selecting a standard template. Now, we need to open an Excel workbook.
- Then, go to File >- New >-
We may see a similar screen like the below screenshot.
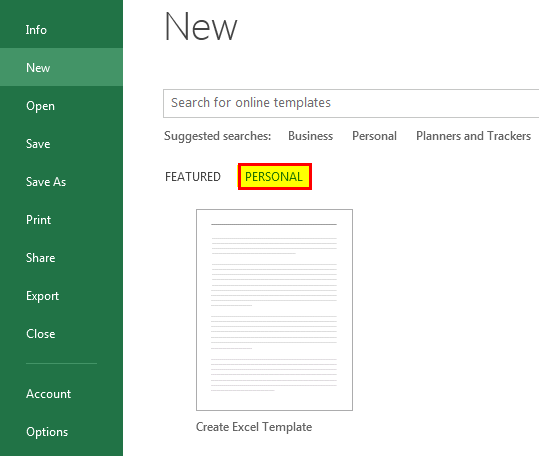
We can see a “PERSONAL” category adjacent to the “FEATURED” one. All our templates will be present here.
We will go to the “Personal” one and double click the template “Personal” template (the name that we gave to your template). On clicking it, we may see a workbook with all the initial settings already present, which we do not need to do again.
You may see the screenshot below for reference.
Things to Remember
- Using an Excel template is about creating a perfect first copy and duplicating it many times. So, invest an awful lot of time in designing the first copy.
- Depending on whether a macro is present or not in our template, save it accordingly. Save it as the “.xltm” file if the macro is present. Otherwise, you can save it in the “xlt” excel extensionExcel extensions represent the file format. It helps the user to save different types of excel files in various formats. For instance, .xlsx is used for simple data, and XLSM is used to store the VBA code.read more.
- The created Excel templates will be present in a different section called “PERSONAL,” apart from the already present ones in the “FEATURED” section.
Recommended Articles
This article is a guide to Create Templates in Excel. We discuss creating a custom Excel template, practical examples, and a downloadable template here. You may learn more about Excel from the following articles: –
- Calendar Template in Excel
- Excel Inventory Template
- Creating a Dashboard in Excel
- Combination Charts in Excel
Create Excel Template (Table of Contents)
- Create Templates in Excel
- How to Create Templates in Excel?
- Examples to Create Templates in Excel
Create Templates in Excel
We have different types and categories of templates available in Excel, which we can be accessed from the File menu ribbon’s New section. This has a different types of Templates such as Business, Calendar, Budget, Planner, Financial Management, etc. To create customize templates other than these, we can use Data Validation for drop-down, Table, Images and give them proper header names. We can also insert a logo for our template. To standardize the template, always fix the theme or template, and visuals should see the purpose of creation.
How to create Templates?
Templates can be made by saving an excel file with a specialized extension and then saving the file in a specified directory.
What type of content can be stored as a Template?
Text data can be stored as a template. Various sections of a document, such as page titles, column and row labels, text and section headings, any cell in Excel that contains text or numbers, or any kind of data, can all be included in a template. We can also include any graphical shapes, logos of companies, or any background image and even Excel formulae.
The type of text formattings such as font or color, or size can be saved as a template along with the data. Formats of cells or worksheets, such as column width or background fill color or alignment of text and even formats of numbers and dates, and a number of sheets can be saved in templates.
What are the advanced features that can be saved as Templates?
All hidden and protected areas such as locked cells that cannot be altered and hidden columns and rows, or even worksheets that may contain data that is not meant for general view.
All Macros are specially customized toolbars that may contain frequently used options; macros, as well as the quick access toolbar, can be saved as templates.
How to Create Templates in Excel?
To create a template in recent versions of Excel, there is actually very little work that has to be done.
Excel 2013 & later versions – Prior to saving a file as a template, one has to define the custom template directory.
- Go to File.

- Click on Options.
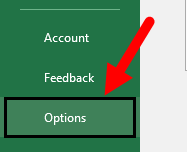
- Select the option Save in the menu ribbon.
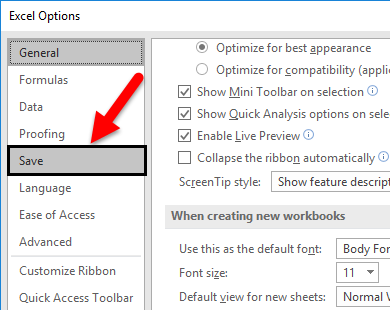
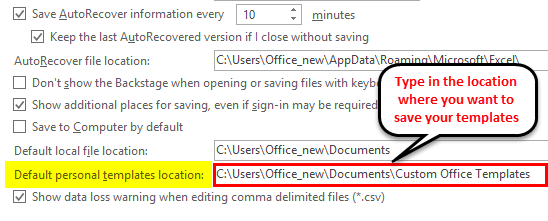
- Find the option Default personal templates location among the various options.
- Provide the choice of a directory where you want to save all the templates. DocumentsCustom Office Templates is regarded as a good choice.
Excel 2007 and Excel 2010
- Firstly, go to the File.
- Click on Save As.
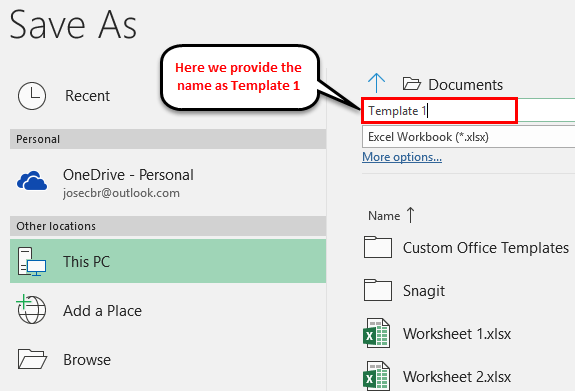
- Now, the option to provide a name to your template file appears.
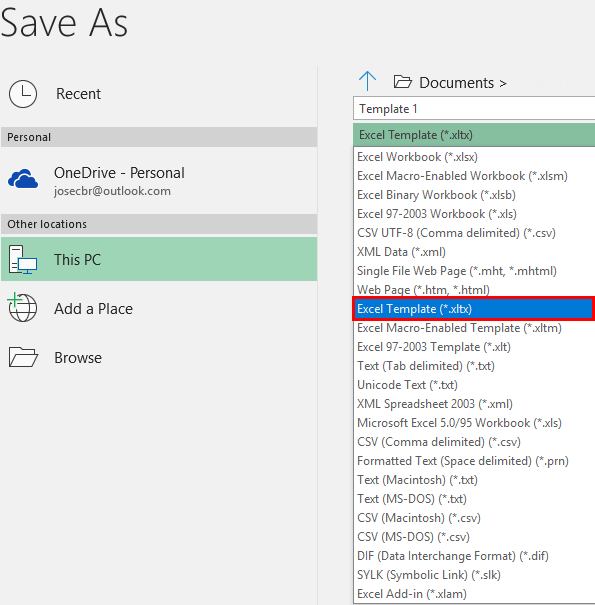
- Here we see that in the drop-down menu, there is an option called Excel Template (*.xltx)
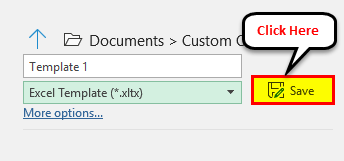
- Click on the Save button to save the template.
Note: It is better to choose “Excel Macro-Enabled Template” (.xltm) for cases where the workbook might contain macros. “Excel 97-2003 Template” (.xlt) is to be chosen for the cases where the version of the Excel workbook is very old. “Excel Template” (.xltx) should be chosen for all other cases.
Examples to Create Templates in Excel
Below are some examples to create templates in excel.
Example #1
Now, firstly we will make all the changes in a new file, modify it till all the items that you wish to save in the template are ready. Then you have to save the file as a template. Template files have a special extension.
In the screenshot above, we have added an image and text as the structure of the template. Now we shall follow the steps below to create the excel template.
Step 1 – Firstly, go to File.

Step 2 – Click on Save As.
Now, the option to provide a name to your template file appears.
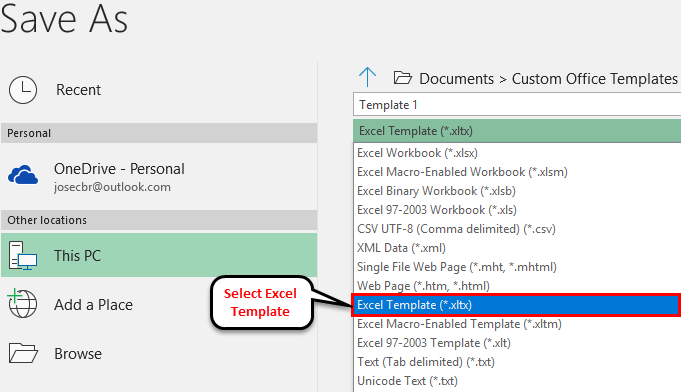
Step 3 – Here, we see that in the drop-down menu, select Excel Template (*.xltx)
Step 4 – Click on the Save button to save the template.
Now, automatically, Excel will place this template file in the appropriate directory. And new Excel documents can be created based on this template file by navigating and choosing “Personal” in the new file window (which is right next to Featured) and then choosing the appropriate template.
Concepts always become much clearer when we have more examples. So, let us look at yet another example to create Excel Templates.
Example #2
Let us now explore how to save a Macro-Enabled Excel template through an example. Suppose we have an excel with some macros(s) that is to be used as a base for other files, then we need to save this Excel as a macro-enabled excel template.
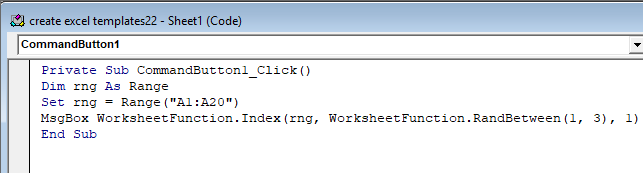
In the screenshots above, we have added a macro in the template file, and now we shall proceed to create the template in excel.
- Firstly, go to File –> Save As (As shown in the above Example)
- Now, the option to provide a name to your template file appears.
- Here we see that in the drop-down menu, there is an option called Excel Macro-Enabled Template (*.xltm)
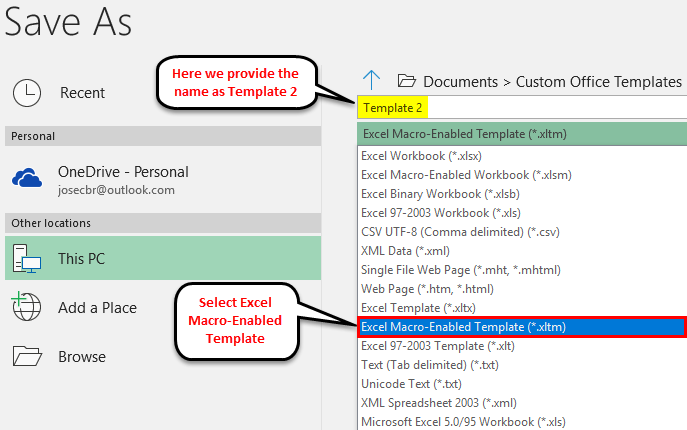
- Click on the Save button to save the template.
Now, automatically, Excel will place this template file in the appropriate directory. And new Excel documents can be created based on this template file by navigating.
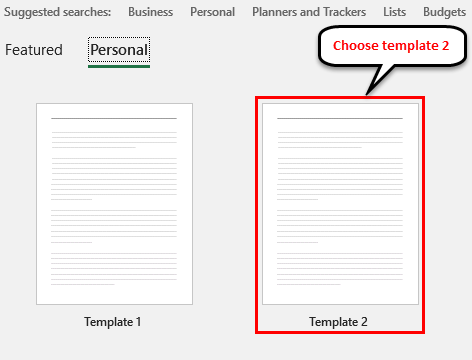
- Firstly, go to File.

- Click on New.
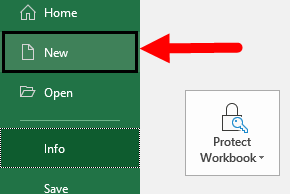
- Choose Personal in the new file window (which is right next to Featured) and then choose Template 2.

Example #3
Now, let us look at another example. Firstly, we will make all the changes in the new file, modify it till all the items that you wish to save in the template are ready. Then you have to save the file as a template. Template files have a special extension.
In the above screenshot, we have added an image and text as the structure of the template. Now we shall follow the steps below to create the excel template.
Step 1 – Firstly, go to File and then click on Save As an option (As shown in the above examples).
Now, the option to provide a name to your template file appears.
Step 2 – Here, we see that in the drop-down menu, select Excel Template (*.xltx)

Step 3 – Click on the Save button to save the template.
Example #4
Now, let us look at yet another example. Now, we will make all the changes in a new file, modify it till all the items that you wish to save in the template are ready. Then you have to save the file as a template. Template files have a special extension.
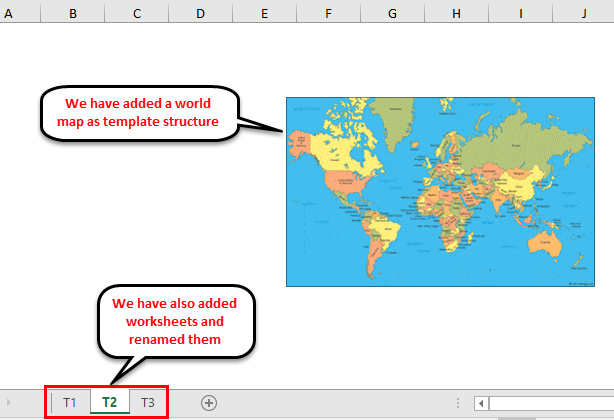
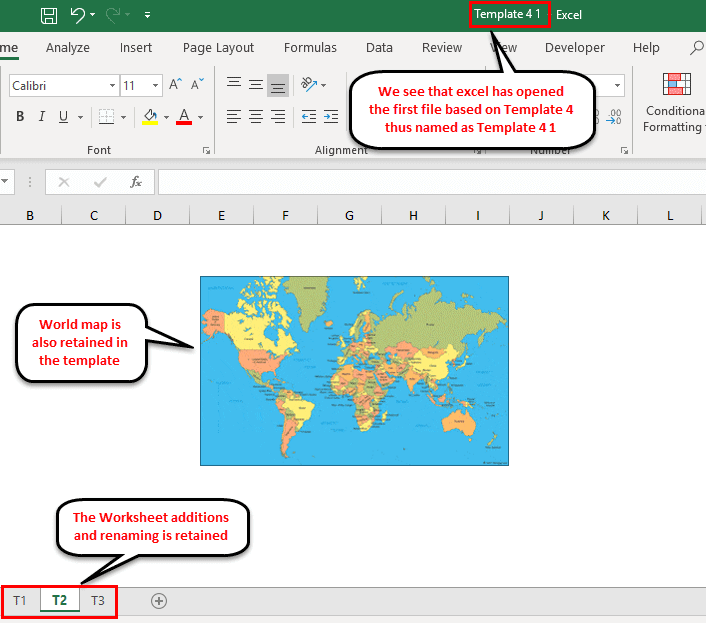
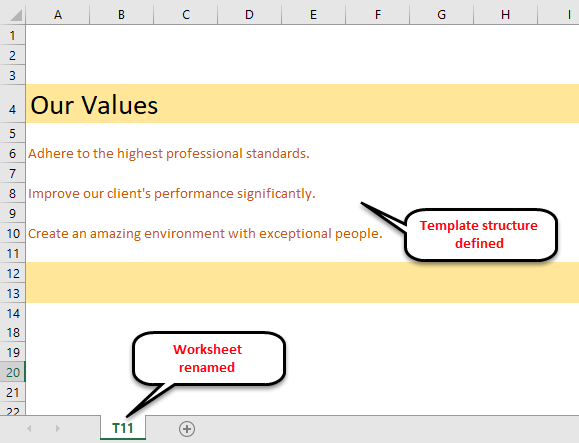
In the screenshot above, as you can see, we have added the template structure – we have added a world map and increased the default worksheets and renamed them, and now we shall proceed to save this file as a template.
Now we shall follow the steps below to create the excel template.
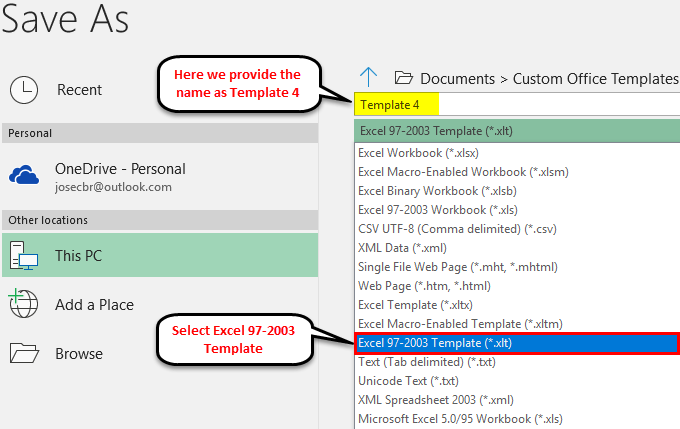
Step 1 – Firstly, go to File and then click on Save As an option (As shown in the above examples).
Now, the option to provide a name to your template file appears.
Step 2 – Here from the drop-down menu, select Excel 97-2003 Template (*.xlt)
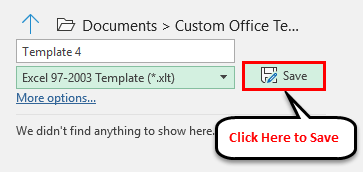
Step 3 – Click on Save to save the template.
Example #5
Now we shall proceed to use a template file to create a new file in excel. We will make use of the Example #4 template file.
- Firstly, go to File.
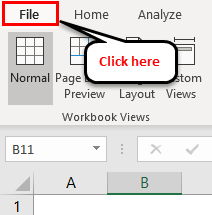
- Click on New.

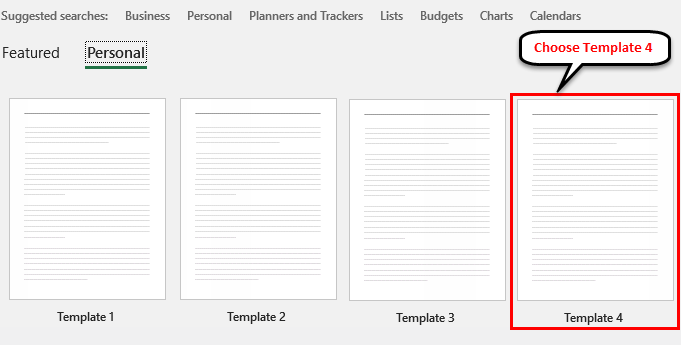
- Choose “Personal” in the new file window (which is right next to Featured) and then choose the appropriate template.
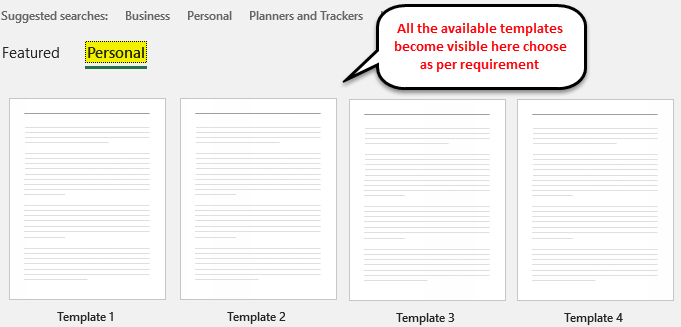
- We shall choose Template 4 as the base and create a new file in excel.
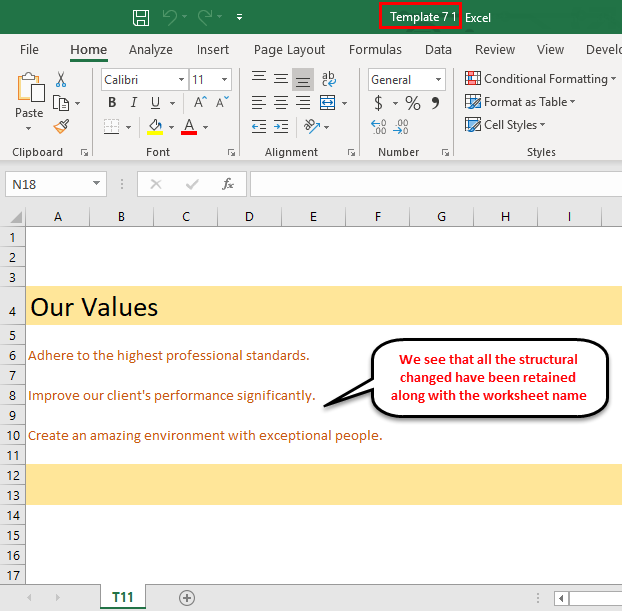
- As we can see, all the template structures are retained, and the new file is named Template4 1 – the first file based on Template 4.
Example #6
Now we shall proceed to use another template file to create a new file in excel. We will make use of the Example #3 template file.
We shall choose Template 3 as the base and create a new file in excel.
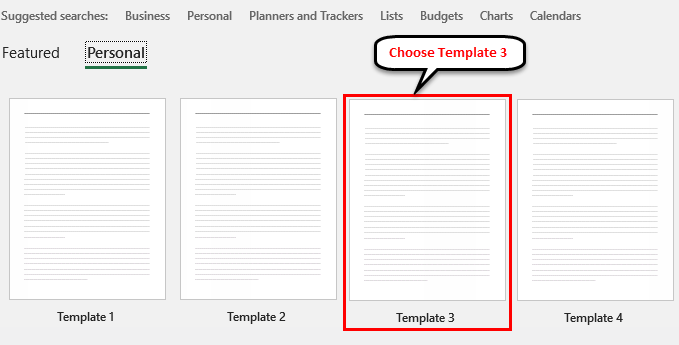
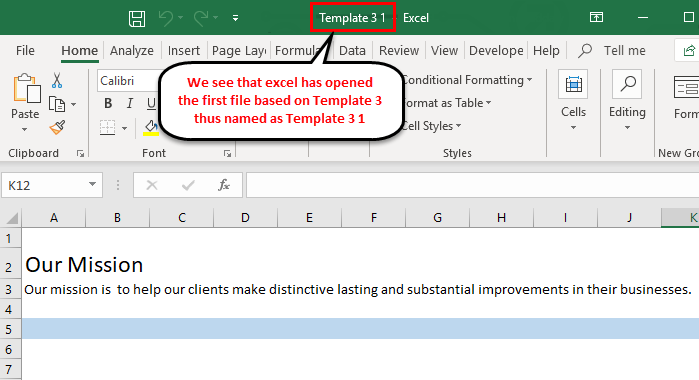
Hence, we can see that the image and the header structure is retained in the new file. And it is also important to note that this new file is named Template3 1 – signifying that it is the first file based on Template 3.
Example #7
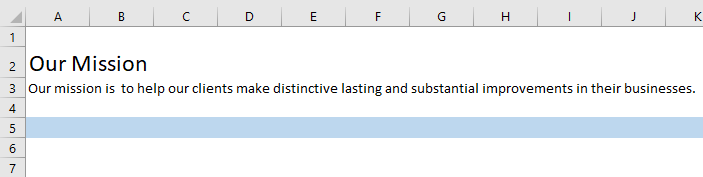
Now we shall create another new template. We will create the template structure in excel, as shown below.
Now we shall follow the steps below to create the excel template.
Step 1 – Firstly, go to File and then click on Save As an option (As shown in the above example).
Now, the option to provide a name to your template file appears.
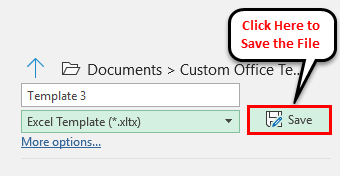
Step 2 – Here, from the drop-down menu, select Excel Template (*.xltx)
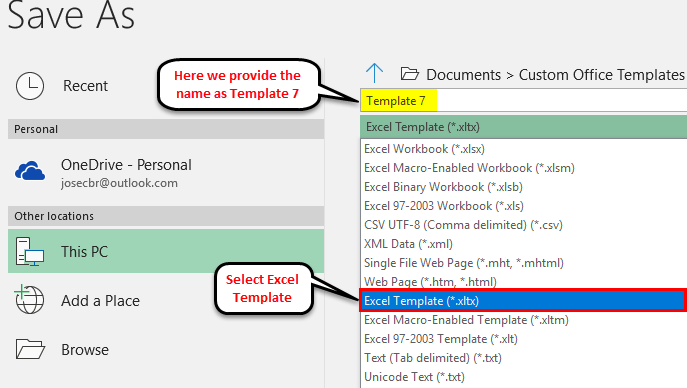
Step 3 – Click on the Save button to save the template.

This will create a Template 7 template with the template structure defined in the Default Template location in excel.
Example #8
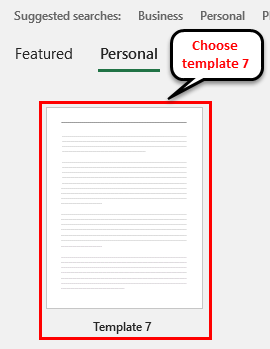
Now we shall attempt to use Template 7 to create another file in excel.
Here we see that we have Template 7 listed. Click on it to create a new file based on Template 7.
Now, automatically, Excel will place this file in the appropriate directory.
Example #9
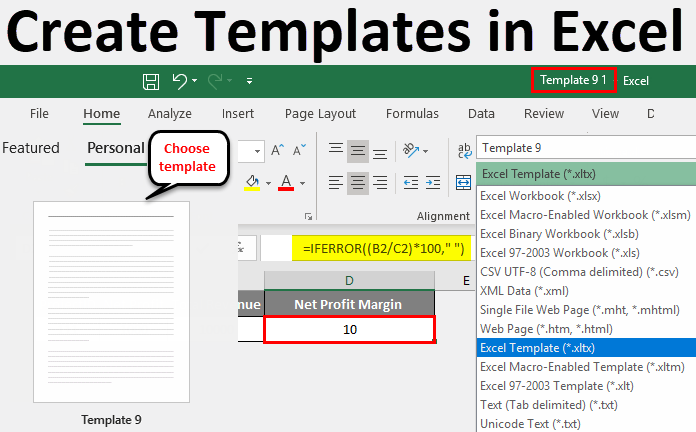
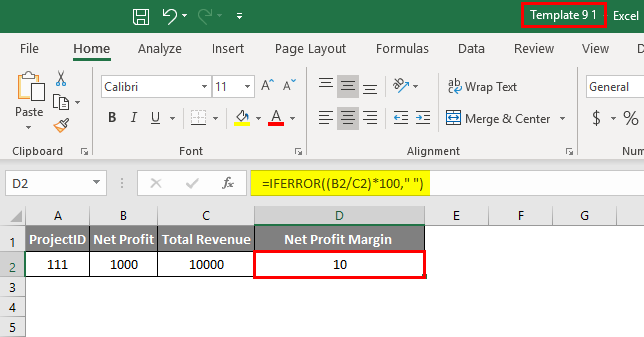
Now, let us see an example where we have Excel formulae in the Template file.
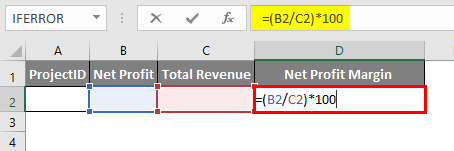
As we can see above, we have created a Template structure with the formula for Net Profit Margin defined as:
Net Profit Margin = (Net Profit/Total Revenue)*100
Since this is the template, no data is present here. Let us see how to create the template file in excel.
Now we shall follow the steps below to create the excel template.
Step 1 – Firstly, go to File and then click on Save As an option (As shown in the above examples).
Now, the option to provide a name to your template file appears.
Step 2 – Here, from the drop-down menu, select Excel Template (*.xltx)
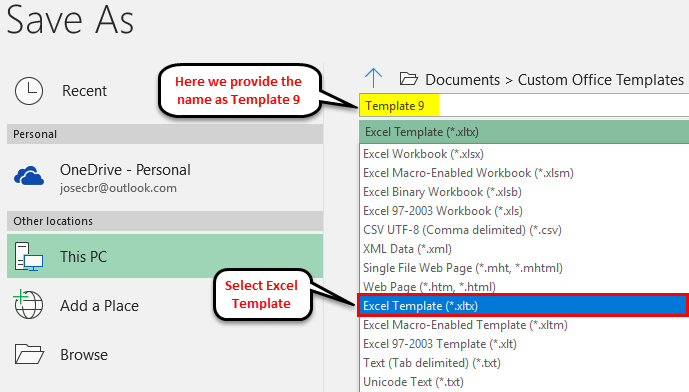
Step 3 – Click on the Save button to save the template.

This will create a Template 9.xltx template with the template structure defined in the Default Template location.
Example #10
Now, we shall attempt to use the previous example template to create a new file and see if that works in excel.
We will go to File -> New -> personal and then find our Template file (in this case, it is Template 9) and click on it to select it.
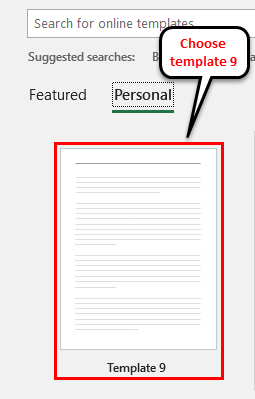
We see that in the new file, we have the structure defined and once we feed in the data on Column A, B, and C, the Net Profit Margin in Column D is automatically calculated by using the formula from the Template File.
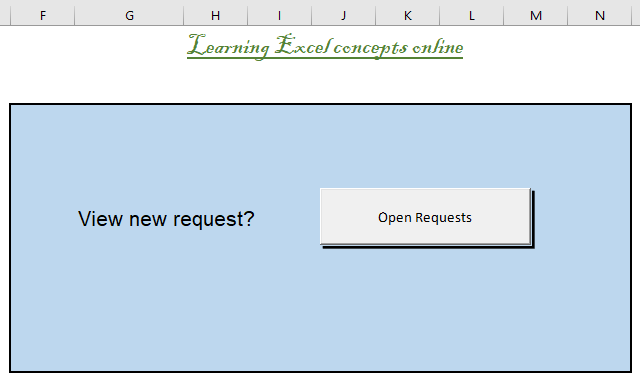
Example #11
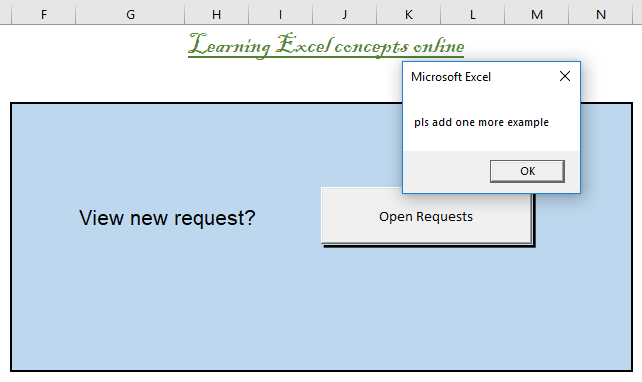
Let us now use our second example – Template 2 to create a new file in excel. Template2 has a macro defined in it, so let us see if the same is available in the new file.
Now let us see what happens when we select “Template2”.
It opens up a new file with the same macro (that was defined in the template file) loaded automatically.
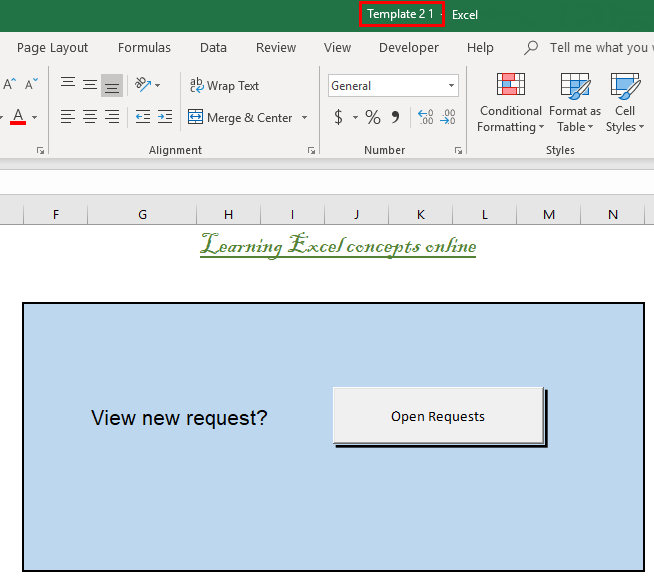
We will need to click on “Enable Content” in the pop-up to enable the macro upon enabling content once we click on the Open Requests button.
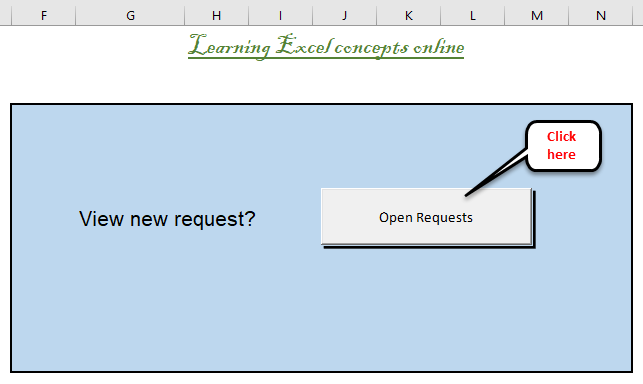
We will get the desired result.
Things to Remember
- For versions of Excel 2013 and later, it is possible to change Excel’s default template for a workbook by saving the template at the appropriate location. All default templates must have a specific name – Book.xltx or Book.xltm and must be saved in Excel’s startup directory.
C:Users%username%AppDataRoamingMicrosoftExcelXLSTART
- In order to modify the template used to add new sheets in already existing files, the template has to be named xltx or Sheet.xltm and must be saved in the same folder.
Recommended Articles
This has been a guide to Create Templates in Excel. Here we discuss how to Create Templates in Excel along with practical examples and type of content can be stored as a Template. You can also go through our other suggested articles –
- Excel Chart Templates
- Free Excel Template
- Estimate Template in Excel
- Excel Business Plan Template

Odds are pretty good that you create the same types of Excel spreadsheets over and over again. Creating a custom template can help make that process a lot smoother.
When faced with creating similar spreadsheets, many people pop open an existing sheet, delete the data they don’t want there, and then save it as a different file. Worse still, some just create the file from scratch every time. A custom template can make this go a lot faster. Template files are more or less the same as standard Excel files, but with formatting and boilerplate content already set. You just use the template to create a new Excel file, and fill in the data. You can create a custom template from scratch, or you can save an existing spreadsheet as a template, and then clean it up a bit. The only difference is whether you start with a new, blank sheet or one you’ve already created.
Create a Template
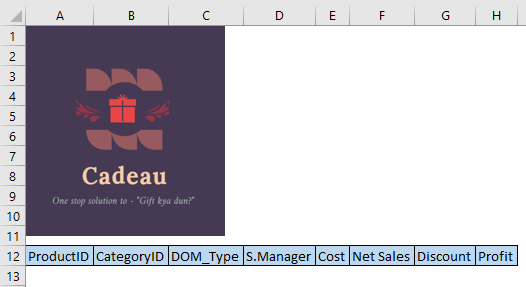
For our example, we’re going to create template from an existing spreadsheet. Here’s a standard sheet we use at How-To Geek for expense reports.

The file is just a regular Excel file saved with the .xlsx extension. Ours is already nicely formatted, so we just need to delete any actual data we don’t need to be there. If you’re adapting an existing sheet (or creating a new one), go ahead and clean it up. Set up the base sheet, add your headings, include formulas, format cells, create borders, whatever. In short, make it so that when you create a new file based on the template, you can just start typing in data.
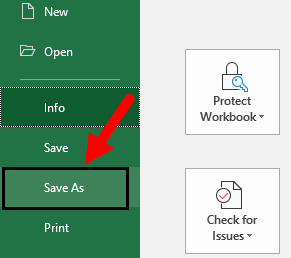
When you’ve got things looking the way you want, you need to save the file as a template. Open the “File” menu, and then click the “Save As” option.
In the file type dropdown (just underneath the file name text box), select the “Excel template (.xltx)” option.
By default, Excel likes to save templates in DocumentsCustom Office Templates, but you can save them wherever it makes sense to you.
If you want an even more organized approach, you can change the default location where Excel saves templates. On the “File” menu, click the “Options” command. In the “Excel Options” window, slick the “Save” category in the left column.
On the right, you’ll see a “Default personal templates location” box where you can type a path to a custom save location for templates. There’s “Browse” button for some reason, so type the full path to the folder you want to use or copy and paste the location from a File Explorer address bar.
Use a Template to Create a New Document
Now that you’ve got your template saved, you can use it to create new documents. And you can do this in one of two ways.
If you save your templates in the official custom templates folder Office uses (whether that’s the default DocumentsCustom Office Templates location or you configured a new save location in Settings), those templates become available on the Office splash screen. That screen shows featured templates by default, but you can see templates you’ve saved by clicking the “Personal” link.
Just click the template you want to use, and Excel creates a new document for you based on that template.
You can also create a new file based on a template by just double-clicking the template in File Explorer. The default action on template files is to create a new file rather than open the template file, so double-clicking a template immediately opens a new Excel file for you.
If you want to open the actual template file to modify it, you can right-click the file, and then choose “Open” from the context menu.
In the end, template files are functionally much like regular excel files. The big difference lies in how Excel handles those files, making it easy for you to create new documents based on them.
READ NEXT
- › How to Resize All Columns and Rows in Microsoft Excel
- › How to Track Almost Anything with Excel List Templates
- › How to Create a Template in Microsoft Word
- › How to Make a Simple Budget in Microsoft Excel
- › How-To Geek is Looking for Microsoft Excel Writers
- › How to Use Microsoft Excel Templates for Event Planning
- › Why the Right-Click Menu in Windows 11 Is Actually Good
- › Why One Ultrawide Is Better Than Two Monitors
![]()
Creating Excel Template
- What is an Excel Template?
- How to Create Excel Template?
- Steps to Create Excel Templates:
- Creating Excel Macro- Enabled Template
- Why do we use Excel Templates?
- Components of Excel Templates:
- How to make an outstanding Excel Template
- Benefits of Excel Templates
- Example Excel Templates
- Best Practices:
Effortlessly Manage Your Projects
120+ Project Management Templates
Seamlessly manage your projects with our powerful & multi-purpose templates for project management.
Check our 120+ PM Templates :

Creating Excel template helps you to save the time and avoid doing same task repeatedly. You can create a standard Excel file and format the workbook, sheets and ranges with the default information. Let us see, how to create Excel Templates in this step by step tutorial.
What is an Excel Template?
Excel templates are ready to use Excel files with all required formats and Inputs for Requirement. You can prepare an Excel File with all required details and use it whenever it required. You can Save the Excel Templates in .xltx or .xltm Format.
- An Excel template is a pre-designed spreadsheet that is intended to be used as a starting point for a particular type of task or project. It contains formatting, formulas, and placeholders for data entry that can be customized to fit specific needs.
- Excel templates can save time and effort by eliminating the need to create a new spreadsheet from scratch every time a similar task or project needs to be completed. They are available in a variety of formats, including budgets, calendars, invoices, and project plans, among others.
- Users can modify an Excel template to fit their needs by adding or removing columns, changing formulas, adjusting formatting, and adding their own data. Templates can also be shared with others, making them a useful tool for collaboration and standardizing processes within an organization.
How to Create Excel Template?
Follow the below step by step instructions to develop Excel Templates. Creating an Excel Template is very useful and easy to prepare. You can create the template once and save the file in the folder. And open the template, when you want to create new file using Excel Template.
- Open Microsoft Excel Application
- Create New Excel File
- Change the Worksheet names to suit your needs
- Enter the default information at required ranges
- Insert the Charts or Pivot Tables if required
- Format the Cells to make the template more professional and cleaner
- Save the File as, browse the location and choose the file format .xltx
Steps to Create Excel Templates:
Creating an Excel template is a simple process that involves setting up a workbook with the desired layout, formatting, and formulas. Here are the steps to create an Excel template:
- Open Microsoft Excel and create a new workbook.
- Customize the workbook by adding headers, footers, formatting, and any other elements that you want to include in your template.
- Enter any formulas or calculations that you want to use in the template.
- Place any placeholders like text boxes, shapes, Charts that you will use in the template.
- Save the workbook as a template file by clicking File > Save As and selecting Excel Template (*.xltx) in the Save as type dropdown menu.
- Choose a name for the template and save it in the Templates folder (usually located in C:UsersusernameDocumentsCustom Office Templates).
- Close the template file and reopen it to make sure that it is saved as a template file and not a regular workbook.
- Once you have saved the template file, you can use it to create new workbooks with the same layout and formatting by clicking File > New > Custom, and selecting your template from the list of templates.
- You can also modify your template file at any time by opening it, making changes, and saving it again.
Creating Excel Macro- Enabled Template
It is very often to use Macros in Excel Templates to enhance the features and automate repeated tasks. Follow the below steps to build macro – enabled Excel Templates.
- Open Microsoft Excel Application
- Create New Excel File and Save the File with required Name
- Open the VBA Editor and add new module
- Enter the default information at required ranges
- Add the required macros / sub procedures in the code module
- Insert the required Excel Objects, like Shapes, Charts or Pivot Tables if required
- Format the Cells to make the template more cleaner and professional
- Save the File As, browse the location and choose the file format .xltm.
Why do we use Excel Templates?
We can Create an Excel Template and we it any number of times whenever we require. We can create a template with basic structure and format and Save the file in folder. Here are main uses of Excel Templates:
- You can create once and Use it forever
- Save Time to create new files based on Templates
- Produce the Excel Files with consistence format and structure
- You will put minimal efforts when you create new file
- You can share with others and your team to maintain the same look and feel
Components of Excel Templates:
Excel templates can have different components depending on their purpose and design, below are some commonly used components:
- Worksheets: These are the primary component of an Excel template and serve as the main working area where data can be entered, analyzed, and manipulated.
- Formulas and Functions: Excel templates can include pre-built formulas and functions that automate calculations and perform complex data analysis.
- Charts and Shapes: These visual representations of data can help users quickly understand trends and patterns in the data.
- PivotTables: These powerful data analysis tools enable users to summarize and analyze large datasets quickly and easily, providing valuable insights and facilitating decision-making.
- Data Validation: Excel templates can include data validation rules that restrict the type of data that can be entered in a cell or range of cells, helping to ensure data accuracy and consistency.
- Conditional Formatting: This feature enables users to apply formatting to cells based on certain conditions or criteria, making it easy to highlight important data or outliers.
- Custom User Interfaces: Excel templates can include custom user interfaces, such as dialog boxes or menus, that make it easy to navigate and use the template efficiently.
- Visual Basic for Applications (VBA): Advanced Excel templates can include VBA code, which enables users to automate complex processes and create custom functions and procedures. Excel templates can include macros, which are sets of instructions that automate repetitive tasks, saving time and increasing accuracy.
- Data Connections: Excel templates can include data connections that link to external data sources, such as databases or web services, allowing users to import or refresh data automatically.
- Cell Styles: Excel templates can include predefined cell styles that make it easy to format cells consistently throughout the template.
- Page Layout and Print Settings: Excel templates can include predefined page layout and print settings that make it easy to create professional-looking reports or documents.
How to make an outstanding Excel Template
By following the below steps, you can create a professional-looking and user-friendly Excel templates that can be used to streamline your workflow, save time, and improve the accuracy of your data.
- Add Place Holders: If you want to add any placeholder text or images to the template, you can use the “Placeholder Text” and “Placeholder Picture” options in the “Text” and “Insert” tabs of the Excel ribbon.
- Protect to avoid accidental mistakes: Once you have created your template, you can protect it from accidental changes by clicking File > Info > Protect Workbook, and selecting “Mark as Final” or “Encrypt with Password” options.
- Data Validation Lists: To make your template more user-friendly, you can also add data validation rules or drop-down lists to help users enter data correctly and consistently. This can be done by selecting the cells that you want to validate, and then clicking Data > Data Validation in the Excel ribbon. From there, you can choose the type of validation rule you want to use and set any additional criteria or messages as needed.
- Conditional Formatting: Consider adding conditional formatting to the template to make it more user-friendly. Conditional formatting applies different formatting based on the values or conditions of cells. For example, you can use conditional formatting to highlight cells that meet certain criteria, such as values above or below a certain threshold, or cells that contain specific text.
- Use Charts, Tables, PivotTables, and Other Visualizations: Another way to improve your template is to include shapes, charts, tables, and pivot tables that help users visualize and analyze their data.
- Add VBA Macros: You can also add any custom macros or VBA code to the template by pressing Alt + F11 to open the Visual Basic Editor, and then adding the code to the appropriate module.
- Customize to suit your organization: Customize the template further by adding your company’s logo or branding. You can do this by inserting an image in the header or footer of the template.
Benefits of Excel Templates
Excel templates can be a valuable tool for individuals and businesses looking to save time, increase productivity, and ensure accuracy when working with data. Here are some reasons why people use Excel templates:
- Saves time: Excel templates save time because they already contain the necessary formatting and calculations, eliminating the need to start from scratch.
- Increases productivity: With a pre-designed Excel template, you can complete tasks more efficiently, freeing up more time for other important tasks.
- Ensures accuracy: Excel templates are designed with pre-built formulas and functions, ensuring that calculations are accurate and reducing the risk of errors.
- Consistency: Using an Excel template helps ensure consistency in formatting, design, and data entry, making it easier to analyze data and compare results over time.
- Customization: Excel templates can be customized to fit your specific needs, allowing you to create professional-looking spreadsheets that meet your unique requirements.
- Easy to use: Excel templates are user-friendly and easy to navigate, making them accessible to users with different levels of proficiency.
- Standardization: Excel templates can be standardized across an organization or team, ensuring that everyone is using the same format and data entry standards.
- Multiple uses: Excel templates can be used for a wide range of tasks, such as budgeting, project management, data analysis, and more.
- Accessibility: Excel templates are widely available and can be downloaded from various sources online, making them accessible to anyone with an internet connection.
- Cost-effective: Excel templates are a cost-effective solution for businesses and individuals who need to manage and analyze data, as they eliminate the need to invest in expensive software or hire additional personnel.
In summary, Excel templates offer a range of benefits, from saving time and increasing productivity to ensuring accuracy and standardization. Whether you’re managing personal finances or working on a complex business project, Excel templates can help simplify your work and achieve your goals more efficiently.
Example Excel Templates
There are many Excel templates available online for a variety of tasks. Here are some examples:
- Budget templates: These templates help you create and manage budgets for personal or business finances.
- Invoice templates: These templates allow you to easily create and customize professional-looking invoices.
- Project management templates: These templates help you track and manage project tasks, timelines, and budgets.
- Employee schedule templates: These templates allow you to schedule and track employee work hours and shifts.
- Sales report templates: These templates help you track and analyze sales data to identify trends and opportunities.
- Balance sheet templates: These templates help you track and manage your business’s financial health by monitoring assets, liabilities, and equity.
- Timesheet templates: These templates allow you to track employee work hours and calculate pay based on hourly rates.
- Inventory management templates: These templates help you track inventory levels, sales, and reorder points to optimize stock levels.
- Marketing plan templates: These templates help you create and track marketing campaigns, including budget, goals, and metrics.
- Travel itinerary templates: These templates help you plan and organize your travel itinerary, including flights, accommodations, and activities.
These are just a few examples of the many Excel templates available online. Depending on your needs, you can find templates for almost any task or industry.
Here are the Example Templates created using Excel Application. You can download and explore to create your own Templates. You can find the verity of templates in Microsoft Office Blog.
Creating Excel Template.xlsx
Excel Template
Best Practices:
You can create a more advanced Excel template that is tailored to your specific needs and preferences by following the below best practices. By sharing the template with others, you can help others save time and effort when working with similar requirements.
- Add Instructions: Add instructions or guidance for how to use the template. You can include notes or comments in cells or add a separate sheet with instructions on how to use the template.
- Protect Your Template: If you want to protect certain parts of the template to prevent accidental changes, select the cells you want to protect and right-click to bring up the context menu. Choose “Format Cells” and then click on the “Protection” tab. Check the box next to “Locked” to lock those cells. Then, go to the “Review” tab and click on “Protect Sheet” to restrict editing to only the unlocked cells.
- Make it for multiple users: If you want to create a template that can be used by multiple users, you can also consider using Excel’s built-in collaboration features, such as co-authoring or sharing via OneDrive. This allows multiple users to work on the same workbook simultaneously, without having to worry about conflicting changes or version control issues.
- Test thoroughly: Test the template by creating a new spreadsheet using the template. Make sure all the formulas and functions are working as intended and that the formatting looks good.
- Save in Templates folder: Save the template in a location where you can easily access it in the future. You can also share the template with others by sending them the file or uploading it to a shared folder or online storage service.
- Save Multiple Versions: Save multiple versions of the template to accommodate different data sets or use cases. For example, you might create a template for tracking sales data and another for tracking expenses.
- Share with the users: Share the template with others in your organization or community. You can upload the template to a shared network drive or use an online file sharing service like Dropbox or Google Drive.
Finally, keep in mind that when you create a template, it is important to consider the needs of the users who will be using it. Make sure that the template is easy to use, flexible enough to accommodate different types of data, and includes clear instructions or guidance on how to use it effectively.
Hope you these steps are helpful to create customized and professional Excel templates that meets your specific needs and saves you time and effort when working with similar data sets. Please let us know your thoughts on this in the comments.
Share This Story, Choose Your Platform!
Related Posts
© Copyright 2012 – 2020 | Excelx.com | All Rights Reserved
Page load link