
Create a document in Word

With Word on your PC, Mac, or mobile device, you can:
-
Create documents from scratch, or a template.
-
Add text, images, art, and videos.
-
Research a topic and find credible sources.
-
Access your documents from a computer, tablet, or phone with OneDrive.
-
Share your documents and work with others.
-
Track and review changes.
Create a document
-
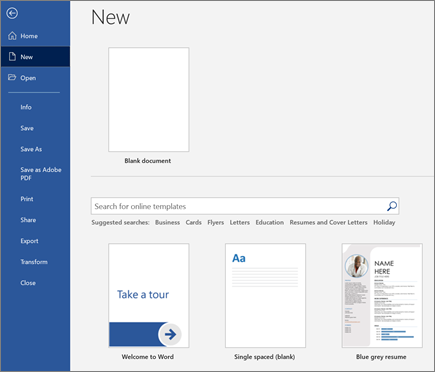
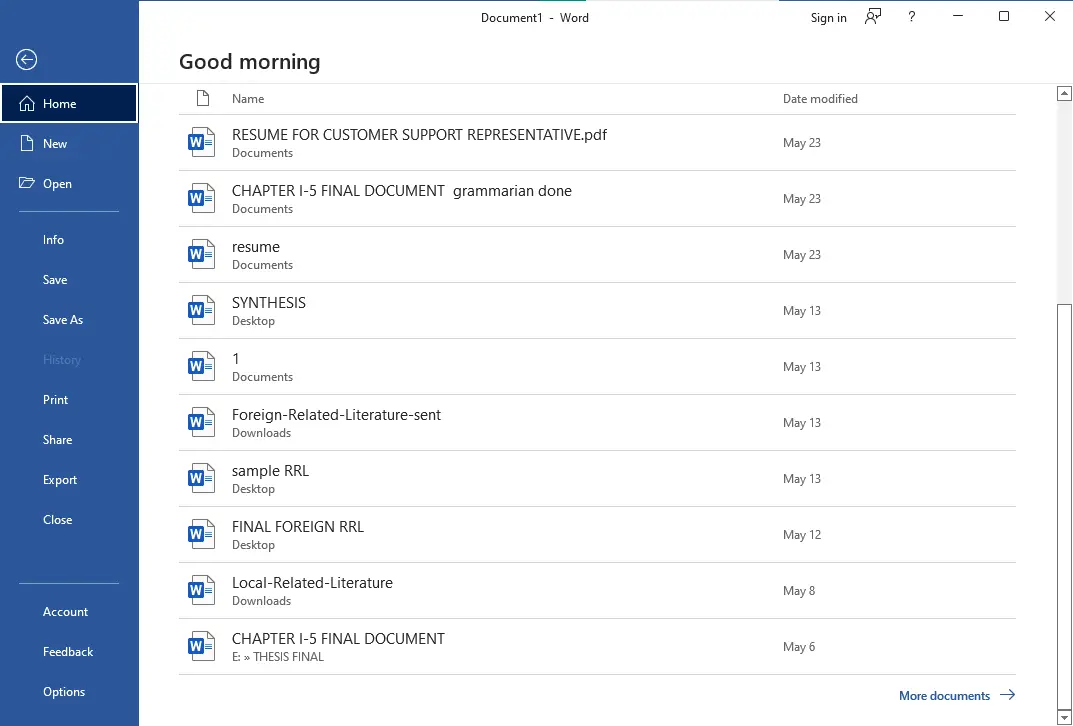
On the File tab, click New.
-
In the Search for online templates box, enter the type of document you want to create and press ENTER.
Tip: To start from scratch, select Blank document. Or, for practice using Word features, try a learning guide like Welcome to Word, Insert your first table of contents, and more.
Add and format text
-
Place the cursor and type some text.
-
To format, select the text and then select an option: Bold, Italic, Bullets, Numbering, and more.
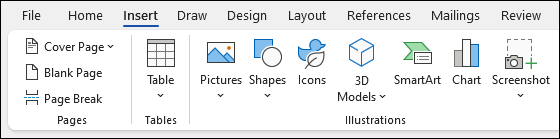
Add Pictures, Shapes, SmartArt, Chart, and more
-
Select the Insert tab.
-
Select what you want to add:
-
Tables — select Table, hover over the size you want, and select it.
-
Pictures — select Pictures, browse for pictures from your computer, select a stock image, or even search Bing.
Note:
Older versions of Word may have Online Pictures on the ribbon next to Pictures. -
Shapes — select Shapes, and choose a shape from the drop-down.
-
Icons — select Icons, pick the one you want, and select Insert.
-
3D Models — select 3D Models, choose from a file or online source, go to the image you want, and select Insert.
-
SmartArt — select SmartArt, choose a SmartArt Graphic, and select OK.
-
Chart — select Chart, select the chart you want, and select OK.
-
Screenshot — select Screenshot and select one from the drop-down.
-
Next:
Save your document to OneDrive in Word
Need more help?
Create a document
Try it!
-
Open Word.
-
Select Blank document.
Or, if Word is already open, select File > New > Blank document.
To create a document using a template
-
Open Word. Or, if Word is already open, select File > New.
-
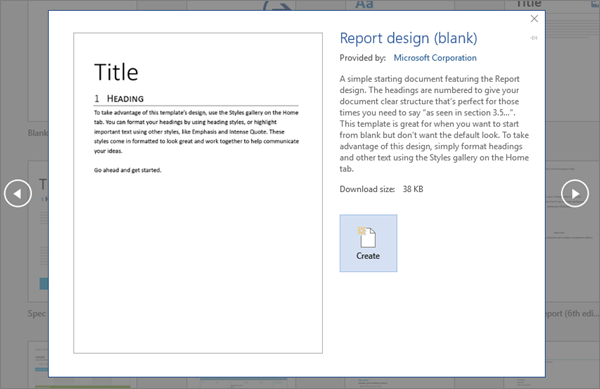
Double-click a template to open it.
Tip: Pin templates you like, so you always see them when you start Word. Select the template and then select the pin icon that appears next to the name of the template.
Search for a template
-
Open Word. Or, if Word is already open, select File > New.
-
In the Search for online templates box, enter a search word like letter, resume, or invoice.
Or, select a category under the search box like Business, Personal, or Education.
-
Click a template to see a preview. Click the arrows on the side of the preview to see more templates.

-
Select Create.
For more templates, see Microsoft templates.
Want more?
Create more with Microsoft templates
Download free, pre-built templates
Save documents online
Discover more Word training at LinkedIn Learning
Need more help?
Creating New Document in MS Word
In this tutorial, we’ll talk about how to create new Document in MS Word 2019 using templates and blank document. As you go over when you start a new project in Word, you have to make a new document, this document can be blank or it can be based on a template.
Table of contents
- Creating New Document in MS Word
- What is a Blank Document?
- What is MS Word Templates in Creating Document?
- 5 Good Reasons to Use Templates in Creating Document
- The Efficiency
- Consistency
- The Accuracy of Templates
- Automation
- Professionalism
- How To Create MS Word Document
- Summary
What is a Blank Document?
A blank document or blank file is a document or file that has no information in it. When you start a new document, for example, it will be blank.
A document or file that already contains content may also have blank pages, which consist of one or more empty pages. In documents created with a word processor, a blank page could be inserted by inserting a page break.
What is MS Word Templates in Creating Document?
A MS Word Template is a document that will automatically produce a copy of itself for your use. For instance, a business plan is a typical document that is typically created in Microsoft Word. You can save time by using a template that already has the page layout, fonts, margins, and styles set up for you. Instead of making the structure of the business plan from scratch, you can use a template that does it for you.
Furthermore, templates basically make sure that everything is the same by having a set structure and layout. When you use a template to make a document, it will have the same layout as the template. The styles tool in Word is a great way to keep the formatting of the text in your document uniform.
5 Good Reasons to Use Templates in Creating Document
Here are five Good Reasons to Use Templates in Microsoft Word:
The Efficiency
The efficiency of a template means it is something you only have to do once. If you use that template again, you won’t have to spend time putting your document in the right format. It’s already done! Templates take away the time-consuming part of making a document, so you can focus on making sure the document is good.
Consistency
The consistency of templates is like rules because they have a set structure and layout. When you use a template to make a document, it will look the same.
The Styles tool in Word is a great way to keep the formatting of the text in your document consistent. Styles, which are a standard part of Microsoft Word templates, make sure that all of the text in your document looks the same.
The Accuracy of Templates
The accuracy of templates is a good reason, because we already talked about how a set structure helps keep mistakes to a minimum. Headers and other parts of a template can be used to remind you of important points or sections that you might otherwise forget.
Automation
Auto-formatting, or automation, is a big part of why templates save so much time and stress. One of the best things about Word Styles is the automatic Table of Contents. If you want to change the title of a section, you don’t have to update the TOC by hand because Word will do it for you.
Professionalism
Templates give your documents structure and a polished, professional look. Maybe the biggest benefit is that it makes you stand out from the crowd. And you already know how important it is for your brand to stand out from the crowd.
Here are the ways on How To Create MS Word Document using Blank Document or Templates. Follow these step-by-step instructions.
- First, Click the MS Word and wait to Launch.
When you click the MS Word for the first time, the Start Screen will appear. From here, you’ll be able to create a new document, choose a template, and access your recently edited documents.

- Select the New option. You will see some templates displayed but Click Blank document
When you Select the New option from the first column, it will display the blank document. Then, double-click on the Blank document.

- Next, you should have your blank document as shown below. The document is now ready for you to start typing your text.
You can use a shortcut to open a blank document anytime. Try using the Ctrl + N keys and you will see a new blank document similar to the one in the above screenshot.

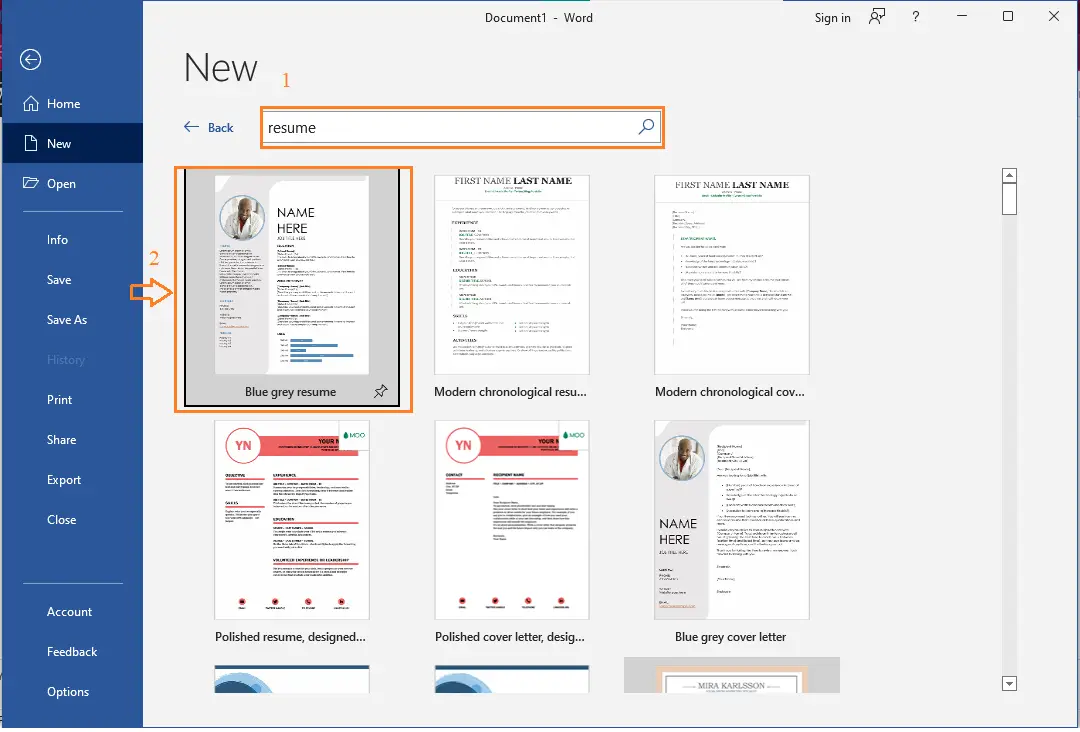
- To Create document using templates. Click the File tab to access Backstage view, then select New.
Several templates will appear below the Blank document option. You can also use the search bar to find something more specific. In our example, we’ll search for a resume template.

- Next, when you find something you like, select a template to preview it.
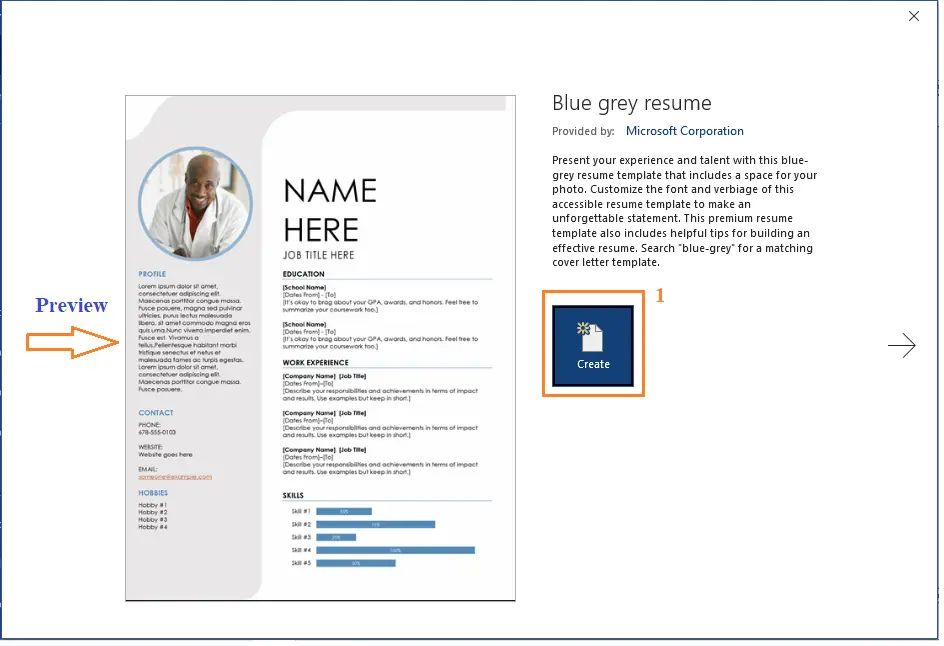
- Then, a preview of the template will appear. Click Create to use the selected template.

- Lastly, a new document will appear with the selected template.


Summary
In this tutorial, we’ve talked about how to create documents with blank documents and templates, as well as what those terms mean. We also gain insight into why it’s beneficial to utilize document templates. Further, we also picked up some skills in document creation utilizing Microsoft Word’s built-in free templates along the way.
We hope this tutorial helps you as you plan to create a document in MS Word.
PREVIOUS

NEXT
Microsoft Word – текстовый редактор с широчайшими пожалуй возможностями, с которыми постепенно будем знакомиться на страницах нашего блога. В этой публикации мы рассмотрим базис работы с этой программой. Мы поговорим о том, как в Microsoft Word создать документ, как его сохранить, какие в текстовом редакторе есть основные возможности, на которые на первых порах знакомства с ним нужно обратить внимание новичкам. Работу редактора мы рассмотрим на примере его последней ритейл-версии Microsoft Word 2019, которая во многом с двумя другими версиями идентична из числа актуальных — Microsoft Word 2016 и 2013.
Содержание
- Создание документа
- Сохранение документа
- Основные функции в процессе набора текста
- Форматирование текста
- Режимы отображения документа
Создание документа
Работа с Microsoft Word начинается либо с открытия существующего документа, либо с создания, соответственно, нового. Создать новый документ можно прямо на главной вкладке приветственного окошка программы. Это будет у нас пустой документ, чистый лист формата А4.
А во вкладке «Создать» у нас будет возможность с вами создать документ Word с использованием коллекции шаблонов. Если образца нужного типа документа не найдется, тогда можно попытаться поискать его в сети.
Сохранение документа
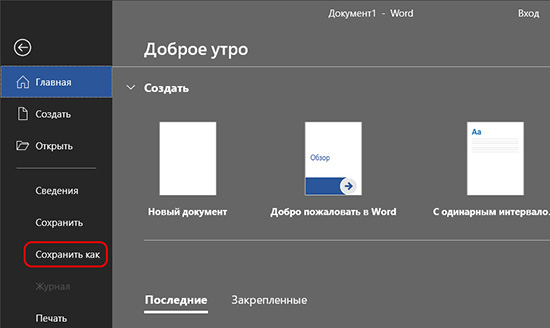
Созданный документ, и неважно, выберем ли мы просто пустой документ, либо же это будет готовый шаблон, нам нужно сохранить его под своим названием в нужном месте компьютера. Жмём «Файл».
Выбираем «Сохранить как».
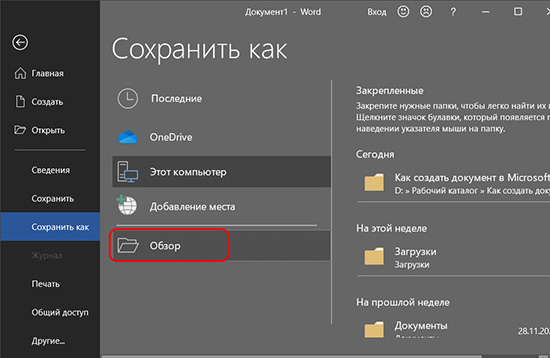
Далее – «Обзор».
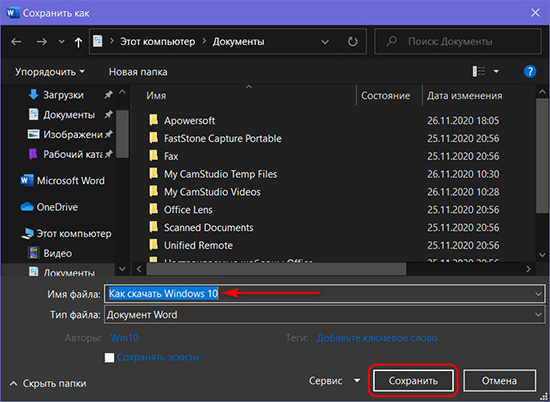
Выбираем путь сохранения на диске компьютера и жмём «Сохранить».
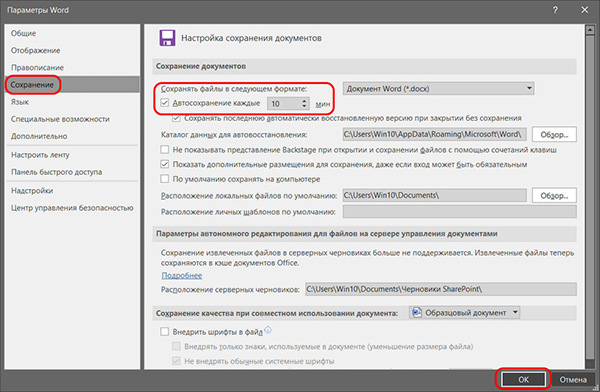
Приступая к работе с Microsoft Word в первый раз на каждом новом компьютере или же в новом профиле ОС Windows, важно сразу настроить под себя параметры автосохранения документов. Это нужно на будущее, чтобы при непредвиденном аварийном завершении работы текстового редактора как можно большая часть проделанной в нём работы осталась сохранённой. Нажмём меню «Файл», внизу слева выберем «Параметры». В окне параметров зайдем в раздел «Сохранение». И указываем самый оптимальный для нас промежуток времени автосохранения документов. По умолчанию в Microsoft Word выставлено 10 минут, но это будет, конечно, мало. Можно выставить минут 5. Выставляем и нажимаем «Ок».
Помимо настройки автосохранения, в процессе работы с текстовым редактором можем вручную сохранять документ. Для этого жмём кнопку в виде дискетки на панели быстрого доступа или клавиши Ctrl+S.
Основные функции в процессе набора текста
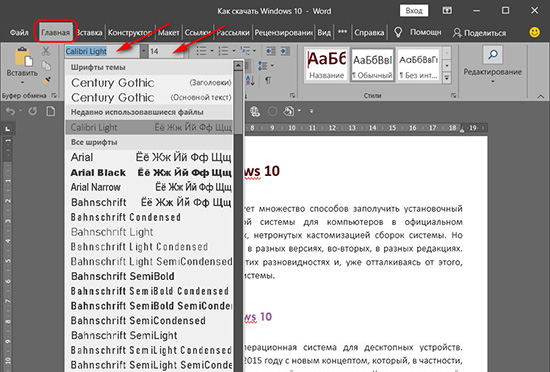
Непосредственно работу над пустым документом начинаем с выбора шрифта и его размера в главном меню программы.
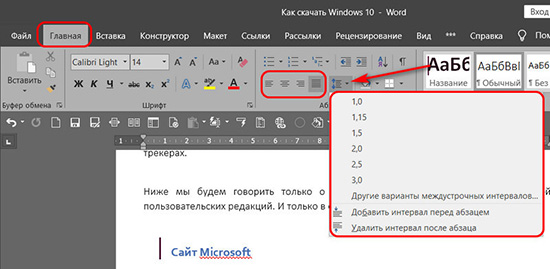
Далее выбираем выравнивание текста – по правому/левому краю, посредине, по ширине. Можем выбрать другой, нежели предустановленный, междустрочный интервал. И при необходимости убрать или добавить интервалы до или после абзаца. Но можно и просто делать между абзацами отступы двойным отбитием клавиши Enter.
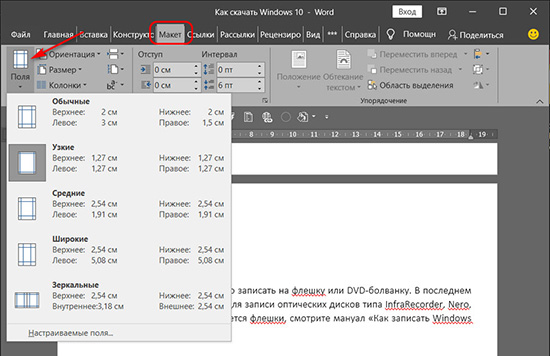
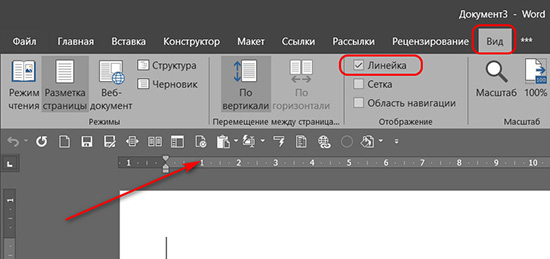
Если нам нужно изменить параметры самого листа документа, в меню «Макет» можем задать размеры полей, размер (формат) – А4, А3, А5 и т.п., книжную или альбомную ориентацию.
А в меню «Вид» при необходимости включается отображение линейки.
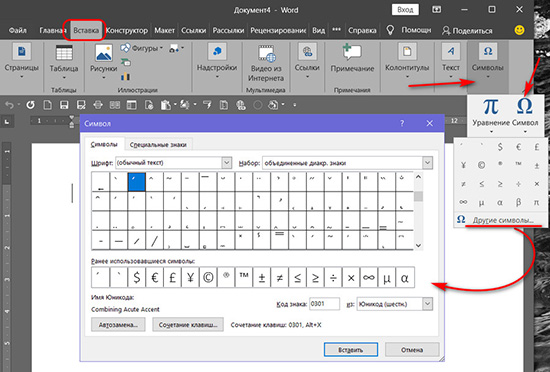
В Microsoft Word действуют общие правила компьютерного набора текста. Если в процессе набора текста нам нужно использовать какие-то символы, которых нет на клавиатуре, ищем их в меню программы «Вставка». Кликаем «Символ» и, если нужный нам символ есть в небольшом перечне, выбираем его. А если нет, открываем полный перечень символов «Другие символы» и ищем то, что надо.
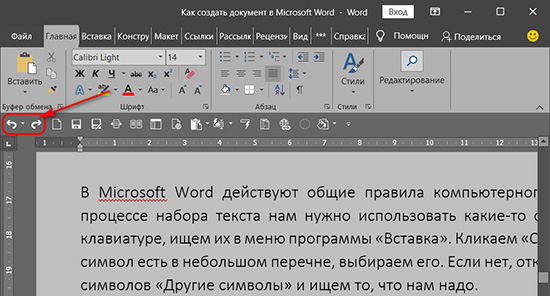
При наборе текста для удобства можно пользоваться функциями отмены ввода, если мы что-то удалили нужное и хотим вернуть это обратно. И также можно использовать повторение ввода – функцию, обратную отмене ввода. Их кнопки размещены на панели для быстрого доступа, и также эти функции можно всегда задействовать клавишами, соответственно, Ctrl+Z и Ctrl+Y.
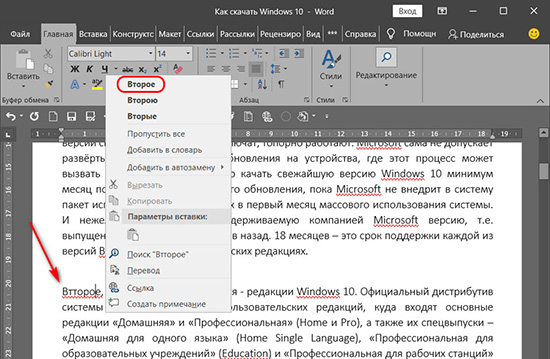
По умолчанию в программе Microsoft Word включена проверка орфографии. Все грамматические ошибки отмечены красным подчёркиванием, пунктуационные и стилистические – синим. В контекстном же меню на подчёркнутых словах и фразах мы можем посмотреть, как, возможно, правильно пишется то или иное слово, либо как правильно нужно ставить знак препинания. Однако стоит иметь в виду, что автоматизированное средство для проверки правописания Microsoft Word ещё далеко от идеальной реализации, и сомнительные какие-то моменты всегда нужно перепроверять.
Форматирование текста
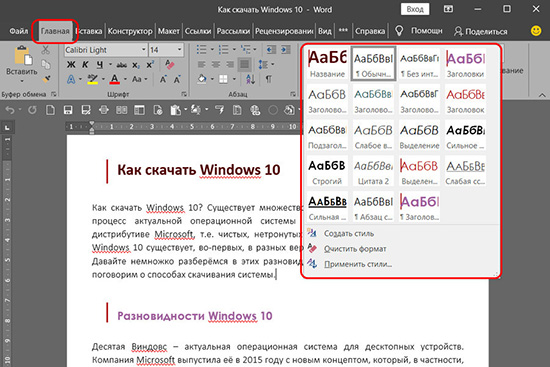
Программа Microsoft Word может предложить нам огромнейшие возможности в плане форматирования текста. К тексту можем применять различные шрифты, выделение жирным, курсивом, нижним подчёркиванием, цветным маркером и блоком. Можем буквы сделать любого цвета и стиля, в том числе объёмного. Все эти операции есть в главном меню программы. И также в нём есть коллекция из разнообразных стилей форматирования. Это стили, которые можно применять к определённому тексту – названиям, заголовкам, подзаголовкам, цитатам, а также акцентным выделениям и т.п. У каждого шаблона имеются разные стили форматирования, прямо в коллекции в главном меню у нас есть возможность эти стили редактировать на свой вкус и создавать новые.
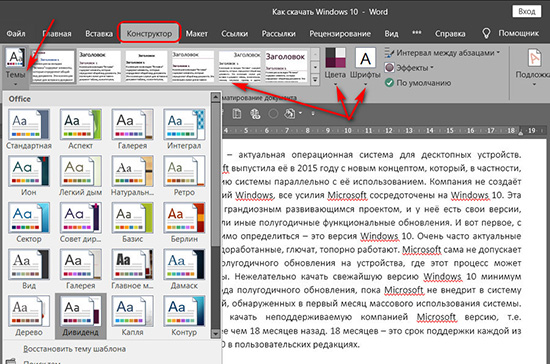
Но это ещё не всё, существующую тему стилей для форматирования во вкладке программы «Конструктор» можем сменить на другую. И для выбранной темы можем сменить образцы заголовков, их шрифт и цвета.
Ещё по умолчанию в Microsoft Word настроена вставка текста, скопированного из другого источника, с сохранением форматирования этого другого источника (другой программы, веб-страницы в браузере и т.п.). Такое форматирование в себя включает шрифт, его размер, цвет, применённые эффекты, вставленные картинки. Во многих случаях форматирование из другого источника не нужно, нужно вставить только сам текст. И вот чтобы нам не нарушать формат текста, который был задан в документе Microsoft Word, форматом источника, где мы позаимствовали текст, вставлять нужно текст очищенным от форматирования. Делается это не обычной комбинацией клавиш Ctrl+V, а уже Ctrl+Shift+V. Либо же можно использовать параметры вставки в главном меню текстового редактора, в выпадающем списке кнопки «Вставить».
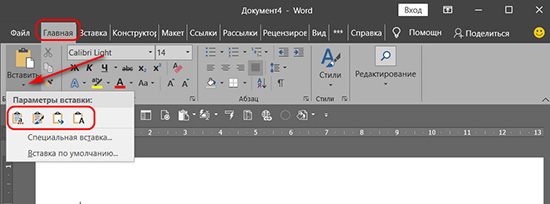
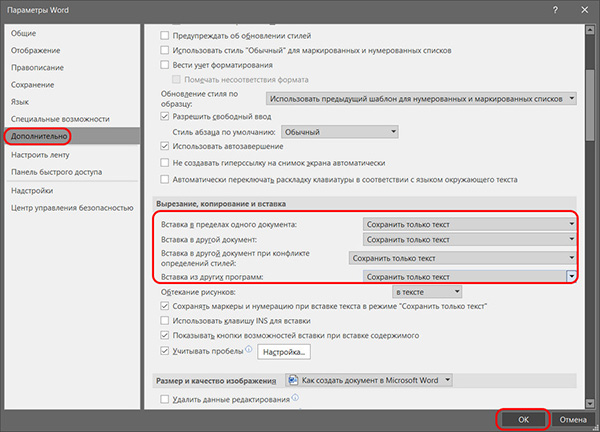
Но можно сделать и так, чтобы у нас по клавишам Ctrl+V и кнопкой «Вставить» вставлялся очищенный от форматирования текст. Для этого нам необходимо в параметрах Microsoft Word, во вкладке «Дополнительно» выставить 4 значения вставки «Сохранить только текст».
Режимы отображения документа
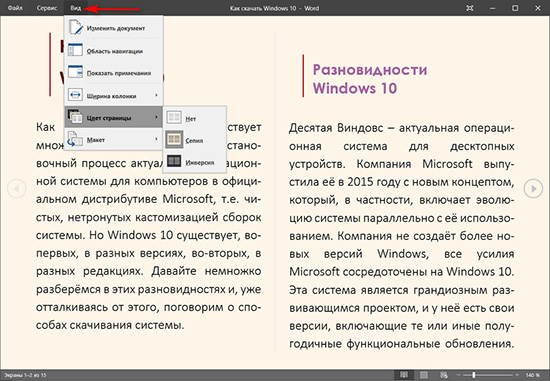
У Microsoft Word есть несколько режимов отображения документа, их кнопки для переключения находятся внизу справа. Двое из режимов предназначены для набора текста – это режим обычного документа и режим веб-страницы. Между ними можно переключаться и выбирать, какой из них для какой ситуации нам больше подходит.
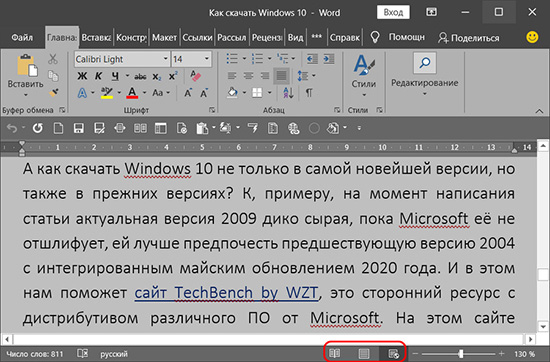
И есть ещё режим чтения, он предназначен для чтения книг и прочих текстовых материалов. Ну и, соответственно, его можно использовать для вычитки разных документов. В режиме чтения нельзя редактировать текст. Но данный режим у нас настраивается: можем выбрать тему, макет, ширину колонки.
Вот это только основные возможности Microsoft Word по созданию документов. Ну а все остальные возможности текстового редактора мы уже узконаправленно рассмотрим в других статьях блога.
How would you create a document? To create a document, you will need a word processing application installed in your computer system. You might also use online word processing apps such as Google Docs, Zoho Writer, Pages, Office online, etc.
There are different word-processing desktop applications that you can use to create a document. Some of them are Pages for Apple devices, WordPerfect for Windows only, and LibreOffice for Linux, Windows, and Mac. In this tutorial, our emphasis is on creating a document using Microsoft Word only.
From the previous tutorial [What is Microsoft Word?], we discovered that you can create different kinds of documents in Word. For example, letters, reports, memos, newsletters, flyers, books, etc. In this Microsoft Word tutorial, we shall learn how to create letters, resumes, invoices, and certificate documents.
Creating your First Document
Creating your first document begins with saving a new document or by creating a file. There are two options:
- Create a document from available templates
- Start with a blank document template
Every document created will be saved to allow us to have access to them in the future. Also, every change made to a document requires saving to sustain the changes. This means that when something is added or removed from a document, it must be saved to sustain the changes.
Before we delve into creating different kinds of documents, let us understand how to save a document. This is the process of creating a file. You can create a file in any compatible application using a similar method.
Create a file in MS Word
Saving a document is the process of storing a document in a storage device for easy accessibility in the future. When you create a document, you must preserve it so you can use it in the future. The saved document which becomes a file can be:
- archived for future references
- updated or revised to meet the present-day needs
- deleted if it is no longer needed
The document is usually saved in a storage device which is primarily the hard drive in the computer system. There are other storage devices where you can save your documents, including the cloud. Microsoft has made it easy for you to save documents in the cloud using OneDrive for your desktop. Documents saved in the cloud are accessible from any device by using your Microsoft ID.
Also Available:
- What is Microsoft Word: A Practical Overview
- What is a Word Processor in 2021?
- What are Word Processing Fundamentals?
- Fundamental Concepts of Computer System
Also, to save a document, you need to place it in a folder. The default folder where all documents are saved in Microsoft Word is called Documents. However, you have the option of choosing an appropriate folder where your documents will be saved. Hence, you can create new folders for ease of file organization.
This means that as a business owner or student, you can have different folders where different files are stored. Files for research work can be stored in the research folder, while other files are stored in documents. Haven said this, how do you save your documents?
To save your document or create a file in Microsoft word, do the following:
- Open Microsoft Word using any of the methods discussed in our previous post.
- On the Microsoft Word window that appears, do any of the following:

- Select the Save button on the Quick Access toolbar; or
- Press [CTRL+S] on the keyboard; or
- Go to File, from the file menu, select Save. The Save this file mini dialog box will appear.

- On this dialog box (shown above), enter a name for your document in the File Name box.
- Choose the location (folder) where you want to save your file under Choose a Location. NB: available locations are folders you recently saved a file, including OneDrive.
- When you are done, click the Save button to save your document.
Choosing a different location for your file
Sometimes, the location you may want to save your document will not be available on the mini dialog. Or, you may want to create a new folder for your document. If this is the case, continue with the following steps.
- On the Save this file mini dialog box, select More options… The Save As (backstage view) will appear. You can also select More Locations → in the Choose a Location menu.

- On the Save As backstage view, you will notice two panes. The left pane displays links to the different locations you can save your document. The right pane displays available folders in your selected location.
- Select a location on the left pane, e.g., OneDrive – Personal. On the right pane, select the folder location you want to save your document, e.g. My Tutorial-Courses. The Save As dialog box will appear.

- On the Save As dialog box, enter a name for your document in the File Name box.
- Click the Save button.
Creating a new folder for your file
To enhance file organization, you may want to create a folder for your new document. The folder may contain all the files of that department, sector, or job. If you feel like creating a new folder location for your new document in Microsoft Word. Then, continue with the following steps.
- On the Save As dialog box (shown above), select the New folder button. The new folder will immediately appear on the list of files.
- Change the “New folder” name to the appropriate name you want, and press Enter on the keyboard.
- Select the Open button to open the folder location.
- Enter a name for your document in the File Name box, and click the Save button.
What is Microsoft word compatibility mode?
Microsoft Word compatibility mode is a file format that is compatible with other applications. It extends functionality to other applications for viewing or /and editing purposes.
For example, Microsoft Word 97-2003 uses the .doc file extension while 2007 and above use .docx. This implies that documents saved in word 2007 and above formats cannot be opened in word 97-2003. Similarly, documents created in Microsoft word applications cannot be opened in other word processors.
To ensure that your document is compatible with other apps, you will need to save it in a compatibility mode. This is simply a means of extending functionality to other word processing applications. It will then allow you to view or edit your document with other applications. This is important, especially, when viewing your file in a system that does not have Microsoft word.
Some of the compatibility formats available in Microsoft word include
- PDF/XPS: This will allow you and others to view a word document using Adobe Acrobat Reader or XPS viewer. You can only edit the document in Adobe reader if you have access to pdf editor.
- Word 97-2003: This will enable you and others to view and edit documents created in Word 2007 – 2019 in word 97 – 2003. This is the word compatibility mode that enables people who are using older versions to access your document.
- Rich text format: This is a format that allows your word document to be accessible in different word processors. Though it has limited functionality. Documents with the .rtf extension can be opened and edited in the WordPad application.
- Open document text: This is a format that is compatible with OpenOffice word processing applications. To create a document that is compatible with people using OpenOffice or LibreOffice, use this extension.
Save in compatibility mode
To save your document using the compatibility mode, continue with the following:
- On the Save As dialog box shown below.

- Click the Save as type: dropdown menu.
- From the list, select the file type you want. E.g. Word 97-2003 Document for word compatibility; PDF to convert to PDF; OpenDocument text for .odt extension.
- Select the Save button.
Now that you have learned how to save your document, always remember to save every change made.
Create a document in Microsoft Word using a template
Microsoft word makes it easy and faster to create any type of document through its list of templates. Templates are prototype documents that one can mimic when creating his/her document. It removes the hassle required when creating a document from the scratch. It also makes it easy for those not familiar with MS Word to create professional-looking documents.
Microsoft Word installs different document templates that you can use on your computer. If you did not see what you want, you can browse online for more templates.
Create a letter document using a template
To use a template to create a letter, do the following:
- Open Microsoft Word app in backstage view.
- If MS Word is already open, go to File and select New from the menu.

- On the window that appeared, scroll down to choose a letter template of your choice.
- If you did not see a letter template, select the Letters link under the Search Box. You can also search for letters in the search box. NB: you need an internet connection.

- Scroll down through the search result to see the types of letters available.
- Select the appropriate type of letter from the list. E.g., cover letter, thank you letter, letter of resignation, etc.

- On the ‘create letter’ window that appears, click on the Create button. The template will be downloaded and opened in a new window.

- On the template’s window, select each placeholder, delete the default text and replace them with yours.
- Save the document.
Create a certificate document using a template
To create a document using a certificate template, do the following:
- Repeat steps 1 – 4 above.
- In step (4), enter ‘certificates’ in the Search Box and press Enter on the keyboard.
- Continue with steps 5 – 9 above.
Create a document using a blank document
You can create a document from the scratch without the assistance of a template. This requires the knowledge of Microsoft Word. A blank document presents you with an empty page. You will need to add texts, images, shapes, and placeholders in other to create a professional document.
Let us get started creating documents with a blank document.
- Open Microsoft Word. Word opens in the backstage view.
- On the backstage view, select Blank document. A blank word document opens.
- If Microsoft word is already open, follow any of these steps:
- Go to File and select New. On the New view, select Blank document.
- On the Quick Access toolbar, select the New file icon.
- Press CTRL+N on the keyboard.
![]()
- Save your blank document.
Creating different kinds of documents in Microsoft Word
Let us use the blank document template to create the following types of documents: resume, and invoice. We will illustrate how, but you will complete the document yourself. We shall use the default document size in all our illustrations.
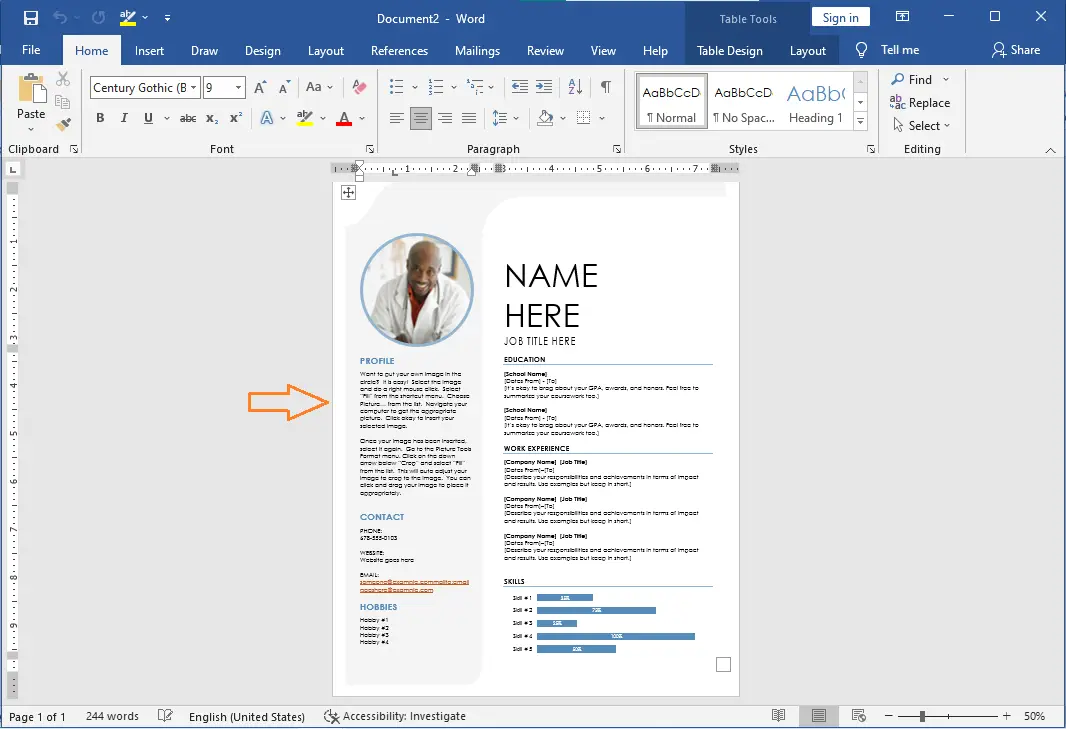
Create a resume document in word using a blank document
A resume has different formats. You can use any of the formats provided by the templates in Microsoft Word. However, we shall create a simple resume with a simple design.
A resume is a single page that briefly shows the following information:
- name, contacts, and objectives
- biodata, and
- professional qualifications including education, skills, and work experience
Let us begin in the following steps.
- Open a new Microsoft word document.
- On the Layout tab, select Columns and choose Left.

- On the left side of the page, insert a picture by doing the following:
- Go to Insert tab, under Illustrations, select Pictures.
- From the dropdown list, select This Device. The insert pictures dialog window will appear.

- Choose a picture and click the Insert button. The picture is inserted into the document. Click outside the image and press the Enter key on the keyboard.
- Under the picture in your document, insert a table with one column and four rows as follow.
- Go to the Insert tab and select Table.
- From the dropdown menu, point on column 1 and move to the 4th row, and select.

- A table with one column and four rows will appear on your document.
- Select the box on the bottom-right of the table and drag it towards the bottom of the page.

- Alternatively, you can start entering information in the respective rows of the table. As information fills each row, the table will expand on its own.
- Fill in the information on each row under the following headings: Objectives, Skills, Contacts, and Hobbies.
- When you are done, click outside the table (specifically, below the table). Press Enter key on the keyboard to move to the right column.
- On the right side of the page, insert another table with three rows. Follow the same process discussed above.
- Enter information under the following headings on each row: Biodata, education, and work experience.
- The complete document should look like the image below. The color formatting should not be a problem for you.

Create an invoice document in Microsoft word using a blank document
An invoice is used to capture product sales. It can have different formats. You may decide to use any of the formats provided by the templates in Microsoft Word. Here, we shall create a simple invoice. Over time you can create invoices with sophisticated design.
An invoice should contain the following information:
- Name of company and contact information
- Name of a customer with contact information or space to include such
- Date, invoice no., and products description including quantity, rate, and total amount.
Let us begin in the following steps.
- Open a new Microsoft word document.
- On the Insert tab, under Illustrations, select Pictures. Choose a picture that represents the logo of the organization.
- Under the picture, insert a 1×1 (one column and one row) table. In this table, enter the company’s name and contact information.
- Go to the Insert tab, under Illustrations, select Shapes. From the list of shapes, under Basic Shapes, select the Text Box.

- On the right side of the page, along with the logo image, click and drag to create a text box.
- In the text box, insert a 1×2 table (1 column and 2 rows). See the final image below.
- In the first row, enter the following information: INVOICE, Date, and invoice no.
- In the second row, enter the information of the customer. If the information is not handy, enter lines to create a space so that the information can be entered manually.
- Click below the text box and press the Enter key.
- Insert a 4×11 table and adjust the width of the columns.
- Enter the following information appropriately Qty, Description, Rate, Amount, Subtotal, VAT, and Total. See the final document below.
- Highlight the three rows of subtotal, VAT, and Total.
- Go to the Design tab, under Borders, select Borders. From the list that appears, click on Borders and Shading…

- The Borders and Shading dialog box will appear.

- In the borders and shading dialog, under Preview, remove all borders except the top and right borders. Remove borderlines by clicking on the borderlines on the preview window.
- Click OK to apply changes.
The final document after all changes is made should look like the image below. If you didn’t get it exactly, don’t worry, but keep practicing.

To edit a document means to either add items or remove existing ones from a document. It is simply called updating a document.
Before you edit a document, the document must have been existing. Hence, you will locate the document, open it before you can edit it. Let us go through the process.
Open an existing document
To open an existing Microsoft Word document or file, follow the following steps.
- Locate the folder where the file is stored, and double click the file to open it; OR
- Click the Start button, and type in the name of the file in the Search box. Select the file from the results that appears; OR
- Open Microsoft word application.
- On the File menu, check through the list of Recent files.

- Select the file you want to open. The document opens.
- If the document is not on the Recent list, do the following:
- Select Open from the backstage view.

- On the left pane, choose a location where the file is stored, say, This PC, OneDrive.
- On the right pane, select the Folder or the File you want to open. If you selected a folder, it will expose the files on the folder. Then select the file you want to open within the folder.
- Instead of the File menu, you can also do any of this to display the Open Backstage View.
- On the Microsoft word window, select the Open icon on the Quick Access toolbar.
- Press CTRL+O on the keyboard.
- Follow step 6(a-c)
Edit a document
To edit a document in Microsoft word, you will learn how to insert texts and images, and format them. Here, we just introduced the method. You will need to follow through this tutorial to master how to work with Microsoft word. Meanwhile, do the following:
- Place your cursor where you want to enter additional text and start typing. Highlight the texts and format them appropriately.
- Highlight the texts you want to remove from the document and press Delete on the keyboard.
- Place the cursor where you want to insert a shape or image and press Enter on the keyboard. Select the appropriate shape you want to add. Insert and format the shape(s) appropriately.
- Use the Spelling & Grammar check tool to proofread the document.
- When you are done editing, save the document to update the changes made.
Conclusion
To create a document in Microsoft word, you will need a word application installed on your PC. Alternatively, you can use the online version of MS Word.
In this tutorial, we learned how to create simple documents using Microsoft word. We created the following documents a letter, an invoice, and a resume. These documents were created using templates and blank documents.
To effectively work with Microsoft word, you need to learn how to use it. This is why we are bringing this tutorial to you. Continue with us next week as we bring to you how to set up your document.