
Remove the page number from the first page
-
Go to Insert > Header or Footer > Edit Header or Edit Footer.
-
Select Different First Page.
Note:
Different first page can be applied to the first page of any section in your document, not just the very first page. -
In the header or footer area, you should see a label on the first page that says First Page Header. Select the page number and press Delete.
-
Select Close Header and Footer or press Esc to exit.
Tip: If you want your second page to start at 1 rather than 2, go to Insert > Page Number > Format Page Numbers, and set Start at under Page Numbering to 0, rather than 1.
Start page numbering on Page 3 — double-sided printing
If the first page of your document is a cover page, the second page is a table of contents, and you want the third page to show “Page 1”, see Start page numbering on Page 3 — double-sided printing.
Choose the scenario that most closely matches what you want to do:
You don’t want a page number to appear on your title page, but you want the second page to show «Page 2.»
-
Go to Insert > Header or Footer > Edit Header or Edit Footer.
-
Select Different First Page.

Note:
Different first page can be applied to the first page of any section in your document, not just the very first page. -
In the header or footer area, you should see a label on the first page that says First Page Header. Select the page number to highlight it and press Delete.
-
Select Close Header and Footer or press Esc to exit.

Start page numbering on Page 3 — double-sided printing
If the first page of your document is a cover page, the second page is a table of contents, and you want the third page to show “Page 1”, see Start page numbering on Page 3 — double-sided printing.
Remove the page number from the first page
-
Go to Insert > Header & Footer.
-
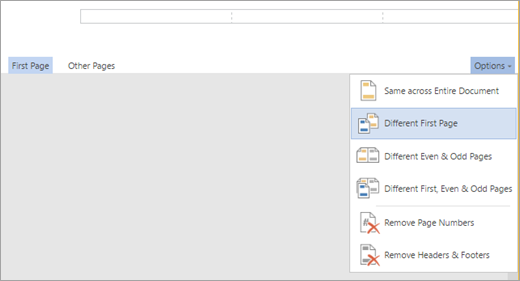
SelectOptions on the right side, and then select Different First Page.
-
Select Options again, and then select Remove Page Numbers.
-
To see your page numbers and confirm deletion of the number from the first page, go to View > Reading View.
-
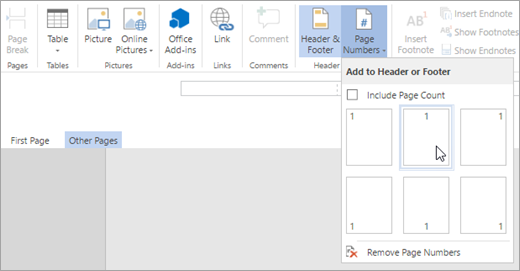
If all page numbers are deleted, go to Insert > Header & Footer and select Other Pages on the left side,. Go to Insert > Page Number and choose a number placement.
Содержание
- Способ 1: Простое редактирование
- Способ 2: Редактирование нумерации в сложном документе
- Вопросы и ответы
Нумерация страниц в документе при помощи MS Word может быть изменена довольно легко:
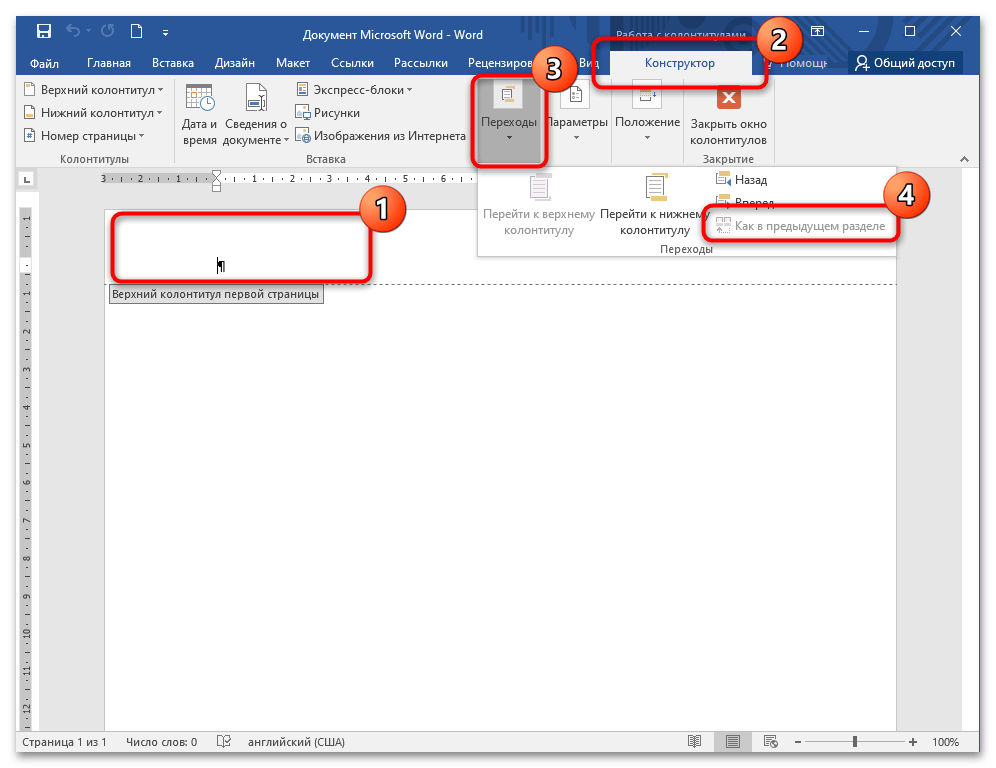
- Дважды щелкните левой кнопкой мыши по номеру страницы, чтобы выделить цифру вместе с колонтитулом.
- Через верхнюю панель Ворда перейдите в раздел «Конструктор», найдите там пункт «Номер страницы», по которому и нажмите.
- Из выпадающего списка выберите нужный вариант расположения нумерации и наведите на него курсор, чтобы отобразились шаблоны с видами нумерации.
- Все в том же «Номере страницы» на этот раз выберите «Формат номеров страниц», чтобы изменить стиль цифр.
- Для смены шрифта и размера цифр вместо шагов 2-4 через верхнюю панель Ворда перейдите на вкладку «Главная» > «Шрифт».
Способ 1: Простое редактирование
В некоторых ситуациях необходимо изменение стиля, расположения на странице, формата номера на страницах документа редактора Microsoft Word. В зависимости от сложности документа это делается несколькими способами. Если нужно изменить формат или начертание нумерации в простых документах сплошного текста, то это можно сделать с помощью встроенных функций текстового процессора. Для этого действуйте согласно инструкции:
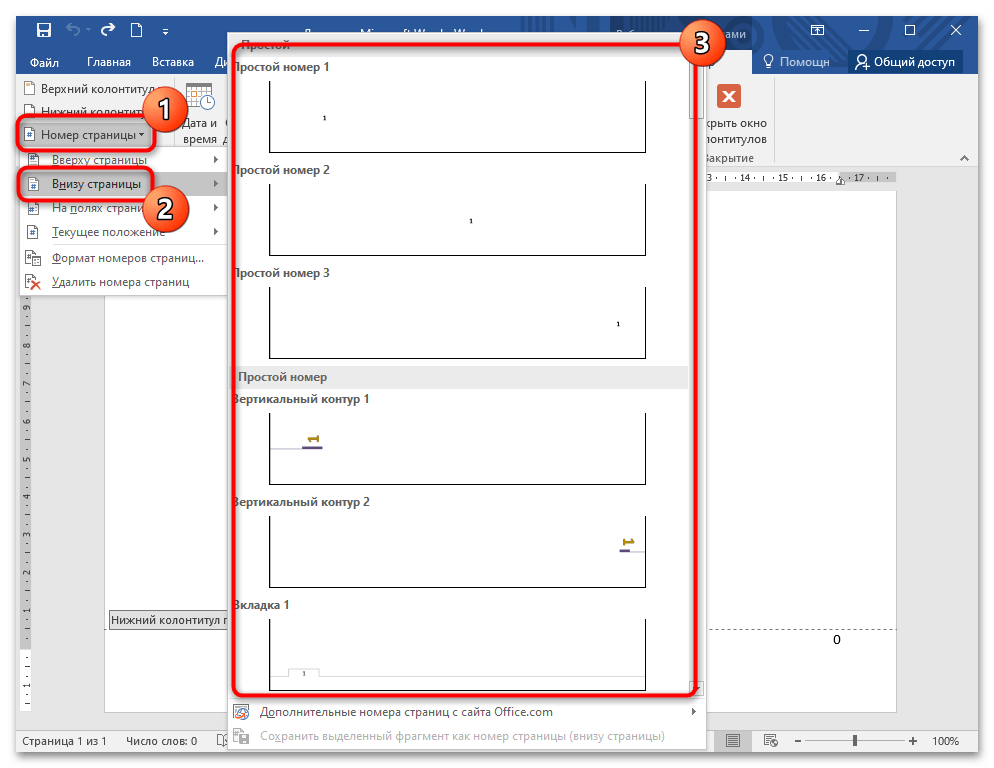
- Дважды щелкните по номеру страницы левой кнопкой мыши — таким образом цифра вместе с колонтитулом выделится. Активируется новое окно в верхней панели – «Конструктор». Найдите меню «Номер страницы» и раскройте его.
- Выберите параметр, который нужно использовать в конечном документе. Расположить номер можно слева, справа или посередине страницы. Встроенная коллекция шаблонов Ворда позволяет использовать различные варианты, включая значение «Страница X из Y». По итогу нумерация будет выглядеть, как «Страница 2 из 35», например.
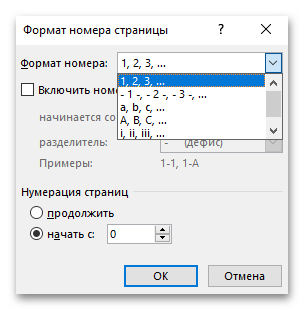
- Перейдите в «Формат номеров страниц», чтобы задать стиль цифр или использовать буквы вместо номеров.
- Здесь доступен выбор страницы, с которой можно начать нумерацию, при этом предыдущие листы пронумерованы не будут.
Читайте также: Как пронумеровать страницы в Microsoft Word
Если нужно изменить шрифт и размер цифр, то после выделения номера перейдите на вкладку «Главная», расположенную на верхней панели, затем выберите нужные значения в блоке «Шрифт». Открыть окно с изменением шрифта, размера, стиля цифр можно и с помощью комбинации клавиш «Ctrl + D» при выделенном номере.
При необходимости отключения отображения номера на первой странице достаточно отметить пункт особого колонтитула на вкладке конструктора колонтитулов.
Способ 2: Редактирование нумерации в сложном документе
В объемных документах со сложной структурой, где требуется отдельная нумерация для каждого раздела, действовать придется иначе. В этом случае сделайте следующее:
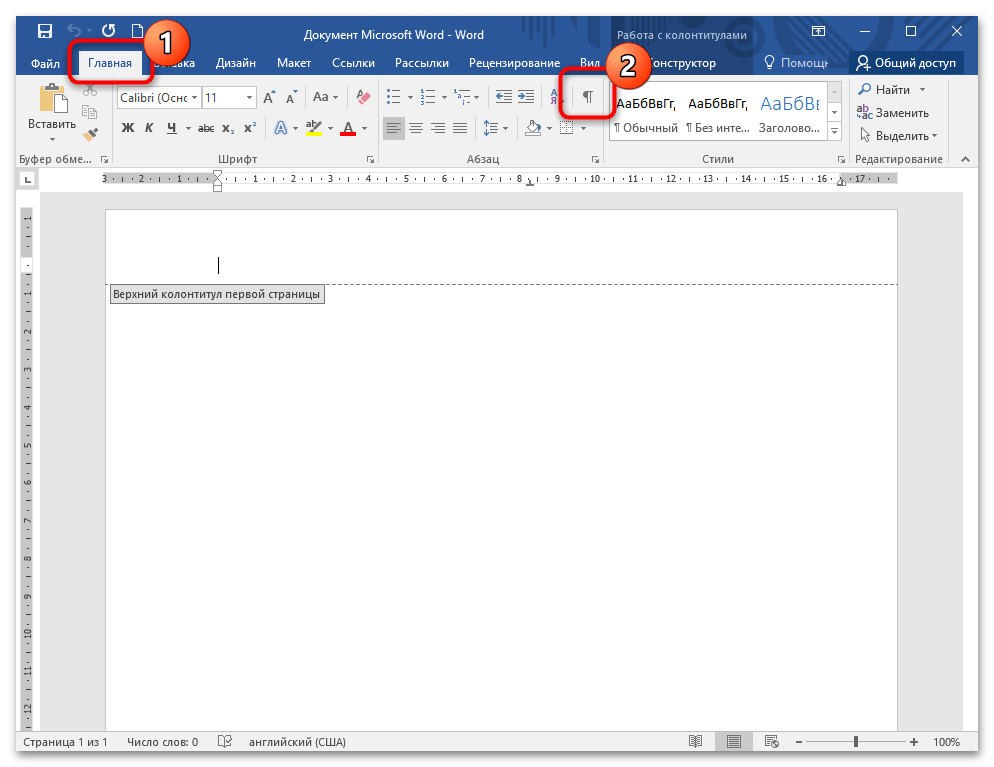
- Проверьте, используются ли в документе разделы и разрывы между ними. Для этого нажмите на иконку отображения непечатаемых знаков в разделе «Абзац» на главной вкладке.
- Выделите нижний или верхний колонтитул на странице, следующей за разделом. Сделать это можно двойным нажатием левой кнопки мыши. На вкладке конструктора колонтитулов должна стать активной функция перехода «Как в предыдущем разделе». Если она не работает, то изменить нумерацию для каждого раздела нет возможности, поскольку между страницами нет разрыва раздела.
Читайте также: Добавляем разрыв страницы в Microsoft Word
Если между страницами есть разрывы, то в блоке «Колонтитулы» раскройте меню «Номер страницы», затем измените расположение или стиль номеров в разделе.

Еще статьи по данной теме:
Помогла ли Вам статья?
This tutorial shows two ways to create numbered lists in Microsoft Word. We will also look at how to change list levels, start with a different list number, and change the font, size, and color of list numbers.
Do you want to create bulleted lists? Please see my previous tutorial “How to Create Bulleted Lists in Microsoft Word.”
What about Lists Ordered by Letters?
For simplicity, this tutorial refers to “numbered lists” because Word organizes all ordered (hierarchical) list options in the Numbering Library. However, all the steps shown here also apply to lists organized by letters.
If you would like to learn more about ordered and unordered lists, please see “How to Write Vertical Lists (Ordered and Unordered).”
Table of Contents
- How to Create a Numbered List — Basic Method 1
- How to Create a Numbered List — Basic Method 2
- How to Change Numbered List Levels
- How to Start a List with a Different Number
- How to Change the Font, Size, and Color of List Numbers
Watch all the steps shown here in real time!
Explore more than 200 other writing-related software tutorials on my YouTube channel.
The images below are from Word for Microsoft 365. These steps also apply to Word 2021, Word 2019, Word 2016, and Word 2013.
The basic steps are similar in Word for Mac. However, the more advanced steps, such as starting a list with a different number, are different on Mac. So, we will cover this topic for Word for Mac in a separate tutorial.
How to Create a Numbered List — Basic Method 1
This is the basic method to create a numbered list in Word. This method requires you to type each item as you create the list. If you have already typed your list items, see Method Two below.
- Place your cursor where you want to start your list.
- Select the Home tab in the ribbon.

- Select the menu arrow next to the Numbering button.
![]()
- Choose a number style from the Numbering Library.

The number one will appear in your document.

- Type your first list item after the number, and then press the Enter key on your keyboard. The next number will appear.

Continue typing your list items and pressing the Enter key until your list is complete.
- After typing the final item, press the Enter key twice to remove your cursor from the list.
How to Create a Numbered List — Basic Method 2
This method is for existing text formatted vertically as a list.
- Select the text.

- Select the Home tab in the ribbon (see figure 1).
- Select the menu arrow next to the Numbering button (see figure 2).
- Choose a style from the Numbering Library (see figure 3).
Your selected items should become a numbered list.

How to Change Numbered List Levels
Word lets you create numbered lists with up to nine nested levels. Here are two ways to change the level of list items.
Change List Levels — Method 1
Important note: This method won’t work for the first item in your list.
- Select one or more list items (other than the first item).

- Select the Home tab in the ribbon (see figure 1).
- Select the Increase Indent button in the Paragraph group.

Each time you select the Increase Indent button, the item(s) will move one level and take on the appropriate format for that level (e.g., lowercase letters, roman numerals, etc.).

Pro Tip: To return the selected text to a previous level, select the Decrease Indent button to the left of the Increase Indent button.
Change List Levels — Method 2
- Select one or more list items (see figure 8).
- Select the Home tab in the ribbon (see figure 1).
- Select the menu arrow next to the Numbering button (see figure 2).
- Select Change List Level from the drop-down menu.

- Select a list level from the list-level menu.

Your list item(s) should move to the next level.
How to Start a List with a Different Number
You can start a list with a number other than one or continue the numbering from the previous list.
- Select the first list number or place your cursor within the first list item. If you select the list number, all numbers on that level should also be selected.

- Select the Home tab in the ribbon (see figure 1).
- Select the menu arrow next to the Numbering button (see figure 2).
- Select Set Numbering Value from the drop-down menu.

5.a. Enter the number you want to start with in the Set value to text box in the Set Numbering Value dialog box.

5.b. (Alternative Option) Select Continue from previous list if you want to continue the numbering from a previous list in your document.

- Select the OK button.

Your list should be renumbered according to your selections in the Set Numbering Value dialog box.
How to Change the Font, Size, and Color of List Numbers
By default, the font, size, and color of your list numbers will be the same as your normal text style. However, you can manually change the appearance of list numbers by selecting them separately from the text.
- Select one list number. All numbers on that level should also be selected.

- Select the Home tab in the ribbon (see figure 1).
- Select a new font, size, or color from the Font group.

Your list numbers should change to the new formatting. Repeat these steps for each level in your list, as necessary.

Related Resources
How to Write Run-In Lists
How to Create and Update a List of Tables or Figures in Microsoft Word
How to Create Numbered Lists in PowerPoint (PC & Mac)
Updated February 12, 2023
Lesson 14: Modifying Page Numbers in Word
/en/word-tips/basic-keyboard-shortcuts/content/
Modifying page numbers in Word
If you’re having trouble with page numbers in Microsoft Word, you’re not alone. We’ve received tons of comments and questions from learners like you on our Page Numbers video.
One of the most common questions is How do I restart or reformat my page numbers partway through the document? Apparently, this is a common problem for students who are working on academic papers.
Your comments prompted us to look for an answer, and we found one. Special thanks to Jessica, who discovered the solution while proofreading dissertations in her spare time.
Modifying page numbers with section breaks
The key to using different types of numbering in the same document is section breaks. Once you’ve added a section break to your document (you can add as many as you need), you’ll be able to restart your page numbers there and/or apply a different style.
Here’s an overview of the steps you need to follow. These steps should work for Word 2007, Word 2010, and Word 2013.
- Place your cursor on the page where you want the first section to end.
- Go to the Page Layout tab, then click the Breaks command.
- Choose Next Page from the menu.
- A section break will be added, creating a new section on the next page.
- To continue, select your header or footer in the new section.
- Go to the Design tab, and deselect the Link to Previous command.
- Now you can modify the page numbers in your new section depending on what you need. To restart your numbering, click the Page Number command, then choose Format Page Numbers. From there, you’ll be able to select Start at: 1.
- To reformat your numbering, select the page number, then go back to the Home tab. You can change the font, color, size, and more.
For more information, read our Page Numbers lesson from our Word 2016 tutorial.
/en/word-tips/how-to-create-a-table-of-contents-in-word/content/
Download PC Repair Tool to quickly find & fix Windows errors automatically
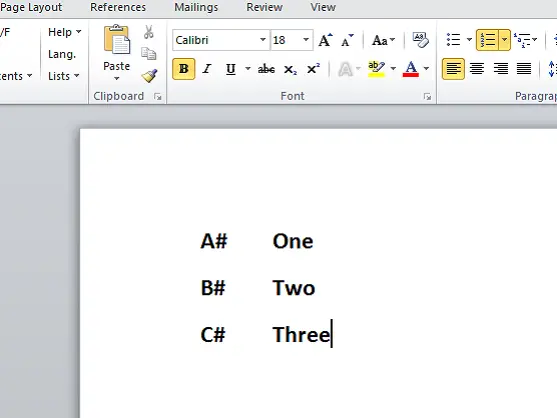
We all know that the default numbered list used in Microsoft Word is like – 1, 2, 3, etc. But if you wish, you can change them to letters or another type, as the Roman numbers. If we look closely at them, numbers or letters are added with a dot (.) beside them as shown below:
- One
- Two
- Three
There might be a situation where you may want to have something other than a dot (.). What we can do, is remove that dot and replace it with the character that we want. If it is one or two, then it is easy, but what if we have many entries to change?
This article will help you to change, edit or create the new numbered list as you want. If you want to add different characters after the number or letter, it can be done easily and I will let you know how to do that.
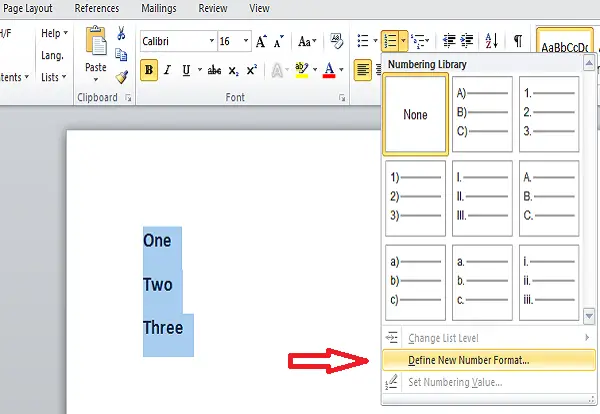
To get started, select the text to which you want to add the numbered list and click the downward arrow of the Numbering button of the Paragraph section in the Home tab.
- The Number Format which you have used recently is shown Recently Used Number Formats.
- The Number Formats which you have used in the present document are shown in Document Number Formats.
![]()
You can use the Number Formats available in the Numbering Library. The problem comes when the number formats which we want to use are available in the Numbering Library. Here comes the use of this article. We can create our own number formats which we want.
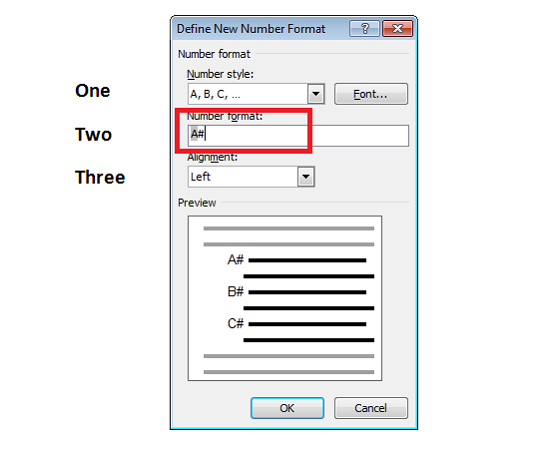
Click on the Define New Number Format and select the respective style which you want to define from the Number style drop-down list.
You can select anything like,
- Uppercase Roman: I, II, III
- Lowercase Roman: i, ii, iii
- Arabic: 1, 2, 3
- Leading Zeros: 01, 02, 03
- Arabic: 1, 2, 3, and more
By default, we have a dot (.) in the Number Format editable text box. Delete that dot and type the character whatever you want. You can add hyphens ‘-‘, the colon ‘:’, ampersand ‘&’ or any character you are interested in.
The Alignment specifies whether your number or letter should be left or right or centered in the space for numbering. By default, it is left aligned and you can change it to whatever you want.
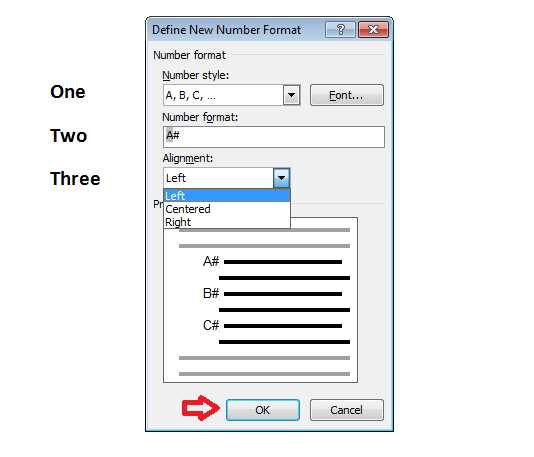
If you want to change the Font of numbers or letters you want to use in the number formats, then you can specify the font you want. Once you are done with your changes and if you are satisfied, then click “OK”.
Now, you will see that the created numbered list is applied to the selected text. When you press Enter, the same numbered list is applied to the other entries as well.
Isn’t this cool?
These are the simple steps to change the default numbered list in Word and define your own number format. You can create your own numbered list and make your Word document look good.
If you have anything to add or suggest, please do share with us through comments.
Read: How to create a Forecast in Excel on Windows PC.
How do I make numbering lists automatically in Word?
Open Word, and then go to Options > Proofing. Here you can click on the AutoCorrect Options button, and then switch to the AutoFormat tab. Check the box next to Automatic bulleted lists or Automatic numbered lists. Apply the changes, and it will be set to automatic.
How do you continue multilevel numbering in Word?
Open the Word document, and select the set of text to which you want to apply multilevel numbering. Ensure the paragraph appearing below the first is set to the left-side or has a tab space before it. Once selected, go to Home tab > Paragraph > and select Multilevel List.

Sridhar is a Software Engineer who loves to stay updated with developments in the world of technology. He is fond of writing everything related to Internet, Computers and Mobile and Desktop Operating Systems.

By default, Word uses Arabic numbers (1, 2, 3, etc.) when you create numbered lists. However, you can change the numbers to a different type or to letters. The character after the number or letter can also be changed.
NOTE: We used Word 2016 to illustrate this feature, but this procedure works in 2013 as well.
Highlight the text you want to convert to a numbered list. Click the down arrow on the “Numbering” button in the “Paragraph” section of the “Home” tab. Some number formats are available in the “Numbering Library” section on the drop-down menu that displays. If you’ve created at least one numbered list in the current document, the number formats used in the document display in the “Document Number Formats” section of the drop-down list. Any number formats used recently in the document are listed in the “Recently Used Number Formats” section. You can choose from any of these formats for your current numbered list. If the format you want is not on the drop-down menu, select “Define New Number Format”.

On the “Define New Number Format” dialog box, select a style from the “Number style” drop-down list.
You can select any of the following number and letter types for use on your numbered lists.
- Arabic: 1, 2, 3, 4
- Uppercase Roman: I, II, III, IV
- Lowercase Roman: i, ii, iii, iv
- Uppercase Alphabetic: A, B, C, D
- Lowercase Alphabetic: a, b, c, d
- Ordinals: 1st, 2nd, 3rd, 4th
- Word Numbers: One, Two, Three, Four
- Word Ordinals: First, Second, Third, Fourth
- Leading Zeros: 01, 02, 03, 04
In the “Number format” edit box, there is a period after the number or letter by default. If you want to change that to another character, such as a parenthesis (“)”), dash (“-“), or colon (“:”), delete the period and type the character you want.
The “Alignment” drop-down list allows you to specify whether the number or letter is aligned left, centered, or right in the space allotted for the numbering. The default choice is “Left”. Select “Centered” or “Right” if you want to change the alignment. To change the font of the numbers or letters on your list, use the “Font” button. When you’re finished making your changes, click “OK”. The numbered list is created similar to the example in the image at the beginning of this article.
If you’re going to customize the numbering on your list, you might want to turn off automatic numbered lists so Word doesn’t automatically apply the default numbering as you type your items.
You can also easily skip numbering in numbered lists and create numbered lists using the keyboard in Word.
READ NEXT
- › How to Change the Alignment of the Numbers in a Numbered List in Microsoft Word
- › How to Format the Numbers or Bullets in a List in Microsoft Word
- › Google Chrome Is Getting Faster
- › Expand Your Tech Career Skills With Courses From Udemy
- › BLUETTI Slashed Hundreds off Its Best Power Stations for Easter Sale
- › This New Google TV Streaming Device Costs Just $20
- › How to Adjust and Change Discord Fonts
- › The New NVIDIA GeForce RTX 4070 Is Like an RTX 3080 for $599
How-To Geek is where you turn when you want experts to explain technology. Since we launched in 2006, our articles have been read billions of times. Want to know more?
Restart numbering at 1
- Click the item that you want to be the first item in the new list.
- On the Format menu, click Bullets and Numbering, and then click the Numbered tab.
- Under List numbering, click Restart numbering.
Contents
- 1 How do I restart and continue numbering in Word?
- 2 How do I restart auto numbering?
- 3 How can you restart the numbering in a numbered list?
- 4 How do you fix multilevel numbering in Word?
- 5 How do I reset Numbering in Word 365?
- 6 When I Restart Numbering in Word the formatting changes?
- 7 How do I unlink my number?
- 8 How do I reset numbering libraries in Word?
- 9 How do I start numbering from 2.1 in Word?
- 10 How do I delete a multilevel list in Word?
- 11 Which command should you use to tell Word to restart the numbering for a new list?
- 12 How do I merge two numbered lists in Word?
- 13 Why is numbering in Word so difficult?
- 14 How do you change numbering to automatic numbering in Word?
- 15 Why is set numbering value greyed out?
- 16 How do I apply default numbering style in Word?
- 17 How do I remove a drop down list in Word 2007?
- 18 How do I get rid of bullet points?
How do I restart and continue numbering in Word?
If you want to restart the numbering of a list, Word has a Restart at 1 option. It can be applied to numeric and alphabetical lists. Right-click the list item you want to restart the numbering for, then select Restart at 1 from the menu that appears. The list numbering will restart.
How do I restart auto numbering?
Turn on or off automatic bullets or numbering
- Go to File > Options > Proofing.
- Select AutoCorrect Options, and then select the AutoFormat As You Type tab.
- Select or clear Automatic bulleted lists or Automatic numbered lists.
- Select OK.
How can you restart the numbering in a numbered list?
Double-click the numbers in the list. The text will not appear selected. Right-click the number you want to start a new list. Click Restart at 1.
How do you fix multilevel numbering in Word?
How to fix Multilevel list in Word
- Select the first heading level and then from the Word Main menu, under the tab Home, within the group Paragraph, click the Multilevel List icon.
- From the drop-down list, click option Define New Multilevel List.
How do I reset Numbering in Word 365?
Working on Word 365.
To do this, do the following:
- Position the cursor where you want a numbered or bulleted list.
- On the Home tab, click the arrow next to bullets or Numbering.
- Choose a style and start writing.
- Press ENTER every time you want a new bullet or number, or press ENTER twice to end the list.
When I Restart Numbering in Word the formatting changes?
When you go to restart the numbering (right-click and select “Restart at 1″), Word changes the hanging indent to be . 25″ (we need it to be . 12″). Is .
How do I unlink my number?
If the list is a numbered list, click on the Numbering tool located on the Home tab of the Ribbon, in the Paragraph group. Word displays a drop-down list. Choose None from the Numbering Library group. Word removes the numbering format from the selected text.
How do I reset numbering libraries in Word?
In that case, you can right-click a list format in the library and click Remove from List Library. To restore the default numbering formats, exit Word and then delete the ListGal.
How do I start numbering from 2.1 in Word?
If you just need the chapter number included in captions, on the On the Home Ribbon, in the Paragraph Group, click the Multilevel List icon and select the one with the words Chapter 1 in it from the List Library section. If you need subsections numbered (for example, 2.1, 2.2, 2.12, etc.)
How do I delete a multilevel list in Word?
Styles listed under “List Styles” at Home tab | Multilevel List can be removed in the Manage Styles dialog box. In the Styles pane (Ctrl+Alt+Shift+S), click the Manage Styles icon. On the Edit tab of the dialog box, select the style name and click Delete.
Which command should you use to tell Word to restart the numbering for a new list?
Restart numbering at 1
- Click the item that you want to be the first item in the new list.
- Ctrl+click or right-click the item, and then click Restart numbering.
How do I merge two numbered lists in Word?
In Microsoft Word, you can connect a subsequent numbered list to a previous numbered list by selecting and right-clicking the second list and, from the resulting pop-up menu, selecting the Continue Numbering option, as suggested in the image below.
Why is numbering in Word so difficult?
Numbering can be difficult to understand because, ironically, Word attempts to make it simple by ‘hiding’ the way it works.It does not cover all the complexities of numbering, or all the things that can go wrong – there is simply not enough space for that.
How do you change numbering to automatic numbering in Word?
From the Tools menu, choose AutoCorrect. Select the AutoFormat As You Type tab, and check the option for Automatic numbered lists.
Why is set numbering value greyed out?
You need to right-click on the text to the right of the list number, then select “Restart numbering” and enter the starting value. Alternatively left-click on the text and use the menus (Format > Bullets & numbering > List options > Restart numbering).
How do I apply default numbering style in Word?
Go to Tools Customize and choose the Commands tab. On the left, choose Styles. Click the default numbers button on your toolbar to select it.
How do I remove a drop down list in Word 2007?
Select the cell with the drop-down list. If you have multiple cells with drop-down lists that you want to delete, you can use Ctrl+Left click to select them. Click Data >Data Validation. On the Settings tab, click Clear All.
How do I get rid of bullet points?
Removing Bullets or Numbers
- Select the paragraph(s) containing the bullets or numbers you want to remove.
- On the Home tab, click Bullets.
- To remove bullets, on the Bullets tab, select None.
- Click OK.
If you need to customize an existing numbered list (see
how to create a numbered list) or apply your
specifications to the number format, use the Define New Number Format dialog box.
I. To create a custom numbering format, do the following:
1. On the Home tab, in the Paragraph group,
choose the Numbering button:

2. In the Numbering list, click
Define New Number Format… item to display the Define New Number Format dialog
box:

3. In the Define New Number Format dialog box:
- Number style — Specifies the numbering style that you want. Choices include Arabic numerals,
uppercase and lowercase Roman numerals, uppercase and lowercase alphabet letters, and word series
(1st, One, and First). You can also choose no numbers at all, killing the sequential numbering. - Font… — Specifies the special font or font attributes (such as bold, italic, and underline)
and the point size for the numbers. A standard Font dialog box appears when this button is chosen. - Number format — Types the characters, if any that you want to come before each number. If you
want each number enclosed in parentheses, for example, type an opening parenthesis before the number
in this box.
Do not type over this number in this box! If you do so, even replacing it with another
number, you will break the automatic numbering; each number in the list will be the same. - Alignment — Sets the distance from the left, centered or right margin that Word places the
number.
II. To create a custom multilevel list format, following:
On the Home tab, in the Paragraph group, choose the Multilevel List button and
click Define New Multilevel List… item to display the Define new Multilevel List dialog
box:

If the button in the lower-left corner is the More >> button, click it. Word displays an
extra panel at the right of the dialog box, so you see the full dialog box, as shown here. Word also
changes the More >> button to a << Less button that you can click to hide the
extra section of the dialog box again.
- In the Click Level To Modify, select the list level you want to change. Word selects the
first level, 1, when you open the Define New Multilevel List dialog box. - If you need to link this numbered list level to a particular style, select the style in the Link
Level To Style drop-down list. - Use the controls in the Number Format area to specify the number format.
- In the Number Style For This Level drop-down list, select the number format you want
to use. For example:- «1, 2, 3,»
- «i, ii, iii,»
- «A, B, C.»
- To include the number from the previous level (or a higher level), choose the level from the
Include Level Number From drop-down list. (This drop-down list is unavailable for the
first level because there’s no level above it.) For example: if Level 1 uses «1, 2, 3»
numbering and Level 2 uses «a, b, c» numbering, applying Level 1 in the Include Level
Number From drop-down list to Level 2 changes the Level 2 numbering to 1a, 1b, and
so on. - Word displays the number formatting you’ve chosen in the Enter Formatting For Number
text box. Type any changes for the text of the format into this text box. For example, you
might edit the «A)» format to «Section A)» so that each instance of the number included the
word «Section.» - To specify font formatting, click the Font button. Word displays the Font
dialog box. Choose the font, font style, size, and any extras (such as color or effects),
and then click the OK button. - To customize the numbering, use the Start At spinner to change the starting number.
If you want to restart numbering after a certain level, select the Restart List After
check box and choose that level in the drop-down list. (The Restart List After
controls aren’t available for the first level in the list, because there’s no higher level.) - Select the Legal Style Numbering check box if you want to use legal-style numbering:
changing any roman numeral to an Arabic numeral. For example, 1.1.1 instead of
I.1.1.
- In the Number Style For This Level drop-down list, select the number format you want
- Use the controls in the Position box to customize where the number appears.
- In the Number Alignment drop-down list, choose Left, Centered, or
Right. - In the Aligned At text box, choose the position at which to align the number.
- In the Text Indent At text box, set the indent position for the text.
- In the Follow Number With drop-down list, select the character to include after the
number: a tab, a space, or nothing. If you choose a tab, you can select the Add Tab Stop
At check box and set the distance at which to place a tab stop.
- In the Number Alignment drop-down list, choose Left, Centered, or
Note: more details are available
in the Numbered lists section
in the Work with bulleted, numbered and multi-level lists lesson
of the Create basic documents free course.
See also this tip in French:
Comment personnaliser une liste numérotée.
Okay, I hate to say there’s no DIRECT way to change the
defaults. But here’s a workaround. By now, you know that your
normal.dot file is
ever-so-important if you have custom settings.
Briefly, we’ll create a new style based on your desired
defaults, and swap the toolbar buttons to make them use your style instead of
Word’s default. For our demonstration, we’ll use numbered lists.
Step 1. Create a New Style
Create a new, blank document. Reset all the numbering styles as
shown
here. Type the following and hit Enter:
=rand()
That’ll provide you with some sample text. Select the three
paragraphs that get created, and apply the numbered items to it using the
toolbar button shown.

For our demonstration, we’re going to get rid of the indentation
settings, so that our numbers align on the left margin with the rest of the
text. Instead of using Paragraph formatting, we’re going to customize the
numbering.
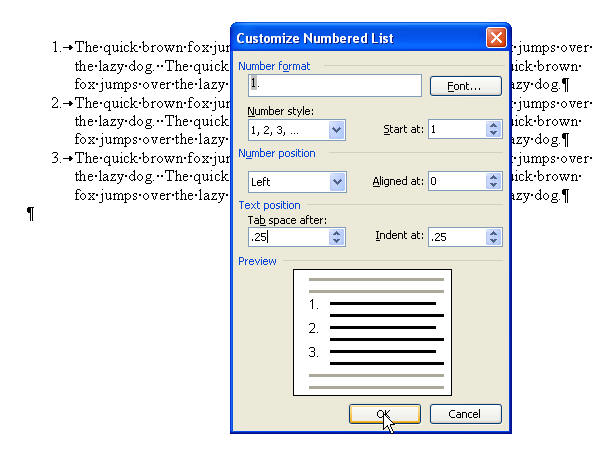
Select the three paragraphs and choose Format Bullets
and Numbering, Numbering tab, then hit the Customize button. Change the
formatting and hit OK. We’ve used:
-
Aligned at 0
-
Tab space after .25
-
Indent at .25
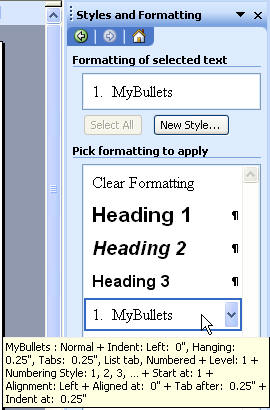
Keeping the paragraphs selected, choose Format Styles
and Formatting from the menu. On the task pane, hit the New Style button. Give
it a name like MyBullets. Choose Add to Template. That style should now appear
in your Styles and Formatting task pane.
Changing the Toolbar Button
We’ve created out style, now we make it quick to use.
Go to Tools Customize and choose
the Commands tab. On the left, choose Styles. Click the default numbers button
on your toolbar to select it. You’ll now see that Modify Selection is available
on the Customize dialog box. Hit Modify Selection and choose Copy Button Image.
From the list of styles on the right, choose MyBullets and drag
it up next to the default numbers button. Choose Modify Selection and then Paste
Button Image.
You should now have two button images that look the same. Drag
the original (default) button image button down off the toolbar and close the
Customize dialog.
Close Word to ensure that your normal.dot has been saved with
these new settings.