
To use your favorite font in Word all the time, set it as the default.
-
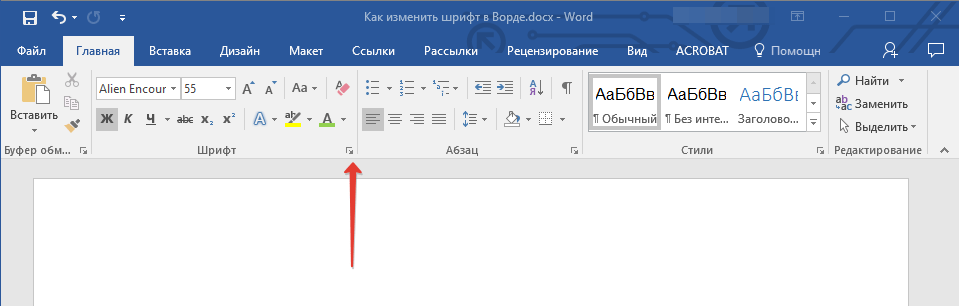
Go to Home, and then select the Font Dialog Box Launcher
 .
. -
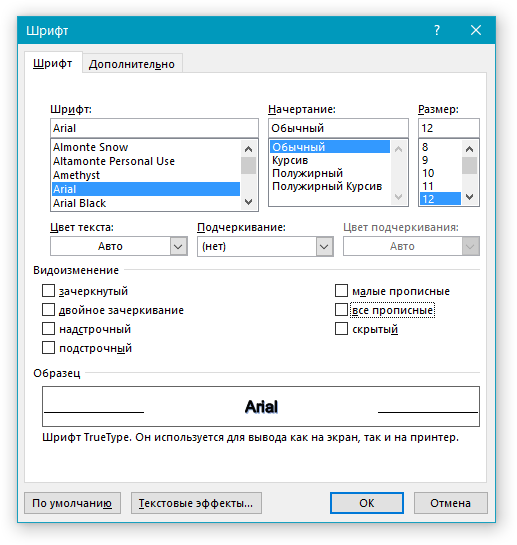
Select the font and size you want to use.
-
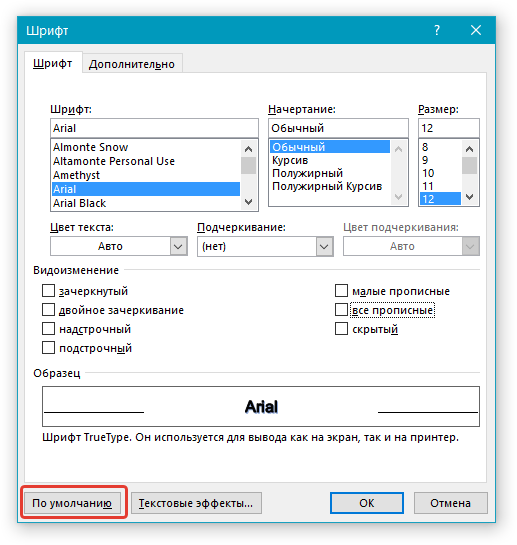
Select Set As Default.
-
Select one of the following:
-
This document only
-
All documents based on the Normal template.
-
-
Select OK twice.
 .
.
If the default font setting doesn’t persist
Sometimes, a company’s permission settings or some add-ins change the default font back to the original font. If that’s happening, here are some things to try.
-
Select Start.
-
In the Search box, type Normal.dotm and select Search.
-
Right-click Normal.dotm, and select Properties.
-
On the General tab, make sure Read-only isn’t checked. If it’s checked, uncheck it.
-
Select the Security tab. Under Group or user names, select your name, and then make sure you have Write permission in the Permissions box.
-
Select OK.
If you aren’t able to uncheck the Read-only box or if you don’t have Write permission, contact the person who’s in charge of your company’s computer systems.
If you have Write permissions and the default font setting still doesn’t stick, you might have to turn off Word add-ins and change the default font setting. Here’s how:
-
Select File > Options > Add-Ins.
-
In the Add-ins box, find one of the add-ins you want to turn off and note the add-in type listed in the Type column.
-
Select that add-in type in the Manage list, and select Go.
-
Uncheck the boxes for the add-ins you want to turn off, and select OK.
-
Repeat steps 1-4 for other types of add-ins.
After you change the default font, turn on the add-ins.
-
Select File > Options > Add-Ins.
-
Select an Add-in type in the Manage list, and select Go.
-
Check the boxes for the add-ins you want to turn on, and select OK.
-
Repeat steps 1-3 for the other types of add-ins you want to turn on.
Note: You don’t have to turn off the Document Inspector type add-ins.
To use your favorite font in Word all the time, set it as the default.
-
Go to Format > Font > Font.
You can also press and hold
+ D to open the Font dialog box. -
Select the font and size you want to use.
-
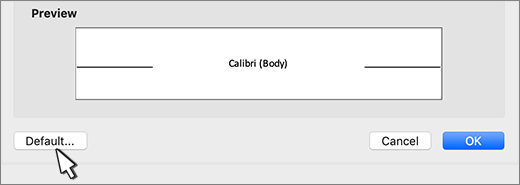
Select Default, and then select Yes.
-
Select OK.
 + D to open the Font dialog box.
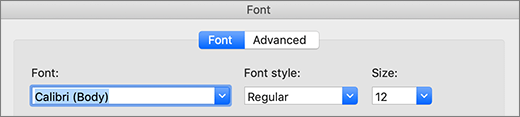
When it comes to creating a compelling and effective document, one of the most important tools at your disposal is the font (also known as «typeface»).
Fonts do much more than improve—or hamper—the legibility of your piece. They set a tone. They’ve got personalities. They evoke feelings. As such, fonts can either reinforce or undermine your brand.


Because fonts are so important, you may want to change the default fonts in Microsoft Word. In this article, you’ll see, step-by-step how to add fonts to Microsoft Word so you can change the default fonts in your document.
You’ll also learn tips on where to find the best Microsoft Word fonts and how to choose the best ones for your document.
(Note: In the tutorials below, I use Microsoft Word for macOS. If you’re on Windows or a different version of Word, then your interface will look different.)
Why Use Premium Fonts in Your Microsoft Word Document?
When it comes to creating documents that get and keep your readers’ attention, fonts are some of your most powerful tools. The right fonts:
- reinforce your branding
- express the right tone
- direct the reader’s attention
- improve readability
You might be tempted to use free fonts for Microsoft Word in your next document. But remember, those built-in MS Word fonts are exactly the same fonts that everyone else is using. Or, you might find a free Microsoft Word fonts download. But free fonts are often not as well-designed as premium fonts.
You can easily add fonts to Microsoft Word from outstanding sources like Envato Elements or GraphicRiver. To be able to download unlimited fonts, then look to Envato Elements. You get access to thousands of fonts. Download as many as you need for one small subscription price.


For one-off projects, GraphicRiver is a great source of the best Microsoft Word fonts on a pay-per-use basis.
And lastly, use the tips above to choose and use fonts effectively in your document. The misuse and overuse of fonts are sure signs of an amateur.
How to Change Microsoft Word Default Font
Word comes with default fonts, but you can change the font to match your branding or to change the tone and personality of the document.
You’ll find that dozens of fonts are already built into Word, and you can replace the default fonts with those. And you can also add new fonts. We’ll talk about how to add fonts to Microsoft Word later in this post.
To change the Microsoft Word default font, you’ve got three options:
1. How to Change the Microsoft Word Default Font for a Block of Text
This is a quick method that’s good to use if you want to change the default font only for one or a few bits of text. Here are the steps:
Step 1. Select the Text


Step 2. Open the Font Selection Tool


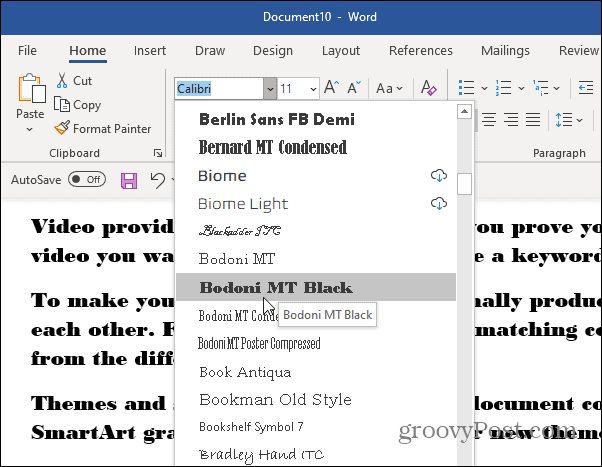
Click on the Font selection tool on the ribbon. You must be on the Home tab to see the buttons for formatting text. The Microsoft Word fonts list opens.
Step 3. Find the font you wish to use.
The Microsoft Word fonts list shows the Theme Fonts, Recent Fonts, and All Fonts. Scroll down farther to see all the fonts available on your computer. This includes fonts that are built-in as well as fonts you’ve added, listed in alphabetical order. The fonts list also gives you a preview of what each font looks like.
Click on the font you wish to use. A triangle next to the font means there are further selections you can make.


Step 4. Change the Font Size
Go to the font-size button to change the font size.


Or, click the Increase Font Size or Decrease Font Size buttons to change the font size by increments.
Step 5. Change Other Text and Paragraph Settings
Use the other buttons on the ribbon to add emphasis (bold, italics, underline), change the font color, and apply other effects.


We’ve now changed the default font in Microsoft Word.


2. How to Replace the Default Font Based on Paragraph Style
By changing the font used for a paragraph style, the change is applied globally in your document for all text with that paragraph style. Use this if you want to change the default font for large sections of text.
Follow the steps on how to change the Microsoft Word default font for a paragraph style:
Step 1. Select the Text
Highlight text that’s representative of the paragraph style you want to re-format. Make sure it’s got the paragraph style you want to change.


In this example, I’ll replace the default font for the Normal paragraph style.
Step 2. Apply the Font Settings You Wish to Use
Follow the steps in Method 1 to change the font, font size, font color, and apply other settings. You may also want to change the paragraph settings, such as alignment, line spacing, etc.


Step 3. Apply the New Formatting to the Paragraph Style
With the cursor in the paragraph you’ve formatted, click on the Styles button on the ribbon. This opens the paragraph Styles selection.


The current paragraph style will be highlighted. In this case, it’s the Normal style. Right-click on the Normal style, then click on Update Normal to Match Selection.


All other paragraphs with the Normal style are updated with the new font and settings you made.


3. How to Change the Font Based on Paragraph Styles Button
This method has the same end-result as Method 2. It changes the default font for a specific paragraph style. The steps are slightly different, as you’ll see:
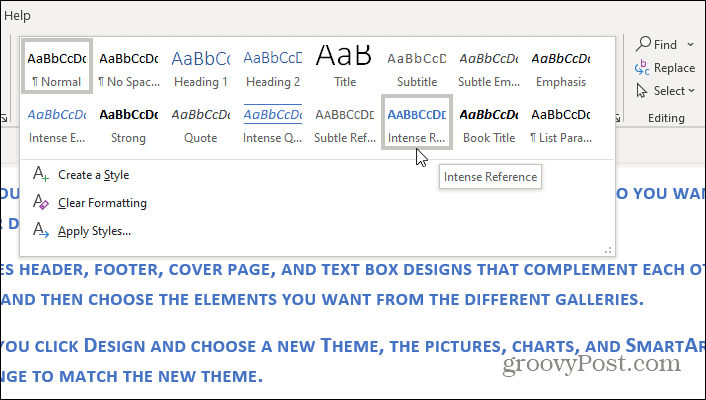
Step 1. Open the Styles Settings
Click on the Styles button on the ribbon. This displays the paragraph styles.


Step 2. Modify the Paragraph Style
Right-click on the style you wish to change. Click Modify…


The Modify Style dialog opens.


Change the font, font size, and other settings. The box shows a preview of what the paragraph will look like when the settings you chose are applied. If you’re happy with the way it looks, click OK.


The new font (and other settings) will be applied to all paragraphs with that paragraph style.
How to Add Fonts to Microsoft Word
Right out of the box, Microsoft Word comes with dozens of fonts built in. But what if you want to use a font and you don’t see it on the Microsoft Word fonts list?
In that case, you add the font to Microsoft Word. I’ll walk you through how to do that in this section:
Step 1. Find New Fonts
The first step is to find the font you want to use. There are many sources of custom fonts. One to consider is Envato Elements, where you can download an unlimited number of fonts for one small subscription price.
To find a font you like, log into your Envato Elements account.


On the search bar, click on the downward arrow, then select Fonts.


Type a keyword into the search bar, depending on what kind of font you’re looking for. Click the search icon. The most relevant results appear.


Refine the results by Categories, Spacing, Optimum Size, and Properties. You can also sort the results by popularity (Popular) and newness (New).
Click on a font image or name to see its details.


When you find a font you like, click on any of the Download buttons on the page.


The Add this file to a project dialog box pops up.


Select a project to add the font file to. Or, click Create new project to add it to a new project. For this example, I’ll add the font to my existing tutorial project. Click the Add & Download button.
The file manager opens (Finder, if you’re on macOS; File Explorer, if you’re on Windows). Specify where you want to save the font file on your computer. Click Save.


The font files are now saved on your computer as a zip file.


Double-click on the zip file to unzip it.


Double-click on the font file itself to open it. It’ll usually have an extension like OTF or TTF. Click Install Font.


This adds the font to your computer’s fonts library.


The new font should now appear in the All Fonts list in Microsoft Word. To confirm, click on the Fonts button on the ribbon and scroll down the list until you see the new font. If you don’t see it, you may have to restart your computer.


Now, follow any of the methods above to change the default font with the new one.
2 Types of Fonts
Now that you know how to add fonts to Microsoft Word and replace the default fonts in your document, it would help for you to know more about fonts. This will help you choose the best fonts for your Word document.
There are two basic types of fonts you can use in your documents:
1. Serif Fonts
Serif fonts have little lines at the end of each stroke, like this:


Common examples of serif fonts include:


Various research studies have shown that, when it comes to printed matter, serif fonts are the easiest to read and result in the best comprehension.
2. Sans Serif Fonts
As the name implies, sans serif fonts don’t have little lines at the end of each stroke (“sans” means “without” in French):


These are some of the most common sans serif fonts:


Citing research by the Software Usability Research Laboratory, Drew E. Whitman in his book Ca$vertising, noted that sans serif fonts are the most legible fonts to use on a computer screen. Specifically, Arial, Courier, and Verdana were considered the best for online reading.
But these studies were conducted when the resolution of online screens was still very low (below 100 dpi) compared to printed materials (300 dpi). As computer screen resolutions get closer to 300 dpi, serif fonts may prove to be legible both online and offline.
In the meantime, you can use both serif and sans serif fonts in one document—if you know how. Read on for tips on how to use combine fonts.
5 Tips on Using Typography Effectively in Your Word Documents
It’s easy to get carried away with fonts! You may find that having so many kinds of fonts available at your fingertips unleashes your creativity. Yet, as with most things, fonts can either enhance or sabotage your document.
Follow these tips to harness the power of typography:
1. Keep It Simple
When it comes to choosing fonts, legibility is of utmost importance. Sure, it’s easier than ever now for you to find the most creative and outrageous fonts. But if nobody can read your text, then they defeat their purpose. If you must use an ornate font, restrict it to one letter or word.
2. Stick to Two Fonts
A document that’s dripping with many different fonts makes it look amateurish, confusing, and incoherent. For best results, stick to a maximum of two fonts: one serif and one sans serif. (More on this in tip #4).
Remember, use formatting like bold, italics, underlines, different font sizes and colors to add emphasis and variety.
3. Match the Tone and Goals for the Document
Fonts have personality, so pick the ones that match the tone and goals of the document. For example, the fonts for a 16th birthday party invitation will be different from the ones in a financial business report.
When in doubt, pre-test the document. Show it to other people, especially those who are like the intended audience. Make sure they can comprehend the document, first, and that they respond favorably.
4. Choose Fonts Appropriate for the Document’s Intended Use
Whether the document will be printed out or consumed on a computer screen will also affect your choice of fonts.
If you’re making a printed document, use the sans serif font for headings and the serif font for body text. For a web-based document, switch it: Use a serif font for headings and sans serif for body text.
5. Use Handwritten, Cursive, and Decorative Fonts Sparingly


There are other font types that may not fit easily in either serif or sans serif categories. These include handwritten, cursive, and decorative fonts. Handwritten fonts, as the name says, look like they were written by hand. These are extremely popular and useful for adding a warm, personal touch on materials. They can range from casual to glamorous.
Cursive fonts are a kind of handwritten font that look like they’re written in longhand. Beware of using cursive and handwritten fonts because they can be difficult to read. Use them for short bits of text you want to emphasize.
You can easily find handwritten fonts in marketplaces like Envato Elements or GraphicRiver.
Decorative fonts have special effects or treatments. They may be serif or sans serif. And some handwritten fonts can be considered decorative as well.
Here’s a sampling of the decorative fonts available in Envato Elements:
5 Best Font Styles for 2020
Designers come up with new fonts every day. Below are five of the best and freshest Microsoft Word font styles we’re seeing for 2020, along with two fresh examples of each style:
1. Vintage Fonts
Vintage fonts evoke the aesthetic of times past. If you’re working on a document that’s about a specific time, you’re bound to find a font to match.
Anthique — Vintage Typeface


Anthique is reminiscent of handmade Victorian hand lettering but with a modern flavor. It works best for materials that relate to the early 1800s. The font includes three variations in TTF and OTF formats. It also supports multilingual characters.
Middle Class Script


Middle Class is a script font that’s evocative of the bold style of the ’60s and ’70s. It’s got a hand-drawn and layered style, and includes punctuation, common ligatures, and extra swashes (lines).
2. Brush Script Fonts
Brush script fonts are handwritten fonts that look like they were written with a brush, such as a calligraphy or a paintbrush. These are increasingly popular as brands want to add a personal touch to their materials.
Eberthany Brush Script


Eberthany is a modern brush script signature font that works for:
- social media posts
- logos
- wedding invitations
- labels
- quotes
- and more
It works best with software that supports OpenType fonts like Adobe Illustrator CS, Adobe Photoshop CC, Adobe InDesign, and Corel Draw.
Mistrully Brush Script


Mistrully is a stylish brush script that looks like natural handwriting. It comes with special swashes or handwritten lines that you can use to add emphasis. Mistrully works well for logos, social media posts, advertisements, product designs and labels, stationery, among others.
3. Font Duos
Font Duos take the guesswork out of choosing fonts that work well together. These two-for-one font packages are designed to complement each other. You only need to pick the font duo that aligns with your branding and the tone of the material you’re designing. Examples of font duos include:
Chiladepia — Font Duo


The Chiladepia Font Duo is made up of two handwritten fonts. One’s a cursive font and the other’s a sans serif font. This font duo would work well on a computer screen. Use the cursive font for titles or headers and the sans serif font for the rest of the document.
Perkin | Duo Font Pack


The Perkin Duo Font combines a bold sans serif and a serif font. The sans serif font is best for titles and headings, while the serif font works great for body text. This duo is ideal for printed materials.
4. 3D Decorative Fonts
3D decorative fonts look like they’re popping off the pages. These fonts are incredibly eye-catching. For that reason, they’re great for titles. But, they’re not the most legible fonts, so use them sparingly for short bits of text.
Ultra — Modern Font


If you’re creating a futuristic document, then consider the Ultra — Modern Font. It’s got a modern and futuristic style. This pack is actually made up of four font styles: regular, bold, 3D, and bold 3D. It also comes in both OTF and TTF formats.
Under Construction 3D Color Font


Under Construction is a stunning 3D decorative font to use on materials related to industry, construction, technology, and the like. Each letter looks like it floats on top of the page. It’s a color or SVG OpenType font, which works only in Photoshop CC 2017+, Illustrator CC 2018, and some Mac apps.
5. Tech Sans Serif Fonts
Tech sans serif fonts have gone a long way since the pixelized arcade fonts of the ‘80s. Many are also much more legible and modern. Below are two examples:
Azuria — Technology Science Font


The Azuria — Technology Science Font evokes technology, science, and outer space. Its metallic, 3D look would work well in video games, movie titles, and tech-related branding. The font includes all Latin letters from A-Z, numbers, and punctuation marks.
Cyborg — Futuristic Technology Typeface


Cyborg is another futuristic tech font. Inspired by science fiction, it’s perfect for titles related to space, technology, and science. It comes in OTF, TTF, and WOFF formats.
Put Fonts to Work in Your Microsoft Word Document Today
As you’ve learned in this article, you don’t need to stick to the default fonts in Microsoft Word. Follow the steps outlined above to replace the default fonts with ones that are more appropriate to your document.
Now that you understand how to add fonts to Microsoft Word, you’re ready to start taking advantage of the unique look a professionally designed font can give your documents.
At Envato Elements and GraphicRiver we’ve got some of the best Microsoft Word fonts available. Take a look at our Microsoft Word fonts list today. Download your favorites for your next MS Word document.

Here is how to quickly change the font or format of your entire Word document.
So you have your document written out, but you don’t like the way it looks. No problem. Changing the font of the entire document in Microsoft Word is easy and can be done in a few simple steps. If you are using Open Office, Google Docs, or another alternative, the process is very similar. Once you learn how to do it with a one-word processing program, you can pretty much do it in all of them.
First, select all of the text in the document. To do that, just use the keyboard shortcut Ctrl + A on your keyboard. Or, if you don’t like using keyboard shortcuts, select the Home tab on the Ribbon and from the “Editing” section, click Select > Select All.
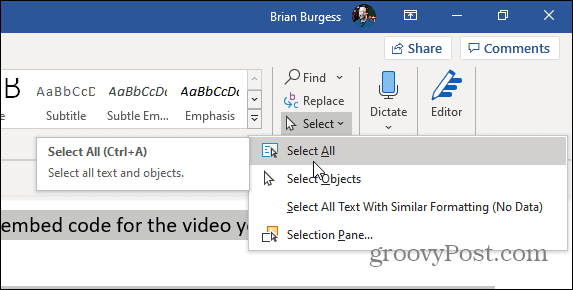
All of the text in your document should now be selected and highlighted. With this done, you can edit the entire document at once.
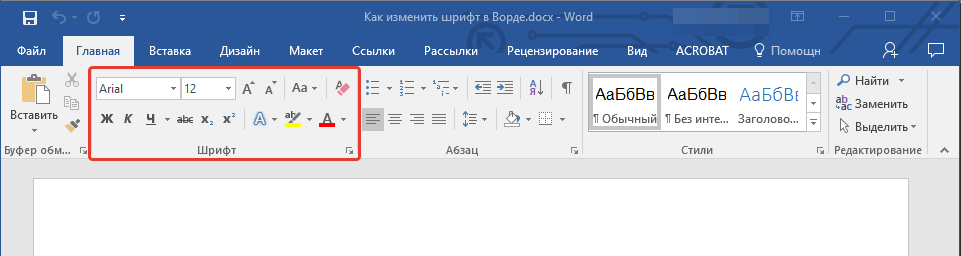
On the Home ribbon, you’ll find everything you need under the “Font” heading.
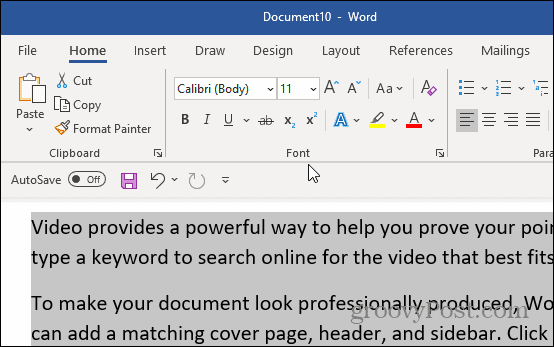
Click the wide font box to display a list of fonts. From this list, you can hover the mouse over a font to preview it or click it to change the text to that font. You can also adjust boldness, italics, color, size, and underline.
But, manually adjusting the font might not be the easiest or the fastest way to make your document look great. The first thing you should try is styles; I’ll show you where they are below.
Word Document Styles
Alternatively, you can use the “Styles” menu from the Home tab to select pre-made font sets. A style will automatically adjust the color and font of your document. It also applies different values to headings, titles, and other special text.
With a pre-made style, you can change the look of your entire document to something professional and appropriate with a click of the mouse.
Styles allow you to quickly apply a set of formatting choices consistently throughout your document.
![]()
This tutorial shows how to change the default font in Microsoft Word. Specifically, we will look at how to change the default font for normal body text. Then, we will look at how to restore Word’s original defaults by replacing the normal.dotm template file through the Windows File Explorer.
Quick Links:
- How to Change the Default Font for Body Text
- How to Restore Word’s Default Font Styles
We will change the default fonts for all nine heading levels in a separate tutorial.
This tutorial is available as a YouTube video showing all the steps in real time.
Watch more than 200 other writing-related software tutorials on my YouTube channel.
The images below are from Word for Microsoft 365 and the Windows 10 File Explorer. These steps will also work in Word 2021, Word 2019, Word 2016, and Word 2013. However, your interface may look slightly different in those older versions of the software.
If you are on a Mac, please see “How to Change the Default Font in Word for Mac.”
Important Note: These steps may not work if you are using Word through work or school because you need permission to change the Normal.dotm file.
How to Change the Default Font for Body Text
These steps can be used to change the default font, font size, and font color for regular body text styled as Normal. However, other styles that rely on the Normal style may also be affected.
- Select the Home tab in the ribbon.

- Select the dialog box launcher in the Font group.

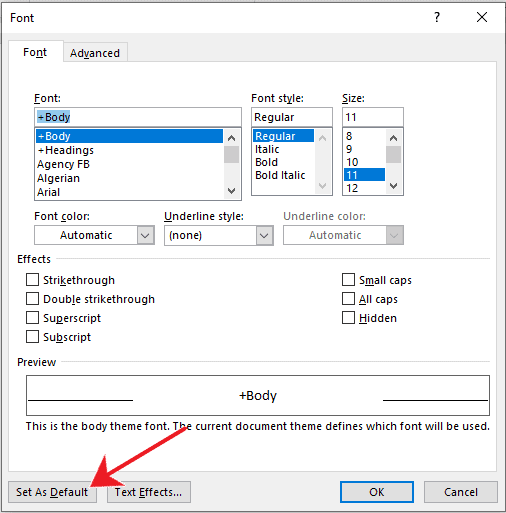
- Select your new default font, font size, and font color in the Font dialog box.

- Select the Set As Default button.

- Select the All documents based on the Normal.dotm template? option in the question dialog box.

- Select the OK button.

Your existing body text should change to your new default font immediately. Plus, your new default should appear when you open a new Word document.
How to Restore Word’s Default Font Styles
Your default font choices are stored in the Normal.dotm template file. If you want to restore Word’s default font styles, you can delete the existing Normal.dotm file. Word will then create a new Normal.dotm file the next time you open the software. Be aware that this process will delete any existing custom themes.
Important Note: The location of the Normal.dotm file shown below will be correct for most Windows users. However, there is a chance that your file will be located elsewhere.
- Save any open documents and close Word.
- Press the Windows key + E on your keyboard to open the File Explorer. (Alternatively, you can search for “File Explorer” in the search box in the taskbar.)
- Select the Windows (C:) drive in the File Explorer.

- Select the Users folder.

- Select your username folder. (For example, my username is Erin.)

- Select the View tab.

- Select the Hidden Items option if it is not already selected. This will reveal folders that were previously hidden.

- Select the AppData folder.

- Select the Roaming folder.

- Select the Microsoft folder.

- Select the Templates folder.

- Select the Normal.dotm file, and then select the Delete key on your keyboard. Alternatively, you can right-click the file and select Delete from the shortcut menu.

- Select the X to close the File Explorer.

When you reopen Word, the original defaults should be restored.
Related Resources
How to Change the Font, Font Size, and Font Color in Microsoft Word
How to Create Drop Caps in Microsoft Word
How to Create External Hyperlinks in Microsoft Word
How to Create Custom Bullets in Microsoft Word
Updated February 01, 2023
Содержание
- Как изменить шрифт?
- Как изменить размер шрифта?
- Как изменить толщину и наклон шрифта?
- Как изменить цвет и фон шрифта?
- Изменяем стиль шрифта
- Изменяем фон за текстом
- Изменяем цвет текста
- Как установить понравившийся шрифт в качестве используемого по умолчанию?
- Как изменить шрифт в формуле?
- Вопросы и ответы

В программе MS Word имеется довольно большой набор встроенных шрифтов, доступных к использованию. Проблема в том, что далеко не все пользователи знают о том, как изменить не только сам шрифт, но и его размер, толщину, а также ряд других параметров. Именно о том, как изменить шрифт в Ворде и пойдет речь в этой статье.
Урок: Как установить шрифты в Word
В Ворде есть специальный раздел для работы со шрифтами и их изменения. В новых версиях программы группа “Шрифт” расположена во вкладке “Главная”, в более ранних версиях этого продукта средства для работы со шрифтами находятся во вкладке “Разметка страницы” или “Формат”.
Как изменить шрифт?
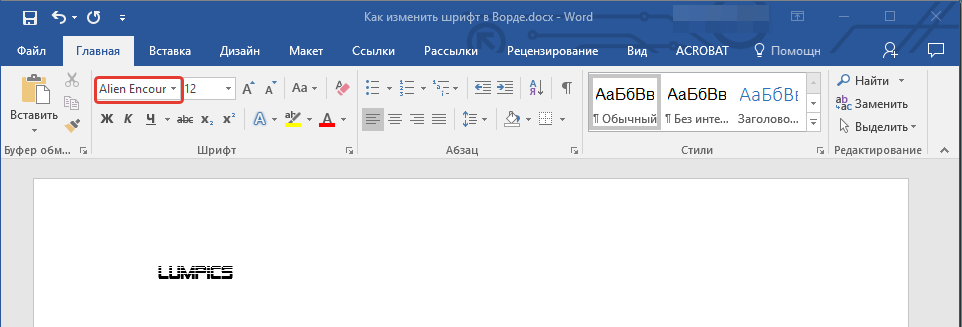
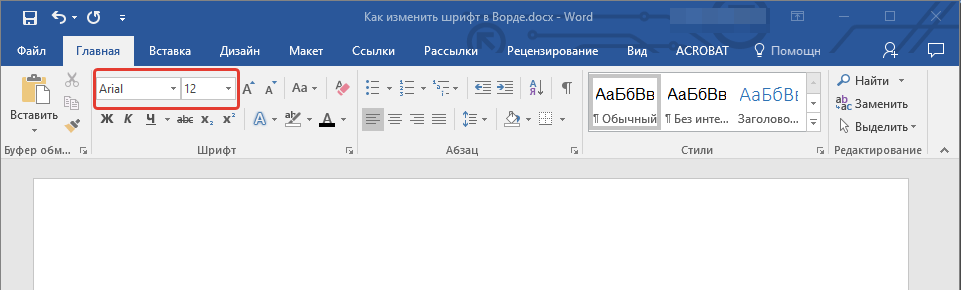
1. В группе “Шрифт” (вкладка “Главная”) разверните окошко с активным шрифтом, нажав на небольшой треугольник возле него, и выберите в списке тот, который вы хотите использовать
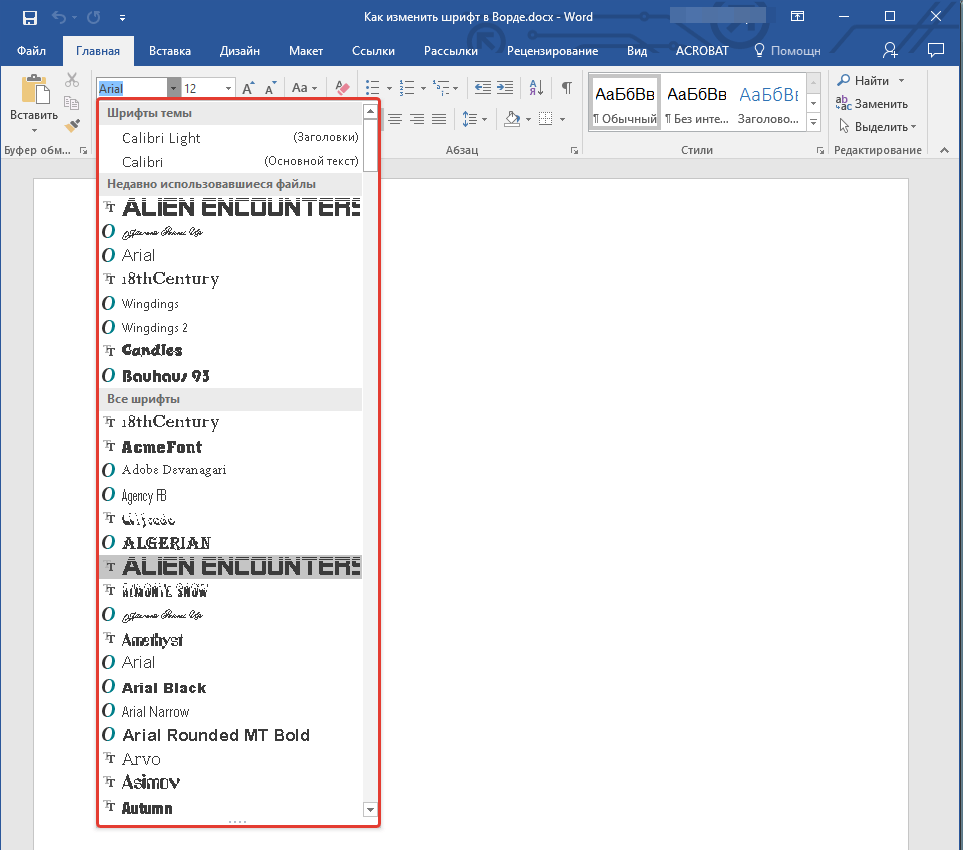
Примечание: В нашем примере шрифт по умолчанию — Arial, у вас он может быть другим, к примеру, Open Sans.
2. Активный шрифт изменится, и вы сразу же сможете начать его использовать.
Примечание: Название всех шрифтов, представленных в стандартном наборе MS Word отображается в том виде, в котором будут отображаться буквы, напечатанные этим шрифтом на листе.
Как изменить размер шрифта?
Прежде, чем изменить размер шрифта, необходимо усвоить один нюанс: если вы хотите изменить размер уже набранного текста, его сначала нужно выделить (это же касается и самого шрифта).
Нажмите “Ctrl+A”, если это весь текст в документе, или же используйте для выделения фрагмента мышку. Если же вы хотите изменить размер текста, который только планируете набирать, ничего выделять не нужно.
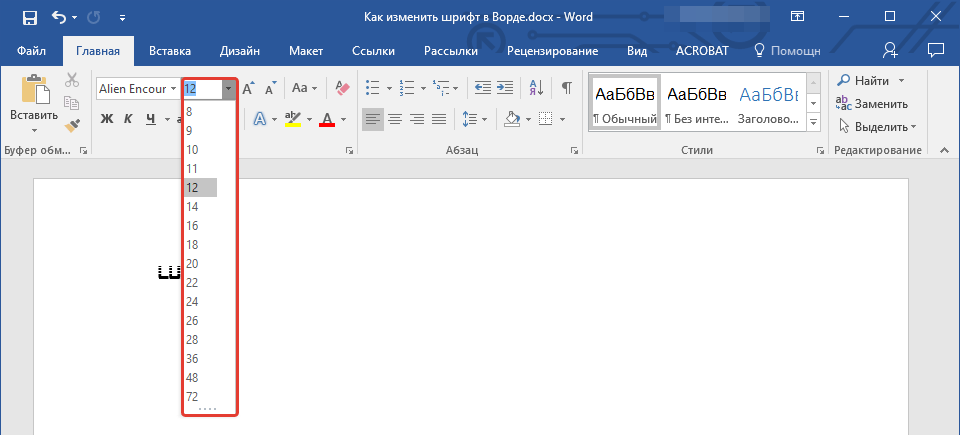
1. Разверните меню окошка, расположенного рядом с активным шрифтом (там указаны цифры).
Примечание: В нашем примере размер шрифта по умолчанию — 12, у вас он может быть другим, например, 11.

2. Выберите подходящий размер шрифта.
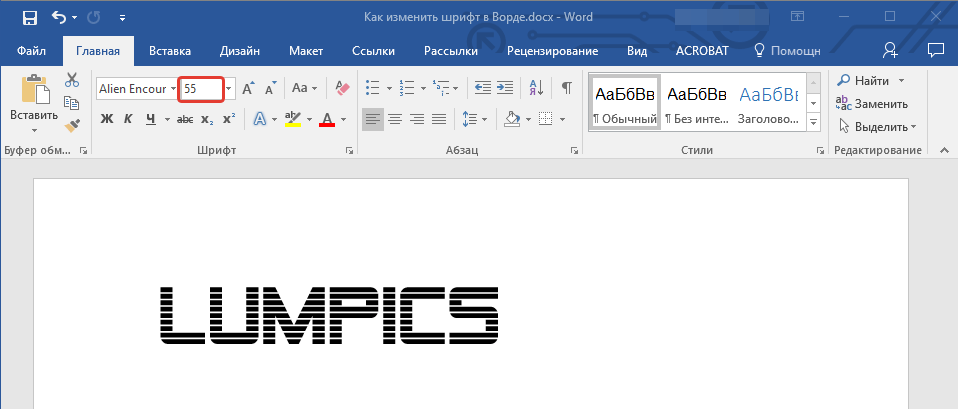
Совет: Стандартный размер шрифтов в Ворде представлен с определенным шагом в несколько единиц, а то и десятков. Если вас не устраивают конкретные значения, вы можете ввести их вручную в окне с активным размером шрифта.

3. Размер шрифта изменится.
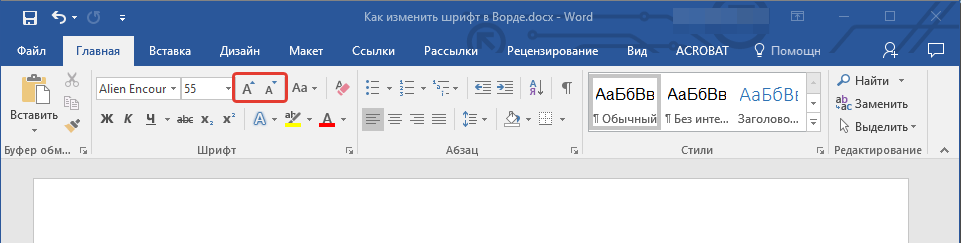
Совет: Рядом с цифрами, показывающими значение активного шрифта, расположены две кнопки с буквой “А” — одна из них больше, другая меньше. Нажимая на эту кнопку, вы можете пошагово менять размер шрифта. Большая буква увеличивает размер, а та что поменьше — уменьшает.
Кроме того, рядом с этими двумя кнопками находится еще одна — “Аа” — развернув ее меню, вы можете выбрать подходящий тип написания текста.

Как изменить толщину и наклон шрифта?
Помимо стандартного вида больших и маленьких букв в MS Word, написанных в том или ином шрифте, они также могут быть жирными, курсивными (курсив — с наклоном), и подчеркнутыми.
Чтобы изменить вид шрифта, выделите необходимый фрагмент текста (ничего не выделяйте, если вы только планируете что-то написать в документе новым типом шрифта), и нажмите одну из кнопок, расположенных в группе “Шрифт” на панели управления (вкладка “Главная”).

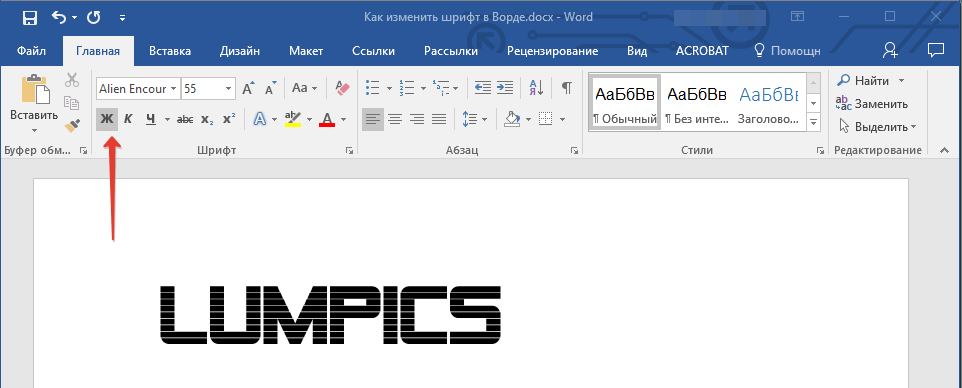
Кнопка с буквой “Ж” делает шрифт жирным (вместо нажатия кнопки на панели управления можно использовать клавиши “Ctrl+B”);
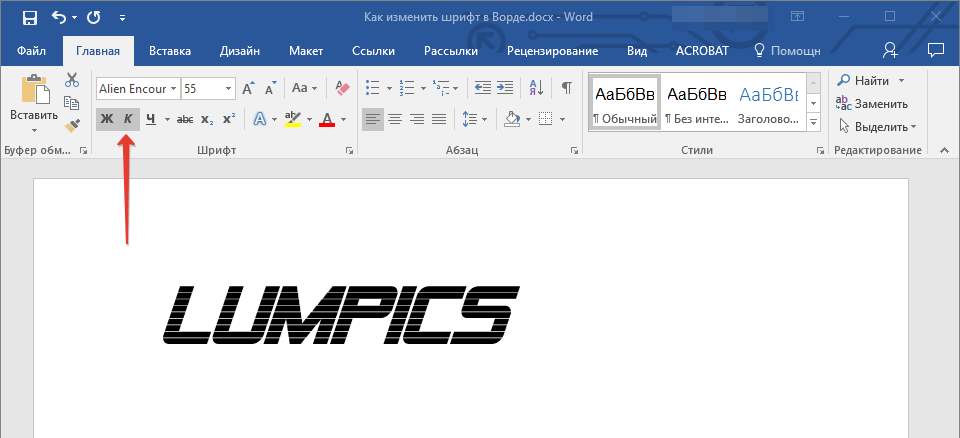
“К” — курсив (“Ctrl+I”);
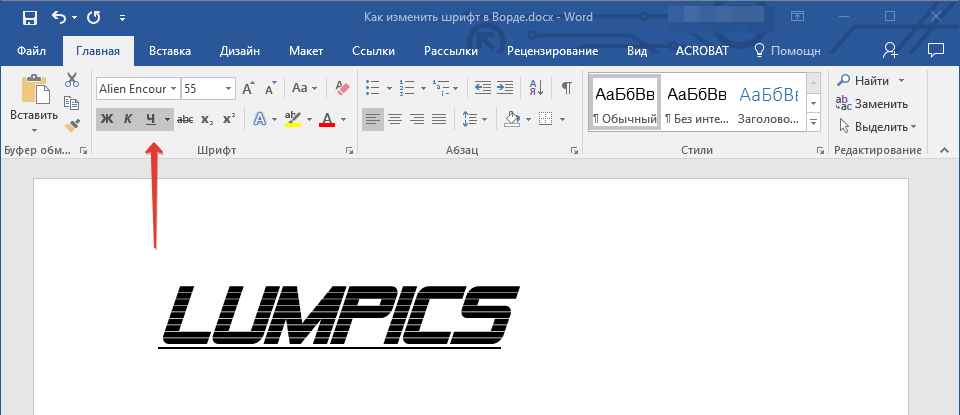
“Ч” — подчеркнутый (“Ctrl+U”).
Примечание: Жирный шрифт в Ворде, хоть и обозначается буквой “Ж”, на самом деле является полужирным.
Как вы поняли, текст может быть одновременно жирным, курсивом и подчеркнутым.
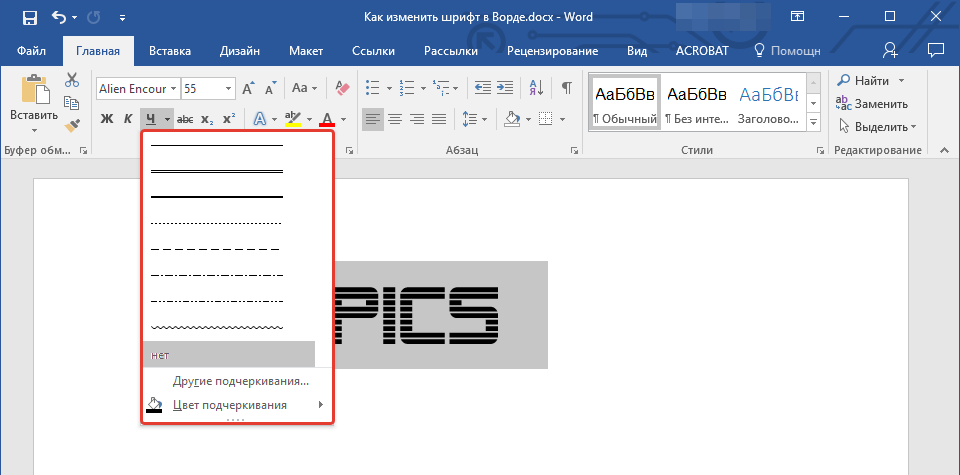
Совет: Если вы хотите выбрать толщину линии подчеркивания, нажмите на треугольничек, расположенный возле буквы “Ч” в группе “Шрифт”.
Рядом с буквами “Ж”, “К” и “Ч” в группе шрифт находится кнопка “abc” (зачеркнутые латинские буквы). Если вы выделите текст, а затем нажмете на эту кнопку, текст будет зачеркнут.
Как изменить цвет и фон шрифта?
Помимо внешнего вида шрифта в MS Word можно также изменить его стиль (текстовые эффекты и оформление), цвет и фон, на котором текст будет находиться.
Изменяем стиль шрифта
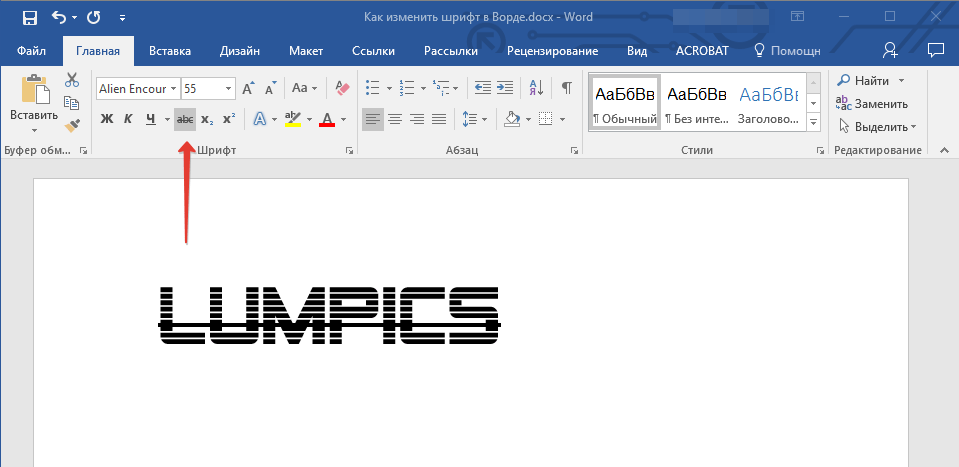
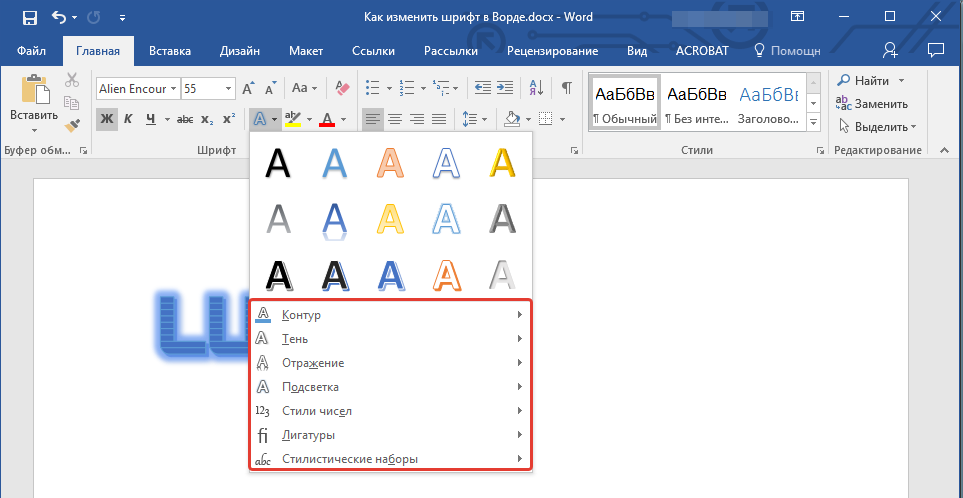
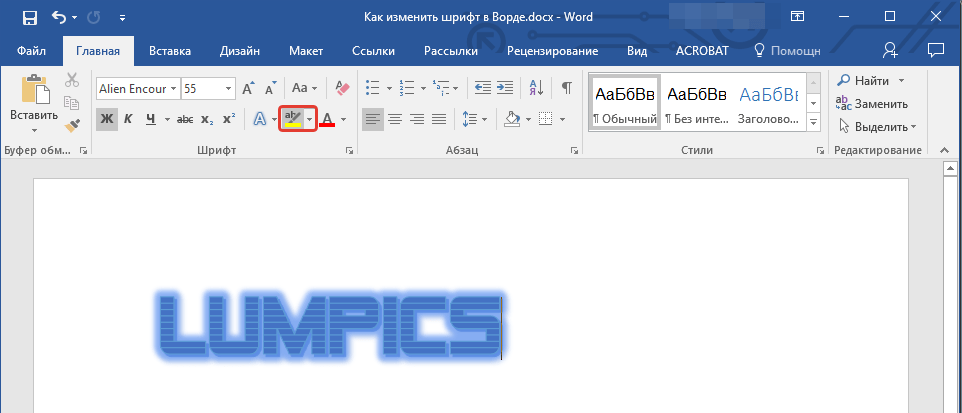
Чтобы изменить стиль шрифта, его оформление, в группе “Шрифт”, которая расположена во вкладке “Главная” (ранее “Формат” или “Разметка страницы”) нажмите на небольшой треугольник, расположенный справа от полупрозрачной буквы “А” (“Текстовые эффекты и оформление”).
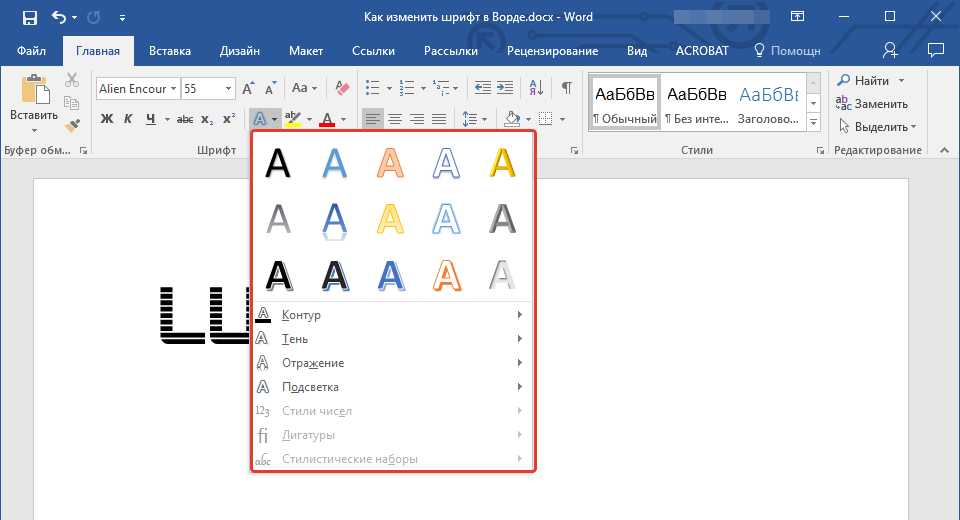
В появившемся окошке выберите то, что бы вы хотели изменить.
Важно: Помните, если вы хотите изменить внешний вид уже имеющегося текста, предварительно выделите его.
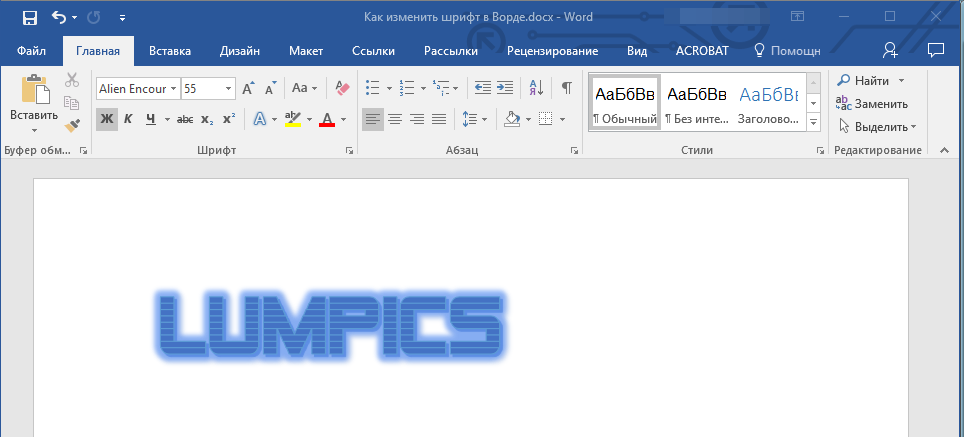
Как видите, один этот инструмент уже позволяет изменить цвет шрифта, добавить к нему тень, контур, отражение, подсветку и другие эффекты.
Изменяем фон за текстом
В группе “Шрифт” рядом с кнопкой, рассмотренной выше, находится кнопка “Цвет выделения текста”, с помощью которой можно изменить фон, на котором находится шрифт.
Просто выделите фрагмент текста, фон которого хотите изменить, а затем нажмите на треугольничек возле этой кнопки на панели управления и выберите подходящий фон.
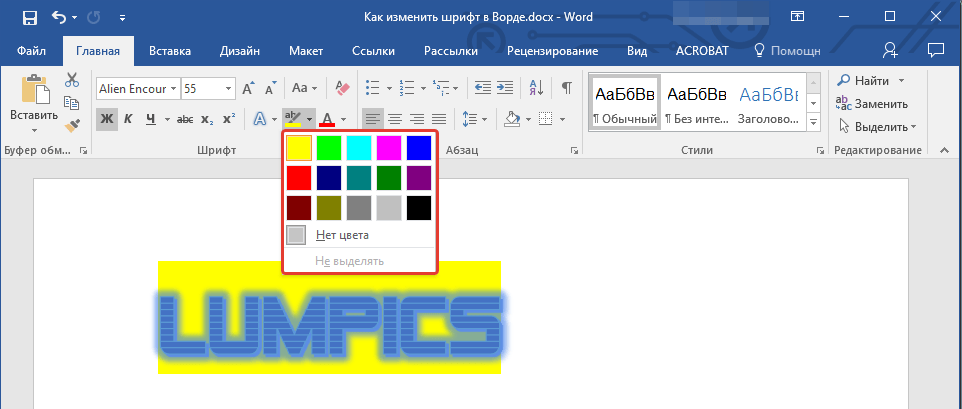
Вместо стандартного белого фона, текст будет находиться на фоне того цвета, который вы выбрали.
Урок: Как убрать фон в Ворде
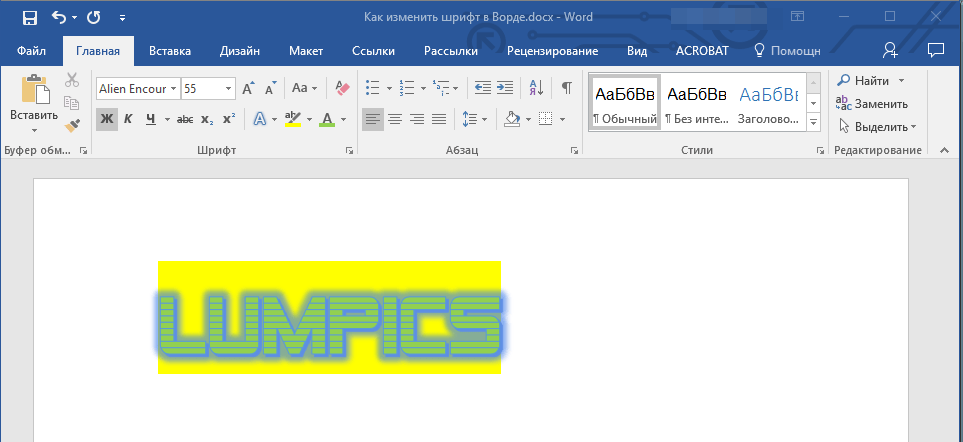
Изменяем цвет текста
Следующая кнопка в группе “Шрифт” — “Цвет шрифта” — и, как понятно из названия, она позволяет этот самый цвет изменить.

Выделите фрагмент текста, цвет которого необходимо изменить, а затем нажмите на треугольник возле кнопки “Цвет шрифта”. Выберите подходящий цвет.
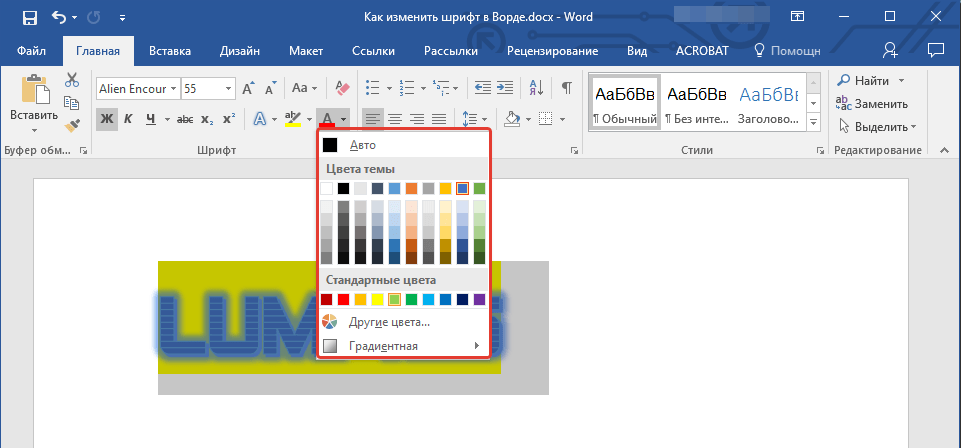
Цвет выделенного текста изменится.
Как установить понравившийся шрифт в качестве используемого по умолчанию?
Если вы часто используете для набора текста один и тот же, отличный от стандартного, доступного непосредственно при запуске MS Word, шрифт, не лишним будет установить его в качестве используемого по умолчанию — это позволит сэкономить немного времени.
1. Откройте диалоговое окно “Шрифт”, нажав на стрелочку, расположенную в правом нижнем углу одноименной группы.
2. В разделе “Шрифт” выберите тот, который вы хотите установить в качестве стандартного, доступного по умолчанию при запуске программы.
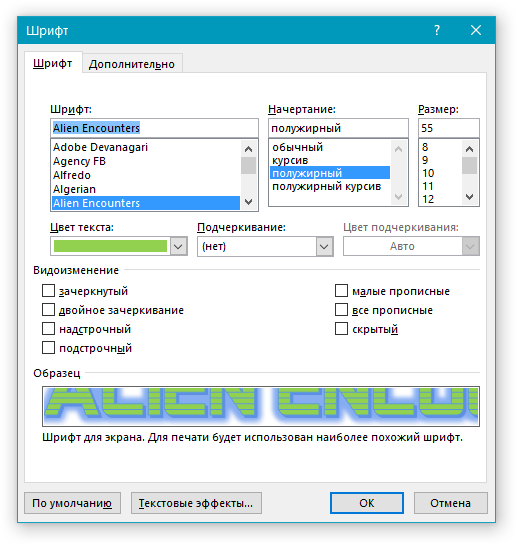
В этом же окне вы можете установить подходящий размер шрифта, его начертание (обычный, полужирный или курсив), цвет, а также многие другие параметры.
3. Выполнив необходимые настройки, нажмите на кнопку “По умолчанию”, расположенную в нижней левой части диалогового окна.
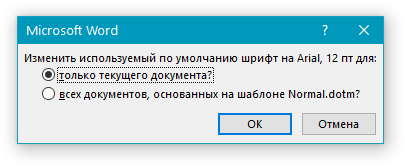
4. Выберите, как вы хотите сохранить шрифт — для текущего документа или для всех, с которыми будете работать в дальнейшем.
5. Нажмите кнопку “ОК”, чтобы закрыть окно “Шрифт”.
6. Шрифт по умолчанию, как и все дополнительные настройки, которые вы могли выполнить в этом диалоговом окне, изменится. Если вы применили его для всех последующих документов, то при каждом создание/запуске нового документа Ворд сразу же будет установлен ваш шрифт.
Как изменить шрифт в формуле?
Мы уже писали о том, как в Microsoft Word добавлять формулы, и как с ними работать, более подробно об этом вы можете узнать из нашей статьи. Здесь же мы расскажем о том, как изменить шрифт в формуле.
Урок: Как в Ворде вставить формулу
Если вы просто выделите формулу и попробуете изменить ее шрифт точно так же, как вы это делаете с любым другим текстом, ничего не получится. В данном случае действовать необходимо немного иначе.
1. Перейдите во вкладку “Конструктор”, которая появляется после клика по области формулы.
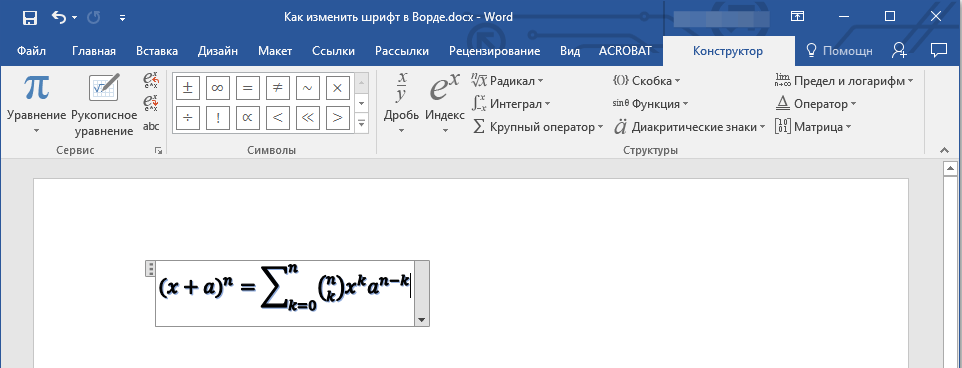
2. Выделите содержимое формулы, нажав “Ctrl+A” внутри области, в которой она находится. Для этого также можно использовать мышку.
3. Откройте диалоговое окно группы “Сервис”, нажав на стрелочку, расположенную в правой нижней части этой группы.
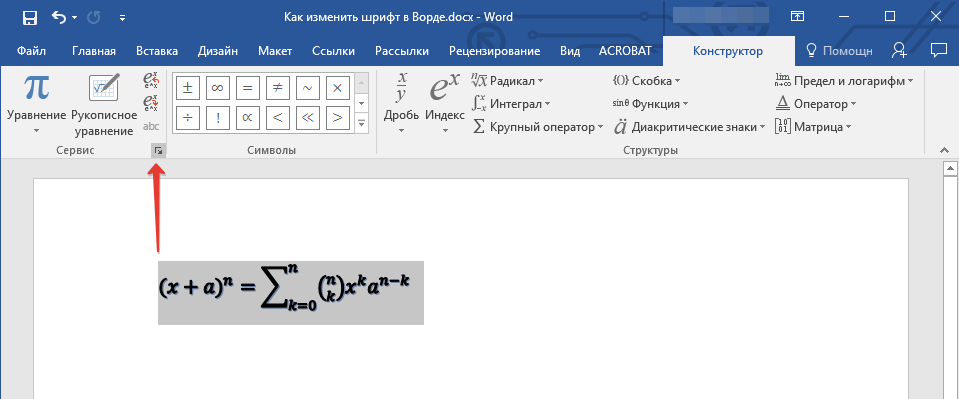
4. Перед вами откроется диалоговое окно, где в строке “Шрифт по умолчанию для областей формул” можно изменить шрифт, выбрав понравившийся из доступного списка.

Примечание: Несмотря на то, что в Word имеется довольно большой набор встроенных шрифтов, далеко не каждый из них может быть использован для формул. Кроме того, возможно, что помимо стандартного Cambria Math вы не сможете выбрать никакой другой шрифт для формулы.
На этом все, теперь вам известно, как изменить шрифт в Ворде, также из этой статьи вы узнали о том, как настроить другие параметры шрифта, в числе которых его размер, цвет и т.д. Желаем вам высокой продуктивности и успехов в освоение всех тонкостей Microsoft Word.
Change the size of selected text
- Select the text or cells with text you want to change. To select all text in a Word document, press Ctrl + A.
- On the Home tab, click the font size in the Font Size box. You can also type in any size you want, within the following limits:
let’s discuss this in detail below!
When working in Microsoft Word, your highest priorities should include the look and feel of your document. It’s possible that you just typed up an excellent essay or made an awesome business report. However, if you don’t format your documents correctly, people might have a hard time reading your files. This can cause dissatisfied teachers, clients or employers.
If you want to avoid making this mistake, you need to learn how to format your Word documents correctly. The very first step is learning how you can modify the size of your text, as well as the font you’re using. Follow our step-by-step guide to make your documents more readable, eye-catching and memorable.
Things you’ll need
- A device with Microsoft Word installed and activated.
How to change Text Size and Font in Word
Let’s start learning!
- Launch Word, then either open an existing document or create a new one from the welcome screen, then type in your text.
- If you only want to change the size and font of a portion of your text, you need to select it. Hold down the left mouse key and make your selection. Now, only the selected text will be affected by the font and size change. If you want to change your entire document, you need to select everything by pressing the Ctrl + A keys on your keyboard.

- To change your text to a different font or size, you need to be on the Home tab in the Ribbon.

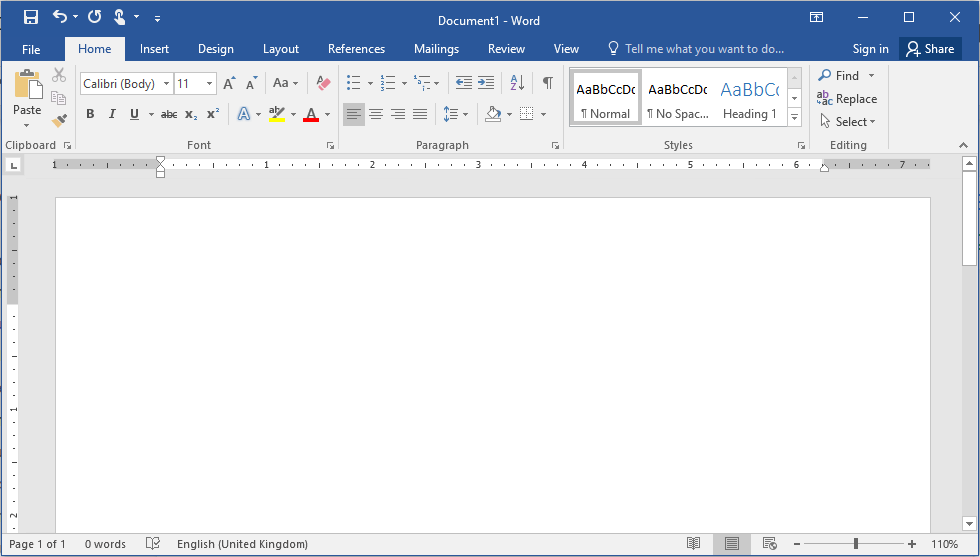
- In the Font section, you’ll see two drop-down menus. The one on the left shows the name of the current font you’re using. The default font in Word is either Calibri or Times New Roman, you’re most likely seeing one of the two.

- The other drop-down menu shows the current size of your text. By default, Word sets the size to either 11 or 12 points.
- To change the font you’re using, open the first drop-down menu. This will display every font installed on your computer. When you hover over a font, you’ll see a preview of how it’ll look like in your document. Simply click on the font you want to use to select it.

- Similarly, you can click on the second drop-down menu with the numbers to change the text size. Hovering over a number will preview how your text will look like, and clicking on it finalizes the change.


How to Change the default text size and font in Word
You can also change the default text size and font in Word. This means that each time you start a new document, Word will automatically use the font and text size you define.
- Click on the arrow in the bottom-right corner of the Font section (again, found in the Home tab).

- A new window will appear. Here, you can select a font, modify the size of it and even apply font styles and effects. However, if you’re settings a default font, we recommend sticking to the Regular style without any effects.

- After you customized the font you want to use, click on the Set As Default button in the bottom-left corner of the window.

- Another window will come up. Here, select if you want to make your settings the default font in the currently open document only (first option), or make it the default font for all documents (second option).
- Press the OK button.


We hope that this article was able to help you learn how you can change the size and font of your text in Microsoft Word. Do you know someone who’s starting out with Word and other Microsoft Office products? Don’t forget to share this article with them! Your friends, classmates, colleagues or employees can all get help in getting started with Word. If you want to learn more about Word or other Microsoft Office suite applications, feel free to browse our section of guides.
If you’re looking for a software company you can trust for its integrity and honest business practices, look no further than SoftwareKeep. We are a Microsoft Certified Partner and a BBB Accredited Business that cares about bringing our customers a reliable, satisfying experience on the software products they need. We will be with you before, during, and after all the sales.
Learn Microsoft Word from articles in our Help Center
Here are some more content to help you learn Microsoft Word:
» How To Change Your Apple ID Password on Any Device
» 7 Microsoft Word Hacks You Need to Know in 2022
» MS Word Features: 20 Secret Functions Revealed
» How to Create a Hanging Indent in Microsoft Word
» How to make columns in Microsoft Word
» How to Fix the Spell Check Not Working in Word
» How to Install Fonts to Word on Mac
» How to Unfreeze Word on Mac Without Losing Work
» Top 14 Microsoft Word Tips and Tricks for Productivity
Final Thoughts
This guide has been about Microsoft Word. We hope you’ve learned how to use Microsoft Word and more tricks.
We’re glad you read the article up to here  Thank you
As we’ve shared above, there are more articles you can read about Microsoft Word and Microsoft Office in our Help Center and Blog.
Please share this article on your socials or with your friends. Someone else may benefit from it too.
One more thing …
Subscribe to our newsletter and be among the first to receive these documents in your inbox. We also share deals, promotions, and more through email. Don’t be left out.
Change theme fonts
- On the Page Layout tab in Excel or the Design tab in Word, click Fonts, and pick the font set you want.
- To create your own set of fonts, click Customize Fonts.
- In the Create New Theme Fonts box, under the Heading font and Body font boxes, pick the fonts you want.
Contents
- 1 How do I change the theme style in Word?
- 2 How do you change the theme font in Word on a Mac?
- 3 How do I change font size and style in Word?
- 4 How do I change the theme in Word 2021?
- 5 How do I create a custom theme color in Word for Mac?
- 6 How do I change the default font in Word 2020?
- 7 What is 12pt?
- 8 Why can’t I change font in Word?
- 9 How do I change my text font?
- 10 How do you change the theme on Office 365?
- 11 How do I apply a theme in Word?
- 12 How do I change my Word theme to black?
- 13 How do I save a custom font color in Word?
- 14 What is the shortcut key for changing the font in Word?
- 15 Why does the same font look different in Word?
- 16 How do I change the default font in Windows 10?
- 17 Is font size 10 too small?
- 18 What size is 8pt font?
- 19 Why is font grayed out in Word?
- 20 Does Office 365 have themes?
How do I change the theme style in Word?
Apply a theme to quickly format an entire document and give it a modern, professional look.
- Select Design > Themes.
- Point to a theme to preview how it will look in your document.
- Select a theme.
How do you change the theme font in Word on a Mac?
Select the text that you want to change to a theme font. On the Home tab, under Font, click the arrow next to the font box. To change text to a theme font, click the Theme Headings font or the Theme Body font.
How do I change font size and style in Word?
Change the size of selected text
- Select the text or cells with text you want to change. To select all text in a Word document, press Ctrl + A.
- On the Home tab, click the font size in the Font Size box. You can also type in any size you want, within the following limits:
How do I change the theme in Word 2021?
How to use themes in Word
- Open the Word app.
- Click the Open option.
- Select the document you already styled to open it.
- Click the Design tab.
- Click the Themes button.
- Roll the mouse pointer over the themes to see a live preview of each available theme.
- Click the theme you want for the document.
How do I create a custom theme color in Word for Mac?
Click Word > Preferences
- Click General.
- Under Personalize, click the Office theme dropdown. Choose between Colorful or Classic.
- As I mentioned earlier, the options are very minimal when it comes to changing the Color Theme. It’s basically White or Blue. Being that the new Mac Office Suite was just released.
How do I change the default font in Word 2020?
To use your favorite font in Word all the time, set it as the default.
- Go to Format > Font > Font. You can also press and hold. + D to open the Font dialog box.
- Select the font and size you want to use.
- Select Default, and then select Yes.
- Select OK.
What is 12pt?
Font sizes are measured in points; 1 point (abbreviated pt) is equal to 1/72 of an inch. The point size refers to the height of a character. Thus, a 12-pt font is 1/6 inch in height.
Why can’t I change font in Word?
If you like to change the default font, you need to press Ctrl+D and then have to click on Set As Default after picking a font. Finally, you have to select All documents based on this Normal template option to make the changes available for new documents.
How do I change my text font?
To change the font, follow these steps:
- Click the Home tab and then select the text you want to change.
- Click the Font list box. A list of available fonts on your computer appears.
- Move the mouse pointer over each font.
- Click the font you want to use.
How do you change the theme on Office 365?
Change the Microsoft 365 theme
- On the Microsoft 365 navigation bar at the top of the screen, click the Settings icon .
- Click a theme in the gallery to see it previewed on your screen. Scroll down and click Save to set it as your theme.
How do I apply a theme in Word?
To apply a theme in Word to a document, click the “Design” tab in the Ribbon. Then click the “Themes” drop-down button in the “Document Formatting” button group to show a drop-down menu of theme choices. To preview a theme in your document, hold your mouse over a theme in this drop-down menu.
How do I change my Word theme to black?
1. To turn on Dark mode in the Word canvas, select File > Account > Office Theme > Black. 2. Once the black theme is set, you can toggle between the black and white page background colors by selecting View > Switch Modes from the ribbon.
How do I save a custom font color in Word?
1 Answer
- Go to the design tab.
- Select ‘Colors’
- Choose ‘Customize colors’
- Change one of the Accent colors to your desired color.
- Press save.
- Save document.
What is the shortcut key for changing the font in Word?
Change or re-size the font
- Open the Font dialog box to change the font. Ctrl+Shift+F.
- Increase the font size. Ctrl+Shift+>
- Decrease the font size. Ctrl+Shift+<
- Increase the font size by 1 point. Ctrl+]
- Decrease the font size by 1 point. Ctrl+[
Why does the same font look different in Word?
Another common difference is fonts, which are not the same across systems. If you create a document using one font that happens to be installed on your computer, and then view it on another system where the font is not present, things will look different. Word will substitute something “close” to the font you wanted.
How do I change the default font in Windows 10?
Open the “Start” menu, search for “Settings,” then click the first result. You can also press Windows+i to quickly open the Settings window. In Settings, click “Personalization,” then select “Fonts” in the left sidebar. On the right pane, find the font that you want to set as the default and click the font name.
Is font size 10 too small?
Most textbooks will use 10 to 12pt type. 10pt type is generally readable provided the font is well designed and line spacing is appropriate. (Personal opinion: That san serif text is horrible. Letter spacing is horrendous and it is not a very “readable” typeface to use at a small size.
What size is 8pt font?
Comparison table
| Point | Metric size | American system |
|---|---|---|
| American | ||
| 712 | ≈ 2.646 mm | |
| 8 | ≈ 2.822 mm | Brevier |
| 9 | ≈ 3.175 mm | Bourgeois |
Why is font grayed out in Word?
Word Isn’t Activated
Microsoft Word is a paid software program, but is sometimes available for free for a timed trial. If a valid registration code isn’t entered by the end of this trial, most features–including the font menu–will become unavailable.
Does Office 365 have themes?
Bring a Bit of Color to Some Office 365 Apps
The themes are called Rainbow (Figure 1), Ribbon (Figure 2), and Unicorn (Figure 3). To select one of the new themes, go to the Office 365 home page and select your preferred theme from the settings (cogwheel) menu.
You know the default body font which comes with your MS Word Software Installation?
The answer is:
Calibri, 11pt.
Your font will always be the same every time you open a new Word document unless you change it before you start typing.
Have you ever wondered how you could change that?
Having a personalized font set up as the default body theme in MS Word is a clever way to save time. It also allows you to create a new document without having to change the font repeatedly. This is particularly true for those of us that have our own personal fonts that we like using. The same set of fonts we use in our articles make it a distinctive piece of work. However, we do not want to go through the hassle of always changing the font every time we open MS Word. Fortunately, we can change the default font easily.
Now, there are about three ways to change the default font in MS Word.
- Using the Ribbon
- Using the Context Menu
- Using a Shortcut Key
Without further ado, let’s get on with it.
Method 1: Using the Ribbon
Step 1: Open up your MS Word document.

Step 2: Go to the Font group in the Ribbon.
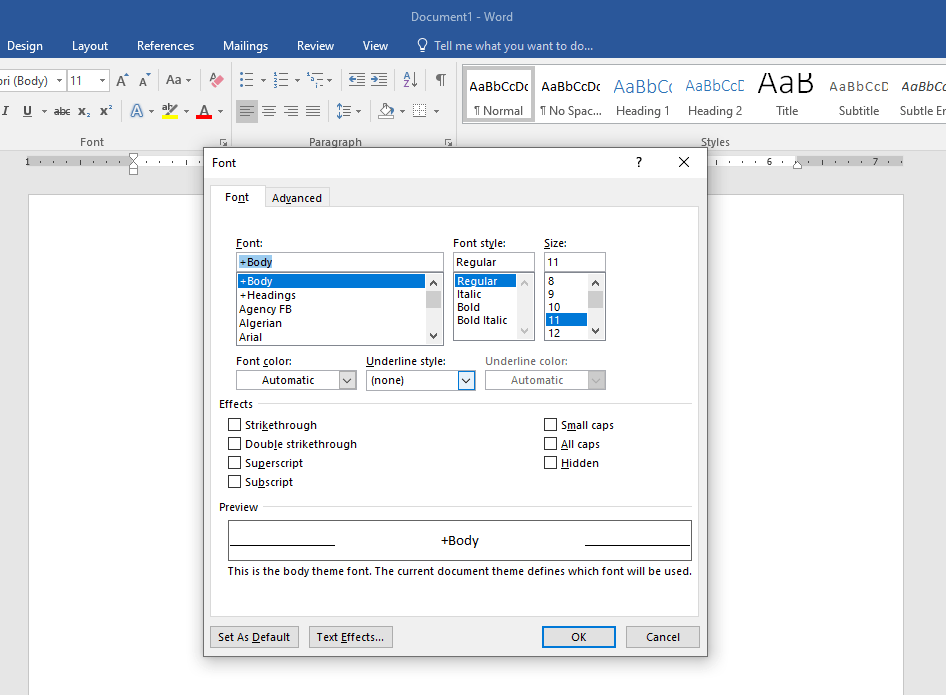
By default, the Home tab in the Ribbon is already selected when you launch an MS Word document. Move your cursor to the upper-left part of the MS Word window, then click the small arrow icon found at the lower-right corner of the Font group.
You’ll find this sitting right next to the border of the Clipboard group.

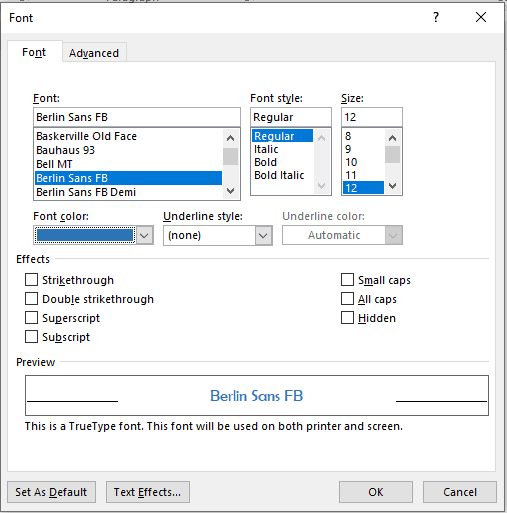
The Font Dialogue box will be displayed in the middle of your screen.
Step 3: Change the default font.
Under the Font: selection box, type the font you want to use as default or simply choose one from the list below it.
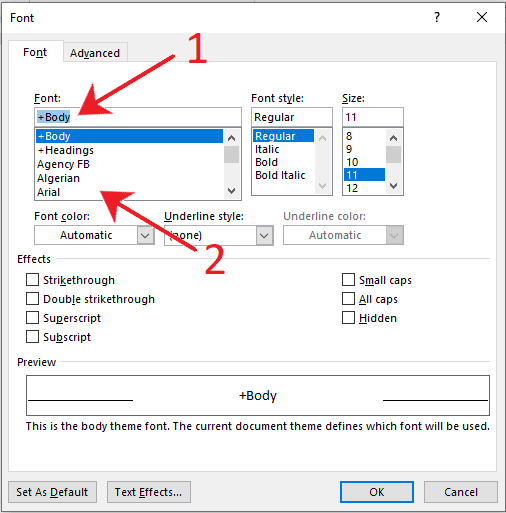
You will notice that you have the option to set the default font properties for both the body and headings of your document.
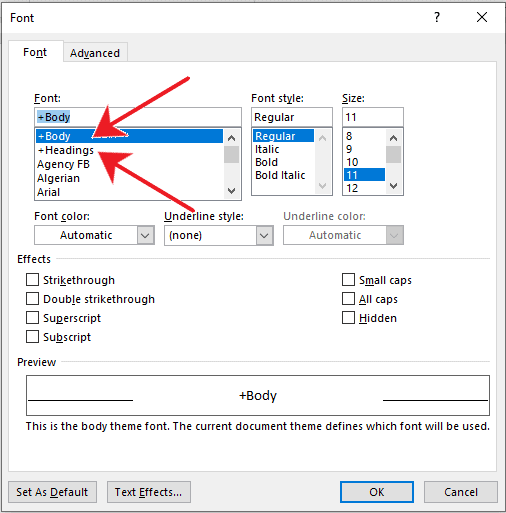
On the font list, select +Body to edit the default font for the document body.
And, select +Headings to edit the default font for the document headings.
Nonetheless, it is best to leave these two options untouched because these hold the default font that came with your MS Word installation.
This means you can simply select the +Body option if you want to revert your font to its default format.
Click the Set As Default button found at the bottom-left corner of the dialogue box when you’re done.
Now, a small dialogue box will pop-up asking you whether you want to apply the changes to the current document only or to all future documents.
Select This document only? if you want to apply the changes on the current document you are working on.
Otherwise, select All documents based on the Normal template? If you want the settings applied to all future documents.

If you’re unsure, you can always choose the first to limit the changes to your current document only.
Again, you can easily revert the changes by pressing CTRL+Z.
Click Cancel if you want to revert any changes made.

You’ve just changed the default font of your MS Word application.
Method 2: Using the Context Menu
Step 1: Open up your MS Word document.

Step 2: Right-click on any part of the document.
Once you have a file opened, right-click on any part of the document to display the Context Menu. Then, select Font… found in the middle part of the menu.

This opens the Font Dialogue box by using the Context Menu. Anything from here on out is the same as the previous method.
If you want to learn more about how to customize the default settings of your font, then check out the “Customizing the Default Font in MS Word” section.
Method 3: Using a Shortcut Key
This method is, by far, the fastest way to change the default font in MS Word.
Step 1: Open up your MS Word document.
Now, as we proceed with the steps, none of the contents of your document should change except for when you type something afterward.
Step 2: Launch the Font Dialogue box.
On your keyboard, press CTRL+D. This will launch the Font Dialogue box right in the middle of your screen.

The steps are the same as the previous method from this point forward.
Customizing The Default Font In MS Word
This section will guide you through the steps to customize your default font in MS Word. As you may have noticed, there are a bunch of other options on the Font Dialogue box. We will go through each of them here.

Font Tab
You can specify here the different font properties like weight, size, color, etc.
Font style
Use this when you want to set the default text to be in boldface, italicized or both.
Size
Use this when you want to specify the size of the default text.
Font color
Use this when you want to specify the color of the default text.
Underline style
Use this when you want to specify the underline type of the default text.
Underline color
Use this when you want to specify the underline color of the default text. This is enabled only when you choose a specific underline style.
Effects
Tick one or more if you want to specify any of the effects listed
Conclusion
We hope you found this article helpful!
Using google docs? Check out this guide to change default font in Google Docs.
Updated: 08/16/2021 by
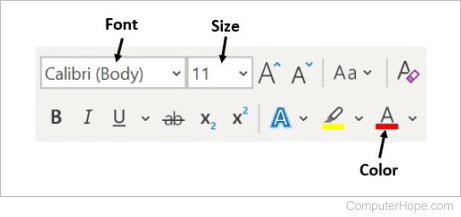
In Microsoft Word, you can change the properties of any text, including font type, size, and color, and make it bold, italic, or underlined (font style). The following illustration shows an example of the formatting bar and a description of the tools it contains.
Tip
In Word 2003 or earlier, if you do not see the formatting bar when you open Word, click View, then Toolbars, and make sure Formatting has a check next to it.
The font settings placement changed after Word 2003, with all the settings placed in the Font section on the Ribbon’s Home tab. An example of the font settings in Word 2016 is pictured below.
Select a link below to learn how to change font color, size, style, or type in Microsoft Word.
Changing font color
To change the font color in a Microsoft Word document, follow the steps below.
- Highlight the text you want to change.
- Click the down arrow next to the color icon on the formatting bar or Ribbon. It is usually displayed as the letter «A» with a red underline.
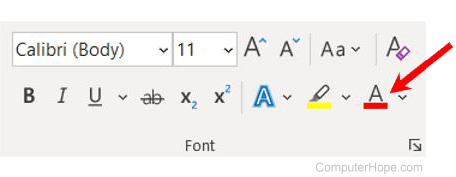
- After clicking the down arrow, select a color for the text.
Note
If you do not highlight any text, the font color changes at the cursor’s location as soon as you start typing.
Changing font size
To change the font size in a Microsoft Word document, follow the steps below.
- Highlight the text you want to change.
- Click the down arrow next to the size box on the formatting bar or Ribbon to enlarge or reduce the font size. The default font size is usually 11 or 12.
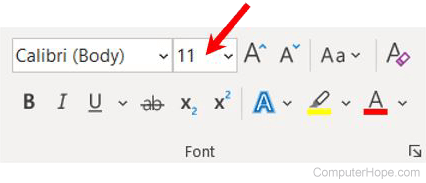
- After clicking the down arrow for the size, you see a list of predesignated sizes to select. Some fonts do not scale appropriately to have limited size options.
- You can also change the font size by clicking and highlighting the current default size. In the picture above, the default is 11. Once highlighted, you can type in a number. For example, if you want to use font size 100, you can type in that number rather than choosing a preset number from the list.
Note
If you do not highlight any text, the font size changes at the cursor’s location as soon as you start typing.
Changing font style
To change the font style, including bold, italic, and underline, follow the steps below in a Microsoft Word document.
- Highlight the text you want to change.
- Click the B, I, or U option on the formatting bar or Ribbon to change the text to bold, italic, or underlined.
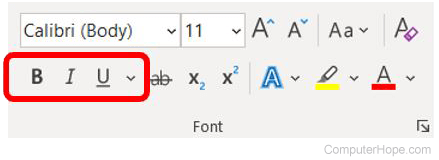
- After clicking the B, I, or U option, the text changes to the selected font style.
Tip
You can select more than one font style for text. You can also select different underline styles by clicking the down arrow next to the U icon.
Note
If you do not highlight any text, the font style changes at the cursor’s location as soon as you start typing.
Changing font type
To change the font type in a Microsoft Word document, follow the steps below.
- Highlight the text you want to change.
- Click the down arrow next to the font field on the formatting bar or Ribbon. (If you want to change the font to bold, italic, or underlined, click the B, I, or U on the format bar.)

- After clicking the down arrow for the font, select the desired font from the list of installed fonts on your computer, like Arial, Calibri, and Times New Roman.
Note
If you do not highlight any text, the font type changes at the cursor’s location as soon as you start typing.
![]()
Download Article
![]()
Download Article
Do you want to switch things up in Word by changing the default Times New Roman or Calibri font to something else? There’s an easy way to adjust settings so you can set a new default font. This wikiHow article will show you how to set the default font in Word Office 365 (for all versions since Word 2013) on Windows and macOS.
-
1
Open Word. On your Windows PC, open up the Microsoft Word application.
-
2
Open up a document. You can use any document you want, but if you want to start a new document, click on File > New > Blank Document in the top left corner of the window.[1]
Advertisement
-
3
Click on Home. This is located in the left corner of the top Windows menu bar.
-
4
Click on the Font Dialogue Box Launcher. This is the small square icon with an arrow inside. It is located in the bottom right corner of the “Font” section above the document.[2]
-
5
Select your font. In the pop-up window, you’ll see a drop down menu labeled “Font” in the top left corner. Simply scroll until you find the font that you want to set as the default. Click on it.
- You can see a preview of your font in the “Preview” section near the bottom of this pop-up window. This will show you exactly what your font looks like as you make changes.
-
6
Set your Font style and Size. There are two drop down menus to the left of “Font.” Scroll through each to set your desired default font style and size.
-
7
Set other font preferences (optional). If you also want to change features such as «Font color,» «Underline style,» or «Effects,» simply adjust these settings within the same pop-up window.
- You can also click on Advanced near the top of this pop-up window to change more settings such as “Character Spacing” and “Advanced Typography.”
-
8
Click on Default…. This is located in the bottom left corner of the pop-up window.
-
9
Click on This document only or All documents based on the Normal template. The former will only change the default font for this particular document, while the latter will change the default font for all future Word documents.
-
10
Click on OK. This is located in the bottom right corner of the pop-up window. You have now successfully changed the default font in Word.
- If you’ve tried this method and the font you chose still does not appear as the default font, look towards the next method for troubleshooting.


Advertisement
-
1
Open the Start menu. This is located on the left or center of your PC’s taskbar. This button is the Windows logo, which looks like four squares.[3]
-
2
Type Normal.dotm into the search bar. The search bar is located in the bottom left corner of the Search menu. If your office template directory is not indexed and you are unable to find «Normal.dotm» through search, Right click start menu and select «Run» option. Then type «%Appdata%/Microsoft/Templates» in run dialogue box and click «OK». This will open office’s templates directory and you will find Normal.dotm in this directory.
-
3
Right-click the Normal.dotm. Now click on Properties at the bottom of this drop down menu.
-
4
Navigate to General. If it isn’t already displayed, click on this button near the top of the pop-up window to view the general information.
-
5
Uncheck Read-only (if necessary). If you see that the checkbox next to “Read-only” is selected, simply click on it to uncheck it. You should now be able to change default settings on Word.
- If you are unable to uncheck this box, look towards the last step of this method.
-
6
Click on the Security tab. This is located at the top of the pop-up window.
-
7
Click on your name. You should see your name located underneath “Group or user names.” Now look and see if there’s a checkmark in the “Allow” section of the “Write” permission.
- If there isn’t, look to the last step.
-
8
Click on OK. This is located at the bottom of the Normal Properties pop-up window.
-
9
Contact your company (if necessary). If you weren’t able to uncheck the “Read-only” box, or did not see the “Write” permission allowed, this means that your company will not allow you to change the default font. We recommend that you contact your company’s technology or computer services to try and resolve this issue.


Advertisement
-
1
Open Word. On your Mac, open up the Microsoft Word application.
-
2
Open up a document. You can use any document you want, but if you want to start a new document, click on File > New Document in the top left Apple menu bar.
-
3
Click on Format > Font. These are located in your top Apple menu bar.[4]
-
4
Click on the “Font” drop down menu. This is located in the top left corner of the “Font” pop-up window. Simply click on the arrow.
-
5
Select your font. In the drop down menu that appears below “Font,” you’ll see all of the fonts available to you. Simply scroll until you find the font that you want to set as the default. Click on it.
- You can see a preview of your font in the “Preview” section near the bottom of this pop-up window. This will show you exactly what your font looks like as you make changes.
-
6
Set your Font style and Size. There are two drop down menus to the left of “Font.” Click on each to set your desired default font style and size.
-
7
Set other font preferences (optional). If you also want to change features such as «Font color,» «Underline style,» or «Effects,» simply adjust these settings within the same pop-up window.
- You can also click on Advanced near the top of this pop-up window to change more settings such as “Character Spacing” and “Advanced Typography.”
-
8
Click on Default…. This is located in the bottom left corner of the pop-up window.
-
9
Click on This document only or All documents. The former will only change the default font for this particular document, while the latter will change the default font for all future Word documents.
-
10
Click on OK. This is located in the bottom right corner of the pop-up window. You have now successfully changed the default font in Word.
- If you’ve tried this method and the font you chose still does not appear as the default font, look towards the next method for troubleshooting.


Advertisement
-
1
Open Finder. If the default font you chose isn’t remaining as the default, use these steps to check your permissions. The Finder application is blue and white with a smiley face inside.
- Some companies have permission settings that don’t allow default font changes, which is why you may want to check and see if this is the case for you.
-
2
Type Normal.dotm into the search bar. Click on the magnifying glass in the top left corner to open the search bar. Press Enter on your keyboard after typing it in.
-
3
Click on the Normal.dotm file. If you don’t see this file in your search results, you may need to click on This Mac near the top left corner of the window.
-
4
Click on File > Get Info. These are located in the top Apple menu bar.
-
5
Navigate to General. If it isn’t already displayed, click on this button near the top of the pop-up window to view the general information.
-
6
Uncheck Locked (if necessary). If you see that the checkbox next to “Locked” is selected, simply click on it to uncheck it. You should now be able to change default settings on Word.
- If you are unable to uncheck this box, look towards the last step of this method.
-
7
Click on Sharing & Permissions. This is located at the bottom of the pop-up window. Now look and see if the “Read & Write” privilege appears next to your name. If it doesn’t, look to the next step.
-
8
Contact your company (if necessary). If you weren’t able to uncheck the “Locked” box, or did not see “Read & Write” next to your name, this means that your company does not allow you to change the default font. We recommend that you contact your company’s technology or computer services to try and resolve this issue.


Advertisement
Ask a Question
200 characters left
Include your email address to get a message when this question is answered.
Submit
Advertisement
References
About This Article
Article SummaryX
1. Open a document in Word.
2. Click on Home > Font Dialogue Box Launcher.
3. Select your font.
4. Change font style.
5. Click on Default.
6. Click on This document only or All documents.
7. Click on OK.
Did this summary help you?
Thanks to all authors for creating a page that has been read 2,627 times.