
Word 2016 is designed to help you create professional-quality documents. Word can also help you organize and write documents more efficiently.
When you create a document in Word, you can choose to start from a blank document or let a template do much of the work for you. From then on, the basic steps in creating and sharing documents are the same. And Word’s powerful editing and reviewing tools can help you work with others to make your document great.
Start a document
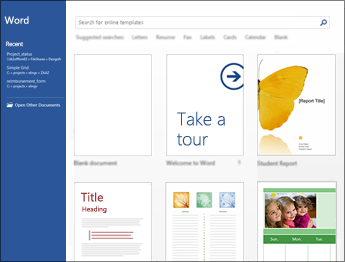
It’s often easier to create a new document using a template instead of starting with a blank page. Word templates come ready-to-use with pre-set themes and styles. All you need to do is add your content.
Each time you start Word, you can choose a template from the gallery, click a category to see more templates, or search for more templates online.
For a closer look at any template, click it to open a large preview.
If you’d rather not use a template, click Blank document.
Open a document
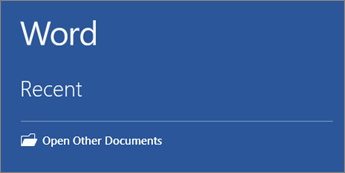
Every time you start Word, you’ll see a list of your most recently used documents in the left column. If the document you’re looking for isn’t there, click Open Other Documents.
If you’re already in Word, click File > Open and then browse to the file’s location.
When you open a document that was created in earlier versions of Word, you see Compatibility Mode in the title bar of the document window. You can work in compatibility more or you can upgrade the document to use Word 2016.
Save a document
To save a document for the first time, do the following:
-
On the File tab, click Save As.
-
Browse to the location where you’d like to save your document.
Note: To save the document on your computer, choose a folder under This PC or click Browse. To save your document online, choose an online location under Save As or click Add a Place. When your files are online, you can share, give feedback and work together on them in real time.
-
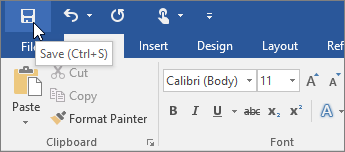
Click Save.
Note: Word automatically saves files in the .docx file format. To save your document in a format other than .docx, click the Save as type list, and then select the file format that you want.
To save your document as you continue to work on it, click Save in the Quick Access Toolbar.
Read documents
Open your document in Read Mode to hide most of the buttons and tools so you can get absorbed in your reading without distractions.
-
Open the document you want to read.
Note: Some documents open in Read Mode automatically, such as protected documents or attachments.
-
Click View > Read Mode.
-
To move from page to page in a document, do one of the following:
-
Click the arrows on the left and right sides of the pages.
-
Press page down and page up or the spacebar and backspace on the keyboard. You can also use the arrow keys or the scroll wheel on your mouse.
-
If you’re on a touch device, swipe left or right with your finger.
Tip: Click View > Edit Document to edit the document again.
-
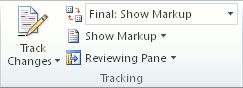
Track changes
When you’re working on a document with other people or editing a document yourself, turn on Track Changes to see every change. Word marks all additions, deletions, moves, and formatting changes.
-
Open the document to be reviewed.
-
Click Review and then on the Track Changes button, select Track Changes.

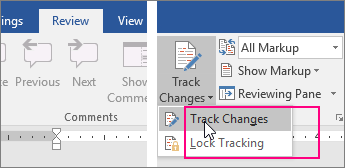
Read Track changes to learn more.
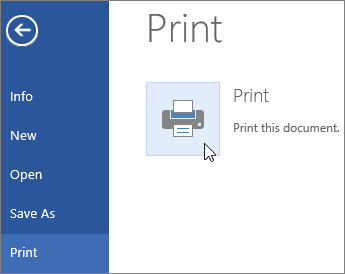
Print your document
All in one place, you can see how your document will look when printed, set your print options, and print the file.
-
On the File tab, click Print.
-
Do the following:
-
Under Print, in the Copies box, enter the number of copies you want.
-
Under Printer, make sure the printer you want is selected.
-
Under Settings, the default print settings for your printer are selected for you. If you want to change a setting, just click the setting you want to change and then select a new setting.
-
-
When you’re satisfied with the settings, click Print.
For details, see Print a document.
Beyond the basics
For more on the fundamentals of using Word, see What’s new in Word 2016.
Top of Page
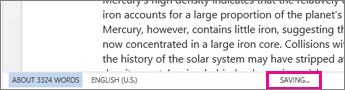
With Word for the web, you use your web browser to create, view, and edit the personal documents that you store on OneDrive. If your organization or college has a Microsoft 365 plan or SharePoint site, start using Word for the web by creating or storing documents in libraries on your site.Save changes
Word saves your changes automatically. Look on the status bar at the bottom left corner of Word for the web. It will either show Saved or Saving.
Share documents online
Because your document is online, you can share it by sending a link instead of an email attachment. People can read it in their web browser or mobile device.
Click File > Share > Share with People.

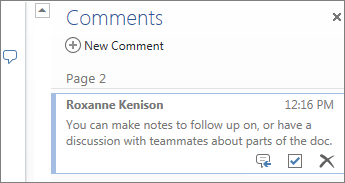
Comment in the browser
A comment balloon shows where comments have been made in the doc.

Reply to comments, and check off items you’ve addressed.
Edit in the browser
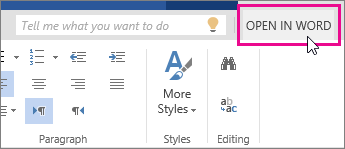
If you try to type in the document and nothing happens, you’re probably in Reading view. Switch to Editing view: click Edit Document > Edit in Word for the web.

Type and format text, add pictures, adjust the layout of the page, and more. For more advanced editing, click Open in Word.
Work together on the same doc
To work together in Word for the web, you edit a document as you normally would. If others are also editing it, Word for the web alerts you to their presence. You can see everyone who is currently working in the document by clicking in the ribbon.

Clicking on an author’s name jumps you to where they’re working in the doc. And you’ll see the changes they make as they’re happening. They can be working in Word for the web, Word 2010 or later, or Word for Mac 2011.
Add a header or footer
Go to Insert > Header & Footer to add headers and footers to your document.
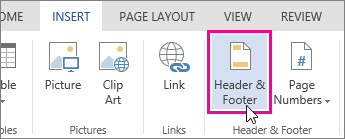
Click Options to choose how you’d like them to appear.

Add page numbers
Click Insert > Page Numbers and then choose from the gallery where you’d like the page numbers to appear.
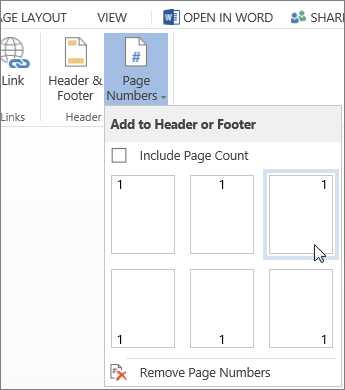
Select Include Page Count to show the current page number along with the total number of pages (page X of Y).
Find and replace text
Quickly search for every occurrence of a specific word or phrase in your document by clicking Home > Find (or type Ctrl+F). Results appear next to your document so you can see the term in context. Clicking on a search result jumps you to that occurrence.
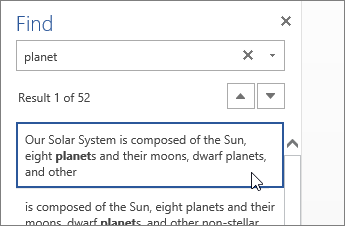
Click Replace (or type Ctrl+H) to find and replace text.
Print in Word for the web
Go to File > Print. Word for the web creates a PDF preview of your document that keeps all the layout and formatting of your document. Send the PDF to your printer and it will print the way you expect.
Microsoft Word 2013 is a word-processing program designed to help you create professional-quality documents. Word helps you organize and write your documents more efficiently.
Your first step in creating a document in Word 2013 is to choose whether to start from a blank document or to let a template do much of the work for you. From then on, the basic steps in creating and sharing documents are the same. Powerful editing and reviewing tools help you work with others to make your document perfect.
Choose a template
It’s often easier to create a new document using a template instead of starting with a blank page. Word templates are ready to use with themes and styles. All you need to do is add your content.
Each time you start Word 2013, you can choose a template from the gallery, click a category to see the templates it contains, or search for more templates online. (If you’d rather not use a template, just click the Blank document.)
For a closer look at any template, just click it to open a large preview.
Top of Page
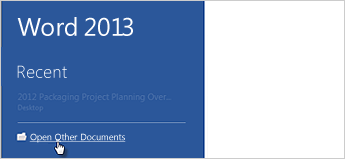
Open a document
Every time you start Word, you’ll see a list of your most recently used documents in the left column. If the document you’re looking for isn’t there, click Open Other Documents.
If you’re already in Word, click File > Open and then browse to the file’s location.
When you open a document that was created in earlier versions of Word, you see Compatibility Mode in the title bar of the document window. You can work in compatibility more or you can upgrade the document to use features that are new or enhanced in Word 2013.
Top of Page
Save a document
To save a document for the first time, do the following:
-
Click the File tab.
-
Click Save As.
-
Browse to the location where you’d like to save your document.
Note: To save the document on your computer, choose a folder under Computer or click Browse. To save your document online, choose a location under Places or Add a Location. When your files are online, you can share, give feedback and work together on them in real time.
-
Click Save.
Note: Word automatically saves files in the .docx file format. To save your document in a format other than .docx, click the Save as type list, and then select the file format that you want.
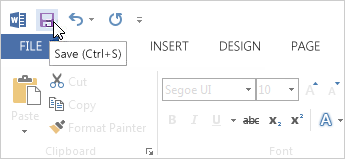
To save your document as you continue to work on it, click Save in the Quick Access Toolbar.
Top of Page
Read documents
Open your document in Read Mode to hide most of the buttons and tools so you can get absorbed in your reading without distractions.
-
Open the document you want to read.
Note: Some documents open in Read Mode automatically, such as protected documents or attachments.
-
Click View > Read Mode.
-
To move from page to page in a document, do one of the following:
-
Click the arrows on the left and right sides of the pages.
-
Press page down and page up or the spacebar and backspace on the keyboard. You can also use the arrow keys or the scroll wheel on your mouse.
-
If you’re on a touch device, swipe left or right with your finger.
Tip: Click View > Edit Document to edit the document again.
-
Top of Page
Track changes
When you’re working on a document with other people or editing a document yourself, turn on Track Changes to see every change. Word marks all additions, deletions, moves, and formatting changes.
-
Open the document to be reviewed.
-
Click Review and then on the Track Changes button, select Track Changes.

Read Track changes to learn more.
Top of Page
Print your document
All in one place, you can see how your document will look when printed, set your print options, and print the file.
-
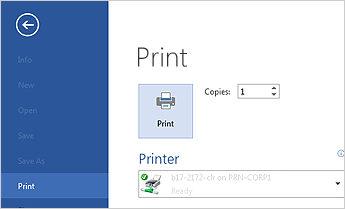
Click the File tab and then click Print.
-
Do the following:
-
Under Print, in the Copies box, enter the number of copies you want.
-
Under Printer, make sure the printer you want is selected.
-
Under Settings, the default print settings for your printer are selected for you. If you want to change a setting, just click the setting you want to change and then select a new setting.
-
-
When you’re satisfied with the settings, click Print.
For details, see Print and preview documents.
Beyond the basics
Go beyond the basics with your documents by creating a table of contents or saving a document as a template.
Top of Page
Important:
Office 2010 is no longer supported. Upgrade to Microsoft 365 to work anywhere from any device and continue to receive support.
Upgrade now
In this article
-
What is Word?
-
Find and apply a template
-
Create a new document
-
Open a document
-
Save a document
-
Read documents
-
Track changes and insert comments
-
Print your document
What is Word?
Microsoft Word 2010 is a word-processing program, designed to help you create professional-quality documents. With the finest document-formatting tools, Word helps you organize and write your documents more efficiently. Word also includes powerful editing and revising tools so that you can collaborate with others easily.
Top of Page
Find and apply a template
Word 2010 allows you to apply built-in templates, to apply your own custom templates, and to search from a variety of templates available on the web.
To find and apply a template in Word, do the following:
-
On the File tab, click New.
-
Under Available Templates, do one of the following:
-
To use one of the built-in templates, click Sample Templates, click the template that you want, and then click Create.
-
To reuse a template that you’ve recently used, click Recent Templates, click the template that you want, and then click Create.
-
To use your own template that you previously created, click My Templates, click the template that you want, and then click OK.
-
To find a template on Office.com, under Office.com Templates, click the template category that you want, click the template that you want, and click Download to download the template from Office.com to your computer.
-
Note: You can also search for templates on Office.com from within Word. In the Search Office.com for templates box, type one or more search terms, and then click the arrow button to search.
Top of Page
Create a new document
-
Click the File tab and then click New.
-
Under Available Templates, click Blank Document.
-
Click Create.
For more information about how to create a new document, see Create a document.
Top of Page
Open a document
-
Click the File tab, and then click Open.
-
In the left pane of the Open dialog box, click the drive or folder that contains the document.
-
In the right pane of the Open dialog box, open the folder that contains the drawing that you want.
-
Click the document and then click Open.
Top of Page
Save a document
To save a document in the format used by Word 2010 and Word 2007, do the following:
-
Click the File tab.
-
Click Save As.
-
In the File name box, enter a name for your document.
-
Click Save.
To save a document so that it is compatible with Word 2003 or earlier, do the following:
-
Open the document that you want to be used in Word 2003 or earlier.
-
Click the File tab.
-
Click Save As.
-
In the Save as type list, click Word 97-2003 Document. This changes the file format to .doc.
-
In the File name box, type a name for the document.
-
Click Save.
For more information about how to create a document that is compatible with Word 2003 or earlier versions, see Create a document to be used by previous versions of Word.
Top of Page
Read documents
-
Open the document that you want to read.
-
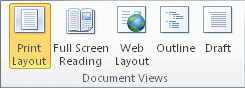
On the View tab, in the Document Views group, click Full Screen Reading
-
To move from page to page in a document, do one of the following:
-
Click the arrows in the lower corners of the pages.
-
Press PAGE DOWN and PAGE UP or SPACEBAR and BACKSPACE on the keyboard.
-
Click the navigation arrows at the top center of the screen.
Tip: Click View Options, and then click Show Two Pages
to view two pages, or screens, at a time.
-
 to view two pages, or screens, at a time.
For more information about how to view documents, see Read documents in Word.
Top of Page
Track changes and insert comments
-
To turn on change tracking, on the Review tab, in the Tracking group, click Track Changes.
-
To insert a comment, on the Review tab, in the Comments group, click New Comment.
For more information about how to track changes made while revising, see Track changes and insert comments.
Top of Page
Print your document
-
Click the File tab and then click Print.
-
Do the following:
-
Under Print, in the Copies box, enter the number of copies that you want to print.
-
Under Printer, make sure that the printer that you want is selected.
-
Under Settings, the default print settings for your printer are selected for you. If you want to change a setting, click the setting you want to change and then select the setting that you want.
-
-
When you are satisfied with the settings, click Print.
For more information about how to print a file, see Preview and print a file.
Top of Page
Click Edit Document > Edit in Word for the web to make changes to a document. When you open a document from OneDrive, Word for the web displays it in Reading view. To make changes to your document, switch to Editing view, where you can add and delete content and do other things, such as: Add tables and pictures.
Contents
- 1 Where can I edit DOC files?
- 2 How do I enable editing on a Word document?
- 3 How can I open a .doc file without word?
- 4 How do I add text to a .docx file?
- 5 How do I edit text in DOCX?
- 6 Why is my Word document not letting me edit it?
- 7 How do I edit a read only document in Word?
- 8 How do I open a DOC file in Chrome?
- 9 How do I open a DOC file on my PC?
- 10 How can I edit a Word document for free?
- 11 How do I edit a doc in Google Docs?
- 12 How do I edit a Google Doc?
- 13 Can you edit DOCX in Google Docs?
- 14 How do I write text in a Word document?
- 15 How do I open and edit a DOCX file?
- 16 How can I edit a Word document without word?
- 17 How do I make a document editable?
- 18 Why can’t I edit Word on my Mac?
- 19 How do I edit a Word document in an email?
- 20 Why is my word doc read only?
Where can I edit DOC files?
Discover GroupDocs.Editor free online app!
Upload your Excel, Word, PowerPoint, MOBI, documents and edit them in your browser. Edit files from anywhere – it works on all platforms including Windows, MacOS, Android and iOS.
How do I enable editing on a Word document?
Enable editing in your document
- Go to File > Info.
- Select Protect document.
- Select Enable Editing.
How can I open a .doc file without word?
9 Ways to Open a Word Document Without Word
- Word Mobile (Windows Only) Word Mobile allows you to open and view the contents of any Word document for free.
- OpenOffice or LibreOffice.
- Word Online.
- Google Docs.
- Apple Pages.
- Smallpdf & ZamZar.
- Docs (Android) & Pages (iOS)
- Word for Android & iOS.
How do I add text to a .docx file?
Microsoft Word 2016
- Open the first document.
- Place the cursor where you want the second document to be inserted.
- From the Insert tab, Text group, click on the down arrow next to Object and choose Text from file.
- Select the file to be inserted.
- Click on Insert.
How do I edit text in DOCX?
To edit, click Edit Document in the top left corner and select Edit in Word Online. The document will then open in the editor and allow you to make changes to the document. To edit a document with Word on your desktop, select Edit in Word when in the Read Only version of your OneDrive document.
Why is my Word document not letting me edit it?
If you cannot edit your Word document, it’s probably protected with a password. In case you don’t want to enter the password every time you access the document, you’ll need to disable document protection, and delete the password.
How do I edit a read only document in Word?
Remove read only
- Click the Microsoft Office Button. , and then click Save or Save As if you have previously saved the document.
- Click Tools.
- Click General Options.
- Clear the Read-only recommended check box.
- Click OK.
- Save the document. You might need to save it as another file name if you have already named the document.
How do I open a DOC file in Chrome?
If you want to open an Office document in Google Docs through the Chrome browser, use the suite’s Import utility.
- Launch Chrome on your computer, then go to the Chrome Web Store.
- Type “Google Docs” in the search bar at the upper right corner of the screen, then select “Google Docs” from the search results list.
How do I open a DOC file on my PC?
A DOC file is a Microsoft Word Document file. Open one with MS Word or for free through Google Docs or WPS Office. Convert to PDF, JPG, DOCX, etc. with those same programs or Zamzar.
How can I edit a Word document for free?
- Aspose Words Editor. Aspose Words Editor is a free online document editor.
- Google Docs. Google Docs allows you to write, edit, and collaborate on Word documents with others anytime, anywhere.
- Zoho Writer. Zoho Writer is a powerful word processor available across all of your devices.
- ScanWritr.
- ONLYOFFICE.
How do I edit a doc in Google Docs?
To edit a document:
- On your computer, open a document in Google Docs.
- To select a word, double-click it or use your cursor to select the text you want to change.
- Start editing.
- To undo or redo an action, at the top, click Undo or Redo .
How do I edit a Google Doc?
Step 1: On your Android phone or tablet, open a document in the Google Docs app. Step 2: After opening a file tap Edit. Step 3: Next to select a word, double-tap it.
Can you edit DOCX in Google Docs?
No editing is possible. To perform editing, choose File>Open With>Google Docs. If you want to bring the document back into Word later, you can re-export the document as a . docx file (but not .
How do I write text in a Word document?
Save as a text file and then copy and paste
From the File menu, select Save As…, and specify ASCII or Text as the file format. For example, in WordPerfect, in the Save dialog box, select Text Export; in Microsoft Word, select Text only.
How do I open and edit a DOCX file?
Microsoft Word (version 2007 and above) is the primary software program used to open and edit DOCX files. If you have an earlier version of Microsoft Word, you can download the free Microsoft Office Compatibility Pack to open, edit, and save DOCX files in your older version of MS Word.
How can I edit a Word document without word?
Install LibreOffice, a free and open-source office suite. This is an alternative to Microsoft Office. LibreOffice Writer, which is included, can open and edit Microsoft Word documents in DOC and DOCX format. Upload the document to Google Drive and open it in Google Docs, Google’s free web-based office suite.
How do I make a document editable?
How to create fillable PDF files:
- Open Acrobat: Click on the “Tools” tab and select “Prepare Form.”
- Select a file or scan a document: Acrobat will automatically analyze your document and add form fields.
- Add new form fields: Use the top toolbar and adjust the layout using tools in the right pane.
- Save your fillable PDF:
Why can’t I edit Word on my Mac?
Sign out of and quit all Microsoft Office applications. In the next window that pops up select the following three files, delete them, and then empty your trash. Restart your Mac, re-launch Word, and sign back in with your [email protected] and password.
How do I edit a Word document in an email?
Click on the File menu, then select Options. Select Customize Ribbon and then use the drop list to choose “Commands not in the ribbon.” Find the “Edit Message” tool and copy it over to a custom group in the right-hand panel. The Edit Message option should now appear in the message menu bar when there is an attachment.
Why is my word doc read only?
Turn Off The Trust Center Options To Remove Word Opening In Read Only. Trust Center is a feature in Word that blocks certain documents from being fully opened with editing capabilities on your computer. You can disable the feature in the program and that should fix the read only issue you’re facing with your document.
![]()
Download Article
![]()
Download Article
This wikiHow teaches you how to edit a Microsoft Word document’s page layout, change its design theme, and make basic style edits on the text, using a computer.
-
1
Open the Word document you want to edit. Find the document you want to edit, and double-click on its name to open the text file.
-
2
Click the Layout tab at the top. This button is located above the toolbar ribbon in the upper-left corner of your document. It will open your layout tools on the toolbar ribbon.
Advertisement
-
3
Click the Margins menu on the top-left. This is the first option on the Layout ribbon. It will open your document’s margin options on a drop-down menu.
-
4
Select the document margin you want to use. You can use Normal, Narrow, Moderate, Wide, or Mirrored margins.
- Click a margin option to see what it looks like.
- You can see the exact margin indent values below each option.
- If you don’t like any of the options here, click Custom Margins at the bottom, and manually enter the margin indent values you want to use.
-
5
Select a paragraph or section to customize margin and spacing. You can manually customize the margin indent and spacing options of a paragraph or section in your text without affecting the overall margins of your document.
-
6
Fill out the Indent and Spacing values on the toolbar. You can find these sections in the middle of the Layout ribbon.
- Indent will allow you to customize the selected region’s margins from left and right.
- Spacing will allow you to make the space above or below the selected region larger or smaller.
-
7
Click the Orientation menu next to Margins. This will open your document’s page orientation options on a drop-down menu.
-
8
Select Portrait or Landscape on the menu. Click one of the options here to change your document’s page orientation.
-
9
Click the Size menu next to Orientation. This will open a list of available paper size configurations you can use for your document.
-
10
Find and select the paper size you want to use. This will help you accurately preview your document’s print output on the paper size you’re planning to use.
-
11
Click the Columns next to Size. This option allow you to create multiple text columns in your text document.
- You can select a paragraph or section in your document and apply your columns here if you want to use different numbers of columns in different parts of your text.
-
12
Select the number of columns you want to use. Click a column option on the drop-down menu to apply it to the selected part of your text.
- Two and Three will create multiple, equal-sized columns.
- Left and Right will create two columns, and make one of them wider than the other one.
- If you want to manually customize your column number, size, and spacing, click More Columns at the bottom.


Advertisement
-
1
Click the Design tab at the top. You can find it between Insert and Layout above the toolbar ribbon in the upper-left corner. It will open your design tools on the ribbon.
-
2
Click the Themes button. This is the first option on the Design toolbar in the upper-left corner. It will open your document theme options on a drop-down menu.
-
3
Select a theme on the drop-down menu. Click on a theme to see different design variations of it.
- When you select a theme, related design variations will be listed next to it on the Design ribbon.
-
4
Click the Colors button. This button is located towards the right-hand side of the toolbar ribbon. It will open a drop-down menu of different color palettes you can use.
-
5
Select a color palette. Click the color palette you want to use. This will filter the themes on the toolbar ribbon, and restrict the selection to the selected color palette.
-
6
Click the Fonts button. This will open a list of all the available fonts you can use for your text.
-
7
Select the font you want to use in your document. This will filter the themes on the ribbon, and only show themes with your selected font.
-
8
Click a design theme on the toolbar ribbon. Find an interesting design and click on it to apply the theme to your document.
- Some themes will change all the heading and spacing stylings in your document whereas some other will do as little as only changing your font.


Advertisement
-
1
Click the Home tab on the top-left. This button is in the upper-left corner of your document. It will open your text styling tools on the toolbar ribbon.
-
2
Select the text you want to format. You can select a word, sentence, paragraph or section in your document.
- If you want to select the entire document, press Control+A on Windows, or ⌘ Command+A on Mac.
-
3
Click the
icon next to the Font field. This will open a list of all your available font options.
-
4
Select a font on the menu to apply it. Clicking a font here will change the selected text to this font.
-
5
Enter a number into the Font Size field. This field shows the current size of your text next to the Font field.
- You can manually enter a size here, or click the
icon and select a size on the menu.
- You can manually enter a size here, or click the
-
6
Select an alignment position for your text. The alignment buttons look like aligned, centered, and justified paragraph icons in the middle of the Home toolbar.
- You can align your text left, center it, align it right, or justify it.
-
7
Click the Line and Paragraph Spacing button. This button looks like a paragraph icon with two blue arrows next to it. It will open your spacing options on a drop-down menu.
-
8
Select the spacing option you want to use. You can set your spacing at different common values like 1.0, 1.5, or 2.0.
- If you want to double-space your text, select 2.0 here.


Advertisement
Ask a Question
200 characters left
Include your email address to get a message when this question is answered.
Submit
Advertisement
Thanks for submitting a tip for review!
About This Article
Thanks to all authors for creating a page that has been read 21,296 times.
Is this article up to date?
- Free Courses
- Microsoft Word
- How to Edit a Word Document

How to Select and Edit Text in Word
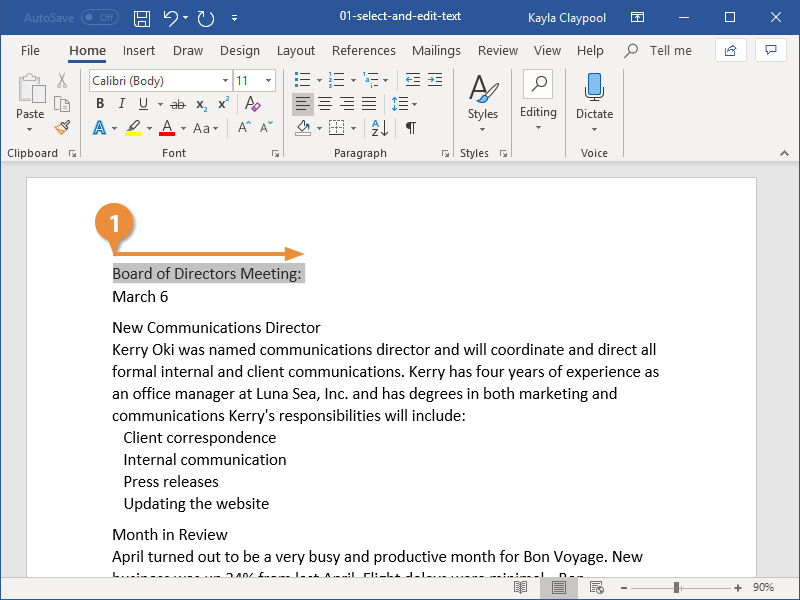
The greatest advantage of using a word processor is how easy it is to edit text throughout a document. One quick and easy way to edit text is by selecting it and then typing over it to replace it.
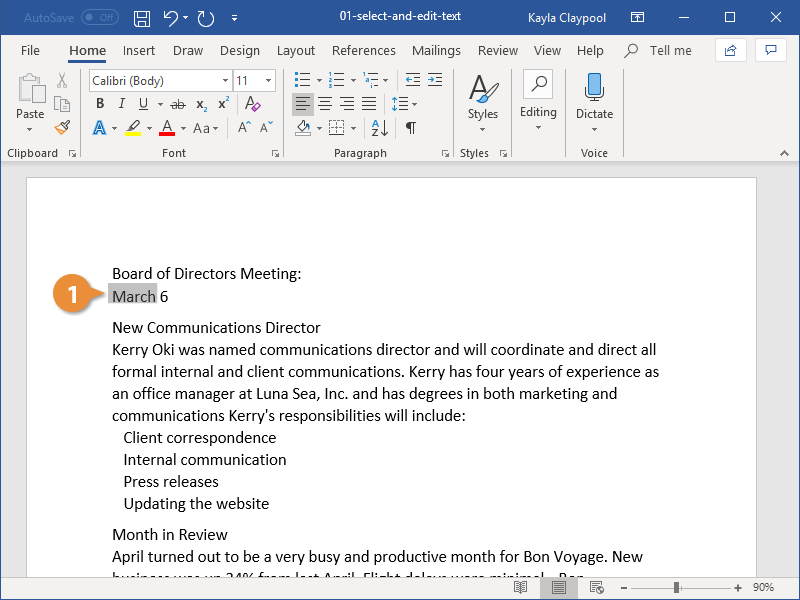
Select Text
Selecting text is a very important skill in Word. Whenever you want to edit or format text, you first need to select it. There are multiple ways to select text, letting you select a small amount to entire paragraphs at once.
- Click and drag across the text you want to select.
You can select any amount of text with this method, from a single character to your entire document.
Here are some other ways to select text you’ll find useful:
- Press and hold down the Shift key, and move the insertion point either with your mouse or the arrow keys to select text.
- Double-click a single word to select it.
- Press the Ctrl key and click in a sentence to select it.
- Triple-click in a paragraph, or double-click in the left margin next to a paragraph, to select it.
- Click in the left margin to select an entire line, or click and drag in the left margin to select multiple lines.
- Press Ctrl + A to select everything in the document.

Edit Text
- Select the text you want to replace, then start typing the new text.

FREE Quick Reference
Click to Download
Free to distribute with our compliments; we hope you will consider our paid training.
If you need to edit documents in different formats using only the usual browser like Chrome, Firefox or Safari, without installing any editing software like Microsoft Office or OpenOffice, then Word Editor App is exactly what you need!
With our Word Editor App, which is absolutely free and doesn’t require registration, you can easily drag and drop the required file on upload form, edit its content right here in the browser, and then download the edited version in order to save it locally. Even more, you’re not forced to download the resultant file in the same format as you’ve uploaded it, — you’re able to choose any appropriate one! For example, you can upload a document in RTF format, edit it, and save as DOCX.
WYSIWYG-editor with its toolbar adapts to the specific format of an uploaded document, enabling those features and possibilities, which are actual for only this format and disabling those, which are not related. In particular, for WordProcessing documents like DOC, DOCX, RTF, and ODT, all toolbar features will be unlocked and the document content will be splitted on the separate pages, like in MS Word or Google Docs.
This online editor, because of its web-based nature, is absolutely portable and multi-platform — you only need a usual web-browser without any plugins, and no matter on which platform you’re using it: desktop PC or smartphone, Windows, Linux, or macOS, Android or iOS.