
Removing Extra Breaks in Word Documents
Delete page breaks fast
Updated on December 10, 2020
What To Know
- Press Ctrl+Shift+8 to show section breaks. Place the cursor left of the break, and press Delete. Press Ctrl+Shift+8 again to hide.
- For find & replace, press Ctrl+H. Put ^p^p in Find, and Replace With ^p. Press Replace or Replace All.
This article explains how to remove remove extra breaks in Word documents using the find and replace tool or deleting them manually. Instructions in this article apply to Word for Microsoft 365, Word 2019, Word 2016, Word 2013, Word 2010, and Word for Mac.
Remove Line Breaks in Word: Show Section Breaks
A quick way to find section breaks is to show these breaks in the document.
-
Go to the Home tab and, in the Paragraph group, select Show/Hide. Or, press Ctrl+* (or Ctrl+Shift+8).
In Word for Mac, go to the Home tab and select Show all nonprinting characters.
-
All section breaks become visible in the document.
-
Place the cursor to the left of break you want to remove, then press Delete.
-
Select Show/Hide to hide the section breaks.
Remove Line Breaks in Word Using Find and Replace
Use the Find and Replace tool to delete extra breaks in a document.
-
Go to the Home tab and, in the Editing group, select Replace. Or, press Ctrl+H to open the Find and Replace dialog box.
In Word for Mac, use the Search box in the upper-right corner of the document.
-
In the Find what text box, enter ^p^p (the letter p must be lower case).
In Word for Mac, go to the Search box and enter ^p^p.
-
In the Replace with text box, enter ^p.
In Word for Mac, select the magnifying glass, then select Replace. In the Replace With text box, enter ^p.
-
Select Replace All or Replace. Or, to view the breaks before deleting them, select Find Next.
This replaces two paragraph breaks with one. You can specify other options, depending on the number of paragraph breaks between paragraphs. You can also replace a paragraph break with another character.
Remove Line Breaks in Word Containing HTML
If you copied the text from the internet, this might not work for you. That’s because there are different types of breaks in HTML files.
-
Press Ctrl+H.
In Word for Mac, use the Search box in the upper-right corner of the document.
-
In the Find and Replace dialog box, go to the Find what text box and enter ^l (the lowercase letter L).
In Word for Mac, go to the Search box and enter ^l.
-
In the Replace With text box, enter ^p.
In Word for Mac, select the magnifying glass, and then select Replace. In the Replace With text box, enter ^p.
-
Select Replace All or Replace. To view the breaks before deleting them, select Find Next.
Thanks for letting us know!
Get the Latest Tech News Delivered Every Day
Subscribe
The text copied from websites or PDF files usually contains a lot of line breaks. These line breaks make the text look messed up. You can not easily identify the paragraphs with all those line breaks messing the formatting. To arrange the text in paragraphs, it is necessary to remove line breaks present in the copied text.
So, in this tutorial, we are going to explain two methods to remove line breaks from the text – one method uses Microsoft Office Word and other uses an online website tool for removing line breaks from the text. Let’s start with the first method.
SEE ALSO: How to Password Protect your MS Office Documents?
Method 1: Remove Line Breaks from the Text using MS Word
In this method, we will be using Microsoft Word to remove line breaks present in the text. Microsoft Word is commonly used software for word processing. Follow these steps:
Step 1: Paste the Text in MS Word Document
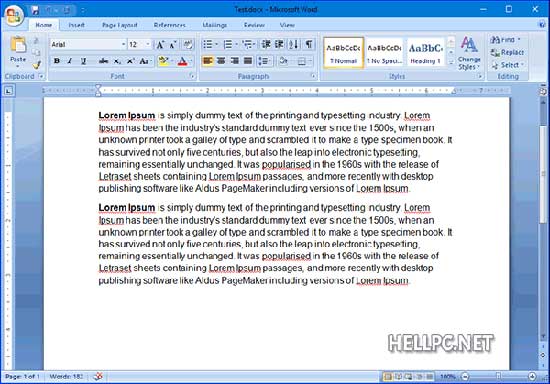
First copy the text with line breaks into a new Microsoft Word document and save it with any name. Saving the document will help us recover it if something goes wrong. We have taken example of dummy Lorem Ipsum text.

Step 2: Open Find and Replace
Now, when you have your text ready, click on Replace button in the Home menu. Alternatively, you can press Ctrl + H on Keyboard to launch Find and Replace.
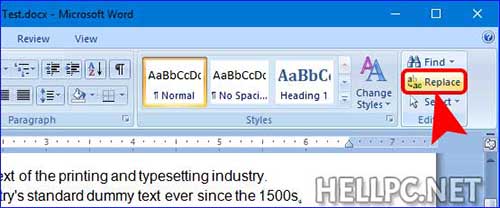
We will use Find and Replace tool of Microsoft Office Word to remove line breaks from the text. Click on More >> button to see advanced options.

Step 3: Find and Remove Line Breaks from Text
In Advanced Options, click on Special button and select Manual Line Break. This will enter a special character in Find what: text box. Replacing this character with space will remove all Line Breaks present tin the document or text.
Now, enter SPACE in Replace with: text box and click on Replace All button. You will see a confirmation message showing the number of the words replaced, click OK to continue.
Step 4: Save your Clean Text
You can now close Find and Replace window. As you can see that all your unnecessary line breaks are gone and your text is now arranged in paragraphs.
This method is quite easy and simple. But if someone doesn’t have Microsoft Office installed in their PC or simply doesn’t want to use this method, they can easily get same results by using a website tool named as TEXTFIXER.COM. This website provides online tool for removing line breaks.
SEE ALSO:
1. List of All MS Word Shortcut Key Combinations
2. List of All MS Excel Shortcut Key Combinations
Method 2: Remove Line Breaks from the text using Online Tool
In this method we are going to use a website names as TextFixer.com. This website provides an online tool for removing line breaks present in the text. Just follow these steps.
Step 1: Open TextFixer website
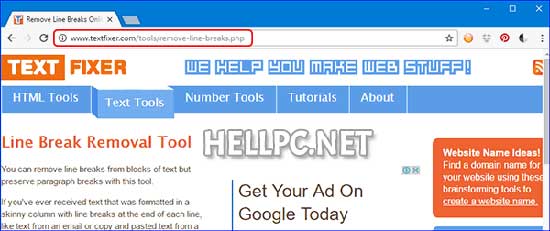
Click this link to access TextFixer online tool for removing line breaks present in the text. Alternatively, you can copy following URL into your web browser’s address bar.
http://www.textfixer.com/tools/remove-line-breaks.php
Step 2: Paste the Text to Remove Line Breaks
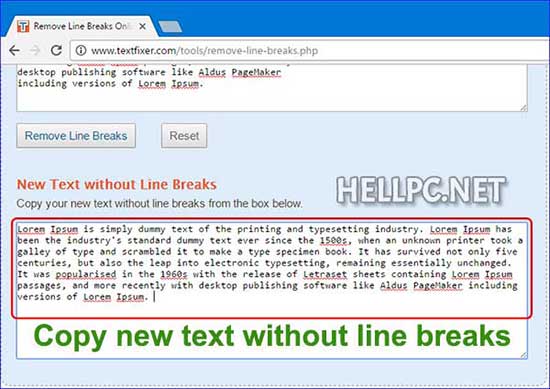
Scroll a bit down to see Line Break Removal Tool. You will see two text boxes – first text box is input box for pasting the text with line breaks and second one is for output text.
Above first text box, select Remove line breaks only option if not selected already. After that, paste your text with line breaks in first text input box and click on Remove Line Breaks button.

Step 3: Copy New Text without Line Breaks
You have successfully removed line breaks from your text. You have your text without line breaks in the second text box. Copy and use it the way you want.
Make your Text Free from unnecessary Line Breaks
The two methods explained above to remove line breaks from text are quite simple and straightforward to use and do the job quickly. There are many other websites available across the world wide web to do the same job. You can use any of them which suites you the best. Just do a simple Google search.
After removing line breaks, your text is ready to be used the way you want. Feel free to comment your problems and suggestions. You may also subscribe to receive such tips directly into your inbox.

Hi there, we are the editorial staff at WINDOSPC (former HELLPC). We are a team of funny and technical people. Feel free to get in touch with us via Contact-Us page.
Remove Line Breaks in Word: Show Section Breaks
- Go to the Home tab and, in the Paragraph group, select Show/Hide.
- All section breaks become visible in the document.
- Place the cursor to the left of break you want to remove, then press Delete.
- Select Show/Hide to hide the section breaks.
Contents
- 1 How do I delete a line in word that won’t delete?
- 2 How do I get rid of automatic horizontal lines in Word?
- 3 How do I remove a vertical line between columns in Word?
- 4 How do I get rid of the vertical line on the left side of a Word document?
- 5 How do I remove vertical lines from a table in Word?
- 6 Why is there a line in my Word document?
- 7 How would you delete a column break?
- 8 How do you delete column lines?
- 9 How do I get rid of the GREY line in Word?
- 10 How do I get rid of the vertical line on my laptop?
- 11 How do I remove column spaces in Word?
- 12 How do you remove column breaks in Word 2010?
- 13 How do I change column breaks in Word?
How do I delete a line in word that won’t delete?
The easiest way to get rid of it is to use the Ctrl+Q combination on your keyboard. Simply move your cursor anywhere in the paragraph above the line that you want to delete, and then use Ctrl+Q.
How do I get rid of automatic horizontal lines in Word?
The first method is to press “Ctrl + Z” right after typing the characters and pressing “Enter” to undo the automatic creation of the horizontal line. The line is removed and your characters remain.
How do I remove a vertical line between columns in Word?
Select the table, Design contextual tab, Table styles group, Border button, click Inside Vertical border that should leave the table border and the horizontal lines. Note that the lines will not be deleted but just won’t print. Select it and press the delete button.
How do I get rid of the vertical line on the left side of a Word document?
Click the arrow under Accept on the ribbon and select “Accept All Changes” to remove the vertical lines.
How do I remove vertical lines from a table in Word?
Remove individual borders
- Click in any cell to show the Table Design tab.
- On the Table Design tab, in the Line Style box, click No Border.
- Click the borders you want to erase.
- When you’re done, on the Table Design tab, click Border Painter to change the paintbrush back to a cursor.
Why is there a line in my Word document?
The line you’re seeing across the page is a paragraph border that Word has automatically inserted using AutoFormat.Go to Format, Borders and Shading (Word 2002-2003) or click the Border drop-down in the Paragraph section of the Home tab of the Ribbon (Word 2007 and up)
How would you delete a column break?
Delete a column break
- Click Home> Show/Hide. to display non-printing characters (including where the column breaks are).
- To remove the column break, either double-click to select it and press Delete or click to the left of it and press Delete.
How do you delete column lines?
To do this, select the row or column and then press the Delete key.
- Right-click in a table cell, row, or column you want to delete.
- On the menu, click Delete Cells.
- To delete one cell, choose Shift cells left or Shift cells up. To delete the row, click Delete entire row. To delete the column, click Delete entire column.
How do I get rid of the GREY line in Word?
To get rid of them, select the paragraph(s) and press ctrl+Q (but beware you would loose all paragraph formatting in your case the indent at the beginning of the paragraph), or select the paragraph(s) and go to the border button and choose no border.
How do I get rid of the vertical line on my laptop?
Right-click on the empty area of your desktop and click Display settings. In Resolution, click the drop-down menu and make sure the recommended resolution is selected. Then see if the vertical lines disappear.
How do I remove column spaces in Word?
On the Page Layout or Layout tab, click Columns. At the bottom of the list, choose More Columns. In the Columns dialog box, adjust the settings under Width and spacing to choose your column width and the spacing between columns.
How do you remove column breaks in Word 2010?
Remove all column breaks one by one
- To show column break marks in the document, please click Home > Show/Hide Editing Marks as shown in the below screenshot.
- Select the column break that you want to remove;
- Press the Delete key on your keyboard.
How do I change column breaks in Word?
Insert a column break
- Place your cursor where you want the column to break.
- Click Layout > Breaks. In Word 2013 or Word 2010, click Page Layout > Breaks.
- A menu with options will appear. Click Column.
- A column break is inserted. Click Home > Show/Hide. to see it.
In this tutorial, I’m gonna show you 2 simple ways to remove line breaks error in word 2016. Also, you can remove line breaks online.
There is a possible error in Word that perhaps when you hear it, many newcomers will not know what it is.
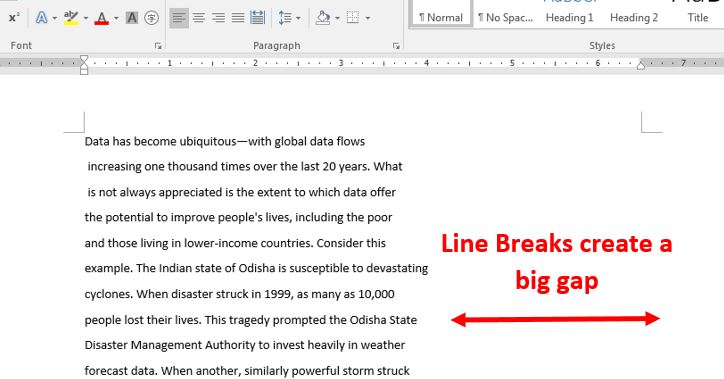
Line breaks is an error occurs often when you download or paste a document into Word, then suddenly appears an annoying line break, which can break in the middle of the page leaving a big gap to the margin, like this.
1: In Home, go to Editing then Replace. You might want to use a quick key combination is Ctrl + H.
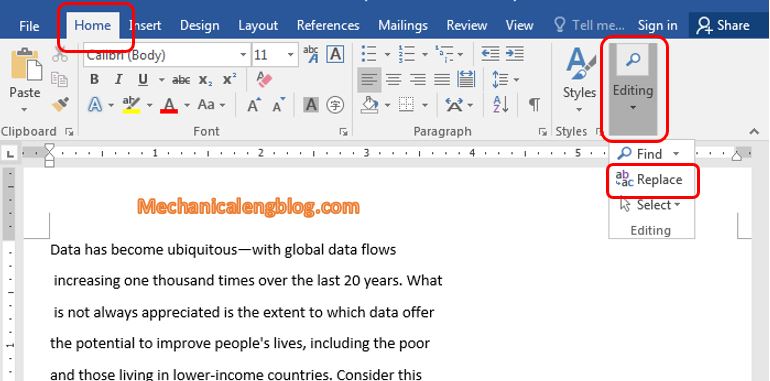
2: The Find and Replace window appears, click More to expand the feature.

3: Here, place the cursor in the Find what box, click the drop-down arrow in Special then select the Manual Line Break line as shown below.

4: On the Replace with line, leave a space there. Then click Replace All.
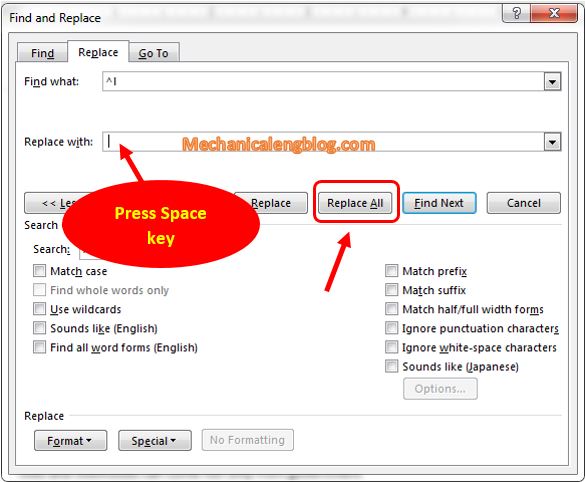
And Word will remove all the blank spaces for you, quite easy.
#2. Remove line breaks online.
You can let an online web tool fix it for you. Below is my recommend website textfixer.com so you can try if it’s suit.
1: First, visit the following address:
http://www.textfixer.com/tools/remove-line-breaks.php
2: After you have accessed, we will start using it. Actually, its interface is extremely simple so everyone can use it easily.
You will have 2 options at this step:
Remove line breaks only: Remove line breaks only
Remove line breaks and paragraph breaks: Eliminates both line breaks and paragraph breaks.
(Usually we will choose the first feature.)
Next up copy the paragraph you want to remove Line Breaks, then click on Remove Line Breaks as shown below.

3: As a result, we will get the text in the New Text with Line Breaks box below. Now you can copy it to Word or any text file you want.

CONCLUSION
And those are the ways you can use to get rid of Line Breaks in Word. For the most convenience, I recommend you to use the second method so that the browser will automatically do it for you, to avoid errors that cause wasting time when editing manually.
So the tutorial ends here. Hope you will find it useful and continue to follow the blog in the future. Thanks and good luck.
-hhchi
Reader Interactions
Word for Microsoft 365 Outlook for Microsoft 365 Word 2021 Outlook 2021 Word 2019 Outlook 2019 Word 2016 Outlook 2016 Word 2013 Outlook 2013 Word 2010 Outlook 2010 Word Starter 2010 More…Less
You can control where Word and Outlook position automatic page breaks by setting pagination options.
Keep lines of a paragraph together on a page or in a column
-
Select the paragraphs that contain lines you want to keep together.
-
On the Home tab in Word, or on the FORMAT TEXT tab in an Outlook email, select the Paragraph Dialog Box launcher
 .
. -
Select the Line and Page Breaks tab.
-
Under Pagination, select Keep lines together.
-
Select OK.
 .
.Keep paragraphs together on a page or in a column
-
Select the paragraphs you want to keep together on a page.
-
On the Home tab in Word, or on the FORMAT TEXT tab in an Outlook email, select the Paragraph Dialog Box launcher
. -
Select the Line and Page Breaks tab.
-
Under Pagination, select Keep with next.
-
Select OK.
Always force a page break before a paragraph
-
Select the paragraph that you want to follow the page break.
-
On the Home tab in Word, or on the FORMAT TEXT tab in an Outlook email, select the Paragraph Dialog Box launcher
. -
Select the Line and Page Breaks tab.
-
Under Pagination, select Page break before.
-
Select OK.
Control widow and orphan lines
-
Select the paragraphs in which you want to control widows and orphans.
-
On the Home tab in Word, or on the FORMAT TEXT tab in an Outlook email, select the Paragraph Dialog Box launcher
. -
Select the Line and Page Breaks tab.
-
Under Pagination, select Widow/Orphan control.
-
Select OK.
Note: This option is turned on by default.
Suppress line numbers from a paragraph or paragraphs
-
Select the paragraph or paragraphs.
-
On the Home tab in Word, or on the FORMAT TEXT tab in an Outlook email, select the Paragraph Dialog Box launcher
. -
Select the Line and Page Breaks tab.
-
Under Formatting, select Suppress line numbers.
-
Select OK.
Remove hyphens from a paragraph or paragraphs
-
Select the paragraph or paragraphs.
-
On the Home tab in Word, or on the FORMAT TEXT tab in an Outlook email, select the Paragraph Dialog Box launcher
. -
Select the Line and Page Breaks tab.
-
Under Formatting, select Don’t hyphenate.
-
Select OK.
Text box options
You can use the text box options to more tightly wrap the text that surrounds the text box. To use these options, the text box border must be transparent (no line and no fill), and the Wrap Text must be set at Tight or Through.
-
Inside the text box, right-click, and then select Paragraph.
-
Select the Line and Page Breaks tab.
-
Under Textbox options, in the Tight wrap list, select one of the following:
-
All
-
First and Last Lines
-
First Line Only
-
Last Line Only
Note: To undo changes, select None.
-
-
Select OK.
Need more help?
Want more options?
Explore subscription benefits, browse training courses, learn how to secure your device, and more.
Communities help you ask and answer questions, give feedback, and hear from experts with rich knowledge.