
Excel for Microsoft 365 for Mac Word for Microsoft 365 for Mac PowerPoint for Microsoft 365 for Mac Excel 2021 for Mac Word 2021 for Mac PowerPoint 2021 for Mac Excel 2019 for Mac Word 2019 for Mac PowerPoint 2019 for Mac Excel 2016 for Mac Word 2016 for Mac PowerPoint 2016 for Mac More…Less
Here’s how to add a line, pattern, or custom border to a text box, picture, and other objects in Word, PowerPoint, or Excel for Mac.
Note: If you didn’t add the border to the shape, text box, picture, or other object in Mac Office, you can’t change or remove the border for the object.
Try the «Sketched» outline
If you’re using Microsoft 365 for Mac (version 16.28 or later), you can give a casual, hand-drawn look to shapes with the Sketched outline.
-
Select an existing shape in your document, or draw a new one.
-
With the shape selected, on the Shape Format tab, select Shape Outline > Sketched, and then select a line width. (The smaller the point size («pt»), the thinner the line is.)
Add or remove a border for a shape or text box
-
Select the shape or text box to which you want to add, change, or remove a border.
-
Click Shape Format, and then click the arrow next to Shape Outline.

-
Do any of the following:
To
Do This
Add or change the color of the border
Either click the color that you want, or mix your own color by clicking More Outline Colors.
Add or change the thickness of the border
Point to Weight, and then choose the line weight that you want.
Add or change the style of the border
Point to Dashes, and then click the line style that you want.
Remove the border from the shape or text box
Click No Outline.

Add or remove a picture border
-
Select the picture to which you want to add, change, or remove a border.
-
Click Picture Format, and then click the arrow next to Picture Border.
-
Do any of the following:
To
Do This
Add or change the color of the border
Either click the color you want, or mix your own color by clicking More Outline Colors.
Add or change the thickness of the border
Point to Weight, and then choose the line weight you want.
Add or change the style of the border
Point to Dashes, and then click the line style you want.
Remove the border from the picture
Click No Outline.

See also
Add a page border
Need more help?
Remove a page border
You remove a border by changing the page border setting to None.
-
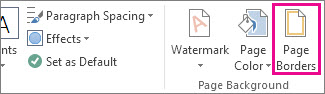
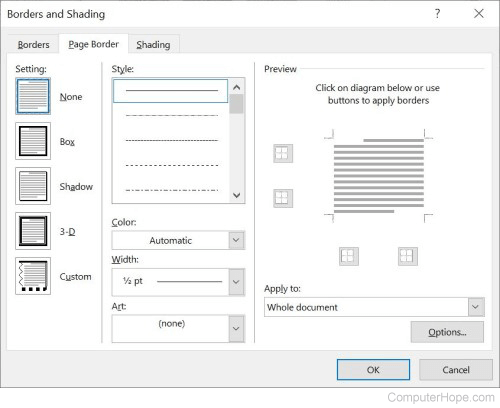
On the Design tab, choose Page Borders.
-
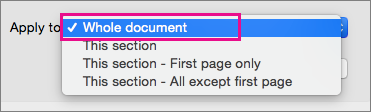
In the Borders and Shading dialog box, in the Apply to list, choose the page (or pages) you want to remove the border from.
-
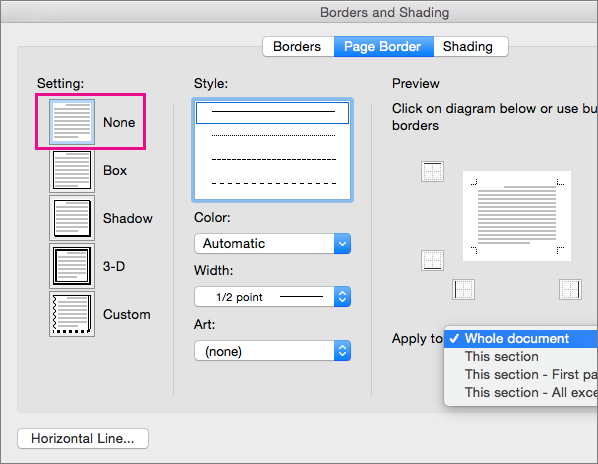
Under Setting, choose None.
-
Select OK.
Remove a page border
-
On the Page Layout tab, in the Page Background group, select Page Borders.
-
In the Borders and Shading dialog box, on the Page Border tab, under Setting, choose None.
-
Select OK.

Note: To remove the border from only one edge of the document—for example, to remove all but the top border—select the borders that you want to remove in the diagram under Preview.
If you’ve added a border to a page in your document, you can remove it by changing the page border setting to None.
-
Go to Design > Page Borders.
-
In the Borders and Shading box, on the Page Border tab, select the arrow next to Apply to and choose the page (or pages) you want to remove the border from.
-
Under Setting, select None, and then select OK.

Updated: 05/16/2020 by
Microsoft Word gives you hundreds of page border options, allowing you to surround a page with a clean or fancy border, like a frame for a picture. You can also set a border to provide a shadow or 3D effect.
Add a border
- Open Microsoft Word.
- Click the Page Layout tab. In Word 2013 and 2016, click the Design tab instead.
- In the Page Background group, click the Page Borders option.
- In the Borders and Shading window (shown below), if not already selected, click the Page Border tab.
- Select Box if you want a square border around your page.
- Select the Style of border you want on the page, which can be solid, dotted, or dashed. Select the Color and Width of the border. If you want to select artwork to use as the border, click the down arrow for the Art drop-down menu. In the example below, we’re using the hearts art as a border.

Tip
By default, the borders are applied to the whole document, which means every page has the same border. Clicking the down arrow on Apply to gives you the option to select the first page only, selected page, all pages but the first page, and other options.
- Once you’ve selected all the border options you want to use in your document, click the OK button to apply the border.
Modify a border
- Open Microsoft Word.
- Click the Page Layout tab. In Word 2013 and 2016, click the Design tab instead.
- In the Page Background group, click the Page Borders option.
- In the Borders and Shading window (shown below), if not already selected, click the Page Border tab.
- Make the desired changes to the border that is currently set for the document or page. You can change the type of border in the Settings section, choosing from Box, Shadow, 3-D, or Custom. You can also change the style, color, and width of the order, and add or change art used in the border.
- When you have finished making the desired changes to the border, click the OK button to apply the changes.
Remove a border
- Open Microsoft Word.
- Click the Page Layout tab. In Word 2013 and 2016, click the Design tab instead.
- In the Page Background group, click the Page Borders option.
- In the Borders and Shading window (shown below), if not already selected, click the Page Border tab.
- Select None to remove any border on the page.
- Click the OK button to remove the border.
Including a text box in a Word document provides you with the ability to display text outside of the regular document content. This text box can then be formatted and moved around, but you may be wondering how to remove the border from that text box if you don’t need it.
You can remove borders from text boxes in a Word document by selecting the border of the text box, choosing the Shape Format tab at the top of the window, then clicking the Shape Outline button and selecting the No Outline option from the drop down list.
Microsoft Word handles a text box like a separate object, much like if you added a picture or a table to your document. As such, it has a variety of formatting options that you can apply.
But if you have never had to change a setting for a text box, you may be having trouble figuring out where all of those options are.
Our guide below will show you how to get rid of your text box border in Microsoft Word so that you don’t see the line surrounding the box in your document.
How to Delete a Text Box Border in Microsoft Word
- Open your document.
- Click on the text box border.
- Select the Shape Format tab.
- Click the Shape Outline button and choose No Outline.
Our article continues below with additional information on how to remove text box border in Word, including pictures of these steps.
Learn how to draw a line through text in Google Docs if you also use that program and want to learn about some of its less common text formatting tools.
How to Get Rid of the Border on a Text Box in Word 2016 (Guide with Pictures)
The steps in this article were performed in the Microsoft Word for Office 365 version of the application, but will work in most other versions of Word as well.
Step 1: Open the document with the text box whose border you wish to remove.
Step 2: Click on the text box border, which will select the entire object.
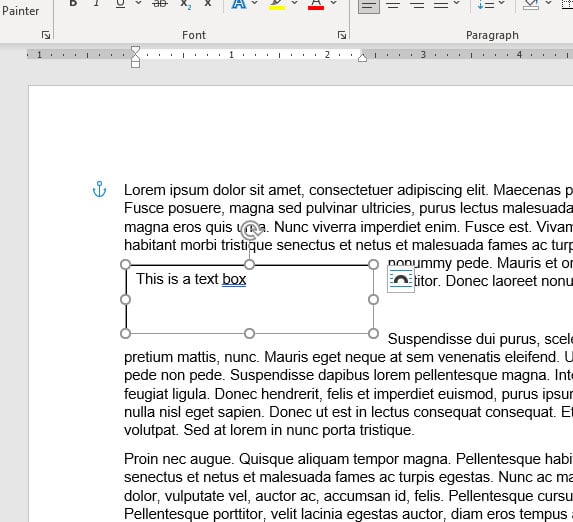
If you are having trouble clicking on the text box border, you can also choose to click inside of the text box.
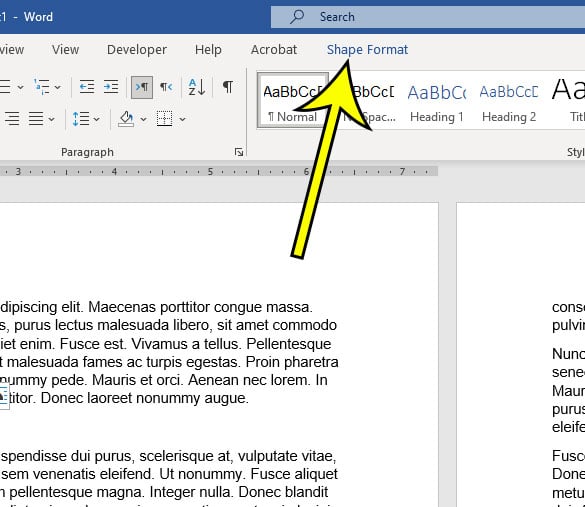
Step 3: Select the Shape Format tab at the top of the window.
Note that this tab is only visible when the text box is selected, so you won’t see it when you are editing the body of your document.
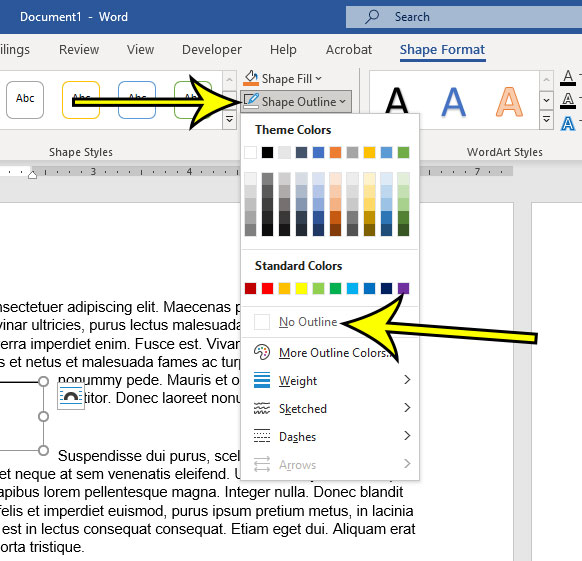
Step 4: Click the Shape Outline button in the Shape Styles group in the ribbon, then choose the No Outline option from the drop down.
Now that you know how to remove text box border in Word you will be able to fix issues that arise in your document related to text box borders.
You will still see a line around the text box, as it is currently selected. However, when you click on another part of the document, that line should be gone, allowing you to see how the text box will look now that you have eliminated the border.
More Information on How to Remove Border from Text Box in Word
While the steps in this tutorial discuss removing the border completely, you can use these same steps if you want to use a different color for your border.
The text box border can be further customized from this menu by selecting the Weight, Sketched, or Dashes option. This will change things such as the style of the text box border, or its thickness. There is also an option on the Shape Outlines menu that says More Outline Colors, which you can choose if you don’t see the color that you want to use for the border.
Word also gives you the option to adjust the fill color of your text box. By default the text box background is white, but you can make it almost any other color that you would like. This is accomplished by going to Shape Format > Shape Fill then selecting the desired background color. If you do change the background color, you may also need to change the text color. You can do this by selecting the text inside of the text box, then using the Font formatting options found on the Home tab.
if you need to do something other than removing the border from a text box, then you will find a lot of options on the Format Shape dialog box. you can open this menu by clicking the small Format Shape button that appears at the bottom-right of the Shape Styles group in the ribbon.
Here you will find ways to customize your shape or text box, including:
- Changing the line style
- Adjusting the line weight
- Changing the shape border
- Changing the vertical alignment or text direction
- Using different margins for the content inside of the text box
- Adding various effects to the text box like shadow, reflection, glow soft edges, and more
- Applying or removing a fill color from the text box
There is even a tab for Text Options that let you select the formatting and layout settings for the text that is inside of the text box.
When you combine all of these different customization options along with the ability to create a custom border or remove a border from a text box then you can see just how many options there are for you to format the text box the way that you want.
If you need to change multiple text boxes at the same time inside of your document, then you can do that by clicking the first text box, then hold Ctrl key on your keyboard, and clicking on the additional text boxes that you want to change.
Note that doing this will cause you to apply the same changes to each of the selected text boxes. So if you give a different border style from the Borders tab then it will apply that effect to each of the selected text boxes.

Kermit Matthews is a freelance writer based in Philadelphia, Pennsylvania with more than a decade of experience writing technology guides. He has a Bachelor’s and Master’s degree in Computer Science and has spent much of his professional career in IT management.
He specializes in writing content about iPhones, Android devices, Microsoft Office, and many other popular applications and devices.
Read his full bio here.
By default, freshly-created tables in Microsoft Word have solid black borders around every cell. This is great if you do want the borders, but extremely annoying if you don’t. Make table borders completely invisible, both on your screen and when the document is printed using one of several methods; which is faster depends on whether you are trying to hide all borders in the table or just some.
Explore this article
- Removing All Borders From a Table or Cells
- Hiding Specific Borders
1 Removing All Borders From a Table or Cells
Hover your mouse over the table until the table move handle displays in the upper left corner and then click this handle to select the entire table. Click «Table Tools,» select «Design,» click the arrow on the «Borders» button and then select «No Borders.» This hides the borders for the entire table. If you want to hide the borders only for some specific cells, select those cells by dragging across them with your mouse instead of selecting the entire table. From there, the process works in exactly the same way.
2 Hiding Specific Borders
Place your cursor inside the table to enable the table options, click «Table Tools» and select «Design.» Unfold the «Line Style» drop-down menu, the first of several in the Draw Borders section, and select «No Border.» Your cursor turns into a paintbrush, and clicking on a border segment will remove it. Once you’re done, click anywhere outside the table or press «Esc» to return your cursor to its default.
About the Author
Laurel Storm has been writing since 2001, and helping people with technology for far longer than that. Some of her articles have been published in «Messaggero dei Ragazzi», an Italian magazine for teenagers. She holds a Master of Arts in writing for television and new media from the University of Turin.
In Microsoft Word we can create tables with a particular design that includes an automatic format. This format is modifiable by configuring a group of styles such as borders. Reason why, we recommend you read this article with which you will learn How to hide or remove the borders of a table in Word step by step
The importance of Microsoft Word
The practicality when customizing or creating new text styles in Word is one of the reasons that give it importance compared to other word processors. It also highlights the broad compatibility with other word processors. Microsoft Word can be used on multiple platforms and has been very relevant to office automation since its launch in 1981.
Microsoft Word is considered to be the leader among all word processors on the market . This attribute is due to the variety of powerful tools included in the software and because it allows multitasking to present information in a professional manner.
Microsoft Word tables
It is possible to make tables in Microsoft Word fast and easy . These elements are part of the tools that can be inserted into text documents. A table is a space that includes a series of data inserted in cells and separated by stripes or borders to give it a more logical organization.
Tables allow information to be presented clearly and precisely. In this sense, Word allows us to automate the creation of this tool and modify its structure manually.
The edges of a table are part of the structure of the table. When we create a table in Microsoft Word we can set the number of rows and columns . By default, the software includes all borders. However, it is possible to remove or hide these edges using the procedure that we explain below.
Step 1: Access Microsoft Word
First, you must select “All applications” in the Windows start menu. Locate the “Microsoft Office” folder and click on “Microsoft Word . ” You can also enter the software through the system desktop or by using the “Search” tool by typing the word “Word” (without the quotation marks) in the search box on the start menu.
Step2: Open the document in Microsoft Word
If you created the table before, click on the Word start button and choose the “Open” option. Next, locate the document that includes the table you want to modify . Press the “Open” button for the program to access the content of the file. You can also choose to link Excel tables with Word if you prefer to do the process from a spreadsheet.
Step 3: Modify the table format to hide the borders of a table in Word
Later, drag the cursor to select the part of the table and remove its borders, be it a cell, a group of cells or the entire structure. Also, you can use the “Table” button to choose the section of the table by marking the ends of the cells in order to modify their format.
At the top, you will see a set of tools organized in tabs. Select “Design” and press the down arrow in the “Draw Borders” section. A new window will appear where you must select the “Borders” tab and click “None” in “Type”. Finally, press the “Accept” button.
Another alternative to hide the borders of a table in Word
You can also modify the format of the table from the option “Table styles” . In the “Design” tab, locate the “Borders” button and click the arrow pointing down. Select the last option “Borders and shading”.
A new window will open where you must choose the value “None” and press the “OK” button. In this way, you can hide or remove the borders of a table in Word.

Abdullah Sam
I’m a teacher, researcher and writer. I write about study subjects to improve the learning of college and university students. I write top Quality study notes Mostly, Tech, Games, Education, And Solutions/Tips and Tricks. I am a person who helps students to acquire knowledge, competence or virtue.
You are here: Home / Word / How to Remove Table Borders in Microsoft Word for Office 365
When you create a new table in Microsoft Word you are able to specify the number of rows and columns in that table. But the table will have borders, so you might be wondering how to remove table borders in Microsoft Word for Office 365.
Fortunately you have a lot of options for customizing the appearance of your table, including the styling of the borders. This includes whether or not the borders are even there.
By removing your table borders you can keep your data in that layout of of a table, but without the lines that identify the rows and columns.
Our guide below will show you how to remove the borders from a Word table.
- Open your document.
- Select all of the table cells.
- Choose Table Design.
- Click the Borders button.
- Select No Border.
Continue reading below for more information on removing table borders in Word, including pictures of these steps.
How to Remove Microsoft Word Table Borders
The steps in this article were performed in Microsoft Word for Office 365. However this method will also work in most other versions of Word.
Step 1: Open your document in Microsoft Word.
Step 2: Select all of the cells in the table.

You can click on the bottom-right cell and drag up to the top-left cell to select them all.
If you haven’t created the table yet, then you will need to do that first.
Step 3: Select the Table Design tab at the top of the window.

Step 4: Click the Borders button in the Borders section of the ribbon.

Step 5: Choose the No Border option from the dropdown menu.

There will still be a dotted line to indicate the cells, but the border won’t appear when you go to print the document.
You will notice that there some other styling options in the Borders section of the ribbon if you would like to change the appearance of your borders instead of removing them.
You can also adjust border settings using the Borders and Shading option at the bottom of the Borders dropdown menu.
Find out how to check for passive voice in Word if you would like to include that as an option when you run the spelling and grammar checker.

Matthew Burleigh has been a freelance writer since the early 2000s. You can find his writing all over the Web, where his content has collectively been read millions of times.
Matthew received his Master’s degree in Computer Science, then spent over a decade as an IT consultant for small businesses before focusing on writing and website creation.
The topics he covers for MasterYourTech.com include iPhones, Microsoft Office, and Google Apps.
You can read his full bio here.
Search
When you add a table to a document in Microsoft Word, it will have borders around the table and its cells.
These borders can be useful in providing some visual separation of the data that you have entered into those cells.
But the needs of your document might not require table borders, which can leave you looking for a way to eliminate them.
Our tutorial below will show you how to remove table lines in Word documents.
How to Get Rid of Table Borders in Word Documents
- Open the document.
- Click inside a table cell.
- Select the Design tab.
- Click the Borders button.
- Choose None under the Setting column.
- Click Apply to and choose Table.
- Click the OK button.
Our guide continues below with additional information on how to remove borders from a table in Word, including pictures of these steps.
Word processing applications like the Microsoft Office version, Word, or the Google Apps version, Docs, allow you to add various objects to your document to help you convey information to your readers.
One such object is a table, and you can specify the number of rows and columns included in that table.
But you can also format a table in Word by adjusting the appearance of the table border. You can even remove the table borders in Microsoft Word if you don’t like how they look.
Borders on a table in Word 2010 can be helpful for keeping information organized for the person reading your document. But they can be distracting or ugly, depending upon the styling of the rest of your document.
You may have discovered how to remove the borders from an individual cell of your table, but are struggling to delete all of the borders at once.
Fortunately, this is something that you can accomplish with your Word 2010 document, allowing you to quickly remove all of your table borders at once so that your table information prints without those visible lines.
In some situations, you may want to have your text appear in the middle of the page. Our how to center text in Word tutorial can show you how to do that.
How to Remove Table Lines in Word 2010 (Guide with Pictures)
This tutorial will assume that you already have a Word document containing a table. The steps below will remove the borders from that table so that they are gone when you print the document.
You will still see blue gridlines on your screen to identify the borders of the table. You can read this article to learn how to remove those as well.
These steps will show you how to remove table lines in Word documents.
Step 1: Open your document in Microsoft Word 2010.
Open the document with the table lines.
Step 2: Click anywhere inside the table whose borders you want to remove.

Click inside one of the table cells.
Step 2: Click the Design tab under Table Tools at the top of the window.
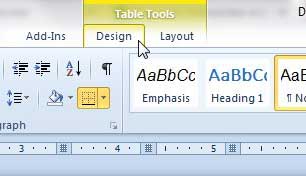
Select the Table Tools – Design tab.
Step 3: Click the Borders button at the right side of the ribbon at the top of the window.
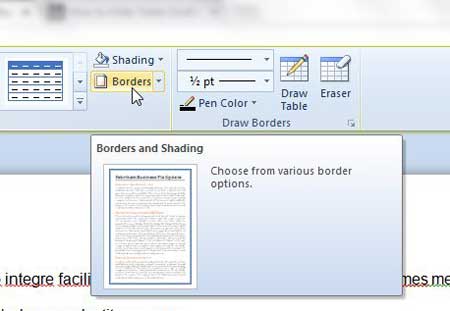
Choose the Borders button in the ribbon.
If you click the arrow to the right of the Borders dropdown menu then you can also see some different border style options as well.
Step 4: Click the None option at the left side of the window, make sure the Table option is selected at the bottom-right of the window under Apply To, then click the OK button at the bottom of the window.
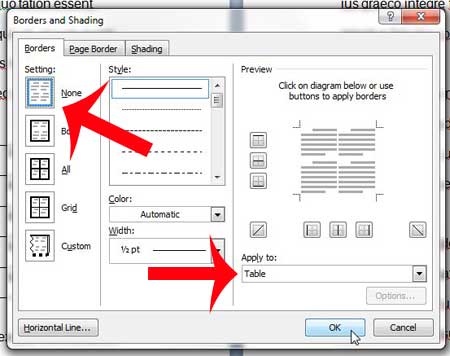
Select None, then choose Table under Apply To, then click OK.
You can then navigate to the Print Preview window and see how your table will look now that it is set to print without borders.

Now that you know how to remove table lines in Word you will be able to use this whenever you want to get rid of the borders in a table in your document, or even if you want to change something about the style of your table borders.
More Information on How to Remove Table Borders in Word 2010
Removing the borders from a table in a Microsoft Word document will only remove the lines that signify the borders. They are still technically there, even if you can’t see them. This means that data that you add to cells in your table will still respect the row and column boundaries of that table.
If you are trying to create one big “cell” then you may want to try using a text box from the Insert menu, or use a single-cell table instead. You can do this by adding a table that is only one row by one column. As you add content to that cell it will expand to accommodate the content, allowing that one cell to become quite large.
There are some other border options available for Microsoft Word tables as well. The options include:
- Box
- All
- Grid
- Custom
- None
If you don’t want to remove the table borders entirely then you may try one of those options instead to see if it produces the desired result. A table in Microsoft Word can look very different when you adjust the table gridlines or the way that your table cells look. Even if you don’t want the full set of lines on your horizontal and vertical rows if can be useful to format borders for the table so that you have black borders going around the perimeter of the whole table to separate it from the rest of the document content.
If you choose “None” then this border option will remove gridlines from the table entirely. If you select “Box” then this option will only show the outside borders of the table
Another interesting thing that you can try is setting the color of the table border to white, or whatever the page background color is in your document. You can change the table border color in Word from the Borders and Shading dialog box that we used in the steps above, but click the Color drop down menu instead and choose the color that matches the document background.
After you erase table lines in Word you may not like the way that it makes your table look. Fortunately you can always go back to the Borders and Shading window and choose a different table border setting to restore the lines to the table.
These same steps will work in most newer versions of Microsoft Word as well. In some versions, however, you will be selecting the Table Design tab rather than the Design tab.
If you want to reduce the number of sheets on which your document is printed, you can learn how to print two pages on one sheet in Word 2010.
Frequently Asked Questions About How to Remove Table Lines in Word
How do I delete an entire table from my Word document?
While the focus of this article has been on erasing table lines, you might discover that you need to remove the table from the document entirely.
If you place your mouse pointer inside one of the table cells you can select the Layout option in the menu bar at the top of the window.
You can then click the Delete button, and choose the Delete Table option to remove the table and its contents.
How do I adjust column width for an MS Word table?
If you would like to make a column smaller or larger in your Word table, then you can position your mouse over the left or right column border until you see a vertical line with an arrow on either side.
If you click and drag when you see this icon you will be able to make the column smaller or larger.
How can I add a new table to an open Word document?
If you need to add a table to your document then you can click in the document at the point where you want the table, then select the Insert tab at the upper left corner of the window.
You can then click the Table button, and choose the number of rows and columns for the table.
Additional Sources

Matthew Burleigh has been writing tech tutorials since 2008. His writing has appeared on dozens of different websites and been read over 50 million times.
After receiving his Bachelor’s and Master’s degrees in Computer Science he spent several years working in IT management for small businesses. However, he now works full time writing content online and creating websites.
His main writing topics include iPhones, Microsoft Office, Google Apps, Android, and Photoshop, but he has also written about many other tech topics as well.
Read his full bio here.
How to Add and Remove a Border From a Word Document
Use a border to highlight important information in your Word doc
What to Know
- Add border: Select Design tab > highlight text > Page Borders > Borders tab. Assign style, color and width.
- Remove border: Position cursor in bordered text > Design > Page Borders > Borders. Under Setting, choose None.
This article explains how to add and remove a text border in Microsoft 365, Word 2019, Word 2016, and Word 2013.
Apply a Text Border
There are many ways to call attention to your important ideas in a Word document, including bulleted or numbered lists, different typefaces, and section headers. Another is text borders. If you do insert a text border, you may later decide your document looks better without it. If that’s the case, you can easily remove it.
Placing a border around a section of text in a Word doc takes just seconds.
-
Open your document. On the ribbon, select Design.
-
Highlight the text you want to put the border around.
-
In the Page Background group, select Page Borders.
-
In the Borders and Shading dialog box, select the Borders tab.
-
Choose a style, color, and width for the border.
-
Select OK.
-
The border surrounds the text you initially chose.
Remove a Text Border
If you later decide to remove the border, here’s how to do it.
-
Place the cursor anywhere within the bordered text. On the Design tab, in the Page Background group, select Page Borders.
-
In the Borders and Shading dialog box, select Borders.
-
Under Setting, select None.
-
Select OK.
-
The border is removed from the document.
Thanks for letting us know!
Get the Latest Tech News Delivered Every Day
Subscribe