
Microsoft Word has many types of nonprintable symbols such as different types of spaces,
tabulations, line or page breaks, etc. The non-printable symbols are also known as
Whitespace characters in typography, nonprinting characters in the
previous versions of Microsoft products, or formatting marks.
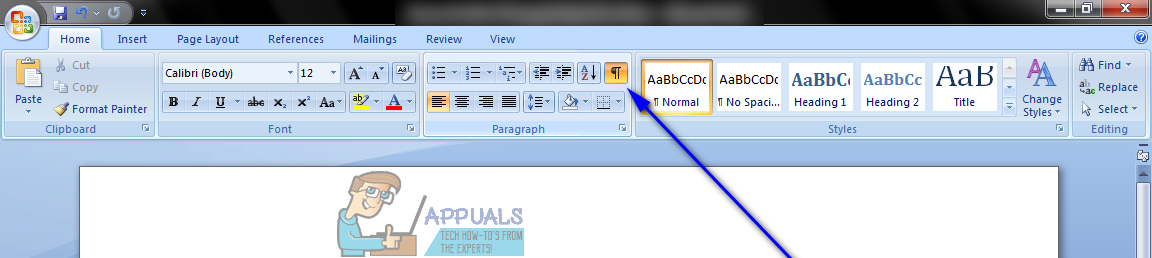
You can show or hide, if you see a lot of strange symbols in the document, some or all of these
symbols by clicking the button Show/Hide ¶ (or pressing Ctrl+* or
Ctrl+Shift+8):

Notes:
- Each of nonprintable characters that you will see after highlighting this button, can be
selected and removed from the document. Also, you can select, delete or replace all
occurrences of a particular kind of special symbols, see
Replacing special characters. - There are some other useful elements that you can use in a document such as bookmarks, fields,
etc. You can show and hide them too, independently from the nonprinting symbols. See
How to show/hide bookmarks in a Word document,
How to turn on or turn off highlighting off fields in a Word document.
You can selectively show only spaces in the document, only Tabulation symbols,
etc. To show or hide specific nonprintable symbols, do the following:
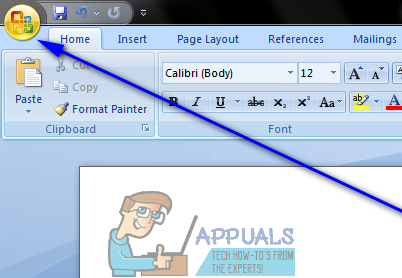
1. On the File tab, click the Options
button:

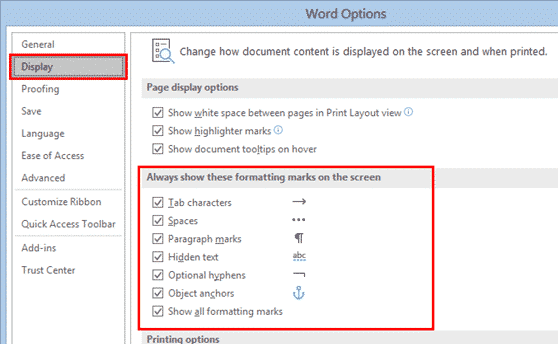
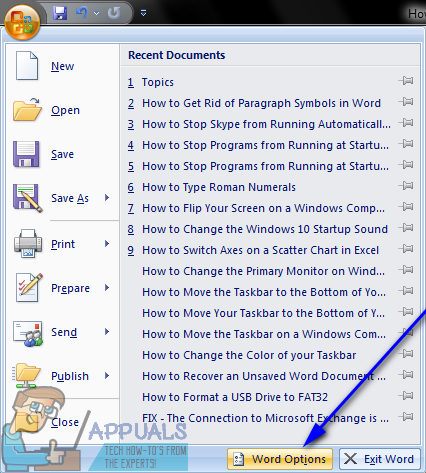
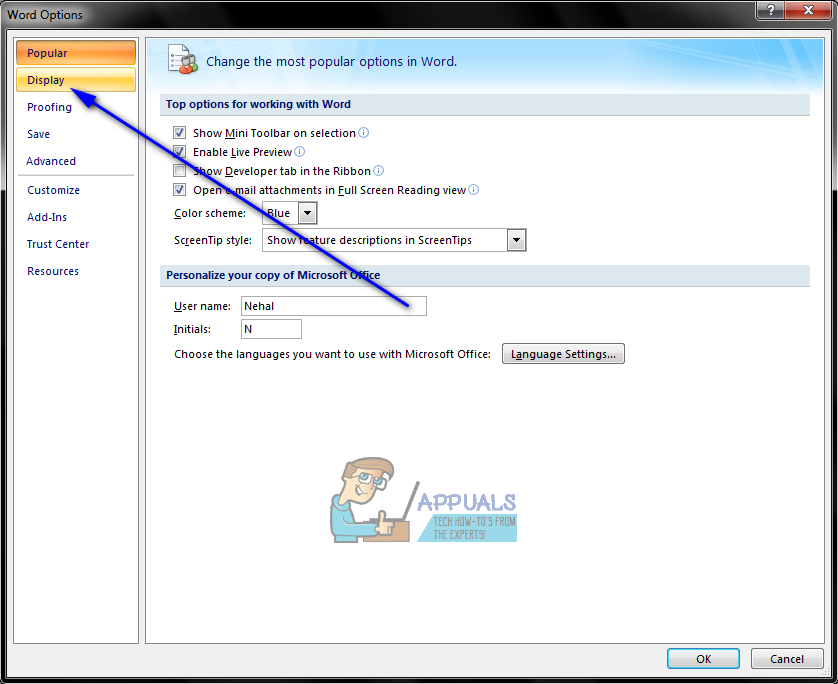
2. In the Word Options dialog box, open the
Display tab and then check or uncheck options as you like:

- Tab characters or Tabulations: If you check this checkbox, all tabulations
will be shown as an arrow symbol (→):
See
A perfect text alignment using tabs
and
Setting tabs using the Tabs dialog box. - Spaces can differ:
- When you type the text, usually you separate words (sentences or even syllables in
some languages) by pressing the Space key (also known as Spacebar).Usual or common space is shown as a little dot between words:

- To keep words together, can a Nonbreaking space (also called
non-breaking space, no-break space,
non-breakable space (NBSP), hard space, or
fixed space) be used. A Nonbreaking space in the Word document
looks like a degree symbols between words:
See
How to keep two or several words together in a document Word. - Sometimes more specific spacing characters like Em Space, En Space or
¼ Em Space are used.These spaces distinguish by their width:
- Em space means a space the same width as a lowercase m
character. - En space means a space the same width as a lowercase n
character. - ¼ Em space (also known as mid space) accordingly means a
space the same width as a lowercase m character divided by 4 —
one fourth of an Em Space wide.
Em space and En space are shown as common space, as a little dot
between words, but with wider gaps before and after them. ¼ Em Space looks
like a vertical bar between words:
- Em space means a space the same width as a lowercase m
- When you type the text, usually you separate words (sentences or even syllables in
- Paragraph marks or pilcrows (¶) represent a paragraph break.
They are inserted by Word at the end of every paragraph. In other words, it appears every
time when you press Enter:
Notes:
- As you can see in the example above, many of emails are formatted incorrectly. See
How to remove paragraph symbols for every line in Word. - The paragraph mark ¶ contains all the paragraph formatting. To copy all paragraph
formatting, you can select this symbol, copy it, and then paste it into another
paragraph. The last ¶ in the document contains formatting for the last section of the
document, or for entire document if it contains just one section.See
How to copy paragraph or numbering format without changing the text format
and
How to do anything with paragraph format with keyboard.
- As you can see in the example above, many of emails are formatted incorrectly. See
- Hidden text can be used in any Word document because it is a pre-defined format like
Italic or Bold. It isn’t necessary to do something extra to add hidden text.Hidden text is shown with a dotted underline:

See
Check the document for hidden information
and
11 Shortcut Keys to control font format.Notes: In contrast of other nonprinting characters, hidden text can be
printed. See
How to see/show a hidden text in a Word document
and
How to print a hidden text in a Word document. - Optional hyphens are used to break specific lines of text.
They are shown as ¬.
For example, if a lengthy word wraps to the next line and leaves a large amount of white
space, you can insert an optional hyphen in that specific word so that the first part
appears on the first line. If the word later moves to a different position because of
editing, the optional hyphen does not print. If further editing moves the word back into
a hyphenation zone, the hyphen reappears:
See
Using nonbreaking and optional hyphens. - Object anchors are shown in a document just when you select an object.
Any floating object in a document has an anchor that is tied to a particular paragraph
 . It can be moved, replaced or
removed with that paragraph like its part.It is possible to move any anchor to any other paragraph.
- The Show all formatting marks checkbox mirrors the button Show/Hide ¶ that was
described above. When you click to highlight that button on the ribbon or non-highlight it
(or use shortcut keys for that), that checkbox will be checked or unchecked appropriately.


Other formatting marks that you can see in the document by clicking on the Show/Hide 
button:
- Line breaks:
a) As a right-angle arrow pointing to the left
 . This symbol can be added
to the document to start a new line, not a new paragraph, by clicking on
Shift+Enter:
b) As a right-angle arrow between two vertical lines
 . This symbol shows the
break that separate text around object, such as a caption text or an image from the body
text.
- Pagination breaks — a Column break, a Page break and a Section break
are used for the better formatting of the document:

To add the page break, just click Ctrl+Enter.
- Keep marks are shown as a small black bullet ■ on the margin next to the paragraph:

Keep marks represents some of paragraph options:
- Keep with next,
- Keep lines together,
- Page break before.
See
How to keep lines and paragraphs together in a Word document
for more details.You can open the Paragraph dialog box and see keep marks by double-clicking on the
appropriate keep mark. - End-of-cell and End-of-row marks that you can see in tables as universal
monetary symbol or currency sign (¤) looks like a circle with four lines
radiating from the corner:
End-of-cell marks like a paragraph marks contain formatting for the last (or only)
paragraph in the cell and formatting for the cell.End-of-row marks placed at the end of each row of a table. They contain formatting
for the row.


Notes:
- You can show or hide all these special symbols, but they are still non-printable! You can
print just some of them. - To delete any of these special characters, select them and press the Delete key.
- Displaying of these special characters is very helpful for troubleshooting. If your text
doesn’t break as you like, it can be because you have too many (or the wrong) paragraphs set
as Keep with next.If your printer is adding a blank page at the end of your document, it could be because of
several empty paragraphs at the end that are forcing an extra page.If an automatic number insists on being bold even though you have applied bold formatting
only to the part of the numbered paragraph, it can be because of paragraph marks. You need
to select the paragraph mark and un-bold it, since automatic bullets and numbering take
on the formatting of the paragraph mark.
See also this tip in French:
Comment afficher / masquer les symboles non imprimables dans le document Word.
If you are working on a Word document with complex formatting, sometimes you need to see the hidden characters and unseen workings. It helps figure out Word’s secrets or what’s going on when the layout doesn’t behave. That’s where ‘Show All’ becomes essential.
Microsoft Word was designed to hide all the formatting and technicalities (WYSIWYG). Early versions of Word had a ‘Show All’ option but it was hidden away because Microsoft believed their software was so good, such a tool was not necessary. At some point commonsense prevailed and now ‘Show All’ is on the Home tab, Paragraph section.

Show all is the easy way to see all the underlying formatting to help you figure out what’s happening. Tabs, Section Breaks, Paragraph Marks even Spaces are all exposed by Show All.
See Understand the Show All markers in Word
As with most things in Word, you can use either a keyboard shortcut or the mouse to see the hidden formatting characters.
- Keyboard, hit Control+Shift+8.
- Mouse, simply click the Show/Hide button on the Home tab.

Formatting Magic with Word
See how experts make their Word documents look better and more professional. Word 365/2021/2019/2016 edition
Font effects, paragraphs, tabs, borders, lists, numbering, tables, text boxes, styles and many special formatting tricks for all occasions.
Show All at work
For example, in the document below, I have a few strange things happening – text in columns with strange gaps in the column, and the text has stopped halfway down the page, even though there is more following on the next page.

We can now see all the paragraph marks, indents, and several different section breaks that are making our text do strange things. The Section Break (Continuous) in the middle of the right-hand column make the two-column setting to become single column then back to two-column. The next page section break at the bottom, is what is pushing text to the next page.
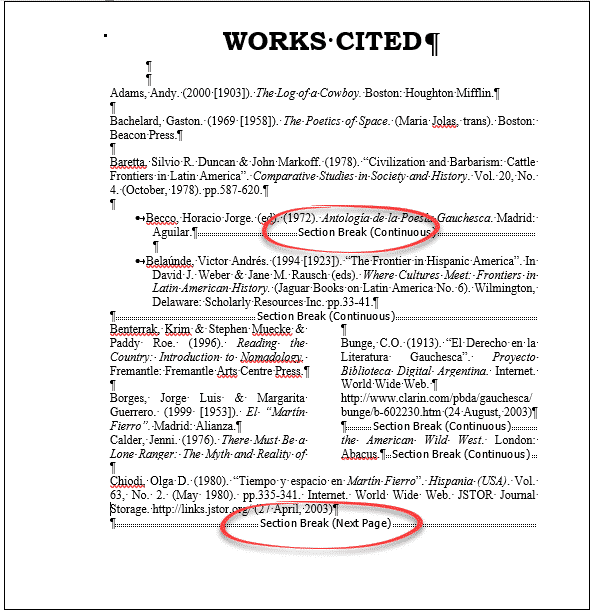
Once we can see all these things, it becomes a lot easier to find the culprits causing problems, and remove them.
Here’s a document with an off-center heading and a paragraph with strange text wrapping..
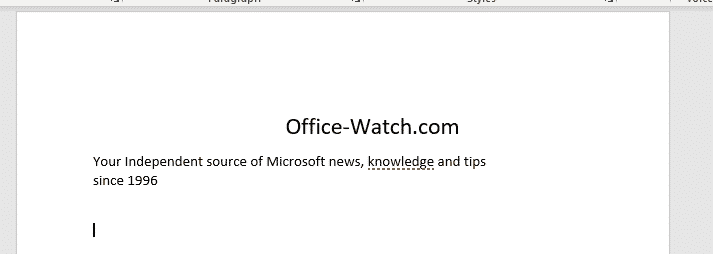
Show All reveals the problems. The text isn’t centered, someone has used tabs instead, and there are unnecessary tabs after the text. The paragraph is broken with a Line Break

Hiding the Characters Again
Both the keyboard and mouse methods of showing hidden characters act as toggles. So to hide the characters again, just press Control+Shift+8 or click the Show/Hide button again.
If you find you are regularly needing to look at the hidden characters in your document, it is possible to make some or all display permanently. Doing this isn’t usually necessary and make Word very cluttered and difficult to work with, but ‘each to their own’.
Just go to File | Options, and click on the Display tab. Then under “Always show these formatting marks on the screen”, tick the items that you want to show permanently.
“Show all formatting marks” box acts as a toggle switch for the Show/Hide button on the ribbon. If you tick this box, the Show/Hide button will be toggled on when you look at the document again. Turning this button off on the ribbon will also untick the “Show all formatting marks” in the Word Options dialog.
If you have characters such as paragraph marks, spaces, or tab marks ticked in the Word Options dialog, then switching off Show Hidden Characters will only switch off the items that are not ticked in Word Options. The paragraph marks, etc. will continue to display until you turn them off in Options.
Formatting Magic with Word
Four more vertical formatting tricks in Word
Word tables for formatting magic
All your Clear Formatting options for Microsoft Word
Hide Paragraph Marks (¶) and Other Nonprinting Symbols in Microsoft Word
by Avantix Learning Team | Updated April 5, 2021
Applies to: Microsoft® Word® 2010, 2013, 2016, 2019 and 365 (Windows)
You can show or hide paragraph marks (¶) or symbols and other nonprinting characters (such as tabs, spaces and soft returns) in your Microsoft Word documents using the Ribbon or a keyboard shortcut. It’s generally a good idea to display paragraph marks and other formatting symbols when working on Word documents. Formatting symbols display only on screen and do not print.
Recommended article: How to Quickly Remove Hard Returns in Word Documents
A paragraph in Word is anything with a hard return after it (you have pressed Enter or Return).
The following symbols are typically displayed when you turn on formatting symbols :
Paragraph – 
Space (dot) – .
Tab – →
In the following sample Word document, Show/Hide ¶ is turned on:

Hiding paragraph marks and other nonprinting symbols using the Ribbon
To show or hide paragraph marks and other nonprinting symbols in Word using the Ribbon:
- Click the Home tab in the Ribbon.
- In the Paragraph group, click ¶ (Show/Hide ¶).
Below is the Paragraph group in the Ribbon:

Hiding paragraph marks and other nonprinting symbols using a keyboard shortcut
To show or hide paragraph marks and other nonprinting symbols in Word using a keyboard shortcut, press Ctrl + Shift + 8 (the asterisk key at the top of the keyboard).
When you display formatting symbols, Word will also display manual page breaks and section breaks in your document.
Subscribe to get more articles like this one
Did you find this article helpful? If you would like to receive new articles, join our email list.
More resources
How to Insert a Watermark in Word (like DRAFT)
How to Insert Today’s Date in Word (with Shortcut)
14 Shortcuts to Quickly Select Text in MIcrosoft Word
How to Find and Replace in Word (and Use Wildcards)
How to Keep Text Together in Word (Paragraphs, Lines or Word)
Related courses
Microsoft Word: Intermediate / Advanced
Microsoft Excel: Intermediate / Advanced
Microsoft PowerPoint: Intermediate / Advanced
Microsoft Visio: Introduction
VIEW MORE COURSES >
Our instructor-led courses are delivered in virtual classroom format or at our downtown Toronto location at 18 King Street East, Suite 1400, Toronto, Ontario, Canada (some in-person classroom courses may also be delivered at an alternate downtown Toronto location). Contact us at info@avantixlearning.ca if you’d like to arrange custom instructor-led virtual classroom or onsite training on a date that’s convenient for you.
Copyright 2023 Avantix® Learning
Microsoft, the Microsoft logo, Microsoft Office and related Microsoft applications and logos are registered trademarks of Microsoft Corporation in Canada, US and other countries. All other trademarks are the property of the registered owners.
Avantix Learning |18 King Street East, Suite 1400, Toronto, Ontario, Canada M5C 1C4 | Contact us at info@avantixlearning.ca
Download PC Repair Tool to quickly find & fix Windows errors automatically
Formatting marks are special characters that are hidden by default that affect how text is displayed in a Microsoft Word document; its purpose is to reveal spaces, tabs, and paragraph breaks in your document. The formatting tab is unprintable; if any of the formatting marks are turned on in Word, it displays hidden characters such as Tab characters, Spaces, Paragraphs marks, Hidden text, Optional hyphens, Object anchors, and you can choose to show all formatting marks.
Follow the steps below to show and hide formatting marks or non-printing characters in Word:
- To show the formatting marks, click the File tab
- Click Options on the backstage view
- A Word Options dialog box will open
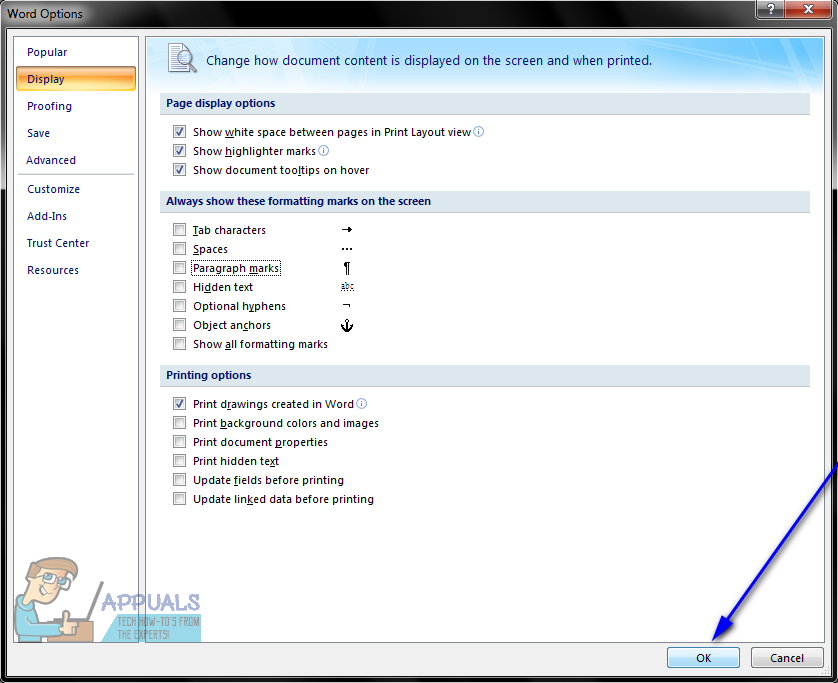
- Click Display on the left pane.
- Under the section “Always show these formatting marks on screen,” you can enable one or more formatting marks if desired by checking the checkboxes.
- You can also click the checkbox for Show all formatting marks to display all formatting marks.
- Then click OK.
- To hide the formatting marks follow the same procedure above and uncheck the formatting mark or marks you have enabled, then click OK.
Let us see this in detail.
How to Show or Hide Non-Printing Characters in Word
To show the formatting marks, click the File tab.
Click Options on the backstage view.
A Word Options dialog box will open

Click Display on the left pane.
Under the section “Always show these formatting marks on screen,” you can enable one or more formatting marks if desired by checking the checkboxes.
You can also click the checkbox for Show all formatting marks to display all formatting marks.
Then click OK.
To hide the formatting marks follow the same procedure above and uncheck the formatting mark or marks you have enabled, then click OK.
Turn on or off Formatting Marks in Word using a Hotkey
This is the quickest way to show/hide formatting marks in a Microsoft Word document. Here are the steps:
- Open Microsoft Word
- Open a blank document or a saved document
- Press the Ctrl+Shift+* hotkey.
This will instantly turn on Formatting Marks and all the used formatting marks will visible in the document. You will see dots for spaces, pilcrow for paragraph marks, right arrows for tabs used in the document, and other available formatting marks.
To hide or turn off formatting marks again, press the same Ctrl+Shift+* hotkey.
Show or hide Formatting Symbols using the Home tab in Microsoft Word

If you want to temporarily display formatting marks or formatting symbols in a Word document, then you can use the Home tab of MS Word. Here are the steps:
- Open MS Word
- Open a saved document in MS Word or a blank document
- Switch to the Home tab available in the Ribbon menu
- Click on the paragraph mark icon (or pilcrow symbol) available in the Paragraph group of the Home tab.
That will reveal all the formatting symbols present in your Word document. To hide the formatting symbols, you can use the same paragraph mark icon or symbol.
Show or hide Formatting Marks in Word Online

If you want to show or hide formatting marks in Word Online, then it can be done in three different ways. For this, first, open Word Online and then open a document. After that, use any of the following ways to show/hide formatting marks or symbols:
- Click on the More Options icon (three vertical dots) available in the top right corner and use the Show/Hide option
- Right-click on the Word document and click on the Show/Hide option
- Type formatting marks in the Search box of Word Online and select the Show/Hide option in the search result.
Hope this helps.
How do you reveal formatting codes in Word?
If you want to reveal formatting codes or formatting marks in the Microsoft Word desktop application and Word Online, then you can use the Home tab, hotkey, right-click menu, Word Options, and other ways. All these ways to show/hide formatting marks in a Microsoft Word document are covered in this post with step-by-step instructions.
Which button do you press to show non-printing characters formatting marks and breaks?
You can open the Paragraph marks a formatting mark by using the combination keys Ctrl + Shift + 8, and you will see the Paragraph mark symbol displayed on your screen. The formatting mark follows any new paragraph in a document.
We hope this tutorial helps you understand how to show and hide formatting marks in Word; if you have questions about the tutorial, let us know in the comments.

Shantel has studied Data Operations, Records Management, and Computer Information Systems. She is quite proficient in using Office software. Her goal is to become a Database Administrator or a System Administrator.
This is a complete replacement for my original Answer (the original text is below).
Your document marks words in green («words that copy how you want») and red («words that do not copy how you want»).
Both types use a ZWNJ, e.g. to precede a Heh character that should only join to the left, not to the right.
The difference is that in the green words, the ZWNJ has been entered RTL, but in the red words, it has been entered LTR.
I do not know how you would normally enter a ZWNJ, but here, if I choose the «No-width Optional Break» from the Special Characters pane in the Symbol dialog, the ZWNJ is entered LTR (bad, in this case), whereas if I select character 0x200C from the table of characters in the Symbol dialog, it is entered RTL (good, in this case). In Word 2010, if I go into Word->File-Options->Customize Ribbon->Keyboard Shortcuts->Customize… and assign a keystroke to the No-Width Optional Break, pressing that keystroke when entering RTL text appears to insert the ZWNJ as RTL (good). You can assign that as follows:
- in the list of Categories, scroll down to «Common Symbols» and select
it - in the list of Common Symbols that is displayed, select «No-Width
Optional Break» - click in the «Press new Shortkey Key» box
- press the shortkey you want (I used ctrl-9 as an experiment)
- click Assign
- click Close
I don’t know if that wil achieve everything you need, but I think it at least explains what is going on.
(I suspected it was something like that, but I had to save as .docx and look at the XML. The «green words» were encoded in a single Word «run» with «run property» RTL (a run is s sequence of characters that shares the same characteristics, so if you change text colour, there will be a new run). The red words were encoded as three runs: two RTL runs containing the text, and a non-RTL run containing the ZWNJ character.)
To change the LTR ZWNJs to RTL ones, you should be able to use the following VBA. (For those who know VBA, this is one of the occasions where you have to work with the Selection rather than Range, because AFAIK the only way to set a Run to RTL text is via the Selection object’s RTLRun method):
Sub replace_LTR_NBZWs_with_RTL_ones()

ActiveDocument.Select
With Selection.Find
  .ClearFormatting
  .Text = ChrW(8204)
  .Forward = True
  .Wrap = wdFindStop
  .Format = False
  .MatchCase = False
  .MatchWholeWord = False
  .MatchKashida = False
  .MatchDiacritics = False
  .MatchAlefHamza = False
  .MatchControl = False
  .MatchByte = False
  .MatchWildcards = False
  .MatchSoundsLike = False
  .MatchAllWordForms = False
  While .Execute
    Selection.RtlRun
  Wend
End With
End Sub
The original text of my answer follows…
It probably is a ZWNJ . If you select it, then click Insert->Symbol->More Symbols, the ZWNJ (0x200C) should be selected. It is the same as the character that Microsoft calls «No-Width Optional Break» in the «Special Characters» pane in the Symbol dialog.
As far as I know, NotePad ignores ZWNJ. I suspect you will have to replace the ZWNJ (if that is what it is) by a space (one selected, you ought to be able to press the space bar to do that) that will cause NotePad to display the correct character form.
Copying from one point in a Word document to another should preserve the ZWNJ, but is that what you are seeing?
Microsoft Word, arguably the best word processor out there for the Windows Operating System, is extremely feature-rich. One of Word’s many, many features is the ability for users to have Word display an array of different, usually invisible marks and symbols that are used to format the text in a document. One of the formatting symbols words uses is a paragraph symbol (which basically looks like some kind of a “P”). Whenever a new paragraph is created in a Word document, this paragraph symbol is added to where the paragraph starts. This symbol is hidden by default, but users can have Word display every instance of it present within a document.
This feature is useful for when you need to see if there’s a paragraph on an empty page in a document or when you need to clean up your document as simply selecting the P symbol corresponding to a paragraph and deleting it deletes the entire paragraph, but many users end up not being able to get rid of the paragraph symbols once they have Word display them. While paragraph symbols can be a huge help in some instances, under normal circumstances they only make a document harder to read as they make text appear unnecessarily busy.
Thankfully, though, getting rid of paragraph symbols after having Word display them is easy enough. The following are the two methods you can go about getting rid of paragraph symbols after you have Word display them:
Method 1: Use the Show/Hide paragraph symbols button in the toolbar
Located in Microsoft Word’s toolbar is a Show/Hide paragraph symbols button which can be used to have Word display or hide not only paragraph symbols but also most other formatting symbols used by Word (from symbols used for spaces and lines to those used for page breaks and Tab breaks). This method is the simplest method you can use to get rid of paragraph symbols in Word:
- Navigate to the Home tab in Microsoft Word’s toolbar.
- Click on the Show/Hide paragraph symbols button situated in the Paragraph section of the Home tab of Word’s toolbar.

As soon as you click on the button, if Word was configured to show paragraph symbols, it will hide them. While this method is extremely simple and straightforward, it sometimes doesn’t work for users, especially for those who only have Word display paragraph symbols and hide all other formatting symbols used by the word processor.
Method 2: Get rid of paragraph symbols from Word Options
If Method 1 doesn’t work for you for whatever reason, you can simply get rid of paragraph symbols from Word Options. To do so, you need to:
- Click on the Microsoft logo (if you’re using Word 2007) or File (if you’re using a newer version of Word).

- Click on Word Options.

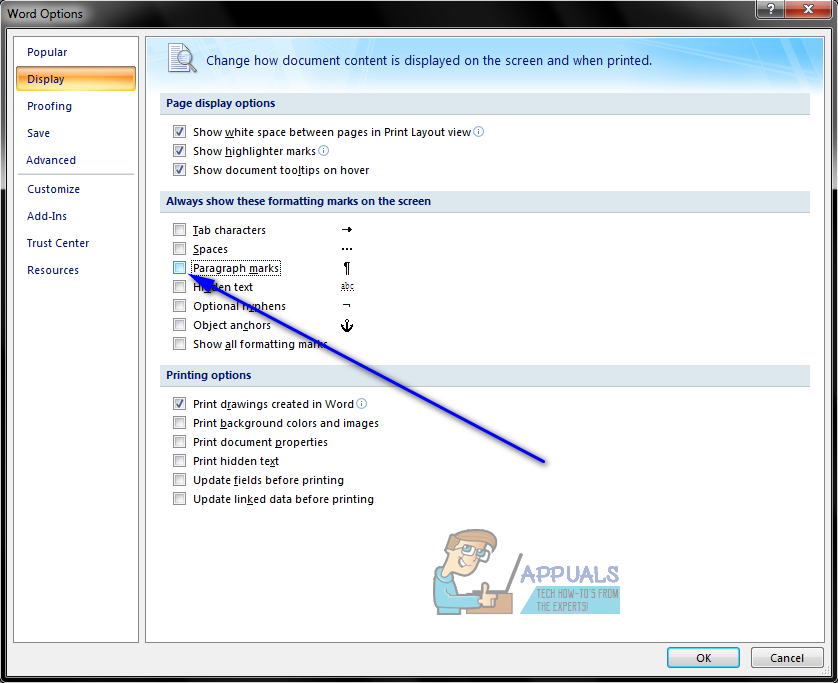
- In the left pane of the Word Options dialog, click on Display.

- Locate the Paragraph marks option under the Always show these formatting marks on the screen section and uncheck the checkbox beside it to have Word hide the symbols.

- Click on OK and the change you have made will be applied.

Kevin Arrows
Kevin Arrows is a highly experienced and knowledgeable technology specialist with over a decade of industry experience. He holds a Microsoft Certified Technology Specialist (MCTS) certification and has a deep passion for staying up-to-date on the latest tech developments. Kevin has written extensively on a wide range of tech-related topics, showcasing his expertise and knowledge in areas such as software development, cybersecurity, and cloud computing. His contributions to the tech field have been widely recognized and respected by his peers, and he is highly regarded for his ability to explain complex technical concepts in a clear and concise manner.
Back to top button
There are several ways to change how a document’s contents are displayed on the screen using the preset document views. You can also zoom in or out to view more or less of the page at a time and view multiple documents at once.
Change Document Views
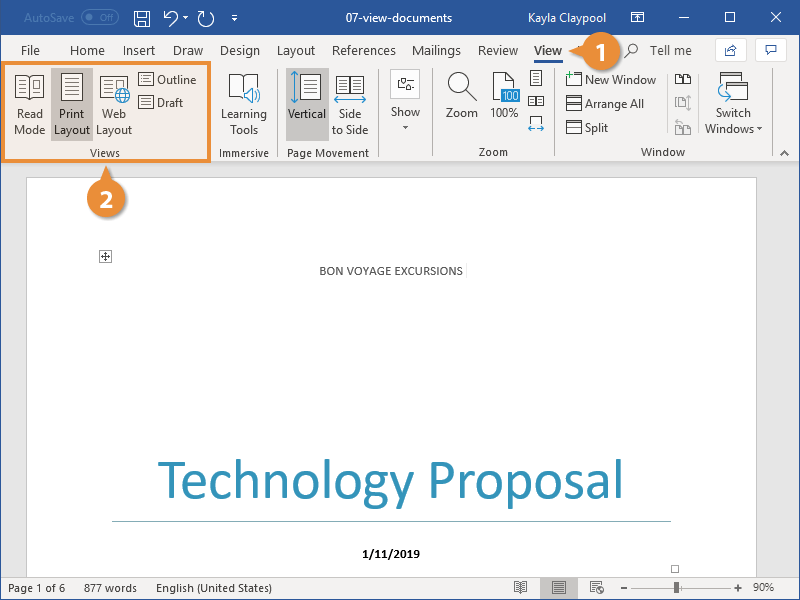
- Click the View tab.
- Select a view:
- Read Mode only shows necessary toolbars, making room for enlarged text and navigational tools. This view is read-only, so you won’t be able to make edits.
- Print Layout view displays your document as it will appear when printed. It’s best for working in documents with advanced formatting.
- Web Layout view shows backgrounds, wraps text to fit inside the window, and positions graphics just as they are in a web browser.
- Outline view displays your document in classic outline form.
- Draft view works well for most simple word-processing tasks, such as typing, editing, and simple formatting. Does not display advanced formatting, such as page boundaries, headers and footers, or floating pictures.

You can quickly access Read Mode, Print Layout, and Web Layout views from the View buttons in the status bar.
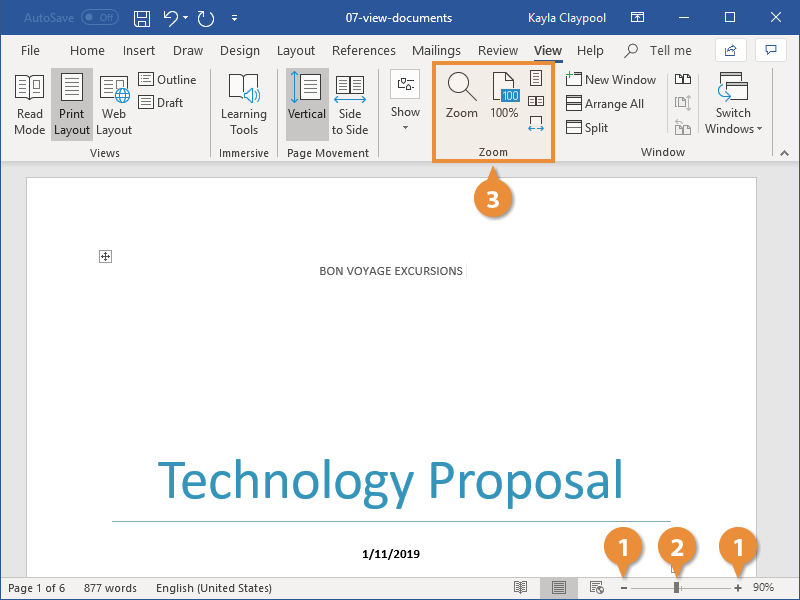
Zoom
Sometimes it is helpful to make a document appear larger on the computer’s screen, especially if you have a small monitor or poor eyesight. It can also be helpful to zoom out so that you can see how the whole document looks.
- Click the Zoom In or Zoom Out buttons on the status bar.
The page zooms in or out.
- Click and drag the zoom slider to adjust the zoom level.
Using the zoom slider is a more precise way to adjust the zoom on your document.
- Click one of the options in the Zoom group on the View tab of the ribbon to control the zoom level further.
- Click the Zoom button to open the Zoom dialog box, where you can specify a zoom level.
- Click the 100% button on the View tab to return your document to viewing at 100%.
- Click the One Page button to zoom the document out so that one entire page is visible in the window.
- Click the Multiple Pages button to see multiple full pages side by side.
- Click the Page Width button to automatically zoom the document in so that the page fills the window side-to-side.
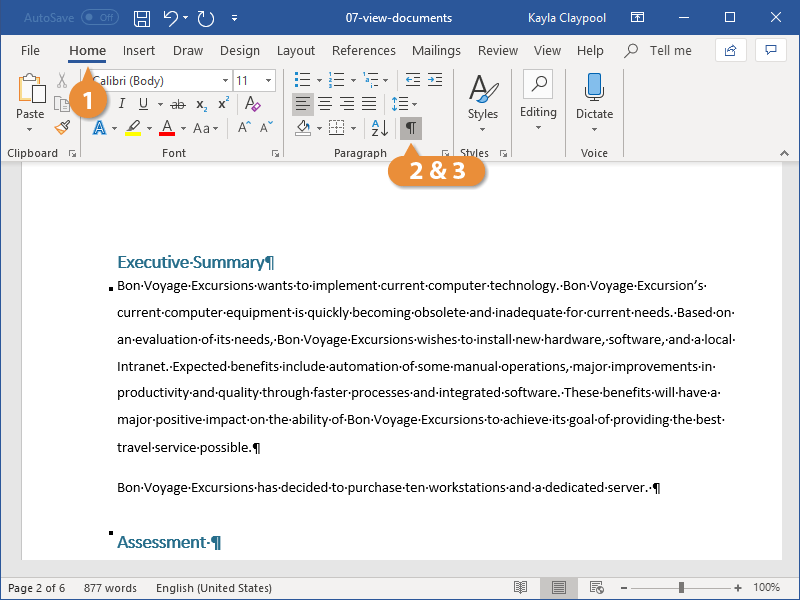
Show or Hide Formatting Symbols
Every document is filled with hidden formatting symbols that help control how the text is laid out on the page. New paragraphs, carriage returns, tabs, spaces, and page breaks can be seen, selected, moved, and deleted.
Viewing these formatting symbols lets you see where you may have added extra spaces between words, for example, or whether spaces or tab stops were used to indent text.
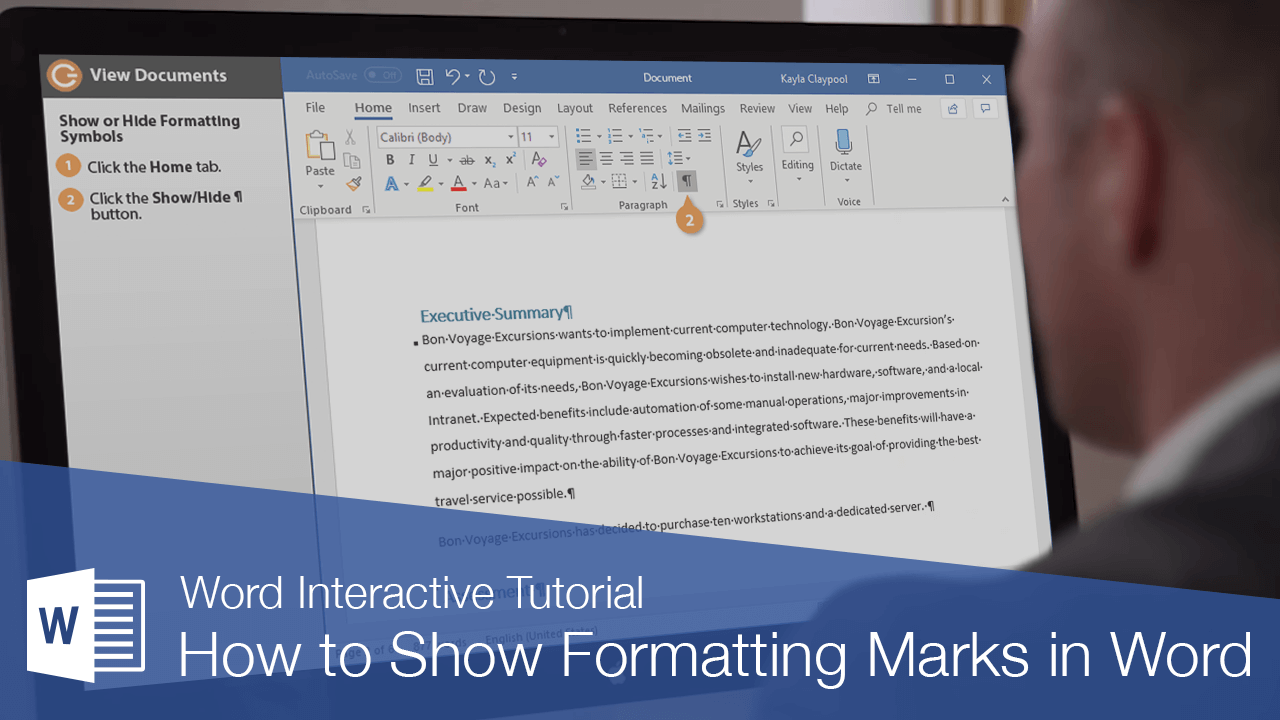
- Click Home tab.
- Click Show/Hide ¶ button.
The hidden formatting symbols are now shown. These symbols represent spaces, new paragraphs, page breaks, and other bits of text and page formatting.
- Click Show/Hide ¶ button again.
The symbols are hidden once again.
Press Ctrl + * to display or hide the formatting symbols.

FREE Quick Reference
Click to Download
Free to distribute with our compliments; we hope you will consider our paid training.