
Введение
Данная статья посвящена созданию файла справки в формате CHM и его последующей интеграции в книгу Microsoft Excel. Из статьи вы узнаете:
- как создать и настроить проект в программе Dr.Explain;
- как работать со структурой файла справки;
- как создать аннотированное изображение книги Microsoft Excel;
- как сохранить проект;
- как экспортировать проект в СHM файл;
- как создать элемент вызова файла справки в Microsoft Excel и настроить соответствующий элементу макрос.
Установка Dr.Explain
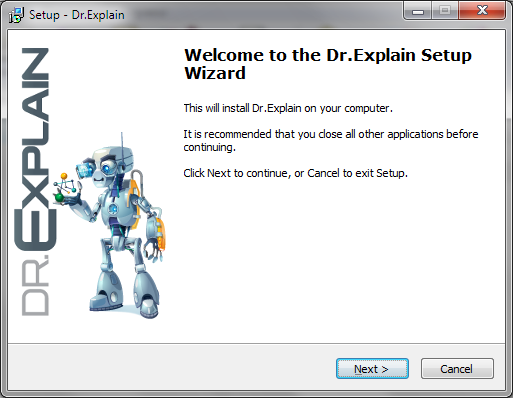
Для загрузки установочного файла программы Dr.Explain воспользуйтесь кнопкой «Скачать бесплатно» на официальном сайте продукта по адресу http://www.drexplain.ru/. После окончания загрузки запустите файл. Для успешного завершения стандартного процесса установки следуйте указаниям мастера (Рисунок 1).
Вы можете использовать пробную версию, функционал которой аналогичен полной, но при этом все изображения в экспортированном файле будут помечены специальным водяным знаком.
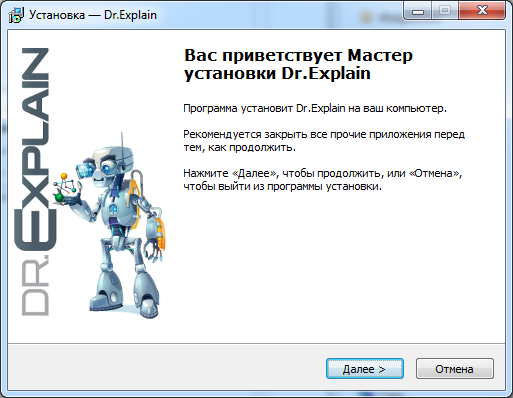
Рисунок 1. Мастер установки «Dr.Explain»
Создание и настройка нового проекта
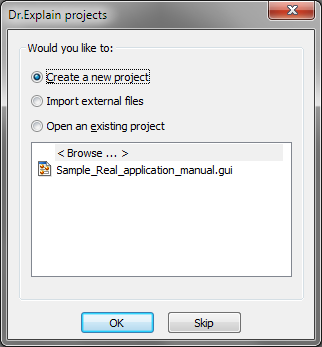
Для создания нового проекта файла справки, выберите пункт «Создать новый проект» в окне «Проекты Dr.Explain» (Рисунок 2) и нажмите «ОК», либо используйте пункт «Создать» в меню «Файл».
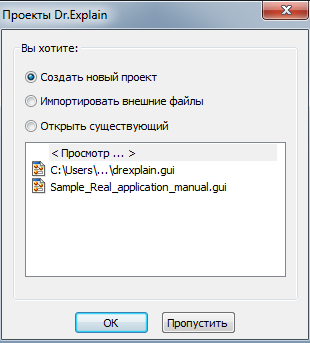
Рисунок 2. Окно «Проекты Dr.Explain»
Для изменения параметров экспорта в формат CHM воспользуйтесь пунктом меню «Настройки -> Настройки проекта -> CHM экспорт».
Создание тематических разделов в файле справки
Чтобы структура файла справки была удобной необходимо создать отдельные тематические разделы для описания различных элементов описываемой книги Microsoft Excel.
Новая тема создается с помощью пункта «Настройки -> Добавить тему» в главном меню, либо пункта «Добавить -> Добавить тему» в контекстном меню, которое вызывается нажатием правой кнопки мыши по любой из позиций дерева проекта (Рисунок 3). Для исчерпывающего описания книги необходимо создать тематические разделы для всех её элементов.
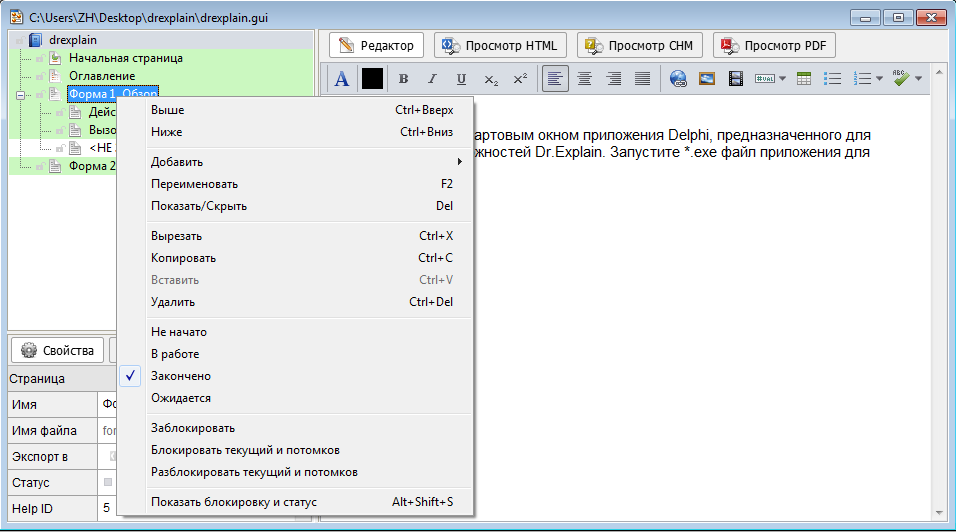
Рисунок 3. Дерево проекта «Dr.Explain»
Для изменения названий тем и их порядка, используйте следующие пункты меню «Переименовать», «Выше» и «Ниже».
Для заполнения конкретного раздела, выберите его в дереве проекта, а затем введите содержимое раздела в свободной форме в окне редактора. Для редактирования и форматирования содержимого в редакторе предусмотрен стандартный набор основных функций работы с текстом, а также ряд функций для работы с изображениями, видео, таблицами и переменными (использование переменных позволяет заменить повторяющиеся данные именем переменной, в таком случае при изменении присвоенного переменной значения, соответствующий текст изменится во всем документе).
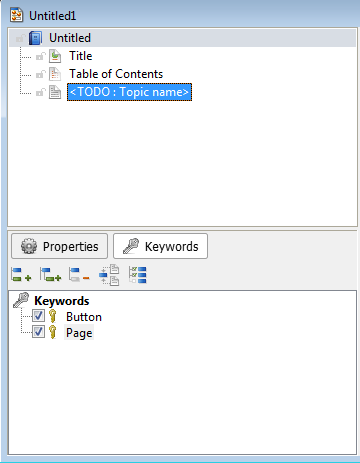
Для повышения удобства поиска по файлу справки необходимо создать перечень ключевых слов. Добавлять и удалять слова можно с помощью соответствующих кнопок в панели, которая вызывается нажатием кнопки «Ключевые слова» (Рисунок 4). Для настройки параметров привязки тем к словам выберите соответствующую тему в дереве проекта и проставьте метки напротив слов, с которыми необходимо ассоциировать данную тему.
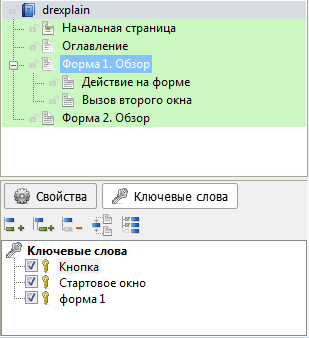
Рисунок 4. Ключевые слова
Для наглядного описания книги Microsoft Excel, а также её отдельных элементов воспользуйтесь функцией «Захват объекта» (Рисунок 5) — кнопка «Схватить экран».
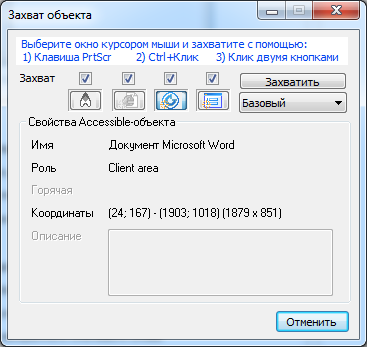
Рисунок 5. Окно «Захват объекта»
В окне захвата нажмите или отметьте поле «Accessible-объект» или «Win32-окно», после чего перейдите в окно Microsoft Excel и выберите описываемый в разделе объект одним из указанных в окне захвата способов.
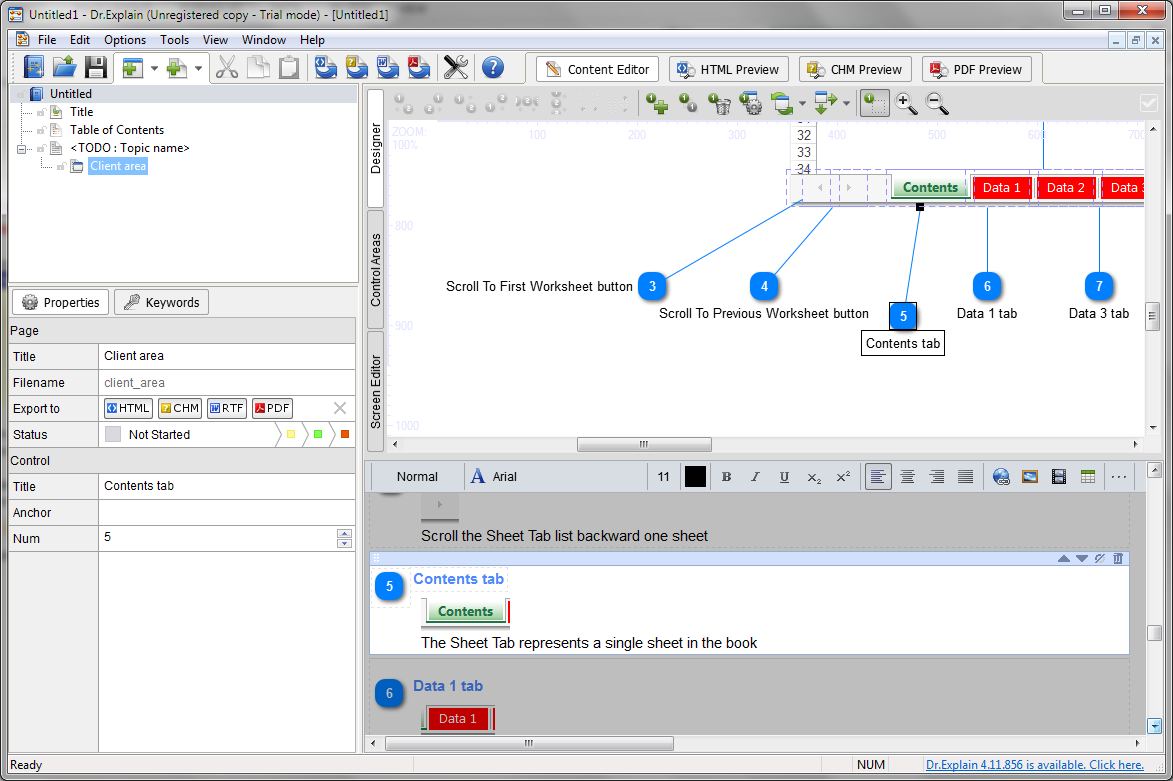
После захвата объекта в окне редактора будет создана тема, содержащая аннотированное изображение интерфейса приложения (Рисунок 6). Функционал редактора позволяет добавлять и удалять аннотацию отдельных элементов интерфейса, менять порядок следования описания различных элементов.
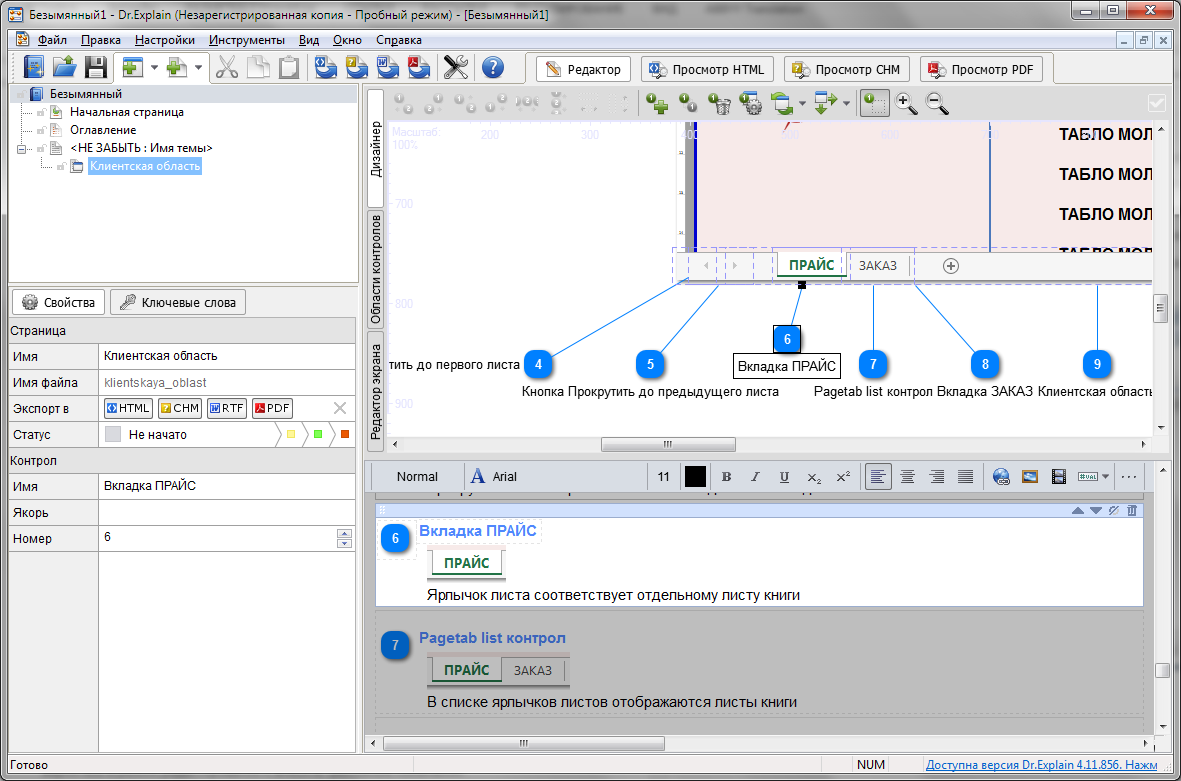
Рисунок 6. Результат выполнения захвата объекта
Предварительный просмотр и сохранение проекта
Перед тем как приступить к экспорту документа воспользуйтесь функцией предварительного просмотра. Для этого используйте кнопку «Просмотр CHM» в верхней части окна текущего проекта. В режиме предварительного просмотра убедитесь в правильном отображении всех страниц и разделов документа. При необходимости вернитесь в режим редактирования и внесите требуемые изменения.
Для того, чтобы позднее возобновить работу над проектом, рекомендуется сохранить проект, для этого используйте пункт «Файл -> Сохранить как», главного меню. После выбора данного пункта открывается стандартное окно сохранения файла, где предлагается ввести имя файла и указать его размещение.
Экспорт проекта в CHM-файл
После того, как все разделы будут заполнены необходимо экспортировать проект, для этого используйте «Настройки -> Экспорт в CHM» главного меню. Для проверки корректности проекта перед экспортом, отметьте поле «Запустить проверку проекта перед экспортом». Если необходимо открыть файл справки сразу после экспорта, установите флаг «Открыть CHM файл». Для перезаписи существующего файла справки без подтверждения пользователем установите флаг «Перезаписать молча». После установки необходимых параметров нажмите кнопку «Начать экспорт». В результате в окне «Экспорт в CHM» (Рисунок 7) будет отображаться отчет о ходе процесса. По окончании процедуры экспорта нажмите кнопку «Закрыть».
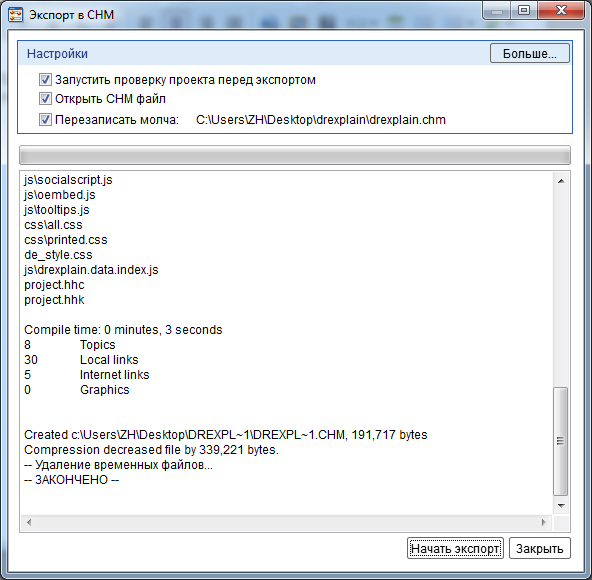
Рисунок 7. Окно «Экспорт в CHM»
Интеграция CHM-файла в книгу Microsoft Excel
Для вызова файла справки из книги Microsoft Excel необходимо создать объект, который будет выполнять вызов соответствующего CHM-файла. Таким объектом может являться изображение, фигура либо надпись.
Для создания объекта выполните следующие действия:
- откройте интересующую книгу в Microsoft Excel;
- откройте лист, на котором хотите создать элемент вызова файла справки;
- выделите ячейку или область из нескольких ячеек, в которой должен располагаться элемент вызова справки;
- добавьте элемент. Для добавления рисунка или фигуры используйте одноименные кнопки подраздела «Иллюстрации» в разделе «Вставка» главного меню, для добавления надписи используйте одноименную кнопку подраздела «Текст» в разделе «Вставка»;
- если необходимо, измените расположение элемента. Для этого перетащите его мышью на свободное поле;
- после размещения элемента, создайте подпись для него, например, «Справка»;
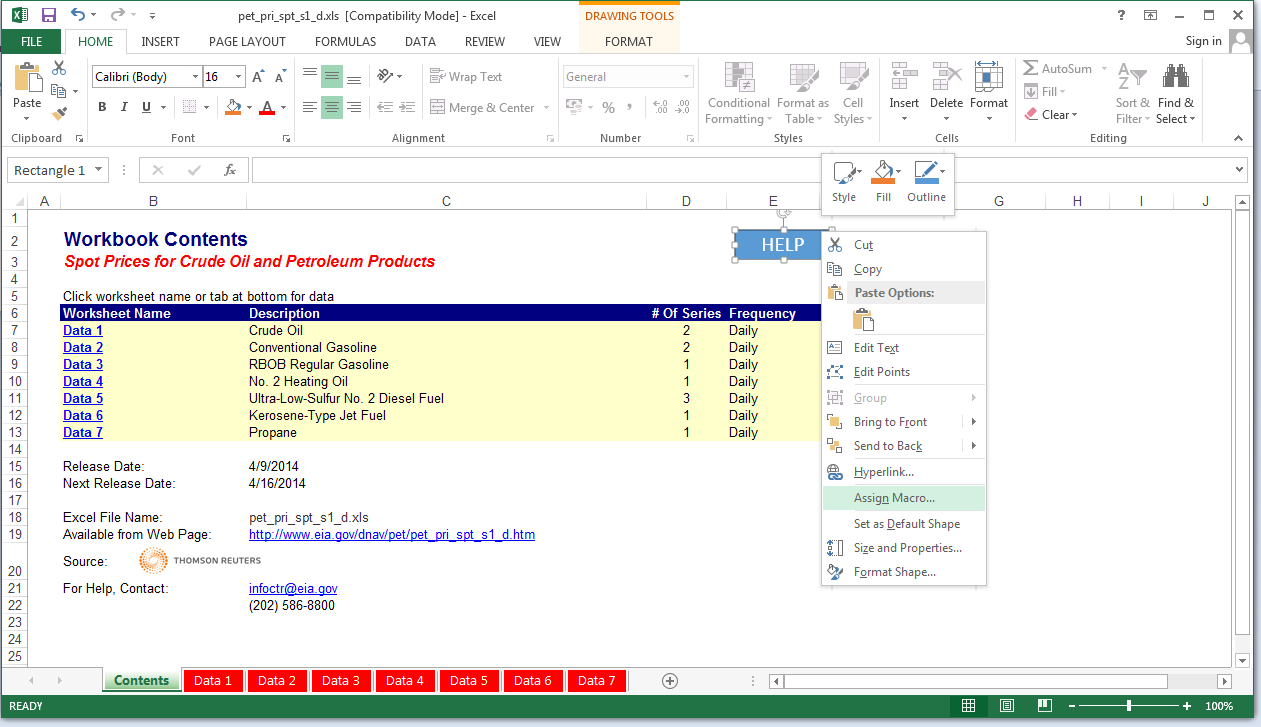
- вызовите контекстное меню нажатием правой кнопкой мыши на добавленном объекте (Рисунок 8);
- выберите пункт «Назначить макрос» в открывшемся окне нажать правка, после чего откроется окно редактора кода Microsoft Visual Basic (Рисунок 9);
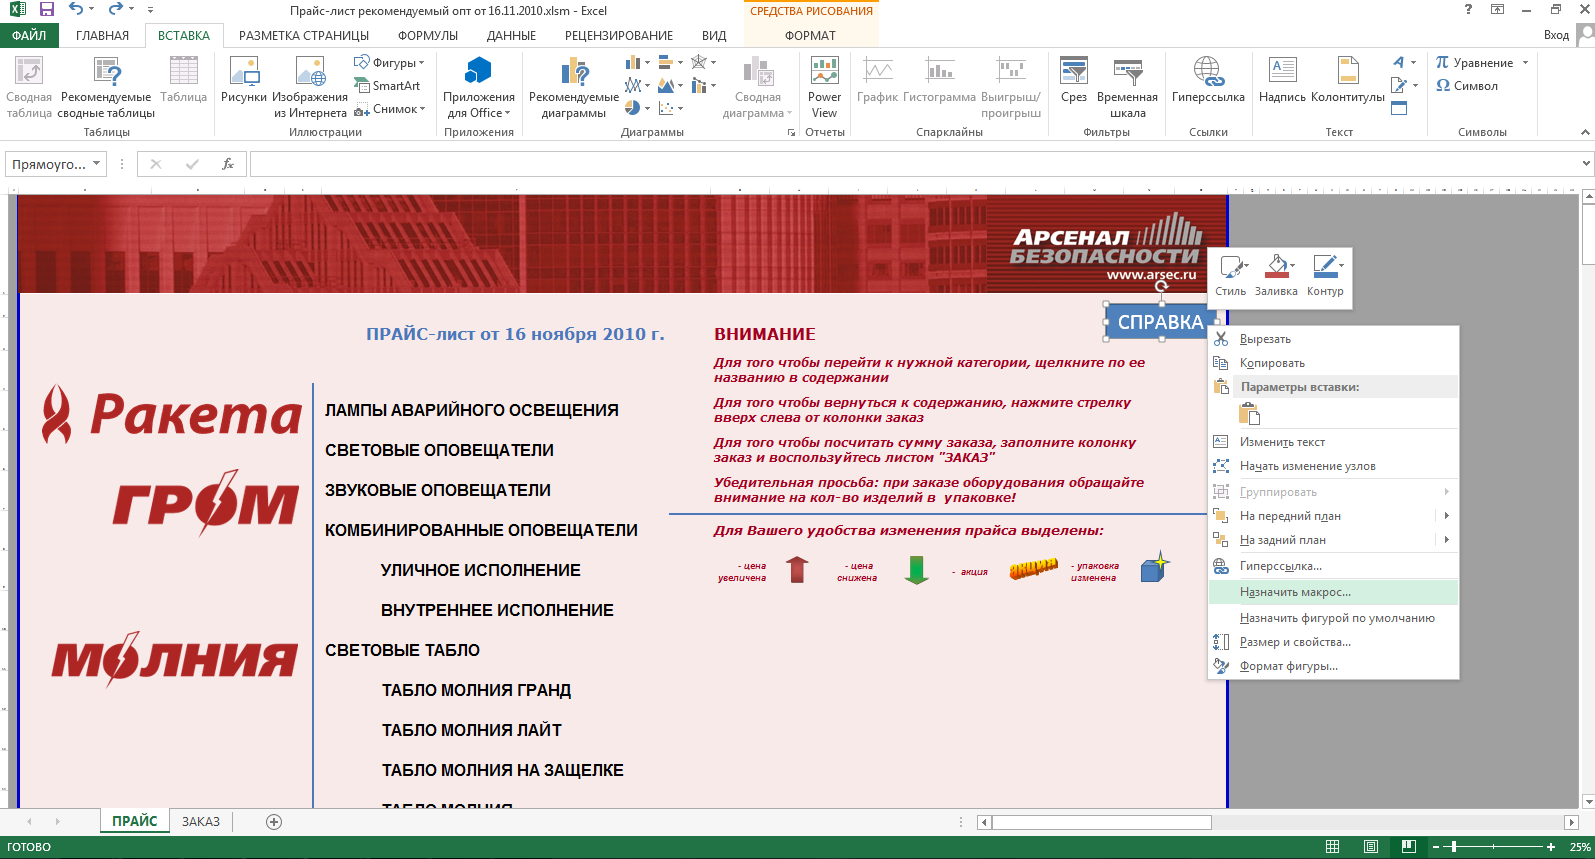
Рисунок 8. Контекстное меню объекта
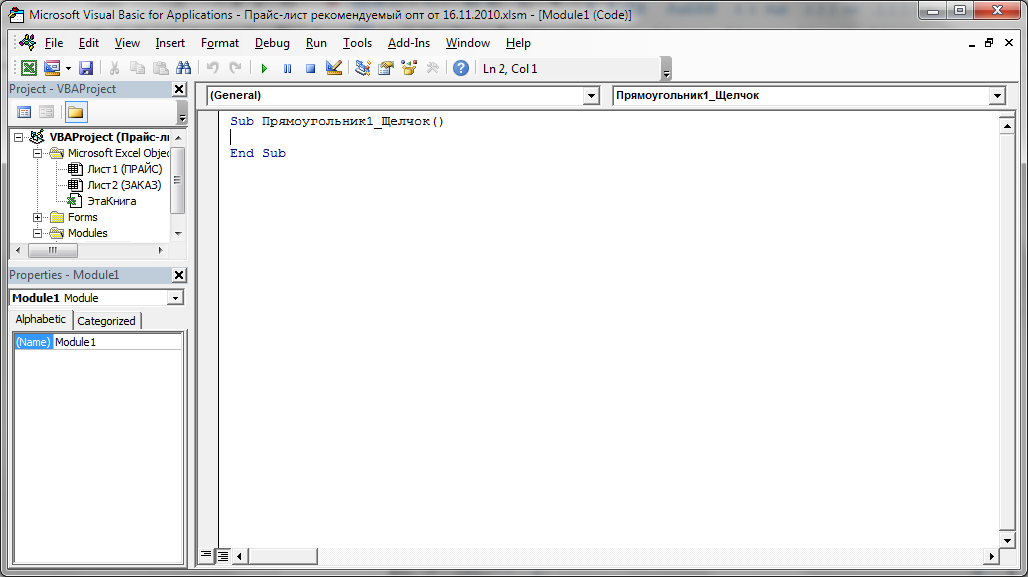
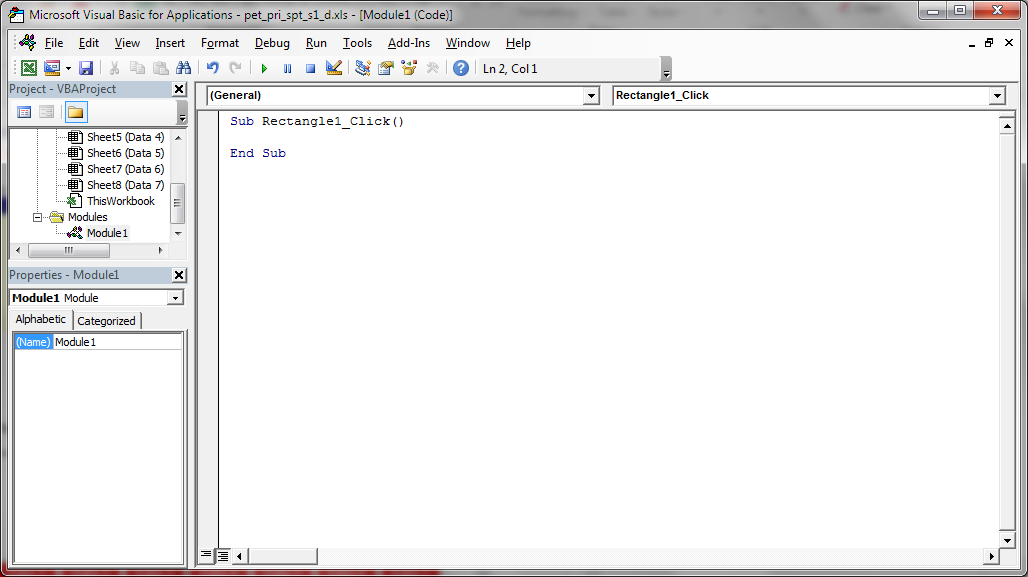
Рисунок 9. Код элемента в Microsoft Visual Basic
- в строке «Sub Прямоугольник1_Щелчок()» отображается имя вашего элемента (в данном случае «Прямоугольник1»). Введите ниже строку — CallShell(«explorer.exe » & ActiveWorkbook.Path & «help.chm», vbNormalFocus), где help.chm -имя файла справки в формате CHM. После чего весь код элемента управления должен иметь вид:
Sub Прямоугольник1_Щелчок()

Call Shell("explorer.exe " & ActiveWorkbook.Path & "help.chm", vbNormalFocus)

End Sub
- закройте окно Microsoft Visual Basic;
- проверьте корректную работу элемента управления. Для этого откройте форму и нажмите кнопку «СПРАВКА», после чего должен открыться файл справки, созданный ранее в программе Dr.Explain;
- повторите описанную процедуру для всех листов, в которые необходимо вставить элемент вызова справки.
ОБРАТИТЕ ВНИМАНИЕ! Для корректной работы элемента вызова файла справки необходимо, чтобы файл в формате CHM и файл Microsoft Excel книги находились в одной директории. Если есть необходимость разместить файл справки отдельно от файла базы данных, используйте такую строку кода элемента управления Shell «cmd /cstartD:worktechwritehelp.chm», где D:worktechwritehelp.chm — полный путь до файла справки в формате CHM. Код в целом будет иметь вид:
Sub Прямоугольник1_Щелчок()

Shell "cmd /cstartD:worktechwritehelp.chm"

EndSub
В таком случае при любом изменении размещения файла справки, путь, указываемый в коде элемента управления, должен быть заменен на актуальный.
Будьте внимательны при вводе кодов управляющих элементов, строго соблюдайте синтаксис, приведенный в примерах, это является обязательным условием правильной работы элемента вызова файла справки.
Для вызова файла справки можно также использовать гиперссылку, связанную с объектом. Для создания гиперссылки выполните следующие действия:
- вызовите контекстное меню нажатием правой кнопкой мыши на добавленном объекте (Рисунок 8);
- выберите пункт «Гиперссылка»;
- в открывшемся окне укажите размещение CHM-файла. Для удобства поиска в окно настройки гиперссылки встроен проводник;
- при необходимости можно ввести текст всплывающей подсказки, для этого используйте кнопку «Подсказка»;
- после того как гиперссылка настроена, нажмите кнопку «ОК».
Обратите внимание, что при использовании гиперссылки, указанный путь к файлу является относительным, поэтому, при любом изменении взаимного размещения файла книги и файла справки, необходимо обновить путь к файлу справки.
Смотрите также
- Создание help-файла (справки) в формате CHM для Visual Basic (VB.NET)-приложения для Windows при помощи Dr.Explain
- Создание help-файла (справки) в формате CHM для MS Access-приложения для Windows в Dr.Explain
- Делайте правильно! Публикуем онлайн-документацию на сайте проекта
Dennis Crane
Introduction
This article is devoted to creation of help file in CHM format and its further integration into the Microsoft Excel workbook. From the article you will know:
· How to create and adjust a project Dr.Explain program;
· How to work with a help file structure;
· How to create an annotated image of Microsoft Excel workbook;
· How to save a project;
· How to export a project to CHM format;
· How to create a help file call item in Microsoft Excel and how to set a corresponding macros.
Installing Dr.Explain
To download Dr.Explain installation program, click «Free download» button on the product web-site http://www.drexplain.com. After finishing, run a downloaded program. To complete an installation process, follow the setup wizard instructions (Picture 1).
You can use a trial version; it has the same functional as a full version; however, all images in exported file will have watermarks.
Picture 1. Dr.Explain setup wizard
Creating and saving a new project
To create a new help file project select «Create a new project» radio button in the «Dr.Explain projects» window (Picture 2) and then press «OK». Also you can use «Create» item in the «File» menu.
Picture 2. «Dr.Explain projects» window
To change CHM format export parameters use «Options -> Project settings -> Export to CHM».
Creating help file topics
To make help file structure handy, you have to create separate topics for describing various Microsoft Excel workbook elements.
New topic can be created either by clicking «Options -> Add topic» in the main menu, or by using «Add -> Add topic» pop-up menu item, which can be activated by right-click on any project tree item (Picture 3). To make an exhaustive workbook description you have to create topics for every its element.

Picture 3. «Dr.Explain» project tree
To change order of topics and their names use «Rename», «Move Up» and «Move Down» pop-up menu items. To fill out the particular topic, select it in the project tree and then enter its content in the editor window. There is a standard text editing toolkit as well as some tools for working with images, videos, tables and variables (variables usage allows you to replace recurrent data with variable; in this case if you change variable value, corresponding text will be changed in the whole document).
For increasing a convenience of help file searching you have to create a list of keywords. You can add and delete keywords using buttons located on the panel which can be shown up by pressing the «Keywords» button (Picture 4). To set properties of keywords to topic link, select a corresponding topic in the tree project, and enter labels for the keywords you want to associate the topic with.
Picture 4. Keywords
To make an illustrative description of Microsoft Excel workbook as well as its separate components use «Capture an object» function (Picture 5) – «Snapshot» button.
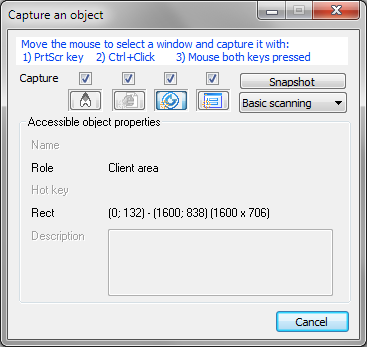
Picture 5. «Capture an object» window
In capture window check «Accessible-object» or «Win32-window» boxes, then go to Microsoft Excel window and select describable object by one of mentioned in the window ways.
After that a new topic containing annotated interface image will be created in the editor window (Picture 6). Using editor you can add and delete single elements annotations and change order of various items.
Picture 6. Result of object capturing
Previewing and saving a new project
Before you start document export, use the preview function. For this click «CHM preview» button on the top of the current project window. In the preview mode make sure all pages and topics are shown properly. Go back to editing mode and make desired changes if necessary.
If you want to resume your work with the project later it is recommended to save the project. For this use the «File -> Save as» main menu item. After you choose it, the standard save file window will come up where you can enter a file name or point its location.
Exporting project to CHM file
After you fill all topics out you should export your project. For this click «Options -> Export to CHM» in the main menu. If you would like to validate the project before exporting process check «Run the validation tool before exporting». If you want generated file to be open immediately after the exporting process, tick «Open CHM file» check box. To overwrite an existing file with no user confirmation tick «Overwrite silently» check box. After you set all desired parameters click «Start export» button. You will see «Export to CHM file» window where exporting process report will be shown.
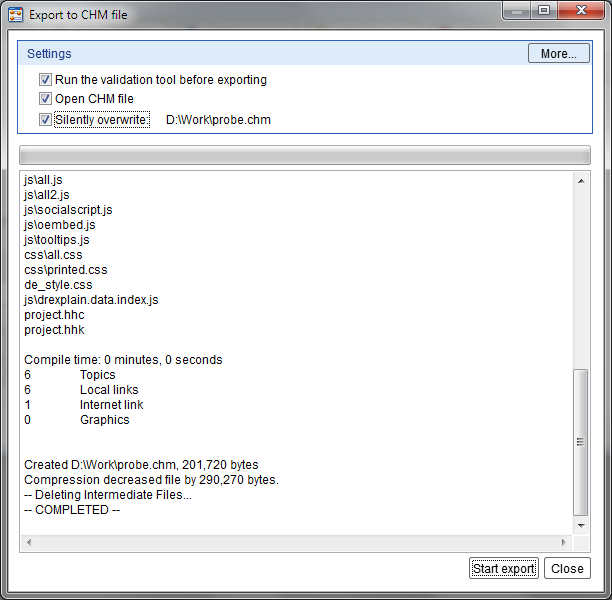
Picture 7. «Export to CHM file» window
Integrating CHM file into Microsoft Excel workbook
To open a help file from Microsoft Excel workbook you should create an object which calls a corresponding CHM file. Such object can be an image, a figure or a text box.
To create the object:
- Open a desired workbook in Microsoft Excel;
- Open a sheet where you want to place a help file call element;
- Select a cell or a range of cells where you want to locate this element;
- Add the element. To add an image or a figure, use the corresponding buttons on the «Illustrations» panel of the «Insert» tab on the main toolbar. To add a text box, use a corresponding button on the on the «Text» panel of the «Insert» tab on the main toolbar;
- Change element location if necessary. Just drag it by mouse to the desired cell;
- After placing the element you can create its title. For example «Help»;
- Open a context menu by right click on the added object (Picture 8);
- Select «Assign macro» menu item. Click «Edit» in the appeared window, after that Microsoft Visual Basic editor window will come up (Picture 9);
Picture 8. Context object menu
Picture 9. Element code in Microsoft Visual Basic editor
- You can see your element’s name in the following string: «Sub Rectangle1_Click()» (in our example this is «Rectangle1»). Enter the following string below — Call Shell(«explorer.exe » & ActiveWorkbook.Path & «help.chm», vbNormalFocus), where help.chm is the help filename in CHM format. After all changes element code should has the following look:
Sub Rectangle1_Click()
Call Shell("explorer.exe " & ActiveWorkbook.Path & "help.chm", vbNormalFocus)
End Sub
- Close the Microsoft Visual Basic editor window;
- Make sure your control element works properly. Just open the form and click «Help» button. Corresponding help file created in Dr.Explain should be open;
- Repeat described procedure for each sheet where you want to insert a help file call element.
PLEASE NOTE! To make a help file call element work properly, you have to put the CHM file and the Microsoft Excel workbook in the same folder. If it is necessary to put the help file separately from the workbook file; you have to enter the following string in the control element code: Shell «cmd /cstart D:worktechwritehelp.chm», where D:worktechwritehelp.chm is the full path to the help file in CHM format. The code will look like this:
Sub Rectangle1_Click()
Shell "cmd /cstart D:worktechwritehelp.chm"
End Sub
In this case, every time you change the help file location you have to change the path in the control element code to the actual one.
Be careful in entering control element codes; strictly follow the syntax shown in the examples. This is necessary condition for proper work of control elements.
You can use a hyperlink bound to an object to open a help file. To create a hyperlink, perform the following steps:
- Right-click on the added object to open a context menu (Picture 8);
- Click on «Hyperlink» menu item;
- Enter a file location in the «Insert hyperlink» dialog;
- If you would like to set a pop-up hint, use a «ScreenTip» button;
- Click «OK» when finished.
Please note the file path you enter for the hyperlink is a relational one. So every time you change the workbook and help file locations relatively to each other, you have to update a help file path.
See also
- How to Create Help Files for Visual Basic (VBA.NET) Windows-Application in Dr.Explain
- How to Create Help File for MS Access (VBA) Windows-Application in Dr.Explain
- 16 Reasons Why Only Your Users Do Not Read User Documentation
-
#1
I know this sounds like a dumb question, but anyone who’s been using Office and Excel for decades, like I have, would remember things like context-sensitive help, local help files, hierarchical walkthroughs of every feature in the program. It all seems to have disappeared.
All the «Help» seems to be online, and there’s no reference material at all. It’s all just badly-written tutorials for absolute beginners. The search term MERGEFORMAT actually manages to deliver zero relevant hits (admittedly, that’s Word, but I know I’ve had the same issues with Excel features).
So, am I missing something, or has Microsoft really just removed all the Help information they used to provide? And if so, how can I get my money back?
Can I install Office XP help files, or something?
(I’m really angry about this. It just makes no sense, for a company that used to have the best manuals in the business — admittedly that was Word 6.0.)
Square and cube roots
The =SQRT(25) is a square root. For a cube root, use =125^(1/3). For a fourth root, use =625^(1/4).
-
#2
It’s all online now and in theory, pressing ‘F1’ will get you to the relevant (context sensitive) online help page. In practice it is hit or miss, certainly slower, and often produces unsatisfying results. I find I get better and faster results just googling the feature I am seeking help for. It does raise the question of how to you would use Office on systems that are air-gapped for security. MS makes a «government» version of office 365 to address certain security concerns and I’ve wondered if there still exists for some versions, the option of local help files.
-
#3
I think you’re being overly generous by calling it, «hit or miss.»
Feels like there’s a gap in the «market» for someone to take the old help files and update them for the latest version. Somehow, I doubt there’d be many changes.
ExcelDnaDoc is a command-line utility to create a compiled HTML Help Workshop file (.chm) for ExcelDna.
- single help file created even if multiple library are specified in the «dna» file.
- can use customized templates and content
Use the issues log to report any issues or give feedback for future enhancements.
Alternatively, you can download the source as a ZIP file or download
the compiled binaries as a ZIP.
To build a compiled help file (.chm) the HTML Help Workshop (HHW) must be installed.
ExcelDnaDoc expects HHW to be installed at C:Program Files (x86)HTML Help Workshop.
If it is installed at another location change packages/ExcelDnaDoc/tools/ExcelDnaDoc.exe.config
to reference the proper directory before compiling your project.
When installed from NuGet it will edit the default .dna file installed by Excel-DNA and adds post
build steps to build the .chm documentation file whenever the project is build.
Notes
Uses the ExcelFunction, ExcelArgument, and ExcelCommand attributes in Excel-DNA to build
documentation for your Excel-DNA add-in.
The following fields are can be used to create documentation :
ExcelFunction Attribute
|
|
if not given the actual method name is used |
|
|
if not used no description will be included in documentation |
|
|
if not given functions will be grouped under « Functions» |
|
|
can be used to link function to generated help in Excel’s function wizard |
ExcelArgument Attribute
|
|
if not given the actual parameter name is used |
|
|
if not used no description will be included in documentation |
ExcelCommand Attribute
|
|
if not given the actual parameter name is used |
|
|
if not used no description will be included in documentation |
|
|
can be used to link function to generated help in Excel’s function wizard |
|
|
if not used no shortcut will be included in documentation |
If ExcelDna.Documentation is included as a reference (default in NuGet package) then an additional
attribute ExcelFunctionDoc is available as a replacement to the ExcelFunction attribute
which includes additional fields that can be used for additional documentation.
ExcelFunctionDoc Attribute
|
|
if not given the actual method name is used |
|
|
if not used no description will be included in documentation |
|
|
if not given functions will be grouped under « Functions» |
|
|
can be used to link function to generated help in Excel’s function wizard |
|
|
description of the return value |
|
|
longer discussion of function included in documentation |
|
|
remarks on usage and / or possible errors |
Example
F#
1: 2: 3: 4: 5: 6: 7: 8: 9: 10: 11: 12: 13: 14: 15: 16: 17: 18: |
namespace DocTest open ExcelDna.Integration open ExcelDna.Documentation module Math = [<ExcelFunctionDoc( Name = "Math.AddThem", Category = "Math", Description = "adds two numbers", HelpTopic = "DocTest-AddIn.chm!1001", Summary = "really all it does is add two number ... I promise.", Returns = "the sum of the two arguments")>] let addThem ( [<ExcelArgument(Name = "Arg1", Description = "the first argument")>]a, [<ExcelArgument(Name = "Arg2", Description = "the second argument")>]b ) = a+b |
C#
namespace DocTest
{
    using ExcelDna.Integration;

    public class Text
    {
        [ExcelFunction( Name = "Text.ConcatThem",
                        Description = "concatenates two strings",
                        HelpTopic = "DocTest-AddIn.chm!1002")]
        public static object ConcatThem(
            [ExcelArgument(Description="the first string")] object a,
            [ExcelArgument(Description="the second string")] object b)
        {
            return string.Concat(a.ToString(), b.ToString());
        }
    }
}
Command Line Usage
1:
|
ExcelDnaDoc.exe dnaPath |
dnaPath The path to the primary .dna file for the ExcelDna add-in.
Example: ExcelDnaDoc.exe <build folder>SampleLib-AddIn.dna
The HTML Help Workshop content will be created in <build folder>HelpContent.
External libraries will be searched for UDFs and Commands
that are exposed to Excel and documented using the ExcelFunctionAttribute and the ExcelArgumentAttribute.
If The ExcelDna.Documentation library has been referenced then the ExcelFunctionDocAttribute
is also available to include additional documentation fields that will not be exposed in the Excel Function
Wizard, but will be included in the HTML Help Workshop content.
This Project Uses
Excel-DNA
FAKE (F# MAKE)
HTML Help Workshop
NuGet Package Manager
RazorEngine
Contributing and copyright
The project is hosted on GitHub where you can report issues, fork
the project and submit pull requests.
The library is available under the MIT license, which allows modification and
redistribution for both commercial and non-commercial purposes. For more information see the
License file in the GitHub repository.
Archived Forums C-D
>
Developer Documentation and Help System
-
Question
-

0
Sign in to vote
Hi everyone,
This is my very first post on this forum. Actually I need to know the simplest means of writing and connecting a help file with a VBA UDF for Excel 2007 & 2010/ Shall oblige your help and guidance in this regard.
Regards & thanx in advance.
Best Regards, Faraz A Qureshi
Thursday, January 12, 2012 6:22 PM

Answers
-
0
Sign in to vote
Faraz,
you may try to make following old stuff working for your needs:
http://www.help-info.de/en/Visual_Basic_Applications/vba.htmPlease have a look at:
Creating context-sensitiv Help for VBA (HTMLHelp — CHM)Please search for download link:
Download Visual Basic for Applications example project (EXCEL)- download the ZIP file from the link above.
- unzip to a temp directory.
- right-click the CHM file first, click Properties, and then click Unblock.
- double-click CHM_VBA_example.xls
- first have a look to security warnings ( Excel) and set Macros to «Enable this content».
- Follow the instructions from the Excel example worksheet.
You have to create your own HTMLHelp (CHM) file e.g. for the function help call and the buttons.
Office 12 is Help2 / AP Help. Going deeper into this (Information is a bit dated and I never tried):
http://helpware.net/mshelp2/CollectionWizard/Office12Help.htmHTH
Ulrich Kulle — Microsoft Help MVP — (2007-2009) — http://www.help-info.de
-
Edited by
Ulrich Kulle
Monday, January 16, 2012 7:15 PM -
Marked as answer by
FARAZ A QURESHI
Saturday, February 11, 2012 9:48 PM
Saturday, January 14, 2012 6:37 PM