
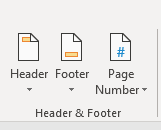
Insert a header or footer

-
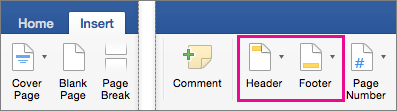
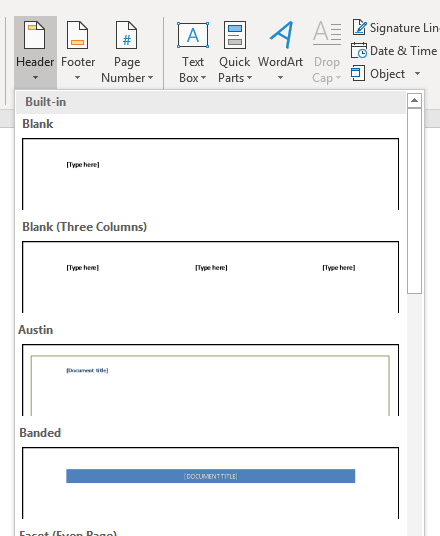
Go to Insert > Header or Footer.
-
Choose the header style you want to use.
Tip: Some built-in header and footer designs include page numbers.
-
Add or change text for the header or footer. For more info on things you can do with headers, see Edit your existing headers and footers. To edit a header or footer that’s been already created, double-click on it.
-
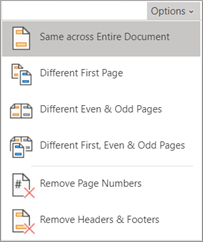
To eliminate a header—like deleting it on the title page—select it and then check the Different First Page box.
-
Select Close Header and Footer or press Esc to exit.
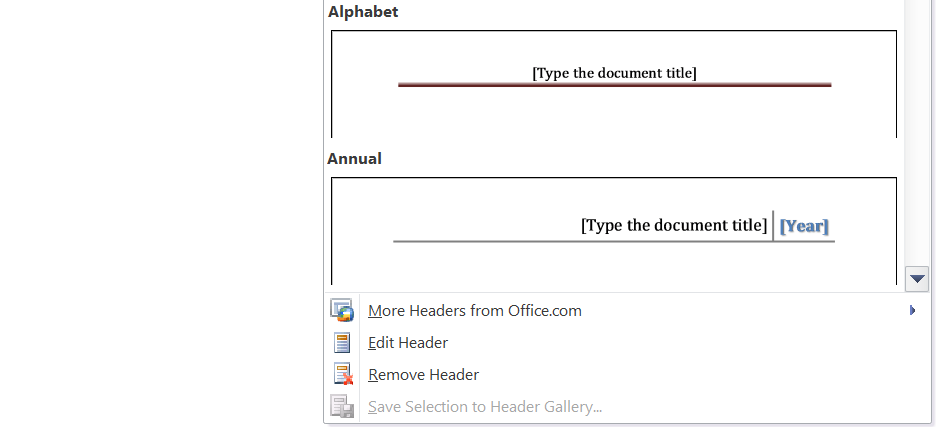
To delete, select Insert > Header (or Footer) > Remove Header (or Remove Footer).
Add a standard or customized header or footer
-
Go to Insert > Header or Footer.

-
Choose from a list of standard headers or footers, go to the list of Header or Footer options, and select the header or footer that you want.
Or, create your own header or footer by selecting Edit Header or Edit Footer.
-
When you’re done, select Close Header and Footer or press Esc.
Important:
Office for Mac 2011 is no longer supported. Upgrade to Microsoft 365 to work anywhere from any device and continue to receive support.
Upgrade now
-
On the Layout tab, under View, click Page Layout.
-
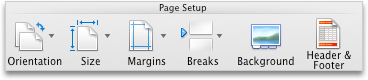
On the Layout tab, under Page Setup, click Header & Footer.
-
Choose from a list of standard headers or footers by going to the Header or Footer pop-up menu, and clicking the header or footer that you want.
Or, create your own header or footer by clicking Customize Header or Customize Footer and following the instructions.
Note: When you customize your header or footer, you can add images, page numbers, date, time, sheet name, file name and path, and more.
-
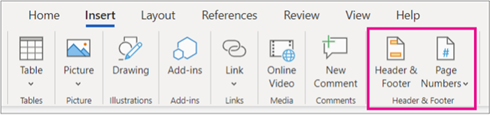
Go to Insert > Header & Footer.
-
Add or header or footer text.
-
Use the Options menu for additional customization.
-
To exit, select Close Header and Footer or press Esc.
-
To delete, select Insert > Header (or Footer) > Remove Header (or Remove Footer).
For more on headers and footers, see Headers and footers in Word.
Need more help?
Want more options?
Explore subscription benefits, browse training courses, learn how to secure your device, and more.
Communities help you ask and answer questions, give feedback, and hear from experts with rich knowledge.
Содержание
- Создание заголовка с помощью встроенных стилей
- Заголовок 1
- Заголовок 2
- Создание собственного стиля и сохранение его в качестве шаблона
- Вопросы и ответы

Некоторые документы требуют особого оформления, и для этого в арсенале MS Word содержится довольно много средств и инструментов. В числе таковых различные шрифты, стили написания и форматирования, инструменты для выравнивания и многое другое.
Урок: Как выравнивать текст в Ворде
Как бы там ни было, но практически любой текстовый документ невозможно представить без заголовка, стиль которого, конечно же, должен отличаться от основного текста. Решение для ленивых — выделить заголовок жирным, увеличить шрифт на один-два размера и на этом остановится. Однако, есть ведь и более эффективное решение, позволяющее сделать заголовки в Word не просто заметными, а правильно оформленными, да и просто красивыми.
Урок: Как изменить шрифт в Ворде
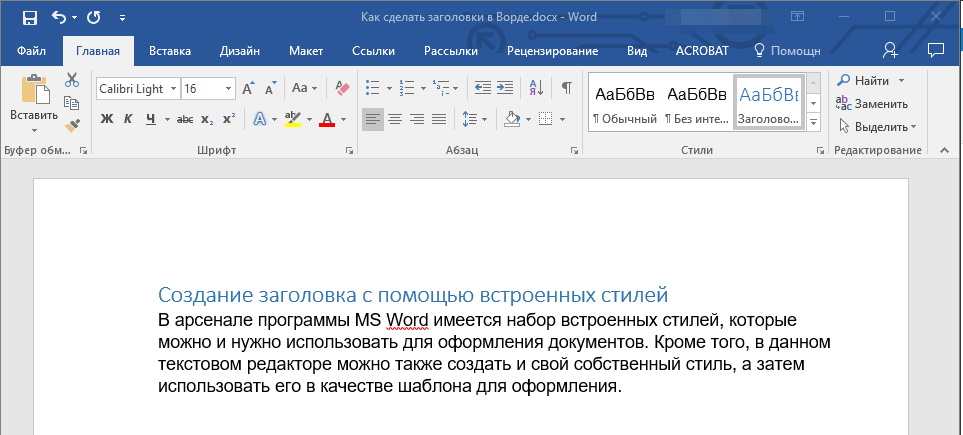
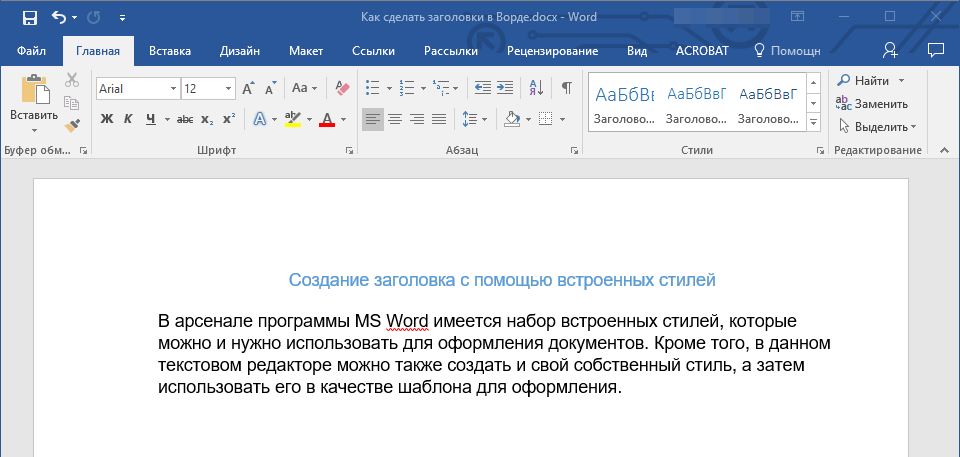
Создание заголовка с помощью встроенных стилей
В арсенале программы MS Word имеется большой набор встроенных стилей, которые можно и нужно использовать для оформления документов. Кроме того, в данном текстовом редакторе можно также создать и свой собственный стиль, а затем использовать его в качестве шаблона для оформления. Итак, чтобы сделать заголовок в Ворде, выполните следующие действия.
Урок: Как в Word сделать красную строку
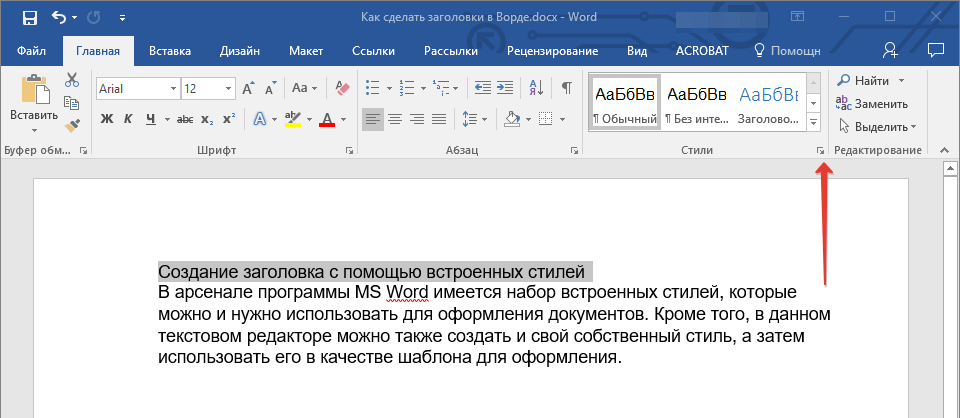
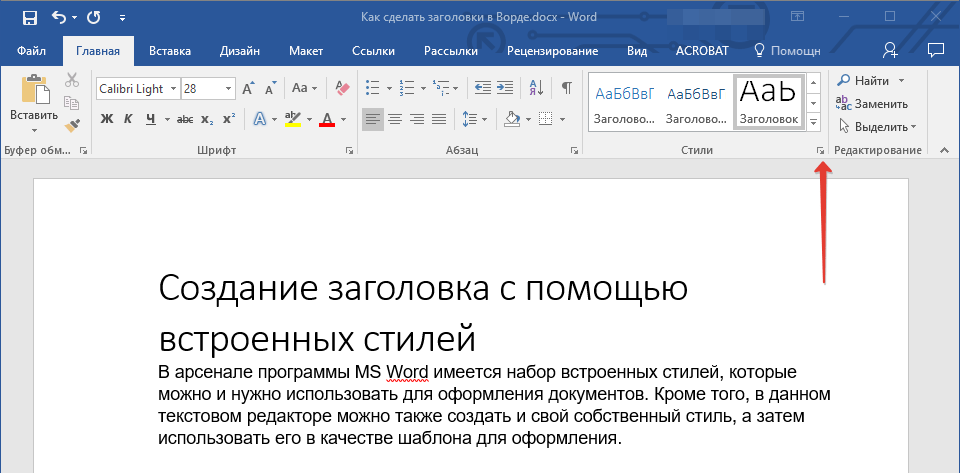
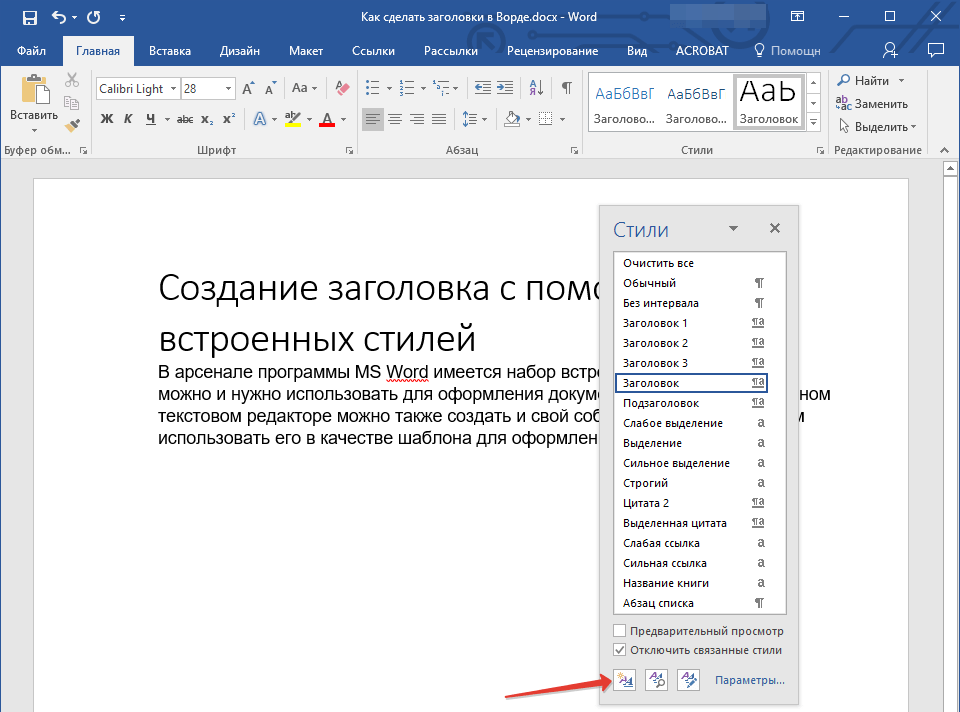
1. Выделите заголовок, который необходимо оформить должным образом.

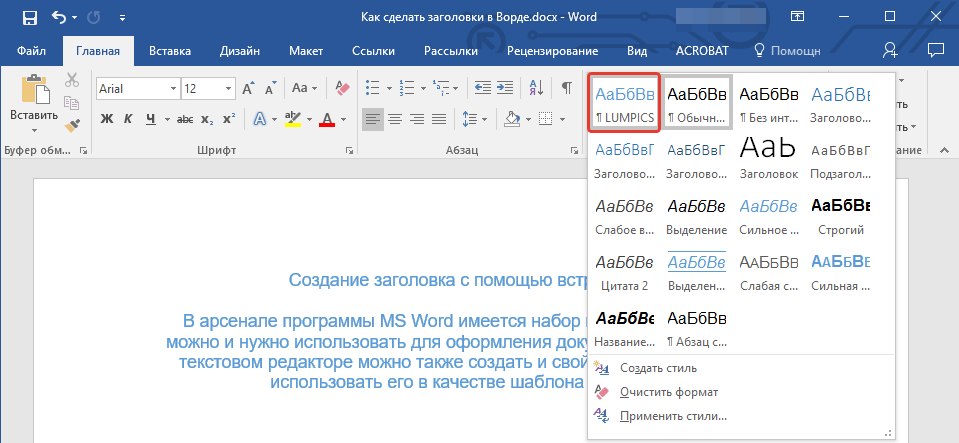
2. Во вкладке “Главная” разверните меню группы “Стили”, нажав на небольшую стрелочку, расположенную в ее правом нижнем углу.
3. В окне, которое откроется перед вами, выберите необходимый тип заголовка. Закройте окно “Стили”.
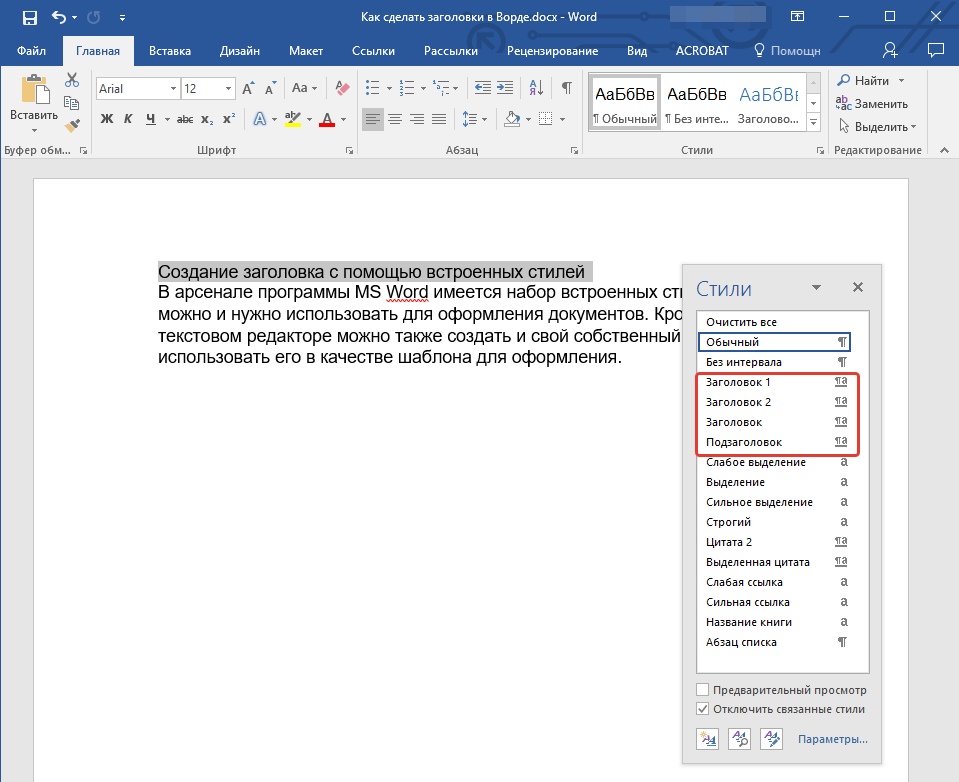
Заголовок
это основной заголовок, идущий в самом начале статьи, текста;

Заголовок 1
заголовок меньшего уровня;
Заголовок 2
еще меньше;
Подзаголовок
собственно, это и есть подзаголовок.
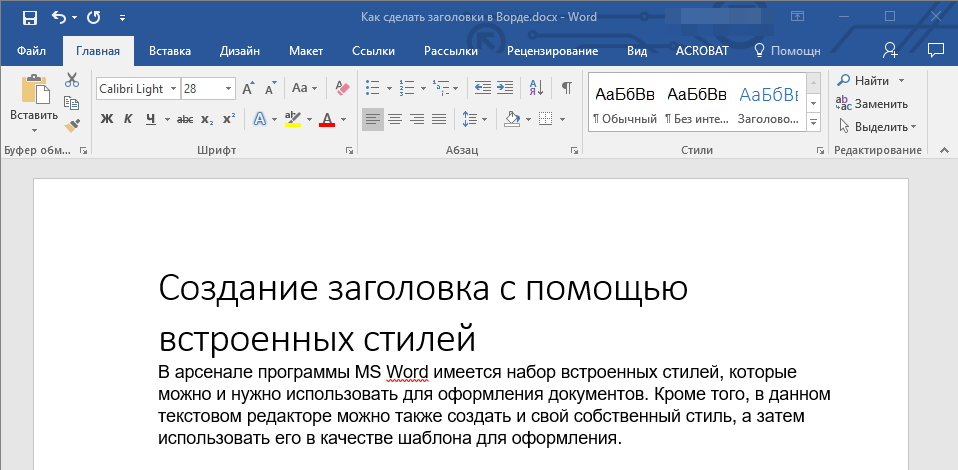
Примечание: Как можно заметить со скриншотов, стиль заголовка помимо изменения шрифта и его размера также изменяет и междустрочный интервал между заголовком и основным текстом.
Урок: Как изменить междустрочный интервал в Ворде
Важно понимать, что стили заголовков и подзаголовков в MS Word являются шаблонными, в их основе лежит шрифт Calibri, а размер шрифта зависит от уровня заголовка. При этом, если у вас текст написан другим шрифтом, другого размера, вполне может быть такое, что шаблонный заголовок меньшего (первого или второго) уровня, как и подзаголовок, будут мельче, чем основной текст.
Собственно, именно так получилось в наших примерах со стилями “Заголовок 2” и “Подзаголовок”, так как основной текст у нас написан шрифтом Arial, размер — 12.
- Совет: В зависимости от того, что вы можете себе позволить в оформление документа, измените размер шрифта заголовка в большую сторону или текста в меньшую, дабы визуально отделить одно от другого.
Создание собственного стиля и сохранение его в качестве шаблона
Как было сказано выше, помимо шаблонных стилей, вы также можете создать свой собственный стиль оформления заголовков и основного текста. Это позволяет переключаться между ними по необходимости, а также использовать любой из них в качестве стиля по умолчанию.
1. Откройте диалоговое окно группы “Стили”, расположенной во вкладке “Главная”.
2. В нижней части окна нажмите на первую кнопку слева “Создать стиль”.
3. В окне, которое перед вами появится, задайте необходимые параметры.
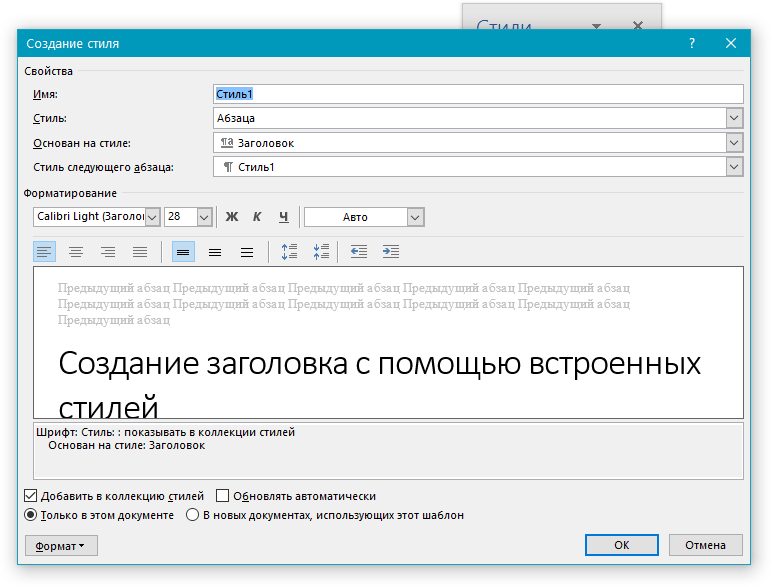
В разделе “Свойства” введите название стиля, выберите ту часть текста, для которой он будет использоваться, выберите стиль, на котором он основан, а также укажите стиль для следующего абзаца текста.
В разделе “Формат” выберите шрифт, который будет использоваться для стиля, укажите его размер, тип и цвет, положение на странице, тип выравнивания, задайте отступы и междустрочные интервалы.
- Совет: Под разделом “Форматирование” находится окно “Образец”, в котором вы можете видеть то, как будет выглядеть ваш стиль в тексте.
В нижней части окна “Создание стиля” выберите необходимый пункт:
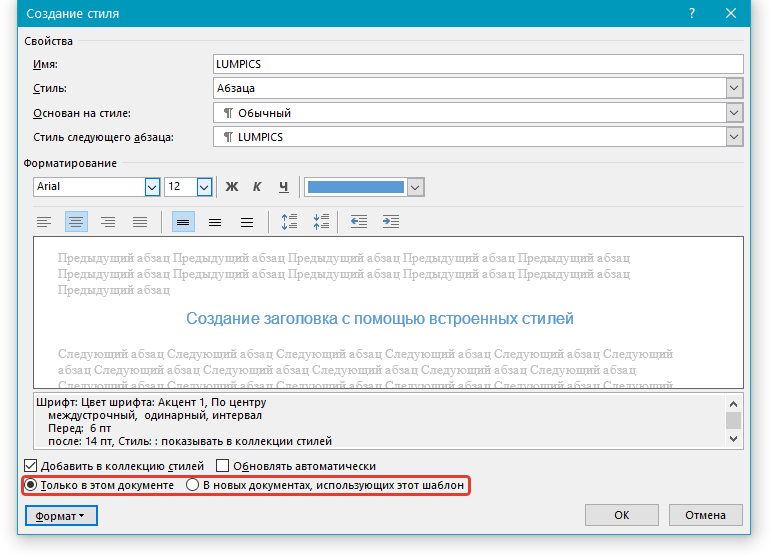
- “Только в этом документе” — стиль будет применим и сохранен только для текущего документа;
- “В новых документах, использующих этот шаблон” — созданный вами стиль будет сохранен и станет доступен для использования в дальнейшем в других документах.
Выполнив необходимые настройки стиля, сохранив его, нажмите кнопку “ОК”, чтобы закрыть окно “Создание стиля”.
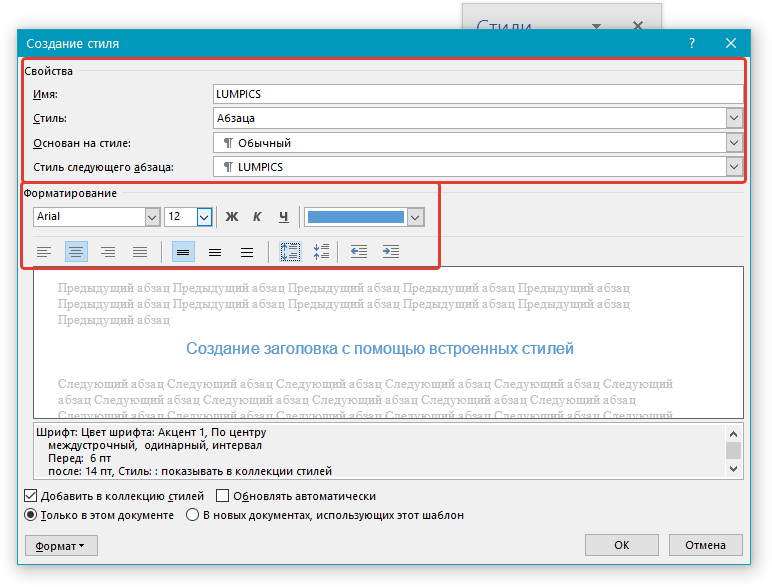
Вот простой пример стиля заголовка (хотя, скорее, подзаголовка), созданного нами:
Примечание: После того, как вы создадите и сохраните свой собственный стиль, он будет находится в группе “Стили”, которая расположена во вкладе “Главная”. Если он не будет отображаться непосредственно на панели управления программы, разверните диалоговое окно “Стили” и найдите его там по названию, которое вы придумали.
Урок: Как сделать автоматическое содержание в Ворде
На этом все, теперь вы знаете, как правильно сделать заголовок в MS Word, используя шаблонный стиль, доступный в программе. Также теперь вы знаете о том, как создать свой собственный стиль оформления текста. Желаем вам успехов в дальнейшем изучении возможностей этого текстового редактора.
Things You Should Know
- Adding a header in Microsoft Word will add text to the top of your pages.
- When adding a header, you can choose between pre-made templates or blank.
- In Header settings, you can toggle «Different First Page» and «Header Position».
-
1
Open Microsoft Word. It’s a blue app with a white «W» on it.
- You can also open an existing document by double-clicking it.
-
2
Click Blank Document. This will open a new document in Word.
Advertisement
-
3
Click the Insert tab. You’ll see it near the top of the Word window, directly to the right of the Home tab.
-
4
Click Header. It’s in the «Header & Footer» section that’s on the right side of the row of options near the top of the screen. You’ll see a list of header options in a drop-down menu.
- These options will vary depending on your Office subscription type and version of Word.
-
5
Click a header option. In most cases, you’ll just click the Blank option, since it will apply to the majority of Word documents necessitating a header. Selecting an option will add it to your document.
-
6
Type in your header’s text. This is the text that will appear at the top of every page.
-
7
Click Close Header and Footer. Doing so will apply it to your document; you’ll see your header text at the top of each page.


Advertisement
-
1
Double-click your header text. Doing so will open the Header options menu in the bar near the top of the Word window.
-
2
Review the header’s basic settings. There are a couple of aspects of the header that you can edit in the «Options» and «Position» sections:
- Different First Page — Check this box to customize your document’s first page’s header. It will appear different than the header on the rest of the pages.
- Header Position — Change the number in the «Header from Top» box to raise or lower the header’s position on the page.
-
3
Click and drag your cursor across the header text. This will select it, which will allow you to modify it as needed.
- If you’re using the «Different First Page» option, you’ll need to do this on a page other than the first for your changes to apply across your document (first page aside).
-
4
Click the Home tab. Doing so will allow you to edit the header by using options in the following sections:
- Font — Edit your text’s font, size, color, and general formatting (e.g., bolding or underlining).
- Paragraph — Change your header’s orientation (e.g., centered).
-
5
Double-click the «Header» tab. It’s below your header’s text; doing so will save your changes and close the header section.


Advertisement
Add New Question
-
Question
How do I make the header show up in the document?

To make a header appear, double-click (left mouse key) the highest part of the «page» and a new box will appear, with a dotted line indicating the «header» boundaries. You can then select the font/sizing/etc. for the header. When you’ve finished writing your header, double-click (left mouse key again) to return to the normal page, and leave the header at the top. Note that the header will fade out slightly and will seem to have a greyish tint. Your header will appear at the top of every page.
-
Question
How can I have page numbers inserted sequentially?
Once you add page numbers in the header options, they will automatically be inserted sequentially.
-
Question
How do I add another header in Microsoft Word if I already have one?
Go to the «Design» tab in the menu across the top. You’ll see an option to «Link to Previous.» That is where you turn headers on and off.
Ask a Question
200 characters left
Include your email address to get a message when this question is answered.
Submit
Advertisement
Video
Thanks for submitting a tip for review!
About This Article
Article SummaryX
1. Open a new or existing document in Microsoft Word.
2. Click Insert.
3. Click Header.
4. Click a header template.
5. Enter your preferred text.
6. Click Close Header and Footer.
Did this summary help you?
Thanks to all authors for creating a page that has been read 300,868 times.
Is this article up to date?

Microsoft Word gives you the option to place a header and footer at the top and bottom of your pages. You can place anything in this section, but Word uses header and footer information in all pages. You can use these settings to create titles above your pages and page numbers at the bottom of your pages.
Header and Footer Buttons
The header and footer settings buttons are in the «Insert» tab. Click the tab and find the «Header & Footer» category located in the tab.
(Header and footer buttons)
The arrows under each button indicate that clicking it will display a set of options. Headers are generally reserved for leaving titles at the top of pages. When you read a paper novel, you see the book’s title at the top of a page. Some books have the chapter name at the top of a page. This is what a header does in a Word document.
Footers are generally used for information regarding page numbers or information that you want to mark at the bottom of each page. If you choose to add page numbers to the bottom of your pages in a footer setting, Word will automatically increment each page number. You don’t need to manually type a page number in each footer. Word knows that a page number setting should display the page number.
In this lesson, we’ll discuss header and footer configurations to customize long documents with several sections, chapters and pages.
Setting a Word Document Header
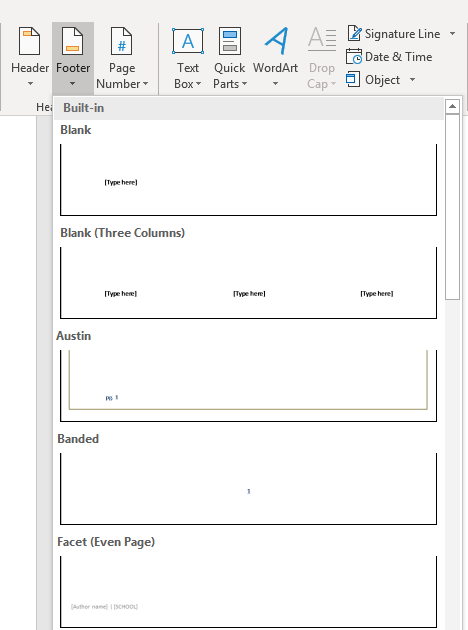
When you click the «Header» button, Word opens another window asking if you want to create a header for your document. If you click the button a second time, a list of preset header configurations is shown in a dropdown list.
(Header options dropdown styles)
You can add any one of these header options to the document, and Word will automatically format it using the style shown in the example. Choose the «Banded» option and notice that a header is added to the top of the currently active page.

(Header added to document)
After you choose a header style, it’s shown at the top of the current page with a tab at the bottom-left corner that says «Header.» Whenever you type any content in a document header, Word automatically displays this tab to let you know that the content you’re adding to the document is the header and not the body of the page.
Word displays a prompt where you can type your custom header. In the image above, the template location is labeled «Title.» Remember that headers are generally used for titles that will be displayed on every page, so typing content in the header template will be shown in each page as static content. When you add static content to a header or footer, this same content persists across all pages. Not only does the content remain the same, but the style also persists across all pages.
In the image above, the title «Test Document» is added to the header. The content is set at all capital letters due to the style presets created by Word. You can still customize header settings, but any changes that you make will affect all pages in your file. To test the new header settings, add a new page to the document.
Before you add a page break, click the document body. Notice that the «Header» tab disappears, and you’re returned to the page body as the active part of the document. To add a page break, go to the «Pages» category in the «Insert» tab. Click the «Page Break» button and a new page is added to the document. Depending on the view layout, you see a new page added to the right or to the bottom of the current page. Notice that the header persists, and you see the same text and style in the footer of the new page.
Creating Footer Settings
Headers give you the benefit of adding static content at the top of your pages, but footers are usually reserved for content that changes from page to page. Most commonly, footers contain page numbers. Word supports a number of preset footer styles. You can place a page number to the left, center or right of the page. Word also supports styles that make footer settings more attractive than just having a number at the bottom of a page.
The «Footer» button is located next to the «Header» button, and clicking it displays the same action. A dropdown list of styles is displayed where you can choose the one that you prefer for your document.
(Footer dropdown options)
You’ll notice that several footer options and styles are the same as the options displayed for the header dropdown. These preset styles can be added to your footer so that you don’t need to create one on your own.
The most common footer is page numbers. In the footer dropdown options, you can see the page number examples with the styles applied so that you can sample what your footer will look like.
A better option to create a page number in a footer is using the «Page Number» Word function. Next to the «Footer» button is the «Page Number» button. Click this button and then choose a location for the page number. In this example, the bottom of the page is chosen. Then, choose a style and location for the page number. In this example, the right side of the bottom of the page is chosen, and Word opens the footer and places a page number to the right side of the page.

(Page number footer added to a document)
Similar to the «Header» tab that displays when you edit the header section, Word displays a «Footer» tab as you change the content in a footer. This lets you know that you aren’t editing the body of a document but rather the footer. Notice in the image above that the page number «2» displays. This number is automatically generated based on the page where it’s displayed.
If you look at the first page in your document, you’ll notice that the page number is «1.» You can test the footer feature by adding a new page break on page two. A new page is created, and at the bottom of the page will show the number «3.» Word takes care of the page numbers, so should you add or delete a page in your document, the numbers will reflect the right page.
You can further format page numbers by clicking the «Page Number» button again and selecting «Format Page Numbers.» This selection opens a configuration window.

(Page Number Format configuration window)
It’s standard to start page number counts on page two, and this window lets you configure at which page the first number displays. You can start at any page, but it’s common to start after the table of contents if you have a large document. You can also change the number format from the top dropdown. For instance, you can use roman numerals as page numbers.
You can also include chapter numbers if you’re creating an ebook or a large document that has a table of contents. These footer configurations help customize the way Word displays page numbers and other information across the document.
Setting headers and footers is common for large documents, and you’ll use this feature often when you create long documents. We’ll cover creating a table of contents in later chapters, which is another useful tool that Word offers that will automatically generate organizational information for documentation.
When one of the default Microsoft Word headers doesn’t work for you, create your own with these steps.

Microsoft Word provides a built-in feature to create headers for your documents. This way, you can add your company logo, stamps, or branding elements without having to create them again and again.
Creating a custom header for your organization is a great way to make your Word documents look professional. It can also reduce one of the repetitive design tasks on your documents. Here’s how you can make your Word documents stand out with a custom header.
You can either add the built-in headers from Microsoft Word or customize them as per your requirements.
1. To start, open your Word document and click on the Insert tab.
2. Next, click on the Header option to either add a header or edit it. Here you’ll also see the built-in headers provided by Microsoft Word.
3. After selecting one of the Built-in headers, click on Close Header and Footer to start editing your document.
This is a great option if you’re creating college projects or personal documents that don’t require a lot of customizing. However, we’re more interested in designing the header to match our styles. So let’s see how that’s done!
1. Just below the built-in header features on the Word menu, you’ll see the Edit Header option. Select that to edit your header.
2. This will display the Design tab of Header & Footer Tools. With the options under this tab, you can create a personalized header that suits your style.
Tip: Double-click on the top of any page of the document to open the Edit Header option.
Here are the different elements you can customize to create your unique header. All options are available on the Header & Footer tab on the Ribbon:
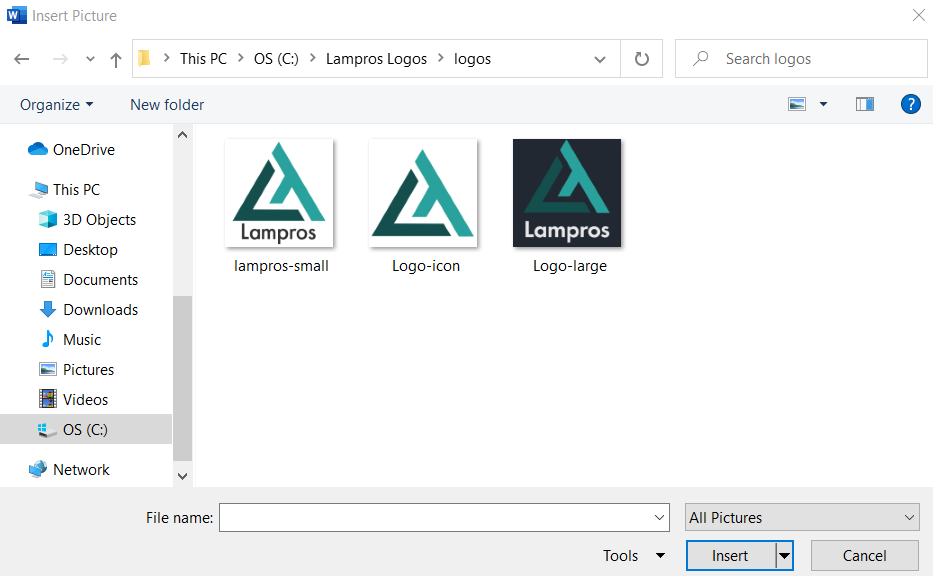
Pictures
Pictures are the most important visual element in a header. A picture can be a company’s logo or something else.
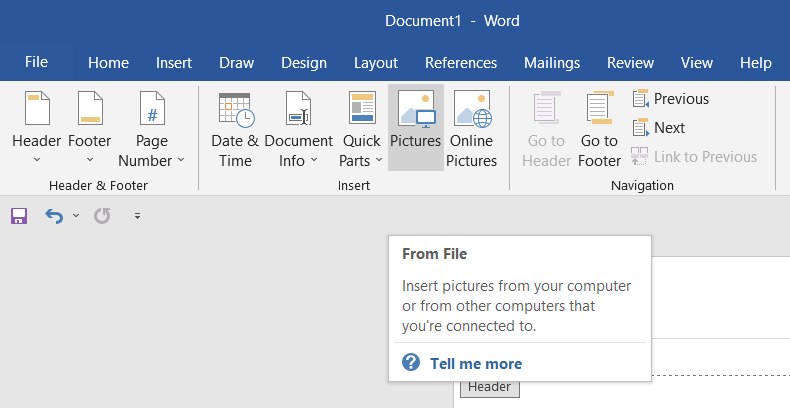
1. With the Header & Footer tab open, select Pictures. Next, browse to the image you want to add from your PC and insert it in your document’s header.
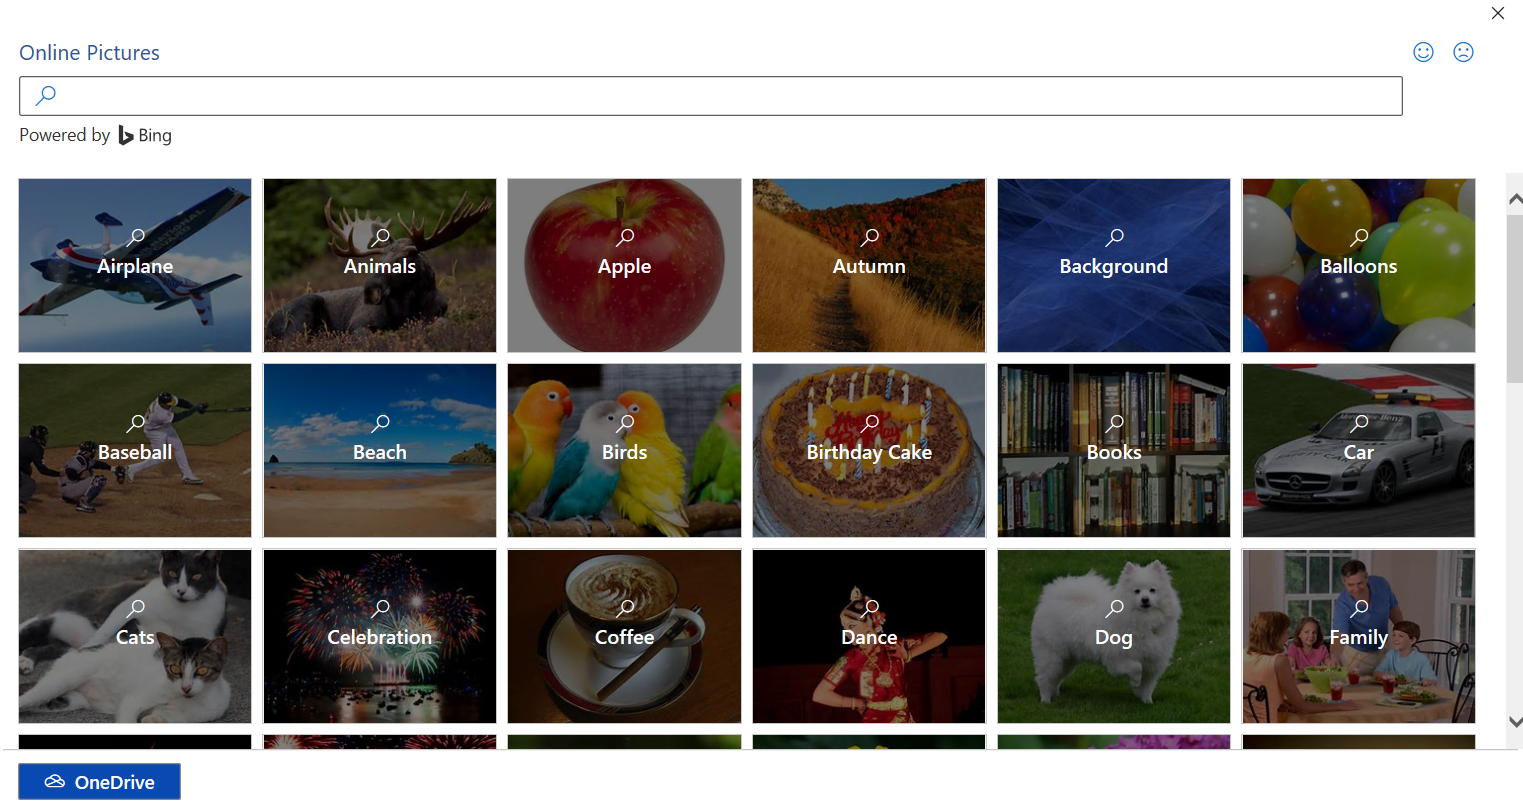
2. You can also add images from the web using the Online Pictures option located in the Insert group of the Header & Footer ribbon.
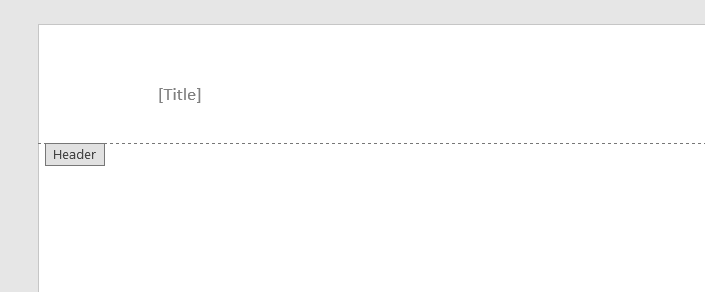
Document Title
1. Go to the Document Info menu on the Insert group and click on Document Title.
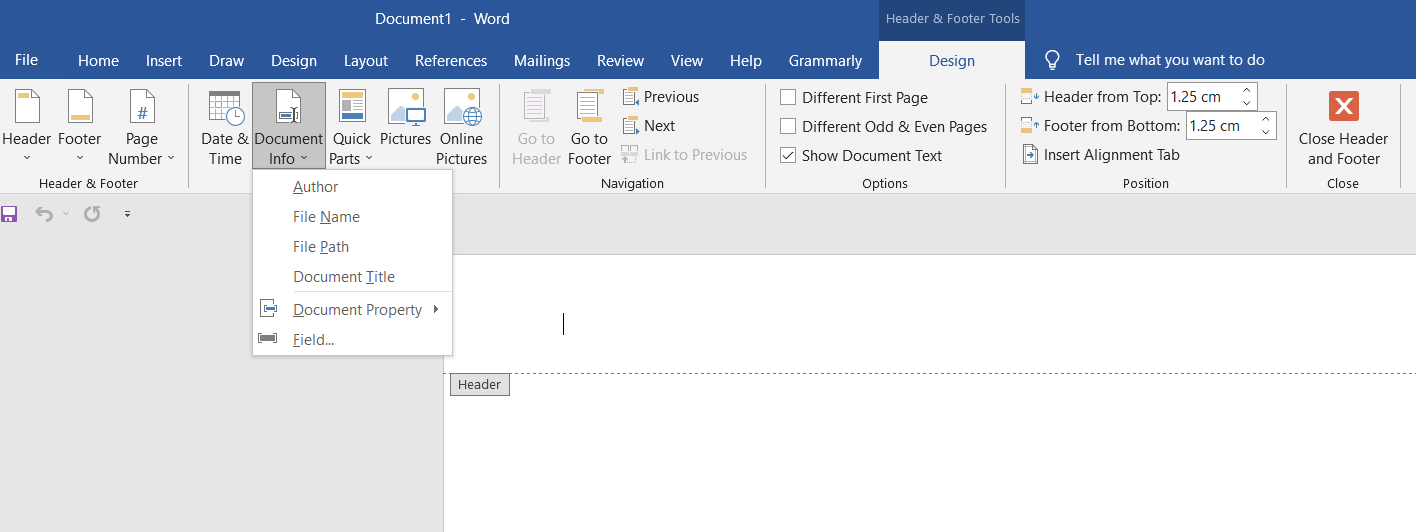
2. This creates a placeholder in the Header section. You can update your Document Title here.
Document Title is just one of the information about the Word Document. Likewise, there are other properties you can add to the header.
Document Property
Document Property can be any detail regarding the document such as Author, Company, Company Address, etc.
1. To add these, go to Document Info > Document Property, and select the property that you want to add.
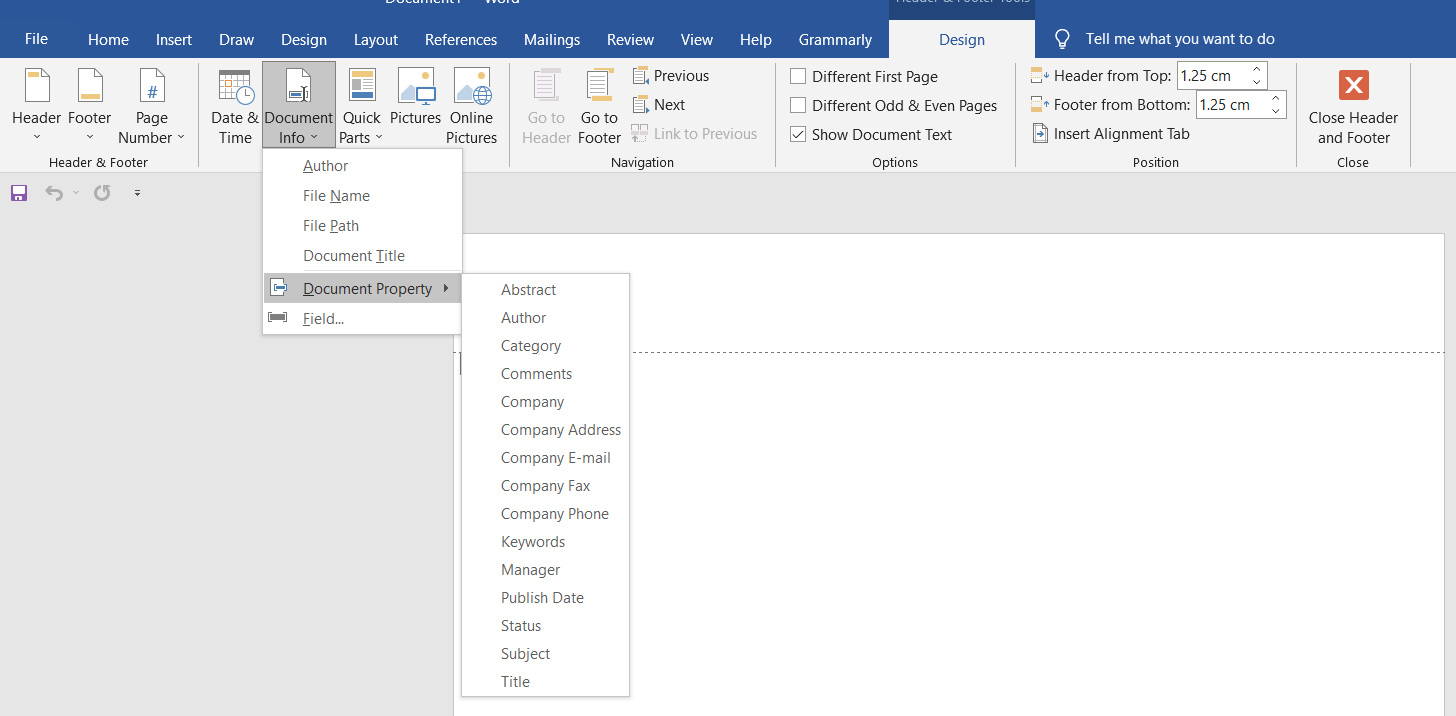
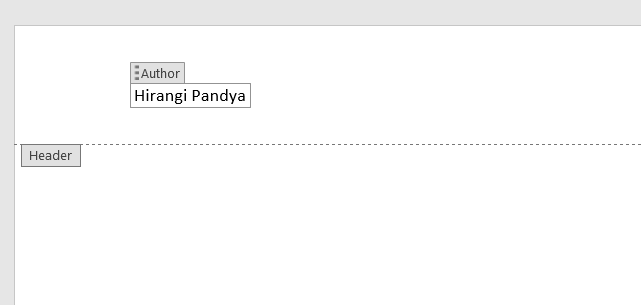
2. As an example, let’s add the Author of the document to the header. When you select the option, it will create a placeholder for the author. By default, it will take the current author’s name. However, this is editable and can be updated.
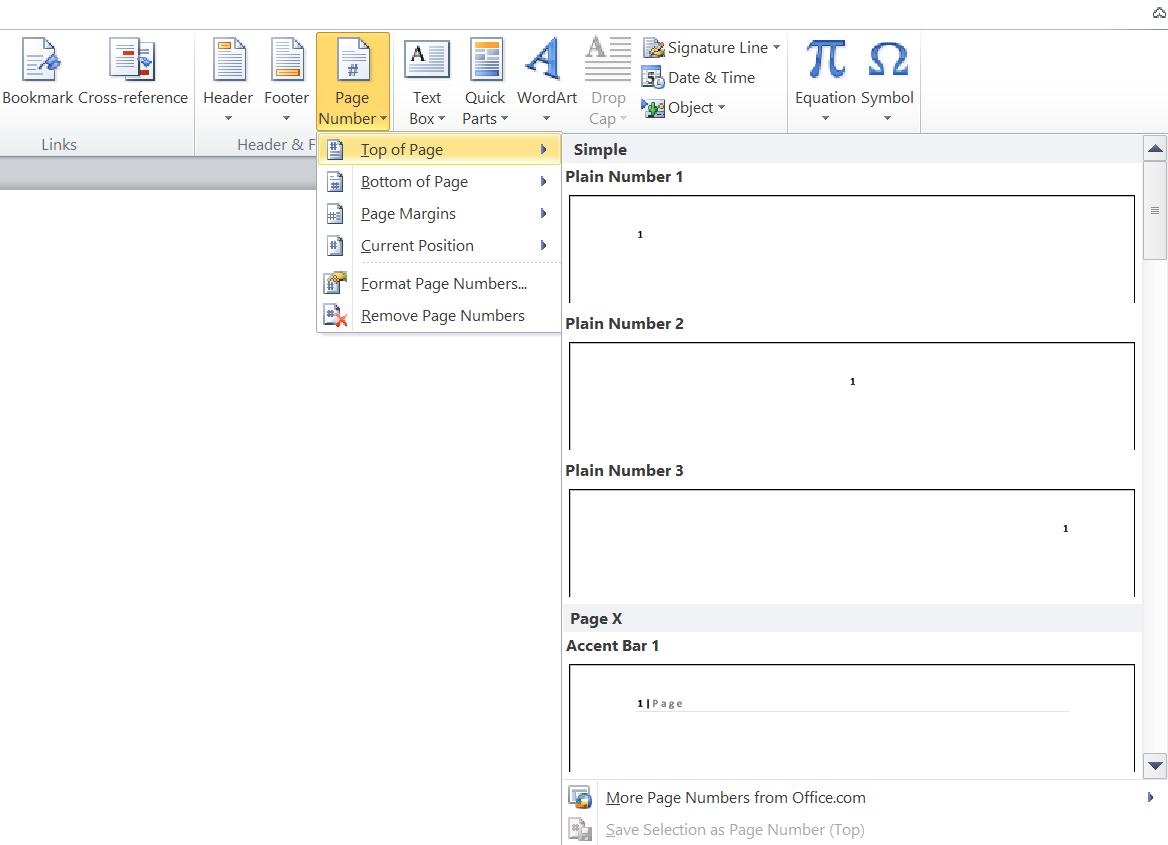
Page Number
1. Click on Page Number to display the dropdown.
2. Select the Top of Page option to include it in the header. Again, Microsoft Word has some built-in designs to add a Page Number to your header. You can select the one that you want to add.
Date & Time
1. Click on Date & Time.
2. Select the format you want to insert in the document.
3. If you want to automatically update this information, then you can check the Update automatically box.
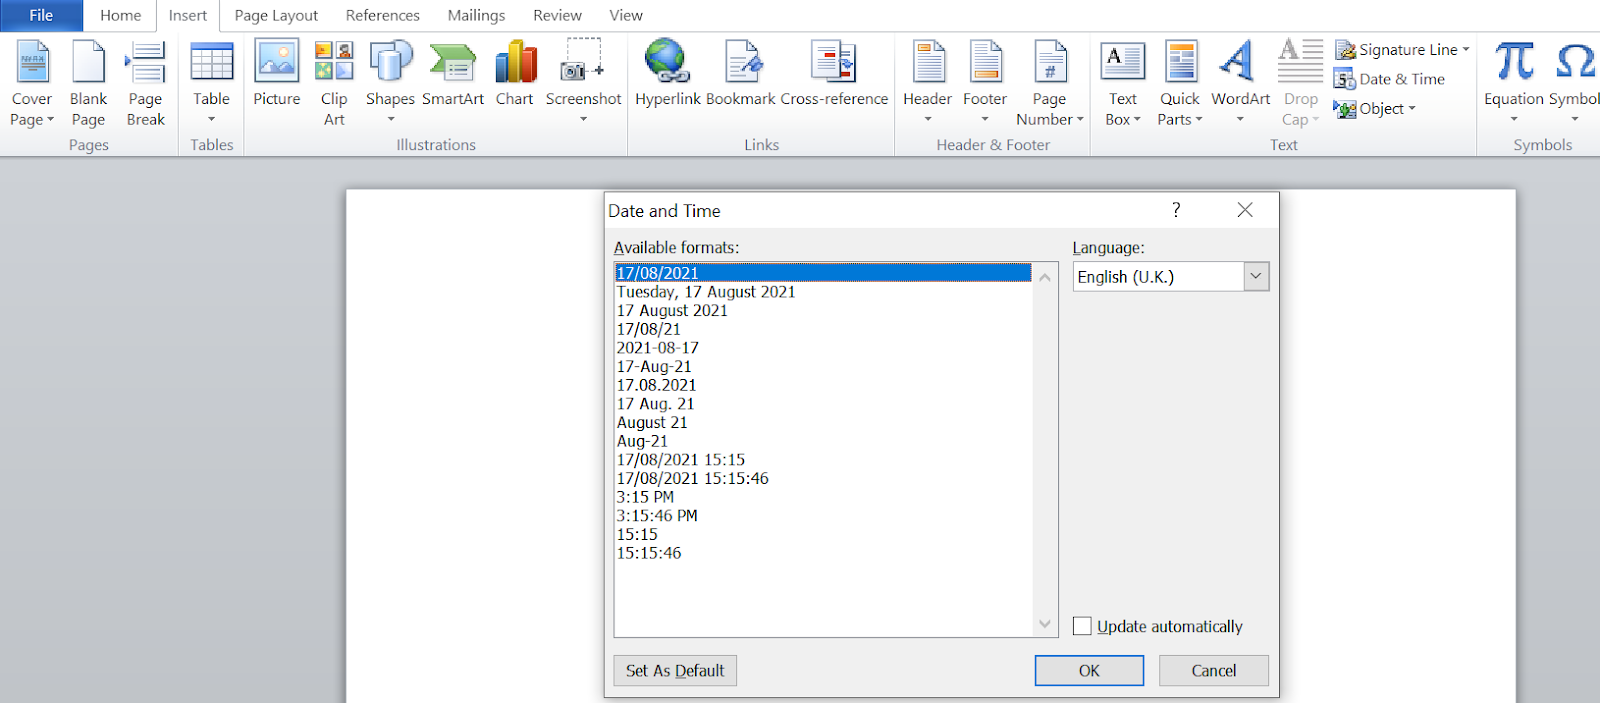
4. After selecting the format, click OK.
Quick Parts
Quick Parts can be used to add frequently-used blocks of text to the documents. Quick Parts is another method to speed up your header design. Let’s look at how to use Quick Parts within the header.
1. Save Selection lets you select the written portion you want to add from the option of Save Selection to Quick Part Gallery. Select OK and it will be saved in the Quick Part gallery.
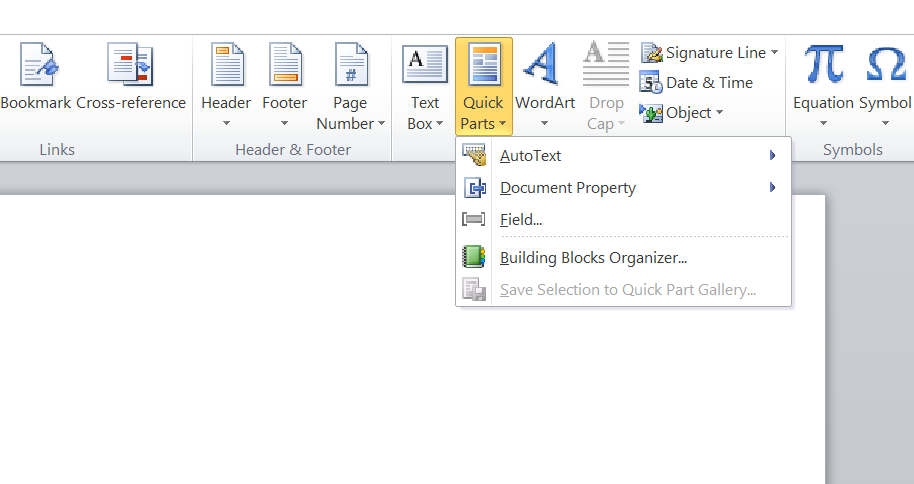
2. AutoText is a pre-made block of text. You can browse from a selection of default AutoText under the option of Quick Parts. You can also make one and add it to the Quick Parts gallery.
3. The Field option displays information that is specific to the current document or page. The information in the field includes the author name, page number, document title, and document date.
Likewise, you can select the properties that meet your requirements. Once done, click on OK to save your choice.
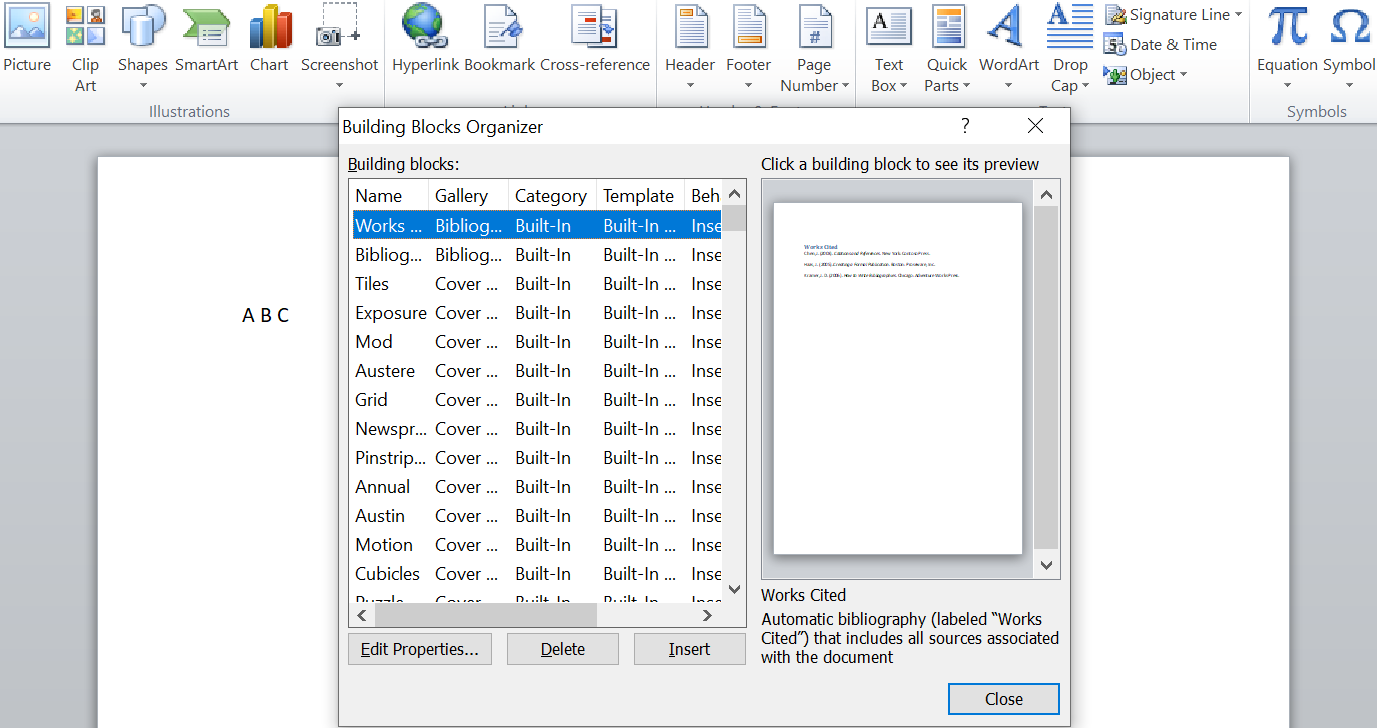
4. With the option of Building Blocks Organizer, you can view and organize different properties of Quick Parts. From the different Building Blocks that are available, you can Edit Properties, Insert, or Delete. Once done, you can click on Close to save your changes.
How to Create a Branded Header in Word
Now that we’ve looked at all the options available let’s create a branded header for an organization. Using headers and footers in MS Word is important to create that professional document.
1. Double-click on the top of the page to open Header & Footer Tools.
2. To add a Page Number on Top of Page, select a design of your choice.

3. Click on Pictures to insert any graphic. This can be a colorful design or a logo saved in one of the image formats.
4. You can also add a company logo to the header. For our example, let’s see how it will look with both images.
![]()
5. Now that your header is ready, you can start creating documents with it. Double-click anywhere below the header area to add the content for the document.

You can use these design skills to create any other document in Microsoft Word. For instance, you can create a certificate template for your school or company or design a custom cover page. Combine a custom cover page with a unique header to make your documents stand apart from others instantly.
Headers are extremely useful when you want to add essential page information to the top of every page on your document. However, if it’s still time-consuming or difficult for you, go with a built-in header template.

Headers and footers are useful for adding things such as page numbers, dates, file names, and disclaimers to documents. Word allows you to add headers and footers with built-in, ready-made layouts or add your own custom headers and footers.
NOTE: We used Word 2013 to illustrate this feature.
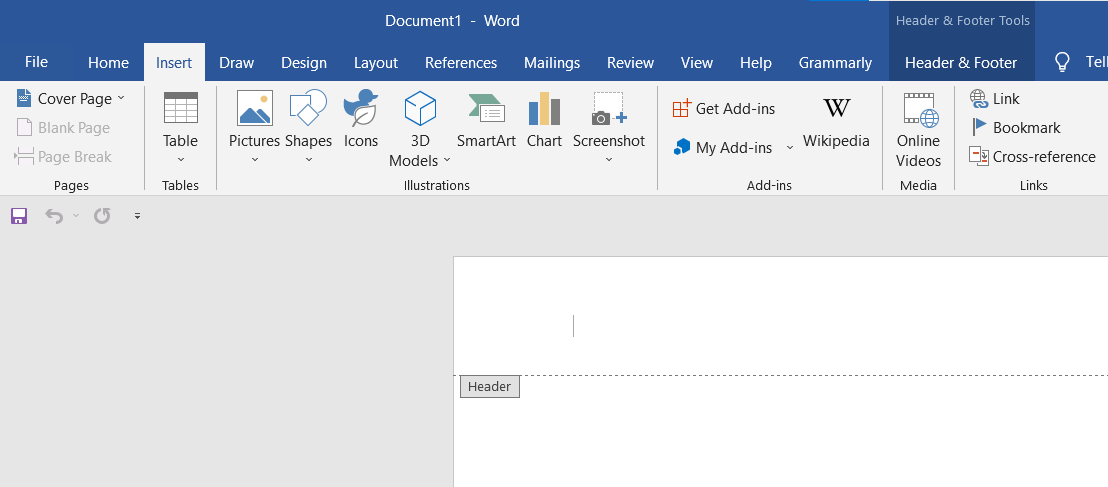
To add a header or footer, click the “Insert” tab.

For this example, we’ll start with adding a header, so, in the “Header & Footer” section of the “Insert” tab, click “Header.”
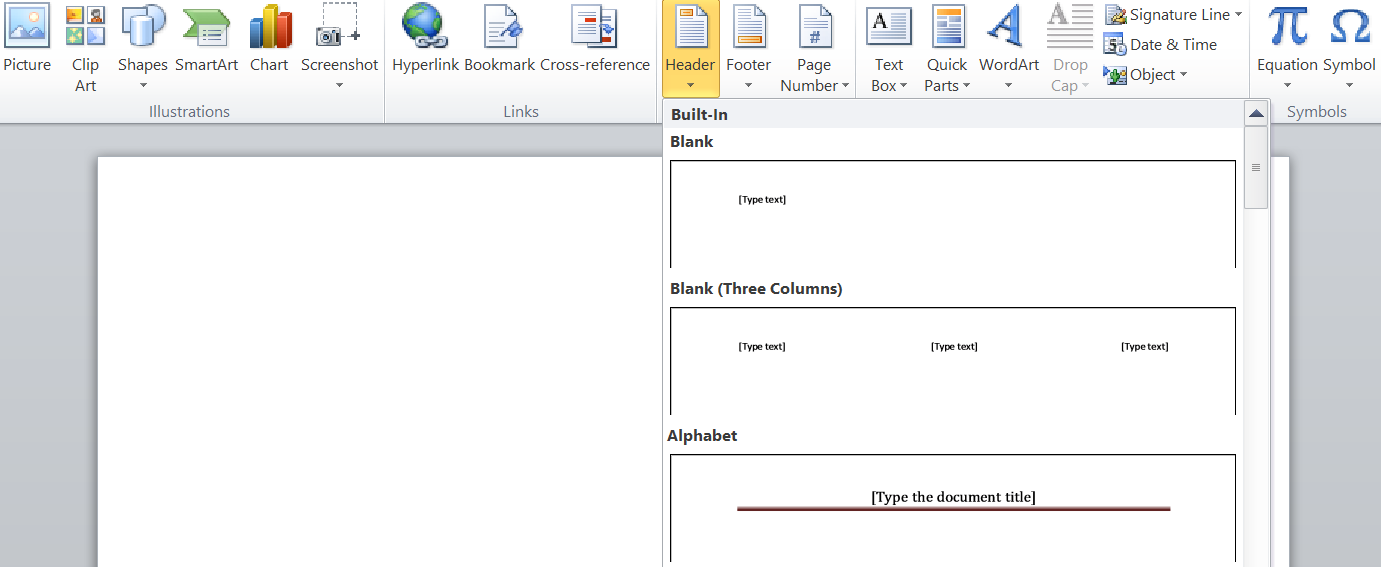
A list of built-in header layouts display on the drop-down menu. Scroll down for additional layouts and select a ready-made header layout from the list.
The pre-defined layout is inserted into the header, which is marked by a dashed line and a “Header” tag.
Most ready-made headers contain some placeholder text. In the ready-made header we chose, the document title from the advanced properties was inserted into our header. You can keep the placeholder text or replace it with your own text.
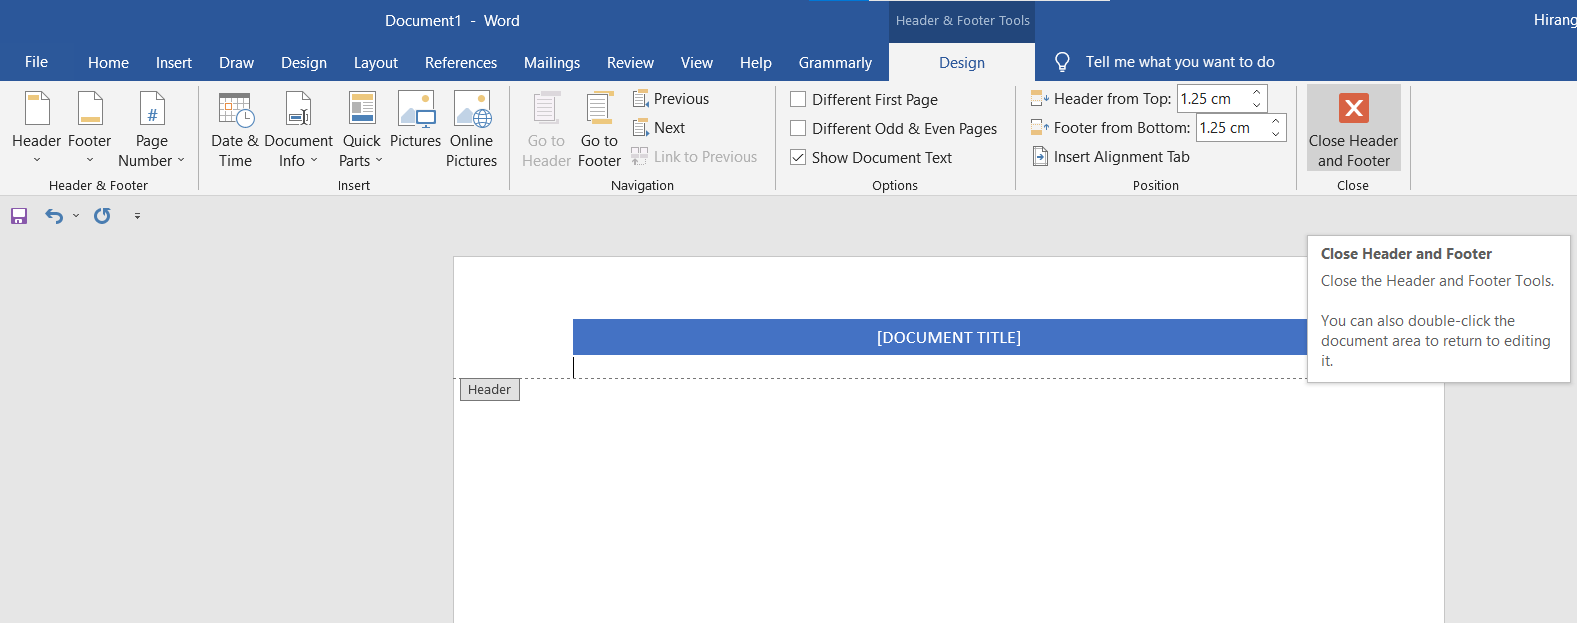
Notice that the text in the main body of your document is grayed out. You cannot edit the text in the body of the document while you are editing the header or footer. When we’re done editing the header and footer, we’ll show you how to go back to editing your document.
Notice, also, that an extra tab displays when you are editing your header. A “Design” tab is added at the right end of the ribbon tab bar with a heading of “Header & Footer Tools” above the tab.
NOTE: You may not be able to see the full “Header & Footer Tools” heading above the “Design” tab, depending on the current width of the Word window.
Once you’ve set up your header, you can easily jump to the footer to set it up. To do this, click “Go to Footer” in the “Navigation” section of the “Design” tab under the “Header & Footer Tools.”
You can insert items such as page numbers in your footer using the “Page Number” button in the “Header & Footer” section of the “Design” tab under the “Header & Footer Tools” heading. If you want to insert a ready-made, or built-in, footer, use the “Footer” button above the “Page Number” button to access a list of pre-defined footer layouts, similar to the list available for the header.
When you’re finished setting up your header and footer, you can go back to editing your document by clicking the “Close Header and Footer” button in the “Close” section of the header and footer “Design” tab. You can also double-click on the grayed out text in the main body of the document to return to editing it.
NOTE: If you use the “Close Header and Footer” button, you are returned to where you left off. However, if you double-click on the body text of your document to return to editing it, you are returned to the beginning of your document.
If you want to insert an empty header so you can add your own text or images to it without having to remove placeholder text, click the “Header” button in the “Header & Footer” section of the “Insert” tab and select “Edit Header” from the drop-down menu.
NOTE: You can do the same thing for the footer using the “Footer” button.
Now, you can add your own text and/or images to your header.
Format the text or images however you like, such as centering the line or making the text bold and applying a bigger font.
We made the text in our header bigger than the text in the body of the document, bold, and we added a line below the paragraph. Again, click the “Close Header and Footer” button in the “Close” section of the header and footer “Design” tab to go back to editing your document, or double-click on the grayed-out text in your document.
Headers and footers can be different for odd and even pages. To make different headers and footers for odd and even numbered pages, click the “Different Odd & Even Pages” check box in the “Options” section of the “Design” tab under the “Header & Footer Tools” heading so there is a check mark in the box. The “Header” tag under the dashed line in the header section becomes either “Odd Page Header” or “Even Page Header,” depending on which page you are currently on in your document. Use the “Previous” and “Next” buttons in the “Navigation” section of the “Design” tab to jump between the odd and even headers or footers.
NOTE: The “Different Odd & Even Pages” option is a document-level setting. You can only apply it to the entire document. So, if you turn on the option and your header and/or footer in one or more sections is the same on both odd and even pages, you’ll have to insert the same text twice for each section
When inserting page numbers into the header or footer, you can omit the page number from the first page of your document and start a new section with an odd page number. You can also create multiple headers and footers in a single document.
READ NEXT
- › How to Make a Dot Grid Paper Template in Microsoft Word
- › How to Add Document Properties to a Header or Footer in Microsoft Word
- › How to Edit a Header and Footer in PowerPoint
- › How to Have Different Headers and Footers Per Page in Google Docs
- › How to Reference Text from Other Documents in Microsoft Word
- › How to Customize or Remove the Headers and Footers of a Notepad Text File
- › How to Create a Book in Microsoft Word
- › Google Chrome Is Getting Faster