
Insert a header or footer

-
Go to Insert > Header or Footer.
-
Choose the header style you want to use.
Tip: Some built-in header and footer designs include page numbers.
-
Add or change text for the header or footer. For more info on things you can do with headers, see Edit your existing headers and footers. To edit a header or footer that’s been already created, double-click on it.
-
To eliminate a header—like deleting it on the title page—select it and then check the Different First Page box.
-
Select Close Header and Footer or press Esc to exit.
To delete, select Insert > Header (or Footer) > Remove Header (or Remove Footer).
Add a standard or customized header or footer
-
Go to Insert > Header or Footer.

-
Choose from a list of standard headers or footers, go to the list of Header or Footer options, and select the header or footer that you want.
Or, create your own header or footer by selecting Edit Header or Edit Footer.
-
When you’re done, select Close Header and Footer or press Esc.
Important:
Office for Mac 2011 is no longer supported. Upgrade to Microsoft 365 to work anywhere from any device and continue to receive support.
Upgrade now
-
On the Layout tab, under View, click Page Layout.
-
On the Layout tab, under Page Setup, click Header & Footer.
-
Choose from a list of standard headers or footers by going to the Header or Footer pop-up menu, and clicking the header or footer that you want.
Or, create your own header or footer by clicking Customize Header or Customize Footer and following the instructions.
Note: When you customize your header or footer, you can add images, page numbers, date, time, sheet name, file name and path, and more.
-
Go to Insert > Header & Footer.
-
Add or header or footer text.
-
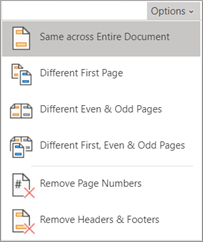
Use the Options menu for additional customization.
-
To exit, select Close Header and Footer or press Esc.
-
To delete, select Insert > Header (or Footer) > Remove Header (or Remove Footer).
For more on headers and footers, see Headers and footers in Word.
Need more help?
Want more options?
Explore subscription benefits, browse training courses, learn how to secure your device, and more.
Communities help you ask and answer questions, give feedback, and hear from experts with rich knowledge.
![]()
Download Article
![]()
Download Article
This wikiHow teaches you how to create your own custom headers and footers in Microsoft Word. You can start with one of Word’s pre-made header and footer templates or start yours from scratch. Both headers and footers can include custom text, page numbers, images, and special formatting.
Things You Should Know
- Click Insert > Header or Footer > Edit Header or Edit Footer.
- Create your header. You can add page numbers, date, and logos. Then, hit Close Header & Footer to preview it on the document.
- Double click the header or footer to make edits or change the settings.
-
1
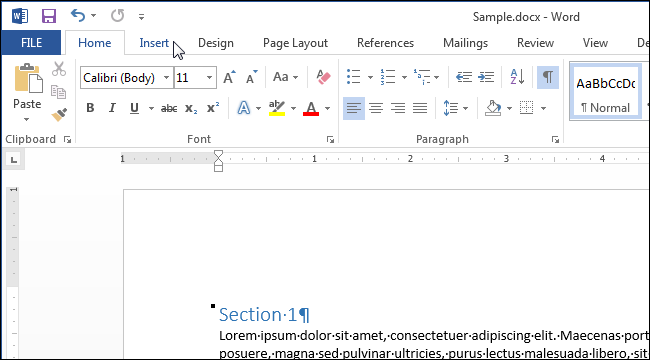
Click the Insert tab. It’s at the top of Word.
- If you’ve already inserted a header or footer and want to edit it, simply double-click it now.
-
2
Click Header or Footer. It’s in the «Header & Footer» panel at the top of Word. A menu will expand.
- On the menu, you’ll see different header and footer styles that you can use as a starting point—all are fully editable. You can select one of these now to add it to your document if you’d like. To edit the header or footer after placing it, just double-click it on the page.
- You can also browse more pre-made headers and footers by clicking More Headers from Office.com.
Advertisement
-
3
Click Edit Header or Edit Footer. Depending on the option you selected, you’ll see the link at the bottom of the menu. This opens a Design tab in the toolbar that’s specifically for creating custom headers and footers.
- Every time you double-click a header or footer to edit it, the Design tab (Windows) or Header & Footer tab (Mac) will automatically open.
-
4
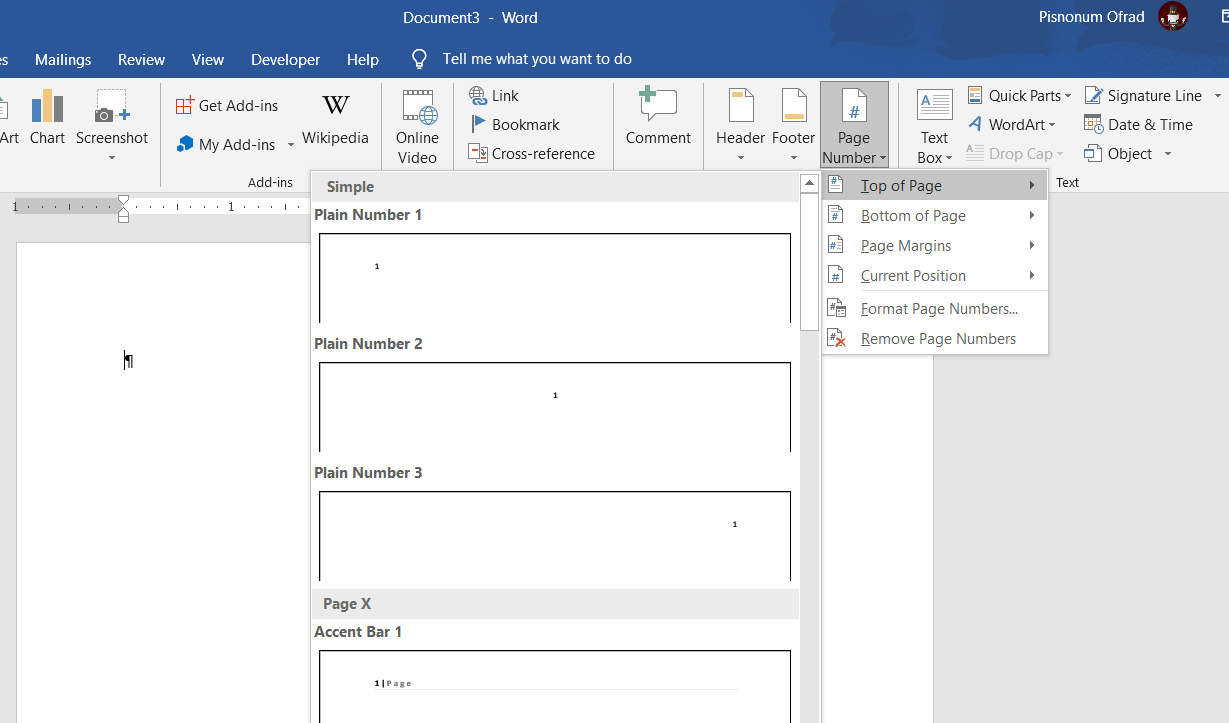
Click Page Number to add page numbering. You can select from a number of numbering styles and locations from the menu.
- Click the Format Page Numbers menu to choose a different number format, such as roman numerals. You can also choose to add other numbering elements here, such as chapter numbers and headings.[1]
- Click the Format Page Numbers menu to choose a different number format, such as roman numerals. You can also choose to add other numbering elements here, such as chapter numbers and headings.[1]
-
5
Add text to the header or footer. If you’d like to add specific text, such as your name, to the header or footer, you can easily type it at the desired location. If you chose one of Word’s pre-made header or footer templates, you can edit the placeholder text by clicking the text and typing over it.
-
6
Insert other features into the header or footer. The «Insert» panel on the Design or Header & Footer tab contains a bunch of different features you can add to your header or footer:
- Date & Time: This allows you to select a date and/or time format to place in the header or footer.
-
Document Info: Use this option to include certain information about your document in the header or footer, such as the document’s title, author name, and file path.[2]
- Quick Parts: Quick Parts are reusable text and properties that you can add to any part of your document, including headers and footers.
-
Pictures or Online Pictures: You can use either of these options to place an image into your header or footer.[3]
For best results, stick to a small image, such as a decorative horizontal bar or logo.
-
7
Click Close Header & Footer. It’s the red-and-white «X» icon on the far right side of the Design tab. This closes the header and footer editor, which shows you how it will really look on your document.
- If you added a header and want to add a footer as well (or vice-versa), return to the Insert tab and select Header or Footer as necessary.


Advertisement
-
1
Double-click the header or footer. If you don’t want the header or footer you created to appear on the first page (or until a certain page you specify), use this method. Start by double-clicking the header or footer on the first page to open it for editing.
-
2
Check the box next to «Different First Page.» It’s in the Options panel on the Design tab (PC) or Header & Footer tab (Mac), which opens automatically. This removes the header or footer from the first page, making the second page of your document the new Page 1.
- If you’d like, you can select Different Odd & Even Pages to place different headers/footers on even and odd pages. For example, if you want odd pages to contain the title of your document and even pages to display a page number.
- The Show Document Text option just toggles the actual text of your document on or off so can see what the header or footer looks like without the document.
-
3
Click Close Header & Footer. It’s the red-and-white «X» icon on the far right side of the Design or Header & Footer tab. This saves your changes.


Advertisement
Add New Question
-
Question
How can I put my name in a footer on the left on every page and put the page number on the right, having it change on each page?

Malsha Ranawaka
Community Answer
There are pre-designed footers like this available. If this is not in your list, simply select a footer design that has two text fields on the left and right. Then go to «edit footer» mode and put the name on the left. Select the text field on the right. In the «Header & Footer Tools» tab, select «Quick Parts.» From the dropdown, select «Fields.» This will open a dialog box. Select «Page» from the field names list. Select a page number format and click «OK.» You will get an updating page number field on the right.
-
Question
How do I insert a line above the footer?
Malsha Ranawaka
Community Answer
Go to Edit Footer, and place your cursor somewhere in the first line of words you have in the footer. Select the «Home» tab. In the «Paragraph» section, select the «Borders» dropdown. From the dropdown menu, select «Top Border», and you will get a border above the footer.
-
Question
How do I edit a horizontal line in MS Word 2007?
Malsha Ranawaka
Community Answer
Double click on the line, or right click it and select «Format Horizontal Line» to get the dialog box with edit options.

See more answers
Ask a Question
200 characters left
Include your email address to get a message when this question is answered.
Submit
Advertisement
Video
-
Browse through Microsoft Word’s collection of templates before you start adding your own header and footer to documents. The pre-set templates can save you a lot of time.
Thanks for submitting a tip for review!
Advertisement
About This Article
Article SummaryX
1. Click the Insert tab.
2. Click Header or Footer.
3. Click a header or filter option, or select Edit Header/Footer to start from scatch.
4. Click Page Number to add automatic numbering.
5. Add text.
6. Insert dates, document info, quick parts, and/or images.
7. Click Close Header & Footer.
Did this summary help you?
Thanks to all authors for creating a page that has been read 324,489 times.
Is this article up to date?

Microsoft Word gives you the option to place a header and footer at the top and bottom of your pages. You can place anything in this section, but Word uses header and footer information in all pages. You can use these settings to create titles above your pages and page numbers at the bottom of your pages.
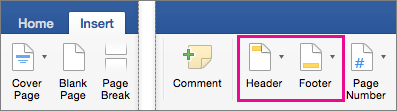
Header and Footer Buttons
The header and footer settings buttons are in the «Insert» tab. Click the tab and find the «Header & Footer» category located in the tab.
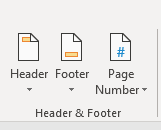
(Header and footer buttons)
The arrows under each button indicate that clicking it will display a set of options. Headers are generally reserved for leaving titles at the top of pages. When you read a paper novel, you see the book’s title at the top of a page. Some books have the chapter name at the top of a page. This is what a header does in a Word document.
Footers are generally used for information regarding page numbers or information that you want to mark at the bottom of each page. If you choose to add page numbers to the bottom of your pages in a footer setting, Word will automatically increment each page number. You don’t need to manually type a page number in each footer. Word knows that a page number setting should display the page number.
In this lesson, we’ll discuss header and footer configurations to customize long documents with several sections, chapters and pages.
Setting a Word Document Header
When you click the «Header» button, Word opens another window asking if you want to create a header for your document. If you click the button a second time, a list of preset header configurations is shown in a dropdown list.
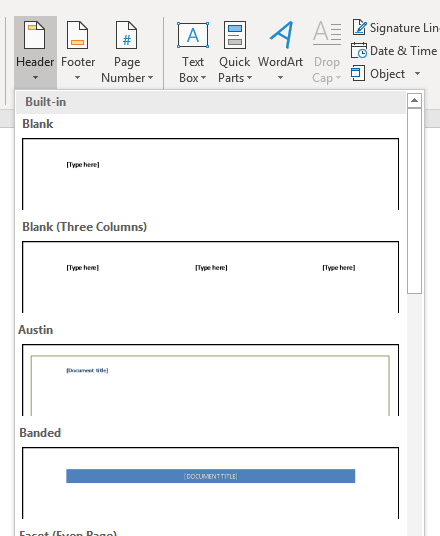
(Header options dropdown styles)
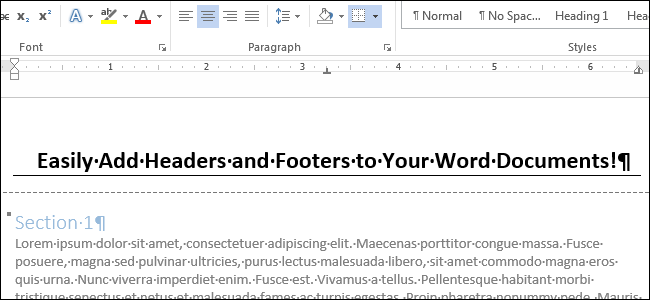
You can add any one of these header options to the document, and Word will automatically format it using the style shown in the example. Choose the «Banded» option and notice that a header is added to the top of the currently active page.

(Header added to document)
After you choose a header style, it’s shown at the top of the current page with a tab at the bottom-left corner that says «Header.» Whenever you type any content in a document header, Word automatically displays this tab to let you know that the content you’re adding to the document is the header and not the body of the page.
Word displays a prompt where you can type your custom header. In the image above, the template location is labeled «Title.» Remember that headers are generally used for titles that will be displayed on every page, so typing content in the header template will be shown in each page as static content. When you add static content to a header or footer, this same content persists across all pages. Not only does the content remain the same, but the style also persists across all pages.
In the image above, the title «Test Document» is added to the header. The content is set at all capital letters due to the style presets created by Word. You can still customize header settings, but any changes that you make will affect all pages in your file. To test the new header settings, add a new page to the document.
Before you add a page break, click the document body. Notice that the «Header» tab disappears, and you’re returned to the page body as the active part of the document. To add a page break, go to the «Pages» category in the «Insert» tab. Click the «Page Break» button and a new page is added to the document. Depending on the view layout, you see a new page added to the right or to the bottom of the current page. Notice that the header persists, and you see the same text and style in the footer of the new page.
Creating Footer Settings
Headers give you the benefit of adding static content at the top of your pages, but footers are usually reserved for content that changes from page to page. Most commonly, footers contain page numbers. Word supports a number of preset footer styles. You can place a page number to the left, center or right of the page. Word also supports styles that make footer settings more attractive than just having a number at the bottom of a page.
The «Footer» button is located next to the «Header» button, and clicking it displays the same action. A dropdown list of styles is displayed where you can choose the one that you prefer for your document.
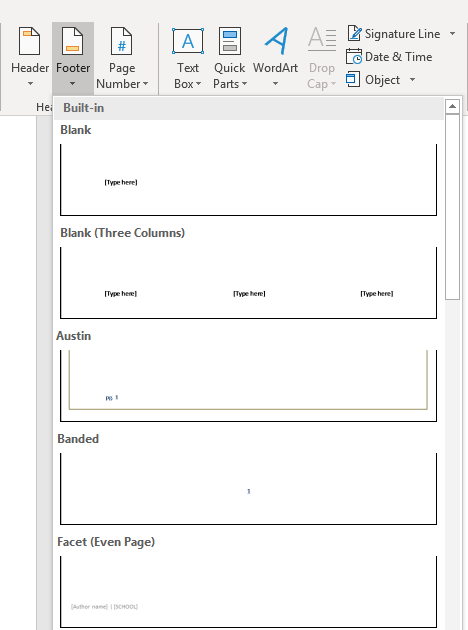
(Footer dropdown options)
You’ll notice that several footer options and styles are the same as the options displayed for the header dropdown. These preset styles can be added to your footer so that you don’t need to create one on your own.
The most common footer is page numbers. In the footer dropdown options, you can see the page number examples with the styles applied so that you can sample what your footer will look like.
A better option to create a page number in a footer is using the «Page Number» Word function. Next to the «Footer» button is the «Page Number» button. Click this button and then choose a location for the page number. In this example, the bottom of the page is chosen. Then, choose a style and location for the page number. In this example, the right side of the bottom of the page is chosen, and Word opens the footer and places a page number to the right side of the page.

(Page number footer added to a document)
Similar to the «Header» tab that displays when you edit the header section, Word displays a «Footer» tab as you change the content in a footer. This lets you know that you aren’t editing the body of a document but rather the footer. Notice in the image above that the page number «2» displays. This number is automatically generated based on the page where it’s displayed.
If you look at the first page in your document, you’ll notice that the page number is «1.» You can test the footer feature by adding a new page break on page two. A new page is created, and at the bottom of the page will show the number «3.» Word takes care of the page numbers, so should you add or delete a page in your document, the numbers will reflect the right page.
You can further format page numbers by clicking the «Page Number» button again and selecting «Format Page Numbers.» This selection opens a configuration window.

(Page Number Format configuration window)
It’s standard to start page number counts on page two, and this window lets you configure at which page the first number displays. You can start at any page, but it’s common to start after the table of contents if you have a large document. You can also change the number format from the top dropdown. For instance, you can use roman numerals as page numbers.
You can also include chapter numbers if you’re creating an ebook or a large document that has a table of contents. These footer configurations help customize the way Word displays page numbers and other information across the document.
Setting headers and footers is common for large documents, and you’ll use this feature often when you create long documents. We’ll cover creating a table of contents in later chapters, which is another useful tool that Word offers that will automatically generate organizational information for documentation.
Верхние и нижние колонтитулы нужны для того, чтобы добавлять в документ такие элементы, как номера страниц, даты, имена файлов и дисклеймеры. В Word можно использовать встроенные и готовые к работе макеты колонтитулов или создать собственные.
Примечание: Иллюстрации для этой статьи взяты из Word 2013.
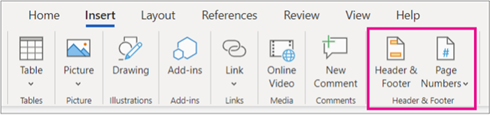
Чтобы добавить верхний или нижний колонтитул, откройте вкладку Вставка (Insert).
Мы начнём с того, что добавим верхний колонтитул. Для этого в разделе Колонтитулы (Header & Footer) нажмите кнопку Верхний колонтитул (Header).
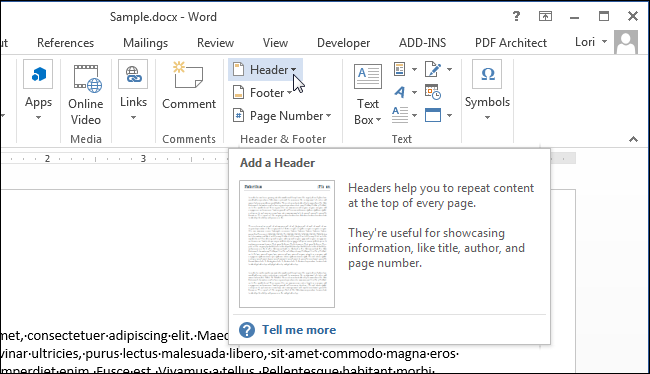
Откроется выпадающее меню с набором встроенных макетов. Пролистайте вниз, просмотрите доступные макеты и выберите из этого списка любой готовый колонтитул.
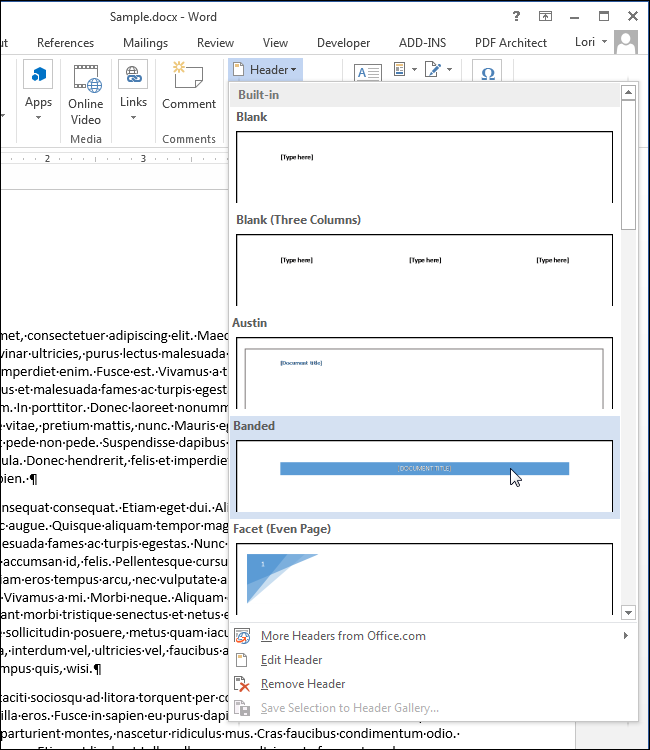
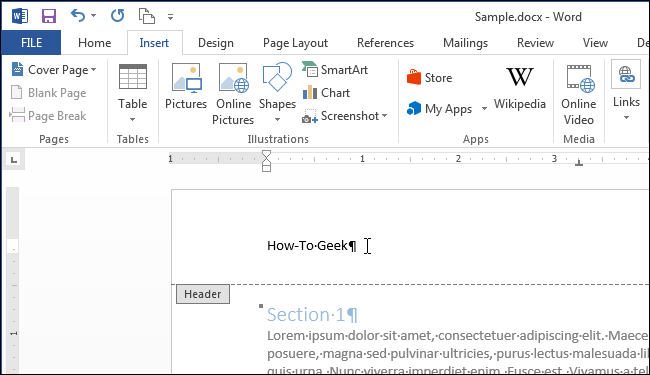
Макет верхнего колонтитула будет вставлен в документ и отделён от прочего содержимого пунктирной линией и меткой Верхний колонтитул (Header).
В большинстве готовых колонтитулов есть поле для ввода текста. В макете колонтитула, который мы выбрали, вставлен заголовок документа, указанный в его свойствах. Вы можете оставить текст, предложенный по умолчанию, или ввести собственный.
Обратите внимание, что основной текст документа сейчас окрашен серым. Вы не сможете его редактировать, пока открыт режим редактирования колонтитулов. Когда мы завершим редактирование колонтитулов, то обязательно покажем, как вернуться в обычный режим.

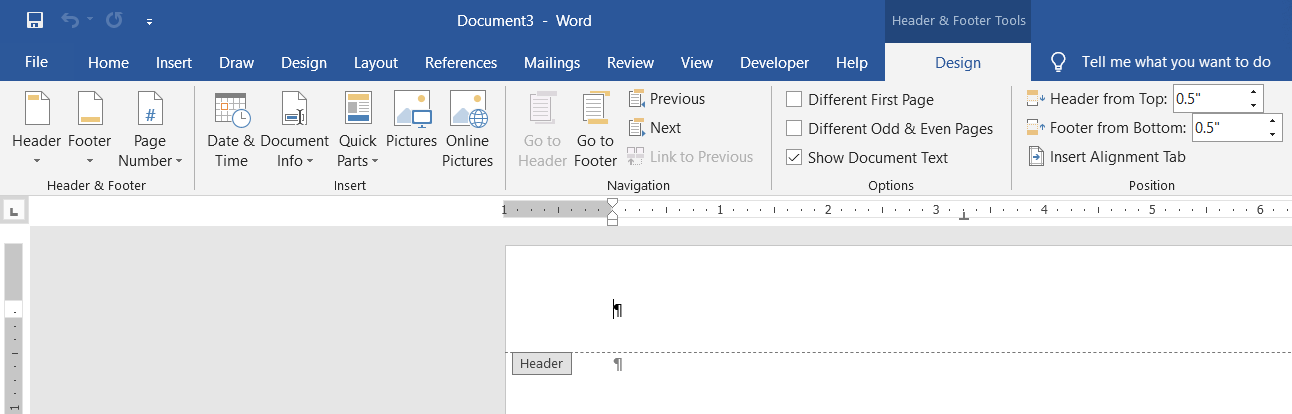
Заметьте также, что в режиме редактирования колонтитулов на ленте появилась дополнительная вкладка. Это контекстная вкладка Конструктор (Design), расположенная под заголовком Работа с колонтитулами (Header & Footer Tools).
Примечание: Возможно, заголовок Работа с колонтитулами (Header & Footer Tools) будет виден не полностью. Это зависит от ширины окна Word.
После оформления верхнего колонтитула можно легко переместиться в нижний колонтитул и заняться его настройкой. Для этого в разделе Переходы (Navigation) вкладки Конструктор (Design) нажмите Перейти к нижнему колонтитулу (Go to Footer).
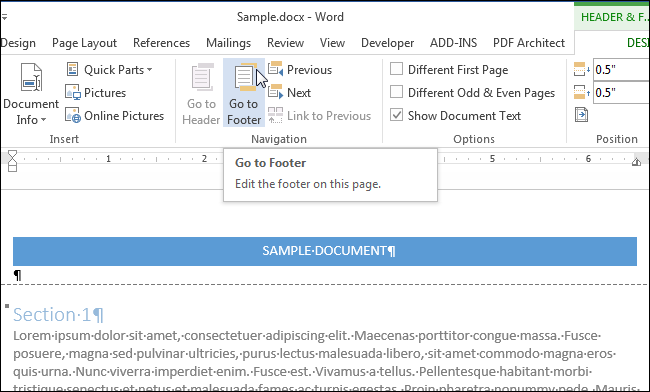
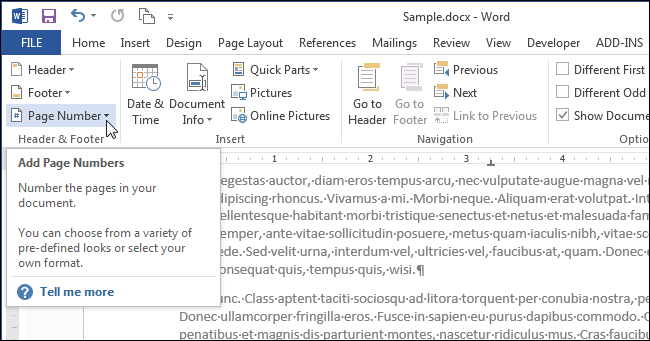
В нижний колонтитул можно вставить, к примеру, номера страниц. Для этого используйте команду Работа с колонтитулами | Конструктор > Колонтитулы > Номер страницы (Header & Footer Tools | Design > Header & Footer > Page Number). Если Вы хотите использовать готовый встроенный макет колонтитула, кликните по кнопке Нижний колонтитул (Footer) и выберите готовый макет нижнего колонтитула.
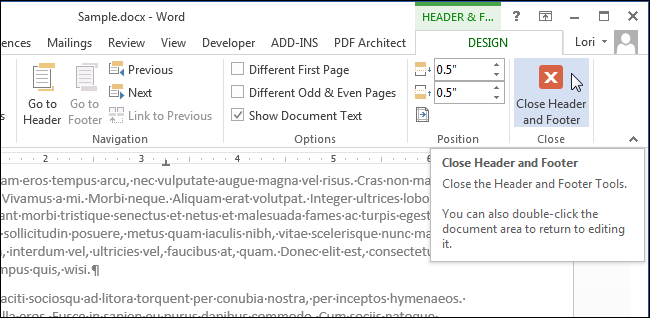
Когда настройки верхнего и нижнего колонтитулов будут завершены, можно вернуться в режим редактирования документа, нажав кнопку Закрыть окно колонтитулов (Close Header and Footer) или дважды кликнув по телу документа.
Примечание: Если вы воспользуетесь кнопкой Закрыть окно колонтитулов (Close Header and Footer), то вернётесь в то место, в котором изначально были. Если дважды кликните по телу документа, то курсор окажется в том месте, по которому вы кликнули. Если на этом месте будет находится какой-либо объект (например, рисунок), то он выделится.
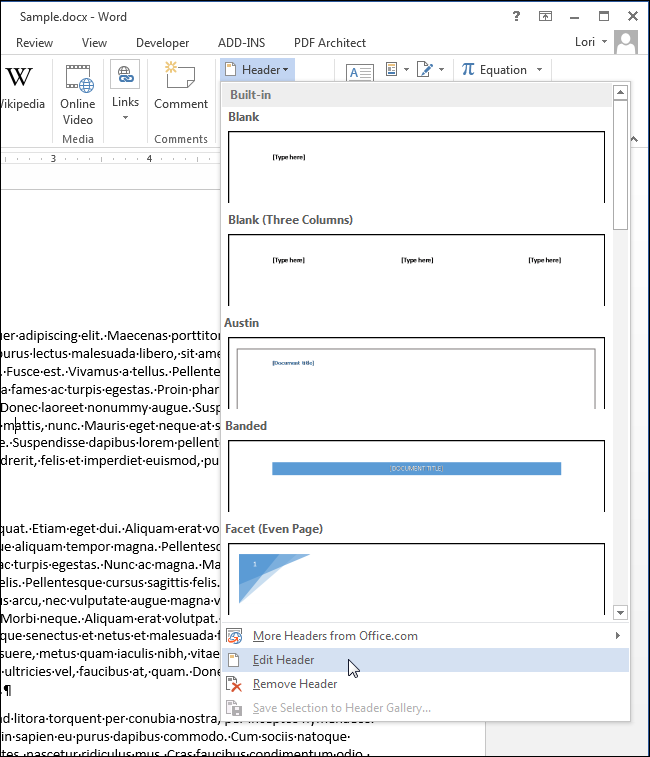
Если Вы хотите добавить пустой колонтитул, чтобы затем вставить в него собственный текст или картинку, нажмите кнопку Вставка > Колонтитулы > Верхний колонтитул (Insert > Header & Footer > Header) и в открывшемся меню выберите Изменить верхний колонтитул (Edit Header).
Примечание: То же самое можно сделать для нижнего колонтитула, нажав кнопку Нижний колонтитул (Footer).
Теперь добавьте к колонтитулу собственный текст и/или картинку.
Настройте для текста (или картинок) необходимый формат, например, выровняйте строки по центру, выделите текст жирным и увеличьте размер шрифта.
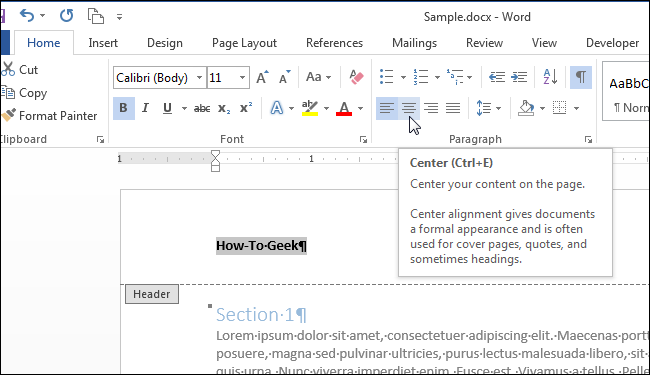
Мы сделали текст верхнего колонтитула больше, чем основной текст документа, выделили его жирным и добавили линию под абзацем. Чтобы вернуться к редактированию документа, снова нажмите кнопку Конструктор > Закрытие > Закрыть окно колонтитулов (Design > Close > Close Header and Footer) или дважды кликните по основному тексту документа.
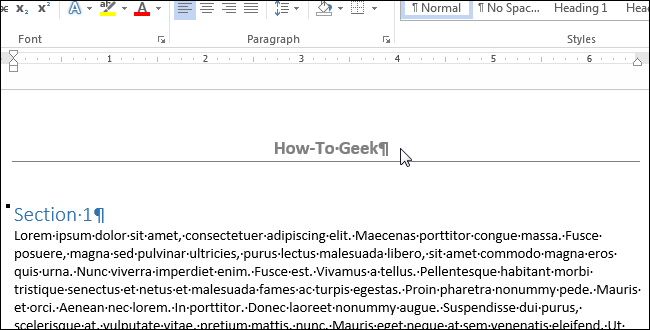
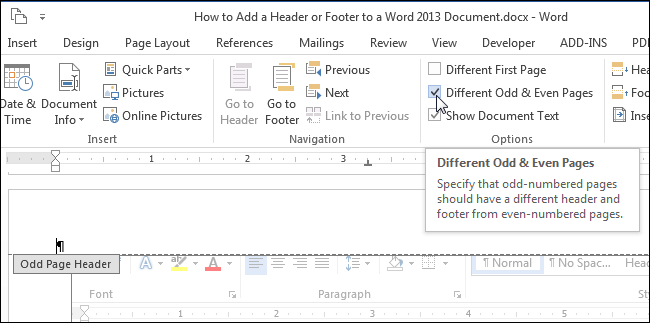
Колонтитулы могут различаться для чётных и нечётных страниц. Чтобы создать разные колонтитулы для чётных и нечётных страниц, поставьте галочку напротив параметра Конструктор >Параметры > Разные колонтитулы для чётных и нечётных страниц (Design > Options > Different Odd & Even Pages).
Теперь вместо метки Верхний колонтитул (Header), которая располагается под пунктирной границей верхнего колонтитула, появится метка Верхний колонтитул нечётной страницы (Odd Page Header) или Верхний колонтитул чётной страницы (Even Page Header), в зависимости от номера текущей страницы документа. Перемещаться между чётными и нечётными колонтитулами удобно при помощи кнопок Назад (Previous) и Вперёд (Next), которые находятся в разделе Переходы (Navigation) на вкладке Конструктор (Design).
Вставляя номера страниц в верхний или нижний колонтитул, можно опустить в нумерации первую страницу документа или начать новый раздел на нечётной странице. Кроме этого, в одном документе можно создавать различные колонтитулы.
Оцените качество статьи. Нам важно ваше мнение:
You can get a lot out of headers and footers in Microsoft Word. We show you how to use them in a document.

Headers and footers are simple to use in Microsoft Word, but there is much more to them than catches the eye. Learn how to get more out of headers and footers in Word.
In Microsoft Word, the top margin of a page is called its header, and the bottom margin is called the footer. Headers and footers are especially useful for including information that you want to display on every page, or specific pages. This information could be the page number, the chapter title, or anything else.
The main difference between a header and a footer is where they’re positioned in the document. So, what works for the header also works for the footer. That being said, let’s start with inserting something to the header in Word.
- Go to the Insert tab.
- Select Header. This will bring up a dropdown menu with some options in it. These are all presets for the header, provided by Microsoft. For now, select the first option which is Blank. This will take you to the header and also activate the Header & Footer Tools in the Design tab.


If you’ve more than a single page in your document, you’ll notice that once you add something in the header, it’s going to appear on top of every page in your document. This makes the header an excellent location to place document info.
A quicker way to access the header is to double-click on the top margin of the page. Double-clicking the bottom margin will bring up the footer.
The Header & Footer Tools tab activates whenever you’re editing the header or the footer of a page. This tab allows you to change options related to the header and also insert components other than plain text to it.
Different First Page
So far, anything that you add to the header will appear on every other page but what if you don’t want the header on your first page to appear on every page in the document? You might want to have other content in the header of other pages or anything else. This can effortlessly be resolved:
- Double-click on the header.
- In the Header & Footer Tools tab, in the Options section, check Different First Page.
Once you check this option, the stuff you put in the header of the first page won’t appear on other pages and conversely, if you change the header of any other page it won’t affect the first page.
Different Odd and Even Pages
You probably have seen this one in different documents and even books. As a familiar example, you could have the document title in the odd page header and the heading title on the even pages. You need to check only one option to have different headers on odd & even pages:
- Double-click on the header.
- In the Header & Footer Tools tab, check Different Odd & Even Pages.
Now, when you edit the header of an odd page it will apply to all odd pages but it won’t affect the even pages. This also works the other way around.
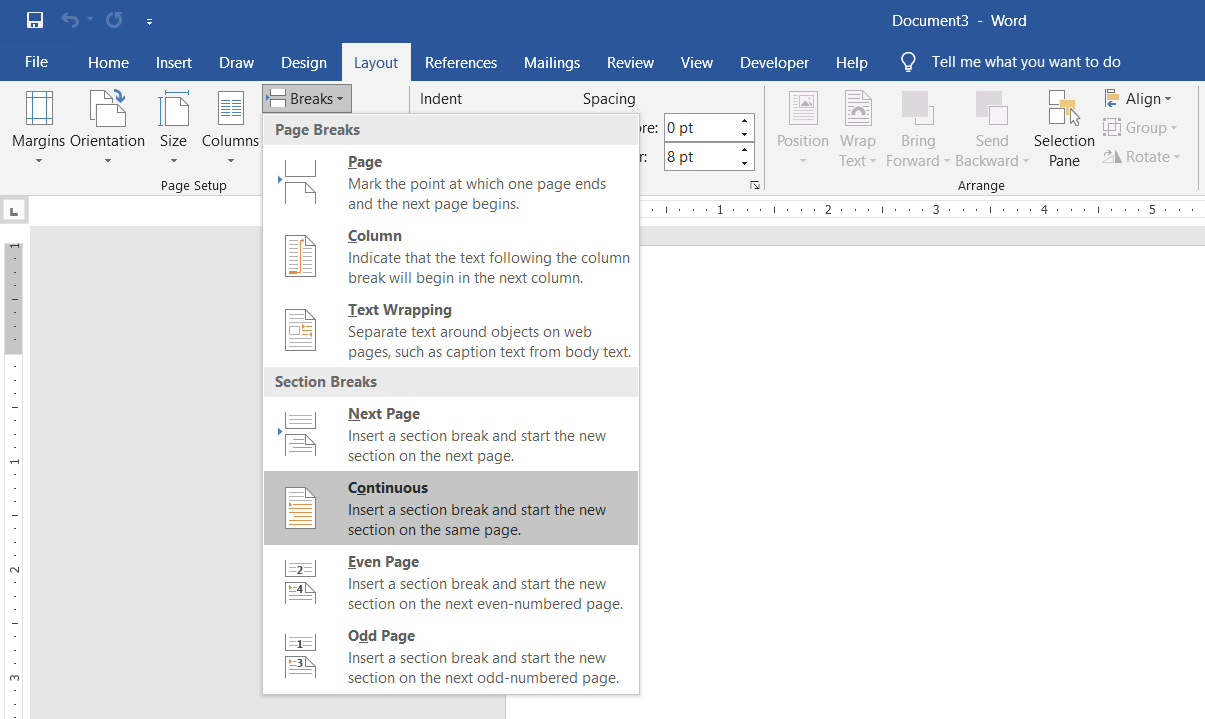
You can also have different headers for different sections. To do this, you need to create sections in your document first. To create sections:
- Select where you want to create a section by placing your cursor there.
- Go to the Layout tab and then click on Breaks.
- In the bottom half of the menu, you can see the Section Breaks.
- Select Continous from the menu. This will create a Section Break right where you had placed the cursor.

Once you create sections in your document, you can have different headers for each section. You can read our article on creating and removing page breaks to learn more about breaks.
To have different headers for a section:
- Double-click on the header and go to the Header & Footer Tools tab.
- Click on Link to Previous and disable it. Keeping this option enabled will use the same header and footer as the previous one for this section.
There you have it! With these, you can have unique headers for any page in your document.
Numbering Pages in Word
Headers and footers in Word provide a display area for page numbers in your document. Adding page numbers to longer documents makes them easier to navigate for readers. To add page numbers:
- Go to the Insert tab.
- In the Header & Footer section click Page Number.
- In the menu, you will have four choices for the location. Choose one and then select the styling you want.

Top of Page and Bottom of Page will display the page number in the header and the footer respectively, but you can show the page number in areas other than these two.
Selecting Page Margins will display the page number on the right or left side of the page. What’s more, is that you can show the page number anywhere within the page. To do this:
- Place your cursor where you want to display the page number.
- Go to Insert and then select Page Number.
- From the menu, select Current Position then select a style.

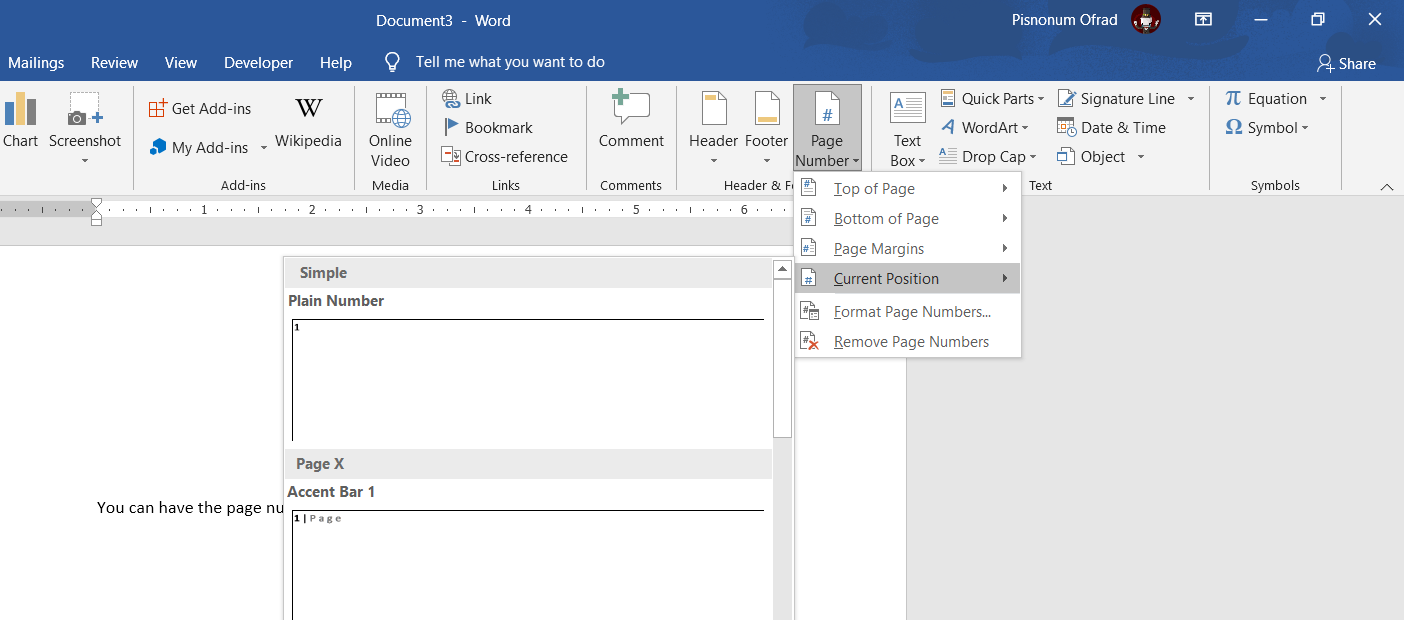
This will add the page number right where your cursor was. Keep in mind that this won’t show the page number on every page, it will appear only where the cursor was.
For an in-depth guide on numbering pages in Word documents, read our article on how to number your Word document.
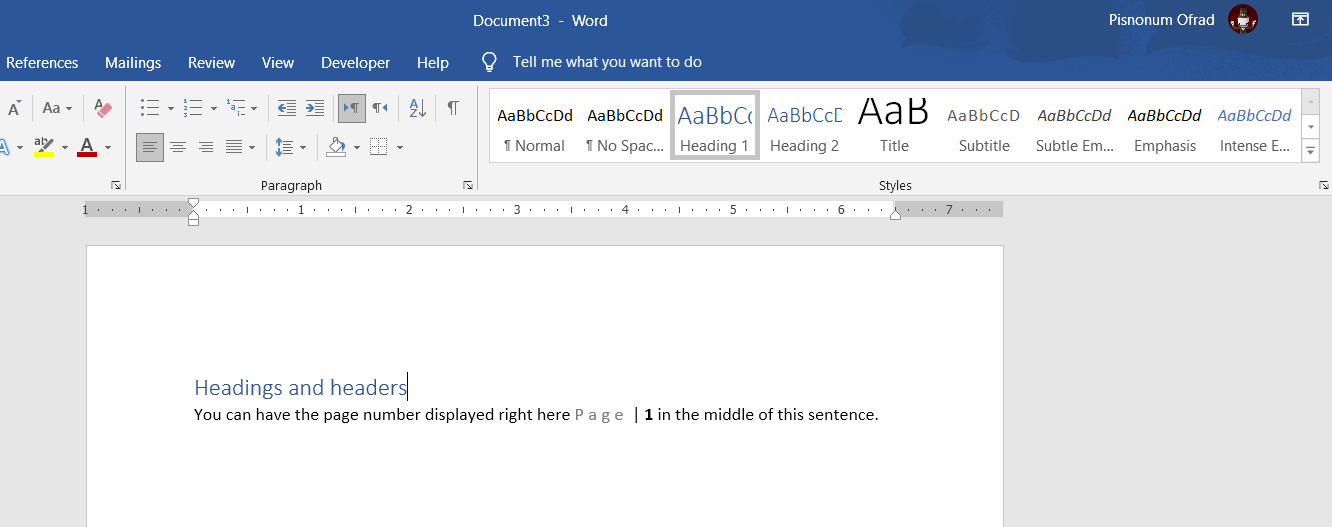
You can make your document more dynamic by utilizing Fields in Microsoft Word. Fields are dynamic components that add auto-updating variables to your document. For example, you could insert a field in your header to display a heading on every page. This way you don’t have to type the heading on top of each page.
Note: Headers and headings are similar in name, but they’re different in nature. A header is the top margin of the document while a heading is a document element that allows you to define different sections and build a table of content for your document.)
Let’s work on the example we mentioned to add the heading to the top of each page. To do this, you’ve to first create some headings for your document.
- Go to the Home tab.
- In the Styles section, select a heading. For now, let’s go with Heading 1.
- Next, type something in your heading so that it’s not blank.

Once you’ve your headings set out, it’s time to display their names in the header.
- Double-click the header and then go to the Header & Footer Tools tab.
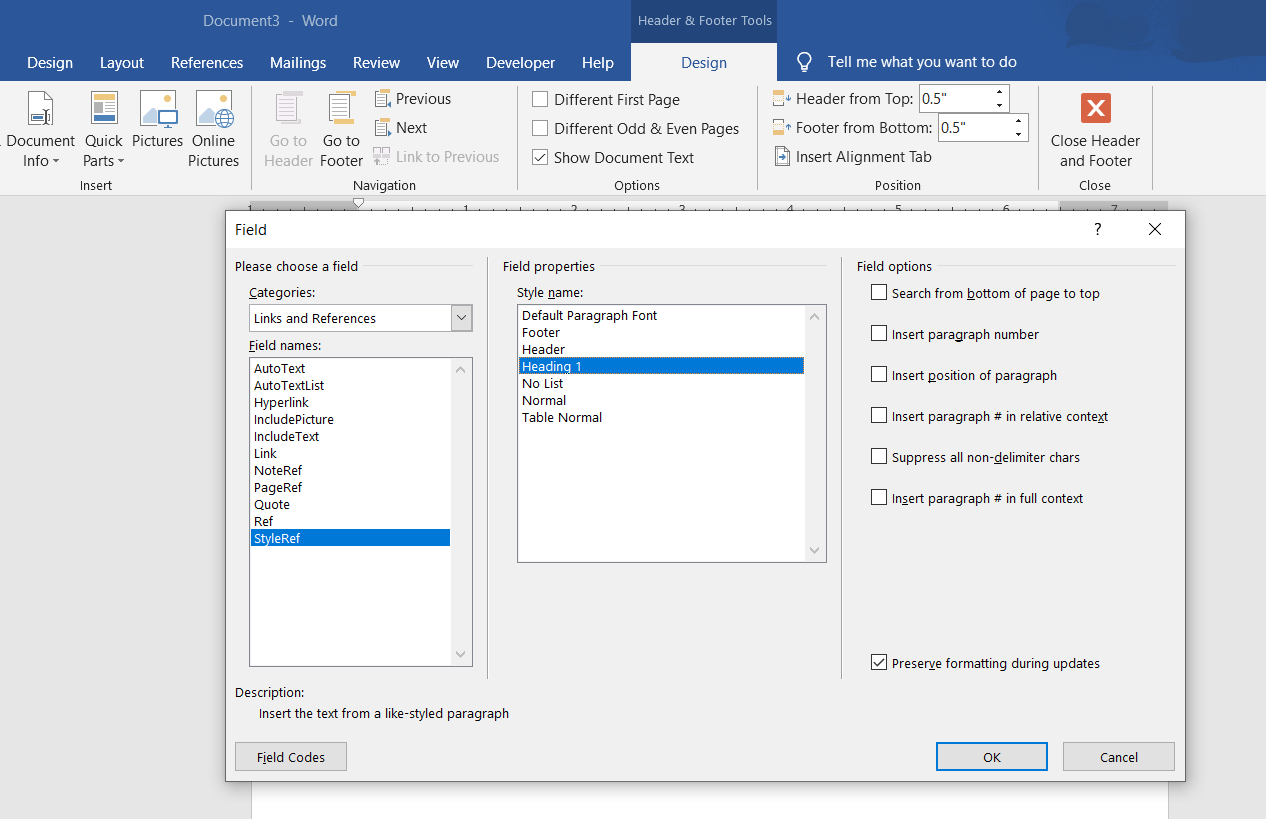
- Click on Quick Parts and then select Field… . Here you can see the various fields you can add to the header.
- From the Categories menu, select Links and References.
- In the Field names select StyleRef.
- Finally, in the Style name box, select Heading 1.
- Check the additional options that you might want in Field options and once you’re done, click OK.

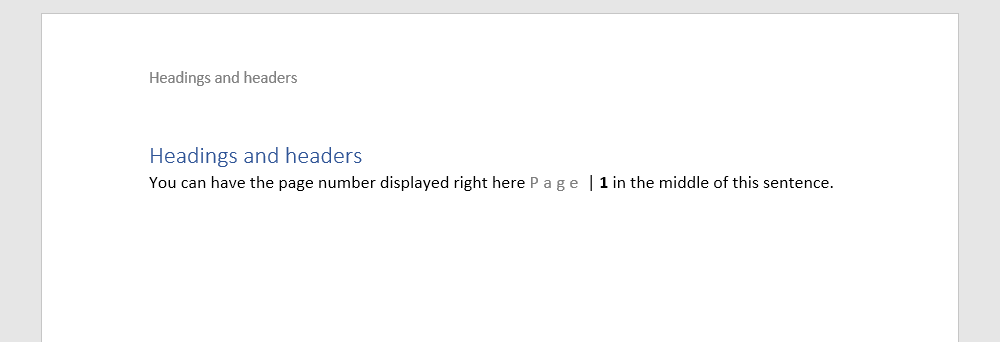
Now you can see the headings displayed in the header of the page. It will show the same heading until a new heading is used on a page.
There are many fields that you can use in your document. Fields aren’t exclusive to the header or the footer and you can use them anywhere else in your document as well. You can access fields from the Insert tab:
- Go to the Insert tab.
- On the right side, click Quick Parts and then select Fields.


Now that you’ve read through all these, you can achieve a lot more from the top and bottom margins of your document. However, this is just one of the many things you can do to improve your document.