
Word for Microsoft 365 Word for Microsoft 365 for Mac Word 2021 Word 2021 for Mac Word 2019 Word 2019 for Mac Word 2016 Word 2016 for Mac Word 2013 Word 2010 More…Less
You can group shapes, pictures, or other objects. Grouping lets you rotate, flip, move, or resize multiple shapes or objects as though they’re a single shape or object.
Group shapes, pictures, or other objects
-
Press and hold CTRL and select shapes, pictures, or other objects to group.
The Wrap Text option for each object must be other than In line with Text. For more info, see Wrap Text.
-
Do one of the following:
-
Go to Picture Format or Picture Tools Format >
 Group > Group.
 -
Go to Shape Format or Drawing Tools Format > Group > Group.
To still work with an individual item in the group, select the group, and then select the item.
The Group button is enabled for two or more selected objects.
-
 Group > Group.
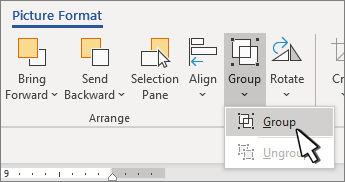
Group shapes, pictures, or objects
-
Press and hold CTRL while you select the shapes, pictures, or objects that you want to group.
The Wrap Text option for each object must be other than In line with Text. For more info, see Wrap Text.
-
Go to Drawing Tools or Picture Tools, on the Format tab, in the Arrange group, select Group
, and then select Group.
To work with an individual item in the group, select the group, and then select the item.
 , and then select Group.
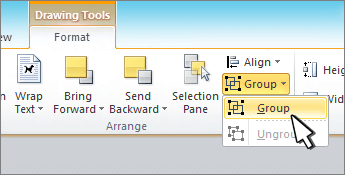
Group shapes, pictures, or other objects
-
Press and hold command while selecting the shapes, pictures, or other objects to group.
The Wrap Text option for each object must be other than In line with Text. For more info, see Wrap Text.
-
Go to Shape Format or Picture Format, and then select Group
> Group.If Group
isn’t visible on the ribbon, select Arrange to display it.
 > Group.
To work with an individual item in the group, select the group, and then select the item.
If the Group button is unavailable, verify that you have more than one object selected.
See also
For more info selecting shapes or pictures, see Select a shape or other object in Word.
SVG icons must converted to shapes before grouping. For more info, see Convert an SVG image to an Office shape.
Need more help?
![]()
Download Article
![]()
Download Article
- Grouping Objects in Word
- Why is the Group button grayed out?
- Q&A
|
|
Do you want to move or resize multiple pictures, shapes, or other objects in your document at the same time? Grouping objects in Microsoft Word is an efficient way to manipulate them to act as a whole instead of individual pieces. You can group shapes, pictures, and other objects so that if you wish to relocate them but not change the distance between them, they will move as one. This wikiHow article teaches you step-by-step how to group and ungroup shapes, pictures, and other objects in Word on your PC or Mac.
Things You Should Know
- Group items by selecting them and then going to «Layout > Group».
- Make sure none of the objects have the «In Line with Text» wrap setting before creating a group.
- If the Group option is grayed out, make sure you have more than one object selected & that none of the objects is a SVG, table, or worksheet.
-
1
Open your document in Word. You can either double-click the file in your file manager (Finder for Mac and File Explorer for Windows) or you can click the Word app icon and go to File > Open.
-
2
Make sure none of your objects are set to «In Line with Text.» If a picture or object you want to add to the group has its text wrapping set to «In Line with Text,» you won’t be able to select it while creating your group.[1]
Here’s how to check and change the text wrap settings:- Click any object you want to add to the group.
- Click the «Layout Options» icon that appears at the top-right corner.
- If the «In Line with Text» option is selected, choose any of the other text wrapping options.
- Repeat for all objects you want to group.
Advertisement
-
3
Select the objects you want to group. If you’re using Windows, press and hold Ctrl as you click each object. If you’re on a Mac, press and hold Cmd instead.
-
4
Click the Shape Format or Picture Format tab. You’ll see one or both of these tabs at the top of Word, depending on which objects you’ve selected. The option to group objects appears on both of these tabs.
- If you don’t see either of these tabs, click the Layout tab instead. You’ll also find the option to group here.
- If you’re using Office 2010, click the Drawing Tools or Picture Tools tab, then click the Format tab.[2]
-
5
Click Group on the toolbar. You’ll see this on the Arrange panel near the top-right corner of Word. If you don’t see this option, click Arrange to make it visible. A brief menu will expand.
-
6
Click Group again to group the selected objects. The objects are now grouped together, which allows you to rotate,
- To ungroup objects, click your group to select it, click the Layout tab, then select Ungroup.
- Once you’ve grouped, then separated a group, you can regroup it. Go to Layout > Regroup.


Advertisement
-
1
You can’t include SVG icons in your groups. If there are SVG icons in your selection, you’ll first have to convert the SVG icons to shapes, which is a feature that only Windows 365 subscribers have access to. There will be a «Convert to Shape» button under Graphics Tools > Format.
-
2
You only have one shape, picture, or object selected. Since you can’t create a group with only 1 item, you’ll need to add more items. Press and hold Ctrl (Windows) or Cmd (Mac) as you click to add other objects.
-
3
Your selection includes a table or worksheet. Unfortunately, you cannot add these things to your group.


Advertisement
Add New Question
-
Question
How can I group text boxes in Word?

Click one after the other while holding Ctrl. Then do a right-click and press ‘Group’.
-
Question
Microsoft Word wouldn’t allow me to group for some reason. Do you have any idea what I’m doing wrong?
Objects with «In Line» text wrapping and GIFs cannot be grouped. Since wrapping is difficult in a text box, it is best to move any items out of a text box, change the word wrap setting, and then group. You can then copy the group and paste it back into a text box and finish by deleting the group outside the box.
Ask a Question
200 characters left
Include your email address to get a message when this question is answered.
Submit
Advertisement
Thanks for submitting a tip for review!
About This Article
Thanks to all authors for creating a page that has been read 190,876 times.
Is this article up to date?
Lesson 22: Aligning, Ordering, and Grouping Objects
/en/word2016/text-boxes/content/
Introduction
There may be times when your documents have multiple objects, such as pictures, shapes, and text boxes. You can arrange the objects any way you want by aligning, grouping, ordering, and rotating them in various ways.
Optional: Download our practice document.
Watch the video below to learn more about arranging objects in Word.
To align two or more objects:
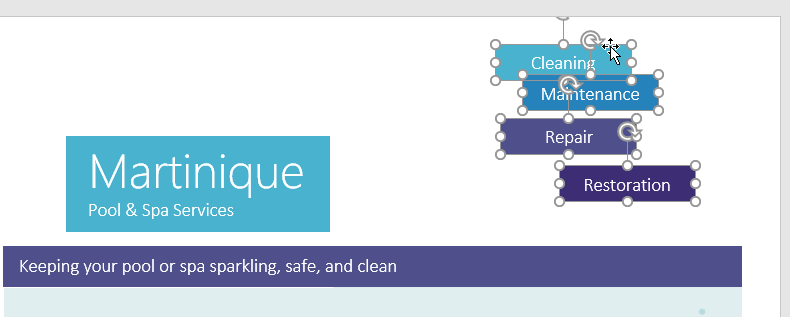
- Hold the Shift (or Ctrl) key and click the objects you want to align. In our example, we’ll select the four shapes on the right.
- From the Format tab, click the Align command, then select one of the alignment options. In our example, we’ll choose Align Right.
- The objects will be aligned based on the selected option. In our example, the shapes are now aligned with each other.
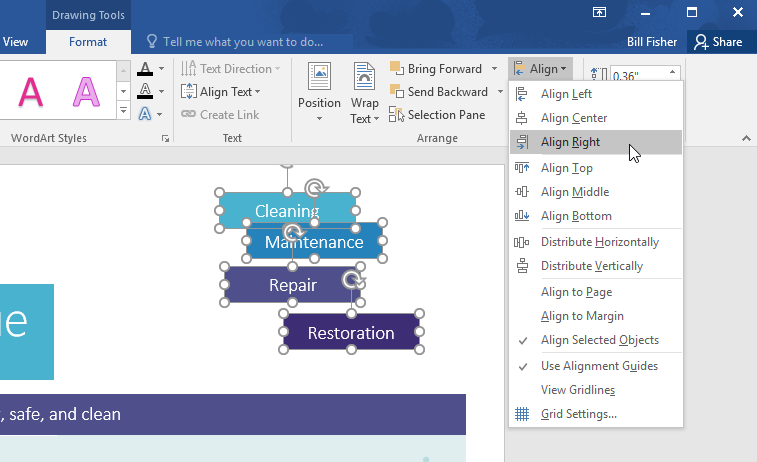

Note that the Align Selected Objects option is selected by default, which allows you to align objects without moving them to a different part of the page. However, if you want to move the objects the top or bottom of the page, select Align to Page or Align to Margin before choosing an alignment option.
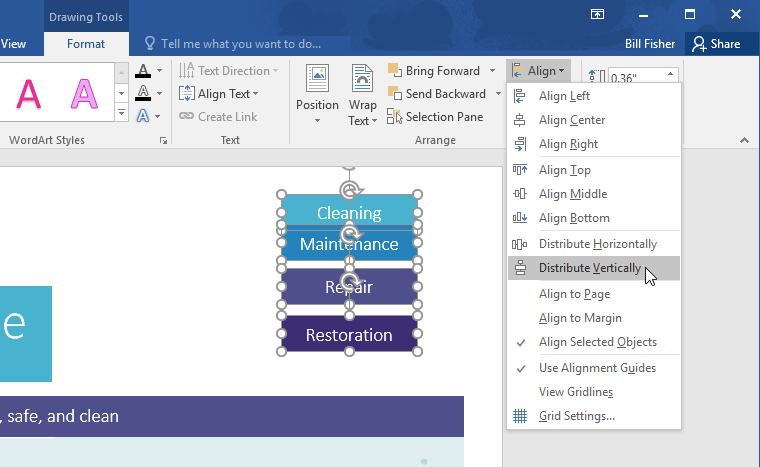
To distribute objects evenly:
If you have arranged your objects in a row or column, you may want them to be an equal distance from one another for a neater appearance. You can do this by distributing the objects horizontally or vertically.
- Hold the Shift (or Ctrl) key and click the objects you want to distribute.
- On the Format tab, click the Align command, then select Distribute Horizontally or Distribute Vertically.
- The objects will be evenly spaced from one another.

Grouping objects
At times, you may want to group multiple objects into one object so they will stay together. This is usually easier than selecting them individually, and it also allows you to resize and move all of the objects at the same time.
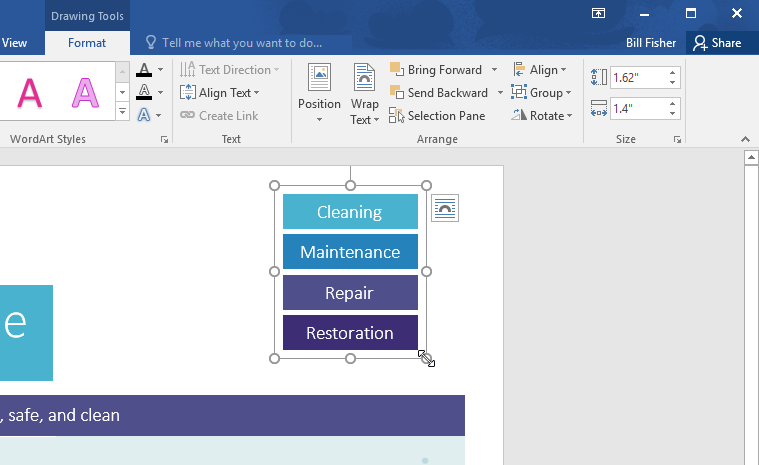
To group objects:
- Hold the Shift (or Ctrl) key and click the objects you want to group.
- Click the Group command on the Format tab, then select Group.
- The selected objects will now be grouped. There will be a single box with sizing handles around the entire group so you can move or resize all of the objects at the same time.

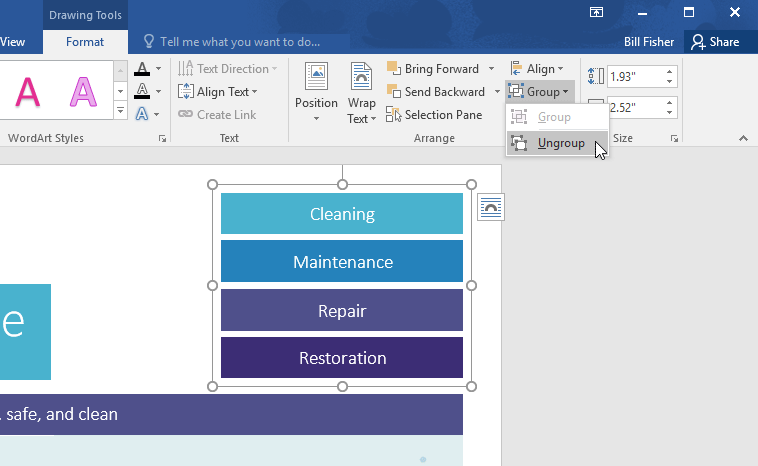
To ungroup objects:
- Select the grouped object. From the Format tab, click the Group command and select Ungroup.
- The objects will be ungrouped.
Ordering objects
In addition to aligning objects, Word gives you the ability to arrange objects in a specific order. The ordering is important when two or more objects overlap because it determines which objects are in the front or the back.
Understanding levels
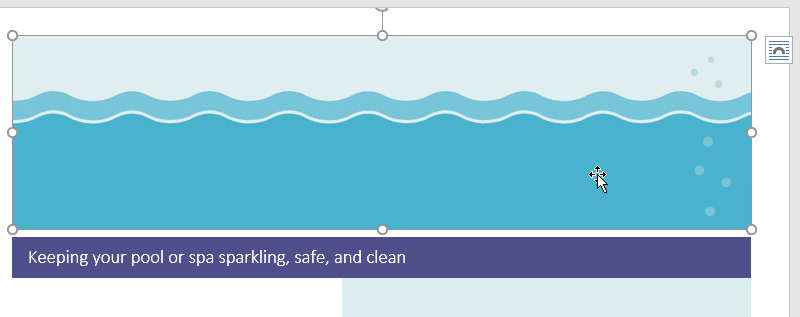
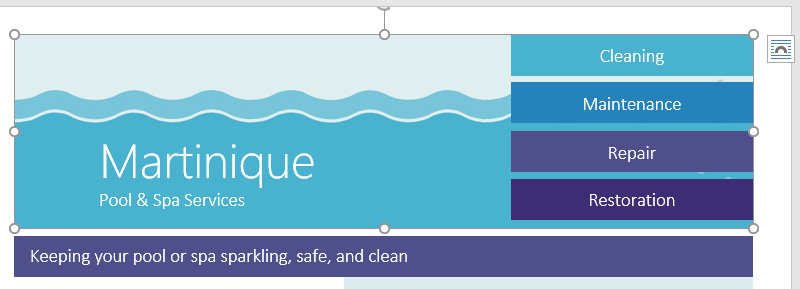
Objects are placed on different levels according to the order in which they were inserted into a document. In the example below, if we move the waves image to the beginning of the document, it covers up several of the text boxes. That’s because the image is currently on the highest—or top—level. However, we can change its level to put it behind the other objects.
To change an object’s level:
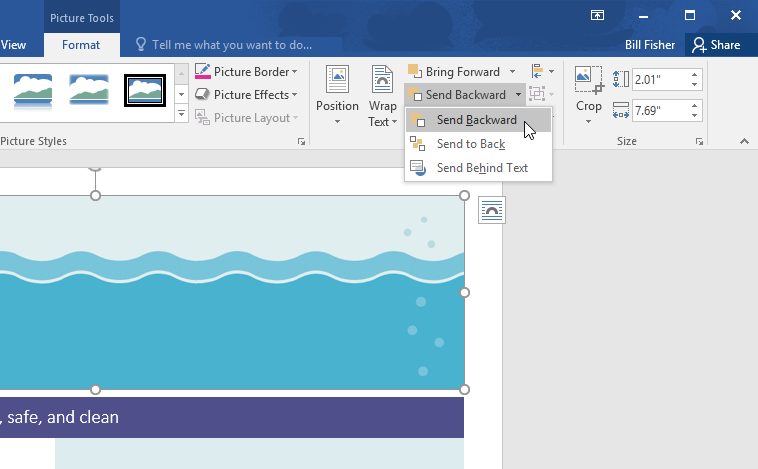
- Select the object you want to move. In our example, we’ll select the image of the waves.
- From the Format tab, click the Bring Forward or Send Backward command to change the object’s ordering by one level. In our example, we’ll select Send Backward.
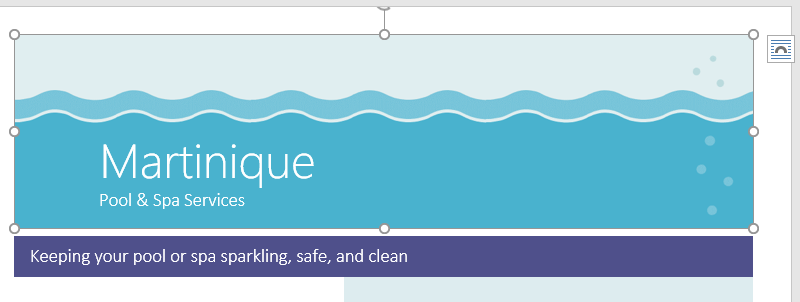
- The objects will be reordered. In our example, the image is now behind the text on the left, but it’s still covering the shapes on the right.
- If you want to move an object behind or in front of several objects, it’s usually faster to use Bring Forward or Send Backward instead of clicking the other ordering command multiple times.
- In our example, the image has been moved behind everything else on the page, so all of the other text and shapes are visible.
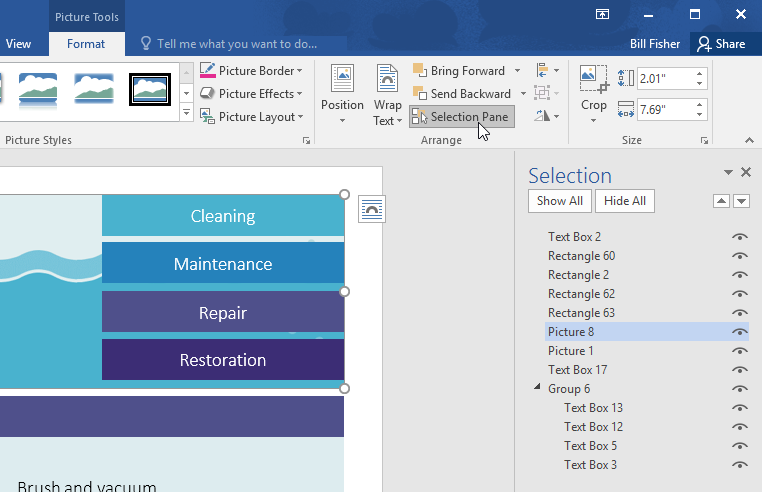
If you have several objects placed on top of each other, it may be difficult to select an individual object. The Selection Pane allows you to easily drag an object to a different level. To view the Selection Pane, click Selection Pane on the Format tab.
To rotate or flip an object:
If you need to turn an object so it faces a different direction, you can rotate it to the left or right, or you can flip it horizontally or vertically.
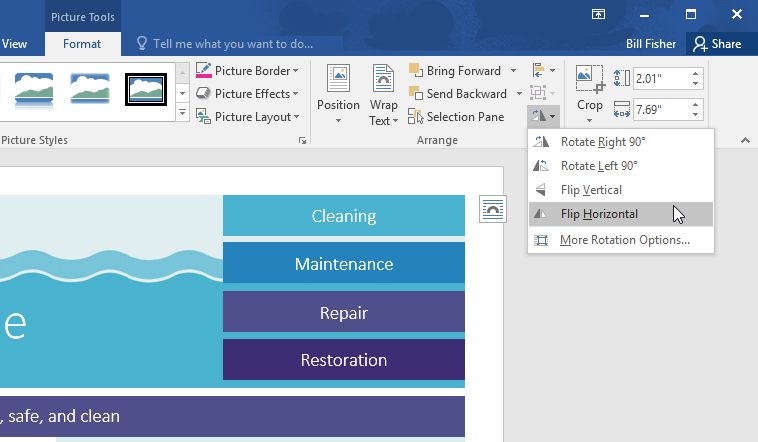
- With the desired object selected, click the Rotate command on the Format tab, then choose the desired rotation option. In our example, we’ll choose Flip Horizontal.
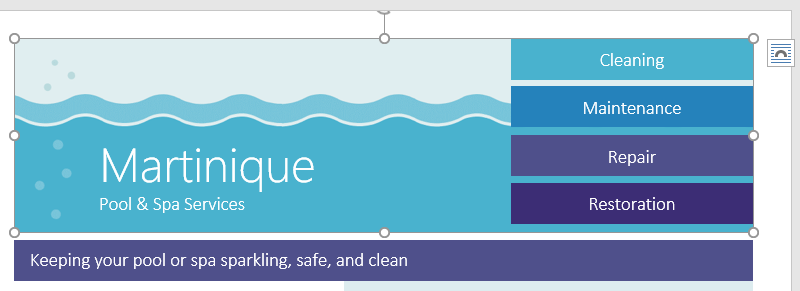
- The object will be rotated. In our example, we can now see the bubbles on the left that were previously hidden behind the text boxes.
Challenge!
- Open our practice document.
- Scroll to page 2 and select the picture of the waves at the top of the page.
- Use the Rotate command to flip the waves vertically.
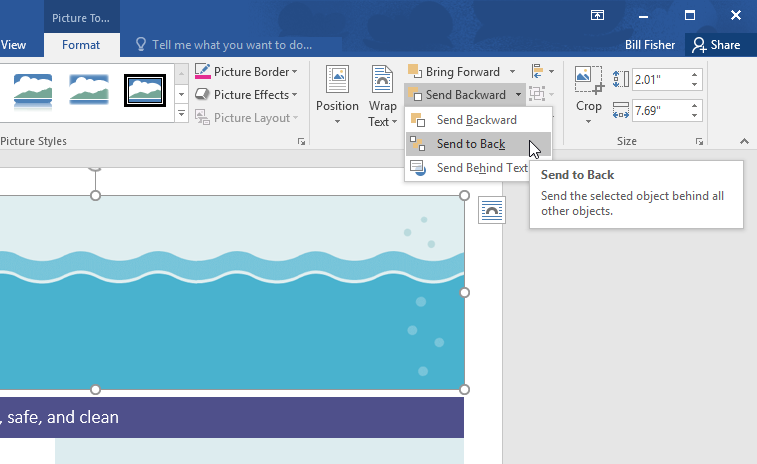
- Use the Send to Back command to move the waves behind the Martinique text box.
- Move the Martinique text box so it is near the bottom of the waves image.
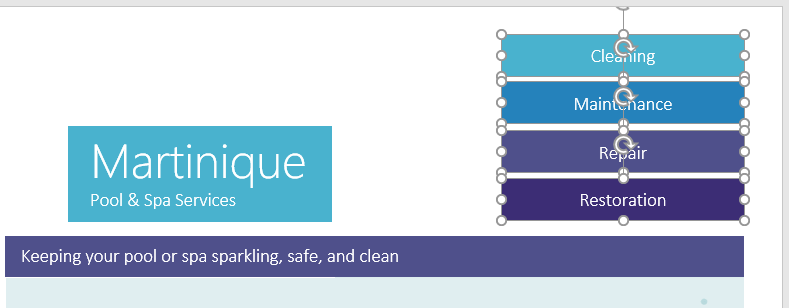
- Make sure the waves picture and Martinique text box are no longer selected. Hold down the Shift key, then select the text boxes containing Cleaning, Maintenance, Repair, and Restoration.
- Click the Align command, and make sure the Align Selected Objects option is selected. Select Align Right and Distribute Vertically.
- With the text boxes still selected, group them.
- When you’re finished, your page should look something like this:
/en/word2016/tables/content/

How to Group Objects in Word
It is often easier to work with a single object than it is to work with several smaller objects that belong together. A group is a collection of objects that Word treats as a single object.
Group
By grouping several objects together, you can format multiple objects at once rather than formatting each object individually.
- Select all the objects you want to group together.
- Click the Layout tab on the ribbon.
- Click the Group button.
- Select Group.
Press and hold down Shift as you select multiple objects.
You can also click the Format tab on the ribbon — the Arrange group on either tab includes the Group button.
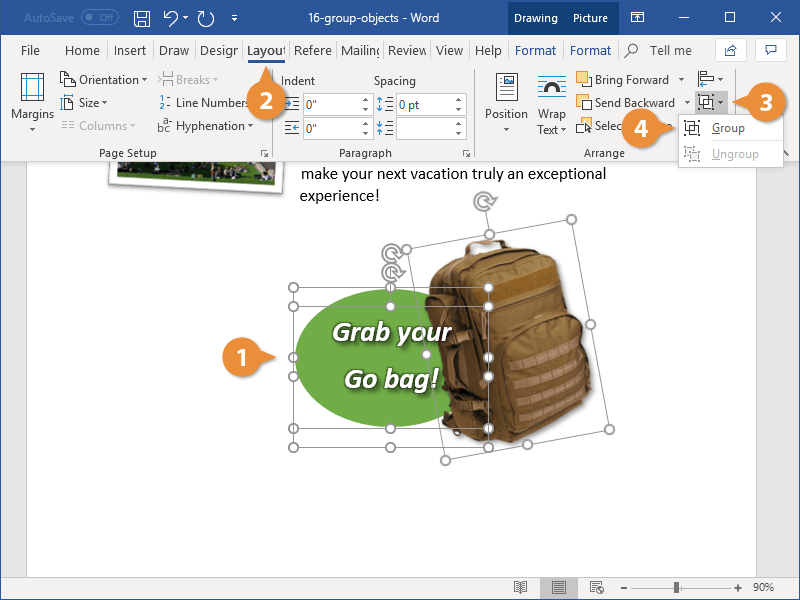
The selected objects are grouped together.
Now that the objects are grouped, you can apply effects to all three objects at once and move the grouped objects around the document together.
You can also right-click selected items and select Group from the contextual menu to group objects.
If you need to apply some formatting to just a single object in the group, or move something around within the group, first select the group, then click the object you want to format within the group. Just that object is selected, but it remains part of the group.
Ungroup
If you no longer need to keep a group of objects together, you can ungroup them so they’re all independent objects again.
- Select the object group.
- Click the Layout tab.
- Click the Group button.
- Select Ungroup.
When a group is selected, the Group command is no longer available, but the Ungroup command is.
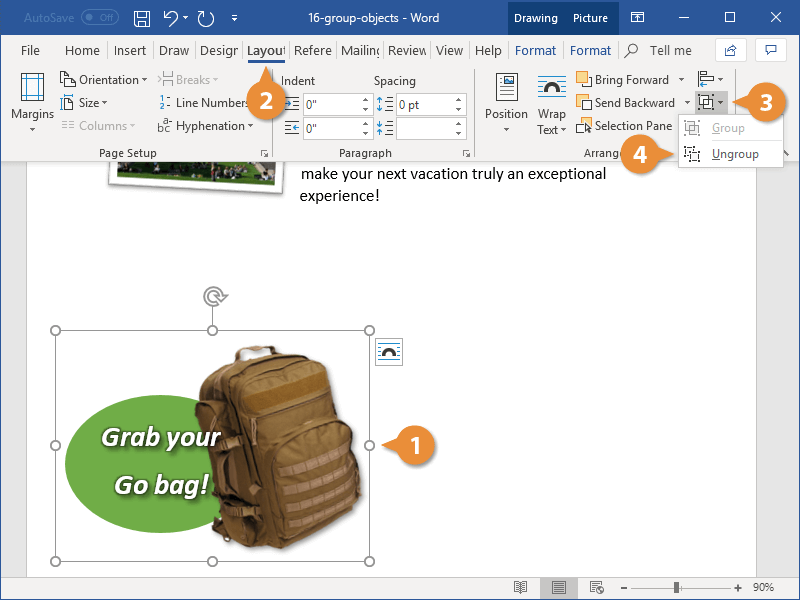
The objects can now be manipulated individually.

FREE Quick Reference
Click to Download
Free to distribute with our compliments; we hope you will consider our paid training.
If you work with several objects and have to move them or apply shared formatting to them, you must select
these objects every time. Apply formal grouping, and you will be able to operate those objects quickly as a
unit.
To group several objects, select all objects you want to group by pressing Ctrl or
Shift and clicking every of these objects:

Then do one of the following:
- On the Format tab, in the Arrange group, click the Group command:

- Right-click one of the objects and choose Group -> Group from the popup menu:


Word puts a single box around the objects instead of a separate box around each object:

To ungroup grouped objects, do one of the following:
- On the Format tab, in the Arrange group, click Ungroup:
- Right-click a grouped object, and then choose Group -> Ungroup from the popup menu:


See also this tip in French:
Grouper et dissocier des objets.
Please, disable AdBlock and reload the page to continue
Today, 30% of our visitors use Ad-Block to block ads.We understand your pain with ads, but without ads, we won’t be able to provide you with free content soon. If you need our content for work or study, please support our efforts and disable AdBlock for our site. As you will see, we have a lot of helpful information to share.
In the following text, there are 4 effective ways which enable you to quickly select and group multiple objects in your Word document.
It’s not unusual for some of you to create a Word document with plenty of shapes, text boxes, and pictures, etc. And there are also occasions when you have to select them to group so you can move them together instead of operating one by one. Doubtlessly, the question lies at how to select numerous objects. So we will take the example of selecting several flowchart shapes to demonstrate you the 4 methods.
Method 1: Group Objects by Selecting them One by One
Obviously, you can select number of objects one by one.
- Firstly, suppose we have an example as below:


Press either “Ctrl” or “Shift”.
- Then left click shapes to be group one by one.
- Next right click.
- Click “Group” option on the list-menu.
- And again click “Group” on the extend list-menu.


Now you have succeeded in grouping these objects, and you can move them together as a whole.
Method 2: Group Objects by Selecting them on “Selection Pane”
- This time click “Page Layout” tab first.
- Then click “Selection Pane” in “Arrange” group.

- Next on the right side of the document, there will open the “Selection Pane” where you can see all the shapes on a certain page. Press “Ctrl” and hold on.
- And click the shape name on the pane one by one. You can see the shapes on the document page have been selected.

- Then repeat from step 3 to step 5 in method 1.


Method 3: Group Objects by Using “Select Objects” Option in Word 2010
Here is what you need to know that you are unable to use “Select Objects” option in Word 2010 directly but to insert a “New Drawing Canvas” into Word document first before you insert all the shapes.
- To begin with, click “Insert” tab.
- Then choose “Shapes” in “Illustrations” group.
- Next click “New Drawing Canvas”.

- Then insert shapes you need on the drawing canvas.
- Next, click “Home” tab.
- And go to click “Select” option in “Editing” group.
- Choose “Select Objects” on the list-menu.

- Now you can see the indication on the left-down corner of the document page, such as below:


Just follow the lead, and click and drag to draw an area including all objects on the canvas so as to select them.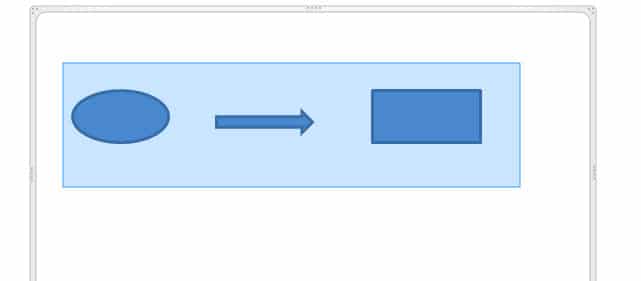

- Again repeat from step 3 to step 5 in method 1.
Method 4: Group Objects by Using “Select Objects” Option in Other Word Versions
Actually, in all Word versions except Word 2010, you can use “Select Objects” option directly to select and group objects without inserting a canvas first. What you need to do is follow from step 5 to step 9 in method 3.
Also you can save the .docxs file as .doc file so you can select objects on document directly.
And if you try to group pictures, then you have to change the pictures’ “Text Wrapping” style into any one but “In line with text”.
Comparison
| Methods | Advantages | Disadvantages |
| Method 1: Group Objects by Selecting them One by One | 1. It’s an easy and simple way.
2. You can apply this method no matter what Word version you’re using. |
1. You have to select objects one by one.
2. You could miss some small objects since there are too many. |
| Method 2: Group Objects by Selecting them on “Selection Pane” | 1. It’s an easy and simple way.
2. You won’t miss objects since they are listed on the pane. 3. You can apply this method no matter what Word version you’re using. |
You have to select objects one by one. |
| Method 3: Group Objects by Using “Select Objects” Option in Word 2010
& Method 4: Group Objects by Using “Select Objects” Option in Other Word Versions |
1. You can select multiple objects at one time.
2. You’re less likely to miss some objects. 3. If you are not using Word 2010, then you can select multiple objects directly by drawing an area to include them. |
1. For Word 2010 users, you have to insert a drawing canvas before inserting shapes into documents so as to select them multiply.
2. For Word 2010 users, you may need to save the .docx file as .doc file so as to select objects directly. |
Keep Handy a High Efficiency Recover Tool
Basically, in modern business practices, time is money. So there is not so much time for you to think about what to do once you get files corrupted. Therefore, the best way is to keep a well-functioned Word file repair tool in place so you can address the corruption issues efficiently.
Author Introduction:
Vera Chen is a data recovery expert in DataNumen, Inc., which is the world leader in data recovery technologies, including corrupted Excel file repair and pdf repair software products. For more information visit www.datanumen.com

Если в вашем документе MS Word помимо текста содержатся еще и фигуры и/или графические объекты, в некоторых случаях может возникнуть необходимость их сгруппировать. Это нужно для того, чтобы более удобно и эффективно выполнять различные манипуляции не над каждым объектом отдельно, а над двумя или более сразу.
Например, у вас есть две фигуры, расположенные рядом друг с другом, которые необходимо переместить таким образом, чтобы расстояние между ними не нарушалось. Именно для таких целей и рекомендовано сгруппировать или объединить фигуры в Ворде. О том, как это сделать, мы расскажем ниже.
Урок: Как в Word создать схему
1. Откройте документ, в котором необходимо сгруппировать фигуры. Это также может быть пустой документ, в который вы только планируете добавить фигуры или графические файлы.
Урок: Как в Ворд вставить картинку
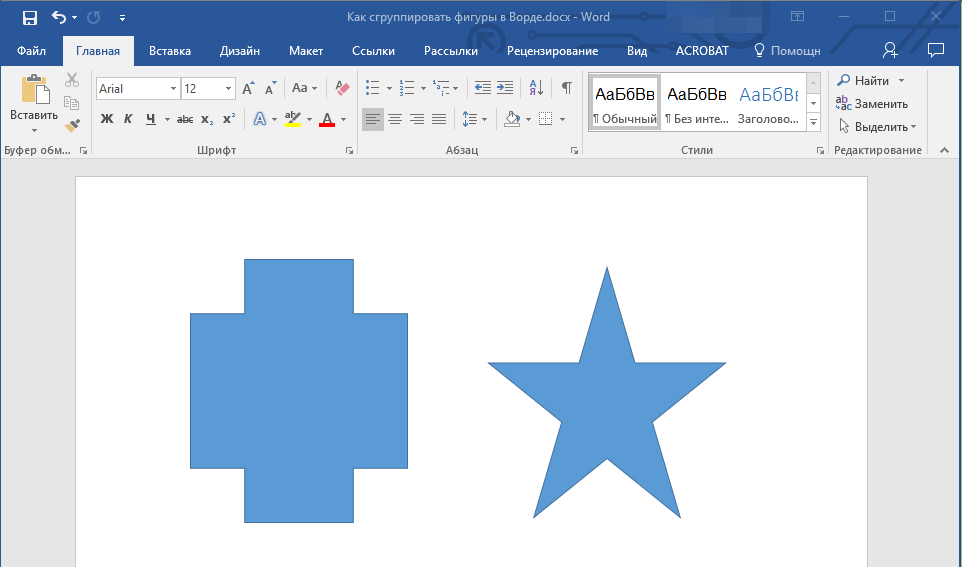
2. Кликните по любой из фигур (объектов), чтобы открыть режим работы с ней (вкладка “Формат”). Перейдите в появившуюся вкладку.
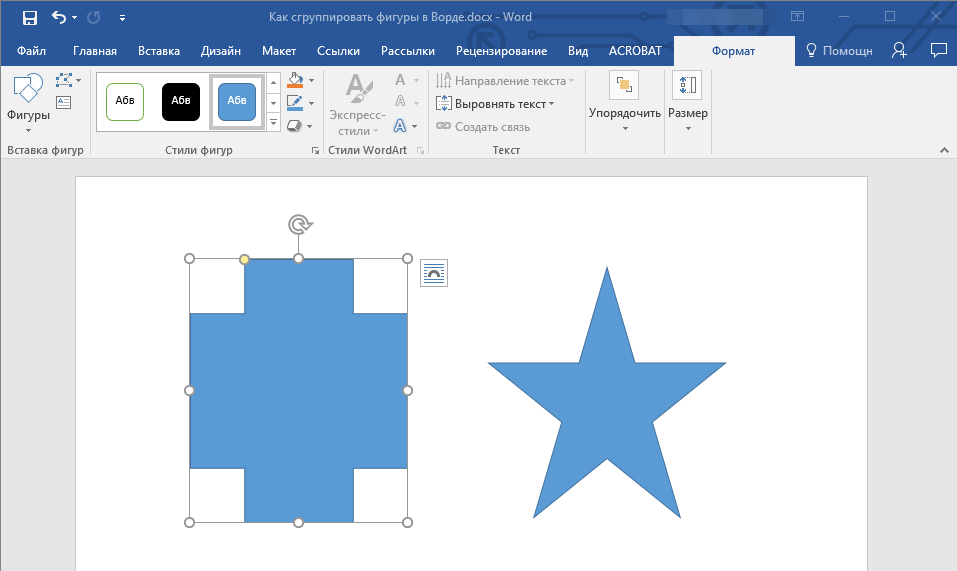
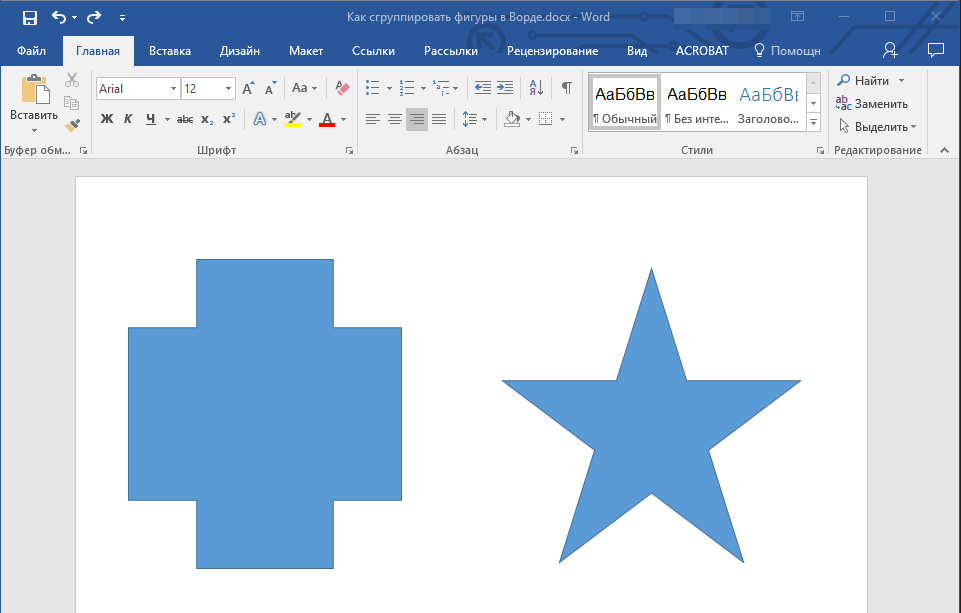
3. Зажмите клавишу “CTRL” и кликните по фигурам, которые необходимо сгруппировать.
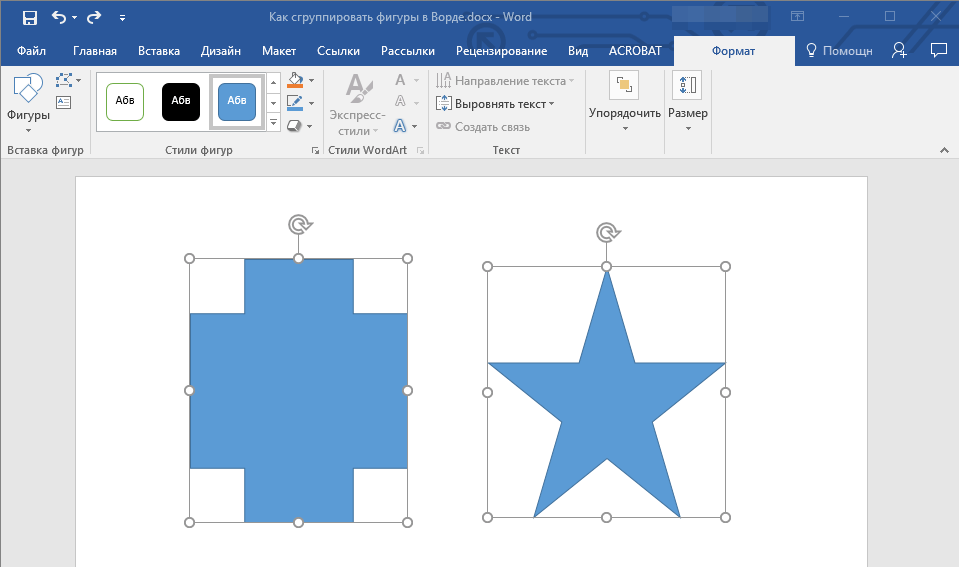
- Совет: Прежде, чем выделять фигуры, убедитесь в том, что они расположены именно так, как это вам необходимо.
4. Во вкладке “Формат” в группе “Упорядочить” нажмите на кнопку “Группировать” и выберите пункт “Сгруппировать”.
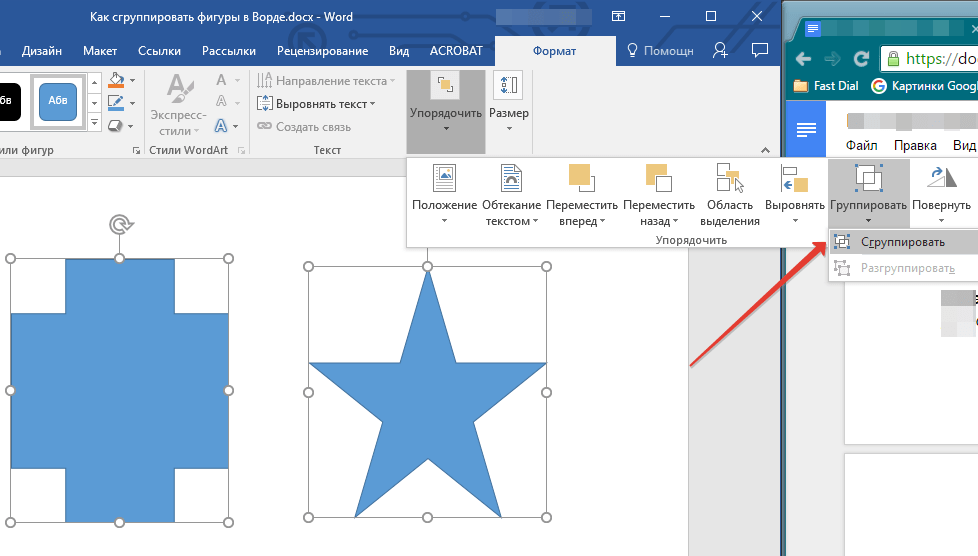
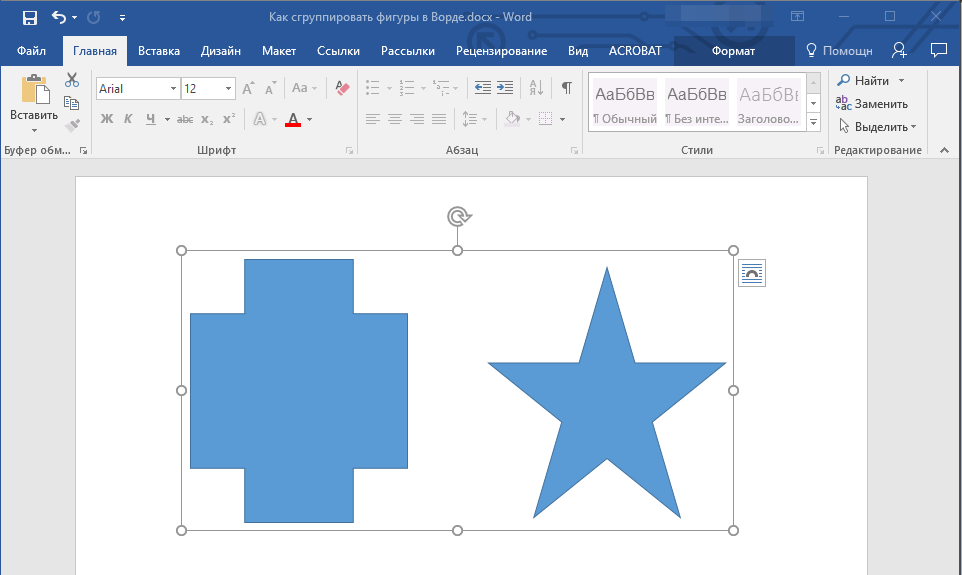
5. Объекты (фигуры или изображения) будут сгруппированы, у них появится общее поле, с помощью которого их и можно будет перемещать, изменять размер, а также выполнять все остальные манипуляции, допустимые для элементов конкретного типа.

Урок: Как в Word нарисовать линию
На этом все, из этой статьи вы узнали, как сгруппировать объекты в Ворде. Инструкция, описанная в данной статье, может использоваться не только для группировки фигур. С ее помощью также можно объединить рисунки и любые другие графические элементы. Используйте софт от Microsoft правильно и эффективно, осваивая все его возможности.
Еще статьи по данной теме:
Помогла ли Вам статья?
В документах Microsoft Office доступна работа с автофигурами. Вы можете создавать композиции, комбинировать картинки, вставлять объекты WordArt. Но вот изменять их придётся отдельно. Это очень неудобно, если вы составляете узор из множества различных частей. Чтобы не перемещать каждый кружочек, разберитесь, как сгруппировать фигуры в Ворде.

Для переноса или других операций с автофигурами их можно объединить
Если объединить изображения, то программа будет воспринимать их как единое целое. Так можно изменить сразу все элементы, переместить их или применить к ним определённые атрибуты.
Как сгруппировать объекты в документе?
Вы скомбинировали рисунок из нескольких частей и решили перенести его в другое место. Чтобы не перетаскивать автофигуры отдельно, соедините их через панель WordArt.
Вот как сгруппировать объекты в Ворде:
- Расположите иллюстрации так, как вам нужно.
- Выделите их. Для этого зажмите клавишу Ctrl и кликайте на фигуры, которые хотите соединить.
- В строке меню появится пункт «Формат». Выберете его — откроется ВордАрт. В Office 2003 эти настройки надо вызывать через Вид — Панель рисования.
- Нажмите кнопку «Сгруппировать». Она находится в правой части меню. Если её не видно, расширьте или разверните окно.

После этого Word будет воспринимать отдельные объекты как один. Их можно изменять, передвигать и копировать одновременно.
Гораздо легче объединить рисунок через контекстное меню. Для этого выберите все изображения с зажатой клавишей Ctrl и кликните по ним правой кнопкой мыши. В выпавшем списке наведите на «Сгруппировать».

Если вы захотите изменить цвет иллюстрации или использовать атрибуты, это можно сделать сразу со всеми картинками. Но некоторые эффекты накладываются не на композицию, а на отдельные фигуры. Например, тень — она появляется не у всего узора, а по контуру каждого элемента.
В Ворде не получится объединить изображения, созданные в разных программах. Если вы добавите в документ изображение из файла и WordArt, их нельзя будет выделить одновременно. Чтобы обойти это ограничение, надо изменить параметры обтекания.
- Кликните на картинку правой кнопкой мыши.
- Наведите на пункт «Обтекание текстом».
- Нажмите на любое значение кроме «В тексте». Теперь графические файлы и объекты ВордАрт можно соединить.

В Word 2007 эту функцию убрали.
Как отменить группировку?
Не стоит удалять всю композицию и создавать новую, если вы хотите что-то кардинально поменять. Лучше снять объединение, внести коррективы и снова создать общую картинку. Самое время узнать, как разгруппировать рисунок в Word. Разделять и соединять узоры можно в одном и том же меню.
- Выделите иллюстрацию.
- Кликните по ней правой кнопкой мыши.
- Наведите на пункт «Сгруппировать». Там будет необходимая опция. Она также доступна в панели WordArt.

Как изменить объект, не разъединяя группу?
Если вам нужно поработать с одним элементом, не надо ничего разъединять. Чтобы снова не разбираться, как сгруппировать рисунок в Ворде, следуйте инструкции.
- Кликните на изображение.
- Нажмите на отдельный элемент Word Art. Теперь рамка будет и вокруг него, и вокруг всей композиции. Несколько элементов можно выделить, если при выборе следующей фигуры зажать клавишу Ctrl.
- Свободно меняйте автофигуры, перемещайте их вместо того, чтобы разгруппировать, используйте атрибуты. Если вы перенесёте компонент за пределы всей иллюстрации, её рамка расширится. Но рисунок останется целым.
Объединение фигур и рисунков в Microsoft Office 2007
В Word 2007 невозможно соединить иллюстрации из других программ и объекты ВордАрт напрямую. Их нельзя выделить одновременно. Но есть обходные пути. В частности, использование инструментария для работы с надписями. Вот как сделать группировку в Word 2007.
- Перейдите на вкладку «Вставка». В поле «Текст» найдите меню «Надпись» и нажмите на стрелочку под ним.
- Выберите «Простая надпись» и кликните в произвольном месте документа.
- В панели «Стили надписей» нажмите «Заливка фигуры» и перейдите к пункту «Рисунок».

- Найдите желаемое изображение.
- Подкорректируйте его размеры и перенесите в нужное место. Чтобы перетащить область с текстом (в этом случае — с картинкой), «зацепите» её за рамку.

Объекты ВордАрт и надписи можно выделять одновременно, используя клавишу Ctrl или Shift. Объединение в одну композицию будет доступно и в меню работы с текстом, и во вкладке автофигур.
В Word можно создавать многогранные и многослойные узоры, комбинируя разные фигуры. Впоследствии их распечатывают, копируют в графические редакторы, используют для презентаций или просто сохраняют на память. Чтобы облегчить работу с ВордАрт и не перетаскивать отдельно все составные части, используйте группировку.
Last Updated: November 21, 2021 | Author: Dana-Henry
How do you group objects in Microsoft Word?
Group shapes, pictures, or other objects
- Press and hold CTRL while you click the shapes, pictures, or other objects to group. You will need to select more than one shape, picture or object in order to enable the Group button. …
- Select the Arrange button and choose Group.
How do you select and group objects in Word?
Hold the Shift (or Ctrl) key and click the objects you want to group. Click the Group command on the Format tab, then select Group. The selected objects will now be grouped. There will be a single box with sizing handles around the entire group so you can move or resize all of the objects at the same time.
Why can I not group objects in Word?
The Group button is unavailable
Only one shape or picture is selected. Make sure you have multiple shapes or pictures selected. If your selection includes a table, worksheet, or GIF image, the Group button will not be available.
What is the shortcut to group objects in Word?
To group objects:
- Hold the Shift (or Ctrl) key and click the objects you want to group.
- Click the Group command on the Format tab, then select Group.
- The selected objects will now be grouped.
Why can’t I select multiple objects in Word?
Word cannot select multiple pictures at a time by default. To achieve this goal, in addition to adding Select Multiple Objects, you must also modify the Layout Options of the pictures and document format. … The document format is a new format and you cannot select multiple pictures at once.
How do you select multiple objects in Word?
To select one object, click or tap the object. To select multiple shapes in a group, press and hold Shift or Ctrl while you click or tap the shapes.
What is Ctrl G?
Alternatively referred to as Control G and C-g, Ctrl+G is a shortcut key most often used to go to a line or page.
Is there a shortcut for grouping?
Alternatively, you can use the group shortcut (CTRL + G). The advantage of grouping objects together is that they are easier to grab and format as a group. You can also further organize your objects by creating groups within groups.
Which key is used in grouping?
Press and hold Ctrl while you select each object. Select Format >Group > Group. Format or move the grouped object however you want.
Is Ctrl P paste?
You’d need to have a non-intuitive print shortcut, and in that scenario you may well have ended up asking why Print is not Ctrl + P . If you really want to use separate hands for copying and pasting, you can use Ctrl + C for copying and Shift + Insert for pasting.
What is Ctrl F in Word?
Ctrl-F is the shortcut in your browser or operating system that allows you to find words or phrases quickly. You can use it browsing a website, in a Word or Google document, even in a PDF. You can also select Find under the Edit menu of your browser or app.
What does Alt Tab do?
Alt + Tab ↹ is the common name for a keyboard shortcut that has been in Microsoft Windows since Windows 2.0 (1987). This shortcut switches between application-level windows without using the mouse; hence it was named Task Switcher (Flip in Windows Vista).
Is Ctrl C Copy?
Alternatively referred to as Control+C and C-c, Ctrl+C is a keyboard shortcut used to copy highlighted text or other object to the clipboard in a graphical user environment. On Apple computers, the keyboard shortcut to copy is Command + C .
What Ctrl Z do?
To reverse your last action, press CTRL+Z. You can reverse more than one action. To reverse your last Undo, press CTRL+Y. You can reverse more than one action that has been undone.
What is Control N?
☆☛✅Ctrl+N is a shortcut key often used to create a new document, window, workbook, or another type of file. Also referred to as Control N and C-n, Ctrl+N is a shortcut key most often used to create a new document, window, workbook, or another type of file.
What is Ctrl P?
☆☛✅Ctrl+P is a shortcut key often used to print a document or page. … Also referred to as Control P and C-p, Ctrl+P is a shortcut key often used to print a document or page. Tip. On Apple computers, the shortcut to print may also be the Command key+P keys.
What is Ctrl D?
Alternatively referred to as Control D and C-d, Ctrl+D is a shortcut key that varies depending on the program. For example, in most Internet browsers, Ctrl+D is used to add the current site to a bookmark or favorite.
What is the use of Ctrl E?
Ctrl+E in an Internet browser
In Chrome, Edge, Firefox, Opera, and Internet Explorer, Ctrl + E focuses on the address bar, search bar, or omnibox. Using this shortcut can be helpful when you’re done browsing the current page and want to type in a new address or search for something else without using the mouse.
What is Ctrl +H?
Alternatively referred to as Control H and C-h, Ctrl+H is a shortcut key that varies depending on the program being used. For example, in most text programs, Ctrl+H is used to find and replace text in a file. In an Internet browser, Ctrl+H may open the history.
What is Ctrl Q?
Also referred to as Control Q and C-q, Ctrl+Q is a shortcut key that varies depending on the program being used. In Microsoft Word, Ctrl+Q is used to remove the paragraph’s formatting. In many programs, the Ctrl+Q key may be used to quit the program or close the programs window.
What does Ctrl k do in Word?
In Microsoft Word and other word processor programs, pressing Ctrl+K inserts a hyperlink into the current location.
What is the function of Ctrl B?
Ctrl+B in Word and other word processors
In Microsoft Word and other word processor programs, highlighting text and pressing Ctrl+B makes the text bold. If the text is already bold, highlighting the bold text and pressing Ctrl+B un-bolds the text.

When you work with shapes and objects in Microsoft Word, one of the most convenient features is Grouping. By grouping these types of elements together, they become one. This makes moving, resizing, and formatting them easier.
Maybe you’re making a flowchart or creating instructions using arrows in Word. You can group them to control them at the same time.
Select all of the shapes or objects that you want to group. You can do this by holding Ctrl (Windows) or Command (Mac) and clicking each one. If you want to group all elements in your document, you can use Ctrl+A (Windows) or Command+A (Mac) to speed things up.
When you have the shapes or objects selected, you’ll see a border indicator for each. This is a good way to make sure that you have them all selected.

Go to the Layout tab and the Arrange section of the ribbon. Click “Group” and select “Group.” Alternatively, you can right-click, move your cursor to Grouping, and pick “Group.”
You’ll then see all of those shapes or objects within one border area. It’s now a single element.
Then, you can drag to move the group, resize it using one of the corners, add color to the elements, or perform whatever action you need.
In the screenshot below, we’re moving the group upward. You can see the outline of each element in the group, but they stay together.
How to Ungroup Objects in Word
Once you group your shapes or objects together, they don’t have to stay that way forever. You might only group them to execute a few actions and then want to work with them individually again.
Select the group and go back to the Layout tab. Click “Group” and select “Ungroup.”
Alternatively, you can right-click, move your cursor to Grouping, and pick “Ungroup.”
You’ll then see all elements in the group within their own borders like before you grouped them initially.
How to Regroup Objects
A super handy trick after you’ve grouped and then ungrouped your objects is that you can easily regroup them. The best part is that you don’t have to click each one.
Simply select one of the objects that was in the group and go to the Layout tab once more. Click “Group” and select “Regroup.”
Or, you can right-click, move to Grouping, and pick “Regroup.”
Like magic, Word remembers the shapes and objects that were in the group and regroups them for you!
For additional tips, check out our tutorial on working with shapes, pictures, and other graphics in Microsoft Word.
READ NEXT
- › How to Group Images in Google Docs
- › Google+ Will Come to a Final End on July 5, 2023
- › Universal Audio Volt 2 Review: A Workhorse Audio Interface With Vintage Charm
- › The Best DNS Servers for Secure Browsing
- › Why the Right-Click Menu in Windows 11 Is Actually Good
- › Why One Ultrawide Is Better Than Two Monitors
- › Get to Your Windows 11 Desktop: 7 Fastest Methods
How-To Geek is where you turn when you want experts to explain technology. Since we launched in 2006, our articles have been read billions of times. Want to know more?