
Merging text boxes
- Select the Object tool ( ) from the tool bar.
- Click on each of the text boxes you want joined.
- Once all are selected, choose Text->Text Box->Merge Vertically to join the separate boxes into one.
- Once joined, text will flow as a single column and the results should look better.
Contents
- 1 How do I merge text box shapes?
- 2 How do I group a text box and shape in Word?
- 3 How do you join two objects together in Word?
- 4 How do I link two text boxes together?
- 5 How do I group all objects in Word?
- 6 How do you select multiple text boxes in Word?
- 7 How do I make a multi level list in Word?
- 8 What is dialog box launcher in MS Word?
- 9 Where is dialog box launcher word?
- 10 What is mail merge in Word?
- 11 How do you select all boxes in Word?
- 12 Why can’t I group items in Word?
- 13 How do you select multiple text boxes at once?
- 14 How do I select a text box?
- 15 How do I copy everything in a text box?
- 16 What is a multi level list?
- 17 How do you fix multilevel numbering in Word?
- 18 How do you create a hierarchy in Word?
- 19 Where is dialog box in computer?
- 20 How do I get rid of a dialog box in Word?
How do I merge text box shapes?
Press and hold Ctrl while you click the shapes, pictures, or other objects to group. 2. Then right click and select Group. By doing this, we can group shapes, pictures, or other objects at the same time as though they were a single shape or object.
How do I group a text box and shape in Word?
Group shapes, pictures, or other objects
- Press and hold CTRL while you click the shapes, pictures, or other objects to group. You will need to select more than one shape, picture or object in order to enable the Group button.
- Select the Arrange button and choose Group.
How do you join two objects together in Word?
Select the shapes you want to merge: press and hold the Shift key while you select each shape in turn. (If you don’t select any shapes, then the Merge Shapes button in step 2 will be grayed out.) On the Drawing Tools Format tab, in the Insert Shapes group, select Merge Shapes, and then pick the option you want.
How do I link two text boxes together?
Follow these steps:
- Insert the text boxes that you will link and position them where you want them.
- Under Drawing Tools, on the Format tab, in the Text group, click the Create Link button:
- Click the next text box.
- Choose the second text box, and then repeat the linking process as needed.
How do I group all objects in Word?
Grouping objects
- Hold the Shift (or Ctrl) key and click the objects you want to group.
- Click the Group command on the Format tab, then select Group.
- The selected objects will now be grouped.
How do you select multiple text boxes in Word?
Step 2: Click on the text boxes.
Now, press and hold the CTRL key and click the next one. Repeat the same steps to go over all of the text boxes in your document. There you have it! That’s how you use the CTRL key and your mouse to select multiple text boxes in Word.
How do I make a multi level list in Word?
To create a multilevel list:
- Select the text you want to format as a multilevel list.
- Click the Multilevel List command on the Home tab. The Multilevel List command.
- Click the bullet or numbering style you want to use.
- Position your cursor at the end of a list item, then press the Enter key to add an item to the list.
What is dialog box launcher in MS Word?
A dialog box launcher is a small icon that appears in a group. Users click this icon to open related dialog boxes or task panes that provide more options that relate to the group.
Where is dialog box launcher word?
Click the Home tab. In the Fonts group, click the dialog box launcher button. The button is found in the lower-right corner of the Font group. Use the Dialog box launcher to open the Font dialog box.
What is mail merge in Word?
Mail Merge is a handy feature that incorporates data from both Microsoft Word and Microsoft Excel and allows you to create multiple documents at once, such as letters, saving you the time and effort of retyping the same letter over and over.
How do you select all boxes in Word?
To select one object, click or tap the object. To select multiple shapes in a group, press and hold Shift or Ctrl while you click or tap the shapes.
Why can’t I group items in Word?
The Group button is unavailable
Only one shape or picture is selected. Make sure you have multiple shapes or pictures selected. If your selection includes a table, worksheet, or GIF image, the Group button will not be available.
How do you select multiple text boxes at once?
Just hold the mouse button down (don’t release it). You can hold down the Ctrl key while clicking the edge of each text box.
How do I select a text box?
To select the text box, you need to click the border of the text box, and the insertion point disappears. If you press Tab or Ctrl+Tab while the insertion point is visible in the text box, then you only modify the text in the text box; you don’t select the next object.
How do I copy everything in a text box?
Copy a text box
- Click the border of the text box that you want to copy.
- Press Ctrl+C. Note: Make sure the pointer is on the border of the text box, not inside it. If the pointer is inside, pressing Ctrl+C will copy the text, not the text box.
- Select a location and press Ctrl+V to paste the text box.
What is a multi level list?
Word’s multilevel list feature takes bullets and numbering to the next step. It makes creating sublists or subpoints in a list easy. An example of a multilevel list is an outline where the first level uses a Roman numeral and the next level uses a capital letter.
How do you fix multilevel numbering in Word?
How to fix Multilevel list in Word
- Select the first heading level and then from the Word Main menu, under the tab Home, within the group Paragraph, click the Multilevel List icon.
- From the drop-down list, click option Define New Multilevel List.
How do you create a hierarchy in Word?
Create a hierarchy
- On the Insert tab, in the Illustrations group, click SmartArt.
- In the Choose a SmartArt Graphic gallery, click Hierarchy, and then double-click a hierarchy layout (such as Horizontal Hierarchy).
- To enter your text, do one of the following: Click [Text] in the Text pane, and then type your text.
Where is dialog box in computer?
In Microsoft Windows, when you right-click a file and choose Properties, you are presented with the Properties dialog box. You can press Esc to cancel or close a dialog box.
How do I get rid of a dialog box in Word?
Click the x button from the top right corner of the dialog box that you’d like to close. Clicking this button should close the box and make it vanish. However, this could sometimes make alternate other boxes open up instead. Use a context-Close task from the taskbar listing for the dialog box that appears.
There are two ways you can insert a text into a Word document
First method:
From the Ribbon, under the tab Insert, within the group Text, click the Text Box icon. You can view a gallery of built-in text boxes in a drop-down list. From the ribbon under the tab insert within the group text click the text box icon you can view a gallery of built in text boxes in a drop-down list
- Click to insert one of these into your document. Depending on the Text Wrapping property of the selected text box, it may sit on top of text, behind the text, in line with text, surrounded by text, etc.
- Now, to reveal the text wrapping property of the inserted text box, click the text box on the borders. Text Box Tools tab appears on the Ribbon.
- Click the Format tab under this. Under the Format tab, within the group Arrange, click the Text Wrapping icon. From the drop-down menu, you can view various text-wrapping styles and the one highlighted is the default style. You can change this property as required.

You can also create a new empty text box from the gallery drop-down. Click Draw Text Box from the bottom of the drop-down. The mouse pointer changes to a plus symbol and you can draw a text box.

Note: Text wrapping styles are: In Line with Text, Square, Tight, Behind Text, In Front of Text, Top and Bottom, and Through. All these style are self-explanatory.
Difference between Square and Tight
You may wonder about the difference between Square and Tight styles, as in both case text surrounds the box. Difference lies in the manner that text surrounds. With Square, text takes the shape of a square around the box (irrespective box shape). With Tight, surrounding text takes the shape of the box (e.g. star shaped box, trapezoid, hexagon, etc.)
Second method:
- From the Ribbon, under the tab Insert, within the group Illustrations, click Shapes. From the gallery of Shapes, under Basic Shapes, click the Rectangle shape.
- The mouse pointer changes to a plus symbol and you can draw a rectangular shape in your document. What you can draw is a basic rectangular shape and you cannot enter text readily.
- Right-click the shape and from the right-click menu, select Add Text. The shape transforms to a text box and you can enter text.
- Change the text-wrapping property of the text boxes as explained above.
How to fix text boxes in one line
If you select the text wrapping style of a text box to In Line with Text, the text box gets fixed to that line. So, the text box will move only with the line.
Formatting text boxes
You can design a text box with fill color, gradient color, border color, shadow, 3D effects, and many more.
- Right-click on the borders of the text box and from the right-click menu, select Format Text Box. Format Text Box dialog box appears.
- From the Colors and Lines tab, apply fill color, change transparency of color, add border line color, change border line pattern, etc.
- From the Size tab, select height and width of the text box, lock aspect ratio,
- In the Layout tab, you can select the text wrapping type as discussed above. You can also specify height and width of the text box relative to the page, page margin, etc.
- In the Text Box tab, set the left, right, bottom, and top margins the text inside the text box. Also, set the vertical alignments: Top, Center, or Bottom.
Use built in text box styles
You can select the built in text box styles from the Text Box Styles group under Text Box Tools tab >> Format tab >> Tex Box Styles
Change direction of text inside text box
If you want the text inside text box to appear vertically (from top or bottom), under the Format tab, within group Text, click Text Direction.
Flow text from one box to another
Select a text box and from the Format tab, within group Text, click Create Link. A coffee cup icon appears. Then click the next text box (should be a empty text box) to which you want the text to flow from the first text box. Done. It links the first text box to the second. Want to break the link, right-click on the first text box, then from the right click menu, select Break Forward Link.

Cut, Copy, and Paste text boxes
Click on the borders of text box and then right-click. From the right-click menu, select Copy to copy text box, select Cut to delete text box, and select Paste to paste the check box at the point of insertion.
Changing the text box shape
Under Text Box Tools tab >> Format tab >> Tex Box Styles, click Change Shape. From the drop-down, select any of the shapes. Text box takes the selected shape.
Grouping text boxes
If you are using multiple text boxes in one place to create a design, flow chart, etc., you can group all to manage them easily, move them all together. To group, press CTRL and click on the borderlines of all text boxes one by one. Release the CTRL button and right-click on the selected text boxes. From the right-click menu, select Group under Grouping.
Lesson 22: Aligning, Ordering, and Grouping Objects
/en/word2016/text-boxes/content/
Introduction
There may be times when your documents have multiple objects, such as pictures, shapes, and text boxes. You can arrange the objects any way you want by aligning, grouping, ordering, and rotating them in various ways.
Optional: Download our practice document.
Watch the video below to learn more about arranging objects in Word.
To align two or more objects:
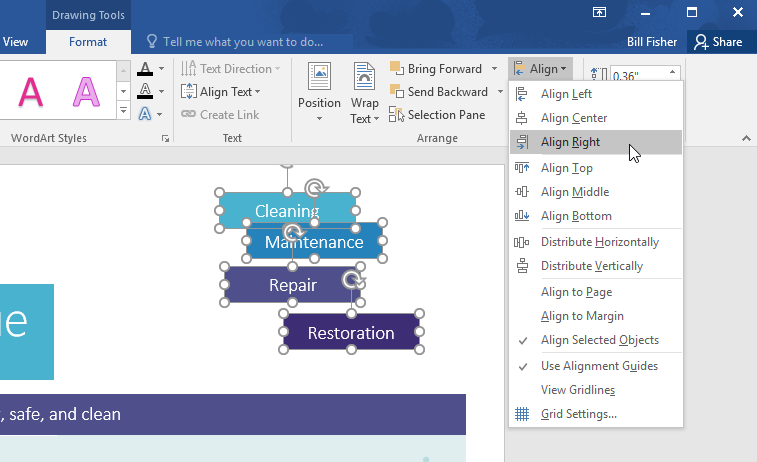
- Hold the Shift (or Ctrl) key and click the objects you want to align. In our example, we’ll select the four shapes on the right.

- From the Format tab, click the Align command, then select one of the alignment options. In our example, we’ll choose Align Right.
- The objects will be aligned based on the selected option. In our example, the shapes are now aligned with each other.

Note that the Align Selected Objects option is selected by default, which allows you to align objects without moving them to a different part of the page. However, if you want to move the objects the top or bottom of the page, select Align to Page or Align to Margin before choosing an alignment option.
To distribute objects evenly:
If you have arranged your objects in a row or column, you may want them to be an equal distance from one another for a neater appearance. You can do this by distributing the objects horizontally or vertically.
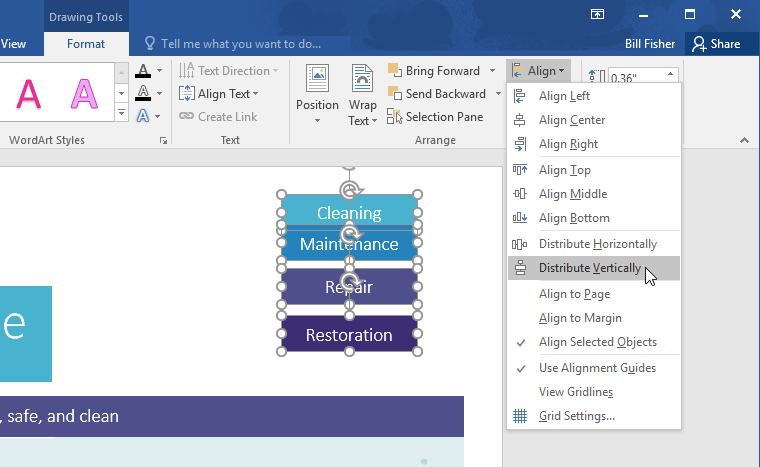
- Hold the Shift (or Ctrl) key and click the objects you want to distribute.
- On the Format tab, click the Align command, then select Distribute Horizontally or Distribute Vertically.
- The objects will be evenly spaced from one another.
Grouping objects
At times, you may want to group multiple objects into one object so they will stay together. This is usually easier than selecting them individually, and it also allows you to resize and move all of the objects at the same time.
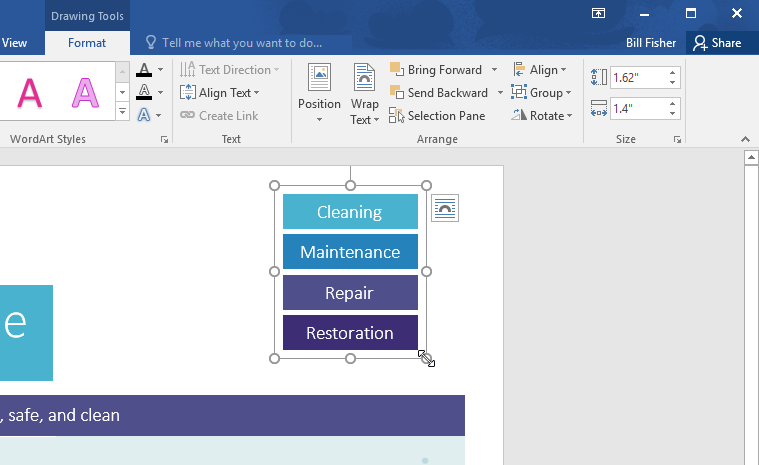
To group objects:
- Hold the Shift (or Ctrl) key and click the objects you want to group.
- Click the Group command on the Format tab, then select Group.
- The selected objects will now be grouped. There will be a single box with sizing handles around the entire group so you can move or resize all of the objects at the same time.

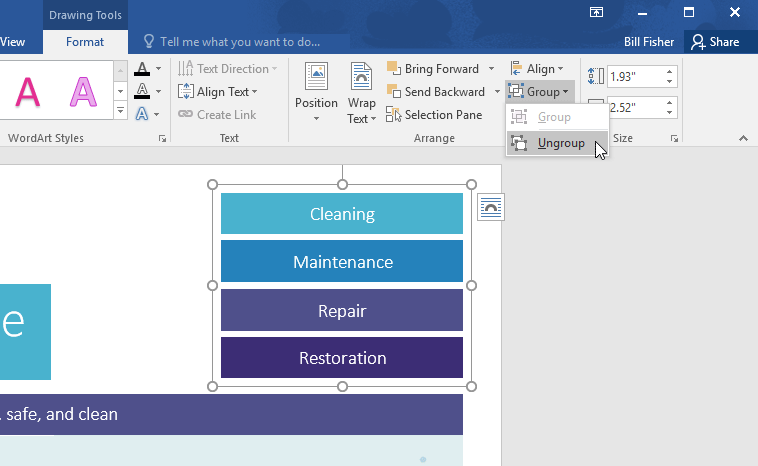
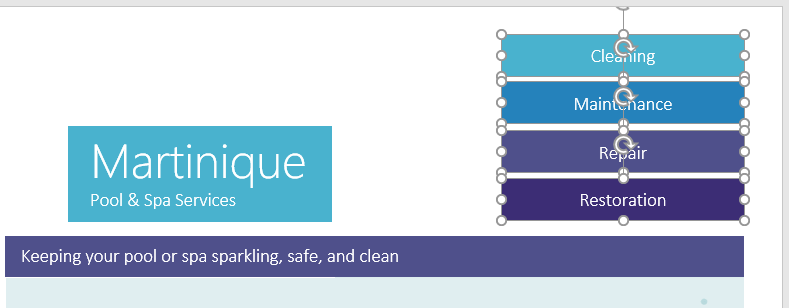
To ungroup objects:
- Select the grouped object. From the Format tab, click the Group command and select Ungroup.
- The objects will be ungrouped.
Ordering objects
In addition to aligning objects, Word gives you the ability to arrange objects in a specific order. The ordering is important when two or more objects overlap because it determines which objects are in the front or the back.
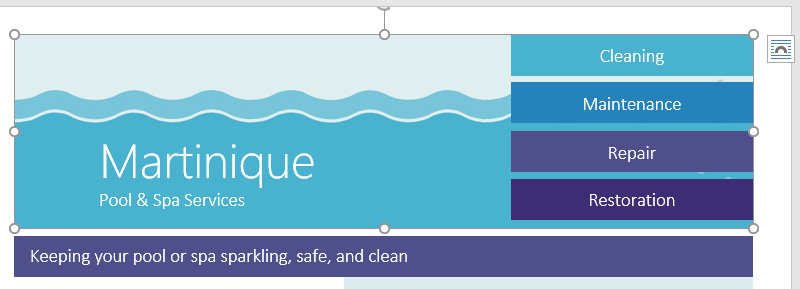
Understanding levels
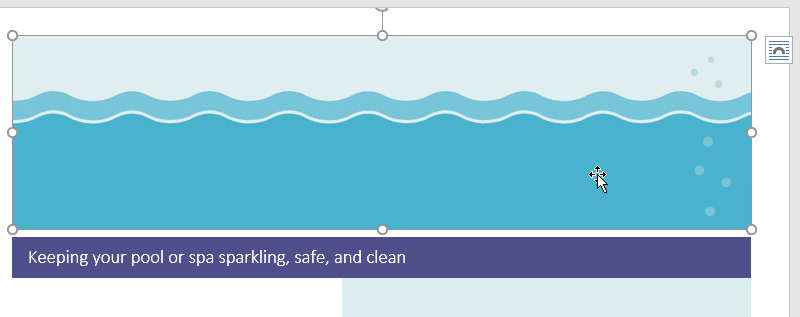
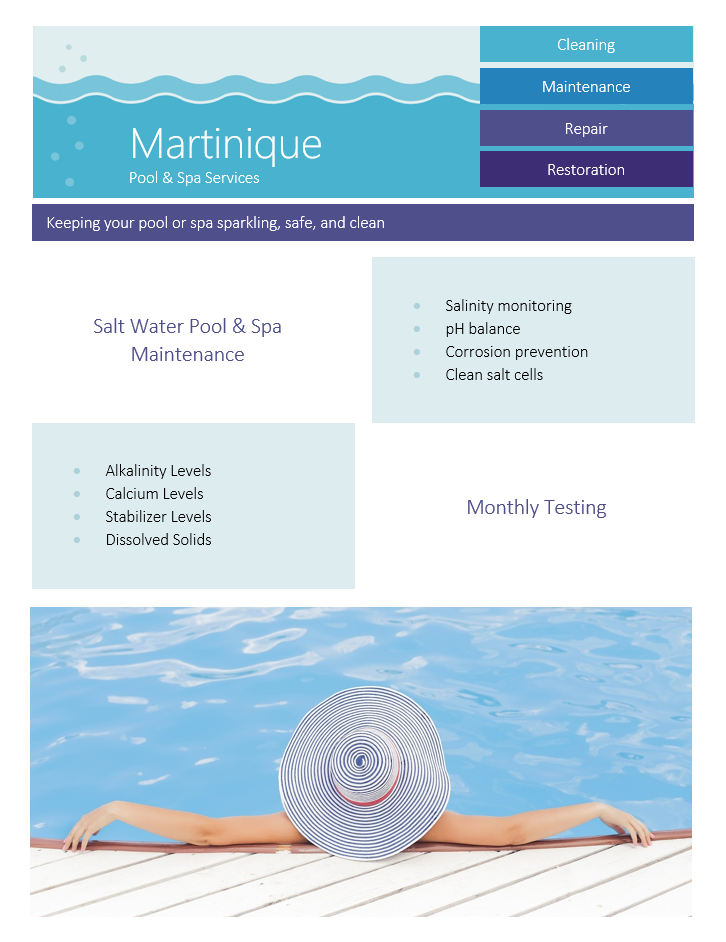
Objects are placed on different levels according to the order in which they were inserted into a document. In the example below, if we move the waves image to the beginning of the document, it covers up several of the text boxes. That’s because the image is currently on the highest—or top—level. However, we can change its level to put it behind the other objects.
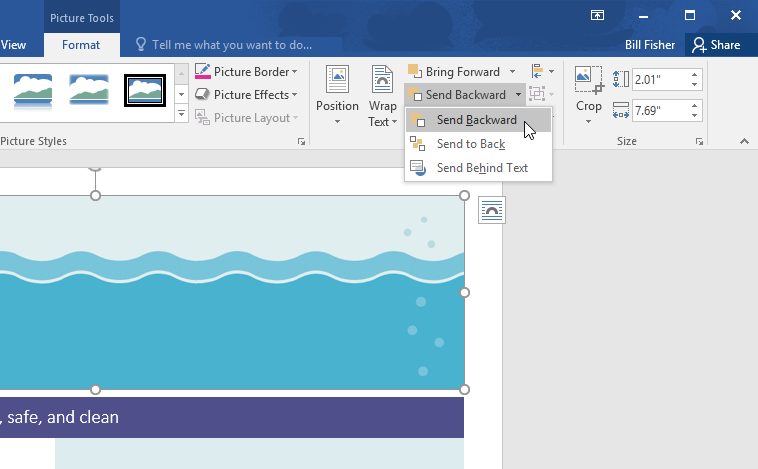
To change an object’s level:
- Select the object you want to move. In our example, we’ll select the image of the waves.
- From the Format tab, click the Bring Forward or Send Backward command to change the object’s ordering by one level. In our example, we’ll select Send Backward.
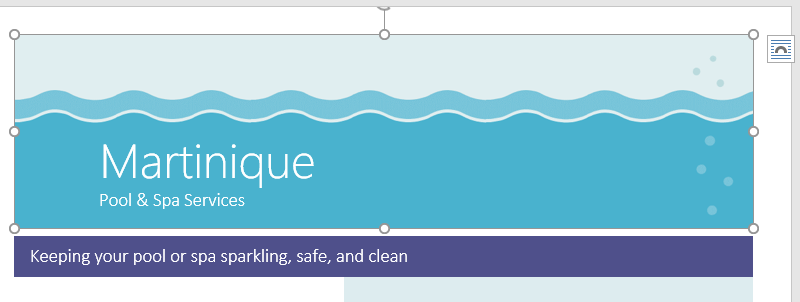
- The objects will be reordered. In our example, the image is now behind the text on the left, but it’s still covering the shapes on the right.
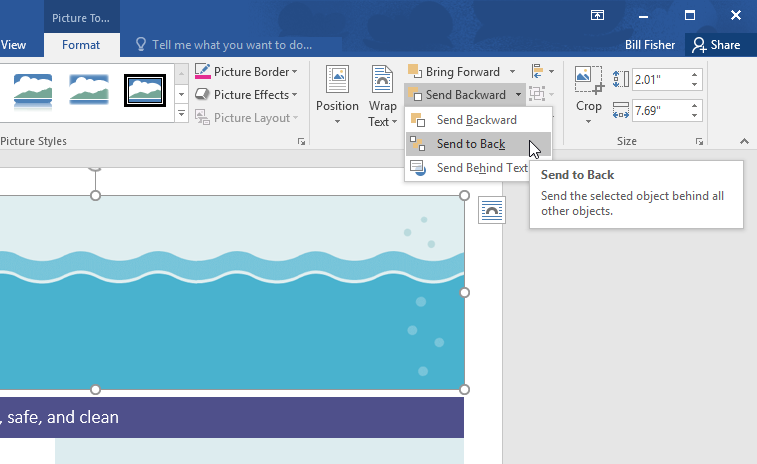
- If you want to move an object behind or in front of several objects, it’s usually faster to use Bring Forward or Send Backward instead of clicking the other ordering command multiple times.
- In our example, the image has been moved behind everything else on the page, so all of the other text and shapes are visible.
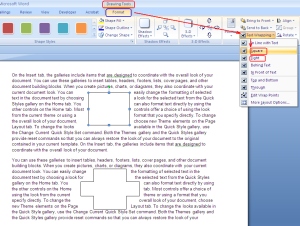
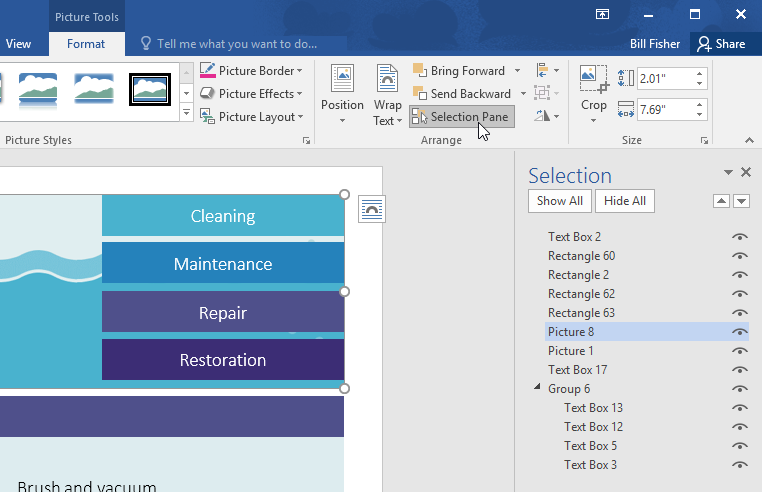
If you have several objects placed on top of each other, it may be difficult to select an individual object. The Selection Pane allows you to easily drag an object to a different level. To view the Selection Pane, click Selection Pane on the Format tab.
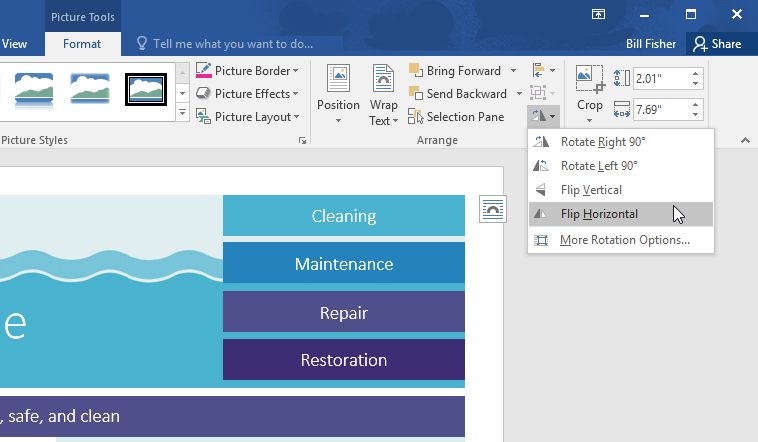
To rotate or flip an object:
If you need to turn an object so it faces a different direction, you can rotate it to the left or right, or you can flip it horizontally or vertically.
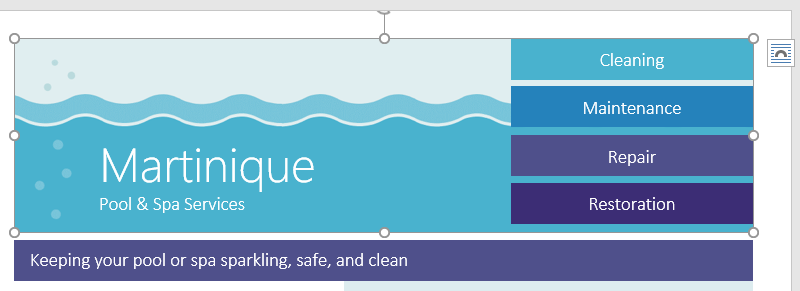
- With the desired object selected, click the Rotate command on the Format tab, then choose the desired rotation option. In our example, we’ll choose Flip Horizontal.
- The object will be rotated. In our example, we can now see the bubbles on the left that were previously hidden behind the text boxes.
Challenge!
- Open our practice document.
- Scroll to page 2 and select the picture of the waves at the top of the page.
- Use the Rotate command to flip the waves vertically.
- Use the Send to Back command to move the waves behind the Martinique text box.
- Move the Martinique text box so it is near the bottom of the waves image.
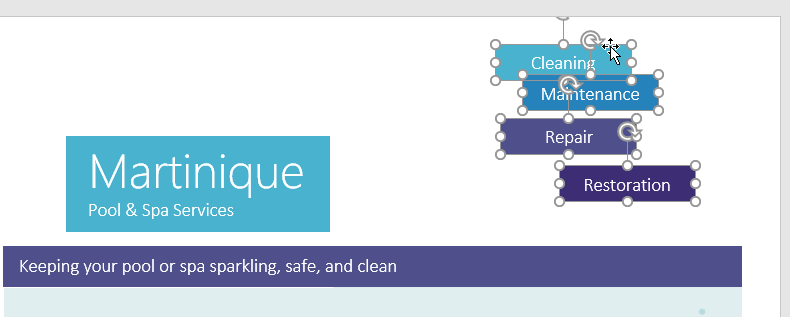
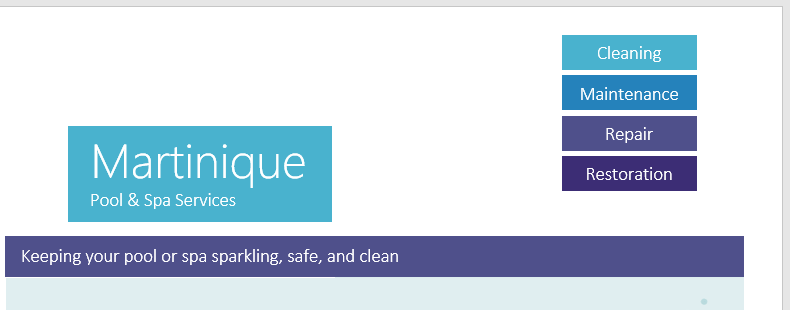
- Make sure the waves picture and Martinique text box are no longer selected. Hold down the Shift key, then select the text boxes containing Cleaning, Maintenance, Repair, and Restoration.
- Click the Align command, and make sure the Align Selected Objects option is selected. Select Align Right and Distribute Vertically.
- With the text boxes still selected, group them.
- When you’re finished, your page should look something like this:
/en/word2016/tables/content/

- Using the CTRL key and your mouse
- Using the Select Objects tool
- Using the Selection Pane
Method 1: Using the CTRL Key and Your Mouse
Step 1: Open your MS Word document.

Step 2: Click on the text boxes.
Once your document is ready, select a text box in your document. You can do this by clicking on any of the four sides of your text box.
Now, press and hold the CTRL key and click the next one.
Repeat the same steps to go over all of the text boxes in your document.

Method 2: Using the Select Objects Tool
Step 1: Open an MS Word document.

Step 2: Zoom out your document.
To be able to select all text boxes on a page, zoom out your document to view the entire page.
You can do this by clicking the Zoom Out button found at the bottom right corner of your window.
Keep clicking until all your text boxes on a page are visible.

Step 3: Access the Select Objects tool.
Now that your document is ready, go to the Editing group found at the rightmost part of the Home tab.
Click the Select Objects drop-down menu and select the Select Objects tool.

Now, click the upper right portion of your document and drag your cursor to its bottom right.

This will select all the text boxes on the respective page.
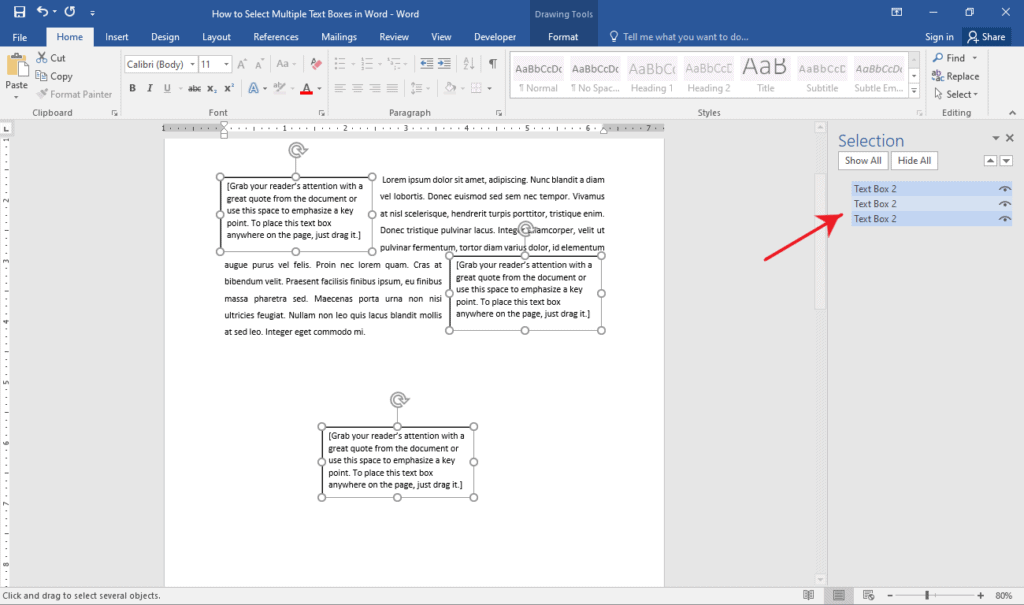
Method 3: Using the Selection Pane
The Selection Pane lists down all objects in your document. This way, you can easily select your text boxes throughout your document from the list.
The disadvantage though is that this method requires the text boxes to be in a different text wrapping format other than the default.
Step 1: Open up a Word document.

Step 2: Display the Selection Pane.
Click the Select drop-down menu found at the rightmost part of the Home tab. On the list of options, select the Selection Pane.
This will display the Selection Pane on the right side of your window.
You should see a list of text boxes you have in your document.

Step 3: Select your text boxes.
On the Selection Pane, press and hold the CTRL key while clicking each text box that you want to select.
Conclusion
We hope you’ve found this article helpful!
If you work with several objects and have to move them or apply shared formatting to them, you must select
these objects every time. Apply formal grouping, and you will be able to operate those objects quickly as a
unit.
To group several objects, select all objects you want to group by pressing Ctrl or
Shift and clicking every of these objects:

Then do one of the following:
- On the Format tab, in the Arrange group, click the Group command:

- Right-click one of the objects and choose Group -> Group from the popup menu:


Word puts a single box around the objects instead of a separate box around each object:

To ungroup grouped objects, do one of the following:
- On the Format tab, in the Arrange group, click Ungroup:
- Right-click a grouped object, and then choose Group -> Ungroup from the popup menu:


See also this tip in French:
Grouper et dissocier des objets.
Please, disable AdBlock and reload the page to continue
Today, 30% of our visitors use Ad-Block to block ads.We understand your pain with ads, but without ads, we won’t be able to provide you with free content soon. If you need our content for work or study, please support our efforts and disable AdBlock for our site. As you will see, we have a lot of helpful information to share.