
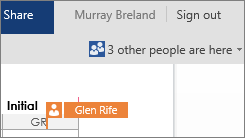
To work together in Word for the web, you edit a document as you normally would. If others are also editing it, Word for the web alerts you to their presence, and shows you the paragraph they’re working on. There’s no special co-authoring mode and no command to begin co-authoring.
As authors come and go, Word for the web notifies you briefly.
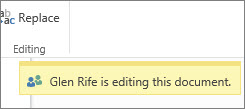
You can always see who is currently working in the document by clicking near the top of the window.
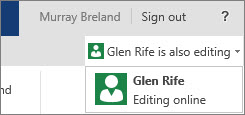
A colored indicator shows you where others are editing the document.
Opening the document in your desktop application
If you want to make changes that require features of the Word desktop application, click Open in Word and continue editing. For example, you might want to add a table of contents or a bibliography whose entries update automatically.
Note: Co-authoring in the Word desktop application requires Word 2010, Word 2013, or Microsoft Word for Mac 2011.
In the Word desktop application, be careful not to introduce content or functionality to the document that will prevent other authors from editing the document in Word for the web. For example, don’t use permission features such as editing restrictions or marking the document as final. If you want to restrict access to the document, use the permission features where the document is stored (OneDrive, Microsoft 365, or SharePoint).
If someone does save the document with features that aren’t supported by Word for the web, you can still co-author, just not in Word for the web anymore. If everyone in the group has Word 2010, Word 2013, or Word for Mac 2011, continue working together in Word (click Open in Word and continue editing).
If someone in the group doesn’t have one of those versions of Word, you need to remove the unsupported features from the document so that everyone can continue to work together in Word for the web. Do the following:
-
In Word for the web, click Open in Word (requires Word 2003, or later, or Word for Mac 2008 12.2.9 or later).
-
In the Word desktop application, remove the unsupported features. For details about what’s supported, see Differences between using a document in the browser and in Word.
-
Save the document (press Ctrl+S in Windows, or ⌘+S on the Mac).
-
If you used Word 2003, Word 2007, or Word for Mac 2008 12.2.9, close Word so that others can continue co-authoring the document in Word for the web.
If another author saves the document with unsupported features before you have saved the document in Word for the web, you might not be able to save your work in Word for the web. If you have Word 2010, Word 2013, or Word for Mac 2011 you can prevent losing your changes by opening the document in the Word desktop application. Click Open in Word, copy your changes from Word for the web, and then paste them in the document in Word. When you save the document in Word, your changes are saved on the server.
If co-authoring in Word for the web isn’t working
If co-authoring isn’t working in Word for the web, it might be because someone has the document open in a version of Word that doesn’t support co-authoring. The document might contain features that are not supported for editing in Word for the web, or some other problem. For help, see Troubleshoot co-authoring Word documents.
Note: In SharePoint 2010, Word for the web does not support co-authoring, but you can work together in Word 2010, Word 2013, and Microsoft Word for Mac 2011.
Need more help?
Want more options?
Explore subscription benefits, browse training courses, learn how to secure your device, and more.
Communities help you ask and answer questions, give feedback, and hear from experts with rich knowledge.
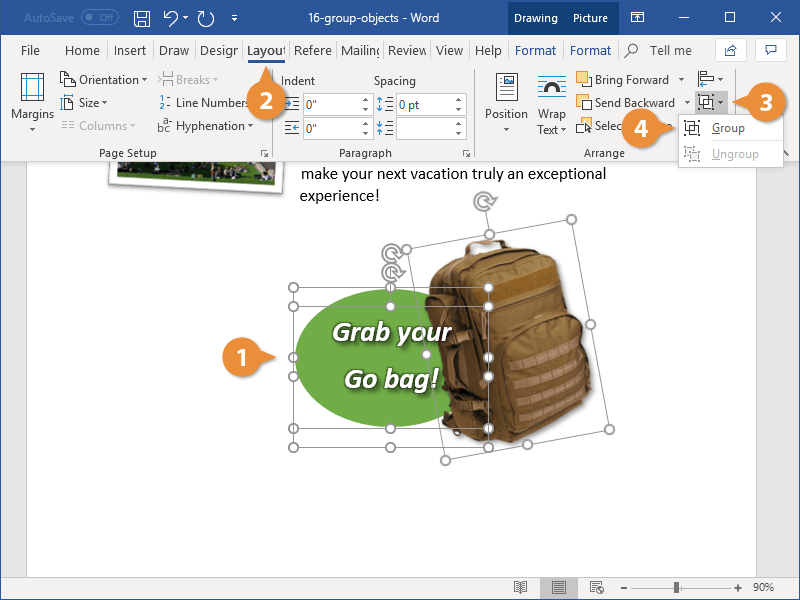
If you work with several objects and have to move them or apply shared formatting to them, you must select
these objects every time. Apply formal grouping, and you will be able to operate those objects quickly as a
unit.
To group several objects, select all objects you want to group by pressing Ctrl or
Shift and clicking every of these objects:

Then do one of the following:
- On the Format tab, in the Arrange group, click the Group command:

- Right-click one of the objects and choose Group -> Group from the popup menu:


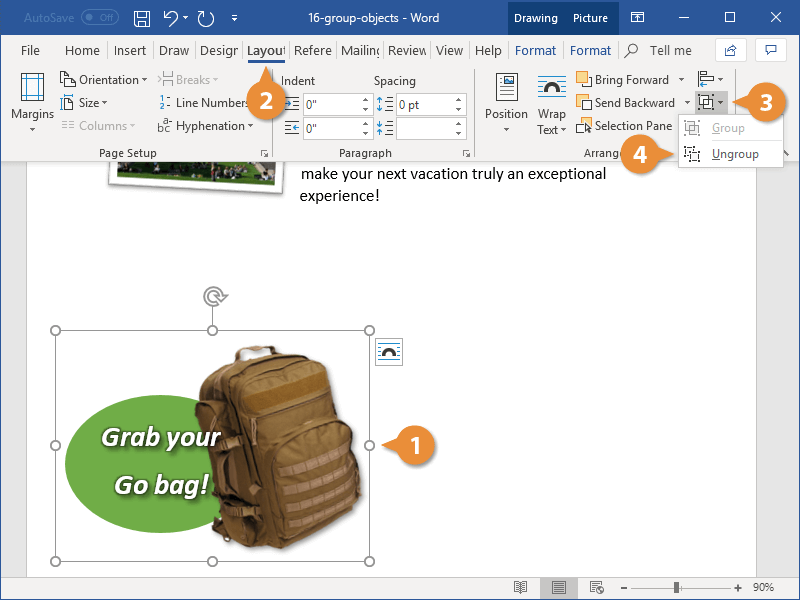
Word puts a single box around the objects instead of a separate box around each object:

To ungroup grouped objects, do one of the following:
- On the Format tab, in the Arrange group, click Ungroup:
- Right-click a grouped object, and then choose Group -> Ungroup from the popup menu:


See also this tip in French:
Grouper et dissocier des objets.
Please, disable AdBlock and reload the page to continue
Today, 30% of our visitors use Ad-Block to block ads.We understand your pain with ads, but without ads, we won’t be able to provide you with free content soon. If you need our content for work or study, please support our efforts and disable AdBlock for our site. As you will see, we have a lot of helpful information to share.

How to Group Objects in Word
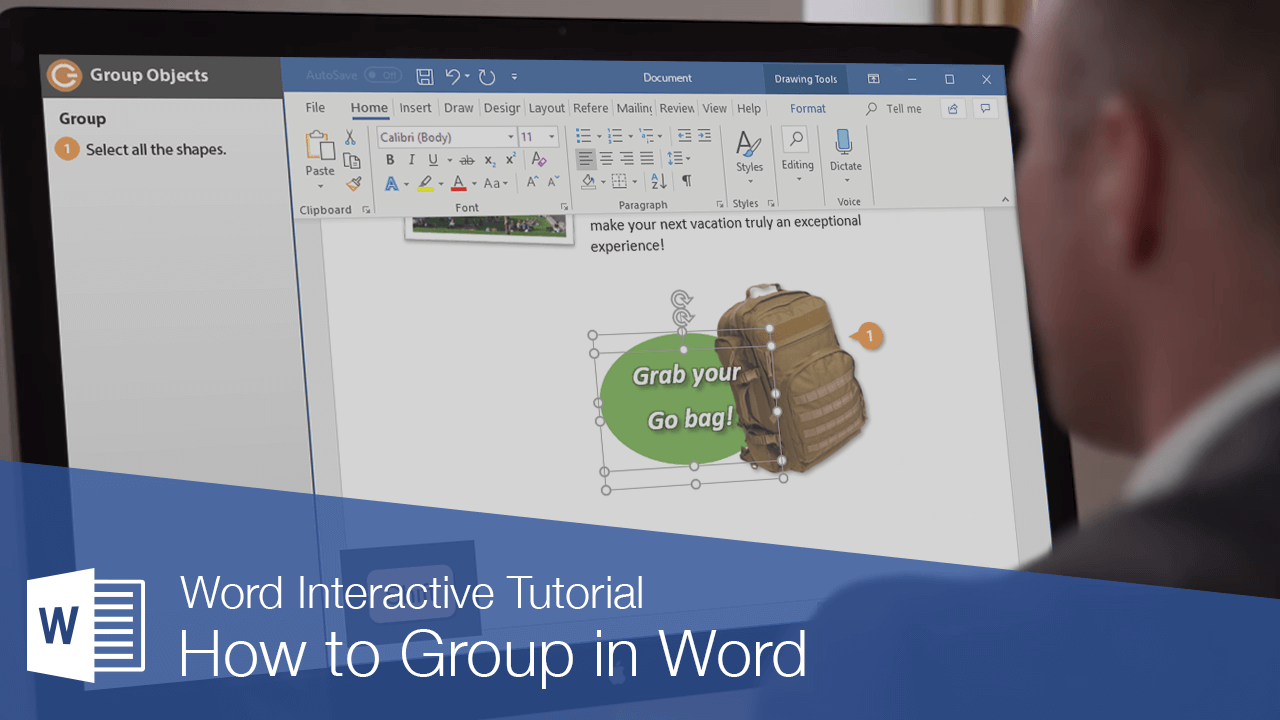
It is often easier to work with a single object than it is to work with several smaller objects that belong together. A group is a collection of objects that Word treats as a single object.
Group
By grouping several objects together, you can format multiple objects at once rather than formatting each object individually.
- Select all the objects you want to group together.
- Click the Layout tab on the ribbon.
- Click the Group button.
- Select Group.
Press and hold down Shift as you select multiple objects.
You can also click the Format tab on the ribbon — the Arrange group on either tab includes the Group button.
The selected objects are grouped together.
Now that the objects are grouped, you can apply effects to all three objects at once and move the grouped objects around the document together.
You can also right-click selected items and select Group from the contextual menu to group objects.
If you need to apply some formatting to just a single object in the group, or move something around within the group, first select the group, then click the object you want to format within the group. Just that object is selected, but it remains part of the group.
Ungroup
If you no longer need to keep a group of objects together, you can ungroup them so they’re all independent objects again.
- Select the object group.
- Click the Layout tab.
- Click the Group button.
- Select Ungroup.
When a group is selected, the Group command is no longer available, but the Ungroup command is.
The objects can now be manipulated individually.

FREE Quick Reference
Click to Download
Free to distribute with our compliments; we hope you will consider our paid training.
Collaborating on group projects is a common occurrence in the workplace and at school. Being able to divide up tasks, communicate, and improve your final product makes it an enjoyable experience.
Follow our group project advice here at SoftwareKeep when using Microsoft Word!
Strengthen Group Projects with Microsoft Word
Group projects are a great way to get your team engaged. However, it can sometimes lead to confusion and wasted time as members of the team try to find out what is assigned for them. Microsoft Word makes it easy for groups to collaborate on documents.
A group project is a difficult undertaking. It often takes a lot of effort to get everyone on board and it can be hard to keep the whole team motivated. One way to increase cooperation and make sure that all members are contributing is by using Microsoft Word’s collaboration features.
These features allow you to create documents with comments, track changes, lock certain sections so they cannot be edited without permission, insert pictures in your document for reference purposes, and even chat directly in the document itself.
If you want your group projects done right then make sure you use Microsoft Word’s tools!
Microsoft Word Tips and Tricks for Group Projects
Collaborating with your peers on group projects is an unavoidable reality in most adults’ lives. In order to succeed, it’s important that you get the job done efficiently and effectively! Here are some helpful tips for Microsoft Word from SoftwareKeep:
- Divide up tasks amongst each other. This will ensure that everyone understands their part of the assignment before starting work.
- Use a bulletin board or whiteboard to map out exactly what needs to be completed and how much time should be allocated per task (this helps keep things organized).
- Keep meetings brief but productive—no more than half an hour long at best so no one feels like they’re wasting too much valuable time.
Now, let’s see some more tips and tricks on how using Microsoft Word can improve your group projects in both work and school settings!
1. Have Multiple People Work on a Single Document
Microsoft Word is an excellent tool for group collaboration on a single document. You can share the documents you are collaborating with your team by saving it to the cloud. After that, choose OneDrive or SharePoint Online as your save location before clicking Save.
Word will enable co-authoring so that everyone in the project has access to the file to make edits at any time! Once the project is complete, you can disable editing and send the file off to wherever it needs to be.
2. Give People Permission to Edit the Document
Inviting those you know to collaborate on your work is as easy as typing their email address in the invite box. You can add and remove contacts or change permissions from this same window. This is easy for both newbies and veterans alike who want a simpler experience when collaborating with others.
Adding more folks will also give them permission to access or edit the document so they can contribute without feeling like an outsider. Removing some permissions might also make the project run smoother while still keeping all of your most valuable team members onboard.
3. Know What Has Been Done, and What Needs to Be Done
Microsoft Word’s Activity pane is a great way to keep track of how much work everyone in your office has done.
You can also see who was online and what they were working on while accessing the tab, making it easy for you to delegate duties among those still left at their desktops when others are finished with theirs.
You can also use this as a way to audit the work of your co-writers. If something was removed or edited, you’ll be able to see it in this tab and hold everyone accountable.
4. Colored Flags Let You Know What Everyone is Working On
Colored flags let you know what everyone is working on. That’s why it’s important to make sure that you agree to automatically share changes before collaborating with others. The whole team will be able to see the collective progress.
You’ll also notice colored flags show up throughout the document; when someone collaborates with you, their flag will show up to indicate where they’re in the document. This is another way of tracking changes and provides the option for more cooperation too.
5. Transform Your Group Documents
With Microsoft Word, your group presentations and documents will stand out because they’re polished and professional. With this program, you can make any document look like it took hours of work to get just the right formatting or design.
Your group projects will evolve from being basic into complex with a seamless collaboration process!
6. Use Skype for Business to Speak Privately to Collaborators
Use Skype for Business to privately talk with all collaborators. If you’re trying to account for everyone working on a group project, this feature integration can be very handy.
You’re also given the option of chatting without anyone else being privy to your conversation if something needs addressing in private.
7. Make Use of Comments in Word
When people are invited to edit a document with you, they all have the option to comment on parts of the file. This opens the door for even more communication, as people can ask questions, start comment threads, and resolve issues all from Word itself.
Once the conversation is done, you can lock the comment from further replies, while the discussion still remains accessible and readable to those who missed participating.
Buy and Download Microsoft Office
Purchase Microsoft Office right now and prepare to be a hero in the workplace. Whether you’re writing an email, making a presentation or polishing up your resume on Word, every professional needs Office at their disposal so they can make sure everything is perfect.
You don’t want to end up with spelling mistakes or typos under these circumstances — avoid this embarrassment by downloading software from SoftwareKeep today!
How To Pick the Perfect Office for Your Needs
The general rule of thumb is to use Microsoft Office Home and Student for academic projects, and Microsoft Office Professional for more serious work projects.
Student Microsoft Office is great for group academic projects, and it can be purchased on our website. A professional version of the software suite is also available if you’d prefer that instead.
Shop with SoftwareKeep Today
SoftwareKeep is a one-stop-shop for computer software. With guarantees and low prices, we’ll keep your business on the latest tech without breaking the bank. We also offer group discounts so if you work in an office or have students at school who are looking to purchase Microsoft products together, give us a call right away!
Final Thoughts
Collaborating on group projects is a common occurrence in the workplace and at school. Being able to divide up tasks, communicate, and improve your final product makes it an enjoyable experience.
With patience and perseverance, you’ll find yourself enjoying this work environment where everyone is pitching in for a better outcome! Now that you’re aware of the benefits, are you ready to buy Office? Shop with us today to get the best price on the market!
Visit our Help Center to get access to hundreds of articles covering hundreds of topics, and with tips on how to get the most out of your system. Want more? Sign up for our newsletter to get promotions, deals and discounts from us right in your inbox.
Subscribe with your email address below.
You May Also Like
» How to Create Excel Header Row
» How To Use “If Cell Contains” Formulas in Excel
» How to Edit Legend in Excel

When working with a Word document, groups often need to review and make editing changes. If you want to be able to track who makes what changes, the Tracking Changes feature can be very helpful. You can see who wants what changes and then choose to accept/decline the changes. (Note: If you have document protection turned on, you will need to go to the Review tab, click the Restrict Editing, and then select Stop Protection. If there is a password, you need to type that in and then should be able to access the Tracking Changes feature. )
Turn on Tracking
To turn on tracking, open the Word file and go to the Review tab. Click the Track Changes button in the Tracking group. See Figure 1. The button is a segmented button, so you want to click the top half of the button. If you select the bottom of the button, you get a drop-down menu and then would need to click Track Changes from that menu.

Figure 1
You can also add an indicator to the status bar at the bottom of your Word window. Just right-click the status bar and choose Track Changes. See Figure 2.

Figure 2
Display Tracked Changes
Click on the Review tab and use the Display for Review drop-down list (just to the right of the Track Changes button) to pick from:
- Final: Show Markup
- Final
- Original: Show Markup
- Original
See Figure 1. Final will show your document as if you had accepted all of the changes. Original will show your document as if you rejected all of the changes. Both Original and Final hide the tracked changes but do not remove them from your document. You have to go through the Accept or Reject process for each change to get rid of it. When you click on the Accept or Reject button on the Review tab, you do have the option of Rejecting or Accepting All changes in the document.
Display Options
Earlier, we clicked the top half of the Track Changes segmented button. If you click the bottom half of the button, you will be able to access the options for tracking changes. See Figure 3. You can customize how each of the markups appears and the formatting on the balloons that tell you who made what change.

Figure 3
Print Tracked Changes
To print your document with the tracked changes, click on the File tab and choose Print. Under Settings, click the Print All Pages drop-down list and make sure that Print Markup has a check next to it. If it does not, then click Print Markup to turn that on. See Figure 4. To print without showing tracked changes, ensure that Print Markup does is unchecked. Under the Print All drop-down list you will also find the option to print a list of markups.

Figure 4
Change User Name
On the Review tab, click the bottom half of the Track Changes button and choose Change User Name. The Word options window will open allowing you to change your user name, unless it has been locked by your system administrator. See Figure 5.

Figure 5
Choose Reviewers
On the Review tab, click on the Show Markup drop-down list and point to Reviewers. Check or uncheck the reviewers. See Figure 6.

Figure 6
Choose Markup Items
On the Review tab, use the Show Markup drop-down list to choose what types of markups you would like it to see. See Figure 6 above. You can choose from Comments, Ink, Insertions and Deletions, and Formatting. Most of the time, I keep all of these showing and don’t need to make any changes. In this same drop-down list make sure that Highlight Updates is selected.
Select Editing Balloons
On the Review tab under the Show Markup drop-down list, you can choose to show your revisions in balloons, show all revisions inline (this is with the text), or show only comments and formatting in balloons. The default for editing balloons is to show only comments and formatting in balloons. See Figure 7.

Figure 7
Reviewing Pane
To turn on the Reviewing Pane, go to the Review tab and click on the Reviewing Pane drop-down list. See Figure 8 for an example of what the vertical reviewing pane looks like. The vertical pane will show up on the left side of your Word screen. The horizontal pane will appear at the below your document. I actually like this pane. I can understand how it can be seen as too much information for some people. It does provide data on the revisions that have been made so it is good to know that it is available if you need it. To turn off the reviewing pane, just click the Reviewing Pane drop-down list and select the same pane that you have showing and it will toggle off.

Figure 8
Tracking Changes – Turning Off
Before you turn off the feature, you will want to Accept or Reject the changes that have been made by using those buttons in the Changes group on the Review tab. See Figure 1. Then, you can go to the Review tab and click the Track Changes button. (You can also right-click the Status bar and select Track Changes to turn off that feature.)
One of the things that has caught me once before is sending out a document without turning off the tracked revisions. Once the recipient opened the document, and turned on their option to track their changes, they could see ALL of the revisions and strikeouts. You can turn on a warning so that when you try to email the document from Word’s menu, it will let you know that you still have revision tracking turned on. Go to File, Options, and Trust Center. Click on Trust Center Settings button on the right. Then choose the Privacy Settings category on the left. Put a check mark next to “Warn before printing, saving or sending a file that contains tracked changes or comments.” See Figure 9.

Figure 9
Image credit: https://www.flickr.com/photos/stereoscopy/