
There are two ways you can insert a text into a Word document
First method:
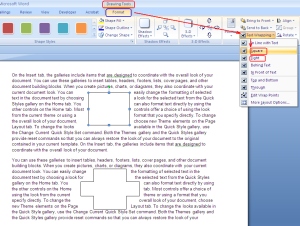
From the Ribbon, under the tab Insert, within the group Text, click the Text Box icon. You can view a gallery of built-in text boxes in a drop-down list. From the ribbon under the tab insert within the group text click the text box icon you can view a gallery of built in text boxes in a drop-down list
- Click to insert one of these into your document. Depending on the Text Wrapping property of the selected text box, it may sit on top of text, behind the text, in line with text, surrounded by text, etc.
- Now, to reveal the text wrapping property of the inserted text box, click the text box on the borders. Text Box Tools tab appears on the Ribbon.
- Click the Format tab under this. Under the Format tab, within the group Arrange, click the Text Wrapping icon. From the drop-down menu, you can view various text-wrapping styles and the one highlighted is the default style. You can change this property as required.

You can also create a new empty text box from the gallery drop-down. Click Draw Text Box from the bottom of the drop-down. The mouse pointer changes to a plus symbol and you can draw a text box.

Note: Text wrapping styles are: In Line with Text, Square, Tight, Behind Text, In Front of Text, Top and Bottom, and Through. All these style are self-explanatory.
Difference between Square and Tight
You may wonder about the difference between Square and Tight styles, as in both case text surrounds the box. Difference lies in the manner that text surrounds. With Square, text takes the shape of a square around the box (irrespective box shape). With Tight, surrounding text takes the shape of the box (e.g. star shaped box, trapezoid, hexagon, etc.)
Second method:
- From the Ribbon, under the tab Insert, within the group Illustrations, click Shapes. From the gallery of Shapes, under Basic Shapes, click the Rectangle shape.
- The mouse pointer changes to a plus symbol and you can draw a rectangular shape in your document. What you can draw is a basic rectangular shape and you cannot enter text readily.
- Right-click the shape and from the right-click menu, select Add Text. The shape transforms to a text box and you can enter text.
- Change the text-wrapping property of the text boxes as explained above.
How to fix text boxes in one line
If you select the text wrapping style of a text box to In Line with Text, the text box gets fixed to that line. So, the text box will move only with the line.
Formatting text boxes
You can design a text box with fill color, gradient color, border color, shadow, 3D effects, and many more.
- Right-click on the borders of the text box and from the right-click menu, select Format Text Box. Format Text Box dialog box appears.
- From the Colors and Lines tab, apply fill color, change transparency of color, add border line color, change border line pattern, etc.
- From the Size tab, select height and width of the text box, lock aspect ratio,
- In the Layout tab, you can select the text wrapping type as discussed above. You can also specify height and width of the text box relative to the page, page margin, etc.
- In the Text Box tab, set the left, right, bottom, and top margins the text inside the text box. Also, set the vertical alignments: Top, Center, or Bottom.
Use built in text box styles
You can select the built in text box styles from the Text Box Styles group under Text Box Tools tab >> Format tab >> Tex Box Styles
Change direction of text inside text box
If you want the text inside text box to appear vertically (from top or bottom), under the Format tab, within group Text, click Text Direction.
Flow text from one box to another
Select a text box and from the Format tab, within group Text, click Create Link. A coffee cup icon appears. Then click the next text box (should be a empty text box) to which you want the text to flow from the first text box. Done. It links the first text box to the second. Want to break the link, right-click on the first text box, then from the right click menu, select Break Forward Link.

Cut, Copy, and Paste text boxes
Click on the borders of text box and then right-click. From the right-click menu, select Copy to copy text box, select Cut to delete text box, and select Paste to paste the check box at the point of insertion.
Changing the text box shape
Under Text Box Tools tab >> Format tab >> Tex Box Styles, click Change Shape. From the drop-down, select any of the shapes. Text box takes the selected shape.
Grouping text boxes
If you are using multiple text boxes in one place to create a design, flow chart, etc., you can group all to manage them easily, move them all together. To group, press CTRL and click on the borderlines of all text boxes one by one. Release the CTRL button and right-click on the selected text boxes. From the right-click menu, select Group under Grouping.
![]()
Download Article
![]()
Download Article
- Grouping Objects in Word
- Why is the Group button grayed out?
- Q&A
|
|
Do you want to move or resize multiple pictures, shapes, or other objects in your document at the same time? Grouping objects in Microsoft Word is an efficient way to manipulate them to act as a whole instead of individual pieces. You can group shapes, pictures, and other objects so that if you wish to relocate them but not change the distance between them, they will move as one. This wikiHow article teaches you step-by-step how to group and ungroup shapes, pictures, and other objects in Word on your PC or Mac.
Things You Should Know
- Group items by selecting them and then going to «Layout > Group».
- Make sure none of the objects have the «In Line with Text» wrap setting before creating a group.
- If the Group option is grayed out, make sure you have more than one object selected & that none of the objects is a SVG, table, or worksheet.
-

1
Open your document in Word. You can either double-click the file in your file manager (Finder for Mac and File Explorer for Windows) or you can click the Word app icon and go to File > Open.
-
2
Make sure none of your objects are set to «In Line with Text.» If a picture or object you want to add to the group has its text wrapping set to «In Line with Text,» you won’t be able to select it while creating your group.[1]
Here’s how to check and change the text wrap settings:- Click any object you want to add to the group.
- Click the «Layout Options» icon that appears at the top-right corner.
- If the «In Line with Text» option is selected, choose any of the other text wrapping options.
- Repeat for all objects you want to group.
Advertisement
-
3
Select the objects you want to group. If you’re using Windows, press and hold Ctrl as you click each object. If you’re on a Mac, press and hold Cmd instead.
-
4
Click the Shape Format or Picture Format tab. You’ll see one or both of these tabs at the top of Word, depending on which objects you’ve selected. The option to group objects appears on both of these tabs.
- If you don’t see either of these tabs, click the Layout tab instead. You’ll also find the option to group here.
- If you’re using Office 2010, click the Drawing Tools or Picture Tools tab, then click the Format tab.[2]
-
5
Click Group on the toolbar. You’ll see this on the Arrange panel near the top-right corner of Word. If you don’t see this option, click Arrange to make it visible. A brief menu will expand.
-
6
Click Group again to group the selected objects. The objects are now grouped together, which allows you to rotate,
- To ungroup objects, click your group to select it, click the Layout tab, then select Ungroup.
- Once you’ve grouped, then separated a group, you can regroup it. Go to Layout > Regroup.


Advertisement
-
1
You can’t include SVG icons in your groups. If there are SVG icons in your selection, you’ll first have to convert the SVG icons to shapes, which is a feature that only Windows 365 subscribers have access to. There will be a «Convert to Shape» button under Graphics Tools > Format.
-
2
You only have one shape, picture, or object selected. Since you can’t create a group with only 1 item, you’ll need to add more items. Press and hold Ctrl (Windows) or Cmd (Mac) as you click to add other objects.
-
3
Your selection includes a table or worksheet. Unfortunately, you cannot add these things to your group.


Advertisement
Add New Question
-
Question
How can I group text boxes in Word?

Click one after the other while holding Ctrl. Then do a right-click and press ‘Group’.
-
Question
Microsoft Word wouldn’t allow me to group for some reason. Do you have any idea what I’m doing wrong?
Objects with «In Line» text wrapping and GIFs cannot be grouped. Since wrapping is difficult in a text box, it is best to move any items out of a text box, change the word wrap setting, and then group. You can then copy the group and paste it back into a text box and finish by deleting the group outside the box.
Ask a Question
200 characters left
Include your email address to get a message when this question is answered.
Submit
Advertisement
Thanks for submitting a tip for review!
About This Article
Thanks to all authors for creating a page that has been read 190,876 times.
Is this article up to date?
Achieve more control and flexibility with your documents
Updated on September 11, 2022
What to Know
- Select Insert > Text Box > choose a text box template. Select and drag box to the position you want.
- To resize text, select and drag circles around the edge. To rotate text, select and drag the circular arrow.
- Place the cursor inside the text box and type the information you want to appear.
This article explains how to use text boxes in Microsoft Word. Instructions apply to Word for Microsoft 365, Word 2019, Word 2016, and Word 2013.
How to Insert a Text Box in Word
Start by opening the document you want to add a text box to. Then follow the steps below.
-
On the ribbon, select Insert.
-
In the Text group, select Text Box, then choose a text box template.
-
The new text box appears in the middle of the text, and the Shape Format tab is automatically selected.
-
Select and drag the box to the position you want. To resize the text box, select and drag the circles around the edge. To rotate the text box, select and drag the circular arrow at the top of the box.
-
Place the cursor inside the text box and type the information you want to appear there.
Why Use Text Boxes?
When you type text in Microsoft Word, you have options for making it look a particular way on the page (such as changing the page margins), but those options are limited. Text boxes expand your formatting repertoire by offering additional control and flexibility for how your text appears. You can place a text box anywhere within a document and format it with different colors and fonts. This feature is especially helpful for creating a blockquote or a sidebar.
Customize a Text Box
After you create a text box, you can customize it in a number of ways.
-
To bring up options, place the cursor inside the text box and right-click. Choose an option and follow the screen prompts to add a border, change the style, or adjust the way the text box interacts with the other text on the page.
Alternatively, use the controls on the Shape Format tab.
-
To go directly to the Layout Options menu, select the text box, then select the Layout Options icon (it looks like a horseshoe and is located to the right of the text box).
-
Change the text, make more adjustments, or move the box to another location at any time. To delete a text box, select its border, then press Delete on the keyboard.
Thanks for letting us know!
Get the Latest Tech News Delivered Every Day
Subscribe