
Word for Microsoft 365 Word 2021 Word 2019 Word 2016 Word 2013 Word 2010 Word 2007 More…Less
These are the basic types of graphics that you can use to enhance your Word documents: drawing objects, SmartArt, charts, pictures, and clip art. Drawings refer to a drawing object or a group of drawing objects.
Drawing objects include shapes, diagrams, flowcharts, curves, lines, and WordArt. These objects are part of your Word document. You can change and enhance these objects with colors, patterns, borders, and other effects.
Note: It is no longer necessary to insert a drawing canvas to work with drawing objects in Word. However, you may still use a drawing canvas as an organizational aid when working with several drawing objects, or if you want to add connectors between shapes. To insert a drawing canvas, on the Insert tab, click Shapes, and then click New Drawing Canvas.
What do you want to do?
-
Add a drawing to a document
-
Delete all or part of a drawing
Add a drawing to a document
-
Click in your document where you want to create the drawing.
-
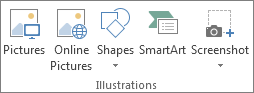
On the Insert tab, in the Illustrations group, click Shapes.

-
You can do any of the following on the Format tab, which appears after you insert a drawing shape:
-
Insert a shape. On the Format tab, in the Insert Shapes group, click a shape, and then click somewhere in the document.
-
Change a shape. Click the shape you want to change. On the Format tab, in the Insert Shapes group, click Edit Shape, point to Change Shape, and then choose a different shape.
-
Add text to a shape. Click the shape you where you want text, and then type.
-
Group selected shapes. Select several shapes at a time by pressing CTRL on your keyboard and clicking each shape you want to include in the group. On the Format tab in the Arrange group, click Group so that all of the shapes will be treated like a single object.
-
Draw in the document. On the Format tab, in the Insert Shapes group, expand the shapes options by clicking the arrow. Under Lines click Freeform or Scribble.
Tip: To stop drawing with the Freeform or Scribble lines, double-click.
-
Adjust the size of the shapes. Select the shape or shapes you want to resize. On the Format tab, in the Size group, click the arrows or type new dimensions in the Height and Width boxes.
-
Apply a style to a shape. In the Shape Styles group, rest your pointer over a style to see what your shape will look like when you apply that style. Click the style to apply it. Or, click Shape Fill or Shape Outline and select the options that you want.
Note: If you want to apply a color and gradient that aren’t available in the Shape Styles group, select the color first, and then apply the gradient.
-
Add flow charts with connectors. Before you create a flow chart, add a drawing canvas by clicking the Insert tab, clicking Shapes in the Illustrations group, and then clicking New Drawing Canvas. On the Format tab, in the Insert Shapes group, click a Flow chart shape. Under Lines, choose a connector line such as the Curved Arrow Connector.
-
Use shadow and three-dimensional (3-D) effects to add interest to the shapes in your drawing. On the Format tab, in the Shape Styles group, click Shape Effects, and choose an effect.
-
Align the objects on the canvas. To align the objects, press and hold CTRL while you select the objects that you want to align. On the Format tab, in the Arrange group, click Align to choose from an assortment of alignment commands.
-

Delete all or part of a drawing
-
Select the drawing object that you want to delete.
-
Press DELETE.
See also
Add shapes
Draw a curve or circle shape
Insert pictures
Crop a picture
Add clip art to your file
What do you want to do?
-
Add a drawing to a document
-
Delete all or part of a drawing
Add a drawing to a document
-
Click in your document where you want to create the drawing.
-
On the Insert tab, in the Illustrations group, click Shapes.
-
When you find the shape you want to insert, double-click to insert it automatically, or click and drag to draw it in your document.
You can do any of the following on the Format tab, which appears after you insert a drawing shape:
-
Insert a shape. On the Format tab, in the Insert Shapes group, click a shape, and then click somewhere in the document.
-
Change a shape. Click the shape you want to change. On the Format tab, in the Shape Styles group, click Change Shape, and then choose a different shape.
-
Add text to a shape. Right-click the shape, click Add Text, and then type.
-
Group selected shapes. Select several shapes at a time by pressing CTRL on your keyboard and clicking each shape you want to include in the group. On the Format tab in the Arrange group, click Group so that all of the shapes will be treated like a single object.
-
Draw in the document. On the Format tab, in the Insert Shapes group, expand the shapes options by clicking the arrow. Under Lines click Freeform or Scribble.
-
Adjust the size of the shapes. Select the shape or shapes you want to resize. On the Format tab, in the Size group, click the arrows or type new dimensions in the Shape Height and Shape Width boxes.
-
Apply a style to a shape. In the Shape Styles group, rest your pointer over a style to see what your shape will look like when you apply that style. Click the style to apply it. Or, click Shape Fill or Shape Outline and select the options that you want.
Note: If you want to apply a color and gradient that aren’t available in the Shape Styles group, select the color first, and then apply the gradient.
-
Add flow charts with connectors. Before you create a flow chart, add a drawing canvas by clicking the Insert tab, clicking Shapes in the Illustrations group, and then clicking New Drawing Canvas. On the Format tab, in the Insert Shapes group, click a Flow chart shape. Under Lines, choose a connector line such as the Curved Arrow Connector.
-
Use shadow and three-dimensional (3-D) effects to add interest to the shapes in your drawing. On the Format tab, choose an option in either the Shadow Effects or the 3-D Effects group.
-
Align the objects on the canvas. To align the objects, press and hold CTRL while you select the objects that you want to align. On the Format tab, in the Arrange group, click Align to choose from an assortment of alignment commands.
-

Delete all or part of a drawing
-
Select the drawing object that you want to delete.
-
Press DELETE.
See also
Draw a curve or circle shape
Insert pictures
Crop a picture
Add clip art to your file
Need more help?
We’ll talk about how to use graphics in Word 2019 in this chapter. You can make your Microsoft Word documents look nicer by adding different kinds of graphics. This section will show you two ways to add pictures.
Table of contents
- What are graphics in Word?
- What is graphics used for?
- How to add Picture in Document
- How to Add WordArt in Document
- Summary
What are graphics in Word?
Graphics refers to hardware or software that allows a computer to show and change pictures. The word can also mean the pictures themselves. For example, laser printers and plotters are graphics devices because they let the computer print pictures.
You can add more information and make your spreadsheets, documents, and presentations more interesting by using graphics. In Office 2010, the commands and tools used to add and change images, shapes, SmartArt graphics, and clip art are used in all of the programs in the suite.
What is graphics used for?
Graphics are used for everything from making Web pages look better to be the presentation and user interaction layer for full-fledged Web applications. Graphics can be used in many different ways, so there are many different technologies to choose from.
Images and Multimedia
You don’t have to think of Word as just a program for making and editing text. It has the tools you need to make some pretty cool page layouts. Even though it doesn’t have as many features or be as strong as a professional page layout program like Adobe InDesign. You can still make things look very professional if you know what you have and how to use it.
Online Pictures and Pictures
The same thing is done by both “Pictures” and “Online Pictures.” The only difference is that when you choose “Pictures,” you can insert images from your computer. Still, when you choose “Online Pictures,” you can add images from the internet, such as clip art from Office.com, Bing, or OneDrive.
Drawing Tools
Shapes, diagrams, flowcharts, curves, lines, and WordArt are all drawing tools. These things are part of the Word file you are working on. You can use colors, patterns, borders, and other effects to change and improve these objects.
Picture Tools
If you want to change a picture or anything else in a Word document, you can always click on it, and the right tab will show up on the Ribbon.
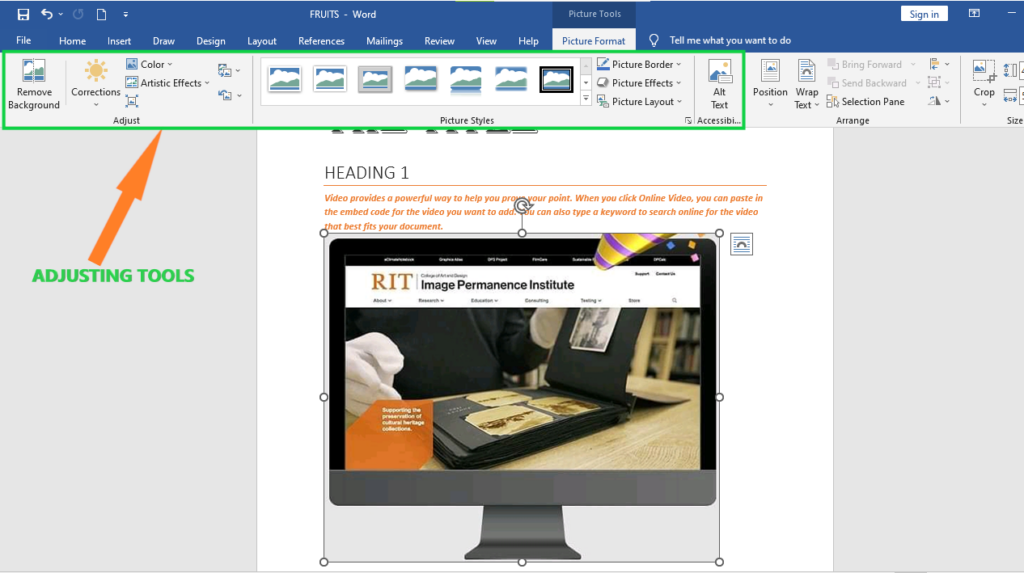
“Picture Tools” is the name of the tab for pictures. Here, we can see that you can make changes to the picture as you go. For instance, you can change the brightness, contrast, color, and add a border.
Your choice of where to put text and how to wrap it will also have a big impact on how your documents look.
These controls are shown here. We don’t worry as much about how words wrap or where they go in our documents because Word isn’t the last step before publishing online. But if you’re making something WYSIWYG (What You See Is What You Get), like for a PDF or print publication, these things will matter.
Also, you can change your pictures inline in a few ways, such as by resizing, rotating, or moving them. In the next picture, you can see these controls, many of which you may already know.
Shapes
You can use the built-in shapes in Microsoft Word 2013 to make callouts, boxes, stars, and other shapes.
When you click the shape, all you have to do is draw it on a blank spot on the page. You can change it as much as you want once it’s in your document, so it doesn’t matter if it’s perfect or just the way you want it.
At the bottom of the “Shapes” menu, there is an option to make a “new drawing canvas.” This will open a box for shapes that works like a text box. You can use these shapes to make drawings on this drawing canvas. This lets you make things like diagrams and flowcharts.
SmartArt and WordArt
SmartArt and WordArt are similar in some ways, especially if you use WordArt to make something and then change the text. You can use one or the other, but not both. However, we’ll discuss them in the same section because one often leads to the other.
Think of SmartArt as pre-made drawing canvases that you can add to your document and then change as you like. Just pick a way to put things together, like a list, a process, or a cycle.
As you can see, we used a “Continuous Block Process” to make a picture. We can change what is in the text boxes when we click them. There are also the usual grab handles for resizing the image and “Layout Options” that let you wrap text however you like.
Format Text Effects
Let’s look at this more closely because it has a pretty big number of features. We’ll talk about the basics so you know more about them. The “Format Text Effects” pane slides out from the right side of the screen.
It can be detached, just like any other pane in Word 2013. You can then move it out of the way to save screen space or keep it close, so it is easy to use.
This dialog box will make it easy to work quickly with text, so you won’t have to keep going to the ribbon to make changes. Note that the “Text Fill and Outline” and “Text Effects” buttons are separated in the dialog box. “Text Fill and Outline” is easy to understand and is used to improve the way text looks.
Chart
Charts are fun for everyone. Charts are a great way to show data sets visually, and Word 2013 comes with a huge variety of charts to choose from, such as columns, pie, bars, and many more. Take a look at the screenshot to see how many choices you have:
It’s easy to change and format charts. When you click on a chart in your document, you’ll see “Chart Tools,” which, as you might have guessed, is the Ribbon tab for charts only.
Text Box
In Word, text boxes are like little islands. When you add a “Text Box” to a document, it can’t be changed no matter what you do to the rest of the document. It’s like putting a document inside another document.
This is helpful if you want to show something “as is” in your work but still be able to change the formatting of the document as a whole. Something you’ve pasted will stay the same.
Text boxes are usually painful for editors because they don’t work well with styles. You may find them very useful, which is fine, but if you want something that fits the style and format of your document but still goes in a box or has a border around it, we suggest just adding a border.
Drop Cap
Drop caps just mean that the first letter of a chapter or book is bigger than the rest:
You can set your drop cap to “Dropped” or “In Margin.” If you choose “Dropped,” the text below will move under it. Check out the “Drop Cap” options to have more control over how your drop caps work.
How to add Picture in Document
Follow these steps to add an already-made picture to your Word file. It is assumed that before you add this picture to your Word document, you already have a picture on your computer.
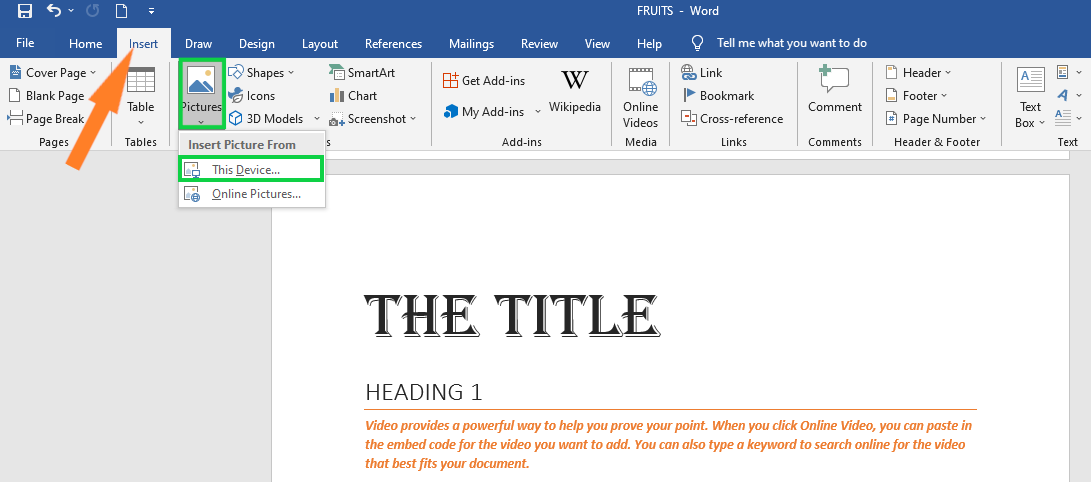
- Step 1 − Click on your document where you want to add a picture.
- Step 2 −Click the Insert tab and then click the Picture button in the Illustrations group, the Insert Picture dialog box will appear.

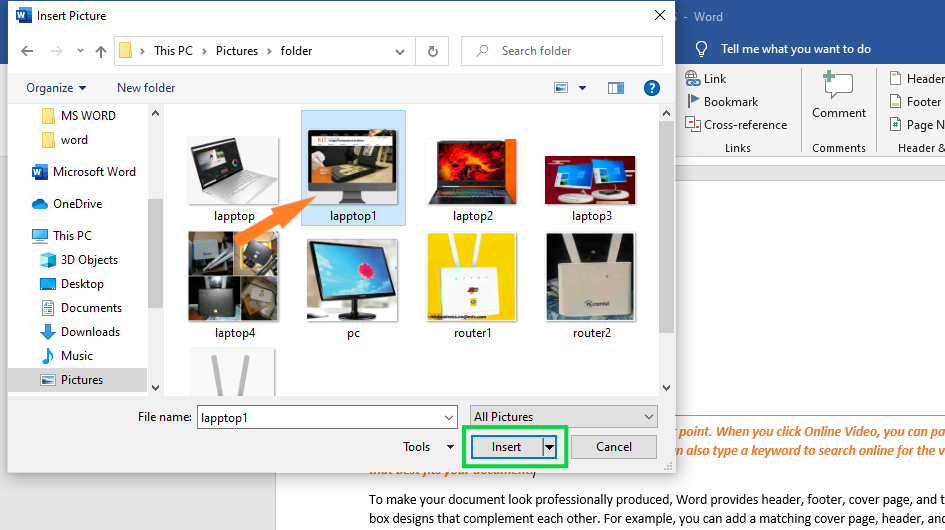
- Step 3 − The Insert Picture dialog box lets you choose the picture you want to use.
 When you click “Insert,” the picture you chose will be added to your document.
You can play around with your inserted picture in different ways. For example, you can give it quick styles, change its size, or change its color.To try it out, just click on the image you inserted, and Word will give you a lot of options for how to format it under the Format tab.

- You can try to add other graphics, such as Clipart, different shapes, charts, SmartArt, or screenshots, if you want to.
 When you click “Insert,” the picture you chose will be added to your document.
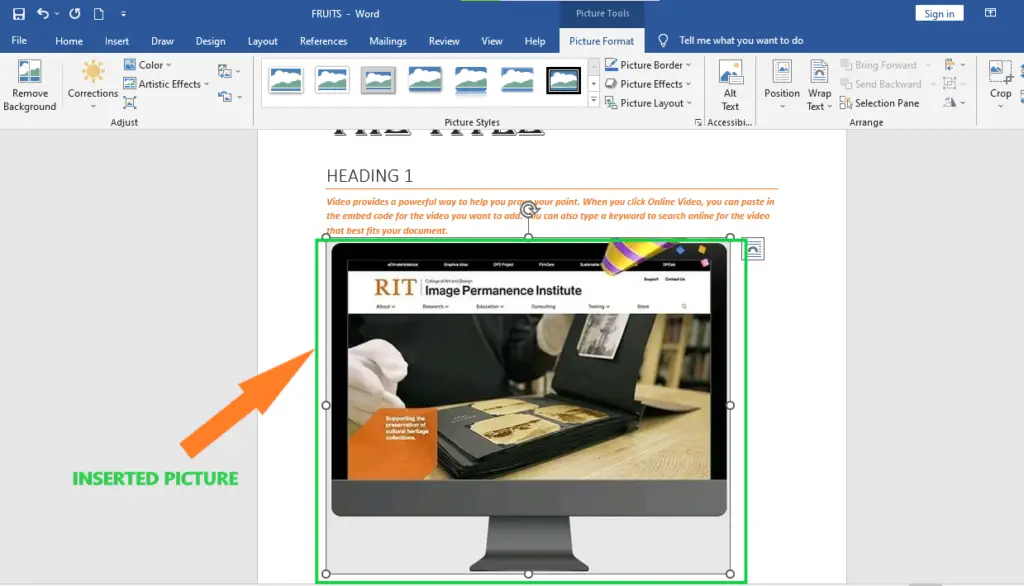
How to Add WordArt in Document
With WordArt, you can add fancy words to a Word document. There are many ways to back up your text. Follow these steps to put WordArt into your document.
- Step 1 − Click in your document where you want to add WordArt.
- Step 2 − Click the Insert tab and then click the WordArt option available in the Text group; this will display a gallery of WordArt.
- Step 3 − You can click on any of the WordArt styles shown in the gallery to choose it. Now you can change the text you’ve added to fit your needs, and you can use the different options to make it look even better. To try it, just double-click the WordArt you’ve added, and Word will give you many options for how to format your image on the Format tab. Shape Styles and WordArt Styles are the options that are used most often.
You can change the shape styles, colors, WordArt Styles, etc. of the inserted WordArt to try out different options.
Summary
In the end, we’ve learned how to use graphics in Word and what those terms mean. We also know that there are available graphics that can be used, which we can use in our document to make it look more professional and presentable.
Meanwhile, if you want to learn more about working on tables, see the previous tutorial on how to resize tables and how to merge and split table in Microsoft Word. You can browse those guides if you are having a hard time working with your tables in a document
We hope this tutorial helps you as you format your documents in MS Word.
PREVIOUS
NEXT
Рисунки и графические объекты в текстовых документах Word
Курс дистанционного обучения:
«Экономическая информатика»
Модуль 2 (2,5 кредита): Прикладное программное обеспечение офисного назначения
Тема 2.1. Обработка текстовой информации
Тема 2.2. Процессоры электронных таблиц
Тема 2.3. Программные средства презентаций и основы офисного программирования
Тема 2.4. Системы управления базами данных и экспертные системы
2.4.11. Учебная база данных с главной кнопочной формой «Training_students» — Скачать
2.1. Обработка текстовой информации. Текстовые процессоры
2.1.5. Работа с графикой в Word
В документах Word могут быть использованы два типа графических изображений:
- рисунки;
- графические объекты.
Рисунки импортируются из файлов, созданных другими программами (не программой Word), а графические объекты можно создавать самостоятельно с помощью встроенных в Word средств (встроенным редактором графических объектов).
Графические объекты в Word
Графические объекты: это любой нарисованный или вставленный объект, который можно редактировать и форматировать с помощью панели инструментов рисования (встроенным редактором графических объектов). Эти объекты являются частью текстового документа.
Автофигуры являются векторными рисунками. Векторные рисунки создаются из линий, кривых, прямоугольников и других объектов. Векторные рисунки сохраняются в формате приложения, в которых они создавались.
К графическим объектам в Word относятся:
- Автофигуры.
- Объекты Надпись.
- Объекты WordArt.
Рисунки в Word
Рисунки в Word являются изображениями, созданными из другого файла. Рисунки можно вставлять в документы Word, применив следующие методы: копирование, внедрение или связывание.
К рисункам в Word относятся: точечные рисунки, сканированные изображения, фотографии и картинки. Для изменения рисунков служат панель инструментов Настройка изображения и некоторые инструменты панели инструментов Рисование.
Точечные рисунки (растровые рисунки) – это рисунки, образованные набором точек. Точечные рисунки создаются в таких графических редакторах, как Microsoft Paint. К точечным рисункам относятся все сканированные изображения и фотографии. Точечные рисунки часто сохраняются с расширением BMP, PNG, JPG или GIF.
Вставка распространенных графических форматов файлов (формат файла обозначается расширением имени файла) в документ производится напрямую или с использованием специальных графических фильтров.
Типы графических файлов, поддерживаемые Word:
- Enhanced Metafile (.EMF).
- Graphics Interchange Format (.GIF).
- Joint Photographic Experts Group (.JPG).
- Portable Network Graphics (.PNG).
- Точечные рисунки Microsoft Windows (BMP, RLE, DIB).
- Метафайлы Microsoft Windows (.WMF).
- Tagged Image File Format (.TIF).
- Encapsulated PostScript (.EPS).
В комплект поставки Word входит коллекция рисунков в составе Clip Gallery. В коллекции клипов содержится набор картинок, относящихся к Microsoft Word. Большинство картинок выполнено в формате метафайла.
Кроме того, в Windows существует технология, позволяющая одним приложениям использовать информацию, создаваемую и редактируемую другим приложением. Называется эта технология OLE – объектное связывание и встраивание.
Для связывания и внедрения используется либо часть объекта, либо весь документ полностью. Вставка различных графических изображений из различных графических редакторов осуществляется командой Вставка / Объект, откроется окно диалога Вставка объекта. Для вставки нового рисунка (объекта) в документ Word используют вкладку Создание, а для вставки существующего рисунка – вкладку Создание из файла.
Импортирование графики в документ Word
Вставка рисунка в документ Word из другой программы (из файла)
Для вставки содержимого графического файла необходимо выполнить:
- щелкнуть место вставки рисунка;
- в меню Вставка выбрать команду Рисунок, а затем — команду Из файла…;
- выбрать рисунок, который следует вставить;
- дважды щелкните рисунок, который следует вставить.
Копирование графики из другой программы:
- Выделите графический объект в другой программе и выполните команду копирования в буфер обмена одним из способов.
- Укажите курсором место вставки рисунка в документе WORD.
- Выполните в WORD команду Правка – Вставить или Правка – Специальная вставка.
- Выберите из списка «Как:» необходимый формат данных. Можно выбрать любое значение, кроме того, в которое входит слово объект, так как в этом случае произойдет внедрение данных.
Вставка рисунка или картинки из коллекции в документ Word:
- Укажите место вставки рисунка или картинки.
- В меню Вставка выберите команду Рисунок или Нажмите кнопку Добавить картинку на панели инструментов Рисование, а затем в Области задач выберите раздел Упорядочить картинки. Появится окно Избранное – Коллекция картинок, в котором необходимо выбрать нужную категорию в Коллекции Microsoft Office.
- Выделите нужный рисунок, а затем выберите команду Копировать в появившемся меню, после этого нажмите кнопку Вставить на панели инструментов.
- После завершения работы с коллекцией нажмите кнопку Закрыть в окне Избранное – Коллекция картинок.
Вставка рисунка со сканера в документ Word
Сканирование и вставка рисунка в документ Word
Для выполнения этой процедуры к компьютеру должно быть подключено устройство (сканер или цифровая камера), поддерживающее протокол TWAIN. Кроме того, на компьютере должно быть установлено программное обеспечение, поддерживающее протокол TWAIN.
Настройка изображения в документе Word
Рисунки, созданные из другого файла, включают точечные рисунки, сканированные изображения и фотографии, а также картинки. Для изменения рисунков служат панель инструментов Настройка изображения и некоторые кнопки панели инструментов Рисование.
При выделении рисунка на экран выводится панель инструментов Настройка изображения с инструментами, позволяющими обрезать рисунок, добавить к нему границу или изменить его яркость и контраст и т.д.
Рис. 1.
Создание графических объектов в документе Word
Графический редактор Word, позволяет быстро строить несложные рисунки. Возможности, предоставляемые редактором рисунков, очень похожи на средства, имеющиеся в любом другом графическом редакторе. Для редактирования объектов и изменения их цветов, заливок, границ и других параметров, служит панель инструментов Рисование.
Рис. 2.
Процесс создания рисунков из графических объектов состоит из трех основных действий:
- Вставка рисованных объекты в документ.
- Рисование или выполнение определенных действий (например, перемещение рисованных объектов по документу, группировка, порядок и т.д.).
- Изменение рисованных объектов (например, изменение размеров, угла поворота и т.д.).
Средняя группа кнопок на панели инструментов Рисование предназначена для вставки разнообразных графических объектов:
- автофигуры;
- линии;
- стрелки;
- прямоугольник;
- овал;
- надпись;
- добавить объект WordArt.
Рис. 3.
Существует три основные категории графических объектов, создаваемых средствами Word:
- Автофигуры – это стандартные графические объекты.
- Объект WordArt служит для создания фигурного текста.
- Объект Надпись служит для нестандартной вставки небольших текстов. Кнопка с изображением текста и буквицы А, которая активизирует этот объект, находится на панели Рисование.
После вставки графических объектов в документ осуществляется процесс рисования. Для рисования или работы с графическими объектами предназначена группа кнопок: Рисование и Выбор объектов.
Рис. 4.
В процессе действий (группировать, порядок, перемещение, изменение размеров и угла поворота, привязка, расположение текста в объектах и т.д.) создается рисунок.
Основной принцип работы с графическими объектами тот же, что и при работе с текстом документа: сначала следует выделить объект, а затем выполнить с ним некоторые действия.
Изменение цвета и типа графических объектов.
Группа кнопок на панели инструментов Рисование предназначена для изменения цвета и узора заливки графических объектов, цвета и типа линий, цвета шрифта, а также для придания объекту эффекта тени или объема
Рис. 5.
Форматирование надписей, картинок и рисунков
Диалоговое окно формат. Диалоговое окно формат предполагает наиболее полные возможности для форматирования графических объектов.
Для того чтобы активизировать окно диалога Формат, необходимо выполнить следующие действия:
- Выделить объект, щелкнув на нем. Чтобы выделить объект, располагающий позади текста, нужно сначала щелкнуть на кнопке Выбор объектов панели инструментов Рисование.
- Выбрать из меню Формат команду Автофигура, Надпись, Рисунок, Объект WordArt. Название команды зависит от типа выделенного объекта. Откроется диалоговое окно Формат. Название окна будет соответствовать типу выделенного объекта.
Рис. 6.
На вкладках диалогового окна необходимо выбрать параметры форматирования:
- Цвета и линии: выбор стиля обтекания и выбор цвета и способа заливки, цвета, типа и толщины линии.
- Размер: изменение размера, масштаба и угла поворота.
- Положение: выбор стиля обтекания и выравнивания по горизонтали.
- Рисунок: только для рисунков – обрезка рисунков, выбор их цвета, яркости и контрастности.
- Надпись: только для надписи – изменение полей между текстом и рамкой надписи.
Copyright
© Обучение в интернет, .
Обратная связь
Добавление рисунка в документ
К основным типам графики, которые можно использовать в документах Word, относятся объекты-рисунки, графические объекты SmartArt, диаграммы, изображения и картинки. Рисунками называются объекты-рисунки или их группы.
Объекты-рисунки включают в себя фигуры, диаграммы, блок-схемы, кривые и прямые линии, а также объекты WordArt. Эти объекты являются частью документа Word. Вы можете изменять цвета, узоры, границы и другие эффекты этих объектов.
Примечание: Больше не нужно вставлять полотно для работы с объектами-рисунками в Word. Однако вы можете использовать полотно в качестве организационной помощи при работе с несколькими объектами-рисунками или при добавлении соединители между фигурами. Чтобы вставить полотно, на вкладке Вставка нажмите кнопку Фигурыи выберите новое полотно.
В этой статье
Добавление рисунка в документ
Щелкните в том месте документа, где вы хотите создать рисунок.
На вкладке Вставка в группе элементов Иллюстрации нажмите кнопку Фигуры.
При вставке полотна появляется вкладка Формат, на которой можно:
Вставить фигуру. На вкладке Формат в группе Вставка фигур выберите фигуру и щелкните в нужном месте документа.
Изменить фигуру. Щелкните фигуру, которую вы хотите изменить. На вкладке Формат в группе Вставка фигур нажмите кнопку Изменить фигуру, выберите Изменить фигуру и щелкните новую фигуру.
Добавить текст в фигуру. Щелкните фигуру и введите текст.
Сгруппировать выделенные фигуры. Чтобы выделить несколько фигур одновременно, щелкните их, удерживая нажатой клавишу CTRL. На вкладке Формат в группе Упорядочить щелкните Группировать, чтобы все фигуры рассматривались как один объект.
Рисовать в документе. На вкладке Формат в группе Вставка фигур разверните список фигур, щелкнув стрелку. В разделе Линии щелкните Полилиния или Рисованная кривая.
Совет: Прервать рисование с помощью линий типа «Полилиния» или «Рисованная кривая» можно двойным щелчком мыши.
Изменить размер фигур. Выделите фигуры, размер которых вы хотите изменить. На вкладке Формат в группе Размер выберите с помощью стрелок или введите значения в полях Высота и Ширина.
Применить стиль к фигуре. Наведите указатель мыши на стиль в группе Стили фигур, чтобы увидеть, как будет выглядеть фигура, если применить к ней этот стиль. Щелкните стиль, чтобы применить его. Кроме того, можно выбрать нужные параметры, нажав кнопку Заливка фигуры или Контур фигуры.

Примечание: Если вы хотите использовать цвет или градиент, которые недоступны в группе Стили фигур, сначала подберите цвет, а затем примените градиент.
Добавление flow charts with connectors. Перед созданием потоковой диаграммы добавьте полотно. Для этого на вкладке Вставка в группе Иллюстрации нажмите кнопку Фигуры и выберите создать полотно. На вкладке Формат в группе Вставка фигур щелкните фигуру Flow Chart. В областиЛинии выберите соединители, такие как Кривая стрелка.
Использовать затенение и объемные эффекты, чтобы сделать фигуры на рисунке более привлекательными. На вкладке Формат в группе Стили фигур щелкните Эффекты фигур, а затем выберите эффект.
Выровнять объекты на полотне. Чтобы выровнять объекты, нажмите и удерживайте клавишу CTRL, выделяя при этом объекты. На вкладке Формат в группе Упорядочить щелкните Выровнять и выберите одну из команд выравнивания.
Удаление всего рисунка или его части
Выделите объект-рисунок, который вы хотите удалить.
Нажмите клавишу DELETE.
Дополнительные сведения
В этой статье
Добавление рисунка в документ
Щелкните в том месте документа, где вы хотите создать рисунок.
На вкладке Вставка в группе элементов Иллюстрации нажмите кнопку Фигуры.
Когда вы найдете фигуру, которая вы хотите вставить, дважды щелкните, чтобы вставить ее автоматически, или щелкните и перетащите, чтобы нарисовать ее в документе.
При вставке полотна появляется вкладка Формат, на которой можно:
Вставить фигуру. На вкладке Формат в группе Вставка фигур выберите фигуру и щелкните в нужном месте документа.
Изменить фигуру. Щелкните фигуру, которую вы хотите изменить. На вкладке Формат в группе Стили фигур нажмите кнопку Изменитьфигуру и выберите другую фигуру.
Добавление текста в фигуру. Щелкните фигуру правой кнопкой мыши, выберите добавить тексти введите текст.
Сгруппировать выделенные фигуры. Чтобы выделить несколько фигур одновременно, щелкните их, удерживая нажатой клавишу CTRL. На вкладке Формат в группе Упорядочить щелкните Группировать, чтобы все фигуры рассматривались как один объект.
Рисовать в документе. На вкладке Формат в группе Вставка фигур разверните список фигур, щелкнув стрелку. В разделе Линии щелкните Полилиния или Рисованная кривая.
Изменить размер фигур. Выделите фигуры, размер которых вы хотите изменить. На вкладке Формат в группе Размер щелкните стрелки или введите новые размеры в поля Высота фигуры и Ширина фигуры.
Применить стиль к фигуре. Наведите указатель мыши на стиль в группе Стили фигур, чтобы увидеть, как будет выглядеть фигура, если применить к ней этот стиль. Щелкните стиль, чтобы применить его. Кроме того, можно выбрать нужные параметры, нажав кнопку Заливка фигуры или Контур фигуры.
Примечание: Если вы хотите использовать цвет или градиент, которые недоступны в группе Стили фигур, сначала подберите цвет, а затем примените градиент.
Добавление flow charts with connectors. Перед созданием потоковой диаграммы добавьте полотно. Для этого на вкладке Вставка в группе Иллюстрации нажмите кнопку Фигуры и выберите создать полотно. На вкладке Формат в группе Вставка фигур щелкните фигуру Flow Chart. В областиЛинии выберите соединители, такие как Кривая стрелка.
Чтобы сделать фигуры в рисунке более эффектными, используйте тень и объемные эффекты. На вкладке Формат выберите один из вариантов в группе Эффекты тени или Трехуголовые эффекты.
Выровнять объекты на полотне. Чтобы выровнять объекты, нажмите и удерживайте клавишу CTRL, выделяя при этом объекты. На вкладке Формат в группе Упорядочить щелкните Выровнять и выберите одну из команд выравнивания.
Удаление всего рисунка или его части
Выделите объект-рисунок, который вы хотите удалить.
Как рисовать в Ворде
Текстовый редактор Word помимо своего прямого предназначения – создания и редактирования текстовых документов – можно использовать и для других целей. Так с его помощью вы сможете нарисовать и добавить несложные иллюстрации к своему тексту. Если вы еще не знакомы с этой возможностью, то мы расскажем, как рисовать в Ворде и подробно опишем процесс для каждой версии программы.
Как активировать рисование в Ворде 2003
Для включения этой функции в Microsoft Word 2003, откройте «Вид/Панели инструментов/Рисование».
Чтобы включить рисование в Word 2007, 2010 и 2013 версии следует:
- Открыть на главной панели инструментов Word вкладку «Вставка».
- В разделе «Иллюстрации» найти подпункт «Фигуры» и нажать на стрелочку под ним.

В самом конце списка нажать на кнопку «Новое полотно».

После этого перед вами откроется поле для рисования в Word, а над ним появятся все необходимые инструменты.

Обзор инструментов для рисования в Word:
Естественно, что о рисовании в полном смысле этого слова речи идти не будет: в Microsoft Word отсутствуют наборы кистей, карандашей и ластиков. Вместо этого есть большой выбор геометрических фигур, из которых можно составить абсолютно любые иллюстрации.

- В разделе «Стили фигур» вы найдете инструменты для заливки, изменения контура, добавления штриховки и рамки.

Для каждого нарисованного в текстовом редакторе Word объекта можно задавать определенные эффекты объема и теней.

В разделе под названием «Упорядочить» находятся команды для настройки расположения картинки: она может находиться на переднем или заднем плане относительно текста, либо же внутри него (обтекание текстом).

Регулировать размер рисунка можно с помощью мышки или задав определенные параметры.

Как видите процесс рисования в Ворде не такой сложный, каким мог бы показаться на первый взгляд, а простых инструментов будет достаточно для создания интересных иллюстраций.
A Picture Is Worth a Thousand Words
Nothing beats a screen shot when you are trying to convey information about using the computer. With just a couple of easy shortcuts, you can add screen shots to your documents.
Absolutely Positioning a Graphic
Want a graphic to appear at a precise place on the page? It’s easy to gain control by following the steps in this tip.
Adding a Background to Your Document
Document backgrounds come in handy if you plan on converting the document to a Web page. Here’s how you can add a background of your choice to your document.
Adjusting Shadow Settings
Insert a graphic into a document and Word allows you to add a shadow behind the graphic. You can also adjust the properties of the shadow, as described in this tip.
Anchoring Objects by Default
When you position objects (such as text boxes or graphics) on a page, one of the things you can do is to anchor the object so it won’t move as freely. Want the object to be anchored by default? You’d be out of luck, as described in this tip.
Automatically Formatting Graphics and AutoShapes
Want to change the graphics formatting defaults in Word? You can customize some of these defaults, saving yourself some time.
Best Quality for High Resolution Graphics
You want your documents to look as good as they can. If those documents include graphics, then you also need to make sure that they look as good as they can. Here are some ideas on how to get the best quality you can.
Can’t Select and Edit Graphics Elements
Adding graphics to your documents can make them livelier and easier to understand. What if you can’t select and edit the graphics, though? Here’s something to check that may make editing the graphics easier.
Cannot View Graphics in a Document
Got a problem where you can’t view any of the graphics you insert in your document? The solution could be simple, or you could be seeing a symptom of a more complex problem. This tip explains some of the things you can check out.
Capturing a Screen
Windows provides a way of «capturing» the image on the screen into the clipboard. You can then paste the image from the clipboard into your document.
Changing Compression Print Resolution
The resolution at which Word compresses graphics in a document may be bothersome. If it is, your options are very limited, and you will probably get better results by looking toward a solution other than Word.
Changing Defaults for Text Boxes and Callouts
Do you find yourself frequently creating text boxes and callouts? This tip describes how to change the default settings and how you can easily create text boxes that exactly meet your common requirements.
Changing the Size of a Drawing Object
Documents are often made up of more than just text. If you have drawing objects in your document, you will doubtless need to change their sizes from time to time. Here’s how to easily make the changes you need.
Changing the Size of a Graphic
Word allows you to add more than text to your documents; you can also add graphics. Once added, you can modify the size of those graphics by using the techniques in this tip.
Choosing an Insert Method for Pictures
The way that you choose to add pictures to your document can have an effect on the file size of those documents. It is best not to paste pictures, but to insert them instead.
Clip Art Sizing Difficulties
A discussion of problems a reader was having resizing clip art in Word.
Converting Tables to Charts
Put numeric information in a table and you can then convert that information to a graphical chart using Microsoft Graph Chart. Here’s how to create the chart object.
Counting All Graphics
Need to know how many graphics a document contains? Getting at the true number may take a little more work than it first appears.
Creating a Drawing Object
Word documents can contain more than just words. They can also contain drawing objects such as lines and simple shapes. Word provides an easy way to add such objects to a document.
Creating Oval Pictures
A couple of ways to create oval shaped pictures in a Word document.
Creating Usable Figure Captions
Many people add both images and figure captions within text boxes so they can be easily positioned within a document. Doing so, however, has drawbacks as the figure captions are not as easily accessible for cross referencing or for inclusion in a Table of Figures. This tip describes how you can rectify this situation so that the captions are again usable.
Cropping Graphics
Need your hide some of the outside edges of a graphic? You can instruct Word to crop (or hide) those outside edges by following the steps in this tip.
Default Picture Location
When you insert pictures into a document, the first folder that Word opens up is normally the My Pictures folder. You can change the starting folder by making a change on the Files tab of the Options dialog box.
Default Picture Settings
Place enough pictures, and sooner or later you start wondering if there is a way to set up some default settings for those pictures. The short answer is that you can’t, but there are things you can do to make the picture-formatting process much easier.
Determining Picture Size in a Macro
When processing a document using a macro, you may need for your macro to figure out the sizes of the images in your document. This information can be accessed by using the techniques described in this tip.
Disappearing Graphics Groups
Grouping graphics together can be a great way to manage them easier. Doing the grouping, however, could have unintended consequences. Word handles grouped graphics differently than the individual graphics that make up the group. This tip explains how that can affect your document.
Displaying Thumbnails and Full-Size Images
Sometimes images can be just too big to display in a document. Instead you may want to display a smaller, thumbnail-size version of the graphic that people can click on in order to see the full-size version. Word doesn’t have a built-in function to do this, but you can devise your own display method using the hyperlink capabilities of the program.
Dragging and Dropping Pictures in a Document
Do you like to add pictures to your document just by dragging and dropping? What are you to do if it appears the capability just stops one day? Here’s an idea for a fix you can check.
Easily Changing Links in Documents
You may have a lot of linked images in a document, and then one day need to change the links if the location of the images changes. Here’s how you can make the necessary changes quickly.
Editing Wrap Points
If you have a graphic that has text wrapping around it, you might want a way to modify the wrapping path used by Word. You can easily do that by modifying the points that define the wrapping path. This tip shows how easy it is to monkey with the wrap points around an image.
Extracting INCLUDEPICTURE File Names
If you use the INCLUDEPICTURE field to add images to your document, you may love the macro in this tip. It allows you to pull all the filenames used in the field, resulting in a handy image file list.
Extracting Pictures from a Document
Word allows you to easily insert pictures into your documents. Getting the pictures back out of your documents can be another story, however. Here’s a description of what happens to your pictures once they are inserted and what your options are for getting them out.
Faster Picture Displaying
If you have a document with many graphics, you know that Word can sometimes be slow in displaying all those graphics. This tip examines why this occurs and discusses some things you can try to speed up the display of those pictures.
Filling A Drawing Object
Creating a drawing object can be just the first step in putting together your masterpiece drawing. This tip explains how you can fill the object with a color of your choosing.
Flipping a Drawing Object
Place a drawing object in your document, and it doesn’t have to stay that way. You can flip a drawing object in either of two directions, as discussed in this tip.
Freezing Cell Size when Inserting Pictures
Insert a picture into a table cell, and you may quickly find that the table is no longer the size you expected. Here’s how to make sure that the cells in your table don’t resize themselves when you insert an image.
Graphics and Line Height
If the inline graphics in your document appear «chopped off,» it could be directly related to the formatting within the paragraph containing the graphic. This tip explains why this chopping happens and how you can adjust formatting so that the entire graphic shows up.
Grouping Drawing Objects
Drawing objects are easily added to a document. You can group these objects so they are easier to manage by following the steps in this tip.
Hanging Indents in Wrapped Text
If you use hanging indents for some of your paragraphs, you may wonder why they don’t look right when they wrap on the right side of a text box or graphic. Here’s the reason and what you can do to correct the formatting.
Hiding Graphics
Do you need a printout where graphics can be turned on and off? This tip provides some concrete ways you can get just want you need in such a printout.
Horizontal Alignment Errors for Graphics
Discussion of alignment differences for graphics in Word 97 and Word 2000.
Inserting from the Clip Art Gallery Doesn’t Work
Ever insert a picture and it won’t display in your document? It could be due to some of the display settings in Word. Here’s how to check them out.
Inserting Multiple Graphics in a Document
Word allows you to easily place graphics in a document. Placing one or two graphics is easy, but placing many graphics in a single document can easily become tedious. Here are some ways that you can insert a large number of graphics into a document quickly and easily.
Keeping a Picture Title with the Picture
Pictures and their titles go together like peanut butter and jelly. (Wow, did I just say that?) Seriously, pictures and titles belong together, and keeping them on the same page can be a challenge at times. Here are some things to check.
Keeping Callouts Positioned
Using graphics to add callouts to your graphics is a common occurrence in Word. Here’s how to stop all those graphics from moving to places other than where you originally place them.
Merging Graphics from Access
An Access database can store all types of data, including graphic images. Merging most data from Access into Word is relatively easy, except when it comes to graphics. This tip explains why this is the case and ways you can work around the problem.
Merging Graphics into Word Documents
Ever want to expand the mail merge feature to include graphics? Merging graphics into your document is easy but requires some know-how. This tip explains how Word handles the process.
Missing Left Border
Ever wonder why a border around a graphic doesn’t print the way it looks on the screen? There are several ways to add and edit borders. Here’s where to look to find the problem, along with other useful information about printing.
Moving Captions with Pictures
Put a caption with a picture and you’d probably like the two elements to behave like they belong together. If you are tired of your captions getting separated from their pictures, here are some ideas you can use.
Moving Drawing Objects
When you need to move a drawing object around your document, you use the mouse after you select the object. This tip shows how you can make the move.
Moving Object Anchors
When you insert an object into your document, it is anchored to a paragraph. If you want to change the paragraph to which the object is anchored, you can do so by using the technique in this tip.
Nudging a Graphic
If you need to move a graphic just a little bit in one direction or another, you can do so by using the techniques in this tip. (Hint: Using the keyboard to nudge a graphic is easiest.)
Only Inline Figures Can be Seen and Printed
Insert a graphic into a document and you expect to be able to see it. What do you do if it isn’t displayed, however? Here are some things to check out.
Permanent Watermarks in a Document
Need to add a graphic watermark to a document? It’s not that hard to do, but making the watermark permanent can be a bit more vexing.
Placing Many Graphics in a Document
Word documents can contain more than just text. You can even create documents that contain almost no text at all. This would be the case if you have a document in which you want to insert a large number of graphics. This tip explains how you can easily do the insertion and make the graphics printable.
Positioning Graphics Evenly
If you have some graphics inserted in your document, you may want to adjust the horizontal space between those graphics. Here’s the easiest way to make that adjustment.
Problems Pasting Large Pictures
If you insert a large picture in your document and your text jumps all around and the picture seems to disappear, don’t worry. The information in this tip will help you get matters back to normal in record time.
Resize Graphics Outside of Word
Need your graphics to be larger or smaller than they first appear when you insert them in a document? Your best bet may be to resize them using a program other than Word. Here’s why.
Rotating a Drawing Object
You can add all sorts of drawing objects to a document. Once placed, you can then rotate them to your heart’s content. This tip explains a couple of ways you can perform the rotation.
Rotating Fractions in a Text Box
Rotating graphics in Word is not always straight-forward, but it can be done. The tools on the Drawing toolbar allow you to modify the graphics in your document to your needs.
Rotating Graphics Around a Different Center Point
You use the rotation handle in Word 2002 and Word 2003 to, well, rotate graphics around a center point. But if you hold down the Ctrl key while you use the handle, you can rotate the graphic around a center point that is even lower in the graphic.
Scaling Graphics in a Macro
If you need to make sure that the graphics in a document are all scaled similarly, you’ll love the macros presented in this tip. Use them to scale individual graphics or all the graphics.
Searching and Replacing Graphics
Got a bunch of graphics in a document that need replacing? (Perhaps you need to replace an old logo with a new one.) Word doesn’t provide a direct way to do it, but there are ways to get what you want.
Searching for Floating Graphics
Graphics can be added to a document so that they are either inline with the text or floating over the text. You can use Word’s Find and Replace tool to locate the inline graphics, but not the floating ones. This tip provides ways you can find the latter type of graphics.
Selecting a Graphic Behind a Text Box
How to select a graphic that is obscured by a text box can be perplexing. Here’s an overview of the different ways you can select just the graphic and nothing else.
Selecting a Graphic that is Behind Text
Position a graphic so that it is «behind» your text, and it may seem like you can no longer select the graphic. Here’s how you can get to that graphic, even if it is obscured by your text.
Selecting Drawing Objects
Word allows you to create all sorts of drawings using a wide assortment of tools. When you need to take an action upon those drawing objects, you need to know how to select them. Here’s how.
Stopping Text from Jumping Around
Do you struggle with getting your graphics and surrounding text to appear just the way you want it? Here are some techniques you can use to make the task a bit easier.
Turning On Picture Placeholders
Displaying graphics in a document requires a great deal more computer processing than displaying simple text. A document that has «too many» graphics in it scrolls very slowly. If switching from Print layout to Draft view does not speed up scrolling to a satisfactory point you can also tell Word to display the graphics as simple empty box placeholders.
Understanding Fill Effects
Want to fill a drawing shape with more than just a color? Word allows you to use all sorts of fills, as described in this tip.
Understanding Graphic Linking
Word provides a couple of different ways that graphics can be linked to your document. How you control the method used depends on the choices you make in the Insert Picture dialog box.
Understanding Grayscale Images
Word allows you to easily add images to your documents. For documents intended for monochrome printers, grayscale images are the most common type of graphic you can use. This tip explains exactly what a grayscale image is.
Understanding Object Anchors
Do you have documents that contain objects? Understanding how Word handles objects and the way they are anchored can make a big difference in the final look of your document. This tip explores object anchors and why they are important.
Understanding Page Border Art
Add some artwork around the border of your printed page, and you may not know where that artwork comes from. You may also want to add your own graphics to be used as page borders. Because Word uses a proprietary format for this type of graphic, adding your own artwork may not be possible.
Understanding the Drawing Canvas
Need to keep your drawing shapes together in one place? The drawing canvas may be exactly what you are looking for.
Unwanted Graph Paper Effect
When you open a document or start to use Word, do you see a background that looks like graph paper? It could be because of any number of reasons, as described in this tip.
Using Callouts
If you want to put comments in your document, you can use Word’s built-in comment feature. Another way is to use callout graphics (which function like text boxes) to add your comments.
Using MPF Graphic Files
There are all sorts of file formats used to store graphics. You might think that one of those formats is the MPF format, described in this tip.
Using the Drawing Grid
One of the lesser-known drawing tools provided in Word is the drawing grid. You can easily turn this feature on and use it to help you create drawing objects that are uniformly sized and placed.
Vertical Alignment of an Inline Graphic
Word allows you to insert graphics in two ways: either inline or floating. If you use inline graphics, you may want to adjust the vertical position of the graphic in relation to the text to the left or right of the graphic. Here’s how to do it.
Vertical Lines in Word
Lines can help to organize the data on a page or make certain points clearer. Word provides several different ways you can add vertical lines to your page layout.
Working With OLE Graphics
An explanation of the way Word imports graphics.
Wrapping Text Around a Graphic
Place a graphic in your document, and you may want to make sure that your document text «wraps» around the edges of the graphic. There are several wrapping methods you can instruct Word to use; here’s how to do it.
How to Insert and Position Graphics in Word Documents
Summary
Step-by-step instructions for working with graphics in Microsoft Word
Overview
Graphics can add interest and impact to your Word documents. Suppose you’ve completed a letter telling your friends about the great party you threw for your cat’s birthday. The words capture the festive mood of the event, but a page of only text can look lifeless and dull. Graphics can help enliven your document.
Insert Clip Art
1. Place the insertion point in your document where you want to insert clip art, and then select the clip you want.
2. On the Insert tab in the Illustrations group, click Online Pictures.
3. In the Insert Pictures dialog box, you can search either the Office.com site, or do a Bing image search. Type a word or phrase that describes the clip art that you want. Click the search button or press enter.
4. The results will produce both clip art and photographs. In the list of results, click the clip art to select it. You can hold the Ctrl button while clicking other illustrations to make multiple selections. Click the insert button to insert your selection(s).
Insert a Picture From a File
1. Click in the document where you want to insert the picture.
2. On the Insert tab in the Illustrations group, click Pictures.
3. Locate the picture that you want to insert.
4. Double-click the picture that you want to insert. After you insert a graphic, you can use wrapping styles to modify the layout of the text in relation to the graphic.
Wrap Text Around a Picture
1. Click the picture in your document to select the picture. When the picture is selected, you will see the Picture Tools tab appear on the right end of the Tab Bar.
2. Click the Picture Tools Tab to see the Picture Tools Ribbon.
3. In the Arrange Group, click the Wrap Text button.
4. You will see a drop-down list of Wrap Styles to choose from. Click the Wrap Style you want. Click off the picture to de-select it.
Wrapping Styles
You may now have a nice graphic, but that gap of white space to the right is probably not what you want. Don’t worry; you can further refine the layout of the graphic and text. Using the five wrapping styles below, you can create documents with just the look you want.
Wrapping Style |
Result |
|---|---|
|
The In line with text style insets the graphic in the text at the location of the insertion point. The graphic moves as you add or delete text. The text does not wrap around the graphic; white space extends to the margins on either side of the graphic. |
|
|
The Square style wraps the text around all sides of a square bounding the graphic. The graphic moves as you add or delete text. |
|
|
The Tight style wraps the text around the graphic in an irregular shape bounding the actual image. The graphic moves as you add or delete text. |
|
|
The Behind text style has no border around the graphic. The graphic floats on its own layer behind the text. |
|
|
The In front of text style has no border around the graphic. The graphic floats on its own layer in front of the text. |
|
In most cases, you can get the results you want by using these choices from the Layout tab. If you want even more control in positioning your graphic, see Help on how to use the advanced layout options.
Keywords: graphics, Microsoft Word, image position
Filed Under: Academic Help/Tutoring, Help Desk
There are no attachments for this article.
Books Required for Classes
Added on Tue, Aug 1, 2017
Tutoring Center
Added on Tue, Oct 23, 2012
Images — Intermediate Word
Added on Mon, Jun 1, 2015
About the A-B Tech HelpDesk
Added on Fri, Mar 28, 2014

Word allows you to do much more than simply insert or place graphics. For our fourth lesson in this series, we will focus on the graphic design functions in Word such as pictures, SmartArt, screenshots, and other items that can be found on the “Insert” tab.
These functions really breathe life into your drab black and white text documents. With a simple picture or chart, you can turn your term paper from meh to yeah! Luckily, there’s a whole range of ways you can add images to better illustrate (no pun intended) your point.
We’ll wrap the lesson by changing gears a bit and discussing how to use more than one language in Word 2013.
Images and Multimedia
You don’t have to think of Word as simply a word processing program. It has requisite tools for doing some pretty nifty page layout. While it’s not a feature-complete or robust as a professional page layout program such as Adobe InDesign. You can still get very professional looking results if you know what’s in your toolbox and how to use it.

Pictures and Online Pictures
Both “Pictures” and “Online Pictures” accomplish the same goal. The only difference is that “Pictures” means you can insert pictures locally, while “Online Pictures” allows you to insert images from an internet-based source such as clip art from Office.com, Bing, or OneDrive (formerly SkyDrive).
You can also insert pictures from your Facebook profile or Flickr although you could always just save the pictures you want to insert to your computer and then insert them from there if you don’t want to connect Office to these profiles.
Picture Tools
As always, when you want to edit a picture or any element place in a Word document, you can click on it and the appropriate tab will appear on the Ribbon.
With pictures, that tab is “Picture Tools.” Here we see you can make all kinds of corrections to the picture on-the-fly. For example, you can correct brightness and contrast, the color, add a border.
Where you position and how you wrap text will also play a large role in formatting your documents.
Here we see those controls. In our documents, we don’t worry so much about word wrapping or positioning because Word isn’t the final step toward publishing online. However, if you’re going to produce something WYSIWYG (What You See is What You Get), such as for a PDF or print publication, then these things will definitely matter.
Also, there are a couple ways you make changes to your pictures inline, such as resizing, rotating, and moving them. In the following image, you see these controls, many of which you will likely be familiar with.
When you click on an image in your document, you get a box on each corner, which will let you resize a picture. At the top, in the middle, is a circular arrow, grab this to freely rotate your picture. To move the image, hover the mouse over the image until the pointer is the four arrows, you can then click and drag the image anywhere you like.
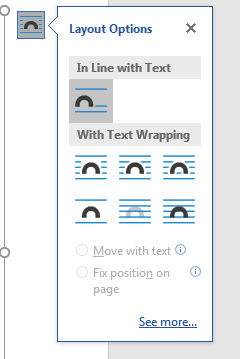
Finally, if you click on the little “Layout Options” button, you can change your text wrapping without going to the Ribbon.
Clicking on “See more…” at the bottom of the “Layout Options” opens the full-blown “Layout” dialog.
Note, the size tab both on the Ribbon the “Layout” dialog allows you to specifically resize, rotate, and scale your pictures, rather than relying wholly on winging it:
We’d like to spend the whole day talking about formatting images in Word, but as you can see, there’s a ton of options at your disposal. Let’s move on now to other objects you can insert into your documents, starting with “Shapes.”
Shapes
Microsoft Word 2013 comes with an array of built-in shapes, which you can use to create callouts, boxes, stars, and other shapes.
When you choose a shape, you simply draw it on a blank space on the page. It doesn’t matter if you get it perfect or just the way you want it because you can adjust it to your heart’s content once it is placed in your document.
Note in the screenshot, the previously mentioned little “handles” you can use to resize and rotate your shapes.
At the bottom of the “Shapes” menu, there’s an option to create a “new drawing canvas.” This will open, what is essentially a text box for shapes. With this drawing canvas, you can create drawings using these shapes allowing you to create things like diagrams and flowcharts.
SmartArt and WordArt
SmartArt and WordArt tend to have some overlap, particularly if you create something using WordArt and then customize any of the text within it. Of course, you can use one or the other and never the twain shall meet, but we’re going to talk about them in the same section because one often leads to the other.
Think of SmartArt as premade drawing canvases that you can insert into your document and then customize as you like. Simply pick an arrangement, such as a list, process, or cycle.
As you can see, we created a graphic based on a “Continuous Block Process.” When we click on the text boxes, we can edit what is inside. There are also the usual grab handles needed to resize the image, and the “Layout Options” allowing you to wrap text to your preference.
If you use SmartArt, note that the Ribbon changes to reflect this. The “SmartArt Tools” features two tabs: “Design” and “Format.” Let’s cover each one and its features.
The right half of the “Format” tab allows you to pick from a number of “SmartArt Styles” and you can also “Change Colors.”
If you look at our previous example, you can see we applied an embossed, shiny effect and changed the colors of our text boxes and arrow.
On the left half of the “Design” tab, you can “Create Graphic” so you can add shapes, bullets, text, and move things around.
The “Layouts” section lets you change how your graphic looks on the fly. Simply hover over any of the built-in options to see how it would look utilizing a different layout. Changes to the layout are not applied unless you first click on a style.
The right side of the “Format” tab is used for affecting changes to text. These include “WordArt Styles” and other effects suchs as fill and outline. Beyond that, you can arrange multiple layers by sending them forward and backward.
The “Layout” dialog pops out if you select the little arrow in the bottom-right corner of the “size” section or you can choose more options from any of the drop-down menus including “Position”, “Align”, and “Rotate.”
On the left side of the “Format” tab you can select any of your shapes and change them to another, and also make them larger or smaller.
If you click on “Shape Styles” you will be able to choose from a selection of pre-defined shapes and colors.
Shift right just slightly and you will find controls to alter the fill. Choose from various “Theme Colors” or select your own. You an also use pictures, gradients, and textures for even more fill options.
If you want to refine the outline around your shape(s), you can choose any color, weight, or dashes.
Finally, “Shape Effects” has quite a few options for enhancing your shapes, many of which will give them a cool 3D effect that you can adjust by clicking 3D Options at the bottom of the of the menu.
Format Text Effects
Let’s take a closer look at this because it contains a pretty sizable amount of features. We’ll cover the basics so that you’re more aware of them. The pane titled, “Format Text Effects,” slides out from the right edge.
As with any other panes in Word 2013, it can be detached, which you can then stick out of the way to save screen area, or keep it nearby so it is handy. Regardless, this dialog box will allow you to quickly work with text, so you don’t have to repeatedly keep going to the ribbon to change things. Note also that the dialog is split into functions, “Text Fill and Outline” and “Text Effects.” “Text Fill and Outline” is simple enough to figure out, and is used to enhance how text appears.
Say, for instance, we want to write How-To Geek School and enhance it so that it is size 48 pt., blue with a black 1 pt. outline. We simply select the text we want, increase to the size to 48, then in the “Format Text Effects” dialog, we can change the color (we can also do this in the “Font” section of the “Home” tab. Then under “Text Outline” we choose “Solid line” and choose block and 1 pt. for the outline width.
That looks pretty good, but we really want it to pop, let’s add some more text effects, such as a shadow, a reflection, and we’ll add a bit of a 3d bezel to round the lettering out.
The result is a bit more striking and while it’s not likely to make it into any final designs, it does give you an idea of what you can do with WordArt.
Chart
Who doesn’t like charts? Charts are a great way to visually display data sets and Word 2013 comes jam packed with a large assortment of Charts to choose from, including columns, pie, bar charts and much, much more. Check out the screenshot for an idea of just how many options there are:
When you choose a style, you’ll get a spreadsheet, which will allow you to enter the data points on your x and y axes. As you enter data, the chart will change.
Manipulating and formatting charts is easy. Whenever you click on a chart in your document, you’ll get the “Chart Tools,” which, as you might have guessed, is the Ribbon tab devoted solely to charts.
Using the “Design” tab, if you don’t like the colors or style of your chart, you can instantly apply changes to it without having to generate a new one.
If you decide you don’t think the layout works for this particular type of data, change it using “Quick Layout” or add another element such as another axis, chart title, gridlines, and more.
On the right side of the “Design” tab you will find essential tools for altering your data and you can also go back and completely change the type of chart you’re using.
So, if you think a pie chart would work better, you can change to that. Note however, some data points, such as “breakfast,” “lunch,” and “dinner” aren’t represented on this chart.
The “Chart Tools” also give you a “Format” tab so you can dress things up a bit by adding shapes and then being able to change the style, fill, and outline.
Turning to the right side of the “Format” tab, you are given options for adding and changing WordArt, arranging elements, and adjusting the size of your chart (which you can also do with the grab handles).
It’s easy also to affect changes inline too. When you click on a chart in your document, formatting controls appear along the upper-right corner. From top-to-bottom, you get “Layout options” so you can set your text wrapping. You can change chart elements with the plus (+) symbol, so if you want to change chart titles, add gridlines, and stuff like that.
The paintbrush icon is for setting a style and color them, and finally, the sieve icon is for “Chart Filters,” so you can edit data points and names on your chart.
Screenshot
The “Screenshot” feature will allow you to take a screen clip, which is automatically pasted in you document.
When you use the screenshot function, it will let you choose between any currently open windows, or you can select “Screen Clipping,” which will minimize Word allowing you to take a selection or full shot of your desktop. So for example, if you want to simply insert a shot of your desktop and its icons, you would first need to minimize everything you have open.
There’s a myriad of ways you can take and add screenshots, so we’re not going to dwell on it. Just note this feature, if you’re unfamiliar with adding screenshots, and you want an easy way to do it in Word.
Online Video
You can insert “Online Video” such as Bing, YouTube, or video embed code into your document.
When you embed a video, it will appear as if it is a regular picture, complete with grab handles and text wrap controls.
Further, you can adjust how the emedded video thumbnail appears (as a picture) using the “Picture Tools” so you can make adjustments to the color, add a border, correct the contrast and brightness, and more.
So you see, we simply applied a “picture style” and add a purple border. This is only a fraction of the stuff you can do, so if you to add some really nice looking effects and create a nice looking document that really pops, you should take your time to familiarize yourself with everything.
On the other hand, if you don’t like your changes and you want to go back to the default, simply click “Reset Picture” and it will revert to normal.
Other Text Features
Here are few more text features that you might want to be aware of though you will probably rarely use them.
Text Box
Text boxes are like their own little islands in Word. What we mean is, when you add a “Text Box” to your documents, it is immune to changes you make to the rest of the document. It is like a document within a document.
This is useful if you want to present something “as is” in your work, be able to make overarching changes to the document’s formatting, but have something you’ve pasted remain unchanged.
For the most part, text boxes are something of a bane to an editor’s existence because they don’t play nice with styles (Lesson 5). You may find them extremely convenient and that’s perfectly fine, but if you want something that conforms to your document’s style and formatting, but still place it in a box or have a border around it, then we recommend simply adding a border, which we covered in Lesson 2 – Shading and Borders.
Drop Cap
Drop caps are simply that one letter at the beginning of a chapter or book that is larger than the rest:
You can either make your drop cap “Dropped” (the text below it shifts underneath it) or “In Margin.” Check out the “Drop Cap” options for more power over how your drop caps behave.
Using More than One Language
If you want to produce content in a language other than the one that comes with Word by default, you will likely need to purchase it. Open the Word “Options” and click on “Language.”
Pick the language you want to add from the dropdown list and then click the “Add” button. When you add a language, you will need to enable it, which means that you will have to turn it on in the “Control Panel.”
From here, you can write in the language, but Word won’t display in it, in other words, menus and help systems will still appear in the default language. To get the full multilingual experience, you may need to purchase a language pack from Microsoft.
To see what languages are available for purchase, and how much, click on “Not installed” and you will be whisked to the Microsoft Office website.
If you want to add proofing tools, such as spellcheck, grammar check, and/or screen tooltips, then you may be able to simply download them for free.
While it’s doubtful you’ll be using Word in full multilingual mode, it’s nice to know how you can affect those changes. Moreover, most languages are freely available to use system-wide so actually creating a document in another language is well within your reach, for free.
Coming up Next…
So that concludes this section. We know it’s been a lot to absorb but you’ll see that after a while, this stuff is a cinch!
Once you get the hang of one skill, the rest is pretty similar and comes easier. By now you should have more than enough knowledge to create awesome documents with lists, tables, pictures, video, and anything you need to create a true multimedia publication!
Don’t forget though, if you’ve missed anything in this series you can always go back and read our introduction in Lesson 1, all that stuff on paragraphs and lists in Lesson 2, and all-important tables and other formatting options in Lesson 3.
In our final lesson, Lesson 5, we will cover styles, templates, and themes. It doesn’t sound like much, but they can be a fantastic way to not only save tons of time and create consistently formatted documents, but quickly apply themes that will instantly affect the entire appearance of your documents, as well as create templates that you can later use over and over again!
READ NEXT
- › Google Chrome Is Getting Faster
- › This New Google TV Streaming Device Costs Just $20
- › HoloLens Now Has Windows 11 and Incredible 3D Ink Features
- › The New NVIDIA GeForce RTX 4070 Is Like an RTX 3080 for $599
- › How to Adjust and Change Discord Fonts
- › BLUETTI Slashed Hundreds off Its Best Power Stations for Easter Sale

Documents wouldn’t be complete if you couldn’t add images and graphics. You can even add graphs that you’ve created in Microsoft Excel to Word documents, because any Microsoft product works well with the developer’s other products. Whether it’s graphs or pictures, you can copy and paste them to your documents but usually you’ll need to format them to work with other text in the document.
Adding Pictures to a Document
Word supports insert images from either the Internet or your local computer. If you’re able to copy an image, you can paste it to your document. You can use your own images stored on your computer, or you can copy an image from the Internet and use it in your document. Before you copy an image from the Internet, ensure that the owner offers free use without attribution or payment. Some image owners require payment before you can use them either on your site or in private documents.
To copy an image from the Internet, open your browser and go to the web page that contains the image that you want to copy. Right click the image and select «Copy» (the wording in the context menu is slightly different across browsers). When you copy an image from a web page, it gets copied to your clipboard, which runs in the background of your computer and isn’t visible from the desktop.
Go back to your document and click the section of the document where you want to paste the image. Right click the document and select «Paste.» The image is pasted to your document, but it still must be formatted for your text. We’ll discuss formatting a picture after explaining how to insert an image from Microsoft Word’s long list of freely usable clipart available from Microsoft Office software.
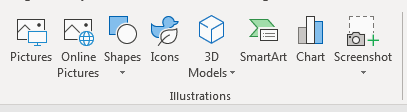
(Illustration controls menu)
Notice from the list of options that you can add pictures located online or locally, but you can also add shapes, icons, models charts and even screenshots. Word has several options for image insertion into your documents. Inserting the different types of images and shapes is the similar for each control.
First, let’s take a look at the «Picture» option. A window opens asking you to select an image. Double click the image and it displays in your document. What if you need ideas for an image or don’t have one of your own? You can use Microsoft’s online search for images located in the cloud.
Click the «Online Pictures» button. This time, a window opens with an online search prompt.
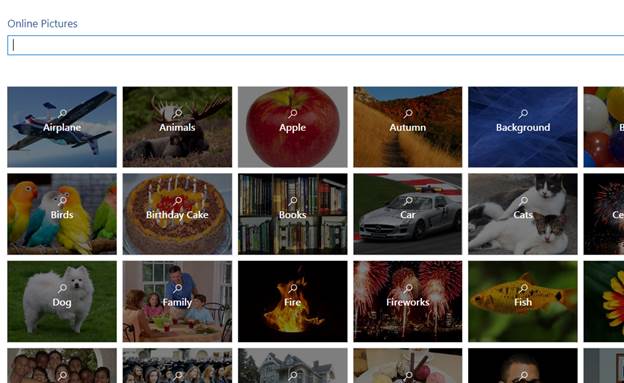
(Online picture search)
Word’s online picture search is powered by Bing, so you might notice some images should you also perform a Bing search. Notice how the images are categorized. You can click one of these categories to view a list of available images related to the category. For instance, click the «Apple» category.
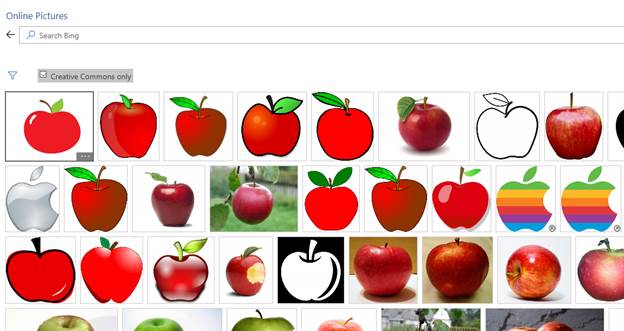
(Apple category image search)
When you click the «Apple» category, several images display. Clipart, photography and even the Apple technology company’s logo is displayed. Microsoft’s online image search gives you a large sample of possible images that you can use, but you aren’t limited to just category searches.
At the top of the image search, you see a «Search Bing» input text box. Type any phrase into this text box and press «Enter.» Word searches Bing to find images related to your search and displays them.
Double click an image that you want to include in your document, and Microsoft transfers it from the online search window to your document. In this example, an apple image is added to the document.
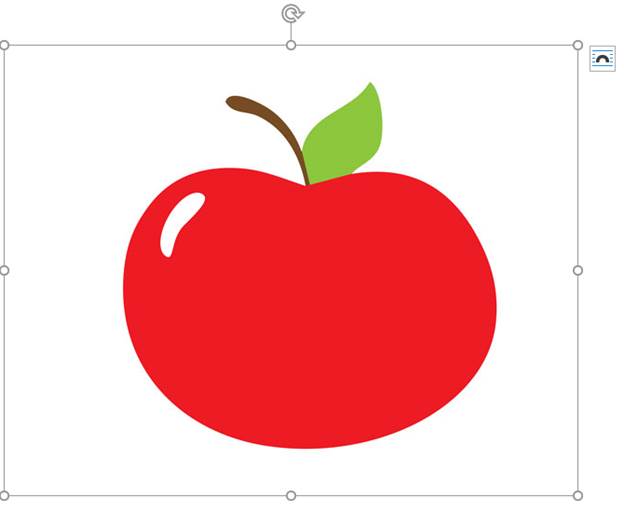
(Apple image added to document)
Notice that the image has a border around it with an arrow at the top and an icon in the upper-right corner. These prompts are significant as they provide ways to configure the way the image looks in your document.
The borders around the image with circles located on each line lets you resize the image. Using the corner circles, you can resize the image on all sizes to avoid skewing the way the image looks in the document.
The arrow at the top lets you rotate it. You can rotate it to the left or right. Click the arrow and then move your cursor in the direction that you want to set the rotation. After you rotate the image, release your hold on the mouse and it will display in your document.
The most important part of formatting an image is setting text to flow around it. Word has several options for this style. You can get to it by clicking the «Layout Options» icon in the upper-right corner of the image. A menu opens that displays the text formatting and wrapping of content around the image.
(Layout text options)
The default layout is highlighted in the image above. It’s «Inline with text» sets an image to work similarly like text on the page. The text that you place in the document does not wrap around the image but rather treats it like text albeit large text within the paragraph. This default is enough for an image placed within text without the need for text wrapping, but you have other options that can be seen in the menu.
The way text wraps around an image can be seen in the icons in the Layout Options menu. You can even have text flow over or under an image. Hover your mouse over each option and review the text that displays in the popup. The text that displays indicates the way text will align with the image. For instance, select «Tight» and text will wrap and flow around the image without creating a carriage return and line feed within the document. This option will show text similarly to when you view a web page with an image that has text flow around it without creating any page breaks.
Inserting Shapes
Microsoft Word has a number of shapes that you can add to your documents. These shapes are beneficial for workflows and charts that require simple shapes. Click the «Shapes» menu option and a list of shapes that can be included in your documents is displayed.
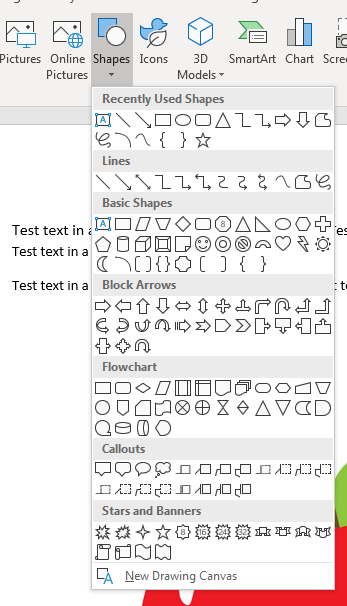
(List of shapes available in Word)
Any of these shapes can be added to your Word document by clicking the menu item. After you click the menu item, your cursor changes to prompt you to draw the same. For instance, click the rectangular icon in the «Recently Used Shapes» section. The cursor changes to a cross icon prompting you to draw the rectangle. Go to your document and draw the rectangle on your document and it’s drawn once you release the cursor.
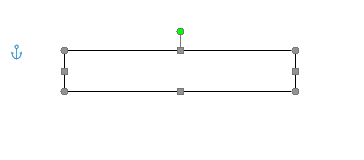
(Inserted shape)
Notice that the inserted shape also has points along each line and at the corners. These points are where you can resize and reshape the rectangle. Each shape that you add to your document can be resized by clicking these points and dragging the mouse to make the shape larger or smaller. The anchor is used to lock the object to the document and text surrounding it. In the image above, no text is surrounding the shape, but should you have text around it, you can use the anchor to determine the way text is formatted around the shape.
View the other options in the Illustrations category and you can insert these additional images and shapes. For instance, the «Icons» button will open a window similar to the «Online Pictures» button where you can search and view icon images to insert into your document. The other options in this menu list work similarly. You just need to determine what type of image that you want to add to your file.
Use these menu items to insert any images that you want to add to your documentation. You can use either Word images included with your installation or ones that you store on your local hard drive.
Crop a Picture
When you crop a picture, you cut away the outer edge of the picture to create a new version.
Let’s crop the picture below.
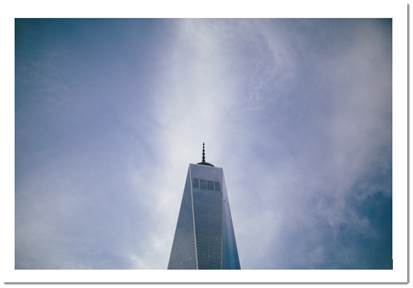
Click on the image to select it. You will see a bounding box around the image.
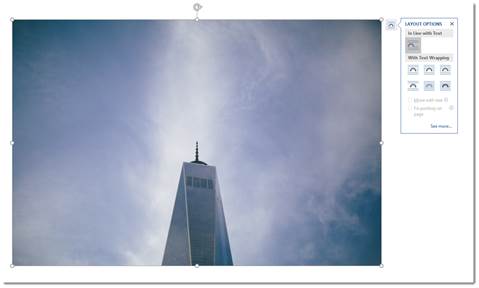
Right click on the image, and you’ll see the Crop option in the menu. We’ve highlighted it below.
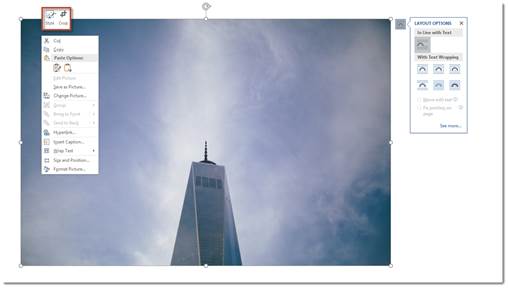
Click Crop.
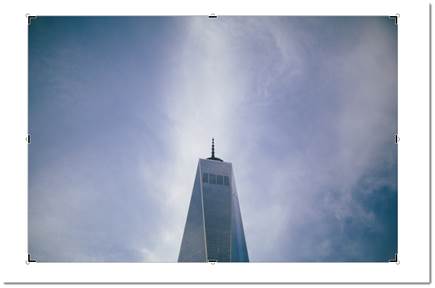
You’ll now see crop marks around the image – at all four corners and on each side. These are the black marks. Click and drag your mouse on any of these marks. Click and drag inward on the image until you have cropped away the area you want to get rid of in the image.
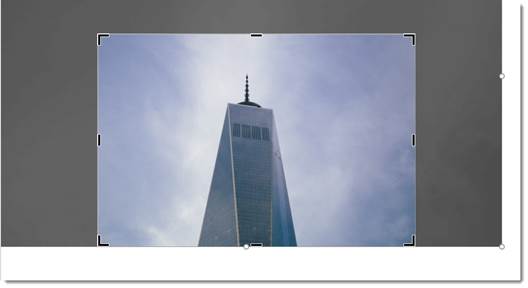
The area you’re cropping away is shaded in gray.
Click outside of the image and gray area to remove the cropped area.
NOTE: You can also click on the Insert tab after you’ve selected the image, and go to Crop>Crop.
Color
You can easily adjust the color of any image you place in your documents.
To do this, double click on the image.
You’ll then see the Picture Tools Format Tab.

Click the Color button.
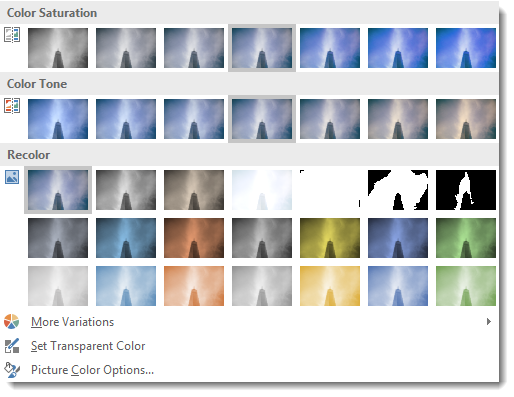
Choose the color effect you want to apply to your image.
Color Correction
You can also adjust and modify the colors in your image through color correction. Once again, go to the Picture Tools Format tab by double clicking your image.
Click the Corrections button.
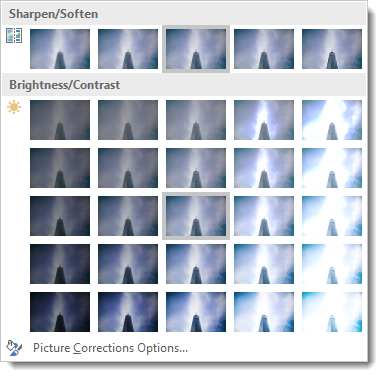
Choose a color correction.
Artistic Effects
Just as you can use Photoshop and other photo editing software programs to add effects to your images, you can also use Word for this.
Double click your picture to bring up the Format tab, then click the Artistic Effects button.

Choose the artistic effect that you want to apply to your image.
Removing Backgrounds from Images
Although Microsoft Word is a word processing program, it also offers some photo editing tools, as we’ve already seen in this lesson. Perhaps one of the most useful photo editing tools found in Word is the background removal tool. This tool allows you to remove backgrounds from your images.
We are going to remove the background from our image:
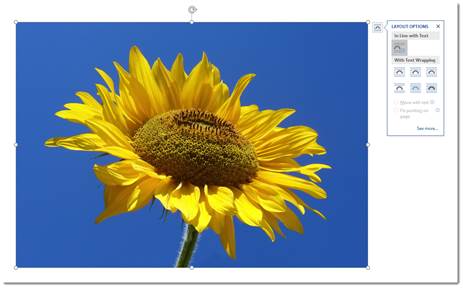
To use this tool, double click on the image for which you want to remove the background. Click on the Remove Background button in the Adjust group under the Picture Tools Format tab.
When you click the Remove Background button, you will see the Background Removal tab appear on the Ribbon. Your image’s background – and possibly your image – will also change colors. Don’t worry. This is temporary.
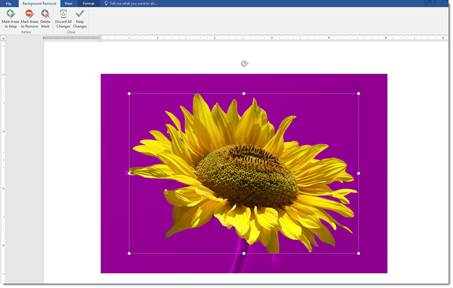
The areas that appear in purple are the areas that Word has determined are background areas that it needs to remove. If there is purple on any areas of your image that you want to keep, you can drag the handles of the bounding box that appears over the image. Drag the handles outward to keep more of the image.
In the snapshot above, you can see that the stem of the flower and part of a petal appear purple. If we leave them purple, they will be removed from the image. We can drag the hands of the bounding box to fix this, as pictured below.
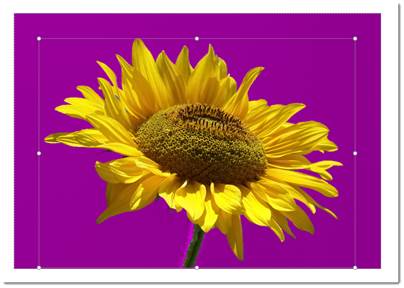
After you adjust the bounding box, if there are still areas of your image that are purple that are not supposed to be purple, go to the Background Removal tab in the Ribbon. Remember, any areas that are purple are considered background areas by Word.
Click the Mark Areas to Keep button.
Your cursor will turn into a pencil.
Simply click on an area that you want to keep.
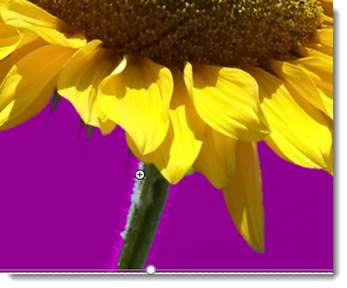
As shown in the snapshot above, a plus sign appears where you clicked. If you look at our previous snapshot, you can see this area used to be purple, but by clicking on it, it’s restored to its original color.
We can now click on all areas we want to keep.
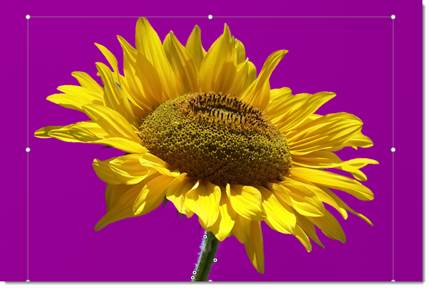
You can also mark areas of your image for removal. It’s quite possible that Word will not detect all background areas, so those areas will not appear purple. To mark areas you want the tool to remove, go to the Ribbon and click Mark Areas to Remove.
Click on the areas to remove just as you clicked on the areas you wanted to keep. However, this time, those areas will turn purple.
When you’re finished, click the Keep Changes button in the Ribbon.
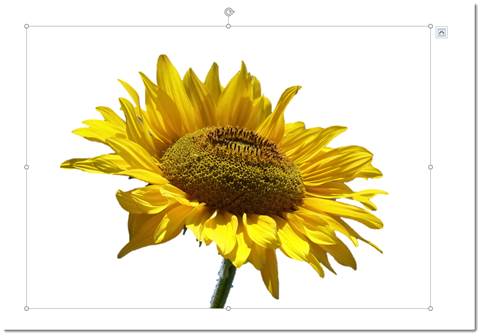
Wrap and Position Text around Images
Word can also wrap paragraphs around a picture, charts and graphs as in the example below.
To wrap text around a picture or art object, double click on the image. The Format tab will appear in the Ribbon. Go to the Arrange group.
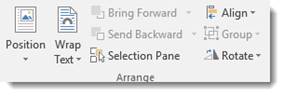
In the Arrange group, click Position to view the dropdown menu.
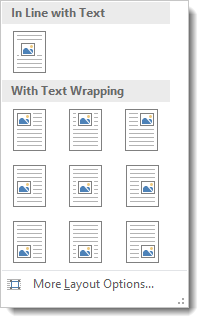
In the dropdown menu, you will see thumbnail-sized illustrations of documents with images in them. The location of the image in the illustration shows you where your image will be placed in relation to your text.
To wrap text around an image, click the Wrap Text button to wrap the text around an image. When you click the button, the following dropdown menu will appear:
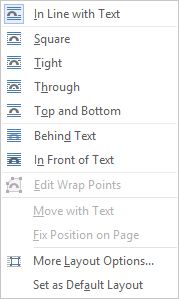
-
Square means your image sits on the same plane as the text. The text flows around the image in a square pattern.
-
Tight text flows around the image, hugging its shape. If you insert a circular shape, the text will take a circular pattern around the text.
-
Through means that the text will flow around the image as best as possible.
-
Top and Bottom means text will appear on top of the image and at the bottom.
-
Behind Text means the image is behind the text. The image looks like it is part of the paper.
-
In Front of Text means the image is on top of your text. It’s the same as if you printed a document and dropped a photograph on top of it.
You can lock an image to text so that if you move the text, the image moves also. To do this, click the Text Wrapping button, choose More Layout Options. Under the Position tab select Move Object with Text.
NOTE: You can also wrap text around an image as soon as you insert it into your document without having to go to the Ribbon. Look at the text wrap icon in the snapshot below. Clicking on it reveals the Layout Options menu.

WordArt
WordArt is a very popular feature in Word. To use WordArt, go to the Text group under the Insert tab.
The WordArt button looks like this:
When you click the downward arrow, you’ll see the WordArt menu:

Select the way you want your text to look and click on it.
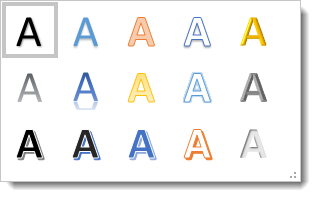
You can now format WordArt the same way you did shapes and images.
Insert Video
You can insert videos into your documents just as easily as you can insert images. To insert a video, go to the Insert tab and click the Online Video button in the Media group.
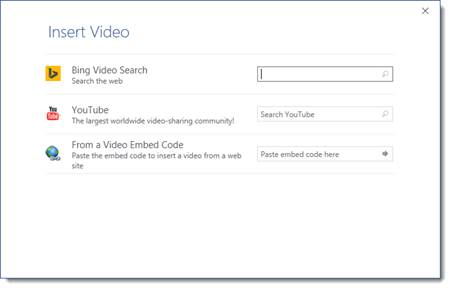
You can insert videos by searching for them on Bing, from a video embed code that you find on video webpages such as YouTube, and even from YouTube itself.
Let’s search for a video of a cat on Bing.
Type «cat» into the Bing Video Search field.
You will then see the search results appear.
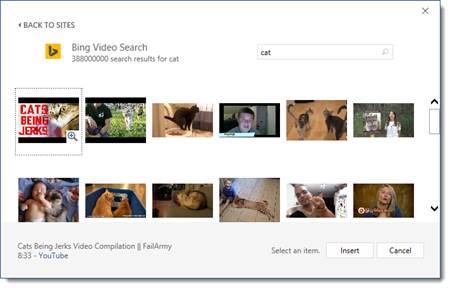
Click on a thumbnail of a video to select it, then click the Insert button.
The video is inserted into your document.
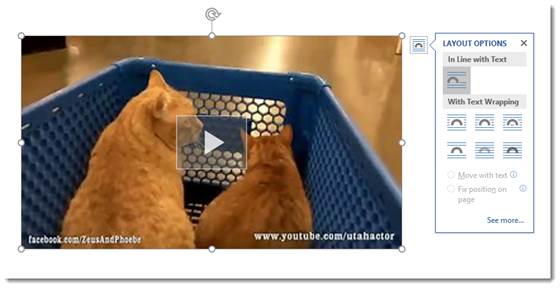
You can then rotate, resize, and position the video just as you would an image.
Formatting ClipArt and Pictures Using the Picture Tools and Format Ribbon
Whenever a picture is inserted or selected, the Format tab will automatically appear as a tab in the Ribbon. It provides you with a few of the most commonly used features available in image editing software like Photoshop. You can change the contrast, add artistic effects, remove backgrounds, or crop them. To view the Format tab, select a picture by double clicking on it.

In the center of this ribbon, you’ll see styles you can add to pictures. You can add frames, drop shadows, reflections, etc.

You can also add your own formatting to your images. Remember, a style is just a chunk of formatting heaped together.
To add formatting to your picture, you can click the Picture Border, Picture Effects, or Picture Layout, as shown below. These are located in the Styles group under the Format tab.
When you add a picture border, you can choose the color of the border, the weight (or thickness) of the line, and even the type of line (dashed, etc.).
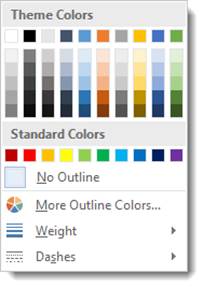
If you remember, earlier in this course you learned how to add text effects such as shadows and reflections. You can also add these to your pictures by clicking on Picture Effects.
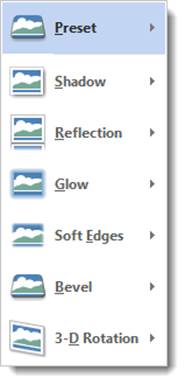
If you choose Picture Layout, you can format your picture with a caption or more information.
Here are the choices when you click Picture Layout:
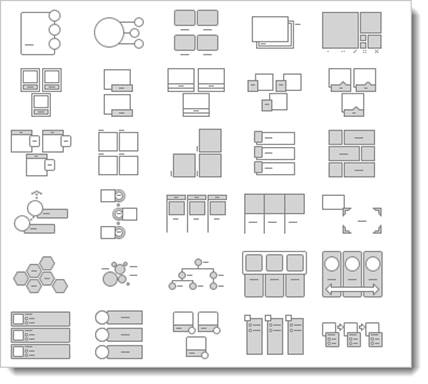
Choose the layout you want to use. We chose:

Word also provides a box where we can enter the caption:
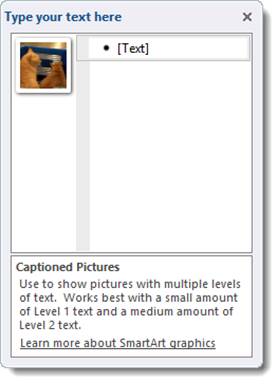
NOTE: You can also right click on an image and select Add Caption. The method above gives your image additional formatting.
Using the Screenshot Tool
The screenshot feature was new with Word 2010. It gives you the ability take a screenshot and have it appear instantly in your documents. To use this feature, position the cursor in the place you want the screenshot to appear. Select the Insert tab and click the Screenshot button. It looks like this:

Be aware though, that this feature is somewhat limited, allowing you to only take screenshots of active windows. Windows that have been minimized to the taskbar will not be available. When we click the Screenshot button, we’ll see a list of the windows that are available, as in the following example.
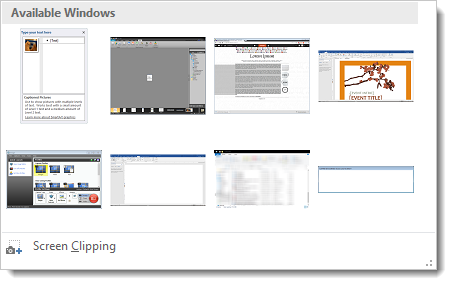
Selecting an available window will take a screenshot of the entire thing and insert it into your document. You can then use the Format ribbon to crop the screenshot or change other attributes.
If you do not want to take a screenshot of the entire window, you can select the Screen Clipping command at the bottom of the window.
When you select the Screen Clipping command, the entire window will be opaque. Click the left mouse button and drag the pointer over the area you want to capture. This selected area will become clear. Release the mouse to capture the screenshot, and it will automatically appear in your document.
Using SmartArt and SmartArt Tools
According to Microsoft, SmartArt is a quick and convenient way to create a visual representation of the information in your document. That’s a mouthful, isn’t it? What they really mean is it’s a quick and convenient way to create flow charts. The following is an example of an available SmartArt template.
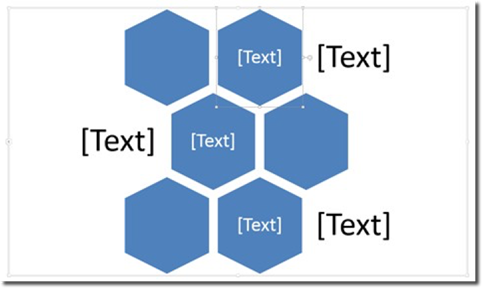
The SmartArt button is located on the Illustrations section of the Insert tab. It looks like this:

Click it and a dialogue box opens. It gives you a different categories of SmartArt to choose froom. There are lists, processes, cycles, hierarchys, etc.
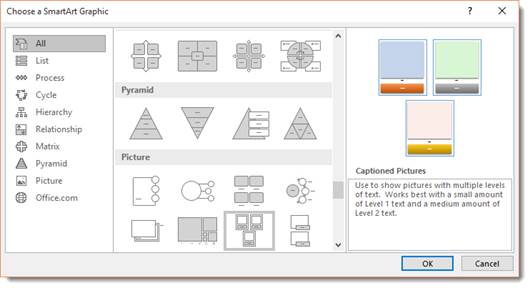
If you have access to Word, take a moment to explore the different SmartArt graphics available in each section. Seeing them all for yourself will give you the best exposure to all of the possibilities. You can even click «Office.com» and find SmartArt graphics that were created by other Office users.
When you’ve found a SmartArt graphic that you like, select it and click OK.
When the graphic opens in your document, or when it is selected, a pane opens up beside it. You can either click the areas marked [Text] in the graphic or in the pane. Click on these, then type your text. In some templates, you can also insert pictures.
Inserting Charts
To insert a chart, navigate to the Insert tab and click the Chart button. It looks like this:

The Insert Chart dialogue will open.

The chart types are arranged along the left side of the window.
Select the chart you want to use, then click OK.
If Microsoft Excel is installed on your computer, it will also open with your chart. You can input data into Excel which will then be conveyed by your chart.
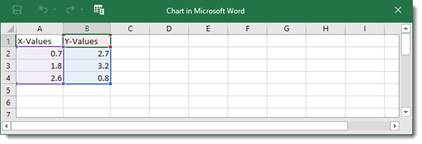
Chart Types
Word brings with it some new chart types to help you better illustrate data that you include in your documents.
These chart types include:
- Treemap. A treemap chart displays hierarchically structured data. The data appears as rectangles that contain other rectangles. A set of rectangles on the save level in the hierarchy equal a column or an expression. Individual rectangles on the same level equal a category in a column. For example, a rectangle that represents a state may contain other rectangles that represent cities in that state.
- Waterfall. As explained by Microsoft, «Waterfall charts are ideal for showing how you have arrived at a net value, by breaking down the cumulative effect of positive and negative contributions. This is very helpful for many different scenarios, from visualizing financial statements to navigating data about population, births and deaths».
- Pareto. A Pareto chart contains both bars and a line graph. Individual values are represented by bars. The cumulative total is represented by the line.
- Histogram. A histogram chart displays numerical data in bins. The bins are represented by bars. It’s used for continuous data.
- Box and Whisker. A Box and Whisker chart, as explained by Microsoft, is «A box and whisker chart shows distribution of data into quartiles, highlighting the mean and outliers. The boxes may have lines extending vertically called ‘whiskers’. These lines indicate variability outside the upper and lower quartiles, and any point outside those lines or whiskers is considered an outlier.»
- Sunburst. A sunburst chart is a pie chart that shows relational datasets. The inner rings of the chart relate to the outer rings. It’s a hierarchal chart with the inner rings at the top of the hierarchy.
Using the Chart Tools
Whenever you insert a new chart into your document, the Chart Design and Chart Format tabs will open, as pictured below.
This is the Chart Design tab. By default, it’s the tab you’ll see.

You can also click on the chart Format tab, to the right of the Chart Design tab.

Let’s take a look at the chart tools available on the Design tab.

Just like in the text ribbon, you have a choice of Chart Quick Styles. You can apply them just like you would with text, paragraphs, and pictures.
Use the Chart Layouts group on the Ribbon to add chart elements or change the layout.
Now look at the Type and Data Sections. The data section lets us select an existing data set, or edit one.
With these, we can change the chart type, switch rows to columns or vice versa, select, and edit data. Say, for example, that after we entered our data, we realized that maybe a pie chart wasn’t the right way to convey it. We’ve decided instead to use a graph chart. To do so, we’d click the Change Chart Type button and select a new chart.
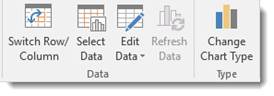
Now let’s take a look at the Format tab for charts:

Use the Current Selection group to change the formatting of the current selection.
Use the Insert Shapes group to add and insert shapes. Use the Shape Styles section to change the style of your shapes. You can also change WordArt styles that appear in your chart.
The Arrange group lets you arrange your data and images, including text wrap and position.
The Size group allows you to adjust the size of your chart (in inches).
Содержание
- Включение вкладки «Рисование»
- Средства рисования
- Инструменты
- Перья
- Преобразовать
- Воспроизведение
- Рисование с помощью фигур
- Добавление области для рисования
- Инструменты для рисования
- Вставка фигур
- Стили фигур
- Стили WordArt
- Текст
- Упорядочить
- Размер
- Вопросы и ответы
MS Word — это, в первую очередь, текстовый редактор, однако, рисовать в этой программе тоже можно. Таких возможностей и удобства в работе, как в специализированных программах, изначально предназначенных для рисования и работы с графикой, ждать от Ворда, конечно, не стоит. Тем не менее, для решения базовых задач стандартного набора инструментов будет достаточно.
Урок: Как нарисовать линию в Word
Прежде, чем рассмотреть то, как сделать рисунок в Ворде, следует отметить, что рисовать в данной программе можно двумя разными методами. Первый — вручную, подобно тому, как это происходит в Paint, правда, немного проще. Второй метод — рисование по шаблонам, то есть, с использованием шаблонных фигур. Обилия карандашей и кистей, цветовых палитр, маркеров и прочих инструментов в детище Майкрософт вы не найдете, но создать простой рисунок здесь все же вполне возможно.
Включение вкладки «Рисование»
В Microsoft Word есть набор средств для рисования, которые подобны таковым в стандартном Paint, интегрированном в Windows. Примечательно, что о существовании этих инструментов многие пользователи даже не догадываются. Все дело в том, что вкладка с ними по умолчанию не отображается на панели быстрого доступа программы. Следовательно, прежде, чем приступить к рисованию в Ворде, нам с вами предстоит эту вкладку отобразить.
1. Откройте меню «Файл» и перейдите в раздел «Параметры».
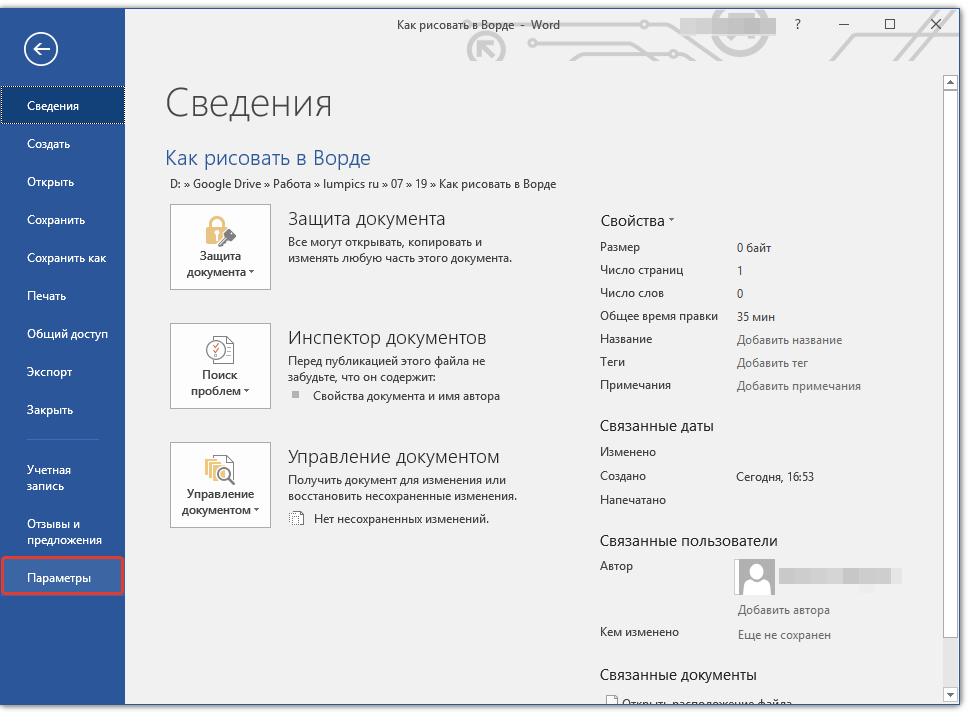
2. В открывшемся окне выберите пункт «Настроить ленту».
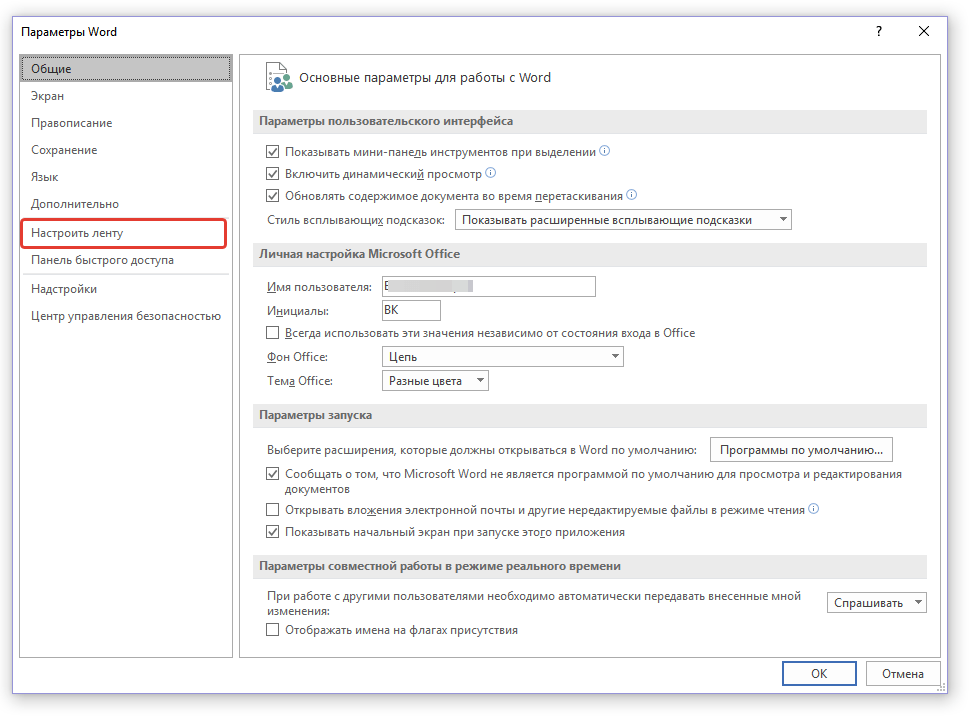
3. В разделе «Основные вкладки» установите галочку напротив пункта «Рисование».
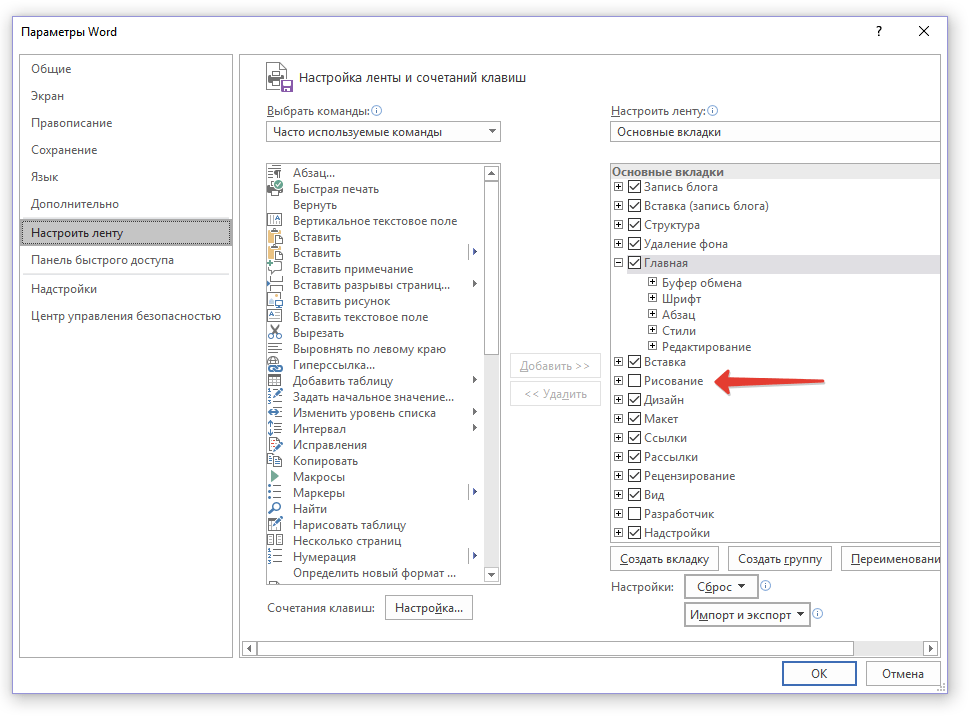
4. Нажмите «ОК», чтобы внесенные вами изменения вступили в силу.
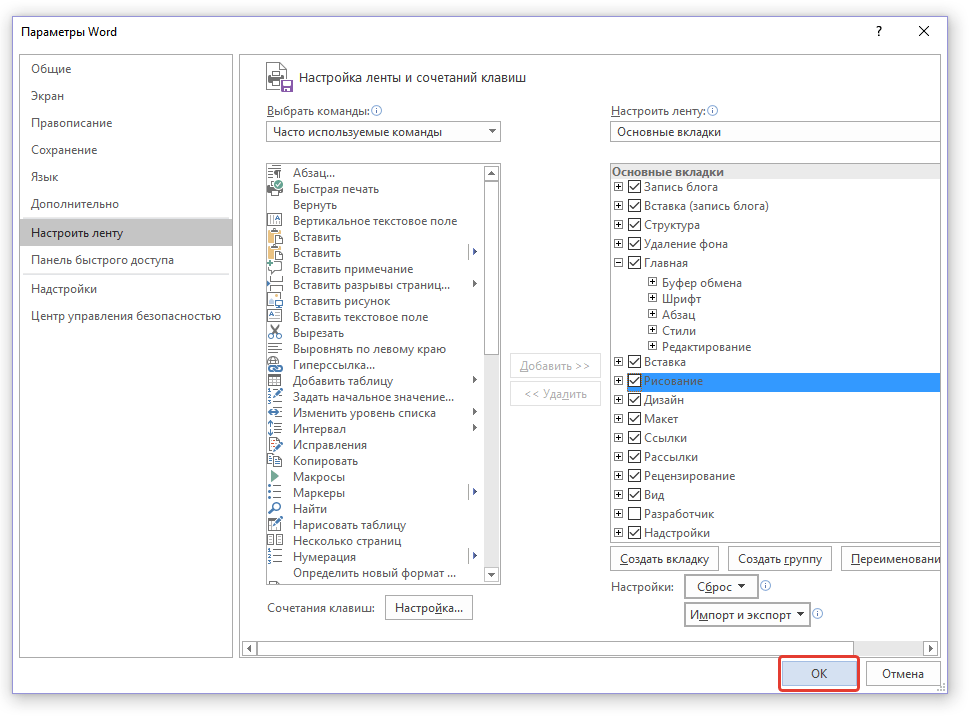
После закрытия окна «Параметры» на панели быстрого доступа в программе Microsoft Word появится вкладка «Рисование». Все инструменты и возможности этой вкладки мы рассмотрим ниже.
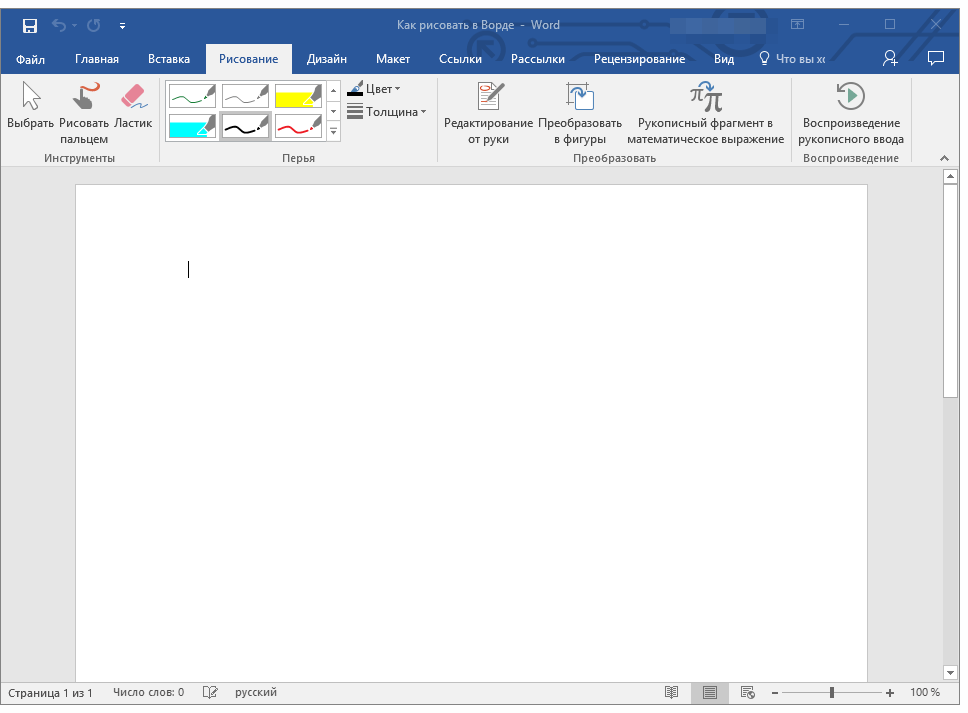

Средства рисования
Во вкладке «Рисование» в Ворде, вы можете видеть все те инструменты, с помощью которых можно рисовать в этой программе. Давайте подробно рассмотрим каждый из них.
Инструменты
В этой группе расположились три инструмента, без которых рисование попросту невозможно.
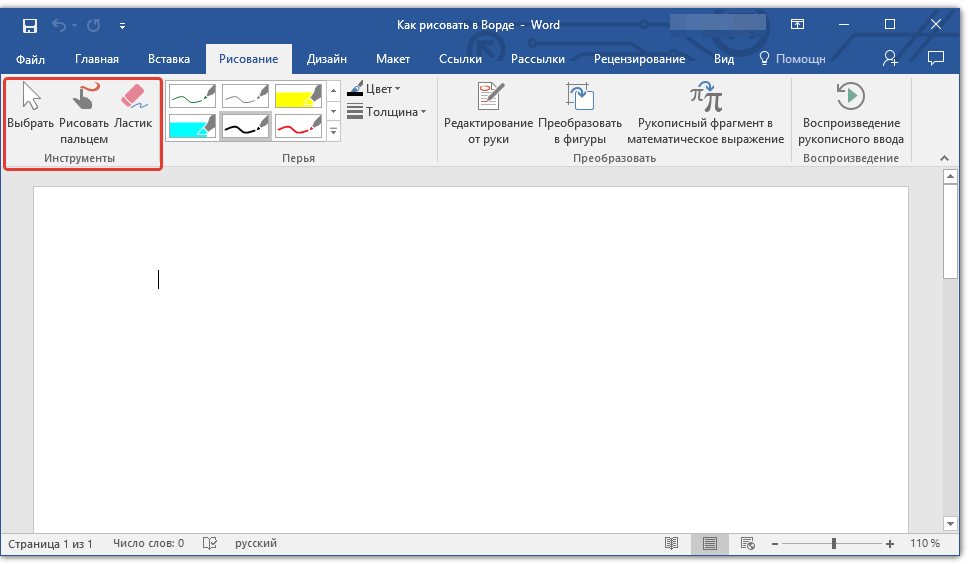
Выбрать: позволяет указать на уже нарисованный объект, расположенный на странице документа.
Рисовать пальцем: предназначен, в первую очередь, для сенсорных экранов, но может использоваться и на обычных. В таком случае вместо пальца будет использоваться указатель курсора — все как в Paint и других подобных программах.
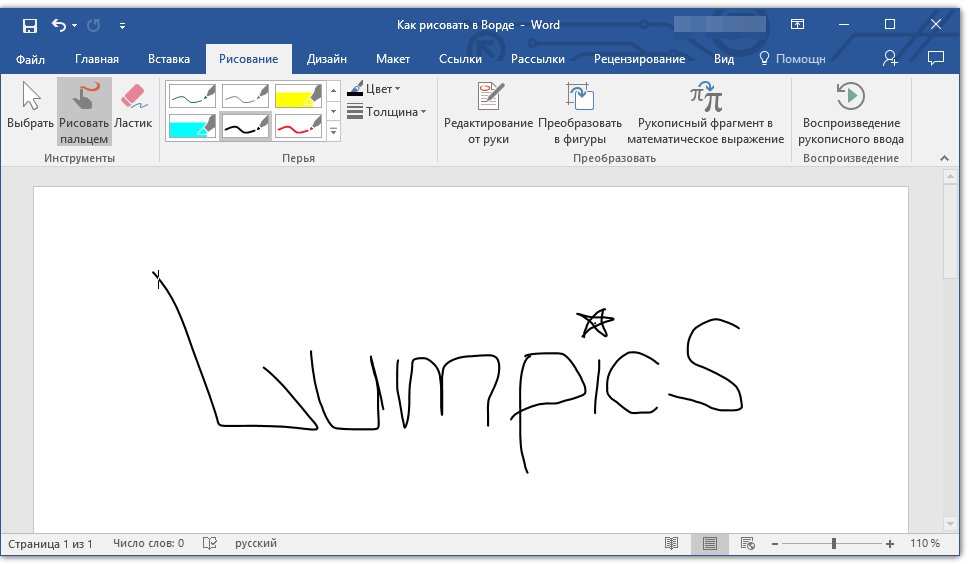
Примечание: Если вам необходимо изменить цвет кисти, которой вы рисуете, сделать это можно в соседней группе инструментов — «Перья», нажав на кнопку «Цвет».
Ластик: этот инструмент позволяет стереть (удалить) объект или его часть.
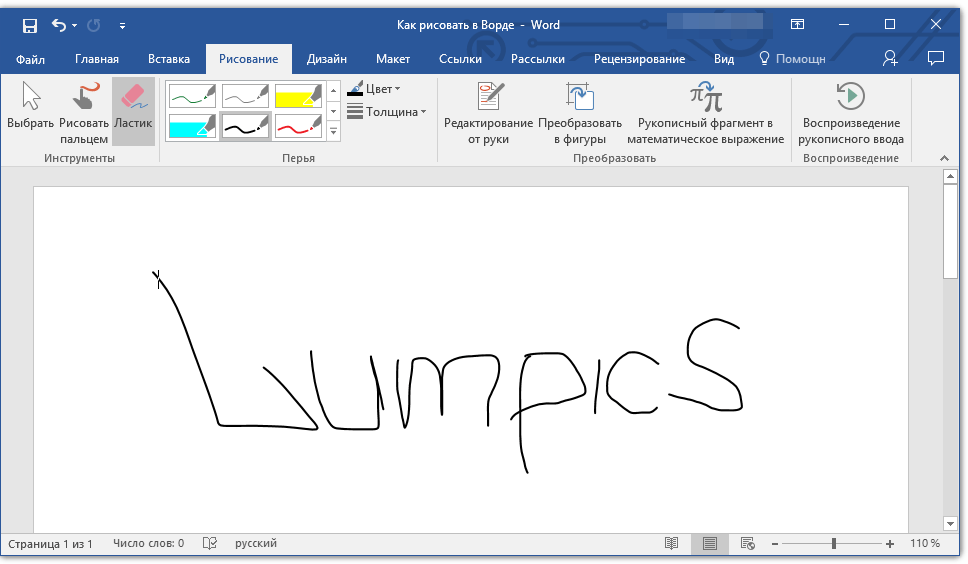
Перья
В этой группе вы можете выбрать одно из множества доступных перьев, которые отличаются, в первую очередь, по типу линии. Нажав на кнопку «Больше», расположенную в правом нижнем углу окна со стилями, вы сможете увидеть предпросмотр каждого доступного пера.
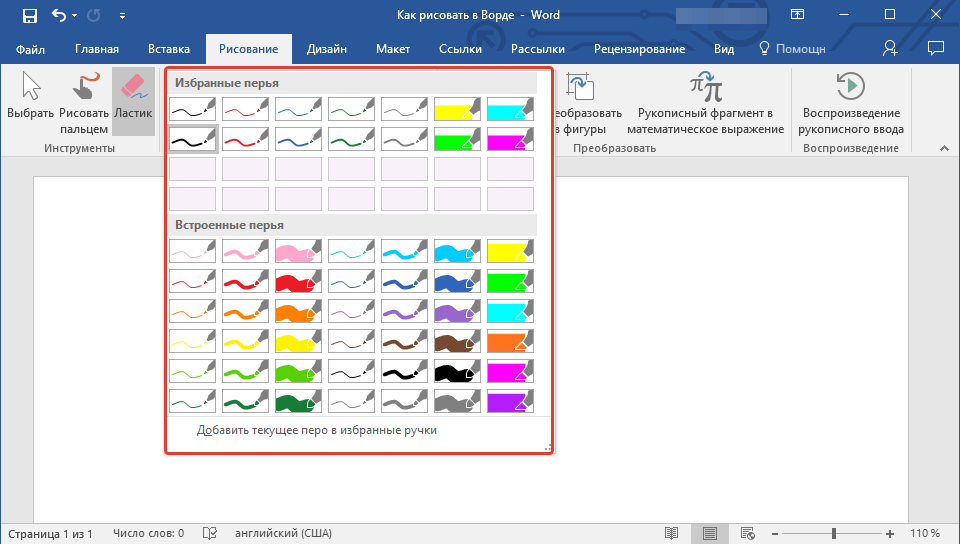
Рядом с окном стилей расположены инструменты «Цвет» и «Толщина», позволяющие выбрать цвет и толщину пера, соответственно.
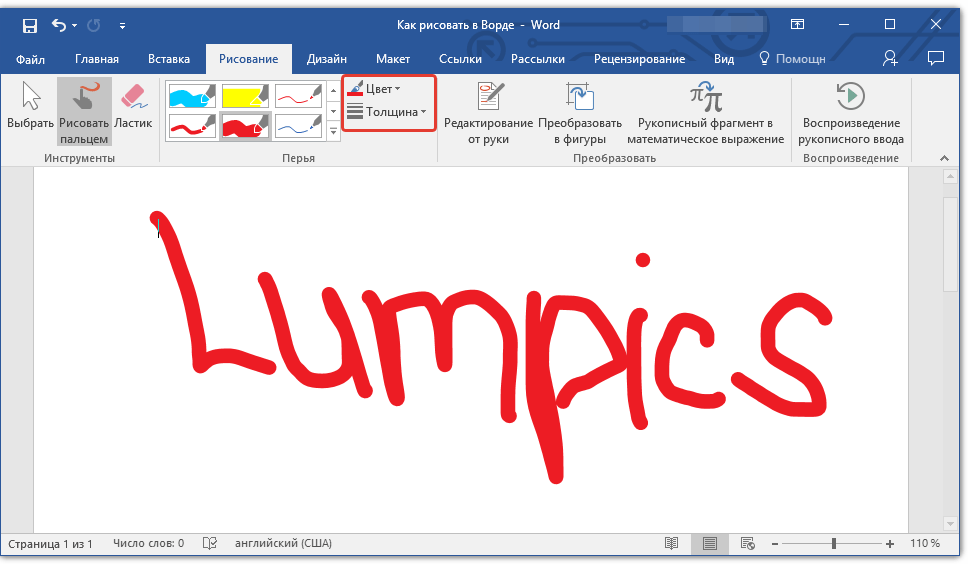
Преобразовать
Инструменты, расположенные в этой группе, предназначены не совсем для рисования, а то и вовсе не для этих целей.

Редактирование от руки: позволяет выполнять редактирование документов с помощью пера. Используя этот инструмент, можно вручную обводить фрагменты текста, подчеркивать слова и фразы, указывать на ошибки, рисовать указательные стрелки и т.д.
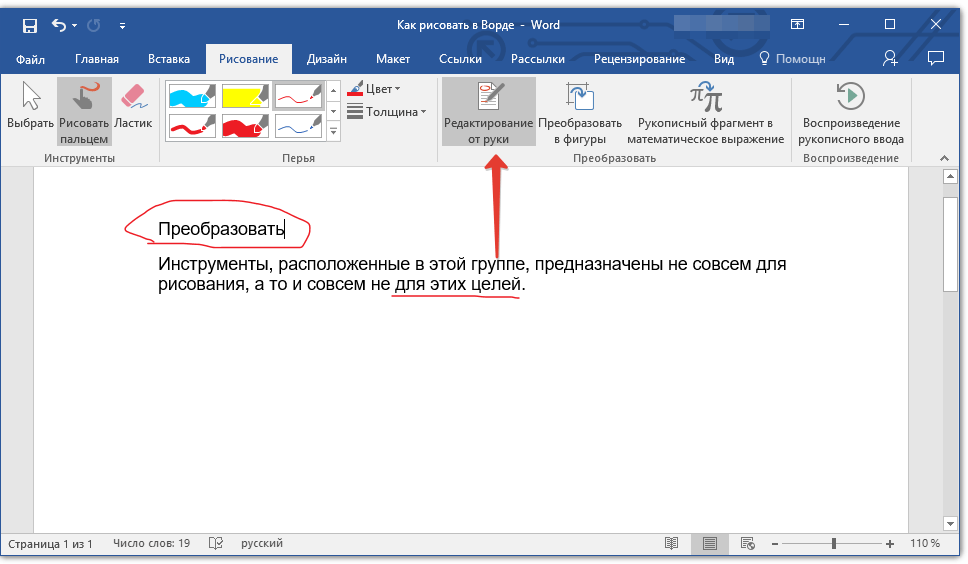
Урок: Рецензирование текста в Word
Преобразовать в фигуры: сделав набросок какой-либо фигуры, вы можете преобразовать ее из рисунка в объект, который можно будет перемещать по странице, можно будет изменять его размер и выполнять все те манипуляции, которые применимы для других рисованых фигур.
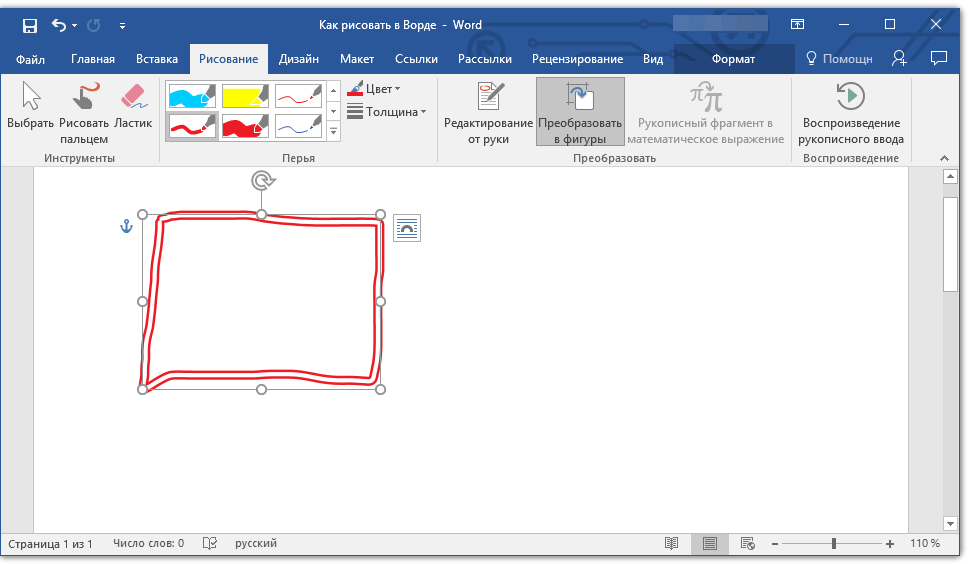
Для преобразования наброска в фигуру (объект) необходимо просто указать на нарисованный элемент, воспользовавшись инструментом «Выбрать», а затем нажать кнопку «Преобразовать в фигуры».
Урок: Как сгруппировать фигуры в Ворде
Рукописный фрагмент в математическом выражении: мы уже писали о том, как добавлять математические формулы и уравнения в Word. С помощью данного инструмента группы «Преобразовать» вы можете вписать в эту формулу символ или знак, которого нет в стандартном наборе программы.
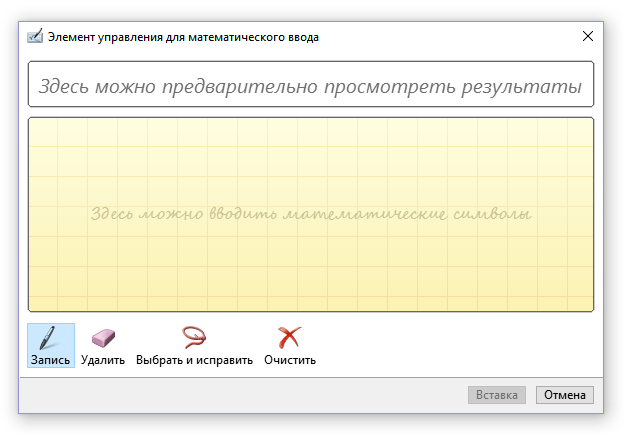
Урок: Вставка уравнений в Ворде
Воспроизведение
Нарисовав или написав что-то с помощью пера, вы можете включить визуальное воспроизведение этого процесса. Все, что для этого требуется, нажать кнопку «Воспроизведение рукописного ввода», расположенную в группе «Воспроизведение» на панели быстрого доступа.
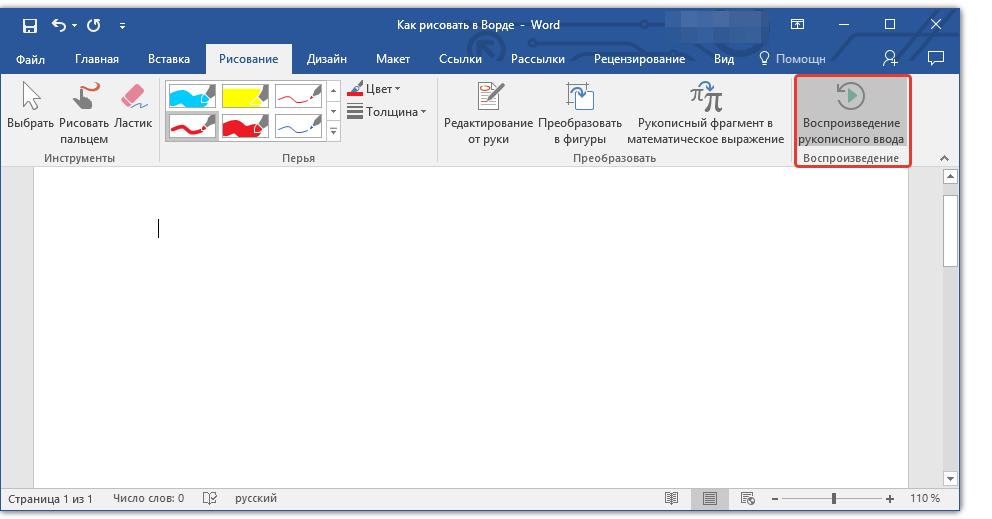
Собственно, на этом можно было бы и закончить, так как мы с вами рассмотрели все инструменты и возможности вкладки «Рисование» программы Microsoft Word. Вот только рисовать в этом редакторе можно не только от руки, но и по шаблонам, то есть, используя для этого готовые фигуры и объекты.
С одной стороны такой подход может оказаться ограниченным в плане возможностей, с другой стороны — он предоставляет куда более широкий выбор средств для редактирования и оформления создаваемых рисунков. Более подробно о том, как в Ворде рисовать фигуры и рисовать с помощью фигур, читайте ниже.
Рисование с помощью фигур
Создать рисунок произвольной формы, со скруглениями, пестрыми цветами с плавными переходами, оттенками и прочими деталями этим методом практически невозможно. Правда, зачастую столь серьезный подход и не требуется. Проще говоря, не выдвигайте к Word высокие требования — это не графический редактор.
Урок: Как в Ворде нарисовать стрелку
Добавление области для рисования
1. Откройте документ, в котором нужно сделать рисунок, и перейдите во вкладку «Вставка».
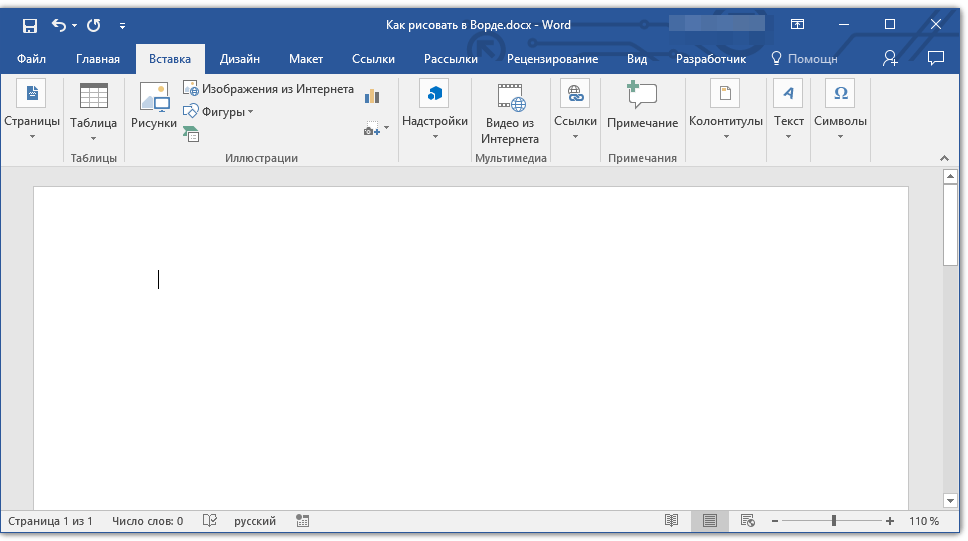
2. В группе иллюстрации нажмите на кнопку «Фигуры».
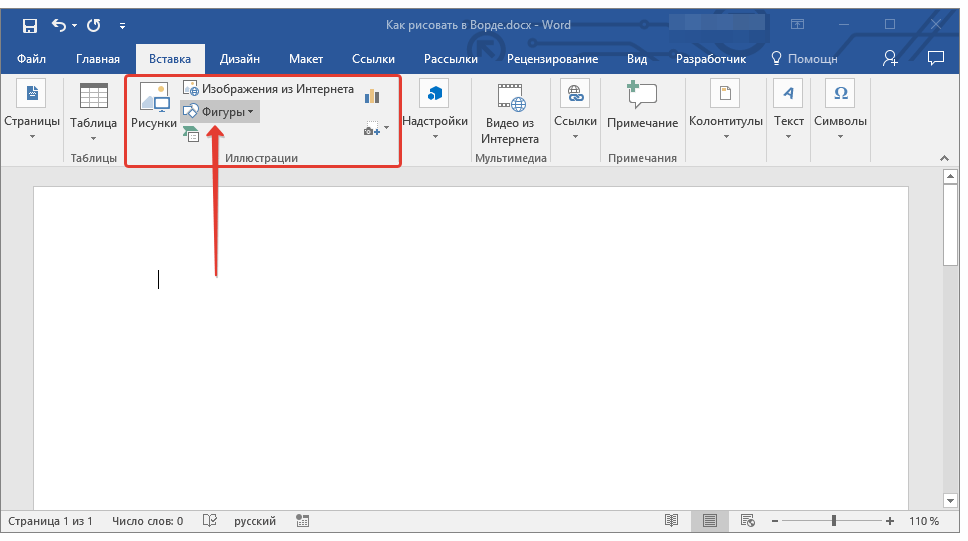
3. В выпадающем меню с доступными фигурами выберите последний пункт: «Новое полотно».
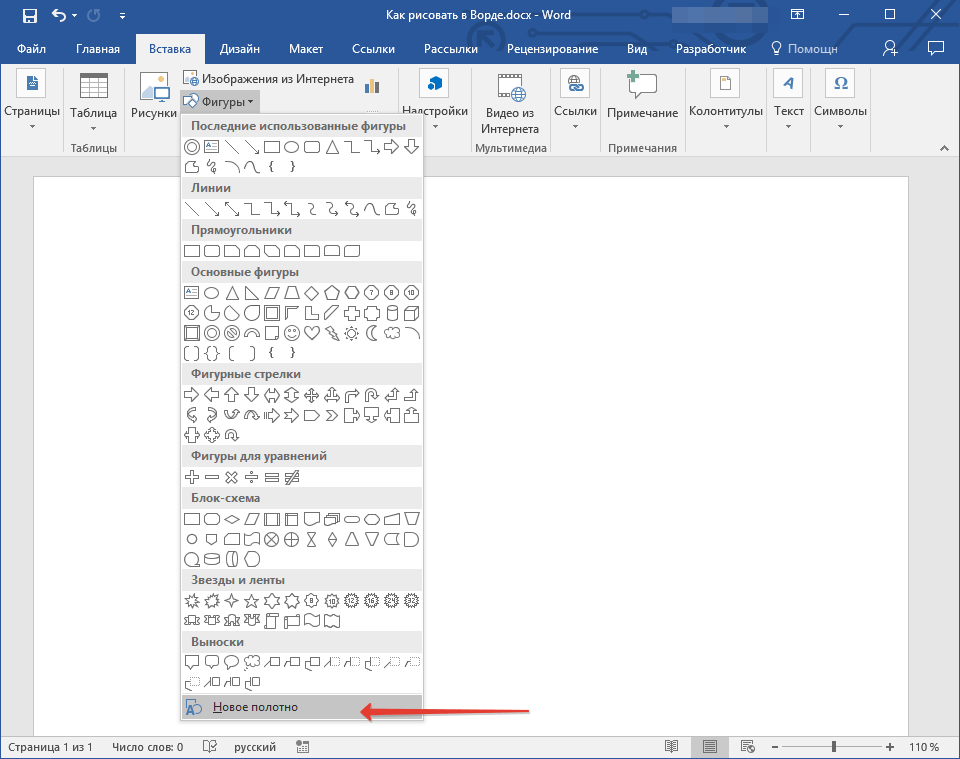
4. На странице появится прямоугольная область, в которой и можно начать рисовать.
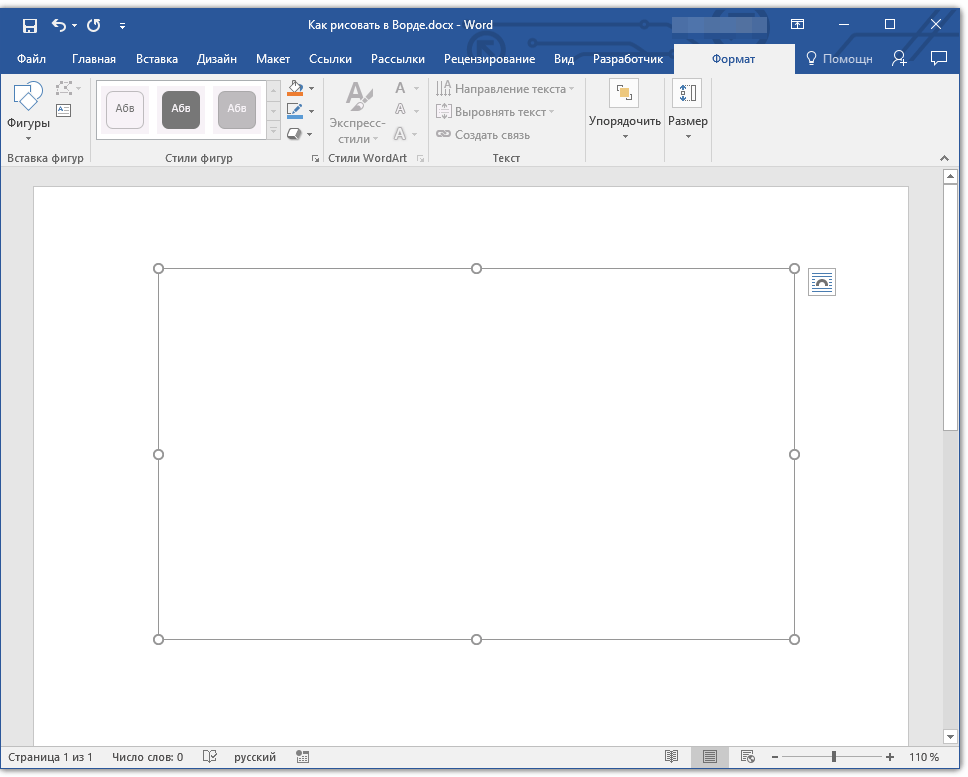
Если это необходимо, измените размеры поля для рисования. Для этого потяните в нужном направлении за один из маркеров, расположенных на его границе.
Инструменты для рисования
Сразу после добавления нового полотна на страницу, в документе откроется вкладка «Формат», в которой и будут находиться основные инструменты для рисования. Рассмотрим детально каждую из групп, представленных на панели быстрого доступа.

Вставка фигур
«Фигуры» — нажав на эту кнопку, вы увидите большой перечень фигур, которые можно добавить на страницу. Все они разделены по тематическим группам, название каждой из которых говорит само за себя. Здесь вы найдете:
- Линии;
- Прямоугольники;
- Основные фигуры;
- Фигурные стрелки;
- Фигуры для уравнений;
- Блок-схемы;
- Звезды;
- Выноски.
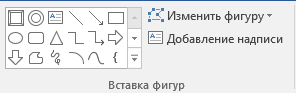
Выберите подходящий тип фигуры и нарисуйте ее, задав левым кликом мышки точку начала. Не отпуская кнопку, укажите конечную точку фигуры (если это прямая) или область, которую она должна занимать. После этого отпустите левую кнопку мышки.
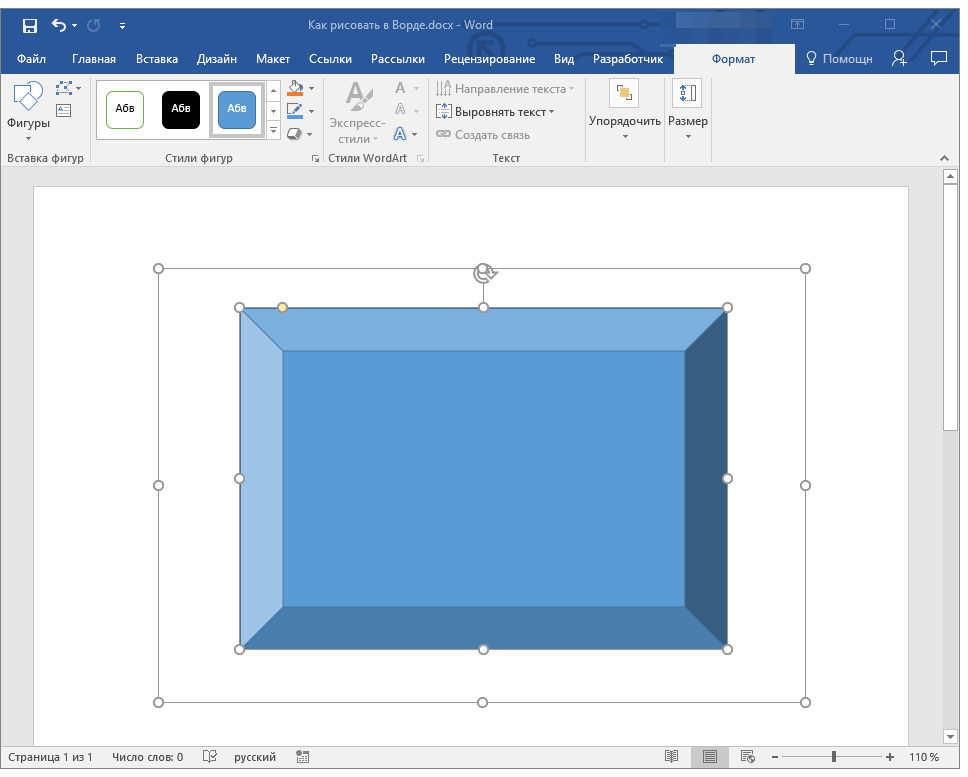
«Изменить фигуру» — выбрав первый пункт в меню этой кнопки, вы можете, в буквальном смысле, изменить фигуру, то есть, вместо одной нарисовать другую. Второй пункт в меню этой кнопки — «Начать изменение узлов». Выбрав его, вы можете изменить узлы, то есть, точки привязки конкретных мест фигуры (в нашем примере это внешние и внутренние углы прямоугольника.
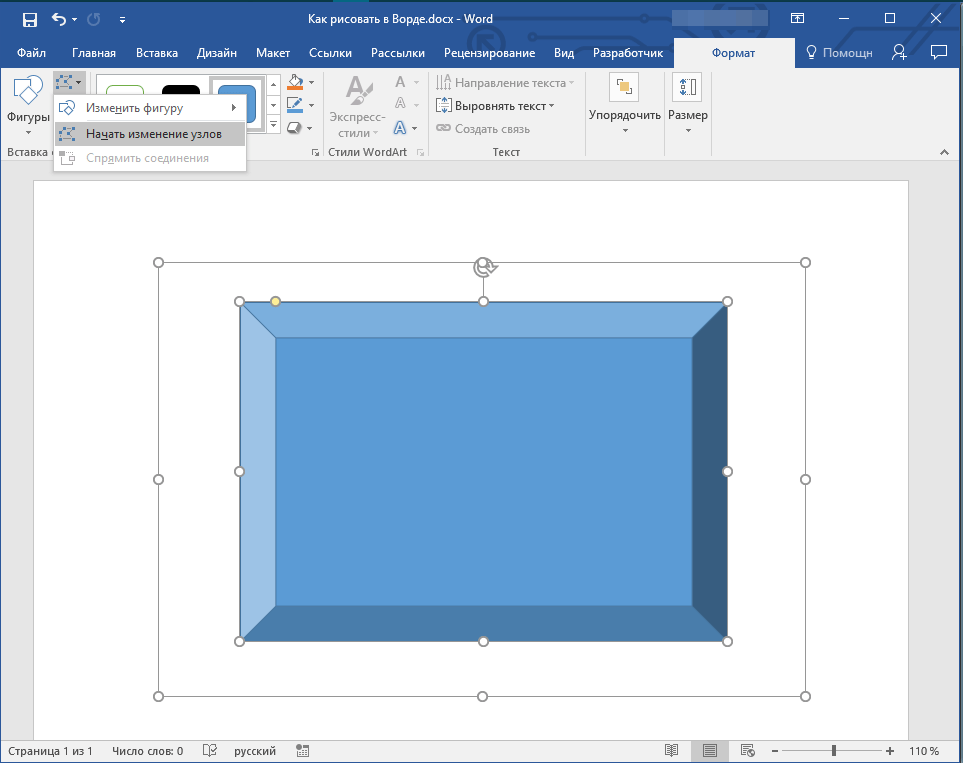
«Добавить надпись» — эта кнопка позволяет добавить текстовое поле и вписать в него текст. Поле добавляется в указанном вами месте, однако, при необходимости его можно свободно перемещать по странице. Рекомендуем предварительно сделать поле и его грани прозрачными. Более подробно о том, как работать с текстовым полем и что можно сделать с его помощью, вы можете прочесть в нашей статье.
Урок: Как в Word перевернуть текст
Стили фигур
С помощью инструментов данной группы вы можете изменить внешний вид нарисованной фигуры, ее стиль, текстуру.

Выбрав подходящий вариант, вы можете изменить цвет контура фигуры и цвет заливки.
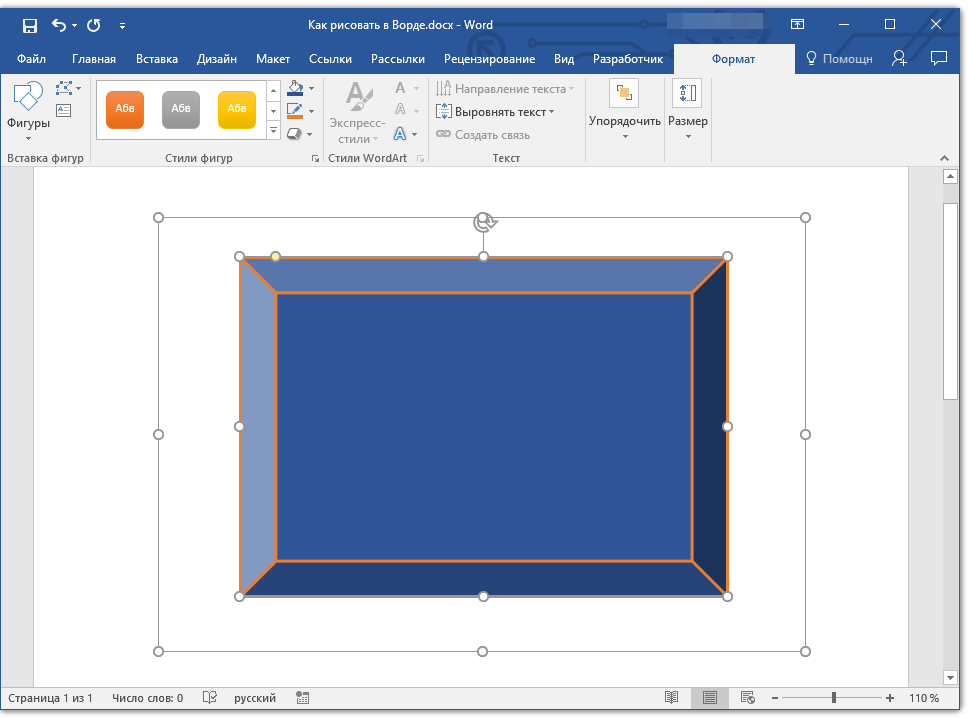
Для этого выберите подходящие цвета в выпадающем меню кнопок «Заливка фигуры» и «Контур фигуры», которые расположены справа от окна с шаблонными стилями фигур.
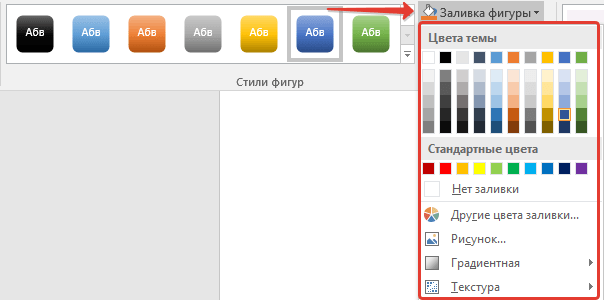
Примечание: Если стандартные цвета вас не устраивают, вы можете изменить их с помощью параметра «Другие цвета». Также, в качестве цвета заливки можно выбрать градиент или текстуру. В меню кнопки «Цвет контура» можно регулировать толщину линии.
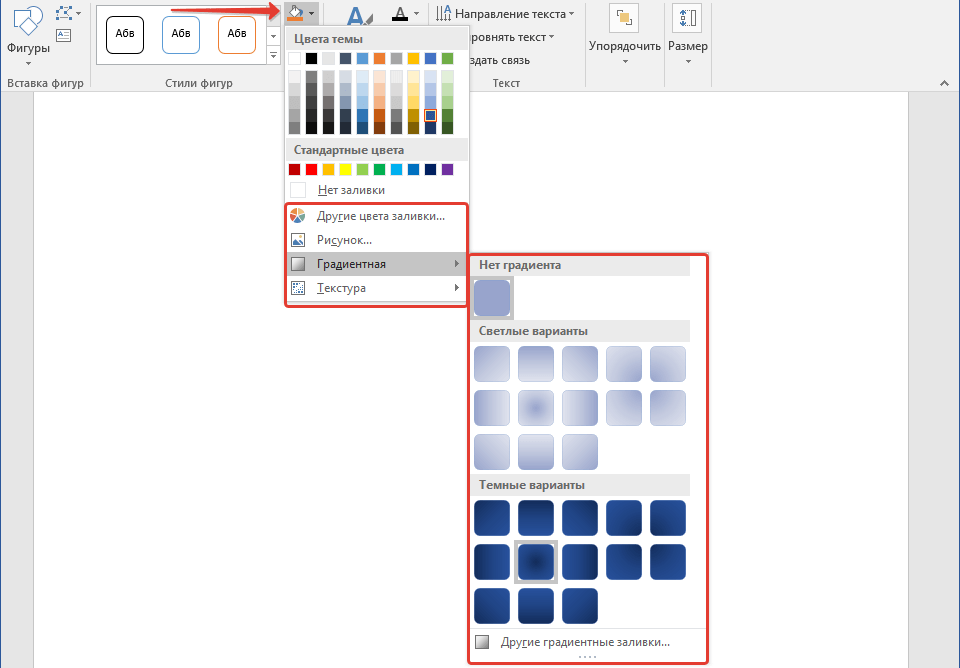
«Эффекты фигуры» — это инструмент, с помощью которого можно еще больше изменить внешний вид фигуры, выбрав один из предложенных эффектов. В числе таковых:
- Тень;
- Отражение;
- Подсветка;
- Сглаживание;
- Рельеф;
- Поворот.
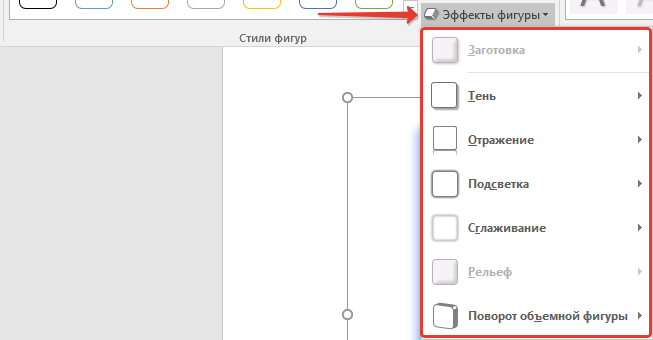
Примечание: Параметр «Поворот» доступен только для объемных фигур, некоторые эффекты из вышеперечисленных разделов тоже доступны только для фигур определенного типа.
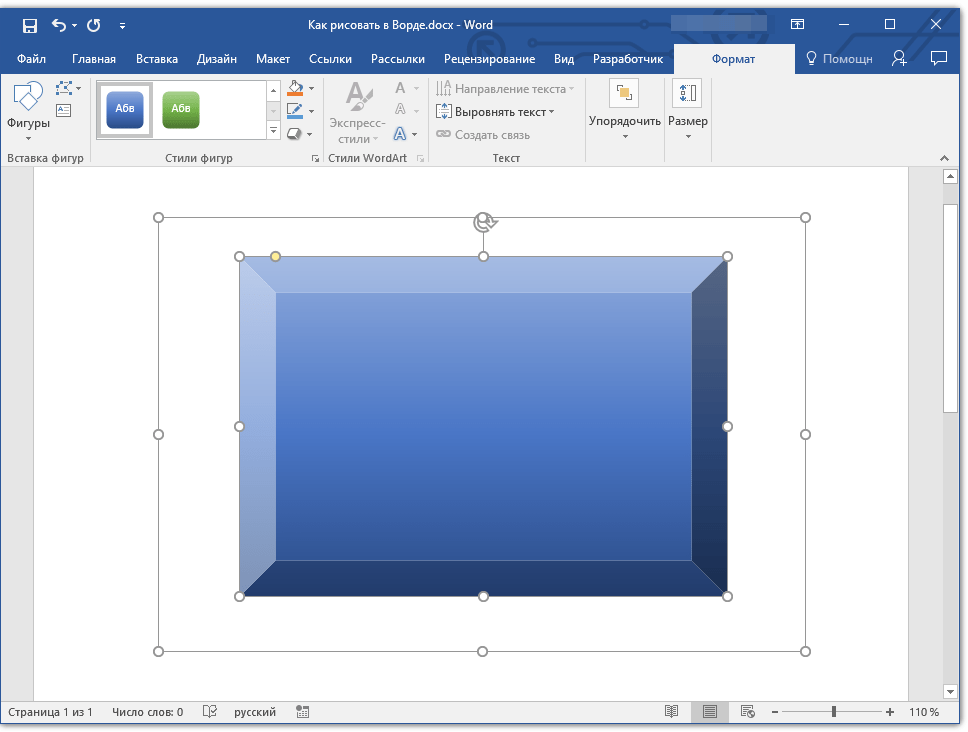
Стили WordArt
Эффекты из данного раздела применяются исключительно к тексту, добавленнуму с помощью кнопки «Добавление надписи», расположенной в группе «Вставка фигуры».
Текст
Аналогично стилям WordArt, эффекты применяются исключительно к тексту.
Упорядочить
Инструменты этой группы предназначены для изменения положения фигуры, ее выравнивания, поворота и других подобных манипуляций.
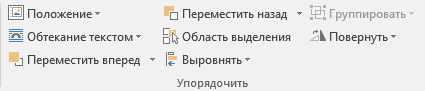
Поворот фигуры выполняется точно так же, как и поворот рисунка — на шаблонное, строго заданное или произвольное значение. То есть, можно выбрать стандартный угол поворота, указать свой или просто повернуть фигуру, потянув за круговую стрелку, расположенную непосредственно над ней.
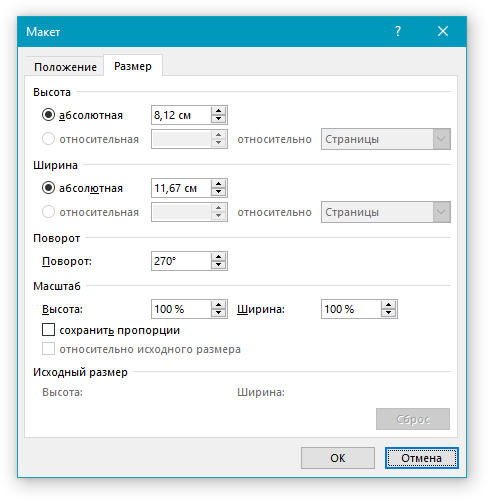
Урок: Как в Ворд повернуть рисунок
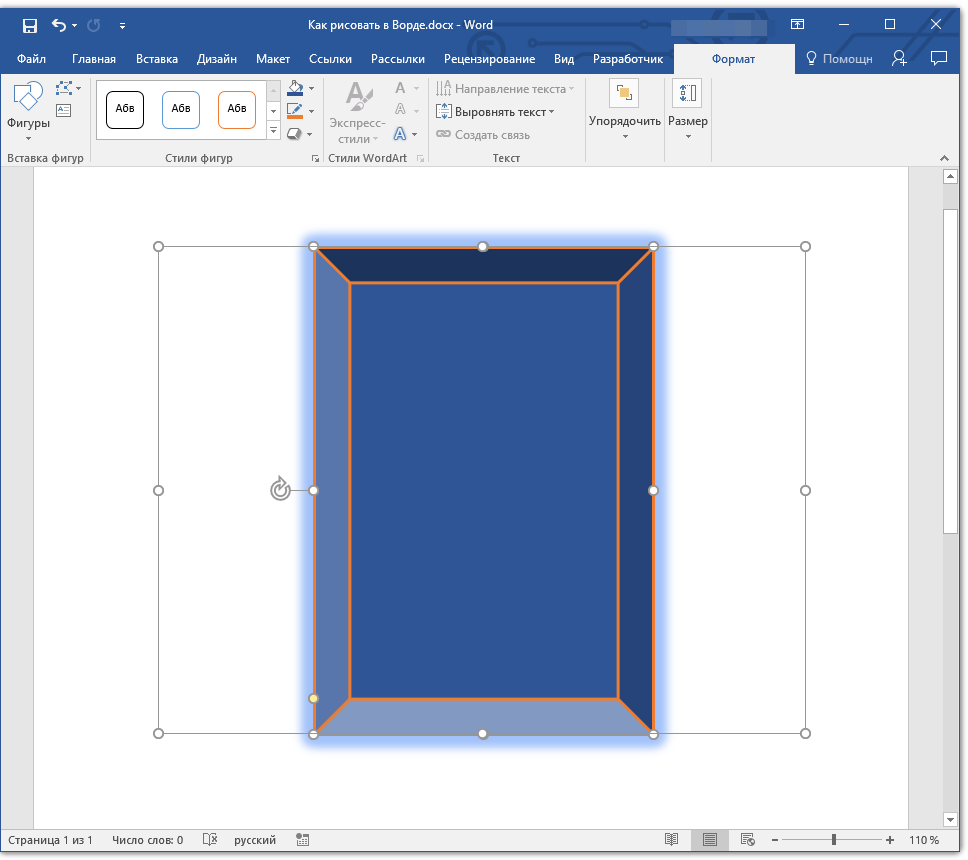
Кроме того, с помощью данного раздела можно наложить одну фигуру на другую, подобно тому, как это можно сделать с рисунками.
Урок: Как в Word наложить одну картинку на другую
В этом же разделе можно сделать обтекание фигуры текстом или сгруппировать две и более фигур.
Уроки по работе с Ворд:
Как сгруппировать фигуры
Обтекание картинки текстом
Примечание: Инструменты группы «Упорядочить» в случае работы с фигурами абсолютно идентичны таковыми при работе с рисунками, с их помощью можно выполнять ровно такие же манипуляции.
Размер
Возможность единого инструмента данной группы всего одна — изменение размера фигуры и поля, в котором она находиться. Здесь можно задать точное значение ширины и высоты в сантиметрах или изменить его пошагово с помощью стрелок.
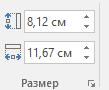
Кроме того, размер поля, как и размер фигуры, можно менять вручную, используя для этого маркеры, расположенные по контуру их границ.
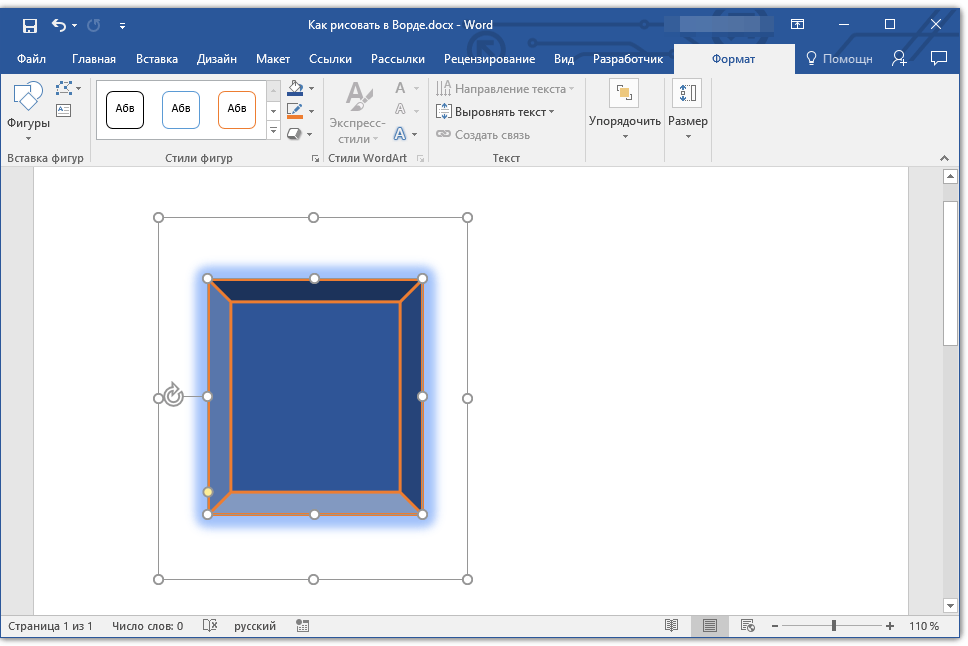
Урок: Как обрезать рисунок в Word
Примечание: Для выхода из режима рисования нажмите клавишу «ESC» или же кликните левой кнопкой мышки в пустом месте документа. Чтобы вернуться к редактированию и открыть вкладку «Формат», дважды кликните по рисунку/фигуре.
Вот, собственно, и все, из этой статьи вы узнали, как рисовать в Ворде. Не забывайте о том, что данная программа является в первую очередь текстовым редактором, поэтому не стоит возлагать на нее слишком серьезных задач. Используйте для таких целей профильный софт — графические редакторы.
In this chapter, we will discuss how to use graphics in Word 2010. You can add beauty to your Microsoft Word documents by inserting a variety of graphics. This chapter will teach you two ways of adding graphics.
Adding Picture in Document
The following steps will help you add an existing picture in your word document. It is assumed that you already have a picture available on your machine before you add this picture in your Word document.
Step 1 − Click on your document where you want to add a picture.
Step 2 − Click the Insert tab and then click the Picture option available in illustrations group, which will display the Insert Picture dialog box.
Step 3 − You can select a required picture using the Insert Picture dialog box. When you will click the Insert button, selected picture will be inserted in your document. You can play with your inserted picture in different ways, like you can apply quick styles to your picture, you can resize it, or you can change its color too. To try it, just -lick your inserted image and Word will give you numerous options available under the Format tab to format your inserted graphics.
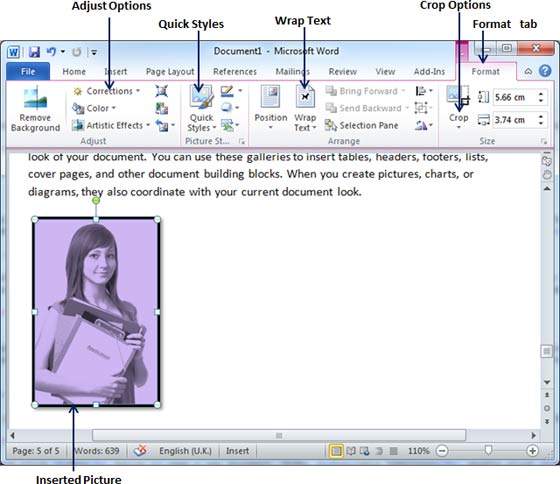
You can try yourself to insert other available graphics like Clipart, Different Shapes, Charts and SmartArt or Screenshots.
Adding WordArt in Document
WordArt provides a way to add fancy words in your Word document. You can document your text in a variety of ways. The following steps will help you add WordArt in your document.
Step 1 − Click in your document where you want to add WordArt.
Step 2 − Click the Insert tab and then click the WordArt option available in the Text group; this will display a gallery of WordArt.
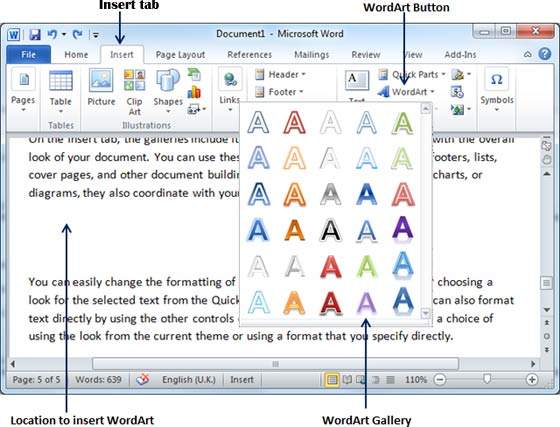
Step 3 − You can select any of the WordArt style from the displayed gallery by clicking on it. Now you can modify the inserted text as per your requirement and you can make it further beautiful by using different options available. To try it, just double-click your inserted WordArt and Word will give you numerous options available from the Format tab to format your image. Most frequently used options are Shape Styles and WordArt Styles.
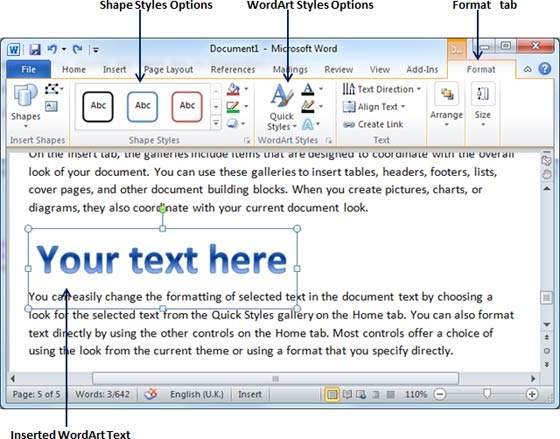
You can try yourself to apply different options on the inserted WordArt by changing its shape styles, colors, WordArt Styles, etc.
![]()
Download Article
Step-by-step guide to inserting pictures in Word
![]()
Download Article
- Windows
- Mac
- Web App
- Video
- Q&A
- Tips
|
|
|
|
|
Whether you’re working on a hefty research project or a friendly holiday greeting card, adding images to your Word document can really add value to your project. Whether you want to insert a picture from your computer or find one online, it’s easy to add photos in Word. This wikiHow teaches you how to insert an image into a Microsoft Word document using Windows, a Mac, and the free web version of Word.
Things You Should Know
- Use the Insert tab on Windows, Mac, and the web app to add a picture.
- Select Pictures > This Device to use an image on your computer.
- Click the image to resize and reformat it.
-
1
Click the place in your document where you want to insert the picture. Word’s insertion cursor, a vertical blinking bar, will appear at this point. When you insert the image, its bottom-left corner will be at this point.
- This method works for all modern versions of Word beginning with Word 2016. You can also use it as a guide for earlier versions of Windows, although there will be fewer tools and features.
- Changing the background is done through a different method, using the Design tab.
-
2
Click the Insert tab. It’s near the top of Word between «Home» and «Draw» (or «Home» and «Design» in some versions).
Advertisement
-
3
Click the Pictures tool. It’s in the «Illustrations» section of the toolbar running along the top of Word. Some location options will appear. If you’re using Word 2019 or later, a menu will expand. If you’re using Word 2016 or earlier, your file browser will appear.
-
4
Select the type of image you want to insert. You can choose an image on your computer, a stock image from Microsoft, or an image from the internet.
- Word 2019 or later:
- Click This Device if the picture is on your computer.
- Click Stock Images to select a free stock image from Microsoft’s collection.
- Click Online Pictures to use Bing’s image search to find photos on the web.
- If the photo is on your OneDrive, select Online Pictures and click OneDrive at the bottom-left corner.
- Word 2016:
- If the picture is on your computer, simply navigate to it in the file browser.
- If you want to search for a photo online or insert one from Facebook, Flickr, or your OneDrive, close the file browser and click the Online Pictures icon next to the «Pictures» in the toolbar. You can then select an image from Bing image search, Flickr, or Facebook.
- If the picture is on your OneDrive, click Online Pictures instead of Pictures and click Browse next to «OneDrive.»
- Word 2019 or later:
-
5
Select the image you want to insert. When you find the picture, click it once to select it.
- If you’re selecting from stock images or online images, you can click multiple pictures to add more than one.
- If you’re choosing files from your computer and want to add more than one picture, hold the Ctrl button down as you click each image.
-
6
Click Insert. It’ll be near the bottom-right corner of the window no matter where you’ve selected your image(s). You’re done! Continue to the next steps for formatting information, or print the document when you’re ready.
-
7
Resize the picture. If you want to change the picture’s size, click it once to select it, and then drag any of the corner circles in or out.[1]
- You can also specify the size if you want. Double-click the picture to open the Picture Format tab at the top, and then set your desired measurements next to «Height» and «Width.»
-
8
Use the curved arrow at the top of the picture to rotate it. It’s above the dot at the top-center part of the picture. To rotate, place the mouse cursor over the curved arrow, and then click and drag the cursor left or right until you’re satisfied.
-
9
Double-click the picture to access more editing tools. This opens the «Picture Format» (2019 and later) or «Format» (2016) tab at the top of Word. On this tab, you can:
- In the «Arrange» panel in the top-right area, click Wrap Text to choose how to situate the picture in blocks of text. You can also set alignment preferences here. Wrapping the text is a good way to get your document formatted exactly the way you want.
- To crop the picture, click the Crop tool in the «Size» panel at the top-right corner.
- The «Adjust» panel near the top-left corner has additional tools for background removal, color effects, and corrections.
- To add a border or effect around the picture, select one of the «Picture Styles» at the center of the Format bar, or choose any of the other options in the section to have more control over the style.


Advertisement
-
1
Click the place in your document where you’d like to insert a picture. This places the cursor at that location.
-
2
Click the Insert tab. It’s at the top of Word between the «Home» and «Design» or «Home» and «Draw» tabs.
-
3
Click the Pictures icon. It’s on the toolbar that runs along the top of Word. Look for an icon of a green mountain with a yellow sun between «Tables» and «Shapes.»
-
4
Click Photo Browser or Picture from File. If you want to browse images in your Mac’s Photos app, use Photo Browser. To select an image file using Finder, choose Picture from File.
-
5
Insert the picture into the document. If you’re using the Photo Browser option, simply drag the photo into your document. If you’re using Picture from File, select the image and click Insert.
-
6
Resize the picture. If you want to increase or reduce the picture’s size, click the image to select it, and then do one of the following:
- To maintain the picture’s proportions so it doesn’t stretch or warp, hold down the Shift key as you drag any of the sizing handles (the circles) inward or outward.[2]
- To keep the image’s center in place as you resize, hold down the Option key as you drag the handles.
- You can also specify a size. Double-click the Picture to open the Picture Format tab, then enter your desired measurements next to «Height» and «Width.»
- To maintain the picture’s proportions so it doesn’t stretch or warp, hold down the Shift key as you drag any of the sizing handles (the circles) inward or outward.[2]
-
7
Drag the curved arrow at the top of the picture to rotate it. It’s above the dot at the top-center edge of the picture. Just place the mouse cursor over the curved arrow, and then click and drag it left or right until it’s correct.
-
8
Double-click the picture to access more editing tools. This opens the «Picture Format» tab at the top of Word, which has a bunch of editing features, including the ability to remove the background and add styles.
- Click Corrections near the top-left corner to correct lighting and color problems.
- Click Artistic Effects to play around with filters, and Transparency to make the picture more see-through.
- To crop the picture, click the Crop tool next to the height and width controls.
- Click Wrap Text to choose how to situate the picture in blocks of text, and use Align and Position to ensure correct placement.
- Click Quick Styles to choose pre-styled borders, shadows, and other options.


Advertisement
-
1
Click the place in your document where you’d like to insert a picture. This places the cursor at that location.
- If it’s your first time using Office Online on the web, go to https://www.office.com, sign in with your Microsoft account, and select Word to get started.
-
2
Click Insert. This opens the Insert tab.
-
3
Click Pictures. This opens a drop down options menu.
-
4
Select a picture type. There are four options to choose from:
- This Device — choose a picture on your computer
- OneDrive — choose an image from your OneDrive
- Stock Images — insert a stock image or sticker
- Bing Pictures — search Bing for an image
-
5
Select an image. If you choose the This Device option, you’ll be prompted to select an image from your computer. Click it to select it.
-
6
Click Open. This is in the bottom right corner of the image selection window. This will confirm your selected image and insert it into the document.
-
7
Resize the picture. If you want to change the picture’s size, click it once to select it, and then drag any of the corner circles in or out.
- You can also specify the size if you want. Double-click the picture to open the Picture tab at the top, and then set your desired measurements next to «Height» and «Width.»
-
8
Use the curved arrow at the top of the picture to rotate it. It’s above the dot at the top-center part of the picture. To rotate, place the mouse cursor over the curved arrow, and then click and drag the cursor left or right until you’re satisfied.
-
9
Double-click the picture to access more editing tools. This opens the «Picture» tab at the top of the Word web app. On this tab, you can:
- In the «Arrange» panel in the top-right area, click Wrap Text to choose how to situate the picture in blocks of text. You can also set alignment preferences here.
- To crop the picture, click the Crop tool in the «Image Size» panel at the top-right corner.
- To add a border or effect around the picture, select one of the «Picture Styles» at the center of the bar, or choose any of the other options in the section to have more control over the style.


Advertisement
Add New Question
-
Question
How do I take screenshots?

On a Mac, shift command 3 to screenshot the whole screen. If you want to take a screenshot of a certain area on the screen, press shift command 4. On a Windows PC, press control and print screen at the same time, then you can paste the image into Paint or Microsoft Word.
-
Question
When I insert several photos on an age in a Word document, the photos often won’t stay in place. How do I stop the photos from bumping each other around?
You can right-click the image, hold the cursor over the «Wrap Text» menu option, and select an option from the list that is NOT «In Line with Text» (usually selected by default), such as «Tight» or «Behind/In Front of Text.» Then you should be able to move the image freely around the page.
-
Question
How do I format images in a Word document?
Try double-tapping the photo. A photo format menu should come up on the right side.
See more answers
Ask a Question
200 characters left
Include your email address to get a message when this question is answered.
Submit
Advertisement
Video
-
Adding photos to your Word document increases its size.
-
Other photo modification features available in newer versions of Microsoft Word include the ability to add borders, cutout styles, shadows, beveled edges, glows, and drop shadows.
-
When you crop a picture, the actual cropped part of the picture is hidden, not removed; unless you check the «Delete Cropped Areas of Pictures» box in the «Compression Settings» dialog box. Any compressed pictures with their cropped areas deleted cannot be restored to their original appearance.
Show More Tips
Thanks for submitting a tip for review!
Advertisement
About This Article
Article SummaryX
1. Click the place you want to insert the image.
2. Click the Insert tab.
3. Click Pictures.
4. Choose a location.
5. Select the image and click Insert.
6. Double-click the picture to open editing and format tools.
Did this summary help you?
Thanks to all authors for creating a page that has been read 650,203 times.