
Word for Microsoft 365 Word 2021 Word 2019 Word 2016 Word 2013 Word 2010 Word 2007 More…Less
These are the basic types of graphics that you can use to enhance your Word documents: drawing objects, SmartArt, charts, pictures, and clip art. Drawings refer to a drawing object or a group of drawing objects.
Drawing objects include shapes, diagrams, flowcharts, curves, lines, and WordArt. These objects are part of your Word document. You can change and enhance these objects with colors, patterns, borders, and other effects.
Note: It is no longer necessary to insert a drawing canvas to work with drawing objects in Word. However, you may still use a drawing canvas as an organizational aid when working with several drawing objects, or if you want to add connectors between shapes. To insert a drawing canvas, on the Insert tab, click Shapes, and then click New Drawing Canvas.
What do you want to do?
-
Add a drawing to a document
-
Delete all or part of a drawing
Add a drawing to a document
-
Click in your document where you want to create the drawing.
-
On the Insert tab, in the Illustrations group, click Shapes.

-
You can do any of the following on the Format tab, which appears after you insert a drawing shape:
-
Insert a shape. On the Format tab, in the Insert Shapes group, click a shape, and then click somewhere in the document.
-
Change a shape. Click the shape you want to change. On the Format tab, in the Insert Shapes group, click Edit Shape, point to Change Shape, and then choose a different shape.
-
Add text to a shape. Click the shape you where you want text, and then type.
-
Group selected shapes. Select several shapes at a time by pressing CTRL on your keyboard and clicking each shape you want to include in the group. On the Format tab in the Arrange group, click Group so that all of the shapes will be treated like a single object.
-
Draw in the document. On the Format tab, in the Insert Shapes group, expand the shapes options by clicking the arrow. Under Lines click Freeform or Scribble.
Tip: To stop drawing with the Freeform or Scribble lines, double-click.
-
Adjust the size of the shapes. Select the shape or shapes you want to resize. On the Format tab, in the Size group, click the arrows or type new dimensions in the Height and Width boxes.
-
Apply a style to a shape. In the Shape Styles group, rest your pointer over a style to see what your shape will look like when you apply that style. Click the style to apply it. Or, click Shape Fill or Shape Outline and select the options that you want.
Note: If you want to apply a color and gradient that aren’t available in the Shape Styles group, select the color first, and then apply the gradient.
-
Add flow charts with connectors. Before you create a flow chart, add a drawing canvas by clicking the Insert tab, clicking Shapes in the Illustrations group, and then clicking New Drawing Canvas. On the Format tab, in the Insert Shapes group, click a Flow chart shape. Under Lines, choose a connector line such as the Curved Arrow Connector.
-
Use shadow and three-dimensional (3-D) effects to add interest to the shapes in your drawing. On the Format tab, in the Shape Styles group, click Shape Effects, and choose an effect.
-
Align the objects on the canvas. To align the objects, press and hold CTRL while you select the objects that you want to align. On the Format tab, in the Arrange group, click Align to choose from an assortment of alignment commands.
-

Delete all or part of a drawing
-
Select the drawing object that you want to delete.
-
Press DELETE.
See also
Add shapes
Draw a curve or circle shape
Insert pictures
Crop a picture
Add clip art to your file
What do you want to do?
-
Add a drawing to a document
-
Delete all or part of a drawing
Add a drawing to a document
-
Click in your document where you want to create the drawing.
-
On the Insert tab, in the Illustrations group, click Shapes.
-
When you find the shape you want to insert, double-click to insert it automatically, or click and drag to draw it in your document.
You can do any of the following on the Format tab, which appears after you insert a drawing shape:
-
Insert a shape. On the Format tab, in the Insert Shapes group, click a shape, and then click somewhere in the document.
-
Change a shape. Click the shape you want to change. On the Format tab, in the Shape Styles group, click Change Shape, and then choose a different shape.
-
Add text to a shape. Right-click the shape, click Add Text, and then type.
-
Group selected shapes. Select several shapes at a time by pressing CTRL on your keyboard and clicking each shape you want to include in the group. On the Format tab in the Arrange group, click Group so that all of the shapes will be treated like a single object.
-
Draw in the document. On the Format tab, in the Insert Shapes group, expand the shapes options by clicking the arrow. Under Lines click Freeform or Scribble.
-
Adjust the size of the shapes. Select the shape or shapes you want to resize. On the Format tab, in the Size group, click the arrows or type new dimensions in the Shape Height and Shape Width boxes.
-
Apply a style to a shape. In the Shape Styles group, rest your pointer over a style to see what your shape will look like when you apply that style. Click the style to apply it. Or, click Shape Fill or Shape Outline and select the options that you want.
Note: If you want to apply a color and gradient that aren’t available in the Shape Styles group, select the color first, and then apply the gradient.
-
Add flow charts with connectors. Before you create a flow chart, add a drawing canvas by clicking the Insert tab, clicking Shapes in the Illustrations group, and then clicking New Drawing Canvas. On the Format tab, in the Insert Shapes group, click a Flow chart shape. Under Lines, choose a connector line such as the Curved Arrow Connector.
-
Use shadow and three-dimensional (3-D) effects to add interest to the shapes in your drawing. On the Format tab, choose an option in either the Shadow Effects or the 3-D Effects group.
-
Align the objects on the canvas. To align the objects, press and hold CTRL while you select the objects that you want to align. On the Format tab, in the Arrange group, click Align to choose from an assortment of alignment commands.
-

Delete all or part of a drawing
-
Select the drawing object that you want to delete.
-
Press DELETE.
See also
Draw a curve or circle shape
Insert pictures
Crop a picture
Add clip art to your file
Need more help?
We’ll talk about how to use graphics in Word 2019 in this chapter. You can make your Microsoft Word documents look nicer by adding different kinds of graphics. This section will show you two ways to add pictures.
Table of contents
- What are graphics in Word?
- What is graphics used for?
- How to add Picture in Document
- How to Add WordArt in Document
- Summary
What are graphics in Word?
Graphics refers to hardware or software that allows a computer to show and change pictures. The word can also mean the pictures themselves. For example, laser printers and plotters are graphics devices because they let the computer print pictures.
You can add more information and make your spreadsheets, documents, and presentations more interesting by using graphics. In Office 2010, the commands and tools used to add and change images, shapes, SmartArt graphics, and clip art are used in all of the programs in the suite.
What is graphics used for?
Graphics are used for everything from making Web pages look better to be the presentation and user interaction layer for full-fledged Web applications. Graphics can be used in many different ways, so there are many different technologies to choose from.
Images and Multimedia
You don’t have to think of Word as just a program for making and editing text. It has the tools you need to make some pretty cool page layouts. Even though it doesn’t have as many features or be as strong as a professional page layout program like Adobe InDesign. You can still make things look very professional if you know what you have and how to use it.
Online Pictures and Pictures
The same thing is done by both “Pictures” and “Online Pictures.” The only difference is that when you choose “Pictures,” you can insert images from your computer. Still, when you choose “Online Pictures,” you can add images from the internet, such as clip art from Office.com, Bing, or OneDrive.
Drawing Tools
Shapes, diagrams, flowcharts, curves, lines, and WordArt are all drawing tools. These things are part of the Word file you are working on. You can use colors, patterns, borders, and other effects to change and improve these objects.
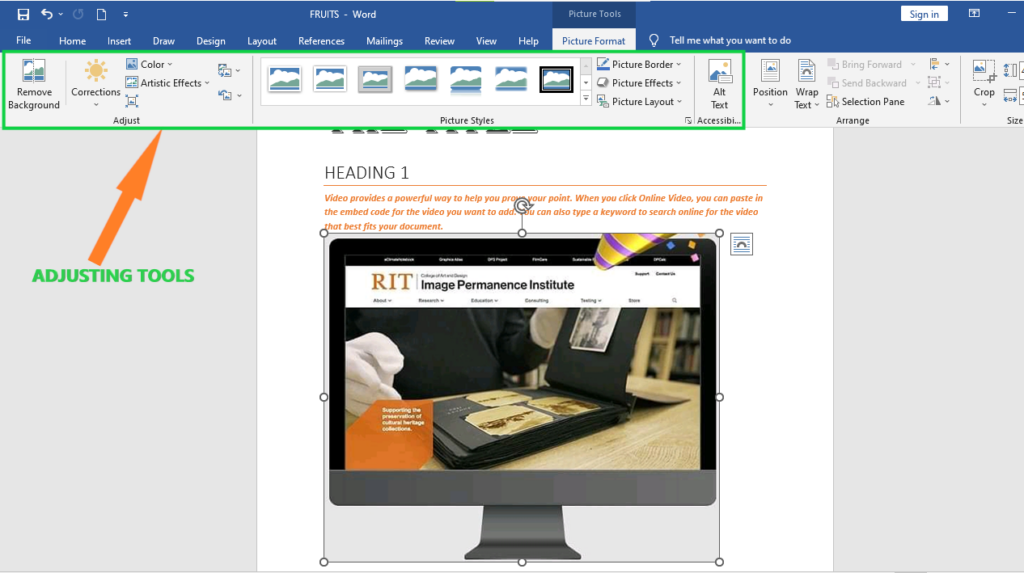
Picture Tools
If you want to change a picture or anything else in a Word document, you can always click on it, and the right tab will show up on the Ribbon.
“Picture Tools” is the name of the tab for pictures. Here, we can see that you can make changes to the picture as you go. For instance, you can change the brightness, contrast, color, and add a border.
Your choice of where to put text and how to wrap it will also have a big impact on how your documents look.
These controls are shown here. We don’t worry as much about how words wrap or where they go in our documents because Word isn’t the last step before publishing online. But if you’re making something WYSIWYG (What You See Is What You Get), like for a PDF or print publication, these things will matter.
Also, you can change your pictures inline in a few ways, such as by resizing, rotating, or moving them. In the next picture, you can see these controls, many of which you may already know.
Shapes
You can use the built-in shapes in Microsoft Word 2013 to make callouts, boxes, stars, and other shapes.
When you click the shape, all you have to do is draw it on a blank spot on the page. You can change it as much as you want once it’s in your document, so it doesn’t matter if it’s perfect or just the way you want it.
At the bottom of the “Shapes” menu, there is an option to make a “new drawing canvas.” This will open a box for shapes that works like a text box. You can use these shapes to make drawings on this drawing canvas. This lets you make things like diagrams and flowcharts.
SmartArt and WordArt
SmartArt and WordArt are similar in some ways, especially if you use WordArt to make something and then change the text. You can use one or the other, but not both. However, we’ll discuss them in the same section because one often leads to the other.
Think of SmartArt as pre-made drawing canvases that you can add to your document and then change as you like. Just pick a way to put things together, like a list, a process, or a cycle.
As you can see, we used a “Continuous Block Process” to make a picture. We can change what is in the text boxes when we click them. There are also the usual grab handles for resizing the image and “Layout Options” that let you wrap text however you like.
Format Text Effects
Let’s look at this more closely because it has a pretty big number of features. We’ll talk about the basics so you know more about them. The “Format Text Effects” pane slides out from the right side of the screen.
It can be detached, just like any other pane in Word 2013. You can then move it out of the way to save screen space or keep it close, so it is easy to use.
This dialog box will make it easy to work quickly with text, so you won’t have to keep going to the ribbon to make changes. Note that the “Text Fill and Outline” and “Text Effects” buttons are separated in the dialog box. “Text Fill and Outline” is easy to understand and is used to improve the way text looks.
Chart
Charts are fun for everyone. Charts are a great way to show data sets visually, and Word 2013 comes with a huge variety of charts to choose from, such as columns, pie, bars, and many more. Take a look at the screenshot to see how many choices you have:
It’s easy to change and format charts. When you click on a chart in your document, you’ll see “Chart Tools,” which, as you might have guessed, is the Ribbon tab for charts only.
Text Box
In Word, text boxes are like little islands. When you add a “Text Box” to a document, it can’t be changed no matter what you do to the rest of the document. It’s like putting a document inside another document.
This is helpful if you want to show something “as is” in your work but still be able to change the formatting of the document as a whole. Something you’ve pasted will stay the same.
Text boxes are usually painful for editors because they don’t work well with styles. You may find them very useful, which is fine, but if you want something that fits the style and format of your document but still goes in a box or has a border around it, we suggest just adding a border.
Drop Cap
Drop caps just mean that the first letter of a chapter or book is bigger than the rest:
You can set your drop cap to “Dropped” or “In Margin.” If you choose “Dropped,” the text below will move under it. Check out the “Drop Cap” options to have more control over how your drop caps work.
How to add Picture in Document
Follow these steps to add an already-made picture to your Word file. It is assumed that before you add this picture to your Word document, you already have a picture on your computer.
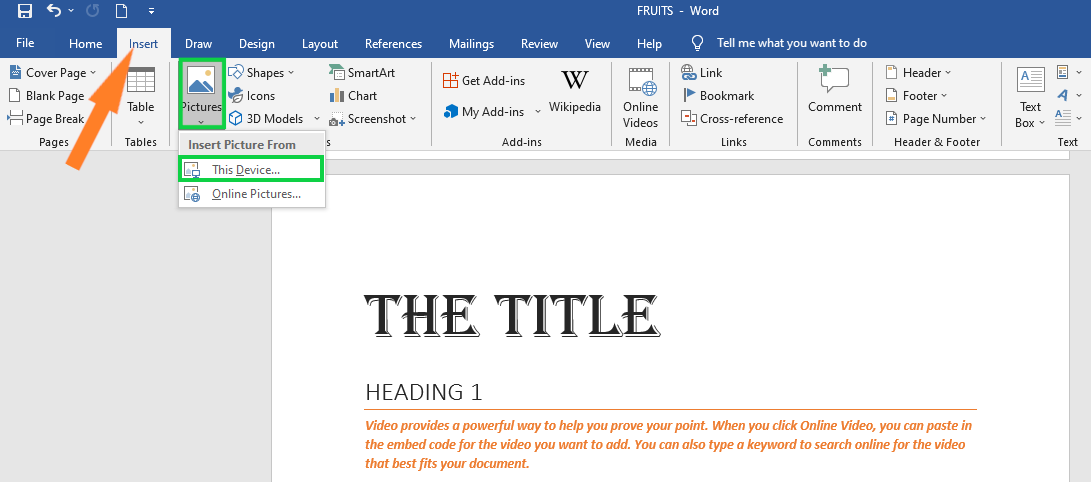
- Step 1 − Click on your document where you want to add a picture.
- Step 2 −Click the Insert tab and then click the Picture button in the Illustrations group, the Insert Picture dialog box will appear.

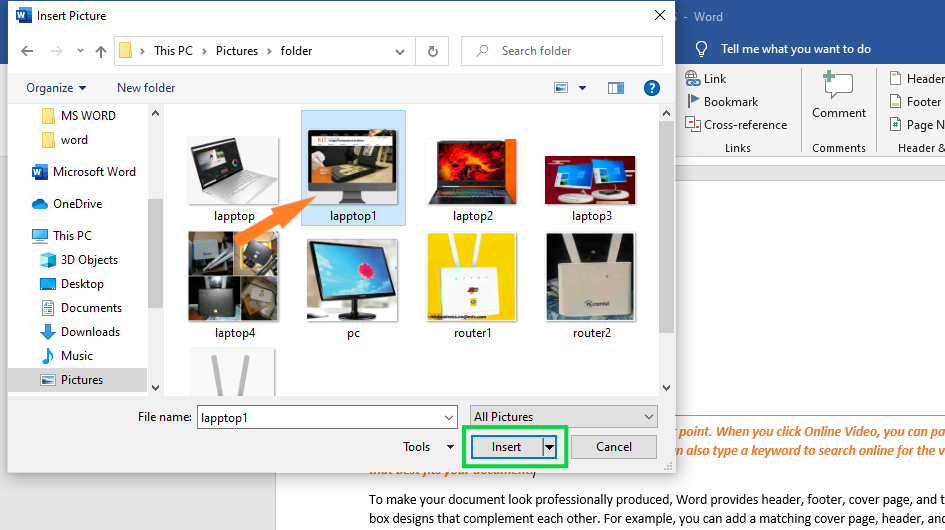
- Step 3 − The Insert Picture dialog box lets you choose the picture you want to use.
 When you click “Insert,” the picture you chose will be added to your document.
You can play around with your inserted picture in different ways. For example, you can give it quick styles, change its size, or change its color.To try it out, just click on the image you inserted, and Word will give you a lot of options for how to format it under the Format tab.

- You can try to add other graphics, such as Clipart, different shapes, charts, SmartArt, or screenshots, if you want to.
 When you click “Insert,” the picture you chose will be added to your document.
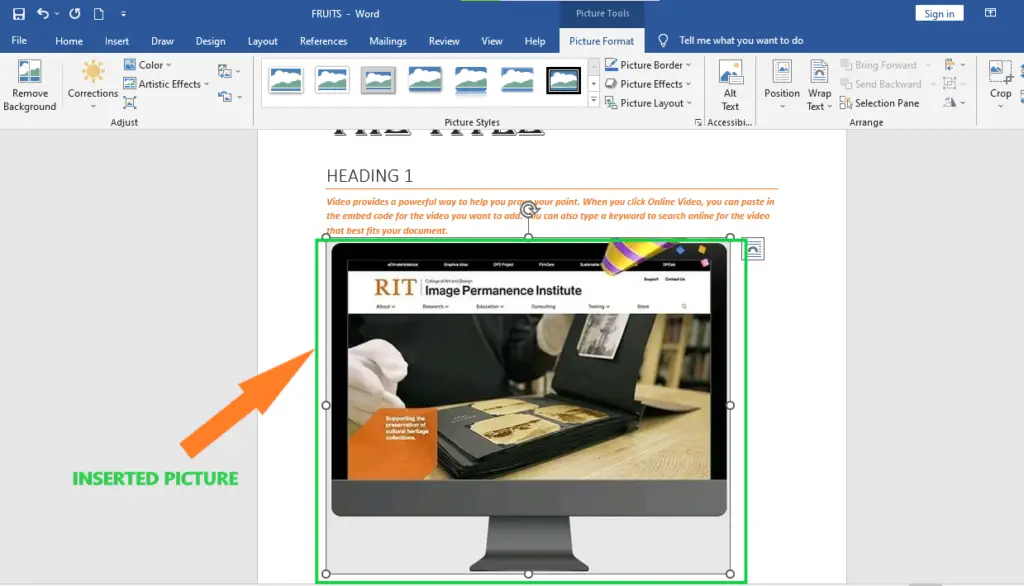
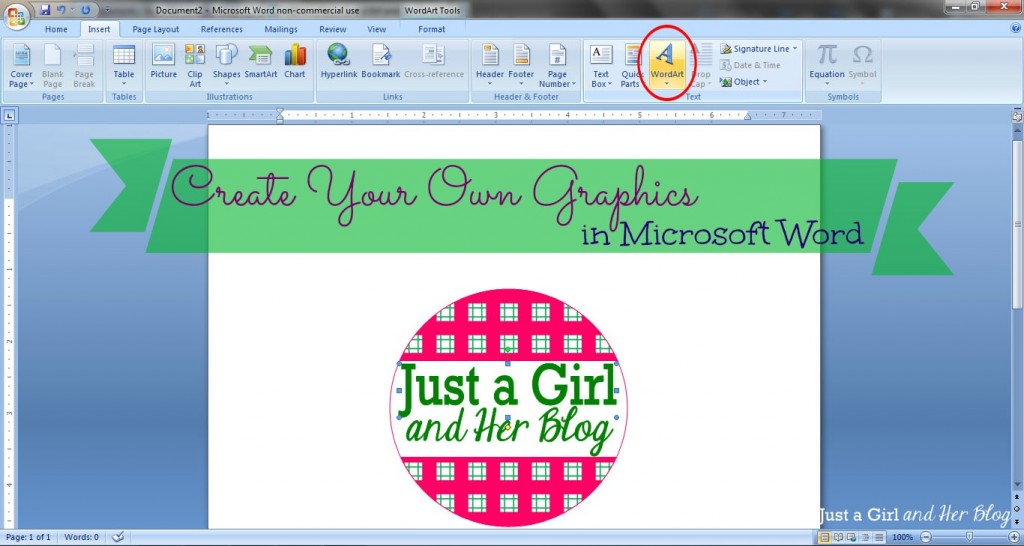
How to Add WordArt in Document
With WordArt, you can add fancy words to a Word document. There are many ways to back up your text. Follow these steps to put WordArt into your document.
- Step 1 − Click in your document where you want to add WordArt.
- Step 2 − Click the Insert tab and then click the WordArt option available in the Text group; this will display a gallery of WordArt.
- Step 3 − You can click on any of the WordArt styles shown in the gallery to choose it. Now you can change the text you’ve added to fit your needs, and you can use the different options to make it look even better. To try it, just double-click the WordArt you’ve added, and Word will give you many options for how to format your image on the Format tab. Shape Styles and WordArt Styles are the options that are used most often.
You can change the shape styles, colors, WordArt Styles, etc. of the inserted WordArt to try out different options.
Summary
In the end, we’ve learned how to use graphics in Word and what those terms mean. We also know that there are available graphics that can be used, which we can use in our document to make it look more professional and presentable.
Meanwhile, if you want to learn more about working on tables, see the previous tutorial on how to resize tables and how to merge and split table in Microsoft Word. You can browse those guides if you are having a hard time working with your tables in a document
We hope this tutorial helps you as you format your documents in MS Word.
PREVIOUS

NEXT

After my posts about creating monograms, labels, and banners in Word, I have received quite a few questions asking if it was possible to make other graphics as well. It is! Today I’m going to show you a couple examples of how to create your own graphics and let you in on my little graphic-making secret. 😉 Let’s get started!
Make Your Own Backgrounds
Have you ever searched and searched for a background graphic to use only to become frustrated that nothing is “just right”? I have definitely been there, so I started creating my own simple backgrounds. I actually make a lot of them in Photoshop Elements, but the same thing can easily be accomplished in Word as well.
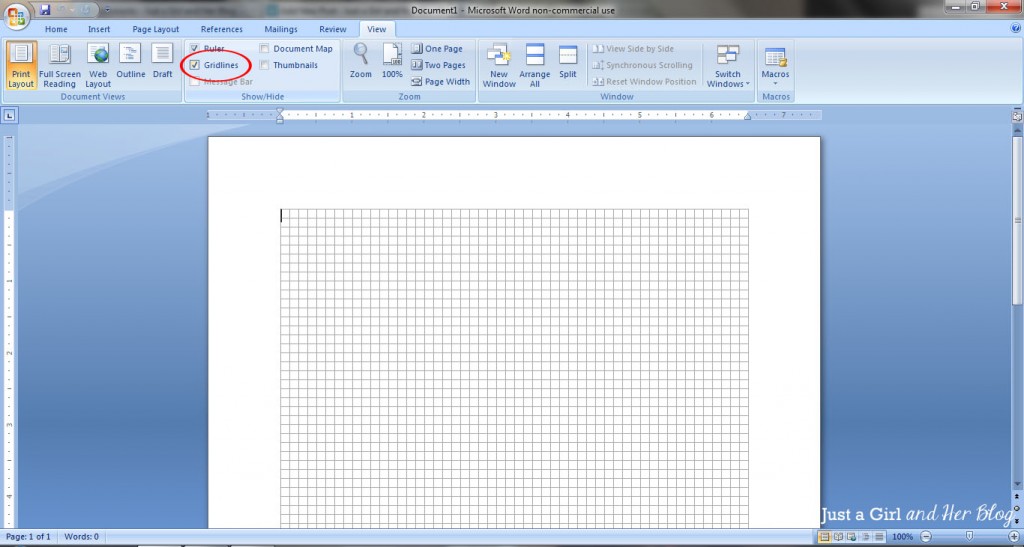
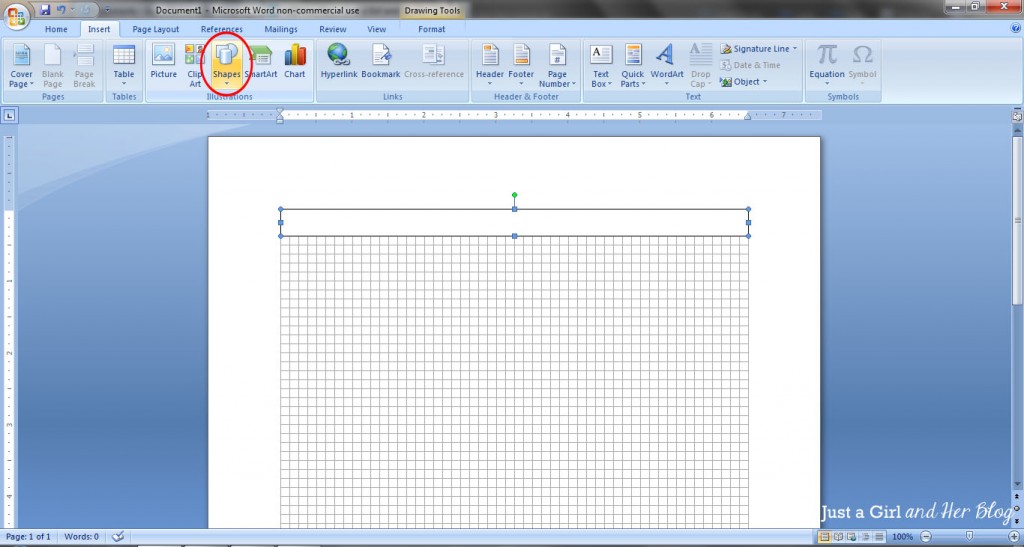
1. Use Gridlines
The first thing I do is, under the “View” tab at the top of the screen, check the “Gridlines” box. This way you’ll have a guide to help you make sure your patterns are straight and evenly spaced.
2. Start with a Shape
Let’s say I want to make a plaid pattern. I will go to the “Insert” tab, click on “Shape” and choose a rectangle to begin my pattern. I made my rectangle two boxes high and ran it the full width of the gridlines.
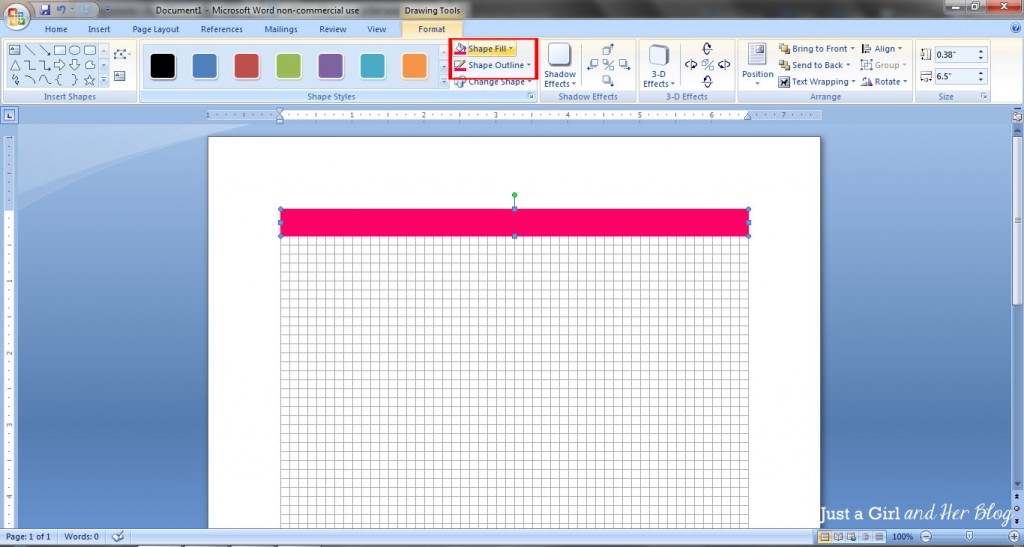
3. Pick your colors.
I can then go to my “Drawing Tools” toolbar to change the outline and fill colors of my shape. I chose pink. {Because who doesn’t love pink in the spring?!}
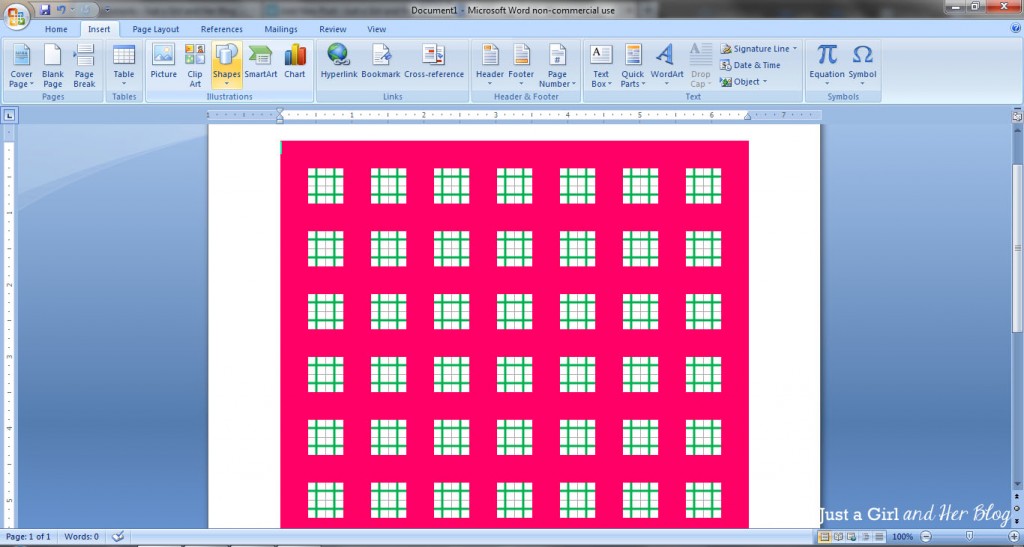
4. Continue Adding Shapes.
Continue this same process with each shape until you have the pattern you want. {Shortcut: You can copy and paste the shape if you’re using the same one over and over.} I used a combination of vertical and horizontal rectangles and the “Line” shape to make my pattern.
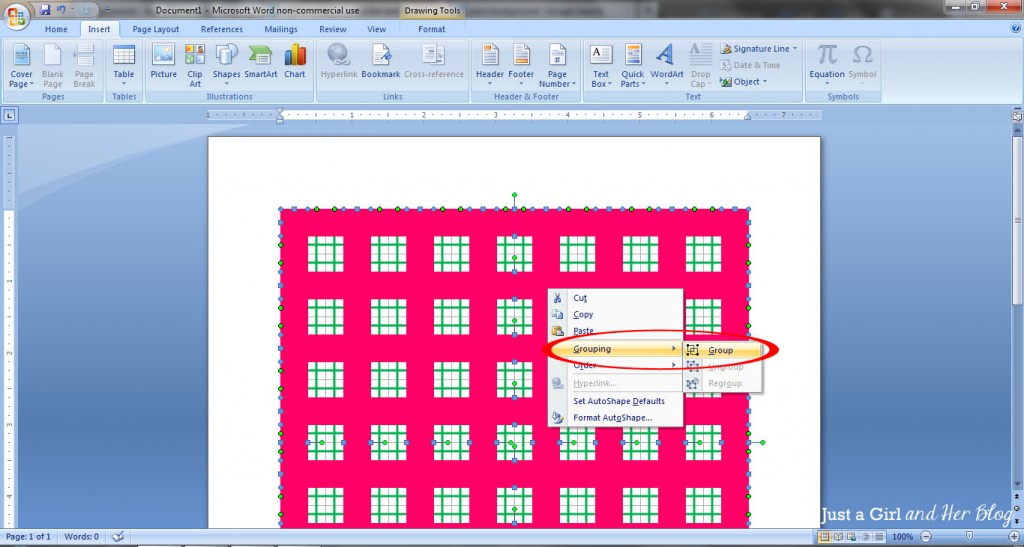
5. Group Your Shapes.
Next, like we did in the labels and bunting banner tutorials, I am going to “group” my pattern. To do this. I select each shape by holding down the “Ctrl” key and clicking each shape individually. I then right click and select “Grouping” and then “Group.”
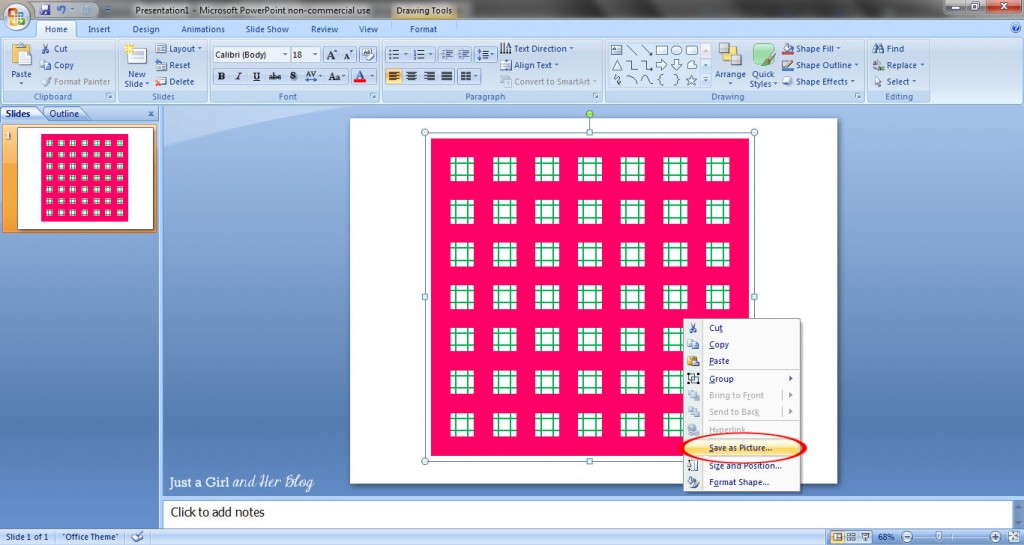
6. Save As Picture in PowerPoint.
Here comes my little secret when it comes to making graphics. In order to use this as a graphic, we need to save it as a .jpg or other picture file. While Microsoft Word doesn’t let you do this, PowerPoint does. So the next thing you’ll do is right click your shape and select “Copy.” Then paste it into a PowerPoint presentation and right click it. Select “Save as Picture…” I usually save it as a .jpg file as opposed to .png or .tif, but you can test them out and see what works best for you.
Use Your Background to Create a Graphic
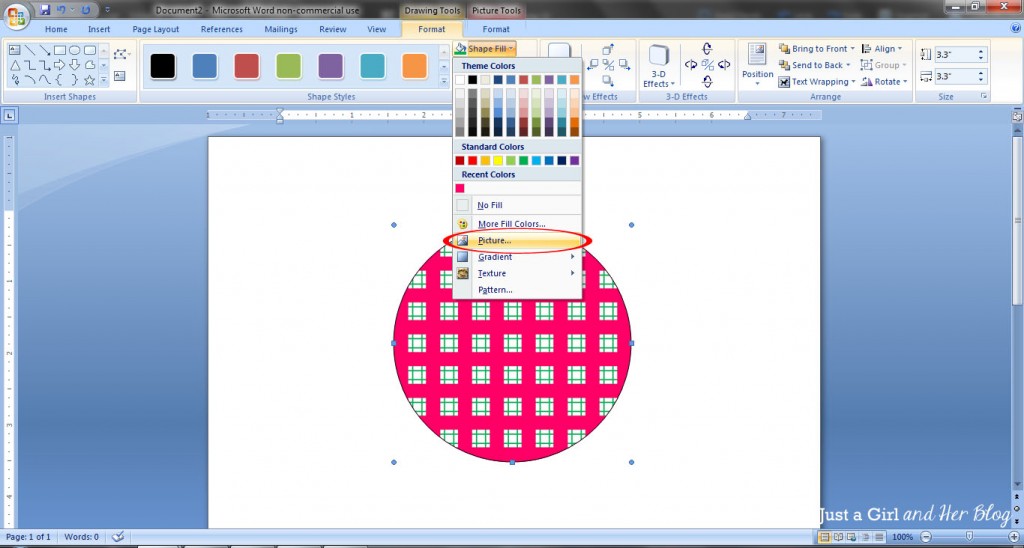
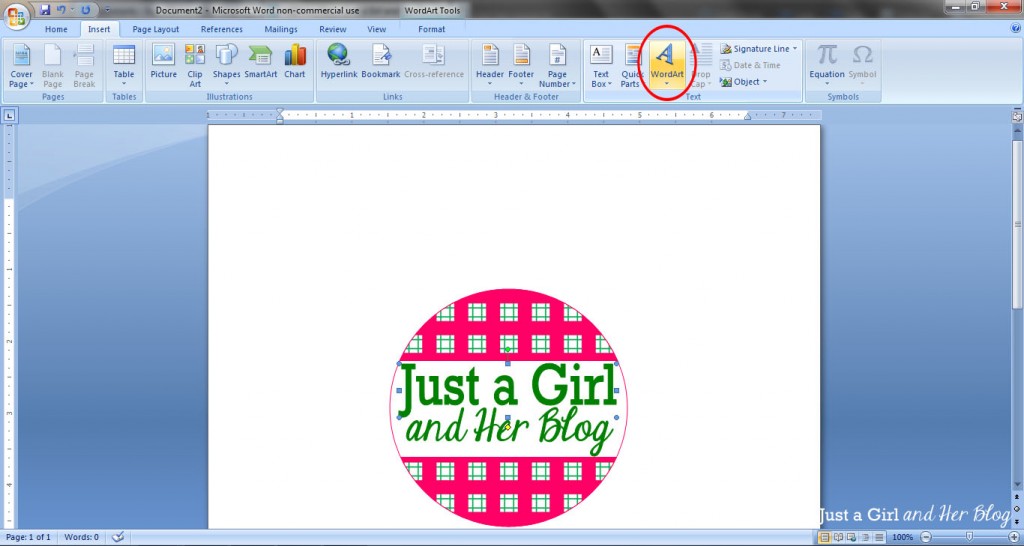
You can now use your graphic as a background in Word or another program or to fill a shape, like we did in the bunting banner tutorial. I used my background to create a graphic for my blog in Word.
I drew a shape, then under the “Drawing Tools” tab, I clicked the “Shape Fill” drop down and selected “Picture.” I picked the pattern .jpg that I just created.
Next, I drew a white rectangle as a background for my blog name.
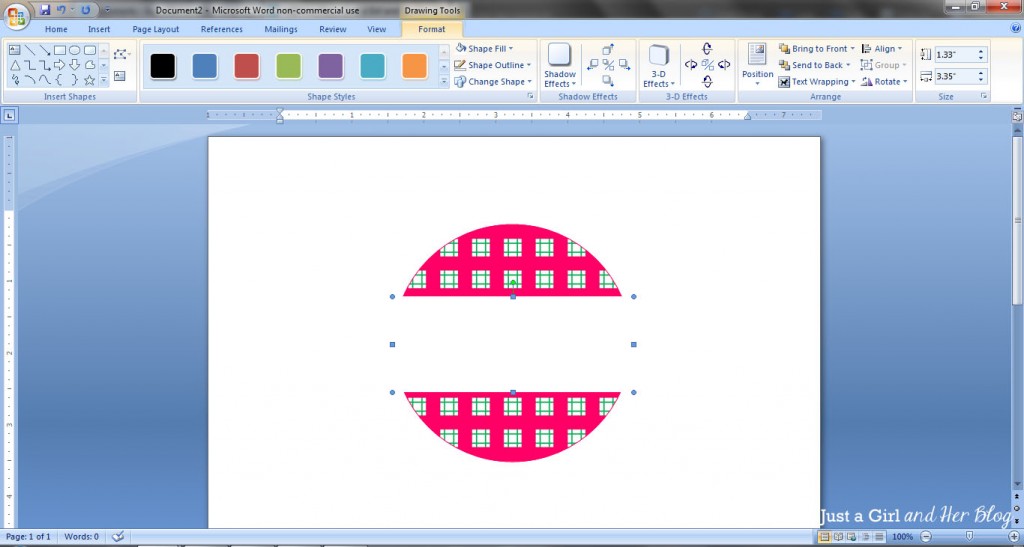
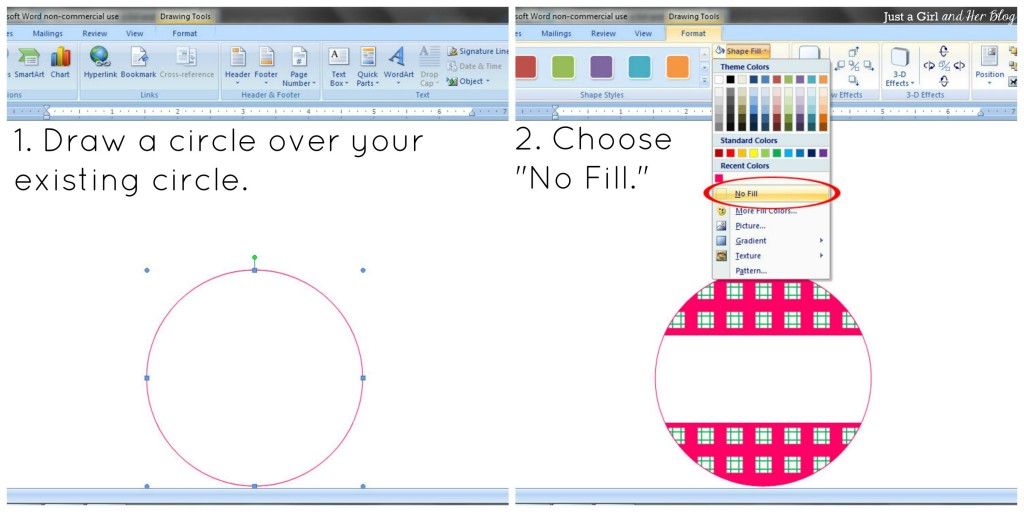
I wanted to make sure the circle was defined, so I drew another circle of the same size and put it directly over my existing circle. I chose “No Fill” as the fill color so that I could have a well defined outline while still seeing my patterned circle.
I then went under the “Insert” tab and used the “Word Art” feature to add my blog name. {For more details on how to format your Word Art, see my Bunting Banner Tutorial.}
Finally, you will want to follow steps five and six above to group the graphic and save it as a picture using PowerPoint. Then you can use it like you would use any other .jpg picture file!
If you’re just starting to experiment with graphic design and aren’t ready to invest in designing software, Microsoft Word has a surprising amount of options available and is SO easy to use! The possibilities are endless!
Do you have any design tips in Microsoft Word?

Linked Up Here:
Sharing with Domestic Superhero Thursday, House of Rose- Inspire Me Please
Follow my blog with Bloglovin
Иллюстрированный самоучитель по Microsoft Word
Редактирование диаграмм в Microsoft Graph
Microsoft Graph – прикладная программа, которая может быть использована для создания, импорта, редактирования диаграмм и графиков. Диаграммы и графики – это внедренные объекты, их можно не только вставлять в любую прикладную программу, которая поддерживает механизм OLE, но также и редактировать.
Основные шаги по созданию диаграммы очень просты.
В документе Word поместите курсор ввода в том месте, где Вы хотите разместить новую диаграмму.
Выберите пункт меню Вставка › Объект и убедитесь, что активна вкладка Создание, затем выберите в списке Тип объекта диаграмму Microsoft Graph.

Другой способ создания диаграммы состоит в выборе пункта меню Вставка › Рисунок › Диаграмма.
Диаграммы широко применяются в научно-технической документации. Рассмотрим два метода вставки диаграмм в документ. Первый метод состоит в том, что сначала вставляется произвольная диаграмма, с которой связана произвольная базовая таблица данных. Затем базовая таблица редактируется путем заполнения нужными данными и производится соответствующая настройка параметров диаграммы. Второй метод основан на том, что диаграмма создается на базе конкретной таблицы, имеющейся в документе. В этом случае необходимо выполнить только настройку внешнего вида.
Создать диаграмму можно командой Вставка -> Объект…. В открывшемся диалоговом окне Вставка объекта выбрать пункт Диаграмма Microsoft Graph 97, после чего в документ вставляется диаграмма.
Динамический обмен данными
DDE предоставляет Windows-приложениям возможность обмена данными друг с другом. Этот интерфейс позволяет использовать многие возможности одного приложения из другого приложения Windows, например, из текстового процессора Microsoft Word можно получить доступ к средствам Microsoft Excel. Приложение (текстовый процессор Microsoft Word), из которого вызывается Microsoft Excel, называется OLE-клиентом. Microsoft Excel в этой ситуации становится OLE-сервером.
Использование DDE может понадобиться, например, для проведения вычислений, которые трудно осуществить в приложении-клиенте. Например, вычислить данные по формулам легче в электронной таблице Microsoft Excel, а оформить отчеты с этими таблицами в текстовом процессоре Microsoft Word.
Некоторые примеры внедрения и связывания объектов и обмена данными между программами в операционной системе Windows
Пример создания внедренного или связанного объекта из существующего файла
В качестве внедренного или связанного объекта выберем файл, содержащий таблицу Microsoft Excel, а в качестве конечного файла — документ Microsoft Word.
Для создания внедренного или связанного объекта из существующего файла необходимо:
— создать документ Microsoft Word;
— выбрать команду Объект… в меню Вставка, а затем вкладку Создание из файла;
— нажать кнопку Обзор… для выбора файла, содержащего таблицу Microsoft Excel из списка;
— установить флажок Связь с файломдля создания связанного объекта, если флажок Связь с файлом не установить, будет создан внедренный объект.
Пример создания нового внедренного объекта
Для создания нового внедренного объекта необходимо:
— выбрать в документе место, куда следует поместить внедренный объект;
— выбрать команду Объект… в меню Вставка, а затем вкладку Создание;
— выбрать тип создаваемого объекта в списке Тип объекта(например, Microsoft Equation 3.0, диаграмма Microsoft Graph 97 и др.).
Пример создания связанного или внедренного объекта на основе данных из открытого документа для обмена данными между программами
Для создания связанного или внедренного объекта на основе данных из открытого документа необходимо:
— выделить данные для связанного или внедренного объекта (например, данные в таблице Excel);
— нажать кнопку Копировать;
— перейти к файлу, в который будут помещены данные (например, к файлу с документом Microsoft Word);
— выбрать команду Специальная вставка в меню Правка;
— для создания связанного объекта выбрать Связать, а для создания внедренного объекта выбрать Вставить;
— в списке Как: выбрать значение, содержащее слово объект.
Пример создания приглашения с картинкой
Уважаемый господин Иванов Иван Иванович!
Приглашаем Вас на собрание общества «Союз студентов России».
Будем рады видеть Вас и Ваших друзей.
На вечере Вы можете посмотреть студенческое шоу и посетить студенческий бар.
Президент общества «Союз студентов России» Голубев И.К. 30 ноября 2001 года
Задания и порядок выполнения
Варианты для заданий № 1, 2, 3, 4 определяются преподавателем.
Задание № 1
1. Создать таблицу Microsoft Excel в соответствии с вариантом и сохранить на диске.
2. Внедрить исходный документ с таблицей Microsoft Excel в конечный документ Microsoft Word. Отредактировать исходный документ с таблицей и посмотреть внеслись ли сделанные изменения в конечном документе.
3. Связать исходный документ с таблицей Microsoft Excel и конечный документ Microsoft Word (в качестве связанного объекта выбрать документ с таблицей). Отредактировать исходный документ с таблицей Microsoft Excel и убедиться в изменении объекта конечного документа.
Задание № 2
1. Изучить возможности математического редактора формул.
2. Создать математическую формулу с использованием Microsoft Equation 3.0 в документе Microsoft Word в соответствии с вариантом.
Задание № 3
1. Изучить возможности Microsoft Graph 97, используемого для создания диаграмм в текстовом процессоре Microsoft Word.
2. Cоздать диаграмму с помощью Microsoft Graph 97 в документе Microsoft Word, используя данные, полученные в электронной таблице Microsoft Excel (см. пункт 1 в задании № 1).
Задание № 4
1. Создать связанный и внедренный объект в текстовом процессоре Microsoft Word на основе данных из существующего документа Microsoft Excel (предварительно необходимо его создать в соответствии с заданием).
2. Отредактировать данные в исходном документе.
3. Убедиться в изменении объекта конечного документа.
Задание № 5
Взаимно расположите текст и объект на странице с обтеканием этого текста (на примере картинок). Творческое задание: самостоятельно создать рекламное объявление или приглашение, содержащее одну или несколько картинок.
Контрольные вопросы
1. Перечислите основные способы обмена данными между программами в операционной системе Windows.
2. Как осуществить внедрение и связывание объектов из существующего файла?
3. Каким образом можно внедрить новый объект?
4. Сравните методы внедрения и связывания объектов.
5. Какие приложения называют OLE-серверами и OLE-клиентами?
6. Как осуществить ввод формул и установить настройки для редактирования формул?
7. Какие два метода вставки диаграмм в документ известны?
8. Что означает динамический обмен данными?
Рекомендуемая литература
1. Информатика. Базовый курс / Симонович С.В. и др. — СПб: Питер, 2001.
2. Фигурнов В.Э. IBM PC для пользователя. Краткий курс.- М.: ИНФРА-М, 1999.
Как создать диаграмму в Microsoft Word

Диаграммы помогают представлять числовые данные в графическом формате, существенно упрощая понимание больших объемов информации. С их помощью также можно показать отношения между различными рядами данных. Компонент офисного пакета от Microsoft — текстовый редактор Word — тоже позволяет создавать диаграммы, и далее мы расскажем о том, как это сделать с его помощью.
Важно: Наличие на компьютере установленного программного продукта Microsoft Excel предоставляет расширенные возможности для построения диаграмм в Word 2003, 2007, 2010 — 2016 и более свежих версиях. Если же табличный процессор не установлен, для создания диаграмм используется Microsoft Graph. Диаграмма в таком случае будет представлена со связанными данными – в виде таблицы, в которую можно не только вводить свои данные, но и импортировать их из текстового документа и даже вставлять из других программ.
Создание базовой диаграммы в Ворде
Добавить диаграмму в текстовый редактор от Майкрософт можно двумя способами – внедрить ее в документ или вставить соответствующий объект из Эксель (в таком случае она будет связана с данными на исходном листе табличного процессора). Основное различие между этими диаграммами заключается в том, где хранятся содержащиеся в них данные и как они обновляются непосредственно после вставки. Подробнее все нюансы будут рассмотрены ниже.
Примечание: Некоторые диаграммы требуют определенного расположения данных на листе Microsoft Excel.
Вариант 1: Внедрение диаграммы в документ
Диаграмма Эксель, внедренная в Ворд, не будет изменяться даже при редактировании исходного файла. Объекты, которые таким образом были добавлены в документ, становятся частью текстового файла и теряют связь с таблицей.
Примечание: Так как содержащиеся в диаграмме данные будут храниться в документе Word, использование внедрения оптимально в случаях, когда не требуется изменять эти самые данные с учетом исходного файла. Этот метод актуален и тогда, когда вы не хотите, чтобы пользователи, которые будут работать с документом в дальнейшем, должны были бы обновлять всю связанную с ним информацию.
- Для начала кликните левой кнопкой мышки в том месте документа, куда вы хотите добавить диаграмму.

Далее перейдите во вкладку «Вставка», где в группе инструментов «Иллюстрации» кликните по пункту «Диаграмма».

В появившемся диалоговом окне выберите диаграмму желаемого типа и вида, ориентируясь на разделы в боковой панели и представленные в каждом из них макеты. Определившись с выбором, нажмите «ОК».


Замените указанные по умолчанию данные, представленные в этом окне Эксель, на значения, которые вам необходимы. Помимо этих сведений, можно заменить примеры подписи осей (Столбец 1) и имя легенды (Строка 1).

После того как вы введете необходимые данные в окно Excel, нажмите на символ «Изменение данных в Microsoft Excel» и сохраните документ, воспользовавшись пунктами меню «Файл» — «Сохранить как».

Выберите место для сохранения документа и введите желаемое имя. Нажмите по кнопке «Сохранить», после чего документ можно закрыть.

Это лишь один из возможных методов, с помощью которых можно сделать диаграмму по таблице в Ворде.
Вариант 2: Связанная диаграмма из Excel
Данный метод позволяет создать диаграмму непосредственно в Excel, во внешнем листе программы, а затем просто вставить в Word ее связанную версию. Данные, содержащиеся в объекте такого типа, будут обновляться при внесении изменений/дополнений во внешний лист, в котором они и хранятся. Сам же текстовый редактор будет хранить только расположение исходного файла, отображая представленные в нем связанные данные.
Такой подход к созданию диаграмм особенно полезен, когда необходимо включить в документ сведения, за которые вы не несете ответственность. Например, это могут быть данные, собранные другим пользователем, и по мере необходимости он сможет их изменять, обновлять и/или дополнять.
- Воспользовавшись представленной по ссылке ниже инструкцией, создайте диаграмму в Эксель и внесите необходимые сведения.
Подробнее: Как в Excel сделать диаграмму
Выделите и вырежьте полученный объект. Сделать это можно нажатием клавиш «Ctrl+X» либо же с помощью мышки и меню на панели инструментов: выберите диаграмму и нажмите «Вырезать» (группа «Буфер обмена», вкладка «Главная»).

В документе Word нажмите на том месте, куда вы хотите добавить вырезанный на предыдущем шаге объект.

Вставьте диаграмму, используя клавиши «Ctrl+V», или выберите соответствующую команду на панели управления (кнопка «Вставить» в блоке опций «Буфер обмена»).

Сохраните документ вместе со вставленной в него диаграммой.
Примечание: Изменения, внесенные вами в исходный документ Excel (внешний лист), будут сразу же отображаться в документе Word, в который вы вставили диаграмму. Для обновления данных при повторном открытии файла после его закрытия потребуется подтвердить обновление данных (кнопка «Да»).
В конкретном примере мы рассмотрели круговую диаграмму в Ворде, но таким образом можно создать и любую другую, будь то график со столбцами, как в предыдущем примере, гистограмма, пузырьковая и т.д.
Изменение макета и стиля диаграммы
Диаграмму, которую вы создали в Word, всегда можно отредактировать и дополнить. Вовсе необязательно вручную добавлять новые элементы, изменять их, форматировать — всегда есть возможность применения уже готового стиля или макета, коих в арсенале текстового редактора от Майкрософт содержится очень много. Каждый такой элемент всегда можно изменить вручную и настроить в соответствии с необходимыми или желаемыми требованиями, точно так же можно работать и с каждой отдельной частью диаграммы.
Применение готового макета
- Кликните по диаграмме, которую вы хотите изменить, и перейдите во вкладку «Конструктор», расположенную в основной вкладке «Работа с диаграммами».

Выберите макет, который вы хотите использовать (группа «Стили диаграмм»), после чего он будет успешно изменен.

Примечание: Для того чтобы увидеть все доступные стили, нажмите по кнопке, расположенной в правом нижнем углу блока с макетами — она имеет вид черты, под которой расположен указывающий вниз треугольник.
Применение готового стиля
- Кликните по диаграмме, к которой вы хотите применить готовый стиль, и перейдите во вкладку «Конструктор».
- В группе «Стили диаграмм» выберите тот, который хотите использовать для своей диаграммы
- Изменения сразу же отразятся на созданном вами объекте.

Используя вышеуказанные рекомендации, вы можете изменять свои диаграммы буквально «на ходу», выбирая подходящий макет и стиль в зависимости от того, что требуется в данный момент. Таким образом можно создать для работы несколько различных шаблонов, а затем изменять их вместо того, чтобы создавать новые (о том, как сохранять диаграммы в качестве шаблона мы расскажем ниже). Простой пример: у вас есть график со столбцами или круговая диаграмма — выбрав подходящий макет, вы сможете из нее сделать диаграмму с процентами, показанную на изображении ниже.

Ручное изменение макета
- Кликните мышкой по диаграмме или отдельному элементу, макет которого вы хотите изменить. Сделать это можно и по-другому:
- Кликните в любом месте диаграммы, чтобы активировать инструмент «Работа с диаграммами».
- Во вкладке «Формат», группа «Текущий фрагмент» нажмите на стрелку рядом с пунктом «Элементы диаграммы», после чего можно будет выбрать необходимый элемент.
- Во вкладке «Конструктор» в группе «Макеты диаграмм» кликните по первому пункту — «Добавить элемент диаграммы».

В развернувшемся меню выберите, что вы хотите добавить или изменить.

Примечание: Параметры макета, выбранные и/или измененные вами, будут применены только к выделенному элементу (части объекта). В случае если вы выделили всю диаграмму, к примеру, параметр «Метки данных» будет применен ко всему содержимому. Если же выделена лишь точка данных, изменения будут применены исключительно к ней.
Ручное изменение формата элементов
- Кликните по диаграмме или ее отдельному элементу, стиль которого вы хотите изменить.

Перейдите во вкладку «Формат» раздела «Работа с диаграммами» и выполните необходимое действие:

Для форматирования выделенного элемента диаграммы выберите «Формат выделенного фрагмента» в группе «Текущий фрагмент». После этого можно будет установить необходимые параметры форматирования.

Для форматирования фигуры, которая является элементом диаграммы, выберите необходимый стиль в группе «Стили фигуры». Помимо этого вы также может залить фигуру, изменить цвет ее контура, добавить эффекты.


Сохранение в качестве шаблона
Нередко бывает так, что созданная вами диаграмма может понадобиться в дальнейшем, точно такая же или ее аналог, это уже не столь важно. В данном случае лучше всего сохранять полученный объект в качестве шаблона, упростив и ускорив таким образом свою работу в будущем. Для этого:
- Кликните по диаграмме правой кнопкой мышки и выберите в контекстном меню пункт «Сохранить как шаблон».

В появившемся окне системного «Проводника» укажите место для сохранения и задайте желаемое имя файлу.

Заключение
На этом все, теперь вы знаете, как в Microsoft Word сделать любую диаграмму — внедренную или связанную, имеющую различный внешний вид, который всегда можно изменить и подстроить под свои нужды или необходимые требования.
Мы рады, что смогли помочь Вам в решении проблемы.
Помимо этой статьи, на сайте еще 11904 инструкций.
Добавьте сайт Lumpics.ru в закладки (CTRL+D) и мы точно еще пригодимся вам.
Отблагодарите автора, поделитесь статьей в социальных сетях.
Опишите, что у вас не получилось. Наши специалисты постараются ответить максимально быстро.
 Please Note:
This article is written for users of the following Microsoft Word versions: 97, 2000, 2002, and 2003. If you are using a later version (Word 2007 or later), this tip may not work for you. For a version of this tip written specifically for later versions of Word, click here: Getting Pictures Out of Word.
![]()
Written by Allen Wyatt (last updated February 2, 2019)
This tip applies to Word 97, 2000, 2002, and 2003
When working with other people’s documents, you may wonder if there is a way to move graphic images out of the document and into their own files. There are actually several different ways you can accomplish this.
First, if you have a graphics program on your computer, you can simply copy the files from Word to the graphics program. Follow these steps:
- Load the document that contains the graphics images.
- Start your graphics program.
- In Word, click once on the graphic you want saved in a file. Small squares (handles) should appear around the graphic, and the Picture toolbar may also appear.
- Press Ctrl+C. This copies the graphic to the Clipboard.
- In the graphics program, press Ctrl+V. This pastes the graphic into the graphics program.
- Use the controls in the graphics program to save the graphic as you desire.
If you don’t remember installing a graphics program on your computer, you should check to see if Microsoft Photo Editor is on your system. It has been available with several versions of Office, although it is not installed by default. If you would like to install it, you can run the Office setup program to do so, and then use the steps above.
Another approach to getting graphics out of your document is to save the document in HTML format. When you do, Word extracts the graphic images and stores them in their own JPG files. Use these steps:
- Create a folder that will contain the HTML document.
- In Word, open the document containing the images.
- Choose Save As Web Page from the File menu. Word displays the Save As dialog box. (See Figure 1.)
- Use the controls in the dialog box to select the folder you created in step 1.
- In the File Name field, specify a name for the file.
- Click on Save.
- Close the document.
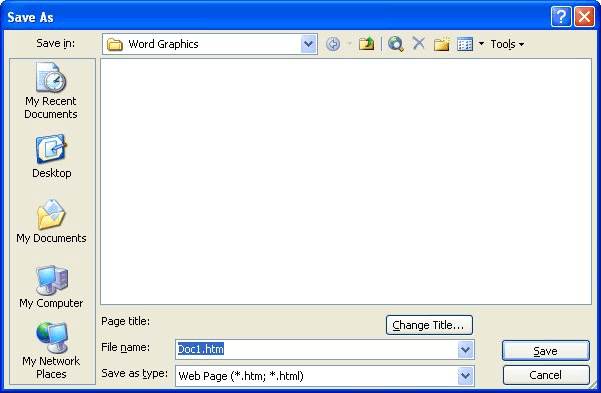
Figure 1. The Save As dialog box, ready to save a Web page.
At this point, the folder contains the HTML document and it also contains a new folder that contains all the images that were in the document. These are regular JPG files; you can open them with any graphics program. There is a drawback to using this approach, however: If you only wanted to save one of the graphics from the document, you will find that all of them have been saved in individual files, and you will need to search through them to find the one you want.
WordTips is your source for cost-effective Microsoft Word training.
(Microsoft Word is the most popular word processing software in the world.)
This tip (1861) applies to Microsoft Word 97, 2000, 2002, and 2003. You can find a version of this tip for the ribbon interface of Word (Word 2007 and later) here: Getting Pictures Out of Word.
Author Bio
With more than 50 non-fiction books and numerous magazine articles to his credit, Allen Wyatt is an internationally recognized author. He is president of Sharon Parq Associates, a computer and publishing services company. Learn more about Allen…
MORE FROM ALLEN
Starting with a Different Template
Don’t want Word to start by using the Normal.dot template? This tip explains how to start using a different template.
Discover More
Editing a Template
Editing a template can be as easy as editing a regular Word document, provided you know where to find the templates. Here …
Discover More
Recording a Data Entry Time
When entering information in a worksheet, it is common to also note a date or time corresponding to the entry. There are …
Discover More
3 Ways to Extract Images from a Word File
by Avantix Learning Team | Updated April 7, 2021
Applies to: Microsoft® Word® 2010, 2013, 2016, 2019 or 365 (Windows)
In Microsoft Word, images can be extracted one by one or you can extract all images by converting a Word document to a zip file or saving it as a web page. Extracting all images is helpful if you’d like to find pictures that are inflated in size or reuse pictures in other files. In this article, we’ll use 3 methods to extract images (we’re referring to images or pictures that have been inserted into your Word document, not shapes or SmartArt you’ve created).
Recommended article: How to Reduce the Size of a Microsoft Word Document (10 Ways to Compress a Word File)
Do you want to learn more about Word? Check out our virtual classroom or live classroom Word courses >
Extracting one image at a time using Save as Picture
You can extract individual images and save them as new files using Save As Picture.
There are two benefits to this method:
- You can give each image a meaningful name and save it in a specific location.
- You can save the image as a different file type.
To save an image as a new file:
- Right-click the image and then click Save as Picture from the drop-down menu.
- In the Save as type drop-down menu, select the image file format you want to use. You can save a picture in many formats but common choices are JPG or JPEG (Joint Photographics Experts Group) or PNG (Portable Network Graphics).
- In the File name box, type a name for the file.
- Navigate to the desired location.
- Click Save.
Displaying file extensions in Windows
In order to use the zip procedure (below), you may need to display file extensions in Windows if they are not showing automatically.
If you’re using Windows 8 or 10:
- In File Explorer, click the View tab in the Ribbon.
- In the Show/Hide group, click the File name extensions check box.
If you’re using Windows 7:
- In Windows Explorer, click Folder and Search Options and then click Organize.
- On the View tab, under Files and Folders, clear the check box for Hide extensions for known file types.
- Click OK.
Extracting all images by changing the file to a zip format
If you want to extract all images, the following trick works with any Microsoft Word file using XML (Extensible Markup Language) format. XML files are stored as a package and can therefore be unzipped. They also end with an «x» such as .docx.
In order to use the zip method, you will need a document created in Word 2007 or a later version and File Explorer or Windows Explorer must be set so that it shows file names with extensions (see the following section if extensions are not displayed).
To extract all image files from a Microsoft Word file:
- In File Explorer or Windows Explorer, select the document (it should have a .dotx extension) with the images you wish to extract.
- Right-click and choose Copy or press Ctrl + C.
- Right-click and choose Paste or press Ctrl + V.
- Right-click the copy of the document and choose Rename.
- Change the file extension from .dotx to .zip (Windows must be set to display file extensions).
- Press Enter. A dialog box appears warning you that the file may become unusable if you change the extension.
- Click Yes to continue. The file icon changes to a folder icon.
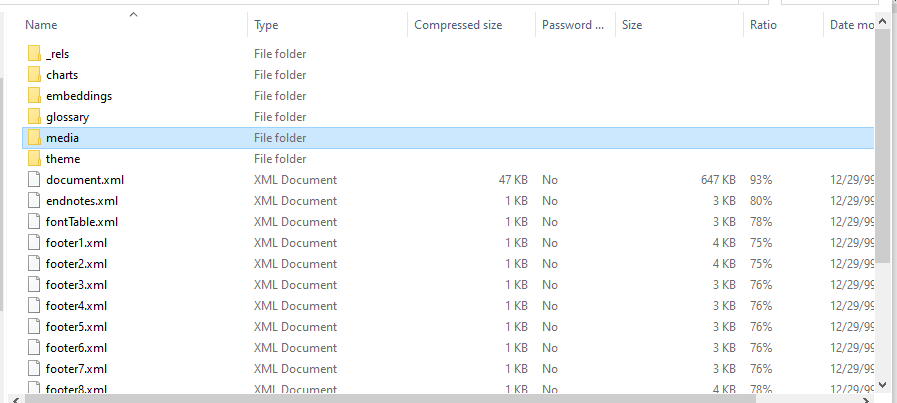
- Double-click the zipped folder. The zipped folder contains multiple folders (some contain information such as XML code or properties).
- Double-click the Word folder.
- Double-click the media folder to view image, video and audio files. Each file is given a generic name.
- Copy these files (or the entire folder) to another location to use in other documents and to rename the files. Copying to another location will unzip the files. You can also click the Extract button in Windows Explorer to extract the files to another location.
Below is a sample Word folder (with a media folder) created during this process:
Extracting all images by saving the Word file as a web page
Unlike PowerPoint, Microsoft Word files can be saved as web pages (HTML format). If you save a Word file as a web page, then separate files are created for pictures and media files.
To extract all image files from a Microsoft Word file by saving the file as a web page:
- Click the File tab in the Ribbon and select Save As.
- From the Save As Type drop-down menu, select Web Page.
- Enter a new name for the file. A .htm extension will be added.
- Click OK.
- A dialog box may appear indicating that you may lose some formatting. Click Continue. Word will change the view to Web Layout View.
- Close the file.
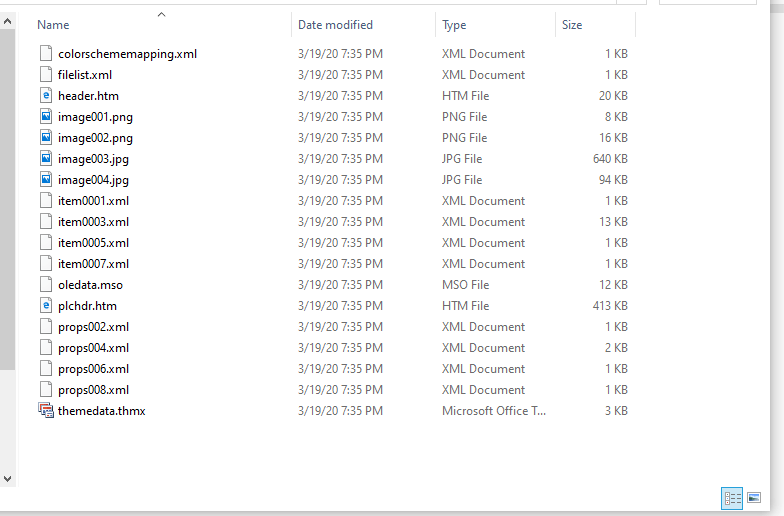
- In File Explorer or Windows Explorer, navigate to the location in which you had saved the file. A folder should have been created with the same name and «files» at the end.
- Double-click the folder. Image, video and audio files should appear in this folder. Each file is given a generic name.
- Right-click any of the files to rename them.
Below are the contents of a folder that was created when a Word file was saved as a web page:
When you open Word again, click the View tab and select Print Layout (the default view).
It’s up to you which method you’d prefer but the last two are the easiest if you are extracting multiple images.
Subscribe to get more articles like this one
Did you find this article helpful? If you would like to receive new articles, join our email list.
More resources
How to Double Space in Word (4 Ways)
14 Shortcuts to Quickly Select Text in Microsoft Word
How to Check Word Count in Microsoft Word (4 Ways)
How to Show or Hide White Space in Word Documents
How to Create a Hanging Indent or First Line Indent in Microsoft Word
Related courses
Microsoft Word: Intermediate / Advanced
Microsoft Excel: Intermediate / Advanced
Microsoft PowerPoint: Intermediate / Advanced
Microsoft Word: Long Documents Master Class
Microsoft Word: Styles, Templates and Tables of Contents
Microsoft Word: Designing Dynamic Word Documents Using Fields
VIEW MORE COURSES >
Our instructor-led courses are delivered in virtual classroom format or at our downtown Toronto location at 18 King Street East, Suite 1400, Toronto, Ontario, Canada (some in-person classroom courses may also be delivered at an alternate downtown Toronto location). Contact us at info@avantixlearning.ca if you’d like to arrange custom instructor-led virtual classroom or onsite training on a date that’s convenient for you.
Copyright 2023 Avantix® Learning
Microsoft, the Microsoft logo, Microsoft Office and related Microsoft applications and logos are registered trademarks of Microsoft Corporation in Canada, US and other countries. All other trademarks are the property of the registered owners.
Avantix Learning |18 King Street East, Suite 1400, Toronto, Ontario, Canada M5C 1C4 | Contact us at info@avantixlearning.ca