
Word for Microsoft 365 Word 2021 Word 2019 Word 2016 Word 2013 Word 2010 Word 2007 More…Less
These are the basic types of graphics that you can use to enhance your Word documents: drawing objects, SmartArt, charts, pictures, and clip art. Drawings refer to a drawing object or a group of drawing objects.
Drawing objects include shapes, diagrams, flowcharts, curves, lines, and WordArt. These objects are part of your Word document. You can change and enhance these objects with colors, patterns, borders, and other effects.
Note: It is no longer necessary to insert a drawing canvas to work with drawing objects in Word. However, you may still use a drawing canvas as an organizational aid when working with several drawing objects, or if you want to add connectors between shapes. To insert a drawing canvas, on the Insert tab, click Shapes, and then click New Drawing Canvas.
What do you want to do?
-
Add a drawing to a document
-
Delete all or part of a drawing
Add a drawing to a document
-
Click in your document where you want to create the drawing.
-
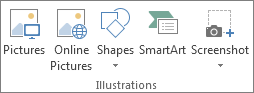
On the Insert tab, in the Illustrations group, click Shapes.

-
You can do any of the following on the Format tab, which appears after you insert a drawing shape:
-
Insert a shape. On the Format tab, in the Insert Shapes group, click a shape, and then click somewhere in the document.
-
Change a shape. Click the shape you want to change. On the Format tab, in the Insert Shapes group, click Edit Shape, point to Change Shape, and then choose a different shape.
-
Add text to a shape. Click the shape you where you want text, and then type.
-
Group selected shapes. Select several shapes at a time by pressing CTRL on your keyboard and clicking each shape you want to include in the group. On the Format tab in the Arrange group, click Group so that all of the shapes will be treated like a single object.
-
Draw in the document. On the Format tab, in the Insert Shapes group, expand the shapes options by clicking the arrow. Under Lines click Freeform or Scribble.
Tip: To stop drawing with the Freeform or Scribble lines, double-click.
-
Adjust the size of the shapes. Select the shape or shapes you want to resize. On the Format tab, in the Size group, click the arrows or type new dimensions in the Height and Width boxes.
-
Apply a style to a shape. In the Shape Styles group, rest your pointer over a style to see what your shape will look like when you apply that style. Click the style to apply it. Or, click Shape Fill or Shape Outline and select the options that you want.
Note: If you want to apply a color and gradient that aren’t available in the Shape Styles group, select the color first, and then apply the gradient.
-
Add flow charts with connectors. Before you create a flow chart, add a drawing canvas by clicking the Insert tab, clicking Shapes in the Illustrations group, and then clicking New Drawing Canvas. On the Format tab, in the Insert Shapes group, click a Flow chart shape. Under Lines, choose a connector line such as the Curved Arrow Connector.
-
Use shadow and three-dimensional (3-D) effects to add interest to the shapes in your drawing. On the Format tab, in the Shape Styles group, click Shape Effects, and choose an effect.
-
Align the objects on the canvas. To align the objects, press and hold CTRL while you select the objects that you want to align. On the Format tab, in the Arrange group, click Align to choose from an assortment of alignment commands.
-

Delete all or part of a drawing
-
Select the drawing object that you want to delete.
-
Press DELETE.
See also
Add shapes
Draw a curve or circle shape
Insert pictures
Crop a picture
Add clip art to your file
What do you want to do?
-
Add a drawing to a document
-
Delete all or part of a drawing
Add a drawing to a document
-
Click in your document where you want to create the drawing.
-
On the Insert tab, in the Illustrations group, click Shapes.
-
When you find the shape you want to insert, double-click to insert it automatically, or click and drag to draw it in your document.
You can do any of the following on the Format tab, which appears after you insert a drawing shape:
-
Insert a shape. On the Format tab, in the Insert Shapes group, click a shape, and then click somewhere in the document.
-
Change a shape. Click the shape you want to change. On the Format tab, in the Shape Styles group, click Change Shape, and then choose a different shape.
-
Add text to a shape. Right-click the shape, click Add Text, and then type.
-
Group selected shapes. Select several shapes at a time by pressing CTRL on your keyboard and clicking each shape you want to include in the group. On the Format tab in the Arrange group, click Group so that all of the shapes will be treated like a single object.
-
Draw in the document. On the Format tab, in the Insert Shapes group, expand the shapes options by clicking the arrow. Under Lines click Freeform or Scribble.
-
Adjust the size of the shapes. Select the shape or shapes you want to resize. On the Format tab, in the Size group, click the arrows or type new dimensions in the Shape Height and Shape Width boxes.
-
Apply a style to a shape. In the Shape Styles group, rest your pointer over a style to see what your shape will look like when you apply that style. Click the style to apply it. Or, click Shape Fill or Shape Outline and select the options that you want.
Note: If you want to apply a color and gradient that aren’t available in the Shape Styles group, select the color first, and then apply the gradient.
-
Add flow charts with connectors. Before you create a flow chart, add a drawing canvas by clicking the Insert tab, clicking Shapes in the Illustrations group, and then clicking New Drawing Canvas. On the Format tab, in the Insert Shapes group, click a Flow chart shape. Under Lines, choose a connector line such as the Curved Arrow Connector.
-
Use shadow and three-dimensional (3-D) effects to add interest to the shapes in your drawing. On the Format tab, choose an option in either the Shadow Effects or the 3-D Effects group.
-
Align the objects on the canvas. To align the objects, press and hold CTRL while you select the objects that you want to align. On the Format tab, in the Arrange group, click Align to choose from an assortment of alignment commands.
-

Delete all or part of a drawing
-
Select the drawing object that you want to delete.
-
Press DELETE.
See also
Draw a curve or circle shape
Insert pictures
Crop a picture
Add clip art to your file
Need more help?
We’ll talk about how to use graphics in Word 2019 in this chapter. You can make your Microsoft Word documents look nicer by adding different kinds of graphics. This section will show you two ways to add pictures.
Table of contents
- What are graphics in Word?
- What is graphics used for?
- How to add Picture in Document
- How to Add WordArt in Document
- Summary
What are graphics in Word?
Graphics refers to hardware or software that allows a computer to show and change pictures. The word can also mean the pictures themselves. For example, laser printers and plotters are graphics devices because they let the computer print pictures.
You can add more information and make your spreadsheets, documents, and presentations more interesting by using graphics. In Office 2010, the commands and tools used to add and change images, shapes, SmartArt graphics, and clip art are used in all of the programs in the suite.
What is graphics used for?
Graphics are used for everything from making Web pages look better to be the presentation and user interaction layer for full-fledged Web applications. Graphics can be used in many different ways, so there are many different technologies to choose from.
Images and Multimedia
You don’t have to think of Word as just a program for making and editing text. It has the tools you need to make some pretty cool page layouts. Even though it doesn’t have as many features or be as strong as a professional page layout program like Adobe InDesign. You can still make things look very professional if you know what you have and how to use it.
Online Pictures and Pictures
The same thing is done by both “Pictures” and “Online Pictures.” The only difference is that when you choose “Pictures,” you can insert images from your computer. Still, when you choose “Online Pictures,” you can add images from the internet, such as clip art from Office.com, Bing, or OneDrive.
Drawing Tools
Shapes, diagrams, flowcharts, curves, lines, and WordArt are all drawing tools. These things are part of the Word file you are working on. You can use colors, patterns, borders, and other effects to change and improve these objects.
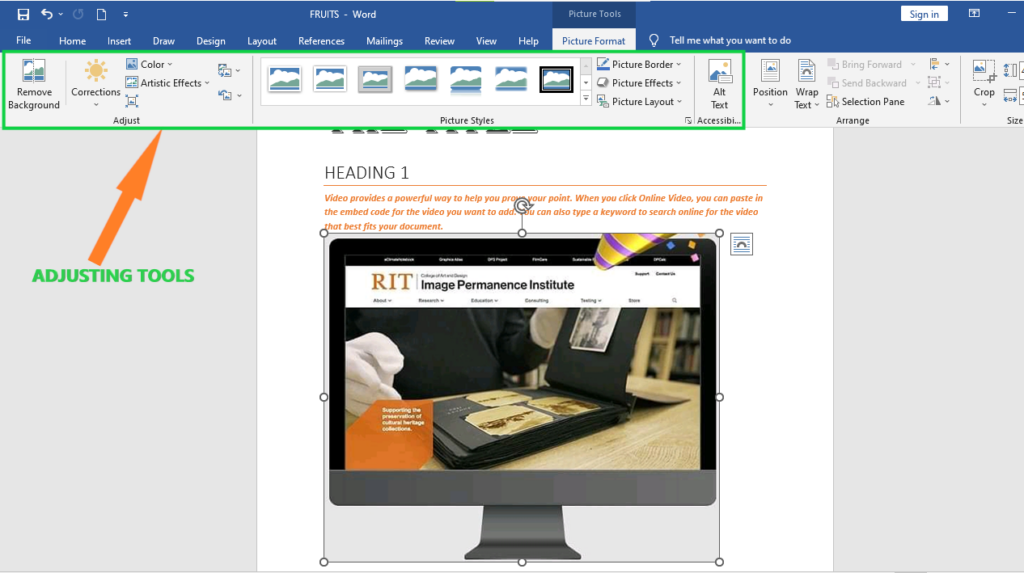
Picture Tools
If you want to change a picture or anything else in a Word document, you can always click on it, and the right tab will show up on the Ribbon.
“Picture Tools” is the name of the tab for pictures. Here, we can see that you can make changes to the picture as you go. For instance, you can change the brightness, contrast, color, and add a border.
Your choice of where to put text and how to wrap it will also have a big impact on how your documents look.
These controls are shown here. We don’t worry as much about how words wrap or where they go in our documents because Word isn’t the last step before publishing online. But if you’re making something WYSIWYG (What You See Is What You Get), like for a PDF or print publication, these things will matter.
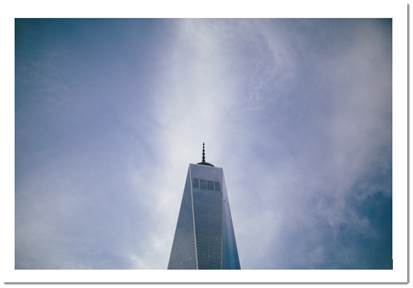
Also, you can change your pictures inline in a few ways, such as by resizing, rotating, or moving them. In the next picture, you can see these controls, many of which you may already know.
Shapes
You can use the built-in shapes in Microsoft Word 2013 to make callouts, boxes, stars, and other shapes.
When you click the shape, all you have to do is draw it on a blank spot on the page. You can change it as much as you want once it’s in your document, so it doesn’t matter if it’s perfect or just the way you want it.
At the bottom of the “Shapes” menu, there is an option to make a “new drawing canvas.” This will open a box for shapes that works like a text box. You can use these shapes to make drawings on this drawing canvas. This lets you make things like diagrams and flowcharts.
SmartArt and WordArt
SmartArt and WordArt are similar in some ways, especially if you use WordArt to make something and then change the text. You can use one or the other, but not both. However, we’ll discuss them in the same section because one often leads to the other.
Think of SmartArt as pre-made drawing canvases that you can add to your document and then change as you like. Just pick a way to put things together, like a list, a process, or a cycle.
As you can see, we used a “Continuous Block Process” to make a picture. We can change what is in the text boxes when we click them. There are also the usual grab handles for resizing the image and “Layout Options” that let you wrap text however you like.
Format Text Effects
Let’s look at this more closely because it has a pretty big number of features. We’ll talk about the basics so you know more about them. The “Format Text Effects” pane slides out from the right side of the screen.
It can be detached, just like any other pane in Word 2013. You can then move it out of the way to save screen space or keep it close, so it is easy to use.
This dialog box will make it easy to work quickly with text, so you won’t have to keep going to the ribbon to make changes. Note that the “Text Fill and Outline” and “Text Effects” buttons are separated in the dialog box. “Text Fill and Outline” is easy to understand and is used to improve the way text looks.
Chart
Charts are fun for everyone. Charts are a great way to show data sets visually, and Word 2013 comes with a huge variety of charts to choose from, such as columns, pie, bars, and many more. Take a look at the screenshot to see how many choices you have:
It’s easy to change and format charts. When you click on a chart in your document, you’ll see “Chart Tools,” which, as you might have guessed, is the Ribbon tab for charts only.
Text Box
In Word, text boxes are like little islands. When you add a “Text Box” to a document, it can’t be changed no matter what you do to the rest of the document. It’s like putting a document inside another document.
This is helpful if you want to show something “as is” in your work but still be able to change the formatting of the document as a whole. Something you’ve pasted will stay the same.
Text boxes are usually painful for editors because they don’t work well with styles. You may find them very useful, which is fine, but if you want something that fits the style and format of your document but still goes in a box or has a border around it, we suggest just adding a border.
Drop Cap
Drop caps just mean that the first letter of a chapter or book is bigger than the rest:
You can set your drop cap to “Dropped” or “In Margin.” If you choose “Dropped,” the text below will move under it. Check out the “Drop Cap” options to have more control over how your drop caps work.
How to add Picture in Document
Follow these steps to add an already-made picture to your Word file. It is assumed that before you add this picture to your Word document, you already have a picture on your computer.
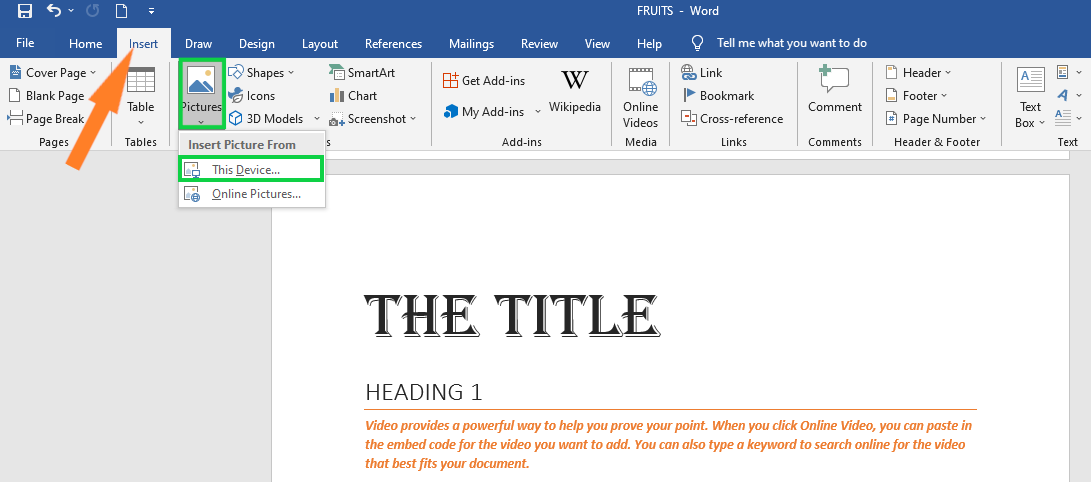
- Step 1 − Click on your document where you want to add a picture.
- Step 2 −Click the Insert tab and then click the Picture button in the Illustrations group, the Insert Picture dialog box will appear.

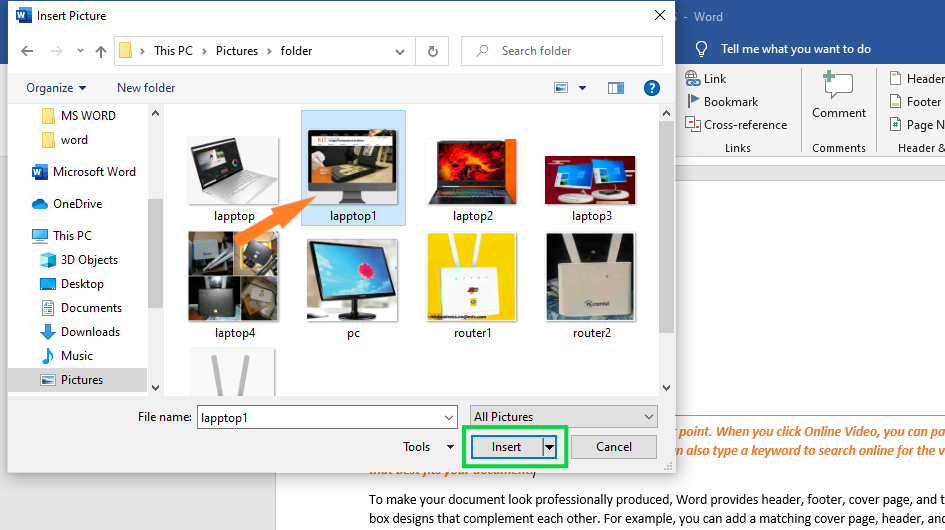
- Step 3 − The Insert Picture dialog box lets you choose the picture you want to use.
 When you click “Insert,” the picture you chose will be added to your document.
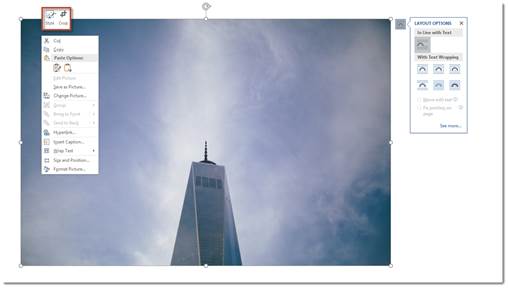
You can play around with your inserted picture in different ways. For example, you can give it quick styles, change its size, or change its color.To try it out, just click on the image you inserted, and Word will give you a lot of options for how to format it under the Format tab.

- You can try to add other graphics, such as Clipart, different shapes, charts, SmartArt, or screenshots, if you want to.
 When you click “Insert,” the picture you chose will be added to your document.
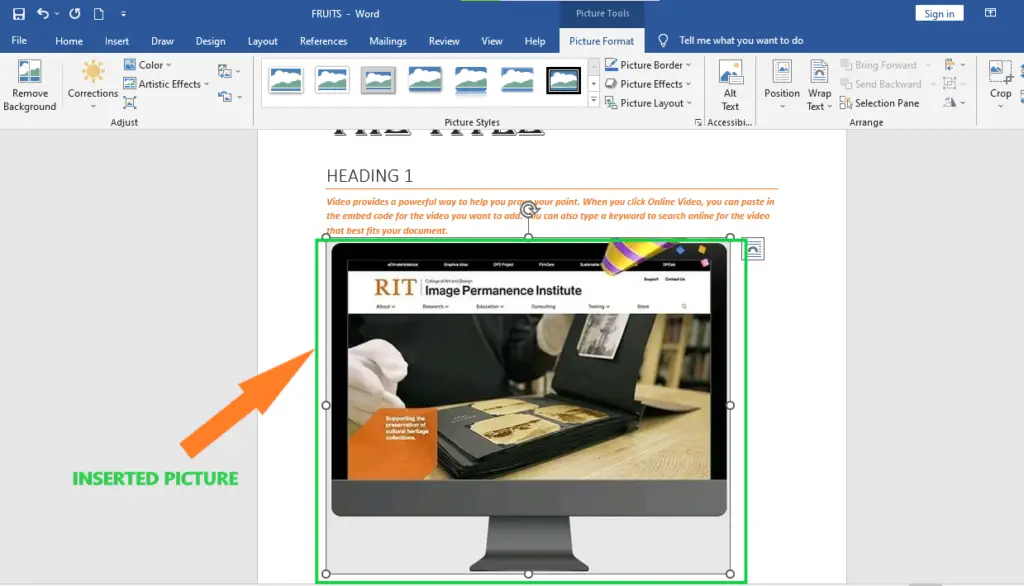
How to Add WordArt in Document
With WordArt, you can add fancy words to a Word document. There are many ways to back up your text. Follow these steps to put WordArt into your document.
- Step 1 − Click in your document where you want to add WordArt.
- Step 2 − Click the Insert tab and then click the WordArt option available in the Text group; this will display a gallery of WordArt.
- Step 3 − You can click on any of the WordArt styles shown in the gallery to choose it. Now you can change the text you’ve added to fit your needs, and you can use the different options to make it look even better. To try it, just double-click the WordArt you’ve added, and Word will give you many options for how to format your image on the Format tab. Shape Styles and WordArt Styles are the options that are used most often.
You can change the shape styles, colors, WordArt Styles, etc. of the inserted WordArt to try out different options.
Summary
In the end, we’ve learned how to use graphics in Word and what those terms mean. We also know that there are available graphics that can be used, which we can use in our document to make it look more professional and presentable.
Meanwhile, if you want to learn more about working on tables, see the previous tutorial on how to resize tables and how to merge and split table in Microsoft Word. You can browse those guides if you are having a hard time working with your tables in a document
We hope this tutorial helps you as you format your documents in MS Word.
PREVIOUS
NEXT

Word allows you to do much more than simply insert or place graphics. For our fourth lesson in this series, we will focus on the graphic design functions in Word such as pictures, SmartArt, screenshots, and other items that can be found on the “Insert” tab.
These functions really breathe life into your drab black and white text documents. With a simple picture or chart, you can turn your term paper from meh to yeah! Luckily, there’s a whole range of ways you can add images to better illustrate (no pun intended) your point.
We’ll wrap the lesson by changing gears a bit and discussing how to use more than one language in Word 2013.
Images and Multimedia
You don’t have to think of Word as simply a word processing program. It has requisite tools for doing some pretty nifty page layout. While it’s not a feature-complete or robust as a professional page layout program such as Adobe InDesign. You can still get very professional looking results if you know what’s in your toolbox and how to use it.

Pictures and Online Pictures
Both “Pictures” and “Online Pictures” accomplish the same goal. The only difference is that “Pictures” means you can insert pictures locally, while “Online Pictures” allows you to insert images from an internet-based source such as clip art from Office.com, Bing, or OneDrive (formerly SkyDrive).
You can also insert pictures from your Facebook profile or Flickr although you could always just save the pictures you want to insert to your computer and then insert them from there if you don’t want to connect Office to these profiles.
Picture Tools
As always, when you want to edit a picture or any element place in a Word document, you can click on it and the appropriate tab will appear on the Ribbon.
With pictures, that tab is “Picture Tools.” Here we see you can make all kinds of corrections to the picture on-the-fly. For example, you can correct brightness and contrast, the color, add a border.
Where you position and how you wrap text will also play a large role in formatting your documents.
Here we see those controls. In our documents, we don’t worry so much about word wrapping or positioning because Word isn’t the final step toward publishing online. However, if you’re going to produce something WYSIWYG (What You See is What You Get), such as for a PDF or print publication, then these things will definitely matter.
Also, there are a couple ways you make changes to your pictures inline, such as resizing, rotating, and moving them. In the following image, you see these controls, many of which you will likely be familiar with.
When you click on an image in your document, you get a box on each corner, which will let you resize a picture. At the top, in the middle, is a circular arrow, grab this to freely rotate your picture. To move the image, hover the mouse over the image until the pointer is the four arrows, you can then click and drag the image anywhere you like.
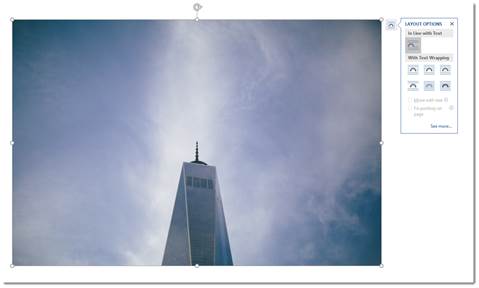
Finally, if you click on the little “Layout Options” button, you can change your text wrapping without going to the Ribbon.
Clicking on “See more…” at the bottom of the “Layout Options” opens the full-blown “Layout” dialog.
Note, the size tab both on the Ribbon the “Layout” dialog allows you to specifically resize, rotate, and scale your pictures, rather than relying wholly on winging it:
We’d like to spend the whole day talking about formatting images in Word, but as you can see, there’s a ton of options at your disposal. Let’s move on now to other objects you can insert into your documents, starting with “Shapes.”
Shapes
Microsoft Word 2013 comes with an array of built-in shapes, which you can use to create callouts, boxes, stars, and other shapes.
When you choose a shape, you simply draw it on a blank space on the page. It doesn’t matter if you get it perfect or just the way you want it because you can adjust it to your heart’s content once it is placed in your document.
Note in the screenshot, the previously mentioned little “handles” you can use to resize and rotate your shapes.
At the bottom of the “Shapes” menu, there’s an option to create a “new drawing canvas.” This will open, what is essentially a text box for shapes. With this drawing canvas, you can create drawings using these shapes allowing you to create things like diagrams and flowcharts.
SmartArt and WordArt
SmartArt and WordArt tend to have some overlap, particularly if you create something using WordArt and then customize any of the text within it. Of course, you can use one or the other and never the twain shall meet, but we’re going to talk about them in the same section because one often leads to the other.
Think of SmartArt as premade drawing canvases that you can insert into your document and then customize as you like. Simply pick an arrangement, such as a list, process, or cycle.
As you can see, we created a graphic based on a “Continuous Block Process.” When we click on the text boxes, we can edit what is inside. There are also the usual grab handles needed to resize the image, and the “Layout Options” allowing you to wrap text to your preference.
If you use SmartArt, note that the Ribbon changes to reflect this. The “SmartArt Tools” features two tabs: “Design” and “Format.” Let’s cover each one and its features.
The right half of the “Format” tab allows you to pick from a number of “SmartArt Styles” and you can also “Change Colors.”
If you look at our previous example, you can see we applied an embossed, shiny effect and changed the colors of our text boxes and arrow.
On the left half of the “Design” tab, you can “Create Graphic” so you can add shapes, bullets, text, and move things around.
The “Layouts” section lets you change how your graphic looks on the fly. Simply hover over any of the built-in options to see how it would look utilizing a different layout. Changes to the layout are not applied unless you first click on a style.
The right side of the “Format” tab is used for affecting changes to text. These include “WordArt Styles” and other effects suchs as fill and outline. Beyond that, you can arrange multiple layers by sending them forward and backward.
The “Layout” dialog pops out if you select the little arrow in the bottom-right corner of the “size” section or you can choose more options from any of the drop-down menus including “Position”, “Align”, and “Rotate.”
On the left side of the “Format” tab you can select any of your shapes and change them to another, and also make them larger or smaller.
If you click on “Shape Styles” you will be able to choose from a selection of pre-defined shapes and colors.
Shift right just slightly and you will find controls to alter the fill. Choose from various “Theme Colors” or select your own. You an also use pictures, gradients, and textures for even more fill options.
If you want to refine the outline around your shape(s), you can choose any color, weight, or dashes.
Finally, “Shape Effects” has quite a few options for enhancing your shapes, many of which will give them a cool 3D effect that you can adjust by clicking 3D Options at the bottom of the of the menu.
Format Text Effects
Let’s take a closer look at this because it contains a pretty sizable amount of features. We’ll cover the basics so that you’re more aware of them. The pane titled, “Format Text Effects,” slides out from the right edge.
As with any other panes in Word 2013, it can be detached, which you can then stick out of the way to save screen area, or keep it nearby so it is handy. Regardless, this dialog box will allow you to quickly work with text, so you don’t have to repeatedly keep going to the ribbon to change things. Note also that the dialog is split into functions, “Text Fill and Outline” and “Text Effects.” “Text Fill and Outline” is simple enough to figure out, and is used to enhance how text appears.
Say, for instance, we want to write How-To Geek School and enhance it so that it is size 48 pt., blue with a black 1 pt. outline. We simply select the text we want, increase to the size to 48, then in the “Format Text Effects” dialog, we can change the color (we can also do this in the “Font” section of the “Home” tab. Then under “Text Outline” we choose “Solid line” and choose block and 1 pt. for the outline width.
That looks pretty good, but we really want it to pop, let’s add some more text effects, such as a shadow, a reflection, and we’ll add a bit of a 3d bezel to round the lettering out.
The result is a bit more striking and while it’s not likely to make it into any final designs, it does give you an idea of what you can do with WordArt.
Chart
Who doesn’t like charts? Charts are a great way to visually display data sets and Word 2013 comes jam packed with a large assortment of Charts to choose from, including columns, pie, bar charts and much, much more. Check out the screenshot for an idea of just how many options there are:
When you choose a style, you’ll get a spreadsheet, which will allow you to enter the data points on your x and y axes. As you enter data, the chart will change.
Manipulating and formatting charts is easy. Whenever you click on a chart in your document, you’ll get the “Chart Tools,” which, as you might have guessed, is the Ribbon tab devoted solely to charts.
Using the “Design” tab, if you don’t like the colors or style of your chart, you can instantly apply changes to it without having to generate a new one.
If you decide you don’t think the layout works for this particular type of data, change it using “Quick Layout” or add another element such as another axis, chart title, gridlines, and more.
On the right side of the “Design” tab you will find essential tools for altering your data and you can also go back and completely change the type of chart you’re using.
So, if you think a pie chart would work better, you can change to that. Note however, some data points, such as “breakfast,” “lunch,” and “dinner” aren’t represented on this chart.
The “Chart Tools” also give you a “Format” tab so you can dress things up a bit by adding shapes and then being able to change the style, fill, and outline.
Turning to the right side of the “Format” tab, you are given options for adding and changing WordArt, arranging elements, and adjusting the size of your chart (which you can also do with the grab handles).
It’s easy also to affect changes inline too. When you click on a chart in your document, formatting controls appear along the upper-right corner. From top-to-bottom, you get “Layout options” so you can set your text wrapping. You can change chart elements with the plus (+) symbol, so if you want to change chart titles, add gridlines, and stuff like that.
The paintbrush icon is for setting a style and color them, and finally, the sieve icon is for “Chart Filters,” so you can edit data points and names on your chart.
Screenshot
The “Screenshot” feature will allow you to take a screen clip, which is automatically pasted in you document.
When you use the screenshot function, it will let you choose between any currently open windows, or you can select “Screen Clipping,” which will minimize Word allowing you to take a selection or full shot of your desktop. So for example, if you want to simply insert a shot of your desktop and its icons, you would first need to minimize everything you have open.
There’s a myriad of ways you can take and add screenshots, so we’re not going to dwell on it. Just note this feature, if you’re unfamiliar with adding screenshots, and you want an easy way to do it in Word.
Online Video
You can insert “Online Video” such as Bing, YouTube, or video embed code into your document.
When you embed a video, it will appear as if it is a regular picture, complete with grab handles and text wrap controls.
Further, you can adjust how the emedded video thumbnail appears (as a picture) using the “Picture Tools” so you can make adjustments to the color, add a border, correct the contrast and brightness, and more.
So you see, we simply applied a “picture style” and add a purple border. This is only a fraction of the stuff you can do, so if you to add some really nice looking effects and create a nice looking document that really pops, you should take your time to familiarize yourself with everything.
On the other hand, if you don’t like your changes and you want to go back to the default, simply click “Reset Picture” and it will revert to normal.
Other Text Features
Here are few more text features that you might want to be aware of though you will probably rarely use them.
Text Box
Text boxes are like their own little islands in Word. What we mean is, when you add a “Text Box” to your documents, it is immune to changes you make to the rest of the document. It is like a document within a document.
This is useful if you want to present something “as is” in your work, be able to make overarching changes to the document’s formatting, but have something you’ve pasted remain unchanged.
For the most part, text boxes are something of a bane to an editor’s existence because they don’t play nice with styles (Lesson 5). You may find them extremely convenient and that’s perfectly fine, but if you want something that conforms to your document’s style and formatting, but still place it in a box or have a border around it, then we recommend simply adding a border, which we covered in Lesson 2 – Shading and Borders.
Drop Cap
Drop caps are simply that one letter at the beginning of a chapter or book that is larger than the rest:
You can either make your drop cap “Dropped” (the text below it shifts underneath it) or “In Margin.” Check out the “Drop Cap” options for more power over how your drop caps behave.
Using More than One Language
If you want to produce content in a language other than the one that comes with Word by default, you will likely need to purchase it. Open the Word “Options” and click on “Language.”
Pick the language you want to add from the dropdown list and then click the “Add” button. When you add a language, you will need to enable it, which means that you will have to turn it on in the “Control Panel.”
From here, you can write in the language, but Word won’t display in it, in other words, menus and help systems will still appear in the default language. To get the full multilingual experience, you may need to purchase a language pack from Microsoft.
To see what languages are available for purchase, and how much, click on “Not installed” and you will be whisked to the Microsoft Office website.
If you want to add proofing tools, such as spellcheck, grammar check, and/or screen tooltips, then you may be able to simply download them for free.
While it’s doubtful you’ll be using Word in full multilingual mode, it’s nice to know how you can affect those changes. Moreover, most languages are freely available to use system-wide so actually creating a document in another language is well within your reach, for free.
Coming up Next…
So that concludes this section. We know it’s been a lot to absorb but you’ll see that after a while, this stuff is a cinch!
Once you get the hang of one skill, the rest is pretty similar and comes easier. By now you should have more than enough knowledge to create awesome documents with lists, tables, pictures, video, and anything you need to create a true multimedia publication!
Don’t forget though, if you’ve missed anything in this series you can always go back and read our introduction in Lesson 1, all that stuff on paragraphs and lists in Lesson 2, and all-important tables and other formatting options in Lesson 3.
In our final lesson, Lesson 5, we will cover styles, templates, and themes. It doesn’t sound like much, but they can be a fantastic way to not only save tons of time and create consistently formatted documents, but quickly apply themes that will instantly affect the entire appearance of your documents, as well as create templates that you can later use over and over again!
READ NEXT
- › How to Adjust and Change Discord Fonts
- › The New NVIDIA GeForce RTX 4070 Is Like an RTX 3080 for $599
- › This New Google TV Streaming Device Costs Just $20
- › Google Chrome Is Getting Faster
- › HoloLens Now Has Windows 11 and Incredible 3D Ink Features
- › BLUETTI Slashed Hundreds off Its Best Power Stations for Easter Sale
A Picture Is Worth a Thousand Words
Nothing beats a screen shot when you are trying to convey information about using the computer. With just a couple of easy shortcuts, you can add screen shots to your documents.
Absolutely Positioning a Graphic
Want a graphic to appear at a precise place on the page? It’s easy to gain control by following the steps in this tip.
Adding a Background to Your Document
Document backgrounds come in handy if you plan on converting the document to a Web page. Here’s how you can add a background of your choice to your document.
Adjusting Shadow Settings
Insert a graphic into a document and Word allows you to add a shadow behind the graphic. You can also adjust the properties of the shadow, as described in this tip.
Anchoring Objects by Default
When you position objects (such as text boxes or graphics) on a page, one of the things you can do is to anchor the object so it won’t move as freely. Want the object to be anchored by default? You’d be out of luck, as described in this tip.
Automatically Formatting Graphics and AutoShapes
Want to change the graphics formatting defaults in Word? You can customize some of these defaults, saving yourself some time.
Best Quality for High Resolution Graphics
You want your documents to look as good as they can. If those documents include graphics, then you also need to make sure that they look as good as they can. Here are some ideas on how to get the best quality you can.
Can’t Select and Edit Graphics Elements
Adding graphics to your documents can make them livelier and easier to understand. What if you can’t select and edit the graphics, though? Here’s something to check that may make editing the graphics easier.
Cannot View Graphics in a Document
Got a problem where you can’t view any of the graphics you insert in your document? The solution could be simple, or you could be seeing a symptom of a more complex problem. This tip explains some of the things you can check out.
Capturing a Screen
Windows provides a way of «capturing» the image on the screen into the clipboard. You can then paste the image from the clipboard into your document.
Changing Compression Print Resolution
The resolution at which Word compresses graphics in a document may be bothersome. If it is, your options are very limited, and you will probably get better results by looking toward a solution other than Word.
Changing Defaults for Text Boxes and Callouts
Do you find yourself frequently creating text boxes and callouts? This tip describes how to change the default settings and how you can easily create text boxes that exactly meet your common requirements.
Changing the Size of a Drawing Object
Documents are often made up of more than just text. If you have drawing objects in your document, you will doubtless need to change their sizes from time to time. Here’s how to easily make the changes you need.
Changing the Size of a Graphic
Word allows you to add more than text to your documents; you can also add graphics. Once added, you can modify the size of those graphics by using the techniques in this tip.
Choosing an Insert Method for Pictures
The way that you choose to add pictures to your document can have an effect on the file size of those documents. It is best not to paste pictures, but to insert them instead.
Clip Art Sizing Difficulties
A discussion of problems a reader was having resizing clip art in Word.
Converting Tables to Charts
Put numeric information in a table and you can then convert that information to a graphical chart using Microsoft Graph Chart. Here’s how to create the chart object.
Counting All Graphics
Need to know how many graphics a document contains? Getting at the true number may take a little more work than it first appears.
Creating a Drawing Object
Word documents can contain more than just words. They can also contain drawing objects such as lines and simple shapes. Word provides an easy way to add such objects to a document.
Creating Oval Pictures
A couple of ways to create oval shaped pictures in a Word document.
Creating Usable Figure Captions
Many people add both images and figure captions within text boxes so they can be easily positioned within a document. Doing so, however, has drawbacks as the figure captions are not as easily accessible for cross referencing or for inclusion in a Table of Figures. This tip describes how you can rectify this situation so that the captions are again usable.
Cropping Graphics
Need your hide some of the outside edges of a graphic? You can instruct Word to crop (or hide) those outside edges by following the steps in this tip.
Default Picture Location
When you insert pictures into a document, the first folder that Word opens up is normally the My Pictures folder. You can change the starting folder by making a change on the Files tab of the Options dialog box.
Default Picture Settings
Place enough pictures, and sooner or later you start wondering if there is a way to set up some default settings for those pictures. The short answer is that you can’t, but there are things you can do to make the picture-formatting process much easier.
Determining Picture Size in a Macro
When processing a document using a macro, you may need for your macro to figure out the sizes of the images in your document. This information can be accessed by using the techniques described in this tip.
Disappearing Graphics Groups
Grouping graphics together can be a great way to manage them easier. Doing the grouping, however, could have unintended consequences. Word handles grouped graphics differently than the individual graphics that make up the group. This tip explains how that can affect your document.
Displaying Thumbnails and Full-Size Images
Sometimes images can be just too big to display in a document. Instead you may want to display a smaller, thumbnail-size version of the graphic that people can click on in order to see the full-size version. Word doesn’t have a built-in function to do this, but you can devise your own display method using the hyperlink capabilities of the program.
Dragging and Dropping Pictures in a Document
Do you like to add pictures to your document just by dragging and dropping? What are you to do if it appears the capability just stops one day? Here’s an idea for a fix you can check.
Easily Changing Links in Documents
You may have a lot of linked images in a document, and then one day need to change the links if the location of the images changes. Here’s how you can make the necessary changes quickly.
Editing Wrap Points
If you have a graphic that has text wrapping around it, you might want a way to modify the wrapping path used by Word. You can easily do that by modifying the points that define the wrapping path. This tip shows how easy it is to monkey with the wrap points around an image.
Extracting INCLUDEPICTURE File Names
If you use the INCLUDEPICTURE field to add images to your document, you may love the macro in this tip. It allows you to pull all the filenames used in the field, resulting in a handy image file list.
Extracting Pictures from a Document
Word allows you to easily insert pictures into your documents. Getting the pictures back out of your documents can be another story, however. Here’s a description of what happens to your pictures once they are inserted and what your options are for getting them out.
Faster Picture Displaying
If you have a document with many graphics, you know that Word can sometimes be slow in displaying all those graphics. This tip examines why this occurs and discusses some things you can try to speed up the display of those pictures.
Filling A Drawing Object
Creating a drawing object can be just the first step in putting together your masterpiece drawing. This tip explains how you can fill the object with a color of your choosing.
Flipping a Drawing Object
Place a drawing object in your document, and it doesn’t have to stay that way. You can flip a drawing object in either of two directions, as discussed in this tip.
Freezing Cell Size when Inserting Pictures
Insert a picture into a table cell, and you may quickly find that the table is no longer the size you expected. Here’s how to make sure that the cells in your table don’t resize themselves when you insert an image.
Graphics and Line Height
If the inline graphics in your document appear «chopped off,» it could be directly related to the formatting within the paragraph containing the graphic. This tip explains why this chopping happens and how you can adjust formatting so that the entire graphic shows up.
Grouping Drawing Objects
Drawing objects are easily added to a document. You can group these objects so they are easier to manage by following the steps in this tip.
Hanging Indents in Wrapped Text
If you use hanging indents for some of your paragraphs, you may wonder why they don’t look right when they wrap on the right side of a text box or graphic. Here’s the reason and what you can do to correct the formatting.
Hiding Graphics
Do you need a printout where graphics can be turned on and off? This tip provides some concrete ways you can get just want you need in such a printout.
Horizontal Alignment Errors for Graphics
Discussion of alignment differences for graphics in Word 97 and Word 2000.
Inserting from the Clip Art Gallery Doesn’t Work
Ever insert a picture and it won’t display in your document? It could be due to some of the display settings in Word. Here’s how to check them out.
Inserting Multiple Graphics in a Document
Word allows you to easily place graphics in a document. Placing one or two graphics is easy, but placing many graphics in a single document can easily become tedious. Here are some ways that you can insert a large number of graphics into a document quickly and easily.
Keeping a Picture Title with the Picture
Pictures and their titles go together like peanut butter and jelly. (Wow, did I just say that?) Seriously, pictures and titles belong together, and keeping them on the same page can be a challenge at times. Here are some things to check.
Keeping Callouts Positioned
Using graphics to add callouts to your graphics is a common occurrence in Word. Here’s how to stop all those graphics from moving to places other than where you originally place them.
Merging Graphics from Access
An Access database can store all types of data, including graphic images. Merging most data from Access into Word is relatively easy, except when it comes to graphics. This tip explains why this is the case and ways you can work around the problem.
Merging Graphics into Word Documents
Ever want to expand the mail merge feature to include graphics? Merging graphics into your document is easy but requires some know-how. This tip explains how Word handles the process.
Missing Left Border
Ever wonder why a border around a graphic doesn’t print the way it looks on the screen? There are several ways to add and edit borders. Here’s where to look to find the problem, along with other useful information about printing.
Moving Captions with Pictures
Put a caption with a picture and you’d probably like the two elements to behave like they belong together. If you are tired of your captions getting separated from their pictures, here are some ideas you can use.
Moving Drawing Objects
When you need to move a drawing object around your document, you use the mouse after you select the object. This tip shows how you can make the move.
Moving Object Anchors
When you insert an object into your document, it is anchored to a paragraph. If you want to change the paragraph to which the object is anchored, you can do so by using the technique in this tip.
Nudging a Graphic
If you need to move a graphic just a little bit in one direction or another, you can do so by using the techniques in this tip. (Hint: Using the keyboard to nudge a graphic is easiest.)
Only Inline Figures Can be Seen and Printed
Insert a graphic into a document and you expect to be able to see it. What do you do if it isn’t displayed, however? Here are some things to check out.
Permanent Watermarks in a Document
Need to add a graphic watermark to a document? It’s not that hard to do, but making the watermark permanent can be a bit more vexing.
Placing Many Graphics in a Document
Word documents can contain more than just text. You can even create documents that contain almost no text at all. This would be the case if you have a document in which you want to insert a large number of graphics. This tip explains how you can easily do the insertion and make the graphics printable.
Positioning Graphics Evenly
If you have some graphics inserted in your document, you may want to adjust the horizontal space between those graphics. Here’s the easiest way to make that adjustment.
Problems Pasting Large Pictures
If you insert a large picture in your document and your text jumps all around and the picture seems to disappear, don’t worry. The information in this tip will help you get matters back to normal in record time.
Resize Graphics Outside of Word
Need your graphics to be larger or smaller than they first appear when you insert them in a document? Your best bet may be to resize them using a program other than Word. Here’s why.
Rotating a Drawing Object
You can add all sorts of drawing objects to a document. Once placed, you can then rotate them to your heart’s content. This tip explains a couple of ways you can perform the rotation.
Rotating Fractions in a Text Box
Rotating graphics in Word is not always straight-forward, but it can be done. The tools on the Drawing toolbar allow you to modify the graphics in your document to your needs.
Rotating Graphics Around a Different Center Point
You use the rotation handle in Word 2002 and Word 2003 to, well, rotate graphics around a center point. But if you hold down the Ctrl key while you use the handle, you can rotate the graphic around a center point that is even lower in the graphic.
Scaling Graphics in a Macro
If you need to make sure that the graphics in a document are all scaled similarly, you’ll love the macros presented in this tip. Use them to scale individual graphics or all the graphics.
Searching and Replacing Graphics
Got a bunch of graphics in a document that need replacing? (Perhaps you need to replace an old logo with a new one.) Word doesn’t provide a direct way to do it, but there are ways to get what you want.
Searching for Floating Graphics
Graphics can be added to a document so that they are either inline with the text or floating over the text. You can use Word’s Find and Replace tool to locate the inline graphics, but not the floating ones. This tip provides ways you can find the latter type of graphics.
Selecting a Graphic Behind a Text Box
How to select a graphic that is obscured by a text box can be perplexing. Here’s an overview of the different ways you can select just the graphic and nothing else.
Selecting a Graphic that is Behind Text
Position a graphic so that it is «behind» your text, and it may seem like you can no longer select the graphic. Here’s how you can get to that graphic, even if it is obscured by your text.
Selecting Drawing Objects
Word allows you to create all sorts of drawings using a wide assortment of tools. When you need to take an action upon those drawing objects, you need to know how to select them. Here’s how.
Stopping Text from Jumping Around
Do you struggle with getting your graphics and surrounding text to appear just the way you want it? Here are some techniques you can use to make the task a bit easier.
Turning On Picture Placeholders
Displaying graphics in a document requires a great deal more computer processing than displaying simple text. A document that has «too many» graphics in it scrolls very slowly. If switching from Print layout to Draft view does not speed up scrolling to a satisfactory point you can also tell Word to display the graphics as simple empty box placeholders.
Understanding Fill Effects
Want to fill a drawing shape with more than just a color? Word allows you to use all sorts of fills, as described in this tip.
Understanding Graphic Linking
Word provides a couple of different ways that graphics can be linked to your document. How you control the method used depends on the choices you make in the Insert Picture dialog box.
Understanding Grayscale Images
Word allows you to easily add images to your documents. For documents intended for monochrome printers, grayscale images are the most common type of graphic you can use. This tip explains exactly what a grayscale image is.
Understanding Object Anchors
Do you have documents that contain objects? Understanding how Word handles objects and the way they are anchored can make a big difference in the final look of your document. This tip explores object anchors and why they are important.
Understanding Page Border Art
Add some artwork around the border of your printed page, and you may not know where that artwork comes from. You may also want to add your own graphics to be used as page borders. Because Word uses a proprietary format for this type of graphic, adding your own artwork may not be possible.
Understanding the Drawing Canvas
Need to keep your drawing shapes together in one place? The drawing canvas may be exactly what you are looking for.
Unwanted Graph Paper Effect
When you open a document or start to use Word, do you see a background that looks like graph paper? It could be because of any number of reasons, as described in this tip.
Using Callouts
If you want to put comments in your document, you can use Word’s built-in comment feature. Another way is to use callout graphics (which function like text boxes) to add your comments.
Using MPF Graphic Files
There are all sorts of file formats used to store graphics. You might think that one of those formats is the MPF format, described in this tip.
Using the Drawing Grid
One of the lesser-known drawing tools provided in Word is the drawing grid. You can easily turn this feature on and use it to help you create drawing objects that are uniformly sized and placed.
Vertical Alignment of an Inline Graphic
Word allows you to insert graphics in two ways: either inline or floating. If you use inline graphics, you may want to adjust the vertical position of the graphic in relation to the text to the left or right of the graphic. Here’s how to do it.
Vertical Lines in Word
Lines can help to organize the data on a page or make certain points clearer. Word provides several different ways you can add vertical lines to your page layout.
Working With OLE Graphics
An explanation of the way Word imports graphics.
Wrapping Text Around a Graphic
Place a graphic in your document, and you may want to make sure that your document text «wraps» around the edges of the graphic. There are several wrapping methods you can instruct Word to use; here’s how to do it.
Plain text documents look plain and boring. The world is visual, and an easy way to spice up your document is with clip art.


The term “clip art” refers to simple drawings made for computer users for both digital and printed materials. They’re usually fun and whimsical.
Microsoft Word has a feature that makes adding Office clip art to your project easier than ever. As you’ll see in this article, you don’t have to leave Word to find and insert clip art into your Word document. That’s because Word has a built-in online browser you can use to find clip art for your material.
But your best bet is to use premium clipart in Word from Envato Elements. Elements offers thousands of stylish clipart packs for download now. Use them to learn how to insert clipart in Word and wow every reader!
Find Clip Art on Microsoft Word Now (Quickstart Video)
Do you want to quickly find out how to add clip art to your Microsoft Word document? Our quickstart video can help.
To learn even more about using clip art with Microsoft Word, study the written tutorial below.
How to Find Clip Art on Microsoft Word
Now, let’s learn how to insert clipart in Word. The first option here is to use Word’s built-in library of clipart. You can do this right inside the app!
The tips in this section were written using Windows and Office365. If you’ve got a different operating system or a different version of PowerPoint, your steps may be slightly different.
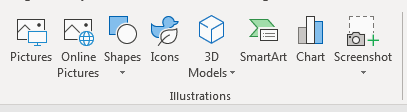
To get started finding clip art, first click on the Insert tab. Then, in the Illustrations group, click on the Pictures drop-down arrow. From the list of options, choose Online Pictures.


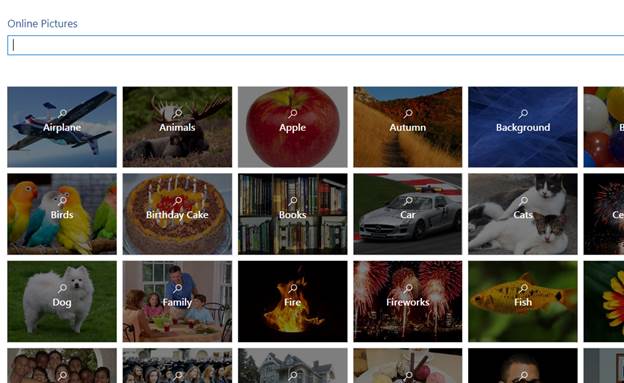
In the center of your Word screen, you’ll see the Online Pictures menu launch. In the search bar, type a keyword or phrase related to the image you want to use. Press Enter.
When you hit Enter, you’ll see images for your search term appear. Now, you’ll have a few options.


By default, the Creative Commons only filter is checked. This means the images’ creator has given permission for others to use, share, and build on their work. It’s always best to leave this option checked. Otherwise, you may find yourself using clipart and images that you’re not allowed to use in your work.
You can click on the filter icon to filter the results based on other dimensions:
- Size. Small, medium, large, or extra large
- Type. Photograph, clipart, line drawing, or transparent
- Layout. Square, wide, or tall
- Colors. Color only, black and white.


Click on Clipart and whatever other filters you want to use. This displays only clip art in the results, leaving out other types of images.


The image results will be filtered according to these settings. Scroll down the results to find a clip art for your document. If you’re not happy with the results, try using different keywords and filters.
How to Insert Clip Art
When you find the clip art you want to add to your document, click on it to select it.
To find out more about the image, click on the ellipsis on the lower-right corner of the image. This displays the image size and link to its source.


If you want to add the clipart to your Word document, click on its thumbnail. This will select the clipart in Word design. Then, find the Insert button in the lower right corner of the Online Pictures menu. Click it, and you’ll see the clipart appear in your Word doc.


You could also insert several clip art images all at the same time. To do so, scroll throughout the image results and click on all the images you wish to insert. Then, press Insert. Watch as every clipart image you selected appears on your page.
That’s it! You’ve learned how to insert clipart in Word easily. But you’re not done! Now, it’s time to learn how to use clip art with Word’s editing designs. This lets you make each piece of clipart your own, seamlessly merging it with your documents.
How to Edit Clip Art
With the clip art added to your Word document, you can now manipulate and edit it as you would any other image in Word.
For example, you can resize and rearrange clip art in Word. To begin, select the clip art, then click and drag one corner to resize the image. Then, you can click and drag on the center of the image to move it around the page.
Additionally, you can make many other changes and customizations to your favorite clipart in Word designs. Be sure your clipart is selected, then come up to the Picture Format tab, found on Word’s ribbon. Click on it.
Here, you have many choices. In the Adjust group, you can apply corrections and new colors to change up the look and feel of your clipart. In the Picture Styles group, you can add frames, borders, and more. For example, you can make your clip art black and white by opening the Color drop-down and choosing Grayscale from the Recolor group.


Use the other buttons on the Picture Format tab to achieve the look and effect you desire.
For example, click Wrap Text > Square to have the text run around the clip art. Or select other text wrap options to achieve the layout you’ve got in mind.


This controls how text interacts with your clipart, and how they fit together. It’s a key part of the design process, helping you ensure your documents always look their very best.
How to Insert Icons, the Modern Clip Art
There’s another kind of drawing you can add to your Word document. What are these? Icons! They’re super simple and have become popular both online and in printed form.
Icons are all over the screens of computers and mobile devices. In fact, many people have developed a kind of icon vocabulary. Most people know, for example, that the floppy disk icon means “save.” This includes folks who’ve never seen a floppy disk in their lives!
To insert an icon, place the cursor where you want the icon to be. Click the Insert tab, then click Icons.
![]()
![]()
![]()
The Stock Images menu opens, on the Icons tab. Use the search field to look for a specific icon. When you find the one you want to use, click on it to select it. Then, click Insert. The selected icon is added to the document.
![]()
![]()
![]()
From here you can treat the icon like any image in Word and change its size, orientation, position, text wrapping, and other settings.
For example, to change the color of the icon, select it, then click the Graphics Format tab. Click Graphics Fill, then select the color you wish to use from the drop-down.


Click on the thumbnail of the new color, and you’ll see Word apply it to the icon that you have selected.
How to Find More Clip Art Online
Want a wider selection of clip art images and icons to add to your Word project? You can look at external sources. And the best option here is Envato Elements.


Elements is the top source for professionally made Microsoft clip art, graphics, and icons. Plus, you’ll enjoy countless Microsoft Word templates! The offer is powerful.
For a flat monthly rate, you can download and use as many of these templates and assets as you want. It’s a tremendous creative value, and one that you can’t afford to miss in 2023 and beyond.


Elements also provides fonts, photos, stock video, video footage, music, and more. All these categories are included in the unlimited downloads offer. Join Elements today and start downloading!
How to Find Premium Graphics from Elements for More Professional Results
To find and use clip art from Elements, first log into your account. At the top of the homepage, you’ll see the search box. You can use this to find clip art of your own.


Begin by clicking on the drop-down arrow beside All Items. From the list of displayed options, choose Graphics. Next, type a keyword or phrase in the search bar. Click the search icon.
You’ll see an array of clipart designs appear. We’ll use the Truck Driver Sitting In Construction Truck clipart design to demonstrate. Click on the thumbnail of the file that you wish you use.
This opens the page for that graphic or graphic pack. This page gives you a preview of the images, as well as more information about the file, such as what formats and image sizes are included. Click the Download button to download the file.


The Add this file to a project dialog box opens. Check the appropriate box to add the file to an existing project. Then click Add & Download.
The file is downloaded into your computer. If it’s a zip file, double-click on the file name to unzip it.
Then, go back to your Word document, and place the cursor where you want to insert the clip art. Click on the Insert tab. Next, click Pictures > This Device. Find your clipart page, select it by clicking, and then choose Insert.


Word will add clipart that you’ve selected. From here, you can move and style it like any other image — just like we did above!


As you can see, it’s a great idea to use clipart in Word from Envato Elements. With thousands of expertly crafted designs to choose from, you’re sure to find the perfect design for your next project. Get started today!
6 Bestselling Clip Art Images From Envato Elements
Clip art images have come a long way since they were first used in desktop publishing in the 1980s.


The following bestselling clip art graphics in Elements show you the wide range of options you’ve got at your fingertips. They’re proof that clip art can look anywhere from whimsical to technical to cartoonish, and everything between.
1. Maternity Clip Art


As the name suggests, this pack includes clip art of images related to pregnancy, maternity, nursery, and mom and baby. All clip art images are in PNG format, which means they’ve got a transparent background. This makes it easy for you to add them to a collage, design, or layout.
2. Christmas Clip Arts


Whoever thinks clip art can’t be elegant should check out this collection. Although they maintain the hand-drawn charm that clip art images are known for, these Christmas-themed clip art graphics are tasteful and graceful at the same time. The collection includes 14 clip art images in both EPS and PNG formats.
3. Flower Set Clip Art


This clip art set is perfect for any flower-related project. It delivers plenty of value: a total of 47 flower clip art images, available in both EPS and PNG file formats. The clip art images are 6 inches x 6 inches, so you can use them even in large, printed projects.
4. Warehouse Clip Art


The boxy, technical look of these images are perfect for warehouse, manufacturing, and industry-related projects. The clip art graphics come in EPS and AI formats. This means you can edit them if you’re so inclined.
5. Outer Space Vector Clip Art


It’s no wonder this pack of outer space-themed clip art images is a bestseller. The graphics are just plain fun! The set has 25 cute clip art images, including a green alien and a monkey in a space suit. The graphics come in a variety of formats, including EPS, PNG, and SVG.
6. Watercolor Clip Art Abstract


These could be one of the most unusual clip art images you’ve ever seen. While most clip art is hand-drawn, this set of flower clip art is hand painted in watercolor, making for a very pretty effect. A total of 18 individual images are included in PNG format. Each flower is 5 inches x 5 inches in size.
Learn More About Microsoft Word
A clip art or icon you add to your Word document behaves like any image. That’s why it pays to learn more about how to work with images and pictures in Word. The following posts can help:
Tips for Using Clip Art in Word
Now that you know how to find, insert, and format clip art images in Word, you might be tempted to go crazy with them. As with other creative elements in a material, clip art can be misused or abused, making your document look amateurish and unprofessional. Careless use of other people’s clip art can even get you into trouble.
To avoid these issues, consider the following tips for using clip art in Word:
1. Check on Permission to Use the Image
As mentioned above, clip art that are publicly available come with different licenses. Even among clip art with the Creative Commons license, different rights and obligations may be assigned.
And so, look at the license of the clip art you want to use and ensure that you comply with it. For example, some clip art with Creative Commons license may not be free for commercial use.
Clip art, icons, and other graphics you download on Envato Elements come with broad commercial rights. This means you can use them for both personal and commercial projects. With that said, there are certain things you’re not allowed to do. This page has more details.
2. Choose Clip Art That Matches the Tone and Visual Style of Your Brand
In general, clip art tends to be casual. Some may even consider them childish. So, clip art tends to go better on projects that are informal in tone and visual style. Icons, on the other hand, tend to be acceptable even in more formal, academic, and corporate materials.
![]()
![]()
![]()
You can only decide on a case-by-case basis, because there are many different kinds of clip art. You may find some that work for more formal projects, especially if you get premium clip art from Elements.
3. Use Clip Art Only When It Adds Meaning to Your Document
To avoid the misuse of clip art, use it only when it makes your document more meaningful. It’s probably a good idea to add clip art to your project if they:
- act like visual shortcuts or metaphors, either replacing or enriching the text
- make the text easier to understand or navigate
- reinforce the personality or style of your brand
A common mistake is to add clip art for its own sake. In this case, clip art only clutters up your project. It doesn’t add value and it can even annoy or turn off your reader.
Download Some Fun Clip Art for Your Microsoft Word Document Today
Clip art continues to be a fun way to make your projects more lively, interesting, and effective. These simple graphics are easy for most users to understand. A type of clip art, the icon, has in fact become ubiquitous in digital materials and screens.
You can also find top-quality clip art, icons, and other graphics at Elements. Elements is the perfect choice for you, if you create many Word documents. You’ll enjoy unlimited downloads of icons, graphics, and Word templates for a flat rate.
Now, it’s time to embrace the idea of clipart! Find your favorite designs and start adding them today. You’ll be crafting stunning and unique Word documents in moments.
Editorial Note: This tutorial was originally published July of 2020. It’s been completely reviewed for accuracy and relevancy and a video has been added by Andrew Childress.

Documents wouldn’t be complete if you couldn’t add images and graphics. You can even add graphs that you’ve created in Microsoft Excel to Word documents, because any Microsoft product works well with the developer’s other products. Whether it’s graphs or pictures, you can copy and paste them to your documents but usually you’ll need to format them to work with other text in the document.
Adding Pictures to a Document
Word supports insert images from either the Internet or your local computer. If you’re able to copy an image, you can paste it to your document. You can use your own images stored on your computer, or you can copy an image from the Internet and use it in your document. Before you copy an image from the Internet, ensure that the owner offers free use without attribution or payment. Some image owners require payment before you can use them either on your site or in private documents.
To copy an image from the Internet, open your browser and go to the web page that contains the image that you want to copy. Right click the image and select «Copy» (the wording in the context menu is slightly different across browsers). When you copy an image from a web page, it gets copied to your clipboard, which runs in the background of your computer and isn’t visible from the desktop.
Go back to your document and click the section of the document where you want to paste the image. Right click the document and select «Paste.» The image is pasted to your document, but it still must be formatted for your text. We’ll discuss formatting a picture after explaining how to insert an image from Microsoft Word’s long list of freely usable clipart available from Microsoft Office software.
(Illustration controls menu)
Notice from the list of options that you can add pictures located online or locally, but you can also add shapes, icons, models charts and even screenshots. Word has several options for image insertion into your documents. Inserting the different types of images and shapes is the similar for each control.
First, let’s take a look at the «Picture» option. A window opens asking you to select an image. Double click the image and it displays in your document. What if you need ideas for an image or don’t have one of your own? You can use Microsoft’s online search for images located in the cloud.
Click the «Online Pictures» button. This time, a window opens with an online search prompt.
(Online picture search)
Word’s online picture search is powered by Bing, so you might notice some images should you also perform a Bing search. Notice how the images are categorized. You can click one of these categories to view a list of available images related to the category. For instance, click the «Apple» category.
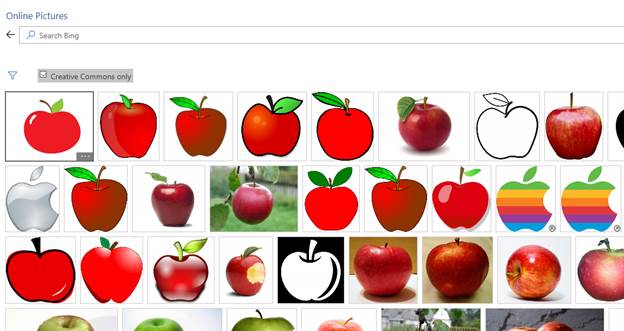
(Apple category image search)
When you click the «Apple» category, several images display. Clipart, photography and even the Apple technology company’s logo is displayed. Microsoft’s online image search gives you a large sample of possible images that you can use, but you aren’t limited to just category searches.
At the top of the image search, you see a «Search Bing» input text box. Type any phrase into this text box and press «Enter.» Word searches Bing to find images related to your search and displays them.
Double click an image that you want to include in your document, and Microsoft transfers it from the online search window to your document. In this example, an apple image is added to the document.
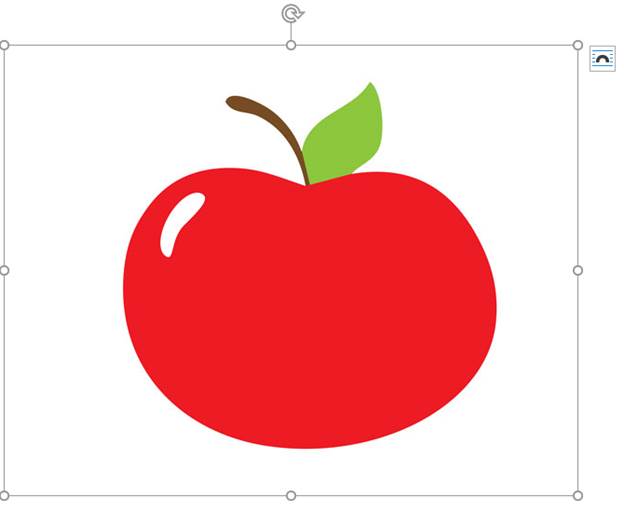
(Apple image added to document)
Notice that the image has a border around it with an arrow at the top and an icon in the upper-right corner. These prompts are significant as they provide ways to configure the way the image looks in your document.
The borders around the image with circles located on each line lets you resize the image. Using the corner circles, you can resize the image on all sizes to avoid skewing the way the image looks in the document.
The arrow at the top lets you rotate it. You can rotate it to the left or right. Click the arrow and then move your cursor in the direction that you want to set the rotation. After you rotate the image, release your hold on the mouse and it will display in your document.
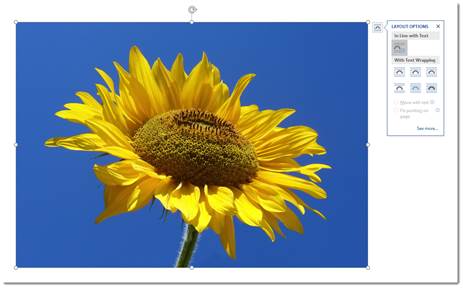
The most important part of formatting an image is setting text to flow around it. Word has several options for this style. You can get to it by clicking the «Layout Options» icon in the upper-right corner of the image. A menu opens that displays the text formatting and wrapping of content around the image.
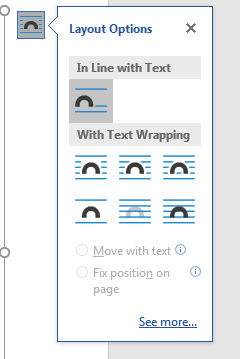
(Layout text options)
The default layout is highlighted in the image above. It’s «Inline with text» sets an image to work similarly like text on the page. The text that you place in the document does not wrap around the image but rather treats it like text albeit large text within the paragraph. This default is enough for an image placed within text without the need for text wrapping, but you have other options that can be seen in the menu.
The way text wraps around an image can be seen in the icons in the Layout Options menu. You can even have text flow over or under an image. Hover your mouse over each option and review the text that displays in the popup. The text that displays indicates the way text will align with the image. For instance, select «Tight» and text will wrap and flow around the image without creating a carriage return and line feed within the document. This option will show text similarly to when you view a web page with an image that has text flow around it without creating any page breaks.
Inserting Shapes
Microsoft Word has a number of shapes that you can add to your documents. These shapes are beneficial for workflows and charts that require simple shapes. Click the «Shapes» menu option and a list of shapes that can be included in your documents is displayed.
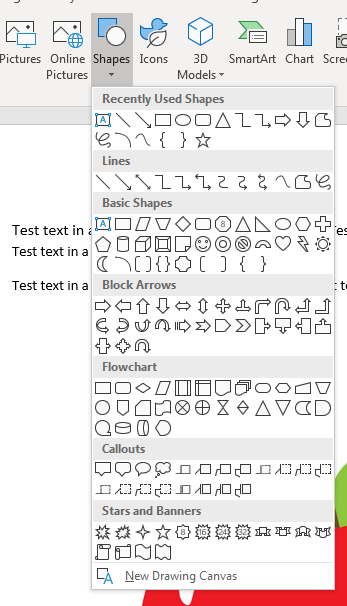
(List of shapes available in Word)
Any of these shapes can be added to your Word document by clicking the menu item. After you click the menu item, your cursor changes to prompt you to draw the same. For instance, click the rectangular icon in the «Recently Used Shapes» section. The cursor changes to a cross icon prompting you to draw the rectangle. Go to your document and draw the rectangle on your document and it’s drawn once you release the cursor.
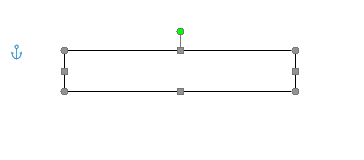
(Inserted shape)
Notice that the inserted shape also has points along each line and at the corners. These points are where you can resize and reshape the rectangle. Each shape that you add to your document can be resized by clicking these points and dragging the mouse to make the shape larger or smaller. The anchor is used to lock the object to the document and text surrounding it. In the image above, no text is surrounding the shape, but should you have text around it, you can use the anchor to determine the way text is formatted around the shape.
View the other options in the Illustrations category and you can insert these additional images and shapes. For instance, the «Icons» button will open a window similar to the «Online Pictures» button where you can search and view icon images to insert into your document. The other options in this menu list work similarly. You just need to determine what type of image that you want to add to your file.
Use these menu items to insert any images that you want to add to your documentation. You can use either Word images included with your installation or ones that you store on your local hard drive.
Crop a Picture
When you crop a picture, you cut away the outer edge of the picture to create a new version.
Let’s crop the picture below.
Click on the image to select it. You will see a bounding box around the image.
Right click on the image, and you’ll see the Crop option in the menu. We’ve highlighted it below.
Click Crop.
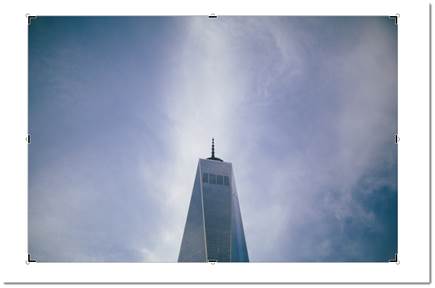
You’ll now see crop marks around the image – at all four corners and on each side. These are the black marks. Click and drag your mouse on any of these marks. Click and drag inward on the image until you have cropped away the area you want to get rid of in the image.
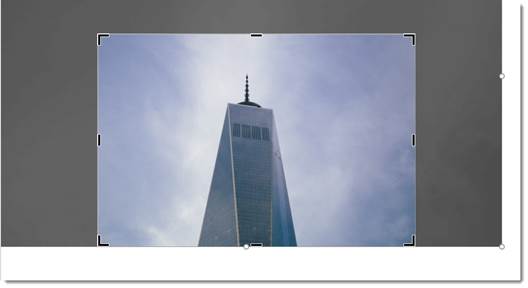
The area you’re cropping away is shaded in gray.
Click outside of the image and gray area to remove the cropped area.
NOTE: You can also click on the Insert tab after you’ve selected the image, and go to Crop>Crop.
Color
You can easily adjust the color of any image you place in your documents.
To do this, double click on the image.
You’ll then see the Picture Tools Format Tab.

Click the Color button.
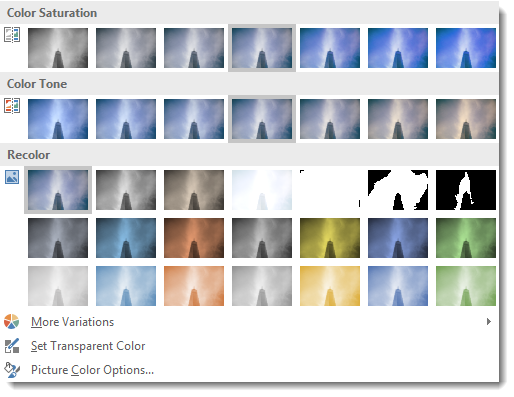
Choose the color effect you want to apply to your image.
Color Correction
You can also adjust and modify the colors in your image through color correction. Once again, go to the Picture Tools Format tab by double clicking your image.
Click the Corrections button.
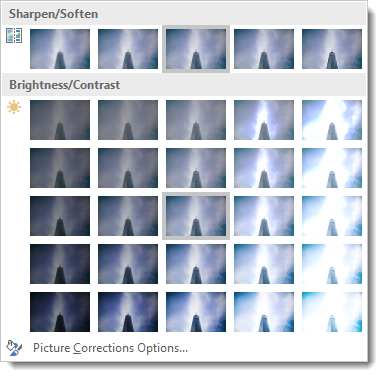
Choose a color correction.
Artistic Effects
Just as you can use Photoshop and other photo editing software programs to add effects to your images, you can also use Word for this.
Double click your picture to bring up the Format tab, then click the Artistic Effects button.

Choose the artistic effect that you want to apply to your image.
Removing Backgrounds from Images
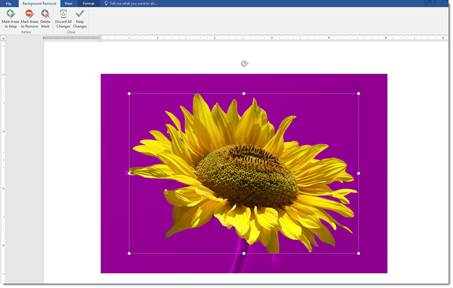
Although Microsoft Word is a word processing program, it also offers some photo editing tools, as we’ve already seen in this lesson. Perhaps one of the most useful photo editing tools found in Word is the background removal tool. This tool allows you to remove backgrounds from your images.
We are going to remove the background from our image:
To use this tool, double click on the image for which you want to remove the background. Click on the Remove Background button in the Adjust group under the Picture Tools Format tab.
When you click the Remove Background button, you will see the Background Removal tab appear on the Ribbon. Your image’s background – and possibly your image – will also change colors. Don’t worry. This is temporary.
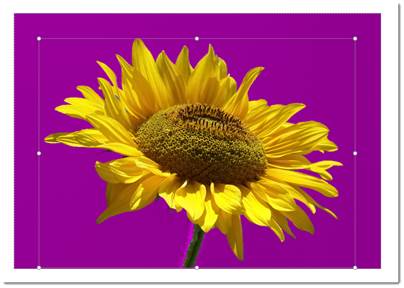
The areas that appear in purple are the areas that Word has determined are background areas that it needs to remove. If there is purple on any areas of your image that you want to keep, you can drag the handles of the bounding box that appears over the image. Drag the handles outward to keep more of the image.
In the snapshot above, you can see that the stem of the flower and part of a petal appear purple. If we leave them purple, they will be removed from the image. We can drag the hands of the bounding box to fix this, as pictured below.
After you adjust the bounding box, if there are still areas of your image that are purple that are not supposed to be purple, go to the Background Removal tab in the Ribbon. Remember, any areas that are purple are considered background areas by Word.
Click the Mark Areas to Keep button.
Your cursor will turn into a pencil.
Simply click on an area that you want to keep.
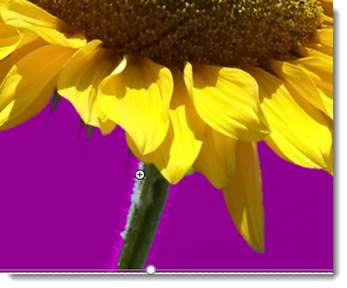
As shown in the snapshot above, a plus sign appears where you clicked. If you look at our previous snapshot, you can see this area used to be purple, but by clicking on it, it’s restored to its original color.
We can now click on all areas we want to keep.
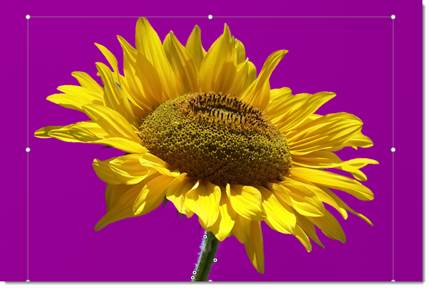
You can also mark areas of your image for removal. It’s quite possible that Word will not detect all background areas, so those areas will not appear purple. To mark areas you want the tool to remove, go to the Ribbon and click Mark Areas to Remove.
Click on the areas to remove just as you clicked on the areas you wanted to keep. However, this time, those areas will turn purple.
When you’re finished, click the Keep Changes button in the Ribbon.
Wrap and Position Text around Images
Word can also wrap paragraphs around a picture, charts and graphs as in the example below.
To wrap text around a picture or art object, double click on the image. The Format tab will appear in the Ribbon. Go to the Arrange group.
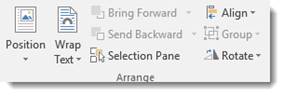
In the Arrange group, click Position to view the dropdown menu.
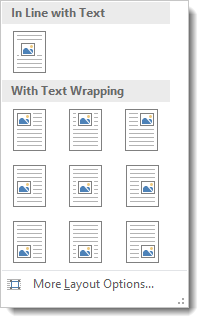
In the dropdown menu, you will see thumbnail-sized illustrations of documents with images in them. The location of the image in the illustration shows you where your image will be placed in relation to your text.
To wrap text around an image, click the Wrap Text button to wrap the text around an image. When you click the button, the following dropdown menu will appear:
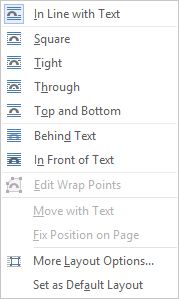
-
Square means your image sits on the same plane as the text. The text flows around the image in a square pattern.
-
Tight text flows around the image, hugging its shape. If you insert a circular shape, the text will take a circular pattern around the text.
-
Through means that the text will flow around the image as best as possible.
-
Top and Bottom means text will appear on top of the image and at the bottom.
-
Behind Text means the image is behind the text. The image looks like it is part of the paper.
-
In Front of Text means the image is on top of your text. It’s the same as if you printed a document and dropped a photograph on top of it.
You can lock an image to text so that if you move the text, the image moves also. To do this, click the Text Wrapping button, choose More Layout Options. Under the Position tab select Move Object with Text.
NOTE: You can also wrap text around an image as soon as you insert it into your document without having to go to the Ribbon. Look at the text wrap icon in the snapshot below. Clicking on it reveals the Layout Options menu.

WordArt
WordArt is a very popular feature in Word. To use WordArt, go to the Text group under the Insert tab.
The WordArt button looks like this:
When you click the downward arrow, you’ll see the WordArt menu:

Select the way you want your text to look and click on it.
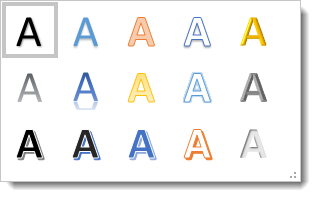
You can now format WordArt the same way you did shapes and images.
Insert Video
You can insert videos into your documents just as easily as you can insert images. To insert a video, go to the Insert tab and click the Online Video button in the Media group.
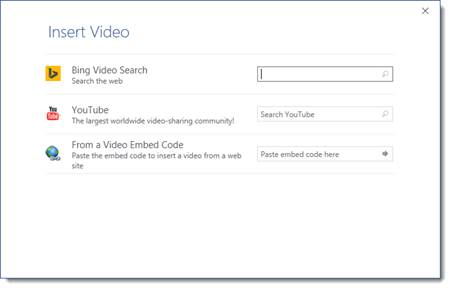
You can insert videos by searching for them on Bing, from a video embed code that you find on video webpages such as YouTube, and even from YouTube itself.
Let’s search for a video of a cat on Bing.
Type «cat» into the Bing Video Search field.
You will then see the search results appear.
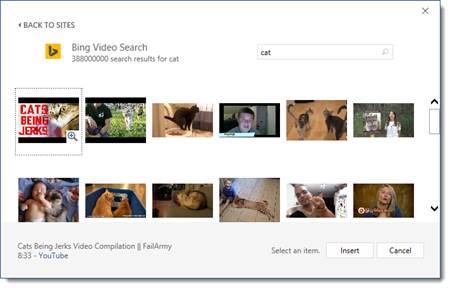
Click on a thumbnail of a video to select it, then click the Insert button.
The video is inserted into your document.
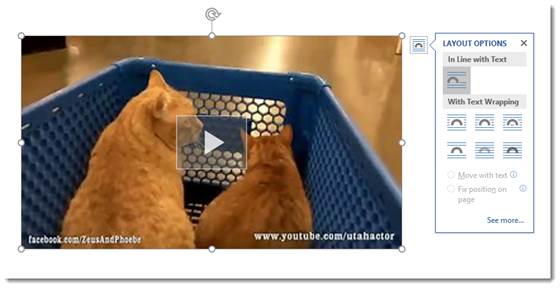
You can then rotate, resize, and position the video just as you would an image.
Formatting ClipArt and Pictures Using the Picture Tools and Format Ribbon
Whenever a picture is inserted or selected, the Format tab will automatically appear as a tab in the Ribbon. It provides you with a few of the most commonly used features available in image editing software like Photoshop. You can change the contrast, add artistic effects, remove backgrounds, or crop them. To view the Format tab, select a picture by double clicking on it.

In the center of this ribbon, you’ll see styles you can add to pictures. You can add frames, drop shadows, reflections, etc.

You can also add your own formatting to your images. Remember, a style is just a chunk of formatting heaped together.
To add formatting to your picture, you can click the Picture Border, Picture Effects, or Picture Layout, as shown below. These are located in the Styles group under the Format tab.
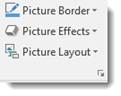
When you add a picture border, you can choose the color of the border, the weight (or thickness) of the line, and even the type of line (dashed, etc.).
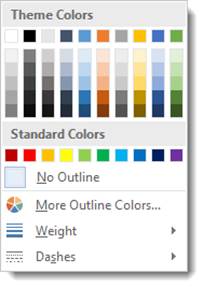
If you remember, earlier in this course you learned how to add text effects such as shadows and reflections. You can also add these to your pictures by clicking on Picture Effects.
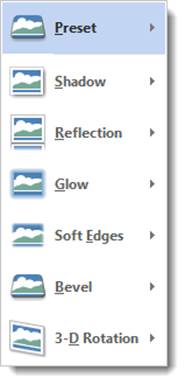
If you choose Picture Layout, you can format your picture with a caption or more information.
Here are the choices when you click Picture Layout:
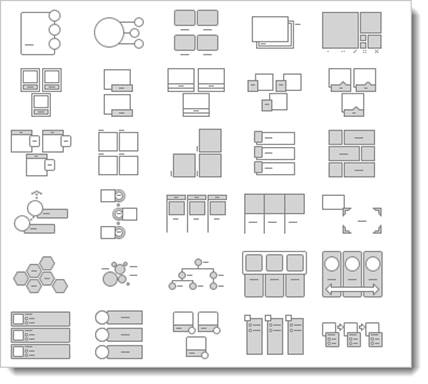
Choose the layout you want to use. We chose:

Word also provides a box where we can enter the caption:
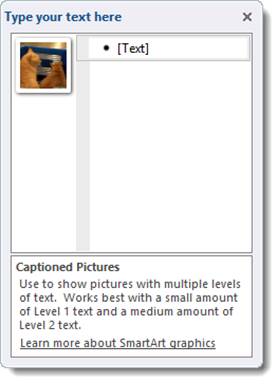
NOTE: You can also right click on an image and select Add Caption. The method above gives your image additional formatting.
Using the Screenshot Tool
The screenshot feature was new with Word 2010. It gives you the ability take a screenshot and have it appear instantly in your documents. To use this feature, position the cursor in the place you want the screenshot to appear. Select the Insert tab and click the Screenshot button. It looks like this:

Be aware though, that this feature is somewhat limited, allowing you to only take screenshots of active windows. Windows that have been minimized to the taskbar will not be available. When we click the Screenshot button, we’ll see a list of the windows that are available, as in the following example.
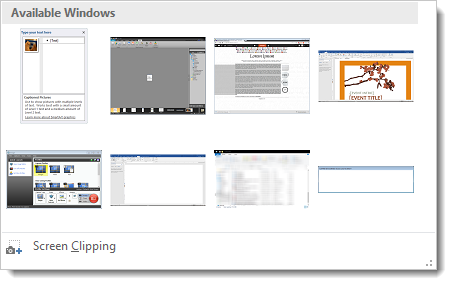
Selecting an available window will take a screenshot of the entire thing and insert it into your document. You can then use the Format ribbon to crop the screenshot or change other attributes.
If you do not want to take a screenshot of the entire window, you can select the Screen Clipping command at the bottom of the window.
When you select the Screen Clipping command, the entire window will be opaque. Click the left mouse button and drag the pointer over the area you want to capture. This selected area will become clear. Release the mouse to capture the screenshot, and it will automatically appear in your document.
Using SmartArt and SmartArt Tools
According to Microsoft, SmartArt is a quick and convenient way to create a visual representation of the information in your document. That’s a mouthful, isn’t it? What they really mean is it’s a quick and convenient way to create flow charts. The following is an example of an available SmartArt template.
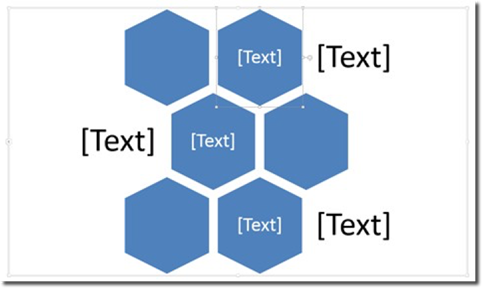
The SmartArt button is located on the Illustrations section of the Insert tab. It looks like this:

Click it and a dialogue box opens. It gives you a different categories of SmartArt to choose froom. There are lists, processes, cycles, hierarchys, etc.
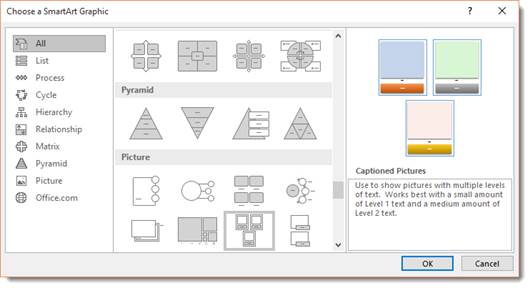
If you have access to Word, take a moment to explore the different SmartArt graphics available in each section. Seeing them all for yourself will give you the best exposure to all of the possibilities. You can even click «Office.com» and find SmartArt graphics that were created by other Office users.
When you’ve found a SmartArt graphic that you like, select it and click OK.
When the graphic opens in your document, or when it is selected, a pane opens up beside it. You can either click the areas marked [Text] in the graphic or in the pane. Click on these, then type your text. In some templates, you can also insert pictures.
Inserting Charts
To insert a chart, navigate to the Insert tab and click the Chart button. It looks like this:

The Insert Chart dialogue will open.

The chart types are arranged along the left side of the window.
Select the chart you want to use, then click OK.
If Microsoft Excel is installed on your computer, it will also open with your chart. You can input data into Excel which will then be conveyed by your chart.
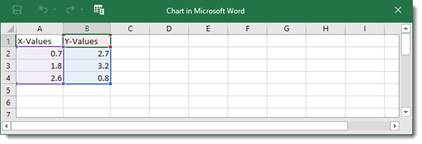
Chart Types
Word brings with it some new chart types to help you better illustrate data that you include in your documents.
These chart types include:
- Treemap. A treemap chart displays hierarchically structured data. The data appears as rectangles that contain other rectangles. A set of rectangles on the save level in the hierarchy equal a column or an expression. Individual rectangles on the same level equal a category in a column. For example, a rectangle that represents a state may contain other rectangles that represent cities in that state.
- Waterfall. As explained by Microsoft, «Waterfall charts are ideal for showing how you have arrived at a net value, by breaking down the cumulative effect of positive and negative contributions. This is very helpful for many different scenarios, from visualizing financial statements to navigating data about population, births and deaths».
- Pareto. A Pareto chart contains both bars and a line graph. Individual values are represented by bars. The cumulative total is represented by the line.
- Histogram. A histogram chart displays numerical data in bins. The bins are represented by bars. It’s used for continuous data.
- Box and Whisker. A Box and Whisker chart, as explained by Microsoft, is «A box and whisker chart shows distribution of data into quartiles, highlighting the mean and outliers. The boxes may have lines extending vertically called ‘whiskers’. These lines indicate variability outside the upper and lower quartiles, and any point outside those lines or whiskers is considered an outlier.»
- Sunburst. A sunburst chart is a pie chart that shows relational datasets. The inner rings of the chart relate to the outer rings. It’s a hierarchal chart with the inner rings at the top of the hierarchy.
Using the Chart Tools
Whenever you insert a new chart into your document, the Chart Design and Chart Format tabs will open, as pictured below.
This is the Chart Design tab. By default, it’s the tab you’ll see.

You can also click on the chart Format tab, to the right of the Chart Design tab.

Let’s take a look at the chart tools available on the Design tab.

Just like in the text ribbon, you have a choice of Chart Quick Styles. You can apply them just like you would with text, paragraphs, and pictures.
Use the Chart Layouts group on the Ribbon to add chart elements or change the layout.
Now look at the Type and Data Sections. The data section lets us select an existing data set, or edit one.
With these, we can change the chart type, switch rows to columns or vice versa, select, and edit data. Say, for example, that after we entered our data, we realized that maybe a pie chart wasn’t the right way to convey it. We’ve decided instead to use a graph chart. To do so, we’d click the Change Chart Type button and select a new chart.
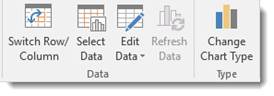
Now let’s take a look at the Format tab for charts:

Use the Current Selection group to change the formatting of the current selection.
Use the Insert Shapes group to add and insert shapes. Use the Shape Styles section to change the style of your shapes. You can also change WordArt styles that appear in your chart.
The Arrange group lets you arrange your data and images, including text wrap and position.
The Size group allows you to adjust the size of your chart (in inches).
5,204 Microsoft Word Graphics and Graphic Design Elements
Download the Best Graphics Compatible with Microsoft Word
Applied filters:
Compatibility: Microsoft Word
×
Clear

Resume/CV Template for Microsoft Word & iWork Pages that includes US Letter Size Files and A4 Size Files; Microsoft Word Files (.docx) and iWork Pages Files (.pages); 1, 2, and 3 Page Resume…
Resume/CV Template for Microsoft Word & Apple Pages 2 in 1 Resume Versions (“Black Edition” & “White Edition”). Each resume version includes US Letter Size Files and A4 Size Files;…
We are offering 100% editable, print based template of premium quality RESUME/CV and cover letter with modern design and typography.
About the ProductThis Modern & Creative Resume Template has been made especially for those who want to get a job to change their career & increase chances of being called for an interview.Any text…
We create pro templates that help you get the best result in the minimum possible time. This file pack is professionally designed and very easy to use and customize, plenty space for all your text…
Cinco De Mayo Party FlyerINSTANT DOWNLOADThis is not a mock-upFILE INFORMATION — Size: 5×7 In — Page: One side — Resolution: 300 dpi — Color mode: CMYK — Bleed: 0.25 in — Software used:…
About the Product-This Modern & Creative Resume CV Template has been made especially for those who want to get a job to change their career & increase chances of being called for an interview.Any…
Certificate TemplateCorporate & Modern Certificate Template. Use this Certificate Template in your business, company or institution in completion of any course, training ,degree or job.This is not…
Looking for the perfect rounded font for all your minimalist design concepts? Then grab this font with an elegant bauhaus style.The font includes upper and lowercase letters with clean, rounded…
Resume/CV Template for Microsoft Word & iWork Pages that includes US Letter Size Files and A4 Size Files; Microsoft Word Files (.docx) and iWork Pages Files (.pages); 1, 2, and 3 Page Resume…
About the Product-This Modern & Creative Resume CV Template has been made especially for those who want to get a job to change their career & increase chances of being called for an interview.Any…
Welcome to the Resume Inventor ! ★★★★★We make every piece of our resume design, such as text, color, photos, design spaces and other related topics, to ensure that you will definitely be…
About the Product:This Modern Invoice Template has been made especially for those who want to spread their business identity to everyone.Any text you can easily edit even any shape & color. The…
WELCOME TO OUR STORE,We are industry experts with several years of recruitment related expertise. Professional resume templates , contemporary resume templates , teacher resume templates , creative…
Introducing this modern Certificate design with more flexibility than ever. You can use this Certificate template for personal or corporate use. It’s suitable for purposes like — completion of any…
Welcome To Our StoreWe are industry experts with several years of recruitment-related expertise. Professional resume templates,Teacher resume templates,contempary resue templates,creative resume…
Introducing the «Bright Sunshine» script font. New fashionable handwriting font and super cool with sexy style. And also the Capital letters set with contemporary and sophisticated accents. Bright…
Welcome to the Resume Inventor ! ★★★★★We make every piece of our resume design, such as text, color, photos, design spaces and other related topics, to ensure that you will definitely be…
Welcome to the Resume Inventor ! ★★★★★We make every piece of our resume design, such as text, color, photos, design spaces and other related topics, to ensure that you will definitely be…
The BESTVALL type family is a highly athletic and dynamic typeface capable of evoking the energy of sport in its literal and historical form.
File incformationA4 Paper Size (210×297)mmTwo Page/Template Resume/CVOne Page/Template Reference& One Page/Template Cover LetterIncluded 30+ Icons PackParagraph & Character StyleDocument & Baseline…
Medical Services Brochure Tri-Fold Template has been designed for medical services. It is mainly aimed at doctors, clinics, laboratories, hospitals and medical products.The layout is so versatile…
Clean & Professional Resume/cvTemplate to help you land that great job. The flexible page designs are easy to use and customize, so you can quickly tailor-make your resume for any opportunity.A4…
Break Love Is An Classy Retro Font Inspired By Stylish and Vintage Character. Font Features :- Break Love OTF ( *Open Type* )- Break Love TTF ( *True Type *)- Break Love WOFF ( *Web Font* )*FAQ’s…
I am pleased to present you an excellent futuristic font «Futurism» in modern graphic style!The font supports the Latin alphabet and Cyrillic alphabet. It is recommended to use it at long intervals…
I suggest you to pay attention to the «Carfont» font.Powerful and humanistic, dynamic and confident, all this is in the character of a modern typeset Carfont. He easily holds attention and inspires…
Mayfest Is An Elegant Display serif Inspired By Luxury and Elegant Character. Font Features :- Mayfest Regular OTF ( Open Type )- Mayfest Italic TTF ( True Type )- Mayfest Bold TTF ( Open Type )-…
Resume/CV Template for Microsoft Word & iWork Pages that includes US Letter Size Files and A4 Size Files; Microsoft Word Files (.docx) and iWork Pages Files (.pages); 1, 2, and 3 Page Resume…
We are professionals with several years of experience in the job recruitment industry. Resume create multiple category resume template like professional resume template, modern resume template,…
Resume/CV Template for Microsoft Word & iWork Pages that includes US Letter Size Files and A4 Size Files; Microsoft Word Files (.docx) and iWork Pages Files (.pages); 1, 2, and 3 Page Resume…
12x Professional and Unique Resume and Cover Letter Design 12 Design a Resume and Cover Letter Professional Resume design for all candidates
Joyfish Is An Lovely Serif Font Inspired By Luxury and Feminine Character. Font Features :- Joyfish OTF ( *Open Type* )- Joyfish TTF ( *True Type *)- Joyfish WOFF ( *Web Font* )*FAQ’s :*Where are…
Socialy — 32 Social Media Network & Office Business Icon SetThis is an unique Social Media Office Business Work Icon Set created for your special project needs. If you need something special and…
About the Product• Fully editable Vector logo• File Format: AI & PSD• Black and white logo• Mockup Images and animations are just for the preview purpose only, are not included in the main…
Resume/CV Template for Microsoft Word & iWork Pages that includes US Letter Size Files and A4 Size Files; Microsoft Word Files (.docx) and iWork Pages Files (.pages); 1, 2, and 3 Page Resume…
Worky — 80+ Corporate Business Office Media Network Vector Set80+ OFFICE BUSINESS WORK VECTOR DRAWINGS ILLUSTRATIONSThis is an awesome graphics and illustrations bundle of business, office and work…
We all know art objects make the end product look attractive, comprehensive. Microsoft Word graphics are varied with figures, images, pictures, charts, and tables to develop the winning item. There are job recruitment industry templates that are editable in Microsoft Word. In general, it’s offered resumes, covered, business, reference letters, CVS, and other useful docs. Because of the professionals working on creating high-quality items, with the help of it, you can get hired for your dream job, impress your boss. They have not one purpose but other directions, functions.
The fact that the formers are beautiful and elegant helps to reconsider the information more structured. A familiar situation when you are doing your best to save time, energy? Our service won’t make you do this, because we’ve already thought it over and made up fast, comfortable facilities. Is it worth it to read to the end of the article? Yes, because you will get precise information, mindful understanding. After reading to the end, you’ll realize how relevant, profitable our offer is.
Great Features of Microsoft Word Graphics
An integral part of a template is the features it contains. You might be confused about the amount of them, but we guarantee that all of these you’ll get in one purchase. In addition, artworks are editable in Microsoft Word, so it’s one more added benefit.
Take a look at the main multi-role characteristics:
- Editable and customized. If you don’t like design, you are in charge of changing it under yourself and enjoying free use. We surely care about our customers’ tastes and preferences.
- A4 paper size. The most common, recognizable.
- Print-ready. We understand that you are in a rush to job meetings, so it’s the reason we’ve made the function where you are free to print documents without blinking an eye. Everything is simple, even for kids or retired people.
- Fully layered. As it was mentioned, simplicity takes a big place in the working process. A layered template contains design cues to help during the usage. To cut a long story short, sketches.
- Modern design. We don’t follow fast-coming trends because we’re sure simple, plain, pastel designs will always be in high demand among clients. In this way, we differ from others.
- Free fonts. Affordable tools come in handy and become an essential part of future page making.
- Help guide. There is a file helping you to figure out issues you are dealing with or maybe to ensure you are doing everything right. Don’t worry; you will have help from us.
- Spot color design. Sharp and bright colors are a sign of qualitative, conscientious, professional work from our side.
- Bleeds, guides are also included.
- Resizable components. As well as changing colors and elements’ places, you can change sizes as you desire. We give you the freedom to select whatever you want from our offered possibilities.
As you see, there are plenty of advantages to exploiting illustration templates. Don’t forget they are fully editable in the Microsoft Word program to add cool stuff and make it one-of-a-kind. These are made to satisfy your wishes, and don’t worry; you will meet expectations. The next question is who might get interested in MS Word graphics. Let’s have a look.
Who May Need Microsoft Word Graphics for Work
It is for a job or schoolwork purposes. To land your dream job, you need a formulated application. Patterns, with graphics, will lead you to the end and assure a successful future working process in the company you hoped to. Firms use MS Word to manage correspondence. For instance, you can use a program to create an email; merge functions can fill the mock-up email with pertinent contact details. It may be used to create business documents, company reports, budgets, plans. It can help you build a library of key forms like receipts, accounts.
Design features are easy to use, allowing you to use data visualization tools to add charts, graphs, and tables to your documents. Its SmartArt function uses craft items to transfer information. Promotional and marketing materials such as brochures, flyers, newsletters are full of colorful graphics and exploited in MS Word. It handles letterhead, allowing to format and create it. It can be helpful for small businesses that are doing their best to pay for services, consumables. You can use styles, themes to decide how all your documents will look for branding aims, ensuring harmonization in colors, fonts, and effects.
For everyday routines such as doing a daily journal or calendar, graphs come in handy. Teachers are target users as well. To provide students with a great repository of information, they need to assemble it and give it cool visuals. They will wake up wanting to learn in this way. Methodists help teachers, coaches with problems, emergency tasks to handle. In turn, pupils are supposed to do homework, presentations, take notes, coursework to get a good mark and learn a little for themselves. Marketologs and business owners like to build tables related to finances and other necessary things to their minds. As you can see, art elements are multipurpose and are used in different spheres of life.
Microsoft Word Graphics Video
Not a secret everybody in their time was a beginner. But not everybody had access to Internet resources to gain knowledge in a particular field. Today’s days are full of free, valuable information to read or watch. In this article, you have an opportunity to get more. Check out the video translation; it’s about tools for web designers, illustrators, marketers. In this live stream, experts are sharing a bunch of super useful online instruments. Enjoy!
Microsoft Word Graphics Q&A
What is Microsoft Word graphics?
Microsoft Word is soft designed for text manipulations. Graphic elements are inherent components of a program. They are varied, fulfilling texts. Actions to do are: change shapes, colors, add pictures, audios, videos, play with sizes, add shades, borders, shadows. They are used in different fields by different people.
How can I use Microsoft Word graphics?
Here is a step-by-step instruction:
- Click on a doc where you want to see a future picture.
- Click the “Insert” and then on the “Picture” option available in the Illustrations group. As a result, the “Insert Picture” dialog box will appear.
- You can select the desired image using the dialog box.
Well done!
What is SmartArt in Microsoft Word graphics?
SmartArt is a type of image that often can be shown in PowerPoint. It allows you to communicate information with graphics instead of dull text. There is a huge range of styles you can choose from to use to illustrate many ideas.
Where can I find SmartArt in Microsoft Word graphics?
You have a plan to follow. On the «Insert» menu, select «SmartArt graphics.» On the tab in «Insert SmartArt graphic group,» you will see and choose the type of computer graphics you want. Then decide the layout you want and enter text.
How to Insert and Position Graphics in Word Documents
Summary
Step-by-step instructions for working with graphics in Microsoft Word
Overview
Graphics can add interest and impact to your Word documents. Suppose you’ve completed a letter telling your friends about the great party you threw for your cat’s birthday. The words capture the festive mood of the event, but a page of only text can look lifeless and dull. Graphics can help enliven your document.
Insert Clip Art
1. Place the insertion point in your document where you want to insert clip art, and then select the clip you want.
2. On the Insert tab in the Illustrations group, click Online Pictures.
3. In the Insert Pictures dialog box, you can search either the Office.com site, or do a Bing image search. Type a word or phrase that describes the clip art that you want. Click the search button or press enter.
4. The results will produce both clip art and photographs. In the list of results, click the clip art to select it. You can hold the Ctrl button while clicking other illustrations to make multiple selections. Click the insert button to insert your selection(s).
Insert a Picture From a File
1. Click in the document where you want to insert the picture.
2. On the Insert tab in the Illustrations group, click Pictures.
3. Locate the picture that you want to insert.
4. Double-click the picture that you want to insert. After you insert a graphic, you can use wrapping styles to modify the layout of the text in relation to the graphic.
Wrap Text Around a Picture
1. Click the picture in your document to select the picture. When the picture is selected, you will see the Picture Tools tab appear on the right end of the Tab Bar.
2. Click the Picture Tools Tab to see the Picture Tools Ribbon.
3. In the Arrange Group, click the Wrap Text button.
4. You will see a drop-down list of Wrap Styles to choose from. Click the Wrap Style you want. Click off the picture to de-select it.
Wrapping Styles
You may now have a nice graphic, but that gap of white space to the right is probably not what you want. Don’t worry; you can further refine the layout of the graphic and text. Using the five wrapping styles below, you can create documents with just the look you want.
Wrapping Style |
Result |
|---|---|
|
The In line with text style insets the graphic in the text at the location of the insertion point. The graphic moves as you add or delete text. The text does not wrap around the graphic; white space extends to the margins on either side of the graphic. |
|
|
The Square style wraps the text around all sides of a square bounding the graphic. The graphic moves as you add or delete text. |
|
|
The Tight style wraps the text around the graphic in an irregular shape bounding the actual image. The graphic moves as you add or delete text. |
|
|
The Behind text style has no border around the graphic. The graphic floats on its own layer behind the text. |
|
|
The In front of text style has no border around the graphic. The graphic floats on its own layer in front of the text. |
|
In most cases, you can get the results you want by using these choices from the Layout tab. If you want even more control in positioning your graphic, see Help on how to use the advanced layout options.
Keywords: graphics, Microsoft Word, image position
Filed Under: Academic Help/Tutoring, Help Desk
There are no attachments for this article.
About the A-B Tech HelpDesk
Added on Fri, Mar 28, 2014
How to Use OneDrive
Added on Thu, May 17, 2018
Support Services
Added on Wed, Oct 24, 2012
Learn Mouse Skills
Added on Thu, Jan 22, 2015
Tutoring Center
Added on Tue, Oct 23, 2012