
Excel for Microsoft 365 Word for Microsoft 365 Outlook for Microsoft 365 PowerPoint for Microsoft 365 Access for Microsoft 365 Project Online Desktop Client Publisher for Microsoft 365 Excel 2021 Word 2021 Outlook 2021 PowerPoint 2021 Access 2021 Project Professional 2021 Project Standard 2021 Publisher 2021 Excel 2019 Word 2019 Outlook 2019 PowerPoint 2019 Access 2019 Project Professional 2019 Project Standard 2019 Publisher 2019 Excel 2016 Word 2016 Outlook 2016 PowerPoint 2016 Access 2016 Project Professional 2016 Project Standard 2016 Publisher 2016 Office 2016 Excel 2013 Word 2013 Outlook 2013 PowerPoint 2013 Access 2013 OneNote 2013 Project Professional 2013 Project Standard 2013 Publisher 2013 Visio Professional 2013 Visio 2013 Excel 2010 Word 2010 Outlook 2010 PowerPoint 2010 Access 2010 OneNote 2010 Project 2010 Project Standard 2010 Publisher 2010 Visio 2010 Visio Standard 2010 Office 2010 Excel 2007 Word 2007 Outlook 2007 PowerPoint 2007 Access 2007 OneNote 2007 Project 2007 Publisher 2007 Visio 2007 Office 2007 InfoPath 2007 More…Less
Sometimes checking for spelling and grammar errors doesn’t work the way you’d expect. To find a solution for the problem you’re experiencing, visit our community of Word users who can help you.
For more info on spelling and grammar checking, see Spelling and grammar in Word.
Need more help?
Download PC Repair Tool to quickly find & fix Windows errors automatically
Microsoft Word is a very useful software when it comes to writing long paragraphs with styling. Almost every writer uses Word on his/her computer. People use Microsoft Word over Notepad because – apart from the formatting options – it can detect spelling mistakes, grammatical errors, and sentence formations. However, if your Grammar and Spell Checking is not working in Microsoft Word, then this post will show you how to fix the problem
The reason for this problem could be many. For instance, if you have added more than one language in the system, you can get this problem. On Windows 11/10, if you have changed the language to use Cortana, you can get this issue with Microsoft Word. The feature can be disabled automatically. Therefore, if you are facing the same issue and want to solve the problem, carry out the following steps.
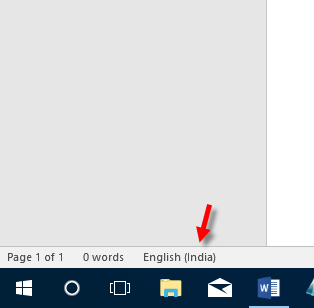
1] Open Microsoft Word. You will see the language at the bottom. It can be English (India), English (US), etc. Click on that language button.
If you have added two languages, you will get a popup like this:

Now, select a language that you want to write in and make sure that the following options are unchecked:
- Do not check spelling or grammar
- Detect language automatically
Remove the tick mark from both of the boxes. If you do not remove the tick from “Detect language automatically”, the same error will appear when you open the Word for the second time. Now, hit the Set As Default button and click on the affirmative option.
2] If you still face the same problem, you can do the following.
Open Word and click on File. Now, go to Options > Proofing.
Under When correcting spelling and grammar in Word, you can find a few options like “Check spelling as you type,” “Check grammar with spelling” and more others. Make sure that all of these are checked.
3] This can also happen if the Proofing Tools are not installed for the default language. You may need to install them. You can do this via Control Panel, Uninstall a Program applet. Select Microsoft Office > Change > Add or remove features > Expand Office Shared Features > Proofing Tools.
4] Ensure that the Speller add-in is disabled. If you use English (US) then the add-in would be Speller EN-US. You can do this here – Click File tab > Options > Add-ins.
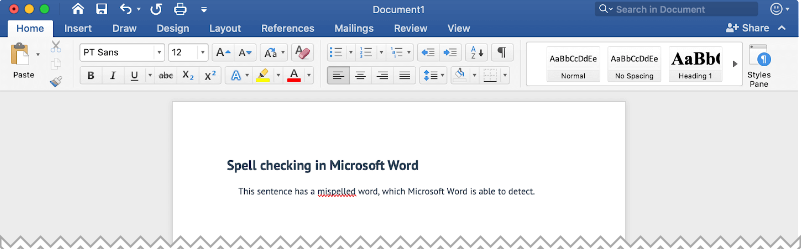
Restart your computer and check. Your Microsoft Word software should be able to detect spelling and grammar mistakes.
How do I enable grammar check in Word?
In the latest version of Microsoft Word in Microsoft 365, you need to use the Editor panel to enable grammar check. It checks for spelling, grammar, clarity, formality, etc., at once in Word. Whether you have a small piece of document or a school and college project, you can use the Editor to check for grammar in Word. Alternatively, you can enable it from File > Options > Proofing.
How do you reset spelling and grammar check in Word?
As of now, there is no option to reset spelling and grammar checks in Word. Most of all, you do not need to reset this setting since it just searches for potential mistakes and notifies you on the go. However, if you want to turn on or off grammar and spelling check, you need to go to File > Options > Proofing. Then, check the Check spelling as you type and mark grammar errors as you type checkboxes.
That’s all! Hope this guide helped.

When he is not writing about Microsoft Windows or Office, Sudip likes to work with Photoshop. He has managed the front end and back end of many websites over the years. He is currently pursuing his Bachelor’s degree.
Microsoft Word is an indisputable leader among text processing applications. Whether you are using Windows or Mac, Microsoft 365 is an essential package for creating documents. However, Word can create some problems that can easily annoy you. Spelling and grammar checker not working issue is one of the problems many users face when using Microsoft Word. In this article, let us explain how to fox this issue and write error free content like a pro.
Earlier Word versions used to check two things – one is spelling and other is grammar. Word used to underline spelling errors with red wavy line and grammar errors with green wavy line. However, the new AI powered Editor interface has slew of checks like clarity, conciseness, formality, etc. including similarly checker in addition to spelling and grammar checks.

However, sometimes Word will not highlight the spelling / grammar checks making you crazy. You will not find any red or green lines even though the document has misspelled words and the Editor will also show you 100% perfect without detecting the errors.

Here are some of the suggestions that you can try to fix the spelling and grammar checker in Microsoft Word.
Fix Spelling and Grammar Checker in Word
Let us explain the available options primarily for Microsoft 365 for Windows. We have mentioned the applicable cases for Mac version since features like repairing Word are only available for Windows.
1. Check Dictionary Language
Proofing tools in Word uses the language set in the dictionary for checking errors. If the document language is different than your dictionary language, you will see all the words are underlined with red or green wavy line. You can simply check the status bar in Word to confirm the language. Click on the language in status bar to change to English or the document’s language to remove all the red/green underlines.

In addition, make sure the option “Do not check spelling or grammar” is not checked. Otherwise, Word will ignore the spelling and grammar errors leading to confusion that you might think it is not working. If the document language is not installed, Word will suggest installing the proofing language for checking spelling and grammar. You can opt to download and install the required language pack for proofing.

Good part is that this dictionary language check from the status bar option is available in Word app comes with Microsoft 365 subscription in Mac also.

2. Check Proofing Options
Word by default will check your document in the background while you type and suggest the spelling and grammar errors. If you have changed the default behavior, it will result in not showing any red or green lines while you type. In Windows, open “Word Options” dialog box by going to “File > Options” menu in Word app. When you are in “Word Options”, go to “Proofing” section and check the followings:

- Auto Correction – if Word is not capitalizing the first word and correct other suggestions automatically, then click on “AutoCorrect Options…” button. Check your settings and make sure everything is fine as per your need.
- Spelling Correction – by default Word ignores the words in capital, containing numbers and mark repeat words. You can check these options are set correctly in this section.
- Spelling and grammar checking – this is the main section that you might have changed. Make sure to enable “Check spelling as you type” and “Make grammar errors as you type” options. This will enable Word to show red and green underlines instantly after you type the words.
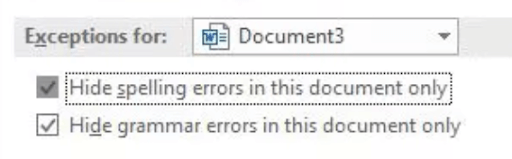
- Exceptions – under this section make sure the options “Hide spelling errors in this document only” and “Hide grammar errors in this document only” options. Ensure to check this especially when you have received the document from someone else. The author of the document might have set these options mistakenly or for different purposes.

In addition, check the proofing language under “Language” tab from the sidebar and make sure you have the required language installed for doing spelling and grammar check.

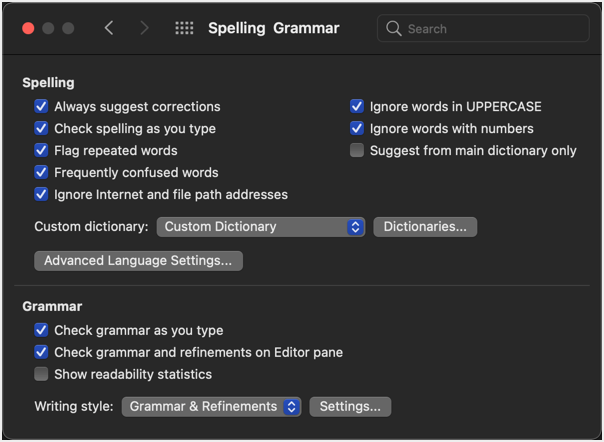
In Mac, you can check these settings under “Spelling & Grammar” section by going to “Word > Preferences…” menu.
Note: Changing settings may affect other Office applications like Outlook. Therefore, make sure to change the options with care.
3. Disable Add-ins
There are large number third-party add-ins available for Word Windows version. These add-ins can easily create problems with the default spelling and grammar checker. When you are in “Word Options” section, go to “Add-ins” tab. Select the type of add-ins from “Manage” dropdown box and click “Go…” button. Simply, disable the add-ins by unchecking the box. Now, check the problem is fixed and spelling checker is working. If yes, you can enable the add-ins one by one to find the actual one causing the problem.

4. Check in Safe Mode
Though the above method works to find the problematic add-in, it may take long time. The alternate option is to open Word in a safe mode which will automatically disable all installed add-ins.
- Press “Win + R” to open Run command prompt.
- Type winword / safe and press “OK” button.
- This will open Word in Safe mode and check the spelling checker is working.

If it is working, you can follow the above explained method to find and disable the add-in that causes the problem.
5. Repair Microsoft Word
If none of the above methods work and you also feel Word is not working properly on your computer, then you can use repair option to fix all problems in your installation. However, if you have Microsoft 365 subscription, this will repair the entire Office installation that includes other Office apps.
- Press “Win + I” keys to open Windows Settings app.
- Go to “Apps” section and click on “Apps & features” tab.
- Here you will find all installed apps in your computer. Search for 365 or Word to find the Office installation.
- Click on the three dots vertical icon and select “Modify” option.
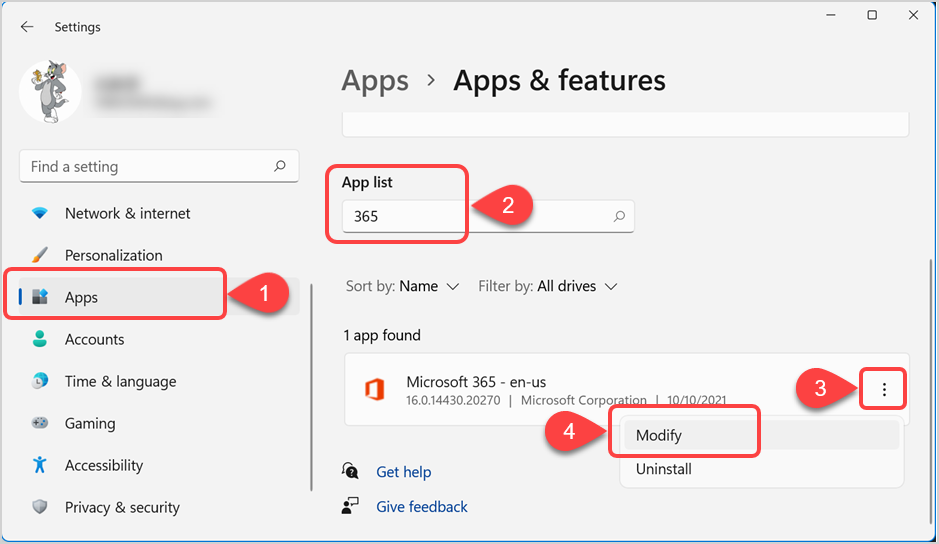
- This will open Office Repair wizard. First select “Quick Check” and click on the “Repair” button to start repairing the installation. If this did not fix the issue, then try “Online Repair” and follow the instructions to repair your Office applications.

Have you ever had one of those days where you’re finishing an important document, but the spell check in Microsoft Word isn’t working correctly? Sometimes you can’t check one document, and other times you can’t spell-check any document. And sometimes, it’s several words. In this troubleshooting tutorial, I’ll show several fixes.
I’ve encountered this annoyance many times. Usually, I can solve the issue with the steps below unless it’s a protected Microsoft Word document. However, one reason you want to correct this issue is that it may interfere with calculating your Word readability statistics.
Spell Check Not Working – (1 Document)
Sometimes Word’s spell check will only work for one document. However, you can open other Microsoft Word documents, and spell check works. The problem is probably with the preferred languages or formatting settings.
Verify Your Language & Check Spelling Options
- Open the problem document.
- Press the Ctrl + A keys to select the entire text.
- From the Review tab, select Language then Set Proofing Language…
- In the Language dialog box make sure the correct default language is selected.
- Verify the checkbox Do not check spelling or grammar is unchecked.
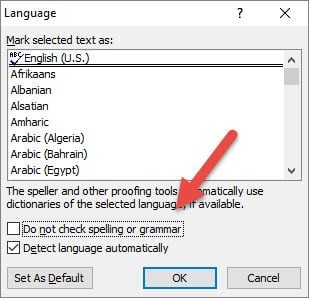
- Click OK.
- Recheck your document
I wish the above method were foolproof. Highlighting the entire document would overwrite all paragraph settings throughout. On older versions of Microsoft Word, I would get the following message as shown below. However, in Microsoft 365, I no longer get this alert even if I have spelling errors.
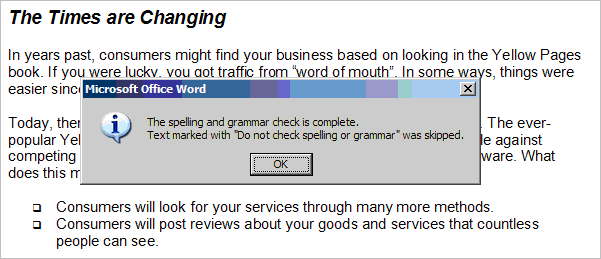
This alert message suggests that your document has a section marked “Do not check spelling or grammar.” Unfortunately, I don’t know any easy way to find these marks. So instead, I find a paragraph with a spelling mistake, highlight it, and press Shift + F1.
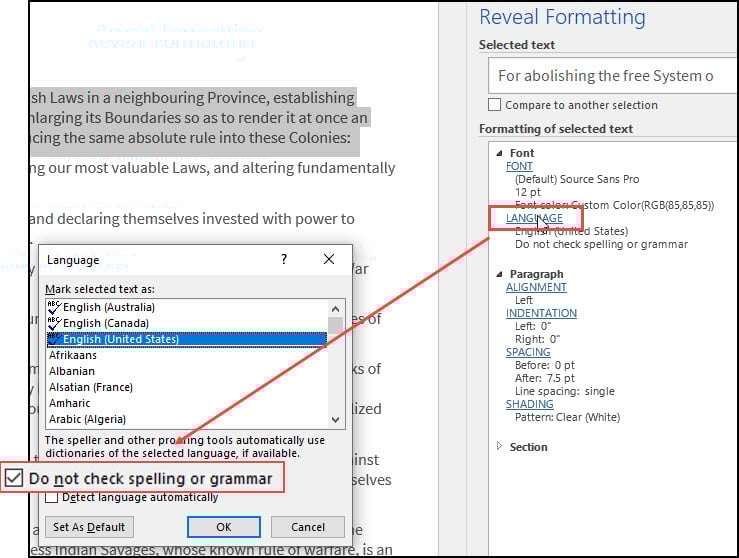
This opens the Reveal Formatting pane, where you can verify that your correct language is what you expect and if the paragraph has spell check turned off. In the example below, the highlighted paragraph is coded not to check for spelling.
Tip: If you don’t see the pane, you may have some sort of Function lock on your keyboard. Generally, these keyboards have an F Lock key on the top row because there are other functions mapped. Other keyboards may use an Fn key.

In the above example, I misspelled the word “government”. Word did not flag this instance because the paragraph was marked not to do spelling or grammar checks.
To fix the issue, highlight your paragraph and click the Language link in the Reveal Formatting dialog. This will open the Language dialog box, and you can deselect the check spelling or grammar option checkbox.
Are Multiple Proofing Languages Set
Looking at the screen print above, you’ll notice that I have three proofing languages above the double line. They are variations of English for Australia, Canada, United States. Word can get confused if you don’t enable “Detect language automatically“.
According to this support page, Microsoft noted several suggestions:
- Automatic language detection requires that a sentence of text be written in that language. Depending on the length of your sentences, you might need to type several sentences before Word has enough contextual information to automatically detect the language and apply the correct dictionary.
- Words that are spelled the same way in several languages, such as “centre” in English (United Kingdom) and French (France) might cause the Detect language automatically check box to incorrectly identify the language of text. To solve this problem, type more words in the language you want, or clear the Detect language automatically check box.
Review Your Proofing Exception Options
You should check another setting, as there is a Word option where you can elect to hide spelling errors. You can set this option on an individual file.
- Click the File tab.
- From the left panel, select Options.
- In the Word Options dialog, click Proofing.
- Scroll to the bottom area called Exceptions for:
- Check to see if the Hide spelling errors in this document only check box is enabled.

Spell Check Not Working – (All Documents)
This second problem can be a real annoyance with many variations. The suggestions range from easy to a Microsoft Windows registry change.
Option 1: Verify the “check spelling as you type” Feature
This feature is an option to see your mistakes as they happen. In some cases, I’ve seen toggling this check box “on” and “off” fix the problem. Additionally, those red squiggly underlines might be from the Word Exclusion Dictionary.
To verify Spelling and Grammar Checkers are on,
- Click the File tab.
- From the left menu, select Options at the bottom.
- In the Word Options dialog, click Proofing.
- Check the boxes for Check spelling as you type and Mark grammar errors as you type. (See picture above.)
- Click OK.
![]() Note: For older versions of Word, use the Check Document feature on your Review tab.
Note: For older versions of Word, use the Check Document feature on your Review tab.
Option 2: Check for Conflicting Word Add-in
Still, your problem may be caused by a combination of factors such as another Word add-in. The way to verify this is to see if the spellchecker works in “safe mode”. Safe Mode is a reduced functionality state where Microsoft Word loads without add-ins.
- Hold down your Ctrl key and then press the icon or menu option for Microsoft Word.
- Click Yes when the Safe Mode dialog appears.

- Open up your document.
- Press F7 to run spell-check.
If the spellchecker works, you need to figure out which add-in is causing the problem. There are two areas where you may see these.
The first is from the Insert tab.

If you click My Add-ins, you will see your installed items. If you hover over an item, a 3-dot menu will appear where you can remove the item.

Additionally, you can access this area from the Word Options dialog box under Add-ins. Hopefully, you recognize an add-in name such as Grammarly. Then you can press the Go button.
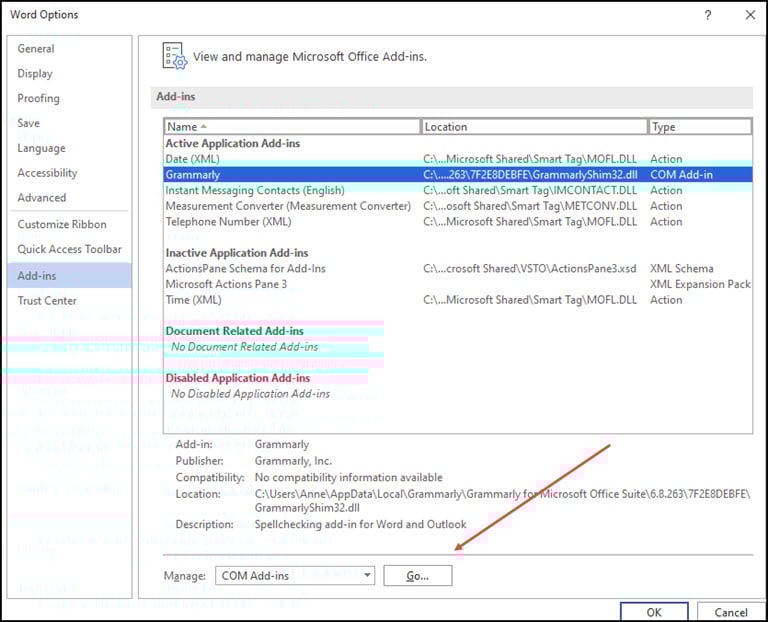
You’ll then get a COM Add-ins dialog where you can uncheck the box so it won’t load or remove it.

I’d suggest closing Word and reopening your document before checking again.
Option 3: Rename Your Word Template
Your Microsoft Word document template, which is either normal.dot or normal.dotm, might also be causing an issue. You can find these files in your Microsoft Templates folder. When you rename the template, Word will reset to the default settings.
Because your global template file has your settings, I would recommend renaming the file to something like normalPRV.dot or normalPRV.dotm so you can change the name if this suggestion doesn’t work.
Tip: If you need to confirm the location of your template you can press your Windows key ![]() + r. This will open the Run dialog, where you can copy and paste the command below.
+ r. This will open the Run dialog, where you can copy and paste the command below.
%appdata%MicrosoftTemplates

Option 4: Try Detect and Repair
Now and then, I have the spell-check feature go wonky after some other software update or hardware change. For example, a registry entry has become corrupted. In these rare cases, you may have to repair your installation.
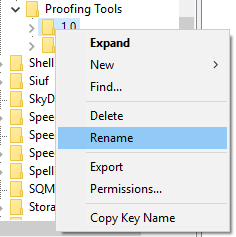
Option 5: Rename a Windows Registry Folder
I don’t like giving instructions on using the Windows registry. But sometimes, this online repair works. If you’re unfamiliar with this area, I strongly recommend reading Microsoft’s https://docs.microsoft.com/en-US/troubleshoot/windows-server/performance/windows-registry-advanced-users.
As with an earlier suggestion, I rename the folder rather than deleting it. Some people rely on third-party dictionaries that may use some of these entries. If you find after renaming the folder, your 3rd party dictionary doesn’t work; you can revert the changes.
To rename the Proofing Tools folder,
- Close Word.
- Press the Windows key + R.
- In the Run dialog box type regedit.
- Click the OK button.
- Expand the left pane to HKEY_CURRENT_USER | Software | Microsoft | Shared Tools| Proofing Tools
- Right-click the folder named 1.0
- Select Rename from the menu.

- Rename folder to 1PRV.0
- Close regedit.
- Restart Microsoft Word.
Specific Word Isn’t Flagged as Misspelled
Sometimes, you’ve run through the steps above and Word still doesn’t flag an item that is misspelled. This can be frustrating, but sometimes the problem is us. Yes, I have misspelled words when adding them to Word’s custom spell check dictionary. That’s why I also created an exclude dictionary for Word.
Check Your Custom Dictionary
- Click the File tab.
- From the left menu, select Options at the bottom.
- In the Word Options dialog, click Proofing.
- Scroll down to When correcting spelling in Microsoft Office program section.
- Click the Custom Dictionaries… button.
- Click the Edit Word List… button.

- Find your misspelled word and delete it.
- Add correct variation if needed.
- Click OK.
Try Another Online Option & Then Fix
This isn’t a fix for the problem, but it buys you time if you’ve got a deliverable. In the interim, you can save your document and try to open or copy it to another online word processor such as Google Docs or Microsoft Word Online. You will need to have an online account. Once you’ve imported your document, use that system’s spell-checker.
Hopefully, these solutions helped you isolate why spell-check wasn’t working. Now, you can continue to write your great novel, business proposal, letter, or tutorial.
- How to Make Symbols with a Keyboard
- How to Make a Letterhead Template with Word
- How to Add Watermark in Word
- How to Compress a Word Document
- Video: How to Make a Letterhead in Word
Get your automatic editor back in action
Updated on April 20, 2022
While Word’s spell check works well most of the time, sometimes it can appear to stop operating. Some simple troubleshooting steps will quickly get Word’s spelling and grammar-checking tool back up and running. These solutions apply to Word for Microsoft 365, Word 2019, Word 2016, Word 2013, Word 2010, and Word for Mac.
Causes of Word’s Spell Check Not Working
There are several reasons Word’s spelling and grammar-checking tool might not be working. You might have changed a simple setting, or the language settings may be off. Exceptions may have been placed on the document or the spell-check tool, or the Word template may have an issue.
Whatever the reason, some easy fixes are likely to have Word back to pointing out mistakes in your documents soon.
The spelling and grammar checker may return an error message about the default language or say «Spelling and grammar check is complete» without flagging any errors. You may not receive any message but may notice the tool isn’t functioning.
Add Grammarly to Word: Learn How Now
How to Fix Word’s Spell Checker Not Working
Follow these troubleshooting steps in the order we present, from the simplest solution to the most complex.
-
Make sure Word spell check is turned on, the most likely culprit and most straightforward solution. If you haven’t enabled automatic spell-checking, the tool won’t function as you expect. Also, select the Mark grammar errors as you type and Check grammar with spelling check boxes.
On a Mac, select Word > Preferences > Spelling & Grammar, and select the Check spelling as you type and Check grammar as you type check boxes.
-
Check Word’s proofing language. Word may be set to the wrong proofing language, causing it to miss errors. Make sure Word is proofing in the correct language, and see if this solves the problem.
-
Check for proofing exceptions. A setting for Hide proofing errors, or other exceptions, may have been enabled in the document. The spell-check tool might not work as expected if a user has made exceptions for checking the spelling or grammar.
-
Open Word in Safe Mode. A Word add-in can interfere with the spelling and grammar-checking tool, causing it to work sporadically or not at all. If you start Word in Safe Mode, add-ins aren’t enabled. See if the spelling and grammar-checking tool works. If it does, move on to step 5.
-
Disable add-ins one at a time. An add-in might be the problem if the spelling and grammar-checking tool worked in Safe Mode. Disable add-ins one at a time to isolate the one causing the issue. When you find the culprit, permanently disable it.
-
Rename the default template. If the issue still isn’t resolved, there could be something wrong with Word’s global template, which is called normal.dotm. Renaming the template could fix the problem. Word will generate a new default document without any customizations.
When you rename the normal.dotm template, you lose the default settings you established, including styles, toolbars, AutoText entries, and macros.
-
Repair Word. If all your efforts haven’t resolved the spell-check problem, use the built-in Office Repair utility to fix Word. This tool repairs the entire Office suite even if there’s only one application you want to fix.
This tool is only available for Windows versions of Office.
-
Contact Microsoft Word. If you still can’t fix the problem with Word’s spelling and grammar-checking tool not working, visit the Microsoft Word help page. With a searchable knowledge base, community forums, and contact information, you’ll find additional help.
FAQ
-
Why is Grammarly not working in Word?
If Grammarly in Word isn’t working, you may be working in a password-protected document, you may have opened the document in Protected View, or the document is stored on a network. To solve the problem, save your document to a local drive and open it from there.
-
How do I turn off spell check in Word?
To turn off spell check in Word on a PC, go to File > Options > Proofing. Uncheck the box next to Check spelling as you type. On a Mac, go to Tools > Spelling & Grammar and select Hide Spelling Errors.
-
How do I reset spell check in Word?
To reset Word’s spell check on a PC, go to the Tools menu and select Spelling & Grammar > Options. In the Proofing Tools section, select Recheck Document. On a Mac, go to Tools > Spelling & Grammar and select Reset Ignored Words and Grammar.
Thanks for letting us know!
Get the Latest Tech News Delivered Every Day
Subscribe
How to Fix the Spell Check Not Working in Word
Spell check in Word is one of the features in Microsoft Word that make typing up documents an easy task. You can breeze through projects much more efficiently without worrying about your spelling and grammatical errors. This is why it’s a serious issue when the spell check feature in Word isn’t working.
We’re here to help you restore the spelling and grammatical check no matter what caused it to stop working in the first place. While the cause of the error can be different for everyone, it’s usually related to misconfigured settings or issues in Word itself.
Jump To Solution:
- How to manually check spelling and grammar in Word
- How to use the Spell Check in Word and Check Grammar in Office
- Show errors automatically while you work
- Why is Spell Check Not Working in Word?
- Problem a: How to Fix Spell check Not Working for a Specific Document
- Solution 1. Check your Language settings
- Solution 2. Check the Proofing Exception options
- Problem b: How to fix spell check not working in any Word document
- Solution 1. Verify the “Check spelling as you type” feature is on
- Solution 2. Repair Microsoft Word with the Office repair tool
- Solution 3. Rename a Windows Registry folder
- Solution 4. Verify that a Word add-in isn’t interfering with the spell checker
- Solution 5: Rename Your Word Template
Note: Please note that the methods below apply to Word 2019, Word 2016, Word 2013, Word 2010, and Word for Office 365.
How to manually check spelling and grammar in Word
- Click the «Review» tab in the ribbon at the top of the screen.
- In the ribbon, click «Spelling & Grammar.»
- If there are any spelling or grammar issues, the Spelling and Grammar dialog box will appear. You’ll see a list of suggestions for each potential error.
How to use the Spell Check in Word and Check Grammar in Office
Here are some tricks and tips to use spell check in Microsoft Word:
- Run the spelling and grammar checker. To start a check of the spelling and grammar in your document, just press F7.
Show errors automatically while you work
Most Office programs, including MS Word, automatically check for potential spelling and grammatical errors as you type, so you don’t need to do anything to show errors while you work.
Notes:
- Automatic spelling and grammar checking is unavailable in Access, Excel, or Project. You can manually start a spell check by pressing F7.
- Automatic grammar checking is available only in Outlook, Word, and PowerPoint 2013 (or newer).
The spell check in MS Office marks potential spelling errors with a red squiggly line and potential grammatical errors with a blue squiggly line.
If spelling or grammatical errors aren’t marked, automatic checking might be turned off. You may need to turn it on.
When you see a spelling or grammatical error you want assistance fixing, right-click on the underlined word or phrase and choose one of the options to fix the error.
If Office is flagging words as misspelled, but you have it spelled the way you want it, select Add to Dictionary to teach Office not to flag that word as misspelled in the future.
Spell check might not work in Word for several reasons, here’re the most common causes.
- The different language is set as default.
- The speller add-in is disabled.
- Proofing tools aren’t installed.
- HKEY_CURRENT_USERSoftwareMicrosoftShared ToolsProofingTools1.0Overrideen-US causing the error.
If you’ve noticed that spell check only seems to stop working in one specific document, you can use one of the methods below to fix this. The problem is usually related to language or formatting settings in cases like this.
Problem a: How to Fix Spell check Not Working for a Specific Document
If the spell check is not working for a specific document, the problem could be with formatting or language settings. Follow the solutions below to solve this problem for a specific document.
Solution 1. Check your Language settings
- Open the Word document you’ve been having spell-checking issues with.
- Press the Ctrl + A keys on your keyboard (Command + A on a Mac) to select the entire document.
- Switch to the Review tab in your Ribbon, then select the Language button and choose Set Proofing Language… from the drop-down menu.

- The Language window will open up. Here, make sure that the «Do not check spelling or grammar» box is unchecked.
- Click the OK button.
- Check if your spell checker works after applying this fix.

Solution 2. Check the Proofing Exception options
- Open the Word document you’ve been having spell-checking issues with.
- Click on File from the Ribbon, then select Options. The Word Options window should open up.
- Go to the Proofing tab in the left-side panel.
- Look for the Exceptions for: (Document name) section in the right-side panel.
- Make sure that the Hide spelling errors in this document only and Hide grammar errors in this document only boxes are both unchecked.

- Click the OK button to save your changes.
- Check if the spell checker works.
Problem b: How to fix spell check not working in any Word document
If neither of the methods above seemed to fix your issue, you might have errors with Word. In the next section, we’ll discuss further solutions to fix the spell checker not working at all in various versions of Word.
Solution 1. Verify the “Check spelling as you type” feature is on
- From the menu click File tab > Options. This will open up the Word Options in a new window.
- Next, select Proofing.
- Make sure to select both the Check spelling as you type and the Mark grammar errors as you type options under the When correcting spelling and grammar in Word section.

- Click on the Recheck Document button to test if Word’s spell check works after turning these features on.
- Click the OK button to save your changes.

Solution 2. Repair Microsoft Word with the Office repair tool
These instructions apply only to Windows 10 operating systems. If you need instructions for other versions of Windows, please navigate to the Repair an Office application page on Microsoft’s website and select your operating system.
- Open the Settings window by using the Windows + S keyboard shortcut.
- Click on the Apps and Features button.
- Scroll down and select the version of Microsoft Word you want to repair.
- Click on the Modify button.
- Depending on your installation, follow the steps below:
- MSI-based: In the Change your installation section, select Repair then click Continue.
- Click-to-Run: In the How would you like to repair your Office Programs window, select Online Repair. Next, choose Repair.
- Follow any on-screen instructions to repair Word, then check if the spell checker works.
Solution 3. Rename a Windows Registry folder
- Completely exit out of Word.
- Press the Windows + R keys on your keyboard to open the Run utility.
- Type in “regedit” without the quotation marks and click the OK button. This will launch up the Registry Editor.
- Navigate to the following key using the panel on the left-hand side: HKEY_CURRENT_USERSoftwareMicrosoftShared ToolsProofing Tools
- Select the folder named 1.0 then right-click on it and choose Rename.

- Rename the folder to 1PRV.0 and click the OK button.
- Close the Registry Editor and re-launch Microsoft Word to check if your spell check works.
Solution 4. Verify that a Word add-in isn’t interfering with the spell checker
- Completely exit out of Word.
- Hold down the Ctrl key and double-click on the icon you use to launch Word. This will attempt starting Word in Safe mode.
- When prompted, click Yes to allow Word to run in Safe mode.
- Open up any document you’ve been having problems with and press the F7 key to perform a spell check.
- If the spell check works, you most likely have an add-in that interferes with the default spell checker in Word. Make sure to find and disable this add-in to be able to use the spell checker without having to launch in Safe mode.
Solution 5: Rename Your Word Template
If all the above solutions don’t work for you, then we recommend renaming your word template «normal.dotm.» Follow the procedure below.
- Press Windows key + R. This will open the Run utility dialog box
- Copy and Paste this text «%appdata%MicrosoftTemplates» on the dialog box without the quotes.
- Click Ok
Proceed and rename the normal.dotm to something like Fixednormal.dotm.
You May Also Like
> How to Check Your Spelling and Grammar in Word
> MS Word Features: 20 Secret Functions Revealed!
> How to Print Black and White on Word (With Images)
> How to Edit Your Word Documents Faster
Содержание
- 0.1 Помогла ли вам эта статья?
- 1 Включение проверки орфографии
- 2 Проверяем орфографию в автоматическом режиме
- 3 Проверяем орфографию в ручном режиме
- 4 Заключение
- 5 Включаем проверку орфографии в Ворде тремя различными способами
- 5.1 Автоматическая проверка
- 5.2 Проверка по умолчанию
- 5.3 Установка средств проверки орфографии
- 5.4 Проверка для выбранного языка
- 5.5 Mozilla Firefox
- 5.6 Opera
- 5.7 Чтобы запустить проверку орфографии и грамматики:
- 5.8 Пропуск «Ошибок»
- 5.9 Для орфографических «ошибок»:
- 5.10 Для грамматических «ошибок»:
- 5.11 Автоматическая проверка орфографии и грамматики
- 5.12 Чтобы исправить орфографическую ошибку:
- 5.13 Чтобы исправить грамматическую ошибку:
- 5.14 Чтобы изменить настройки автоматической проверки орфографии и грамматики:
- 5.15 Чтобы скрыть орфографические и грамматические ошибки в документе:
- 5.16 Как включить проверку правописания
- 5.17 Особенности проверки на ошибки
- 5.18 Настройка проверки правописания в Ворде
- 5.19 Автозамена в MS Word
- 5.20 Подчеркивание ошибок в Word
- 5.21 Диалоговое окно «Орфография»
- 5.22 Поделиться, добавить в закладки или статью
- 5.23 Настройка автоматической проверки текста
- 5.24 Как включить автоматическую проверку ошибок
- 5.25 Ручная проверка ошибок
- 5.26 Как настроить функцию «Автоисправление»
- 5.27 Как изменить фразу в списке автозамены
- 6 Как исправить ошибки в ворде

Microsoft Word выполняет автоматическую проверку орфографических и грамматических ошибок по ходу написания текста. Слова, написанные с ошибками, но содержащиеся в словаре программы, могут автоматически заменяться на правильные (если включена функция автозамены), также, встроенный словарь предлагает свои варианты написания. Те же слова и фразы, которых нет в словаре, подчеркиваются волнистыми красными и синими линиями, в зависимости от типа ошибки.
Урок: Функция автозамены в Ворде
Стоит сказать, что подчеркивание ошибок, как и их автоматическое исправление, возможны лишь в том случае, если данный параметр включен в настройках программы и, как было сказано выше, по умолчанию он включен. Однако, по некоторым причинам этот параметр может быть не активным, то есть, не работать. Ниже мы расскажем о том, как включить проверку орфографии в MS Word.
1. Откройте меню “Файл” (в ранних версиях программы необходимо нажать кнопку «MS Office”).

2. Найдите и откройте там пункт “Параметры” (ранее “Параметры Word”).

3. В появившемся перед вами окне выберите раздел “Правописание”.

4. Установите все галочки в пунктах раздела “При исправлении правописания в Word”, а также уберите галочки в разделе “Исключения для файла”, если таковые там установлены. Нажмите “ОК”, чтобы закрыть окно “Параметры”.

Примечание: Галочку напротив пункта “Показывать статистику удобочитаемости” можно не устанавливать.
5. Проверка правописания в Ворде (орфографии и грамматики) будет включена для всех документов, в том числе и тех, которые вы будете создавать в дальнейшем.
Урок: Как убрать подчеркивание слов в Word
Примечание: Помимо слов и фраз, написанных с ошибками, текстовый редактор также подчеркивает неизвестные ему слова, отсутствующие во встроенном словаре. Данный словарь является общим для всех программ пакета Microsoft Office. Помимо неизвестных слов, красной волнистой линией подчеркиваются еще и те слова, которые написанные на языке, отличном от основного языка текста и/или языка активного в данный момент орфографического пакета.


На этом все, из этой небольшой статьи вы узнали, почему Ворд не подчеркивает ошибки и как это исправить. Теперь все неправильно написанные слова и фразы будут подчеркиваться, а значит, вы будете видеть, где допустили ошибку и сможете ее исправить. Осваивайте Word и не допускайте ошибок.
Мы рады, что смогли помочь Вам в решении проблемы.
Задайте свой вопрос в комментариях, подробно расписав суть проблемы. Наши специалисты постараются ответить максимально быстро.
Помогла ли вам эта статья?
Да Нет
Каждый совершает ошибки. В данном случае речь идет об ошибках правописания. При письме, а особенно при наборе текста в текстовых редакторах, пользователь может совершить ошибку, набирая то или иное слово. Случается это по разным причинам, таким как незнание правил русского языка или простая опечатка из-за быстрого набора. Но во времена технологического прогресса текстовые редакторы способны в автоматическом режиме выявлять все ошибки и предлагать способы их решения.
В этой статье речь пойдет о том, как включить в «Ворде» проверку орфографии, как ею пользоваться и о многом другом, что как-то относится к исправлению опечаток в набранном тексте.
Включение проверки орфографии
Первоначально стоит уделить внимание вопросу, как включить в «Ворде» проверку орфографии. Хоть по умолчанию, после установки, она включена, по некоторым причинам пользователь может отключить ее, сам того не подозревая. В таких случаях используйте инструкцию, которая приложена ниже, чтобы возобновить работу данного инструмента.
- Находясь на главной странице программы, нажмите кнопку «Файл», которая располагается в верхнем левом углу.
- В меню, которое появилось, перейдите в раздел «Параметры».
- В появившемся окне нажмите на пункт «Правописание», располагающийся на панели слева.
- В меню «При использовании правописания в Word» поставьте все галочки рядом с пунктами.
- В меню «Исключения для файла» уберите галочки, которые там расположены.
- Нажмите кнопку «ОК».

Теперь вы знаете, как в «Ворде» включить автоматическую проверку орфографии. После выполнения всех этих действий программу перезагружать не нужно, все изменения вступают в силу сразу после нажатия кнопки «ОК».
Проверяем орфографию в автоматическом режиме
После того как вы узнали, где в «Ворде» включить проверку орфографии, можно сразу же переходить непосредственно к использованию этого инструмента. Первым делом разберем выполнение всех действий в автоматическом режиме. Это не означает, что вам ничего не придется делать, напротив, программа автоматически будет вам указывать на предполагаемые ошибки в правописании, а вы будете решать, что нужно сделать для их исправления.
Итак, предположим, перед вами открыт документ, в котором есть ошибки. В этом случае они подчеркнуты цветными линиями (красной, синей или зеленой). Чтобы начать их исправление, вам нужно открыть панель инструмента «Орфография». Для этого нажмите клавишу F7 или кнопку «Правописание», которая расположена во вкладке «Рецензирование».

После этого в правой стороне окна появится панель «Орфография», в которой и будут проходить все действия. Сразу же в тексте выделится проблемное слово, и вам необходимо будет принять решение, что с ним делать. На выбор есть четыре действия:
- Пропустить — вы пропускаете предполагаемую ошибку и переходите к следующему слову, при этом выделение с него исчезает.
- Пропустить все — вы пропускаете все ошибки в тексте, снимая с них выделение.
- Добавить — вы добавляете слово в словарь программы, чтобы при нахождении такой же ошибки программа ее не воспринимала.
- Изменить — вы изменяете слово с ошибкой на выбранное из списка предложенных.
- Изменить все — вы изменяете все подобные слова с ошибками на выбранное из списка.

Зная значение всех кнопок на панели, вы запросто сможете исправить все ошибки в тексте. В крайнем случае, если ни одно исправление не верно, вы можете заменить слово самостоятельно.
Проверяем орфографию в ручном режиме
Вы уже знаете, как включить в «Ворде» проверку орфографии в автоматическом режиме. Однако это не единственный способ исправить все ошибки в тексте. Сейчас мы подробно разберемся, как включить проверку орфографии в «Ворде» в ручном режиме.
Для выполнения поставленной задачи вам необходимо изначально обратить внимание на сами подчеркивания в тексте. Мы уже знаем, что это ошибки. Исправить их можно не только по нажатию F7, но и правой кнопки мыши (ПКМ). Делается это просто: наведите курсор на подчеркнутое слово и нажмите ПКМ, в контекстном меню помимо привычных пунктов появятся дополнительные, которые дублируют кнопки в панели «Орфография», их значение вы уже знаете. Все, что остается, — это выбрать необходимое действие и нажать по соответствующей строке.

Заключение
Теперь вы знаете не только о том, как включить проверку орфографии в «Ворде», но и как ею пользоваться. Как можно заметить, суть проста, вам необходимо лишь указать нужное действие, и программа самостоятельно все заменит.
Включаем проверку орфографии в Ворде тремя различными способами
Набранный без ошибок текст – показатель уровня грамотности человека. Функция проверки правописания очень помогает, если возникают сомнения в правильности написания некоторых слов или расстановке запятых.
В Ворде предусмотрена автоматическая проверка правописания: грамматические ошибки подчёркиваются зелёной волнистой линией, а орфографические — красной. Чтобы не возникало ситуаций, в которых слово с ошибкой остаётся не подчёркнутым, необходимо включить проверку орфографии в Ворде, а также правильно её настроить.
Автоматическая проверка
Если Word никак не реагирует на заведомо неправильно написанный текст, возможно в нём не включено средство автоматической проверки. Исправить это можно следующим образом:
- Нажать кнопку Office или команду «Файл» (в Windows 7);
- Выбрать «Параметры Word»;
- Слева в меню выбрать пункт «Правописание»;
- Поставить галочку «Автоматически проверять орфографию»;
- Снять все галочки в группе «Исключения» -> ОК;
Проверка по умолчанию
При наборе текста, слова, которые не занесены в словарь Ворда, будут подчёркиваться. Чтобы добавить правильно набранное слово в словарь или просто избавиться от подчёркивания, потребуется:
- Выделить нужный фрагмент текста;
- Выбрать в меню «Рецензирование» -> «Правописание» (в Word 2007 и выше), или «Сервис» -> «Правописание» (в Word 2003 и ниже).
В открывшемся диалоговом окне будут отображаться неправильно написанные (по мнению редактора) слова, которые можно:
- Исправить — если действительно присутствует ошибка;
- Добавить в словарь — если слово написано верно и желательно, чтобы Ворд его в дальнейшем не подчёркивал;
- Пропустить — если ошибки нет, но в словарь добавлять слово не стоит.
Установка средств проверки орфографии
Если при попытке проверки орфографии выдаётся сообщение «Проверка правописания завершена» или «Средства проверки орфографии для языка (который задан по умолчанию) не установлены», исправляется это следующим образом:
- «Пуск» -> «Панель управления» -> «Установка и удаление программ» (в Windows XP), либо «Программы» -> «Удалить программу» (в Windows 7 и выше);
- Найти в списке Microsoft Word и выбрать «Изменить»;
- В открывшемся окне выбрать «Добавить или удалить компоненты» -> «Продолжить»;
- Открыть «Общие средства Office» -> раскрыть список «Средства проверки орфографии» -> выбрать «Запускать все с моего компьютера».
Проверка для выбранного языка
Иногда причиной того, что Ворд не проверяет орфографию, может быть установка флажка с данным требованием. Чтобы отменить эту настройку, нужно:
- Щёлкнуть в меню «Рецензирование»;
- В группе «Правописание» найти «Выбрать язык»;
- Кликнуть по нужному языку;
- Снять флажок «Не проверять правописание».
Поделитесь этой статьёй с друзьями в соц. сетях:
Источник: включить проверку орфографии?
Знание русского языка не у всех идеально. Чтобы исправить досадные текстовые ошибки, воспользуйтесь компьютерными помощниками. Для этого в майкрософтском Word, например, достаточно включить проверку орфографии в Word.
- Для Word 2003: Сервис — Параметры — Правописание — Автоматически проверять орфографию (установите флажок). Здесь же можно проверять грамматику, если установить флажок рядом с «Автоматически проверять грамматику».
- Для Word 2007: Office — Параметры Word — Правописание — выбрать «Автоматически проверять орфографию».
- Для Word 2010: Рецензирование — Правописание — нажать кнопку «Правописание». Для установки автоматической проверки орфографии сделать следующее: Файл — Справка — Параметры — нажать кнопку «Правописание». Чтобы включить/выключить проверку орфографии и грамматики в текущем документе, зайдите в раздел «Исключения для» и щелкните «Имя текущего файла». Снимите или установите флажки напротив «Скрыть грамматические ошибки в этом документе» и «Скрыть ошибки правописания в этом документе». Чтобы включить или выключить проверку орфографии во всех новых создаваемых документах, в разделе «Исключения для» выберите «Все новые документы» и установите или снимите флажки около «Скрыть грамматические ошибки в этом документе» и «Скрыть ошибки правописания в этом документе».
Правописание можно проверить в режиме онлайн и в браузере. Как включить проверку орфографии, коротко в нашей инструкции. Прежде всего, нужно открыть нужный браузер.
Mozilla Firefox
Перейдите по ссылке Словари и локализации. Затем войдите в меню браузера в «Правка» — «Настройки» — «Дополнительные» и нажмите на вкладку «Общие». Поставьте крестик в графе «Проверять орфографию при наборе текста».
Если не помогло, заходим на любой сайт и кликаем правой кнопкой мыши на поле для комментариев, в появившемся окне ставим галочку напротив «Проверки орфографии».
Opera
В этот браузер автоматически встроена проверка орфографии. Чтобы ее проверить, в поле для текста нужно нажать на правую кнопку мыши и отметить «Проверка орфографии». В принципе, это все. Ничего сложного, правда? Переходим к следующему веб-браузеру.
Источник: правописания — проверить текст на ошибки Word
Беспокоитесь, что можете ошибиться, когда набираете текст? Не стоит. Word предоставляет вам несколько функций проверки правописания, которые помогут вам создавать профессиональные без ошибок документы. В этом уроке вы узнаете о различных функциях проверки правописания, включая инструмент проверки орфографии и грамматики.
Чтобы ваш документ выглядел профессионально, вы должны быть уверены, что в нем нет орфографических и грамматических ошибок. Для этого вы можете запустить проверку орфографии и грамматики, или можете позволить Word проверять правописание автоматически при вводе текста.
Чтобы запустить проверку орфографии и грамматики:
- Перейдите на вкладку Рецензирование.
- Кликните по команде Правописание.
- Откроется диалоговое окно Правописание.
Для каждой из ошибок в вашем документе Word попытается предложить один или несколько вариантов замены. Вы можете выбрать приемлемый вариант, а затем нажать Заменить для исправления ошибки.
- Если вариантов замены нет, то вы можете самостоятельно ввести правильное написание.
Пропуск «Ошибок»
Проверка правописания не всегда верно работает. Особенно это касается грамматики. Многих ошибок, Word просто не заметит. Также бывает, что проверка правописания говорит, что что-то содержит ошибку, хотя на самом деле это не так. Такое часто случается с именами людей, которых может не быть в словаре.
Если Word говорит, что что-то содержит ошибку, вы можете ничего не изменять. В зависимости от того, какая перед вами ошибка, орфографическая или грамматическая, вы можете выбрать из нескольких параметров:
Для орфографических «ошибок»:
- Пропустить: Пропустить слово, не изменяя его.
- Пропустить все: Пропустить слово, не изменяя его. Также пропустить это слово во всем документе.
- Добавить в словарь: Добавляет слово в словарь, так что оно не будет восприниматься программой как ошибочно написанное. Убедитесь, что слово написано правильно, прежде чем выбирать этот параметр.
Разметка страницы — ориентация, размер и поля
Для грамматических «ошибок»:
- Пропустить: Пропустить «ошибку» без изменений.
- Пропустить все: Пропустить «ошибку» без изменений, а также применить это со всеми другими случаями, которые относятся к этому же правилу.
- Следующее: Пропустить предложение без изменений и оставить его с пометкой об ошибке. Это означает, что запущенная позже проверка Правописания снова укажет на это предложение.
Если вы не уверены верно ли Word указал на грамматическую ошибку, вы можете нажать на кнопку Объяснить, чтобы прочитать, почему программа так думает. Это может помочь вам решить, хотите ли вы вносить изменения.
Автоматическая проверка орфографии и грамматики
По умолчанию Word автоматически проверяет ваш документ на наличие орфографических и грамматических ошибок, поэтому вам может быть даже не нужно отдельно запускать проверку Правописания. Найденные ошибки подчеркиваются цветными волнистыми линиями.
- Красная линия означает, что слово написано неправильно.
- Зеленая линия означает грамматическую ошибку.
- Синяя линия означает контекстную ошибку. Эта функция по умолчанию отключена.
Контекстная ошибка – это употребление неподходящего для заданного контекста слова. Само слово при этом написано верно. Например, если я напишу предложение «В каждую эпоху формируются свои ценные ориентиры», то ценные является контекстной ошибкой, так как я должен был использовать слово ценностные. Ценные написано верно, но использовано не в том контексте.
Чтобы исправить орфографическую ошибку:
- Кликните правой кнопкой мыши по подчеркнутому слову. Появится контекстное меню.
- Кликните по корректному написанию слова в списке замен.
- Правильное слово появится в документе.
Вы также можете выбрать пропустить подчеркнутое слово и добавить его в словарь, или можете кликнуть Орфография и откроется диалоговое окне с другими вариантами.
Чтобы исправить грамматическую ошибку:
- Кликните правой кнопкой мыши по подчеркнутому слову или фразе. Появится контекстное меню.
- Кликните по корректной фразе в списке замен (или вместо корректной фразы будет объяснение грамматической ошибки).
Что такое режим ограниченной функциональности в Word
Вы также можете пропустить подчеркнутую фразу, открыть диалоговое окно Грамматика, или кликнуть по пункту «Об этом предложении», чтобы узнать нарушенное правило грамматики.
Чтобы изменить настройки автоматической проверки орфографии и грамматики:
- Во всплывающем меню Файл, выберите команду Параметры.
- Выберите Правописание. В открывшемся окне можно будет выбрать из нескольких опций:
- Если вы не хотите, чтобы Word автоматически проверял орфографию, уберите отметку у пункта «Проверять орфографию в процессе набора текста».
- Если вы не хотите, чтобы отмечались грамматические ошибки, уберите отметку у пункта «Отмечать ошибки грамматики в процессе набора текста».
- Для проверки на наличие контекстуальных ошибок отметьте пункт «Использовать контекстную проверку орфографии».
Если вы выключите автоматическую проверку грамматических и орфографических ошибок, вы все равно сможете запустить ее вручную, выбрав команду Правописание, на вкладке Рецензирование.
Чтобы скрыть орфографические и грамматические ошибки в документе:
Если вы делитесь документом с кем-либо, то можете захотеть, чтобы этот человек не видел раздражающих красных, зеленых и синих линий.
Выключение автоматической проверки орфографии и грамматики будет работать только на вашем компьютере, так что линии снова появятся при открытии документа на другом компьютере.
К счастью, вы можете скрыть ошибки в документе так, чтобы линии не отображались ни на одном компьютере.
- Во всплывающем меню Файл, выберите команду Параметры.
- Выберите Правописание.
- Для пункта «Исключения для файла:» выберите нужный документ (если у вас открыто больше одного документа).
- Отметьте галочкой пункты «Скрыть орфографические ошибки только в этом документе» и «Скрыть грамматические ошибки только в этом документе».
- Нажмите OK.
Источник: орфографии
В каждом современном браузере (программе для Интернета) есть встроенная онлайн проверка орфографии. Это означает, что если Вы допустите ошибку при печати текста, то программа сама ее определит и поможет исправить.
Но, к сожалению, о данной функции знают далеко не все пользователи, так как у многих она изначально отключена. Сейчас мы с Вами научимся ею пользоваться.
В том случае, если в Вашей программе для Интернета уже включена и настроена проверка орфографии, то каждое слово, которое печатается неправильно, будет подчеркнуто красной волнистой линией.
Пример:
Действует это везде, где можно напечатать сообщение, — в социальных сетях, в почте, на форумах и в других местах.
Как это работает. Например, я печатаю комментарий к какой-то статье в Интернете и допускаю ошибку. Как правило, через несколько секунд после набора (если я продолжаю печатать), браузер ее обнаруживает и подчеркивает всё слово красной волнистой линией.
Как исправить ошибку. Если слово отметилось такой вот линией, то нужно навести на него курсор, и щелкнуть правой кнопкой мышки.
В верхней части появившегося списка обычно находятся правильно написанные слова. Если какое-то из них подходит, нажимаем на него.
«Проблемное» слово автоматически заменяется тем, которые мы выбрали.
Как включить проверку правописания
Для включения проверки нужно вот сюда напечатать слово с заведомо допущенной ошибкой (например, кортошка) и нажать на клавишу Пробел:
Если оно подчеркнется красной волнистой линией, это будет означать, что проверка включена. Попробуйте исправить ошибку так, как я показал ранее.
А если слово не отметится, щелкните правой кнопкой мышки в поле для ввода текста — туда, куда Вы напечатали слово. В списке наведите на пункт, предназначенный для настройки орфографии. Обычно появляется дополнительное меню, из которого нужно выбрать язык. Указываем нужный — и проверка включается.
Особенности проверки на ошибки
Кроме слов, где действительно допущена ошибка, программа также отмечает те, которых она просто не знает. Поэтому будут подчеркнуты еще и фамилии, специфические термины, разговорная речь.
Кстати, проверять и исправлять ошибки можно не только при печати русских слов, но и каких-нибудь других (английских, немецких, французских и др.). Для этого нужно включить проверку соответствующего языка.
Правда, выбрать можно только один словарь. То есть одновременно исправлять ошибки в нескольких языках не получится — придется переключаться между ними.
На заметку: далеко не для каждого языка проверка вообще работает. Например, ее нельзя включить для белорусского языка.
И еще один важный момент: увы, но работает это только для орфографии, без пунктуации. То есть недостающие знаки препинания показаны не будут.
Но, несмотря на все эти «особенности», данная функция все равно очень полезна. Даже если человек безупречно грамотен, он все равно не застрахован от нелепых описок. А в деловой переписке лучше этого не допускать.
Источник: настроить программу Word, чтобы она показывала все ошибки в тексте?
Как настроить программу Word, чтобы она показывала все ошибки в тексте?
- В самой программе вам необходимо выбрать Параметры — Правописание. Там вы выбираете необходимые вам проверки и ставите галочки. Если не получается попробуйте перезапустить программу и на худой конец переустановить. Есть еще вариант обратиться к интернету. Существует много онлайн ресурсов, которые проверяют правильность написания текстов. Таким образом вы можете сравнить отличия с вашей программой.
- Ворд обладает ограниченными функциями. Если только правописание отдельных слов. А чтобы находить стилистические ошибки, такую программу еще не создали и вряд ли создадут. По крайней мере я таких программ не нашла, когда работала копирайтером. Слишком богат наш могучий русский язык. Если при слове quot;сабакаquot; Ворд подчеркивает его, то все работает и настаивать ничего не надо. А если вдруг перестанет это делать, то значит нужно посмотреть настройки, те которые вы сами указали. Если же галочки стоят в положенных местах, но ошибки не исправляются, значит придется переустанавливать Ворд, ибо произошел сбой.
- Относительно проверки правописания Ворд настраивается очень четко и оперативно реагирует на все изменения в настройке.Я так понял, что вы уже пробовали поставить галочки в диалоговом окне quot;Параметрыquot;, которое открывается в меню quot;Сервисquot; (Сервис-Параметры-ДО Параметры).Там есть вкладка quot;Правописаниеquot; и самая верхняя галочка тут должна стоять — quot;Автоматически проверять орфографиюquot;.Она работает очень четко: включаешь -проверяет (подчеркивает красной волнистой линией), выключаешь — не проверяет.Попробуйте ей повключать-повыключать проверку. Если она у вас не работает, значит, в Ворде произошел какой-то сбой. Самое лучшее — переустановить Ворд.Еще посмотрите вторую галочку — quot;Не выделять слова с ошибкамиquot;. Этой галочки здесь стоять не должно. Если ее поставить, проверка будет идти, но слова выделяться линией не будут.Еще посмотрите на этом же окне поле quot;Набор правилquot;. У меня стоит quot;Для деловой перепискеquot;. Если у вас что-то другое, то поставьте так, как стоит у меня.Посмотрите еще ту часть окна внизу, где написано quot;Грамматикаquot;. Здесь тоже должны стоять галочки в quot;Автоматически проверять грамматикуquot; и quot;Также проверять орфографиюquot;.Но я лично думаю, что это у вас Ворд вылетел. Может быть, загружали объемные документы или копировали большие тексты с картинками из Интернет, или из ПДФ. Бывает такое там в этих текстах накрутят с форматированием и структурой, что Ворд вылетает.Еще бывает такое, что сбой возникает, если в Ворд-2003 открывать документ Ворд-2007 (или еще более поздние версии). Тут сразу все начинает глючить.
- В автоматическом режиме в Ворде будут найдены все орфографические ошибки, если сделатьНажимается quot;Officequot;, выбераются quot;Параметры Wordquot;. Открывается диалоговое окошко, в котором выбирается quot;Правописаниеquot;.Устанавливается галочка на quot;Автоматически проверять орфографиюquot;, которое находится в quot;При исправлении правописания в Wordquot;.Снимаются галочки в разделе quot;Исключенияquot;Для сохранения изменений нажимается на окей. Подробнее все варианты можно посмотреть здесь.Пунктуацию Ворд тоже проверит, если сделать такОткрывается вами раздел quot;Рецензированиеquot;, нажимается quot;Правописаниеquot;.По разделу Рецензирование, вот, что еще можно сделать
- В случае если в связи с какими-то причинами отсутствует автоматическая проверка орфографии, то нужно зайти в параметры настроек Ворда и проверить настройки, относящиеся к правописанию.Чтобы сделать это щлкните по кнопке, имеющей логотип Office. Находится эта кнопка в левом верхнем углу. После этого во всплывающем окне необходимо нажать кнопку под названием quot;Параметры Wordquot;.
У меня правописание проверяется очень легко — открываю вкладку Рецензирование и сразу выбираю пункт Правописание.
Далее начинается проверка орфографии и программа предлагает несколько вариантов исправления не только грамматических ошибок, но и пунктуационных и стилистических, если они есть.
Если Ворд не подчеркивает ошибки, то, скорее всего, их либо нет, либо отключена эта самая проверка орфографии. Проще всего нажать F7 и осуществить ее, настроив необходимые параметры.
Для этого нужно (для Ворда):
нажать кнопку Office, выбрать пункт Параметры Word,
щелкнуть пункт Правописание,
для текущего документа:
в разделе Исключения для выбрать Имя текущего файла,
установить либо снять флажки Скрыть ошибки правописания в этом документе и Скрыть грамматические ошибки в этом документе.
Для последующих документов:
в разделе Исключение для выбрать Все новые документы,
установить или снять флажки Скрыть ошибки правописания в этом документе или Скрыть грамматические ошибки в этом документе.
Источник: включить/отключить проверку грамматики и орфографии в документе?
В Word’e может быть включен режим, в котором проверка орфографии и пунктуации производится прямо при вводе текста. При этом возможные орфографические ошибки выделяются красной волнистой линией, а возможные пунктуационные — зеленой.
Обычно режим автоматической проверки правописания включен по умолчанию. Но если он у вас отключен, его можно включить следующим образом:
1. В строке меню выберите Сервис > Параметры, а затем в открывшемся окне Параметры перейдите на вкладку Правописание.
2. Установите флажки Автоматически проверять орфографию —если хотите проверять орфографию и Автоматически проверять грамматику — если хотите проверять пунктуацию.
@font-face { font-family: «Cambria Math»; }@font-face { font-family: «Calibri»; }p.MsoNormal, li.MsoNormal, div.MsoNormal { margin: 0cm 0cm 10pt; line-height: 115%; font-size: 11pt; font-family: «Calibri»,»sans-serif»; }.MsoChpDefault { }.MsoPapDefault { margin-bottom: 10pt; line-height: 115%; }div.Section1 { page: Section1; }КАК СДЕЛАТЬ ТАК, ЧТОБЫ WORD АВТОМАТИЧЕСКИ ИСПРАВЛЯЛ ОПЕЧАТКИ ПРИ НАБОРЕ ТЕКСТА?
У всех, кто набирает текст достаточно быстро, есть «любимые» сочетания букв, традиционно набираемые с опечаткой. Слова с опечатками можно поместить в список автозамены, чтобы по мере набора автоматически заменять их на правильные.
Чтобы сделать это, вызовите окно Автозамена (Сервис > Параметры автозамены) и откройте вкладку Автозамена.
Установите флажок Заменять при вводе. В поле заменить: введите ошибочно написанное слово, а в поле на: — правильное. Нажмите кнопку Добавить.
Чтобы пополнить список автозамены по мере обнаружения опечаток при автоматической проверке правописания, щелкните правой кнопкой мыши на слове, подчеркнутом красной волнистой линией. Если для этого слова существуют варианты замены, то в контекстном меню ошибки будет команда Автозамена. Выберите ее, чтобы автоматически добавить в список и заменяемое, и заменяющее слова.
Автозамена вступает в действие, когда набор слова закончен, то есть после слова введен пробел или знак препинания
- Установка Windows 7 32 bit Полная установка OS
- Установка Windows 10. Активация. Тест. Обновление с Windows 7/8/8.1 до Windows 10
- Установка Windows 7 на флешку|USB
Источник: правописания в Microsoft Word
Этот маленький пост на самом деле очень важен, ведь проверка правописания в Ворде – это залог качественно сделанной работы. Когда Вы набираете текст – чаще всего он предназначается для демонстрации другим людям. Если в нем есть ошибки, это скажется на вашей репутации. Будет неловко, если читатели заметят ошибки, потому, прочтите эту статью, чтобы избежать таких ситуаций.
Рассматривать тему будем на примере Word 2013, в других версиях программы функционал сходен, но может немного отличаться.
Как вы уже догадались, Ворд умеет проверять корректность набираемого Вами текста. Сразу скажу, чтобы проверка проходила правильно, следите за тем, какой язык указан в строке состояния.
Если вы пишите на русском, а в строке состояния украинский или белорусский – проверка будет происходить на основании этих языков. Помните, что кириллицу, как и латиницу, используют в разных языках мира.
Чтобы исправить ошибочно указанный язык – нажмите на обозначение языка в строке состояния и выберите нужный из списка.
Если документ мультиязычный – можно задать язык для каждого его раздела отдельно. Выделите лишь тот диапазон, в котором нужно изменить язык и исправьте, как я рассказывал выше.
Настройка проверки правописания в Ворде
Вы сами можете определять, насколько дотошно программа будет сканировать ваши труды. Чтобы настроить всевозможные аспекты проверки – перейдите в Файл – Параметры – Правописание.
Все опции интуитивно понятны. Например, если в процессе набора Ворд не сигнализирует Вам об ошибках – установите галочку напротив «Проверять орфографию в процессе набора текста» и «Отмечать ошибки грамматики в процессе набора текста».
Автозамена в MS Word
Если вы уже успели написать хотя бы несколько предложений в Ворде – должны были заметить, как работает автозамена. Например, она делает первую букву в предложении заглавной, если вы сами этого не сделали. Или заменяет тире на дефис, когда это уместно по правилам русского языка (черточка становится длиннее).
Программа содержит больше количество правил автозамены. Они подхватывают и исправляют налету наиболее частые опечатки. Вы и сами можете создать свое правило автозамены.
К примеру, вы пишете юридический текст и часто употребляете словосочетание «Закон о защите прав потребителей». Давайте сделаем так, чтобы вместо этой длинной фразы можно было написать «ззпп», а Ворд сам написал «Закон…».
То есть, мы напишем 4 символа, а на экране появится 32! Заманчиво? Очень даже!
Открываем Файл – Параметры – Правописание – Параметры автозамены – Автозамена. Здесь в поле «Заменить» запишем «ззпп», а в поле «на» — «Закон о защите прав потребителей». Жмем Ок и радуемся бесперебойной работе.
Полистайте вкладки меню «Автозамена», здесь собраны все настройки, которые можно устанавливать на свой вкус.
Подчеркивание ошибок в Word
Если включена проверка правописания в процессе набора текста (как это делается я писал ранее), программа будет подчеркивать ошибки прямо в тексте:
Заметьте, это подчеркивание не будет выводиться на печать, только на экран. Так что, если слово умышленно написано неправильно, оно останется подчеркнутым, но при печати этого заметно не будет. При этом, красным цветом будут подчеркнуты орфографические ошибки, зеленым – грамматические, а синим – ошибки форматирования.
Чтобы получить комментарий, что же за ошибку нашел Word, кликните правой кнопкой мыши на подчеркнутом слове. В контекстном меню отобразится вариант исправления слова или комментарий об ошибке.
Прямо в контекстном меню можно кликнуть на предложенном варианте исправления, и оно будет применено.
Не всегда написанное и подчеркнутое слово ошибочно. Возможно, вы используете специализированные термины, которых нет в словаре Ворда. Тогда можно использовать диалоговое окно «Правописание» для внесения слова в словарь. После этого, оно не будет считаться ошибочным.
Диалоговое окно «Орфография»
Чтобы открыть окно управления словарем – выполните на ленте Рецензирование – Правописание – Правописание, или нажмите F7. Откроется окно «Орфография», где вы сможете проработать все ошибки поочередно. Программа отобразит неправильное слово и предложит варианты замены.
Вы можете пропустить ошибку, исправить на предложенный вариант или добавить слово в словарь. Программа запомнит ваш выбор и в следующем аналогичном случае поступит так вы решили сейчас. Полезно будет добавлять специальные термины в словарь, это снизит вероятность ошибки в них.
Внешний вид диалогового окна «Орфография» может быть различным в разных версиях Ворда, но описанные действия интуитивно можно совершать в любом варианте окна.
Конечно, Microsoft Word со своими средствами проверки орфографии очень помогает и расслабляет. Но помните, программа не совершенна, она не проверяет смыслового содержания текста, не оценивает насколько он связный, гармоничный и читабельный. Так что, вычитывайте свои труды перед публикацией или передачей руководству!
Ну вот, теперь вы никогда не ошибетесь в слове, не поставите лишний пробел или точку. Будьте внимательны, а программа подскажет.
Следующие несколько постов я собираюсь посвятить форматированию текста, вы узнаете, как сделать свой документ более эффектным и удобным за счет оформления, автоматизировать этот процесс и избавиться от повторения своих действий при назначении форматов. Присоединяйтесь, будет интересно и полезно!
Поделиться, добавить в закладки или статью
Источник: орфографии в ворде
При написании статьи текстовый редактор Ворд подчеркивает слова, тем самым указывая грамматические или пунктуационные ошибки.
Если слово написано с ошибкой и уже существует в словаре программы, то будет произведена замена слова (в случае, если включена автозамена).
Встречаются случаи, когда нужно проверить орфографию в Ворде, а автозамена не включена и программа вовсе не подчеркивает слова с допущенными ошибками. В таком случае, рассмотрим, как проверить документ на ошибки в словах и в пунктуации.
Настройка автоматической проверки текста
Чтобы места с орфографическими и грамматическими ошибками подчеркивались автоматически, нужно:
- Перейти во вкладку «Файл» и нажать на «Параметры»;
- В левой панели нового окна выбрать «Правописание»;
- В области «При исправлении правописания Word» проставить галочки в окнах «Проверять орфографию в процессе набора текста», «Использовать … проверку орфографии», или «Отмечать ошибки грамматики…»;
- Можно поставить галочки во всех окошках данного подраздела, так как все перечисленные вариации помогут в работе с текстом.
Внимание! Если Ворд перестал подчеркивать ошибки красной линией, то обязательно нужно убрать галочки в подразделе «Исключения для файла». Перейти «Файл» — «Параметры» — «Правописание» и наконец-то «Исключение для файла». Убрать галочки со строк «Скрыть орфографические и грамматические… в этом документе».
После данной настройки, в документе будут подчеркиваться не только орфографические оплошности, но и пунктуационные.
Как включить автоматическую проверку ошибок
Благодаря данной функции можно легко исправить все ошибки сразу. Включить «Проверку орфографии и грамматики в тексте» можно кнопкой F7 либо зайти во вкладку «Рецензирование» — в отделе «Правописание» — нажать на «Правописание».
Откроется новое окно и всплывет первая допущенная ошибка. Можно ее исправить прямо в области «Нет в словаре» либо указать нужную форму в разделе «Варианты» и нажать заменить.
Внимание! Программа MS Word не умеет автоматически исправлять пунктуационные помарки. Поэтому если будет встречаться зеленая или синяя волнистая линия в течение всего текста, нужно будет вносить изменения самостоятельно, т. е. вручную. Тем более программа делает подсказки, после какого слова не хватает запятой.
Далее всплывёт новое окно с новой ошибкой и так будет до тех пор, пока все ошибки не будут исправлены. После всех изменений всплывёт окно с уведомлением, что проверка правописания завершена, нажмите на «Ок».
Следом Ворд предоставит статистику об удобочитаемости. Скрываем это уведомление, нажав на «Ок».
Ручная проверка ошибок
Подчеркивание красной линией означает, что в слове, вероятно, допущена орфографическая ошибка или фраза незнакома программе Word и не занесена в словарь. С лёгкостью можно исправить ошибки вручную, следующим образом:
1) Нажать на выделенное слово правой кнопкой мыши и в открывшемся окне выбрать корректный вариант.
2) Добавить в словарь программы новое для Ворда слово. Нажать по неправильному слову правой кнопкой мыши и выбрать «Добавить в словарь» и подчеркивание исчезнет. При дальнейшем использовании данного слова, подчеркивание не появится.
3) Найти внизу программы Ворд, книгу с крестиком (если есть ошибки) и нажать.
Появятся правильные варианты написания, нужно указать правильно написанное слово.
Как настроить функцию «Автоисправление»
Функция «автозамена слова» очень полезная, так как во время быстрого набора текста бывают опечатки в словах. Данная функция поможет исправить некорректно написанную фразу автоматически, для этого необходимо сделать следующие настройки:
1) Нажав на раздел «Файл» выбрать «Параметры»;
2) Во вплывающем окне в левой части найти «Правописание», в разделе «Параметры автозамены» кликнуть по кнопке «Параметры автозамены…»;
3) В разделе «Автозамена» проставить галочку напротив «Заменять при вводе»;
4) Добавить фразу, которая часто печатается неправильно. Например: «помошник» введите под полем «заменить» как неверный вариант, а под полем «на» укажите верную словоформу и кликните на «Добавить». Как показано на картинке ниже.
Добавить можно любую фразу и указать её верное написание. Также это может быть сокращение повседневных фраз, аббревиатура или название горячих клавиш на английском. Вот примеры:
Как изменить фразу в списке автозамены
Надо промотать весь список и найти нужную фразу, выделить её, чтобы она появилась в поле «заменить» и в поле «на».
Теперь остается только установить курсор мыши в нужное поле и ввести свой вариант написания символа или фразы, заменить и сохранить. Рассмотрим пример. Чтобы быстро написать символ (а) в виде «@» сначала нужно добавить и указать на какой символ будет производиться замена.
Действия стандартные, что и ранее при добавлении новой фразы. «Файл» — «Параметры» — «Правописание» — «Параметры автозамены». В разделе, где «Автозамена» под полем «заменить» — вводим «(а)», а в поле «на» — пишем «@». Добавляем и кликаем «ОК».
Теперь время проверить. Печатаем нужный фрагмент статьи и пишем «(а)» (на картинке ниже), замена на «@» происходит после нажатия «)» завершающего символа.
Работа с Word станет намного легче, если сделать все настройки для автозамены разных фраз. Только представьте, что можно печатать (Московский Государственный Университет) за одну секунду всего лишь написав три буквы «мгу».
Благодаря определенным опциям пользователь сможет совершить автоматическую проверку на правильную расстановку пунктуации, очень быстро, если учесть, что просматривать документ из 10 листов А4 в ручную будет долго.
В данном случае идёт речь об использовании опции «Правописание» в разделе «Рецензирование».
Источник: Sierra: Проверка правописания и грамматики
Во многих программах macOS правописание проверяется по мере ввода текста и ошибки исправляются автоматически. Можно отключить эту функцию и использовать другие параметры проверки правописания при вводе сообщений электронной почты, текстовых сообщений и документов.
При проверке правописания программа подчеркивает неправильно введенные слова красной линией и предлагает варианты замены.
- Как принять предложенный вариант: Если программа предложила только один вариант замены, просто продолжите ввод текста — слово будет исправлено автоматически. Если предложено несколько вариантов, выберите нужный вариант.
- Как игнорировать предложенные варианты: Нажмите клавишу Escape и продолжайте вводить текст.
- Как отменить автоматически внесенное исправление: Автоматически исправленное слово на некоторое время подчеркивается синей линией. Чтобы восстановить исходное написание, поместите курсор непосредственно после исправленного слова — на экране появится исходный вариант написания. Выберите его. Можно также нажать слово, удерживая клавишу Control. На экране также появится исходный вариант, и его можно выбрать.
Примечание. Чтобы при вводе первого слова предложения или имен (например, Санкт-Петербург или Михаил) со строчной буквы она автоматически заменялась прописной, установите флажок «Автоматически писать слова с заглавной буквы» в панели «Текст» настроек клавиатуры.
- В определенной программе: В программе выберите «Правка» > «Правописание и грамматика» > «Исправлять ошибки автоматически» (функция отключена, если рядом с ней не установлен флажок).
- Для всех программ: Выберите меню Apple > «Системные настройки», нажмите «Клавиатура», затем нажмите «Текст» и снимите флажок «Исправлять ошибки автоматически».
- Как проверить правописание. Выберите «Правка» > «Правописание и грамматика» > «Проверить документ сейчас». Выделяется первая ошибка. Чтобы перейти к следующей ошибке, нажмите Command-точка с запятой (;). Чтобы посмотреть предлагаемые варианты написания слова, щелкните его мышью при нажатой клавише Control.
- Как проверить грамматику: Выберите «Правка» > «Правописание и грамматика» > «Проверять грамматику и правописание» (флажок показывает, что эта функция включена). Грамматические ошибки подчеркиваются зеленой линией. Наведите курсор на подчеркнутое слово, чтобы прочитать описание ошибки.
- Как игнорировать слова с ошибками: Нажмите слово, удерживая клавишу Control, затем выберите «Игнорировать правописание». Если найденное слово встречается несколько раз, то в текущем документе оно будет пропущено, а во всех остальных документах — выделено.
- Как добавить слово в орфографический словарь: Нажмите слово, удерживая клавишу Control, затем выберите «Запомнить правописание». Это слово не будет отмечаться как ошибочное ни в каких документах. Чтобы слово снова отмечалось как ошибочное, нажмите его в документе, удерживая клавишу Control, и выберите «Не запоминать правописание».
При проверке длинных документов иногда удобнее пользоваться окном «Правописание и грамматика». Выберите «Правка» > «Правописание и грамматика» > «Показать правописание и грамматику».
Даже если в меню «Правка» программы нет команды проверки правописания или грамматики, проверьте настройки или меню этой программы — возможно, в ней предусмотрено собственное средство проверки правописания.
СМ. ТАКЖЕЗамена текста и пунктуации в документах
Источник: и редактирование текста | Лекция | НОУ ИНТУИТ
Редактирование любого текста невозможно представить без исправления орфографических и грамматических ошибок. Конечно, вместо того, чтобы исправлять ошибки, их лучше не делать или убирать вручную на этапе проверки текста.
Microsoft Word имеет встроенные средства проверки правописания, которые помогают исправить некоторые очевидные ошибки (например, опечатки).
Однако помните, что даже самая хорошая программная проверка правописания не обнаружит абсолютно все ошибки, поэтому всегда необходимо перечитывать текст самостоятельно.
Word предоставляет три способа проверки и исправления ошибок:
- автоматически;
- вручную;
- автозамена.
Эти способы можно использовать как отдельно, так и вместе.
При автоматическом контроле орфографии и грамматики Word проверяет ошибки в тексте непосредственно при наборе. В таком случае сразу после того, как слово или предложение набрано, видно, допущена ошибка или нет: программа подчеркивает слова, содержащие орфографические ошибки, красным цветом, а грамматические — зеленым.
Если щелкнуть на подчеркнутом слове или предложении правой кнопкой мыши, то появится контекстное меню с вариантами исправления ошибки (рис. 3.40). С помощью этого меню можно также добавить слово в словарь пользователя или указать пропускать все такие же слова.
Рис. 3.40. Варианты замены слова, написанного с ошибкой
Если при вводе слов, которые содержат ошибки, программа не подчеркивает их, значит, автоматическая проверка правописания не включена. Чтобы программа автоматически проверяла орфографию и грамматику, сделайте следующее.
- Нажмите кнопку Office, а затем нажмите кнопку Параметры Word в нижней части меню Office.
- В окне Параметры Word выберите раздел Правописание.
- Перейдите к области При исправлении правописания в Word и установите флажки Автоматически проверять орфографию и Автоматически проверять грамматику (рис. 3.41)
- Нажмите кнопку ОК, чтобы подтвердить свой выбор
В разделе Правописание устанавливаются многие другие параметры проверки правописания: варианты проверки, наборы правил, словари, особенности проверки (проверять ли Интернет-адреса, слова из прописных букв и др.).
Автоматическая проверка не всегда удобна. Например, если в тексте много иностранных слов, то подчеркивание будет отвлекать.
В этом случае при наборе проверку правописания лучше отключить, а потом проверить текст полностью, просматривая каждую ошибку.
Кроме того, проверка вручную удобна, если нужно убедиться в отсутствии ошибок в какой-то части документа (например, при выводе одного раздела на печать).
Для выполнения проверки правописания вручную используется диалоговое окно Правописание. Для его вызова выполните одно из следующих действий:
- воспользуйтесь кнопкой Правописание в одноименной группе на вкладке Рецензирование на ленте (рис. 3.42);
Рис. 3.42. Кнопка Правописание в одноименной группе на вкладке Рецензирование на ленте - нажмите клавишу F7.
Используя диалоговое окно Правописание (рис. 3.43), вы можете просматривать каждую найденную ошибку и принимать решение о ее исправлении.
Рис. 3.43. Диалоговое окно Правописание
Команда Автозамена служит для исправления ошибок, которые часто возникают при наборе (опечаток). Словарь автозамены содержит правильные и ошибочные написания слов. При ошибочном написании Microsoft Word автоматически исправляет его на правильное. Это существенно ускоряет набор текста, так как пользователю не нужно отвлекаться на исправление опечаток.
Microsoft Word содержит список наиболее часто возникающих ошибок и вариантов их замены. Этот список можно дополнить вручную.
Для добавления нового элемента автозамены сделайте следующее.
- Нажмите кнопку Office, а затем нажмите кнопку Параметры Word в нижней части меню Office.
- В окне Параметры Word выберите раздел Правописание.
- Перейдите к области Параметры автозамены и нажмите одноименную кнопку (рис. 3.44). Откроется окно Автозамена.
Рис. 3.44. Кнопка Параметры автозамены - В поле заменить области Заменять при вводе введите слово с ошибкой, которое часто встречается в тексте (например, слоово ).
- В поле на области наберите правильный вариант написания этого слова (например, слово ) (рис. 3.45).
Рис. 3.45. Диалоговое окно Автозамена - Нажмите кнопку ОК, чтобы подтвердить ввод новых значений. Теперь Word будет исправлять ошибку автоматически, не спрашивая разрешения пользователя.
Функцию Автозамена можно использовать не только для устранения опечаток, но и для быстрого ввода каких-нибудь слов и предложений. Например, если вам часто приходится набирать фразу нелинейный видеомонтаж, то введите ее в поле на окна Автозамена, а в поле заменить наберите нели. Теперь после набора этих четырех букв появится вся фраза.
В диалоговом окне Автозамена также устанавливаются некоторые настройки, которые существенно облегчают работу. Обязательно проверьте, установлены ли у вас следующие флажки:
- Исправлять ДВе ПРoпиcные бyквы в нaчaлe cлoвa;
- Делать первые буквы предложений прописными;
- Уcтpaнять пocледcтвия cлyчaйнoгo нaжaтия сAPS LOCK.
Смарт-теги также относятся к функциям автозамены. Они дают возможность распознавать разные типы данных и выполнять их преобразование.
Одна из удобных функций смарт-тегов – преобразование единиц измерения, что может быть полезно, например, если вы переводите текст с английского языка на русский.
Представьте себе, что в этом тексте идет речь о выловленной рыбе и приводится ее вес в фунтах. Мало какой русский читатель сможет сходу преобразовать фунты в килограммы, это лучше сделать переводчику.
Используя смарт-теги, вы сможете выполнить преобразование автоматически. Когда программа распознает данные, которые могут быть преобразованы, текст подчеркивается розовой пунктирной линией.
Необходимо подвести курсор к таким данным, после чего щелкнуть по значку в виде буквы i и в появившемся меню выбрать предложенный вариант преобразования (рис. 3.46).
Word автоматически переведет величины, и в тексте появятся привычные для российских читателей килограммы (рис. 3.47). Теперь они смогут искренне позавидовать английскому рыбаку.
Рис. 3.46. Преобразование фунтов в килограммы
Рис. 3.47. Автоматическое преобразование выполнено
Для того чтобы включить использование смарт-тегов, сделайте следующее.
- Нажмите кнопку Office, а затем нажмите кнопку Параметры Word в нижней части меню Office.
- В окне Параметры Word выберите раздел Правописание.
- Перейдите к области Параметры автозамены и нажмите одноименную кнопку. Откроется окно Автозамена.
- Перейдите на вкладку Смарт-теги, установите флажок Добавить смарт-теги к тексту, а затем установите флажки напротив тех параметров смарт-тегов, которые вы хотите использовать (рис. 3.48).
Рис. 3.48. Выбор окна параметров смарт-тегов из контекстного менюСОВЕТ. Получить быстрый доступ к параметрам смарт- тегов можно и из меню, которое появляется при распознавании данных. В нем следует выбрать команду Параметры смарт-тегов (рис. 3.49).
Рис. 3.49. Выбор окна параметров смарт-тегов из контекстного меню
Источник:
Мы все наверное в курсе,что проверка правописания существует в любых пакетах Microsoft Office. И это очень удобно,ведь часто мы делаем опечатки, а делаем орфографические или пунктуационные ошибки. И есть возможность такие ошибки исправлять в автоматическом режиме. Для того,чтобы активировать данную функцию нам нужно открыть программу- Microsoft Word. Затем нужно нажать на опцию -«Файл» и оттуда следует перейти на оцию- «Параметры». И в параметрах следует кликнуть на опцию-«Правописание». Там мы должны выбрать в меню опцию-«Исключения» и там нажать на поле- «Имя файла». И там нужно снять флажок из строчки
Как исправить ошибки в ворде
В разделе Прочее компьютерное на вопрос Как в Microsoft Word включить исправление ошибок? заданный автором трудоспособный лучший ответ это Прямо исправлять ошибки Ворд за Вас не будет :). Он ведь не знает, может Вы решили именно так написать.
1) Модуль проверки правописания должен быть активирован при установке пакета Microsoft Offise. Если этот модуль проверки орфографии на требуемом языке не установлен, то включить его невозможно.
2) Проверка орфографии может выполняться двумя способами.
* АВТОМАТИЧЕСКИ (без участия пользователя) . Для постоянной автоматической проверки надо в меню «Сервис / Параметры /
Правописание поставить пометки у элементов «Автоматически проверять орфографию» и «Автоматически проверять грамматику»;
* ВРУЧНУЮ. В Ворде 2003 наверху окна, в меню, есть кнопка «Правописание» (в 2007 — не помню) . Или активизировать проверку можно через меню «Сервис / Правописание».
Ответ от
22 ответа
Привет! Вот подборка тем с ответами на Ваш вопрос: Как в Microsoft Word включить исправление ошибок?
Ответ от
Вровень
Обсуждали тут уже, юзай mwfix
Ответ от Простегать
Здесь подробная инструкция, для тех у кого не работает
проверка орфографии, хотя включена в настойках.
Ответ от Кыдырали Шаушев
у меня вообще перестал работать ворд. файлы открывает но нет возможности работать с документами. что нужно сделать чтобы стал работать?
Ответ от Ерла
Ладислав сука не в тему не пиши
Ответ от Кристина малая
У меня На английском все, как зделать мне?
Ответ от Cat Vendel
Установите программу punto switcher, либо же, активируйте ее в панели задач.
Он автоматически исправляет ошибки и меняет язык (например: English=Russian)
Ответ от
2 ответа
Привет! Вот еще темы с нужными ответами:
Word’s Spell check is a built-in feature that can help you detect spelling mistakes and grammatical errors while you’re typing. If the tool finds any mistakes or errors in your document, it will underline the errors with different colors, like red for spelling errors, green for grammar errors, and blue for contextual spelling errors.
However, sometimes, the Spell Check feature doesn’t work as expected in Word. Many users have complained that the tool is not flagging misspelled and missing words correctly or the program stopped working entirely.
If you are facing any issue with Word’s spelling and grammar-checking tool, there are several ways to fix it and we will go through each of them in this post.
Check the Language and Spell Check Options
If the Spell Check and auto-correct are not working for a specific document, the issue could be caused by language settings. So keep a check on the language settings options. When you type in a document, Microsoft Word auto-detects the language you are using and tries to auto-correct it. This feature may be useful in many cases, however, sometimes it may be the cause of why Spell Check is not working properly. Here’s how you can resolve this:
First, open the Word document where spell check is not working. Then, press Ctrl+A to select all the text in the document.

Next, go to the ‘Review’ tab, click the ‘Language’ button in the ribbon and select the ‘Set Proofing Language’ option.
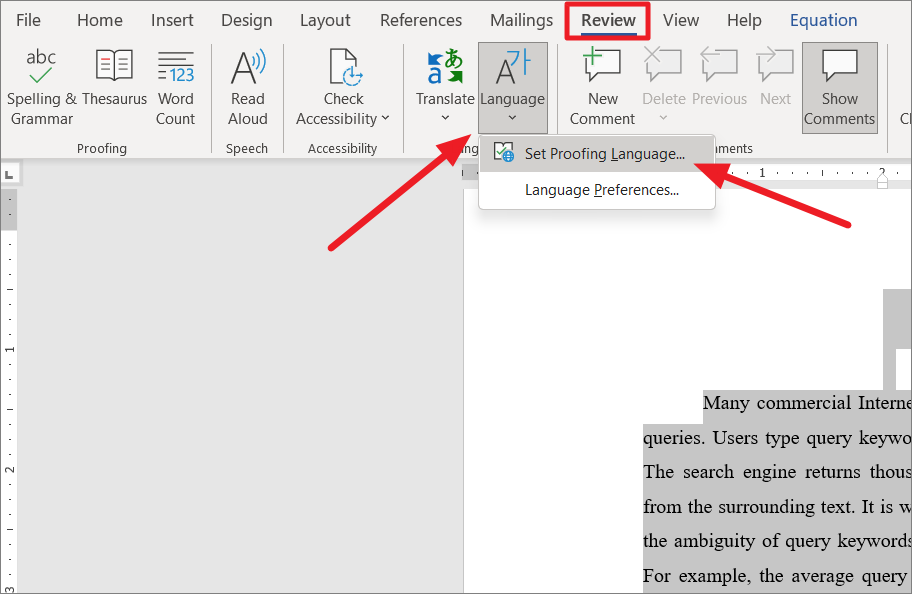
Here, first, make sure the correct language is selected for the text. For example, if the language is set as ‘Spanish’ but the document is in ‘English’, Word will highlight every English word as misspelled words. Also, if your language is set as English (United States) and you’re using British English (for example, if you use the word flavour instead of flavor), it will highlight it as an error.
So, choose the correct language under the ‘Mark selected text as:’ section.
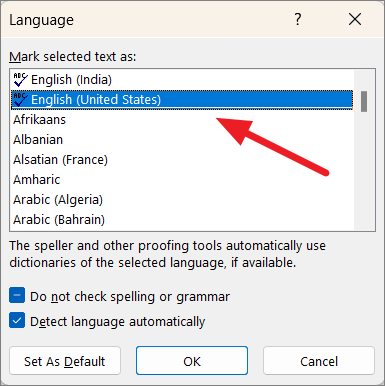
Then, verify that the ‘Do not check spelling or grammar’ option is unchecked. If not uncheck that checkbox.
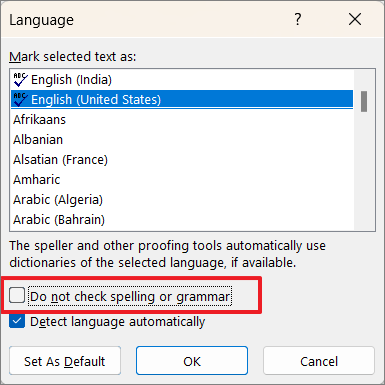
You can also uncheck the ‘Detect language automatically’ option because the auto-language recognition can sometimes throw errors if you occasionally use some other language words (other than the set language).
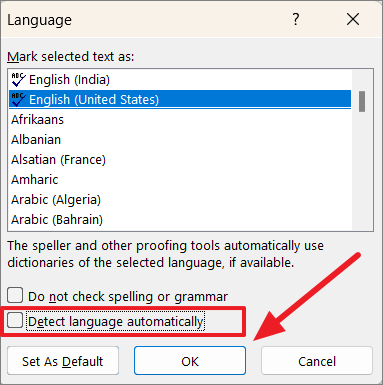
When you are done, click ‘OK’.
After doing the above steps, press the F7 key to run the spelling and grammar tool, and see if the problem is fixed. If not, try the next method.
Check for Proofing Exceptions
There’s another setting in Word that may prevent the spell checker from running properly. The proofing exception is a setting that can exempt certain documents from all proofing and spelling checks. Make sure this option is disabled for the proper functioning of the spell checker. To do this, follow these steps:
First, open Microsoft Word, or you can open any Word documents on the computer. After that, select all the content by pressing Ctrl+A, then go to the ‘Review’ tab and then click the ‘Language’ button. Then, click the ‘Language Preferences…’ option.
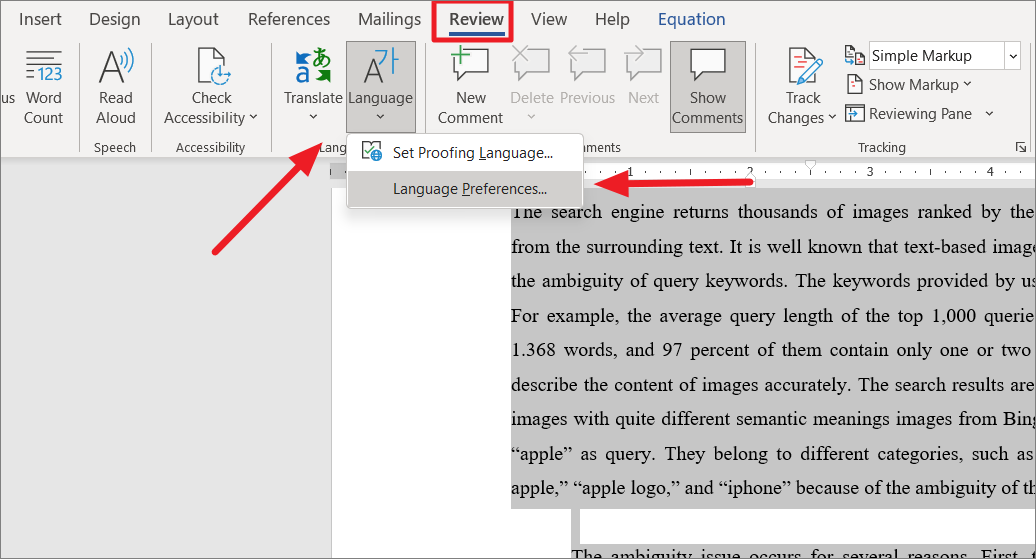
Alternatively, you can go to the ‘File’ tab from the Ribbon, then select ‘Options’ to open Word Options.
In the Word Options window, go to the ‘Proofing’ tab on the left panel. On the right-side panel, scroll down to the ‘Exceptions for’ section at the bottom. Then, make sure both ‘Hide spelling errors in this document only’ and ‘Hide grammar errors in this document only’ checkboxes are unchecked. Then, click ‘OK’ to save the settings.
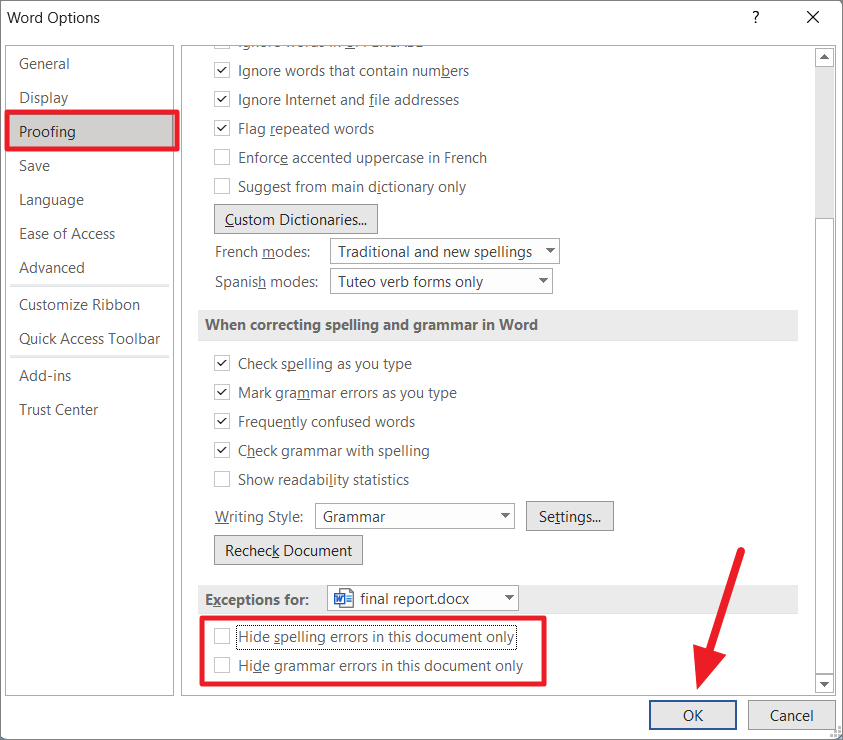
Enable Check Spelling As You Type option
If the Spell Checking is not working in any document, then it might be due to the ‘Check spelling as you type’ setting (which checks the document in real-time for errors) is not turned on. Here is how you can turn it on:
Click the ‘File’ tab, select ‘Options’ in the right sidebar at the bottom of the menu.
When the Word Options dialog opens up, click the ‘Proofing’ section. On the right-side panel, navigate to the ‘When correcting spelling and grammar in Word’ section. Then, make sure to select both ‘Check spelling as you type’ and the ‘Mark grammar errors as you type’ options under that section.
Then, click on the ‘Recheck Document’ button to recheck the document
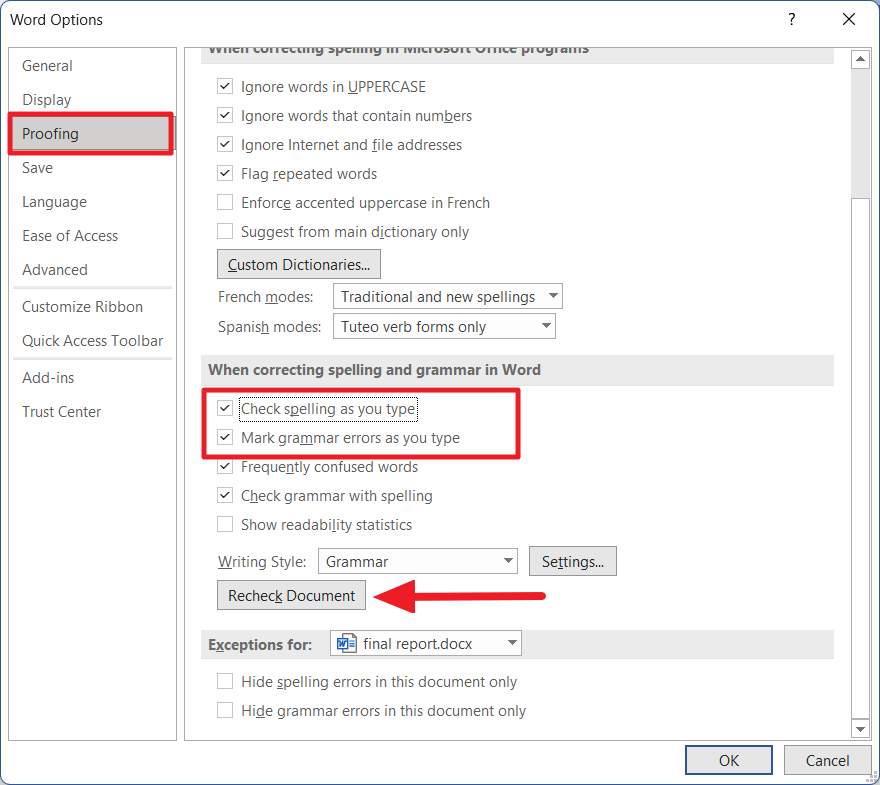
Click ‘Yes’ to the confirmation box.

After that, click ‘OK’ to save the settings and check your document.
Start Microsoft Word in Safe Mode
If some add-in or other program interfering with Spell Checker functionality and causes it to malfunction, you can start Microsoft Word in safe mode (loads without any add-ins) and find out what is causing the issue. Here’s how you can do this:
Press and hold the Ctrl key and then double-click on any Word document on your computer to open it.
In the elevated window, click ‘Yes’.
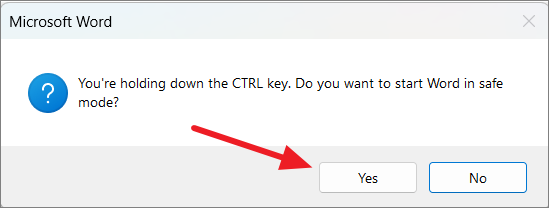
Alternatively, you can launch the Word program in safe mode using the Run command.
To do this first, open the Run command box with Ctrl+R shortcut keys. Then, type winword /safe in the Run command and press Enter or click ‘OK’.
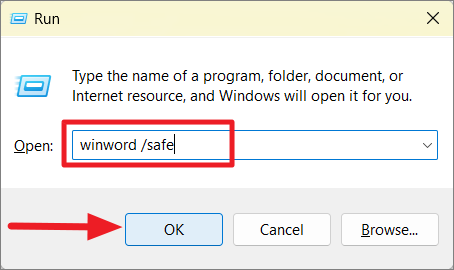
This will open Word in the safe mode.
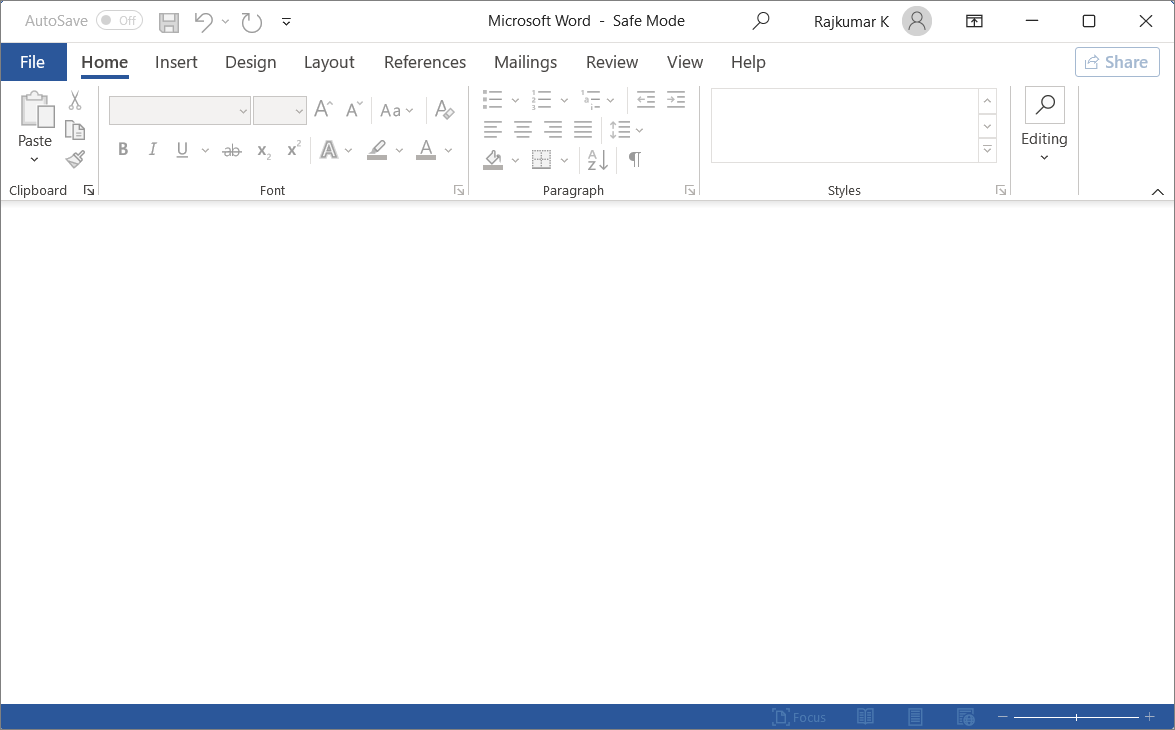
Now, click ‘File’ and select ‘New’ or press Ctrl+N to open a new black document. Then type some text and check if the spell check is working or not.
If the spell check is working on the safe mode, then the problem must be with one of the add-ins. Then, disable the unnecessary add-in that causes the problem.
Disable the Conflicting Add-ins in Word
In some cases, a third-party add-in could be malfunctioning or causing conflict with the spelling and grammar-checking tool. If the spell checker worked properly in safe mode with minimal functionality, then the problem might be with any of the installed add-ins. So you need to disable the third-party add-ins one by one to find which one is causing the conflict. Or you could disable them all and re-install them one by one to find the conflicting add-in. To disable add-ins, follow these instructions:
Open the ‘File’ tab and select ‘Options’ from the left-side panel.
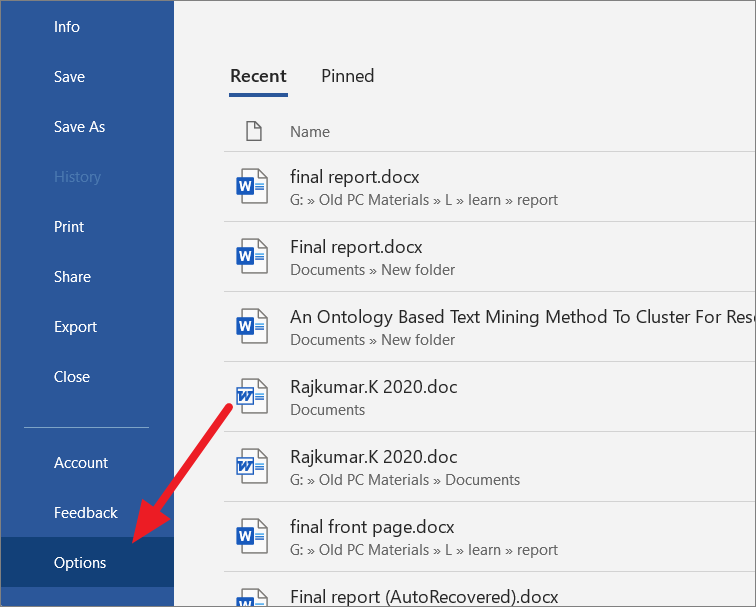
In Word Options, select ‘Add-ins’ on the left-hand pane.

Next, at the bottom of the screen, select the ‘COM Add-ins’ option from the ‘Manage’ drop-down menu and click the ‘Go’ button.
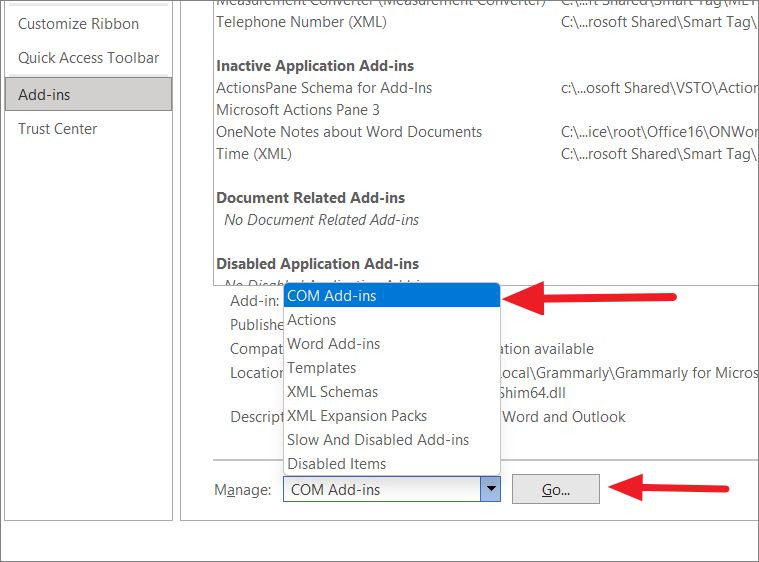
In the COM Add-ins pop-up, simply uncheck the add-in that you think is causing the problem to disable it. If you want to uninstall the add-in, select the add-in and click ‘Remove’. Then, click ‘OK’ to close the dialog.
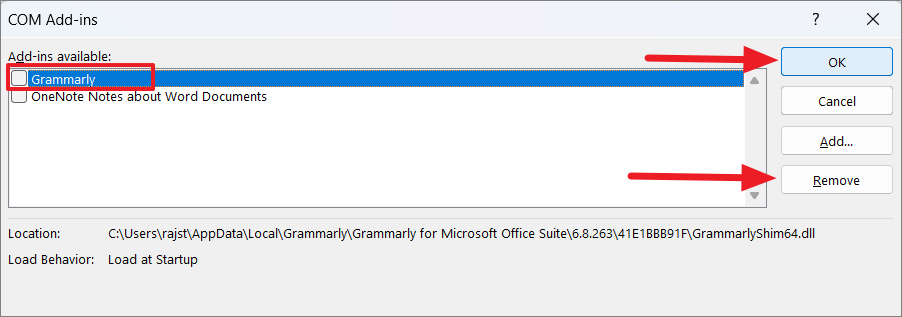
Sometimes all the add-ins will not appear in the COM Add-ins dialog box. If the installed add-in is not available in the COM Add-ins box, do this instead:
Go to the ‘Insert’ tab and click the ‘My Add-ins’ button in the Add-ins group.
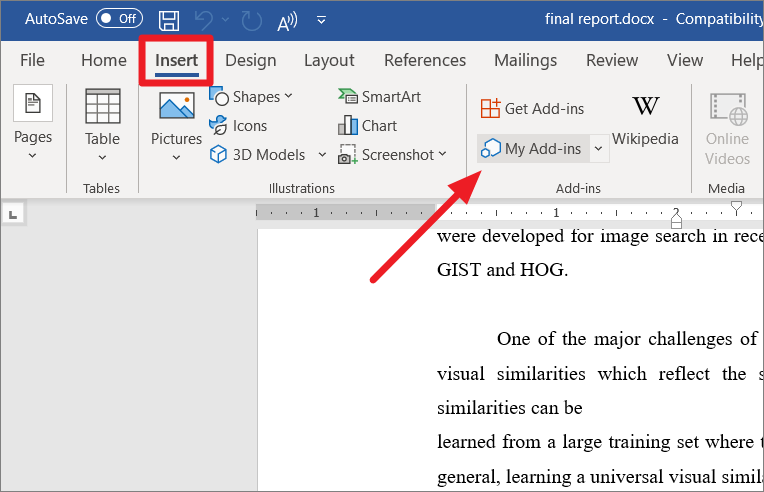
Under Office Add-ins, click the three-dots button (Options) next to the add-in you want to remove.
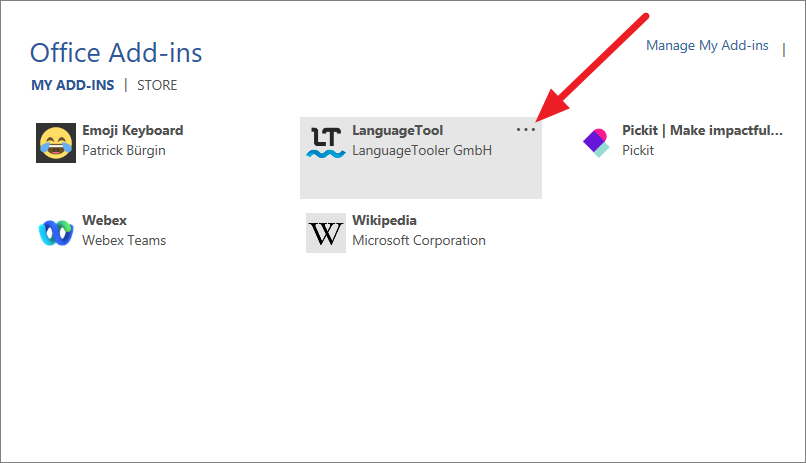
Then, click ‘Remove’ from the menu.
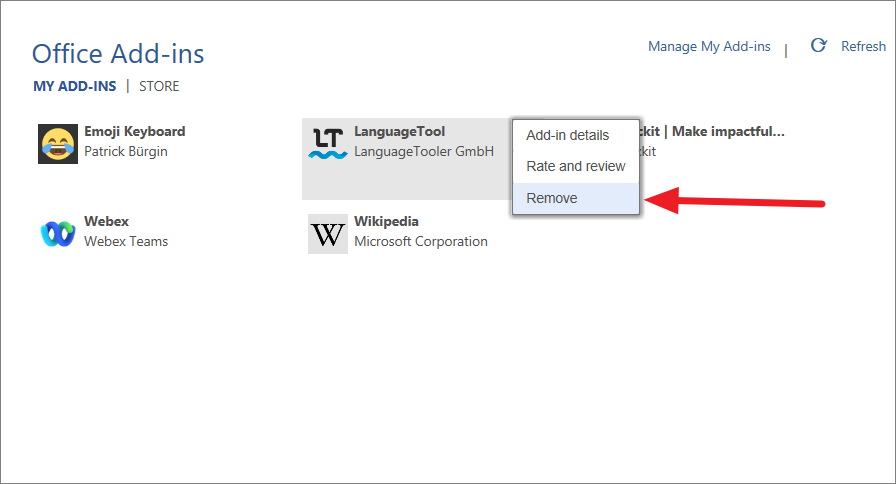
Now, check if the spell checker works or not.
Rename a Windows Registry Folder
Some users claim that renaming the Proofing tools folder in the Registry Editor to resolve the issue. Follow these instructions to rename the proofing folder:
First, completely close the Word program, then launch the Run command box by pressing Win+R. Type regedit to open Registry editor. And, if you see the User Account Control dialog box, click ‘Yes’.
In the Windows Registry windows, navigate to the following path using the left pane or copy-paste the below path in the address bar:
HKEY_CURRENT_USERSoftwareMicrosoftShared ToolsProofing Tools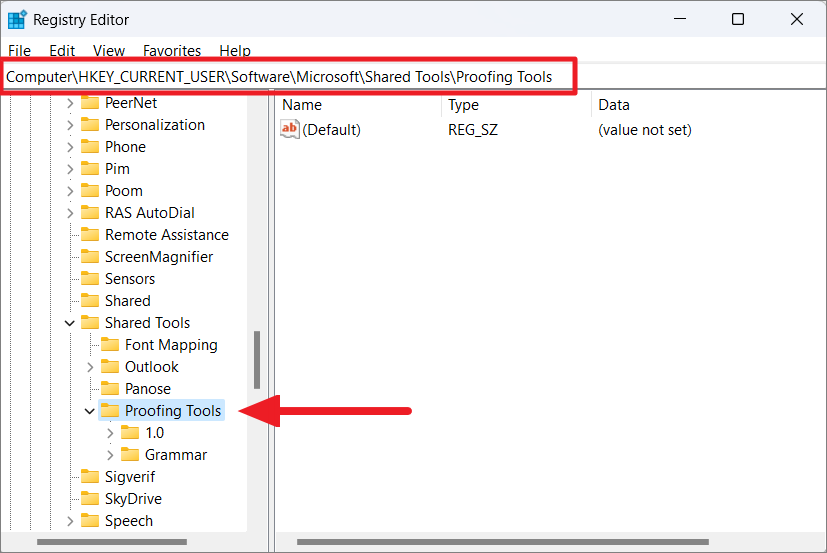
Under Proofing Tools, right-click on the ‘1.0’ folder and select the ‘Rename’ option from the context menu.
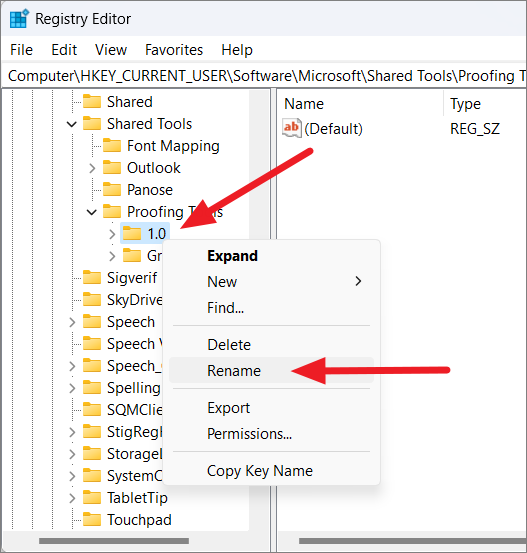
Rename the folder from ‘1.0’ to ‘1PRV.0’.

After that, close the Registry Editor and restart your PC to apply the changes. Now, relaunch Microsoft Word and recheck if the spell checker is working or not.
Rename Your Word Template
It is also possible that the spell checker is not working due to the corrupted global template. The Global Template is either the ‘normal.dot’ or ‘normal.dotm’ for Word 2007 and newer series respectively, which is usually located in the Microsoft Template folder. To resolve this issue, you need to rename the Global template file that will reset MS Word to the default settings. To do this, follow the below steps:
Open the Run command (Win+R), type the following, and press Enter:
%appdata%MicrosoftTemplatesThis will open the Microsoft Word Templates folder where you can find the ‘normal.dot’ or ‘normal.dotm’ file depending on the Word version.
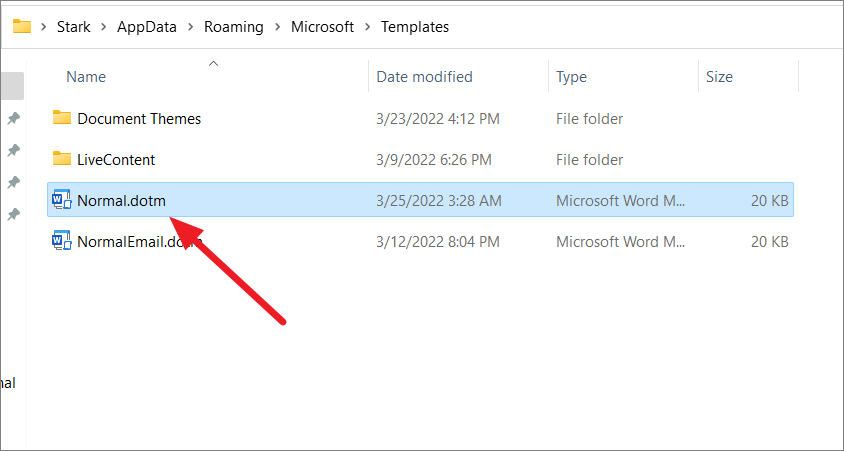
Now, right-click the file and select the ‘Rename’ icon or press F2.
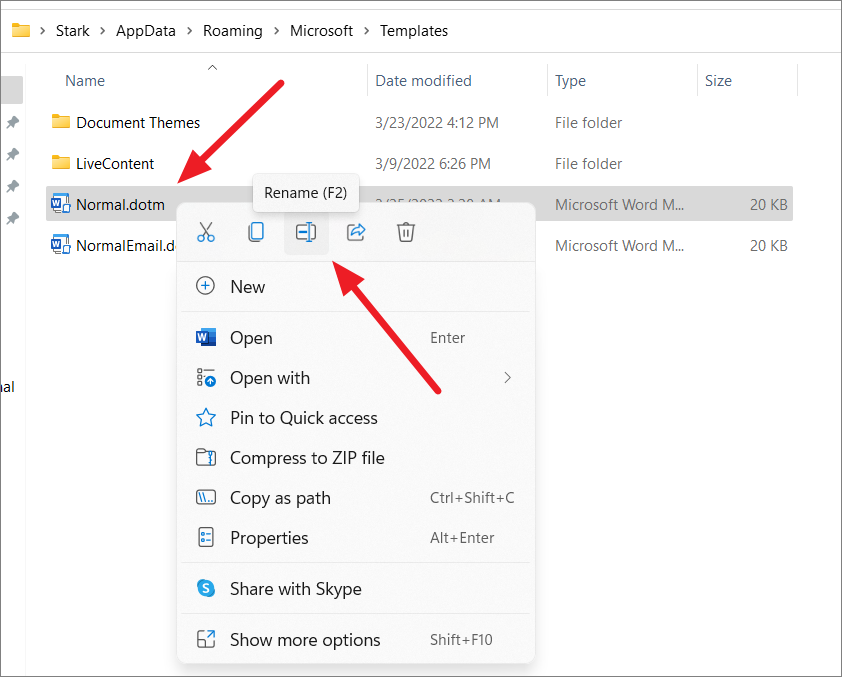
Then, rename the file from Normal.dotm to ‘Normal_old.dotm’.
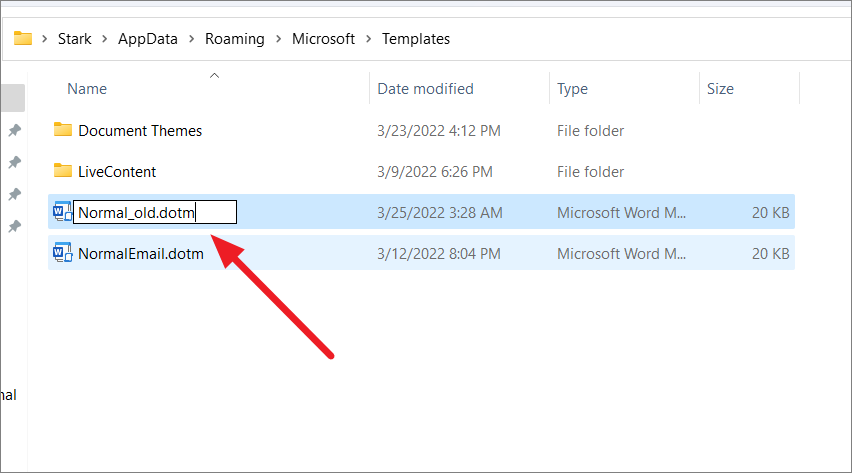
This will reset the Word settings to default and hopefully fix your problem.
Add Proofing Language
While you might be writing or editing a document in English, your preferred authoring and proofing language might be set to a foreign language (e.g German). If you accidentally set a different proofing language or uninstalled English from the list, then spell check might not work.
To fix this, open the ‘File’ menu and go to ‘Options’ in the backstage view. Next, go to the ‘Language’ section on the left and make sure that the correct language is installed and set as preferred under the ‘Office authoring languages and proofing’ section.
To set proofing language, select the language and click the ‘Set as Preferred’ button. In the below example, German is set as the preferred language.

If your language is not available under the ‘Office authoring languages and proofing’ section, click the ‘Add a Language’ button to add a proofing language.
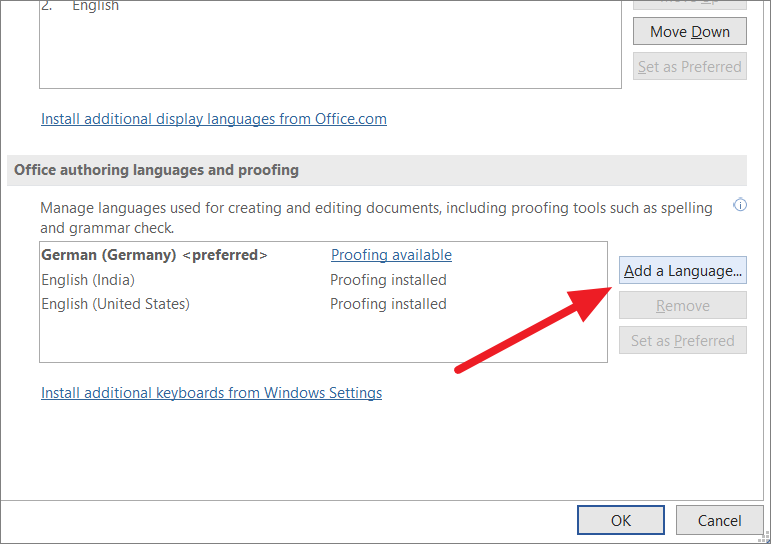
From the pop-up window, choose the language you want to add from the list and click the ‘Add’ button
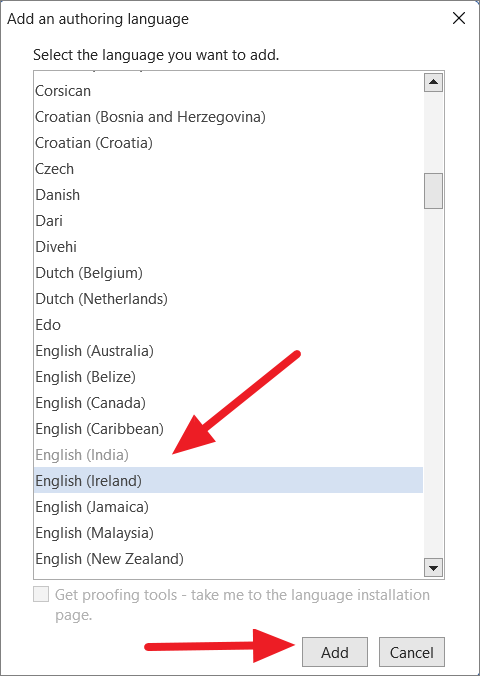
After that, select the language from the list and click ‘Set as preferred’.

Then, click ‘Yes’ in the Microsoft Office Preferred Authoring Language pop-up box.
After selecting the preferred language, click ‘OK’ to close Word Options.
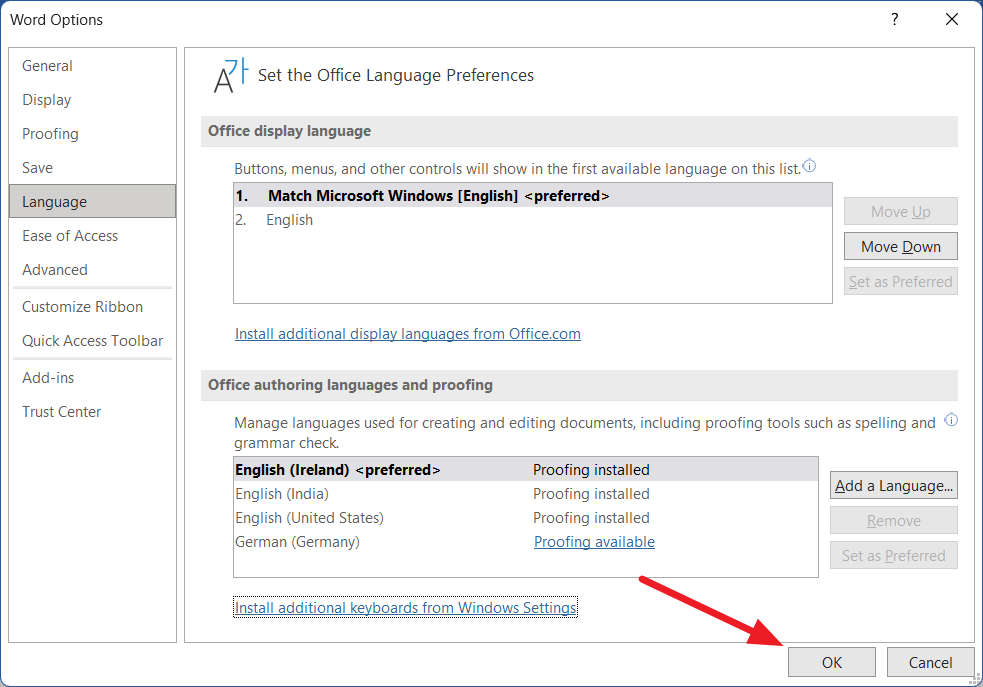
Now, check if the spelling and grammar tool is working or not.
Add to Custom Dictionary
There are times when Word couldn’t recognize certain words such as slags, names, etc. And the program will struggle to detect spelling and grammar mistakes. In such cases, you can add your words to Word’s built-in dictionary and it will not show them as errors in this document and in all future documents.
To add a word to the dictionary, right-click on the word you want to add and select the ‘Add to Dictionary’ option in the context menu.
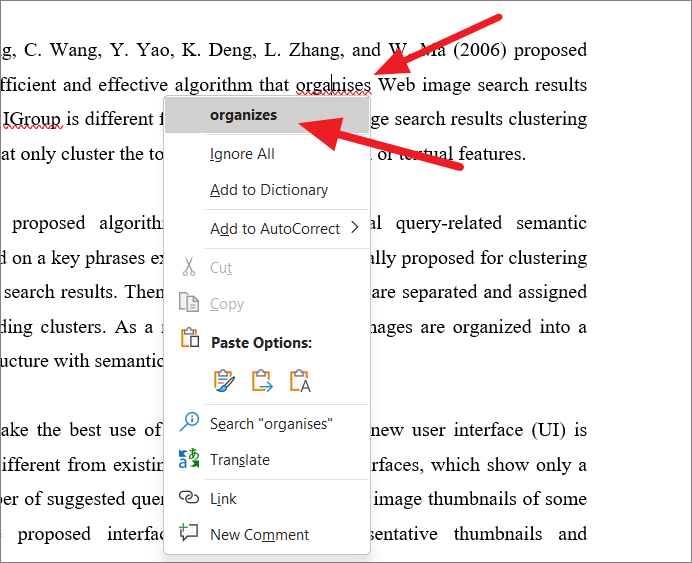
Check Document Style Settings
Word uses different language settings for each paragraph in your document. If you use a style that is formatted the wrong way, then each new paragraph will be formatted in a different language even if you set the entire document language to English. Consequently, Word may highlight the words in the new paragraph as spelling mistakes. To fix this, you must set the correct language in the Style.
On the ‘Home’ tab, head to the Styles section and then right-click on the chosen style and select ‘Modify’ from the context menu.
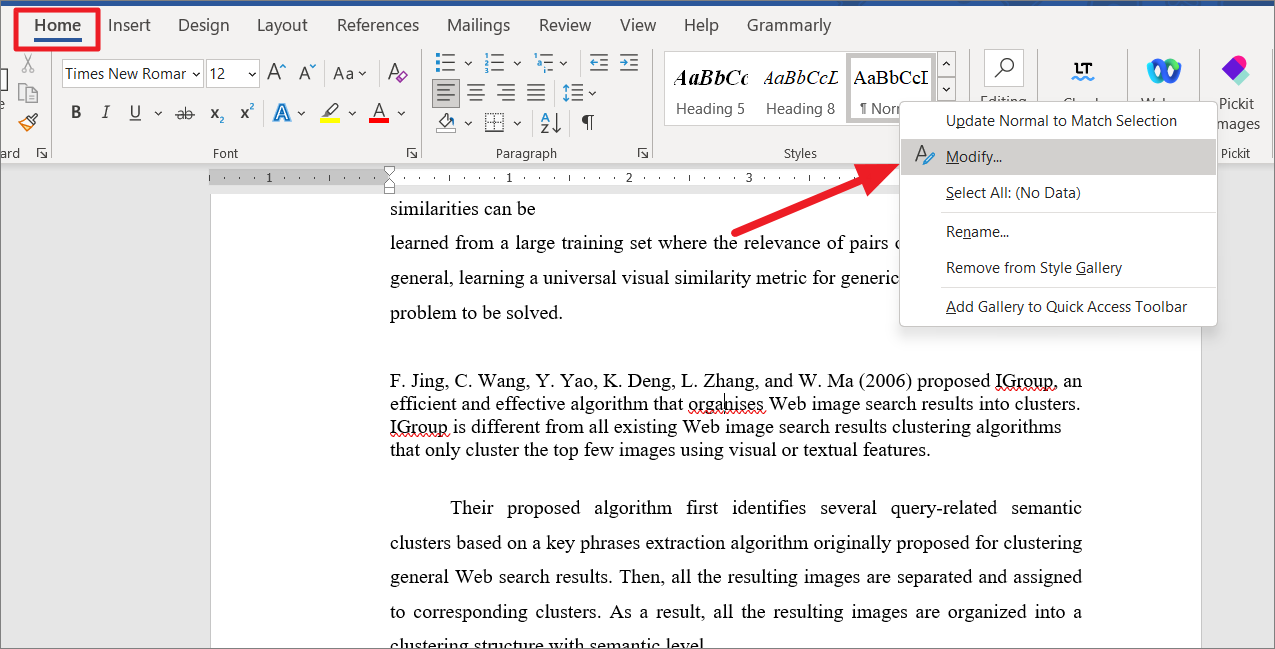
In the Modify Style dialog box, click the ‘Format’ button at the lower-left corner, and select ‘Language’ from the menu.
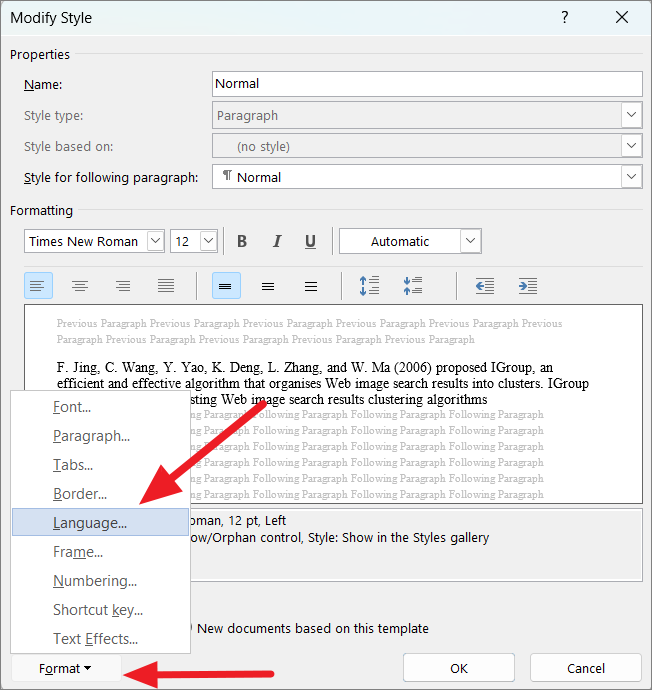
Then, select the correct language for the selected style and make sure the ‘Do not check spelling or grammar’ option is unchecked. Then, click ‘OK’.
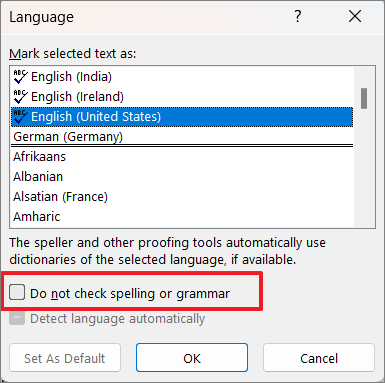
Repair MS Office Application
The MS Word app could be corrupted or maybe a recent update damaged your software’s installation. Either way, damaged or corrupted MS Word application could also be another cause for spelling and grammar checking tool not working. So repairing the MS Office application on your computer might resolve your issue.
First, right-click on the Windows Start menu and select the ‘Installed apps’ option from the menu. or Go to Windows Settings (Win+I) and head to ‘Apps’ and then ‘Apps and features’.
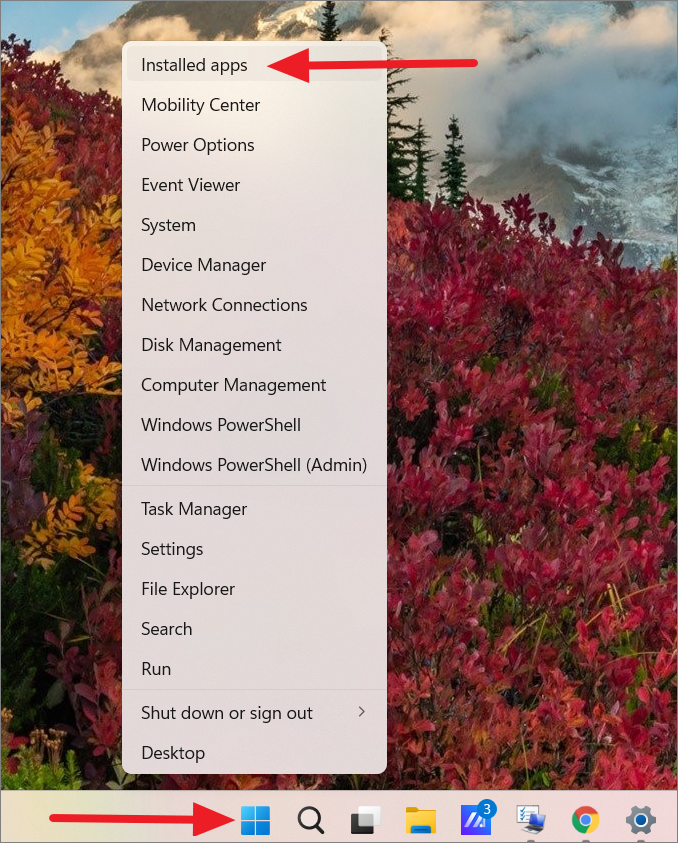
Under the list of installed apps, locate the Microsoft Office version you have installed. Then, click the three-dots button and select ‘Modify’.
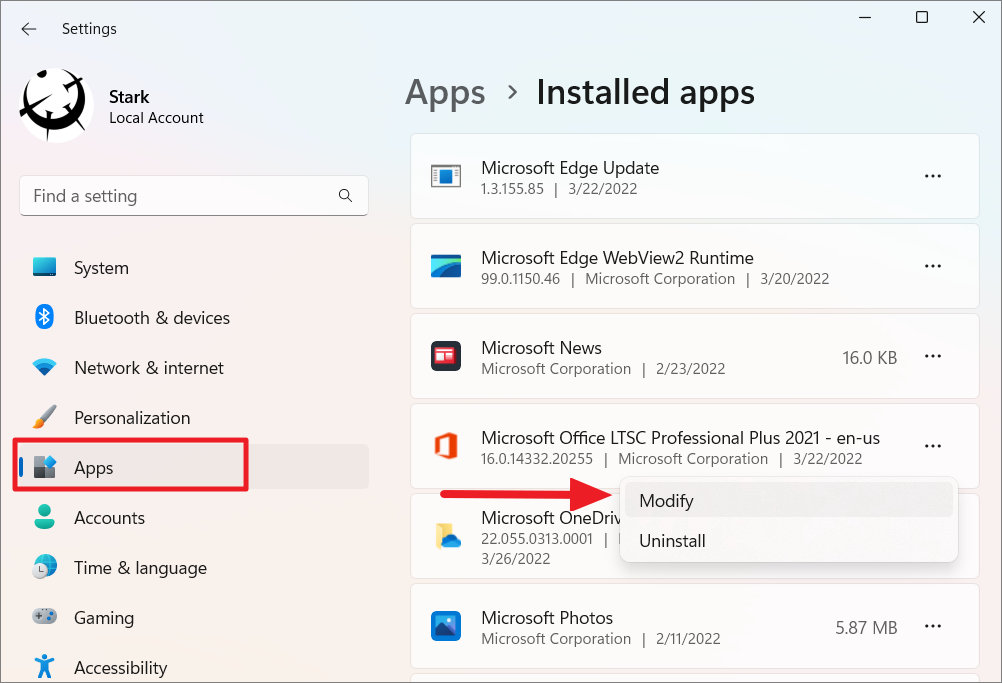
And, click ‘Yes’ to the User Account Control if prompted. In the Microsoft repair window, you will have two options. First, select the ‘Quick Repair’ option and click the ‘Repair’ button.
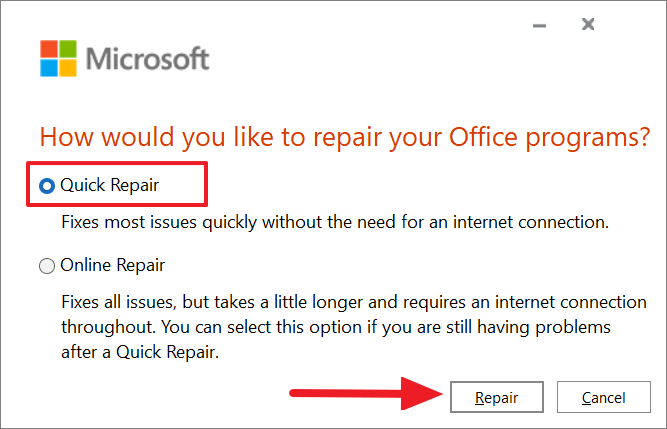
In the next dialog box, click the ‘Repair’ button again.
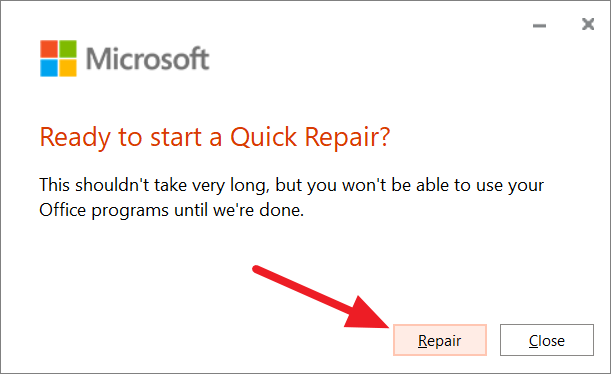
If the above option doesn’t fix the problem, select ‘Online Repair’ option and click the ‘Repair’ button.
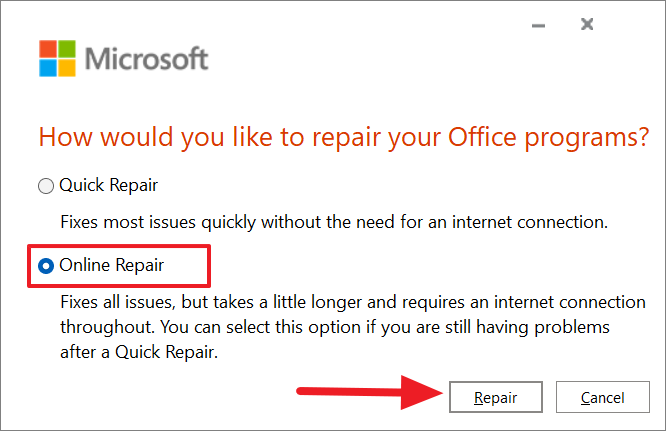
Then, click ‘Repair’ again.
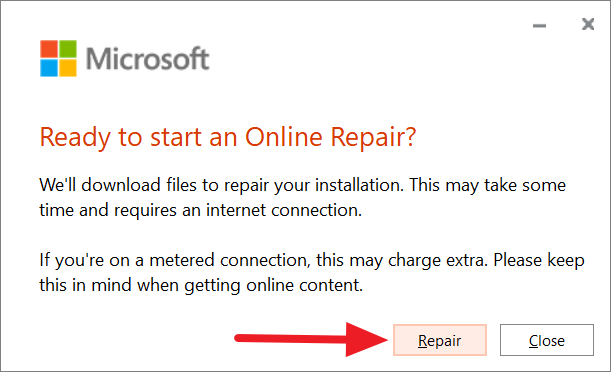
After the repair is finished, restart your device, and see if the issue is fixed or not.
Disable the Do Not Check Spelling Or Grammar option
Sometimes when you try to check the spelling, it will show you the “Text marked with ‘Do not check spelling or grammar’ was skipped” error message. Word usually shows this message when you use the ‘Do Not Check Spelling’ option in the language settings to ignore certain words from the spell checker. However, if this option is not configured right, Word will skip spell-checking for all the words in the document. Here’s how you can disable this option:
Open the Word document and highlight the paragraph or the specific word which is not being shown in the spell checker. Next, press the Shift+F1 shortcut keys.
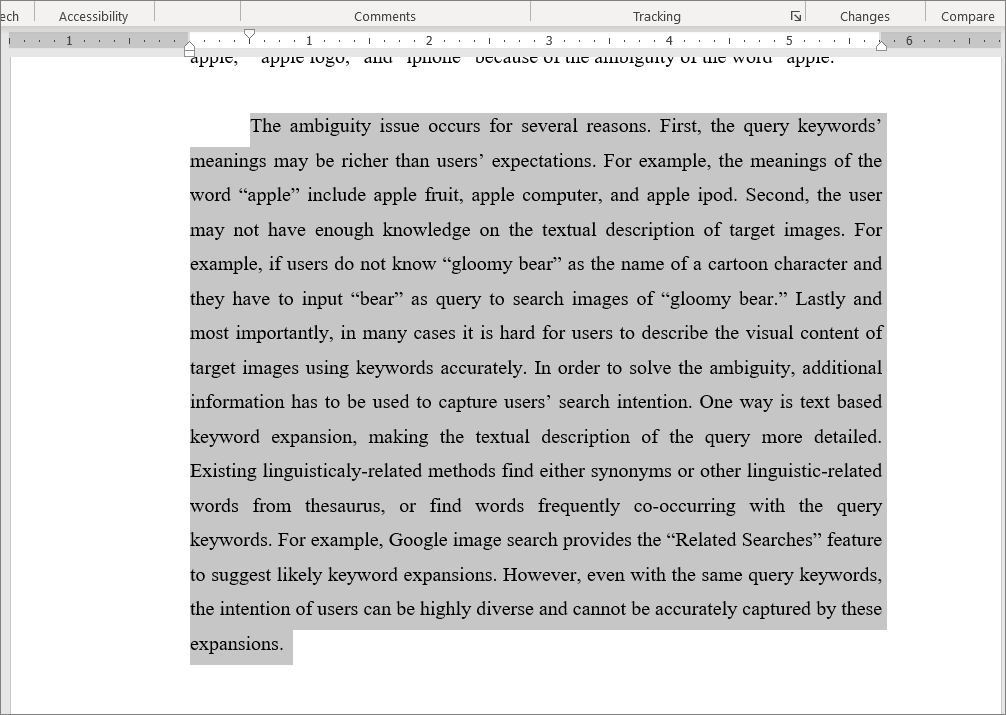
This will show you the Reveal Formatting pane on the right side of the Word window.
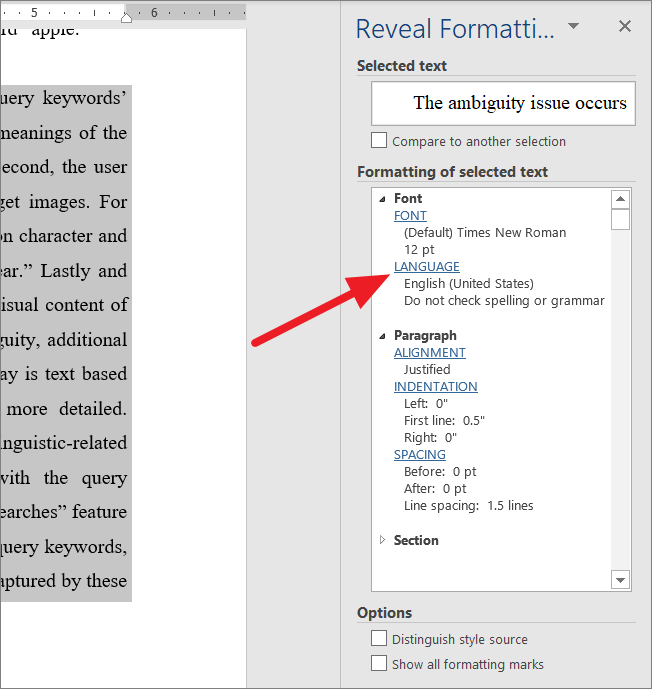
In the Reveal Formatting pane, click on the ‘Language’ option under the Formatting of the selected text box.
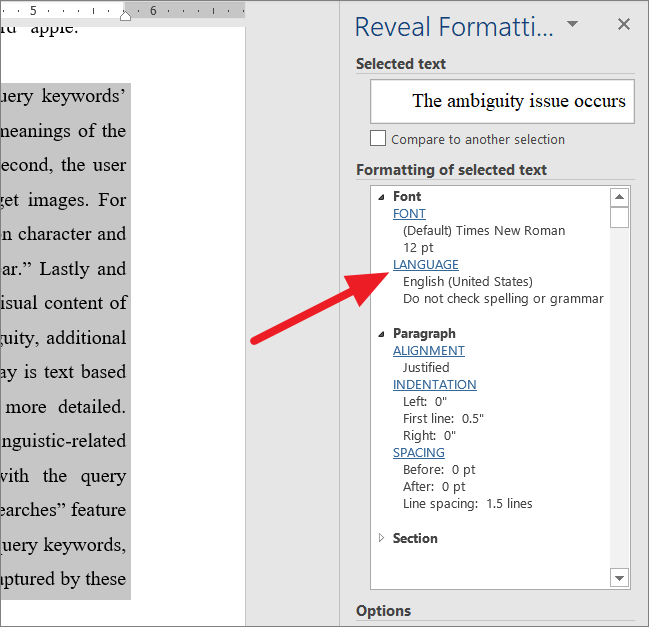
When the Language dialog box appears, make sure to uncheck the ‘Do not check spelling or grammar’ option. After that, click ‘OK’ and restart the Word program.
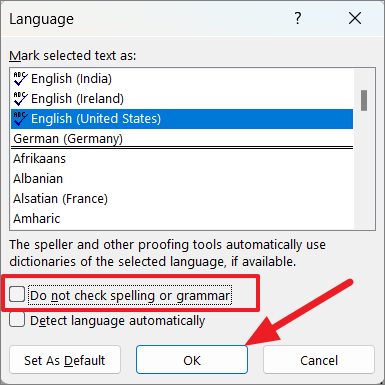
Use Grammarly Plug-in
If Word’s Spelling and Grammer tool is not working for you, you can use Grammarly plug-in as an alternative. Grammarly is a cloud-based typing assistant that helps you detect and fix spelling mistakes, imperfect grammar, and punctuation mistakes. Also, Grammarly integrates seamlessly with Microsoft Word and Outlook.
To download Grammarly for Word and Outlook, go to this website and click the ‘Get the add-in It’s free’ button. After downloading the add-in, install it.
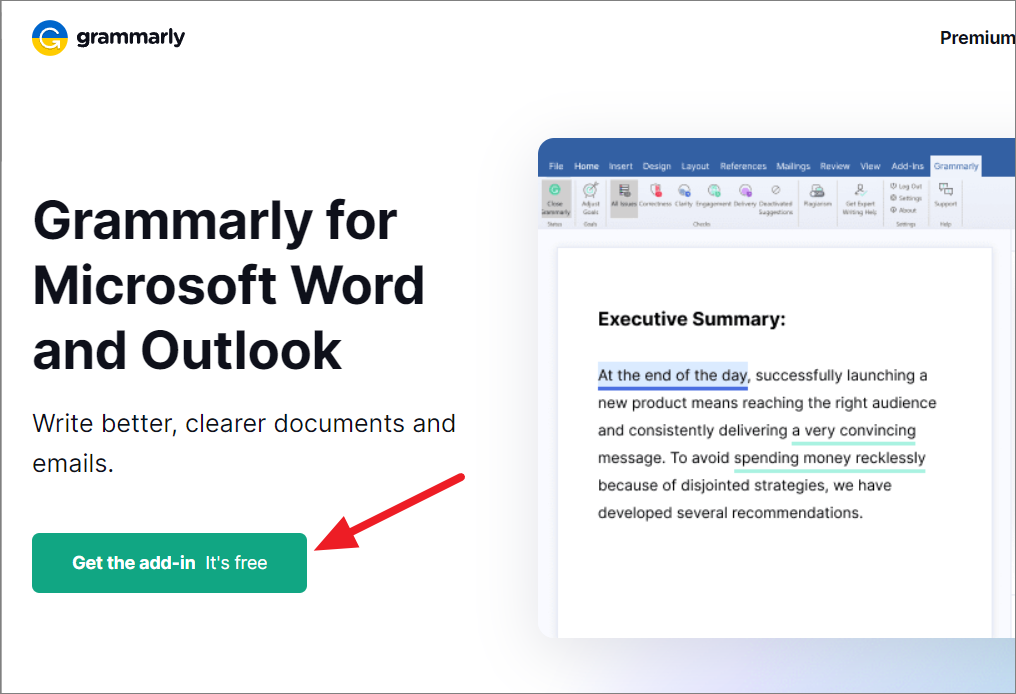
Then, restart the Word app and you will see a new tab called ‘Grammarly’ in the ribbon.
Now, you can open any document and go to the ‘Grammarly’ tab and click the ‘Open Grammarly’.
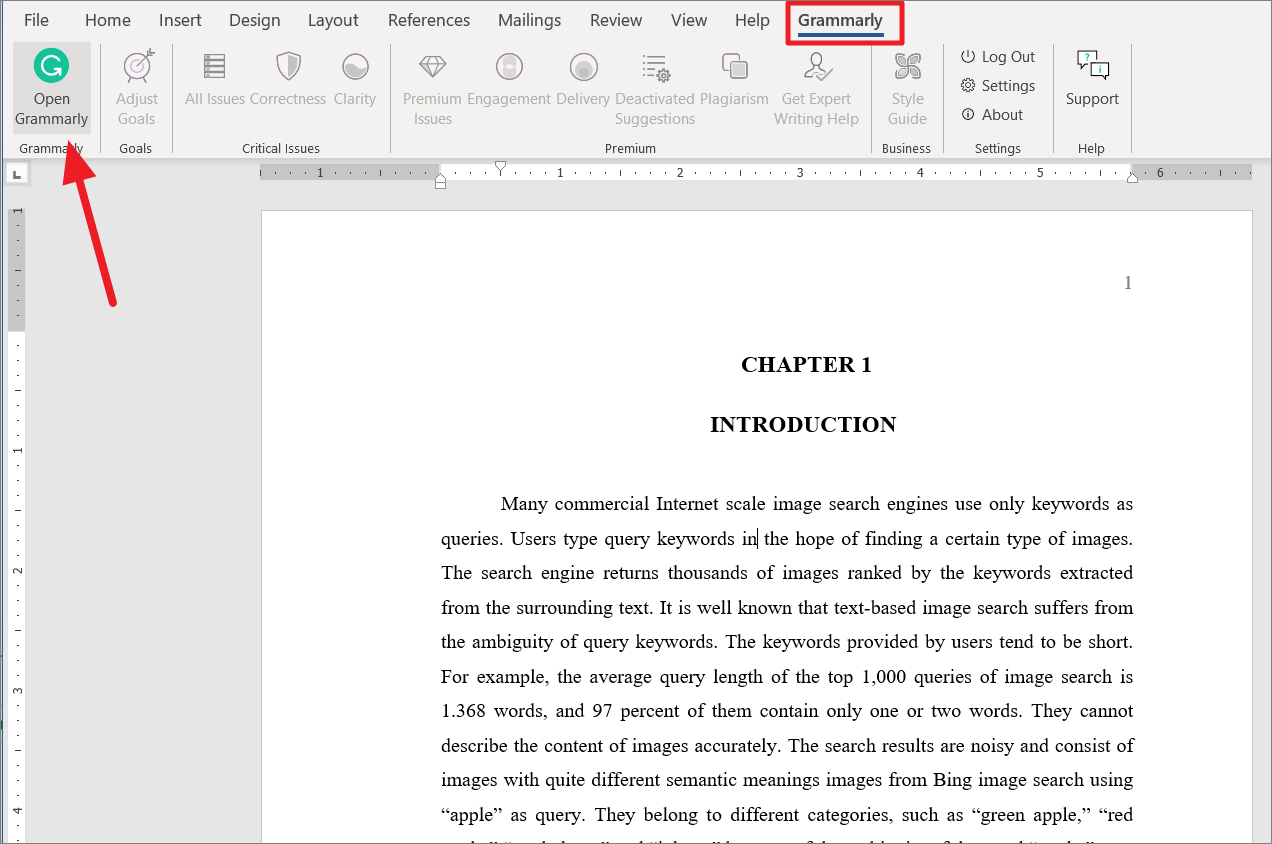
This will open the Grammarly pane on the right, where it will scan the document and show you suggestions to fix your spelling and grammar mistakes.
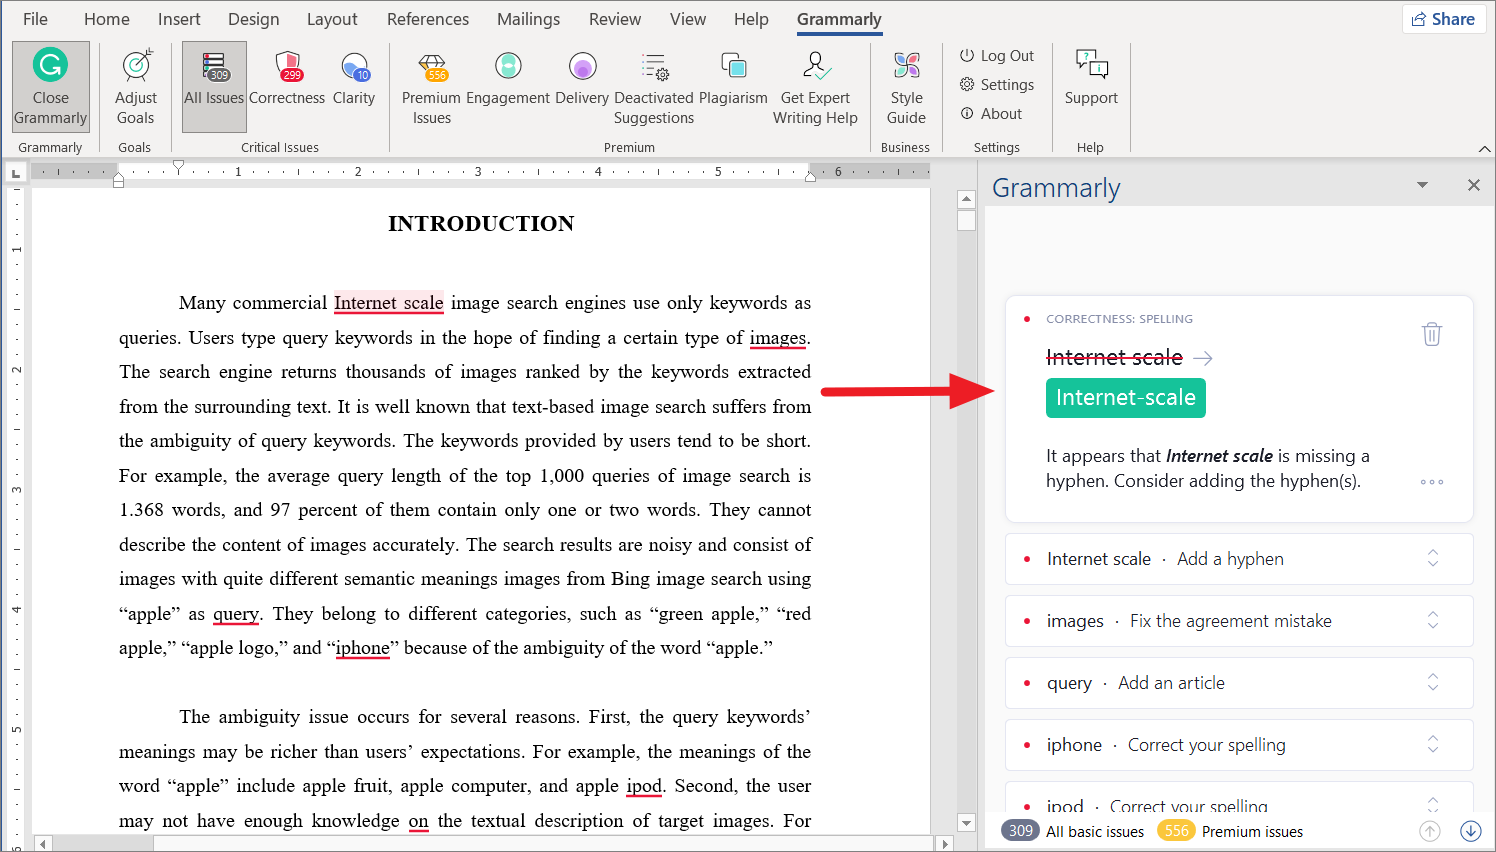
You can also use the Microsoft Word web app to quickly check the spelling of the document. If you have Microsoft 365 subscription, you can open the same document in the web app and quickly check for spelling and grammar mistakes online.
That’s it.
You’re going over your report with the CEO and realize you misspelled “recommendation.”
Will she think I’m an idiot? Will this hurt my performance report? Can she still take make my ideas seriously?
Your cheeks flush. Your hands freeze. You can’t breathe. Such a small mistake, but if you make enough of them, they’ve got big consequences.


Spelling and grammatical errors not only destroy your credibility. They also get in the way of effective communication.
And you can easily avoid them by using Microsoft Word’s spelling and grammar checker.
The spelling and grammar checker are built into Microsoft Word to help you find mistakes. So, you can correct them before putting your document out into the world.
This article shows you the basics of using Word’s spell and grammar checker. You’ll learn how to set up spelling grammar check in Word. It also goes over some of the advanced grammar checker features for Word, and it also includes how to troubleshoot common issues.
Note: For the step-by-step instructions below, I use Microsoft Word for macOS. If you’re using a different version of MS Word, then your screens may look different.
How to Run Spell Check and Grammar Check in Word Automatically
If you’re on Word for macOS, then the spell and grammar checks are probably running automatically. This means that spelling and grammar errors are flagged while you type. On macOS, Word marks possible spelling errors with a red squiggly line and potential grammar errors with blue double underlines.
If not, follow these steps:
1. Opens the Word Preferences Dialog
Go to Word > Preferences….
2. Go to Spelling & Grammar
Click on the Spelling & Grammar button. The Spelling Grammar dialog opens.


3. Activate Spelling and Grammar Check
Check the buttons for Check spelling as you type and Check grammar as you type.


You can also change other spelling and grammar settings in this dialog box.
When you’re happy with the settings, click on the X in the corner of the screen to close it.
Word will now check your spelling and grammar and flag possible errors as you type in your document.
How to Run Spell Check and Grammar Check in Word Manually
You may prefer to switch off automatic spelling and grammar check. After all, seeing your mistakes as you type can distract you from the writing process.
In that case, you’ll want to run the spelling and grammar check when you’re done drafting your document.
First, make sure your cursor is at the beginning of the document. Then, follow these steps to manually run the spelling and grammar checks:
1. Open the Spelling & Grammar Dialog Box
Click on the Review tab > Spelling & Grammar.


2. View Potential Errors
The Spelling & Grammar dialog box opens. Potential spelling mistakes are in red, while possible grammar errors are in blue.


3. Correct or Ignore Potential Errors
Microsoft Word gives you suggestions to correct the potential error. If you want to accept the suggestion, click on the word in the box, then click Change.


If Word doesn’t have a suggestion, or you’d like to correct it your own way, type the correction in the box. Click Change.


You can also choose to ignore the potential errors that were flagged. Click Ignore Once to skip only this specific instance of the error. Or, click Ignore All to skip all instances of the error.


Whichever you choose, Word moves onto the next sentence with a possible error.
How to Use Advanced Spelling and Grammar Check Features
Word’s Spelling & Grammar checker has a few advanced features you can use to improve your workflow:
1. Add or Edit Words in a Spell Check Dictionary
Sometimes Word flags words as misspelled even though they’re not. This may happen with jargon that’s specific to your industry, less frequently used words, and proper names. If you’ll be using these words often, you’ll want to add them to the Spell Check Dictionary on your computer. This way, Word recognizes these words and will stop flagging them as potential errors.
You’ve got three options to do that:
Option 1. If Spell Check Is on as You Type
When a word is flagged as a potential error, right-click on the word then click Add to Dictionary.


Option 2. When Spell Checking Manually
If the word was flagged while you’re checking manually, click on the Add button.


Option 3. Through Word Preferences
Go to Word > Preferences… > Spelling & Grammar.
From the Spelling Grammar dialog, click Dictionaries….


The Custom Dictionaries dialog pops up. Click Edit.


The File Conversion — Custom Dictionary dialog opens. Click OK.


Another document opens with your custom words. Add new words or edit the existing ones as you see fit. Note that the words are in alphabetical order.


Save and close the Custom Dictionary.


2. Using AutoCorrect
AutoCorrect is another feature in Word that can streamline your workflow. Use it to correct errors you frequently make, or to skip having to perform certain tasks. For example, set up AutoCorrect to automatically capitalize the first letter of each sentence.
Here’s how to do that:
1. Go to Word > Preferences… > AutoCorrect


The AutoCorrect dialog opens.
2. Choose the AutoCorrect Settings You Want to Apply


Check the button for Automatically correct spelling and formatting as you type. Check or uncheck specific items as you wish. Note that this is where you can create shortcuts for emoticons and symbols.
When you’re done, click on the X in the corner of the dialog box to close it. Word will now AutoCorrect misspelled words as you type.
3. Grammar and Writing Style Settings
Refine how Word identifies grammar mistakes by tweaking the grammar settings.
Not only that, Word can even make you a better writer! How? By flagging weaknesses in your writing style. Specify which writing style best practices you want Word to check, such as clarity, conciseness, and inclusiveness.
Note: Some of these settings are available only with an Office 365 Subscription.
Follow these steps:
1. Open the Spelling & Grammar dialog.
Go to Word > Preferences… > Spelling & Grammar.
2. Go to Writing Style Settings.
On Writing style: Grammar, click Settings….


The Grammar Settings dialog opens.
3. Choose Your Grammar and Style Options


Check or uncheck items under Grammar and style options. You can choose between Grammar and Grammar & Refinements. The only difference is that the Grammar & Refinements mode has Wordiness and Nominalizations checked.
Scroll down to see the entire list. The Microsoft Office website has a detailed explanation of each option. Set how Word checks Punctuations Required With Quotes and Space Between Sentences.
When you’re happy with the settings, click OK.
4. Spelling and Grammar Check in a Different Language
Occasionally you may use pieces of text in a language different from the default language setting in your document. Change the language of the dictionary Word uses for its spelling and grammar check by following these steps:
Select the text that’s in a different language.
1. Click Review > Language


2. Select the Language You Want to Use


Scroll down to find the language you wish to use. Click on it to select it, then click OK.
3. Change the Default Language
At this point, you can also change the default language Word uses for the entire document. Click on Default….


When prompted whether you want to change the default language, click Yes.


Common Problems with Grammar Check and Spell Check in Word and How to Fix Them
What if the Microsoft Word spell check or grammar check is not working?
Sometimes spell and grammar check in Word don’t work the way you expect them to. Below are some common problems and the most likely fix for each one:
Problem: Word Isn’t Flagging a Misspelled Word
Possible Cause 1: You may have inadvertently added a misspelled word into your custom dictionary.
Fix: Edit the custom dictionary and delete the misspelled word. Follow the steps outlined above for how to edit words in a Spell Check dictionary.
Possible Cause 2: The wrong dictionary is being applied to the text or document.
Fix: Under the Review tab, click on Language, and make sure the correct language is selected.
Problem: Spelling and Grammar Check Aren’t Running Automatically
Cause: The boxes for Check spelling as you type and Check grammar as you type are unchecked.
Fix: Go to Word > Preferences… > Spelling & Grammar and check the boxes for Check spelling as you type and Check grammar as you type.
Word Templates: Another Helpful Tool for Your Word Workflow
Another way to make a good impression with your Word document is by using a professionally designed Word template. This way, the hardest design decisions are already made for you. This means you can focus on the actual content of your document and save time on its design and layout.


If you want to be able to download an unlimited number of Word templates, then a good source for you is Envato Elements. For a small, fixed subscription fee, download as many templates you want—along with fonts, photos, icons, and other ingredients you need to make effective and attractive documents.


But, if you only need the one-off template for Microsoft Word, then GraphicRiver may be a better source. You also have access to professional Word templates as well as custom fonts, photos, and other components, all on a pay-per-use basis.
Say Goodbye to Credibility-Busting Mistakes
With grammar and spell check in Word, there’s no more excuse to have careless mistakes in your document. You’ve just learned how to check grammar and spelling in Word. By following the steps above, you can have Microsoft Word spell and grammar check flag potential mistakes as you type. Or run the checkers manually when you’re done drafting your document.
And make sure to give your masterpiece an impressive design and layout. Use a template for Word created by a professional. Great sources for Word templates include Envato Elements, if you want unlimited downloads. Turn to GraphicRiver, if you want to pay for each use of a template for Word.
These tools not only improve your workflow, but they also help you create documents that uplift your brand, reinforce your credibility, and get you the results you’re hoping for.