
Word for Microsoft 365 Word 2021 Word 2019 Word 2016 Word 2013 Word 2010 More…Less
This article presents basic concepts in Microsoft Word to help new users get started in creating sophisticated, professional-looking documents.
-
Click the Start button
 or press the Windows key on your keyboard to display the Start menu.
 -
In the list of applications, find Word and click it. The startup screen appears and Word starts.
Tip: The first time you start Word, the Microsoft Software License Agreement might appear.
 or press the Windows key on your keyboard to display the Start menu.
To quit Word, click the x button  in the upper-right corner of your screen.
If you made any changes since you last saved the document, a message box appears asking if you want to save changes. To save the changes, click Yes. To quit without saving the changes, click No. If you clicked the x button by mistake, click Cancel.
Top of Page
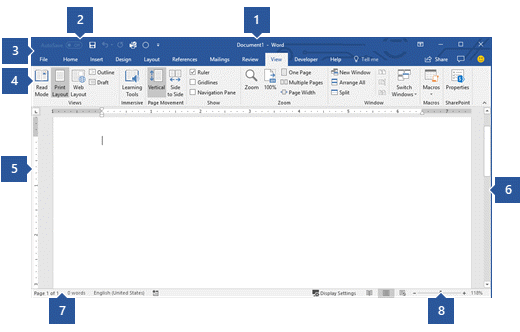
1 Title Bar: Displays the file name of the document that is being edited and the name of the software you are using. It also includes the standard Minimize, Restore, and Close buttons.
2 Quick Access Toolbar: Commands that are frequently used, such as Save, Undo, and Redo are located here. At the end of the Quick Access Toolbar is a pull-down menu where you can add other commonly used or commonly needed commands.
3 File Tab: Click this button to find commands that act on the document itself rather than the content of the document, such as New, Open, Save as, Print, and Close.
4 Ribbon: Commands needed for your work are located here. The appearance of the Ribbon will change depending on the size of your monitor. Word will compress the ribbon by changing the arrangement of the controls to accommodate smaller monitors.
5 Edit Window: Shows the contents of the document you are editing.
6 Scroll Bar: Lets you change the display position of the document you are editing.
7 Status Bar: Displays information about the document you are editing.
8 Zoom slide control: Lets you change the zoom settings of the document you are editing.
Top of Page
In Word, you must save your document so you can quit the program without losing your work. When you save the document, it is stored as a file on your computer or in a network location. Later, you can open the file, change it, and print it.
To save a document, do the following:
-
Click the Save button in the Quick Access toolbar. The Save As window appears.
-
Choose a location where you want to save the document and enter a file name in the File name box. To change the file name, type in a new file name.
-
Click Save.
You can open a Word document to resume your work. To open a document, do the following:
-
Open File Explorer, and click Documents. A list of documents appears.
-
If the document you want to work on is on the list, click the file name to open the document. If the document isn’t on the list, navigate to the location where you stored your file, and double-click the file. The Word startup screen appears, and then the document is displayed.
Tip: You can also open a document from within Word by clicking the File tab and then clicking Open. To open a document you saved recently, click Recent.
Top of Page
Before you edit or format text, you must first select the text. Follow the steps below to select text.
-
Place the curser at the beginning of the text you’d like to edit or format and then press the left mouse button.
-
While holding down the left mouse button, move it to the right (called “dragging”) to select the text. A background color is added in the location of the selected text to indicate the selection range.
You can find most text formatting tools by clicking the Home tab and then choosing from the Font group.
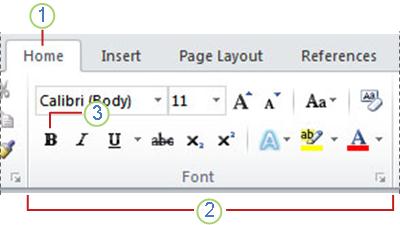
1 This is the Home tab.
2 This is the Font group on the Home tab.
3 This is the Bold button. See the table below for the names and functions of all the buttons in the Font group.
|
Button |
Name |
Function |
|---|---|---|
|
|
Font |
Changes the font. |
|
|
Font Size |
Changes the size of the text. |
|
|
Grow Font |
Increases the text size. |
|
|
Shrink Font |
Decreases the text size. |
|
|
Change Case |
Change all the selected text to uppercase, lowercase, or other common capitalizations. |
|
|
Clear Formatting |
Clears all formatting for the selected text, leaving only the plain text. |
|
|
Bold |
Makes the selected text bold. |
|
|
Italic |
Italicizes the selected text. |
|
|
Underline |
Draws a line under the selected text. Click the dropdown arrow to select the type of underline. |
|
|
Strikethrough |
Draws a line through the middle of selected text. |
|
|
Subscript |
Creates subscript characters. |
|
|
Superscript |
Creates superscript characters. |
|
|
Text Effects |
Apply a visual effect to selected text, such as shadow, glow, or reflection. |
|
|
Text Highlight Color |
Makes text look like it was marked with a highlighter pen. |
|
|
Font Color |
Changes the text color. |


Top of Page
Styles allow you to quickly format major elements in your document, such as headings, titles, and subtitles. Follow the steps below to apply styles to the text in your document.
-
Highlight the text you want to change.
-
On the Home tab in the Styles group, pause the pointer over any style to see a live preview directly in your document. To see the complete list of styles, click the More arrow to open the Styles pane.
-
To apply the style that’s most appropriate for your text, just click it.
When you’re done applying styles to the individual elements, Word lets you use a style set to change the look of your whole document all at once.
-
On the Design tab, in the Document Formatting group, choose one of the predefined style sets, such as Basic or Casual. Pause the pointer over any style set to see a live preview directly in your document. To see more predefined style sets, click the down arrow on the right side of the Document Formatting group.
-
To apply the style set that’s most appropriate for your text, just click it.
Top of Page
With Word, you can easily change the spacing between lines and paragraphs in your document.
-
On the Design tab, click Paragraph Spacing to see a drop-down list of paragraph spacing options. Pause the pointer over any paragraph spacing style to see a live preview directly in your document.
-
When you find the look you want, click it.
Tip: To define your own paragraph spacing, choose Custom Paragraph Spacing.
Top of Page
It’s easy to preview what the layout of your document will look like when printed without actually printing.
-
Click the File tab.
-
Click Print to see a preview of your document.
-
Review the Settings for any properties you might want to change.
-
When the properties for your printer and document appear the way that you want them to, click Print.

Top of Page
To use Word, look for the Word icon in the Start menu and click it.
-
Click the Start button
to display the Start menu. -
Point to All Programs, Microsoft Office, and then clickMicrosoft Word 2010.
-
The startup screen appears, and Word starts.
 to display the Start menu.
Tip: The first time you start Word, the Microsoft Software License Agreement might appear.
To quit, choose the Exit command on the File tab.
-
Click the File tab.
-
Choose Exit.
If you made any changes since you last saved the document, a message box appears asking if you want to save changes. To save the changes, click Yes. To quit without saving the changes, click No. If you clicked the Exit button by mistake, click Cancel.
Top of Page
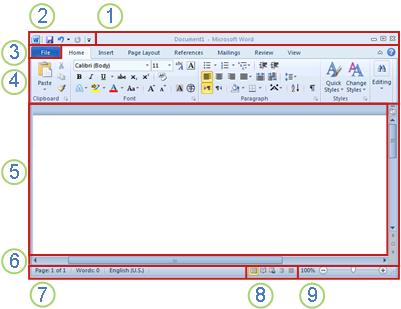
1 Title Bar: Displays the file name of the document that is being edited and the name of the software you are using. It also includes the standard Minimize, Restore, and Close buttons.
2 Quick Access Toolbar: Commands that are frequently used, such as Save, Undo, and Redo are located here. At the end of the Quick Access Toolbar is a pull-down menu where you can add other commonly used or commonly needed commands.
3 File Tab: Click this button to find commands that act on the document itself rather than the content of the document, such as New, Open, Save as, Print, and Close.
4 Ribbon: Commands needed for your work are located here. The appearance of the Ribbon will change depending on the size of your monitor. Word will compress the ribbon by changing the arrangement of the controls to accommodate smaller monitors.
5 Edit Window: Shows the contents of the document you are editing.
6 Scroll Bar: Lets you change the display position of the document you are editing.
7 Status Bar: Displays information about the document you are editing.
8 View Buttons: Lets you change the display mode of the document you are editing to fit your needs.
9 Zoom slide control: Lets you change the zoom settings of the document you are editing.
Top of Page
In Word, you must save your document so you can quit the program without losing your work. When you save the document, it is stored as a file on your computer. Later, you can open the file, change it, and print it.
To save a document, do the following:
-
Click the Save button in the Quick Access toolbar.
-
Specify the location where you want to save the document in the Save in box. The first time you save your document, the first line of text in the document is pre-filled in as the file name in the File name box. To change the file name, type in a new file name.
-
Click Save.
-
The document is saved as a file. The file name in the Title Bar changes to reflect the saved file name.
You can open a Word document to resume your work. To open a document, do the following:
-
Click the Start button, and then click Documents.
-
Navigate to the location where you stored your file, and double-click the file. The Word startup screen appears, and then the document is displayed.
Tip: You can also open a document from within Word by clicking the File tab and then clicking Open. To open a document you saved recently, click on Recent
.
Top of Page
Before you edit or format text, you must first select the text. Follow the steps below to select text.
-
Place the curser at the beginning of the text you’d like to edit or format and then press the left mouse button.
-
While holding down the left mouse button, move it to the right (called “dragging”) to select the text. A background color is added in the location of the selected text to indicate the selection range.
Most text formatting tools are found by clicking the Home tab and then choosing from the Font group.
1 This is the Home tab.
2 This is the Font group on the Home tab.
3 This is the Bold button. See the table below for the names and functions of all the buttons in the Font group.
|
Button |
Name |
Function |
|---|---|---|
|
|
Font |
Changes the font. |
|
|
Font Size |
Changes the size of the text. |
|
|
Grow Font |
Increases the text size. |
|
|
Shrink Font |
Decreases the text size. |
|
|
Change Case |
Change all the selected text to uppercase, lowercase, or other common capitalizations. |
|
|
Clear Formatting |
Clears all formatting for the selected text, leaving only the plain text. |
|
|
Bold |
Makes the selected text bold. |
|
|
Italic |
Italicizes the selected text. |
|
|
Underline |
Draws a line under the selected text. Click the dropdown arrow to select the type of underline. |
|
|
Strikethrough |
Draws a line through the middle of selected text. |
|
|
Subscript |
Creates subscript characters. |
|
|
Superscript |
Creates superscript characters. |
|
|
Text Effects |
Apply a visual effect to selected text, such as shadow, glow, or reflection. |
|
|
Text Highlight Color |
Makes text look like it was marked with a highlighter pen. |
|
|
Font Color |
Changes the text color. |
Top of Page
Styles allow you to quickly format major elements in your document, such as headings, titles, and subtitles. Follow the steps below to apply styles to the text in your document.
-
Highlight the text you want to change.
-
On the Home tab in the Styles group, pause the pointer over any style to see a live preview directly in your document.
-
To apply the style that’s most appropriate for your text, just click it.
When you’re done applying styles to the individual elements, Word 2010 lets you change the look of your whole document all at once.
-
On the Home tab, in the Styles group, click Change Styles.
-
Point to Style Set to find predefined style sets. Pause the pointer over any style set to see a live preview directly in your document.
-
When you find the look you want, click it.
Top of Page
With Word 2010, you can easily change the spacing between lines and paragraphs in your document.
-
On the Home tab, in the Styles group, click Change Styles.
-
Point to Paragraph Spacing to find a selection of built-in paragraph spacing styles. Pause the pointer over any paragraph spacing style to see a live preview directly in your document.
-
When you find the look you want, click it.
Tip: To define your own paragraph spacing, choose Custom Paragraph Spacing.
Top of Page
It’s easy to preview what the layout of your document will look like when printed without actually printing.
-
Click the File tab.
-
Click Print to see a preview of your document.
-
Review the Settings for any properties you might want to change.
-
When the properties for your printer and document appear the way that you want them to, click Print.
Top of Page
Need more help?
Want more options?
Explore subscription benefits, browse training courses, learn how to secure your device, and more.
Communities help you ask and answer questions, give feedback, and hear from experts with rich knowledge.
Lesson 1: Getting Started with Word
Introduction
Microsoft Word is a word processing application that allows you to create a variety of documents, including letters, resumes, and more. In this lesson, you’ll learn how to navigate the Word interface and become familiar with some of its most important features, such as the Ribbon, Quick Access Toolbar, and Backstage view.
Watch the video below to become more familiar with Word.
About this tutorial
The procedures in this tutorial will work for all recent versions of Microsoft Word, including Word 2019, Word 2016, and Office 365. There may be some slight differences, but for the most part these versions are similar. However, if you’re using an earlier version, you may want to refer to one of our other Word tutorials instead.
The Word interface
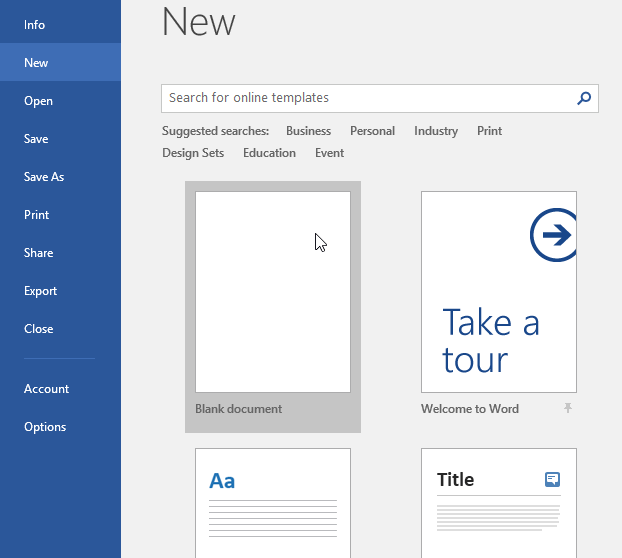
When you open Word for the first time, the Start Screen will appear. From here, you’ll be able to create a new document, choose a template, and access your recently edited documents. From the Start Screen, locate and select Blank document to access the Word interface.
Click the buttons in the interactive below to learn more about the Word interface.
Working with the Word environment
All recent versions of Word include the Ribbon and the Quick Access Toolbar, where you’ll find commands to perform common tasks in Word, as well as Backstage view.
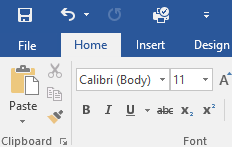
The Ribbon
Word uses a tabbed Ribbon system instead of traditional menus. The Ribbon contains multiple tabs, which you can find near the top of the Word window.
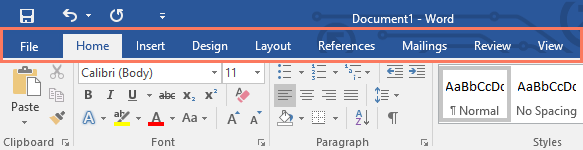
Each tab contains several groups of related commands. For example, the Font group on the Home tab contains commands for formatting text in your document.
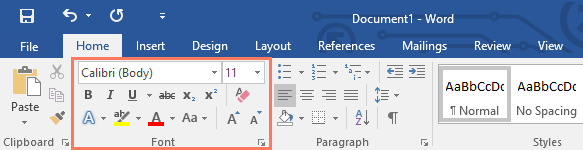
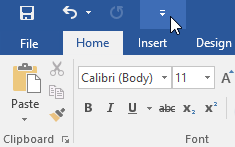
Some groups also have a small arrow in the bottom-right corner that you can click for even more options.
![]()
Showing and hiding the Ribbon
If you find that the Ribbon takes up too much screen space, you can hide it. To do this, click the Ribbon Display Options arrow in the upper-right corner of the Ribbon, then select the desired option from the drop-down menu:
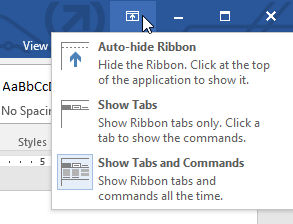
- Auto-hide Ribbon: Auto-hide displays your document in full-screen mode and completely hides the Ribbon from view. To show the Ribbon, click the Expand Ribbon command at the top of screen.
- Show Tabs: This option hides all command groups when they’re not in use, but tabs will remain visible. To show the Ribbon, simply click a tab.
- Show Tabs and Commands: This option maximizes the Ribbon. All of the tabs and commands will be visible. This option is selected by default when you open Word for the first time.
To learn how to add custom tabs and commands to the Ribbon, review our Extra on Customizing the Ribbon.
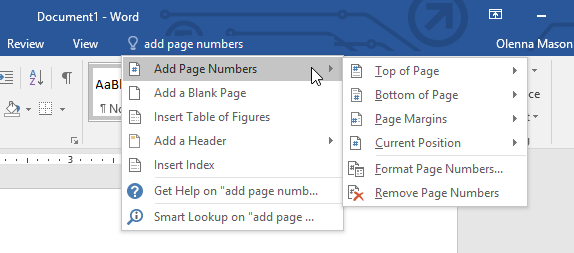
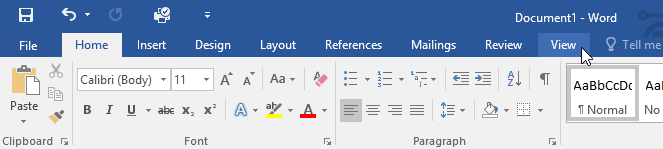
Using the Tell me feature
If you’re having trouble finding a command you want, the Tell Me feature can help. It works just like a regular search bar. Type what you’re looking for, and a list of options will appear. You can then use the command directly from the menu without having to find it on the Ribbon.
The Quick Access Toolbar
Located just above the Ribbon, the Quick Access Toolbar lets you access common commands no matter which tab is selected. By default, it shows the Save, Undo, and Redo commands, but you can add other commands depending on your needs.
To add commands to the Quick Access Toolbar:
- Click the drop-down arrow to the right of the Quick Access Toolbar.
- Select the command you want to add from the menu.
- The command will be added to the Quick Access Toolbar.

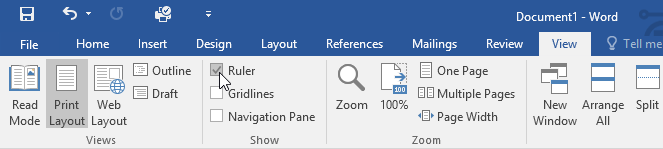
The Ruler
The Ruler is located at the top and to the left of your document. It makes it easier to adjust your document with precision. If you want, you can hide the Ruler to create more screen space.
To show or hide the Ruler:
- Click the View tab.
- Click the checkbox next to Ruler to show or hide the Ruler.
Backstage view
Backstage view gives you various options for saving, opening a file, printing, and sharing your document. To access Backstage view, click the File tab on the Ribbon.

Click the buttons in the interactive below to learn more about using Backstage view.
Document views and zooming
Word has a variety of viewing options that change how your document is displayed. You can choose to view your document in Read Mode, Print Layout, or Web Layout. These views can be useful for various tasks, especially if you’re planning to print the document. You can also zoom in and out to make your document easier to read.
Switching document views
Switching between different document views is easy. Just locate and select the desired document view command in the bottom-right corner of the Word window.
- Read Mode: This view opens the document to a full screen. This view is great for reading large amounts of text or simply reviewing your work.
- Print Layout: This is the default document view in Word. It shows what the document will look like on the printed page.
- Web Layout: This view displays the document as a webpage, which can be helpful if you’re using Word to publish content online.


Zooming in and out
To zoom in or out, click and drag the zoom control slider in the bottom-right corner of the Word window. You can also select the + or — commands to zoom in or out by smaller increments. The number next to the slider displays the current zoom percentage, also called the zoom level.
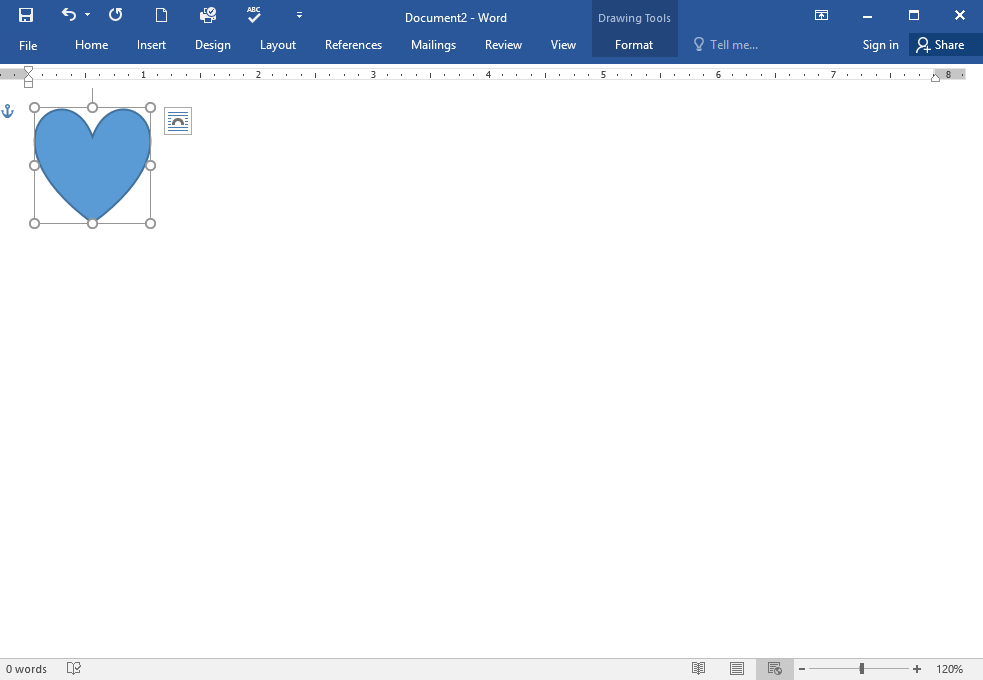
Challenge!
- Open Word, and create a blank document.
- Change the Ribbon Display Options to Show Tabs.
- Using Customize Quick Access Toolbar, add New, Quick Print, and Spelling & Grammar.
- In the Tell me bar, type Shape and press Enter.
- Choose a shape from the menu, and double-click somewhere on your document.
- Show the Ruler if it is not already visible.
- Zoom the document to 120%.
- Change the Document view to Web Layout.
- When you’re finished, your document should look something like this:

-
Change the Ribbon Display Options back to Show Tabs and Commands, and change the Document View back to Print Layout.
/en/word/understanding-onedrive/content/
Things You Should Know
- To create a basic document, choose a template from the list provided or start with a blank document.
- Use the File tab to open, save, and start documents, and the Insert tab to add any images, symbols, or other media to your document.
- Highlight your text and play around with formatting options in the «Home» tab. You can change the font, italicize/bold/underline your words, and play around with font size.
-
1
Open the Microsoft Word application. Do this by double-clicking the Microsoft Word icon.
-
2
Review the available templates. On the right side of the screen, you’ll see several templates of interest:
- Blank document — A blank document with default formatting.
- Creative Resume/Cover Letter — A clean, pre-formatted resume (and accompanying cover letter) document.
- Student Report with Cover Photo — A document format geared toward an academic demographic.
- Fax Cover Sheet — A document to preface fax reports.
- You can also search for specific templates online from within Word by using the search bar at the top of this screen.
Advertisement
-
3
Choose a template. Doing so will open the template in Word with whatever pre-determined formatting applies to it. Now that your document is open, you’re ready to review your Toolbar options.
- When in doubt, open a blank document.


Advertisement
-
1
Click the File tab. It’s in the top left side of the screen (or in the menu bar for Mac users). From here, you have several useful options on the far left side of your screen:
- Info (PC only) — Click this to review the documents statistics, such as when it was last modified, as well as any potential issues with the document.
- New — Click this to bring up the «New Document» page that lists all of the pre-formatted templates. Opening a new document will prompt you to save your old one.
- Open — Click this to review a list of recently-opened documents. You can also select a directory (e.g., «This PC») in which to search.
- Save — Click this to save your document. If this is your first time saving this particular document, you’ll be prompted to enter a name, save location, and preferred file format as well.
- Save As — Click this to save your document «as» something (e.g., a different name or file format).
- Print — Click this to bring up your printer settings.
- Share — Click this to view sharing options for this document, including email and cloud options.
- Export — Click this to quickly create a PDF or change the file type.
-
2
Click ← in the top left corner of your screen. If you’re using a Mac, you won’t have this option—simply click your document to exit the «File» menu.
-
3
Review the Home tab to see your formatting options. At the top of your screen—from left to right—are five sub-sections of this tab:
- Clipboard — Whenever you copy text, it is saved on your clipboard. You can view copied text by clicking the Clipboard option here.
- Font — From this section, you can change your font style, size, color, formatting (e.g., bold or italic), and highlighting.
- Paragraph — You can change aspects of your paragraph formatting—such as line spacing, indentation, and bullet formatting—from this section.
- Styles — This section covers different types of text for various situations (e.g., headings, titles, and subtitles). You’ll also see the popular «No Spacing» option here, which removes excess spaces between lines of text.
- Editing — A couple of commonly-used tools—such as «Find and Replace», which allows you to quickly replace all appearances of one word with another—live here.
-
4
Click the Insert tab to review the types of media you can place in your document. Insert is to the right of the Home tab. The Insert tab allows you to add things like graphics and page numbers to your document. From left to right, a couple of notable options include the following:
- Table — Clicking this option will allow you to create an Excel-style table right in your document.
- Pictures — Use this feature to insert a picture into your document.
- Header, Footer, and Page Number — These options are all essential for writing in MLA- or APA-style formatting. The Header places a space at the top of the document for comment, while the Footer goes at the bottom—page numbers are customizable.
- Equation/Symbol — These options use special formatting to accurately display simple equations. You can select these equations or symbols from the pertinent drop-down menu.
-
5
Click the Design tab to create your own template. It’s to the right of the Insert tab.
- The Design tab contains pre-designed themes and formats listed across the top of the page.
-
6
Click the Layout tab to customize your page’s formatting. This tab contains options for changing the following aspects of your document:
- Margins
- Page orientation (vertical or horizontal)
- Page size
- Number of columns (defaults to one)
- Location of page breaks
- Indentation
-
7
Click the References to manage your citations. If you have a bibliography page, you can also manage it from here.
- For quick bibliography formatting, click the Bibliography drop-down menu and select a template.
- In the «Citations & Bibliography» group of options, you can change your bibliography formatting from APA to MLA (or other citation styles).
- The «Captions» group has an option to insert a table of figures. This is useful for scientific review papers or similar documents in which statistical data is prioritized over quotations.
-
8
Click the Mailings tab to review your document sharing options. You can review your email settings and share your documents from within this section.
- You can also print an envelope or label template by clicking the pertinent option in the top left corner of your screen.
- The Select Recipients drop-down menu allows you to choose Outlook contacts as well as an existing contact list within Word.
-
9
Click the Review tab. The Review section is geared towards editing, so it includes options for marking up documents and proofreading. A couple of important options include:
- Spelling & Grammar — Click this option (far left corner) to underline any spelling or grammatical errors.
- The «Changes» section — This is to the far right of the toolbar. From here, you can enable the «Track Changes» feature which automatically formats any additions or deletions you make in a document to appear in red print.
-
10
Decide on the set of options that best apply to your work. If you’re a student, for example, you’ll likely use the Insert and References tab often. Now that you’re familiar with the toolbar options, you can format your first Word document.


Advertisement
-
1
Open a new Blank Document in Word. If you have an existing document, you can open that instead.
-
2
Enter text. Do this by clicking on the blank section of the document and typing away.
- If you opened an existing document, be sure to save your work before re-formatting.
-
3
Highlight a section of text. To do this, click and drag your cursor across your writing, then let go when you’ve highlighted the section you wish to edit.
-
4
Consider what you want to do to the writing. Some potential options include:
- Quickly format your writing. Do this by right-clicking (or two-finger clicking) your highlighted text and then selecting an option from the right-click menu.
- Change the font of your selection. You can do this by clicking the drop-down bar at the top of the «Font» section (Home tab) and then selecting a new font.
- Bold, italicize, or underline your highlighted section. To do this, click the B, I, or U in the «Font» section of the Home tab.
- Change your document’s spacing. This is easiest to accomplish by right-clicking your selected text, clicking Paragraph, and modifying the «Line Spacing» value in the bottom right corner of this window.
-
5
Continue working with Word. Your preferred options for your documents will differ based on the intention behind creating them, so the more you work within your own particular format, the more proficient you’ll become.


Advertisement
Add New Question
-
Question
How do I copy and paste?

To copy a certain piece of text, highlight it and press Ctrl + C. Then click the spot you want to place the copied text and press Ctrl + V to paste.
-
Question
How do I place a logo in MS Word?
Press the Insert tab and then press the Pictures button. You will then be allowed to select the image.
-
Question
How can I save a document to a specific location?
Click File —> Save As… and you’ll be allowed to select the destination location (and filename and format) of the file.
Ask a Question
200 characters left
Include your email address to get a message when this question is answered.
Submit
Advertisement
-
A red line under a word means the word is misspelled, a green underline suggests a grammatical error, and a blue underline pertains to formatting.
-
If you right-click (or two-finger click) an underlined word, you’ll see a replacement suggestion at the top of the right-click menu.
-
You can quick-save your document by holding down Control (or Command on Mac) and tapping S.
Thanks for submitting a tip for review!
Advertisement
-
Don’t forget to save your work before closing Word.
Advertisement
About This Article
Article SummaryX
1. Create blank documents or from templates.
2. Format text colors, fonts, and sizes.
3. Insert media like photos and animations.
4. Insert data like tables, page numbers, headers, and equations.
5. Customize the on-screen and print layouts.
6. Add references and citations.
Did this summary help you?
Thanks to all authors for creating a page that has been read 213,472 times.
Is this article up to date?
As part of the Microsoft Office Suite, MS Word is one of the most popular office productivity tools in the world.
In this guide, you’ll learn the basics of how to use Microsoft’s word processing software. Whether you’re just getting started with Word or have years of experience, you’ll find this guide helpful.

With Microsoft Word, you’ll be creating useful business documents in no time. Also, many other file formats can be converted to MS Word (.doc) format. And Word documents can be saved as .pdf files.
How to Use Microsoft Word to Create Professional Business Documents
One of the best and easiest ways to create an effective business document with Word is to use a template. There are hundreds of professional Word templates you can use available through Envato Elements and GraphicRiver. Here are just some of them:
-
25 Microsoft MS Word Business Proposal Templates to Make Deals in 2022
-
25 Free Creative Resume Templates (Word & PSD Downloads for 2022)
-
20 Best Free Microsoft Word Resume CV Cover Letter Templates 2022


How to Use This Tutorial Guide
Learn how to work with Word’s tools to make great business documents quickly. We’ll explore everything from formatting basic text styles to making awesome page layout designs to using headers and footers.
Note: Be sure to bookmark this Microsoft Word tutorial guide to start working through each tutorial at your own pace.

Guides to get you started using Word. Including how to start, save, open, move around, find and replace text, print, copy and paste.
An easy guide to starting a new document using Microsoft Word.
Saving your work so that it’s there the next time you want to make changes.
Return to a document that you have previously saved to your computer.
Find out how to navigate around an existing document in Microsoft Word.
Rather than attaching a document from your email, you may find it quicker and more convenient to do this from within Word itself as described here.
When you have finished creating your document, print it out to share.
Learn how to use your mouse or keyboard to select text within a document.
Finding and replacing text in Word
How to locate text in a Word document and replace it with new text.
This link will take you to information on a different website. Digital Unite have selected this information for inclusion because it is up-to-date, relevant and easy-to-understand.
Copying and pasting is a fast way to duplicate text. We show you how to do it quickly.
How can a Digital Champion approach help your organisation?
Take our online assessment to find out.
It takes 10 minutes. There are no strings attached. At the end, you get a tailored report with recommendations and a free, practical guide to running a Digital Champions project.
Get started with our interactive planner.