
Tick symbol (🗸) also known as a check mark is a symbol for “Yes”. Sometimes tick in a box (☑) is preferred over tick symbol to denote yes or completion. In this blog we have covered, four different ways to insert tick and tick in box symbol in Microsoft Word.
Place your cursor where you want to insert the symbol and use any of the following 4 methods. Method 4 is easiest and up to 7 times faster.
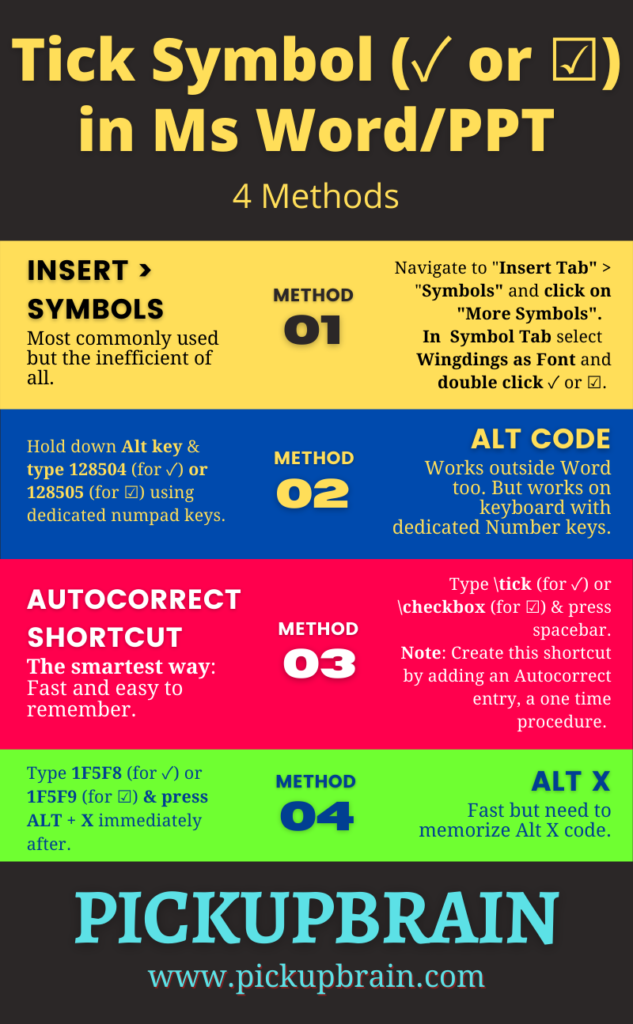
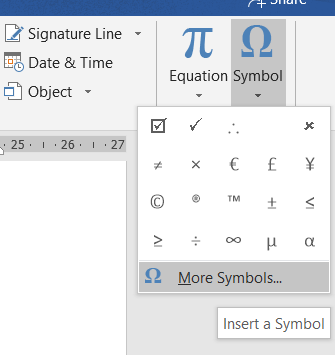
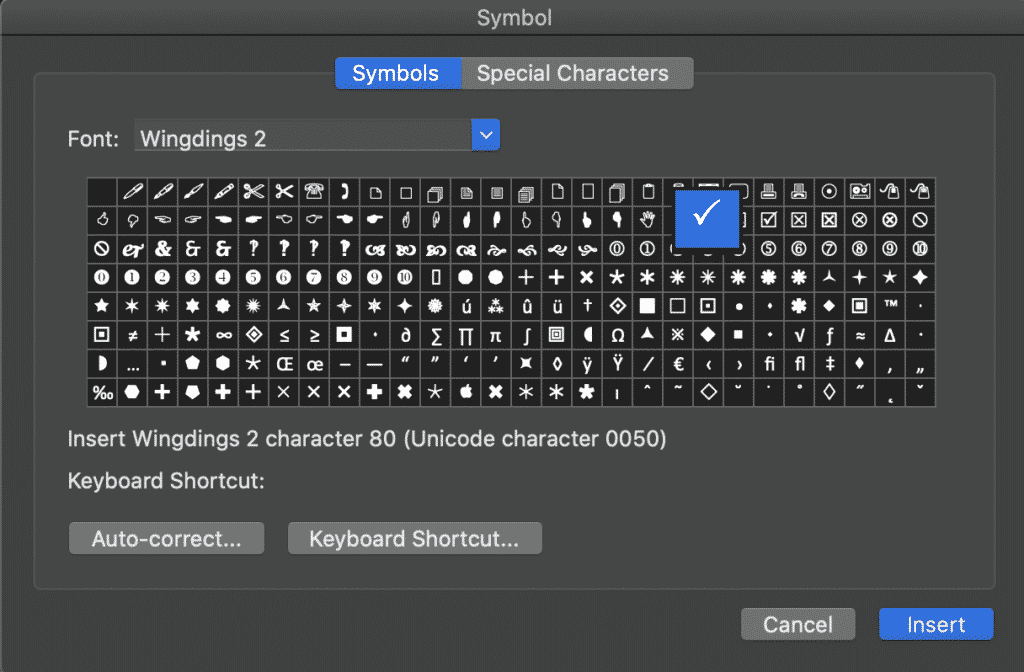
Method 1 – Insert > Symbols
- Navigating Insert Tab > Symbols and select More Symbols
2. Select Symbol Tab > Wingdings Font, and double click on desired symbol i.e. 🗸 or ☑.
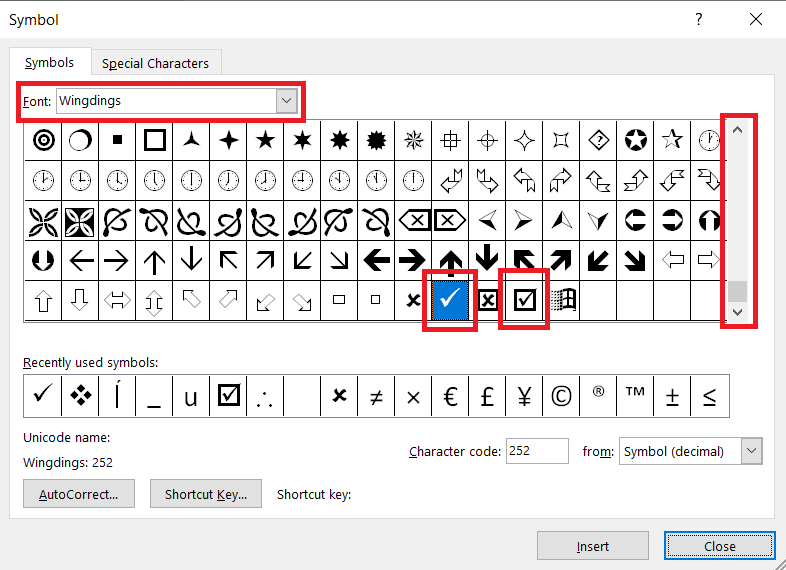
3. Select Close
Method 2 – Alt Code (Requires dedicated Number pad keys)
Ms Word Alt code for Tick (or Check) Mark and Tick in Box are:
| Tick Symbol or Check Mark (🗸) | Tick in Box (☑) |
|---|---|
| 128504 | 128505 |
To insert symbol, type corresponding Alt Code using Number pad (not using numerics key using above letters) while holding down Alt key.
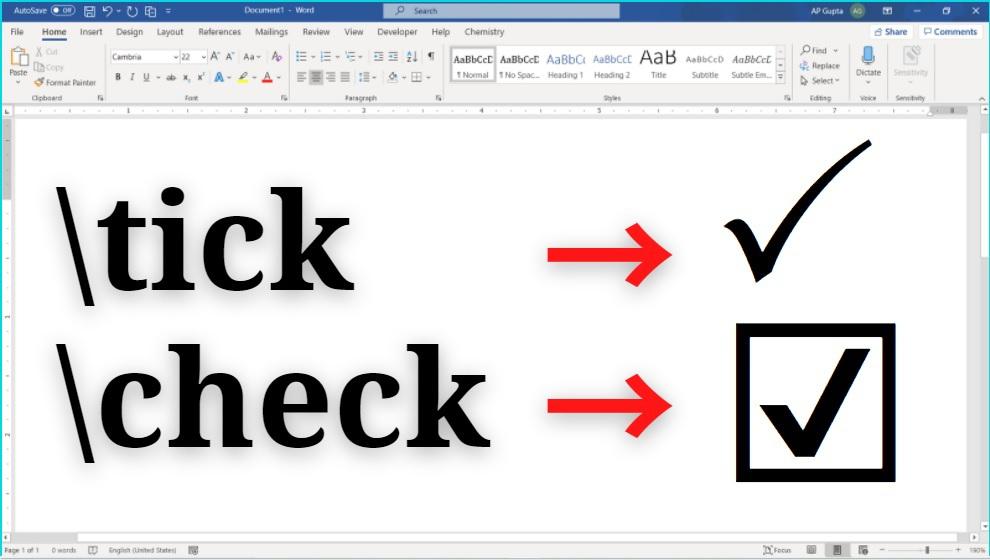
Method 3 – Autocorrect (Fastest method for Tick Symbol Word)
- Create Autocorrect entry
- Locate Tick Symbol or Tick in Box symbol (as shown in Method 1) by navigating to Insert > Symbols > More Symbols and select symbol.
- Click Autocorrect Button to open new AutoCorrect Dialogue box.
- Type desired shortcut text (say tick or checkbox) in Replace.
- Click Add.
- Close Autocorrect and Symbol Window.
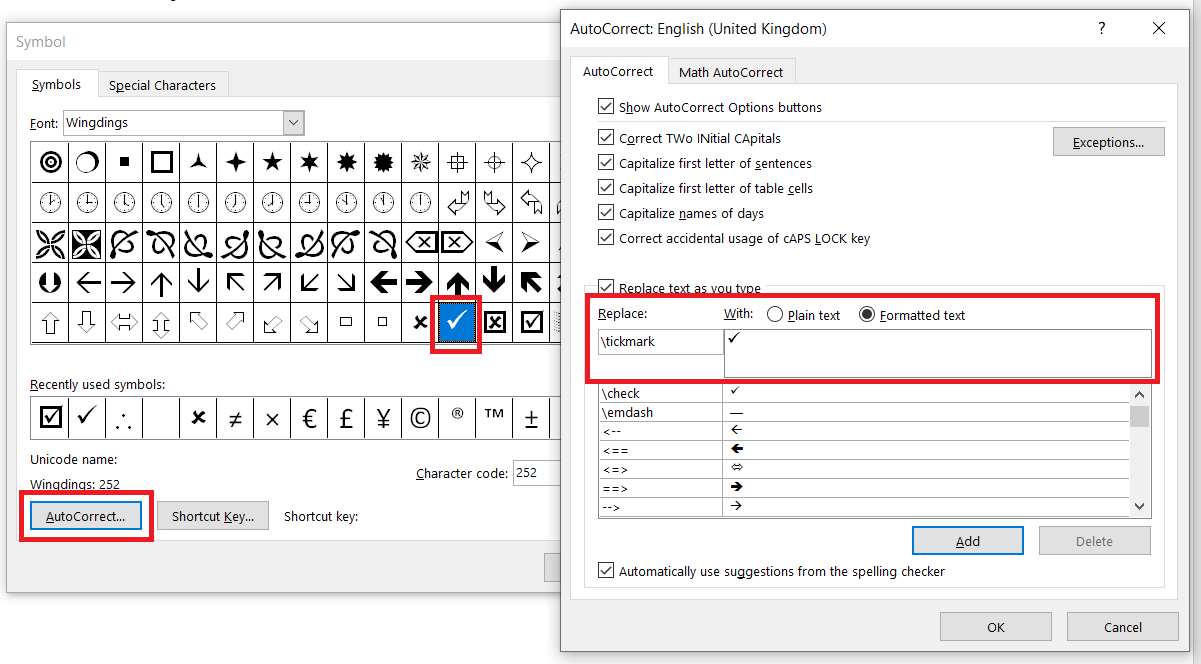
2. Type autocorrect text created in above step and press space (for e.g. tick) to convert into corresponding symbol.
Method 4 – Alt X
Alt X code for Tick (or Check) Mark & Tick in Box are
| Tick Symbol or Check Mark (🗸) | Tick in Box (☑) |
|---|---|
| 1F5F8 | 1F5F9 |
To insert thick (or check) mark, type 1F5F8 and press Alt + X immediately following it. Similarly, for inserting tick in box, type 1F5F8 and press Alt + X.
Summary
There are four different methods to insert tick symbol in Ms Word. Of all, Alt X and Alt Code method requires remembering 4-5 digit code. While, the Insert Symbol and Autocorrect method are straightforward and relatively easy to remember. Of all these, the smartest way to insert tick symbol or tick in box is Autocorrect method as it is fastest and easy to remember.
Related Posts
Contents
- 1 How Do You Insert Tick In Word?
- 2 How Do You Insert A Tick Symbol In Word?
- 3 How Do I Get A Tick In A Box In Word?
- 4 How Do You Write A Tick?
- 5 How Do I Insert A Tick Symbol?
How to get a tick on microsoft wordIn this method, you change the font and can then use the Shift button to insert your symbols: Open Word Change the font to Wingdings 2 Press Shift + P for a tick symbol

How Do You Insert Tick In Word?
To simply add a tick symbol to Microsoft Word, select Insert, then Symbol and choose More Symbols. From the dropdown font menu, click Wingdings and enter 252 into the Character Code field and click Insert.
How Do You Insert A Tick Symbol In Word?
Click the insert button to insert the tick icon into the word document. And the tick symbol is inserted into the word file. For all further additions it is easier to simply copy (ctrl+C) the tick and paste (ctrl+V) to where it is required. Once the Wingdins 2 font is selected press Shift+P to insert the tick symbol.
How Do I Get A Tick In A Box In Word?
Insert a tick – using symbol command. This method involves using the insert tab in the toolbar of Microsoft Word and the Wingdings font. It’s pretty simple. Head up to the top bar and click on insert and then symbol. This will open up an additional dialogue box.
How Do You Write A Tick?
Go to » Start » menu. Search » Character Map » Open «Character Map» and select the » Wingdings » font. Scroll to bottom and click on tick symbol or cross symbol and then click on » Copy » Go to Excel or Word where you want to insert the tick mark / cross symbol. More items…
How Do I Insert A Tick Symbol?
Click the Symbol button Click on the Insert tab. Click the Symbol button on the far right of the toolbar, and then click the More Symbols button. Choose Wingdings In the Font drop-down menu, choose Wingdings. It is at the bottom of the menu. Scroll to the tick symbol Scroll to the bottom of the characters list.
Excel for Microsoft 365 Word for Microsoft 365 Outlook for Microsoft 365 PowerPoint for Microsoft 365 Excel 2021 Word 2021 Outlook 2021 PowerPoint 2021 Excel 2019 Word 2019 Outlook 2019 PowerPoint 2019 Excel 2016 Word 2016 Outlook 2016 PowerPoint 2016 Excel 2013 Word 2013 Outlook 2013 PowerPoint 2013 Excel 2010 Word 2010 Outlook 2010 PowerPoint 2010 Excel 2007 Word 2007 Outlook 2007 PowerPoint 2007 More…Less
You can easily insert a check mark (also known as a «tick mark») in Word, Outlook, Excel, or PowerPoint.
These marks are static symbols. If you’re looking for an interactive check box that you can click to check or uncheck, see: Add a check box or option button (Excel) or Make a checklist in Word.
-
In your file, place the cursor where you want to insert the symbol.
-
Open the Symbol dialog box:
-
Word or Outlook: Insert, select
 Symbols then More Symbols
 -
Excel: Insert, select
Symbols -
PowerPoint: Insert, select
Symbols > Symbol
The Symbols button
is on the far right end of the Insert toolbar tab. -
-
In the Font box, select Wingdings.
-
In the Character code box at the bottom, enter: 252
In the grid of symbols, the check mark
is selected. Another check-mark option is available two squares away from it (character code 254). -
Select the check mark you want. Click Insert. Then click Close to dismiss the dialog box.
-
Once the check mark has been inserted, you may change its size or color. Select the check mark, right-click it, and make your desired changes by using the floating toolbar:
 Symbols then
  is selected. Another check-mark option
  is available two squares away from it (character code 254).
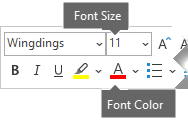
More check marks to choose from
Another font, Segoe UI Symbol, has three checkmark options. You can opt for this font in step 3 of the procedure above, and you can substitute one of the following character codes in step 4.
|
Symbol |
Character code |
|---|---|

|
2705 |

|
2713 |

|
2714 |
Need more help?
Want more options?
Explore subscription benefits, browse training courses, learn how to secure your device, and more.
Communities help you ask and answer questions, give feedback, and hear from experts with rich knowledge.
You’ve seen those cool tick symbols used in Microsoft Word Documents in the past but can’t quite figure out how to insert one yourself.
You’re now alone. Nearly all of us know what they are but other than the old copy + paste of the tick image many of us are baffled as to how you are actually suppose to insert one.
So we’re here to decipher the illicit tick symbol mysterys of Word and show you how to insert a tick symbol the ‘real way’. That is, using Words long or short cut methods rather than the old copy + past image method.
Adding a Tick Symbol in Word
The Microsoft Method
This is the method that Microsoft intended us to use, the manual way to insert a tick symbol.
- Open Word
- Place your cursor at the point you want to insert the tick symbol
- Click Insert in the toolbar
- Under Insert, find and press Advanced Symbols

- Click Font dropdown
- Under the Font dropdown, select Wingdings 2 font
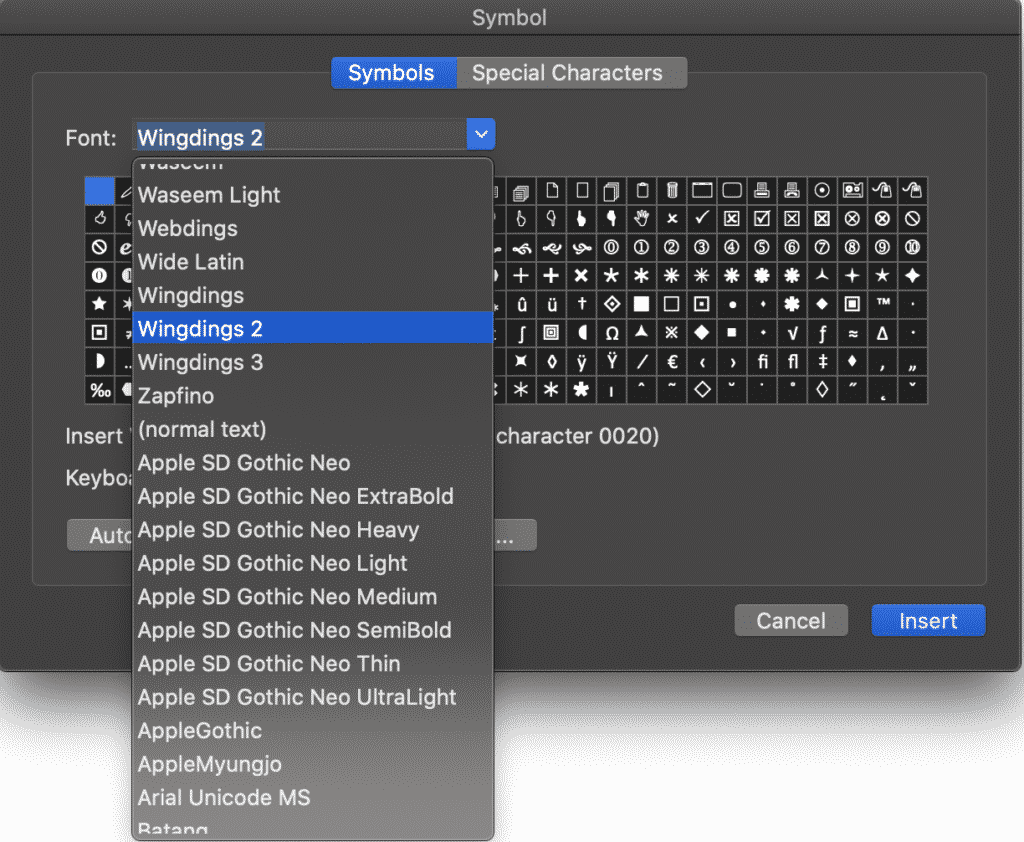
- Select the tick symbol (or any other symbol you want to use from the display box)
- Click Insert
- Press Close
You have now successfully added a tick symbol to your Microsoft Word Document. The steps above can be repeated as many times as required, or you can simple copy > paste the tick symbol to replicate it multiple times.
Font Shortcuts Method
If you are wanting to add multiple tick symbols into a document, you can also use the shortcut method.
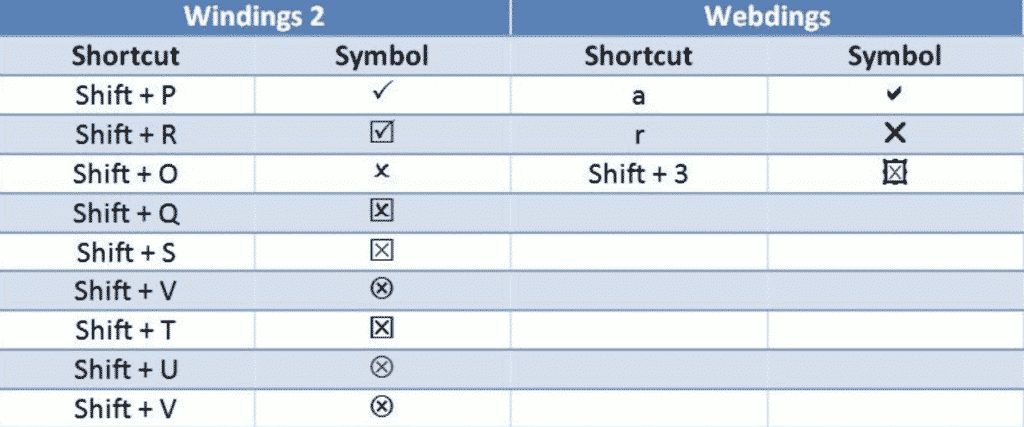
In this method, you change the font and can then use the Shift button to insert your symbols:
- Open Word
- Change the font to Wingdings 2
- Press Shift + P for a tick symbol
Making your bullet points tick symbols in Word
The last common method to inserting tick symbols is through bullet pointing.
If you are trying to turn your bullet points into tick symbols heres how:
- Open Word
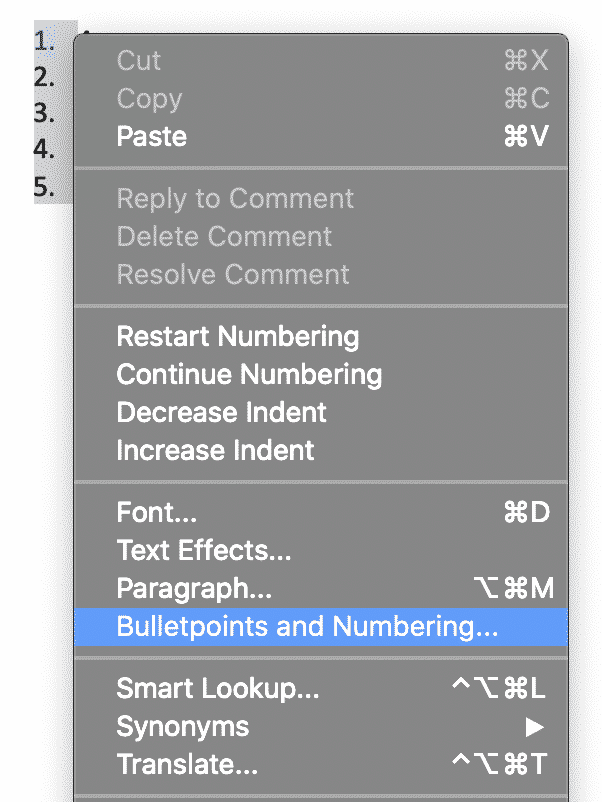
- Right Click on the existing bullet point
- Select Bulletpoints and Numbering…
- Select Bulleted
- Click on the image with the tick symbol bullets
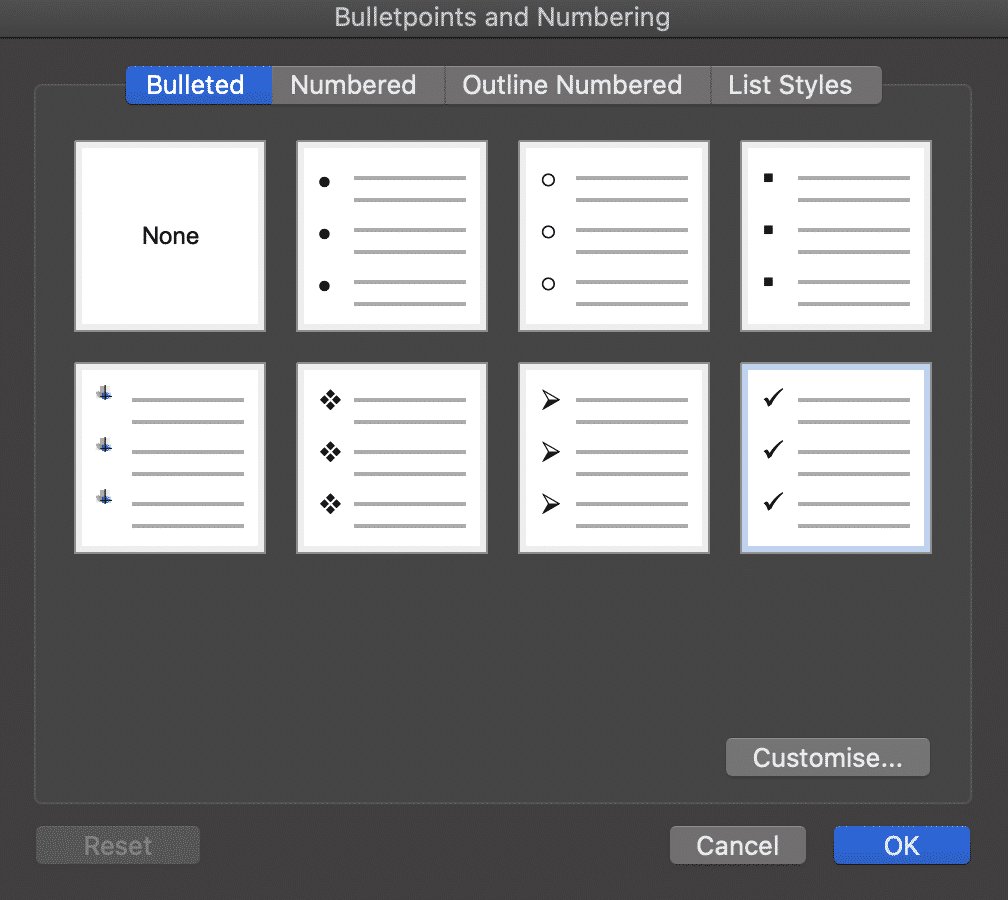
- Press OK
You have now successfully turned your bullet points into tick symbols.
Searching for a better way to work together in Microsoft Word Documents?
When working with a number of people in the same Word document you can quickly find yourself siphoning through old versions to compute who made what changes where and when.
Unless you each have a dedicated ‘edit’ day or time slot, you may also end up accidentally working on the same Word document, at the same time. Leaving you with two versions of the same file and the torturous task of merging them together without wasting 2 hours of precious billable hours.

Before you scroll any further we’d like to introduce you to the solution you have been searching for, meet Simul Docs.
Simul Docs was built to make your life easier.
To make collaborating on a Word Document seamless and pain free.
Simul Docs manages version control for you, version control means they will not only save each new document automatically once an edit is made (no minor feat, with this feature alone you’ll never accidentally save over another author’s document again) but Simul gives each document a version number, relevant to when it was last edited.
This makes it easy to see which document is the most recent file and when it was last edited.

To add a cherry on top of this already sweet tool, Simul also puts the author’s name next to the saved document so you know at a glance when it was saved, how old it is AND who created it. It sounds like a lot but for Simul its a breeze and its what they love doing – making your collaborating life a whole lot easier.

Now without sounding too smug, Simul also has a whole heap of other cool features that might help your team collaborate better.
Think tracked changes, they are automatically turned on, every single new change is tracked and saved. You quite literally will never miss an edit again. Amazing!
Then Simul makes merging as easy as the click of a button.

If two team members are working simultaneously on the document, Simul has your back. Simul will allow the changes to be made, save each version as a new document and let you know there are two new updates for your review. Upon review, you can accept or decline each author’s changes and press ‘merge’. Done. Documents merged!
Simul really does make collaborating easy and it’s a tool that will save you time and frustration.
Insert a tick symbol in Microsoft Word: A complete guide to inserting special characters in your documents.
Ever wondered how to insert a tick in Microsoft Word? Who hasn’t?! It’s certainly a great mystery for many, but one we can help you get to the bottom of.
In total, there are 3 different ways to do it, so we’ve run through each one individually. Check them out below.
Watch: What’s new in Windows 10
Insert a tick – using symbol command
This method involves using the insert tab in the toolbar of Microsoft Word and the Wingdings font.
It’s pretty simple. Head up to the top bar and click on insert and then symbol. This will open up an additional dialogue box. Here you’ll have to select Wingdings as a font from a drop down menu. This will bring up a whole load of symbols – find the tick and click it. It’ll then be inserted into your document.

Related: Microsoft Surface Pro 4 review
Insert a tick in Microsoft Word – Using its character code
You can also insert a tick using its character code. Basically, a character code is a shortcut that allows you to insert symbols as long as you know the specific code for each one.
Before you can do any of that though, you’ll need to change the font to Wingdings again. Once done, hold ALT and type 0252 to insert a tick mark.
There are a selection of different ticks you can insert, here’s their character codes:

It’s worth noting that this will only work if you use a numeric keypad. Sadly, the number bar along the top of a keyboard won’t work.
Related: Xbox One S review
Insert a tick in Microsoft Word – Using autocorrect

This is a pretty nifty way of inserting a tick into a document. It also speeds up the process considerably. Basically, follow the steps in method one, so:
Insert >symbol> change font to Wingdings.
Once you’ve done this, select the tick mark and click autocorrect. This will open an additional dialogue box. In the bar labelled ‘replace with’ write the word that you want to automatically replace with a tick symbol. Now, whenever you type that word, Microsoft Word will automatically insert the symbol – saving you precious time.
Related: Best tablet 2016 – 12 of the best you can buy
Watch: Xbox One S vs Xbox One
VI Video was already generated for this page.
Any other Microsoft Word tips and tricks you want to know? Let us know in the comments below.