
I want to get the value of a cell from an excel file with a software in C#; NOT THE TEXT, because the text depend of the size of the column, and I must not change it myself, the software should not be disturbed by that. So my choice was to get the value.
I get my cell as a range of 1:1, so I have a Range object, but Value field and Value2 field are not recognized by the language. I tried with get_Value() but it needs a parameter and I don’t know what to put in it, i didn’t find documentations about it. Here’s my code (extracted from a loop):
  if((string)(ws_Varsheet.get_Range("L" + iIndex, "L" + iIndex).Text) != "")
  {

    rng_ResolutionCell = ws_Varsheet.get_Range("L" + iIndex, "L" + iIndex);
    float iResolution;
    rng_ResolutionCell.Cells.get_Value(&iResolution); //what to do here?
    str_Resolution = ((string)iResolution.toString()).Replace(",",".");
    str_Resolution = str_Resolution.Replace(" ","");
     mObj.Str_Resolution="1";
  }
Can you help me with that? Thanks by advance.
- Remove From My Forums
-
Question
-
Hi Team,
I’ve one concern i getting the Cell’s Value which has the Formulas as below.
From the Sheet i need to get the FR1 Cells address and as well as Estimates Sales Tax i.e, $B$123 or $B$126.
When i clicked on the Cell, its showing the address as the IF(((…. some thing like that.

And i am using the below code to get the FR1 or Estimated Sales Tax as below and its returning the Cell’s Address as null.
private string OrderLabor_TotalTaxRange(string strEstimatedSalesTax, ExcelTools.Interop.Excel.Worksheet wsOrderLabor)
{
string strCellAddress = null;try
{
Microsoft.Office.Interop.Excel.Range ColRange = wsOrderLabor.get_Range(«B:B»);
Microsoft.Office.Interop.Excel.Range RowRange = ColRange.Find(strEstimatedSalesTax, Type.Missing,
Microsoft.Office.Interop.Excel.XlFindLookIn.xlFormulas,
Microsoft.Office.Interop.Excel.XlLookAt.xlWhole,
Microsoft.Office.Interop.Excel.XlSearchOrder.xlByColumns,
Microsoft.Office.Interop.Excel.XlSearchDirection.xlNext,
false, false, false);return strCellAddress = RowRange.Address;
}
catch (Exception ex)
{
LogError(ex);
}return strCellAddress;
}Kindly Suggest.
Regards,
Sureshbabu-
Edited by
Monday, August 8, 2016 2:28 PM
-
Edited by
Answers
-
Hi suresh,
use the code below to get the cell address of FR1. and with the same steps you can also get the cell address of another values in sheet.
private void DemoFind()
{
    string rngadd;
    Excel.Range currentFind = null;
    Excel.Range rng = Application.get_Range("A:A");
    currentFind = rng.Find("Fr1", missing,
        Excel.XlFindLookIn.xlValues, Excel.XlLookAt.xlPart,
        Excel.XlSearchOrder.xlByRows, Excel.XlSearchDirection.xlNext, false,
        missing, missing);
    rngadd = currentFind.Address;
    MessageBox.Show("Range Address of FR1=" + rngadd);
}
Regards
Deepak
We are trying to better understand customer views on social support experience, so your participation in this interview project would be greatly appreciated if you have time. Thanks for helping make community forums a great place.
Click
HERE to participate the survey.-
Marked as answer by
Sureshbabu Yadavalli
Tuesday, August 9, 2016 9:30 AM
-
Marked as answer by
Working with C# and Excel has been discussed on this site before with tips on preventing Excel.exe from hanging and converting integers into Excel column headings. Today’s post is a very brief example on how we can extract data from specific cells of an Excel worksheet.
Obtaining a value from a specific cell
Assuming we have a value in cell B16 that we wish to have out as a string in our C# code, we can use the following code:
String myString = ((Range)worksheet.Cells[16, 2]).Value2.ToString();
Where:
- Range comes from the Excel interop namespace (‘Microsoft.Office.Interop’)
- worksheet refers to the Excel worksheet you’re working on (see example below)
Obtaining a range of values from a range of cells
Assuming we have values in the range B16 to C20 inclusive, we can create a new range to obtain the values from into an array of objects, like so:
object[,] myObjects;

Range range = worksheet.Range[worksheet.Cells[16, 2], worksheet.Cells[20, 3]];
myObjects = range.Value;
Once you have the array of objects you can then cast them to other data types in the usual manner.
Extended example
Here’s a quick example of setting up an Excel application, opening a worksheet and obtaining a value using both of the above methods.
Application excelApp = new Application();
Workbook workbook = excelApp.Workbooks.Open(@"C:MyWorkbook.xlsx");
Worksheet worksheet = workbook.ActiveSheet;
String b16 = ((Range)worksheet.Cells[16, 2]).Value2.ToString();
object[,] objects = ((Range)worksheet.Range[worksheet.Cells[16, 2], worksheet.Cells[20, 3]]).Value;
About Author

FraserG
Computer Scientist currently undertaking an Engineering Doctorate degree discussing computing, programming, research and racing.
Содержание
- Работа с Excel с помощью C# (Microsoft.Office.Interop.Excel)
- Расстановка рамок.
- Формулы
- Выделение ячейки или диапазона ячеек
- Авто ширина и авто высота
- Получаем значения из ячеек
- Добавляем лист в рабочую книгу
- Добавление разрыва страницы
- Сохраняем документ
- Как открыть существующий документ Excel
- Комментарии
- Работа с Excel с помощью C# (Microsoft.Office.Interop.Excel): 11 комментариев
- Range Interface
- Definition
- Properties
- Methods
Работа с Excel с помощью C# (Microsoft.Office.Interop.Excel)
Оставляю заметку по работе с Excel с помощью C#.
Привожу фрагменты кода, которые искал когда-то сам для работы с Excel документами.
Наработки очень пригодились в работе для формирования отчетности.
Прежде всего нужно подключить библиотеку Microsoft.Office.Interop.Excel.
 Visual Studio здесь довольно старой версии. Если у вас версия новая, отличаться будет только вид окна.
Далее создаем псевдоним для работы с Excel:
using Excel = Microsoft.Office.Interop.Excel;
Расстановка рамок.
Расставляем рамки со всех сторон:
Цвет рамки можно установить так:
Выравнивания в диапазоне задаются так:
Формулы
Определим задачу: получить сумму диапазона ячеек A4:A10.
Для начала снова получим диапазон ячеек:
Excel.Range formulaRange = sheet.get_Range(sheet.Cells[4, 1], sheet.Cells[9, 1]);
Далее получим диапазон вида A4:A10 по адресу ячейки ( [4,1]; [9;1] ) описанному выше:
string adder = formulaRange.get_Address(1, 1, Excel.XlReferenceStyle.xlA1, Type.Missing, Type.Missing);
Теперь в переменной adder у нас хранится строковое значение диапазона ( [4,1]; [9;1] ), то есть A4:A10.
Выделение ячейки или диапазона ячеек
Так же можно выделить ячейку или диапазон, как если бы мы выделили их мышкой:
Авто ширина и авто высота
Чтобы настроить авто ширину и высоту для диапазона, используем такие команды:
Получаем значения из ячеек
Чтобы получить значение из ячейки, используем такой код:
Добавляем лист в рабочую книгу
Чтобы добавить лист и дать ему заголовок, используем следующее:
Добавление разрыва страницы
Сохраняем документ
Как открыть существующий документ Excel
Комментарии
При работе с Excel с помощью C# большую помощь может оказать редактор Visual Basic, встроенный в Excel.
Для этого в настройках ленты надо добавить пункт «Разработчик». Далее начинаем запись макроса, производим действия и останавливаем запись.
Далее заходим в редактор Visual Basic и смотрим код, который туда записался:

В данном макросе записаны все действия, которые мы выполнили во время его записи. Эти методы и свойства можно использовать в C# коде.
Данный метод так же может оказать помощь в формировании относительных формул, например, выполнить сложение чисел, находящиеся слева от текущей ячейки на 4 столбца, и т.п. Пример:
Так же во время работы может возникнуть ошибка: метод завершен неверно. Это может означать, что не выбран лист, с которым идет работа.
Чтобы выбрать лист, выполните sheetData.Select(Type.Missing); где sheetData это нужный лист.
Работа с Excel с помощью C# (Microsoft.Office.Interop.Excel): 11 комментариев
Как прочитать данные из ячейки excel,и записать эти данные в sql server?
Добрый день.
Отправил на почту.
Добрый день.
А мне можно тоже самое?)
Здравствуйте, как изменить цвет диаграммы при работе в C#?(круговая диаграмма)
Вы можете записать макрос на изменение цвета в Visual Basic и списать получившийся код. Затем использовать его в своей программе.
Здравствуйте.
Можете подсказать, как «заставить» приложение работать с разными версиями MS Office? На машине разработчика стоит Office 2010, при запуске на машине с 2003-м — увы — ошибка.
Microsoft.Office.Interop.Excel это довольно старый способ работать с Excel документами.
Что касается версии Office 2003, то он использует совсем другой драйвер.
Соответственно версия Microsoft.Office.Interop.Excel.dll нужна старая, плюс драйвер microsoft jet 4.0, который на новых системах (Win 8, 10) работает неправильно.
Единственное, что могу посоветовать, так это скачать Microsoft Office Compatibility Pack для Office 2003, чтобы научить его открывать xslx документы.
А в своей программе использовать не Interop.Excel, а библиотеку EPPlus. Она работает с excel документами, используя технологию OpenXml и не надо париться по поводу драйверов.
Код будет очень похож на Interop.Excel-ный.
Очень полезная штука, спасибо за удобное представление информации на Вашем сайте!
Скажите пожалуйста, как прочитать данные из ячейки Excel и записать их в SQL Server?
Источник
Range Interface
Definition
Some information relates to prerelease product that may be substantially modified before it’s released. Microsoft makes no warranties, express or implied, with respect to the information provided here.
Represents a cell, a row, a column, a selection of cells containing one or more contiguous blocks of cells, or a 3-D range.
Properties
Reserved for internal use.
Determines if text is automatically indented when the text alignment in a cell is set to equal distribution either horizontally or vertically.
Returns the range reference.
Returns the range reference for the specified range in the language of the user.
Determines if the range can be edited on a protected worksheet.
Returns an Application object that represents the Microsoft Excel application.
Returns an Areas collection that represents all the ranges in a multiple-area selection.
Returns a Borders collection that represents the borders of a style or a range of cells (including a range defined as part of a conditional format).
Returns a Range object that represents the cells in the specified range.
Returns a Characters object that represents a range of characters within the object text.
Returns the number of the first column in the first area in the specified range.
Returns a Range object that represents the columns in the specified range.
Returns or sets the width of all columns in the specified range.
Returns a Comment object that represents the comment associated with the cell in the upper-left corner of the range.
Returns the number of objects in the collection.
Counts the largest value in a given Range of values. Read-only.
Returns a 32-bit integer that indicates the application in which this object was created.
If the specified cell is part of an array, returns a Range object that represents the entire array.
Returns a Range object that represents the current region.
Returns a Range object that represents the range containing all the dependents of a cell.
Returns a Range object that represents the range containing all the direct dependents of a cell.
Returns a Range object that represents the range containing all the direct precedents of a cell.
Gets a DisplayFormat object that represents the display settings for the specified range.
Returns a Range object that represents the cell at the end of the region that contains the source range.
Returns a Range object that represents the entire column (or columns) that contains the specified range.
Returns a Range object that represents the entire row (or rows) that contains the specified range.
Allows the user to access error checking options.
Returns a Font object that represents the font of the specified object.
Returns a FormatConditions collection that represents all the conditional formats for the specified range.
Returns or sets the object’s formula in A1-style notation and in the language of the macro.
Returns or sets the array formula of a range.
Determines if the formula will be hidden when the worksheet is protected.
Returns or sets the formula label type for the specified range.
Returns or sets the formula for the object, using A1-style references in the language of the user.
Returns or sets the formula for the object, using R1C1-style notation in the language of the macro.
Returns or sets the formula for the object, using R1C1-style notation in the language of the user.
Determines if the specified cell is part of an array formula.
Determines if all cells in the range contain formulas.
The height of the range.
Determines if the rows or columns are hidden.
Returns or sets the horizontal alignment for the specified object.
Returns a Hyperlinks collection that represents the hyperlinks for the range.
Returns or sets the identifying label for the specified cell when the page is saved as a Web page.
Returns or sets the indent level for the cell or range.
Returns an Interior object that represents the interior of the specified object.
Returns a Range object that represents a range at an offset to the specified range.
The distance from the left edge of column A to the left edge of the range.
Returns the number of header rows for the specified range.
Returns a ListObject object for the Range object or QueryTable object.
Returns a constant that describes the part of the PivotTable report that contains the upper-left corner of the specified range.
Determines if the object is locked.
Returns the MDX name for the specified Range object. Read-only.
Returns a Range object that represents the merged range containing the specified cell.
Determines if the range or style contains merged cells.
Returns or sets the name of the object.
Returns a Range object that represents the next cell.
Returns or sets the format code for the object.
Returns or sets the format code for the object as a string in the language of the user.
Returns a Range object that represents a range that’s offset from the specified range.
Returns the text orientation.
Returns or sets the current outline level of the specified row or column.
Returns or sets the location of a page break.
Returns the parent object for the specified object.
Returns the Phonetic object which contains information about a specific phonetic text string in a cell.
Returns the Phonetics collection of the range.
Returns a PivotCell object that represents a cell in a PivotTable report.
Returns a PivotField object that represents the PivotTable field containing the upper-left corner of the specified range.
Returns a PivotItem object that represents the PivotTable item containing the upper-left corner of the specified range.
Returns a PivotTable object that represents the PivotTable report containing the upper-left corner of the specified range, or the PivotTable report associated with the PivotChart report.
Returns a Range object that represents all the precedents of a cell.
Returns the prefix character for the cell.
Returns a Range object that represents the previous cell.
Returns a QueryTable object that represents the query table that intersects the specified Range object.
Returns a Range object that represents a cell or a range of cells.
Returns or sets the reading order for the specified object.
Resizes the specified range.
Returns the number of the first row of the first area in the range.
Returns the height of all the rows in the range specified, measured in points.
Returns a Range object that represents the rows in the specified range.
Specifies the actions that can be performed on the SharePoint server for a Range object.
Returns True if the outline is expanded for the specified range (so that the detail of the column or row is visible).
Determines if text automatically shrinks to fit in the available column width.
Returns a SmartTags object representing the identifier for the specified cell.
This property should not be used. Sound notes have been removed from Microsoft Excel.
Gets a SparklineGroups object that represents an existing group of sparklines from the specified range.
Returns a Style object that represents the style of the specified range.
Determines if the range is an outlining summary row or column.
Returns or sets the text for the specified object.
Returns the distance, in points, from the top edge of row 1 to the top edge of the range.
Determines if the row height of the Range object equals the standard height of the sheet.
Determines if the column width of the Range object equals the standard width of the sheet.
Returns the Validation object that represents data validation for the specified range.
Returns or sets the value of the specified range.
Returns or sets the cell value.
Returns or sets the vertical alignment of the specified object.
The width, in points, of the range.
Returns a Worksheet object that represents the worksheet containing the specified range.
Determines if Microsoft Excel wraps the text in the object.
Returns an XPath object that represents the Xpath of the element mapped to the specified Range object.
Methods
Reserved for internal use.
Reserved for internal use.
Activates a single cell, which must be inside the current selection.
Adds a comment to the range.
Filters or copies data from a list based on a criteria range.
Performs a writeback operation for all edited cells in a range based on an OLAP data source.
Applies names to the cells in the specified range.
Applies outlining styles to the specified range.
Returns an AutoComplete match from the list.
Performs an autofill on the cells in the specified range.
Filters a list using the AutoFilter.
Changes the width of the columns in the range or the height of the rows in the range to achieve the best fit.
Automatically formats the specified range, using a predefined format.
Automatically creates an outline for the specified range.
Adds a border to a range and sets the Color, LineStyle, and Weight properties for the new border.
Reserved for internal use.
Calculates a specified range of cells on a worksheet.
Calculates a specfied range of cells.
Checks the spelling of an object.
Clears the entire object.
Clears all cell comments from the specified range.
Clears the formulas from the range.
Clears the formatting of the object.
Removes all hyperlinks from the specified range.
Clears notes and sound notes from all the cells in the specified range.
Clears the outline for the specified range.
Returns a Range object that represents all the cells whose contents are different from the comparison cell in each column.
Consolidates data from multiple ranges on multiple worksheets into a single range on a single worksheet.
Copies the range to the specified range or to the Clipboard.
Copies the contents of an ADO or DAO Recordset object onto a worksheet, beginning at the upper-left corner of the specified range.
Copies the selected object to the Clipboard as a picture.
Creates names in the specified range, based on text labels in the sheet.
You have requested Help for a keyword used only on the Macintosh. For information about this keyword, consult the language reference Help included with Microsoft Office Macintosh Edition.
Cuts the object to the Clipboard or pastes it into a specified destination.
Creates a data series in the specified range.
Deletes the object.
Displays a dialog box defined by a dialog box definition table on a Microsoft Excel 4.0 macro sheet.
Designates a range to be recalculated when the next recalculation occurs.
Discards all changes in the edited cells of the range.
You have requested Help for a keyword used only on the Macintosh. For information about this keyword, consult the language reference Help included with Microsoft Office Macintosh Edition.
Exports to a file of the specified format.
Fills down from the top cell or cells in the specified range to the bottom of the range.
Fills left from the rightmost cell or cells in the specified range.
Fills right from the leftmost cell or cells in the specified range.
Fills up from the bottom cell or cells in the specified range to the top of the range.
Finds specific information in a range and returns a Range object that represents the first cell where that information is found.
TRUE indicates that the Excel Flash Fill feature has been enabled and active.
Starts the Function Wizard for the upper-left cell of the range.
Calculates the values necessary to achieve a specific goal.
When the Range object represents a single cell in a PivotTable field’s data range, the Group method performs numeric or date-based grouping in that field.
Inserts a cell or a range of cells into the worksheet or macro sheet and shifts other cells away to make space.
Adds an indent to the specified range.
Rearranges the text in a range so that it fills the range evenly.
Pastes a list of all displayed names onto the worksheet, beginning with the first cell in the range.
Creates a merged cell from the specified Range object.
Navigates a tracer arrow for the specified range to the precedent, dependent, or error-causing cell or cells.
Returns or sets the cell note associated with the cell in the upper-left corner of the range.
Parses a range of data and breaks it into multiple cells.
Pastes a Range from the Clipboard into the specified range.
Prints the object.
Reserved for internal use.
Shows a preview of the object as it would look when printed.
Removes duplicate values from a range of values.
Removes subtotals from a list.
Returns a Boolean indicating characters in cells within the specified range.
Returns a Range object that represents all the cells whose contents are different from those of the comparison cell in each row.
Runs the Microsoft Excel macro at this location.
Selects the object.
Creates Phonetic objects for all the cells in the specified range.
Scrolls through the contents of the active window to move the range into view.
Draws tracer arrows to the direct dependents of the range.
Draws tracer arrows through the precedents tree to the cell that’s the source of the error and returns the range that contains that cell.
Draws tracer arrows to the direct precedents of the range.
Sorts a PivotTable report, a range, or the active region if the specified range contains only one cell.
Uses East Asian sorting methods to sort the range or a PivotTable report, or uses the method for the active region if the range contains only one cell. For example, Japanese sorts in the order of the Kana syllabary.
Causes the cells of the range to be spoken in row order or column order.
Returns a Range object that represents all the cells that match the specified type and value.
You have requested Help for a keyword used only on the Macintosh. For information about this keyword, consult the language reference Help included with Microsoft Office Macintosh Edition.
Creates subtotals for the range (or the current region, if the range is a single cell).
Creates a data table based on input values and formulas that you define on a worksheet.
Parses a column of cells that contain text into several columns.
Promotes a range in an outline (that is, decreases its outline level).
Separates a merged area into individual cells.
Источник
Оставляю заметку по работе с Excel с помощью C#.
Привожу фрагменты кода, которые искал когда-то сам для работы с Excel документами.
Наработки очень пригодились в работе для формирования отчетности.
Прежде всего нужно подключить библиотеку Microsoft.Office.Interop.Excel.
Далее создаем псевдоним для работы с Excel:
using Excel = Microsoft.Office.Interop.Excel;
//Объявляем приложение
Excel.Application ex = new Microsoft.Office.Interop.Excel.Application();

//Отобразить Excel
ex.Visible = true;

//Количество листов в рабочей книге
ex.SheetsInNewWorkbook = 2;

//Добавить рабочую книгу
Excel.Workbook workBook = ex.Workbooks.Add(Type.Missing);

//Отключить отображение окон с сообщениями
ex.DisplayAlerts = false;

//Получаем первый лист документа (счет начинается с 1)
Excel.Worksheet sheet = (Excel.Worksheet)ex.Worksheets.get_Item(1);

//Название листа (вкладки снизу)
sheet.Name = "Отчет за 13.12.2017";

//Пример заполнения ячеек
for (int i = 1; i <= 9; i++)
{
  for (int j = 1; j < 9; j++)
  sheet.Cells[i, j] = String.Format("Boom {0} {1}", i, j);
}

//Захватываем диапазон ячеек
Excel.Range range1 = sheet.get_Range(sheet.Cells[1, 1], sheet.Cells[9, 9]);

//Шрифт для диапазона
range1.Cells.Font.Name = "Tahoma";
//Размер шрифта для диапазона
range1.Cells.Font.Size = 10;

//Захватываем другой диапазон ячеек
Excel.Range range2 = sheet.get_Range(sheet.Cells[1, 1], sheet.Cells[9, 2]);
range2.Cells.Font.Name = "Times New Roman";

//Задаем цвет этого диапазона. Необходимо подключить System.Drawing
range2.Cells.Font.Color = ColorTranslator.ToOle(Color.Green);
//Фоновый цвет
range2.Interior.Color = ColorTranslator.ToOle(Color.FromArgb(0xFF, 0xFF, 0xCC));
Расстановка рамок.
Расставляем рамки со всех сторон:
range2.Borders.get_Item(Excel.XlBordersIndex.xlEdgeBottom).LineStyle = Excel.XlLineStyle.xlContinuous;
range2.Borders.get_Item(Excel.XlBordersIndex.xlEdgeRight).LineStyle = Excel.XlLineStyle.xlContinuous;
range2.Borders.get_Item(Excel.XlBordersIndex.xlInsideHorizontal).LineStyle = Excel.XlLineStyle.xlContinuous;
range2.Borders.get_Item(Excel.XlBordersIndex.xlInsideVertical).LineStyle = Excel.XlLineStyle.xlContinuous;
range2.Borders.get_Item(Excel.XlBordersIndex.xlEdgeTop).LineStyle = Excel.XlLineStyle.xlContinuous;
Цвет рамки можно установить так:
range2.Borders.Color = ColorTranslator.ToOle(Color.Red);
Выравнивания в диапазоне задаются так:
rangeDate.VerticalAlignment = Excel.XlVAlign.xlVAlignCenter;
rangeDate.HorizontalAlignment = Excel.XlHAlign.xlHAlignLeft;
Формулы
Определим задачу: получить сумму диапазона ячеек A4:A10.
Для начала снова получим диапазон ячеек:
Excel.Range formulaRange = sheet.get_Range(sheet.Cells[4, 1], sheet.Cells[9, 1]);
Далее получим диапазон вида A4:A10 по адресу ячейки ( [4,1]; [9;1] ) описанному выше:
string adder = formulaRange.get_Address(1, 1, Excel.XlReferenceStyle.xlA1, Type.Missing, Type.Missing);
Теперь в переменной adder у нас хранится строковое значение диапазона ( [4,1]; [9;1] ), то есть A4:A10.
Вычисляем формулу:
//Одна ячейка как диапазон
Excel.Range r = sheet.Cells[10, 1] as Excel.Range;
//Оформления
r.Font.Name = "Times New Roman";
r.Font.Bold = true;
r.Font.Color = ColorTranslator.ToOle(Color.Blue);
//Задаем формулу суммы
r.Formula = String.Format("=СУММ({0}", adder);
Выделение ячейки или диапазона ячеек
Так же можно выделить ячейку или диапазон, как если бы мы выделили их мышкой:
sheet.get_Range("J3", "J8").Activate();
//или
sheet.get_Range("J3", "J8").Select();
//Можно вписать одну и ту же ячейку, тогда будет выделена одна ячейка.
sheet.get_Range("J3", "J3").Activate();
sheet.get_Range("J3", "J3").Select();
Авто ширина и авто высота
Чтобы настроить авто ширину и высоту для диапазона, используем такие команды:
range.EntireColumn.AutoFit();
range.EntireRow.AutoFit();
Получаем значения из ячеек
Чтобы получить значение из ячейки, используем такой код:
//Получение одной ячейки как ранга
Excel.Range forYach = sheet.Cells[ob + 1, 1] as Excel.Range;
//Получаем значение из ячейки и преобразуем в строку
string yach = forYach.Value2.ToString();
Добавляем лист в рабочую книгу
Чтобы добавить лист и дать ему заголовок, используем следующее:
var sh = workBook.Sheets;
Excel.Worksheet sheetPivot = (Excel.Worksheet)sh.Add(Type.Missing, sh[1], Type.Missing, Type.Missing);
sheetPivot.Name = "Сводная таблица";
Добавление разрыва страницы
//Ячейка, с которой будет разрыв
Excel.Range razr = sheet.Cells[n, m] as Excel.Range;
//Добавить горизонтальный разрыв (sheet - текущий лист)
sheet.HPageBreaks.Add(razr);
//VPageBreaks - Добавить вертикальный разрыв
Сохраняем документ
ex.Application.ActiveWorkbook.SaveAs("doc.xlsx", Type.Missing,
  Type.Missing, Type.Missing, Type.Missing, Type.Missing, Excel.XlSaveAsAccessMode.xlNoChange,
  Type.Missing, Type.Missing, Type.Missing, Type.Missing, Type.Missing);
Как открыть существующий документ Excel
ex.Workbooks.Open(@"C:UsersMyuserDocumentsExcel.xlsx",
  Type.Missing, Type.Missing, Type.Missing, Type.Missing,
  Type.Missing, Type.Missing, Type.Missing, Type.Missing,
  Type.Missing, Type.Missing, Type.Missing, Type.Missing,
  Type.Missing, Type.Missing);
Комментарии
При работе с Excel с помощью C# большую помощь может оказать редактор Visual Basic, встроенный в Excel.
Для этого в настройках ленты надо добавить пункт «Разработчик». Далее начинаем запись макроса, производим действия и останавливаем запись.
Далее заходим в редактор Visual Basic и смотрим код, который туда записался:
Например:
Sub Макрос1()
'
' Макрос1 Макрос
'

'
    Range("E88").Select
    ActiveSheet.ListObjects.Add(xlSrcRange, Range("$A$1:$F$118"), , xlYes).Name = _
        "Таблица1"
    Range("A1:F118").Select
    ActiveSheet.ListObjects("Таблица1").TableStyle = "TableStyleLight9"
    Range("E18").Select
    ActiveWindow.SmallScroll Down:=84
End Sub
В данном макросе записаны все действия, которые мы выполнили во время его записи. Эти методы и свойства можно использовать в C# коде.
Данный метод так же может оказать помощь в формировании относительных формул, например, выполнить сложение чисел, находящиеся слева от текущей ячейки на 4 столбца, и т.п. Пример:
//Складываем значения предыдущих 12 ячеек слева
rang.Formula = "=СУММ(RC[-12]:RC[-1])";
Так же во время работы может возникнуть ошибка: метод завершен неверно. Это может означать, что не выбран лист, с которым идет работа.
Чтобы выбрать лист, выполните sheetData.Select(Type.Missing); где sheetData это нужный лист.
Просмотрено:
81 944
Все привет, в этой статье опишу исчерпывающие примеры работы с excel на языке C#.
Для начала работы нам необходимо подключить библиотеку COM как на рисунке ниже:
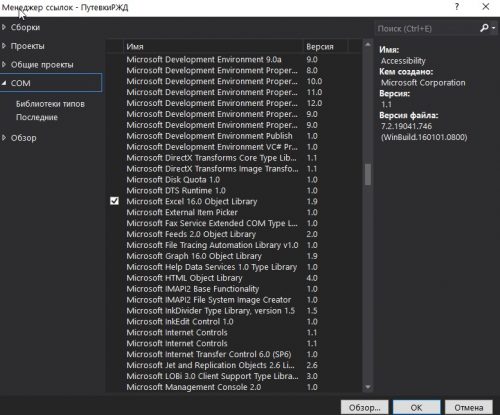
Для этого добавляем ссылку в проект, надеюсь вы знаете как это делается) Выбираем пункт COM ищем библиотеку Microsoft Excel 16.0 Object Library ставим галочку и жмем Ок.
Далее нам не обходимо для сокращения записи и удобства создать алиас.
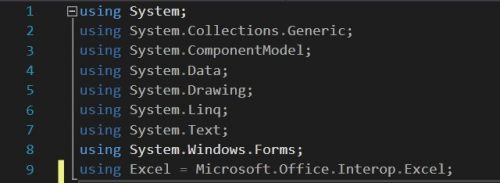
|
using Excel = Microsoft.Office.Interop.Excel; |
Теперь нам нужно объявить объект Excel задать параметры и приступать к работе.
|
//Объявляем приложение Excel.Application app = new Excel.Application { //Отобразить Excel Visible = true, //Количество листов в рабочей книге SheetsInNewWorkbook = 2 }; //Добавить рабочую книгу Excel.Workbook workBook = app.Workbooks.Add(Type.Missing); //Отключить отображение окон с сообщениями app.DisplayAlerts = false; //Получаем первый лист документа (счет начинается с 1) Excel.Worksheet sheet = (Excel.Worksheet)app.Worksheets.get_Item(1); //Название листа (вкладки снизу) sheet.Name = «Имя должно быть не больше 32сим»; |
Пример заполнения ячейки:
|
//Пример заполнения ячеек №1 for (int i = 1; i <= 9; i++) { for (int j = 1; j < 9; j++) sheet.Cells[i, j] = String.Format(«nookery {0} {1}», i, j); } //Пример №2 sheet.Range[«A1»].Value = «Пример №2»; //Пример №3 sheet.get_Range(«A2»).Value2 = «Пример №3»; |
Захват диапазона ячеек:
|
//Захватываем диапазон ячеек Вариант №1 Excel.Range r1 = sheet.Cells[1, 1]; Excel.Range r2 = sheet.Cells[9, 9]; Excel.Range range1 = sheet.get_Range(r1, r2); //Захватываем диапазон ячеек Вариант №2 Excel.Range range2 = sheet.get_Range(«A1»,«H9» ); |
Оформление, шрифт, размер, цвет, толщина.
|
//Шрифт для диапазона range.Cells.Font.Name = «Tahoma»; range2.Cells.Font.Name = «Times New Roman»; //Размер шрифта для диапазона range.Cells.Font.Size = 10; //Жирный текст range.Font.Bold = true; //Цвет текста range.Font.Color = ColorTranslator.ToOle(Color.Blue); |
Объединение ячеек в одну
|
//Объединение ячеек с F2 по K2 Excel.Range range3 = sheet.get_Range(«F2», «K2»); range3.Merge(Type.Missing); |
Изменяем размеры ячеек по ширине и высоте
|
//увеличиваем размер по ширине диапазон ячеек Excel.Range range2 = sheet.get_Range(«D1», «S1»); range2.EntireColumn.ColumnWidth = 10; //увеличиваем размер по высоте диапазон ячеек Excel.Range rowHeight = sheet.get_Range(«A4», «S4»); rowHeight.EntireRow.RowHeight = 50;range.EntireColumn.AutoFit();range.EntireColumn.AutoFit(); //авторазмер |
Создаем обводку диапазона ячеек
|
Excel.Range r1 = sheet.Cells[countRow, 2]; Excel.Range r2 = sheet.Cells[countRow, 19]; Excel.Range rangeColor = sheet.get_Range(r1, r2); rangeColor.Borders.Color = ColorTranslator.ToOle(Color.Black); |
Производим выравнивания содержимого диапазона ячеек.
|
Excel.Range r = sheet.get_Range(«A1», «S40»); //Оформления r.Font.Name = «Calibri»; r.Cells.Font.Size = 10; r.VerticalAlignment = Excel.XlVAlign.xlVAlignCenter; r.HorizontalAlignment = Excel.XlHAlign.xlHAlignCenter; |
Примеры вычисления формул, все вставки формул были скопированы из самой Excel без изменений. Позиция ячейки взята из счетчика переменно и подставлен к букве ячейки
|
sheet.Cells[countRow, countColumn] = $«=G{countRow}-F{countRow}»; sheet.Cells[countRow, countColumn].FormulaLocal = $«=ЕСЛИ((H{countRow}*O{countRow})+(I{countRow}*P{countRow})/100<=0;J{countRow}*O{countRow}/100;((H{countRow}*O{countRow})+(I{countRow}*P{countRow}))/100)»; sheet.Cells[countRow, countColumn] = $«=K{countRow}+N{countRow}-R{countRow}»; sheet.Cells[33, 22].FormulaLocal = «=СУММ(V3:V32)»; |
Добавляем разрыв страницы.
|
//Ячейка, с которой будет разрыв Excel.Range razr = sheet.Cells[n, m] as Excel.Range; //Добавить горизонтальный разрыв (sheet — текущий лист) sheet.HPageBreaks.Add(razr); //VPageBreaks — Добавить вертикальный разрыв |
Как открыть фаил Excel
|
app.Workbooks.Open(@»C:UsersUserDocumentsExcel.xlsx», Type.Missing, Type.Missing, Type.Missing, Type.Missing, Type.Missing, Type.Missing, Type.Missing, Type.Missing, Type.Missing, Type.Missing, Type.Missing, Type.Missing, Type.Missing, Type.Missing); |
Сохраняем документ Excel
|
app.Application.ActiveWorkbook.SaveAs(«MyFile.xlsx», Type.Missing, Type.Missing, Type.Missing, Type.Missing, Type.Missing, Excel.XlSaveAsAccessMode.xlNoChange, Type.Missing, Type.Missing, Type.Missing, Type.Missing, Type.Missing); |
Завершение работы с объектом Excel.Application
|
app.Quit(); System.Runtime.InteropServices.Marshal.ReleaseComObject(app); |
Пример как выбрать фаил и загрузив его и узнать количество заполненных строк и колонок в одном конкретном листе по имени.
|
1 2 3 4 5 6 7 8 9 10 11 12 13 14 15 16 17 18 19 20 21 22 23 24 25 |
//поиск файла Excel OpenFileDialog ofd = new OpenFileDialog(); ofd.Multiselect =false; ofd.DefaultExt = «*.xls;*.xlsx»; ofd.Filter = «Microsoft Excel (*.xls*)|*.xls*»; ofd.Title = «Выберите документ Excel»; if (ofd.ShowDialog() != DialogResult.OK) { MessageBox.Show(«Вы не выбрали файл для открытия», «Внимание», MessageBoxButtons.OK, MessageBoxIcon.Information); return; } string xlFileName = ofd.FileName; //имя нашего Excel файла //рабоата с Excel Excel.Range Rng; Excel.Workbook xlWB; Excel.Worksheet xlSht; int iLastRow, iLastCol; Excel.Application xlApp = new Excel.Application(); //создаём приложение Excel xlWB = xlApp.Workbooks.Open(xlFileName); //открываем наш файл xlSht = xlWB.Worksheets[«Лист1»]; //или так xlSht = xlWB.ActiveSheet //активный лист iLastRow = xlSht.Cells[xlSht.Rows.Count, «A»].End[Excel.XlDirection.xlUp].Row; //последняя заполненная строка в столбце А iLastCol = xlSht.Cells[1, xlSht.Columns.Count].End[Excel.XlDirection.xlToLeft].Column; //последний заполненный столбец в 1-й строке |
Получаем список всех загруженных книг «листов» из файла
|
1 2 3 4 5 6 7 8 9 10 11 12 13 14 15 16 17 18 19 |
//поиск файла Excel OpenFileDialog ofd = new OpenFileDialog(); ofd.Multiselect = false; ofd.DefaultExt = «*.xls;*.xlsx»; ofd.Filter = «Microsoft Excel (*.xls*)|*.xls*»; ofd.Title = «Выберите документ Excel»; if (ofd.ShowDialog() != DialogResult.OK) { MessageBox.Show(«Вы не выбрали файл для открытия», «Внимание», MessageBoxButtons.OK, MessageBoxIcon.Information); return; } string xlFileName = ofd.FileName; //имя нашего Excel файла Excel.Workbook xlWB = ex.Workbooks.Open(xlFileName); ///загружаем список всех книг foreach (object item in xlWB.Sheets) { Excel.Worksheet sheet = (Excel.Worksheet)item; } |

Posted on Tuesday, October 15th, 2013 at 9:22 am by .
If you look at the title of this article, it almost sums up what Microsoft Excel is. Without cells, values and formulas, you just cannot get much done in Excel. Of course everything is contained within worksheets and workbooks and you can do so much more with Excel, but at the heart of it all lies cells.
In this article we’ll take a closer look at manipulating Excel cells in your Add-in Express based Excel add-ins. There are a number of ways to reference cells in Excel. Keep in mind though that the Excel object model does not have any object called Cell, you must always use the Range object.
- Retrieving all cells
- Retrieving multiple cells
- Retrieving selected cells
- Setting Excel cell formulas
- Displaying the Insert Function Dialog
- Formatting cells
Retrieving all cells
The Worksheet object contains a Cells property that is a Range object that comprises a reference to all the cells in the Worksheet. You can get a reference to a Worksheet object by either using the ActiveSheet or WorkSheets properties of the Excel Application.
The following C# code retrieves a reference to the Cells property and displays the number of rows and columns in the active work sheet:
Excel._Workbook workBook = null;
Excel._Worksheet workSheet = null;
Excel.Range cellsRange = null;
Excel.Range columnRange = null;
Excel.Range rowRange = null;
int numberOfColumns = 0;
int numberOfRows = 0;

try
{
    workBook = ExcelApp.ActiveWorkbook;
    workSheet = ExcelApp.ActiveSheet as Excel._Worksheet;
    cellsRange = workSheet.Cells;
    columnRange = cellsRange.Columns;
    rowRange = cellsRange.Rows;
    numberOfColumns = columnRange.Count;
    numberOfRows = rowRange.Count;
    MessageBox.Show(String.Format(
        "There are {0} columns and {1} rows in the Worksheet",
        numberOfColumns, numberOfRows));
}
finally
{
    if (rowRange != null) Marshal.ReleaseComObject(rowRange);
    if (columnRange != null) Marshal.ReleaseComObject(columnRange);
    if (cellsRange != null) Marshal.ReleaseComObject(cellsRange);
    if (workSheet != null) Marshal.ReleaseComObject(workSheet);
    if (workBook != null) Marshal.ReleaseComObject(workBook);
}
Getting multiple cells
You can retrieve multiple Excel cells by either specifying the row and columns number for the Range object or you can use the Range objects’ get_Range method. This method allows you to retrieve a Range object by specifying the address of the cells e.g. A1:H9. The code listing is as follows:
Excel._Workbook workBook = null;
Excel._Worksheet workSheet = null;
Excel.Range allCellsRange = null;
Excel.Range firstCellRange = null;
Excel.Range secondCellRange = null;

try
{
    workBook = ExcelApp.ActiveWorkbook;
    workSheet = ExcelApp.ActiveSheet as Excel._Worksheet;
    allCellsRange = workSheet.Cells;
    firstCellRange = allCellsRange[3, 1] as Excel.Range;
    firstCellRange.Value = "First Range Value";

    secondCellRange = allCellsRange.get_Range("C2:F7");
    secondCellRange.Value = "Second Range Value";
}
finally
{
    if (secondCellRange != null) Marshal.ReleaseComObject(secondCellRange);
    if (firstCellRange != null) Marshal.ReleaseComObject(firstCellRange);
    if (allCellsRange != null) Marshal.ReleaseComObject(allCellsRange);
    if (workSheet != null) Marshal.ReleaseComObject(workSheet);
    if (workBook != null) Marshal.ReleaseComObject(workBook);
}
As you can see in the above code listing, to set the value of multiple cells, you need to set the Value property. You might also notice a Value2 property, which is an interesting one and reading more about this property on MSDN yielded the following piece of information, which is good to know:
“The only difference between this property and the Value property is that the Value2 property doesn’t use the Currency and Date data types. You can return values formatted with these data types as floating-point numbers by using the Double data type.” Find more on MSDN.
Retrieving selected cells
So far we’ve only discussed retrieving a collection of cells programmatically, next, let’s look at how you can get a reference to the Range of cells the user has selected. Do this by using the Selection property of the Excel Application object. Be careful though, the selection is not always a Range object, the user could have selected a chart or an image. Add the following code:
Excel.Range selectedCellsRange = null;
Excel.Range columnRange = null;
Excel.Range rowRange = null;
int numberOfColumns = 0;
int numberOfRows = 0;

try
{
    if (ExcelApp.Selection is Excel.Range)
    {
        selectedCellsRange = ExcelApp.Selection as Excel.Range;
        columnRange = selectedCellsRange.Columns;
        rowRange = selectedCellsRange.Rows;
        numberOfColumns = columnRange.Count;
        numberOfRows = rowRange.Count;
        MessageBox.Show(String.Format(
            "You've selected {0} columns and {1} rows. The selection address is {2}",
            numberOfColumns, numberOfRows, selectedCellsRange.Address));
    }

}
finally
{
    if (rowRange != null) Marshal.ReleaseComObject(rowRange);
    if (columnRange != null) Marshal.ReleaseComObject(columnRange);
    if (selectedCellsRange != null) Marshal.ReleaseComObject(selectedCellsRange);
}
You will notice that in the above code we used the Address property of the Range object. This will return a string containing the selected cells’ addresses e.g. $A$1:$D$3
Setting Excel cell formulas
Let’s take what we’ve learned so far and use it to set cell formulas. You’ll need to get the Range object for the cells which formula you wish to set and then set its Formula property:
Excel.Range selectedRange = null;
try
{
    selectedRange = ExcelApp.Selection as Excel.Range;
    selectedRange.Formula = "=SUM(A1:A7)";
}
finally
{
    if (selectedRange != null) Marshal.ReleaseComObject(selectedRange);
}
Displaying the Insert Function dialog
If you want the user to choose which Excel function they want to insert, you can show the Insert Function dialog programmatically by using the Excel Application objects’ Dialogs collection.

Excel.Dialogs dialogs = null;
Excel.Dialog insertFunctionDialog = null;

try
{
    dialogs = ExcelApp.Dialogs;
    insertFunctionDialog = dialogs[Excel.XlBuiltInDialog.xlDialogFunctionWizard];
    insertFunctionDialog.Show();
}
finally
{
    if (insertFunctionDialog != null) Marshal.ReleaseComObject(insertFunctionDialog);
    if (dialogs != null) Marshal.ReleaseComObject(dialogs);
}
Formatting cells
Setting cell number formats, font, foreground and background colors are done in a similar fashion as setting cell values. You first need to get a reference to the Excel Range object which formatting you want to change. In the following code, we get a reference to the selected cells and set their number format to a custom format, the font to bold, foreground color to white and the background color to blue.
Excel.Range selectedRange = null;
Excel.Font font = null;
Excel.Interior interior = null;

try
{
    selectedRange = ExcelApp.Selection as Excel.Range;
    selectedRange.NumberFormat = "$#,##0.00_);($#,##0.00)";
    font = selectedRange.Font;
    font.Bold = true;
    font.Color = System.Drawing.Color.White;
    interior = selectedRange.Interior;
    interior.Pattern = Excel.Constants.xlSolid;
    interior.Color = System.Drawing.Color.DarkBlue;
}
finally
{
    if (interior != null) Marshal.ReleaseComObject(interior);
    if (font != null) Marshal.ReleaseComObject(font);
    if (selectedRange != null) Marshal.ReleaseComObject(selectedRange);
}
Thank you for reading. Until next time, keep coding!
Available downloads:
This sample Excel add-in was developed using Add-in Express for Office and .net:
Excel Cell Format add-in for Excel (C#)
Excel add-in development in Visual Studio for beginners:
- Part 1: Application and base objects
- Part 2: Customizing the Excel User Interface: What is and isn’t customizable
- Part 3: Customizing Excel ribbons and toolbars
- Part 4: Customizing Excel main menu, context menus, and Backstage view
- Part 5: Creating custom task panes for Excel 2013 – 2003
- Part 6: Working with Excel workbooks and worksheets: VB.NET examples
- Part 8: Working with Excel charts
- Part 9: Working with Excel tables and ranges
- Part 10: Importing data from SQL databases and other sources to Excel
- Part 11: Working with Excel pivot tables: VB.NET code examples