|
asesja Пользователь Сообщений: 320 |
Здравствуйте. Изменено: asesja — 31.10.2022 09:05:01 |
|
asesja Пользователь Сообщений: 320 |
Уважаемые специалисты, помогите, пожалуйста, по этому направлению. |
|
БМВ Модератор Сообщений: 21380 Excel 2013, 2016 |
|
|
Ігор Гончаренко Пользователь Сообщений: 13746 |
#4 29.10.2022 21:45:43
уважаемый пользователь а что мешает задать этот же вопрос гуглу? Программисты — это люди, решающие проблемы, о существовании которых Вы не подозревали, методами, которых Вы не понимаете! |
||
|
asesja Пользователь Сообщений: 320 |
БМВ, спасибо но это к сожалению платно. Таких полно в инете. |
|
asesja Пользователь Сообщений: 320 |
#6 29.10.2022 22:26:45
Игорь, что даст вам ответ на этот вопрос? Изменено: asesja — 29.10.2022 22:27:12 |
||
|
ответ гугла на данный вопрос мне даст ответ на вопрос. я довольно часто задаю вопросы гуглу и стабильно получаю ответы Изменено: Ігор Гончаренко — 29.10.2022 22:40:24 Программисты — это люди, решающие проблемы, о существовании которых Вы не подозревали, методами, которых Вы не понимаете! |
|
|
asesja Пользователь Сообщений: 320 |
#8 30.10.2022 00:14:29
Я имел ввиду, что вам даст если я отвечу на заданный вами вопрос? Это поможет предложить решение или так просто захламляете переписку? Изменено: asesja — 30.10.2022 08:57:18 |
||
|
БМВ Модератор Сообщений: 21380 Excel 2013, 2016 |
#9 30.10.2022 10:15:09
В примере по ссылке генератор использует группировку набора примитивов, которые являются фигурами, соответсвенно при генерации уже не просто накидать эти сотни примитивов , а потом хранить эту груду объектов. Работа по такому принципу будет всегда не быстрой. Серьезное ускорение будет только при использовании спец шрифтов, а, как правильно отмечено, это платно. По вопросам из тем форума, личку не читаю. |
||
|
asesja Пользователь Сообщений: 320 |
#10 30.10.2022 14:04:44
БМВ, шрифт у меня есть. Только теперь нужно придумать как кодировать текст для этого шрифта |
||
|
БМВ Модератор Сообщений: 21380 Excel 2013, 2016 |
#11 30.10.2022 14:06:26
какой именно шрифт? По вопросам из тем форума, личку не читаю. |
||
|
asesja Пользователь Сообщений: 320 |
#12 30.10.2022 14:34:57
MW6 Matrix |
||
|
БМВ Модератор Сообщений: 21380 Excel 2013, 2016 |
#13 30.10.2022 14:47:24
значит у его создателя есть или код или … который позволяет его использовать. Почему не обратится туда где он был взят? По вопросам из тем форума, личку не читаю. |
||
|
asesja Пользователь Сообщений: 320 |
БМВ, вот еще интересное решение. Только не могу разобраться как получить код не на форме а в ячейку Excel. https://ocvita.ru/ocvita-barcode Изменено: asesja — 30.10.2022 15:04:33 |
|
RAN Пользователь Сообщений: 7091 |
Уже который день не могу понять, вам шашечки, или ехать? |
|
asesja Пользователь Сообщений: 320 |
#16 30.10.2022 17:45:30
Мне бы как-нибудь добраться )) Эту тему читал, там в основном про QRкод. Нужна генерация DataMatrix, желательно без использования инета. Изменено: asesja — 30.10.2022 17:47:21 |
||
Надстройка Labels позволяет вставлять матричные штрихкоды формата Data Matrix в создаваемые этикетки.
В каждой этикетке может присутствовать один или несколько таких кодов.
ВНИМАНИЕ: для работы этой функции нужен доступ в интернет, т.к. используется веб-сервис для генерации картинки с кодом по заданному тексту.
Для формирования штрихкодов Data Matrix, в шаблоне этикетки необходимо:
- Вставить в нужное место этикетки контейнер для баркода — автофигуру или объект типа «Надпись»
(на ленте Excel на вкладке Вставка нажмите кнопку Надпись для вставки прямоугольной рамки)
- Задать нужные размеры контейнера (ширину и высоту).
Обычно требуется квадратная рамка (ширина и высота одинаковы)
- Выделить контейнер (объект «Надпись»), и слева от строки формул изменить его имя на dmx
Если нужно вставить несколько штрихкодов Data Matrix, то им можно задать имена вида dmx-1, dmx-2 и т.д.
- Внутри контейнера ввести текст (используя подстановочные коды), который будет закодирован в этом баркоде.
- В свойствах контейнера (правой кнопкой на объекте — Формат фигуры — Свойства) задать режим привязки «Перемещать, но не изменять размеры»
Файлы для тестирования вставки 2D штрихкодов (шаблон этикетки, и таблицу с исходными данными) можно скачать в этой инструкции.
Best Answer
NOTE: A new product is now available since this issue was resolved that offers a better way to generate barcodes in Excel on Windows and Mac, the IDAutomation Native Generator for Excel.
Tutorial Updated 10/28/2021
1. Download and install a font package that includes Data Matrix. The package installs the necessary encoders. To generate barcodes directly in Excel, download and install the IDAutomation 2D XLS Font
2. Open Excel and set up the spreadsheet. In the example, data in column A2 will include the data to convert to the barcode. A formula will be written in B2 to produce the encoded data.
3. Minimize Excel and locate the VBA file named IDAutomation_VBA_DataMatrix_FE2021.bas or (IDAutomation_Datamatrix_Macro.bas—Demo verison). The VBA is located in the Integration folder of the product download.
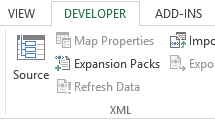
4. Maximize Excel and select the Developer Tab.
Microsoft Support — Enable Developer Tab
5. Select Visual Basic to enter the Editor.
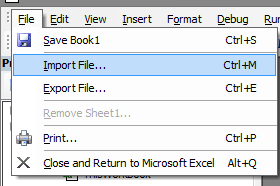
6. To import the VBA file, select File — Import File then search for and select the .bas file.
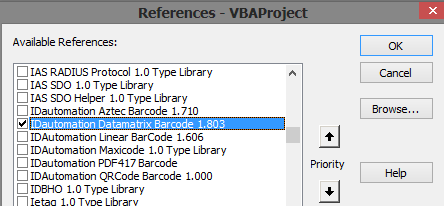
7. NOTE: If using the demo file (IDAutomation_Datamatrix_Macro.bas), you must complete this step. Otherwise, skip to step 8. Select Tools — References and search for the Data Matrix encoder. Choose OK.
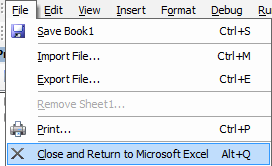
8. Select File and choose Close and Return to Microsoft Excel.
9. In cell B2, enter the formula:
Licensed Version use: =IDAutomation_DMatrix_FontEncoder()
Demo Version, use: =EncDM()
and reference cell A2 to encode the data.
The encoded data displays as several uppercase alpha characters.
===================================================
To generate GS1 Data Matrix
=SUBSTITUTE(EncDM(A2,1,0,0), CHAR(13),»»)
=SUBSTITUTE(IDAutomation_DMatrix_FontEncoder(A2,1,0,0), CHAR(13),»»)
Setting the second parameter to 1 enabled ApplyTilde which allows you to insert ~1 before any Application Identifier (AI). Here is an example of A2 for GS1-Data Matrix:
(01)3456789012345 must be entered as ~1013456789012345
or using the Substitute function:
===================================================
10. Save the file.
HOW TO DISPLAY SCANNABLE 2D BARCODES IN EXCEL
GENERATE BARCODE IN EXCEL
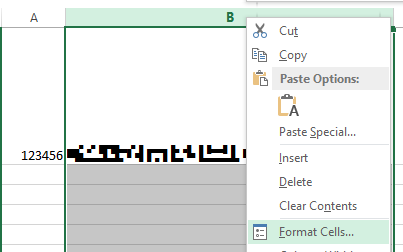
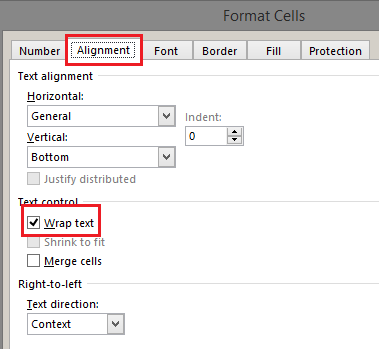
(1) Apply the IDAutomation2D XLS font.
(2) Right-click the column and choose Format Cells.
(3) Select the Alignment tab and then check Wrap text.
HOW TO MAIL MERGE
To generate the barcode the encoded file must be used in a mail merge/data merge. Video Example of 2D mail merge. The only difference between the video and this tutorial is that the video uses the Barcode Add-In encoder and Data Matrix. Begin the video at 2:35.
Video Example
CARRIAGE RETURN ERROR
After merging the data into Word, a group of characters, such as _x000D_ or barcode

Example:
=SUBSTITUTE(EncDM(A2), CHAR(13),»»)

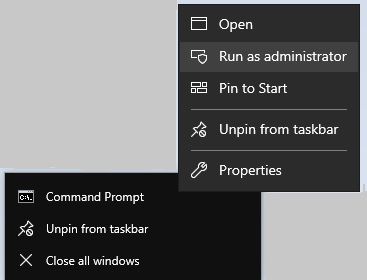
1. Right click command prompt and run command prompt as administrator.
Type in the following commands to register cruflbcs.dll
                            cd "C:Program Files (x86)Common FilesBarcodesoftFontUtil"

                            regsvr32.exe cruflbcs.dll
To register 64-bit DLL, please type in the following commands
                            cd "C:Program Files (x86)Common FilesBarcodesoftFontUtil"

                            %systemroot%System32regsvr32.exe cruflbcs_x64.dll
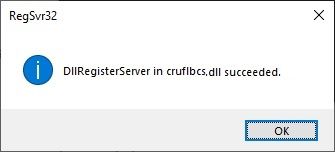
If you see the following Window pop up, your registration was successful.
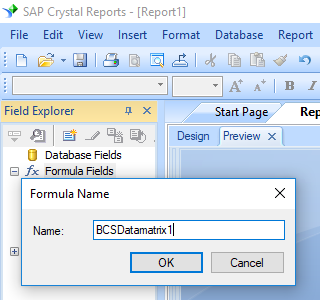
2. Open your crystal report. Right click Formula Fields, choose «New…» from the context menu.
Type in «BcsDataMatrix1» in the Name textbox, then click «Use Editor».
After Data Matrix encoding process, even a short string might have much more code words than you expect.
While Crystal Reports allows no more than 255 characters in a formula field.
Therefore we have to split Data Matrix code words into separate parts, and concatenate them in a Text Object before apply font BcsDataMatrix.
As for how many formula fields are needed, you can find out by using the following function:
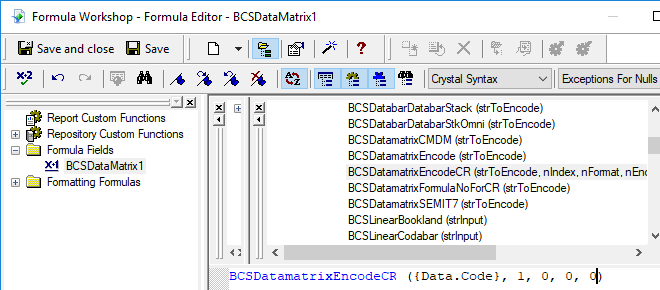
BCSDatamatrixFormulaNoForCR({Test.Data})
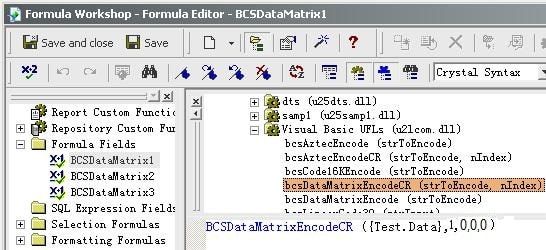
3. Create multiple formula fields as listed below if returned value of BCSDatamatrixFormulaNoForCR({Test.Data}) is larger than one. Then put them in sequence within the same Text Object.
BCSDataMatrixEncodeCR({Test.Data}, 1, 0, 0, 0)
BCSDataMatrixEncodeCR({Test.Data}, 2, 0, 0, 0)
BCSDataMatrixEncodeCR({Test.Data}, 3, 0, 0, 0)
The first parameter in the formula field is string to encode.
The second parameter in the formula field is index.
The third parameter of the formula is Format. Its values range between 0 and 30. When set to zero, it means auto-selected format.
The fourth parameter is Encodation method. Its values range between 1 and 6 which stand for the following encodation separately: ASCII, C40, TEXT, X12, EDIFACT, BASE256.
The fifth parameter is GS1 indicator. It is a Boolean indicating whether this is a GS1-compliant barcode. Set it to zero when this is not GS1-datamatrix compliant.
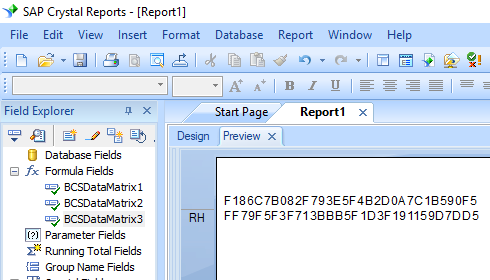
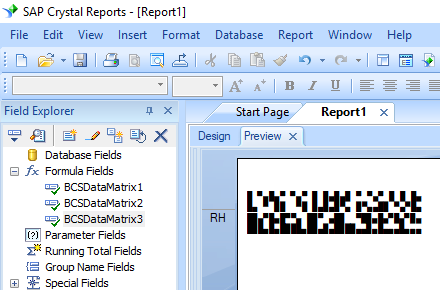
4. Insert a text object in your report. Drag and drop all your formula fields into this text object in sequence. You will see some hex codes in your report. Don’t worry! You have NOT applied BCSDatamatrix font typeface yet.
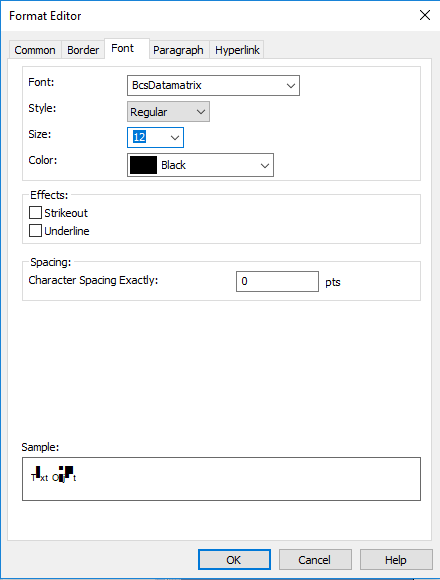
5. Right click Text Object and choose «Format Object» from context menu. Then choose «BcsDatamatrix» as font.
6. Click OK button. You will get data matrix barcode in your report.
- Previous
- Up
- Next
7.1. Access (ActiveX Control)
This section explains the steps to add DataMatrix barcodes in a
Microsoft Access report using Morovia DataMatrix ActiveX Control.
-
The DataMatrix ActiveX control must be installed and
registered on the computer. -
Open a report in design view and choose → .
If you are using Access 2007 or 2010, switch to Design view,
and click on Insert ActiveX Control button. -
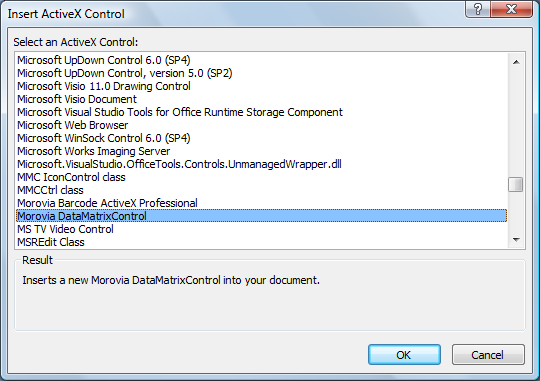
From the list of controls, select
Morovia DataMatrixControl. -
After the control is placed on the report, right click on it and
choose -
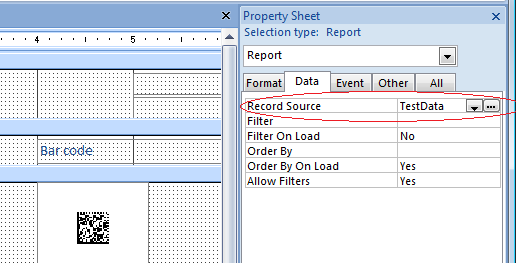
Modify the Control Source property to point to
the table and field of the data you wish to encode into the barcode. The
data source can be a table field, or a field of a comprehensive query result. -
Modify other properties, such as
ModuleWidth,
andSizeID. After
you are satisfied with the result, close the property dialog. -
Save the run the report. You should see the barcodes appear in the
report.
7.2. Access (using DataMatrix Font)
You can also add DataMatrix barcodes to Access report using font-based solution.
-
Before creating barcodes in Microsoft Access, you must import the
required module. This module adds VBA function so that you can put into the report.
Choose → and selectMorovia.DataMatrixFontDLL5.basfile,
located in the program folder. -
Open a report in design view and add a text box to the report. The text
box will be modified to contain a barcode. -
Right click on the text box and choose properties.
-
Place the formula
=DataMatrixEncode([TestData.Data],-1)in the control source property of the text box where [TestData.data] is the field
that contains the data to be encoded into the DataMatrix barcode.
The following parameter is the size ID desired. -
Run the report. You should see lines of hexadecimal characters
appear in the place of the text box. This is the barcode string in the raw text form. -
Go back to the design view and change the font of the text box.
In our case, chooseMRV DataMatrix5and 6 points.
Adjust the size of the text
box to fit the whole barcode. -
Save and run your report. You should see the barcodes appear in the report.
7.3. Excel (ActiveX Control)
Excel has line gap issues with DataMatrix fonts. You can paste EMF image from
GUI encoder, or use ActiveX control as outlined below.
-
After you finished other parts of the spreadsheet,
choose → → -
When Control Toolbox appears,
click on More Controls button.On Excel 2007 and 2010, first switch to developer tab, then
press Insert button on the toolbar, and select More Controls button. -
From the list of controls presented, choose Morovia DataMatrixControl.
-
Select the area to place the control
in the spreadsheet. -
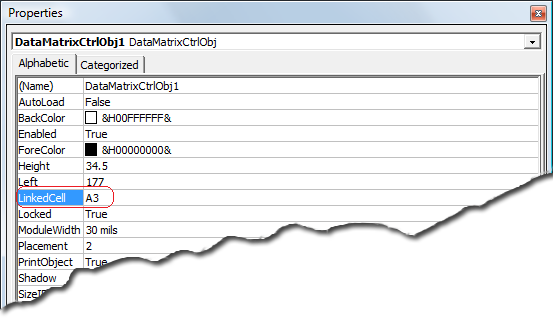
Right click on the control, choose Properties and change the Linked Cell property to the name of
the cell that contains the data you wish to encode. -
Change other properties as necessary such as
Rows,ColsandAspectRatioto adjust the size of the barcode. -
After editing the properties, click on Exit Design Mode button to exit
design mode. The barcode will appear in the spreadsheet. -
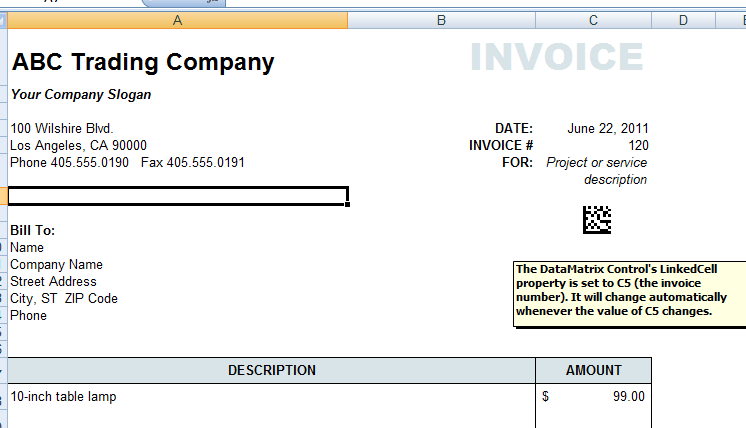
The barcode is now bound to the cell. Change
the data of the linked cell, the barcode will change accordingly.Note: to subsequently modify or delete the barcode control, Excel must
enterDesign Mode. This can be done by pressing
the Design Mode button on the Control Toolbox.
7.4. Microsoft Word
Using Datamatrix control in Microsoft Word is similar to the one in Excel,
except that Word does not provide a way for data binding.
-
choose → → .
-
In the toolbox, choose the more controls button.
-
Select Morovia DataMatrixControl from the list
of available ActiveX controls. After selecting it, the control will appear in the document,
the control may be sized as necessary. To change the properties of the control
right click on the control and choose Properties. -
When finished, exit the design mode by choosing the design mode button.
-
To edit the properties of the control the program must be in design mode.
If there are problems editing the properties of the control, press the design mode button
to enable it.
7.5. Word Mail Merge
This tutorial uses Excel file Word Mail Merge DataSource.xls as mail merge data source. The data looks like this:
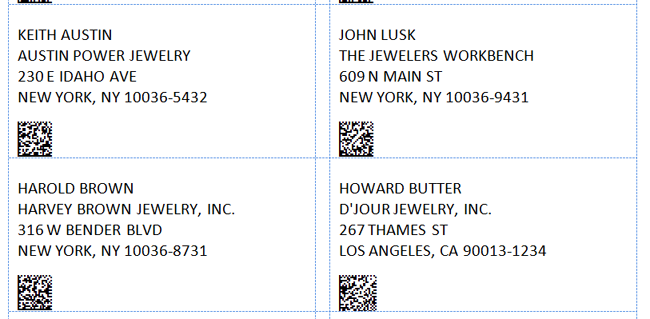
We want to print address information as well as a DataMatrix barcode that
encodes such information in Avery label paper 5163. The Print Preview looks
like the one below:
-
Before we start, we need to import a module into Excel. To do
that, open Visual Basic Editor. In Excel 2007,
this is done by selecting → .In Visual Basic Editor, choose → .
Navigate to the DataMatrix Fonts & Encoder 5
installation folder, and select
theMorovia.DataMatrixFontDLL5.bas.Close Visual Basic Editor.
-
Add a new column in the spreadsheet that will hold the barcode
string. In our case, we use column H. In cell H2, enter the definition as below:After hitting Enter, you should see a hexadecimal string
result show up. If not, examine the formula you entered.Note the use of Excel function
CONCATENATEhere.
This function is used to combine several fields, as well as line return characters.See the DLL API for the meaning of each field. Here we set size ID
to -1. -
Copy the formula to other cells of the same column. This can be done by
selecting cell H2, highlighting the cells that the formula is copied, and select Paste.Close the Excel file and start Microsoft Word.
-
In Microsoft Word, choose → → .
Select Avery 5163 as the label we will work on. -
Select . In the file dialog, navigate
to the spreadsheet we just created. If it asks for Select Table,
choose Sheet1$. -
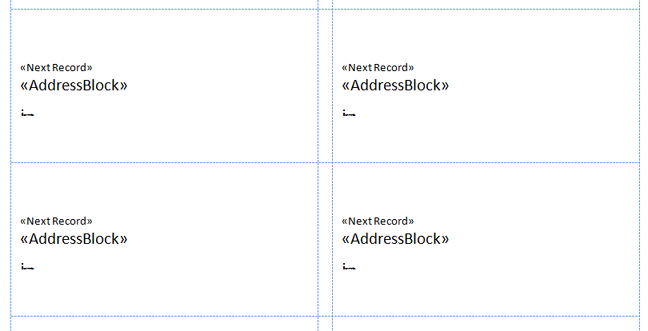
Click on Address Block. This is for the address line.
Microsoft Word has the intelligence to select the address block. -
Hit Enter once to move the cursor below, and click on Insert Merge Field. Select Barcode as the merge field.
Click on Review Results. You should see the first
record show up, with hexadecimal characters in the place of barcode. -
Now adjust the font for the address block and the barcode field. For
the address block, we use Arial 16 points. For the barcode, useMRV DataMatrix56 points. -
Copy the format to other labels by selecting Update labels.
-
Select Preview Results to view
the sheets of labels.
- Previous
- Up
- Home
- Next


