
Tier List Index
Introduction
Assumptions: Generally, a Friend being ranked low does not mean they are worthless — due to LostWord’s elemental system, even Friends who have otherwise lacking kits can still bring element attacks for a full break. A low ranking simply reflects that they lack damage, utility, or both compared to other Friends. Additionally, due to how ATK UP and DEF DOWN work, combined with easy access to the former on Story Cards, even most less damaging Friends can still work — it will take additional support, turns, or both, but even C or D Tier Friends can hit hard. Lower rated Friends are not irredeemable, they are simply worse than those rated above them.
For the purposes of farming, this tier list simply only cares if they can farm Lunatic or not for the purposes of evaluating them.
Rating Notes
For the purposes of a baseline of comparison, all Friends are considered to be fully upgraded — this means skill level 10, max Rank, max Stats, max Limit Break, Level 100, with optimal Story Cards (with a warning if a Friend suffers dramatically for not having their optimal Story Cards). If the Friend in question has a Fantasy Rebirth, this will also affect their CQ rating. Fantasy Rebirth and Awakening are no longer considered in a unit’s farm rating, for the most part — as such, many of the farm ratings skew a little lower than they would for fully upgraded units, and if you’re willing to burn the extra SP, many units will perform better than listed.
Regarding CQ:
«CQ» (short for Challenge Quest) refers to a character’s ability to perform in harder content. This mainly refers to Scarlet Devil Tower and Elemental EX Battle Stages. As Elemental EX Battle Stages have much more use for characters with utility, both damage and team support/buffs will be considered for this tier placement. This is where most of a Friend’s tier rating will come from.
In terms of damage, there is now a greater consideration for set up time, specifically how long it takes for maximum potential. The quicker a unit can take to set up their strongest attacks, the more valued they will likely be. Requiring a lot of support from outside sources like teamwide buffs or story cards can also cripple your CQ value.
Regarding Farming:
There are 2 relevant areas in which a Friend farms: event stages and story card stages. Events are rather simple, tasking a Friend to be able to clear a one-wave event stage in about 1 or 2 turns by themselves. If the Friend cannot do that, their tiering is likely lower unless they can satisfy the second category.
Story card stages are what they sound like, stages (usually bosses) that have rare story card rewards to farm. Most of these cards, such as 2-7-1’s (Or the end of Chapter 2 Act 2) Witch of Scarlet Dreams, is a very important, valued card. Naturally, if any Friend can farm one of these important stages by themselves, they can expect themselves to be higher tiered. 1-5-4 and B3 Hifuu LostWord do not count for this criteria, as many characters can easily farm these stages.
A * in a Friends’ Tier List Explanation means that the Friend requires 12SP (MLB and fully Awakened) to farm the stage in question. These currently still count toward their tiering, but is something to be considered for low-SP farming. Being able to farm at lower SP is helpful, but as this tier list considers every Friend at maximum upgrades, it will not impact their tiering and just be noted for the sake of clarity.
Tiering Definitions:
EX Tier Friends are the cream of the crop, and can practically do anything you’d ever need. Insane damage potential, incredible team support, defensive walls, and more can be found up here.
SS Tier is the tier of Friends that are also solid with just little to no flaws. Why are they not up in EX Tier? Simple, EX Tier Friends are usually just that good or have even wider coverage than this tier.
S+ Tier is practically the golden standard for most units. Their role in battles are clear and they fulfill them very well. Most of their kit is flexible for many challenging battles and synergizes well with many other Friends.
S Tier is a drop below S+ Tier, in which the Friends are mainly solid with little else to say. They fill an important role and are very serviceable, but do not do much more than that. This is likely where Friends who just have very solid damage will land, as any tier greater than that requires something more, such as team utility or breaking.
A+ Tier is where Friends begin to become slightly more average, but they still have very solid purposes in battles. Many standard great attackers and decent support Friends can be found here.
A Tier is good, but their kits really limit what they can cover outside of what they were made to do. Usually, Friends that become outdated thanks to better and newer Friends end up around here or A+ Tier.
B Tier is when the Friend in question really only has one niche that keeps them relevant. They definitely still have their uses, but outside of the few they have, they are weak in comparison to the rest of the list. Most higher Friends can do what they already cover in a better way. In addition, this is practically where, even if a Friend can do good damage, their «setup» time is too long to be as good as A Tier or above.
E Tier is the «Not Relevant» Tier. Very outdated Friends or those who have little to no use are placed here. Sure, they might have one niche use factor, but it is so small and easily overlooked that they sadly cannot be ranked higher than here.
However, please remember that, especially for low-tier Friends, they can still have their moments of practicality! Many Friends are rather easy to set up for high damage, even if B and E Tier Friends will likely need a lot more support to be ready.
Additional Note:
The only tier that is currently «ordered» in terms of ranking is EX Tier. Friends in that section are ordered from best to worst of the tier. Otherwise, the tiers remain unordered.
Update Log
2/2/23: The placement of both E1 Koakuma and L80 Youmu under EX Tier are interchangeable.
11/10/22: Fixes has been made for the EX tier and it is now properly ordered once again.
10/02/22: A new tier list revision has been posted! Keep in mind this revision is a temporary measure while we wait for new mechanics like Overdamage and how they’ll affect characters in the future.
Changes can be reviewed here.
6/26/22: Minor Tier Revisions:
Hecatia from S+ to SS, R8 Youmu from S+ to SS, E9 Remilia from SS to EX.
6/24/22: The Tier List has been updated in context to F1 Reimu and the current ranking system. Tiering notes have been added above and many Friends have been moved. Expect a list of the changed Friends in the near future, as well as ordering for Friends outside of EX Tier.
6/23/22: SS-Tier has been officially added, although please wait warmly for F1 Reimu’s release before most placements on the Tier List are solidified.
6/10/22: Everyone has been given a renewed Tier List Explanation that goes into their strengths and weaknesses and where they are present in the Friends’ kits.
6/9/22: The current Update Log has been removed due to length and the Farming and CQ changes being irrelevant to the current tier list build.
5/20/22: The separate Tiering categories for Farming and CQ have been removed. These 2 factors still consider a Friend’s tiering placement, but to assist in simplicity, every Friend has only one place in tiering to consider. Expect a revamp of the Tier List Explanation in the near future as well.
Tier List
Note: The border on a Friend’s tier placement reflects their type:
- Red: General Friends
- Gold/Yellow: Festival (FES) Friends
- Blue: Ultra Festival (UFES) Friends
- Purple: Epic Friends
- Green: Relic Friends
Click on a Friend’s icon or name to access their character page, and «Explanation» gives a brief overview of their strengths and weaknesses.
| Role |
|
|
|
|
|---|---|---|---|---|
|
|
|
|
|
| Obtained From |
Epic |
Relic |
Prayer |
Fes |
|---|---|---|---|---|
|
Ultra Fes |
| EX |
Yukari (C3) The Yukari Yakumo of C3, just like her Friend Type suggests, is quite an Epic unit, which may even be an understatement to her abilities. She is extremely valuable in battle when it comes to keeping the team healthy with HP recovery, Barrier restoration and even multiple Bind Cleanses. She also boasts teamwide offensive utility including Yang ATK, CRIT ATK, and Spirit Power. And from a more individual standpoint, her access to Water and Sun breaks is quite immense, backed up with Freeze anomaly inflictions and breaking, with a powerful Last Word containing 6 lines of Water and Hard Scaling which is off the chain, this Sage of Eternal Summer’s boundaries for her potential greatness in Touhou LostWord are almost limitless! Abundance in Water and Sun Elemental breaks, including 0P Sun and Water in Spread and Focus Shots.With only 2 Non-Elemental bullet lines on C3 Yukari’s Spread Shot, every other line either consists of Water and Sun. With 2 of each on her Spread Shot, and 3 of each on her Focus Shot, and both Spell Cards as well as 6/6 lines of Water in her Last Word, you’ll be more than content with her immense Sun and Water breaking potential! Able to inflict and break Freeze Anomalies.Freeze Anomaly breaks are Solo-Targeting, barring 3P Last Word.At first glance, it seems that her only Freeze anomaly infliction access is on her second spell card with +3 Layers of Freeze on an enemy (3T), but her bullet lines showcase a lot more Freeze infliction to take advantage of, which all have a 100% chance to be inflicted! Take her Solo-Targeting Focus Shot, with lines 1, 3 and 5 and her All-Targeting first spell card, which appears on lines 2, 4 & 6. She can also break these barriers with relative ease too, albeit, on specific enemies. With Melting bullets on her Spread Shot lines 2 & 6 at 1P and 3P and her second spell card at lines 4 & 6, also at 1P and 3P, which are both Solo-Targeting, we are just left with her All-Targeting Last Word on line 6, which is very unlikely for one to use her Last Word just for multiple Freeze breaks when there are other reasons to use it like raw damage, Water breaks, even Bind Cleanse. That being said, against a specific enemy who is susceptible to Freeze breaks, it’s very easy for C3 Yukari to rack up a good amount of Freeze anomalies, which may result in Freeze breaks later on! Massive damage output in general, especially with her Last Word.From a more selfish standpoint, C3 Yukari’s damage is incredible and cannot be underestimated. With the aforementioned buffs as well as bullet line buffs such as +2 Accuracy on both her first spell card and her Last Word, both on Line 1, as well as Yang DEF debuffs on all enemies all over her Last Word, not only will the Summer Sage’s damage be consistent but will also be backed up greatly with a massive Hard Scaling at 175%/0%/0%/175%/175%/185%, contributing to a truly impactful Last Word in terms of damage output! She can also gain +0.75 and +1.25 Spirit Power from her first and second skills respectively, meaning instant access to a fully powered Last Word. It’s also worth mentioning she has a solid range of Killers, with the common ones like Youkai, God and Human which she can really take advantage of with her CRIT ATK buffs. Whatever the situation, you can always expect great things from C3 Yukari in terms of damage output! Provides valuable offensive utility, such as teamwide Yang ATK, CRIT ATK and Spirit Power.Part of what makes this Summer Sage incredible is her additional support on the offensive side, which also happens to have fruitful turn durations lasting as long as 4 Turns. C3 Yukari can use her second skill to boost everyone’s Yang ATK by +3 Stages (4T) and can also take this teamwide buff further for every boost she performs, thanks to her Ability. There is more though, a +2 in her first spell card’s Pre-ATK and a final +2 for the team with her Last Word’s Pre-ATK. CRIT ATK is fairly abundant too, also in her second skill providing +3 for the team (4T) and can take this further for every Graze she pulls off. We also have the ever so valuable Spirit Power UP being accessed in her first skill, adding +0.75 to everyone’s Spirit Power count. We also see a bit of teamwide Yang DEF UP on her first spell card’s Pre-ATK being +3 Stages (3T). All in all, C3 Yukari is definitely a fantastic option for Spirit Power and Yang-based buffs. Unrivaled with teamwide HP recovery, Barrier restoration and multiple Bind Cleanses.No Passives that can mitigate certain Binds or DebuffsAs a unit with the Heal Class, C3 Yukari excels at this very purpose! Starting with teamwide HP recovery, she can recover 80% of it via her first skill and her Last Word’s Post-ATK including a 100% HP recovery. Don’t forget that since C3 Yukari has the highest HP in the game at 9000, being able to also heal your teammates by that much HP isn’t to be overlooked! As for Barrier support, Skill 3 gives the team +2 Barriers with her second spell card’s Post-ATK providing the team +1 more. Finally, being able to cleanse multiple Binds/Stat Debuffs for the team is quite an exceptional feat, executed by her first and third skill, as well as a Last Word Post-ATK effect being able to do so too, meaning 3 different ways to pull this off! Do note however, that C3 Yukari is missing a Passive to handle specific Binds imposed on her, since being locked out of your Skills for a number of turns will be quite a pain. That being said, this is a more situational drawback, meaning it’s just a small gap that this Sage can overcome easily with means such as team support and strategy!
Koishi (F1) With a new color palette, Koishi Komeiji arrives from the F1 universe! While she may not look like much, don’t be fooled as she holds powers that can make a person green with envy (or maybe it’s the Poison she inflicts? Who knows?) Amazing overall damageWith her Last Word being augmented by Little Sister and Sweets as well as a great deal of self buffs on the first turn, it’s no wonder that she can output insane amounts of damage both in the first turn as well as with setup which nearly no other character can hope to match. Her other spell cards are also no slouch as they also contain great killers. Strong survivability with regards to Defense up, as well as barrier restorationKoishi can certainly tank a few hits here and there with the amount of DEF ups that she has on her skills and spell cards. Combined with her 2nd skill restoring her barriers, she can sustain herself in more difficult content, assuming that she doesn’t get her grazes locked. An absurd amount of anomaly breaks, combined with strong elemental coverage to boot.While Koishi does have an insane amount of elemental breaks (and no non-elemental lines at that!) Koishi’s true appeal would be her anomaly breaks, where she can inflict a load of Poison anomalies and break them by herself using her skills and spell cards alone. Inflicts Poison anomalies to the partyUltimately, the only true flaw this character would have is how she debuffs the team with Poison anomalies, which can be somewhat detriment if you can’t afford to graze and are using Yang attackers.
Reimu (F1) As a Friend who has assumedly explored and gone through multiple worlds, Reimu Hakurei from the F1 Universe has certainly proved her title as an Epic Friend. All of her attacks, be it normal shot or spell, have ridiculous power backing them up, she has insane coverage of Wood and Sun elemental bullets, can quickly build up insane early-turn damage, and has the usual defensive utility that any Reimu is expected to have. Doing almost everything perfectly, she currently stands as one of the best Friends in Touhou LostWord Global. Insane overall damage with her shots, spell cards, and Last WordAny attack from Reimu can practically be a strategic nuke in its own right. There’s almost countless benefits to them: 0P Wood and Sun on the basic shots, great buffs that go off during both basic shots and spells 100% of the time, and crazy barrier break potential thanks to a Last Word that both applies and breaks Burn and Paralyze breaks at the same time! Power generation is no problem with her Spell Cards and skillsGetting 2.00 Spirit Power on Reimu’s third skill and granting herself 3P access turn 1 without outside help wasn’t enough for Reimu. She decided that she needed to produce 1.50 Spirit Power upon using her first spell as well, meaning Reimu will almost always attack at her fullest boosts with ease. Tanky due to her passives and 2nd skillReimu’s defensive stats and buffs are good already, but what really seals the deal on her defensive utility is found on her second skill and first passive. Her second skill provides a 50% damage reduction from Youkai enemies to the whole team for 2 turns, a race that is rather common in this game. As for the passive, any dweller of Gensokyo will deal 35% less damage to her, making her easily cover another common type of opponent. Her barrier anomalies can serve to be a detriment to the teamReimu’s main mistake is applying 2 layers of Burn and Freeze to her whole team via her first and second skill respectively. While Reimu herself is unaffected by these anomalies and instead gets buffs, her team will often not be the same, and with an anomaly that is active for 4 turns, more often than not the team will have to Graze in order to remove the debuffs.
Flandre (E1) At first glance, E1 Flandre may appear to be similar to L1 Flandre in the sense that she is all about letting out the heavy damage numbers. However, with her Ultra Festival status and a newfound drive to protect her older sister, the E1 variant goes a very long way to improve the original’s damage output with much better consistency along with some teamwide support. One of the best T1 damage caps. Setup still manages to improve her peak damage.Flandre’s Last Word goes all out: debuffing every target’s Yin DEF by 2 levels, increasing her own Yin ATK by 4 levels, and even raising her CRIT ATK by 2 more levels. Her Critical rate is already high, and combined with Gensokyo Killer bullets, you will see the damage ramp up rapidly very often. It helps that two of her skills increase her Spirit P up to 2.65 (1.00+0.40+1.25), allowing for access to 4 of the 6 bullet lines on her Last Word right out of the gate. Topped with her own Accuracy support, further CRIT buffs, and even more buffs from self-inflicted Freeze anomalies while setting up, and E1 Flandre can end up dealing the most damage compared to anyone else in the game. Good CRIT support with some Spirit Power support to the party.The partywide CRIT support comes specifically from her third skill, which grants 3 levels of CRIT ATK and CRIT Accuracy UP, making for a very immediate boost to any of the party’s critical hits from either Killer bullets or just regular crits. Flandre herself gets even more CRIT ATK and CRIT Accuracy upon applying Freezes to herself, although beware of accidentally Freezing allies that do not gain benefits from being frozen when using partywide self-Freeze inflictions. Even more support comes from her first skill, which grants the entire party 0.40 Spirit Power. While it may seem like Flandre does not boast many buffs, the ones she does provide are rather helpful and the skill cooldowns are rather low to keep constant pressure up. Decent access to both Star and Water elements.She may not boast a 0P basic shot, but the elemental breaks on her spell cards are very impressive. This mainly comes from her first spell and Last Word, which ironically enough share a very similar elemental spread: 3 Star on the first three lines and 3 Water on the last three. If access to these elements wasn’t enough for you, then you can always go for Poison and Freeze anomaly breaks at 2P or 3P of her first spell respectively, two elements that she can easily inflict herself. With how high Flandre’s damage output is, she doesn’t even really need to go for Full Breaks herself, but the ability to do so only makes her better. Low durations on buffs.While her third skill is very good in terms of CRIT support, the buff only lasts a single turn. This is somewhat mitigated by its lower 4 turn cooldown, but it still means that you have to be more precise when optimizing damage while taking full advantage of this skill in particular.
Toyohime (B3) Toyohime, as the one entrusted by Lady Yagokoro with the Plentiful Temple of Wealth and Equality, does her role as a healer well. However, her role goes beyond plentifully strong heals and barrier restoration, and provides team attack buffs to carry on and defeat the enemy with power befitting the Lunarians. She does every role phenomenally, is useful in a large variety of current content, and will almost certainly stay useful in fights to come. 0P Wood on Focus shotPlentiful Water and Moon breaksWhile B3 Toyohime’s elemental breaking can be somewhat of a strange case at times, it is hard to deny her great access to Water and Moon, both of which can be found with 3 each on her second spell and Last Word. A Wood break at 0P of her Focus shot is just icing on the cake at this point. High T1 damage and potential damageBoth Toyohime’s Last Word pre-ATK effects and third skill are able to buff Toyohime’s Yang ATK to very high levels, 7 levels UP alone, to be exact. This buff can even be maximized to 10 levels thanks to Grazing! The Spirit Power increase on her third skill, being a 1.50 increase, allows her to get to 2P at turn 1 for major damage. If that wasn’t enough, the Hard scaling on her Last Word is insane, topped with the Yang DEF buffs she is able to provide herself. Tanky due to characteristics and her skillsEvery one of Toyohime’s skills and even passives has some type of defensive or supportive utility. Her first skill both gives a small 0.25 Spirit Power increase to the party while recovering 70% HP and restoring 2 barrier layers as well. Her second skill is similar in also restoring 70% HP while also differing by buffing everyone’s Yang DEF and applying Focus UP to herself to absorb more damage. To sweeten the deal, her third skill’s Yang ATK buff is also partywide. Her passives, while the second one is only a 60% chance of occuring, are also helpful in tanking damage, especially when battling Youkai enemies. Bind cleanse for the team helps bypass mechanics which the stage hasToyohime has a very unique mechanic on her third skill and third characteristic that dispels either a stat debuff or a Bind, which are debuffs which restrict a character from using a certain action. Obviously, these type of abilities are downright ridiculous in areas such as the Scarlet Devil Tower and even some Main Story boss stages, where the opponents will try to seal some of your actions such as Boost or Graze. Just remember the skill is the one that will help out all allies, while the characterisitc is purely for herself. Breaks are mediocre against multiple enemiesWhile Toyohime having elemental bullets on every part of her spells is impressive, her spread is sadly rather impractical when facing multiple opponents. Her first spell has 6 different elements which makes targeting one weakness puzzling, and even her impressive 3 Water plus 3 Moon breaks on her second spell is only Solo-target. At the very least, this spell also inflicts and breaks Poison anomalies if you still need the extra barrier breaking power. Bind cleanse is random if there are multiple locks/debuffsThis is mainly a precaution more than a true downside. If you have both a debuff and Binded ability, then it is random if Toyohime’s dispelling abilities will actually get to the Bind before the debuffs. It is less random on herself thanks to being able to remove two debuffs in a single turn, but it can be annoying to your allies if Toyohime decides to lift a random debuff instead of the more urgent Bind. At the very least, this is random and the fight can be tried again so Toyohime gets it right next time. Solo Stage Farms: ;2-7-1 (slow), 3-3-3, 3-6-3 (slow), 3-11-1, and Hifuu Code E9
Koakuma (E1) Coming in as the cute butler of the Scarlet Devil Mansion, Koakuma provides the team with a set of skills and spell cards that most characters would dream of having. While she may have the role of a healer, make no mistake as Koakuma can do nearly anything that your team needs her to do! Whether it be barrier breaks, dishing out damage, or abusing her aforementioned utility, Koakuma is sure to serve you well. Excellent Barrier BreaksBarrier breaks are one of the factors that she excels in. Coming out with an emphasis on Metal and Moon elements to offer as well as anomaly breaks, mainly Incineration (burn breaks). Amazing Damage OutputGensokyo and Youkai Killers cover the majority of the cast in the game in which she has access to all her spell cards including her Last Word. This means that she guarantees critical hits against them and thus, ranks her on the high spectrum of damage potential. Additionally, she also has access to Slicing and Hard scalings which further increases her damage with Agility and Defense buffs respectively. High UtilityShe is able to inflict anomalies using her spell card and skills, although she can also do so towards her team which can prove beneficial or detrimental depending on who is slotted in the party with her. The main course, however, is the fact that she is able to dispel her party’s locks just like B3 Toyohime. In addition, she also has the ability to consistently provide YIN ATK + YANG ATK buffs, P UP support, and healing related effects which solidifies her position of having high utility. No Innate Source of CRIT ATK BuffsAs excellent as she is, she has her own demerits as well, one of the most observable factors is how she does not have any innate source CRIT ATK buffs at all. This impedes her damage potential as she is not able to fully maximize her powerful Killers and scalings. Hence, she needs to constantly rely on external sources — story cards and her party’s buffs. Lack of Accuracy BuffsAnother detriment of hers is the lack of innate accuracy buffs as this might result in an inconsistency on her damage values. However, this may be overlooked if she overkills the enemy anyway as she has a relatively high accuracy to begin with.
Youmu (L80) Trained in the art of sword fighting, L80 Youmu will cut through any and all disillusions facing her way, proving herself as your guiding light for present and future endeavors. Extremely powerful and solid support capabilitiesAs a Support unit, the usual focal point is to support the party, which she fulfills in an excellent way. The buffs she provides have excellent duration and low cooldowns, allowing her to constantly supply her party with it and in turn not worry about it much as the fight goes on. Specifically, her 3rd skill allows for infinite YIN ATK and YANG ATK UP buffing with an extra turn to give leeway to potential skill use stalling. Self sustainableThis is an extension to her ability to provide solid support to the entire party as in conjunction to being able to support this well, the unit herself will definitely not be left out of it. Every aspect that she is able to support, whether it be powerful attack buffs, barrier restores, and Spirit Power, will be maximized to its fullest due to low downtime. Wide variety and range of relevant KillersYoumu is able to deal with a myriad of disillusions with her powerful access to a wide variety and range of Killers such as Gensokyo, Parallel Presence, Soul, and Human, with some niche Killers included within. This enables her to dish out an outstanding damage potential due to guaranteed critical hits. Centered around Metal elemental breaksMajority of her attacks revolve around the Metal element, along with some fragmented elements. This allows her to be very useful in regards to Metal based content and at the same time, may limit her usage on other stages that resists Metal. Decent anomaly inflicts and breaksShe is able to inflict Poison to all targets and simultaneously break it at 2.00P using her 2nd spell card. Additionally, her Spread Shot can do the same, albeit only on a single target at 1.00P Poison inflicts to the party may be a hindrance for the partyHer 3rd skill, which provides 2 Poison inflicts to the party, is beneficial for L80 Youmu due to her Ability. However, this can slightly gimp other units in the party who are YANG oriented due to the anomaly’s negative effects. On the other hand, this is quite minor when compared to other anomalies and you can mitigate this via grazing and/or anomaly cleanse. In fact, this can become a boon instead for your party if they benefit from the anomaly itself.
Satori (S2) Chock-full of ways to remove Seals on her party while maintaining strong Defensive and Offensive support, Satori is a powerful Heal-type Friend who can also wreck havoc on the enemy team with powerful Earth and Fire breaks Phenomenal Seal recovery utilitySatori can remove Seals through both her third Skill and her second Spell Card, thoug the latter may target a Debuff instead, depending on your luck. Amazing tankSimilarly, Satori can recover Barriers through her first Skill and her first Spell Card. Further protection can be derived with Focus UP on herself while boasting self healing through Absorb Bullets and her passive. 0P breaks on both Spread and Focus ShotsSatori has a Single Target P0 Fire and Earth breaks on Spread and Focus Shots respectively. Useful for longer fights. Range of Killers falls short of full coverageWhile wide-reaching, There are certain factions Satori cannot reach with her range of Killers, including most Gods and Lunarians.
Satori (L80) L80 Satori is a Destruction class character who specializes in powerful barrier breaks or nuking. Amazing barrier breaking potentialSatori can inflict both Burn and Poison anomalies and break them via her Shots, 2nd Spell Card, and Last Word. Self sustainableSatori is self sustainable in a way where she can replenish her barriers and Spirit P via her Spell Cards, allowing her to take advantage of barrier breaks and potentially graze utility. Her skills also have a decent duration where they can be used to keep her buffs with little to no downtime. Lackluster Spell Card damage (except Last Word)Despite being a DEST-type character, she cannot carry her Crit Accuracy enough to do great damage using her Spell Cards. Additionally, her lack of currently relevant Killers also contribute on her Spell Card’s damage output. If these Killers do hit however, it can prove to output great damage. Does not have a particularly strong team utilityHer team utility is not strong for a Relic character. Her main utility lies on her 1st skill – which boosts the party’s CRIT ACC and ACC plus give 0.75P – and her ability to give CRIT ATK while grazing. However, the latter gimps her ability to stack buffs via her Poison and Blind anomaly self-inflicts.
Remilia (L80) While she may have lost everything in the L80 universe, Remilia continues to resolve the incident to claim back her fate. As the game’s first Relic character, she certainly holds up. With the ability to do great damage and support both Yin and Yang attackers, it’s no wonder why Remilia can hold her own against the best of the bunch. Amazing damage with her Last WordCoupled with the powerful story card, The Heat of My Fingertips, Remilia can do a great deal of damage with her Last Word. Not to mention, Remilia can do well when it comes to barrier breaking enemies due to a decent amount of burn anomalies which she can then break with either her Spread shot or 2nd Spell Card. Good team utility with skills and Spell CardsNot only can she do a good deal of barrier breaks with burn anomaly breaks, but her skills also lend themselves well to this performance. With a strong buff duration of 5 turns on her 1st skill, debuffs on her 3rd skill, and even more buffs to provide the team with her 1st Spell Card and Last Word. The only truly bad thing you can say about these factors would be the cooldown on her skills, which can be detrimental in multi wave stages. Self Inflicting anomalies can create awkward usageUltimately, one flaw that Remilia does have is her barriers. With burn anomalies being useful for her, Remilia has to decide whether to either graze and deal less damage to provide the team with some utility, or keep the burn barriers to augment her power. This also proves to be a slight loss as her only source of barrier restoration in her kit is her Last Word.
Reisen (B5) B5 Reisen Udongein Inaba is your definition of an incredible Yin tank, capable of buffing her Yin DEF to the max while still hitting high damage numbers thanks to huge Hard scaling. Most of her Yin DEF buffs are teamwide as well, and along with the Focus UP she applies to keep the damage on her, Reisen can stay in the battle long while keeping her allies alive as well. If that wasn’t enough, she has great Moon and Star breaking potential on all of her spells, along with possible Blind anomaly breaks on her first spell card and Last Word. 0P Star Focus shotRich in Moon and Star breaks on spellsExtra utility due to Blind anomaly breaks on SC1 and LWReisen’s breaking potential is definitely above average when put next to any other Friend. Every spell of hers has 3 Moon and 3 Star breaks, along with having a 0P Focus shot. Star has always been a useful element to be good at breaking, and her having both that and Moon solidifies her as a top pick for any stage that has enemies weak to those elements. She can also break Blind anomalies via her first spell and Last Word, but the way those anomalies are applied will depend on other Friends. Devastating setup damage potential thanks to heavy Hard scalingReisen can both dish out major damage from the start of turn 1 or when setting up, all thanks her crazy Hard scaling on her Last Word. Many elements of her kit, from her skills to buffs from Boosting to spell pre-ATK effects, contribute toward maximizing her Yin DEF buffs to make her damage go up very heavily. The 4 levels of Yin ATK UP on her Last Word and 2 levels from her second skill also help, obviously. Amazing Yin tank with 10+ levels of Yin DEF UP; with for herself and partyAs mentioned before, all of the elements that increase Reisen’s Yin DEF in her kit end up making her reach the cap of 10 levels of Yin DEF UP. However, additional utility comes in the form of the partywide buffs to both Yin and Yang DEF in her skills, along with 1 barrier restoration on her third skill. Even the Yin ATK debuff on her first spell can be taken advantage of to decrease the damage she takes, further helping her tanking ability. Finally, a shoutout has to be given to her second characteristic, which decreases the damage Reisen takes by 75% when at full HP. Thanks to Absorbing bullets and the 70% HP heal on her first skill, it is very easy to abuse this skill and make her even tankier. As a DEF Unit, she lacks in team-wide ATK buffsIt is the unit type she is classified with, but many of the EX-tier threats have some sort of offensive buff to provide to the entire party. Reisen even lacks substansial defensive debuffs to indirectly buff party members, meaning she has to be brought down a bit compared to the upper top of EX tier. Still, her defensive utility and elemental access is so high, she remains to be a great Friend in her own right. Solo Story Card Farms: 3-3-3, 3-6-3, 3-11-1, Future Story Card Stage
Sakuya (L80) Sakuya emerges as a Debuff-class Friend who shears away the enemy’s defense, allowing her to crush the opposition in no time. Amazing Star and Moon breaksBoth elements feature on all every single bullet line Sakuya has, including options for 0P Star and Moon breaks on Spread and Focus shots. Enables Yang attackers through debuffs to enemy Yang DEF and Crit DEFSakuya’s claim to fame as a Debuff-class Friend manifests in Yang and Crit DEF debuffs from her Spell Cards and Skill. Strong range of killersWith her bullet lines covering Human, Youkai and God Killers among others, she can guarantee a crit on a large assortment of Gensokyo’s cast. Great utility with anomaly breaks and stunSakuya can break Burn and Paralysis anomalies with her attacks, as well as guarantee a stun on a single enemy with 2P on her second Spell Card. Mix of Yin and Yang on most attacks makes her harder to fully optimizeWith the exception of her fully Yang Last Word, Sakuya’s attacks are all mixed, meaning buffs and debuffs to either stat alone only gives her half the benefit. Evasion tanking is nicheWhile Evasion is more of this subtle maid’s game, being able to completely negate damage is generally more handy than a higher chance of avoiding it. Best paired with Friends who want to avoid grazing in order to keep their Anomalies active. Applying Burn to team may hinder certain FriendsNot everyone relishes the Burn quite like Sakuya does, with normal units taking a hit to Yin ATK and DEF unless they dispel it. Synergizes with Friends with Burn converting Abilities such as Reimu (F1), Reimu (C3) and Marisa (C3).
Remilia (E9) E9 Remilia, boasting power befitting the Mistress of the Scarlet Devil Mansion, hits extremely hard. With having amazing support capabilities for Yin nukers and a good amount of barrier breaks, Remilia can do it all. 0P Moon on Spread shotGood access to both Moon and Fire breaks while able to break Poison and Freeze anomaliesBoth Remilia’s second spell and Last Word have the potential of 3 Fire and Moon breaks, with her first spell having 2 of each instead. Her elemental breaking is already good from that, not even considering the 0P Moon on her Spread shot, but she goes on to do well breaking-wise with Poison and Freeze anomaly breaks. With the ability to inflict many Poison anomalies with her spell pre-ATK effects, the Poison breaks on her second spell are only made better, even if they only target one foe. One of the best Yin supporters in the gameAs expected for an Ultra Festival threat, Remilia can easily reach 2P on turn 1, heavily increase her preferred attack stat of Yin ATK, and sprinkle in some CRIT support for good measure. Her Last Word itself might not have the most amazing Hard scaling, but more than makes up for it with the wide-range Gensokyo Killer bullets. Amazing damage all aroundOutside of her Last Word’s self-Yin ATK UP, the Yin ATK buffs that Remilia provide are partywide, making her a great team supporter, especially Yin-wise. Both her first and third skill increase Yin ATK by 2 levels, with the first skill only having a cooldown of 4, making it an amazing back-up buff in extended fights. Barrier Replenish RNG with her 2nd skill can be annoyingRemilia’s second skill is a guaranteed restoration of at least 1 barrier, but there is a 50% chance to replenish an additional one as well. This can be slightly annoying if you’re relying on restoring another barrier to get past a challenging fight. Since she doesn’t get any buffs from Graze, this issue is at the very least only a defensive one. Poison conflicts with her role as a Yin nukerPoison is an anomaly that decreases a target’s Yang ATK and DEF stats, something that Remilia never really takes advantage of in her own kit. The only Yang attacks are in her shots, and it’s not like she needs to debuff the foe’s Yang ATK to tank more hits. Other Friends might be thankful for the Yang DEF debuffs, especially if they don’t benefit from Remilia’s Yin buffs, but these anomalies are likely just going to be used for barrier breaks. Story card farms: 3-3-3, 3-6-3, Hifuu E9*, a Future story card stage.
Reimu (C3) Reimu is here to spend her days playing games featuring her modified Yin Yang Beach Ball to her heart’s content as a Speed-class Friend that’s ready to rumble! Amazing Wood and Water breaks, with 0P Water break on all ShotsEvery bullet from this beachside shrine maiden features either Wood or Water elements, meaning you’ll have breaks for days. Couple this with her 0P Water breaks of both shots and you have a super soaker that any kid would love to get from the Patron Saint of Learning for Xmas! Great base stats contribute to high amount of slicing damageReimu is naturally endowed with big guns, with a staggering 1940 Yang ATK and 1560 Agility at max. This works perfectly with a full Yang kit and strong Slicing values especially on her Last Word (120%/100%/0%/200%/0%/200%) Powerful team Yang ATK and Agility support, able to keep buffs coming every turnReimu’s multiple sources of team enhancements culminates in a crazy 1 Turn Cooldown on her third Skill, which constantly boosts Yang ATK and Agility for her entire team. Great utility with anomaly breaks and stunReimu can break Freeze and Paralysis anomalies with her attacks, as well as guarantee a stun on a single enemy with a 3P Focus Shot Some buffs also inflict Freeze on allies, which may impede themHer zealous dedication to gaming leaves her allies in the dust, inflicting Freeze barriers on them alongside other positive buffs. This can be turned around with a team that synergizes with Freeze anomalies instead!
Marisa (C3) Marisa is surfing into your lives as a Support-class Friend that stands firm against all opposition, empowering almost everything under the Gensokyo sun! Amazing Star and Water break, with some Earth thrown in for changeThe Magician on Vacation packed a suitcase filled with Star and Water, with features on almost every single line of her attacks. The exception is her Spread Shot, which replaces Water with Earth Breaks instead. Fully enables attackers with buffs for most offensive stats as well as waves of Spirit PAlmost anything Marisa does will provide a buff to her team. Using Skills? Using Spell Cards? Even Boosting and Grazing will endow her team with some form of Yang ATK, Yin ATK, Crit ATK, Accuracy and/or Agility buff. This all comes with a bountiful source of Spirit , ensuring her team is ready for fun in the sun all day! Doubles as an immense tank with Team Barrier recovery with strong personal HP recovery mechanicsMarisa’s seemingly unstoppable drive to enjoy her holiday comes in the form of incredible HP Recovery from most Anomalies, as well as her attacks. She can also put up multiple sources of Barriers for her entire team, prolonging any session in the water as long as she wants. Great utility with anomaly breaks and stunMarisa can break Freeze and Paralysis anomalies with her attacks, as well as guarantee a stun on a single enemy with a 3P Spread Shot Personal damage is lackingMarisa unfortunately falls short on her offensive, lacking broad Killers that set her apart from the top of the chaff.
Sagume (B3) Sagume is best for her team utility, nearly unmatched in terms of how generalized the support is. With good barrier breaks and great damage to boot, Sagume can help the team out tremendously. 0P Moon on Focus shotGreat barrier breaks with paralysis breaks, blind breaks, and a decent spread of Metal and MoonB3 Sagume’s breaking potential is rather insane, if the second positive didn’t spell it out for you already. 0P Moon on a basic shot is always good to spam breaks if needed, but practically all of her spells have good Moon access on them, from the 2 on her first and second spell to the 3 on her Last Word. Metal is also spread out well on all of her spells, with even a small amount of Star on her first spell for good measure. Furthermore, she hold anomaly breaks on some spells: specifically Paralyze breaks on her first spell, Blind breaks on her second, and both on her Last Word. She can only inflict these anomalies via spells (either in pre-ATKs or chances during the spell), but the accessibility only makes her easier to synergize well on different teams. High and versatile utilityIf breaks weren’t what you wanted, then Sagume’s heavy utility usage might be what you’re looking for. Outside of a self-CRIT Accuracy UP on her second skill, all of her skill effects revolve around helping the party. Spirit Power restoration, offensive buffs, defensive buffs, barrier restoration… she has all of it! Even her spells join the fun, with her first spell restoring even more barriers, her second spell giving Agility and more Spirit Power, and her Last Word serving as another offensive buff. Sure, she might not be able to fully max out one buff by herself, but the incredible coverage means that she can be paired with any other good attacker, tank, or Technical Friend to easily build up to great stat coverage. Great damage all aroundIf breaks and utility weren’t what you wanted, then Sagume might as well start dealing good damage as well. She is very easy to reach 6 levels of Yang and CRIT ATK UP with due to skills and her Last Word’s pre-ATK effects, the CRIT buff specifically doing well thanks to her Killer coverage. The enemies will even be constantly getting their Yang DEF decreased over the course of the attack, which is in part thanks to being able to reach 2P on turn 1 from her second skill. Cooldown on her 2nd skill makes it more of a one time use than a skill that actively supports the teamSkill 2’s cooldown of 6 turns is the highest of all of her skills, the other ones being only 4 or 5 turns. It is unfortunate since it is a very powerful skill, being her Spirit Power restoration, CRIT Accuracy buff, and self-Quick. If the fight isn’t going on for an extensive time, this skill will likely be a one-use buff that you need to plan ahead to use. Team can become more fragile with self-inflicted Focus down on spell cardsBoth of Sagume’s basic spells will lower her Focus for 3 turns, which can help her survive against some foes, but will also end up having your teammates take more damage than usual, both from being hit by more Solo-target attacks and absorbing more All-target damage. You can take a more bulky unit with some Focus UP to mitigate this, but if you are running a raw offense team, just be wary of the party’s health. Fortunately, Sagume’s high barrier restoration means everyone on the team can at least use more Grazes than usual to avoid damage. Story card solo farms: 2-7-1*, 3-3-3, 3-11-1, and Hifuu Code E9. |
|---|
| SS |
Meiling (E1) Meiling from the E1 universe is a master of guarding, be it concerning gates or even other party members. She will heavily buff her own Yin DEF as well as her team, which helps protect them all while she keeps her own Focus high and even goes back to doing heavy damage thanks to her hefty Hard scaling. She gets to hit hard thanks to Gensokyo-Killer and Youkai-killer bullets, and while her elemental access is a bit flawed, she more than makes up for it with Burn anomaly casting and breaking on her first spell. There’s almost no obstacle that can bypass this gatekeeper when she does her job right. 0P Earth and Metal on basic shotsRainbow-spread of elements hinders specific elemental utilityWhen it comes to elemental breaks, Meiling primarily stands out for her two 0P spamming options in the form of Earth on her Spread shot and Metal on her Focus shot. While every single bullet line on her spells has an element on it, these elements are very “rainbow-like” and target many different weaknesses, making it challenging to truly focus on one weakness of an opponent. Burn anomaly breaks at 2P of first spell, which also inflicts themHowever, Meiling doesn’t really need to focus on elemental weaknesses when she can easily just break barriers right away with her first spell! She casts 2 layers of Burn to all foes upon activating the spell, followed up with a Burn anomaly break at 2P of the attack, giving her very easy breaks to access whenever they are required. She can even break up to 3 barriers if she inflicts more Burn anomalies during the attack, which has a 50% chance to occur. Last Word packs a punch with Gensokyo-Killer and Hard scalingThanks to Meiling’s high Yin DEF buffs, the Yin-only Hard scaling of her Last Word gives her a very easy way to set up and dish out devastating damage. Combined with even more Yin ATK buffs within her kit and access to Gensokyo-Killer and Youkai-Killer bullets, she can easily kick out the invaders when they are done failing to break her defenses. Insane defensive utility for self and alliesNot only does Meiling heavily buff her own defenses on her spells and skills, but these buffs are given to allies as well! This would already help their survivability tenfold, but Meiling makes sure to be a responsible tank and buffs her Focus to high levels to ensure nothing goes by her unscathed. Afterwards, she can quickly heal off any heavier hits with her second skill and go right back to defending.
Yorihime (B3) Yorihime Peace Temple has everything that an outstanding offensive nuke needs: Spirit Power gain, CRIT ATK buffs and CRIT DEF debuffs to back up her Killers, Yang ATK buffs, Accuracy support, and more. Even better is the fact that either most of these buffs are applied to the entire party or the debuffs can be taken advantage of by other Friends. That combined with her large assortment of elemental and anomaly breaks makes Yorihime worthy of the highest tier in the game. 0P Metal on Focus ShotBarrier breaking with elements and Paralyze/Freeze/Poison anomaliesB3 Yorihime holds a pretty varied range of elemental breaks, from the 0P Metal on her Focus shot to her spells. 3 Star breaks on her second spell is impressive, but she also has 3 Fire and Wood breaks on her first spell as well as a fully-Moon Last Word! If that wasn’t enough, she can also break Paralyze anomalies with her first spell (an anomaly which she inflicts upon using the spell), Freeze anomalies with her second spell, and Poison anomalies on her Last Word. Insane damage output on Moon-only Last WordCRIT Attacker on Large Amount of Cast along with CRIT SupportThe Moon-only nature of her Last Word increases the ways she can support the damage of her Last Word with story cards, along with just decimating any foes weak to Moon. Along with the decent Slice scaling on the attack, the bullets have Killers against youkai, humans, and even more to ensure critical hits on a wide variety of the cast. This is where the CRIT DEF debuff of her Last Word and CRIT ATK buff on her third skill come in to optimize her damage even more. Supports Self and Party with Offensive Buffs and Defensive DebuffsThe party can recieve both the Yang ATK UP from her first skill and the CRIT ATK UP from her third skill, helping increase the damage of allies’ Killer bullets or just critical hits in general. On top of that, Yorihime is good great at debuffing the foes, particularly through her second skill, in which many Yang Friends can join in the nuking potential. She even comes with partywide Accuracy support whenever she boosts, making her being at 3P even more powerful. 1-1-3 Spell Card Spread Can Work Against You Without Some Spirit Power SupportYorihime can only reach 2P on turn 1, and a 1-1-3 spread on both of her spells can hurt her damage output and actually limit what she can do otherwise immediately, as all of her anomaly breaks only occur at 3P. Another Friend can try to jump in to assist with more Spirit P restoration, but otherwise Yorihime will be starting off the fight slower than other Friends. Solo Stage Farms: 2-7-1, 3-3-3, 3-6-3, Future Story Card Stage
Alice (L80) Alice Margatroid, while she may have lost her dolls, showcases her newfound power as another Relic character. With a mix of utility for Yin nukers and being a great Yin nuker herself, Alice can and will do her best to help resolve this incident. Last Word can do great damageWith her story card, Sporadically Margaret, Alice deals good damage to all her enemies due to her decent killer range as well as the powerful boost which her Last Word has. However, her Last Word does have the inherent flaw where due to its elemental spread, it may be more difficult to take advantage of its high damage peak. Utility, especially for Yin characters, is top notchWith a mix of Yin ATK up, Accuracy, and Yin DEF down on her skills, Alice can support the team even further with power and barriers on her 1st skill, and her Last Word providing even more buffs and debuffs to support the team. She does hold a bias towards Yin nukers as she lacks Yang buffs for the party, but that’s a small price to pay as Yin nukers can benefit a great deal from her kit. Self inflicting anomalies can create awkward usageMuch like the other Relic character, Remilia, Alice does have an awkward situation with her barrier usage. With her grazes providing the team utility and the anomalies she inflicts herself providing a great damage boost, Alice puts herself in an awkward spot for what she wants to do with her barriers. However, she can mitigate this cost with her 1st skill due to it restoring 2 barriers.
Patchouli (E1) Coming from the E1 Universe, Patchouli Knowledge makes her appearance as the Magician of the Mistress. Boasting a set of powerful tools with damage and utility, her only true flaw would be her barrier breaks, where they may feel clunky to use. Despite this, Patchouli can help your team dish out damage while doing her own share as well Great Damage OutputWith a great range of killers as well as powerful buffs, Patchouli can dish out a great deal of damage that is sure to make all her enemies quiver. This is especially shown with her Last Word, Periodic Table Ring, which has Gensokyo killers as well as Youkai. Fairly Strong UtilityWith a fair amount of anomaly inflicts, Patchouli also provides a decent amount of ATK up, DEF up, and Accuracy on her skills. However, her 3rd skill may come as an awkward use case due to its long cooldown. Cumbersome Barrier BreaksUltimately, her biggest flaw is her barrier breaks, as her lack of focus on a singular or two elements make her relatively inconsistent as a barrier breaker against multiple enemies. Despite this, she can help break barriers through the use of anomalies.
Ran (A7) Ran Yakumo, coming from the A7 universe, comes and shows her power as one of Yukari’s shikigami. While she may be subservient to the sage, don’t take her lightly, as Ran certainly proves herself worthy as a powerful ally to have. With an array of Metal breaks as well as the ability to provide a good amount of breaks, Ran can support the team through it all.
With Ran’s skills and spell cards helping her generate P easily, Ran has very good access to her barrier breaks. As such, her barrier breaks can come really useful, especially if the enemy is weak to either Moon or Metal.
Thanks to Ran’s skills being on a low cooldown, Ran can even provide the team with 1.8P in 5 turns, which can absolutely help the team in terms of accessing their own breaks or help them augment their damage further. Furthermore, Ran also provides a substantial amount of Yin ATK, Agility, and even some Yin DEF to the party. The only truly bad part about her utility, would be the lack of sustainability on her Yin ATK as she does not extend it without a use of either a story card or Last Word.
One thing that does hold Ran back is her damage. Thanks to her lower range of killers and lackluster scalings, Ran can’t hit as hard as some of the more modern friends. Beyond that, her elements hold her back from being a powerful farmer in the current relevant story card stages.
Momoyo (L1) Momoyo Himemushi, is an absolute force to be reckoned with. You can expect nothing less from someone that enjoys combat, and does their best when faced by a strong opponent. Huge Yin attack statsBeing the FES Friend with the greatest raw Yin Attack stats, she can deal lots of damage and has less obstacles for her offensive potential. Amazing CRIT AccuracyReaching -8 CRIT Evasion on her opponents on turn one and having plenty of attacks to reduce it even further makes her able to CRIT a lot. Amazing access to Metal and EarthWith a Solo targeting Spell Card that is fully Earth and an ALL targeting LW that is fully Metal, Solo shots that allow a 0p Metal and a 0p Earth spammable Attack. Access to Poison anomaly infliction and breakingWith her Focus shot being able to break Poison, her Spread shot having access to 2 lines that apply the same anomaly, and her 2nd Spell Card being a potential 3 poison layers to every opponent that can be broken with the same spell card at 2P, and rarely her ability to reflect Poison will get her extra anomaly inflictions, lastly her LW that can break poison, she is able to use the anomaly to her own benefit by lowering her opponents’ Yin DEF or by full breaking them. Low Hard scaling & mediocre KillersHer low Scaling percentages unfortunately limit how much she benefits from her Yin DEF buffs, and her Killers aren’t very common aside from the occasional Youkai Killer. This is somewhat remedied by her high CRIT Accuracy.
Reimu (B3) Reimu is an incredibly good tank, nuker, and breaker for harder fights, having a strong argument for being one of the best Friends in the game for them. Between her Focus UP, high firepower, P0 access to Wood and Sun on basic shots, and incredible self-sustain, she’ll stay alive for a long while and blast away your foes. She’s merely great instead in shorter fights and for farming purposes, but being merely ‘great’ at your worst areas isn’t a bad deal. Great Breaks, including P0 Sun and Wood on her basic shotsHaving two 0P spammable elemental options in the form of Wood and Sun is already good, but the rest of her kit does well in these elements as well. Wood stands out with 3 breaks on her first spell, which Sun overpowering it with 3 breaks on her second spell and 4 on her Last Word. Great Killer bullet types and amazing damage when at full Spirit Power boostReimu might be a defensive-heavy Friend, but she is able to bring this back to dealing damage thanks to high Hard scaling, especially on her Last Word. Said Last Word also contains Killer bullets against Youkai, a rather common opponent in Lost Word. Topped off with her high Yang ATK and DEF buff upon using her Last Word and other setup opportunities, this Shaman can easily summon devastating damage. Fantastic team support, among the best if not the best in keeping a team aliveJust like L1 Reimu, B3 Reimu tries her hardest to be a defensive threat, and her mechanical enhancements only made her better at the job. Her third skill, while having a cooldown of 6 turns, has a long-enduring 3 turns of partywide defensive buffs to ensure that everyone is able to live through the fight. Her second skill, while not healing everyone, is still very good at keeping herself alive due to a 70% heal. Her third characterisitc is even good for this, healing herself by 20% every turn. This combined with her heavy Focus UP helps keep the damage off of the rest of the team, and even lessens it in general. 1-1-3 Bullet layout makes her 1-Turn damage mediocre without Spirit Power supportThe bullet spread of her Last Word is what mainly holds Reimu back, as she can only reach 2P on turn 1 by herself, meaning that many parts of her Last Word are inaccessible until another turn when being used by herself. This heavily hurts her turn 1 or even early damage output, unless she is being supported by a Power Link Friend or gets Spirit Power from another source. Really wants accuracy support for consistencyStrangely enough, Reimu has no Accuracy UP in her kit whatsoever, making her need to rely on other Friends or a story card to help ensure her damaging shots even connect in the first place. Fortunately, both of the above downsides can be solved with support, but still hurt her own farming potential. Solo Stage Farms: 2-7-1 (slow), 3-3-3, Future Story Card Stage
Junko (B2) Don’t let her looks deceive you. Junko’s hatred for Chang’e still runs deep and she shows this with versatile anomaly breaks, good team utility, and great damage to boot. With a powerful kit and the potential to go further beyond, it’s no wonder why she was a threat to the Lunar Capital. Amazing Anomaly BreaksB2 Junko’s breaking potential is just as deceiving as her cute form. She may not have any elemental breaks on her spells, but Junko has exchanged that for a high amount of anomaly breaks. In fact, they’re so ridiculous that here is a basic list of where each anomaly break is located: 6/6 Star Spread ShotIf you really do want the elements though, She does have a fully-Star spread shot. Star is always very nice to have, since many enemies are usually weak to it, and if you want to flex on other elemental breakers by Full Breaking with a Spread shot, go right ahead. High Turn 1 and Potential DamageJunko carries the usual kit that any great turn 1 attacker wants: ability to reach 2P at turn 1 with her second skill, both Yin ATK buffs and Yin DEF debuffs, and a fair amount of Hard scaling on her Last Word to seal the deal. Additionally, while having no elemental bullets may have seemed like a flaw at first, this likewise means it is impossible for a Friend to have elemental resistances to Junko’s spells, only making her attacks even more universally powerful. When combined with set-up potential with her other spells’ Yin DEF UP buffs and anomaly inflictions, Junko can very easily deal some of the highest damage numbers in the game. Decent utility with her skillsWhile Junko’s focus isn’t to buff her allies, she ends up doing well to support them anyway. The buffs on her third skill are partywide, providing a good amount of Yin ATK, Accuracy, and even some Spirit Power to all allies. Additionally, the Yin DEF and anomaly debuffs that Junko applies to foes are indirectly buffs to other Friends as well due to being able to take advantage of the cripplied opponents. Cannot be Fully BrokenIf all of her usage wasn’t enough for you, it is even impossible to Full Break Junko! She has no elemental weaknesses and is immune to every anomaly in the game, meaning she just cannot break her own barriers. It is unfortunate that she does not gain buffs from Grazing, as there would be no concern about being Full Broken after using all of her barriers. Very Spirit Power hungryIn order to reach many of her anomaly breaks, Junko will need to burn through a lot of Spirit Power. Her skills that restore Spirit Power somewhat help, but if you want to reach her strongest stuff, you will likely need outside Spirit Power support from other Friends (either skills or switch links) or certain story cards. Needs team support to bring out full potentialCannot break barriers with her spell cards aside from anomaliesAs mentioned before, Junko has difficultly in applying all of the anoamlies required to take full advantage of every anomaly break she has, mainly exceling in Burn and Poison and not much else. This means that other Friends are likely needed to apply their own anomalies so that they can be broken as well. However, thanks to Junko’s heavy value in other categories, along with good team support, this is not the worst flaw in the world. Solo story card farms: 2-7-1, 3-3-3, 3-6-3*, 3-11-1, and a future story card.
Hecatia (C3) Hecatia Lapislazuli’s Earth form takes on a very tropical style as she brings the opponents down to Earth through debuffing. She especially specializes in Yang DEF DOWN, being able to put 10 stacks of it on one foe, and Freeze anomalies, capable of applying multiple layers on all foes while breaking them afterwards. With a great Yang ATK stat, some high Hard scaling, and even some team utility in the form of healing and barrier restoration, Hecatia stands tall as one of the highest-ranked Friends in LostWord, even if her debuffs can hit some snags at times. 0P Water on Focus ShotGreat Water and Earth elemental access on spellsPlentiful Freeze anomaly inflictions and breaksHecatia has some of the best breaking potential in the game, mainly if she is in a stage that synergizes well with Water and Earth breaks. Not only does her Focus Shot have 0P Water breaks for spamming, but all of her spells have 3 breaks in both Water and Earth to make an easy 3 breaks for either element as long as Hecatia has Spirit Power, something her second skill gives her a good boost in thanks to 2.00 Spirit Power UP. To top that off, she can even apply many Freeze anomalies with her first skill and follow it up with Freeze breaks on her Focus Shot, first spell, and Last Word. Her Last Word can break Paralyze anomalies as well for good measure. Hits well with high Yang ATK and Hard scalingLacking good killers on her Last WordHecatia’s damage potential is great thanks to her bulky 1930 Yang ATK stat, which gets comboed well with high Hard scaling on her Last Word. The 2.00 Spirit Power she can gain from turn 1 allows her to do a 3P Last Word immediately as well. Sadly, none of this damage will really come from her Killer Bullets, as Gensokyo Killer only shows up on her fifth line, while the rest of her Killer Bullets are more trivial. Insane Yang DEF debuff potential (up to 10 levels on one enemy)Hecatia’s Yang DEF potential comes from all of her spells, especially her second spell and Last Word, the former in which debuffs every Yin and Yang stat as well. Hecatia’s third skill joins in the crippling as well, allowing Hecatia to very easily total up to 10 levels of Yang DEF DOWN, the maximum debuffed value allowed. Breaking potential can conflict with Yang DEF debuffs at timesHecatia is all about applying Yang DEF DOWN, a detail that will be explained more below. However, when a foe is Full Broken, something Hecatia can be great at as mentioned above, all of Hecatia’s Yang DEF debuffs will be removed in favor of the penalty applied on Full Break. While her debuff potential is still great, this debuff removal makes it harder to use Hecatia in certain instances, especially when the situation she is in is all about Full Breaking. High Yang DEF debuffs can be excessive, especially without Yang ATK buffs4-5 turn endurance on debuffs unlikely to last if wave or HP Gauge ends earlyHecatia runs into a few more problems regarding her Yang DEF debuffs. For one, 10 levels of Yang DEF DOWN do add a lot more damage than compared to lower debuff values, but more Yang ATK UP would contribute even more damage than that, something that Hecatia cannot do alone and must rely on allies or story cards instead. On top of that, many of her debuffs boast a long endurance of 4 or 5 turns. While this sounds great on paper, debuffs are removed at the end of a wave or when the target loses their HP Gauge. This heavily limits the practicality of long-enduring debuffs, especially considering Hecatia’s third skill has a brutal 7 turn cooldown, something that can be very painful if used at the wrong time.
Miyoi (C3) Miyoi Okunoda (C3) is a Technical-Class Friend who debuffs enemy Crit DEF and EVA, breaks Freeze Anomalies and supports her Yang Attack teammates. Long Duration Crit Buffs and DebuffsAn experience with Miyoi is one to not be forgotten (ironic). She can inflict multiple sources of Crit DEF and Crit EVA debuffs on enemy teams lasting up to 5 turns long. Her allies benefit the same, with Yang ATK and Crit ATK buffs going up to 4 turns long. These long lasting durations give her the flexibility of extending team strategies as needed. B-B-Brain FreezeWatch out for that Dr Eirin she’s serving up! Miyoi has multiple sources that inflict Freeze Anomalies on enemies, with her Spell Card 2 both dropping and breaking them in a single breath. Unfocused ElementsAlthough Water features heavily in her kit, she shares her other bullet lines with Moon and Star, with her Last Word holding all three elements. This lack of focus takes away from her breaking and damage potential, splitting it up with potential resistances that enemies may have. Odd KillersFor such a beach focused character, Miyoi does a LOT of damage to her fellow beachgoers, with Aquatic, Swimsuit and Summer Killers all lined up in her bullets. Her other Killers aren’t as far reaching, meaning she’ll have to make up for that with Crit ACC, though she stands to shine against others in the C3 World.
Yuuka (H5) Yuuka’s scientific love for flowers translates into a Technical-Class Friend who weeds out her enemies with ease with powerful killers, potent Blind and Poison mastery and Wood/Star bullets. Great damage with room to growWith Yuuka’s wide reaching killers, decent buffs and debuffs, Yuuka can dish out a good amount of damage with options like her 1st Spell Card or her Last Word. Her damage can still improve with more buffs, as well as a future card to come. Powerful breaksA spread of 3 Star and 3 Wood on all her Spell Cards make her breaks powerful against enemies who are weak to these. With her 2nd Spell Card, she can also break Poison and Blind anomalies, which improves her already impressive breaks. A unique thing to note is how she inflicts more Poison anomalies to whoever she was targeting which can be useful in staggering enemy breaks. Support is lacking in most areasWhile her 1st Spell Card has the very powerful niche that is a guaranteed Stun, her utility otherwise is not great. With fairly long cooldowns on both her 1st Skill and 3rd Skill and her Spell Card utility not being as impactful as it may suggest, Yuuka’s utility falls on the lower end of the spectrum. Anomaly usage is awkward to utilizeWhile she does gain buffs from Poison and Blind anomalies, Yuuka also has incentive to use up her barriers for accuracy. Thus, her usage of self-inflicted anomalies and grazes can very frequently come in conflict with each other.
Mokou (L80) Fujiwara no Mokou (but with a cape) comes from the L80 universe as a HEAL-type unit. Providing great party utility and anomaly breaks, there’s not much she can’t do for your team. Strong and widely accessible anomaly breaksPaired with The Witch of Scarlet Dreams and her Skill 2, Burning Evidence, and with the right setup, Mokou is able to provide either herself or her team with an anomaly break every turn with her Spell Cards, along with her Spell Card effects providing massive amounts of team utility and enemy debuffs. Good variety of party buffsMokou’s party buffs come from every which-where in her kit. Her Spell Cards provide the team with HP recovery and Yang DEF up, meanwhile her skills and passives allow her even more team HP recovery, even more Yang DEF up, bind and stat debuff dispels, Yang ATK up, and even Accuracy up. Aside from party Spirit P up, it seems there’s almost nothing Mokou can’t bring to the table. Elemental-type spread on her Spell Cards are very disjointedMokou’s Spell Cards are a bit of a mash-up of various elements. Her Spell Card 1 has an even mix of Moon and Star, meanwhile her Spell Card 2 has an even mix of Moon and Fire. In comparison to other characters, it would be ill-advised to use her as a primary source for breaks. Inflexible with skill optionsMokou’s skills, while great on paper, can be difficult to use to their maximum potential. The biggest example of this would be her Skill 2, Burning Evidence. This one skill has party bind/stat debuff dispels, Yang ATK up, and own 2 Spirit P up. Hypothetically, if you were ever in a situation where you needed to dispel party binds but needed to save the Spirit P up or Yang ATK up and Mokou was one of your only options, this would be trouble as you are essentially having to use the other parts of her skill suboptimally.
Utsuho (S5) S5 Utsuho Reiuji is an Attack-class Friend who can support the team with CRIT buffs, Spirit Power buffs, and Defense debuffs. Strong skills and pre-attack effectsUtsuho’s skills enable her to easily reach 3.1P in 1 Turn while providing the party with CRIT, Accuracy, and YANG ATK buffs. Her Spell Card 1 and Last Word’s pre-attack effects also enable her to debuff enemies’ defense. Powerful Breaking AbilityThanks to her ability to reach 3.1P in 1 Turn and the fact that she can inflict Burn to her enemies, she will have an easier time reaching the full potential of her barrier breaking abilities whether it be through elemental breaking or through anomaly breaking. Lackluster damageWhile she has strong skills to boot, her niche Killers and disjointed debuffs resulted in her damage being lower than expected. Be wary of party Burn inflictsJust like S5 Rin, her 3rd skill has the side effect of inflicting Burn to the party, which is usually unfavorable due to the negative effects it brings. However, this is not a problem if her party is immune to it, and even turns into a boon if they benefit from it.
Rin (S5) S5 Rin Kaenbyou is a Speed-class Friend who hits fast and heavy, Blinding her opponents while supporting Yin Friends and keeping them safe from harm. Powerful Yin attacker with Water/Earth, Blind setting and breakingRin’s ability to ramp up her Yin ATK and Agility means she can very quickly build up the momentum she needs to wreak havoc on enemy teams, especially when taking into account the Slicing scaling on her Last Word. Healthy element breaks coupled with sources of Blind breaks on almost all her attacks will result in enemy teams very quickly being full broken under her assault. Good Yin support means her teammates can follow suit while staying guardedRin doesn’t have to be the period at the end of your attacking sentence. Feel free to continue the attack with your teammates after providing them with the Yin ATK and Agility they need to crush the enemy. Should battles stretch longer, Rin has several sources of Barrier recovery for her team as well. Low cooldown on Skill 1 means easy chaining of buffs and constant supply of Spirit PRin’s Skill 1 can be refired every 2 Turns, meaning she can reapply Agility and Accuracy buffs to her team constantly, while fuelling them with Spirit P for harder hitting attacks. Can remove Debuffs or Seals on herself.Rin’s second Skill doubles up as purification for any pesky Seals or Debuffs landed on her. Especially useful when looking to solo challenging content without needing to also cleanse fellow team mates. Lacks powerful KillersRin’s spread of Killers are fairly specific, allowing her to perform well on certain groups of enemies but not on others, limiting her damage output. Watch out for friendly BurnRin’s 3rd Skill has the unfortunate side effect of also inflicting Burn on her allies. Consider pairing her with Friends who appreciate this anomaly, such as Utsuho (S5), Reimu (F1) or Megumu.
Reimu (A6) Reimu’s a bit of everything — solid All targeting damage, good Spell Cards for Arena, Accuracy support, and good Breaks. She lags a bit behind the highest tier of attackers, but she’s definitely great all the same. Solid Breaks, including P0 Solo-targeting Wood on her Spread ShotA6 Reimu is your example of an above-average breaker, covering 2 elements very well. She may have only a 0P Wood break on her Spread shot, but her spells make up a lot of Wood and Sun breaks. This comes from 4 Wood/2 Sun on her first spell, 4 Sun breaks on her second spell, and 3 Wood and Sun breaks on her Last Word. Very high damage, in farming and hard fights alikeReimu must have been a score-based player back in Embodiment of Scarlet Devil, since two of her skills provide Spirit Power so that she can reach 2P at turn 1. Her buffs on her skills may be simplisitc, but they are still party-wide in the forms of Yang ATK and Yang DEF UP. Topped with further Yang DEF from her first spell and the great Hard scaling on her Last Word, Reimu can easily reach some great damage numbers. It helps that she has rather decent Killer bullets, specifically Youkai-Killer. Provides Accuracy supportAccuracy support from Reimu comes in two forms: party-wide Accuracy UP from her third skill and the Evasion debuffs on her second spell. Combined with the other skills that provide team support (especially the short 4 turn cooldown from the second skill), Reimu can definitely support Friends while still being strong in a longer fight. Doesn’t have quite the scaling of other top tier units for harder fightsThis downside mainly comes from the way the rest of the competition naturally has higher stats (Ultra Festival Friends have higher stat counts than Festivals), but Reimu will just naturally not hit as hard as the rest of the top tier competition, let alone if she’s by herself. She can still dish out good numbers, but it will be smaller when compared to many Ultra Festival attackers. Solo Stage Farms: 2-7-1, 3-3-3, 3-6-3, Future Story Card Stages
Sunny Milk (A6) Sunny Milk (Scarlet) is the ideal Friend, offering team Accuracy support, Spirit P generation to kickstart battles and a boatload of debuffs to demoralize the enemy team. Add that to her stellar element and anomaly breaking ability and decent evasive/defensive bulk and you have yourself a powerful ally worthy of any Yang focused team. Teamwide Accuracy SupportSunny Milk covers the basics of any team’s requirements with team wide Accuracy Up on her third skill, Light Up. This transitions easily into her second perk… Low Cooldown on SkillsHer third skill has a great cooldown time of 3 Turn at max level. Her other two skills require 4 Turns to cool down. This is plenty given that her first skill debuffs enemy team Crit DEF and EVASION for 3 whole turns, while her second skill provides her 1 Spirit P and Quick. Amazing Barrier Breaking UtilitySunny is stuffed to the brim with Sun lines, clocking in at 3 Sun on her first Spellcard which does AoE damage, and a whopping 6 Sun on her second Spellcard which does Single Target damage. Her Last Word does 2 Fire and 4 Sun on all enemies. She also has Blind breaks in her kit, allowing her to do so at 2P with her first Spellcard, and at 3P on her Last Word. Finally, she has an easily accessible 0P Sun on her Focus Shot, allowing her to whittle away barriers in a pinch. Lack of KillersWhere Sunny Milk falls short are her unusual spread of Anti bullets, none of which are common enough to see usage outside certain content. Expect to see Anti-Human bullets lines work the hardest for her, as she sweeps Gensokyo’s regular citizens off their feet.
Marisa (A6) Featuring very high damage, reasonably solid Breaks, and fantastic support for CRIT & Killer units, this scarlet mist fighting witch is a very potent Friend. About the worst you can say about her is that she can’t hit the highs that the most damaging Friends can, and that CRIT & Killer support is perhaps somewhat narrow. P0 Fire on a Basic ShotComing in hot with a 0P spammable Fire break on her Focus shot, Marisa actually has a great niche in Star breaking. All of her spells have at least 3 Star breaks, with her first one even having 4 instead, giving her a great access to this common elemental weakness. Extremely damaging and frontloaded All-targeting Last WordMarisa has a 3-1-1 bullet line spread on her Last Word to make sure enemies feel the pain immediately. On top of that, she can easily raise her own Agility for good Slice values and buff her Yang ATK for overall more damage. Fantastic CRIT and Killer SupportMarisa doesn’t directly help her Friends with teamwide buffs, instead supporting them by heavily crippling the foes’ CRIT defensive stats. With a lot of CRIT DEF DOWN and CRIT Evasion DOWN on both her spells, as well as some more CRIT DEF DOWN on her third skill, Friends with great CRIT stats or just good Killer bullets will heavily appreciate the extra damage they’ll get while with Marisa. Doesn’t quite hit the damage levels of other meta unitsWithout any additional scaling or heavy damage niches, Marisa’s damage still doesn’t land her on the extreme end of most nukes. Solo Stage Farms: 2-7-1, 3-3-3, Future Story Card Stages
Keiki (L1) Keiki Haniyasushin may be a god capable of creation, but her abilities in LostWord give her a lot of destructive capabilities as well. With a Last Word that is powerful with setup time without even needing Killers, plentiful amount of elemental and anomaly breaks, and a good range of support on top of that, there is almost nothing inherently wrong with what Keiki has to offer. Even her slight downsides, mainly backloaded damage and some short-lasting buffs, can be worked around to create a nearly flawless figure. 0P Earth on Focus shotAmazing Earth, Star, and anomaly breaks on spellsPoison on second spell can be immediately broken at 2PKeiki’s barrier breaking potential is one of the best in the game. Element-wise, she gets a spammabe 0P Earth break from her Focus shot and a good mix of Earth and Star on all of her spells, along with an Earth-only Last Word. If that wasn’t enough, her second spell contains Poison anomaly breaks at 2P and Burn anomaly breaks at 3P. As an All-target spell and the ability to inflict 2-3 Poison anomalies before attacking, this makes her second spell both good in elemental breaks and an immediate 2-3 breaks on any foe not immune to Poison. Incredible setup damage via Last WordUnderwhelming turn 1 damageKeiki has a backloaded (1-1-3 bullet spread for boosting) Last Word, which isn’t common but still makes her immediate turn 1 damage less than ideal. Luckily, it doesn’t take much effort to make that damage ideal, especially with a second skill that gives her 1.50 Spirit Power to get closer to the elusive 3P Last Word. As an entirely Earth, Yang, and Heavy bullet attack with Human-Killer bullets, Keiki can easily set herself up to do some amazing damage, especially when using all of her self-Yang ATK buffs. Team utility in the form of CRIT and Yang supportKeiki is a lot more than just a selfish attacker, thanks to both her debuffs via spells and buffs on skills. Both her second spell and third skill debuff the foes’ CRIT DEF to allow Friends with good critical hit chances or Killer bullets the chance to deal even more damage. On top of that, every Graze used can grant all allies up to 3 levels of Yang ATK UP for a single turn to assist Yang nukes. She also can use her first skill for 3 levels of teamwide Yang DEF UP, along with minor Yin ATK UP from her third skill to cover both offensive bases.
Hecatia (L1) The Goddess of Hell is an absolute force to be reckoned with. With hard hitting Spell Cards, a good Elemental layout, and bending the power of anomalies for her own benefit, and In terms of raw stats, she has the one of the highest Yin attacks, only beaten by some Ultra Festival Friends. So if you’re ever in a pinch, relying on her is the right thing to do. Good Elemental accessAlongside having a 0p Star Spread Shot, every Spell Card of hers has an element. She mainly has Star and Moon breaks, with a few Sun and Fire breaks on her 1st Spell Card and Last Word respectively. Extremely high Turn 1 damage as well as set up damageDue to her having so many Gensokyo Killer bullets and buffing herself greatly in addition to her amazing raw stats, she deals extraordinary damage on turn one. She also has amazing damage output with a setup, which is made easier because of her ability. Self-inflicts anomalies which allows her to counter fights which inflict anomaliesDue to her Ability, Freeze anomaly attacks grant her +0.20P, and every layer of poison grants her 1 level up of Yang ATK, Yin ATK, CRIT ATK, and CRIT Accuracy. Beside giving her easy buffs, Poison also protects her against other anomalies when all her barriers have an anomaly inflicted. Good Barrier Management is needed to use her full potentialKnowing when to graze and when to activate her Skills is important to maximize what she can do with all the benefits of the anomalies. This can prove difficult to manage at times. No notable UtilityHer only Party buffs are Yin ATK and CRIT Accuracy, which are on her 2nd Spell Card and 3rd Skill respectively. This isn’t bad, but when higher tier units do more, she can be underwhelming relative to them. Solo Stage Farms: 3-6-3(!), 3-11-1, E9(!), 3-18-3, Future Story Card Stage (as part of a duo)
Youmu (B3) The Lunar War version of Youmu simply does utterly unreal damage in short and hard fights alike, thanks to her dual scaling combined with a 1-2-2 All targeting Last Word and Spirit Power UP on turn 1. She also packs solid teamwide buffs for Yang ATK, Yang DEF, Agility, and Accuracy, and can do some Paralyze infliction for further accuracy support (though it’s not quite enough to use for Breaking purposes). Great Breaking ability, including P0 Water and Sun on basic shotsB3 Youmu’s 0P coverage of Water and Sun is only the base of her great access to these elements. Her first spell boasts 4 Water breaks, her second spell has 3 Sun breaks, and her Last Word tops it off with 4 Sun and 2 Water. Being able to both spam these elements if needed and just dish them out in general makes for a very useful application for many fights. Utterly incredible damage in both short and hard fights, both on her Last Word and Spell CardsBoth of Youmu’s spells increase her own Yang DEF, an attribute that is able to help increase the damage of her spells even more due to some small but useful Hard scaling. Their damage output in general is just great, especially her Last Word due to bulking up her Yang ATK by a staggering 5 levels for a single turn. Solid teamwide buffs, including Yang DEF, Yang ATK, Agility, Accuracy supportAs stated above, Youmu’s supportive utility is very varied and especially helpful for Yang-focused Friends. Yang DEF and ATK for the whole party comes from when she Boosts and Grazes respectively. Even more Yang DEF is given to the party through her third skill, and Agility is even given by her first skill, which can help Slice-based Friends. Finally, Accuracy is provided by her second skill to make sure everyone’s damage output is more consistent. Bad Killer bullet types, making CRIT support necessary for maximum damageYoumu mainly covers soul-like presences or Lunar Capital residents in terms of Killer bullets, generally harming her critical hit output. Without any major CRIT ATK or Accuracy buff access on her own, she needs to rely on other Friends for them. With the buffs she provides back, hopefully it is a rather equal exchange. Solo Stage Farms: 3-3-3, Future Story Card Stage
Hecatia (B3) Hecatia Lapislazuli (B3) is a Support-Class Friend who bolsters attackers of all types, keeping them safe from harm while also exterminating any daring enough to attempt to cross her threshold. A Gate to Powerful Offensive BuffsStored within this form of Hecatia is a bountiful source of buffs that lean towards Yin attackers. She can easily max out party Yin ATK and DEF levels (great for Friends who have Hard scaling) via a combination of Skills, Spell Cards and Graze/Boosts. Slicing Friends also benefit from Agility buffs, and Yang attackers aren’t left behind with her Spell Card 2 providing Yang ATK buffs. Additionally, she fills out team Accuracy and provides a constant source of Spirit P, providing teams the firepower they need to excel. A Defensive GatekeeperMeiling now shares her unique role with Hecatia, who brings defensive buffs and other forms of protection to the table. Asides from giving her team Yin DEF, she can also reduce Moon Damage to the team by 50%, and recover team Barriers. Additionally, Hecatia takes 35% less damage from Youkai enemies; leaving a broad swathe of Gensokyo unable to do more than dent her exterior. Shockingly BrokenHecatia breaks Paralyze barriers with frightening efficiency. Spell Card 2 will inflict and break 2 layers of Paralyze on all enemy targets, while her Last Word doubles this, inflicting and breaking 4 whole barriers at once. This is very certain to result in entire teams being Full Broken, leaving them open to retribution from her teammates should any survive the initial hammerfall. Unfocused ElementsHecatia struggles with carrying the mantle of her three roles, which materialize as Moon, Star and Sun bullets. This lack of focus means that she’ll be dividing her damage potential between elements that may not be effective against enemies, reducing her total output. |
|---|
| S+ |
Seiran (B3) Seiran (B3) is a Speed-class friend who supports Yang Agility teams with Water and Moon elements while stopping enemies in their tracks with Freeze and Paralyze anomalies. Powerful Damage SynergyAll of Seiran’s knowledge comes to bear with the plethora of synergies in her kit geared towards inflicting pain. A combination of Yang ATK and Crit ATK buffs for herself and debuffs on her enemies gives her a good head start while her Agility scaling lends her a good burst of speed. Her ability to deal 30% more Water and Moon damage on enemies weak to those elements will leave her opponents rooted to the spot as the hammer comes rushing down, the moment of impact made sweeter by the range of killers she has, which include Youkai, Kaiju, Moon Rabbit, Fairy, Machine and God. There won’t be much left to clean up when she’s done with her opponent. An Anomaly in the RanksSeiran is able to manipulate both Freeze and Paralyze Anomalies to her favour, distributing them among her enemies and breaking them in wide sweeping ALL attacks that cover her Spell Card 1 and Last Word. She can do the same on a single enemy that has Burn applied to them with her Spread Shot as well. Stunning PresencePlayers looking to devise stall based strategies will enjoy Seiran’s ability to guarantee a stun on her 3P Focus Shot. This works well with her high base Agility stats and Agility buffs, ensuring she can pin enemies down before they have time to even blink. Could use more buffsSeiran has a decent kit to start with, but it doesn’t give her very many levels, even when maxed out. She can use a Friend or Story Card to help boost her levels of Yang ATK, Crit ATK and Agility further to maximize her output.
Sakuya (E1) The Vampire Hunter arrives at the scene and befitting her title, she comes with tools to dispose of anyone who tries to fight against her. E1 Sakuya goes above and beyond to complete her mission to eradicate the Scarlet sisters and she proves this with her CRIT buffs. Amazing power generation.Sakuya will never be short on Spirit P, with her Spell Cards generating more of it with every use, while her skill keeps her fueled from the get go. A good spread of elements on her Spell Cards with Sun and MetalThese two go hand in hand as Sakuya can use the power generation that she has with her skills and Spell Cards to break multiple barriers that her enemies would have. Sakuya’s 3/3 spread of Sun and Metal on both her 1st and 2nd Spell Card break multiple enemies with ease. Last Word has great damage setupHer Last Word, while not necessarily capable of insane damage on the 1st turn, can deal some great damage with setup. With a high peak due to her Last Word’s backloaded scaling of 1-1-3, Sakuya can make use of Yang ATK buffs to pump up her damage, as her Last Word only provides her with 2 levels of Yang ATK. However, thanks to her skills and pre-effects on her Spell Cards and Last Word, CRIT buffs are easily capped. Selfish character with little utilityUltimately, what holds Sakuya back would be her lack of utility outside of CRIT buffs. While the CRIT buffs that she provides can be really powerful in the right hands, these buffs may not impact the field as much as other buffs due to who can possibly take advantage of these buffs. Solo farms: 3-3-3, 3-6-3, 3-11-1, 3-18-3, Hifuu E9.
Koishi (C3) Strong anomaly breaksWhile she may have a primary focus on Star elements, Koishi’s barrier breaks are at their best when utilizing anomalies to break. With strong access to Freeze anomalies, she can full break with ease an enemy on the first turn, assuming they are weak to one of her elements. Powerful Power supportOne powerful utility tool she has is her ability to provide the party with a large amount of power. With her 2nd skill providing the party with 1.2 P, she augments this further with her Spell Cards and Last Word providing more power, allowing her teammates to be more liberal with their boosts. Disjointed skillsWhile she functions as a YANG nuker and accordingly buffs YANG ATK, her DEF DOWN skill debuffs YIN DEF — this allows her to function with YIN teammates, but will be less useful in YANG-oriented teams where she is stronger. Lack of powerful killers hamper her damage potentialDespite her strong initial burst of damage, her lack of powerful killers limits her growth on setup
Suwako (A10) Suwako proves to be the best out of the other A10 Friends, suiting her well for being her source game’s Extra boss. She holds a great front in the Metal-element department and an even greater one when it comes to Spirit Power restoration. On top of that, she holds great finishing power in her fully-metal Last Word and some anomaly breaks on her normal spells. Able to spam barrier breaks with her Spell Cards and skills generating power.Suwako might not have a 0P break option, but the Metal breaks on her spell cards are just great. Both of her normal spells have 3 Metal along with 3 of another element, while her Last Word is entirely made up of Metal. On top of that, her first spell can break Freeze anomalies at 3P and her second spell can do the same to Poison anomalies, which she inflicts when using the spell, at 2P. These may sound like hefty Boost values, but Suwako has so much Spirit Power generation on her spells and two of her skills that this is an easy bar to reach.. Good damage potential with her Last WordA pure Metal Last Word means Suwako will be chasing down exactly one damage type, and excelling at hitting with it. Helps that it also boosts her entire party’s Crit ATK by 3 levels, setting her up for some nice rolling damage. Okay team utilitySuwako achieves decent team utility from her skills and ability. Her second skill provides partywide Yang ATK UP and her third skill grants the team CRIT ATK UP, something her Last Word provides to the whole team as well. Topped with the CRIT Accuracy UP given to the party everytime Suwako Boosts, something that is easy with her quick Spirit Power gain, Suwako is a decent support option when it comes to offensive buffing. High damage varianceSuwako has a Yang-only Last Word that has good damage potential after setup. However, this damage will rely a good bit on critical hits, a factor that her Killer bullets are not that great at ensuring on their own. She has secondary effects to increase CRIT chance based on the foe’s stats, but this is still putting faith into the enemy she is facing over guaranteeing great damage by herself.
Yukari (A7) Yukari (A7) can farm multiple current Story Card Stages, has a ton of elements and high tier Last Word damage, ranking up there with some UFES. A Well-rounded Friend who fits well in farms as well as CQ. Powerful teamwide Yin and Accuracy supportYukari keeps herself strong through many offensive buffs of both types, as well as very good early Hard scaling on her Last Word and even other spells. She can even get up to 2P turn 1 with her third skill to do a lot of immediate damage if needed. To top it off, Yukari has a nice variety of buffs in the form of Accuracy, Yin ATK, and Yin DEF buffs on her spell, and even a barrier restoration on her first spell. Great overall damage.Yukari has access to Human, Youkai and Gensokyo Killers, running the full gamut of the realm and almost anyone in it. Saddle her up with Crit ATK buffs and watch the numbers roll. Very flexible due to ease of supporting.Not only does Yukari do a lot, but she can do a lot relatively fine on any setup. Despite being a mixed Yin and Yang attacker,she can easily buff both her Yin ATK and Yang ATK and do so well in either that it doesn’t matter if she is paired with other Friends. Combined with her varied support as well, and you have a Friend that can serve many purposes in battle. Unfocused Rainbow elements.All of Yukari’s spells have an element on them, for better and for worse. She gets decent coverage of Fire and Metal on her second spell and Water and Wood on her Last Word, but her first spell is an uncomfortable mix of Star, Water, and Earth. With all of these different elements, Yukari may have an easy way to break many types of barriers, but for challenging quests like Elemental EX Battle Stages, her breaks will feel a lot more limited.
Flandre (L80) Flandre is a defense role character, who focuses primarily on Star breaks and protecting the team with guards. Powerful star breakerFlandre can deal a lot of Star breaks, not only with her Spell Cards, but also with her Basic Shots. This can enable some potential gimmicks which only Flandre can do, especially with her Basic Shots targeting all enemies. Defensive capabilities can buy the team extra turnsWith her power to outright prevent Star and Moon damage for the party, defense buffs, and abilities that can make any damage taken at full health to a negligible amount, Flandre can absolutely buy your teams some extra turns to complete a challenging fight. Lackluster damageOne of Flandre’s biggest flaws, ironically, would be her damage output as while her Story Card can compensate for some damage loss, it will never compare to being able to hit common killers like Gensokyo Dweller or Youkai. Too focused on a singular elementWhile focusing on a singular element may sound appealing at first, it reduces how flexible a character can be for multiple stages unless they truly stand out with phenomenal firepower, support, or even both. As Flandre struggles to offer either of these, she only is truly capable of being effective in Star only.
Satori (C3) C3 Satori has come to defend your team with barriers, defense ups, and focus to boot. Great survivability for both herself and the partySatori has a good deal of Yang defense and can heal herself with her 1st skill. Combined with her 3rd passive reducing damage significantly at full HP, her 3rd skill outright nullifying damage from Liquid and Water bullets, and more barrier restorations on her 1st skill and Spell Cards, she can survive some brutal hits while helping the team with Focus. Provides a lot of barriers and defense ups for the teamShe provides multiple barriers with her 2nd spell card, 1st spell card, and Last Word. At the same time, she can also provide more defense ups with a strong preference to Yang on her 2nd skill, Spell Cards, and Last Word. Awkward barrier breakingOne major problem that Satori has would be her elements, or lack of focus on one element. Without anomaly breaks to help supplement this, Satori fails to effectively strike what she wants to nuke easily. Lacking in self buffsHer only source of YANG ATK UP comes from her 3rd skill, not to mention that she has no source of CRIT ATK to take advantage of her damage. This results in her effective damage can be weaker than anticipated without external support.
Parsee (L1) Parsee’s debuffs are great for any Yin-based team, her element density is high, and her personal damage isn’t half bad either. She doesn’t have any significant drawbacks while being a solid choice for many teams. Incredible elemental break potential, including 0P Water and Sun on Solo Shots.Parsee has an All-Targeting first Spell Card with 4 lines of Sun, while her second Spell Card (Solo-Targeting) has 4 Metal with an additional 2 Sun. She tops this off with her Last Word with 4 Sun and 2 Water, with additional Freeze anomaly break potential at 3P. Decent Debuff potential with CRIT DEF and Evasion.Parsee’s various sources of Crit DEF and Evasion debuffs means your teams are always ready to hit hard. Lack of strong Killers.Her Killer range consists of just Soul, Fairy, Princess, Noble and Treasure. Hardly all-encompassing. Lean on Crit ACC if you want her to reach her full potential. Otherwise limited team support.Even if you count the above enemy debuffs as team support, it’s still rather limited, as the most notable team buffs come in the form of her Ability to grant the team +1 Yin ATK for every Boost performed. Exclude the debuff potential and that’s pretty much it for what she can do for the team. This isn’t all bad as Story Card effects and other teammates are always an option.
Miko (A13) Miko has come to terms with her Attack Class to become the Defense Class and do a pretty damn good job at being one. With her main appeal being Yang DEF buffs, she not only applies them to the whole party, but she ends up giving out a huge amount thanks to a mix of spell effects, skills, and 1-turn Boost and Graze buffs. Of course, she still has a good offensive game thanks to self-Spirit Power UP and some Hard scaling on her Last Word. Although her variety of elements on her spells is way too high, she has a few anomaly breaks to make up for it, and it still does not undermine her party support potential. Some elemental anomaly infliction and breaking via spells.Miko can inflict both Burn and Paralyze on all foes with her second spell and follow it up with Solo-target anomaly breaks of both anomalies with her first spell. The amount of anomalies inflicted is random, but Miko is at least ensured 2 breaks as long as the foe isn’t immune to one of the anomalies. Powerful Last Word paired with high Yang stats.Miko’s high Yang offense comes from two sources: her high Yang ATK stat and her high Yang DEF that is buffed even further with several parts of her kit. For reference, she can easily produce 6 levels of Yang DEF UP in 1 turn without even using a spell or skill as long as she Boosts and Grazes 3 times. Thanks to her Last Word’s Hard scaling, these contribute greatly to her overall output. Great tank.The 6 levels of Yang DEF that Miko gets off of maximum Boosts and Grazes is a partywide buff, meaning everyone can join in on the fun! Even greater is her Barrier restore potential, as she restores one layer of the party’s Barrier with her first spell and 4-turn cooldown first skill. Rainbow-element bullet lines on Spell Cards can be a hindrance.Miko’s elemental access is a very mixed bag. She does have a spammable Sun option via 0P Sun on her Focus shot, but the rest of her elements are pretty mediocre. The rainbow spread on her spells, or just elements of very different types, makes it hard for Miko to lock down on a single elemental weakness. At the very least, her Last Word is a fair mix of Sun and Water to make it practical on enemies weak to either. Lacking multiple Focus UP options for tanking.Miko is definitely good at tanking hits, at least on the Yang-side of things, but unlike other tanks, she lacks consistent ways to raise her Focus to keep those attacks on her and not her allies. Her first spell grants 3 levels of Focus UP while her second spell does the same for an extra turn, which isn’t terrible. However, for extended fights, Miko will definitely have some issues catching up with Focus when compared to the best tanks.
Koishi (A11) While you may not notice her, being wary of Koishi’s existence is in your best interest as she’s a Friend that will make your journey much easier with her absolutely massive 1880 Yin ATK, great breaking and damage. Great damage all around, and almost entirely AoEKoishi’s output is held in place with her strong core of base stats, accuracy and a mix of buffs and debuffs to Yin ATK/enemy Yin DEF and Agility which scales with her damage.Being fully Yin also makes her easy to support. Minor Extra SurvivabilityKoishi gets 1 Barrier regen on her 1st Spell Card, and her Passive Skill recovers 1 Barrier 50% of the time at the start of every turn. Live life long! Selfish damage dealerOutside of Accuracy, Evasion, and Agility, and the few AoE Yin DEF downs, she doesn’t support her team with anything big. She’s not bad in this regard, but she certainly gets outdone compared to other units. Lacks any Crit buffs on her kitHer Killers aren’t amazing, which means Koishi will need full Crit support to optimize her output.
Youmu (R8) The Mysterious Sword Master, Youmu Konpaku is a devastatingly powerful nuker, with outrageously high Slicing and a Last Word that’s amongst the highest of damage dealers for both farming and harder fights. She has no team utility besides breaks, but she hits so hard it doesn’t really matter, cutting down even time itself. Great Elemental Break density and diversity throughout her Shots and Spell CardsMetal, Fire and Wood features heavily on Youmu’s bullet lines.. Good Spirit P generation on attacksShe may not be frontloaded, but her shots can build up Spirit Power whenever needed at a decent rate to make up for a lack of a Spirit Power-restoring skill. Really wants CRIT and Accuracy support for best damageYoumu is a selfish buffer, keeping all of her spell and skill buffs to herself. The only teamwide buff is via Boosting, which even then is only Agility, which helps some Friends but not everyone. Even worse, without good Killer bullets or self-Accuracy buffs, she will need even more support in the form of Accuracy UP and CRIT Accuracy UP.
Kaguya (B3) B3 Kaguya Houraisan is an extremely powerful Friend who is an easy pick for any meta-focused player. Unlike other top tiers who just try to heavily increase their Agility for Slice scaling, Kaguya goes for a more evasive approach in…increasing Evasion. While other Friends may have random Evasion buffs or Accuracy debuffs as downsides, B3 Kaguya can keep up the Evasion for so long that it can be a viable option! It also helps to be Ultra Festival, granting her very high Yang ATK and Agility stats. Very high damage potential on Last WordHigh Slice scaling and decent Killers (Youkai Killer hits so many things) means Kaguya’s Last Word will hit most enemies like a truck. Just grab some Crit ATK and you’re good to go! Extremely high Spirit P collection rate.Kaguya converts her self inflicted Paralyze and Blind barriers into Spirit P. No pain no gain (except she’s immune to these Anomalies). Needs Crit and Yang ATK buffs to function at her best.Kaguya does not have strong Yang ATK buffs and will need some support to hit higher levels. Her damage could also be improved by CRIT ATK due to her Youkai-Killer bullets, but she lacks these buffs as well. Outside of Evasion and Agility utility, she does not have any other party utility to speak of.Kaguya’s heavy focus on Evasion is something that really only works during certain challenging content, and otherwise is still a risk of just failing spectacularly. Because of this and her focus of buffing Agility for the whole team (to a good extent, at least), Kaguya lacks any other relevant team support for extended fights.
Nazrin (L1) This little commander packs a lot of support in her arsenal, including Yang ATK, Agility, and Spirit Power for the party. Not only does she do a fantastic job at her role, but her elemental breaks for Water and Metal are very plentiful, and for General Friend standards, Nazrin is definitely one of the best. Generally great access to Metal and Water breaksNazrin both has a good spammable elemental break in the form of a 0P Spread shot and good access to elements overall. Her first spell is a generally decent 3 Water breaks to all foes, while her second spell can be 4 Water breaks along with 2 Metal breaks. Her Last Word is also good at elemental breaks, having 4 Metal and 2 Water to help slap any foes weak to either element. Decent Killers.Nazrin has access to both Human and Youkai Killers, which covers a good spectrum of Gensokyo under her critical eye (Haha Crit joke). A ton of support.Every one of Nazrin’s skills has a buff that can assist many kinds of Friends, from Agility on her first skill to Accuracy support on her second skill to Spirit Power and Yang ATK on her third skill. Even her spells can be used for team support, most notably the 0.7 Spirit Power on her first spell and the Yang ATK and Agility teamwide buffs on her Last Word. Flimsy with low Yang DEF stats.Even with a character ability that allows herself to increase Yang DEF when boosting, Nazrin’s low Yang DEF can be pretty fatal when facing Yang-based opponents, as she isn’t really built to tank hits. Try pairing her up with a defensive tank to ensure she survives to be a good assist. Low Slice scaling.On the other side of the pendulum, Nazrin suffers from weak Slice scaling, which gimps her overall damage output.
Marisa (Z1) Marisa Kirisame, the Witch of Scarlet Dreams, is an incredibly powerful and versatile unit. With a mixture of a devastatingly powerful All targeting Last Word that deals incredible damage for farming and harder fights alike, two All targeting Spell Cards, an abundance of team support, and Elemental Break access second to none, the Witch of Scarlet Dreams does it all. Full ALL targeting on Spell CardsEvery spell in her arsenal is All-target to make sure no one feels left out on the Burning or hurting. Self Charge makes her easy to supportMore allies can stack on debuffs with their own Last Words before Marisa sweeps in for a finishing blow. Also great at supporting othersMarisa provides Evasion DOWN, CRIT Def & Evasion DOWN, and Burn Barriers to support her and her teammates. Weak Spirit Power generation on her shotsFor such a Spirit Power-hungry Friend, not getting much from her basic shots can be somewhat damaging. While her second spell produces Spirit Power as well, you might want to have more boosts before using the spell. On top of that, her first skill only provides 0.75 Spirit Power, meaning she is unable to reach 2P on turn 1 without extra Friend support. Lack of relevant KillersMarisa’s Killer bullets cover only Incident Resolvers and Scarlet Devil Mansion residents, with her Last Word not even having the luxury of that minimal coverage. This means that she will heavily need to rely on CRIT Accuracy to hopefully land critical hits. Even her own CRIT Accuracy support, on her third skill, only lasts for one turn, making it difficult to fully take advantage of over a long fight.
Alice (A7) Alice Margatroid is a speedy yet strong attacker with fantastic breaks. Watch her decimate Paralyze and Burn Anomalies while piling on rainbow elements. Follow that up with a large amount of Yin ATK UP for more damage, Agility UP and heavy Slice scaling for even more damage, and even a few Yin DEF debuffs on her second spell, and you get a magician who can do almost everything. Paralyze and Burn anomaly breaks on All-target spell card, which she can inflict herselfAlice can break Paralyze and Burn anomalies via her first spell, which is All-targeting to maximize breaking potential. With the ability to inflict up to 4 of these anomalies on a single target with her second spell, Alice can easily break a lot of barriers by herself and even more with potential team support. Heavy Yin ATK and Agility buffs for very high damageAlice is a pure Attack-type Friend, heavily raising both her Yin ATK for amazing Last Word damage as well as Agility to get a good amount of Slice scaling at the start of the attack. Unfocused Rainbow elements.The only spell that hits the mark above average is her second spell, with 3 Metal and 3 Earth breaks. Her first spell and Last Word, unfortunately, are rather mixed in many elements and aren’t really good at elemental breaks, instead at higher risk of losing damage to elemental resistances. Low team utility.Alice’s buffs are mostly for herself. She gives a few of the Yin ATK and Agility buffs to the whole party, but not enough to stand as a worthwhile support.
Aya (A9) Flower Aya is very potent in terms of utility and breaking. To be more specific, she provides unseen accuracy support to her team and a solid array of debuffs in addition to 2 Blind anomalies. In terms of breaking she excels due to her P0 break shot and a wide variety of breaks. Good Turn 1 damageWith a slightly frontloaded Last Word with a bullet scaling of 2-2-1, Aya can definitely deal some good immediate damage, especially when using her third skill to reach 2P immediately. Plentiful debuffs to Evasion, Accuracy, and Yang DEFAya’s main role is debuffing, especially in the field of Evasion via her first spell and first skill and CRIT Evasion via her Last Word. Since she gets self-Quick, she can easily apply this CRIT Evasion DOWN before other CRIT-heavy Friends take a shot at the opponents. On top of that, she gets a little defensive debuffing through her third skill, which debuffs all foes’ Yang DEF by 2 levels. Reliant on Killer bullets to deal sufficient damageSadly, since a lot of her kit is focused more for slightly debuffing foes rather than heavily buffing herself, Aya’s damage will not be the greatest unless you hit her Killers, which are very spread out and may not always hit when you need them the most.
Shion (L1) Shion’s got two jobs: saddle your opponent with a ton of Yin & Yang DEF DOWN and some Burn Barriers, and delete one opponent from existence with a extremely potent Solo Last Word. She’s good at hard fights, she’s good for farming, the only thing she’s not stellar at is that her Break ability is just kinda average. Still, she’s so good at everything else it’s hard to care, especially since DEF DOWN doesn’t work with Full Breaks. +Extremely strong Solo-target Last Word that’s also frontloaded, making her good for farming and hard fights alike +Devastatingly powerful DEF DOWN debuffs — Breaks are merely average
Marisa (B3) Marisa’s simply among the strongest units in the game’s history, Possessing superior firepower (in more ways than one), and a ton of support to boot (mainly for Yin and CRIT, and to a lesser extent Yang), she’ll obliterate anything in her path, and singlehandedly farm every fight in the game to boot with some manual play. + Good Element access, including P0 Fire and Star on her basic shots. + Incredible damage output. + Great support for Yin & CRIT attackers, with decent support for Yang attackers. — Bad Spirit Power generation on her shots. — CRIT DEF support is situational. Solo Stage Farms: 2-7-1, 3-3-3, 3-6-3
Sakuya (A6) The maid with a hint of scarlet mist has a wide variety of abilities to make herself stick out, primarily from lowering the Yin DEF and Evasion of every opponent or increasing the Yin ATK of herself as well as her allies. Even with a Solo-target Last Word, Sakuya makes up for that with an array of All-target spell cards that have a great amount of Fire and Moon breaks along with basic spread and focus shots that have 0P Metal breaks. + Every spell card bullet is elemental; plentiful Fire, Metal, or Moon breaks + Support through Yin ATK buffs and Yin DEF/Evasion debuffs + Powerful Yin/Fire-only Last Word Solo Story Card Farms: 3-6-3
Yachie (L1) The Matriarch of the Kiketsu Family is a formidable unit with access to Water and Wood breaks, and an ALL Wood Last Word. While Yachie’s utility isn’t the most impressive thing about her, her Yin ATK boosts and Scaling for Hard and Slice are not to be overlooked. Powerful Last Word, especially when paired with her best story card.Yachie is a very unique Last Word nuke due to getting scaling from both Hard and Slice, giving her reasons to buff both Yin DEF (since it is a fully Yin attack) and Agility. Her skills do both of this, and with a Gensokyo-Killer at 2P, Yachie’s damage easily hits ridiculous numbers fast. Very solid Yin DEF and Agility SupportYachie’s second skill is a partywide Yin DEF buff for 2 levels over 3 turns, making her actually decent as a defensive side-support. Both her second spell and first skill serve as Agility buffs for the party, and doing a rather good job at that. She even gets direct offense support via Grazing, which buffs the party’s Yin ATK. Low barrier restoration is problematic, especially when using Graze for Yin ATKHaving 1 barrier restore on her third skill is definitely not a bad thing, but for a Friend who wants to spam Graze for Yin ATK buffs, having to use barriers for reasons such as defending will make her barrier and Graze access more limited than the usual Friend.
Yuuka (A6) Yuuka Kazami is a healer role character, who is focused around nuking with Sun elements and has some additional utility. Powerful sun nukeAs befitting of the one who hangs around the Garden of the Sun frequently, Yuuka’s sun breaks, as well as damage potential are all great. Thanks to her large amount of Sun breaks as well as good access to Youkai killer, Yuuka can do extremely well against common enemies. Good at enabling and breaking barriersWith her power to outright prevent Star and Moon damage for the party, defense buffs, and abilities that can make any damage taken at full health to a negligible amount, Flandre can absolutely buy your teams some extra turns to complete a challenging fight. Low utilityDespite her 3rd skill having powerful effects tied to it with a dispel and 2 party barriers, Yuuka’s utility is not particularly impressive due to the high cooldown on the skill, as well as overall weak supporting ability. Too focused on a singular elementWhile it can be taken as a strength, too much focus on an element can make her rather cumbersome in more difficult content, and Yuuka has this problem with her focus towards Sun elements, albeit compensated by her killer range.
Reisen (A8) Eternal Reisen fixates herself on her ability that allows her to deal a lot of damage in a very short amount of time to enemies weak against the elements she applies. Because of this, she is very useful for farming and at the same time, harder fights that could make use of her breaks and high damage output. Breaks at anomalies on P2 of Spell Card 1Reisen can break any anomaly with her first spell…provide you find a way to inflict them beyond Paralyze and Blind on her kit. Bring other Anomaly inflicting Friends for the ride Very high damage for both hard levels and farmingReisen’s Last Word damage is simply very good, giving herself 4 levels of Yin ATK UP before beginning and having some great Slice to pair up with her Agility buffs. Great team-wide Agility buffsReisen may not do much teamwide support, but she can at least raise the party’s Agility a fair bit with her second spell and third skill. Granted, not everyone might need these buffs, but Friends with Slice scaling that need more Agility will appreciate it. Doesn’t scale nearly as well as other top tier units for longer fightsWhile Reisen can easily max out her own Yin ATK, she lacks Crit related buffs to capitalize on. Crit Evasion debuffs will only go so far. Bring some Crit ATK support to keep her doing healthy damage.
Youmu (A7) Youmu is a powerful CRIT and Killer enabler with a potent All targeting Last Word, fantastic for harder fights and solid for event farming. Good access to Water and Metal Breaks, including P0 All targeting Metal on a Basic ShotYoumu both breaks Metal at 0P with her Focus shot and does good elemental breaks on her spells. She has 4 Metal and 2 Water on her first spell, with the revese on her second spell (4 Water and 2 Metal). Her Last Word goes for a good mix of Wood and Moon if needed, heavily outpacing her L1 self’s Moon access. High All-targeting damage on Last WordJust like the L1 Myon, Youmu powers both her Yin ATK and Yang ATK before using her Last Word for major damage. Her damage is a bit backloaded, but if set up with the defensive debuffs of her other spells, then Youmu will definitely show off her sword mastery with flying colors. She even gets a good variety of Killer bullets for good measure. Fantastic support for CRIT and Killer attackersYoumu has a great first skill that buffs both CRIT ATK and CRIT Accuracy of the party to serve as very good CRIT support for Friends who need the accuracy or the attack buff for Killers. Backloaded damageYoumu requires heavy Spirit P expenditure to hit a lot of her bullet lines.
Reisen (B3) Lunar War Soldier, like her Gardener comrade, is a more balanced fighter of the six Lunar War fighters; not outright excelling in one field of combat but instead doing very well in most of them. Reisen can guide everyone well in the front lines of battle. Very good turn 1 Last Word damageWhile not a frontloaded attack, her Last Word can still do heavy damage right off the bat at 2P thanks to an incredible 5 levels of Yang ATK UP upon use. She even gets 5 levels of Yang DEF UP to support the huge Hard scaling on the attack. Furthermore, she debuffs the targets’ Evasion to serve as great accuracy support and hit even more bullets. With already good turn 1 damage, her set-up damage only makes her stronger. Provides good attack and defense supportMany parts of Reisen’s kit are able to provide good team utility. Grazing gives the party Yang ATK UP, she can give the party Yin DEF through Boosting or her third skill, and the Evasion debuffs on her spells indirectly serve as accuracy support to everyone. To top things off, she can even restore a barrier via her third skill and heal the party for 25% of her HP through her first skill. Accuracy debuffs are situationalReisen’s spells and skills obsess a bit over debuffing the opponents’ Accuracy. While it can definitely get you through some tight scenarios, the debuffs are definitely not as globally useful as what the rest of her kit boasts. Mediocre KillersReisen’s Killer bullets only target Moon-related entities, something that not a lot of Lost Word foes can say they have. In order to optimize her CRIT damage, she will need support in the form of CRIT ATK and CRIT Accuracy.
Saki (L1) The steed of Prince Shoutoku serves to provide plentiful barrier breaks and a strong hitting single-targeting Last Word. While her utility may not be the best for most characters to take advantage of, the other aspects of her kit compensate for this downside and help make her useful in nearly any piece of challenging content. Amazing Elemental access rivaling the best in terms of barrier breaks.Not only does Saki contain two 0P spammable break options in the form of 0P Wood on her Spread shot and 0P Fire on her Focus shot, but the rest of her spells’ breaks are just outright good. Her first spell is 4 breaks of Star and her second spell covers 4 breaks of Wood, with 2 Fire spread out for those two. Saki more than makes up for the firepower with a Fire-only Last Word, solidifying herself as a great elemental breaker. High Turn 1 damage which can be increased with CRIT support.Without a backloaded Last Word, Saki’s Solo-target damage potential turn 1 is better than other backloaded competitors. Thanks to her Gensokyo-Killer and Human-Killer bullets, however, she can easily rack up even higher numbers with a little bit of CRIT ATK support. It helps that her damage doesn’t fully rely on critical hits either, thanks to some decent Slice scaling and other buffs. Main sources of team utility are locked to her 2nd Spell Card and Last Word.
|
|---|
| S |
Meiling (L1) Once, Meiling was the weakest friend in the game. Now, she has been buffed to the point of being one of the strongest. For event farming, she’s among the strongest candidates, she is also capable of farming chapter 3 act 1 in conjunction with Tewi. For harder fights, she packs amazing damage, good team support, and above average element access, including P0 Earth on her Focus Shot. You can’t go wrong with this gatekeeper, and she’s absolutely deserving of being called one of LostWord’s stronger Friends. + Above average Element access, including P0 Earth on a Basic Shot + Extremely strong Last Word that scales well into longer fights + Good team support
Sanae (A10) The Sanae from the incident involving the mountain gods fills a very clear role: offensive Speed-type Nuking. With high a Agility stat, Agility buffs, and a heavy Yang ATK stat to coincide with her Yang-only, Slice-heavy Last Word, she will certainly give the foes a run for their money (or faith?). Outside of this, Sanae can provide some Yang ATK and Agility buffs for the party, but her team utility is still low and her elemental breaks can be rather mixed. + All-target 0P Star on Spread Shot + High Yang ATK + Lots of Barrier restore for longer fights — Unfocused team support, with only a couple levels of Party’s Agility, Evasion and Yang ATK UP throughout skills
Koakuma (A6) Very good supportive capabilitiesThe cute scarlet-haired nameless devil gives it her all as a Support unit to support her party by providing a wide variety of buffs. Her Yin-based support capabilities are above average and can be convenient to have if you want to easily set up offensive buffs for the party. She is also able to support the CRIT and Accuracy department via her Spell Cards, which can prove beneficial most of the time due to how crucial both buffs are in having consistent and high damage outputs. For universal support, she is capable of adding barrier layers and granting high Spirit Power to the party, not to mention that she can easily provide 1.50 Spirit Power UP to the party through her skills alone. Her Skills are also good in terms of cooldowns but not as amazing as other Support units. Disjointed elemental breaksHer Spell Cards have some fragmented elements embedded within, which is usually not a good sign. However, her Spell Cards and Last Word’s main elements can be easily accessed at 2.00P so it’s a fair trade perhaps.
Flandre (A6) Flandre shows the power of an Extra Stage boss as a Speed-type character who is focused on Star and good turn 1 damage. Decent turn 1 damageDue to the amount of Yin ATK buffs and Yin DEF debuffs that she can inflict on the enemy on her first turn, she can easily deal a large amount of damage on her first turn. Team utility with regards to Yin nukers, as well as Power support.Thanks to her low cooldowns, Flandre has the ability to support the team with Spirit Power and Yin DEF debuffs, while also providing Yin ATK by boosting herself. Her spell cards also help out by providing even more buffs and debuffs to the team. Aside from Star, lacks strong elementsHer elements, aside from Star, lack focus which can make her tedious to use outside of Star oriented content. Peaks early on, but doesn’t scale well due to lack of strong killers.While her initial burst of damage may seem great at first glance, her killers, or lack of wide reaching killers, make her damage with setup not as impactful.
Ringo (B3) Ringo (B3) a Technical-Class Friend who balances a range of roles, supporting Yang teams, increasing her side’s survivability and dropping heavy Anomalies on both allies and enemies alike. Major Anomaly GamerRingo drops Paralyze on enemies with two of her Spell Cards, while breaking them with all of them. She can also land Burn with her Focus Shot, with her Last Word breaking those as well. Stun lock metaThe ever useful guaranteed 3P Stun on a Spread Shot makes Ringo ideal for scenarios where you need to stall for a few turns. Enables Yang attacking teamsRingo can boost your team’s Yang ATK and Crit ATK via Skills, Grazing and Spell Cards. Low defensive synergyWith part of Ringo’s kit dedicated to lowering enemy Yang and Yin ATK, you will likely have to deal with situations where those debuffs get wiped when she, or any of her Friends inadvertently Full Breaks the enemy. This is especially easy to do, with her penchant of dropping and breaking Paralyze barriers on her opponents. Lacks damageRingo’s Last Word suffers the unfortunate side effect of being divided cleanly in half by both Element and bullet type. A minor setback, given that there’s a card that buffs both bullet types at once, though with stronger Story Cards likely to show in future, this may limit her growth potential. Her lack of Killers cements this as well, targeting a very specific niche of enemies only. Beware team inflicted AnomaliesRingo’s electrifying personality may not be appreciated by all Friends. Bring along allies who benefit from Paralyze barriers, or be careful with popping Skill 1 in battle, lest someone ends up being stunned mid-turn.
Mike (L1) Mike shines best as a Yang Support member who provides Accuracy and Spirit P to her team, boosts EVASION and lays down decent Metal cover fire against the enemy. Teamwide Accuracy and Spirit P supportMike boosts team Accuracy with her first Spell Card and provides everyone Spirit P with her first skill. A nice little boost to ensure battles run smoother. Decent Metal breaksMike has a useful 0P Metal on her Focus Shot, and 3 lines of Metal (and Star) on her first two spellcards. Her Last Word includes a modest 2 lines of Metal. Empowers Yang focused teamsMike’s third skill boosts your team’s Yang ATK and Crit ATK, while her Last Word further boosts team Yang ATK and DEF. Support falls short of the required amount to hit 2P boosts on Turn 1At max, Mike can only provide 0.75P up to her entire team. While not unsubstantial, this means teammates will need a little more of a push to hit 2P. This will either come from their own reserves of Spirit P generation, an ally who can give Spirit P to their team, or through hitting the enemy and taking hits on Turn 1. Dilution of elements in Last Word takes off some of her edgeHer Last Word comes with a balanced 2 Metal / 2 Water / 2 Sun loadout, spreading out her breaking and damage among the three elements. Beware any resistances! Evasion tanking is less reliable compared to barrier recoveryWhile the idea of never getting hit is tempting, it’s simply not as ideal as being able to drop grazes into the field. Still worth considering if you’re the type to conserve barriers for anomalies that provide team members buffs.
Satori (A11) Satori (A11) provides valuable Crit support to herself and her allies, laying all opponents bare with her mind reading abilities. A power assortment of Fire, Water, and Metal breaks couple together with Freeze anomaly breaks that will leave any opponents frozen in their tracks, unable to respond to her onslaught. + P0 Water Break on Focus Shot + Can both set and break Freeze barriers Satori brings freeze anomalies into the mix, laying them down on both her 3rd skills, her Spread Shot and her 2nd Spell Card as a post effect. She can then choose to break these with either her Focus Shot (as at 2P) or her Last Word at 3P. + CRIT and Accuracy support helps for setting up big damage Her second Spellcard, Recollection: Philosopher’s Stone boosts team Crit ATK, which is then further bolstered by her Last Word, Memory Fault Crash which increases team Crit ATK while debuff the enemy team’s Yang DEF and Crit DEF. These work in tandem with her 3rd skill, Confirmation Bias which lowers Crit DEF and Crit EVA by up to 3 levels, leaving enemies ripe for the plucking. — Backloaded Last Word dampens 1T farming slightly — Large mix of elements of her AoE Spell Card makes it difficult to target elemental breaks. Her second Spell card spreads out across a veritable Philosopher’s Stone worth of elements, hitting Earth, Fire, Water, Wood, Metal and then Earth again on her 3P bullet line.
Kisume (L1) Kisume, hiding in her bucket like always, shows up as a CRIT oriented character. While she may have okay CRIT support and self-sustaining Yin ATK, Kisume does suffer from a lack of Accuracy as well as somewhat inconsistent damage due to the nature of DEST characters. + Decent Crit support + Decent Fire access — Lacks Accuracy
Ichirin (L1) If Ichirin Kumoi had to enter a fistfight, then she definitely knows what to bring with her: the cloud spirit Unzan! This nyuudou is an excellent offensive tool, not only hitting very hard when using Ichirin’s Last Word, but even bringing her to 3P after enlarging himself! Ichirin supports her ally through CRIT ATK buffs, although these are mainly for herself and not other Friends. At the very least, she has a small amount of teamwide buffs and some elemental breaks to make her a nice and strong Friend on her own merits. + 0P Metal on Spread shot + Very high CRIT ATK buffing + Reaches 3P immediately due to third skill — Selfish attacker with very little team buffs
Misumaru (L1) Misumaru Tamatsukuri takes full advantage of creating the yin-yang orbs by mixing up Yin and Yang within her attacks. While at times this can hurt the way her Last Word is only Yang, she still comes through as a great Friend in terms of a variety of buffs, debuffs, and barrier breaks via Earth and Star or Blind anomalies. + 0P All-target Earth break on Focus shot + Buffs herself a decent bit for a strong Last Word + Variety of Yin, Yang, and CRIT-related buffs and debuffs
Takane (L1) Takane Yamashiro is a Technical Friend that actually does a lot for the rest of the team as well as herself. While she can buff her own Yang ATK and CRIT ATK to very serviceable levels, she also debuffs all opponents’ Yang DEF and CRIT DEF for a similar outcome for the entire team. Combined with her great Wood breaking and decent Metal/Paralyze breaking as well as great Last Word for damage and Human-killer purposes, Takane is one of the better Yang attackers to bring out to battle, benefitting herself and other Friends. + 0P All-target Wood on Focus shot — Can’t really take full advantage of Paralyze anomaly breaks on shots + Sets up good damage all by herself + Includes partywide offense buffs and enemy debuffs for utility
Yamame (L1) Yamame Kurodani, an earth spider living in the underworld. She doesn’t use her ability to control illness but she still deals big damage, has amazing access to Earth, and is overall a selfish Speed type nuker with great Slice scaling.
Looking into her kit in more detail: -Lack of team utility Story Card Stages: 3-3-3, 3-18-3
Eirin (A8) Eirin Yagokoro from the Eternal Night Incident is still on the defensive, leading her to go all-out in terms of damage and offensive medicine. Instead of healing her allies, you can bet this doctor will steel herself with defensive buffs via applying Poison and Blind on herself while applying the same anomalies on foes to keep them unhealthy. To finish them off, Eirin goes for a Yin-based Last Word filled with Human and Youkai Killers to make sure they will never solve the mystery of Eientei! + 0P All-target Moon on Focus shot + Niche in Poison and Blind anomaly breaks + Good Yin nuking potential on Last Word thanks to Killers + Slight CRIT and Yin support
Kanako (A10) Kanako (Faith) is a powerhouse, dealing incredible damage and even providing some buffs to CRIT ATK and Yin ATK to the team, as well as debuffing the enemies’ CRIT DEF. Her breaks are average, and strong in the Metal department. +Amazing damage due to self buffs, Hard Scaling and Killer Bullets. +Good metal breaks, decent breaks in general. -Team utility is alright, nothing outstanding.
Reisen (B3) Reisen, as the Peacekeeper of the Capital, shows her power as a supporter to her team. With good access to elements and utility all around, Reisen can help the team out through a variety of ways. Her CRI ACC and CRI ATK support helps critical reliant teams who would like to boost their critical damage. + Decent Breakings throughout shots and spells + Boost Based Teamwide P — Her 3rd skill, while spammable, has low buff durations Solo Story Card Farms: 3-3-3, 3-6-3, and E9.
Yukari (L1) A tank with an All Last Word that starts off weak but scales well with Power and unparalleled access to Barrier recovery, Yukari Yakumo is better at keeping a team alive than any other Friend in the game. She’s not very well suited to farming, due to the lack of punch on her Last Word at 1 Power, and for shorter fights her defensive utility is mostly meaningless. But for any harder fight that goes on for multiple turns, between her team-wide Barrier recovery, Yang DEF Up, and her own personal exceptional access to Focus, Yukari is a tank who can babysit just about any team, buying you valuable turns to ensure victory. She’s no slouch offensively either, packing an All Last Word that deals tremendous damage at 3 Power, as well as slightly above average access to Barrier Breaks. + Access to Earth on a Basic Shot at 0 Power + Very solid damage on All Last Word at 3 Power + Unparalleled team-wide Barrier restoration, restoring 2 Barriers every 5 turns team-wide — Utility is entirely defensive, leaving her somewhat lacking for shorter fights
Nue (L1) Nue Houjuu is a powerful Yin Attacker with great break potential among Star, Fire and Water Elements. Not only does her ability allow immunity to Burn, Freeze and Blind but she also gains Spirit P from them upon self infliction. With plentiful access to Yin ATK buffs, this mysterious being should not be taken lightly. + 0P Water and Fire on Basic shots + Lots of Yin ATK UP and Accuracy UP for herself and also her team + Immune to Burn, Freeze and Blind and gains Spirit P for being inflicted with them
Mayumi (L1) The second in command, Mayumi Joutouguu, bolsters her might as a haniwa soldier by having good access to the Earth and Metal elements. Her Last Word has a 4:2 ratio of Slash to Sharp bullets as well as its Earth to Metal elements, allowing her to be a potent Earth nuker. Mayumi’s team utility is YANG oriented and falls a bit short due to the duration of the buffs from her second skill. + P0 Earth on Focus Shot. + Very good Last Word, especially when paired with her best story card. + Decent Yang-oriented support for the team. Story Card Farms: 3-3-3, Future Story Card stage
Shinmyoumaru (L1) Shinmyoumaru is your everyday (though definitely not unimpressive) Yang nuker, doing well in increasing both her own Yang ATK and her party’s through the use of her spells. Along with some Yang DEF buffs to optimize her Hard scaling and accuracy support, Shinmyoumaru does not need much from other Friends to hit hard. However, she does somewhat lack in team utility outside of her Yang support and is rather unimpressive in terms of barrier breaks. + 0P Star on Focus shot + Fully Star Last Word hits hard with set up + Comes with her own Accuracy support — Rather fragile; little Yang DEF buffs
Sakuya (B3) There’s not much to go wrong with using Servant from the Lunar War; as she proves her worth through maxing her Agility UP by herself and following up with heavy Slice damage as well as elementally breaking foes with a 0P Moon shot and more Moon and Metal breaks. She can also give a helpful boost to Agility and Accuracy to other Friends in need, along with applying Freeze barriers on opponents for the chance of Friends to follow-up with anomaly breaks. + 0P Moon break on Focus shot + Heavy amount of Agility and Accuracy buffs for self and allies + Solo-target Last Word can unleash devastating damage + Good All-target spells with Freeze anomaly potential — Mediocre farming capability
Sanae (B3) Under the codename of Oracle, Sanae boasts great power from her amazing spread of Star and Wood breaks, plentiful debuffs on the enemies’ CRIT DEF and Evasion, and overall general support in the form of offensive buffs and healing. With a passive that heals 20% of her HP every turn, Oracle is a Friend who refuses to fall down until the job is done. + 0P Star and Wood breaks on basic shots + Good Slice scaling values +Large amounts of healing on Last Word and skills + Amazing CRIT DEF and Evasion debuffs Solo Stage Farms: 2-7-1, 3-3-3
Tenshi (L1) Tenshi Hinanawi brings a lot of damage to the table, and quickly — she doesn’t really do much in the way of utility, with only P0 Earth on a Basic Shot being notable, but she hits so hard it’s hard to care too much. +P0 Earth on her Focus Shot +Incredible damage output, including an All-targeting Last Word -Selfish attacker, brings no utility Solo Stage Farms: 2-7-1, 3-3-3, Future Story Card Stages
Sagume (L1) Sagume Kishin is a great Yang attacker support. Featuring an incredible 5 levels of Yang DEF DOWN against all targets in total, combined with some accuracy support, she gives Yang teams effectively half a Full Break — which is more than enough to take down any fight. Otherwise, she’s got great personal damage, and she’s a fine farmer to boot, if limited mostly to event stages and needing 2 or 3 turns to handle single-target stages. . Great damage in short and long fights alikeSagume gets good damage off by herself, mainly due to her many Yang DEF debuffs she applies on foes. Otherwise, even with a Last Word with mixed elements, being only composed of Yang and Sharp bullets makes it easy to support for even better damage.p> Incredible support for Yang attackersFeaturing an incredible 5 levels of Yang DEF DOWN against all targets in total, combined with some accuracy support, she gives Yang teams effectively half a Full Break — which is more than enough to take down any fight. Good Accuracy SupportSagume’s can debuff Evasion to give indirect accuracy support to her team. Best Yang DEF DOWN debuff only lasts one turnYou will need to be careful with how you apply your debuffs, or else find a way to extend her duration with other supports. Slightly lacking break potentialSagume just has an average breaking potential when it comes to elemental breaks. Her Moon access is decent, with 3 breaks on each spell. Her Last Word also has 3 Moon with 3 Star mixed in, so she’s not the worst at breaking; she just has nothing impressive going for her.
Yuyuko (R2) She may be small, but Yuyuko brings big damage. For farming or harder fights alike, she’s your girl, with some Water Breaks as well, and a tiiiny amount of Agility support for her teammates. But since she kind of suffers in longer fights due to how her character ability works, you’re really just bringing her to do a bunch of damage when the time is right — which she’ll do extremely well. And perhaps cook you up some delicious food while she’s at it. + Solid access to Water Breaks, including Solo targeting P0 Water on her Focus Shot + Very high 1-Turn damage — Low team utility — Damage suffers if she needs to use Barrier Solo Stage Farms: 3-3-3, 3-11-1
Doremy (L1) Doremy is a selfish attacker with a powerful All targeting Last Word that does good damage both in short fights, and scales immensely in harder fights. She also provides some Earth and Star breaks, alongside Yang DEF DOWN support. With that said, she’s very reliant on landing a Killer in order to do her damage — whilst very wide ranging, there are some targets she doesn’t have a Killer against, so watch out for those, as her damage will suffer immensely when she cannot get the automatic critical hits that a Killer provides. + P0 Star on a basic shot for spammable Star Breaks + Very damaging All-targeting Last Word both for farming and longer fights + Provides some DEF Down support for Yang teammates
Tewi (L1) Tewi Inaba is an extremely powerful DEF Down support, with a powerful nuke of a last word to boot. She requires a bit of a careful hand to get the maximum value out of her though, as a lot of her utility comes from skills, which must be carefully used for maximum value. Additionally, whilst she excels at one boss event farms, as well as enabling some main story boss farms, she can struggle with two or three boss stages. Still, those are minor flaws, and any player would be more than happy to have her. + Great defensive debuff potential on single targets + Great access to Freeze, Burn, and Poison — Below average elemental access
Suika (L1) Suika Ibuki is a remarkably powerful unit — so powerful, in fact, she was Global LostWord’s first S+ Tier Friend. Although, due to the passing of time, she has grown a bit dull. Despite this, she still possesses a tremendous amount of team support — Yin & Yang DEF Down, Yin ATK Up, and Accuracy Up. If that’s not enough, her All Last Word deals fantastic damage at 1 Power, and scales very well with additional Spirit Power. Farming, hard fights, damage, team support — the oni simply can provide nearly anything for the party. + Extremely damaging All-targeting Last Word at 1 Power that scales well with additional Spirit Power + Graze provides 1 Level of Yin ATK UP for 1 Turn for entire team — Very low on focused elemental breaks — Outside of Accuracy buffs, Last Word’s debuffs are only team support
Kasen (L1) Kasen Ibaraki is a selfish damage dealer with a Solo Last Word designed around doing one thing: hitting hard. Either hitting pretty hard turn 1, making her a good farmer (if limited to Solo friendly stages), or hitting extremely hard if given prep time. She has no team utility otherwise, and her access to Barrier Breaks is merely average, but if you need a single enemy knocked cold out, there aren’t many who do it better than Kasen. + Access to both Water and Earth element on spells + Powerful Solo-target Last Word that deals high damage in 1 turn and an incredible amount at 3P — Entirely selfish damage dealer with no utility
Sannyo (L1) Sannyo is a Debuff Friend honing in on her Fire and Wood breaks, Blind and Poison utility and her Yin DEF debuffing capabilities. Breaking the Mold.To be in her element, Sannyo only needs Wood and Fire, as she hones in on both of them, especially Fire as her Last Word has 6 Fire breaks. Her anomaly utility is also self-sufficient, finding multiple ways to inflict Blind and Poison breaks onto her enemies and breaking them, mainly with her Second Spell Card at 2P and 3P respectively. Definitive DebufferOf the debuffs that are featured in this yamajorou’s hand include Evasion on her Second Spell Card, Yin ATK scattered across some of her bullet lines, and most importantly, Yin DEF as her ace up her sleeve, which can be found in her third Skill, first Spell Card and her Last Word. Selfish and Finite GamblerAside from Anomalies and Yin DEF debuffing, Sannyo doesn’t provide a whole lot for her teammates to work with. Since she can only buff her own Yin DEF and Accuracy to an extent, she is reliant on external means of providing important buffs to her like Yin ATK and CRIT ATK. Should Sannyo score some CRIT ATK buffs, she doesn’t have the best hand when it comes to Killer range. With some of her more effective targets being Youkai Mountain, Collector and Noble to name a few, Sannyo and her house of cards have a ceiling when it comes to Killers. |
|---|
| A+ |
Raiko (L1) With an ample amount of Slicing and Wood throughout her entire kit and a hefty amount of Yang Attack up without any Story Cards, Raiko can prove to be quite a capable farmer for certain events and stages. However, much like Kaguya, Raiko’s skills and Story Cards do not provide much use for her allies, with the buffs she receives being primarily self-buffs to her speed, accuracy, Spirit P, and Yang Attack. — Her kit primarily provides Wood and Slicing, making Raiko an incredibly specialized fighter. This means outside of specific stages, she may not be the most prioritized Friend. — Incredibly selfish Friend, providing almost no buffs to her team. An overwhelming majority of her buffs are self-buffs. — Is able to give herself a 1 Spirit P buff with her 2nd Skill when maxed out, allowing for an advantaged turn 1 attack versus other Friends.
Reimu (L1) A tank with an above-average All Last Word that also scales very well with Power, Reimu Hakurei is one of the best Def Friends in the game. Offensively, on top of her LW, she also has access to the Sun element on a basic shot and unusually high accuracy on all of her attacks. Defensively, her ability to buff her team’s evasion, Yang Def, and Yin Def combine to allow her to circumvent the usual weakness of a tank against All attacks. She isn’t perfect: her damage outside of her Last Word is lacking, and her access to Focus is rather low for a tank, meaning she won’t always intercept Solo attacks. Overall though, she’s a fantastic tank, and a top-tier Friend especially as all players get her for free. + Highly spammable 0P Sun on a shot + Powerful All-target Last Word which scales at 3 Power + Powerful defensive utility, having large amounts of Yin & Yang DEF, and Evasion UP on both skills and her passive
Aunn (L1) Aunn Komano is your shining definition of a Support Friend, doing everything in her power to back up the rest of her team. Her skills basically cover everything: offense support, defense support, and accuracy support (at most, she is lacking CRIT support if you really need it). Outside of that, Aunn provides some Wood and Earth breaks on her spells followed up by an impressive Sun-only Last Word for some additional damage if the team utility wasn’t enough for you. + Last Word comprised entirely of Sun and Energy bullets + All-around supporter: Accuracy, Yin ATK, and defensive buffs
Daiyousei (A6) Daiyousei (A6) is a Debuff Friend who scrambles enemy lines with Yin and Crit Debuffs while inflicting and breaking Freeze and Paralyze anomalies. ”Weights are so passé.”Once known for her proficiency with dropping the Twitter bird onto a single target for 6 Metal bonks, this prankster has embraced modernity, opting instead to apply Freeze and Paralyze Anomalies onto enemy teams which she can then break with Spell Card 1 or her Last Word. 25% less memey, 150% more efficient! ”Where are you aiming?”Understanding the value of a funny prank, Daiyousei has diversified her skill set, settling on instead blinding her opponents so hard even Rumia would take notice. Her Spell Card 1, Last Word and Skill 1 drop a combined 9 Levels of Accuracy Down on all enemies for 3 turns, meaning they’ll be fumbling around in the dark long after your Friends are done setting up for their afternoon cup of murder. Poor damage potentialDaiyousei is a selfless debuffer through and through, devoting every little of her kit to herself. While she is technically able to max out her Yin ATK with sustained Focus Shots and continuous Boosting, players wanting to avoid drawn out battles will find that she otherwise lacks relevant buffs to Accuracy and Crit ATK to really hit home her damage. Debuffs aren’t all they’re cracked up to beWith no actual team buffs to speak of, players may find themselves starting back at zero when enemy buffs are thrown off, most commonly due to being Full Broken.
Meiling (A6) Hong Meiling (A6) is a Speed-Class Friend specializing in Yin and Crit DEF debuffs while supporting Yin teams with relevant buffs. Great Wall of ChinaMeiling has multiple ways of reducing damage, from skills that reduce Wood and Star element bullets by 45% to passives to allow her to take 25% less damage from Humans. She also provides party Barrier recovery through her Spell Card 2. Swift as a Coursing RiverWhile Meiling works best with Yin teams, she is especially good at ramping up Agility buffs for her Friends. With the right Story Card load out, she can cap team Agility in a single turn, combining buffs from her Last Word, Skill 1 and Grazing, all of which provide Agility. A Lack of FocusWhile Meiling has many ways of reducing damage to herself, she is unable to draw enemy fire as she lacks Focus buffs. Make sure your Friends don’t neglect to graze, especially when not covered by her protective buffs. A Lack of Damage PotentialWhile she excels in providing Agility buffs, she is unable to capitalise on them very well, with low Agility scaling on her attacks. She makes up for this with bonus damage from effective Elements, but this is somewhat stymied by her somewhat rainbow coloured bullet lines. Furthermore, she lacks Yin ATK buffs to reach the upper limits of her damage, requiring help from Friends or Story Cards to do so.
Remilia (A6) Remilia, with her overwhelming might, reveals herself as a Speed type Friend with a strong emphasis towards Burn breaks. Inflicts a massive amount of Burn anomalies, which she can break with her attacksHer 1st skill, as well as her Spell Cards inflicting a decent amount of burn, can break a large amount of barriers Decent utility providing Agility, Yin ATK, Yin DEF, and barriers.Thanks to her skills and Spell Cards providing Agility, Yin buffs, and barriers, Remilia can support Yin nukers, especially if they have strong Slicing scaling. Aside from Moon, lackluster sub-elements.One factor that holds her barrier breaks from being truly amazing is her spell cards having a weird spread of elements aside from Moon that makes her awkward to utilize. Setup damage is on the weaker endWhile her turn 1 damage is certainly not weak by any means, her lack of strong killers or Slicing scaling makes her damage not peak as high, especially when compared to the higher end of characters.
Nitori (A10) Nitori (Faith) is a self-sufficient Friend with decent Turn 1 damage, Freeze anomaly setting and breaking and minor tanking ability. That’s about as much that can be said for this kappa, who lacks the punch that modern A-Universe Friends have. She’ll get the job done; albeit with a little less punch compared to her peers. + P0 Water Break on Spread Shot + Can both set and break Freeze barriers Nitori is able to apply up to 3 barries of Freeze to one enemy with her second skill, <skill 2>, as well as her Spread and Focus shots on 3P (35% chance). Her second spellcard, Kappa: Spin the Cephalic Plate can then be used to break these at 2P, leaving her target worse for wear, especially when combo-ed with other Freeze applying Friends. + Immune to both Burn and Freeze anomalies, is healed by them Her ability allows her to sit on Freeze and Burn anomalies without suffering from the usual debuffs. In fact, Freeze and Burn anomalies will heal her for 5% for every stack she has! — Triple Element Last Word dampens her potential burst damage — Minor team support utility Her biggest contribution to team synergy is her ability to boost team Yin ATTACK for 3 levels for one turn. The rest of the kit is geared mostly towards making her as strong as she can be; emblematic of the business minded Nitori looking to turn a good profit for herself!
Kyouko (L1) Kyouko Kasodani excels in providing CRIT support to herself and her allies, bringing valuable assistance to any firefight regardless of the terms. Her kit focuses on boosting her own CRIT while debuffing the enemy team’s CRIT EVASION, leading to a cascading effect that will topple any resistance given the right setup. + Easy T1 damage makes her a decent farmer + CRIT and Accuracy support helps for setting up big damage — Low personal synergy with anomaly setting and breaking
Mystia (L1) Mystia Lorelei is here to inflict night-blindness on all of her foes, ranging from decreasing their Accuracy and (the more practical effect) causing actual Blind via anomalies. Once inflicted, she can break these anomalies at 3P of her second spell, which can lead to 5 breaks with proper set up and without even considering her decent elemental coverage! Afterwards, Mystia has a good way to set up a strong Yin Last Word finisher, although she is one of the Friends that unfortunately needs some sort of Spirit Power booster if she wants to set up quickly. + 0P All-target Moon on Spread shot and serviceable Moon/Wood on spells + Stacks up Blind anomalies for breaks on 2nd spell — Lacks Spirit Power restoration to quickly apply breaks to perform strongest attacks — Very situational debuffs
Seija (L1) Seija is mainly on the team for pure damage, setting herself up with Blind anomalies on her skills to heavily increase her offensive stats. With Specular on every single bullet, she will aim to confuse the enemies by attacking their flipped defensive stats, mainly being Yin attacks targeting Yang DEF instead of Yin DEF. Outside of this, Seija doesn’t provide a whole lot for her team (and can even detriment them by giving everyone Blind anomalies), but she still pulls through with decent synergy and Blind anomaly breaks, one even being on a normal shot. + 0P Moon break on Spread + Last Word can hit hard after setting up from self-Blind buffs — Very low team synergy + Specular bullets makes her Yin attacks target Yang DEF (more battle-dependent than a strength)
Cirno (A6) Even as way back as her original appearance, Cirno proves that she is stronger than her L1 alternative- but only slightly. She boasts a minimum of 4 Freeze anomalies on all targets in a single turn, as well as a good amount of Yin DEF, CRIT DEF, and Evasion debuffs between her spells and skills. However, there are many detriments to her kit, such as requiring heavy Spirit Power to pull off her Freeze anomaly breaks and other bullet lines but lacking Spirit Power restoration to make up for it. Still, Cirno can definitely have her moments to shine in battle, just not when it comes to farming. + 0P All-target Water on spread shot + 4 to 5 easy Freeze anomalies in a single turn + A good amount of debuffs: Yin DEF, CRIT DEF, and Evasion — Needs a lot of Spirit Power to function and just cannot make that herself — Damage is underwhelming in general
Miko (L1) A strong Solo-targeting burst nuker, the Crown Prince also brings a solid amount of Breaks to the table, alongside All targeting P0 Sun on a Basic Shot, and some Accuracy support. Outside of that though her other primary team support, that being some Yin ATK UP on a Spell Card, is only really useful in the Arena (and does not benefit herself), and she can’t hit quite as hard as the top tier nukers. + P0 All-targeting Sun on a Basic Shot + Great burst damage to singular targets + Self Charge makes her easy to support
Youmu (L1) Youmu Konpaku has one job — hit very hard with her All-target Last Word. Her access to elemental attacks is average at best, but she hits super hard and she has access to the potent DEF DOWN in both Yin and Yang flavors. Unfortunately she does have some RNG so it may take a few attempts to make the most of it, but at a 80% chance for a bonus level of each type of DEF DOWN, it’s easy to fish for and well worth the effort — and for many fights, even 1 level of each alone will suffice to massively amplify your team’s output. + Extremely damaging Last Word both at 1 and 3 Power — Purely a selfish buffer and attacker — Below average access to Metal and Moon element attacks
Yuuka (L1) Yuuka Kazami does two things for you — she hits extremely hard with her All-targeting Last Word, and she comes packed with a suite of All-targeting Spell Cards for Arena, farming, and mashing through events for Seal Crystal first time clear bonuses. She has no utility to speak of, and her Breaks are rather poor, but she hits hard enough to be valuable all the same. + Very high and front-loaded damage which partially ignores elemental resistances — Minimal utility Solo Stage Farms: 2-7-1, 3-3-3
Merlin (L1) A solid Solo-targeting frontloaded nuker with strong Yang DEF DOWN & Accuracy support, Merlin’s only real flaws are mixed damage (leaving her with a lower ceiling than other Solo nukers), as well as merely average Breaks. + Can apply a decent amount of Freeze Barriers + Very strong, front-loaded Solo-targeting Last Word + Solid amount of Yang DEF DOWN to all enemies
Rin (L1) A purrfect Friend, Orin may just well be the ultimate in Yin attacker support. Between her abundance of Burn barriers and Yin DEF DOWN, there’s no defense she can’t kasha off guard. She may be lacking in personal attack power, but you can sharpen her claws with some Story Cards or Friend support to help her cat-ch up to her allies. + Solid Breaks, including P0 Solo targeting Moon on a basic shot + Great levels of Yin DEF DOWN & Burn Barriers — No Accuracy UP
Utsuho (L1) Packing fire power on the level of an atomic bomb, Utsuho Reiuji is an incredibly powerful All targeting Last Word nuker useful both for farming and harder fights, with some party-wide Agility support to boot alongside 0P Sun on a Basic Shot. Her Breaks are otherwise fairly average, but when that’s the worst you can say about a Friend, they’re unquestionably top tier. + 0P All-targeting Sun Breaks on a Basic Shot +Extremely strong All-targeting Last Word, for farming or longer fights alike. +Can provide Yang DEF DOWN on a priority target or two.
Murasa (L1) Minamitsu Murasa is an extremely powerful unit — so powerful in fact that she is one of the better units in the game,. Her ability to ramp up damage and speed as quickly as she does using her skills combined with her good Slice values makes her a force to be reckoned with. She also has very good Barrier breaks and can provide the rest of her allies the same speeds she gives herself using her skills. + Plenty of Water breaks. + Remarkable Agility which translates into more damage using her Slice — Very little supportive utility Solo Stage Farms: 3-3-3
Okina (L1) Okina combines a abundance of Barrier Breaks (especially fire!), CRIT heavy damage, and support for CRIT attackers and units with relevant Killers into one godly package. Do keep in mind her rating is particularly reliant on the farmable 5* Story Card from Chapter 3 Act 2, and she takes a larger than average hit for having to use a different Story Card. + Abundance of Barrier Breaks, including P0 Fire on a Basic Shot + Very high damage potential in longer fights
Yorihime (L1) Watatsuki no Yorihime is here to do one job — hit extremely, extremely hard with her 1-1-3 All targeting Last Word. She has no team utility, her Element access isn’t great, she needs time to set up, and she hits so hard none of that matters. Just make sure she has time to set up, both for hard fights and farming. + Incredible damage when properly set up + Varied elemental coverage on Last Word at P3 — Purely selfish attacker Solo Stage Farms: 3-3-3
Toyohime (L1) As expected of Lunarian nobility, Toyohime is very powerful. She hits incredibly hard in shorter, scales well in longer fights, serves as a useful farmer in both Events and for Chapter 1, 2 Act 2, and 3 Act 1’s Story Cards, and completely invalidates any fight that relies on Evasion to provide a challenge. She’s entirely a selfish damage dealer and her Barrier Break abilities are unusually abysmal, but those don’t really undermine her overwhelming strengths. + Great Turn 1 Damage — Almost no Breaks — No utility
Kaguya (L1) Due to her sheer amount of Hard, Kaguya Houraisan punches harder than you might expect from a princess. As a selfish attacker, she’s a rather above average farmer, and a solid candidate for harder fights, thanks to her ability to generate a ton of Spirit P on demand combined with average access to Metal and Fire on top of her highly damaging All targeting Last Word. She’s got no utility on account of being a selfish princess, but what more can you ask for? + Average access to two elements, Fire and Metal, as well as Wood on Last Word + Highly damaging All-targeting Last Word with potential on turn 1 and with setup + Gains a lot of Spirit Power — Selfish attacker with no utility outside of Breaks
Remilia (L1) A damage dealer with good Yin DEF Down support and a powerful All Last Word that hits hard at both 1 Power and scales higher at 3 Power, Remilia Scarlet is good at both farming and challenge quests. Her Breaking ability is somewhat below average, but her damage and offensive utility both more than make up for it. + 2 Solo Fire Breaks for 1P from her second Spell Card. + Powerful All-target Last Word that deals a lot of damage at 1 Power and nearly double at 3 Power + Brings a fair amount of Yin DEF DOWN, especially against a single target
Alice (A6) Alice Margatroid (A6) is a Debuff-Class Friend who weakens her enemies with defensive debuffs, plays with Burn and Paralyze anomalies and showers her foes with a rainbow of elements. Debuffs and AnomaliesWhile A6 Alice may be focused on Yang DEF debuffs via Skill 2 and her Last Word, she provides Yin DEF debuffs through her Second Spell Card and Last Word Pre-ATKs. It may seem odd for a Yang unit like this puppeteer, but with some Yin-based allies, this could be of use. Yin allies will also appreciate the slight benefit from A6 Alice inflicting Burn anomalies on her foes, should she opt not to anomaly break. Puppets and PowerHaving a decent range of Killers, with Youkai being the main one here is always convenient, and with the CRIT DEF and CRIT Evasion debuffs in A6 Alice’s kit, she will capitalize on that well. She is also able to use Hard Scaling to her advantage, with it having more of an effect through methods such as her Paralyze anomaly inflicts on herself. Alice in RainbowlandHaving all kinds of elements in one’s attacks is very hard to work with, especially when the most rainbow-y set of elements we have seen to date resides in A6 Alice’s kit. With her rainbow scheme preventing an element appearing more than once in any of her attacks, her elemental break potential is very much hindered, even mitigations like slight anomaly breaking and resisted elements getting a 25% boost aren’t enough to cover this flaw up. No Support, Needs SupportAs a debuffer, it’s natural that A6 Alice will want to focus on that, but her only way to buff the team is Yang DEF UP, which is especially selfish. On top of that, her buffs she gives herself like Yang ATK, CRIT ATK and to some extent, Yang DEF are very lacking, so she needs some backup that can provide the above to really bring her damage up. |
|---|
| A |
Marisa (L1) A selfish damage dealer with four All Spell Cards, Marisa Kirisame carries new players hard with her extremely powerful Spell Card, Master Spark. Unfortunately after the early game ends and players begin to Max Limit Break their Friends, Marisa falls off somewhat Her Solo Last Word deals average damage for a Solo LW, she has no utility, and her access to only Star element attacks is merely acceptable. However, still has some uses in a few 3-wave stages and harder fights due to having two rather strong All Spell Cards, and her All access to Star will still be relevant at times in difficult content. + First spell deals high All damage for a Spell Card — Mixed Yin and Yang damage makes her hard to scale — Overall low access to elements + Very powerful early-game Marisa is an A-Tier Friend when considering all of her Fantasy Rebirth 2.0 upgrades, specifically her Last Word upgrade. This upgrade nearly quadruples her Last Word’s damage, making her once again a very good and fast nuker depending on the situation. However, due to the minor changes with her other 2.0 upgrades and the how lackluster she is at base, she is only E-Tier without the Last Word buffs.
Rumia (L1) Rumia’s a Solo-targeting nuker with some support for teammates who benefit from Blind Barriers being applied to them. It’s a bit narrow, but decent support when a unit benefits. Otherwise, she hits single targets hard, and brings some Breaks (including Blind Breaks) along the way. +Blind anomaly break on All-target Focus Shot +Decently strong Solo-target Last Word -Primarily self-buff focused
Eternity Larva (L1) Eternity takes on the role of a Support-class Friend here in Touhou Lost Word, helping Yin-focused teams excel with various buffs to power their attacks. Supports Yin teams via buffsEternity keeps her team running via buffs to ACC and Yin ATK. She also buffs Agility as well as Yin and Yang DEF to help with Slicing and Heavy bullets. Defensive options keep teams going strongEternity can recover both Barriers and HP for her teammates, keeping them going through long firefights. Zero Anomaly InteractionsWhere most modern characters can manipulate Anomalies in some way through buffs or breaks, Eternity stands out like a sore thumb with no interactions with Anomalies whatsoever. Her simple nature means you’ll be sticking to your bread and butter when it comes to her. Lacks offensive powerElement breaks aside, Eternity doesn’t contribute very much in the way of damage, due to her lack of notable Killers and Crit enhancements.
Wriggle (L1) Wriggle is a Debuff-Class Friend who inflicts various anomalies on her enemies to sow chaos among their ranks. Supports Yin teams via debuffsWriggle’s various debuffs to enemy Yin DEF, EVASION and Crit EVASION and buffs to team Agility helps Yin attackers shine, especially if their attacks feature Slicing bullets. Anomalies are her playgroundWriggle inflicts Poison and Burn via Spell Cards, and can reflect Poison and Blind back at opponents. Her Shots and Spell Cards break Poison, Burn and Blind Lacks Spirit P generation to constantly hit her Anomaly breaksTwo out of three of Wriggle’s Anomaly breaks are locked behind her 3P Spread Shot and Focus Shot. With only one skill giving her 1P every 4 turns, she has to rely on support to hit those levels while maintaining her output each turn.
Kutaka (L1) Kutaka is a through and through healer and barrier restoring Friend. She’s got a little bit of other stuff, like Speed support and Melting, but overall not too complicated of a Friend. As such, she’s not gonna be blowing apart the battlefield with ridiculous damage or anything like that, so as long as you temper your expectations for nuking or lots of buffs, she does the job she sets out to do. +0P Wood Focus Shot +Some party wide speed buffs, and personally benefits from Slice scaling +Immune to poison, freeze and burn -Middling damage without speed support -Weak passive skills
Eiki (L1) Eiki, as one of the Yama who judges the dead, comes to Lost Word with a decent array of elements and decent damage. While she may lack utility and may not hit as hard as some of the other characters, Eiki can still give her enemies a rough lecture. + 0P Fire on Spread Shot
— Spellcards need both Yin and Yang to make the most of their damage output. — Little utility to speak of Story Card farms: 3-3-3*, 3-6-3*
Tojiko (L1) Tojiko is a selfish Destroy class Friend who requires some support to get going. Give her enough juice and she serves as a powerful nuke and Wood/Moon breaker. Decent Wood and Moon breaks that hit AoE on up to 4 Spell CardsBoth her first and second Spell Cards hit ALL enemies, dealing 3 Wood and 2 Moon worth of Element damage reach. Her Last Word is a Single Target nuke, landing 3 Wood and 3 Moon breaks on one unlucky opponent. 0P breaks on both Spread and Focus ShotsTojiko’s Spread and Focus shots can hit Single Target Elements at P0, with the former breaking Wood while the latter breaks Moon. Versatile for long fights! Requires Accuracy and Spirit P supportConspicuously absent from her kit are Accuracy and Spirit P boosts, meaning she will require Story Cards to help her boost those stats, or Friends who can support her in that way. Be sure to pack wisely when bringing her into firefights! Heavily backloadedWith most of her lines locked behind 3P, Tojiko requires a lot of energy for her Lightning to run free. Selfish attacker with low utilityBig breaks and damage numbers aside, Tojiko has little to offer as a team player, with some minor Crit ACC and Crit ATK for her team to use.
Futo (L1) Mononobe no Futo is your example of a good Yang nuker, buffing her own Yang ATK for more damage off of her Last Word as well as Agility for better Slice scaling. Outside of this, though, she somewhat lacks a purpose. She can spam Fire and Earth breaks on her basic shots in extended battles, but otherwise her elemental breaks are low and team utility even lower. + 0P Fire and Earth on basic shots + Can get good damage off of her Yang-only Last Word + Good amount of Agility buffs from whole kit; helps Slice scaling — Rather lacking in defensive stats
Seiga (L1) Seiga Kaku’s main purpose is to dash around the enemies, constantly debuff their Evasion and Yin DEF, and then circle around her Agility buffs for an All-target Last Word finisher. The backloaded nature of her spells get in the way of this at times, but the low cooldown on her skills and heavy amount of self-Accuracy support make for a rather reliable offensive pick. Also, 6 Star on a single Last Word is still pretty crazy. + Decent Earth and Water coverage + All-target, Energy and Star-only Last Word + Small debuffs on skills that quickly recharge — All spells are backloaded (1-1-3) — Risks health of teammates due to Focus DOWN and Poison anomalies
Sekibanki (L1) Sekibanki can be described as a glass cannon. She is a good nuker but her HP is extremely low which makes her vulnerable to being wiped out if you are not careful. However, she provides decent Fire elemental breaks which are essential for Challenge Quest. + Good set of Fire elements + Human and Fairy Killer on Last Word — Extremely low HP stats — Lack of team utility Solo Stage Farms: 3-6-3
Mai (L1) As a strong supporter, Mai brings Yang ATK and CRIT ATK UP to her party, alongside an extremely solid amount of Barrier Recovery on her Spell Cards, and spamable Star Breaks on her Spread Shot. She has otherwise somewhat average damage however, and her Barrier restoration is a one-time thing each fight. + P0 Solo-targeting Star on a Basic Shot, with sure-hit to boot + Solid offensive support, with good levels of Yang ATK and CRIT ATK UP + Incredible Barrier restoration in shorter fights due to restoring 2 Barriers with a Spell Card — Average, backloaded damage
Satono (L1) Satono Nishida brings out the mental energy of anyone she dances behind, translating to Yin-focused buffs in the world of Touhou LostWord. She is able to give 3 levels of Yin ATK UP and 6 levels of Yin DEF UP from her kit, which may be lower than other supports but is still a nice help for Yin-based fighters. She also comes with a 0P Fire break on her focus shot and a decent amount of other Fire breaks to make her a decent addition to a team. +0P Fire Focus shot +Yin ATK and DEF buffs +Minor amount of Spirit Power and Barrier restoration -Solo-target Last Word with mediocre strength -CRIT buffs only particularly helps Friends with high CRIT chance
Kokoro (L1) Hata no Kokoro is a solid, well-rounded healer who is able to dish out some surprisingly, strong damage. In addition, she has 12 Earth Breaks, one of which being a P0 Break on her Focus Shot. She’s an overall strong friend who covers a lot on the table. + Amazing Earth breaking capabilities, including a 0P shot break + Solid damage + Great healing on spells and skills
Yuugi (L1) Yuugi has two jobs — provide your Killer friends with CRIT ATK UP, and hit a single target hard. In addition, she also provides some decent breaks, including notably All targeting Star at P0 on a basic shot. She doesn’t hit as hard as the friends rated above her, and she needs setup time which isn’t ideal for Solo attackers, who want to take out a priority target ASAP, but she’s solid and will do well in fights where you need one or more of what she brings to the table. + P0 Star on a Basic Shot + High damage on a single target with setup time + CRIT support for the party
Koakuma (L1) Packing Yin & CRIT DEF DOWN support, a ton of damage herself, and some solid Break potential, Koakuma’s name may mean Little Devil, but she’s actually extremely strong. A competent farmer and a great unit for harder fights, her only real failings are not being quite as good as the top shelf farmers, not quite doing as much damage as the top shelf attackers, and not being able to support Yang attackers who don’t CRIT — but she’s still very good. + Overall good Break potential + Strong All-targeting Last Word that gets very powerful in longer fights + Team support in the form of Yin & CRIT DEF DOWN
Reisen (L1) Reisen Udongein Inaba stands out for having access to Moon element attacks, and she can take down the first main story boss at a lower level than anyone else. She also can apply two Paralyze barriers to all enemies, which is nice Accuracy support and can synergize well with Discharge attackers. That’s about all she has going for her — both of her Spell Cards and her Last Word are Solo, her damage is overall rather low, and she brings no utility outside of that. + Access to Moon-element attacks + Applies 2 Paralyze anomalies with her Skill 2 + Quite a bit of Evasion debuffs — Low damage
Shou (L1) Shou’s a selfish attacker with P0 Sun and a Pagoda Tank here to blast at your enemies. She’s not a super great All farmer, though she can be a good Solo farmer on some one- boss stages due to her Human killer. Where she shines is harder fights, bringing a powerful backloaded Last Word to the table. + P0 Sun on Basic Shot + Powerful All-targeting Last Word if given time to set up + Self Charge makes her easy to support
Keine (L1) Keine is a very good Hard attack support, providing loads of Yang DEF team-wide. In addition, and as a result of her own scaling, Keine’s overall damage without much external Yang ATK support matches that of some other S-Tier contenders. + Rather high damage All targeting Last Word that can farm + Extremely high levels of Yang DEF UP support — Element access is below average, unless willing to use Last Word for Breaking.
Koishi (L1) Koishi hits extremely hard in fights she’s given a chance to set up with her Solo-targeting Last Word, and that’s about it. Her team utility is very lacking, and she’s an average farmer for Solo friendly stages. Still, if you ever need a single, beefy target dead, or just need Water Breaks, Koishi’s your girl. + Slightly above average access to Water breaks + Has a respectably powerful Solo-targeting Last Word that deals tremendous damage if given time to set up.
— Many of her buffs and debuffs rely on bullet line RNG
Minoriko (L1) Minoriko brings plenty of healing, Barrier recovery, Barrier Breaks, and a kit of only All targeting Spell Cards (and Last Word). She’s got rather low damage, no offensive team support, but her strengths certainly outweigh her flaws. Even without the ability to cast the anomalies she breaks, the correct team set-up will allow for her to easily Full Break multiple opponents at once. + Average access to both Metal and Wood — Low damage & mixed scaling + Solid healing and Barrier recovery support
Suwako (L1) Suwako Moriya’s here to do three things: curse your enemies with Yin DEF Down, destroy them with a powerful Solo Last Word, and party. Both a capable farmer and a powerful challenge unit, with some Barrier Break potential on the side, she’s a Friend you just can’t go wrong with. + Average Break potential + Deals high Solo damage both immediately and at 3 Spirit Power + Fantastic Yin DEF DOWN support
Eirin (L1) A powerful healer who packs a punch alongside some potent Poison Barriers, Eirin Yagokoro is a great candidate for harder fights. Her ability to farm is somewhat average, healing can be a bit niche, and her Barrier Break ability is rather poor, but she’s overall a powerful Friend anyone would be happy to have. + Last Word can deal a lot of damage if given a turn to set up + Fantastic amount of Healing and Barrier restoration + Great Poison Barrier support, for either Anomaly Breaks or supporting Yang Attackers — Hard to support due to mixed attacks
Mokou (L1) Fujiwara no Mokou is a Solo Last Word damage dealer who can provide some decent team support and above average Break potential, as she can both generate and Break Burn Barriers on any opponent not immune to them. Additionally her Spell Cards provide her with a massive amount of Yang ATK Up, allowing Mokou to build up to a extremely potent nuke. However, she has some major flaws — her Spell Cards inflict a ton of self damage (that cannot kill her, but at 1 HP she probably won’t survive for long), and are extremely Spirit Power hungry. Additionally, she has rather low turn 1 damage, meaning she can’t solo many one wave one boss event stages. Overall though, her strengths are rather solid, and for most fights lasting longer than a single turn, Mokou is a valuable asset. + Good access to Burn barriers, which she can Break with her All-targeting Spread shot + Solo-target Last Word has incredible damage potential, even without team support + 2 levels of Yang DEF DOWN on 1 foe is decent offensive support — Unusually frail, as both of her Spell Cards consume a lot of HP — will likely require healing support
Chen (L1) Due to the extreme inconsistency in her kit, and a high theoretical damage output, one could be forgiven for assuming Chen is an attacker meant for difficult fights. However, with a 3 Stage Accuracy Story Card boosting her All Last Word accuracy to 100% 4/5ths of the time and 90% otherwise, she actually makes for a reasonably powerful event farmer, especially as she doesn’t have to worry about resistances. The main issue for her is difficult fights — all she brings to the table is damage, not even elements, and this combined with her lower stand-alone damage that’s difficult to practically scale leaves her somewhat lacking compared to the competition. If you are willing to pair her up with Support-type Friends, her damage will skyrocket, but for most team compositions she will simply be an average All-target attacker with no elements. + Strong All-target Last Word + Above-average chances of Critical Hits — Zero elemental bullets — Lacking Accuracy without buffs or story cards
Ran (L1) Ran Yakumo is a fairly powerful farmer, due to her rather powerful All-target Last Word. When it comes to harder fights, her access to elements is sorely lacking. However, she’s still good — her damage is on the higher end of things, albeit with a low ceiling, she has Charge to make her synergize well with debuffers, and she brings powerful team Accuracy support, if somewhat let down by it being on a Spell Card and not a Skill. + Powerful All-target Last Word at 1 Power — Only has Earth element on Last Word — Selfish buffer
Yuyuko (L1) Although she has fallen off rather far from the game’s release and cannot farm any significant content, Yuyuko Saigyouji’s All-target Last Word’s damage output is still high, starting off strong at P1 and becoming notably powerful at P3. She also has a great 3 turn accuracy buff, freeing up her Story Card choices, alongside access to the powerful Charge, letting her synergize well with any source of Yang Def down for powerful LW burst turns. Her major flaws are lackluster access to elements, no secondary scaling which leaves her lagging behind the top tiers, and no team support. + Powerful Last Word, dealing quite high damage at 1 Power and scaling tremendously at 3. + Self Charge on Skill 3 means she works well with any supporter — Only brings Wood element and lacks many elemental bullets nowadays — Fell off hard with the introduction of many stronger Friends
Medicine (L1) One of closest things this game has to a wild card, Medicine Melancholy excels in two areas: boss farming, and difficult fights. Due to her abundance of Poison barriers, and a Last Word with a lot of Toxic on it, she can easily Full Break any enemy who isn’t immune to Poison — of which rarely any exist. Whilst this is the only thing she can do due to her otherwise low damage and lack of any other utility, it’s such a valuable niche that she’s unquestionably an extremely powerful asset. + Wonderful Poison breaker, practically able to break almost any opponent — Below average elemental breaks + Quick farmer for early game content + Poison anomalies can serve as Yang support — Low Damage Solo Story Card Farms: 2-7-1
Megumu (L1) As a Speed-class Friend in Touhou Lost Word, Megumu can inflict a decent amount of Star breaks, Blind anomalies, and some evasion down to boot. Decent buffs with Spell Cards and skillsWhile her skills don’t provide herself too many buffs on paper, in-line effects on attacks like her 1st Spell Card provide her more buffs to be used properly. Decent Blind and Star breaksShe can inflict a decent amount of Blind anomalies with her 2nd skill and 2nd Spell Card, whilst also having the ability to break them with her 1st Spell Card. At the same time, she can inflict some decent Star breaks with her 2nd Spell Card and Last Word. Low damageUnfortunately, despite her buffs, Megumu struggles to output a great deal of damage with her Yin ATK and lack of relevant killers. Utility is lackingOne major thing that holds her back is her lack of true utility for the party with her skills. Her main source of utility comes from her Spell Cards which don’t hold too many strong buffs aside from barrier restoration with her 1st Spell Card and Last Word. |
|---|
| B |
Patchouli (L1) Patchouli Knowledge’s main claim to fame is her extreme spread of elements — Having access to every element, including the very powerful Sun and Moon elements, means she can break at least two if not three barriers on virtually every enemy in the game. Unfortunately her Sun and Moon element attacks are both single target, and the somewhat awkward distribution of her elements means it may take her a few turns and/or heavy amounts of Power support to accomplish those breaks. Her damage output is also relatively lacking, with little team support outside of elements. Still, her sheer flexibility and elemental access means she’s a Friend well worth having. + Nearly unparalleled Element access — Low damage — Requires Spirit Power and Accuracy support
Joon (L1) As a unit, Joon Yorigami is a mixed bag that shapes her up to a decent unit overall. Her damage output is just about average, even with her rather selfish buffing. In terms of utility Joon does have a supportive Spell Card that provides some nice buffs to the entire team. These tools, while useful, are outshined in almost every aspect by some other unit out there. + Can be used as a Metal Breaker + Provides team-wide buffs using her second Spell Card — Average damage overall — Both offensive Spell Cards are Solo — Greedy buffer outside of Aid spell
Wakasagihime (L1) Wakasagihime’s quiet, level-headed demeanour manifests as a Support-class Friend who is ever at the ready to assist her compatriots in battle. Decent Water breaksDelivers decent Water breaks on enemies, with her first and second Spell Cards packing 3 and 4 Water Breaks each. 0P Water on her Focus Shot helps with longer battles. Enables Yang focused teamsBoosts Accuracy, Yang ATK and Agility through a combination of Spell Cards, Skills, and Graze. Heals team HP and barriersRecovers both HP and Barriers for her team via her Support oriented Last Word. Support Last Word isn’t particularly impressiveThere are very few instances where Wakasagihime’s inclusion will outclass an offensive Last Word. Large cooldowns on skillsExpect to wait between 5-7 turns for her Skills to cooldown; enough time to switch out someone fresh who can finish the job in her stead. Evasion tanking is iffy at best, especially at low levels.Evasion isn’t as reliable as solid damage negation.
Kagerou (L1) Kagerou’s canine traits allow her to fulfil the requirements of being a Speed-class Friend in Touhou Lost Word. Decent Wood and Moon breaksDelivers decent Wood and Moon breaks on enemies, with her first and second Spell Cards hitting all enemies with 2/2 Moon/Water Breaks each. Her Last Word hits a single Enemy for 3/3 Moon/Water, leaving her with a 0P Wood on her Focus Shot to finish things off. Slicing helps with damage boostingWhile she has Slicing on all her Spell Cards, this is especially prevalent on her Last Word, with slicing values of 80%/0%/0%/80%/0%/90%, turning it into a bona fide ST Nuke. Single target Last Word limits her to hitting just one thing hard.While there’s no knocking ST attacks in general due to enemies being able to put ALL Resist up, her limited targeting slightly dampens her as a general purpose attacker. Selfish attackerKagerou lends very little to team synergy, focusing only on what she can do to the other team, with no real utility outside of breaks and damage. Evasion tanking is iffy at best, especially at low levels.Evasion isn’t as reliable as solid damage negation.
Kogasa (L1) With a surprisingly good amount of Water breaks, Kogasa can be very helpful with whittling down the enemy’s barrier count, provided they are weak to Water. That being said, she is somewhat disappointing compared to other recent units, from the lack of Killers she has, to the lack of team utility. There are a few silver linings, like a Last Word with some Paralyze and Blind break potential without even having to boost, as well as some helpful Hard and Slice scaling, but Kogasa is just simply outclassed by a lot of the competition. + Great Accessibility to Water Breaks including P0 Water on Spread Shot + Spirit P gain on both Spell Cards can be helpful + Potential to break both Paralyze and Blind Anomalies of an Enemy via P0 Last Word. — Struggles to make much use of self-inflicted anomalies on her own — Killers are almost not present at all — No team support
Sumireko (L1) Sumireko attempts to get a footing in the world of Gensokyo with her variety of psychic abilities. This ends up giving her a small mix of Wood and Star elemental breaks, access to Evasion DOWN via spells, and some slightly heavy Yang damage via her Last Word. Her abilities might not be as impressive as most of the cast, but her kit definitely has time to shine. + 0P Wood break on Spread Shot + Decent amount of Spirit Power UP on kit + Solo-target Evasion debuff on spells
Letty (L1) Letty Whiterock is a decent Solo-target Yin nuker who has some Yin DEF buffs and self-inflicted Freeze. Struggling to farm most event stages, she can show her strong side in some harder challenge content. Her identity is a bit muddled, however, and she cannot excel as either a defensive unit or nuker. + Solo-target Yin nuker + Some Yin DEF up — Does not provide any utility to the rest of the team besides Accuracy DOWN on targets — No Focus UP as a defensive unit
Hina (L1) Even though Hina Kagiyama could not avoid her own misfortune of only having Solo-targeting spell cards, she still has fairly situational use with a Yin-based Last Word and being able to lower the evasion of every opponent. Her second spell card serves as an anomaly breaker for any barriers inflicted with Poison, Paralyze, or Burn, meaning Hina can synergize with quite a good amount of other Friends and still break barriers, even without an impressive element spread. + Poison, Paralyze, and Burn anomaly breaks on second spell card + Decent Solo-target Last Word Yin nuke + Lowers the Evasion of all enemies
Lunasa (L1) Lunasa is simply average — she has an average amount of Break potential (with the noteworthy P0 Water on a basic shot), with a backloaded (and unfortunately mixed) Solo targeting Last Word and decent but not spectacular healing capabilities let down by a lack of Barrier restoration. +P0 access to Water on a Basic Shot + Backloaded Solo-target nuke with reasonably solid potential damage
— Damage is mostly backloaded -Entirely lacking in offensive support
Mamizou (L1) Featuring extremely high levels of Focus UP, Evasion UP, and Yin DEF UP, Mamizou is the premier anti-Yin tank. Combine this with some rather stellar Breaks, including a P0 solo targeting Earth Break on a spammable basic shot, and the tanuki has plenty of tricks up her (lack of) sleeves to keep those pesky Yin attackers at bay. However, her complete lack of Yang DEF UP as well as a lack of Barrier restorations means that not only is she fairly vulnerable to Yang attackers, but she is also on a harsher time limit against All-targeting attacks than other tanks with Barrier restoration. She also has rather lackluster damage, due to unimpressive Hard scaling, leaving her overall average. + 0P Solo-target Earth Spread shot to spam breaks + Good amount of Yin DEF buffs for herself and the party + Focus UP emphasis to keep damage off teammates — Spirit Power-hungry for her 1-1-3 spell card spreads
Clownpiece (L1) Clownpiece has two major jobs — hit hard with a backloaded Solo targeting Last Word, and inflict Blind Barriers on all your foes. She’s not really capable of farming relevant story card stages, and she’s nothing special, but she’s a solid enough unit. + P0 access to Solo-targeting Fire on Focus shot + Rather strong backloaded Solo-targeting Last Word + Inflicts a lot of Blind Barriers
Nemuno (L1) Nemuno’s a simple youkai, with simple jobs. Applying 2 Paralyze Barriers to all foes, and hitting one foe hard with a backloaded Solo targeting Last Word. She isn’t a very fast farmer, and the backloaded nature of her kit makes her less desirable than the competition, but she’ll get the job done. + Slightly above average access to Metal Breaks + Her Solo-target Last Word can hit pretty hard in longer fights + One of her skills inflicts 2 Paralyze barriers to all foes, fantastic for Discharge support
Cirno (L1) Cirno serves as something of a budget wild card barrier breaker. Whilst it’s impractical to use for farming bosses due to a 10% failure rate on the second barrier, 90% of the time Cirno will apply 2 Freeze barriers to all foes, which she can then break with her Melting All-target Last Word. This generally won’t be enough to get the job done by itself however, and her kit otherwise is heavily lacking in both utility and damage. However, if you can give her additional Freeze barrier support, she can break up to 4 Freeze barriers on all enemies, which can make her situationally very powerful, but even breaking 2 Freeze barriers is enough to justify bringing her along. Just watch out for Freeze immune enemies. + Decent Water breaker + Has the ability to cast Freeze anomalies and break them via spell 2 and Last Word — Very low damage — Low utility in the forms of healing, buffs, or debuffs
Lyrica (L1) Lyrica is a solid enough Support Friend, offering a wide array of supportive capabilities via her Skills and Ability — however that’s about it. She has an overall poor performance when it comes to breaking and her Solo-targeting Last Word is also nothing special. + Wide array of buffs — Poor breaking capabilities — Weak, Solo-targeting Last Word
Satori (L1) Satori Komeiji is essentially defined by her Solo targeting Last Word dealing respectably high damage without much setup. She also brings a slightly above average access to Fire Breaks. The rest of her kit is lacking, and she can’t reach the heights that other Solo nukers can in extended fights, so she’s essentially average on the whole. + Slightly above average access to Fire breaks + Respectable damage turn 1 on a Solo-targeting Last Word — No party utility
Aya (L1) The fastest in Gensokyo, Aya brings a fairly damaging Solo targeting Last Word that can scale well in longer fights to the table, alongside some Wood Breaks and teamwide Accuracy support. She’s not particularly strong or weak — just simply average + Above average access to Wood breaks on all of her spell cards + Decent Turn 1 Solo-targeting Last Word + Evasion debuff on all enemies — Low turn count on buffs forces her to choose between Breaks or more damage
Shizuha (L1) Shizuha’s a pretty alright supporter. She brings a unique teamwide Spirit Power support, Accuracy support, can apply Paralyze Barriers, and has solid access to Wood and Metal. Unfortunately she’s saddled by low overall damage, which is a big detriment in LostWord, but she’s overall solid and a boon to have on your side. +Access to Wood and Metal element attacks +Provides team-wide accuracy support +Applies Paralyze on her first Spell Card -Low overall damage, and not much use beyond the above
Akyuu (L1) A somewhat situational unit, Akyuu is usually hard to fit on a team, as the buffs she provides only affect a somewhat small subset of units — CRIT attackers, and attackers with a fight-relevant Killer. However, when she is useful, Akyuu tends to be incredibly powerful, due to the strength of CRIT ATK combined with how hard it can be to get. Additionally, she can also serve as a Chapter 2-7-1 farmer when combined with Toyohime and Kosuzu, though don’t expect her to farm any events. +Provides useful buffs in the form of CRIT ATK, CRIT Accuracy, Yin ATK, and Accuracy UP +Can apply Blind barriers -Below average Barrier Break potential -Low damage
Ringo (L1) Ringo has a pretty simple job: provide lots of Yang ATK, Yang DEF, and Agility UP for the party, which makes her excel with weaker teammates and falter with stronger ones. Outside of that, her Solo-targeting Last Word doesn’t hit very hard, and her Break potential is rather lacking. She’s just here to provide buffs and dango. + Good access to Yang ATK & DEF UP, plus solid access to Agility UP — Below average Break potential — Somewhat low damage
Kosuzu (L1) Kosuzu’s main selling point is the Piercing (defense buff ignoring) damage on her Last Word. This makes her an attractive teammate to farm 2-7-1. Do keep in mind that her Farm rating is heavily affected by this — her damage is rather low and she’ll have problems farming Event stages on Lunatic by herself. The Piercing is also not as good as you’d think in most fights too, for reasons covered in her analysis. Outside of that, she packs an average amount of Water and Wood Breaks, alongside some CRIT support, making her overall an above average Friend. + Average access to Water and Wood Breaks + Last Word deals a lot of Piercing damage + Some CRIT Evasion DOWN Support for teammates — Second Spell Card deals self-damage to Kosuzu
Flandre (L1) Flandre Scarlet is a Friend with a devastatingly powerful Solo Last Word, and some offensive utility as well, but with a lot of caveats. Her Last Word is exceptionally inaccurate and thus requires heavy Accuracy Up support, her Break potential is very lacking, and her support is only against a single target. Additionally, she’s completely unsuited to farming by herself, as even when Solo friendly stages show up again, Flandre’s extremely poor Accuracy means she’ll always have consistency issues. However, keep these caveats in mind, provide her with the support she needs, and she can do some devastating damage in harder fights. + Devastatingly powerful Solo Last Word — at max potential. + Reasonably solid team support for Yin attackers with 3 Yin DEF Down against a single target. — Poor access to elements — Due to brutally low accuracy, she requires heavy accuracy support.
Luna Child (L1) Luna Child’s primary job is to hit somewhat hard with a Solo Last Word, and her secondary job is to provide you with some okay but decidedly below average access to Moon Breaks. Unfortunately she falls somewhat shy of the real power houses, leaving her in a decidedly average position. + Access to Moon breaks + Solo-target Last Word can hit somewhat strong + Power Link — Low support
Alice (L1) As a purely support-focused Friend, Alice Margatroid excels at bringing Accuracy and ATK Up support to her allies. Due to her rather low personal damage and complete lack of elemental attacks, and her necessity for turns to setup for farming purposes, she shines more in harder fights where, weaker allies are brought in — unfortunately, powercreep means her worth is primarily with less potent friends, whom lack ATK UP in their kit. Even with a farmable story card built just for her, Alice is really just no more than average. + Skill 3 is enough to make her teammates very accurate, with some Yang ATK UP to boot + She also has additional Evasion DOWN , Yin ATK UP, and Yin / Yang DEF DOWN support — No Barrier Break potential at all — Low damage output
Urumi (L1) Urumi Ushizaki (L1) is a Destruction-Class Friend who specialises in both Crit buffs and debuffs. Crit SupporterUrumi can help Crit focused friends hit harder with Crit ATK buffs and enemy Eva/Crit Def/Crit Eva debuffs to throw into the mix. Decent Spread of ElementsMost of Urumi’s bullets will hit one element or another, with the bulk of this going to Earth, Moon or Water. She also does more effective damage to enemies weak to those elements, helping her to stretch her damage a little further. Weak UtilityThe amount of support she has to give isn’t very much, especially when it mostly amounts to Crit buffs. Her Evasion debuffs are fairly short-lived or single target only, and while she can break Poison barriers, she is unable to inflict them herself, leaving her to rely on others to lay the Anomaly. Lacks Personal BuffsUrumi needs all the help she can get to raise her damage. Yin ATK and Accuracy support is a requirement on this ushi-oni to help her go the distance. |
|---|
| E |
Sakuya (L1) Sakuya Izayoi is a Friend who excels in going as fast as possible. Unfortunately that’s a rather useless and actively detrimental niche in LostWord, as you want your debuffers to go first in difficult fights, and for farming you’ll always go first due to Last Word priority. Due to her low damage, mixed Yin & Yang scaling, and nonexistent utility otherwise, you’re pretty much only bringing Sakuya for her somewhat-lacking access to Metal element attacks. + Metal elemental access on two of her spell cards + Can do OK damage when applied in the right situation — No utility whatsoever
Kanako (L1) Kanako’s main claim to fame is being able to take on the Chapter 3 Act 1 Story Card farming in 4 Turns with the right teammate. Other than that, she’s somewhat reliant on getting a Killer target to farm events, and her ability to tank is somewhat lackluster due to low access to Focus and a lack of team-wide damage mitigation. Her damage is also somewhat low in harder fights unless she hits a Killer target and she needs setup beforehand to match other Solo nukers. + First Spell Card provides 1 Spirit Power, which makes Kanako very flexible + Last Word deals solid damage if backed by a Killer, of which Kanako has a wide range (Humans, Dwellers of Water, and Gods) — Below average Break access — Fully selfish tank, has no way of keeping her tank alive outside of Focus
Junko (L1) Junko simply doesn’t have a ton to offer by modern unit standards — she’s got P0 Water Breaks, a backloaded Solo targeting Last Word, and that’s it. She’ll get the job done if you give her time, but just don’t expect anything amazing. + P0 Solo targeting Water Breaks on Spread Shot + Decently powerful Solo targeting Last Word if given time to setup — No team support
Momiji (L1) Momiji Inubashiri is focused on increasing her own Focus while decreasing her allies’ so that she can defend everyone with her strong Yin DEF. Sadly she does not bring much else to fights, her defenses do not cover Yang attackers, and her damage output and breaks are pretty low. + Good amount of Yin DEF self-buffs + Evasion debuff on singular targets — Underwhelming Wood breaks — Low amount of Hard scaling on a low-power Last Word — Rather specific Defense unit (Yin only + Focus UP can be harmful)
Hatate (L1) Hatate Himekaidou arrives as quickly as she can on the scene with a great amount of Agility buffs to herself to compliment her Slice bullets, along with an equally impressive amount of Accuracy buffs that can easily be shared with other Friends. She does not really provide much support outside of that, but can still unleash a rather damaging All-target Last Word if set up properly. + 8 levels of Agility UP works well with Slice scaling on Last Word + Up to 3 levels of party Accuracy support, as well as 2 levels of Evasion DOWN on all foes — Mediocre, Wood-only breaks — Rather selfish offensive buffer
Komachi (L1) Komachi Onozuka’s primary goal is to buff herself to get the most out of her Solo-target Last Word with not much else going for her afterwards. Her elemental breaks are lacking or expensive in Spirit Power to access and the rest of her kit does little to impress in general. + Spread shot contains Metal breaks + Self-buffs to Yin ATK and Accuracy — Selfish attacker/buffs
Yatsuhashi (L1) Yatsuhashi can do okay damage, brings some lackluster, team buffs, and brings some Wood and Sun Breaks. That’s about it. Her kit’s very plain and ineffectual. + Decent teamwide ATK UP — Below-average breaks — Low damage
Benben (L1) Benben’s a simple but kind of weak attacker with some decent Breaks and not much else going for her. + Decent All-targeting Last Word with Fire and Wood breaks + Buffs own Yin ATK and debuffs one enemy’s Yin DEF — Below average access to elemental breaks — 1/3/1 scaling on 1/2/3 Spirit Power hurts damage output when farming — Little team support outside of Yin DEF debuffs
Seiran (L1) Seiran provides you with a below average amount of Moon and Earth breaks and that’s about it. Her debuffs aren’t very helpful, her damage is low, and she just doesn’t really do anything else. + Earth and Moon Breaks — Debuffs aren’t very helpful and have low values — Low damage
Lily White (L1) As a Healer, Lily White provides the bare minimum required to be considered serviceable in the role, restoring 1 barrier to all allies upon using her Last Word, to help them go just the little extra mile to see a fight done. Her damage is otherwise low, she brings no offensive utility, her access to elements is merely acceptable, and her Focus DOWN actively gets her team killed. +Cheap access to some Wood elements when needed +Capable of slightly buffing Party’s Yang DEF -Very lacking in offensive potential -Low value on supportive skills (HP heals are based on the user’s max HP, not the % of each healed Friend)
Reisen (L1) Reisen has some potent buffs, unfortunately let down by their 2 Turn durations. Combined with very low personal damage output and no Barrier Break potential, and Reisen just isnt great. + Solid buffing potential, especially for teammates with Hard and/or Slicing scaling — Cannot Barrier Break — Last Word deals no damage -Buffs are short, at 2 turns or less each
Byakuren (L1) Byakuren Hijiri is a tank who provides an adequate amount of Sun Breaks at 3 for 3 Power on her first Spell Card, some defensive utility to the team, and she can cheese some earlier floors of the Scarlet Devil Tower. Outside of that, her damage is low, she provides no offensive team utility, and she’s unfortunately lacking in defensive utility compared to the other tanks. + Average amount of Sun on first Spell Card at 0/1/2/3 Breaks for 0/1/2/3 Power + Buffs her team’s DEF. — Low damage — No form of teamwide Barrier recovery or Healing
Star Sapphire (L1) Packing a slightly below average Solo Last Word, Star Sapphire’s job is to smack one boss a bit shy of hard, and break some barriers along the way. Having one All Star 1 Break Spell Card and one Solo Star 1 Break Spell Card is a useful asset too, due to the general rarity of the Star element for a long time. Still, her damage is overall lackluster, and she brings no utility to the table outside of that, leaving her a still useful but somewhat lacking Friend. + Access to Star breaks + Accuracy buffs for self and whole party — Mediocre Solo-target Last Word
Sunny Milk (L1) Sunny Milk is a Friend you bring if you need Sun element attacks, and not much else. Her access to them isn’t great, her Last Word is Solo and deals low damage to boot, her overall damage output is poor, and her gimmick of lowering enemy Accuracy isn’t very useful. + Access to a few Sun breaks + Blind barrier access from a skill (and potentially Focus shot) — Niche debuffs that does little to support a party — Lacking in damage
Nitori (L1) With an overall lackluster kit, bringing no damage and minimal utility to the table, Nitori Kawashiro doesn’t have a lot going for her. She only brings Solo target Water and Metal element Spell Cards with only 1 break a piece at 0 Power, and only 1 more break at P2 and P3. However, she can apply 2 Electrified barriers to all foes, though the second barrier has a 10% failure rate. This grants her some small niche in providing team-wide Accuracy support that bypasses the normal 10 Stage Accuracy limit, which also goes well with Discharge attacks. + Access to Water and Metal element attacks + Provides team-wide accuracy support + Applies up to 2 Paralyze Barriers with her Skill 2 — Low utility — Very low damage
Sanae (L1) The best of the healers at launch, Sanae Kochiya’s main selling point is Barrier restoration on a skill. It’s only 1 barrier with a 50% chance of another 1, and on a 8 turn cooldown, but it being on a skill means it doesn’t eat a turn to use. Her healing is also simply better than the other healers, with access to two healing skills. She has simply okay element access otherwise, with a Last Word that would seem theoretically very good for element breaks, but in practice due to how weaknesses are assigned will typically only be 2 breaks on a single target at P3. Her low damage and lack of offensive utility otherwise keeps her firmly as a weaker Friend. + Extremely versatile Element access, being able to provide Star, Wood, Earth, Water, and Metal breaks + Exceptionally powerful and flexible healing, alongside Barrier restoration — Power hungry, her best breaks all require 3P and she has no Spirit Power boosters herself — Low damage
Daiyousei (L1) Daiyousei is unfortunately perhaps the worst healer in the game. The most powerful form of healing is Barrier restoration, which she has no access to. Her second spell card is completely worthless, her Last Word is the weakest in the game and provides no barrier breaks, and her ability to restore HP is the worst of the healers as well. That said, it isn’t all bad — she gives the team some Yang ATK Up, her 3 Power Spread Shot gives 2 All Wood breaks, and at P3 her first spell card gives a whopping six Metal breaks to a single foe. + Unparalleled 6 Metal breaks on first Spell Card + Very slight heals Well actually, her Last Word also gives a 40% heal but…having an Aid Last Word is an issue in its own right. + Provides Yang ATK & DEF UP on a skill — Very low damage
Yoshika (L1) Yoshika mainly serves as a Yin-based Defense Friend, who might get some good hits in with her Last Word. Unfortunately, outside of a fair amount of Water breaks, she will likely not serve much else to the party, and even endangers her own survivability thanks to the increased All-target damage she takes when heavily increasing her own Focus. + Average Water breaker + Good amount of self-Yin DEF buffs — Unimpressive damage on LW — Greedy buffer; little team utility — Heavy Focus UP can heavily screw over Yoshika’s defenses |
|---|

- Community
- Discord
- Nalu Wiki
- Sign In
- Register
![]()
3 hours ago
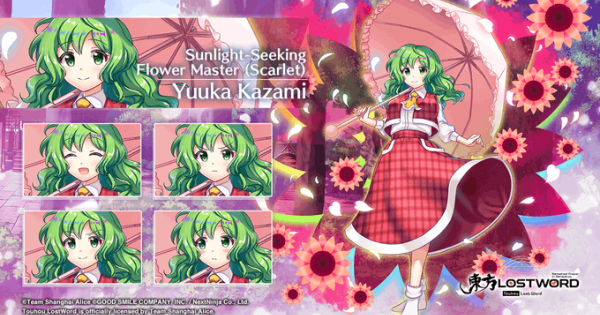
![]()
3 hours ago

![]()
13 hours ago

![]()
17 hours ago

![]()
17 hours ago

![]()
4 days ago

![]()
6 days ago

![]()
6 days ago
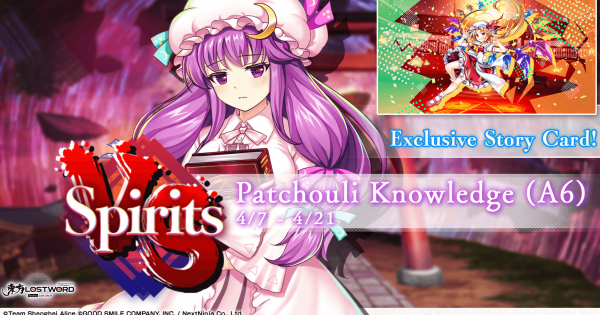
![]()
1 week ago

![]()
1 week ago

![]()
1 week ago

![]()
1 week ago
![]()
1 week ago

![]()
1 week ago

![]()
1 week ago

![]()
2 weeks ago
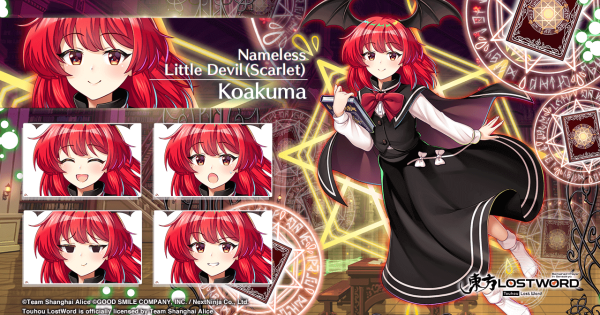
![]()
2 weeks ago

![]()
2 weeks ago

![]()
2 weeks ago

![]()
3 weeks ago


Reimu Hakurei
![]()
Solo
Solo
Solo
Solo
All
| 6650 | 910 | 930 | 1235 | 855 | 1190 |
| HP | AGI | Yang ATK | Yang DEF | Yin ATK | Yin DEF |

8


![]()
Eirin Yagokoro (Eternal)
![]()
All
All
Solo
All
All
| 5175 | 1325 | 850 | 900 | 1730 | 1060 |
| HP | AGI | Yang ATK | Yang DEF | Yin ATK | Yin DEF |

10
7

7


![]()
Reisen (Peacekeeper of the Capital)
![]()
Solo
Solo
Solo
All
All
| 5275 | 1285 | 1755 | 1415 | 1015 | 825 |
| HP | AGI | Yang ATK | Yang DEF | Yin ATK | Yin DEF |
14

5

6

3

![]()
Kaguya Houraisan (Love Temple of Benevolence and Conscience)
![]()
Solo
All
Solo
All
All
| 6000 | 1500 | 1890 | 1055 | 775 | 930 |
| HP | AGI | Yang ATK | Yang DEF | Yin ATK | Yin DEF |
11
5
2
2

2

2
6
![]()
Sanae Kochiya (Faith)
![]()
All
All
Solo
All
All
| 5000 | 1410 | 1650 | 890 | 1150 | 800 |
| HP | AGI | Yang ATK | Yang DEF | Yin ATK | Yin DEF |
9
7
6


![]()
Keiki Haniyasushin
![]()
All
Solo
Solo
All
All
| 5500 | 1150 | 1500 | 1000 | 1200 | 950 |
| HP | AGI | Yang ATK | Yang DEF | Yin ATK | Yin DEF |
1
16
1
5

![]()
Kutaka Niwatari
![]()
Solo
Solo
All
Solo
All
| 6500 | 1000 | 1460 | 1110 | 850 | 730 |
| HP | AGI | Yang ATK | Yang DEF | Yin ATK | Yin DEF |
8
6
8


![]()
Sakuya Izayoi (Legendary Vampire Hunter)
![]()
All
Solo
All
Solo
All
| 5325 | 1475 | 1880 | 905 | 1210 | 815 |
| HP | AGI | Yang ATK | Yang DEF | Yin ATK | Yin DEF |
15
9
![]()
Kanako Yasaka (Faith)
![]()
All
All
All
Solo
All
| 5250 | 850 | 1275 | 950 | 1725 | 1050 |
| HP | AGI | Yang ATK | Yang DEF | Yin ATK | Yin DEF |
6
12
6

![]()
Reimu Hakurei (God-Summoning Shaman)
![]()
Solo
Solo
Solo
All
All
| 5000 | 1250 | 1900 | 800 | 1850 | 1000 |
| HP | AGI | Yang ATK | Yang DEF | Yin ATK | Yin DEF |
8
16
![]()
Mystia Lorelei
![]()
All
All
All
Solo
All
| 5025 | 1005 | 915 | 945 | 1345 | 1235 |
| HP | AGI | Yang ATK | Yang DEF | Yin ATK | Yin DEF |
10
9
![]()
Yamame Kurodani
![]()
Solo
Solo
All
Solo
All
| 5000 | 1340 | 1090 | 790 | 1220 | 1010 |
| HP | AGI | Yang ATK | Yang DEF | Yin ATK | Yin DEF |
17

![]()
Nazrin
![]()
Solo
Solo
All
Solo
All
| 4500 | 1225 | 1540 | 715 | 915 | 1155 |
| HP | AGI | Yang ATK | Yang DEF | Yin ATK | Yin DEF |
12
10
![]()
Takane Yamashiro
![]()
All
All
Solo
All
All
| 5300 | 1330 | 1120 | 1030 | 960 | 950 |
| HP | AGI | Yang ATK | Yang DEF | Yin ATK | Yin DEF |
13
10
![]()
Misumaru Tamatsukuri
![]()
All
All
Solo
All
All
| 5250 | 750 | 1625 | 925 | 1625 | 925 |
| HP | AGI | Yang ATK | Yang DEF | Yin ATK | Yin DEF |
12
12
![]()
Remilia Scarlet (The Heat of My Fingertips)
![]()
All
Solo
Solo
All
All
| 5150 | 1400 | 1405 | 900 | 1905 | 935 |
| HP | AGI | Yang ATK | Yang DEF | Yin ATK | Yin DEF |
12
4
4
5
3
![]()
Patchouli Knowledge (Scarlet)
![]()
All
All
All
Solo
All
| 4250 | 750 | 1825 | 800 | 1850 | 825 |
| HP | AGI | Yang ATK | Yang DEF | Yin ATK | Yin DEF |
6
2
6
2
3
4
1
![]()
Koishi Komeiji (Subterranean)
![]()
All
All
Solo
All
All
| 5000 | 1450 | 1020 | 750 | 1880 | 800 |
| HP | AGI | Yang ATK | Yang DEF | Yin ATK | Yin DEF |
13
13
![]()
Suwako Moriya (Faith)
![]()
All
All
All
Solo
All
| 5000 | 1050 | 1875 | 925 | 1200 | 850 |
| HP | AGI | Yang ATK | Yang DEF | Yin ATK | Yin DEF |
1
13
4
4
![]()
Hong Meiling (Immovable Demon’s Gate)
![]()
Solo
Solo
All
Solo
All
| 5125 | 825 | 800 | 1600 | 1550 | 1550 |
| HP | AGI | Yang ATK | Yang DEF | Yin ATK | Yin DEF |
2
7
13
4
2
2
![]()
Ichirin Kumoi
![]()
Solo
Solo
Solo
All
All
| 5000 | 915 | 1660 | 855 | 1125 | 895 |
| HP | AGI | Yang ATK | Yang DEF | Yin ATK | Yin DEF |
1
11
10
![]()
Yukari Yakumo (Boundary of Sand and Sea)
![]()
Solo
Solo
All
Solo
All
| 9000 | 775 | 1925 | 1325 | 1025 | 950 |
| HP | AGI | Yang ATK | Yang DEF | Yin ATK | Yin DEF |
11
17
![]()
Toyosatomimi no Miko (Desires)
![]()
All
All
Solo
All
All
| 5000 | 750 | 1550 | 1625 | 750 | 1225 |
| HP | AGI | Yang ATK | Yang DEF | Yin ATK | Yin DEF |
8
8
2
2
1
1
1
1
![]()
Nue Houjuu
![]()
Solo
Solo
All
Solo
All
| 5000 | 1234 | 1234 | 765 | 1777 | 890 |
| HP | AGI | Yang ATK | Yang DEF | Yin ATK | Yin DEF |
6
11
6
1
![]()
Reisen Udongein Inaba (Lunatic Space Youkai)
![]()
All
Solo
Solo
All
All
| 5000 | 975 | 725 | 1400 | 1550 | 1700 |
| HP | AGI | Yang ATK | Yang DEF | Yin ATK | Yin DEF |
14
13
![]()
Alice Margatroid (Sporadically Margaret)
![]()
Solo
Solo
Solo
All
All
| 5375 | 1300 | 1095 | 950 | 1905 | 1250 |
| HP | AGI | Yang ATK | Yang DEF | Yin ATK | Yin DEF |
8
3
3
3
3
3
4
3

Junko (Nameless Space Terror)
![]()
Solo
All
All
Solo
All
| 4500 | 950 | 1375 | 825 | 1775 | 1525 |
| HP | AGI | Yang ATK | Yang DEF | Yin ATK | Yin DEF |
9
![]()
Sumireko Usami
![]()
Solo
All
Solo
Solo
All
| 4000 | 1000 | 1150 | 1100 | 1350 | 1050 |
| HP | AGI | Yang ATK | Yang DEF | Yin ATK | Yin DEF |
6
2
5
3
![]()
Kogasa Tatara
![]()
Solo
Solo
Solo
All
Solo
| 5150 | 910 | 1090 | 950 | 1300 | 1170 |
| HP | AGI | Yang ATK | Yang DEF | Yin ATK | Yin DEF |
13
2
![]()
Kagerou Imaizumi
![]()
All
Solo
All
All
Solo
| 3800 | 1315 | 1375 | 910 | 1205 | 885 |
| HP | AGI | Yang ATK | Yang DEF | Yin ATK | Yin DEF |
13
7
![]()
Aunn Komano
![]()
All
All
Solo
Solo
All
| 4500 | 1030 | 1430 | 1330 | 830 | 930 |
| HP | AGI | Yang ATK | Yang DEF | Yin ATK | Yin DEF |
4
12
2

Yoshika Miyako
![]()
Solo
Solo
All
All
All
| 7000 | 800 | 890 | 1090 | 980 | 1290 |
| HP | AGI | Yang ATK | Yang DEF | Yin ATK | Yin DEF |
12
![]()
Mononobe no Futo
![]()
Solo
Solo
Solo
All
All
| 4000 | 1330 | 1390 | 780 | 1380 | 770 |
| HP | AGI | Yang ATK | Yang DEF | Yin ATK | Yin DEF |
10
4
1
1
3
![]()
Soga no Tojiko
![]()
Solo
Solo
All
All
Solo
| 5150 | 1100 | 1380 | 770 | 1390 | 780 |
| HP | AGI | Yang ATK | Yang DEF | Yin ATK | Yin DEF |
12
10
![]()
Raiko Horikawa
![]()
Solo
All
Solo
Solo
All
| 5000 | 1400 | 1350 | 840 | 1050 | 810 |
| HP | AGI | Yang ATK | Yang DEF | Yin ATK | Yin DEF |
14
3

Byakuren Hijiri (Fantastic)
![]()
All
All
Solo
All
All
| 5000 | 1225 | 1075 | 1025 | 1750 | 825 |
| HP | AGI | Yang ATK | Yang DEF | Yin ATK | Yin DEF |
4
1
10
1
2
![]()
Yukari Yakumo (Cherry Blossom)
![]()
All
All
All
Solo
All
| 5250 | 830 | 1400 | 905 | 1700 | 1015 |
| HP | AGI | Yang ATK | Yang DEF | Yin ATK | Yin DEF |
5
4
7
4
4
1
1
2

Cirno (Scarlet)
![]()
All
All
Solo
All
All
| 5000 | 1050 | 910 | 890 | 1620 | 1430 |
| HP | AGI | Yang ATK | Yang DEF | Yin ATK | Yin DEF |
12
4
5

Sagume Kishin (Truth Temple of Legitimacy and Integrity)
![]()
All
All
All
Solo
All
| 5625 | 1285 | 1795 | 905 | 1315 | 925 |
| HP | AGI | Yang ATK | Yang DEF | Yin ATK | Yin DEF |
2
10
10
2

Seija Kijin
![]()
Solo
All
Solo
All
All
| 5800 | 980 | 1140 | 1100 | 1330 | 1190 |
| HP | AGI | Yang ATK | Yang DEF | Yin ATK | Yin DEF |
12
6

Shinmyoumaru Sukuna
![]()
All
Solo
All
Solo
Solo
| 3775 | 1265 | 1505 | 975 | 1445 | 955 |
| HP | AGI | Yang ATK | Yang DEF | Yin ATK | Yin DEF |
6
12
![]()
Eiki Shiki, Yamaxanadu
![]()
Solo
Solo
Solo
All
All
| 6500 | 1000 | 1400 | 900 | 1400 | 900 |
| HP | AGI | Yang ATK | Yang DEF | Yin ATK | Yin DEF |
10
6
![]()
Remilia Scarlet (Tiny Devil Mistress)
![]()
Solo
Solo
All
Solo
All
| 5050 | 1310 | 1245 | 720 | 1760 | 1305 |
| HP | AGI | Yang ATK | Yang DEF | Yin ATK | Yin DEF |
12
10
![]()
Mayumi Joutouguu
![]()
Solo
Solo
All
Solo
All
| 5000 | 930 | 1450 | 920 | 1140 | 1010 |
| HP | AGI | Yang ATK | Yang DEF | Yin ATK | Yin DEF |
13
10
![]()
Yachie Kicchou
![]()
Solo
Solo
Solo
All
All
| 5000 | 950 | 1145 | 1200 | 1155 | 1450 |
| HP | AGI | Yang ATK | Yang DEF | Yin ATK | Yin DEF |
14
6
![]()
Alice Margatroid (Cherry Blossom)
![]()
All
All
All
Solo
All
| 5000 | 1350 | 1000 | 875 | 1725 | 950 |
| HP | AGI | Yang ATK | Yang DEF | Yin ATK | Yin DEF |
5
5
6
6
4
![]()
Flandre Scarlet (Vampire Pursuing the Hunter)
![]()
All
All
Solo
All
All
| 5250 | 1215 | 1235 | 900 | 1750 | 1200 |
| HP | AGI | Yang ATK | Yang DEF | Yin ATK | Yin DEF |
10
10
![]()
Parsee Mizuhashi
![]()
Solo
Solo
All
Solo
All
| 5125 | 905 | 1185 | 795 | 1495 | 1045 |
| HP | AGI | Yang ATK | Yang DEF | Yin ATK | Yin DEF |
5
13
4
![]()
Ran Yakumo (Cherry Blossom)
![]()
All
All
All
Solo
All
| 5150 | 940 | 1425 | 930 | 1675 | 900 |
| HP | AGI | Yang ATK | Yang DEF | Yin ATK | Yin DEF |
8
15
![]()
Yuuka Kazami (Cell-Fused Kaiju)
![]()
Solo
All
Solo
All
All
| 5250 | 900 | 1325 | 1025 | 1925 | 1125 |
| HP | AGI | Yang ATK | Yang DEF | Yin ATK | Yin DEF |
14
12
![]()
Rumia (Scarlet)
![]()
All
All
Solo
All
All
| 5000 | 1225 | 650 | 600 | 1750 | 1675 |
| HP | AGI | Yang ATK | Yang DEF | Yin ATK | Yin DEF |
17
8
![]()
Tewi Inaba (Bunny Rebellion Strategist)
![]()
Solo
All
All
Solo
All
| 8500 | 845 | 1855 | 900 | 1250 | 800 |
| HP | AGI | Yang ATK | Yang DEF | Yin ATK | Yin DEF |
6
12
3
3
![]()
Ringo (Veteran Detective of the Capital)
![]()
Solo
All
Solo
All
All
| 5750 | 1240 | 1760 | 900 | 1450 | 850 |
| HP | AGI | Yang ATK | Yang DEF | Yin ATK | Yin DEF |
14
13
![]()
Satori Komeiji (NAЯAKA)
![]()
Solo
Solo
Solo
All
All
| 5250 | 1030 | 1905 | 885 | 1855 | 850 |
| HP | AGI | Yang ATK | Yang DEF | Yin ATK | Yin DEF |
15
15
![]()
Youmu Konpaku (Disillusion)
![]()
Solo
Solo
Solo
All
All
| 5000 | 1125 | 1890 | 835 | 1890 | 835 |
| HP | AGI | Yang ATK | Yang DEF | Yin ATK | Yin DEF |
5
17
5
1
1
1
![]()
Fujiwara no Mokou (Defiant Blue Phoenix)
![]()
Solo
All
Solo
All
All
| 5500 | 705 | 1855 | 1860 | 695 | 1135 |
| HP | AGI | Yang ATK | Yang DEF | Yin ATK | Yin DEF |
6
15
1
1
1
1
![]()
Remilia Scarlet (Scarlet)
![]()
All
All
Solo
All
All
| 5000 | 1600 | 750 | 700 | 1900 | 950 |
| HP | AGI | Yang ATK | Yang DEF | Yin ATK | Yin DEF |
6
12
4
3
![]()
Flandre Scarlet (Scarlet)
![]()
All
All
All
Solo
All
| 5000 | 1500 | 800 | 650 | 1900 | 1050 |
| HP | AGI | Yang ATK | Yang DEF | Yin ATK | Yin DEF |
2
5
6
2
10
![]()
Ibaraki-Douji’s Arm
![]()
Solo
Solo
All
Solo
All
| 5000 | 900 | 1550 | 750 | 1900 | 800 |
| HP | AGI | Yang ATK | Yang DEF | Yin ATK | Yin DEF |
3
12
3
3
1
4
![]()
Miyoi Okunoda (Waitress of Beach House Kourindou)
![]()
All
All
Solo
All
All
| 5250 | 1200 | 1925 | 1025 | 1125 | 1475 |
| HP | AGI | Yang ATK | Yang DEF | Yin ATK | Yin DEF |
7
10
2
5
![]()
Koishi Komeiji (The Excited Eyes of Love)
![]()
All
Solo
Solo
All
All
| 5000 | 1225 | 1950 | 925 | 1825 | 875 |
| HP | AGI | Yang ATK | Yang DEF | Yin ATK | Yin DEF |
2
13
7
5
3
![]()
Urumi Ushizaki
![]()
All
Solo
Solo
All
All
| 5275 | 865 | 1175 | 915 | 1425 | 1015 |
| HP | AGI | Yang ATK | Yang DEF | Yin ATK | Yin DEF |
6
9
7
![]()
Seiran (Thought Investigator of the Capital)
![]()
Solo
Solo
All
Solo
All
| 5600 | 1550 | 1780 | 850 | 1250 | 800 |
| HP | AGI | Yang ATK | Yang DEF | Yin ATK | Yin DEF |
16
14
![]()
Kanako Yasaka (Blue Goodbyes)
![]()
All
Solo
All
Solo
All
| 6000 | 905 | 1910 | 1105 | 1450 | 1005 |
| HP | AGI | Yang ATK | Yang DEF | Yin ATK | Yin DEF |
6
8
7
3
6
![]()
Hecatia Lapislazuli (Gate Administrator)
![]()
All
All
Solo
All
All
| 5250 | 800 | 1925 | 825 | 1925 | 825 |
| HP | AGI | Yang ATK | Yang DEF | Yin ATK | Yin DEF |
8
11
5
![]()
Hong Meiling (Scarlet)
![]()
All
All
All
Solo
All
| 5500 | 1425 | 1000 | 725 | 1800 | 850 |
| HP | AGI | Yang ATK | Yang DEF | Yin ATK | Yin DEF |
9
8
4
1
1
1
![]()
Daiyousei (Scarlet)
![]()
All
All
All
Solo
All
| 5250 | 1025 | 950 | 900 | 1650 | 1325 |
| HP | AGI | Yang ATK | Yang DEF | Yin ATK | Yin DEF |
6
15
3
![]()
Koakuma (Scarlet)
![]()
All
All
All
Solo
All
| 5000 | 950 | 1300 | 925 | 1775 | 950 |
| HP | AGI | Yang ATK | Yang DEF | Yin ATK | Yin DEF |
4
4
9
4
4
![]()
Sannyo Komakusa
![]()
All
All
Solo
All
All
| 5500 | 950 | 1100 | 850 | 1550 | 900 |
| HP | AGI | Yang ATK | Yang DEF | Yin ATK | Yin DEF |
16
9
![]()
Flandre Scarlet (I’m Alright!)
![]()
All
All
Solo
All
All
| 5250 | 925 | 725 | 1125 | 1850 | 1900 |
| HP | AGI | Yang ATK | Yang DEF | Yin ATK | Yin DEF |
18
3
6
1
1
1
![]()
Yuuka Kazami (Scarlet)
![]()
All
All
Solo
All
All
| 6750 | 950 | 1775 | 1100 | 925 | 800 |
| HP | AGI | Yang ATK | Yang DEF | Yin ATK | Yin DEF |
10
16
![]()
Satori Komeiji (The Girl Even the Beachgoers Fear)
![]()
Solo
All
All
Solo
All
| 5000 | 950 | 1850 | 1950 | 800 | 1250 |
| HP | AGI | Yang ATK | Yang DEF | Yin ATK | Yin DEF |
8
4
8
5
2
3
![]()
Fujiwara no Mokou (Silver Gale)
![]()
Solo
All
All
Solo
All
| 7500 | 1250 | 1905 | 900 | 1150 | 870 |
| HP | AGI | Yang ATK | Yang DEF | Yin ATK | Yin DEF |
18
3
6
![]()
Kyouko Kasodani
![]()
Solo
Solo
Solo
All
All
| 5025 | 1005 | 1345 | 1235 | 915 | 945 |
| HP | AGI | Yang ATK | Yang DEF | Yin ATK | Yin DEF |
12
10
![]()
Momoyo Himemushi
![]()
Solo
Solo
Solo
All
All
| 6000 | 860 | 1345 | 715 | 1880 | 900 |
| HP | AGI | Yang ATK | Yang DEF | Yin ATK | Yin DEF |
12
16
![]()
Kisume
![]()
Solo
Solo
Solo
All
All
| 4600 | 1050 | 1050 | 785 | 1445 | 1200 |
| HP | AGI | Yang ATK | Yang DEF | Yin ATK | Yin DEF |
7
3
10
2
![]()
Hecatia Lapislazuli (Tropical Goddess)
![]()
All
All
All
Solo
All
| 6500 | 1020 | 1930 | 1150 | 1400 | 1000 |
| HP | AGI | Yang ATK | Yang DEF | Yin ATK | Yin DEF |
12
12
![]()
Satori Komeiji (Subterranean)
![]()
All
All
Solo
All
All
| 5000 | 1020 | 1880 | 800 | 1450 | 750 |
| HP | AGI | Yang ATK | Yang DEF | Yin ATK | Yin DEF |
8
11
4
2
1
![]()
Nitori Kawashiro (Faith)
![]()
All
All
All
Solo
All
| 5000 | 825 | 1225 | 1000 | 1675 | 1175 |
| HP | AGI | Yang ATK | Yang DEF | Yin ATK | Yin DEF |
10
9
2
![]()
Koakuma (Compendium of Advanced Magic)
![]()
Solo
All
Solo
All
All
| 5500 | 1100 | 1450 | 950 | 1800 | 950 |
| HP | AGI | Yang ATK | Yang DEF | Yin ATK | Yin DEF |
16
10
![]()
Patchouli Knowledge (Loyal Elemental Magician)
![]()
Solo
Solo
All
Solo
All
| 4250 | 900 | 1900 | 900 | 1900 | 900 |
| HP | AGI | Yang ATK | Yang DEF | Yin ATK | Yin DEF |
5
6
5
6
4
2
2
![]()
Sunny Milk (Scarlet)
![]()
All
All
All
Solo
All
| 5000 | 1225 | 1700 | 1500 | 750 | 725 |
| HP | AGI | Yang ATK | Yang DEF | Yin ATK | Yin DEF |
20
2
![]()
Mike Goutokuji
![]()
All
All
Solo
All
All
| 5250 | 1025 | 1400 | 1325 | 825 | 825 |
| HP | AGI | Yang ATK | Yang DEF | Yin ATK | Yin DEF |
10
4
2
2
2
6
2
![]()
Chimata Tenkyuu
![]()
All
All
Solo
All
All
| 5500 | 1050 | 1875 | 830 | 1325 | 720 |
| HP | AGI | Yang ATK | Yang DEF | Yin ATK | Yin DEF |
8
8
2
2
2
2
![]()
Yuyuko Saigyouji (Cherry Blossom)
![]()
All
All
All
Solo
All
| 5250 | 850 | 1300 | 900 | 1800 | 1000 |
| HP | AGI | Yang ATK | Yang DEF | Yin ATK | Yin DEF |
13
13
![]()
Utsuho Reiuji (The Tiny Queen’s Charcoal Maker)
![]()
All
Solo
All
Solo
All
| 5000 | 1125 | 1925 | 1250 | 1050 | 1000 |
| HP | AGI | Yang ATK | Yang DEF | Yin ATK | Yin DEF |
13
13
![]()
Satori Komeiji (Tiny Underworld Queen)
![]()
Solo
Solo
Solo
All
All
| 7250 | 725 | 1020 | 1500 | 1905 | 750 |
| HP | AGI | Yang ATK | Yang DEF | Yin ATK | Yin DEF |
21
9
![]()
Koishi Komeiji (Spontaneous White Beauty)
![]()
Solo
All
Solo
All
All
| 5250 | 1215 | 1935 | 950 | 1150 | 1500 |
| HP | AGI | Yang ATK | Yang DEF | Yin ATK | Yin DEF |
10
20
![]()
Wakasagihime
![]()
All
All
Solo
All
Aid
| 3800 | 1050 | 1315 | 1045 | 1275 | 1005 |
| HP | AGI | Yang ATK | Yang DEF | Yin ATK | Yin DEF |
13
![]()
Reimu Hakurei (Leisurely Shrine Maiden of Paradise)
![]()
Solo
Solo
All
Solo
All
| 5500 | 1560 | 1940 | 850 | 1550 | 800 |
| HP | AGI | Yang ATK | Yang DEF | Yin ATK | Yin DEF |
16
14
![]()
Marisa Kirisame (Magician on Vacation)
![]()
Solo
Solo
All
Solo
All
| 5500 | 1305 | 1945 | 1000 | 1600 | 850 |
| HP | AGI | Yang ATK | Yang DEF | Yin ATK | Yin DEF |
16
3
11
![]()
Sakuya Izayoi (The Moon and Izayoi)
![]()
Solo
Solo
All
Solo
All
| 5000 | 1400 | 1905 | 1000 | 1400 | 870 |
| HP | AGI | Yang ATK | Yang DEF | Yin ATK | Yin DEF |
16
14
![]()
Wriggle Nightbug
![]()
All
Solo
Solo
All
All
| 5000 | 1255 | 1025 | 640 | 1405 | 1125 |
| HP | AGI | Yang ATK | Yang DEF | Yin ATK | Yin DEF |
10
12
![]()
Eternity Larva
![]()
Solo
Solo
Solo
All
All
| 5200 | 1150 | 695 | 900 | 1500 | 715 |
| HP | AGI | Yang ATK | Yang DEF | Yin ATK | Yin DEF |
12
10
![]()
Megumu Iizunamaru
![]()
All
Solo
All
Solo
All
| 4500 | 1320 | 1430 | 910 | 1430 | 910 |
| HP | AGI | Yang ATK | Yang DEF | Yin ATK | Yin DEF |
12
6
1
1
1
1
1
![]()
Rin Kaenbyou (The Tiny Queen’s Nursemaid)
![]()
Solo
All
Solo
All
All
| 5000 | 1350 | 1100 | 900 | 1900 | 1100 |
| HP | AGI | Yang ATK | Yang DEF | Yin ATK | Yin DEF |
13
13

Marisa Kirisame
![]()
Solo
Solo
All
All
Solo
| 5500 | 920 | 1290 | 1010 | 1200 | 930 |
| HP | AGI | Yang ATK | Yang DEF | Yin ATK | Yin DEF |
6

Suwako Moriya
![]()
Solo
Solo
Solo
All
Solo
| 6150 | 1000 | 1200 | 1090 | 1400 | 980 |
| HP | AGI | Yang ATK | Yang DEF | Yin ATK | Yin DEF |
4
4
2
4

Eirin Yagokoro
![]()
Solo
All
All
Solo
All
| 8400 | 850 | 1500 | 850 | 1220 | 800 |
| HP | AGI | Yang ATK | Yang DEF | Yin ATK | Yin DEF |
1
7

Kaguya Houraisan
![]()
All
All
Solo
Solo
All
| 5400 | 990 | 1480 | 1010 | 1390 | 950 |
| HP | AGI | Yang ATK | Yang DEF | Yin ATK | Yin DEF |
4
4
3

Kosuzu Motoori
![]()
Solo
All
All
Solo
All
| 4900 | 900 | 980 | 1020 | 1280 | 840 |
| HP | AGI | Yang ATK | Yang DEF | Yin ATK | Yin DEF |
8
7

Tewi Inaba
![]()
Solo
Solo
All
Solo
All
| 5150 | 1140 | 1210 | 965 | 1080 | 1025 |
| HP | AGI | Yang ATK | Yang DEF | Yin ATK | Yin DEF |
5
5

Marisa Kirisame (Witch of Scarlet Dreams)
![]()
Solo
Solo
All
All
All
| 5600 | 1130 | 1500 | 900 | 1700 | 1000 |
| HP | AGI | Yang ATK | Yang DEF | Yin ATK | Yin DEF |
5
2
9
3
3

Reisen
![]()
Solo
Solo
Aid
Solo
Aid
| 5300 | 1150 | 680 | 1100 | 870 | 1140 |
| HP | AGI | Yang ATK | Yang DEF | Yin ATK | Yin DEF |


Seiran
![]()
All
Solo
All
Solo
Solo
| 4900 | 1300 | 1020 | 980 | 1110 | 1060 |
| HP | AGI | Yang ATK | Yang DEF | Yin ATK | Yin DEF |
4
5

Ringo
![]()
All
Solo
Solo
All
Solo
| 4900 | 1340 | 980 | 1015 | 1040 | 1095 |
| HP | AGI | Yang ATK | Yang DEF | Yin ATK | Yin DEF |
6
2

Kanako Yasaka
![]()
All
Solo
All
All
Solo
| 8200 | 830 | 1170 | 1120 | 990 | 1150 |
| HP | AGI | Yang ATK | Yang DEF | Yin ATK | Yin DEF |
4
4
3

Hieda no Akyuu
![]()
Solo
Solo
All
Solo
Solo
| 4950 | 830 | 1295 | 915 | 1155 | 815 |
| HP | AGI | Yang ATK | Yang DEF | Yin ATK | Yin DEF |
4
4
2
2
2

Byakuren Hijiri
![]()
Solo
Solo
Solo
Solo
All
| 7150 | 1000 | 1170 | 1130 | 750 | 1420 |
| HP | AGI | Yang ATK | Yang DEF | Yin ATK | Yin DEF |
3
3

Watatsuki no Toyohime
![]()
Solo
Solo
All
Solo
All
| 6500 | 850 | 1000 | 950 | 1500 | 1300 |
| HP | AGI | Yang ATK | Yang DEF | Yin ATK | Yin DEF |
2
3
3
1
2

Shizuha Aki
![]()
All
All
Solo
All
All
| 5500 | 850 | 1050 | 1000 | 1300 | 1150 |
| HP | AGI | Yang ATK | Yang DEF | Yin ATK | Yin DEF |
7
1
8

Minoriko Aki
![]()
Solo
Solo
All
All
All
| 8100 | 830 | 1100 | 750 | 1250 | 900 |
| HP | AGI | Yang ATK | Yang DEF | Yin ATK | Yin DEF |
6
9
1

Watatsuki no Yorihime
![]()
Solo
Solo
Solo
All
All
| 5550 | 1370 | 1000 | 925 | 1420 | 1075 |
| HP | AGI | Yang ATK | Yang DEF | Yin ATK | Yin DEF |
2
3
4
1
1
1

Doremy Sweet
![]()
All
All
Solo
Solo
All
| 5800 | 980 | 1140 | 1100 | 1330 | 1190 |
| HP | AGI | Yang ATK | Yang DEF | Yin ATK | Yin DEF |
7
6

Aya Shameimaru
![]()
Solo
Solo
Solo
All
Solo
| 4400 | 1420 | 1200 | 900 | 1100 | 950 |
| HP | AGI | Yang ATK | Yang DEF | Yin ATK | Yin DEF |
11

Satori Komeiji
![]()
All
Solo
Solo
All
Solo
| 6000 | 900 | 1390 | 1150 | 1210 | 1050 |
| HP | AGI | Yang ATK | Yang DEF | Yin ATK | Yin DEF |
9
3

Koishi Komeiji
![]()
All
All
Solo
All
Solo
| 6000 | 900 | 1210 | 1050 | 1390 | 1150 |
| HP | AGI | Yang ATK | Yang DEF | Yin ATK | Yin DEF |
9
3

Okina Matara
![]()
All
Solo
All
Solo
All
| 4750 | 750 | 1580 | 1020 | 1580 | 1020 |
| HP | AGI | Yang ATK | Yang DEF | Yin ATK | Yin DEF |
7
7
3

Keine Kamishirasawa
![]()
All
Solo
Solo
All
All
| 5500 | 700 | 1200 | 1425 | 800 | 1225 |
| HP | AGI | Yang ATK | Yang DEF | Yin ATK | Yin DEF |
2
6

Suika Ibuki
![]()
Solo
All
Solo
All
All
| 6600 | 780 | 1400 | 910 | 1520 | 970 |
| HP | AGI | Yang ATK | Yang DEF | Yin ATK | Yin DEF |
4
2
1
3
3

Fujiwara no Mokou
![]()
All
Solo
Solo
All
Solo
| 5800 | 1090 | 1310 | 1050 | 820 | 1020 |
| HP | AGI | Yang ATK | Yang DEF | Yin ATK | Yin DEF |
12

Shou Toramaru
![]()
All
Solo
Solo
Solo
All
| 5000 | 950 | 1500 | 1120 | 1100 | 780 |
| HP | AGI | Yang ATK | Yang DEF | Yin ATK | Yin DEF |
7
8

Sanae Kochiya
![]()
All
Solo
Solo
All
Solo
| 8000 | 980 | 1000 | 985 | 940 | 945 |
| HP | AGI | Yang ATK | Yang DEF | Yin ATK | Yin DEF |
4
4
3
2
2

Sakuya Izayoi
![]()
Solo
Solo
Solo
All
All
| 4550 | 1400 | 1195 | 925 | 1105 | 915 |
| HP | AGI | Yang ATK | Yang DEF | Yin ATK | Yin DEF |
6

Patchouli Knowledge
![]()
Solo
All
Solo
Solo
All
| 4200 | 1200 | 850 | 1280 | 1380 | 900 |
| HP | AGI | Yang ATK | Yang DEF | Yin ATK | Yin DEF |
3
3
3
3
3
4
4

Youmu Konpaku
![]()
All
Solo
Solo
All
All
| 5050 | 1240 | 1160 | 940 | 1160 | 940 |
| HP | AGI | Yang ATK | Yang DEF | Yin ATK | Yin DEF |
6
3

Lily White
![]()
All
Solo
Solo
All
All
| 5750 | 950 | 1150 | 1100 | 750 | 900 |
| HP | AGI | Yang ATK | Yang DEF | Yin ATK | Yin DEF |
6
2

Reisen Udongein Inaba
![]()
All
Solo
Solo
Solo
Solo
| 5150 | 1140 | 1210 | 1025 | 1080 | 965 |
| HP | AGI | Yang ATK | Yang DEF | Yin ATK | Yin DEF |
11

Cirno
![]()
Solo
All
All
Solo
All
| 5200 | 1010 | 1120 | 800 | 1170 | 860 |
| HP | AGI | Yang ATK | Yang DEF | Yin ATK | Yin DEF |
12

Daiyousei
![]()
All
Solo
Solo
Aid
Aid
| 4800 | 1140 | 800 | 1065 | 940 | 1095 |
| HP | AGI | Yang ATK | Yang DEF | Yin ATK | Yin DEF |
2
2
6

Alice Margatroid
![]()
Solo
Solo
Solo
Solo
All
| 5350 | 1280 | 890 | 910 | 1080 | 1220 |
| HP | AGI | Yang ATK | Yang DEF | Yin ATK | Yin DEF |

Medicine Melancholy
![]()
All
Solo
All
Solo
All
| 4650 | 950 | 990 | 870 | 1180 | 1080 |
| HP | AGI | Yang ATK | Yang DEF | Yin ATK | Yin DEF |
8
1

Nitori Kawashiro
![]()
All
All
Solo
Solo
All
| 5300 | 1330 | 960 | 950 | 1120 | 1030 |
| HP | AGI | Yang ATK | Yang DEF | Yin ATK | Yin DEF |
3
3

Kasen Ibaraki
![]()
Solo
Solo
Solo
Solo
Solo
| 5850 | 1095 | 1285 | 1045 | 1200 | 1105 |
| HP | AGI | Yang ATK | Yang DEF | Yin ATK | Yin DEF |
3
3
3

Hong Meiling
![]()
All
Solo
Solo
Solo
All
| 5800 | 920 | 1190 | 990 | 1230 | 960 |
| HP | AGI | Yang ATK | Yang DEF | Yin ATK | Yin DEF |
7
8

Yuyuko Saigyouji
![]()
All
All
Solo
Solo
All
| 5350 | 1170 | 1380 | 1280 | 1010 | 990 |
| HP | AGI | Yang ATK | Yang DEF | Yin ATK | Yin DEF |
7

Ran Yakumo
![]()
All
All
Solo
Solo
All
| 5400 | 990 | 1330 | 1180 | 980 | 890 |
| HP | AGI | Yang ATK | Yang DEF | Yin ATK | Yin DEF |
4

Chen
![]()
All
Solo
Solo
Solo
All
| 4500 | 1200 | 1220 | 985 | 880 | 815 |
| HP | AGI | Yang ATK | Yang DEF | Yin ATK | Yin DEF |

Sunny Milk
![]()
Solo
Solo
Solo
All
Solo
| 4350 | 1250 | 1260 | 1035 | 690 | 895 |
| HP | AGI | Yang ATK | Yang DEF | Yin ATK | Yin DEF |
8

Luna Child
![]()
Solo
Solo
Solo
All
Solo
| 4700 | 850 | 870 | 960 | 1220 | 1160 |
| HP | AGI | Yang ATK | Yang DEF | Yin ATK | Yin DEF |
8

Star Sapphire
![]()
Solo
Solo
Solo
All
Solo
| 5150 | 780 | 1260 | 915 | 980 | 1035 |
| HP | AGI | Yang ATK | Yang DEF | Yin ATK | Yin DEF |
8

Remilia Scarlet
![]()
All
Solo
All
Solo
All
| 5000 | 1220 | 1000 | 880 | 1300 | 1050 |
| HP | AGI | Yang ATK | Yang DEF | Yin ATK | Yin DEF |
6

Flandre Scarlet
![]()
Solo
All
Solo
All
Solo
| 4850 | 1080 | 1180 | 890 | 1380 | 950 |
| HP | AGI | Yang ATK | Yang DEF | Yin ATK | Yin DEF |
2

Yukari Yakumo
![]()
Solo
Solo
Solo
All
All
| 7850 | 850 | 930 | 1390 | 840 | 1320 |
| HP | AGI | Yang ATK | Yang DEF | Yin ATK | Yin DEF |
8
2

Lyrica Prismriver
![]()
Solo
All
All
Solo
Solo
| 7075 | 1035 | 1225 | 775 | 1225 | 775 |
| HP | AGI | Yang ATK | Yang DEF | Yin ATK | Yin DEF |
8
5

Watatsuki no Toyohime (Plentiful Temple of Wealth and Equality)
![]()
All
Solo
All
Solo
All
| 8500 | 1230 | 1800 | 850 | 950 | 820 |
| HP | AGI | Yang ATK | Yang DEF | Yin ATK | Yin DEF |
9
9
3
1
1
1

Sakuya Izayoi (Lunar War Servant)
![]()
All
Solo
All
All
Solo
| 5000 | 1400 | 1750 | 925 | 1450 | 825 |
| HP | AGI | Yang ATK | Yang DEF | Yin ATK | Yin DEF |
8
13

Sagume Kishin
![]()
All
Solo
Solo
All
All
| 5800 | 980 | 1330 | 1190 | 1140 | 1100 |
| HP | AGI | Yang ATK | Yang DEF | Yin ATK | Yin DEF |
11
3

Tenshi Hinanawi
![]()
Solo
Solo
Solo
All
All
| 5850 | 810 | 1540 | 1450 | 1140 | 790 |
| HP | AGI | Yang ATK | Yang DEF | Yin ATK | Yin DEF |
2
2
2
8
5

Sakuya Izayoi (Scarlet)
![]()
All
All
All
All
Solo
| 5050 | 1300 | 1225 | 865 | 1525 | 975 |
| HP | AGI | Yang ATK | Yang DEF | Yin ATK | Yin DEF |
7
11
5

Hatate Himekaidou
![]()
All
Solo
All
Solo
All
| 5000 | 1300 | 1100 | 950 | 1200 | 900 |
| HP | AGI | Yang ATK | Yang DEF | Yin ATK | Yin DEF |
11

Momiji Inubashiri
![]()
All
Solo
Solo
Solo
All
| 4000 | 1000 | 1010 | 1220 | 1020 | 1400 |
| HP | AGI | Yang ATK | Yang DEF | Yin ATK | Yin DEF |
10

Toyosatomimi no Miko
![]()
All
Solo
All
All
Solo
| 4875 | 1315 | 1625 | 925 | 1225 | 835 |
| HP | AGI | Yang ATK | Yang DEF | Yin ATK | Yin DEF |
11
8

Sanae Kochiya (Lunar War Oracle)
![]()
Solo
Solo
Solo
All
All
| 6500 | 1200 | 1725 | 875 | 1400 | 850 |
| HP | AGI | Yang ATK | Yang DEF | Yin ATK | Yin DEF |
14
10

Aya Shameimaru (Flower)
![]()
Solo
All
All
Solo
All
| 5000 | 1450 | 1500 | 1100 | 955 | 895 |
| HP | AGI | Yang ATK | Yang DEF | Yin ATK | Yin DEF |
8
4
8
3

Reisen Udongein Inaba (Eternal)
![]()
All
All
Solo
Solo
All
| 5000 | 1405 | 955 | 900 | 1625 | 1015 |
| HP | AGI | Yang ATK | Yang DEF | Yin ATK | Yin DEF |
11
3
3
3
3

Satono Nishida
![]()
All
Solo
All
Solo
Solo
| 4200 | 810 | 1150 | 1010 | 1450 | 1190 |
| HP | AGI | Yang ATK | Yang DEF | Yin ATK | Yin DEF |
12
6

Reimu Hakurei (Lunar War Shaman)
![]()
Solo
Solo
All
Solo
All
| 5125 | 1375 | 1750 | 1000 | 1350 | 850 |
| HP | AGI | Yang ATK | Yang DEF | Yin ATK | Yin DEF |
10
11

Mai Teireida
![]()
Solo
All
All
Solo
Solo
| 4200 | 810 | 1450 | 1190 | 1150 | 1010 |
| HP | AGI | Yang ATK | Yang DEF | Yin ATK | Yin DEF |
7
10

Youmu Konpaku (Cherry Blossom)
![]()
All
All
Solo
Solo
All
| 5050 | 1190 | 1460 | 890 | 1460 | 890 |
| HP | AGI | Yang ATK | Yang DEF | Yin ATK | Yin DEF |
10
8
3
3

Watatsuki no Yorihime (Peace Temple of Modesty and Devotion)
![]()
All
Solo
Solo
All
All
| 5350 | 1320 | 1800 | 1050 | 1230 | 880 |
| HP | AGI | Yang ATK | Yang DEF | Yin ATK | Yin DEF |
10
2
2
3
3
3

Hecatia Lapislazuli
![]()
Solo
Solo
Solo
All
Solo
| 5150 | 850 | 1320 | 870 | 1750 | 1080 |
| HP | AGI | Yang ATK | Yang DEF | Yin ATK | Yin DEF |
10
5
1
1
5
2

Junko
![]()
Solo
All
All
All
Solo
| 4900 | 720 | 1620 | 980 | 1620 | 980 |
| HP | AGI | Yang ATK | Yang DEF | Yin ATK | Yin DEF |
6
6
3

Reisen Udongein Inaba (Lunar War Soldier)
![]()
Solo
Solo
All
Solo
All
| 5000 | 1225 | 1700 | 825 | 1550 | 1050 |
| HP | AGI | Yang ATK | Yang DEF | Yin ATK | Yin DEF |
10
11

Sekibanki
![]()
Solo
Solo
All
Solo
All
| 3800 | 1120 | 1325 | 1000 | 1255 | 990 |
| HP | AGI | Yang ATK | Yang DEF | Yin ATK | Yin DEF |
11
4
2

Seiga Kaku
![]()
Solo
All
Solo
All
All
| 5550 | 1260 | 1050 | 900 | 1210 | 920 |
| HP | AGI | Yang ATK | Yang DEF | Yin ATK | Yin DEF |
6
1
1
4
6

Letty Whiterock
![]()
All
Solo
Solo
All
Solo
| 4850 | 915 | 1145 | 825 | 1395 | 1200 |
| HP | AGI | Yang ATK | Yang DEF | Yin ATK | Yin DEF |
14

Saki Kurokoma
![]()
Solo
Solo
All
All
Solo
| 5150 | 1425 | 1125 | 1015 | 1500 | 805 |
| HP | AGI | Yang ATK | Yang DEF | Yin ATK | Yin DEF |
7
13
4

Youmu Konpaku (Lunar War Gardener)
![]()
Solo
Solo
All
Solo
All
| 5000 | 1250 | 1675 | 875 | 1675 | 875 |
| HP | AGI | Yang ATK | Yang DEF | Yin ATK | Yin DEF |
10
11

Hata no Kokoro
![]()
All
Solo
Solo
All
Solo
| 6075 | 825 | 1205 | 895 | 1405 | 905 |
| HP | AGI | Yang ATK | Yang DEF | Yin ATK | Yin DEF |
12
4

Youmu Konpaku (Mysterious Sword Master)
![]()
Solo
Solo
Solo
All
All
| 6000 | 1150 | 1600 | 900 | 1600 | 900 |
| HP | AGI | Yang ATK | Yang DEF | Yin ATK | Yin DEF |
12
1
1
5
5

Iku Nagae
![]()
Solo
All
Solo
All
All
| 4425 | 1305 | 1455 | 985 | 1355 | 915 |
| HP | AGI | Yang ATK | Yang DEF | Yin ATK | Yin DEF |
10
6
4

Nemuno Sakata
![]()
Solo
Solo
Solo
Solo
Solo
| 5000 | 900 | 1350 | 750 | 1500 | 950 |
| HP | AGI | Yang ATK | Yang DEF | Yin ATK | Yin DEF |
9
4
3

Joon Yorigami
![]()
Solo
Solo
Solo
Aid
Solo
| 6500 | 850 | 1575 | 1150 | 1125 | 900 |
| HP | AGI | Yang ATK | Yang DEF | Yin ATK | Yin DEF |
9

Shion Yorigami
![]()
All
Solo
Solo
All
Solo
| 6500 | 850 | 1125 | 900 | 1575 | 1150 |
| HP | AGI | Yang ATK | Yang DEF | Yin ATK | Yin DEF |
12

Benben Tsukumo
![]()
Solo
All
All
Solo
All
| 5500 | 1200 | 1150 | 700 | 1450 | 850 |
| HP | AGI | Yang ATK | Yang DEF | Yin ATK | Yin DEF |
1
7
4

Yatsuhashi Tsukumo
![]()
All
Solo
All
Solo
All
| 5500 | 1200 | 1450 | 850 | 1150 | 700 |
| HP | AGI | Yang ATK | Yang DEF | Yin ATK | Yin DEF |
9
1
2

Minamitsu Murasa
![]()
Solo
Solo
All
Solo
All
| 4800 | 1320 | 1330 | 890 | 1150 | 800 |
| HP | AGI | Yang ATK | Yang DEF | Yin ATK | Yin DEF |
14

Utsuho Reiuji
![]()
Solo
All
Solo
Solo
All
| 5100 | 1270 | 1400 | 770 | 1200 | 790 |
| HP | AGI | Yang ATK | Yang DEF | Yin ATK | Yin DEF |
7
10

Yuyuko Saigyouji (Tiny Ghost Mistress)
![]()
Solo
Solo
Solo
All
All
| 5875 | 1305 | 1395 | 725 | 1755 | 995 |
| HP | AGI | Yang ATK | Yang DEF | Yin ATK | Yin DEF |
17

Koakuma
![]()
All
All
Solo
Solo
All
| 4500 | 1150 | 1100 | 715 | 1250 | 885 |
| HP | AGI | Yang ATK | Yang DEF | Yin ATK | Yin DEF |
2
2
9
3

Rumia
![]()
Solo
All
All
Solo
Solo
| 4900 | 1000 | 670 | 620 | 1340 | 1390 |
| HP | AGI | Yang ATK | Yang DEF | Yin ATK | Yin DEF |
3
2
6
3

Marisa Kirisame (Lunar War Enchanter)
![]()
Solo
Solo
Solo
All
All
| 5000 | 1350 | 1700 | 900 | 1600 | 800 |
| HP | AGI | Yang ATK | Yang DEF | Yin ATK | Yin DEF |
10
11

Yuuka Kazami
![]()
All
Solo
All
All
All
| 5000 | 1160 | 1440 | 910 | 1400 | 990 |
| HP | AGI | Yang ATK | Yang DEF | Yin ATK | Yin DEF |
11
5

Clownpiece
![]()
All
Solo
Solo
All
Solo
| 4800 | 1000 | 840 | 700 | 1450 | 1050 |
| HP | AGI | Yang ATK | Yang DEF | Yin ATK | Yin DEF |
2
4
1
4
6
4

Reimu Hakurei (Scarlet)
![]()
Solo
All
Solo
All
All
| 5200 | 1100 | 1610 | 985 | 1225 | 940 |
| HP | AGI | Yang ATK | Yang DEF | Yin ATK | Yin DEF |
9
11
2

Yuugi Hoshiguma
![]()
Solo
All
All
Solo
Solo
| 6700 | 760 | 1320 | 850 | 1600 | 1030 |
| HP | AGI | Yang ATK | Yang DEF | Yin ATK | Yin DEF |
6
5
6
1

Rin Kaenbyou
![]()
Solo
Solo
Solo
All
All
| 5500 | 1250 | 1150 | 850 | 1200 | 900 |
| HP | AGI | Yang ATK | Yang DEF | Yin ATK | Yin DEF |
9
8

Mamizou Futatsuiwa
![]()
Solo
Solo
All
Solo
All
| 6000 | 750 | 900 | 1220 | 1400 | 1430 |
| HP | AGI | Yang ATK | Yang DEF | Yin ATK | Yin DEF |
10
2
2
3
3

Lunasa Prismriver
![]()
All
Solo
All
Solo
Solo
| 7750 | 900 | 1000 | 700 | 1450 | 850 |
| HP | AGI | Yang ATK | Yang DEF | Yin ATK | Yin DEF |
11
6

Merlin Prismriver
![]()
Solo
All
Solo
Solo
Solo
| 6400 | 1170 | 1450 | 850 | 1000 | 700 |
| HP | AGI | Yang ATK | Yang DEF | Yin ATK | Yin DEF |
7
7

Marisa Kirisame (Scarlet)
![]()
All
Solo
All
Solo
All
| 5100 | 1400 | 1560 | 895 | 1175 | 850 |
| HP | AGI | Yang ATK | Yang DEF | Yin ATK | Yin DEF |
4
14
4

Komachi Onozuka
![]()
All
Solo
All
Solo
Solo
| 5000 | 1300 | 850 | 730 | 1460 | 1110 |
| HP | AGI | Yang ATK | Yang DEF | Yin ATK | Yin DEF |
9
5

Hina Kagiyama
![]()
Solo
All
Solo
Solo
Solo
| 5800 | 890 | 1300 | 900 | 1200 | 1000 |
| HP | AGI | Yang ATK | Yang DEF | Yin ATK | Yin DEF |
2
2
2
2
2
3
![]()
Alice Margatroid (Scarlet)
![]()
Solo
All
Solo
All
All
| 5000 | 1150 | 1800 | 1150 | 1000 | 800 |
| HP | AGI | Yang ATK | Yang DEF | Yin ATK | Yin DEF |
5
5
5
5
4
5
Table of Contents
- What is Touhou LostWord?
- Downloading Touhou LostWord
- How Do I Play Touhou LostWord?
What is Touhou LostWord?
Touhou LostWord is a Touhou JRPG officially licensed by Team Shanghai Alice. As a spin-off from the main series, combat revolves around turn-based skill usage instead of bullet hell gameplay, with visual novel-based storytelling and professional music, artwork, and voice acting from people passionate about the Touhou franchise. Despite the change in genre, the developers are confident in translating the feel of a Touhou game into a mobile JRPG with spell cards, bullets, and an impressive soundtrack.

Downloading Touhou LostWord
Touhou LostWord is available for free on the App store for iOS users and Google Play Store for Android. To download the game, simply visit the link of your respective system.
iOS App StoreAndroid Google Play Store
Touhou LostWord is available in many different countries. However, if it does not show up in your country’s App Store/ Play Store, that means it is not available. In this case, there are still a few options available, such as waiting for Touhou LostWord to become available in your country, or downloading the game through a different country’s App Store/ Play Store.
How Do I Play Touhou LostWord?
While the game does provide a nice tutorial on how to play the game, things might seem overwhelming at first. Here are some common terms in the game before starting:
Glossary
- Friends — These are the playable characters of the game. Friends are primarily obtained via Prayer, but are sometimes obtained from special game campaigns.
- Prayer — The primary method of obtaining Friends. Each roll requires either 1500 Coins and 5 Seal Crystals for one draw, or 15000 coins and 50 Seal Crystals for a ten-draw. It costs 600 God Crystals for a premium ten-draw that guarantees one Friend.
- Seal Crystals/God Crystals — These are the currencies used for Prayer. Seal Crystals are obtained for free via login bonuses, clearing stages, and more methods, while God Crystals can rarely be obtained for free but are primarily paid. God Crystals can also be used to purchase Costumes.
- Coins — the main transactional currency of the game. Coins are used in many activities from Prayer to strengthening Friends. They can be earned through various quests.
- Spirit Points — the other main currency of the game, this is like the «Stamina» of the game. Stages with battles will cost Spirit Points to attempt. Spirit Points are also used to purchase food for recovering Friends’ morale.
- Story Cards — These are the equipment of this game. Obtained from Prayer, events, log-in rewards, and some stages.
Combat
Combat is most of the active gameplay in Touhou LostWord. It is turn-based, where players select an action for each character/use a skill, then let the turn play out.
Every turn there are a couple of different options to choose from. The player can choose non-active actions:
— Graze — dodging attacks for a turn
— Skills — using skills that have various effects from buffs, debuffs, and more.
— Boost — Power up a shot/spell card.
— Target a specific enemy.
Next, the player can choose a combat action.
- Shot — basic attack cards.
- Spell Cards — powerful attacks with a cooldown.
Story
Touhou LostWord prides itself on having a strong narrative campaign. Stories can be read by selecting them on the mission screen, or revisiting unlocked stories in the library. Additionally, not all missions have battles tied to them. Playing a mission with battles will cost Spirit Points. This cost is based on how many characters you deploy, and how upgraded they are. You can see how much a character will cost to deploy on their stats screen.
Character Raising
Characters are primarily leveled up through battle, but can also gain levels passively by leaving them at School. In addition to levels, characters can also get stronger by enhancement (requires enhancement items), learn new Spell Cards by Limit Breaking (requires a duplicate character or a rare currency called Paper Doll), and level up Skills by Awakening (requires an enhancement currency called Tokens and certain enhancement items).
Comments
Create an account to follow your favorite communities and start taking part in conversations.

Touhou LostWord
pinned by moderators
![]()
![]()
![]()

![]()

![]()
Posted by
The Real Bunbunmaru Newspaper
7 hours ago
![]()
![]()

About Community
Welcome to the official Touhou LostWord subreddit! Please read our subreddit rules and enjoy your stay! Touhou LostWord is published by Good Smile Company and developed by NextNinja while being officially licensed by Team Shanghai Alice.
Related Communities

r/touhou_lostword Rules
All posts should be related to Touhou Lost Word or the Touhou Franchise
Follow the game’s Terms of Service Guidelines
Use the appropriate Megathread
Art, cosplay, and comics must be properly sourced
Weekly Megathreads
Filter by flair
-
Global News
-
Global Discussion
-
JP News
-
JP Discussion
-
News
-
Discussion
-
Official Content
-
Gameplay
-
Guides & Tips
-
OC Fanart
-
Cosplay
-
Comic
-
Non-OC Fanart
-
Fluff
Other Related Subreddits
-
r/touhou — For general Touhou content not related to Touhou LostWord.
-
r/gachagaming — Reddit’s gacha gaming hub