
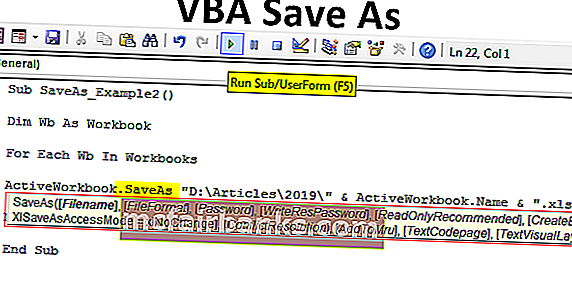
Microsoft Excel offers Visual Basic for Application (VBA) as a scripting tool to let you add additional functionality to your Excel spreadsheets. You can use VBA to prompt the user to enter a filename for an Excel spreadsheet and then save the file where the user has indicated.
In newer versions of Excel, you can use JavaScript scripting to achieve similar functionality.
Understanding VBA for Excel
VBA is a scripting language that’s supported by the Microsoft Office suite of productivity software, including the word processing program Microsoft Word and Microsoft Excel, the suite’s spreadsheet program. Microsoft provides extensive documentation for the functionality that is accessible through VBA.
It’s related to other versions of the Basic and Visual Basic programming language, although it has its own distinct syntax and set of features you can access, particularly as it relates to scripting the Microsoft Office programs. You can embed macros, or short programs, into Microsoft Office files for yourself and your colleagues to work with. They can be used to tweak the user interface in Excel and Word and to automate features, such as copying and pasting text.
These macros are separate from Excel formulas, which are used to automatically compute results in a spreadsheet cell based on values in other cells.
VBA and Security Concerns
Keep in mind that if you write code in VBA and embed it in an Excel or Word file, the file will get a distinct extension indicating that it contains macro code. For security reasons, other users and users on other computers may have to approve the code to run before it will function.
In some cases, depending on settings, you may not be able to run the code at all or the file may be flagged by antivirus software and you won’t be able to install it.
If someone sends you a file that you don’t expect to have macro code or you receive a file with macro code from an unexpected source, do not allow the macro code to run until you verify it was written and sent to you by someone you trust, since it could damage files on your computer.
Setting Up the Developer Toolbar
Before you can access the scripting interface in Microsoft Excel, you must enable it. To do so, click the «File» tab on the ribbon menu, then click «Options» to enable the «Options» dialog box. Click «Customize Ribbon» in the left portion of the box, and then select «Popular Commands» under the «Choose commands from» label.
Then, on the right side of the dialog box, select «Main Tabs» in the «Customize the Ribbon» dropdown list and check the box next to the word «Developer.» Click the «OK» button.
The «Developer» tab will now appear on your ribbon menu. From there, you can click the «Visual Basic» button to see the embedded macro code in your spreadsheet.
Adding «Save» Button in Excel
If you want to add a VBA save as button in Excel, you can do so using the «Developer» tab in the ribbon menu. Make sure you have enabled it by customizing the ribbon, and then click the «Insert» button; under «ActiveX Controls,» click the word «Button.»
Then, click in your spreadsheet where you want the button to appear. Next, in the «Controls» group of the ribbon menu’s «Developer» tab, click «View code.» Select the button’s name in the left dropdown menu and the word «Click» in the right dropdown menu to edit the code that will be executed when you click on the button.
Here, you can add code for your «Save As» button to show the familiar prompt that will enable users to choose a location to store the spreadsheet.
Excel VBA and «Save As»
To give an Excel macro «Save As» functionality, you can use the Excel VBA GetSaveAsFilename function. This is part of the «Application» group of functions, since it is part of Excel’s core functionality.
Assign the result of the operation to a variable with a line like «filename = Application.GetSaveAsFileName()». When the code is run, a «Save As» dialog box will pop up, defaulting to the name of the current file.
You can specify an argument to the function called InitialFileName to indicate another default filename, use an argument called Title to customize the title on the dialog box, and use the FileFilter and FilterIndex options to specify a list of file types, such as Excel spreadsheets or text files, and the index within the list of the one you wish to use as a default.
When you select a folder and enter a file name to save the file with, the function will return the file path. If you close or cancel out of the dialog box, it will return «False.»
Accessing an Excel Workbook
Logically, you’ll likely want your Excel VBA SaveAs button to actually save the file using the file path that the user provided rather than just discarding that name. You can use the SaveAs method on a workbook object to do so. Remember that a workbook is just another name for a Microsoft Excel spreadsheet file.
To access the current workbook the user is working in, use the variable ActiveWorkbook. To get an already open workbook by filename, use the Workbooks method, such as by calling up Workbooks («filename.xls»).
Saving the Workbook
Once you have your workbook, you can call the SaveAs method on it using the filename that the user provided through the dialog box, such as by calling «ActiveWorkbook.SaveAs Filename:=filename». You can also pass other parameters to this function, such as the file format to use for the file, which could be a Windows or Mac text file, a Windows or Mac comma-separated value file or a traditional Excel file.
Other parameters allow you to indicate whether to add the file to the list of recently used files and whether to require a password, which you can specify with the method, to interact with the file. You may wish to prompt the user or otherwise indicate if you wish to set a password so you don’t make the file impossible to open.
Saving the File in Place
While an Excel macro for Save as can be useful if you want to prompt a user to enter a new filename, there are also times where you will simply want to save the Excel spreadsheet with its existing filename.
To do this, use the Save method on the workbook without any arguments. For example, you can call ActiveWorkbook.Save to save the active workbook. You can also iterate through the Application.Workbooks variable using a for loop to save each open workbook.
You may wish to notify users when you intend to save open workbooks, either by including a dialog box or a message within the spreadsheet, so that colleagues are not surprised that their work has been written to disk.
Styling Your Excel VBA Button
You may want to style and label buttons you create in Excel VBA to stand out. To do so, click the «Developer» tab in the ribbon menu and then click the «Design Mode» toggle button to turn design mode on.
Select the button you want to configure and design by clicking it with you mouse, and then click «Properties» within the «Controls» group of the «Developer» tab of the ribbon menu. Alternatively, right-click the button and click «Properties» with design mode enabled.
Within the properties menu, you can configure options like the «Caption» that is displayed on the button, which you may want to set to something like «Save As,» as well as the font settings used to display the text on the button. You can also configure whether the button has an image displayed on it and what type of cursor icon will appear when you move your mouse over it.
It’s also possible to configure whether it will appear when you print the spreadsheet. Configure the button so that you think it will be clear to users of the spreadsheet what it does, taking into account your organization’s usual font and styling preferences.
Using the Default Save As
While it may occasionally be useful to trigger a SaveAs dialog menu with the click of a button within your spreadsheet, it’s usually not necessary, because a SaveAs button is already built in to Microsoft Excel.
To access it, click the «File» menu in Microsoft Excel and then click «Save As.» Choose where you want to save the file on your cloud storage or on your local computer, and use the «Save as type» dropdown menu to choose which file format you want to use to store the file.
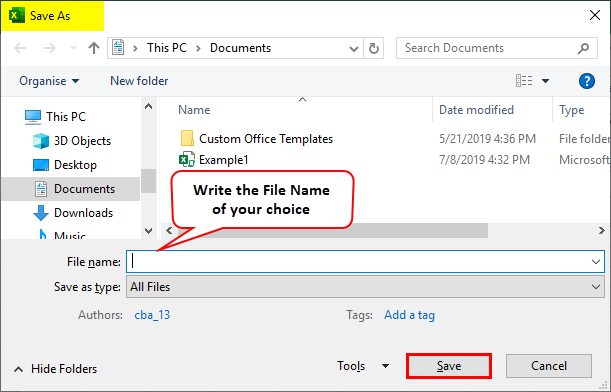
Use the «File name» box to indicate a name for the file, and click the «Save» button when you are satisfied.
Using the JavaScript API
Newer versions of Microsoft Office also enable scripting with JavaScript, a programming language commonly used for implementing interactive functionality on the web.
So far, saving functionality is only available in a public preview version of the scripting tool. You can save the file by calling the Workbook.save method, similar to the functionality in VBA. Call Workbook.save with the parameter Excel.SaveBehavior.save to indicate that you want to save the file in its existing place; use the argument Excel.SaveBehavior.prompt if you want to prompt the user on where to save the file for the first time.
Note that if the user cancels the Save menu, the method will throw an exception.
Using Google Apps Script
If you’re using Google Sheets instead of Microsoft Excel, you can still write code to script interactive elements and automated functionality in your spreadsheets. The code will be written in a version of JavaScript known as Google Apps Script that has access to Google applications like Google Docs, Google Sheets and Gmail.
If you want to create and populate a spreadsheet with a particular name in Google Sheets, you can use the «SpreadsheetApp.create» method, which takes the spreadsheet’s designed name as an argument and will return the web address of the new spreadsheet. If you pass it the name and a number of rows and a number of columns, such as SpreadsheetApp.create(«MySpreadsheet», 20, 5), it will create a new spreadsheet with those specifications.
Compatibility Between Software Tools
Note that the scripting languages included with various word processing and spreadsheet tools are largely incompatible with those from other makers. If you send someone a Microsoft Excel sheet with VBA code that they open with LibreOffice Calc, Apple Numbers or Google Sheets, it is very likely that the VBA code embedded in the sheet simply will not run on the other program.
Take this factor into consideration if you are exchanging files with people using different spreadsheet or word processing software.

Excel VBA Save As
If you are a frequent user of Microsoft Excel, you must have used Save As function under it, which allows you to save the currently opened workbook with a different name or different format (Excel Macro-enabled, CSV, PDF, etc.). You can also save the file in a different folder using this method. However, is it possible to use the same function under VBA? The answer is an absolute Yes! We are having Save As function under VBA as well which helps us to do all these above-mentioned tasks along with some additional benefits (obviously automating things is one of the benefits). In this article, we are going to have a look into different examples for VBA SAVE AS function.
Formula for Save As function in Excel VBA
Let us look below the formula for Save As function in VBA.

Where,
- FileName – Name of the workbook to be saved.
- FileFormat – File format in which the file needs to be saved (Ex. Pdf, CSV, etc.)
- Password – Password to protect the workbook (The workbook can’t be accessible without a password)
- WriteResPassword – Write reservation password for the workbook.
- ReadOnlyRecommended – Recognizes whether the workbook is saved in Read-Only format or not.
- CreateBackup – Determines whether a backup file for the workbook is created or not.
- AccessMode – Recognizes the access mode for the workbook.
- ConflictResolution – Recognizes the conflicts that pop-up when the workbook is shared and is used by more than one user.
- AddToMru – Checks if the workbook is added under recently used file or not.
- Local – Checks if the workbook is saved with the laws of Excel (local language) or with VBA laws (US – English).
Hush! Lots of arguments right? But what if I tell you, all these arguments are optional and can be skipped while using VBA SAVE AS function. However, it is true that these are the arguments that make VBA SaveAs more flexible function to use. “Expression” at the start of the syntax is nothing but an expression against which this function can be used. Like Workbook is the expression against which SaveAs can be used.
Examples to Save Excel File using VBA Save As Function
Below are the different examples to save excel file using VBA Save As function.
You can download this VBA Save As Excel Template here – VBA Save As Excel Template
Example #1 – How to Save a Copy of the Workbook with a Different Name?
Let’s see how we can save the current workbook with a different name.
Follow the below steps to use Save As Function in Excel VBA:
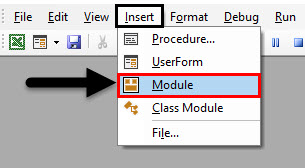
Step 1: Add a new module under Visual Basic Editor (VBE). Go to Insert and then select Module.
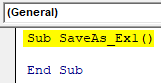
Step 2: Define a new sub-procedure which can store a macro.
Code:
Sub SaveAs_Ex1()

End Sub
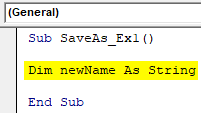
Step 3: Define a new variable which can hold the name by which the file to be saved as.
Code:
Sub SaveAs_Ex1()

Dim newName As String

End Sub
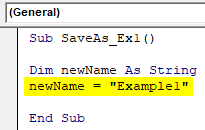
Step 4: Now use the assignment operator to assign a name to this variable using which current file can be saved as.
Code:
Sub SaveAs_Ex1()

Dim newName As String
newName = "Example1"

End Sub
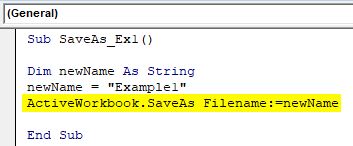
Step 5: Now, use SaveAs function with FileName argument in order to save the file as with name “Example1”.
Code:
Sub SaveAs_Ex1()

Dim newName As String
newName = "Example1"
ActiveWorkbook.SaveAs Filename:=newName

End Sub
Step 6: This is it, now run this code by hitting F5 or manually using the Run button and see the output.
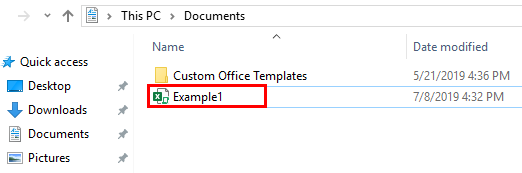
You can see that a file with the name “Example1” is being saved on Documents.
If you could have noted down, the file is being saved as Macro-Enabled File, because the original file which I have used SaveAs function on is a file with Macro-Enabled. It means that this function in VBA automatically checks the file format of the previous file and saves it in the same format. Also, by default, the file will be saved in Documents under This PC. This default location can be provided explicitly at the time of defining sheet name.
Example #2 – Saving Workbook with User Provided Name
Instead of defining name initially, is it possible to write a code which allows a user to save the worksheet by the name of his choice same as Excel Save As function?
Follow the below steps to use Save As Function in Excel VBA.
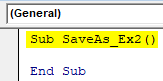
Step 1: Define a new sub-procedure under newly inserted module which can store the macro.
Code:
Sub SaveAs_Ex2()

End Sub
Step 2: Define a new variable which can hold the value of the user-defined name.
Code:
Sub SaveAs_Ex2()

Dim Spreadsheet_Name As Variant

End Sub

The reason for this variable being defined as Variant is, this data type makes Naming conventions versatile. For Example, a user may add some extra special character (which are allowed in naming conventions) or can add dates as well under the file name.
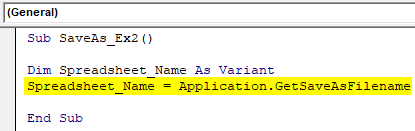
Step 3: Now, with the help of an assignment operator and function combination called application.GetSaveAsFilename, make a statement that allows the system to take a user-defined name. See how it has been achieved in the screenshot below.
Code:
Sub SaveAs_Ex2()

Dim Spreadsheet_Name As Variant
Spreadsheet_Name = Application.GetSaveAsFilename

End Sub
Step 4: Use conditional IF to make sure the name user enters is valid as per the naming conventions.
Code:
Sub SaveAs_Ex2()

Dim Spreadsheet_Name As Variant
Spreadsheet_Name = Application.GetSaveAsFilename
If Spreadsheet_Name <> False Then

End Sub
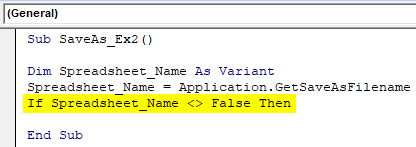
This condition checks if the name given by the user to save the worksheet is properly satisfying the naming conventions set for naming a file or not.
Step 5: Write down a statement which gets evaluated for the given IF condition.
Code:
Sub SaveAs_Ex2()

Dim Spreadsheet_Name As Variant
Spreadsheet_Name = Application.GetSaveAsFilename
If Spreadsheet_Name <> False Then
  ActiveWorkbook.SaveAs Filename:=Spreadsheet_Name

End Sub
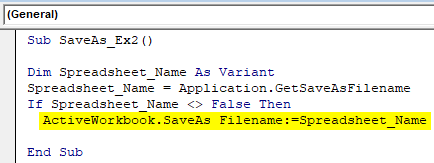
This piece of code gets evaluated once the IF condition is true. If so, the active workbook will get saved under the name define in variable Spreadsheet_Name (Which will be user-defined)
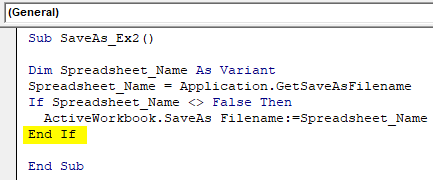
Step 6: End the IF-loop and run this code to see the output.
Code:
Sub SaveAs_Ex2()

Dim Spreadsheet_Name As Variant
Spreadsheet_Name = Application.GetSaveAsFilename
If Spreadsheet_Name <> False Then
  ActiveWorkbook.SaveAs Filename:=Spreadsheet_Name
End If

End Sub
Step 7: As soon as you run this code, you’ll get Save As dialogue box which will allow you to type in the name of your choice and save the file.
Example #3 – How to Save as a File into PDF using Excel VBA SaveAs function?
Suppose you have a data as given below in your excel sheet and you need to convert it into PDF.

Follow the below steps to convert this file into a PDF Using VBA Save As function:
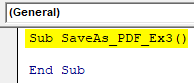
Step 1: Define a new sub-procedure to store a macro.
Code:
Sub SaveAs_PDF_Ex3()

End Sub
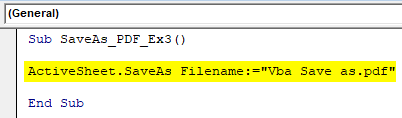
Step 2: Now, use the following code to save this file as a PDF file.
Code:
Sub SaveAs_PDF_Ex3()

ActiveSheet.SaveAs Filename:="Vba Save as.pdf"

End Sub
Step 3: Run this code and you’ll see a pdf file generated under This PC > Documents.
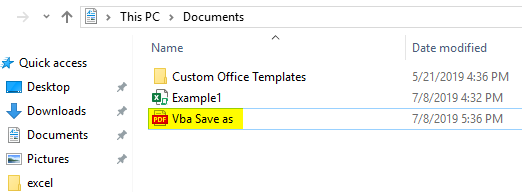
In this code, ActiveSheet.SaveAs allows the file to be saved with the same name. As we have added the extension as .pdf at the end of the file, it gets exported into PDF file. You can see the image above for your reference.
Things to Remember
- The by default save location for the file used under VBA SaveAs will be This PC > Documents. However, you can specify the directory manually at the time of defining file name.
- By default, the file saved using VBA SaveAs will be saved under the format same as that of the original file. However, it can also be defined as per user requirement at the time you define the variable.
Recommended Articles
This is a guide to VBA Save As. Here we discuss how to save the file using Excel VBA Save As function along with an example and downloadable excel template. Below are some useful excel articles related to VBA –
- VBA Exit Sub
- VBA Object
- VBA Object Required
- VBA Get Cell Value
Excel VBA Save As
VBA Save As is the method used to save the Excel file to a specific location. To save the workbook using VBA code, we use the object Workbook with the SaveAs function.
After all the hard work we have done in the workbook, we save it. It is painful to lose the data we have worked on. We have two kinds of saves in Excel or any file. One is “Save,” and another is “Save As.” Ctrl + S is the popular shortcut key as the Ctrl + C and Ctrl + V around the globe. But we are not that familiar with the concept of “Save As.” The worksheet shortcutAn Excel shortcut is a technique of performing a manual task in a quicker way.read more to Save As the file in the regular worksheet is the F12 key. In VBA, too, we can save the file as “Save As.”
Table of contents
- Excel VBA Save As
- What does VBA Save As Function do?
- How to use Save As Function?
- Example #1
- Example #2
- Recommended Articles
You are free to use this image on your website, templates, etc, Please provide us with an attribution linkArticle Link to be Hyperlinked
For eg:
Source: VBA Save As (wallstreetmojo.com)
What does VBA Save As Function do?
It is a general task of saving work in the automation process. Finally, after all the work, we wish to save the file.
Workbooks("Sales 2019.xlsx").Save
This code reads a Workbook named “Sales 2019.xlsx” to save.
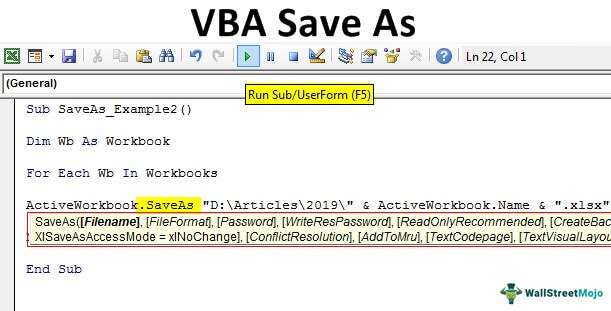
Similarly, replicating the workbook we are working on can be created using the “Save As” method.
![]()
- File Name: What is the file name you wish to give? One should combine this with the file folder path.
- File Format: What should be the format for the file you are saving?
- Password: Would you like to provide a password for the saving file?
- Write Res Password: Mention the reserved password for the workbook.
We think these parameters are enough to understand the Save As method.
How to use Save As Function?
You can download this VBA Save As Excel Template here – VBA Save As Excel Template
Example #1
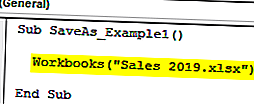
We save a workbook, right? so it is important to mention the workbook name and its extension to use the SaveAs method. So, mention the workbook you are saving.
Code:
Sub SaveAs_Example1()

  Workbooks("Sales 2019.xlsx").

End Sub

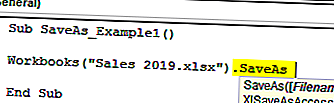
Now, use the Save As method.
Code:
Sub SaveAs_Example1()

Workbooks("Sales 2019.xlsx").SaveAs

End Sub

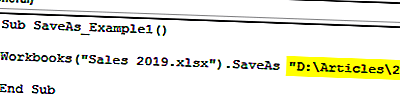
Now, identify where you want to save.
Code:
Sub SaveAs_Example1()

Workbooks("Sales 2019.xlsx").SaveAs "D:Articles2019

End Sub

Now, put backslash and enter the file name as per your wish with a file extension.
Code:
Sub SaveAs_Example1()

Workbooks("Sales 2019.xlsx").SaveAs "D:Articles2019My File.xlsx"

End Sub

Now, mention the file format as “xlWorkbook.”
Code:
Sub SaveAs_Example1()

Workbooks("Sales 2019.xlsx").SaveAs "D:Articles2019My File.xlsx", FileFormat:=xlWorkbook

End Sub

It will save the file in D drive > Folder Name (Articles) > Sub Folder Name (2019).
Example #2
Save All the Opened Workbooks
Assume you are working with 10 workbooks on your computer. You want to create a backup of these workbooks by saving them on the computer as one of the copies. When you want to work with more than one workbook, it is necessary to use the loops.
The below code will help you save all the workbooks as a copy.
Code:
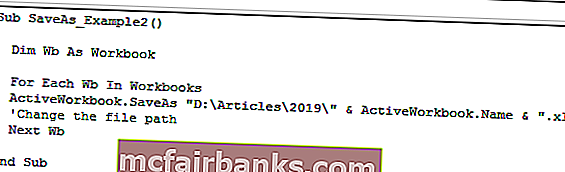
Sub SaveAs_Example2()

  Dim Wb As Workbook

  For Each Wb In Workbooks
  ActiveWorkbook.SaveAs "D:Articles2019" & ActiveWorkbook.Name & ".xlsx"
  'Change the file path
  Next Wb

End Sub

You can use this code if you wish to select your folder path.
Code:
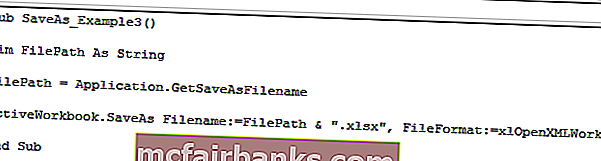
Sub SaveAs_Example3()

 Dim FilePath As String

FilePath = Application.GetSaveAsFilename

ActiveWorkbook.SaveAs Filename:=FilePath & ".xlsx", FileFormat:=xlOpenXMLWorkbook

End Sub

When you run this code using the F5 key or manually, it will ask you to select the destination folder path. Select and click on “OK.” It will save the file.
Recommended Articles
This article has been a guide to VBA Save As. Here, we learn how to use Save As to save an Excel workbook, examples, and downloadable templates. Below are some useful articles related to VBA: –
- Use of DoEvents in VBA
- If Else in VBA
- Intersect in VBA
- Font Color in VBA
- VBA Borders
Excel VBA Сохранить как
Метод VBA Save As используется для сохранения файла Excel в определенном месте. Чтобы сохранить книгу с использованием кода vba, мы используем объект Workbook с функцией SaveAs.
После всей тяжелой работы, которую мы проделали в рабочей тетради, мы сохраняем ее, не так ли? Больно терять данные, над которыми мы работали. У нас есть два типа сохранений в Excel или в любом другом файле: один — «Сохранить», а другой — «Сохранить как». Ctrl + S — это популярное сочетание клавиш, как Ctrl + C и Ctrl + V во всем мире. Но это не совсем привычная концепция «Сохранить как» . В обычном рабочем листе горячая клавиша для сохранения файла — это клавиша F12 . В VBA мы также можем сохранить файл как « Сохранить как ».
Что делает функция «Сохранить как» в VBA?
Это общая задача экономии работы в процессе автоматизации. После всей работы мы хотим сохранить файл.
Рабочие тетради («Продажи 2019.xlsx»). Сохранить
Этот код читает книгу с именем «Sales 2019.xlsx» для сохранения.
Точно так же можно создать копию книги, над которой мы работаем, с помощью метода «Сохранить как».

- Имя файла: каково имя файла, который вы хотите передать. Это должно быть объединено с путем к папке с файлом.
- Формат файла: каким должен быть формат сохраняемого файла.
- Пароль: Вы хотите указать пароль для сохраняемого файла.
- Write Res Password: укажите зарезервированный пароль для книги.
Думаю, этих параметров достаточно для понимания метода «Сохранить как».
Как использовать функцию «Сохранить как»?
Вы можете скачать этот шаблон VBA Save As Excel здесь — VBA Save As Excel Template
Пример # 1
Мы сохраняем книгу правильно, поэтому важно указать имя книги и ее расширение, чтобы использовать метод «Сохранить как». Так что упомяните книгу, которую вы сохраняете.
Код:
Sub SaveAs_Example1 () Workbooks («Sales 2019.xlsx»). Конец подписки
Теперь воспользуйтесь методом «Сохранить как».
Код:
Sub SaveAs_Example1 () Workbooks ("Sales 2019.xlsx"). SaveAs End Sub
Теперь определите, где вы хотите сохранить.
Код:
Sub SaveAs_Example1 () Workbooks ("Sales 2019.xlsx"). SaveAs "D: Articles 2019 End Sub
Теперь поставьте обратную косую черту и введите имя файла по вашему желанию с расширением файла.
Код:
Sub SaveAs_Example1 () Workbooks ("Sales 2019.xlsx"). SaveAs "D: Articles 2019 My File.xlsx" End Sub

Теперь укажите формат файла как «xlWorkbok».
Код:
Sub SaveAs_Example1 () Workbooks («Sales 2019.xlsx»). SaveAs «D: Articles 2019 My File.xlsx», FileFormat: = xlWorkbook End Sub

Хорошо, мы закончили, файл будет сохранен на диске D> Имя папки (статьи)> Имя подпапки (2019).
Пример # 2
Сохранить все открытые книги
Предположим, вы работаете с 10 книгами на своем компьютере. Вы хотите создать резервную копию этих книг, сохранив их на компьютере как одну из копий. Если вы хотите работать с более чем одной книгой, необходимо использовать циклы.
Код ниже поможет вам сохранить все книги как копии.
Код:
Sub SaveAs_Example2 () Dim Wb As Workbook для каждого Wb в рабочих книгах ActiveWorkbook.SaveAs "D: Articles 2019 " & ActiveWorkbook.Name & ".xlsx" 'Изменить путь к файлу Next Wb End Sub
Если вы хотите выбрать свой собственный путь к папке, вы можете использовать этот код.
Код:
Sub SaveAs_Example3 () Dim FilePath As String FilePath = Application.GetSaveAsFilename ActiveWorkbook.SaveAs Filename: = FilePath & ".xlsx", FileFormat: = xlOpenXMLWorkbook End Sub
Как только вы запустите этот код с помощью клавиши F5 или вручную, он попросит вас выбрать путь к папке назначения, выбрать и нажать ОК, он сохранит файл.
Skip to content
Сегодня мы продолжим изучение пользовательских функций Excel. Поскольку вы уже знаете, как их создавать (и, я надеюсь, вы также пробовали применять их), давайте копнем немного глубже и узнаем, как использовать и хранить определяемые пользователем функции в Excel.
Мы покажем вам, как легко сохранить ваши функции в файле надстройки Excel, чтобы использовать их позже буквально несколькими нажатиями мышки.
Вот о чем мы будем говорить:
- Совместное использование с другими функциями
- Применение в других функциях и макросах VBA
- Как вызвать функцию из другой книги
- Использование файла надстройки (рекомендуется)
Использование с другими функциями
После того, как вы проверили, что ваши пользовательские функции работают правильно, их можно использовать в формулах Excel или в коде VBA.
Пользовательские функции в рабочей книге Excel можно применять точно так же, как вы применяете обычные функции. Например, просто запишите в ячейке формулу
=GetMaxBetween(A1:A6;10;50)
Их также можно использовать в сочетании с обычными функциями. Например, добавим поясняющий текст к рассчитанному максимальному значению:
=СЦЕПИТЬ(«Максимальное значение между 10 и 50 – «;GetMaxBetween(A1:A6;10;50))
Результат вы видите на скриншоте ниже:

Можно найти товар, количество которого максимальное и находится в диапазоне от 40 до 50.
В формуле
=ИНДЕКС(A2:A9;ПОИСКПОЗ(GetMaxBetween(B2:B9;F1;F2);B2:B9;0))
пользовательская функция GetMaxBetween находит в диапазоне B2:B9 максимальное число между 40 и 50. Затем при помощи функций ИНДЕКС+ПОИСК мы получаем название товара, которое соответствует этому максимальному значению:

Как видите, использование настраиваемых функций ничем не отличается от обычных функций Excel.
При этом помните, что пользовательская функция может только возвращать значение, но не может выполнять никакие другие действия. Более подробно об ограничениях пользовательских функций читайте здесь.
Применение в других функциях и процедурах VBA
Пользовательские функции также можно использовать в макросах VBA.
На скриншоте ниже вы видите код макроса, который в столбце, содержащем активную ячейку, ищет максимальное значение в диапазоне от 10 до 50.

Код макроса содержит пользовательскую функцию GetMaxBetween(.Cells, 10, 50). Она находит нужное максимальное значение в активном столбце. Затем это значение будет выделено цветом.
Результат работы макроса вы видите на скриншоте ниже.

Также пользовательская функция может быть использована внутри другой пользовательской функции. Проблема конвертации числа в текст обычно решается при помощи пользовательской функции. Функция SpellNumber отлично выполняет эту задачу, добавляя также денежные единицы измерения (рубли). Вот код этого макроса:
Public Function SpellNumber(x As Double) As String
If x > 999999999999.99 Then
SpellNumber = "Число больше 999 999 999 999.99!"
ElseIf x < 0 Then
SpellNumber = "Отрицательное число!"
Else
x = FormatNumber(x, 2)
Dim b As Byte, b1 As Byte, b2 As Byte, kop As String
b = (x - Fix(x)) * 100
b2 = b  10
b1 = b Mod 10
If b2 <> 1 And b1 = 1 Then
kop = " копейка"
ElseIf b2 <> 1 And b1 > 1 And b1 < 5 Then
kop = " копейки"
Else
kop = " копеек"
End If
kop = b2 & b1 & kop
Dim y(1 To 4) As Integer, i1 As Byte
For i1 = 1 To 4
x = Fix(x) / 1000
y(i1) = (x - Fix(x)) * 1000
Next
Dim Numeric(1 To 4) As String, i2 As Byte, y1 As Byte, y2 As Byte, _
y3 As Byte, Numeric0 As String, Numeric1 As String, Numeric2 As String, Numeric3 As String, _
Numeric4 As String
For i2 = 1 To 4
y1 = y(i2) Mod 10
y2 = (y(i2) - y1) / 10 Mod 10
y3 = y(i2)  100
Numeric1 = Choose(y3 + 1, "", "сто ", "двести ", "триста ", "четыреста ", _
"пятьсот ", "шестьсот ", "семьсот ", "восемьсот ", "девятьсот ")
Numeric2 = Choose(y2 + 1, "", "", "двадцать ", "тридцать ", "сорок ", _
"пятьдесят ", "шестьдесят ", "семьдесят ", "восемьдесят ", "девяносто ")
If y2 = 1 Then
Numeric3 = Choose(y1 + 1, "десять ", "одиннадцать ", "двенадцать ", _
"тринадцать ", "четырнадцать ", "пятнадцать ", "шестнадцать ", _
"семнадцать ", "восемнадцать ", "девятнадцать ")
ElseIf y2 <> 1 And i2 = 2 Then
Numeric3 = Choose(y1 + 1, "", "одна ", "две ", "три ", "четыре ", "пять ", _
"шесть ", "семь ", "восемь ", "девять ")
Else
Numeric3 = Choose(y1 + 1, "", "один ", "два ", "три ", "четыре ", "пять ", _
"шесть ", "семь ", "восемь ", "девять ")
End If
If y2 <> 1 And y1 = 1 Then
Numeric4 = Choose(i2, "рубль ", "тысяча ", "миллион ", "миллиард ")
ElseIf y2 <> 1 And y1 > 1 And y1 < 5 Then
Numeric4 = Choose(i2, "рубля ", "тысячи ", "миллиона ", "миллиарда ")
ElseIf y1 = 0 And y2 = 0 And y3 = 0 Then
Numeric4 = Choose(i2, "рублей ", "", "", "")
Else
Numeric4 = Choose(i2, "рублей ", "тысяч ", "миллионов ", "миллиардов ")
End If
Numeric(i2) = Numeric1 & Numeric2 & Numeric3 & Numeric4
Next
If y(1) + y(2) + y(3) + y(4) = 0 Then
Numeric0 = "ноль рублей " & kop
Else
Numeric0 = Numeric(4) & Numeric(3) & Numeric(2) & Numeric(1) & kop
End If
SpellNumber = Replace(Numeric0, Left(Numeric0, 1), UCase(Left(Numeric0, 1)), 1, 1)
End If
End Function
Применив вместе уже знакомую нам GetMaxBetween и SpellNumber, мы можем получить максимальное значение из диапазона и сразу записать его в виде текста.
Для этого создадим новую пользовательскую функцию, в которой используем уже знакомые нам функции GetMaxBetween и SpellNumber.
Function SpellGetMaxBetween(rngCells As Range, MinNum, MaxNum)
       SpellGetMaxBetween = SpellNumber(GetMaxBetween(rngCells, MinNum, MaxNum))
End Function
Как видите, функция GetMaxBetween является аргументом другой пользовательской функции – SpellNumber. Сначала она определяет максимальное значение, как мы уже неоднократно делали ранее. Затем это число преобразуется в текст.

На скриншоте выше вы видите, как функция SpellGetMaxBetween находит максимальное число в диапазоне от 5000 до 7000, а затем конвертирует его в текст.
Как вызвать пользовательскую функцию из другой книги
Если вы создали пользовательскую функцию в вашей рабочей книге, то это ещё, к сожалению, не означает, что её можно без проблем везде применять.
По моему опыту, большинство пользователей рано или поздно собирают свою личную коллекцию макросов и пользовательских функций для автоматизации отдельных процессов и расчётов. И тут встает проблема: код пользовательских функций на Visual Basic нужно где-то хранить, чтобы потом использовать в работе.
Чтобы применить пользовательскую функцию, рабочая книга, в которой вы ее сохранили, должна быть открыта в вашем Excel. Если вы это не сделали, то при попытке использования вы получите ошибку #ИМЯ!. Эта ошибка говорит о том, что Excel не знает имени функции, которую вы хотите употребить в формуле.
Рассмотрим способы, при помощи которых вы можете использовать созданные настраиваемые функции.
Способ 1.
Вы можете перед именем функции указать имя книги, в которой она находится. Например, если вы сохранили пользовательскую функцию GetMaxBetween в книге с именем My_Functions.xlsm, то необходимо ввести такую формулу:
= My_Functions.xlsm!GetMaxBetween(A1:A6;10;50)
Способ 2.
Сохраняем все пользовательские функции в одной специальной рабочей книге (например, My_Functions.xlsm ) и копируем из нее нужную функцию в текущую рабочую книгу в случае необходимости. Тогда не нужно будет указывать имя файла, как это сделано выше.
При создании каждой новой пользовательской функции вам необходимо дублировать ее код в ту книгу, в которой вы будете ее использовать. При таком способе возникает несколько неудобств:
- Если рабочих файлов много, а функция нужна везде, то и копировать код придется в каждую книгу.
- Нужно не забыть сохранить рабочую книгу в формате с поддержкой макросов (xlsm или xlsb).
- При открытии такого файла защита от макросов будет каждый раз показывать предупреждение, которое нужно подтвердить. Многие пользователи пугаются, видя предупреждение на жёлтой полосе, которое просит их включить макросы. Чтобы не видеть это сообщение, вам нужно отключить защиту Excel полностью. Это может быть не всегда правильно и безопасно.
Думаю, вы согласитесь со мной, что все время открывать файл и копировать из него код пользовательских функций или писать название этого файла в формуле – это не самые удачные решения.
Способ 3.
Думаю, что самый лучший способ – хранить часто используемые пользовательские функции в файле надстройки (Excel Add-in).
Достоинства использования надстройки:
- Достаточно один раз подключить надстройку в ваш Excel. После этого можно использовать её процедуры и функции в любом файле на этом компьютере. Сохранять ваши рабочие книги в xlsm- и xlsb-формате не потребуется, так как исходный код будет храниться не в них, а в файле надстройки.
- Защита от макросов вас беспокоить уже не будет, так как надстройки всегда относятся к доверенным источникам. Она будет автоматически загружаться при каждом запуске Excel практически незаметно для вас.
- Надстройка – это отдельный файл. Его легко переносить с компьютера на компьютер, делиться им с коллегами.
О создании и использовании надстройки мы подробнее поговорим далее.
Сохранение пользовательских функций в файле надстройки
Как создать собственную надстройку? Рассмотрим пошагово.
Шаг 1. Создаем файл надстройки.
Открываем Microsoft Excel, создаем новую книгу и сохраняем ее под любым подходящим именем (например My_Functions) в формате надстройки. Для этого используем меню Файл – Сохранить как или клавишу F12. Обязательно указываем тип файла Надстройка Excel:

Ваша надстройка будет иметь расширение .xlam.
Обратите внимание, что стандартно Excel хранит надстройки в папке C:Users[Ваше_имя]AppDataRoamingMicrosoftAddIns. Советую принять расположение по умолчанию. Вы можете указать любую другую папку. Но тогда при подключении надстройки вам нужно будет найти и указать ее новое расположение вручную. Если вы сохраните ее в папке по умолчанию, вам не придется искать надстройку на своем компьютере. Excel автоматически внесет ее в список.
Шаг 2. Подключаем файл надстройки.
Теперь созданную нами надстройку My_Functions надо подключить к Excel. Тогда она будет загружаться автоматически при старте программы. Для этого используем меню Файл — Параметры — Надстройки. Убедитесь, что внизу в поле Управление выбраны Надстройки Excel. Жмем на кнопку Перейти в нижней части окна. В появившемся окне отмечаем нашу надстройку My_Functions. Если вы не видите ее в списке, нажмите кнопку Просмотр и укажите расположение вашего файла надстройки вручную.

Если вы используете надстройку для хранения пользовательских функций, то нужно выполнять одно простое правило. Если вы передаете рабочую книгу другому человеку, то не забудьте также передать копию этой надстройки, которая содержит нужные функции. Он должен подключить ее так же, как вы это сделали сейчас.
Шаг 3. Добавляем в надстройку пользовательские функции и макросы.
Наша надстройка подключена к Excel, но в ней пока нет ничего. Чтобы добавить в нее новые пользовательские функции, откройте редактор Visual Basic при помощи сочетания клавиш Alt+F11. После этого вы можете добавлять новые модули с кодом VBA, как описано в этом руководстве.

Выберите в окне VBAProject ваш файл надстройки (My Finctions.xlam). Используйте меню Insert – Module, чтобы добавить пользовательский модуль. В него нужно записывать пользовательские функции.
Код пользовательской функции вы можете либо набрать вручную, либо скопировать откуда-нибудь.
Вот и все. Теперь вы создали свою собственную надстройку, загрузили ее в Excel и можете использовать в ней макросы и настраиваемые функции. Чтобы добавить новый макрос, просто запишите его код в модуле надстройки в редакторе VBA и сохраните его.
Мы рассмотрели способы создания, отладки пользовательской функции и как ее можно применять в вашей рабочей книге. Надеюсь, эти рекомендации будут вам полезны. Если у вас есть вопросы, пишите в комментариях к этой статье.
 Сумма по цвету и подсчёт по цвету в Excel — В этой статье вы узнаете, как посчитать ячейки по цвету и получить сумму по цвету ячеек в Excel. Эти решения работают как для окрашенных вручную, так и с условным форматированием. Если…
  Проверка данных с помощью регулярных выражений — В этом руководстве показано, как выполнять проверку данных в Excel с помощью регулярных выражений и пользовательской функции RegexMatch. Когда дело доходит до ограничения пользовательского ввода на листах Excel, проверка данных очень полезна. Хотите… Поиск и замена в Excel с помощью регулярных выражений — В этом руководстве показано, как быстро добавить пользовательскую функцию в свои рабочие книги, чтобы вы могли использовать регулярные выражения для замены текстовых строк в Excel. Когда дело доходит до замены… Как извлечь строку из текста при помощи регулярных выражений — В этом руководстве вы узнаете, как использовать регулярные выражения в Excel для поиска и извлечения части текста, соответствующего заданному шаблону. Microsoft Excel предоставляет ряд функций для извлечения текста из ячеек. Эти функции…
  4 способа отладки пользовательской функции — Как правильно создавать пользовательские функции и где нужно размещать их код, мы подробно рассмотрели ранее в этой статье. Чтобы решить проблемы при создании пользовательской функции, вам скорее всего придется выполнить… Как создать пользовательскую функцию? — В решении многих задач обычные функции Excel не всегда могут помочь. Если существующих функций недостаточно, Excel позволяет добавить новые настраиваемые пользовательские функции (UDF). Они делают вашу работу легче. Мы расскажем,…