
Microsoft Word Parts and Their Functions – Microsoft Word as a word processing application has parts and functions that must be known. The following is a complete explanation from us regarding the usability of Microsoft Word, the benefits of Microsoft Word, the menu-menu section in Microsoft Word and the advantages and disadvantages of Microsoft Word.
Microsoft Word Functions
The function of Microsoft Word is as a word processing program. This program is mostly used for typing. As one of the most popular software developers, Microsoft puts forward user-friendliness for every innovation. Therefore, using Microsoft Word is not so difficult.
Initially, Microsoft Word was developed in 1983 until mid 2001. It was first developed by the Corporation. There are several systems supported by this program, including Microsoft Windows, LINUX, Android, iOS and MacOS.
What are the Benefits of Microsoft Word
-
- The job seems easier to doYou can create a document as you wish and at the same time can edit or change the document before printing. You can also create tables with a variety of design options as you wish.
-
- Faster and more efficient working timeYou will find it saves more time in working with Microsoft Word. There is a mail marge option that works to create letters in bulk. This feature will help you to save time compared to writing letters one by one or printing them
-
- More cost and paper savingYou will save paper more because by using Microsoft Word, you will able to save documents that have done in the form of files. With this, you will also save more on operational costs
Menu in Microsoft Word
In carrying out its functions, the appearance of Microsoft Word is equipped with many menus. Here’s the menu in Microsoft Word and its functions that you should know!
-
- Worksheets
This section will display the writing that is made and what will printed. This section is also often referred to as a worksheet.
-
-
Ribbon
This section is the section that contains the main menus in Microsoft Word containing command buttons. In general, this Ribbon contains 9 main menus, namely :
-
-
-
Menu Office Button
This menu contains command buttons for file management.
-
-
-
Menu Home
There are basic command buttons for editing documents such as fonts, margins, text alignment, etc./
-
-
-
Menu Insert
There are command buttons in this menu to perform designs on the worksheet. Such as adding images, borders, to artistic fonts.
-
-
-
Menu Layout
There are command buttons to set the format on paper and writing, such as columns and paper size.
-
-
-
Menu References
There are command buttons on this menu for managing email and mail management.
-
-
-
Menu Mailings
You can do email or mail management in this menu.
-
-
-
Menu Review
You can set the writing review, starting from the spelling and language in this menu.
-
-
-
Menu View
In this menu, you can adjust the appearance of Microsoft Word such as hiding or showing the navigation pane.
-
-
-
Quik Access Toolbar
This section has a function to display the commands you use frequently. You can also add or remove commands that are already display.
-
-
-
Title Bar
This will display the name of the currently opened document. You can also give your document a name before opening or save it first.
-
-
-
Window Management (Window Control)
This section has a function to adjust the appearance of the Microsoft Word window. There are 4 important buttons like the Ribbon Display Option to show and hide the Ribbon.
While Minimize serves to switch the window to background mode on the taskbar, Restore Down Maximize serves to display the window in full (maximize) and Restore Down to minimize the display. Until Close to close the page.
-
-
-
Tab Management
This section serves to manage the tabulation of writing.
-
-
-
Scroll Bar
Serves to shift the page, there are two sections in this menu such as the Horizontal Scroll Bar to move the document to the right and left. As well as the Vertical Scroll Bar to move the document up and down.
-
-
-
Ruler
This menu will display guide lines that can used to adjust paragraph indentation or writing margins. There are two parts, namely the Horizontal Ruler which provides help lines with a horizontal position. Then the Vertical Ruler for auxiliary lines in an upright position.
-
-
-
Status Bar
This section serves to display information on the processes that occur on the worksheet.
-
-
-
Page View
There is a control feature that can change the appearance of the worksheet and reduce and enlarge the worksheet.
-
-
-
This menu is the latest feature for software licensing, sharing, to simplify user management.
-
-
-
Caret (Text Crusor)
This menu serves as the cursor position to write text on the worksheet.
-
Microsoft Word Advantages and Disadvantages
Advantages
- Already equipped with basic tools for desktop publishing.
- It has more complete facilities, starting from being able to enter pictures to make it look more attractive to making a bibliography with the References menu.
- Loading is felt to be faster with a smaller file size so that it can read all files from the available office versions.
- Can directly post articles to blogs to save documents with the desired defaults such as PDFs.
Deficiency
- The specifications achieved are heavier where the processor speed must reach 500 MHz, RAM of 256 MB-512 MB, VGA 64 GB, and HDD that must be provided at least 600 MB to 1 GB.
- Windows used at least XP with SP2.
- The resulting file by default is .docx so it cannot read by Microsoft Word 2003.
That’s about the Parts of the Microsoft Word menu bar and their functions. Hope this article was useful!
also read the functions of microsoft office
Word 2016 предназначен для создания профессионально оформленных документов. Он также помогает эффективно создавать документы и систематизировать их.
При создании документа в Word вы можете выбрать пустой документ или шаблон. В любом случае создание документов и предоставление общего доступа к ним выполняется одинаково. Эффективные средства редактирования и рецензирования Word помогают совместно работать над улучшением документа.
Создание документа
Как правило, документы удобнее создавать на основе шаблона, а не пустой страницы. Шаблоны Word содержат уже настроенные темы и стили и готовы к использованию. Остается только добавить в них содержимое.
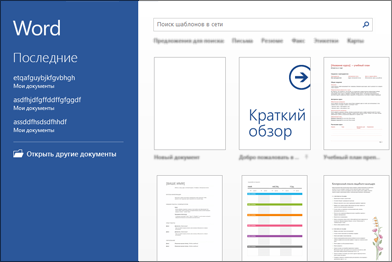
При каждом запуске Word вы можете выбрать шаблон из коллекции, посмотреть дополнительные шаблоны в соответствующей категории или поискать их в Интернете.
Чтобы подробнее изучить шаблон, щелкните его для предварительного просмотра в увеличенном масштабе.
Если вы не хотите использовать шаблон, нажмите кнопку » Пустой документ».
Открытие документа
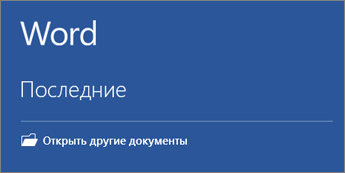
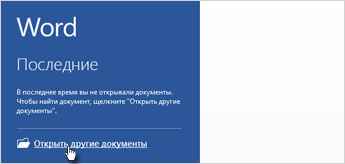
При каждом запуске Word в левом столбце отображается список последних открытых документов. Если в нем нет нужного документа, нажмите кнопку Открыть другие документы.
Если Word уже запущен, на вкладке Файл выберите команду Открыть и выберите расположение файла.
При открытии документа, созданного в более ранней версии Word, в строке заголовка окна документа отображается надпись «Режим ограниченной функциональности». Вы можете работать в этом режиме или обновить документ, чтобы использовать все возможности Word 2016.
Сохранение документа
Чтобы сохранить документ в первый раз, сделайте следующее:
-
На вкладке Файл выберите команду Сохранить как.
-
Выберите нужную папку для сохранения документа.
Примечание: Чтобы сохранить документ на компьютере, выберите папку в разделе Этот компьютер или нажмите кнопку Обзор. Чтобы сохранить документ в Интернете, выберите расположение в Интернете в разделе Сохранить как или щелкните Добавление места. Если файлы размещены в Интернете, вы можете делиться ими, отправлять отзывы о них и совместно работать над ними в режиме реального времени.
-
Нажмите кнопку Сохранить.
Примечание: По умолчанию Word сохраняет файлы в формате DOCX. Чтобы сохранить документ в другом формате, откройте список Тип файла и выберите нужный вариант.
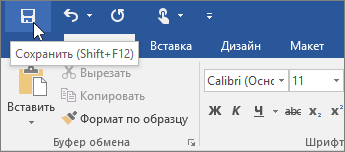
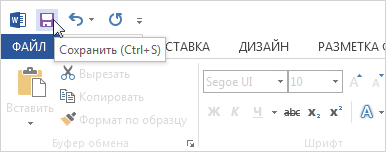
Чтобы сохранить документ в процессе работы, нажмите кнопку Сохранить на панели быстрого доступа.
Чтение документов
Документ можно открыть в режиме чтения, скрыв большинство кнопок и инструментов, которые могут отвлекать от чтения.
-
Откройте нужный документ.
Примечание: Некоторые файлы, например защищенные документы или вложения, автоматически открываются в режиме чтения.
-
На вкладке Вид нажмите кнопку Режим чтения.
-
Перемещаться по страницам документа можно одним из следующих способов:
-
Щелкните стрелку в левой или правой части страницы.
-
Нажимайте клавиши Page Down и Page Up или ПРОБЕЛ и Backspace. Также можно использовать клавиши со стрелками или колесо прокрутки мыши.
-
На устройствах с сенсорными экранами поведите пальцем влево или вправо.
Совет: Нажмите Вид, а затем — Редактировать документ, чтобы снова внести изменения в документ.
-
Регистрация изменений
При совместной работе с документом или самостоятельном редактировании можно включить отслеживание изменений. Word отметит все добавленные, удаленные и перемещенные элементы, а также изменения форматирования.
-
Откройте нужный документ.
-
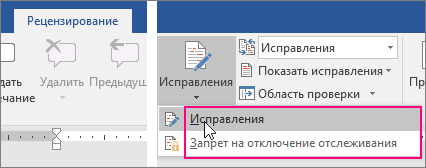
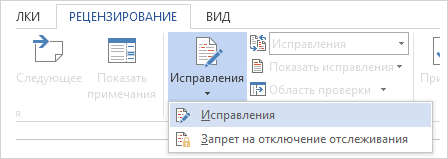
На вкладке Рецензирование нажмите кнопку Исправления и выберите пункт Исправления.

Дополнительные сведения см. в записи отслеживания изменений.
Печать документа
На вкладке «Печать» можно предварительно просмотреть документ, изменить параметры печати и распечатать документ.
-
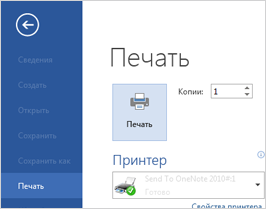
На вкладке Файл нажмите кнопку Печать.
-
Сделайте следующее:
-
В разделе Печать в поле Копии укажите число копий для печати.
-
В разделе Принтер убедитесь, что выбран нужный принтер.
-
В разделе Настройка выбраны параметры, заданные по умолчанию для указанного принтера. Чтобы изменить какой-либо параметр, щелкните его и выберите нужное значение.
-
-
После установки нужных параметров нажмите кнопку Печать.
Дополнительные сведения см. в статье Печать документа.
Более сложные действия
Дополнительные сведения об основах работы в Word см. в статье Новые возможности Word 2016.
К началу страницы
Используя Word в Интернете, вы используете веб-браузер для создания, просмотра и редактирования личных документов, которые хранятся в OneDrive. Если у вашей организации или учебы есть планMicrosoft 365 или SharePoint, начните использовать Word в Интернете, создав или храня документы в библиотеках на сайте. Сохранение изменений
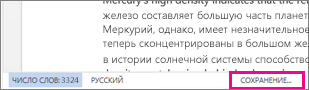
Word автоматически сохраняет изменения. Просмотрите строку состояния в левом нижнем углу Word в Интернете. В ней будет надпись Сохранено или Сохранение.
Совместный доступ к документам через Интернет
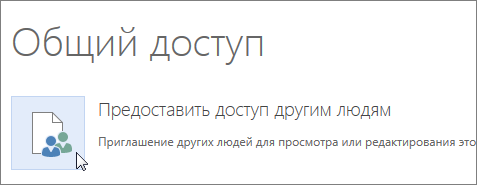
Так как документ находится в Интернете, вы можете предоставить общий доступ к нему, отправив ссылку вместо почтового вложения. Другие пользователи могут просмотреть его в браузере или на мобильном устройстве.
Выберите пункты Файл > Общий доступ > Предоставить доступ другим людям.
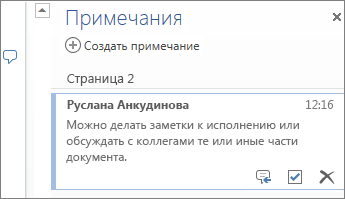
Создание комментариев в браузере
Выноска показывает, куда в документе добавлены комментарии.
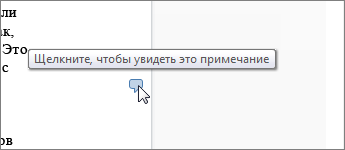
Вы можете отвечать на примечания и помечать просмотренные элементы галочкой.
Редактирование в браузере
Если при попытке написать что-то в документе ничего не происходит, то, вероятно, выбран режим чтения. Переключитесь в режим правки: нажмите кнопку « Изменить документ> Изменить в Word в Интернете.

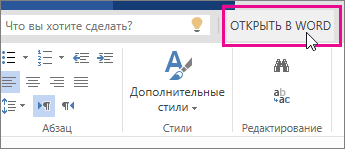
После этого можно ввести и отформатировать текст, добавить изображения, настроить макет страницы и т. д. Для доступа к расширенным возможностям редактирования выберите команду Открыть в Word.
Совместная работа над документом
Для совместной работы в Word в Интернете вы редактируем документ, как обычно. Если другие разработчики также редактирует его, Word в Интернете оповещение о присутствии. Вы можете узнать, кто работает над документом, щелкнув ленту.
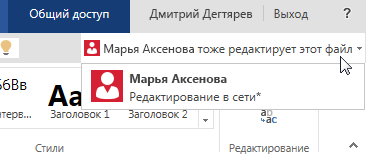
Если щелкнуть имя автора, будет показана часть документа, которую он изменяет. Изменения можно просматривать по мере внесения. Они могут работать в Word в Интернете, Word 2010 или более поздней версии или Word для Mac 2011.
Добавление колонтитулов
Чтобы добавить в документ колонтитулы, щелкните Вставка > Колонтитулы.
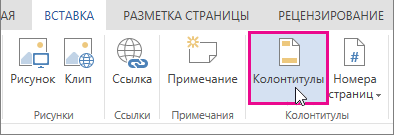
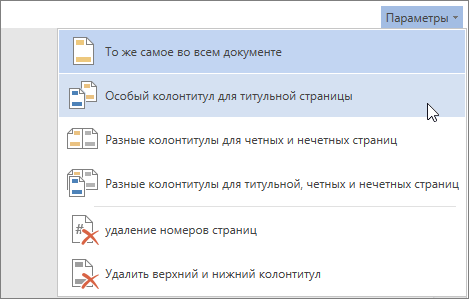
Нажмите кнопку Параметры, чтобы настроить параметры их отображения.
Добавление номеров страниц
Щелкните Вставка > Номера страниц и затем выберите из коллекции вариант отображения номеров страниц.
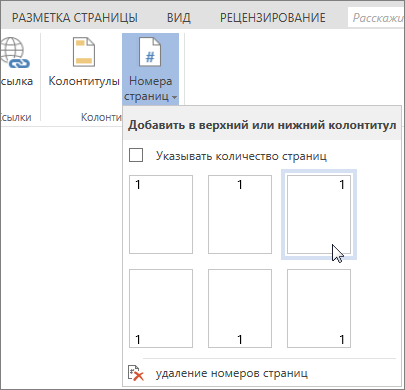
Выберите Включить количество страниц, чтобы отображались как номер текущей страницы, так и общее число страниц (страница X из Y).
Поиск и замена текста
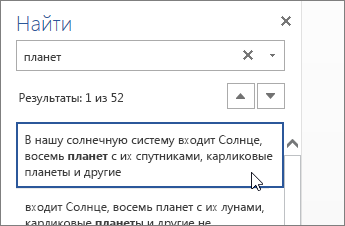
Чтобы быстро найти все вхождения определенного слова или фразы в документе, щелкните Главная > Найти (или нажмите клавиши CTRL+F). Результаты выводятся рядом с документом, так что вы можете просмотреть их в контексте. Если щелкнуть результат поиска, будет выполнен переход к этому вхождению.
Для поиска и замены текста нажмите кнопку Заменить (или нажмите клавиши CTRL+H).
Печать в Word в Интернете
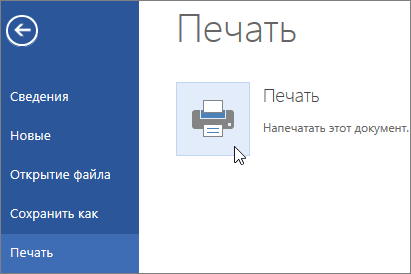
Щелкните Файл > Печать. Word в Интернете создает предварительный просмотр документа в формате PDF, который сохраняет весь макет и форматирование документа. Отправьте PDF-файл на печать, и он будет распечатан в необходимом виде.
Microsoft Word 2013 — это текстовый редактор, предназначенный для создания профессионально оформленных документов. Он помогает легко и эффективно создавать документы и систематизировать их.
Первым делом при создании документа в Word 2013 нужно выбрать пустой документ или шаблон. Дальнейшие действия по созданию документов и предоставлению общего доступа к ним остались без изменений. Эффективные средства редактирования и рецензирования помогают совместно работать над улучшением документа.
Выбор шаблона
Как правило, документы удобнее создавать на основе шаблона, а не пустой страницы. Шаблоны Word содержат темы и стили и готовы к использованию. Остается только добавить в них содержимое.
При каждом запуске Word 2013 можно выбрать шаблон из коллекции, щелкнув категорию для просмотра ее шаблонов или загрузив шаблоны из Интернета. Если использовать шаблон не требуется, просто выберите пункт Новый документ.
Чтобы подробнее изучить шаблон, щелкните его для предварительного просмотра в увеличенном масштабе.
К началу страницы
Открытие документа
При каждом запуске Word в левом столбце отображается список последних открытых документов. Если в нем нет нужного документа, нажмите кнопку Открыть другие документы.
Если Word уже запущен, на вкладке Файл выберите команду Открыть и выберите расположение файла.
При открытии документа, созданного в более ранней версии Word, в строке заголовка окна документа отображается надпись «Режим ограниченной функциональности». Можно работать в этом режиме или обновить документ для использования новых и улучшенных возможностей Word 2013.
К началу страницы
Сохранение документа
Чтобы сохранить документ в первый раз, сделайте следующее:
-
Откройте вкладку Файл.
-
Нажмите кнопку Сохранить как.
-
Выберите нужную папку для файла.
Примечание: Чтобы сохранить документ на компьютере, выберите папку в группе Компьютер или нажмите кнопку Обзор. Чтобы сохранить документ в Интернете, выберите расположение в группе Окружение или Добавление места. Если файлы размещены в Интернете, ими можно обмениваться, оставлять комментарии и совместно работать с документами в реальном времени.
-
Нажмите кнопку Сохранить.
Примечание: По умолчанию Word сохраняет файлы в формате DOCX. Чтобы сохранить документ в другом формате, откройте список Тип файла и выберите нужный вариант.
Чтобы сохранить документ в процессе работы, нажмите кнопку Сохранить на панели быстрого доступа.
К началу страницы
Чтение документов
Откройте документ в приложении » Чтение Mode«, чтобы скрыть большинство кнопок и инструментов, чтобы не отвлекаясь на чтение.
-
Откройте нужный документ.
Примечание: Некоторые файлы, например защищенные документы или вложения, автоматически открываются в режиме чтения.
-
На вкладке Вид нажмите кнопку Режим чтения.
-
Перемещаться по страницам документа можно одним из следующих способов:
-
Щелкните стрелку в левой или правой части страницы.
-
Нажимайте клавиши Page Down и Page Up или ПРОБЕЛ и Backspace. Также можно использовать клавиши со стрелками или колесо прокрутки мыши.
-
На устройствах с сенсорными экранами поведите пальцем влево или вправо.
Совет: Нажмите Вид, а затем — Редактировать документ, чтобы снова внести изменения в документ.
-
К началу страницы
Регистрация изменений
При совместной работе с документом или самостоятельном редактировании можно включить отслеживание изменений. Word отметит все добавленные, удаленные и перемещенные элементы, а также изменения форматирования.
-
Откройте нужный документ.
-
На вкладке Рецензирование нажмите кнопку Исправления и выберите пункт Исправления.
Дополнительные сведения см. в записи отслеживания изменений.
К началу страницы
Печать документа
На вкладке «Печать» можно предварительно просмотреть документ, изменить параметры печати и распечатать документ.
-
Откройте вкладку Файл и нажмите кнопку Печать.
-
Сделайте следующее:
-
В разделе Печать в поле Копии укажите число копий для печати.
-
В разделе Принтер убедитесь, что выбран нужный принтер.
-
В разделе Настройка выбраны параметры, заданные по умолчанию для указанного принтера. Чтобы изменить какой-либо параметр, щелкните его и выберите нужное значение.
-
-
После установки нужных параметров нажмите кнопку Печать.
Дополнительные сведения см. в статье Печать и предварительный просмотр документов.
Более сложные действия
Выйдите за рамки основных сведений о документах, создав оглавлевую таблицу или сохранив документ в качестве шаблона.
К началу страницы
Важно:
Office 2010 больше не поддерживается. Перейдите на Microsoft 365, чтобы работать удаленно с любого устройства и продолжать получать поддержку.
Повысить статус
В этой статье
-
Что такое Word?
-
Поиск и применение шаблона
-
Создание нового документа
-
Открытие документа
-
Сохранение документа
-
Чтение документов
-
Отслеживание изменений и вставка примечаний
-
Печать документа
Что такое Word?
Microsoft Word 2010 — это программа word-обработки, предназначенная для создания профессиональных документов. Благодаря средствам форматирования документов Word помогает эффективнее упорядочивать и писать документы. Word также включает мощные средства редактирования и редактирования, чтобы вы могли легко взаимодействовать с другими пользователями.
К началу страницы
Поиск и применение шаблона
Word 2010 позволяет применять встроенные шаблоны, применять собственные настраиваемые шаблоны и выполнять поиск по различным шаблонам, доступным в Интернете.
Чтобы найти и применить шаблон в Word, выполните следующие действия.
-
На вкладке Файл нажмите кнопку Создать.
-
В разделе «Доступные шаблоны» выполните одно из следующих действий:
-
Чтобы использовать один из встроенных шаблонов, щелкните «Примеры шаблонов «, выберите нужный шаблон и нажмите кнопку «Создать».
-
Чтобы повторно использовать шаблон, который вы недавно использовали, щелкните «Последние шаблоны», выберите нужный шаблон и нажмите кнопку «Создать».
-
Чтобы использовать созданный ранее шаблон, щелкните «Мои шаблоны», выберите нужный шаблон и нажмите кнопку «ОК «.
-
Чтобы найти шаблон на сайте Office.com, в разделе Office.com Templates щелкните требуемую категорию шаблона, выберите нужный шаблон и нажмите кнопку «Скачать», чтобы скачать шаблон с сайта Office.com на компьютер.
-
Примечание: Вы также можете искать шаблоны на сайте Office.com в Word. В поле поиска Office.com введите один или несколько условий поиска, а затем нажмите кнопку со стрелкой для поиска.
К началу страницы
Создание нового документа
-
Откройте вкладку « Файл» и нажмите кнопку » Создать».
-
В разделе «Доступные шаблоны» щелкните «Пустой документ».
-
Щелкните Создать.
Дополнительные сведения о создании документа см. в разделе «Создание документа».
К началу страницы
Открытие документа
-
Откройте вкладку Файл и нажмите кнопку Открыть.
-
В левой области диалогового окна « Открыть» щелкните диск или папку, содержащую документ.
-
В правой области диалогового окна « Открыть» откройте папку, содержащую нужный документ.
-
Щелкните документ и нажмите кнопку » Открыть».
К началу страницы
Сохранение документа
Чтобы сохранить документ в формате, используемом Word 2010 и Word 2007, сделайте следующее:
-
Откройте вкладку Файл.
-
Выберите команду Сохранить как.
-
В поле «Имя файла » введите имя документа.
-
Нажмите кнопку Сохранить.
Чтобы сохранить документ, чтобы он был совместим с Word 2003 или более ранней версии, выполните следующие действия.
-
Откройте документ, который вы хотите использовать в Word 2003 или более ранней версии.
-
Откройте вкладку Файл.
-
Нажмите кнопку Сохранить как.
-
В списке Тип файла выберите значение Документ Word 97–2003. Формат файла будет изменен на DOC.
-
В поле Имя файла введите имя документа.
-
Нажмите кнопку Сохранить.
Дополнительные сведения о создании документа, совместимого с Word 2003 или более ранними версиями, см. в статье «Создание документа для использования в предыдущих версиях Word».
К началу страницы
Чтение документов
-
Откройте документ, который вы хотите прочитать.
-
На вкладке « Вид» в группе » Представления документов» щелкните «Полноэкранный режим чтения»
-
Перемещаться по страницам документа можно одним из следующих способов:
-
Щелкните стрелки в нижних углах страниц.
-
На клавиатуре нажмите клавиши PAGE DOWN, PAGE UP или SPACEBAR и BACKSPACE.
-
Щелкните стрелки навигации в верхней части экрана.
Совет:
Щелкните «Параметры просмотра», а затем выберите команду «Показать » для просмотра двух страниц или экранов за раз.
-
 » для просмотра двух страниц или экранов за раз.
Дополнительные сведения о просмотре документов см. в статье » Чтение документов в Word».
К началу страницы
Отслеживание изменений и вставка примечаний
-
Чтобы включить отслеживание изменений, на вкладке «Рецензию» в группе «Отслеживание » нажмите кнопку «Отслеживать изменения».
-
Чтобы вставить комментарий, на вкладке «Рецензию» в группе » Примечания » нажмите кнопку «Создать примечание».
Дополнительные сведения о том, как отслеживать изменения, внесенные при изменении, см. в разделе «Отслеживание изменений и вставка примечаний».
К началу страницы
Печать документа
-
Откройте вкладку Файл и нажмите кнопку Печать.
-
Сделайте следующее:
-
В разделе «Печать» в поле « Копии» введите количество копий, которые нужно распечатать.
-
В разделе «Принтер» убедитесь, что выбран нужный принтер.
-
В разделе Настройка выбраны параметры, заданные по умолчанию для указанного принтера. Если вы хотите изменить параметр, щелкните нужный параметр, а затем выберите нужный параметр.
-
-
Когда параметры будут удовлетворены, нажмите кнопку » Печать».
Дополнительные сведения о том, как распечатать файл, см. в разделе «Предварительный просмотр и печать файла».
К началу страницы
Ribbon
The Ribbon is the strip of buttons and icons located above the work area in Word 2007. The Ribbon replaces the menus and toolbars found in earlier versions of Word. Each ribbon contains groups of command buttons with common purpose. Each ribbon contains 7 tabs.
Office Button
Click the Office Button to find a drop down menu containing options, such as: open, save, and print. Also shows previously opened files, which you may choose to “pin” them to make them “permanent”choices.
Rulers
Gives you an idea of where you are on the page
Tab Selector Button
You can easily set tab stops by clicking on the desired position on the ruler. This buttonallows you to determine which type of tab will be set left aligned , right aligned , center aligned or decimal tab . Clicking on this button will allow you to change the tab style.
Document
This is what you are typing/what will print out.
Status Bar
This row can be customized by right-clicking and selecting desired options. Desired options may include page number/number of total page, word count, insert/overtype mode, caps lock, and zoom slide.
View Shortcuts
These four buttons allow you to change the way you view your document on the screen. From left to right they are: print layout, full screen reading, web layout and draft. These can be added/removed by right clicking anywhere on the status bar and checking/unchecking View shortcuts.
Task Bar
Shows open programs.
Zoom Slide
Allows you to increase/decrease the amount of the document you see on the screen.
View Ruler Button
Allows you to view/hide the rulers.
Screen Split Button
At the top of the vertical scroll bar is a new button. Just below the double arrow is a tiny button that looks like a minus sign that lets you split your screen in two when double-clicked. Double-clicking it a second time will unsplit your screen.
Scroll Bars
Allows you to view entire workbook by moving it up, down (vertical scroll bar), left or right (horizontal scroll bar).
Right Indent
Slide this triangle to the left of the margin to limit the right side of a paragraph to that point. Move the triangle to the right of the margin to allow the right side of the paragraph to extend beyond the margin. The triangle at the margin will keep the right side of the paragraph with the margin.
Group
Command buttons with a common purpose are clustered together. Each ribbon contains several groups.Some groups, but not all, contain a quick launch bar (dialogue box launcher) in the bottom right hand corner.
Quick Launch Bar/Dialogue Box Launcher
It is the arrow in the bottom right hand corner of some groups. When clicked, it will bring up a dialog box where additional options/changes can be entered.
Title Bar
Shows name of program and open document. Also contains minimize, maximize and close buttons.
Quick Access Toolbar
This customizable toolbar allows you to add frequently used commands. Click on the down arrow at the end of the toolbar to add/remove command buttons – or – right-click on any command button and choose Add to Quick Access Toolbar.
Tab
The ribbon is broken down into 7 tabs. Each tab has a common purpose and consists of several groups. To select a tab, simply click on it and the appropriate groups will be displayed.
First Line Indent
This triangle controls where the first line of a paragraph begins. Moved to the left of the margin, will allow the first paragraph to be in the left margin. Can be moved to the right of the margin to indent your paragraph.
Hanging Indent
The opposite of a first line indent. It is often moved to the right of the first line indent, which allows the remaining lines of a paragraph to be indented according to placement of the triangle.
One of the most widely used programs of Microsoft Office suite, MS Word is a word processor developed by Microsoft.
An introduction to MS Word, its features and its uses, have all been discussed in detail, in this article. Also, a few sample questions based on this MS Office program have been given further below for the reference of candidates preparing for competitive exams.
To know further about the MS Office suite and the various programs included in it, visit the linked article.
Since MS Word is one of the most used programs of the Office Suite, some basic information regarding its creation and development has been given below:
- Charles Simonyi, a developer and Richard Brodie, a software engineer, were the two creators of MS Word
- This program was initially named “Multi-Tool Word” but later, was renamed as MS Word
- It was introduced in 1983
- Word for Windows is available standalone or as a part of MS Office suite
- MS Word for Mac was introduced by Microsoft as Word 1.0 in 1985
- The extension for any word file is “.doc or .docx.”
Moving forward, details about the features and applications of Word have been discussed. To read more about the other Computer Knowledge topics, check the links given below:

Let us first understand some basic aspects of Microsoft Word.
What is MS Word?
Used to make professional-quality documents, letters, reports, etc., MS Word is a word processor developed by Microsoft. It has advanced features which allow you to format and edit your files and documents in the best possible way.
Where to find MS Word on your personal computer?
Follow these simple steps to open MS Word on your personal computer:
Start → All Programs → MS Office → MS Word.
What are the uses of MS Word?
MS Word enables users to do write-ups, create documents, resumes, contracts, etc. This is one of the most commonly used programs under the Office suite.
How to create an MS Word document?
To create an MS Word doc, follow the steps mentioned above to open Microsoft Word. Then once the program is open, click on “File” followed by “New”. This opens a new doc where something new can be created.
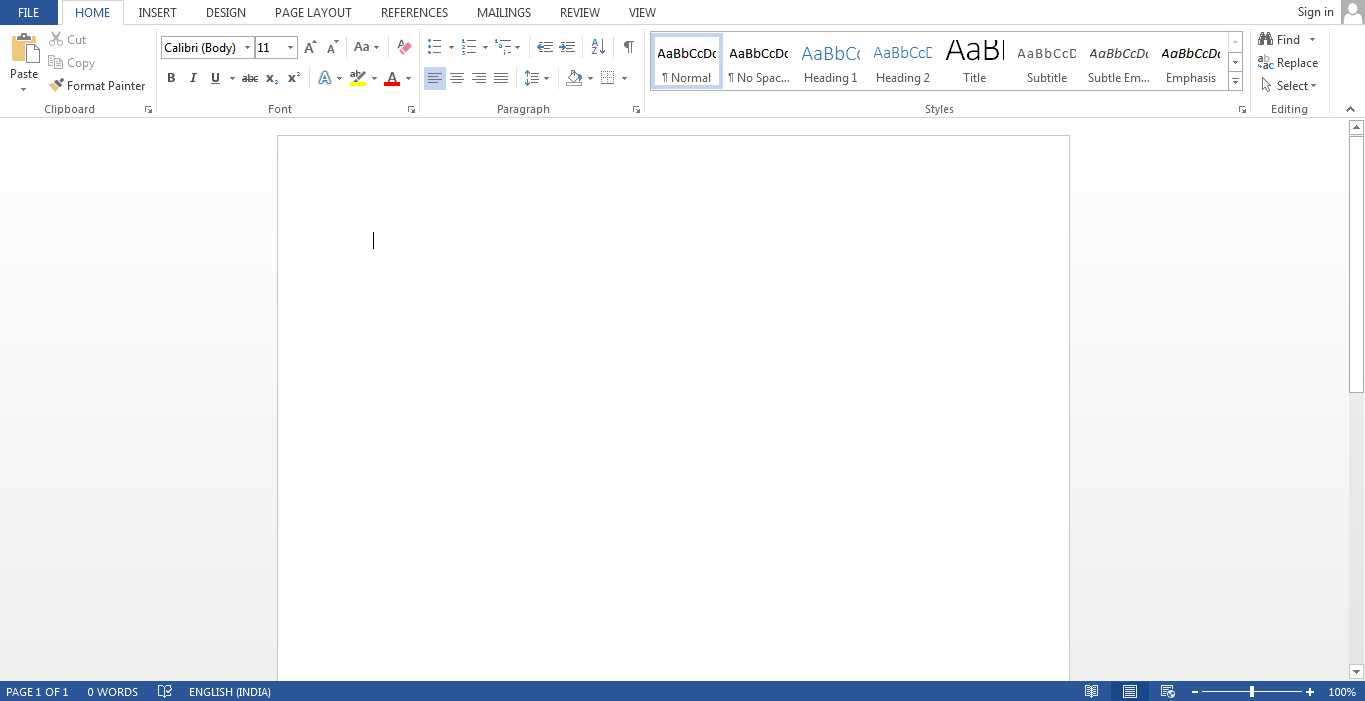
Since it is used by people of all age groups, in schools, in colleges and for official purposes, having proper knowledge of Microsoft Word is a must. The preview of the MS Doc file once it is opened is given below:
Also, from a competitive exam perspective, one must be well aware of this topic. To get the list of all major Government exams conducted in the country, aspirants can visit the linked article.
For a better understanding of how MS Word works and the features that are included in it, you can refer to the video given below and analyse its functioning easily.
Features of MS Word
Now let us read more about the features and components of an MS Word doc file in detail.
The image given below shows the different elements and categories which are available in MS Word doc:

- Home
This has options like font colour, font size, font style, alignment, bullets, line spacing, etc. All the basic elements which one may need to edit their document is available under the Home option.
- Insert
Tables, shapes, images, charts, graphs, header, footer, page number, etc. can all be entered in the document. They are included in the “Insert” category.
- Design
The template or the design in which you want your document to be created can be selected under the Design tab. Choosing an appropriate tab will enhance the appearance of your document.
- Page Layout
Under the Page Layout tab comes options like margins, orientation, columns, lines, indentation, spacing, etc.
- References
This tab is the most useful for those who are creating a thesis or writing books or lengthy documents. Options like citation, footnote, table of contents, caption, bibliography, etc. can be found under this tab.
- Review
Spell check, grammar, Thesaurus, word count, language, translation, comments, etc. can all be tracked under the review tab. This acts as an advantage for those who get their documents reviewed on MS Word.
Apart from all the above-mentioned features, the page can be set in different views and layouts, which can be added and optimised using the View tab on the Word document. Margins and scales are also available for the benefit of the users.
When compared with MS PowerPoint, MS Word is more of reading while PPT is more of visual and graphical representation of data.
To know more about Microsoft Windows, visit the linked article.
For Govt exam aspirants, given below are links to the other subjects which are a part of the competitive exam syllabus:
Uses of MS Word
Given below are the different fields in which MS Word is used and simplifies the work of an individual:
- In Education: It is considered as one of the simplest tools which can be used by both teachers and students. Creating notes is easier using MS Word as they can be made more interactive by adding shapes and images. It is also convenient to make assignments on MS Word and submitting them online
- In Workplace: Submitting letters, bills, creating reports, letterheads, sample documents, can all easily be done using MS Word
- Creating & Updating Resume: One of the best tools to create your resumes and is easy to edit and make changes in it as per your experience
- For Authors: Since separate options are available for bibliography, table of contents, etc., it is the best tool which can be used by authors for writing books and adjusting it as per the layout and alignment of your choice
Also, creating a Doc file and converting it into PDF is a more suitable option, so it is highly recommended.
For competitive exam aspirants, given below are links which may help you prepare yourself for the upcoming exams:
Sample MS Word Question and Answers
Some sample questions and answers with the competitive exam perspective have been given below. Refer to these for assistance.
Q 1. How can you open the column dialogue box?
- Alt+O+C
- Alt+A+C
- Alt+R+C
- Alt+C
- Alt+ctrl+C
Answer: (1) Alt+O+C
Q 2. Which is the default alignment in MS Word?
- Right
- Centre
- Left
- Justify
- None of the Above
Answer: (3) Left
Q 3. “Ctrl + =” is used for _________
- Change Alignment
- Subscript
- Superscript
- Change font to Bold
- None of the above
Answer: (2) Subscript
Q 4. A combination of which shortcut keys to use to split a table?
- Ctrl+shift+enter
- Ctrl+enter
- Shift+enter
- ctrl+alt+S
- alt+S
Answer: (1) Ctrl+shift+enter
Furthermore, to get the best tips to ace the upcoming Government exams, candidates can check the Preparation Strategy for Competitive Exams at the linked article.
Get the best study material and the latest exam information at BYJU’S.

Frequently Asked Questions on Microsoft Word
Q 1. Which formatting features can be added to the MS Word document?
Ans. The common formatting features which are available on MS Word include:
-
- Font Style, Size and Colour</li
- Header and Footer
- Insert Images
- Add tables and bulleted lists
- Set a page layout
- Add Word Art
The basic feature of why people choose MS Word over any other text editor is that it makes the document more visually interactive and appealing.
Q 2. What is Microsoft Word used for??
Ans. MS Word can also help you organize and write documents more efficiently. When the document is created in Word, the user can choose to start from a blank document or let a template do much of the work for the user. From then on, the basic steps in creating and sharing documents are the same.
Q 3. What are the basic functions of MS Word?
Ans. Given below are the basic functions of Microsoft Word:
- Creating text documents
- Editing and Formatting the existing documents
- Making a text document interactive with different features and tools
- Graphical documents, comprising images
- Used by Authors and Researchers
- Detect grammatical errors in a text document
Q 4. What is the extension of an MS Word file?
Ans. An MS Word file is always saved with the extension of .doc or .docx.
.
Q 5. What are the five basic fields of application for MS Word?
Ans. Using Microsoft Word, one can create resumes, reports, and write letters. Authors can use it to write their books and researchers for writing a thesis. Apart from this, it can be used as a simple text editor.
Guide to Microsoft Word Features – All of us adore the benefits Microsoft Office has provided us. Microsoft Word is arguably the most used digital word processor, universally accepted by students, professionals and businesses alike. If you’re migrating from another tool or if this is your first stint with the newer versions of Microsoft word features software, welcome. You’ll find your tryst with Microsoft word software application a multi-dimensional affair, ideal for beginners, advanced users and for making complex formatting changes.
Guide to Get Started With Microsoft Word Features
In this post, we outline a Beginner’s guide to Microsoft Word.
-
Documents, Blog Posts, and Microsoft Word Templates
The first time you open up this tool, you’ll be prompted to “create” one of these three: a blank document, a blog post, or a new/existing Microsoft word templates.
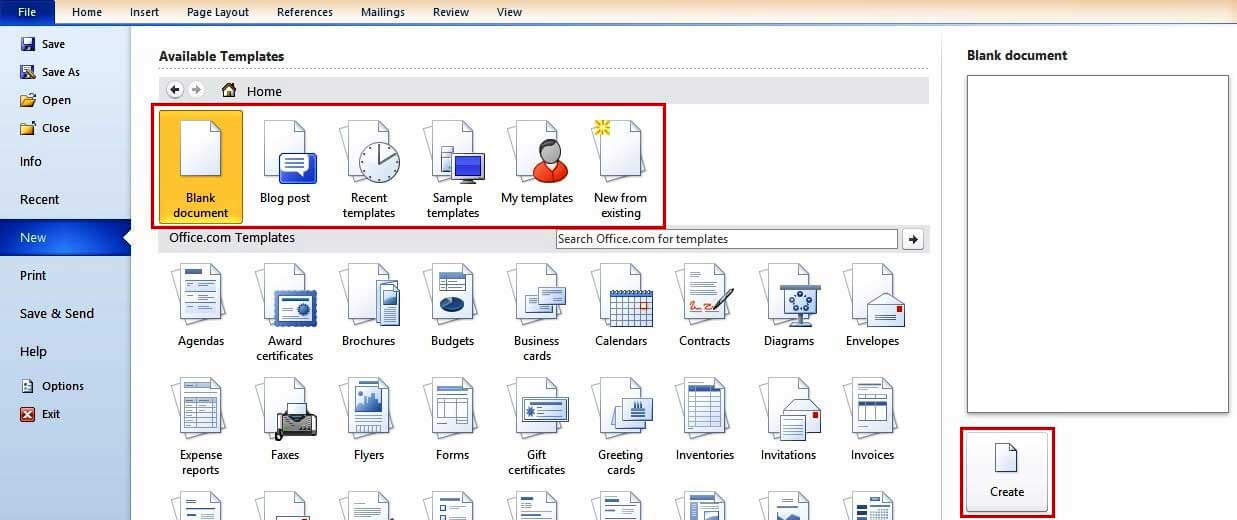
- Documents are essentially like text files that support complex formatting. Each format has a page size and a layout.
- Blog posts are essentially for passionate bloggers. You will be prompted for your blog account details so you can upload your posts seamlessly.
- Microsoft word templates are essentially pre-defined formats.
As a new user, we suggest you create a blank template to get started on your journey to discover Microsoft Office Word.
-
The Tabbed Ribbon in newer versions of Microsoft Word Features
Newer versions of Microsoft Word features (2007 and above) come with the now-famous “Ribbon,” which is a sequence of Screens that capture all the capabilities of your Microsoft Word templates Software application.
Through this, MS Word makes its utilities available to use. The ribbon, in turn, contains:
-
Tabs:
Each tab is an individual screen available on the Ribbon. Commonly used Tabs include Home (the default Tab that opens up when you open a Word document), File (for File operations like Save, New, etc.), Insert, Page Layout, View, etc.
-
Commands:
These enable you to use your Microsoft Word templates software to do something to your word document (or post, template, etc.). While you can simply type out your text in the document, commands empower you to format/ insert/ handle this text in multiple ways.
-
Command Groups:
Commands are grouped together based on their functionality for easy access. For instance, basic text-formatting commands are put together in one group, paragraph formatting commands in another group, and so on. In some cases, you’ll see a tiny arrow at the bottom of the group. You can click on it to open up additional commands and options related to the group.
In addition, here are some special commands available on the Ribbon:
- The caret symbol (^) at the top right-hand side corner of the Ribbon can be used to hide/show the command/groups. This is useful when you want to review your word document in a larger screen space without distractions.
- The question symbol in blue (?) brings up Microsoft Word features Help utility. (Alternately, you can use the F1 keyboard shortcut to bring this up.) You can either browse through existing categories or use the search text box to type out what you want to find.
You can customize this ribbon at any time: to add new commands to an existing group, create a new tab altogether with your favorite commands, etc. To do this, right-click on any part of the ribbon and choose “Customize the Ribbon….”
You will become familiar with the File, Home, Page Layout and View tabs through the rest of this post, as these are most commonly used for editing word documents.
-
The FILE Tab
When you click on the File Tab, you are immediately taken to the “Backstage View”, containing all the tiny details about your document. We’ll keep it simple in this basic tutorial and introduce you to the frequently used file-related commands.
-
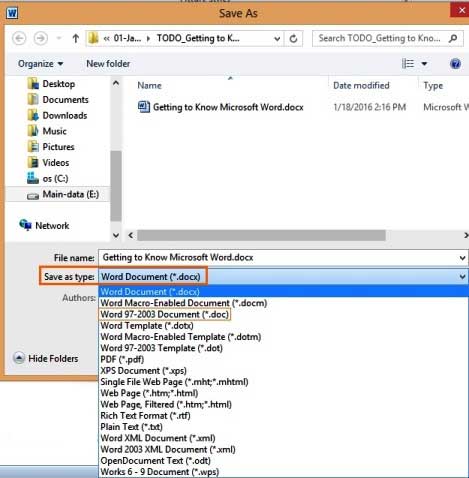
Save and Save As:
This is possibly the first command you should use when you type some text. It enables you to save your document on the hard disk as a .docx file (by default). Take note of the type of file here. If you wish to open your word document with older versions of Microsoft Word features, you will need to explicitly choose a backwards-compatible file type. You can additionally choose to save your file as a PDF file, self-contained web file, text file (.txt or .rtf, formatting changes are lost), etc.
-
New, Open, Close:
Names are self-explanatory as they enable you to open/close or create a new document/ blog post or template.
-
Recent:
This stores the list of recently accessed documents and folders so you can quickly open the last document you worked on.
-
Options:
This dialog box houses the master preferences for your document and controls your display and editing options. Here, the default setup will nicely do for most documents, so you will need to alter this only on rare occasions. But do explore each dialogue when you’re more familiar, for an advanced understanding of Office Word.
-
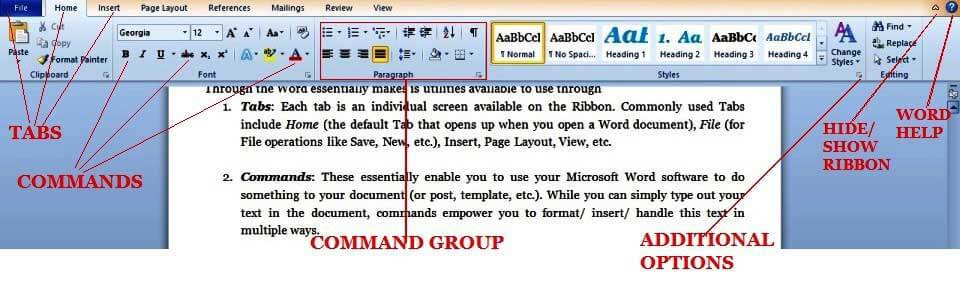
The HOME Tab
The Home Tab is perhaps the most commonly used Tab in Microsoft Word features. And it looks like this:
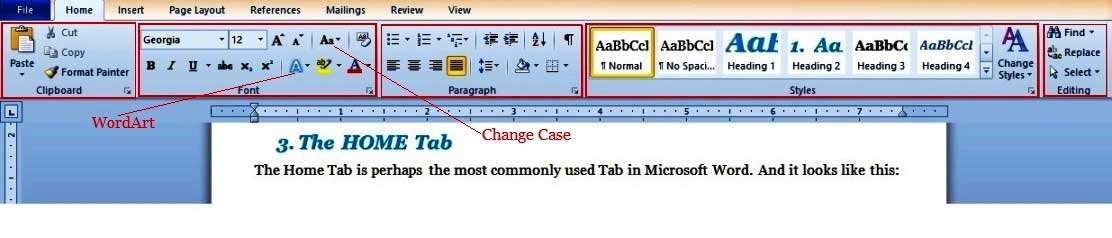
As you can see, this contains 5 formatting command groups. And there lies its most significant utility: formatting. You see, this is where Microsoft Word features wins heads over any other Word processing software tool (including Microsoft’s own WordPad), as it provides users with a host of complex formatting features all available with a mouse-click or two.
Before we dig in deeper, we suggest you play around a bit with a document. Type some sentences and be prepared to edit and format them to your heart’s content. Once you’re done, the Command groups in the Home tab can be used as below.
-
Clipboard group:
This has the mandatory copy and pastes commands. The paste command has additional options (click on the bottom-arrow symbol below) to paste formatted/ unformatted text/pictures. Also, spend time with Office Word’s special command, “Format Painter,” which allows you to paste formatting across text blocks. Try it now to experience its magic.
- Select a portion of text from anywhere in your document (using the Shift Key).
- Use the Keyboard shortcut (Control + B + I). This will make the selected text bold and italicized. Copy this selected text using the (Control + C); this copies everything in Word, text, and formatting.
- Now, select some other portion of (plain) text in your document and click on the Format Painter command. And voila, the formatting (alone) gets copied!
This is especially useful when formatting long documents with complex styles; you don’t have to repeat your special formatting needs across pages of a document. Capture them through the copy command and then “paste” them all over using the Format Painter command!
-
Font group:
Here, we’ll tell you to highlight text in your document and have a free play with this group. (There’s no better way to become familiar with Microsoft Word introduction font options). You can set the font typeface for text (based on your system’s inbuilt fonts), and change its look (includes size, bold, italics, underline, superscript, subscript, color highlight, etc.) and use Microsoft Word introduction Art to add instant drama to your text. Also, explore the command that changes the casing of selected text with just one click, to uppercase, lowercase, sentence case, etc. (refer pic above for details).
Microsoft Word introduction also provides for more advanced options through a single right-click of your mouse. Again, try this right now as you select some text, right-click, and choose the “Font…” option.
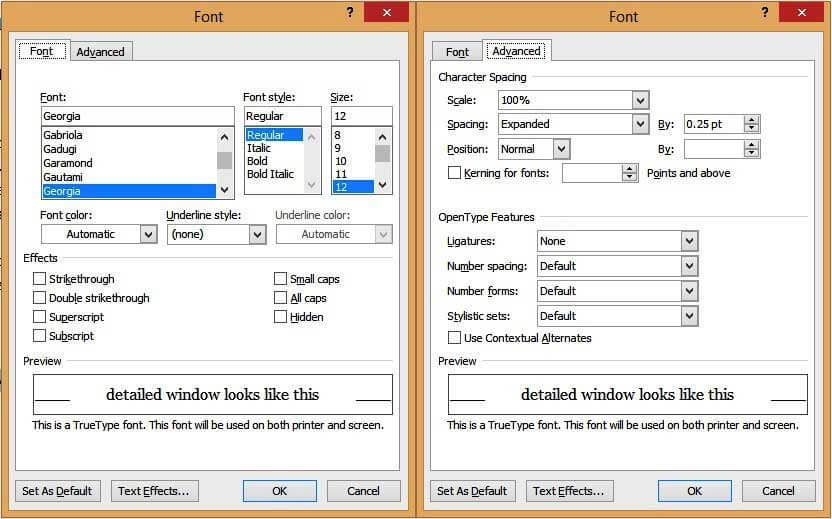
This window has advanced options that give you greater control of your text. Of special interest are the “Text Effects” and “Advanced” tabs to capture Microsoft Word introduction coveted formatting features. You can add shadows and reflections to your text, give it an outer glow, change the spacing between letters, and a lot more.
-
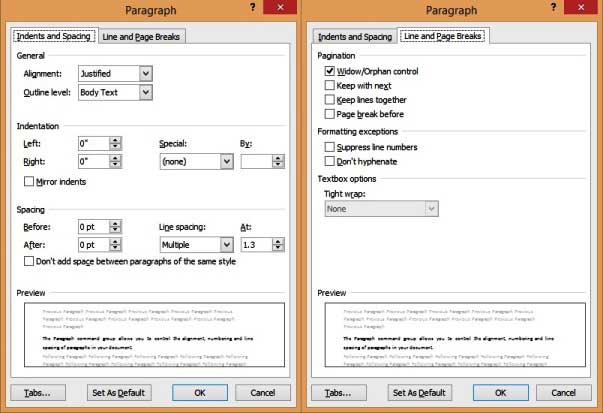
Paragraph:
The Paragraph command group allows you to control the alignment, numbering and line spacing of paragraphs in your document.
Do take note of:
- Text alignment: This determines how your text looks on your page and is left-aligned by default.
- Line spacing: This is the space between lines and is a single line spaced by default.
- Line and Page Breaks: This determines how a Style spawns across pages. For instance, if you check the “Widow/Orphan control” option, then when text with a Heading style falls towards the end of a page, it will automatically be bumped to the top of the next page.
-
Styles:
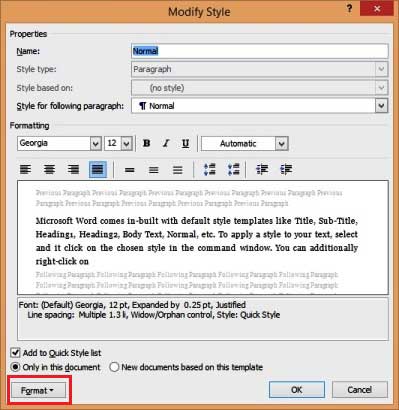
Styles are formatting templates used within a document. For instance, you’ll notice that all the Major Headings in this document are in blue, Georgia font size 16, bold and italicized, and have a light shadow. Likewise, all Minor Headings are in Italics, Georgia size 14. Now imagine that you want to consistently capture these format “styles” through a large text document (say 100 pages). Even with the Format-Painter command, it’s a lot of work. It’s also prone to manual error. With styles, you can do this with minimal effort.
Microsoft Word introduction comes in-built with default style templates like Title, Sub-Title, Heading1, Heading2, Body Text, Normal, etc. To apply a style to your text, select text and click on the chosen style in the command window. You can additionally right-click on the style and “modify” it as desired. You can alter the font settings, text effects, paragraph settings (explained below) and other options in your document, all through the “Format tab” of the Style edit window.
Word also allows you to add your own custom styles. For this:
- Select formatted text.
- Right-click and select Styles…
- Choose the option, “Save Selection as a New Click Style”.
- Name your custom style.
However, custom styles are limited within the document in use (not available as a template in other documents).
-
Editing:
The final command group available in the Home Tab is the Editing tab. Like any good word processor, Microsoft Word introduction allows you to easily select, find and find-and-replace text blocks across your document. Of this, you can bring up the much-used find-replace dialog box with the Keyboard shortcut (Control + H), and it looks like this:
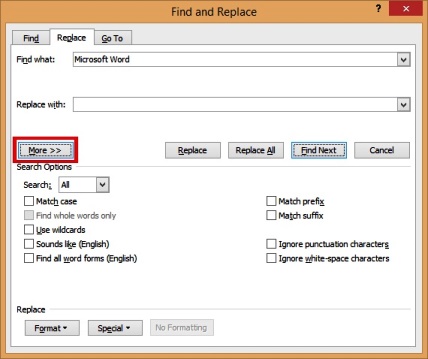
Do remember to click on the “More>>” button to bring up additional options. You can further choose the “Format” and “Special” boxes to find text based on specific formatting criteria.
So that was the Home Tab in a nutshell. Phew! But as you are sure to have noticed, more than 50% of your most used commands lie in this Tab. Explore this thoroughly until you’re comfortable with it, as this will determine your success with the Microsoft Word introduction.
-
The Page Layout Tab
This tab contains a host of command (groups) to control the behavior of each page in your document. And it roughly looks like this:

We’re going to keep it simple here and discuss (only) the Page Setup command group as this houses 2 commands you will most likely need to play with.
-
Size:
By default, a Microsoft Word features document is set to a letter’s size (8.5” X 11”). You can change this to A4, A3, Executive or other standard sizes or even define a custom size. Changes will apply to the whole document.
-
Orientation:
By default, this is set to “Portrait”; you can alternatively set it to Landscape. Again, the orientation applies to the whole document by default. (You can alter this by setting specific “Section Breaks”, but this is outside the scope of this Beginner’s guide).
-
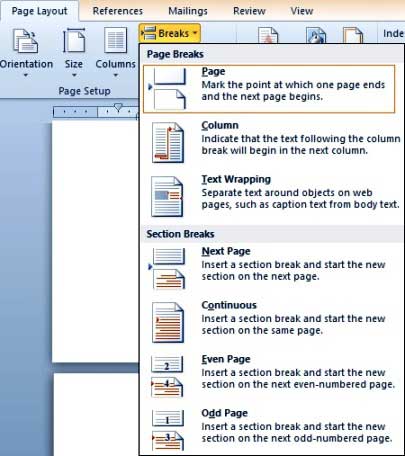
Breaks:
The most commonly used “Break” in a Microsoft Word features document is a Page Beak. When you insert a page break, the following text is bumped to a new page; This is immensely useful when you want to start new chapters/ headings on a fresh page.
-
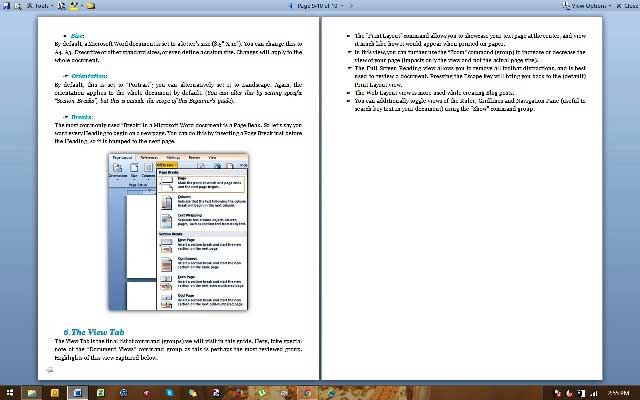
The View Tab
The View Tab is the final list of command (groups) we will visit in this guide. Here, take special note of the “Document Views” command group, as this is perhaps the most reviewed group.

Highlights of this view are captured below.
- The “Print Layout” command allows you to showcase your text page at the center and view it much like how it would appear when printed on paper.
- In this view, you can further use the “Zoom” command (group) to increase or decrease the size of your page (impacts only the view and not the actual page size).
- The Full-Screen Reading view allows you to remove all toolbar distractions and is best used to review a document. Pressing the Escape key will bring you back to the (default) Print Layout view.
- The Web Layout view is typically used to review Blog posts.
- You can additionally toggle views of the Ruler, Gridlines and Navigation Pane (useful to search key text in your document) using the “Show” command group.
And that marks the end of our Beginner’s guide to knowing Microsoft Word features!
-
Next Steps
As a beginner, your tryst with Word is sure to open up endless possibilities, for better formatting, for a cleaner layout and alignment, for an overall superior experience with any digital word processing tool. We encourage you to actively explore Microsoft word features software on your own, even as you look to more advanced micro-tutorials for guidance. Your efforts will be well worth it!
Recommended Articles
Here are some articles that will help you to get more detail about the Microsoft Word is arguably the most used digital word processor so just go through the link.
- Powerful Features of Microsoft Access
- Excel Skills
- Pivot Chart in Excel
- How to Improve your Microsoft Excel Skills?