
You can import data into Excel from a wide variety of data sources and the sections that follow show you how. For more information on what to do with your data once it’s imported, see How data journeys through Excel.
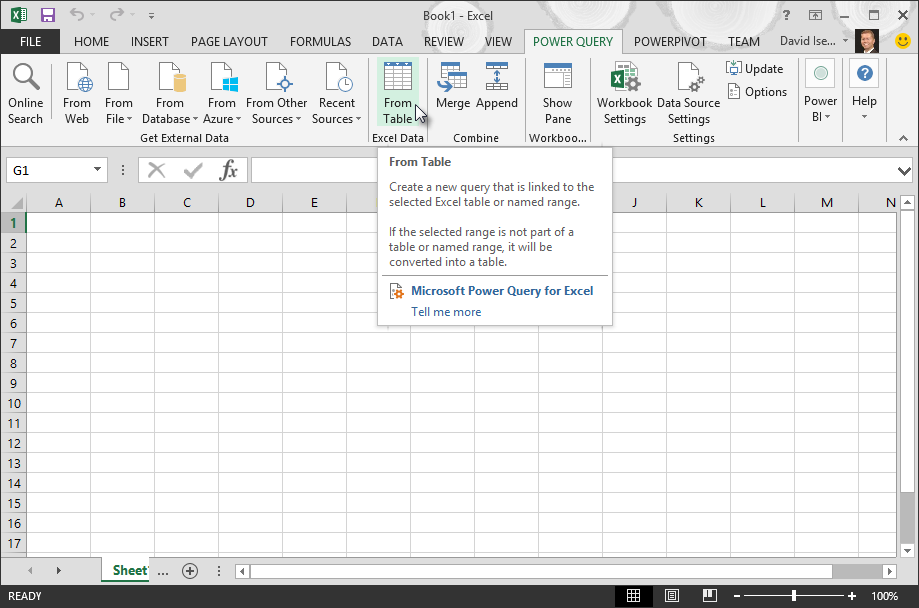
You can create a query from an Excel table, named range, or dynamic array in the current workbook. If the selected data is a simple range, it’s converted to a table. Importing dynamic arrays requires a Microsoft 365 subscription. For more information on dynamic arrays, see Dynamic array formulas and spilled array behavior.
-
Select any cell within your data range.
-
Select Data > From Table/Range.
This command is also available from Data > From Other Sources > From Table/Range.
-
If prompted, in the Create Table dialog box, you can select the Range Selection button to select a specific range to use as a data source.

-
If the table or range of data has column headers, select My table has headers. The header cells are used to define the column names for the query.
-
Select OK.

For more information, see Import from an Excel Table.
-
Select Data > Get Data > From File > From Excel Workbook.
-
In the Excel Browse dialog box, browse for or type a path to the file that you want to query.
-
Select Open.
If your source workbook has named ranges, the name of the range will be available as a data set.
For more information about advanced connector options, see Excel Workbook (docs.com).
The following procedure shows the basic steps. For more detailed coverage, see Import or export text (.txt or .csv) files.
-
Select Data > Get Data > From File > From Text/CSV.
-
In the Comma-Separated Values Browse dialog box, browse for or type a path to the file that you want to query.
-
Select Open.
Note: If you are importing data from a CSV file, Power Query will automatically detect column delimiters including column names and types. For example, if you imported the example CSV file below, Power Query automatically uses the first row as the column names and changes each column data type.
Example CSV file
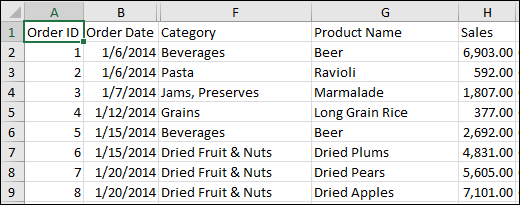
Power Query automatically changes each column data type:
-
Order ID changes to number
-
Order Date changes to date
-
Category remains text (the default column type)
-
Product Name remains text (the default column type)
-
Sales changes to number
For more information about advanced connector options, see Text/CSV (docs.com).
The following procedure shows the basic steps of importing data. For more detailed coverage, see Import XML data.
-
Select Data > Get Data > From File > From XML.
-
In the From XML Browse dialog box, browse for or type a file URL to import or link to a file.
-
Select Open.
After the connection succeeds, use the Navigator pane to browse and preview the collections of items in the XML file in a tabular form.
For more information about advanced connector options, see XML (docs.com).
-
Select Data > Get Data > From File > From JSON. The Import Data dialog box appears.
-
Locate the JSON file, and then select Open.
For more information about advanced connector options, see JSON (docs.com).
Important When you try to import a PDF file, you may get the following PDF message: “This connector requires one or more additional components to be installed before it can be used.” The PDF connector requires .NET Framework 4.5 or higher to be installed on your computer. You can download the latest .NET Framework from here.
-
Select Data > Get Data > From File > From PDF.
-
Select your PDF file, and then click Open. The Navigator dialog box opens your PDF and displays available tables.
-
Select the tables you want to import, then do one of the following:
-
To view the data directly in Excel, Select Load > Load or to see the Import dialog box, select Load > Load To.
-
To work with the data in Power Query first, select Transform Data.
-

For more information about advanced connector options, see PDF (docs.com).
You can import data from several files having a similar schema and format from a folder. Then, you can append the data into one table.
-
Select Data > Get Data > From File > From Folder.
-
In the Browse dialog box, locate the folder, and then select Open.
-
For detailed steps, see Import data from a folder with multiple files.
For more information about advanced connector options, see Folder (docs.com).
You can import data from several files having a similar schema and format from a SharePoint library. Then, you can append the data into one table.
-
Select Data > Get Data > From File > From SharePoint Folder.
-
In the SharePoint Folder dialog box, enter the root URL for the SharePoint site not including any reference to a library, and then navigate to the library.
-
For detailed steps, see Import data from a folder with multiple files.
For more information about advanced connector options, see SharePoint folder (docs.com).
-
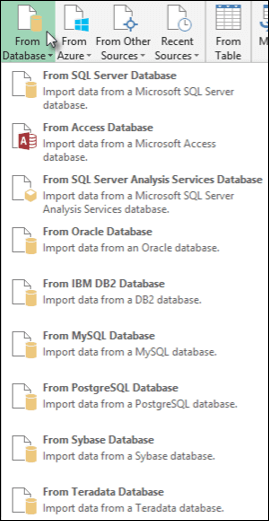
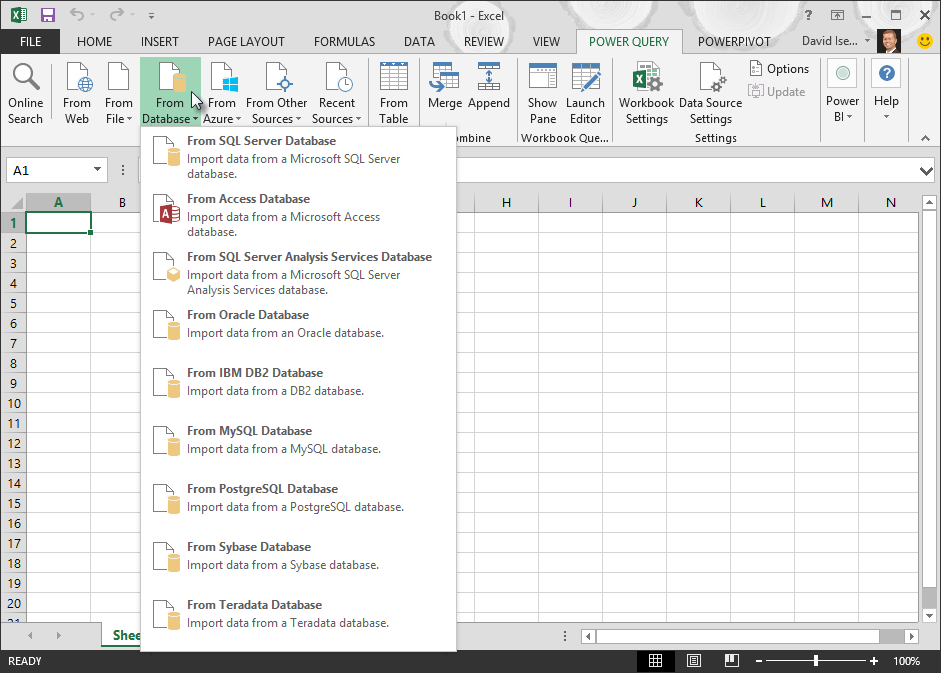
Select Data > Get Data > From Database > From SQL Server Database.
-
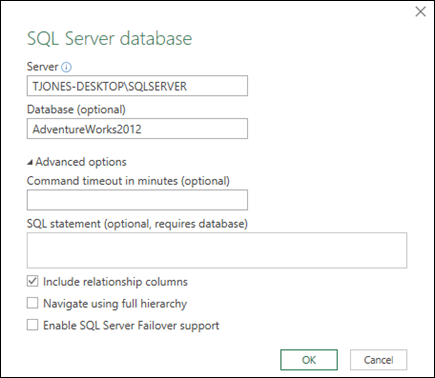
In the Microsoft SQL Database dialog box, specify the SQL Server to connect to in the Server Name box. Optionally, you can specify a Database Name as well.
-
If you want to import data using a native database query, specify your query in the SQL Statement box. For more information, see Import Data from Database using Native Database Query.
-
Select OK.
-
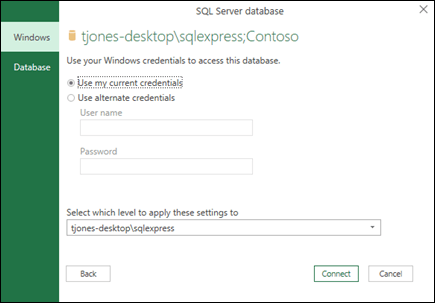
Select the authentication mode to connect to the SQL Server database.
-
Windows This is the default selection. Select this if you want to connect using Windows authentication. -
Database Select this if you want to connect using SQL Server authentication. After you select this, specify a user name and password to connect to your SQL Server instance.
-
-
By default, the Encrypt connection check box is selected to signify that Power Query connects to your database using an encrypted connection. If you do not want to connect using an encrypted connection, clear this check box, and then click Connect.
If a connection to your SQL Server is not established using an encrypted connection, Power Query prompts you to connect using an unencrypted connection. Click OK in the message to connect using an unencrypted connection.
For more information about advanced connector options, see SQL Server database (docs.com).
-
Select Data > Get Data > From Database > From Microsoft Access Database.
-
In the Import Data dialog box, browse for and locate the Access database file (.accdb).
-
Select the file, and then select Open. The Navigator dialog box appears.
-
Select the table or query in the left pane to preview the data in the right pane.
-
If you have many tables and queries, use the Search box to locate an object or use the Display Options along with the Refresh button to filter the list.
-
Select Load or Transform.
For more information about advanced connector options, see Access database (docs.com).
Note When you use a workbook connected to a SQL Server Analysis Services database, you may need additional information to answer specific product questions, such as reference information about multidimensional expressions (MDX), or configuration procedures for an online analytical processing (OLAP) server.
-
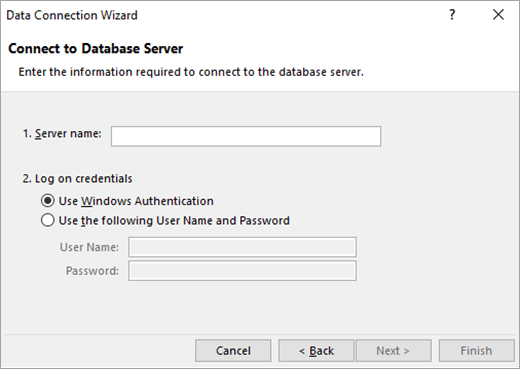
Select Data > Get External Data > From Database > From Analysis Services. The first page of the Data Connection Wizard appears. Its title is Connect to Database Server.
-
In the Server name box, enter the name of the OLAP database server.
Tip: If you know the name of the offline cube file that you want to connect to, you can type the complete file path, file name, and extension.
-
Under Log on credentials, do one of the following, then click Next:
-
To use your current Windows user name and password, click Use Windows Authentication.
-
To enter a database user name and password, click Use the following User Name and Password, and then type your user name and password in the corresponding User Name and Password boxes.
Security Note
-
Use strong passwords that combine uppercase and lowercase letters, numbers, and symbols. Weak passwords don’t mix these elements. For example, Y6dh!et5 is a strong password and House27 is a weak password. Passwords should contain 8 or more characters. A pass phrase that uses 14 or more characters is better.
-
It is critical that you remember your password. If you forget your password, Microsoft cannot retrieve it. Store the passwords that you write down in a secure place away from the information that they help protect.
-
-
-
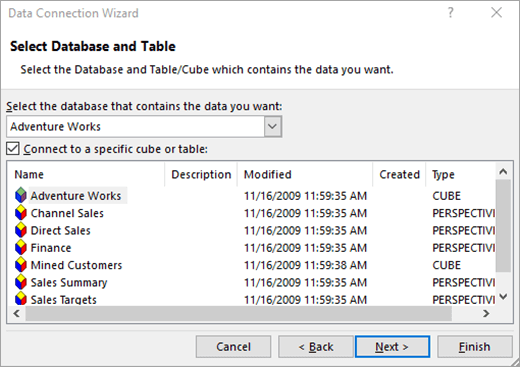
Select Next to go to the second wizard screen. Its title is Select Database and Table.
To connect to a specific cube file in the database, make sure that Connect to a specific cube or table is selected, and then select a cube from the list.
-
In the Select the database that contains the data you want box, select a database, and then click Next.
-
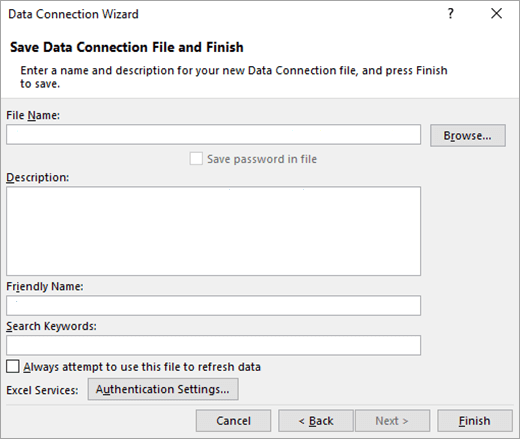
Click Next to go to the third wizard screen. Its titled Save Data Connection File and Finish.
-
In the File Name box, revise the default file name as needed (optional).
-
Click Browse to change the default file location of My Data Sources, or check for existing file names.
-
In the Description, Friendly Name, and Search Keywords boxes, type a description of the file, a friendly name, and common search words (all are optional).
-
To ensure that the connection file is used when the PivotTable is refreshed, click Always attempt to use this file to refresh this data.
Selecting this check box ensures that updates to the connection file will always be used by all workbooks that use that connection file.
-
You can specify how a PivotTable is accessed if the workbook is saved to Excel Services and is opened by using Excel Services.
Note: The authentication setting is only used by Excel Services, and not by Microsoft Office Excel. If you want to ensure that the same data is accessed whether you open the workbook in Excel or Excel Services, make sure that the authentication setting in Excel is the same.
Select Authentication Settings, and select one of the following options to log on to the data source:
-
Windows Authentication Select this option to use the Windows username and password of the current user. This is the most secure method, but it can affect performance when there are many users.
-
SSO Select this option to use Single Sign On, and then enter the appropriate identification string in the SSO ID text box. A site administrator can configure a SharePoint site to use a Single Sign On database where a username and password can be stored. This method can be the most efficient when there are many users.
-
None Select this option to save the username and password in the connection file.
Important: Avoid saving logon information when connecting to data sources. This information may be stored as plain text, and a malicious user could access the information to compromise the security of the data source.
-
-
Select OK.
-
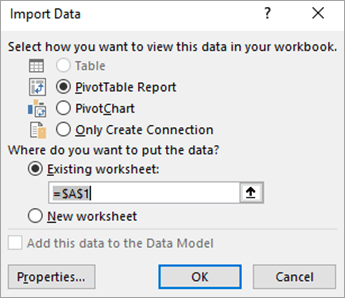
Select Finish to close the Data Connection Wizard. The Import Data dialog box appears.
-
Decide how you want to import the data, and then select OK. For more information about using this dialog box, select the question mark (?).
You can create a dynamic connection between an Excel workbook and a SQL Server Analysis Services Online Analytical Processing (OLAP) database server, then refresh that connection whenever the data changes. You can connect to a specific offline cube file if it has been created on the database server. You can also import data into Excel as either a Table or a PivotTable report.
-
Select Data > Get Data > From Database > From SQL Server Analysis Services Database (Import).
-
Enter the Server name, and then select OK.
Note: You have the option of entering a specific database name, and you can also add an MDX (docs.com) or DAX query.
-
In the Navigator pane select the database, and then select the cube or tables you want to connect.
-
Click Load to load the selected table into a worksheet, or click Edit to perform additional data filters and transformations in the Power Query Editor before loading it.
-
Select Data > Get Data > From Database > From Oracle Database.
-
In the Oracle Database dialog box, in Server Name specify the Oracle Server to connect to. If a SID is required, this can be specified in the form of “ServerName/SID”.
-
If you want to import data using native database query, specify your query in the SQL Statement box. For more information, see Import data from database using Native Database Query.
-
Select OK.
-
If the Oracle server requires database user credentials:
-
In the Access a Database dialog box, enter your username and password.
-
Click Connect.
-
For more information about advanced connector options, see Oracle Database (docs.com).
Warning:
-
Before you can connect to an IBM DB2 database, you need the IBM DB2 Data Server Driver installed on your computer (minimum requirement is the IBM Data Server Driver Package (DS Driver)). Select the driver that matches your Power Query installation (32-bit or 64-bit).
-
There are known issues reported by IBM installing the IBM DB2 Data Server Driver on Windows 8. If you are using Windows 8 and want to connect to IBM DB2 using Power Query, you need to follow additional installation steps. Find more information about the IBM DB2 Data Server Driver on Windows 8.
-
Select Data > Get Data > From Database > From IBM DB2 Database.
-
In the IBM DB2 Database dialog box, in Server Name specify the IBM DB2 Database Server to connect to.
-
If you want to import data using native database query, specify your query in the SQL Statement box. For more information, see Import data from a database using Native Database Query.
-
Select OK.
-
If the IBM DB2 server requires database user credentials:
-
In the Access a Database dialog box, enter your username and password.
-
Click Connect.
-
For more information about advanced connector options, see IBM DB2 database (docs.com).
Note: If receive the message “This connector requires one or more additional components to be installed before it can be used.”, you need to download the appropriate ODBC Driver for MySQL to your Windows device from here. For more information, see MySQL Connectors.
-
Select Data > Get Data > From Database > From MySQL Database.
-
In the MySQL Database dialog box, in Server Name specify the MySQL Database Server to connect to.
-
If you want to import data using native database query, specify your query in the SQL Statement box. For more information, see Import data from a database using Native Database Query.
-
Select OK.
-
If the MySQL server requires database user credentials:
-
In the Access a Database dialog box, enter your username and password.
-
Click Connect.
-
For more information about advanced connector options, see MySQL database (docs.com).
Note: Before you can connect to a PostgreSQL database in Power Query, you need the Ngpsql data provider for PostgreSQL installed on your computer. Select the driver that matches your Office version (32-bit or 64-bit). For more information, see Which version of Office am I using? . Also make sure you have the provider registered in the machine configuration that matches the most recent .NET version on your device.
-
Select Data > Get Data > From Database > From PostgreSQL Database.
-
In the PostgreSQL Database dialog box, specify the PostgreSQL Database Server you want to connect to in the Server Name section.
-
If you want to import data using native database query, specify your query in the SQL Statement box. For more information, see Import data from a database using Native Database Query.
-
Select OK.
-
If the PostgreSQL server requires database user credentials:
-
In the Access a Database dialog box, enter your username and password.
-
Select Connect.
-
For more information about advanced connector options, see PostgreSQL (docs.com).
Note: Before you can connect to an SAP SQL Anywhere database, you need the SAP SQL Anywhere driver installed on your computer. Select the driver that matches your Excel installation (32-bit or 64-bit).
-
Select Data > Get Data > From Database > From Sybase Database.
-
In the Sybase Database dialog box, specify the Sybase Server to connect to in the Server Name box. Optionally, you can specify a Database Name as well.
-
If you want to import data using a native database query, specify your query in the SQL Statement box. For more information, see Import data from a database using Native Database Query.
-
Select OK.
-
By default, the Encrypt connection check box is selected so that Power Query connects to your database using a simple encrypted connection.
-
Select Connect.
For more information, see Sybase database (docs.com).
-
Select Data > Get Data > From Database > From Teradata Database.
-
In the Teradata Database dialog box, in Server Name specify the Teradata Server to connect to.
-
If you want to import data using native database query, specify your query in the SQL Statement box. For more information, see Import data from a database using Native Database Query.
-
Select OK.
-
If the Teradata server requires database user credentials:
-
In the Access a Database dialog box, enter your username and password.
-
Click Save.
-
For more information, see Terabase database (docs.com).
Notes:
-
This feature is only available in Excel for Windows if you have Office 2019 or later, or a Microsoft 365 subscription. If you are a Microsoft 365 subscriber, make sure you have the latest version of Office.
-
Before you can connect to an SAP HANA database using Power Query, you need the SAP HANA ODBC Driver on your computer. Select the driver that matches your Power Query installation (32-bit or 64-bit).
-
You will need an SAP account to login to the website and download the drivers. If you are unsure, contact the SAP administrator in your organization.
To connect to an SAP HANA database:
-
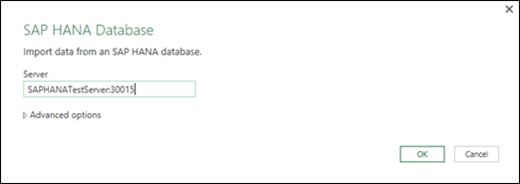
Click Data > New Query > From Database > From SAP HANA Database.
-
In the SAP HANA Database dialog box, specify the server you want to connect to. The server name should follow the format ServerName:Port.
-
Optionally, if you want to import data using native database query, Select Advanced options and in the SQL Statement box enter the query.
-
Select OK.
-
If the SAP HANA server requires database user credentials, then in the Access an SAP HANA database dialog box, do the following:
-
Click the Database tab, and enter your username and password.
-
Click Connect.
-
For more information about advanced connector options, see SAP HANA database (docs.com).
Azure SQL Database is a high-performing, fully managed, scalable relational database built for the cloud and used for mission-critical applications. For more information, see What is Azure SQL? (docs.com).
-
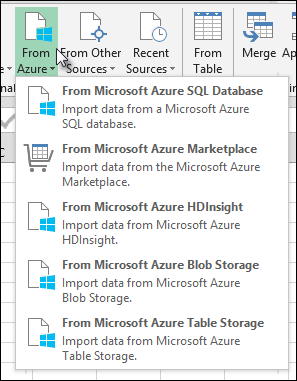
Select Data > Get Data > From Azure > From Azure SQL Database.
-
In the Microsoft SQL Database dialog box, specify the SQL Server to connect to in the Server Name box. Optionally, you can specify a Database Name as well.
-
If you want to import data using a native database query, specify your query in the SQL Statement box. For more information, see Import Data from Database using Native Database Query.
-
Select OK.
-
Select the authentication mode to connect to the SQL Server database.
-
Windows This is the default selection. Select this if you want to connect using Windows authentication. -
Database Select this if you want to connect using SQL Server authentication. After you select this, specify a user name and password to connect to your SQL Server instance.
-
-
By default, the Encrypt connection check box is selected to signify that Power Query connects to your database using an encrypted connection. If you do not want to connect using an encrypted connection, clear this check box, and then click Connect.
If a connection to your SQL Server is not established using an encrypted connection, Power Query prompts you to connect using an unencrypted connection. Click OK in the message to connect using an unencrypted connection.
For more information about advanced connector options, see Azure SQL database (docs.com).
Azure Synapse Analytics combines big data tools and relational queries by using Apache Spark to connect to Azure data services and the Power Platform. You can load millions of rows in no time. Then, you can work with tabular data by using familiar SQL syntax for queries. For more information, see What is Azure Synapse Analytics (docs.com).
-
Select Data > Get Data > From Azure > From Azure Synapse Analytics.
-
In the Microsoft SQL Database dialog box, specify the SQL Server to connect to in the Server Name box. Optionally, you can specify a Database Name as well.
-
If you want to import data using a native database query, specify your query in the SQL Statement box. For more information, see Import Data from Database using Native Database Query.
-
Select OK.
-
Select the authentication mode to connect to the SQL Server database.
-
Windows This is the default selection. Select this if you want to connect using Windows authentication. -
Database Select this if you want to connect using SQL Server authentication. After you select this, specify a user name and password to connect to your SQL Server instance.
-
-
By default, the Encrypt connection check box is selected to signify that Power Query connects to your database using an encrypted connection. If you do not want to connect using an encrypted connection, clear this check box, and then click Connect.
If a connection to your SQL Server is not established using an encrypted connection, Power Query prompts you to connect using an unencrypted connection. Click OK in the message to connect using an unencrypted connection.
For more information about advanced connector options, see Azure Synapse Analytics (docs.com).
Azure HDInsight is used for big data analysis when you need to process large amounts of data. It supports data warehousing and machine learning; you can think of it as a data flow engine. For more information, see What is Azure HDInsight? (docs.com).
-
Select Data > Get Data > From Azure > From Azure HDInsight (HDFS).
-
Enter the Account name or URL of the Microsoft Azure Blob Storage account associated with your HDInsight cluster, and then select OK.
-
In the Access Microsoft Azure HDInsight dialog box, enter your Account Key, and click Connect.
-
Select your cluster in the Navigator dialog, and then find and select a content file.
-
Select Load to load the selected table, or Edit to perform additional data filters and transformations before loading it.
Microsoft Azure Blob Storage is a service for storing large amounts of unstructured data, like images, videos, audio, and documents, which can be accessed from anywhere in the world via HTTP or HTTPS. For more information about Azure Blob Storage service, see How to Use Blob Storage.
-
Select Data > Get Data > From Azure > From Azure Blob Storage.
-
In the Microsoft Azure Blob Storage dialog box, enter your Microsoft Azure storage account name or URL, and then select OK.
-
If you are connecting to the Blob storage service for the first time, you will be prompted to enter and save the storage access key. In the Access Microsoft Azure Blob Storage dialog box, enter your storage access key in the Account Key box, and click Save.
Note: If you need to retrieve your storage access key, browse to the Microsoft Azure Portal, select your storage account, and then select the Manage Access Key icon on the bottom of the page. Select the copy icon to the right of the primary key, and then paste the value in the Account Key box.
-
The Query Editor lists all the available containers in your Microsoft Azure Blob Storage. In the Navigator, select a container from where you want to import data, and then select Apply & Close.
For more information, see Azure Blob Storage (docs.com).
The Azure Storage provides storage services for a variety of data objects. The Table storage component targets NoSQL data stored as key/attribute pairs. For more information, see Introduction to Table storage (docs.com).
-
Select Data > Get Data > From Azure > From Azure Synapse Analytics.
-
Enter the Account name or URL of the Microsoft Azure Table Storage account, and then select OK.
-
Select Data > Get Data > From Azure > From Azure Data Lake Storage.
-
Enter the Account name or URL of the Microsoft Azure Data Lake Storage account, and then select OK.
For example: swebhdfs://contoso.azuredatalake.net/
-
Optionally, enter a value in the Page Size in Bytes box.
For more information, see Azure Data Lake Storage (docs.com).
Azure Data Lake Storage Gen 2 combines different data warehouses into a single, stored environment. You can use a new generation of query tools to explore and analyze data, working with petabytes of data. For more information, see Azure Data Lake Storage (docs.com).
-
In the Azure Data Lake Storage Gen2 dialog box, provide the account URL. URLs for Data Lake Storage Gen2 have the following pattern:
https://<accountname>.dfs.core.windows.net/<container>/<subfolder>
For example, https://contosoadlscdm.dfs.core.windows.net/ -
Select whether you want to use the File System View or the Common Data Model (CDM) Folder View.
-
Select OK.
-
You may need to choose an authentication method.
For example, if you select the Organizational account method, select Sign in to sign into your storage account. You’ll be redirected to your organization’s sign-in page. Follow the prompts to sign into the account. After you’ve successfully signed in, select Connect.
-
In the Navigator dialog box verify the information, and then select either Transform Data to transform the data in Power Query or Load to load the data.
For more information, see Azure Data Lake Storage (docs.com).
Azure Data Explorer is a fast and highly scalable data exploration service for log and telemetry data. It can handle large volumes of diverse data from any data source, such as websites, applications, IoT devices, and more. For more information, see What is Azure Data Explorer (docs.com).
-
Select Data > Get Data > From Azure > From Azure Data Explorer.
-
In the Azure Data Explorer (Kusto) dialog box, enter appropriate values.
Each prompt provides helpful examples to walk you through the process.
-
Select OK.
You can import Datasets from your organization with appropriate permission by selecting them from the Power BI Datasets pane, and then creating a PivotTable in a new worksheet.
-
Select Data > Get Data > From Power BI (<Tenant name>). The Power BI Datasets pane appears. <Tenant name> varies depending on your organization, for example, Power BI (Contoso).
-
If many Datasets are available, use the Search box. Select the arrow next to the box to display keyword filters for versions and environments to target your search.
-
Select a Dataset and create a PivotTable in a new worksheet. For more information, see Overview of PivotTables and PivotCharts.
For more information on Power BI, see Create a PivotTable from Power BI datasets and Data Management Experience in Power BI for Office 365 Help (docs.com).
A dataflow is a data preparation technology that enables ingesting, transforming, and loading data into Microsoft Dataverse environments, Power BI workspaces, or Azure Data Lake. You can trigger dataflows to run either on demand or automatically on a schedule so that data is always kept up to date.
-
Select Data > Get Data > From Power Platform > From Dataflows.
-
If prompted, enter the required credentials, or sign in as a different user. The Navigator pane appears.
-
Select the dataflow in the left pane to preview it in the right pane.
-
Do one of the following:
-
To add the data to a worksheet, select Load.
-
To add the data to the Power Query Editor, select Transform Data.
-
For more information, see An overview of dataflows across Microsoft Power Platform.
Use Dataverse to securely store and manage data in the cloud. You can create or import custom tables specific to your organization, populate them with data by using Power Query, and then use Power Apps or Microsoft Access to build rich business applications.
-
Select Data > Get Data > From Power Platform > From Dataverse.
-
If prompted, enter the required credentials, or sign in as a different user. The Navigator pane appears.
-
Select the data in the left pane to preview it in the right pane.
-
Do one of the following:
-
To add the data to a worksheet, select Load.
-
To add the data to the Power Query Editor, select Transform Data.
-
For more information, see What is Microsoft Dataverse.
-
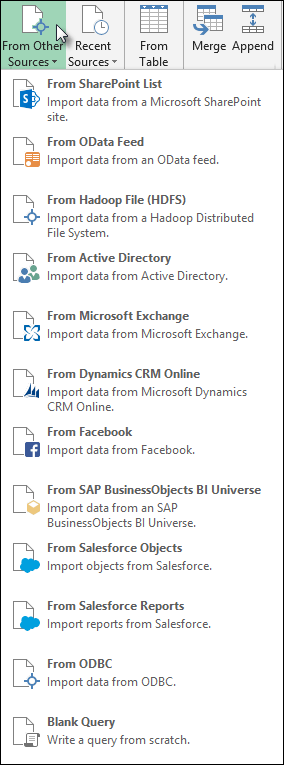
Select Data > Get Data > From Online Services > From SharePoint Online List.
-
In the SharePoint Folder dialog box, enter the root URL for the SharePoint site not including any reference to a library, and then navigate to the library.
-
Select the 2.0 Beta SharePoint implementation, which enables Advanced options, so you can select a View mode:
All Retrieves all columns from a SharePoint List.
Default Retrieves the columns set in the Default View of a SharePoint List. -
As an alternative to 2.0 Beta, you can select 1.0, which corresponds to the earlier version of SharePoint.
For more information about advanced connector options, see SharePoint Online list (docs.com).
-
Select Data > Get Data > From Online Services from SharePoint Online List.
-
In the Microsoft Exchange dialog box enter your email address in the form of <alias>@<organization>.com
-
If you have many objects, use the Search box to locate an object or use he Display Options along with the Refresh button to filter the list.
-
Select or clear the Skip files with errors checkbox at the bottom of the dialog box.
-
Select the table you want: Calendar, Mail, Meeting Requests, People, and Tasks.
-
Do one of the following:
-
To create a query, and then load to a worksheet, select Load > Load.
-
To create a query, and then display the Import Data dialog box, select Load > Load To.
-
To create a query, and then launch the Power Query Editor, select Transform Data.
-
Select the Environment you want to connect to.
-
In the menu, select the Settings icon > Advanced customizations > Developer resources.
-
Copy the Instance Web API value.
Notes:
-
The url format will be something like https://<tenant>.crm.dynamics.com/api/data/v9.0.
-
The exact format of the URL you will use to connect depends on your region and the version of CDS for Apps you’re using. For more information see: Web API URL and versions (docs.com).
-
-
Select Data > Get Data > From Online Services > From Dynamics 365 (online).
-
In the dialog box, with the Basic option selected, enter the Web API URL for your CDS for Apps connection, and click OK.
-
If you select the Advanced option, you can append certain additional parameters to the query to control what data is returned. For more information see: Query Data using the Web API (docs.com).
-
-
Select Organization account.
-
If you aren’t signed in using the Microsoft Work or School account you use to access Dataverse for Apps, select Sign in and enter the account username and password.
-
-
Select Connect.
-
Within the Navigator dialog, select the data you want to retrieve.
-
Verify the data is correct, and then select Load or Edit to open the Power Query Editor.
-
Select Data > Get Data > From Online Services > From Salesforce Objects. The Salesforce Objects dialog box appears.
-
Select either Production or Custom. If you select Custom, enter the URL of a custom instance.
-
Select or clear Include relationships column.
-
Select OK.
For more information about advanced connector options, see Salesforce Objects (docs.com).
Because Salesforce Reports has API limits retrieving only the first 2,000 rows for each report, consider using the Salesforce Objects connector to work around this limitation if needed.
-
Select Data > Get Data > From Online Services > From Salesforce Reports. The Salesforce Reports dialog box appears.
-
Select either Production or Custom. If you select Custom, enter the URL of a custom instance.
-
Select or clear Include relationships column.
-
Select OK.
For more information about advanced connector options, see Salesforce Reports (docs.com).
Make sure you have the latest version of the Adobe Analytics connector. For more information, see Connect to Adobe Analytics in Power BI Desktop (docs.com).
-
Select Data > Get Data > From Online Services > From Adobe Analytics.
-
Select Continue. The Adobe Account dialog box appears.
-
Sign in with you Adobe Analytics Organizational account, and then select Connect.
For more information about advanced connector options, see Adobe Analytics.
For more information, see From Table/Range.
Important:
-
When you try to import a data from the web, you may get the following message: “This connector requires one or more additional components to be installed before it can be used.” The Web connector requires WebView 2 Framework to be installed on your computer.
-
You can download it from here.

Procedure
-
Select Data > New Query > From Other Sources > From Web.
-
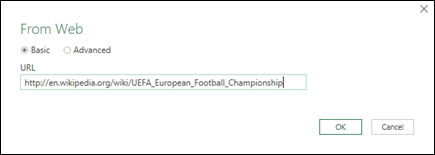
In the From Web dialog box, enter a web page URL, then click OK.
In this case, we’re using: http://en.wikipedia.org/wiki/UEFA_European_Football_Championship.
If the web page requires user credentials:
-
Select Advanced, and then In the Access Web dialog box, enter your credentials.
-
Select Save.
-
-
Select OK.
-
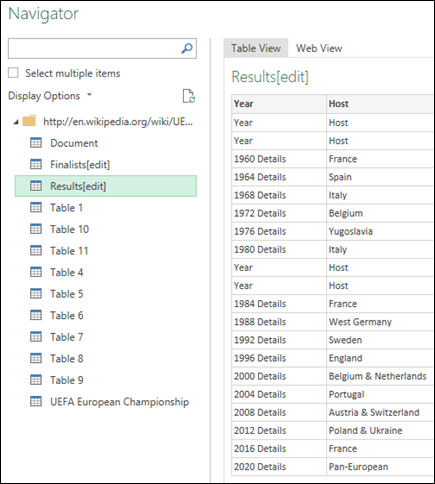
In the Navigator pane, do the following:
Select Table View, such as Results.
Select Web View to see the table as a web page.
-
Select Load to load the data into a worksheet.

For more information about advanced connector options, see Web (docs.com).
-
Select Data > Get Data > From Other Sources > From SharePoint List.
-
In the Microsoft SharePoint Lists dialog box, enter the URL for a SharePoint site.
Note: When connecting to a SharePoint list, enter the site URL instead of the list URL. In the Access SharePoint dialog box, select the most general URL to authenticate against the site correctly. By default, the most general URL is selected.
-
Select OK.
-
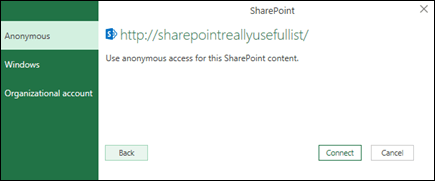
In the Access SharePoint dialog box, select a credentials option:
-
Select Anonymous if the SharePoint Server does not require any credentials.
-
Select Windows if the SharePoint Server requires your Windows credentials.
-
Select Organizational account if the SharePoint Server requires organizational account credentials.
-
-
Select Connect.
For more information about advanced connector options, see SharePoint list (docs.com).
-
Select Data > Get Data > From Other Sources > From OData Feed.
-
In the OData Feed dialog box, enter the URL for an OData feed.
-
Select OK.
-
If the OData feed requires user credentials, in the Access an OData feed dialog box:
-
Select Windows if the OData feed requires Windows Authentication.
-
Select Basic if the OData feed requires your username and password.
-
Select Marketplace key if the OData feed requires a Marketplace account key. You can select the Get your Marketplace Account Key to subscribe to Microsoft Azure Marketplace OData feeds. You can also Sign up for Microsoft Azure Marketplace from the Access an OData Feed dialog box.
-
Click Organizational account if the OData feed requires federated access credentials. For Windows Live ID, log into your account.
-
Select Save.
-
Note: Importing to an OData feed supports the JSON light data service format.
For more information about advanced connector options, see OData feed (docs.com).
Hadoop Distributed File System (HDFS) is designed to store terabytes and even petabytes of data. HDFS connects computer nodes within clusters over which data files are distributed and you can access these data files as one seamless file stream.
-
Select Data > Get Data > From Other Sources > From Hadoop File (HDFS).
-
Enter the name of the server in the Server box, and then select OK.
-
Select Data > Get Data > From Other Sources > From Active Directory.
-
Enter your domain in the Active Directory dialog box.
-
In the Active Directory Domain dialog box for your domain, select Use my current credentials, or select Use alternate credentials and then enter your Username and Password.
-
Select Connect.
-
After the connection succeeds, use the Navigator pane to browse all the domains available within your Active Directory, and then drill down into Active Directory information including Users, Accounts, and Computers.
-
Select Data > Get Data > From Other Sources > From Microsoft Exchange.
-
In the Access an Exchange Server dialog box, enter your Email Address and Password.
-
Select Save.
-
In the Microsoft Exchange Autodiscover Service dialog box, select Allow to allow the Exchange Service to trust your credentials.
-
Select Data > Get Data > From Other Sources > From ODBC.
-
In the From ODBC dialog box, if displayed, select your Data Source Name (DSN).
-
Enter your connection string, and then select OK.
-
In the next dialog box, select from Default or Custom, Windows, or Database connection options, enter your credentials, and then select Connect.
-
In the Navigator pane, select the tables or queries that you want to connect to, then select Load or Edit.
For more information about advanced connector options, see ODBC data source (docs.com).
-
Select Data > Get Data > From Other Sources > From OLEDB.
-
In the From OLE DB dialog box, enter your connection string, and then select OK.
-
In the OLEDB Provider dialog, select from the Default or Custom, Windows, or Database connection options, enter the appropriate credentials, and then select Connect.
-
In the Navigator dialog box, select the database, and tables or queries you want to connect to, and then select Load or Edit.
Important:
Retirement of Facebook data connector notice Import and refresh data from Facebook in Excel will stop working in April, 2020. You will still be able to use the Facebook Power Query (Get & Transform) connector until then, but starting in April, 2020, you will be unable to connect to Facebook and will receive an error message. We recommend revising or removing any existing Power Query (Get & Transform) queries that use the Facebook connector as soon as possible to avoid unexpected results.
Note: If this is the first time you’ve connected to Facebook, you will be asked to provide credentials. Sign in using your Facebook account, and allow access to the Power Query application. You can turn off future prompts by clicking the Don’t warn me again for this connector option.
-
On the Data tab, click Get Data > From Online Services > From Facebook. If you don’t see the Get Data button, click New Query > From Other Sources > From Facebook.
-
In the Facebook dialog box, connect to Facebook using “Me”, your Username, or Object ID.
Note: Your Facebook username is different from your login email.
-
Select a category to connect to from the Connection drop-down list. For example, select Friends to give you access to all information available in your Facebook Friends category.
-
Click OK.
-
If necessary, click Sign in from the Access Facebook dialog, then enter your Facebook email or phone number, and password. You can check the option to remain logged in. Once signed in, click Connect.
-
After the connection succeeds, you will be able to preview a table containing information about the selected category. For instance, if you select the Friends category, Power Query renders a table containing your Facebook friends by name.
-
Click Load or Edit.
You can create a blank query. You might want to enter data to try out some commands, or you can select the source data from Power Query:
-
To change a setting such as credentials or privacy, select Home > Data Source Settings. For more information, see Manage data source settings and permissions.
-
To import an external data source, select Home > New Source. This command is similar to the Get Data command on the Data tab of the Excel ribbon.
-
To import a recent source, select Home > Recent Sources. This command is similar to the Recent Sources command on the Data tab of the Excel ribbon.
When you append two or more queries, the data is added to a query based on the names of the column headers in both tables. If the queries don’t have matching columns, null values are added to the unmatched column. The queries are appended in the order in which they’re selected.
For more information, see Append queries (Power Query) and Append queries (docs.com).
If you are a developer, there are several approaches within Excel that you can take to import data:
-
You can use Visual Basic for Applications to gain access to an external data source. Depending on the data source, you can use either ActiveX Data Objects or Data Access Objects to retrieve the data. You can also define a connection string in your code that specifies the connection information. Using a connection string is useful, for example, when you want to avoid requiring system administrators or users to first create a connection file, or to simplify the installation of your application.
-
If you import data from an SQL Server database, consider using SQL Native Client, which is a standalone data access Application Programming Interface (API) that is used for both OLE DB and ODBC. It combines the SQL OLE DB Provider and the SQL ODBC Driver into one native, dynamic link library (DLL), while also providing new functionality that is separate and distinct from the Microsoft Data Access Components (MDAC). You can use SQL Native Client to create new applications or enhance existing applications that can take advantage of newer SQL Server features, such as Multiple Active Result Sets (MARS), User-Defined Types (UDT), and XML data type support.
-
The RTD function retrieves real-time data from a program that supports COM automation. The RTD COM automation add-in must be created and registered on a local computer.
-
The SQL.REQUEST function connects with an external data source and runs a query from a worksheet. The SQL.REQUEST function then returns the result as an array without the need for macro programming. If this function is not available, you must install the Microsoft Excel ODBC add-in program (XLODBC.XLA). You can install the add-in from Office.com.
For more information about creating Visual Basic for Applications, see Visual Basic Help.
-
Select Data > Get Data (Power Query).
-
In the Choose data source dialog box, select Excel workbook.
-
Select Browse to locate the file you want to connect as the data source.
-
In the File picker dialog box, select the file, review the file details, and then select Get Data and Next.
-
On the left, select the data you want to import, and then on the right, confirm the selection in data preview.
-
At the bottom right, select Load.
-
Select Data > Get Data (Power Query).
-
In the Choose data source dialog box, select Text/CSV.
-
Select Browse to locate the file you want to connect as the data source.
-
In the File picker dialog box, select the file, review the file details, and then select Get Data and Next.
-
Confirm the file origin and delimiter selection in data preview.
-
At the bottom right, select Load.
-
Select Data > Get Data (Power Query).
-
In the Choose data source dialog box, select XML.
-
Select Browse to locate the file you want to connect as the data source.
-
In the File picker dialog box, select the file, review the file details, and then select Get Data and Next.
-
On the left, select the data you want to import, and then on the right, confirm the selection in data preview.
-
At the bottom right, select Load.
-
Select Data > Get Data (Power Query).
-
In the Choose data source dialog box, select JASON.
-
Select Browse to locate the file you want to connect as the data source.
-
In the File picker dialog box, select the file, review the file details, and then select Get Data and Next.
-
At the bottom right, select Close & Load.
-
Select Data > Get Data (Power Query).
-
In the Choose data source dialog box, select SQL Server database.
-
Under Connection settings, enter the name of the server.
-
Under Connection credentials, enter the username and password, decide whether to use an encrypted connection, and then select Next.
-
On the left, select the data you want to import, and then on the right, confirm the selection in data preview.
-
At the bottom right, select Load.
-
Select Data > Get Data (Power Query).
-
In the Choose data source dialog box, select SharePoint Online list.
-
In the Connect to data source dialog box, enter the root URL for the SharePoint site not including any reference to a library, and then sign in to your organizational account.
-
Select the 2.0 SharePoint implementation, which enables Advanced options, so you can select a View mode:
-
All which retrieves all columns from a SharePoint List.
-
Default which retrieves the columns set in the Default View of a SharePoint List.
Note As an alternative to 2.0, you can select 1.0, which corresponds to the earlier version of SharePoint.
-
-
Select Next.
-
On the left, select the data you want to import, and then on the right, confirm the selection in data preview.
-
At the bottom right, select Load.
-
Select Data > Get Data (Power Query).
-
In the Choose data source dialog box, select OData.
-
In the OData Feed dialog box, enter the URL for the OData feed.
-
If the OData feed requires user credentials, in the Connection credentials dialog box under Authentication kind:
-
Select Basic if the OData feed requires your username and password.
-
Select Organizational account if the OData feed requires federated access credentials, and select Sign in.
-
-
Select Next.
-
Select Data > Get Data (Power Query).
-
In the Choose data source dialog box, select Blank table.
-
Enter the desired data to the cells of the table. You can also rename the table under Name at the bottom.
-
Select Next.
-
After editing the query, on the top-right select Close & load.
-
Select Data > Get Data (Power Query).
-
In the Choose data source dialog box, select Blank query.
-
Enter the desired source and commands and then select Next.
-
After editing the query, on the top-right select Close & load.
You can use the Power Query add-in to connect to external data sources and perform advanced data analyses. The following sections provide steps for connecting to your data sources — web pages, text files, databases, online services, and Excel files, tables, and ranges.
Important: Before you can use Power Query in Excel 2013, you must activate it: click File > Options > Add-Ins. In the Manage section at the bottom, choose the COM Add-ins option from the drop-down list, then click Go. Click the Power Query check box, then OK. The Power Query ribbon should appear automatically, but if it doesn’t, close and restart Excel.
Using the Query Editor
Note: The Query Editor appears when you load, edit, or create a new query using Power Query. The following video shows the Query Editor window appearing after editing a query from an Excel workbook. To view the Query Editor without loading or editing an existing workbook query, from the Get External Data section in the Power Query ribbon tab, select From Other Sources > Blank Query. The following video shows one way to display the Query Editor.
-
In the Power Query ribbon tab, click From File > From CSV, or From Text.
-
In the Comma-Separated Values Browse dialog box, browse for or type a path to the file that you want to query.
-
Click Open.
Note: If you are importing data from a CSV file, Power Query will automatically detect column delimiters including column names and types. For example, if you imported the example CSV file below, Power Query automatically uses the first row as the column names and changes each column data type.
Example CSV file
Power Query automatically changes each column data type:
-
Order ID changes to number
-
Order Date changes to date
-
Category remains text (the default column type)
-
Product Name remains text (the default column type)
-
Sales changes to number
In the Query Editor, Power Query automatically applies a FirstRowAsHeader step and ChangeType step. These automatic actions are equivalent to manually promoting a row and manually changing each column type.
After Power Query auto detects columns, you can also use the Query Editor to write formulas for Power Query. For example:
= Csv.Document(File.Contents("C:ExamplesProducts Categories and Orders.csv"),null,",",null,1252)

= Table.PromoteHeaders(Source)

= Table.TransformColumnTypes(FirstRowAsHeader,{{"OrderID", type number}, {"CustomerID", type text}, {"EmployeeID", type number}, {"OrderDate", type date}, {"RequiredDate", type date}, {"ShipName", type text}})
Note: The Query Editor only appears when you load, edit, or create a new query using Power Query. The following video shows the Query Editor window in Excel 2013 appearing after editing a query from an Excel workbook. To view the Query Editor without loading or editing an existing workbook query, from the Get External Data section in the Power Query ribbon tab, select From Other Sources > Blank Query. The following video shows one way to display the Query Editor.
-
Select any cell within your data range.
-
In the Power Query ribbon tab, click From Table.
-
If prompted, in the From Table dialog box, you can click the Range Selection button to select a specific range to use as a data source.
-
If the range of data has column headers, you can check My table has headers. The range header cells are used to set the column names for the query.
-
In the Query Editor, click Close & Load.
Note: If your data range has been defined as a named range, or is in an Excel table, then Power Query will automatically sense the entire range and load it into the Query Editor for you. Plain data will automatically be converted to a table when it is loaded into the Query Editor.
You can use the Query Editor to write formulas for Power Query.
= Excel.CurrentWorkbook(){[Name="Table1"]}[Content]

Note: The Query Editor only appears when you load, edit, or create a new query using Power Query. The following video shows the Query Editor window appearing after editing a query from an Excel workbook. To view the Query Editor without loading or editing an existing workbook query, from the Get External Data section in the Power Query ribbon tab, select From Other Sources > Blank Query. The following video shows one way to display the Query Editor.
-
In the Power Query ribbon tab, click From File > From Excel.
-
In the Excel Browse dialog box, browse for or type a path to the file that you want to query.
-
Click Open.
If your source workbook has named ranges, the name of the range will be available as a data set.
You can also use the Query Editor to write formulas for Power Query. For example:
= Excel.Workbook
 (File.Contents("C:ExampleProducts and Orders.xlsx"))
Note: The Query Editor only appears when you load, edit, or create a new query using Power Query. The following video shows the Query Editor window in Excel 2013 appearing after editing a query from an Excel workbook. To view the Query Editor without loading or editing an existing workbook query, from the Get External Data section in the Power Query ribbon tab, select From Other Sources > Blank Query. The following video shows one way to display the Query Editor.
Note: While trying to import data from a legacy Excel file or an Access database in certain setups, you may encounter an error that the Microsoft Access Database Engine (Microsoft.ACE.OLEDB.12.0 provider) is not registered on the local machine. The error occurs on systems with only Office 2013 installed. To resolve this error, download the following resources to ensure that you can proceed with the data sources you are trying to access.
-
Microsoft Access Database Engine 2010 Redistributable
-
Access Database Engine 2010 Service Pack 1
-
Click the Power Query ribbon, then From Web.
-
In the From Web dialog box, enter a web page URL, then OK.
In this case, we’re using: http://en.wikipedia.org/wiki/UEFA_European_Football_Championship.
If the web page requires user credentials:
-
In the Access Web dialog box, click a credentials option, and provide authentication values.
-
Click Save.
-
-
Click OK.
-
Power Query will analyze the web page, and load the Navigator pane in Table View.
If you know which table you want to connect to, then click it from the list. For this example, we chose the Results table.
Otherwise, you can switch to the Web View and pick the appropriate table manually. In this case, we’ve selected the Results table.
-
Click Load, and Power Query will load the web data you selected into Excel.
-
In the Power Query ribbon tab, click From Database > From SQL Server Database.
-
In the Microsoft SQL Database dialog box, specify the SQL Server to connect to in the Server Name box. Optionally, you can specify a Database Name as well.
-
If you want to import data using a native database query, specify your query in the SQL Statement box. For more information, see Import Data from Database using Native Database Query.
-
Select OK.
-
Select the authentication mode to connect to the SQL Server database.
-
Windows: This is the default selection. Select this if you want to connect using Windows authentication.
-
Database: Select this if you want to connect using SQL Server authentication. After you select this, specify a user name and password to connect to your SQL Server instance.
-
-
By default, the Encrypt connection check box is selected to signify that Power Query connects to your database using an encrypted connection. If you do not want to connect using an encrypted connection, clear this check box, and then click Connect.
If a connection to your SQL Server is not established using an encrypted connection, Power Query prompts you to connect using an unencrypted connection. Click OK in the message to connect using an unencrypted connection.
Formula Example
You can also use the Query Editor to write formulas for Power Query.
= Sql.Databases(".")
= Sql.Database(".","Contoso")
-
Click the Power Query tab on the Ribbon, then select Get External Data > From Other Sources > From ODBC.
-
In the From ODBC dialog, if displayed, select your Data Source Name (DSN).
-
Enter your connection string, then press OK.
-
In the next dialog box, select from Default or Custom, Windows, or Database connection options, enter your credentials, then press Connect.
-
In the Navigator pane, select the tables or queries that you want to connect to, then press Load or Edit.
-
In the Power Query ribbon tab, select From Database > From Access Database.
-
In the Browse dialog box, browse for or type a file URL to import or link to a file.
-
Follow the steps in the Navigator dialog to connect to the table or query of your choice.
-
Click Load or Edit.

-
In the Power Query ribbon tab, click From File > From XML.
-
In the From XML Browse dialog box, browse for or type a file URL to import or link to a file.
-
Click Open.
After the connection succeeds, you will be able to use the Navigator pane to browse and preview the collections of items in the XML file in a tabular form.

You can also use the Query Editor to write formulas for Power Query. For example:
= Xml.Tables(File.Contents("C:DownloadsXML Example.xml"))
Note: The Query Editor only appears when you load, edit, or create a new query using Power Query. The following video shows the Query Editor window appearing after editing a query from an Excel workbook. To view the Query Editor without loading or editing an existing workbook query, from the Get External Data section in the Power Query ribbon tab, select From Other Sources > Blank Query. The following video shows one way to display the Query Editor.
-
On the Data tab, in the Get External Data group, click From Other Sources, and then click From Analysis Services.
The Data Connection Wizard is displayed. This wizard has three panes.
-
Connect to Database Server
-
Select Database and Table
-
Save Data Connection File and Finish
-
-
In the Connect to Database Server pane, in the Server name box, type the name of the OLAP database server.
Tip: If you know the name of the offline cube file that you want to connect to, you can type the complete file path, file name, and extension.
-
Under Log on credentials, do one of the following, then click Next:
-
To use your current Windows user name and password, click Use Windows Authentication.
-
To enter a database user name and password, click Use the following User Name and Password, and then type your user name and password in the corresponding User Name and Password boxes.
-
-
In the Select the database that contains the data you want pane, select a database, then click Next.
To connect to a specific cube in the database, make sure that Connect to a specific cube or table is selected, and then select a cube from the list.
-
In the Save Data Connection File and Finish pane, in the File Name box, revise the default file name as needed (optional).
Click Browse to change the default file location of My Data Sources, or check for existing file names.
-
In the Description, Friendly Name, and Search Keywords boxes, type a description of the file, a friendly name, and common search words (all are optional).
-
To ensure that the connection file is used when the PivotTable is refreshed, click Always attempt to use this file to refresh this data.
Selecting this check box ensures that updates to the connection file will always be used by all workbooks that use that connection file.
-
Click Finish to close the Data Connection Wizard.
-
In the Import Data dialog box, under Select how you want to view this data in your workbook, do one of the following:
-
To create just a PivotTable report, click PivotTable Report.
-
To create a PivotTable report and a PivotChart report, click PivotChart and PivotTable Report.
-
To store the selected connection in the workbook for later use, click Only Create Connection. This check box ensures that the connection is used by formulas that contain Cube functions that you create and that you don’t want to create a PivotTable report.
-
-
Under Where do you want to put the data, do one of the following:
-
To place the PivotTable report in an existing worksheet, select Existing worksheet, and then type the cell reference of the first cell in the range of cells where you want to locate the PivotTable report.
You can also click Collapse Dialog
to temporarily hide the dialog box, select the beginning cell on the worksheet that you want to use, and then press Expand Dialog .
-
-
To place the PivotTable report in a new worksheet starting at cell A1, click New worksheet.
-
To verify or change connection properties, click Properties, make the necessary changes in the Connection Properties dialog box, and then click OK.

 to temporarily hide the dialog box, select the beginning cell on the worksheet that you want to use, and then press Expand Dialog
  .
.-
On the Power Query tab, click From Other Sources > Blank Query.
-
In the Query Editor, click Advanced Editor.
-
Input your query string as follows, replacing «C:UsersNameDesktopJSONTest.json» with the path to your JSON file.
let

    Source = Json.Document(File.Contents("C:UsersNameDesktopJSONTest.json")),
    #"Converted to Table" = Record.ToTable(Source)

in

    #"Converted to Table"
-
In the Power Query ribbon tab, click From Database > From Oracle Database.
-
In the Oracle Database dialog box, in Server Name specify the Oracle Server to connect to. If a SID is required, this can be specified in the form of “ServerName/SID”.
-
If you want to import data using native database query, specify your query in the SQL Statement box. For more information, see Import Data from Database using Native Database Query.
-
Click OK.
-
If the Oracle server requires database user credentials:
-
In the Access a Database dialog box, enter your username and password.
-
Click Connect.
-
-
In the Power Query ribbon tab, select From Other Sources > From SharePoint List.
-
In the Microsoft SharePoint Lists dialog box that appears, enter the URL for a SharePoint site.
Note: When connecting to a SharePoint list, enter the site URL instead of the list URL. In the Access SharePoint dialog box, select the most general URL to authenticate against the site correctly. By default, the most general URL is selected.
-
Select OK to continue.
-
In the Access SharePoint dialog box that appears next, select a credentials option:
-
Select Anonymous if the SharePoint Server does not require any credentials.
-
Select Windows if the SharePoint Server requires your Windows credentials.
-
Select Organizational account if the SharePoint Server requires organizational account credentials.
-
-
Select Connect.

-
In the Power Query ribbon tab, select From Other Source > From OData Feed.
-
In the OData Feed dialog box, enter the URL for an OData feed.
-
Select OK.
-
If the OData feed requires user credentials, in the Access an OData feed dialog box:
-
Select Windows if the OData feed requires Windows Authentication.
-
Select Basic if the OData feed requires your username and password.
-
Select Marketplace key if the OData feed requires a Marketplace account key. You can select the Get your Marketplace Account Key to subscribe to Microsoft Azure marketplace OData feeds. You can also Sign up for Microsoft Azure Marketplace from the Access an OData Feed dialog box.
-
Click Organizational account if the OData feed requires federated access credentials. For Windows Live ID, log into your account.
-
Select Save.
-
Note: Connect to an OData feed supports the JSON light data service format.
-
Click the Data tab, then Get Data > From Other Sources > From OLEDB. If you don’t see the Get Data button, follow the Data Connection Wizard instructions below.
-
In the From OLE DB dialog, enter your connection string, then press OK.
-
In the OLEDB Provider dialog, select from the Default or Custom, Windows, or Database connection options, enter the appropriate credentials, then click Connect.
-
In the Navigator dialog, select the Database and tables or queries you want to connect to, then press Load or Edit.
-
In the Power Query Editor, press Close & Load.
-
In the Power Query ribbon tab, click From Database > From MySQL Database.
-
In the MySQL Database dialog box, in Server Name specify the MySQL Database Server to connect to.
-
If you want to import data using native database query, specify your query in the SQL Statement box. For more information, see Import Data from Database using Native Database Query.
-
Click OK.
-
If the MySQL server requires database user credentials:
-
In the Access a Database dialog box, enter your username and password.
-
Click Connect.
-
-
In the Power Query ribbon tab, select From Other Sources > From Microsoft Exchange.
-
In the Access an Exchange Server dialog box, specify your Email Address and Password.
-
Click Save.
-
In the Microsoft Exchange Autodiscover Service dialog box, select Allow to allow the Exchange Service to trust your credentials.
Important: Make sure you have downloaded and installed the Power Query Add-In.
-
In the Power Query ribbon tab, click From Other Sources > From Active Directory.
-
Enter your domain in the Active Directory dialog box.
-
In the Active Directory Domain dialog box for your domain, click Use my current credentials, or Use alternate credentials. For Use alternate credentials authentication, enter your Username and Password.
-
Click Connect.
-
After the connection succeeds, you can use the Navigator pane to browse all the domains available within your Active Directory, and drill down into Active Directory information including Users, Accounts, and Computers.
Warning:
-
Before you can connect to an IBM DB2 database, you need the IBM DB2 Data Server Driver installed on your computer (minimum requirement is the IBM Data Server Driver Package (DS Driver)). Select the driver that matches your Power Query installation (32-bit or 64-bit).
-
There are known issues reported by IBM installing the IBM DB2 Data Server Driver on Windows 8. If you are using Windows 8 and want to connect to IBM DB2 using Power Query, you need to follow additional installation steps. Find more information about the IBM DB2 Data Server Driver on Windows 8.
-
In the Power Query ribbon tab, click From Database > From IBM DB2 Database.
-
In the IBM DB2 Database dialog box, in Server Name specify the IBM DB2 Database Server to connect to.
-
If you want to import data using native database query, specify your query in the SQL Statement box. For more information, see Import Data from Database using Native Database Query.
-
Click OK.
-
If the IBM DB2 server requires database user credentials:
-
In the Access a Database dialog box, enter your username and password.
-
Click Connect.
-
Note: Before you can connect to a PostgreSQL database in Power Query, you need the Ngpsql data provider for PostgreSQL installed on your computer. Select the driver that matches your Office version (32-bit or 64-bit). See: Which version of Office am I using? for more information. Also make sure you have the provider registered in the machine configuration that matches the most recent .NET version on your device.
-
In the Power Query ribbon tab, select From Database > From PostgreSQL Database.
-
In the PostgreSQL Database dialog box, specify the PostgreSQL Database Server you want to connect to in the Server Name section.
-
If you want to import data using native database query, specify your query in the SQL Statement box. For more information, see Import Data from Database using Native Database Query.
-
Select OK.
-
If the PostgreSQL server requires database user credentials:
-
In the Access a Database dialog box, enter your username and password.
-
Select Connect.
-
-
Navigate to https://web.powerapps.com/
-
Select the Environment you want to connect to.
-
In the menu, select the Settings icon > Advanced customizations > Developer resources.
-
Copy the Instance Web API value.
Notes:
-
The url format will be something like https://<tenant>.crm.dynamics.com/api/data/v9.0.
-
The exact format of the URL you will use to connect depends on your region and the version of CDS for Apps you’re using. For more information see: Web API URL and versions (docs.com).
-
-
Select the Data tab, then Get Data > From Online Services > From Dynamics 365 (online).
-
If you don’t see the Get Data button, click New Query > From Other Sources > From Dynamics 365 (online).
-
-
In the dialog box, with the Basic option selected, enter the Web API URL for your CDS for Apps connection, and click OK.
-
If you select the Advanced option, you can append certain additional parameters to the query to control what data is returned. For more information see: Query Data using the Web API.
-
-
Select Organization account.
-
If you aren’t signed in using the Microsoft Work or School account you use to access CDS for Apps, click Sign in and enter the account username and password.
-
-
Click Connect.
-
Within the Navigator dialog, select the data you want to retrieve.
-
If the data is good to be imported as is, then select the Load option, otherwise choose the Edit option to open the Power Query Editor.
Note: The Power Query Editor gives you multiple options to modify the data returned. For instance, you might want to import fewer columns than your source data contains. In that case, go to the Home tab > Manage Columns > Choose Columns, select the columns you want to keep, then click OK. When you’re ready, click Close & Load to return the modified data to Excel.
-
In the Power Query ribbon tab, select From Database > From Teradata Database.
-
In the Teradata Database dialog box, in Server Name specify the Teradata Server to connect to.
-
If you want to import data using native database query, specify your query in the SQL Statement box. For more information, see Import Data from Database using Native Database Query.
-
Select OK.
-
If the Teradata server requires database user credentials:
-
In the Access a Database dialog box, enter your username and password.
-
Click Save.
-
Important:
Retirement of Facebook data connector notice Import and refresh data from Facebook in Excel will stop working in April, 2020. You will still be able to use the Facebook Get & Transform (Power Query) connector until then, but starting in April, 2020, you will be unable to connect to Facebook and will receive an error message. We recommend revising or removing any existing Get & Transform (Power Query) queries that use the Facebook connector as soon as possible to avoid unexpected results.
Note: If this is the first time you’ve connected to Facebook, you will be asked to provide credentials. Sign in using your Facebook account, and allow access to the Power Query application. You can turn off future prompts by clicking the Don’t warn me again for this connector option.
-
In the Power Query ribbon tab, click From Other Sources > From Facebook.
-
In the Facebook dialog box, connect to Facebook using “Me”, your Username, or Object ID.
Note: Your Facebook username is different from your login email.
-
Select a category to connect to from the Connection drop-down list. For example, select Friends to give you access to all information available in your Facebook Friends category.
-
Click OK.
-
If necessary, click Sign in from the Access Facebook dialog, then enter your Facebook email or phone number, and password. You can check the option to remain logged in. Once signed in, click Connect.
-
After the connection succeeds, you will be able to preview a table containing information about the selected category. For instance, if you select the Friends category, Power Query renders a table containing your Facebook friends by name.
-
Click Load or Edit.
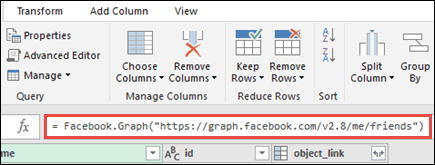
You can use the Query Editor to write formulas for Power Query.
= Facebook.Graph("https://graph.facebook.com/v2.8/me/friends")
Note: The Query Editor only appears when you load, edit, or create a new query using Power Query. The following video shows the Query Editor window appearing after editing a query from an Excel workbook. To view the Query Editor without loading or editing an existing workbook query, from the Get External Data section in the Power Query ribbon tab, select From Other Sources > Blank Query. The following video shows one way to display the Query Editor.
Notes:
-
Before you can connect to an SAP SQL Anywhere database, you need the SAP SQL Anywhere driver installed on your computer. Select the driver that matches your Power Query installation (32-bit or 64-bit).
-
In the POWER QUERY ribbon tab, select From Database > From SAP Sybase SQL Anywhere.
-
In the Sybase Database dialog box, specify the Sybase Server to connect to in the Server Name box. Optionally, you can specify a Database Name as well.
-
If you want to import data using a native database query, specify your query in the SQL Statement box. For more information, see Import Data from Database using Native Database Query.
-
Click OK.
-
By default, the Encrypt connection check box is selected so that Power Query connects to your database using a simple encrypted connection.
-
Click Connect.
Microsoft Azure Blob Storage is a service for storing large amounts of unstructured data, like images, videos, audio, and documents, which can be accessed from anywhere in the world via HTTP or HTTPS. For more information about Azure Blob Storage service, see How to Use Blob Storage.
-
In the Power Query ribbon tab, select From Azure > From Microsoft Azure Blob Storage.
-
In the Microsoft Azure Blob Storage dialog box, enter your Microsoft Azure storage account name or URL, and then click OK.
-
If you are connecting to the Blob storage service for the first time, you will be prompted to enter and save the storage access key. In the Access Microsoft Azure Blob Storage dialog box, enter your storage access key in the Account Key box, and click Save.
Note: If you need to retrieve your storage access key, browse to the Microsoft Azure Portal, select your storage account, and then click on the Manage Access Key icon on the bottom of the page. Click on the copy icon to the right of the primary key, and then paste the value in the Account Key box.
-
The Query Editor lists all the available containers in your Microsoft Azure Blob Storage. In the Navigator, select a container from where you want to import data, and then click Apply & Close.
-
In the POWER QUERY ribbon tab, select From Azure > From Microsoft Azure HDInsight.
-
In the Microsoft Azure HDInsight dialog box, enter an Account Name and click OK.
-
Next, enter your Account Key, and click Connect.
Note: If you need to retrieve your key, return to the Microsoft Azure Portal, select your storage account, and click on the Manage Access Key icon on the bottom of the page. Click on the copy icon to the right of the primary key and paste the value into the wizard.
-
Select your cluster in the Navigator dialog, and then find and select a content file.
-
Click Load to load the selected table, or click Edit to perform additional data filters and transformations before loading it.
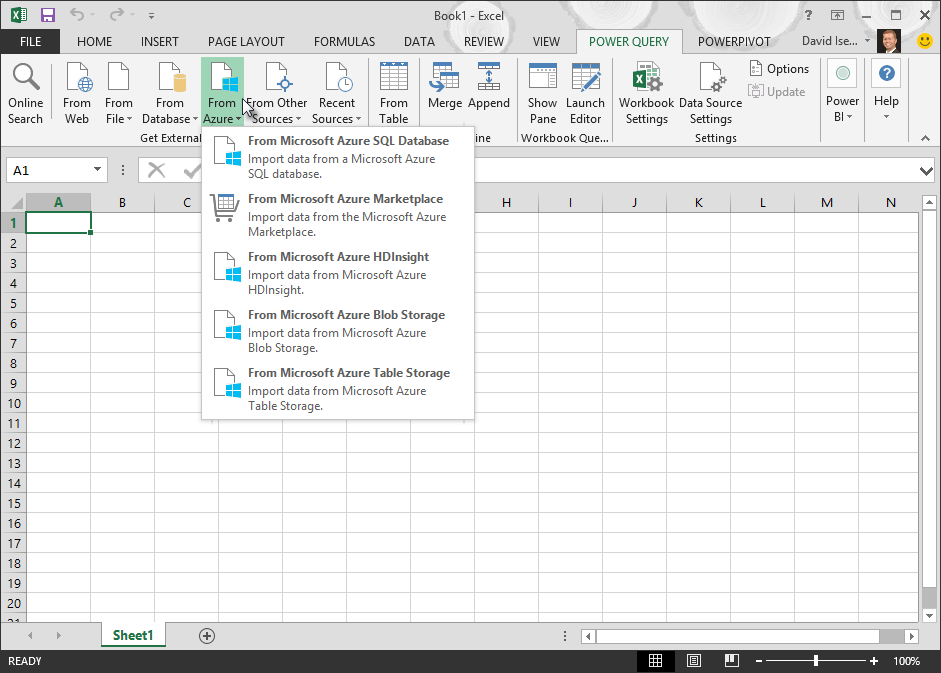
If you are a developer, there are several approaches within Excel that you can take to import data:
-
You can use Visual Basic for Applications to gain access to an external data source. Depending on the data source, you can use either ActiveX Data Objects or Data Access Objects to retrieve the data. You can also define a connection string in your code that specifies the connection information. Using a connection string is useful, for example, when you want to avoid requiring system administrators or users to first create a connection file, or to simplify the installation of your application.
-
If you import data from an SQL Server database, consider using SQL Native Client, which is a standalone data access Application Programming Interface (API) that is used for both OLE DB and ODBC. It combines the SQL OLE DB Provider and the SQL ODBC Driver into one native, dynamic link library (DLL), while also providing new functionality that is separate and distinct from the Microsoft Data Access Components (MDAC). You can use SQL Native Client to create new applications or enhance existing applications that can take advantage of newer SQL Server features, such as Multiple Active Result Sets (MARS), User-Defined Types (UDT), and XML data type support.
-
The RTD function retrieves real-time data from a program that supports COM automation. The RTD COM automation add-in must be created and registered on a local computer.
-
The SQL.REQUEST function connects with an external data source and runs a query from a worksheet. The SQL.REQUEST function then returns the result as an array without the need for macro programming. If this function is not available, you must install the Microsoft Excel ODBC add-in program (XLODBC.XLA). You can install the add-in from Office.com.
For more information about creating Visual Basic for Applications, see Visual Basic Help.
See Also
Power Query for Excel Help
Import data from database using native database query
Use multiple tables to create a PivotTable
Import data from a database in Excel for Mac
Getting data (docs.com)
Вы можете импортировать данные в Excel из самых разных источников данных, и в следующих разделах показано, как это сделать. Дополнительные сведения о том, что делать с данными после их импорта, см. в статье Как данные передаются через Excel.
Запрос можно создать из таблицы Excel, именованного диапазона или динамического массива в текущей книге. Если выбранные данные являются простым диапазоном, они преобразуются в таблицу. Для импорта динамических массивов требуется подписка На Microsoft 365. Дополнительные сведения о динамических массивах см. в статье Динамические формулы массива и поведение массива, разлитого массива.
-
Выберите любую ячейку в диапазоне данных.
-
Выберите > данныхиз таблицы или диапазона.
Эта команда также доступна в > данныхиз других источников > из таблицы или диапазона.
-
При появлении запроса в диалоговом окне Создание таблицы можно нажать кнопку Выбор диапазона , чтобы выбрать определенный диапазон для использования в качестве источника данных.
-
Если таблица или диапазон данных содержат заголовки столбцов, выберите Моя таблица содержит заголовки. Ячейки заголовков используются для определения имен столбцов в запросе.
-
Нажмите кнопку ОК.
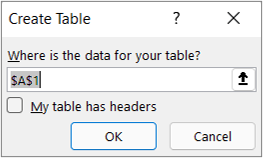
Дополнительные сведения см. в разделе Импорт из таблицы Excel.
-
Выберите Data > Get Data > from File > from Excel Workbook (Получить > данныхиз книги Excel).
-
В диалоговом окне Обзор Excel найдите или введите путь к файлу, к которому требуется выполнить запрос.
-
Нажмите кнопку Открыть.
Если в исходной книге есть именованные диапазоны, их имена будут доступны как наборы данных.
Дополнительные сведения о дополнительных параметрах соединителя см. в разделе Книга Excel (docs.com).
В следующей процедуре показаны основные шаги. Дополнительные сведения см. в статье Импорт и экспорт текстовых файлов (.txt или .csv).
-
Выберите Data > Get Data > from File > From Text/CSV.
-
В диалоговом окне Обзор разделенных запятыми значений найдите или введите путь к файлу, к которому требуется выполнить запрос.
-
Нажмите кнопку Открыть.
Примечание: Если вы импортируете данные из CSV-файла, Power Query автоматически определит разделители столбцов, включая заголовки и типы. Например, при импорте CSV-файла, представленного ниже, Power Query автоматически будет использовать первую строку в качестве заголовков столбцов и изменит тип данных каждого столбца.
Пример CSV-файла
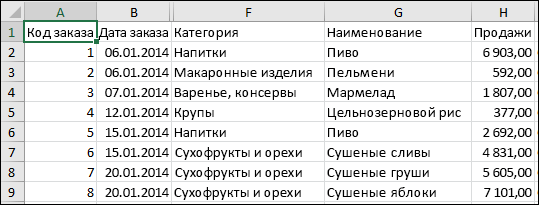
Power Query автоматически изменяет тип данных каждого столбца:
-
Тип поля «Код заказа» изменяется на число
-
Тип поля «Дата заказа» изменяется на дату
-
Тип поля «Категория» остается текстом (тип столбца, используемый по умолчанию)
-
Тип поля «Название товара» остается текстом (тип столбца, используемый по умолчанию)
-
Тип поля «Продажи» изменяется на число
Дополнительные сведения о расширенных параметрах соединителя см. в разделе Text/CSV (docs.com).
В следующей процедуре показаны основные шаги импорта данных. Более подробное описание см. в разделе Импорт XML-данных.
-
Выберите Данные > Получить > данныхиз файла > из XML.
-
В диалоговом окне Обзор из XML найдите или введите URL-адрес файла для импорта или ссылки на файл.
-
Нажмите кнопку Открыть.
После успешного подключения используйте панель Навигатор для просмотра и просмотра коллекций элементов в XML-файле в табличной форме.
Дополнительные сведения о дополнительных параметрах соединителя см. в разделе XML (docs.com).
-
Выберите Data > Get Data > from File > from JSON (Получить > данных из файла > из JSON). Откроется диалоговое окно Импорт данных .
-
Найдите JSON-файл и нажмите кнопку Открыть.
Дополнительные сведения о дополнительных параметрах соединителя см. в статье JSON (docs.com).
Важно При попытке импортировать PDF-файл может появиться следующее сообщение в формате PDF: «Этот соединитель требует установки одного или нескольких дополнительных компонентов, прежде чем его можно будет использовать». Соединитель PDF должен быть установлен на компьютере платформа .NET Framework 4.5 или более поздней версии. Последние платформа .NET Framework можно скачатьздесь.
-
Выберите Данные > получить > данныхиз файла > из PDF.
-
Выберите PDF-файл и нажмите кнопку Открыть. В диалоговом окне Навигатор откроется файл PDF и отображаются доступные таблицы.
-
Выберите таблицы, которые требуется импортировать, а затем выполните одно из следующих действий:
-
Чтобы просмотреть данные непосредственно в Excel, выберите Загрузить > Загрузить или, чтобы открыть диалоговое окно Импорт , выберите Загрузить > Загрузить в.
-
Чтобы сначала работать с данными в Power Query, выберите Преобразовать данные.
-
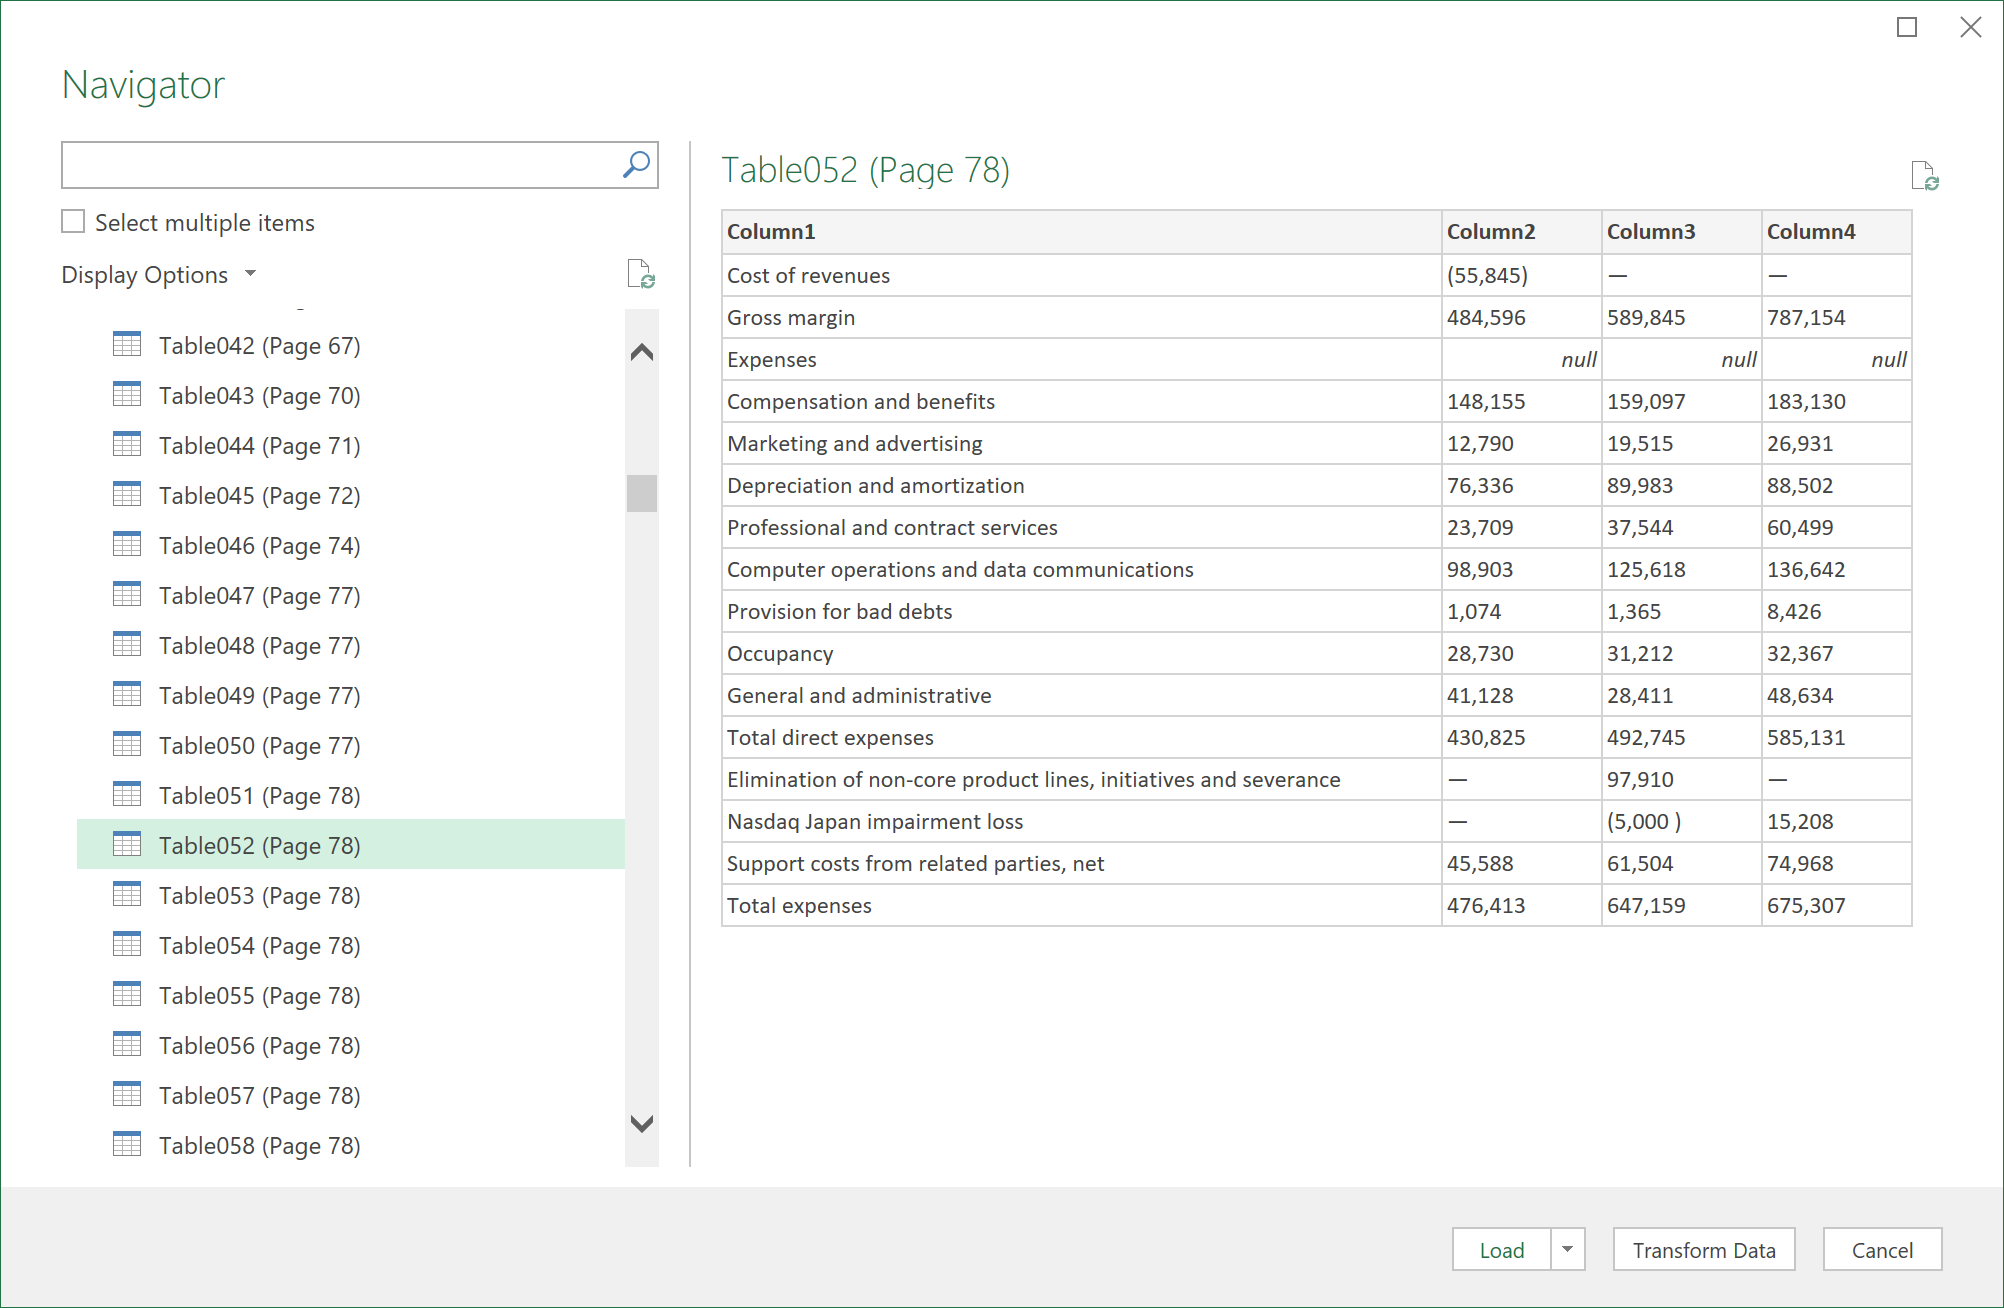
Дополнительные сведения о дополнительных параметрах соединителя см. в разделе PDF (docs.com).
Вы можете импортировать данные из нескольких файлов с похожей схемой и форматом из папки. Затем можно добавить данные в одну таблицу.
-
Выберите Данные > Получить данные > из файла > из папки.
-
В диалоговом окне Обзор найдите папку и нажмите кнопку Открыть.
-
Подробные инструкции см. в статье Импорт данных из папки с несколькими файлами.
Дополнительные сведения о дополнительных параметрах соединителя см. в разделе Папка (docs.com).
Вы можете импортировать данные из нескольких файлов с похожей схемой и форматом из библиотеки SharePoint. Затем можно добавить данные в одну таблицу.
-
Выберите Data > Get Data > from File > from SharePoint Folder (Получить > данныхиз папки SharePoint).
-
В диалоговом окне Папка SharePoint введите корневой URL-адрес сайта SharePoint, не включая ссылки на библиотеку, а затем перейдите к библиотеке.
-
Подробные инструкции см. в статье Импорт данных из папки с несколькими файлами.
Дополнительные сведения о дополнительных параметрах соединителя см. в статье Папка SharePoint (docs.com).
-
Выберите Data > Get Data > From Database > From SQL Server Database (Получить > данных из базы данных SQL Server).
-
В диалоговом окне База данных Microsoft SQL укажите SQL Server, к которому нужно подключиться, в поле Имя сервера. При необходимости вы также можете указать имя базы данных.
-
Если данные нужно импортировать с использованием запроса на языке базы данных, укажите его в поле Инструкция SQL. Дополнительные сведения см. в статье Импорт данных из базы данных с помощью запроса на ее языке.
-
Нажмите кнопку ОК.
-
Выберите режим проверки подлинности для подключения к базе данных SQL Server.
-
Windows Это выбор по умолчанию. Выберите это значение, если вы хотите подключаться, используя проверку подлинности Windows. -
Базы данных Выберите этот параметр, если вы хотите подключиться с помощью SQL Server проверки подлинности. Затем укажите имя пользователя и пароль для подключения к экземпляру SQL Server.
-
-
По умолчанию установлен флажок Шифрование соединения, то есть Power Query подключается к базе данных через зашифрованное соединение. Если вы не хотите использовать зашифрованное соединение, снимите этот флажок, а затем нажмите кнопку Подключить.
Если подключение к SQL Server не установлено через зашифрованное соединение, Power Query предлагает подключиться, используя незашифрованное соединение. Нажмите кнопку ОК в окне сообщения, чтобы использовать незашифрованное соединение.
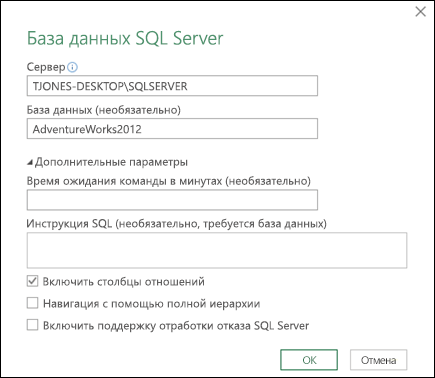
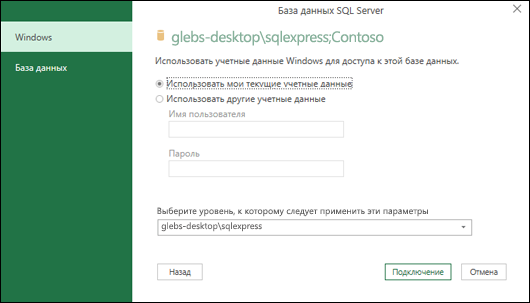
Дополнительные сведения о дополнительных параметрах соединителя см. в разделе база данных SQL Server (docs.com).
-
Выберите Данные > Получить данные > из базы данных > из базы данных Microsoft Access.
-
В диалоговом окне Импорт данных найдите и найдите файл базы данных Access (ACCDB).
-
Выберите файл и нажмите кнопку Открыть. Откроется диалоговое окно Навигатор .
-
Выберите таблицу или запрос в левой области, чтобы просмотреть данные в правой области.
-
Если у вас много таблиц и запросов, используйте поле Поиска , чтобы найти объект, или используйте параметры отображения вместе с кнопкой Обновить , чтобы отфильтровать список.
-
Выберите Загрузить или преобразовать.
Дополнительные сведения о дополнительных параметрах соединителя см. в статье База данных Access (docs.com).
Примечание При использовании книги, подключенной к базе данных SQL Server Analysis Services, могут потребоваться дополнительные сведения для ответов на конкретные вопросы о продукте, например справочные сведения о многомерных выражениях или процедуры конфигурации для сервера OLAP.
-
Выберите Data > Get External Data > from Database > from Analysis Services . Откроется первая страница мастера подключения к данным . Его название — Подключение к серверу базы данных.
-
В поле Имя сервера введите имя сервера базы данных OLAP.
Совет: Если известно имя автономного файла куба, к которому требуется подключиться, можно ввести полный путь к файлу, имя файла и расширение.
-
В разделе Учетные данные входа выполните одно из следующих действий, а затем нажмите кнопку Далее.
-
Чтобы использовать текущее имя пользователя и пароль Windows, щелкните Использовать проверку подлинности Windows.
-
Чтобы указать имя пользователя и пароль для доступа к базе данных, выберите вариант Использовать следующие имя пользователя и пароль и введите соответствующие данные в поля Имя пользователя и Пароль.
Примечание по безопасности
-
Используйте надежные пароли, состоящие из букв в верхнем и нижнем регистре, цифр и символов. В ненадежных паролях не используются сочетания таких элементов. Например, Y6dh!et5 — надежный пароль, а House27 — ненадежный пароль. Пароли должны содержать 8 или более символов. Лучше всего использовать парольную фразу длиной не менее 14 знаков.
-
Очень важно запомнить свой пароль. Если вы забудете пароль, корпорация Майкрософт не сможет его восстановить. Все записанные пароли следует хранить в надежном месте отдельно от сведений, для защиты которых они предназначены.
-
-
-
Нажмите кнопку Далее, чтобы перейти ко второму экрану мастера. Его название — Select Database and Table (Выбор базы данных и таблицы).
Чтобы подключиться к определенному файлу куба в базе данных, убедитесь, что выбран параметр Подключиться к определенному кубу или таблице , а затем выберите куб из списка.
-
В поле Выберите базу данных, содержащую нужные данные, выберите базу данных и нажмите кнопку Далее.
-
Нажмите кнопку Далее , чтобы перейти к третьему экрану мастера. Его озаглавить Сохранить файл подключения к данным и Готово.
-
В поле Имя файла при необходимости проверьте имя файла по умолчанию (необязательно).
-
Нажмите кнопку Обзор , чтобы изменить расположение файла по умолчанию для моих источников данных, или проверьте наличие существующих имен файлов.
-
В полях Описание, Понятное имя и Ключевые слова поиска введите описание файла, понятное имя и распространенные поисковые слова (все они являются необязательными).
-
Чтобы убедиться, что файл подключения используется при обновлении сводной таблицы, щелкните Всегда пытаться использовать этот файл для обновления данных.
Если установить этот флажок, обновления файла подключения всегда будут использоваться всеми книгами, которые используют этот файл подключения.
-
Вы можете указать способ доступа к сводной таблице, если книга сохраняется в службы Excel и открывается с помощью службы Excel.
Примечание: Параметр проверки подлинности используется только службы Excel, а не Microsoft Office Excel. Если вы хотите убедиться, что доступ к тем же данным осуществляется при открытии книги в Excel или службы Excel, убедитесь, что параметр проверки подлинности в Excel совпадает.
Выберите Параметры проверки подлинности и выберите один из следующих параметров для входа в источник данных:
-
Проверка подлинности Windows. Выберите этот параметр, чтобы использовать имя пользователя и пароль Windows текущего пользователя. Это самый безопасный метод, но он может повлиять на производительность при наличии большого количества пользователей.
-
SSO Выберите этот параметр, чтобы использовать единый вход, а затем введите соответствующую строку идентификации в текстовое поле Идентификатор единого входа. Администратор сайта может настроить сайт SharePoint для использования базы данных единого входа, где можно хранить имя пользователя и пароль. Этот метод может быть наиболее эффективным при наличии большого числа пользователей.
-
Ни один Выберите этот параметр, чтобы сохранить имя пользователя и пароль в файле подключения.
Важно: Не рекомендуется сохранять сведения о входе при подключении к источникам данных. Эта информация может храниться в виде обычного текста, и злоумышленники смогут получить с ее помощью доступ к источнику данных.
-
-
Нажмите кнопку ОК.
-
Нажмите кнопку Готово , чтобы закрыть мастер подключения к данным. Откроется диалоговое окно Импорт данных.
-
Выберите способ импорта данных, а затем нажмите кнопку ОК. Для получения дополнительных сведений об использовании этого диалогового окна выберите вопросительный знак (?).
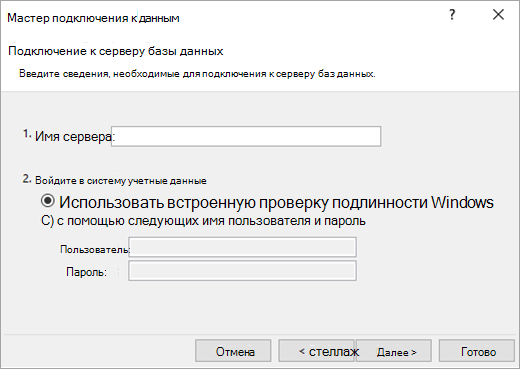
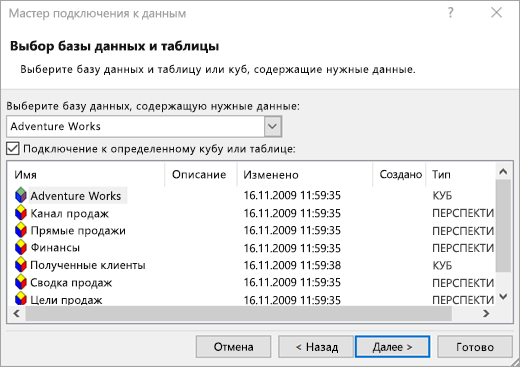
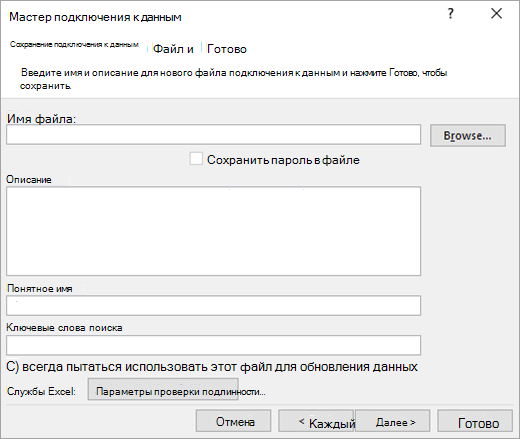
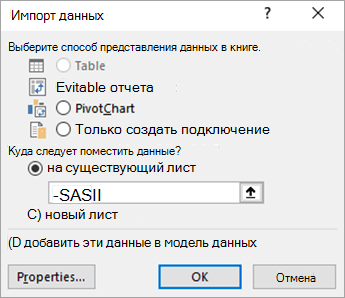
Вы можете создать динамическое соединение между книгой Excel и сервером базы данных OLAP SQL Server Analysis Services, а затем обновлять это подключение при изменении данных. Вы можете подключиться к определенному автономному файлу куба, если он был создан на сервере базы данных. Вы также можете импортировать данные в Excel в виде таблицы или отчета сводной таблицы.
-
Выберите Data > Get Data > From Database > From SQL Server Analysis Services Database (Import)).
-
Введите имя сервера и нажмите кнопку ОК.
-
В области Навигатор выберите базу данных, а затем выберите куб или таблицы, которые требуется подключить.
-
Нажмите кнопку Загрузить, чтобы загрузить выбранную таблицу на лист, или нажмите кнопку Изменить, чтобы выполнить дополнительные фильтры данных и преобразования в Редактор Power Query перед загрузкой.
-
Выберите Data > Get Data > from Database > From Oracle Database Database (Получить > данныхиз базы данных Oracle).
-
В диалоговом окне База данных Oracle в поле Имя сервера укажите сервер Oracle, к которому нужно подключиться. Если требуется идентификатор безопасности, его можно указать в виде «Имя_сервера/идентификатор безопасности».
-
Если данные нужно импортировать с использованием запроса на языке базы данных, укажите его в поле Инструкция SQL. Дополнительные сведения см. в статье Импорт данных из базы данных с помощью запроса к собственной базе данных.
-
Нажмите кнопку ОК.
-
Если серверу Oracle требуются учетные данные пользователя базы данных:
-
В диалоговом окне Доступ к базе данных введите имя пользователя и пароль.
-
Нажмите кнопку Подключить.
-
Дополнительные сведения о дополнительных параметрах соединителя см. в статье База данных Oracle (docs.com).
Предупреждение:
-
Прежде чем подключиться к базе данных IBM DB2, на компьютере должен быть установлен драйвер IBM DB2 Data Server (минимальное требование — пакет драйвера сервера данных IBM (драйвер DS)). Выберите драйвер, разрядность которого соответствует установленной версии Power Query (32-разрядный или 64-разрядный).
-
Существуют известные проблемы при установке драйвера IBM DB2 Data Server в Windows 8. Если вы используете Windows 8 и хотите подключаться к IBM DB2 с помощью Power Query, вам нужно выполнить дополнительные действия по установке. Дополнительные сведения о драйвере сервера данных IBM DB2 см. в Windows 8.
-
Выберите Данные > Получить > данныхиз базы данных > из базы данных IBM DB2.
-
В диалоговом окне База данных IBM DB2 в поле Имя сервера укажите сервер базы данных IBM DB2, к которому нужно подключиться.
-
Если данные нужно импортировать с использованием запроса на языке базы данных, укажите его в поле Инструкция SQL. Дополнительные сведения см. в статье Импорт данных из базы данных с помощью запроса к собственной базе данных.
-
Нажмите кнопку ОК.
-
Если для сервера IBM DB2 требуются учетные данные пользователя базы данных:
-
В диалоговом окне Доступ к базе данных введите имя пользователя и пароль.
-
Нажмите кнопку Подключить.
-
Дополнительные сведения о дополнительных параметрах соединителя см. в статье База данных IBM DB2 (docs.com).
Примечание: Если появляется сообщение «Этот соединитель требует установки одного или нескольких дополнительных компонентов, прежде чем его можно будет использовать».», необходимо скачать соответствующий драйвер ODBC для MySQL на устройство Windows отсюда. Дополнительные сведения см. в разделе Соединители MySQL.
-
Выберите Данные > Получить > данныхиз базы данных > из базы данных MySQL.
-
В диалоговом окне База данных MySQL в поле Имя сервера укажите сервер базы данных MySQL для подключения.
-
Если данные нужно импортировать с использованием запроса на языке базы данных, укажите его в поле Инструкция SQL. Дополнительные сведения см. в статье Импорт данных из базы данных с помощью запроса к собственной базе данных.
-
Нажмите кнопку ОК.
-
Если серверу MySQL требуются учетные данные пользователя базы данных:
-
В диалоговом окне Доступ к базе данных введите имя пользователя и пароль.
-
Нажмите кнопку Подключить.
-
Дополнительные сведения о дополнительных параметрах соединителя см. в разделе База данных MySQL (docs.com).
Примечание: Прежде чем подключиться к базе данных PostgreSQL в Power Query, на компьютере должен быть установлен поставщик данных Ngpsql для PostgreSQL. Выберите драйвер, соответствующий вашей версии Office (32-разрядная или 64-разрядная). Дополнительные сведения см. в разделе Какая версия Office используется? . Кроме того, убедитесь, что в конфигурации компьютера зарегистрирован поставщик, соответствующий последней версии .NET на вашем устройстве.
-
Выберите Data > Get Data > From Database > From PostgreSQL Database (Получить > данных из базы данных PostgreSQL).
-
В диалоговом окне База данных PostgreSQL укажите сервер базы данных PostgreSQL, к которому нужно подключиться, в разделе Имя сервера .
-
Если данные нужно импортировать с использованием запроса на языке базы данных, укажите его в поле Инструкция SQL. Дополнительные сведения см. в статье Импорт данных из базы данных с помощью запроса к собственной базе данных.
-
Нажмите кнопку ОК.
-
Если для сервера PostgreSQL требуются учетные данные базы данных:
-
В диалоговом окне Доступ к базе данных введите имя пользователя и пароль.
-
Нажмите Подключиться.
-
Дополнительные сведения о дополнительных параметрах соединителя см. в разделе PostgreSQL (docs.com).
Примечание: Прежде чем подключиться к базе данных SAP SQL Anywhere, на компьютере должен быть установлен драйвер SAP SQL Anywhere . Выберите драйвер, соответствующий установке Excel (32-разрядная или 64-разрядная версия).
-
Выберите Data > Get Data > From Database > From Sybase Database (Получить > данных из базы данных Sybase).
-
В диалоговом окне База данных Sybase укажите сервер Sybase для подключения в поле Имя сервера . При необходимости вы также можете указать имя базы данных.
-
Если данные нужно импортировать с использованием запроса на языке базы данных, укажите его в поле Инструкция SQL. Дополнительные сведения см. в статье Импорт данных из базы данных с помощью запроса к собственной базе данных.
-
Нажмите кнопку ОК.
-
По умолчанию установлен флажок Шифровать подключение, чтобы Power Query подключался к базе данных с помощью простого зашифрованного подключения.
-
Выберите Подключиться.
Дополнительные сведения см. в статье База данных Sybase (docs.com).
-
Выберите Data > Get Data > From Database > From Teradata Database (Получить данные > из базы данных Teradata).
-
В диалоговом окне База данных Teradata в поле Имя сервера укажите сервер Teradata для подключения.
-
Если данные нужно импортировать с использованием запроса на языке базы данных, укажите его в поле Инструкция SQL. Дополнительные сведения см. в статье Импорт данных из базы данных с помощью запроса к собственной базе данных.
-
Нажмите кнопку ОК.
-
Если серверу Teradata требуются учетные данные пользователя базы данных:
-
В диалоговом окне Доступ к базе данных введите имя пользователя и пароль.
-
Нажмите кнопку Сохранить.
-
Дополнительные сведения см. в статье База данных Terabase (docs.com).
Примечания:
-
Эта функция доступна в Excel для Windows только при наличии Office 2019 или более поздней версии или подписки на Microsoft 365. Если вы являетесь подписчиком Microsoft 365, убедитесь, что у вас установлена последняя версия Office.
-
Для подключения к базе данных SAP HANA с помощью Power Query необходимо установить драйвер ODBC SAP HANA. Выберите драйвер, разрядность которого соответствует установленной версии Power Query (32-разрядный или 64-разрядный).
-
Для входа на веб-сайт и скачивания драйверов потребуется учетная запись SAP. При наличии вопросов обратитесь к администратору SAP вашей организации.
Чтобы подключиться к базе данных SAP HANA:
-
Выберите Данные > Создать запрос > Из базы данных > Из базы данных SAP HANA.
-
В диалоговом окне База данных SAP HANA укажите сервер, к которому вы хотите подключиться. Имя сервера должно иметь формат имя_сервера:порт.
-
При необходимости, если вы хотите импортировать данные с помощью собственного запроса к базе данных, выберите Дополнительные параметры и в поле Инструкция SQL введите запрос.
-
Нажмите кнопку ОК.
-
Если для сервера SAP HANA требуются учетные данные пользователя базы данных, в диалоговом окне Доступ к базе данных SAP HANA сделайте следующее:
-
Откройте вкладку База данных и введите имя пользователя и пароль.
-
Нажмите кнопку Подключить.
-
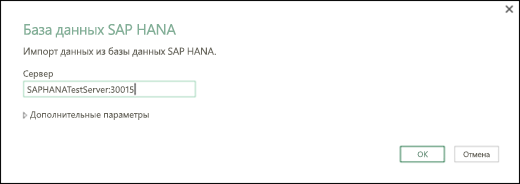
Дополнительные сведения о дополнительных параметрах соединителя см. в статье База данных SAP HANA (docs.com).
база данных Azure SQL — это высокопроизводительная, полностью управляемая масштабируемая реляционная база данных, созданная для облака и используемая для критически важных приложений. Дополнительные сведения см. в статье Что такое Azure SQL? (docs.com).
-
Выберите Data > Get Data > From Azure > From Azure SQL Database (Получить > данныеиз базы данных Azure SQL).
-
В диалоговом окне База данных Microsoft SQL укажите SQL Server, к которому нужно подключиться, в поле Имя сервера. При необходимости вы также можете указать имя базы данных.
-
Если данные нужно импортировать с использованием запроса на языке базы данных, укажите его в поле Инструкция SQL. Дополнительные сведения см. в статье Импорт данных из базы данных с помощью запроса на ее языке.
-
Нажмите кнопку ОК.
-
Выберите режим проверки подлинности для подключения к базе данных SQL Server.
-
Windows Это выбор по умолчанию. Выберите это значение, если вы хотите подключаться, используя проверку подлинности Windows. -
Базы данных Выберите этот параметр, если вы хотите подключиться с помощью SQL Server проверки подлинности. Затем укажите имя пользователя и пароль для подключения к экземпляру SQL Server.
-
-
По умолчанию установлен флажок Шифрование соединения, то есть Power Query подключается к базе данных через зашифрованное соединение. Если вы не хотите использовать зашифрованное соединение, снимите этот флажок, а затем нажмите кнопку Подключить.
Если подключение к SQL Server не установлено через зашифрованное соединение, Power Query предлагает подключиться, используя незашифрованное соединение. Нажмите кнопку ОК в окне сообщения, чтобы использовать незашифрованное соединение.
Дополнительные сведения о дополнительных параметрах соединителя см. в разделе база данных Azure SQL (docs.com).
Azure Synapse Analytics объединяет средства больших данных и реляционные запросы с помощью Apache Spark для подключения к службам данных Azure и Power Platform. Вы можете загрузить миллионы строк в течение всего времени. Затем можно работать с табличными данными, используя знакомый синтаксис SQL для запросов. Дополнительные сведения см. в статье Что такое аналитика Azure Synapse (docs.com).
-
Выберите Data > Get Data > From Azure > From Azure Synapse Analytics.
-
В диалоговом окне База данных Microsoft SQL укажите SQL Server, к которому нужно подключиться, в поле Имя сервера. При необходимости вы также можете указать имя базы данных.
-
Если данные нужно импортировать с использованием запроса на языке базы данных, укажите его в поле Инструкция SQL. Дополнительные сведения см. в статье Импорт данных из базы данных с помощью запроса на ее языке.
-
Нажмите кнопку ОК.
-
Выберите режим проверки подлинности для подключения к базе данных SQL Server.
-
Windows Это выбор по умолчанию. Выберите это значение, если вы хотите подключаться, используя проверку подлинности Windows. -
Базы данных Выберите этот параметр, если вы хотите подключиться с помощью SQL Server проверки подлинности. Затем укажите имя пользователя и пароль для подключения к экземпляру SQL Server.
-
-
По умолчанию установлен флажок Шифрование соединения, то есть Power Query подключается к базе данных через зашифрованное соединение. Если вы не хотите использовать зашифрованное соединение, снимите этот флажок, а затем нажмите кнопку Подключить.
Если подключение к SQL Server не установлено через зашифрованное соединение, Power Query предлагает подключиться, используя незашифрованное соединение. Нажмите кнопку ОК в окне сообщения, чтобы использовать незашифрованное соединение.
Дополнительные сведения о дополнительных параметрах соединителя см. в разделе Azure Synapse Analytics (docs.com).
Azure HDInsight используется для анализа больших данных, когда требуется обрабатывать большие объемы данных. Он поддерживает хранение данных и машинное обучение; его можно рассматривать как подсистему потока данных. Дополнительные сведения см. в статье Что такое Azure HDInsight? (docs.com).
-
Выберите Data > Get Data > From Azure > From Azure HDInsight (HDFS).
-
Введите имя учетной записи или URL-адрес учетной записи Microsoft Хранилище BLOB-объектов Azure, связанной с кластером HDInsight, а затем нажмите кнопку ОК.
-
В диалоговом окне Доступ к Microsoft Azure HDInsight введите ключ учетной записи и нажмите кнопку Подключиться.
-
Выберите кластер в диалоговом окне Навигатор , а затем найдите и выберите файл содержимого.
-
Выберите Загрузить , чтобы загрузить выбранную таблицу, или Изменить , чтобы выполнить дополнительные фильтры и преобразования данных перед загрузкой.
Microsoft Хранилище BLOB-объектов Azure — это служба для хранения больших объемов неструктурированных данных, таких как изображения, видео, аудио и документы, доступ к которым можно получить из любой точки мира по протоколу HTTP или HTTPS. Дополнительные сведения о службе Хранилище BLOB-объектов Azure см. в статье Использование хранилища BLOB-объектов.
-
Выберите Data > Get Data > From Azure > From Хранилище BLOB-объектов Azure .
-
В диалоговом окне Microsoft Хранилище BLOB-объектов Azure введите имя или URL-адрес учетной записи хранения Microsoft Azure, а затем нажмите кнопку ОК.
-
Если вы подключаетесь к службе хранилища BLOB-объектов в первый раз, вам будет предложено ввести и сохранить ключ доступа к хранилищу. В диалоговом окне Доступ к Microsoft Хранилище BLOB-объектов Azure введите ключ доступа к хранилищу в поле Ключ учетной записи и нажмите кнопку Сохранить.
Примечание: Если вам нужно получить ключ доступа к хранилищу, перейдите на порталMicrosoft Azure, выберите учетную запись хранения, а затем щелкните значок Управление ключом доступа в нижней части страницы. Щелкните значок копирования справа от первичного ключа, а затем вставьте значение в поле Ключ учетной записи .
-
В Редактор запросов перечислены все доступные контейнеры в Хранилище BLOB-объектов Azure Майкрософт. В навигаторе выберите контейнер, из которого требуется импортировать данные, и нажмите кнопку Применить & Закрыть.
Дополнительные сведения см. в разделе Хранилище BLOB-объектов Azure (docs.com).
Служба хранилища Azure предоставляет службы хранилища для различных объектов данных. Компонент хранилища таблиц предназначен для данных NoSQL, хранящихся в виде пар «ключ-атрибут». Дополнительные сведения см. в статье Общие сведения о хранилище таблиц (docs.com).
-
Выберите Data > Get Data > From Azure > From Azure Synapse Analytics.
-
Введите имя учетной записи или URL-адрес учетной записи хранения таблиц Microsoft Azure, а затем нажмите кнопку ОК.
-
Выберите Данные > Получить > данныхиз Azure > из Azure Data Lake Storage.
-
Введите имя учетной записи или URL-адрес учетной записи Microsoft Azure Data Lake Storage, а затем нажмите кнопку ОК.
Например, swebhdfs://contoso.azuredatalake.net/
-
При необходимости введите значение в поле Размер страницы в байтах .
Дополнительные сведения см. в разделе Azure Data Lake Storage (docs.com).
Azure Data Lake Storage 2-го поколения объединяет разные хранилища данных в одну хранимую среду. Вы можете использовать новое поколение средств запросов для изучения и анализа данных, работающих с петабайтами данных. Дополнительные сведения см. в разделе Azure Data Lake Storage (docs.com).
-
В диалоговом окне Azure Data Lake Storage 2-го поколения укажите URL-адрес учетной записи. URL-адреса для Data Lake Storage 2-го поколения имеют следующий шаблон:
https://<accountname>.dfs.core.windows.net/<container>/<вложенная папка>
Например, https://contosoadlscdm.dfs.core.windows.net/ -
Укажите, нужно ли использовать представление файловой системы или представление папок модели общих данных (CDM).
-
Нажмите кнопку ОК.
-
Может потребоваться выбрать метод проверки подлинности.
Например, если выбран метод учетной записи организации , выберите Войти, чтобы войти в учетную запись хранения. Вы будете перенаправлены на страницу входа в свою организацию. Следуйте инструкциям, чтобы войти в учетную запись. После успешного входа выберите Подключиться.
-
В диалоговом окне Навигатор проверьте сведения и выберите Преобразовать данные для преобразования данных в Power Query или Загрузить для загрузки данных.
Дополнительные сведения см. в разделе Azure Data Lake Storage (docs.com).
Azure Data Explorer — это быстрая и высокомасштабируемая служба просмотра данных для журналов и данных телеметрии. Он может обрабатывать большие объемы разнообразных данных из любого источника данных, таких как веб-сайты, приложения, устройства Интернета вещей и многое другое. Дополнительные сведения см. в статье Что такое azure Data Explorer (docs.com).
-
Выберите Data > Get Data > From Azure > From Azure Data Explorer.
-
В диалоговом окне Azure Data Explorer (Kusto) введите соответствующие значения.
В каждом запросе содержатся полезные примеры, которые помогут вам выполнить этот процесс.
-
Нажмите кнопку ОК.
Вы можете импортировать наборы данных из организации с соответствующим разрешением, выбрав их на панели Наборы данных Power BI , а затем создав сводную таблицу на новом листе.
-
Выберите Data > Get Data > from Power BI (<Имя клиента>). Откроется панель Наборы данных Power BI . <имя клиента> зависит от вашей организации, например Power BI (Contoso).
-
Если доступно много наборов данных, используйте поле Поиска . Щелкните стрелку рядом с полем, чтобы отобразить фильтры ключевых слов для версий и сред, предназначенных для поиска.
-
Выберите набор данных и создайте сводную таблицу на новом листе. Дополнительные сведения см. в статье Обзор сводных таблиц и сводных диаграмм.
Дополнительные сведения о Power BI см. в статье Создание сводной таблицы на основе наборов данных Power BIи Управление данными в Power BI для справки по Office 365 (docs.com).
Поток данных — это технология подготовки данных, которая позволяет принимать, преобразовывать и загружать данные в среды Microsoft Dataverse, рабочие области Power BI или Azure Data Lake. Потоки данных можно активировать для запуска по требованию или автоматически по расписанию, чтобы данные всегда обновлялись.
-
Выберите Data > Get Data > From Power Platform > From Dataflows (Получить > данных из Power Platform > из потоков данных).
-
При появлении запроса введите необходимые учетные данные или войдите от имени другого пользователя. Откроется панель Навигатор .
-
Выберите поток данных в левой области, чтобы просмотреть его на правой панели.
-
Выполните одно из следующих действий:
-
Чтобы добавить данные на лист, выберите Загрузить.
-
Чтобы добавить данные в Редактор Power Query, выберите Преобразовать данные.
-
Дополнительные сведения см. в статье Обзор потоков данных в Microsoft Power Platform.
Используйте Dataverse для безопасного хранения данных и управления ими в облаке. Вы можете создавать или импортировать пользовательские таблицы, относящиеся к вашей организации, заполнять их данными с помощью Power Query, а затем использовать Power Apps или Microsoft Access для создания многофункциональных бизнес-приложений.
-
Выберите Data > Get Data > from Power Platform > From Dataverse.
-
При появлении запроса введите необходимые учетные данные или войдите от имени другого пользователя. Откроется панель Навигатор.
-
Выберите данные в левой области, чтобы просмотреть их на правой панели.
-
Выполните одно из следующих действий:
-
Чтобы добавить данные на лист, выберите Загрузить.
-
Чтобы добавить данные в Редактор Power Query, выберите Преобразовать данные.
-
Дополнительные сведения см. в статье Что такое Microsoft Dataverse.
-
Выберите Данные > Получить > данныхиз веб-служб > из списка SharePoint Online.
-
В диалоговом окне Папка SharePoint введите корневой URL-адрес сайта SharePoint, не включая ссылки на библиотеку, а затем перейдите к библиотеке.
-
Выберите реализацию SharePoint бета-версии 2.0 , которая включает дополнительные параметры, чтобы выбрать режим представления:
Все Извлекает все столбцы из списка SharePoint.
По умолчанию Извлекает столбцы, заданные в представлении по умолчанию списка SharePoint. -
В качестве альтернативы бета-версии 2.0 можно выбрать версию 1.0, которая соответствует более ранней версии SharePoint.
Дополнительные сведения о дополнительных параметрах соединителя см. в статье Список SharePoint Online (docs.com).
-
Выберите Data > Get Data > from Online Services ( Получить > данныхиз веб-служб ) в списке SharePoint Online.
-
В диалоговом окне Microsoft Exchange введите адрес электронной почты в виде псевдонима <>@<организация>.com
-
Если у вас много объектов, используйте поле Поиск , чтобы найти объект, или используйте параметры отображения вместе с кнопкой Обновить , чтобы отфильтровать список.
-
Установите или снимите флажок Пропускать файлы с ошибками в нижней части диалогового окна.
-
Выберите нужную таблицу: Календарь, Почта, Приглашения на собрания, Люди и Задачи.
-
Выполните одно из следующих действий:
-
Чтобы создать запрос, а затем загрузить на лист, выберите Загрузить > Загрузить.
-
Чтобы создать запрос, а затем открыть диалоговое окно Импорт данных , выберите Загрузить > Загрузить в.
-
Чтобы создать запрос, а затем запустить Редактор Power Query, выберите Преобразовать данные.
-
Выберите Среду , к которой нужно подключиться.
-
В меню щелкните значок Параметры > Дополнительные настройки > ресурсов разработчика.
-
Скопируйте значение веб-API экземпляра .
Примечания:
-
Формат URL-адреса будет примерно таким, какhttps://<tenant>.crm.dynamics.com/api/data/v9.0.
-
Точный формат URL-адреса, который будет использоваться для подключения, зависит от региона и версии CDS для приложений, которые вы используете. Дополнительные сведения см. в статье URL-адрес и версии веб-API (docs.com).
-
-
Выберите Data > Get Data > From Online Services > From Dynamics 365 (online)).
-
В диалоговом окне с выбранным параметром Базовый введите URL-адрес веб-API для подключения CDS for Apps и нажмите кнопку ОК.
-
Если выбран параметр Дополнительно , можно добавить в запрос некоторые дополнительные параметры, чтобы управлять возвращаемыми данными. Дополнительные сведения см. в статье Запрос данных с помощью веб-API (docs.com).
-
-
Выберите Учетная запись организации.
-
Если вы не вошли в систему с помощью учетной записи Microsoft Work или School, используемой для доступа к Dataverse for Apps, выберите Войти и введите имя пользователя и пароль учетной записи.
-
-
Выберите Подключиться.
-
В диалоговом окне Навигатор выберите данные, которые нужно извлечь.
-
Убедитесь, что данные верны, а затем выберите Загрузить или Изменить, чтобы открыть Редактор Power Query.
-
Выберите Data > Get Data > from Online Services > From Salesforce Objects . Откроется диалоговое окно Объекты Salesforce .
-
Выберите Рабочая или Настраиваемая. Если вы выберете Пользовательский, введите URL-адрес пользовательского экземпляра.
-
Выберите или снимите флажок Включить связи столбца.
-
Нажмите кнопку ОК.
Дополнительные сведения о дополнительных параметрах соединителя см. в разделе Объекты Salesforce (docs.com).
Так как salesforce Reports имеет ограничения API, извлекая только первые 2000 строк для каждого отчета, рассмотрите возможность использования соединителя объектов Salesforce для обхода этого ограничения при необходимости.
-
Выберите Данные > Получить > данныхиз веб-служб > из отчетов Salesforce. Откроется диалоговое окно Отчеты Salesforce .
-
Выберите Рабочая или Настраиваемая. Если вы выберете Пользовательский, введите URL-адрес пользовательского экземпляра.
-
Выберите или снимите флажок Включить связи столбца.
-
Нажмите кнопку ОК.
Дополнительные сведения о дополнительных параметрах соединителя см. в разделе Salesforce Reports (docs.com).
Убедитесь, что у вас установлена последняя версия соединителя Adobe Analytics. Дополнительные сведения см. в статье Подключение к Adobe Analytics в Power BI Desktop (docs.com).
-
Выберите Данные > Получить данные > из веб-служб > из Adobe Analytics.
-
Нажмите кнопку Продолжить. Откроется диалоговое окно Учетная запись Adobe .
-
Войдите с учетной записью организации Adobe Analytics и выберите Подключиться.
Дополнительные сведения о дополнительных параметрах соединителя см . в разделе Adobe Analytics.
Дополнительные сведения см. в разделе Из таблицы или диапазона.
Важно:
-
При попытке импортировать данные из Интернета может появиться следующее сообщение: «Для использования этого соединителя требуется установить один или несколько дополнительных компонентов». Для веб-соединителя на компьютере должна быть установлена платформа WebView 2.
-
Его можно скачать здесь.

Последовательность действий
-
Выберите Данные > Новый запрос > из других источников > из Интернета.
-
В диалоговом окне Из Интернета введите URL-адрес веб-страницы, а затем нажмите кнопку ОК.
В этом случае используется страница https://ru.wikipedia.org/wiki/Чемпионат_Европы_по_футболу.
Если веб-страница требует учетные данные пользователя:
-
Выберите Дополнительно, а затем в диалоговом окне Доступ к Интернету введите свои учетные данные.
-
Нажмите Сохранить.
-
-
Нажмите кнопку ОК.
-
В области Навигатор выполните следующие действия.
Выберите Представление таблицы, например Результаты.
Выберите Веб-представление, чтобы увидеть таблицу в виде веб-страницы. -
Выберите Загрузить, чтобы загрузить данные на лист.

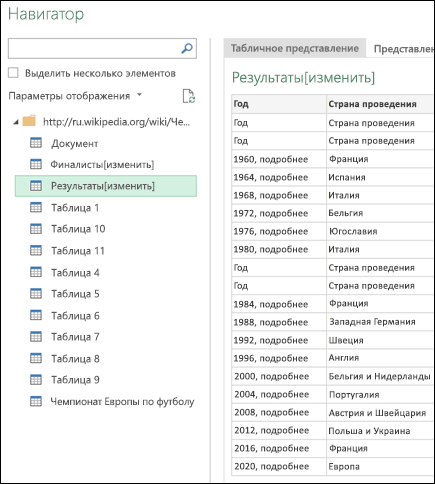
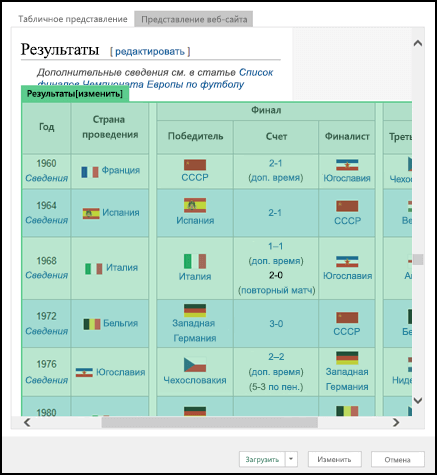
Дополнительные сведения о дополнительных параметрах соединителя см. в разделе Web (docs.com).
-
Выберите Данные > Получить > данныхиз других источников > из списка SharePoint.
-
В диалоговом окне Списки Microsoft SharePoint введите URL-адрес сайта SharePoint.
Примечание: При подключении к списку SharePoint введите URL-адрес сайта, а не URL-адрес списка. В диалоговом окне Доступ к SharePoint выберите наиболее общий URL-адрес, чтобы правильно пройти проверку подлинности на сайте. По умолчанию выбран наиболее общий URL-адрес.
-
Нажмите кнопку ОК.
-
В диалоговом окне Доступ к SharePoint выберите параметр учетных данных:
-
Выберите Анонимно, если на сервере SharePoint Server не требуются учетные данные.
-
Выберите Windows, если на сервере SharePoint Server требуются учетные данные Windows.
-
Выберите Учетная запись в организации, если на сервере SharePoint Server требуются данные учетной записи в организации.
-
-
Нажмите Подключиться.
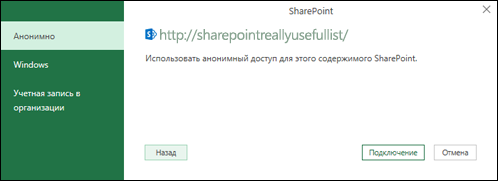
Дополнительные сведения о дополнительных параметрах соединителя см. в статье Список SharePoint (docs.com).
-
Выберите Данные > Получить > данныхиз других источников > из веб-канала OData.
-
В диалоговом окне Канал OData введите URL-адрес канала OData.
-
Нажмите кнопку ОК.
-
Если для канала OData требуются учетные данные пользователя, в диалоговом окне Доступ к каналу OData:
-
Выберите Windows, если для канала OData требуется проверка подлинности Windows.
-
Щелкните Основной, если для канала OData требуются имя пользователя и пароль.
-
Выберите Ключ Marketplace, если для канала OData требуется ключ учетной записи Marketplace. Вы можете выбрать параметр Получить ключ учетной записи Marketplace, чтобы подписаться на веб-каналы OData Microsoft Azure Marketplace. Вы также можете зарегистрироваться в Microsoft Azure Marketplace в диалоговом окне Доступ к веб-каналу OData.
-
Щелкните Организационная учетная запись, если для канала OData требуются учетные данные для федеративного доступа. При использовании Windows Live ID войдите в свою учетную запись.
-
Нажмите кнопку Сохранить.
-
Примечание: Импорт в веб-канал OData поддерживает формат службы светлых данных JSON.
Дополнительные сведения о дополнительных параметрах соединителя см. в разделе Веб-канал OData (docs.com).
Распределенная файловая система Hadoop (HDFS) предназначена для хранения терабайтов и даже петабайт данных. HDFS подключает узлы компьютеров в кластерах, по которым распределены файлы данных, и вы можете получить доступ к этим файлам данных как к одному простому файловому потоку.
-
Выберите Данные > Получить > данныхиз других источников > из файла Hadoop (HDFS).
-
Введите имя сервера в поле Сервер и нажмите кнопку ОК.
-
Выберите Данные > Получить > данныхиз других источников > из Active Directory.
-
Введите свой домен в диалоговом окне Active Directory .
-
В диалоговом окне домен Active Directory для домена выберите Использовать мои текущие учетные данные или выберите Использовать альтернативные учетные данные, а затем введите имя пользователя и пароль.
-
Выберите Подключиться.
-
После успешного подключения используйте панель Навигатор , чтобы просмотреть все домены, доступные в Active Directory, а затем детализировать сведения о Active Directory, включая пользователи, учетные записи и компьютеры.
-
Выберите Данные > Получить > данныхиз других источников > из Microsoft Exchange.
-
В диалоговом окне Доступ к Exchange Server введите адрес ипароль Email.
-
Нажмите Сохранить.
-
В диалоговом окне Служба автообнаружения Microsoft Exchange выберите Разрешить , чтобы разрешить службе Exchange доверять вашим учетным данным.
-
Выберите Данные > Получить > данныхиз других источников > из ODBC.
-
В диалоговом окне Из ODBC выберите имя источника данных (DSN).
-
Введите строку подключения и нажмите кнопку ОК.
-
В следующем диалоговом окне выберите Параметры подключения по умолчанию или Пользовательский, Windows или База данных , введите учетные данные и нажмите кнопку Подключить.
-
В области Навигатор выберите таблицы или запросы, к которым требуется подключиться, а затем выберите Загрузить или Изменить.
Дополнительные сведения о дополнительных параметрах соединителя см. в разделе Источник данных ODBC (docs.com).
-
Выберите Данные > Получить > данныхиз других источников > из OLEDB.
-
В диалоговом окне Из OLE DB введите строку подключения и нажмите кнопку ОК.
-
В диалоговом окне Поставщик OLEDB выберите из параметров По умолчанию или Пользовательское, Windows или Подключение к базе данных , введите соответствующие учетные данные и нажмите кнопку Подключить.
-
В диалоговом окне Навигатор выберите базу данных и таблицы или запросы, к которым требуется подключиться, а затем выберите Загрузить или Изменить.
Важно:
Уведомление о прекращении использования соединителя данных Facebook Импорт и обновление данных из Facebook в Excel перестанет работать в апреле 2020 г. Вы по-прежнему сможете использовать соединитель Power Query Facebook (Get & Transform), но начиная с апреля 2020 года вы не сможете подключиться к Facebook и получите сообщение об ошибке. Мы рекомендуем как можно скорее пересмотреть или удалить все существующие запросы Power Query (Get & Transform), которые используют соединитель Facebook, чтобы избежать непредвиденных результатов.
Примечание: Если вы подключаетесь к Facebook впервые, вам будет предложено указать учетные данные. Войдите, используя свою учетную запись Facebook, и разрешите доступ к приложению Power Query. Вы можете отключить последующие запросы, установив флажок Не предупреждать меня больше об этом соединителе.
-
На вкладке Данные щелкните Получить данные > Из веб-служб > Из Facebook. Если вы не видите кнопки Получить данные, нажмите кнопку Создать запрос и выберите пункты Из других источников -> Из Facebook.
-
В диалоговом окне Facebook подключитесь к Facebook, используя ссылку «Я», имя пользователя или ИД объекта.
Примечание: Ваше имя пользователя Facebook отличается от адреса электронной почты, используемого при входе.
-
Выберите нужную категорию из раскрывающегося списка Подключение. Например, выберите Друзья для доступа ко всей своей информации в категории Друзья Facebook.
-
Нажмите кнопку ОК.
-
При необходимости нажмите Войти в диалоговом окне Доступ к Facebook, а затем введите адрес электронной почты или номер телефона и пароль. Вы можете установить флажок, чтобы оставаться в службе. После входа нажмите кнопку Подключить.
-
После успешного подключения вы сможете просмотреть таблицу, содержащую информацию о выбранной категории. Например, если выбрана категория «Друзья», Power Query отображает таблицу, содержащую имена ваших друзей из Facebook.
-
Нажмите кнопку Загрузить или Изменить.
Вы можете создать пустой запрос. Вы можете ввести данные, чтобы опробовать некоторые команды, или выбрать исходные данные из Power Query:
-
Чтобы изменить параметр, например учетные данные или конфиденциальность, выберите Главная > Параметры источника данных. Дополнительные сведения см. в разделе Управление параметрами и разрешениями источника данных.
-
Чтобы импортировать внешний источник данных, выберите Главная > Новый источник. Эта команда аналогична команде Get Data (Получить данные ) на вкладке Данные ленты Excel.
-
Чтобы импортировать недавний источник, выберите Главная > Последние источники. Эта команда аналогична команде Последние источники на вкладке Данные ленты Excel.
При добавлении двух или более запросов данные добавляются в запрос на основе имен заголовков столбцов в обеих таблицах. Если запросы не имеют совпадающих столбцов, значения NULL добавляются в столбец без сопоставления. Запросы добавляются в том порядке, в котором они выбраны.
Дополнительные сведения см. в разделах Добавление запросов (Power Query) и Добавление запросов (docs.com).
Если вы являетесь разработчиком, в Excel есть несколько подходов, которые можно использовать для импорта данных:
-
Для получения доступа к внешнему источнику данных можно использовать Visual Basic для приложений. В зависимости от источника данных для получения данных можно использовать объекты данных ActiveX или Объекты доступа к данным. Вы также можете определить в коде строку подключения, указывающую сведения о подключении. Использовать строку подключения полезно, например, если вы хотите избежать необходимости требовать от системных администраторов или пользователей сначала создать файл подключения или упростить установку приложения.
-
При импорте данных из базы данных SQL Server рассмотрите возможность использования собственного клиента SQL, который представляет собой автономный api для доступа к данным, который используется как для OLE DB, так и для ODBC. Он объединяет поставщик SQL OLE DB и драйвер SQL ODBC в одну собственную библиотеку динамической компоновки (DLL), а также предоставляет новые функции, отличные от компонентов доступа к данным Майкрософт (MDAC). Собственный клиент SQL можно использовать для создания новых приложений или улучшения существующих приложений, которые могут использовать преимущества новых функций SQL Server, таких как несколько активных результирующих наборов (MARS), User-Defined типов (UDT) и поддержка типов данных XML.
-
Функция RTD извлекает данные в режиме реального времени из программы, которая поддерживает автоматизацию COM. Надстройка ДРВ автоматизации COM должна быть создана и зарегистрирована на локальном компьютере.
-
The SQL. Функция REQUEST подключается к внешнему источнику данных и выполняет запрос с листа. The SQL. Затем функция REQUEST возвращает результат в виде массива без необходимости программирования макросов. Если данная функция недоступна, установите надстройку Microsoft Excel ODBC (XLODBC.XLA). Надстройку можно установить из Office.com.
Дополнительные сведения о создании Visual Basic для приложений см. в справке по Visual Basic.
-
Выберите Данные > Получить данные (Power Query).
-
В диалоговом окне Выбор источника данных выберите книга Excel.
-
Нажмите кнопку Обзор , чтобы найти файл, который требуется подключить в качестве источника данных.
-
В диалоговом окне Выбор файлов выберите файл, просмотрите сведения о файле, а затем выберите Получить данные и Далее.
-
Слева выберите данные, которые нужно импортировать, а затем справа подтвердите выбор в режиме предварительного просмотра данных.
-
В правом нижнем углу выберите Загрузить.
-
Выберите Данные > Получить данные (Power Query).
-
В диалоговом окне Выбор источника данных выберите Текст или CSV.
-
Нажмите кнопку Обзор , чтобы найти файл, который требуется подключить в качестве источника данных.
-
В диалоговом окне Выбор файлов выберите файл, просмотрите сведения о файле, а затем выберите Получить данные и Далее.
-
Подтвердите источник файла и выбор разделителя в предварительном просмотре данных.
-
В правом нижнем углу выберите Загрузить.
-
Выберите Данные > Получить данные (Power Query).
-
В диалоговом окне Выбор источника данных выберите XML.
-
Нажмите кнопку Обзор , чтобы найти файл, который требуется подключить в качестве источника данных.
-
В диалоговом окне Выбор файлов выберите файл, просмотрите сведения о файле, а затем выберите Получить данные и Далее.
-
Слева выберите данные, которые нужно импортировать, а затем справа подтвердите выбор в режиме предварительного просмотра данных.
-
В правом нижнем углу выберите Загрузить.
-
Выберите Данные > Получить данные (Power Query).
-
В диалоговом окне Выбор источника данных выберите JASON.
-
Нажмите кнопку Обзор , чтобы найти файл, который требуется подключить в качестве источника данных.
-
В диалоговом окне Выбор файлов выберите файл, просмотрите сведения о файле, а затем выберите Получить данные и Далее.
-
В правом нижнем углу выберите Закрыть & Загрузить.
-
Выберите Данные > Получить данные (Power Query).
-
В диалоговом окне Выбор источника данных выберите SQL Server базу данных.
-
В разделе Параметры подключения введите имя сервера.
-
В разделе Учетные данные подключения введите имя пользователя и пароль, решите, следует ли использовать зашифрованное подключение, а затем нажмите кнопку Далее.
-
Слева выберите данные, которые нужно импортировать, а затем справа подтвердите выбор в режиме предварительного просмотра данных.
-
В правом нижнем углу выберите Загрузить.
-
Выберите Данные > Получить данные (Power Query).
-
В диалоговом окне Выбор источника данных выберите список SharePoint Online.
-
В диалоговом окне Подключение к источнику данных введите корневой URL-адрес сайта SharePoint без ссылки на библиотеку, а затем войдите в учетную запись организации.
-
Выберите реализацию SharePoint версии 2.0, которая включает дополнительные параметры, чтобы выбрать режим просмотра:
-
Все , которое извлекает все столбцы из списка SharePoint.
-
По умолчанию извлекаются столбцы, заданные в представлении по умолчанию списка SharePoint.
Примечание. В качестве альтернативы версии 2.0 можно выбрать версию 1.0, которая соответствует более ранней версии SharePoint.
-
-
Нажмите Далее.
-
Слева выберите данные, которые нужно импортировать, а затем справа подтвердите выбор в режиме предварительного просмотра данных.
-
В правом нижнем углу выберите Загрузить.
-
Выберите Данные > Получить данные (Power Query).
-
В диалоговом окне Выбор источника данных выберите OData.
-
В диалоговом окне Веб-канал OData введите URL-адрес веб-канала OData.
-
Если для веб-канала OData требуются учетные данные пользователя, в диалоговом окне Учетные данные подключения в разделе Тип проверки подлинности:
-
Выберите Базовый , если для веб-канала OData требуются имя пользователя и пароль.
-
Выберите Учетная запись организации , если для веб-канала OData требуются федеративные учетные данные для доступа, и выберите Войти.
-
-
Нажмите кнопку Далее.
-
Выберите Данные > Получить данные (Power Query).
-
В диалоговом окне Выбор источника данных выберите Пустая таблица.
-
Введите нужные данные в ячейки таблицы. Вы также можете переименовать таблицу в разделе Имя внизу.
-
Нажмите кнопку Далее.
-
После редактирования запроса в правом верхнем углу выберите Закрыть & загрузить.
-
Выберите Данные > Получить данные (Power Query).
-
В диалоговом окне Выбор источника данных выберите Пустой запрос.
-
Введите нужный источник и команды, а затем нажмите кнопку Далее.
-
После редактирования запроса в правом верхнем углу выберите Закрыть & загрузить.
Надстройку Power Query можно использовать для подключения к внешним источникам данных и выполнения расширенного анализа данных. В следующих разделах приведены инструкции по подключению к источникам данных: веб-страницам, текстовым файлам, базам данных, веб-службы и файлам Excel, таблицам и диапазонам.
Важно: Прежде чем использовать Power Query в Excel 2013, его необходимо активировать: выберите Пункт Параметры > файлов > надстройки. В раскрывающемся списке Управление в нижней части экрана выберите пункт Надстройки COM и нажмите кнопку Перейти. Установите флажок Power Query и нажмите кнопку ОК. Лента Power Query должна появиться автоматически, но в противном случае закройте и перезапустите Excel.
Использование редактора запросов
Примечание:
Редактор запросов отображается при загрузке, изменении или создании запроса с помощью Power Query. В видео показано окно редактора запросов, которое отображается после изменения запроса в книге Excel. Чтобы просмотреть Редактор запросов без загрузки или изменения существующего запроса книги, в разделе Получение внешних данных на вкладке ленты Power Query выберите Из других источников > пустой запрос. В видео показан один из способов отображения редактора запросов.
-
На вкладке ленты Power Query щелкните Из файла > Из CSV или Из текста.
-
В диалоговом окне Обзор разделенных запятыми значений найдите или введите путь к файлу, к которому требуется выполнить запрос.
-
Нажмите кнопку Открыть.
Примечание: Если вы импортируете данные из CSV-файла, Power Query автоматически определит разделители столбцов, включая заголовки и типы. Например, при импорте CSV-файла, представленного ниже, Power Query автоматически будет использовать первую строку в качестве заголовков столбцов и изменит тип данных каждого столбца.
Пример CSV-файла
Power Query автоматически изменяет тип данных каждого столбца:
-
Тип поля «Код заказа» изменяется на число
-
Тип поля «Дата заказа» изменяется на дату
-
Тип поля «Категория» остается текстом (тип столбца, используемый по умолчанию)
-
Тип поля «Название товара» остается текстом (тип столбца, используемый по умолчанию)
-
Тип поля «Продажи» изменяется на число
В редакторе запросов Power Query автоматически применяет шаги FirstRowAsHeader и ChangeType. Эти автоматические действия эквивалентны повышению уровня строки вручную и ручному изменению каждого типа столбца.
После Power Query автоматического обнаружения столбцов можно также использовать Редактор запросов для написания формул для Power Query. Например:
= Csv.Document(File.Contents("C:ExamplesProducts Categories and Orders.csv"),null,",",null,1252)

= Table.PromoteHeaders(Source)

= Table.TransformColumnTypes(FirstRowAsHeader,{{"OrderID", type number}, {"CustomerID", type text}, {"EmployeeID", type number}, {"OrderDate", type date}, {"RequiredDate", type date}, {"ShipName", type text}})
Примечание:
Редактор запросов отображается только при загрузке, редактировании или создании нового запроса с помощью Power Query. В видео показано окно редактора запросов, которое отображается после изменения запроса в книге Excel 2013. Чтобы просмотреть Редактор запросов без загрузки или изменения существующего запроса книги, в разделе Получение внешних данных на вкладке ленты Power Query выберите Из других источников > пустой запрос. В видео показан один из способов отображения редактора запросов.
-
Выберите любую ячейку в диапазоне данных.
-
На вкладке ленты Power Query щелкните Из таблицы.
-
Если появился соответствующий запрос, в диалоговом окне Из таблицы нажмите кнопку Выбор диапазона, чтобы выбрать конкретный диапазон в качестве источника данных.
-
Если диапазон данных содержит заголовки столбцов, установите флажок Таблица с заголовками. Ячейки заголовков используются для задания имен столбцов в запросе.
-
В редакторе запросов нажмите кнопку Закрыть и загрузить.
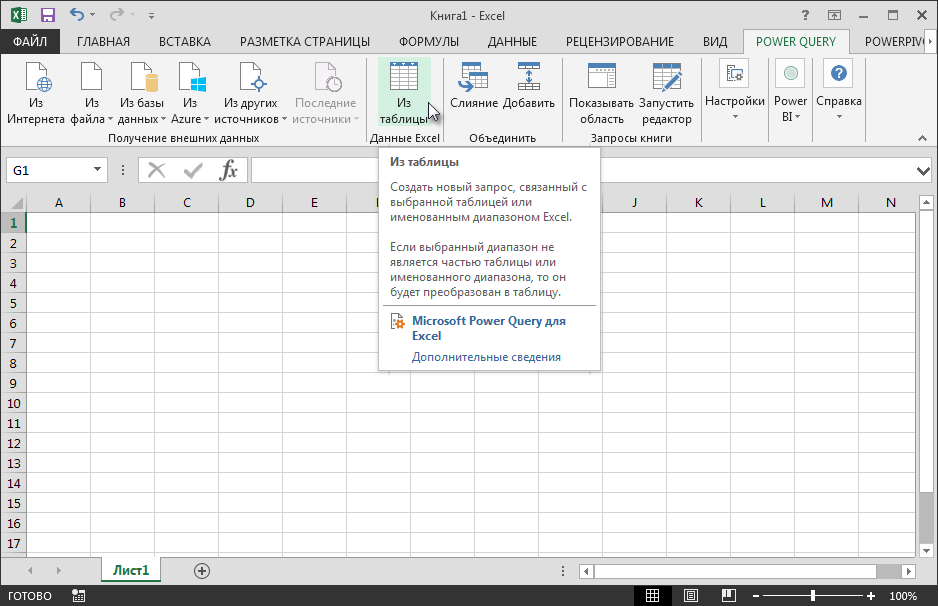
Примечание: Если диапазон данных определен как именованный или находится в таблице Excel, Power Query автоматически распознает весь диапазон и загружает его в редактор запросов. При загрузке в редактор запросов обычный текст автоматически преобразуется в таблицу.
Для написания формул Power Query можно можете использовать редактор запросов.
= Excel.CurrentWorkbook(){[Name="Table1"]}[Content]
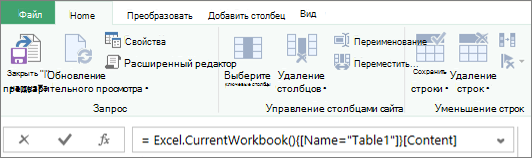
Примечание:
Редактор запросов отображается только при загрузке, редактировании или создании нового запроса с помощью Power Query. В видео показано окно редактора запросов, которое отображается после изменения запроса в книге Excel. Чтобы просмотреть Редактор запросов без загрузки или изменения существующего запроса книги, в разделе Получение внешних данных на вкладке ленты Power Query выберите Из других источников > пустой запрос. В видео показан один из способов отображения редактора запросов.
-
На вкладке ленты Power Query щелкните Из файла > Из Excel.
-
В диалоговом окне Обзор Excel найдите или введите путь к файлу, к которому требуется выполнить запрос.
-
Нажмите кнопку Открыть.
Если в исходной книге есть именованные диапазоны, их имена будут доступны как наборы данных.
Для написания формул Power Query можно также использовать редактор запросов. Например:
= Excel.Workbook
 (File.Contents("C:ExampleProducts and Orders.xlsx"))
Примечание:
Редактор запросов отображается только при загрузке, редактировании или создании нового запроса с помощью Power Query. В видео показано окно редактора запросов, которое отображается после изменения запроса в книге Excel 2013. Чтобы просмотреть Редактор запросов без загрузки или изменения существующего запроса книги, в разделе Получение внешних данных на вкладке ленты Power Query выберите Из других источников > пустой запрос. В видео показан один из способов отображения редактора запросов.
Примечание: При попытке импорта данных из файла Excel прежних версий или базы данных Access с определенной конфигурацией возникает ошибка, вызванная тем, что ядро СУБД Microsoft Access 2010 (поставщик Microsoft.ACE.OLEDB.12.0) не зарегистрировано на локальном компьютере. Ошибка возникает в системах, в которых установлен только набор Office 2013. Чтобы устранить ее, скачайте следующие ресурсы для обеспечения доступа к нужным источникам данных.
-
Распространяемый пакет ядра СУБД Microsoft Access 2010
-
Access Database Engine 2010 с пакетом обновления 1 (SP1)
-
На вкладке ленты Power Query нажмите кнопку Из Интернета.
-
В диалоговом окне Из Интернета введите URL-адрес веб-страницы и нажмите кнопку ОК.
В этом случае используется страница https://ru.wikipedia.org/wiki/Чемпионат_Европы_по_футболу.
Если веб-страница требует учетные данные пользователя:
-
В поле Доступ к веб-содержимому выберите тип учетных данных и введите значения для проверки подлинности.
-
Нажмите кнопку Сохранить.
-
-
Нажмите кнопку ОК.
-
Power Query проанализирует веб-страницу, и откроется область Навигатор в режиме Представление таблицы.
Если вы знаете, к какой таблице нужно подключиться, выберите ее в списке. В этом примере выбрана таблица «Призёры».
В противном случае можно переключиться в режим Веб-представление и выбрать нужную таблицу вручную. В этом случае выбрана таблица «Призёры».
-
Нажмите кнопку Загрузить, и Power Query загрузит выбранные данные из Интернета в Excel.
-
На вкладке ленты Power Query щелкните Из базы данных > Из базы данных SQL Server.
-
В диалоговом окне База данных Microsoft SQL укажите SQL Server, к которому нужно подключиться, в поле Имя сервера. При необходимости вы также можете указать имя базы данных.
-
Если данные нужно импортировать с использованием запроса на языке базы данных, укажите его в поле Инструкция SQL. Дополнительные сведения см. в статье Импорт данных из базы данных с помощью запроса на ее языке.
-
Нажмите кнопку ОК.
-
Выберите режим проверки подлинности для подключения к базе данных SQL Server.
-
Windows: это выбор по умолчанию. Выберите это значение, если вы хотите подключаться, используя проверку подлинности Windows.
-
База данных: выберите это значение, если вы хотите подключаться, используя проверку подлинности SQL Server. Затем укажите имя пользователя и пароль для подключения к экземпляру SQL Server.
-
-
По умолчанию установлен флажок Шифрование соединения, то есть Power Query подключается к базе данных через зашифрованное соединение. Если вы не хотите использовать зашифрованное соединение, снимите этот флажок, а затем нажмите кнопку Подключить.
Если подключение к SQL Server не установлено через зашифрованное соединение, Power Query предлагает подключиться, используя незашифрованное соединение. Нажмите кнопку ОК в окне сообщения, чтобы использовать незашифрованное соединение.
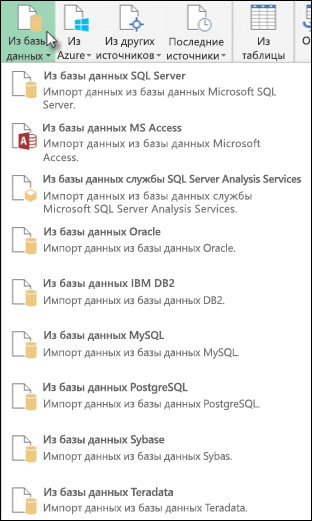
Пример формулы
Для написания формул Power Query можно также использовать редактор запросов.
= Sql.Databases(".")
= Sql.Database(".","Contoso")
-
Откройте вкладку Power Query на ленте и выберите Получить внешние данные > из других источников > из ODBC.
-
В диалоговом окне Из ODBC выберите имя источника данных (DSN).
-
Введите строку подключения, а затем нажмите кнопку ОК.
-
В следующем диалоговом окне выберите параметры По умолчанию или Пользовательское, Windows или Подключение к базе данных , введите учетные данные, а затем нажмите кнопку Подключить.
-
В области Навигатор выберите таблицы или запросы, к которым требуется подключиться, а затем нажмите кнопку Загрузить или Изменить.
-
На вкладке ленты Power Query выберите Из базы данных > Из базы данных Access.
-
В диалоговом окне Обзор найдите или введите URL-адрес файла для импорта или связывания с файлом.
-
Выполните действия, описанные в диалоговом окне Навигатор , чтобы подключиться к выбранной таблице или запросу.
-
Нажмите кнопку Загрузить или Изменить.
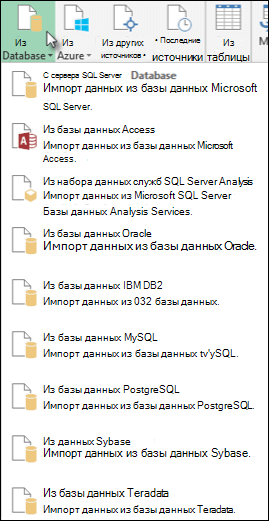
-
На вкладке ленты Power Query щелкните Из файла > Из XML.
-
В диалоговом окне Обзор из XML найдите или введите URL-адрес файла для импорта или ссылки на файл.
-
Нажмите кнопку Открыть.
После успешного подключения вы сможете использовать панель Навигатор для просмотра и просмотра коллекций элементов в XML-файле в табличной форме.
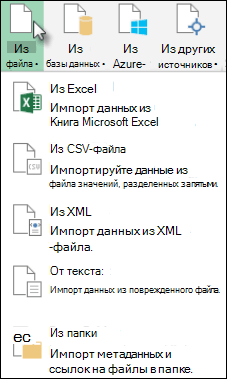
Для написания формул Power Query можно также использовать редактор запросов. Например:
= Xml.Tables(File.Contents("C:DownloadsXML Example.xml"))
Примечание:
Редактор запросов отображается только при загрузке, редактировании или создании нового запроса с помощью Power Query. В видео показано окно редактора запросов, которое отображается после изменения запроса в книге Excel. Чтобы просмотреть Редактор запросов без загрузки или изменения существующего запроса книги, в разделе Получение внешних данных на вкладке ленты Power Query выберите Из других источников > пустой запрос. В видео показан один из способов отображения редактора запросов.
-
На вкладке Данные в группе Получить внешние данные щелкните Из других источников, а затем — Из служб Analysis Services.
Отобразится мастер подключения к данным. Этот мастер имеет три области.
-
Подключение к серверу базы данных
-
Выбор базы данных и таблицы
-
Сохранение файла подключения к данным и завершение
-
-
В области Подключение к серверу базы данных в поле Имя сервера введите имя сервера базы данных OLAP.
Совет: Если известно имя автономного файла куба, к которому требуется подключиться, можно ввести полный путь к файлу, имя файла и расширение.
-
В разделе Учетные данные входа выполните одно из следующих действий, а затем нажмите кнопку Далее.
-
Чтобы использовать текущее имя пользователя и пароль Windows, щелкните Использовать проверку подлинности Windows.
-
Чтобы указать имя пользователя и пароль для доступа к базе данных, выберите вариант Использовать следующие имя пользователя и пароль и введите соответствующие данные в поля Имя пользователя и Пароль.
-
-
В области Выберите базу данных, содержащую нужные данные , выберите базу данных и нажмите кнопку Далее.
Чтобы подключиться к определенному куб в базе данных, убедитесь, что выбран параметр Подключиться к определенному кубу или таблице , а затем выберите куб из списка.
-
В области Сохранить файл подключения к данным и завершить в поле Имя файла при необходимости проверьте имя файла по умолчанию (необязательно).
Нажмите кнопку Обзор , чтобы изменить расположение файла по умолчанию для моих источников данных, или проверьте наличие существующих имен файлов.
-
В полях Описание, Понятное имя и Ключевые слова поиска введите описание файла, понятное имя и распространенные поисковые слова (все они являются необязательными).
-
Чтобы убедиться, что файл подключения используется при обновлении сводной таблицы, щелкните Всегда пытаться использовать этот файл для обновления данных.
Если установить этот флажок, обновления файла подключения всегда будут использоваться всеми книгами, которые используют этот файл подключения.
-
Нажмите кнопку Готово, чтобы закрыть окно мастера подключения к данным.
-
В диалоговом окне Импорт данных в разделе Выбор способа просмотра этих данных в книгевыполните одно из следующих действий.
-
Чтобы создать только отчет сводной таблицы, щелкните Отчет сводной таблицы.
-
Чтобы создать отчет сводной таблицы и отчет сводной диаграммы, щелкните Сводная диаграмма и Отчет сводной таблицы.
-
Чтобы сохранить выбранное подключение в книге для последующего использования, щелкните Только создать подключение. Этот флажок гарантирует, что соединение используется формулами, содержащими созданные функции куба, и что вы не хотите создавать отчет сводной таблицы.
-
-
В разделе Куда вы хотите поместить данные, выполните одно из следующих действий:
-
Чтобы поместить отчет сводной таблицы на существующий лист, выберите Существующий лист, а затем введите ссылку на первую ячейку в диапазоне ячеек, в котором нужно найти отчет сводной таблицы.
Можно также нажать кнопку Свернуть диалоговое окно
, чтобы временно скрыть диалоговое окно, выбрать начальную ячейку на листе, который вы хотите использовать, а затем нажать кнопку Развернуть диалоговое окно .
-
-
Чтобы поместить отчет сводной таблицы на новый лист, начинающийся с ячейки A1, щелкните Новый лист.
-
Чтобы проверить или изменить свойства подключения, щелкните Свойства, внесите необходимые изменения в диалоговом окне Свойства подключения и нажмите кнопку ОК.

 , чтобы временно скрыть диалоговое окно, выбрать начальную ячейку на листе, который вы хотите использовать, а затем нажать кнопку Развернуть диалоговое окно
  .
.-
На вкладке Power Query щелкните Из других источников > Пустой запрос.
-
В Редактор запросов щелкните Расширенный редактор.
-
Введите строку запроса следующим образом, заменив «C:UsersNameDesktopJSONTest.json» путем к JSON-файлу.
let

    Source = Json.Document(File.Contents("C:UsersNameDesktopJSONTest.json")),
    #"Converted to Table" = Record.ToTable(Source)

in

    #"Converted to Table"
-
На вкладке ленты Power Query щелкните Из базы данных > Из базы данных Oracle.
-
В диалоговом окне База данных Oracle в поле Имя сервера укажите сервер Oracle, к которому нужно подключиться. Если требуется идентификатор безопасности, его можно указать в виде «Имя_сервера/идентификатор безопасности».
-
Если данные нужно импортировать с использованием запроса на языке базы данных, укажите его в поле Инструкция SQL. Дополнительные сведения см. в статье Импорт данных из базы данных с помощью запроса на ее языке.
-
Нажмите кнопку ОК.
-
Если серверу Oracle требуются учетные данные пользователя базы данных:
-
В диалоговом окне Доступ к базе данных введите имя пользователя и пароль.
-
Нажмите кнопку Подключить.
-
-
На вкладке ленты Power Query выберите из других источников > из списка SharePoint.
-
В появившемся диалоговом окне Списки Microsoft SharePoint введите URL-адрес сайта SharePoint.
Примечание: При подключении к списку SharePoint введите URL-адрес сайта, а не URL-адрес списка. В диалоговом окне Доступ к SharePoint выберите наиболее общий URL-адрес, чтобы правильно пройти проверку подлинности на сайте. По умолчанию выбран наиболее общий URL-адрес.
-
Чтобы продолжить, нажмите кнопку ОК.
-
В появившемся диалоговом окне Доступ к SharePoint выберите тип учетных данных.
-
Выберите Анонимно, если на сервере SharePoint Server не требуются учетные данные.
-
Выберите Windows, если на сервере SharePoint Server требуются учетные данные Windows.
-
Выберите Учетная запись в организации, если на сервере SharePoint Server требуются данные учетной записи в организации.
-
-
Нажмите Подключиться.
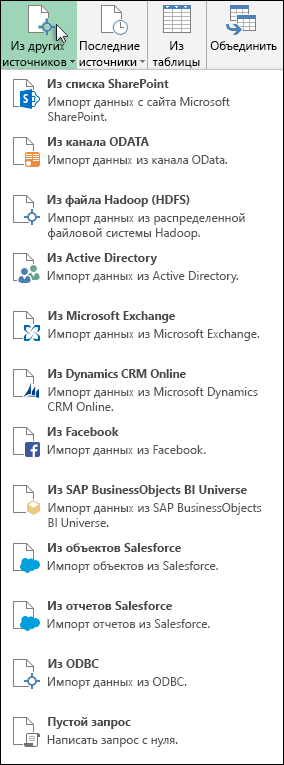
-
На вкладке ленты Power Query выберите Из другого источника > из веб-канала OData.
-
В диалоговом окне Канал OData введите URL-адрес канала OData.
-
Нажмите кнопку ОК.
-
Если для канала OData требуются учетные данные пользователя, в диалоговом окне Доступ к каналу OData:
-
Выберите Windows, если для канала OData требуется проверка подлинности Windows.
-
Щелкните Основной, если для канала OData требуются имя пользователя и пароль.
-
Выберите Ключ Marketplace, если для канала OData требуется ключ учетной записи Marketplace. Вы можете щелкнуть Получить ключ учетной записи Marketplace для подписки на каналы OData Microsoft Azure Marketplace. В диалоговом окне «Доступ к каналу OData» вы можете также зарегистрироваться в Microsoft Azure Marketplace.
-
Щелкните Организационная учетная запись, если для канала OData требуются учетные данные для федеративного доступа. При использовании Windows Live ID войдите в свою учетную запись.
-
Нажмите кнопку Сохранить.
-
Примечание: Для подключения к каналу OData поддерживается упрощенный формат службы данных JSON.
-
Перейдите на вкладку Данные и выберите Получить данные > из других источников > из OLEDB. Если вы не видите кнопку Получить данные , следуйте приведенным ниже инструкциям мастера подключения к данным .
-
В диалоговом окне Из OLE DB введите строку подключения, а затем нажмите кнопку ОК.
-
В диалоговом окне Поставщик OLEDB выберите из параметров По умолчанию или Пользовательское, Windows или Подключение к базе данных , введите соответствующие учетные данные и нажмите кнопку Подключиться.
-
В диалоговом окне Навигатор выберите базу данных и таблицы или запросы, к которым вы хотите подключиться, а затем нажмите кнопку Загрузить или Изменить.
-
В Редактор Power Query нажмите кнопку Закрыть & загрузить.
-
На вкладке ленты Power Query щелкните Из базы данных > из базы данных MySQL.
-
В диалоговом окне База данных MySQL в поле Имя сервера укажите сервер базы данных MySQL для подключения.
-
Если данные нужно импортировать с использованием запроса на языке базы данных, укажите его в поле Инструкция SQL. Дополнительные сведения см. в статье Импорт данных из базы данных с помощью запроса на ее языке.
-
Нажмите кнопку ОК.
-
Если серверу MySQL требуются учетные данные пользователя базы данных:
-
В диалоговом окне Доступ к базе данных введите имя пользователя и пароль.
-
Нажмите кнопку Подключить.
-
-
На вкладке ленты Power Query выберите Из других источников > Из Microsoft Exchange.
-
В диалоговом окне Доступ к Exchange Server укажите адрес ипароль Email.
-
Нажмите кнопку Сохранить.
-
В диалоговом окне Служба автообнаружения Microsoft Exchange выберите Разрешить , чтобы разрешить службе Exchange доверять вашим учетным данным.
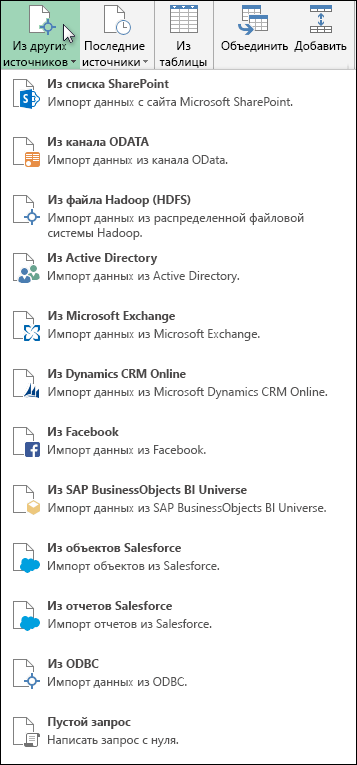
-
На вкладке ленты Power Query выберите пункты Из других источников > Из Active Directory.
-
В диалоговом окне Active Directory введите имя домена.
-
В диалоговом окне Домен Active Directory выберите команду Использовать текущие учетные данные или Использовать другие учетные данные. В поле Использовать альтернативные учетные данные проверки подлинности введите имя пользователя и пароль.
-
Нажмите кнопку Подключиться.
-
После успешного подключения в области Навигатор вы можете просмотреть все домены, доступные в Active Directory, и детализировать данные Active Directory, включая сведения о пользователях, учетных записях и компьютерах.
Предупреждение:
-
Прежде чем подключиться к базе данных IBM DB2, на компьютере должен быть установлен драйвер IBM DB2 Data Server (минимальное требование — пакет драйвера сервера данных IBM (драйвер DS)). Выберите драйвер, разрядность которого соответствует установленной версии Power Query (32-разрядный или 64-разрядный).
-
Существуют известные проблемы при установке драйвера IBM DB2 Data Server в Windows 8. Если вы используете Windows 8 и хотите подключаться к IBM DB2 с помощью Power Query, вам нужно выполнить дополнительные действия по установке. Дополнительные сведения о драйвере сервера данных IBM DB2 см. в Windows 8.
-
На вкладке Power Query ленты щелкните Из базы данных > Из базы данных IBM DB2.
-
В диалоговом окне База данных IBM DB2 в поле Имя сервера укажите сервер базы данных IBM DB2, к которому нужно подключиться.
-
Если данные нужно импортировать с использованием запроса на языке базы данных, укажите его в поле Инструкция SQL. Дополнительные сведения см. в статье Импорт данных из базы данных с помощью запроса на ее языке.
-
Нажмите кнопку ОК.
-
Если для сервера IBM DB2 требуются учетные данные пользователя базы данных:
-
В диалоговом окне Доступ к базе данных введите имя пользователя и пароль.
-
Нажмите кнопку Подключить.
-
Примечание: Прежде чем подключиться к базе данных PostgreSQL в Power Query, на компьютере должен быть установлен поставщик данных Ngpsql для PostgreSQL. Выберите драйвер, соответствующий вашей версии Office (32-разрядная или 64-разрядная). Дополнительные сведения см. в статье Какая версия Office используется? Кроме того, убедитесь, что в конфигурации компьютера зарегистрирован поставщик, соответствующий последней версии .NET на вашем устройстве.
-
На вкладке ленты Power Query щелкните Из базы данных > Из базы данных PostgreSQL.
-
В диалоговом окне База данных PostgreSQL укажите сервер базы данных PostgreSQL, к которому нужно подключиться, в разделе Имя сервера .
-
Если данные нужно импортировать с использованием запроса на языке базы данных, укажите его в поле Инструкция SQL. Дополнительные сведения см. в статье Импорт данных из базы данных с помощью запроса на ее языке.
-
Нажмите кнопку ОК.
-
Если для сервера PostgreSQL требуются учетные данные базы данных:
-
В диалоговом окне Доступ к базе данных введите имя пользователя и пароль.
-
Нажмите Подключиться.
-
-
Перейдите к https://web.powerapps.com/
-
Выберите Среду , к которой нужно подключиться.
-
В меню щелкните значок Параметры > Дополнительные настройки > ресурсов разработчика.
-
Скопируйте значение веб-API экземпляра .
Примечания:
-
Формат URL-адреса будет примерно таким, какhttps://<tenant>.crm.dynamics.com/api/data/v9.0.
-
Точный формат URL-адреса, который будет использоваться для подключения, зависит от региона и версии CDS для приложений, которые вы используете. Дополнительные сведения см. в статье URL-адрес и версии веб-API (docs.com).
-
-
Перейдите на вкладку Данные, а затем — Получить данные > из веб-служб > из Dynamics 365 (в сети).
-
Если вы не видите кнопку Получить данные, нажмите кнопку Создать запрос > из других источников > из Dynamics 365 (в сети).
-
-
В диалоговом окне с выбранным параметром Базовый введите URL-адрес веб-API для подключения CDS for Apps и нажмите кнопку ОК.
-
Если выбран параметр Дополнительно , можно добавить в запрос некоторые дополнительные параметры, чтобы управлять возвращаемыми данными. Дополнительные сведения см. в статье Запрос данных с помощью веб-API.
-
-
Выберите Учетная запись организации.
-
Если вы не вошли в систему с помощью учетной записи Microsoft Work или School, используемой для доступа к CDS for Apps, щелкните Войти и введите имя пользователя и пароль учетной записи.
-
-
Нажмите кнопку Подключить.
-
В диалоговом окне Навигатор выберите данные, которые нужно извлечь.
-
Если данные хорошо импортировать как есть, выберите параметр Загрузить, в противном случае выберите параметр Изменить, чтобы открыть Редактор Power Query.
Примечание:
Редактор Power Query предоставляет несколько вариантов изменения возвращаемых данных. Например, может потребоваться импортировать меньше столбцов, чем содержится в исходных данных. В этом случае перейдите на вкладку Главная > Управление столбцами > Выберите столбцы, выберите столбцы, которые нужно сохранить, а затем нажмите кнопку ОК. Когда все будет готово, нажмите кнопку Закрыть & загрузить , чтобы вернуть измененные данные в Excel.
-
На вкладке ленты Power Query выберите Из базы данных > Из базы данных Teradata.
-
В диалоговом окне База данных Teradata в поле Имя сервера укажите сервер Teradata для подключения.
-
Если данные нужно импортировать с использованием запроса на языке базы данных, укажите его в поле Инструкция SQL. Дополнительные сведения см. в статье Импорт данных из базы данных с помощью запроса на ее языке.
-
Нажмите кнопку ОК.
-
Если серверу Teradata требуются учетные данные пользователя базы данных:
-
В диалоговом окне Доступ к базе данных введите имя пользователя и пароль.
-
Нажмите кнопку Сохранить.
-
Важно:
Уведомление о прекращении использования соединителя данных Facebook Импорт и обновление данных из Facebook в Excel перестанет работать в апреле 2020 г. Вы по-прежнему сможете использовать соединитель Facebook Get & Transform (Power Query) до тех пор, но начиная с апреля 2020 года вы не сможете подключиться к Facebook и получите сообщение об ошибке. Мы рекомендуем как можно скорее пересмотреть или удалить все существующие запросы Get & Transform (Power Query), использующие соединитель Facebook, чтобы избежать непредвиденных результатов.
Примечание: Если вы подключаетесь к Facebook впервые, вам будет предложено указать учетные данные. Войдите, используя свою учетную запись Facebook, и разрешите доступ к приложению Power Query. Вы можете отключить последующие запросы, установив флажок Не предупреждать меня больше об этом соединителе.
-
На вкладке ленты Power Query щелкните Из других источников > Из Facebook.
-
В диалоговом окне Facebook подключитесь к Facebook, используя ссылку «Я», имя пользователя или ИД объекта.
Примечание: Ваше имя пользователя Facebook отличается от адреса электронной почты, используемого при входе.
-
Выберите нужную категорию из раскрывающегося списка Подключение. Например, выберите Друзья для доступа ко всей своей информации в категории Друзья Facebook.
-
Нажмите кнопку ОК.
-
При необходимости нажмите Войти в диалоговом окне Доступ к Facebook, а затем введите адрес электронной почты или номер телефона и пароль. Вы можете установить флажок, чтобы оставаться в службе. После входа нажмите кнопку Подключить.
-
После успешного подключения вы сможете просмотреть таблицу, содержащую информацию о выбранной категории. Например, если выбрана категория «Друзья», Power Query отображает таблицу, содержащую имена ваших друзей из Facebook.
-
Нажмите кнопку Загрузить или Изменить.
Для написания формул Power Query можно можете использовать редактор запросов.
= Facebook.Graph("https://graph.facebook.com/v2.8/me/friends")
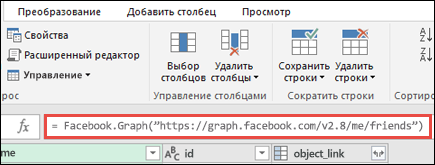
Примечание:
Редактор запросов отображается только при загрузке, редактировании или создании нового запроса с помощью Power Query. В видео показано окно редактора запросов, которое отображается после изменения запроса в книге Excel. Чтобы просмотреть Редактор запросов без загрузки или изменения существующего запроса книги, в разделе Получение внешних данных на вкладке ленты Power Query выберите Из других источников > пустой запрос. В видео показан один из способов отображения редактора запросов.
Примечания:
-
Прежде чем подключиться к базе данных SAP SQL Anywhere, на компьютере должен быть установлен драйвер SAP SQL Anywhere . Выберите драйвер, разрядность которого соответствует установленной версии Power Query (32-разрядный или 64-разрядный).
-
На вкладке ленты POWER QUERY выберите Из базы данных > Из SAP Sybase SQL Anywhere.
-
В диалоговом окне База данных Sybase укажите сервер Sybase для подключения в поле Имя сервера . При необходимости вы также можете указать имя базы данных.
-
Если данные нужно импортировать с использованием запроса на языке базы данных, укажите его в поле Инструкция SQL. Дополнительные сведения см. в статье Импорт данных из базы данных с помощью запроса на ее языке.
-
Нажмите кнопку ОК.
-
По умолчанию установлен флажок Шифровать подключение, чтобы Power Query подключался к базе данных с помощью простого зашифрованного подключения.
-
Нажмите кнопку Подключить.
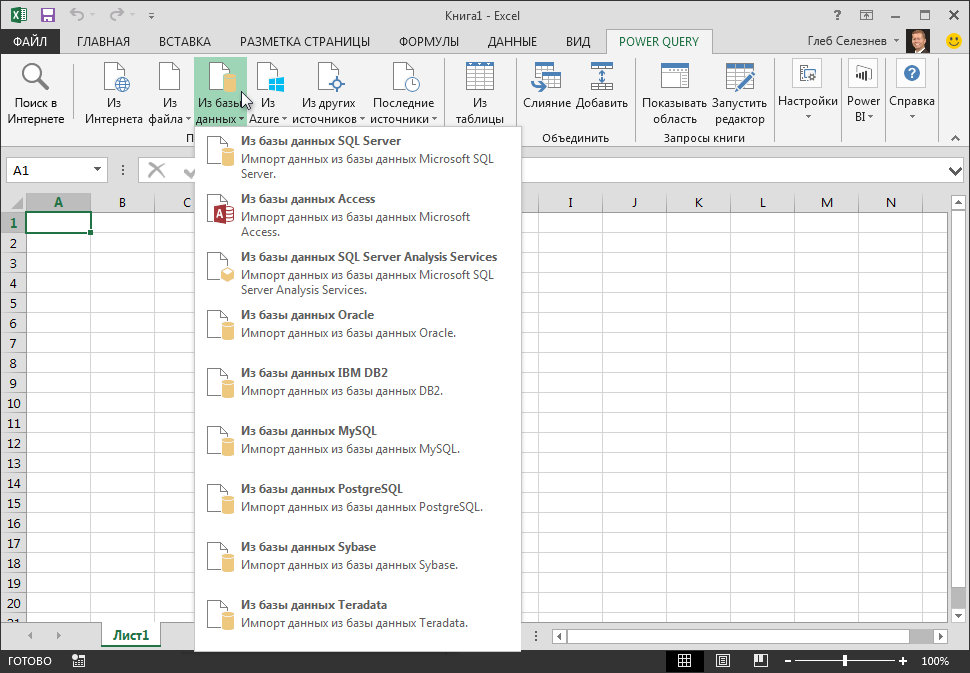
Microsoft Azure Хранилище BLOB-объектов — это служба для хранения больших объемов неструктурированных данных, таких как изображения, видео, аудио и документы, доступ к которым можно получить из любой точки мира по протоколу HTTP или HTTPS. Дополнительные сведения о службе Хранилище BLOB-объектов Azure см. в статье Использование хранилища BLOB-объектов.
-
На вкладке ленты Power Query выберите Из Azure > из хранилища BLOB-объектов Microsoft Azure.
-
В диалоговом окне Microsoft Azure Хранилище BLOB-объектов введите имя или URL-адрес учетной записи хранения Microsoft Azure, а затем нажмите кнопку ОК.
-
Если вы подключаетесь к службе хранилища BLOB-объектов в первый раз, вам будет предложено ввести и сохранить ключ доступа к хранилищу. В диалоговом окне Доступ к хранилищу BLOB-объектов Microsoft Azure введите ключ доступа к хранилищу в поле Ключ учетной записи и нажмите кнопку Сохранить.
Примечание: Если вам нужно получить ключ доступа к хранилищу, перейдите на порталMicrosoft Azure, выберите учетную запись хранения и щелкните значок Управление ключом доступа в нижней части страницы. Щелкните значок копирования справа от первичного ключа и вставьте значение в поле Ключ учетной записи .
-
В редакторе запросов будет выведен список всех доступных контейнеров в хранилище BLOB-объектов Microsoft Azure. На панели Навигатор выберите контейнер, из которого требуется импортировать данные, а затем нажмите кнопку Применить и закрыть.
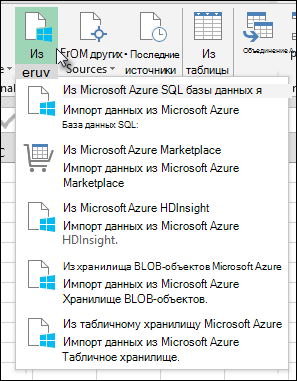
-
На вкладке ленты POWER QUERY выберите Из Azure > из Microsoft Azure HDInsight.
-
В диалоговом окнеMicrosoft Azure HDInsight введите имя учетной записи и нажмите кнопку ОК.
-
Затем введите ключ учетной записи и нажмите кнопку Подключить.
Примечание: Если вам нужно получить ключ, вернитесь на порталMicrosoft Azure, выберите учетную запись хранения и щелкните значок Управление ключом доступа в нижней части страницы. Щелкните значок копирования справа от первичного ключа и вставьте значение в мастер.
-
Выберите кластер в диалоговом окне Навигатор , а затем найдите и выберите файл содержимого.
-
Нажмите кнопку Загрузить , чтобы загрузить выбранную таблицу, или нажмите кнопку Изменить , чтобы выполнить дополнительные фильтры и преобразования данных перед загрузкой.
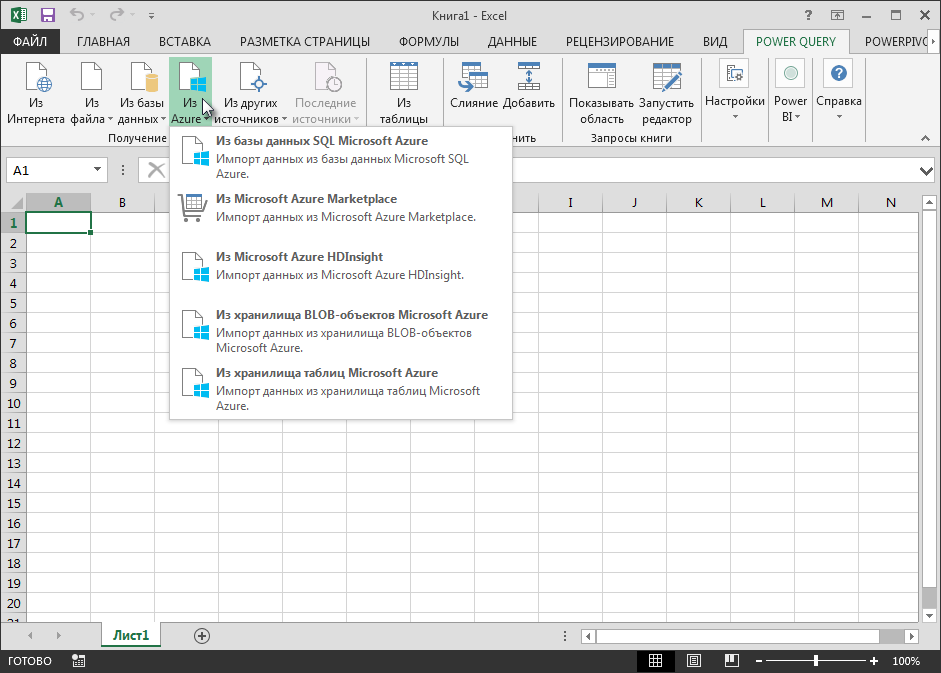
Если вы являетесь разработчиком, в Excel есть несколько подходов, которые можно использовать для импорта данных:
-
Для получения доступа к внешнему источнику данных можно использовать Visual Basic для приложений. В зависимости от источника данных для получения данных можно использовать объекты данных ActiveX или Объекты доступа к данным. Вы также можете определить в коде строку подключения, указывающую сведения о подключении. Использовать строку подключения полезно, например, если вы хотите избежать необходимости требовать от системных администраторов или пользователей сначала создать файл подключения или упростить установку приложения.
-
При импорте данных из базы данных SQL Server рассмотрите возможность использования собственного клиента SQL, который представляет собой автономный api для доступа к данным, который используется как для OLE DB, так и для ODBC. Он объединяет поставщик SQL OLE DB и драйвер SQL ODBC в одну собственную библиотеку динамической компоновки (DLL), а также предоставляет новые функции, отличные от компонентов доступа к данным Майкрософт (MDAC). Собственный клиент SQL можно использовать для создания новых приложений или улучшения существующих приложений, которые могут использовать преимущества новых функций SQL Server, таких как несколько активных результирующих наборов (MARS), User-Defined типов (UDT) и поддержка типов данных XML.
-
Функция RTD извлекает данные в режиме реального времени из программы, которая поддерживает автоматизацию COM. Надстройка ДРВ автоматизации COM должна быть создана и зарегистрирована на локальном компьютере.
-
The SQL. Функция REQUEST подключается к внешнему источнику данных и выполняет запрос с листа. The SQL. Затем функция REQUEST возвращает результат в виде массива без необходимости программирования макросов. Если данная функция недоступна, установите надстройку Microsoft Excel ODBC (XLODBC.XLA). Надстройку можно установить из Office.com.
Дополнительные сведения о создании Visual Basic для приложений см. в справке по Visual Basic.
См. также
Справка по Power Query для Excel
Импорт данных из базы данных с помощью запроса на ее языке
Использование нескольких таблиц для создания сводной таблицы
Импорт данных из базы данных в Excel для Mac
Получение данных (docs.com)
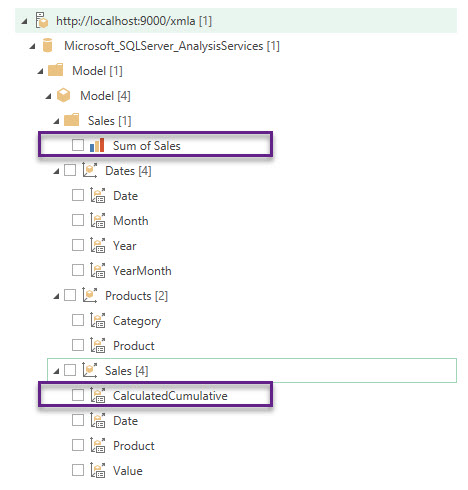
TL;DR
We can
connect almost any data source in Power Query, but PowerPivot data model is not
included in that extensive list of sources out of the box.
But with
the help of the fabulous DAX Studio we can do it (although in my opinion it is
still inconvenient and tricky) at least locally – from the same workbook in Excel
or from Power BI Desktop.
All you
need is to open your Excel workbook, run DAX Studio add-in and connect it to
this workbook. Then you can just connect to the PowerPivot model as to SQL
Server Analysis Services cube.
But this is
an undocumented and extremely limited feature not supported by Microsoft, which
can only be used under your own risk.
Step 1: Ready…
First, we
need the Source. In other words, the Excel workbook with some data, loaded to
the PowerPivot data model. If you can see a table in the PowerPivot window, it
is good.
I have a
workbook with these sample tables:
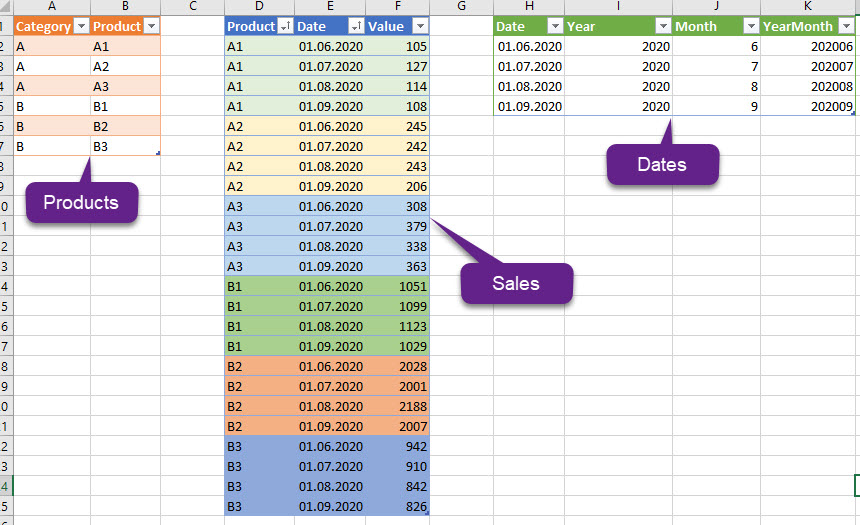
which form this simple data model:
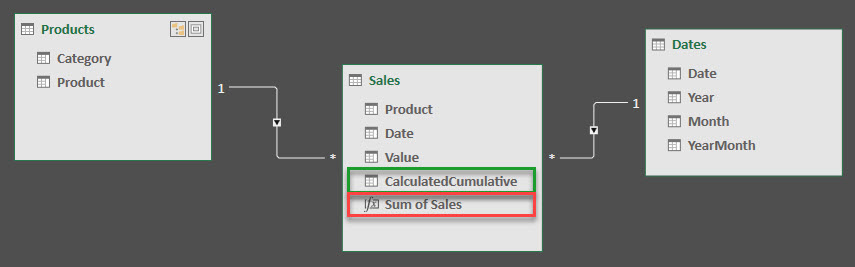
In the ‘Sales’ table I have already created the calculated column to calculate cumulative total for the product by date:

And the simple measure:
|
Sum of Sales := SUM(Sales[Value]) |
The source of
tables in PowerPivot model is the tables from this workbook, but they could also
be from Power Query.
Second, we
need DAX Studio add-in for Excel installed. If you are working with
Power BI or PowerPivot and do not have DAX Studio installed, I have bad news
for you… If so, or if you haven’t installed add-in for Excel, go to the https://daxstudio.org/, click the big green button to download
the latest release and install it. During the installation, do not forget to
install not only application alone, but the Excel add-in, too. It is
necessary.
Step 2: Steady…
To connect
Power Query to your workbook data model, open your workbook :). For some
reasons I insist that only this workbook is opened! This and only this one. If several
workbooks are opened simultaneously, there could be mess and problems.
Run DAX
Studio add-in from the “Add-ins” ribbon group in Excel. After the DAX Studio
starts, you will see connection window, where you must select the first option:
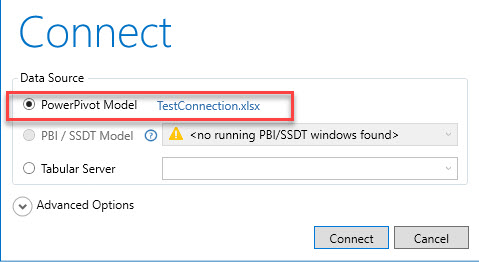
Click “Connect”.
After the connection is established, do not close DAX Studio, it must be
running. You can minimize it if you want.
Now all is
ready to connect.
Step 3: Go!
Now go to
the Power Query and connect to the «SQL Server Analysis Services database
(import)».
We need to know
the server address for it. If this connection was to some server or Power BI
Desktop, we could then see its address in the bottom right corner of DAX Studio
window:

But when connected to the Excel file, we see only this:

No server name, no address, no port number.
Now I
reveal the main secret:
You need to use http://localhost:9000/xmla as the server name/address. That’s all.
Of course, you can also use this database name (it is necessary to write it down if you want to use custom MDX or DAX query in connection): “Microsoft_SQLServer_AnalysisServices”

How did I
reveal this address is too TL;DR even for me 😊. You need to know that these server address and database name are always
the same, at least, at the time when I write this post, so you don’t need
to search for the server address every time.
When Power
Query asks you about the data source credentials, just use your current Windows
authorization (sorry if you cannot read the screenshot in Russian, just look which
options I selected):

Ta-dam!!!
Now you see the model, all its calculated columns and measures as the OLAP cube. You can build any tables you need from it.
If you are
familiar with MD cubes and their behavior, then you are ok 😊 If no, you will need some time to adjust to
cubes logic and use.
Read PowerPivot model from
Power BI
If for some
reason you do not want to import Excel data model in Power BI, you can use this
trick to connect to PowerPivot in Power BI Desktop. But again, only in import
mode, no live connection.
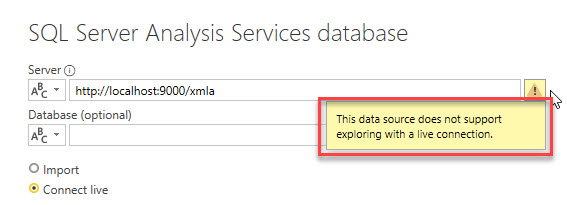
All the steps are THE SAME.
Purposes
For me,
this trick is one of the long “just because I can” list. To be honest, I do not
see any useful applications for this connection today. It is too tricky, limited
to manual refresh, and cannot be used across other workbooks. But if you have
an urgent need to extract some data from the Excel data model to PQ, you can
use this approach carefully. For example, you may need to do some data mashup
operations in Power Query, but some of them are too complex in Power Query and
have a very bad performance there (usually it is about mashups which require a
lot of scans of the same table), or there are other reasons to do some
calculations in DAX rather than in M. You can export mid-step results in the
data model and perform required calculations in PowerPivot, then read it again
in the Power Query.
Or you can use it to perform any suitable MDX or DAX query over your data:
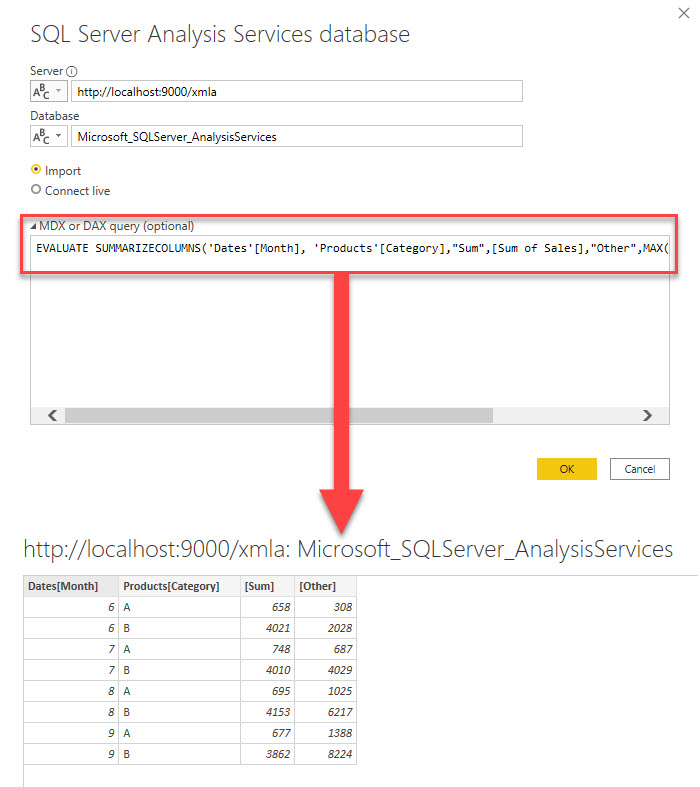
I think that there could be other needs which could be satisfied with this trick and which I did not meet yet. If you have some in mind do not hesitate to share.
Cautions and known
problems
- This is undocumented
- This is unsupported
- This could change any moment, no guarantee.
- When connecting from Power BI
Desktop, be sure that only one workbook is opened – at least, only one workbook
with data model in it - No, I do not know how to read PowerPivot
model in another workbook. All my attempts failed; you only see the data model
from this one workbook. - To get correct refresh order of your
queries and tables, you need to do it manually (or via VBA macro). Clicking “Refresh
All” button in Excel do not guarantee refresh order, so not all your changes
could be reflected correctly. Or press “Refresh All” twice.
There are a lot of other interesting things and pitfalls with this connection, but I don’t want to spend too much time on it now. At least not until I see a good reason or a use case for it.
Good luck!
Follow me:
Share this:
Yeah. Not really aware of a good way. I sometimes will use DAX Studio to export loaded tables to text files.
You could use the Power Query connector in Power Automate then use an export to file in a flow. You can write your Power Query code in Power BI desktop or Excel, then just copy the M code to Power Automate, assuming it has access to the files or data, either via cloud (SharePoint online) or the on prem Gateway.
Did I answer your question? Mark my post as a solution!
Did my answers help arrive at a solution? Give it a kudos by clicking the Thumbs Up!
DAX is for Analysis. Power Query is for Data Modeling
Proud to be a Super User!
MCSA: BI Reporting
Are you dealing with data from a bunch of different places and combine them on a regular basis to do analysis or reporting? Excel Power Query may be the solution you’re looking for! The best thing about this tool is that you can fully automate your data loading and cleaning procedures with a click of a button.
In this tutorial, you’ll learn what Power Query can do and how powerful its features really are. We also provide some practical examples that you can follow to understand basic data transformations using this tool. Let’s get started!
What is Power Query in Excel?
Power Query is a business intelligence tool in Excel used to carry out the ETL (Extract, Transform, and Load) process. This process involves getting data from a source, transforming it, then placing it to a destination for analysis. ETL is known as a crucial step in building a data warehouse, but actually, you’re doing ETL-like processes even if you’re just doing a weekly or monthly report.
What can Power Query do?
With Power Query, everyone can deliver meaningful insight quickly using Excel. There was a time when BI processes required dedicated teams of IT specialists, but not anymore. You can use Power Query as part of your self-service ETL solution to do the following tasks:
#1. Extract (connect and get) data from a source
Power Query allows you to connect instantly with a wide range of data in different formats and locations. Whether your data is in CSV, XML, JSON, or PDF formats, that’s not a problem. Your organization stores data in Azure SQL Database, IBM DB2, Oracle, or PostgreSQL? You can easily access them. Even if you use platforms such as Salesforce and MS Dynamics 365, just connect straight away without hassle!
#2. Transform your data to make it ready for analysis
After connecting to a data source, you may need to modify the data in several ways. Data transformation is the area where Power Query shines. This tool allows for a range of operations, from simple data transformation tasks to the most complex data restructuring challenges, in just a few clicks.
Examples of data transformation tasks:
- Data cleaning: Remove duplicates, change data types and formatting, filter rows, split columns, and pivot/unpivot columns.
- Data integration: Join or split source tables, add lookup keys, and aggregate data.
- Data enrichment: Extend the source data by creating calculated columns.
The ones mentioned above merely scratches the surface of all that Power Query can do to transform your data. The best thing about this tool is that you can automate those data transformation tasks using a code-free interface — without macro or VBA codes.
#3. Load transformed data into a worksheet or the Data Model
After your data is clean and ready for analysis, Power Query Excel gives you options to load your data into one or both of these destinations:
- A worksheet. By default, Power Query lands the output data directly in a new worksheet inside your Excel file. If you want, you can place data from each source into a separate worksheet and then do whatever you want with it, just as if it were “normal” Excel data.
- The Data Model. Your data is compressed and stored in memory. With this option, you can work with millions, tens of millions, even hundreds of millions of rows of data, exceeding the 1,048,576 row limit of an Excel worksheet!
The Data Model is normally used as the basis for pivot table output in Excel. Thus, it’s also referred to as the Power Pivot Data Model. This article won’t be covering the Data Model and Power Pivot in more detail, as those are broad subjects.
Why use Excel Power Query?
Not only does Power Query allow you to get and transform your data, but this tool also records all the steps applied.
You can refresh all the processes such as re-import the source data, reapply all the data filtering, sorting, and other transformations that you defined — in a single click. So, once all of that’s set up, you don’t need to create it again. Of course, you can also go back and edit each step, and even add steps in between.
This is all done within a tool you’re already familiar with: Excel.
Power Query in different versions of Excel
Power Query for Excel was initially released as an add-in to download and install for Excel 2010 and 2013. After you add Power Query to Excel, a new tab named Power Query will appear in the Excel ribbon.
This tool was fully integrated into Excel by the 2016 version and accessed under the Get & Transform section in the Data tab. So if you use the latest versions of Excel, you already have Power Query integrated within Excel.
The following image summarizes where you can find Power Query in different versions of Excel. Please note that each build of Excel may be slightly different — so you might see slightly different icons.
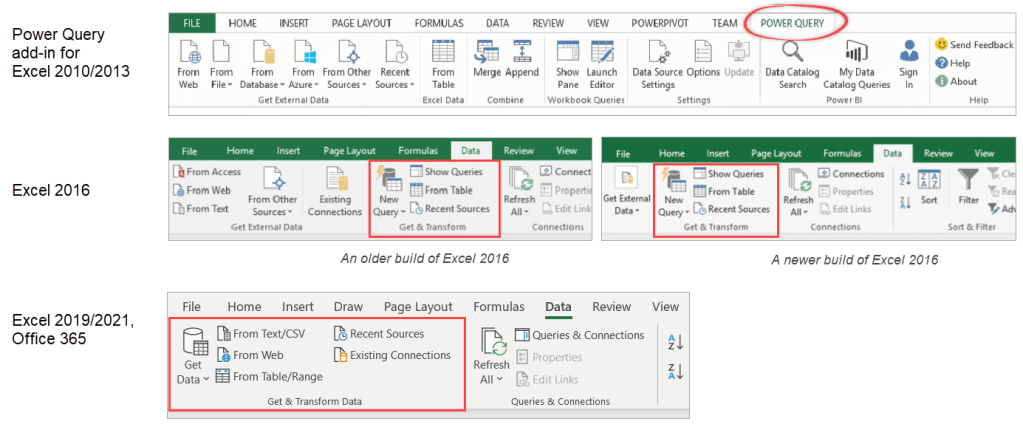
We use Office 365 in this tutorial, however, you can follow the steps described in this article with earlier versions of the product. The entry point into Power Query may be different, but this should not cause any significant difficulties.
Excel Power Query: Download sample files
We provide a small set of sample data used in the examples throughout this article. Just download files from this link to make it easier for you to follow along:
Download sample files
After that, put the CSVs in a folder, for example in “D:/Power Query/Sample files”.
How to use Power Query to GET and LOAD data into Excel
Let’s begin with a quick overview of Power Query’s list of data sources. After that, we’ll get some data into Excel and look into more detail about the Power Query interface.
Power Query list of data sources
Go to the Data tab and locate Power Query in the Get & Transform Data section. Click on the Get Data button — you will see a dropdown menu to select your data source:

Please note that the range of available Power Query data sources will depend on the version of Excel that you are using.
Data source options
- From File: Excel, TXT/CSV, XML, JSON, and PDF.
- From Database: SQL Server, Access, Oracle, DB2, MySQL, PostgreSQL, Sybase, Teradata, and SAP Hana.
- From Azure: Azure SQL Database, Azure Synapse Analytics, Azure HDInsight (HDFS), Azure Blob, Azure Table, and Azure Data Lake Storage.
- From Online Services: Sharepoint Online, Exchange Online, Dynamics 365, Salesforce Objects, and Salesforce Reports.
- From Other Sources: Excel Table/Range, Web, OData Feed, ODBC, OLEDB, Active Directory, etc.
If you take a closer look at the Get Data options, you will find that there are currently around 40 data sources for which Power Query connectors are available. However, even this number is small compared to the number of potential data sources out there.
What can you do if your data source is not among those currently available?
One solution is by using a generic data connector such as OData Feed, OLE DB, and ODBC. Another solution is to use an integration tool to help you seamlessly connect and get data from external apps into Excel. An example of this is by using Coupler.io, which is a solution to import data from various apps such as Airtable, Shopify, Jira, QuickBooks, Pipedrive, Hubspot, and more!
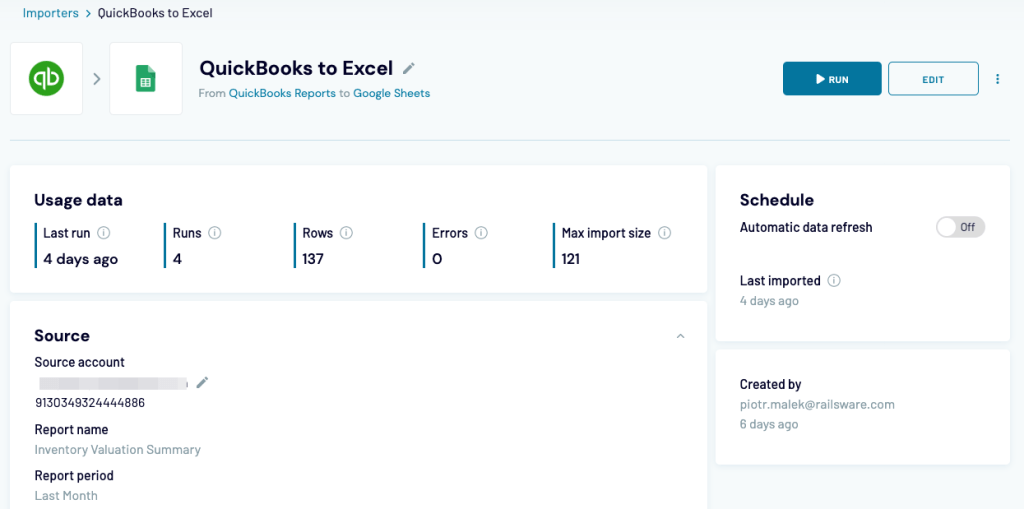
Check out the complete list of Coupler.io’s Excel integrations.
A simple example: Get data from CSV files into Excel using Power Query
In the following example, we will import data from two downloaded CSV files one by one and load them into new worksheets.
First, we’ll show you how to get and load Sales.csv directly into a new worksheet. After that, we’ll show you how to import Products.csv and open it in the Power Query Editor before loading it. Here are the steps:
- Open a new blank Excel workbook.
- Click the Data tab, then click the Get Data button in the Get & Transform Data section.
- In the dropdown, select From File > From TXT/CVS.
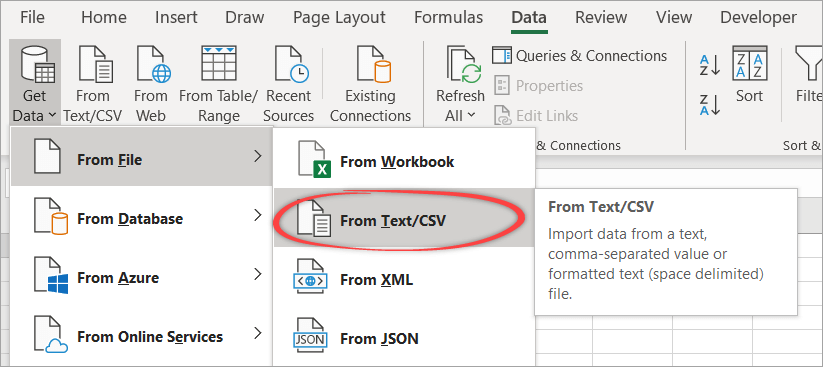
- Browse the folder where you downloaded the sample files. Then, select Sales.csv and click Import.

- In the Preview window, click Load to load the data into a new worksheet.
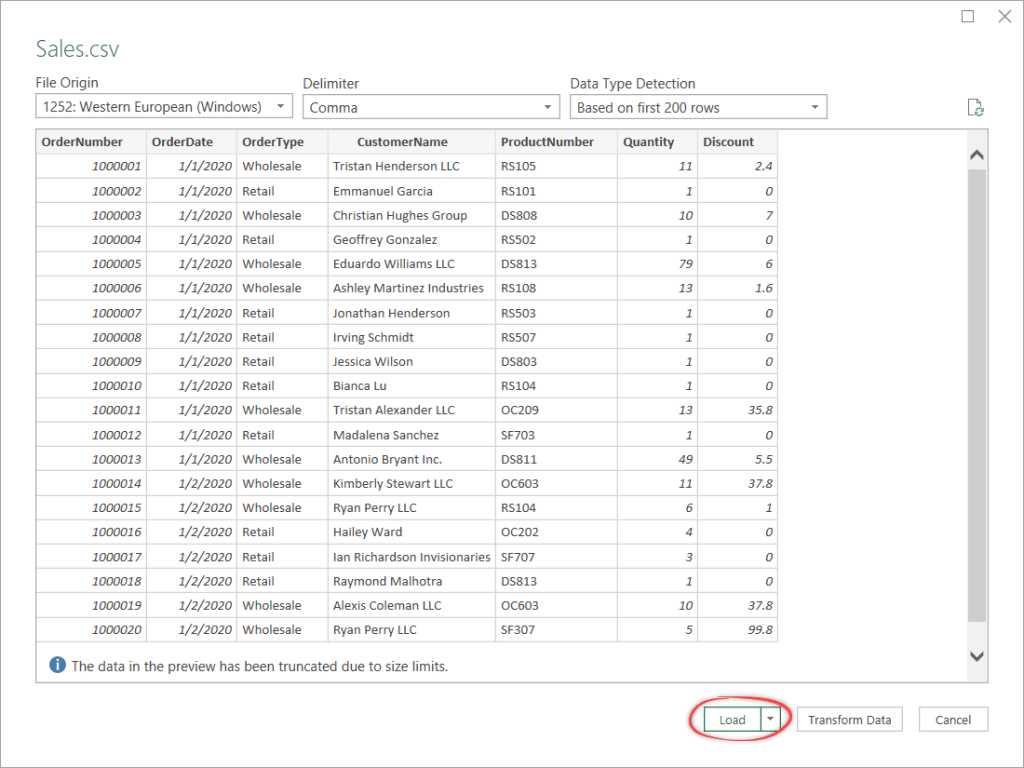
You will see a new worksheet inside the current workbook, as shown in the below screenshot. Your external data is now an Excel table. On the right pane, notice that there is a query to your data source listed there.

- Import Products.csv by repeating Steps 1-4 above, but this time, don’t forget to select Products.csv instead of Sales.csv.
- In the Preview window, click Transform Data.
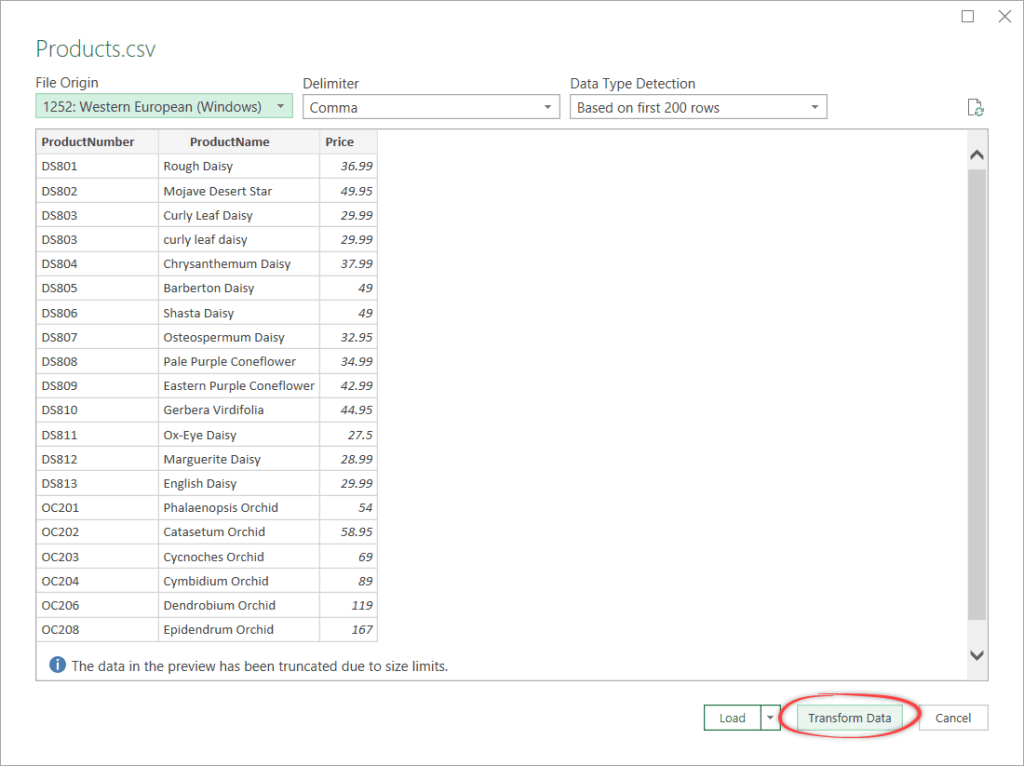
This will open the Power Query Editor as shown in the following screenshot:

As you can see, clicking Transform Data will bring you to a different, separate interface called Power Query Editor. This editor allows you to transform your data before loading it into a new worksheet.
We’ll cover more detail about the Power Query Editor in the next section. For now, let’s not do any data transformations here. We’ll continue to load the products data into a new worksheet from this editor.
- Click the small triangle icon in the Close & Load button in the Home tab. Select the first option in the dropdown.

Note: If you choose the second option, you’ll get more options to load your data — more about this in the Load To… options section.
As the final result, you will see a new worksheet created containing the Products table. If you notice, there are two queries listed on the right pane: Sales and Products.

You’ve learned how to get and load two CSV files directly to Excel using Power Query. By the way, you can do something similar using Coupler.io as it includes a CSV to Excel integration as well. You can even set up automatic data refresh on schedule, such as hourly, weekly, and monthly.
Try Coupler.io for free with the seamless Excel integration
Load To… options in Excel Power Query
As explained previously, Power Query provides you with two options to load data: to a worksheet and/or data model. If you want to load data into a worksheet, there are several variations if you choose the Load To… option:

As shown in the above dialog, you can:
- Load into an Excel named table (the default)
- Load into a pivot table based on the source data
- Load into a pivot chart based on the source data
- Only create a connection to the data, but do not load it yet
Notice that on top of this, you have the choice of whether you want to create the table of data, pivot table, or pivot chart in an existing or new worksheet.
If you also want to add the data to the Data Model, tick the Add this data to the Data Model checkbox.
Excel Power Query Editor
The Power Query Editor is a separate interface from Excel. All of your data transformations will happen in this editor, which can be launched in one of these two ways:
- Click the Get Data button then select Launch Power Query Editor…
- Double-click a query listed in the Queries & Connections pane.

Here are the six main elements of Power Query Editor:

- The Ribbon. It has 5 main tabs: File, Home, Transform, Add Column, and View.
- Query List. This pane contains all the queries that have been added to the current workbook. You can navigate to any query from this area to begin editing it.
- Data Preview. This area is where you can see a sample of the data for a selected query.
- Formula Bar. This area shows the M code of the current transformation step. Power Query records each of your transformation steps into the M code that you can see in this formula bar. Most of the time, you don’t need to use the M language directly at all.
- Properties. This is where you can see and edit the properties of your query. For example, you can rename your query, add a description to it, and enable fast data loading.
- Applied Steps. This area contains a list of steps used to transform data.
How to use Power Query to TRANSFORM data in Excel
The range of transformations that Power Query offers are wide and varied. It can be initially daunting if you’re unfamiliar with the feature set available in this tool, but don’t worry! We’ve selected some simple, practical examples for you:
Excel Power Query: Remove duplicates
An external source of data might not be as flawless as you expect. The presence of duplicates is one of the most annoying characteristics of poor quality data.
If you look closely at the Products table, you’ll notice two products with ProductNumber DS803.

To remove the above duplicates, follow the steps below:
- Launch the Power Query Editor and make sure to select the Products query.

- In the Home tab, click Remove Rows > Remove Duplicates.

- Notice that one of the rows with ProductNumber DS803 is now removed and a step added in the APPLIED STEPS pane:
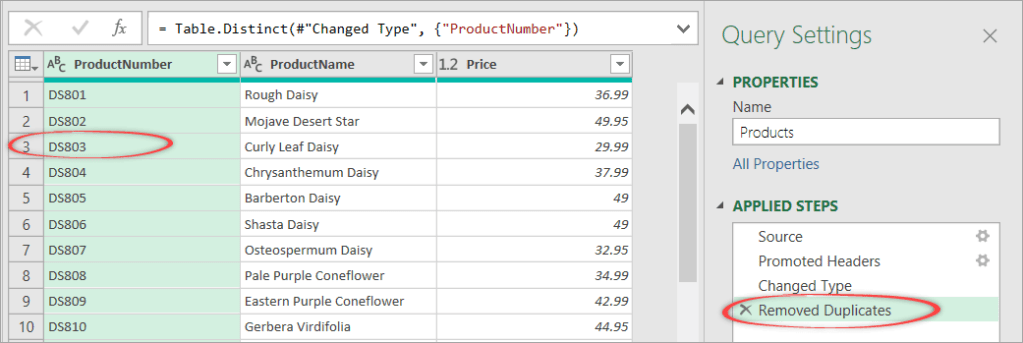
- Click the Close & Load button. This will refresh the Products table in your worksheet.
Excel Power Query: Create parameters for folder paths
In the Power Query Editor, let’s open the Products query and click on the first row “Source” in the APPLIED STEPS. You will see a hard-coded file path like shown below:

If you check on the Sales query, you’ll notice that it also uses a fixed value for the file path, i.e., D:Power QuerySample filesSales.csv
Changing the folder path to use a parameter can be a time-saver in the future. In case you need to move your files to another folder later, you’ll only need to change the parameter value once.
Let’s do the following steps to replace the hard-coded folder path with a parameter:
- In the Home tab, click Manage Parameters > New Parameter.

- Create a new parameter using the following details, then click OK.
- Name:
FolderPath - Required:
✔ - Type:
Text - Suggested Values:
Any value - Current Value:
D:Power QuerySample files
- Name:

- Select the Products query, then click “Source” in the APPLIED STEPS.
- In the formula bar, replace the folder path to use the FolderPath parameter:
FolderPath & "Products.csv"

- Now, select the Sales query, then click “Source” in the APPLIED STEPS.
- In the formula bar, replace the folder path to use the FolderPath parameter:
FolderPath & "Sales.csv"

Now, you’ve changed the file path of both queries to use the FolderPath parameter. Please be aware that the code in the formula bar is case-sensitive. Also, notice that you don’t need to enclose parameters with double quotes.
Excel Power Query: Adding a conditional column with IF statement
Suppose you want to create a new column, i.e., Category in the Products query, that tells you which category each product belongs to. The first 2 digits of the product number identify the product category based on the following rules:
- Product number begins with “DS” → Daisy
- Product number begins with “OC” → Orchid
- Product number begins with “RS” → Rose
- Product number begins with “SF” → Sunflower
Here’s how you can add the Category column:
- Open the Power Query Editor and select the Products query.
- Click the Add Column tab, then click Conditional Column.

- In the “Add Conditional Column” dialog that appears, enter the following details, then click OK when done.
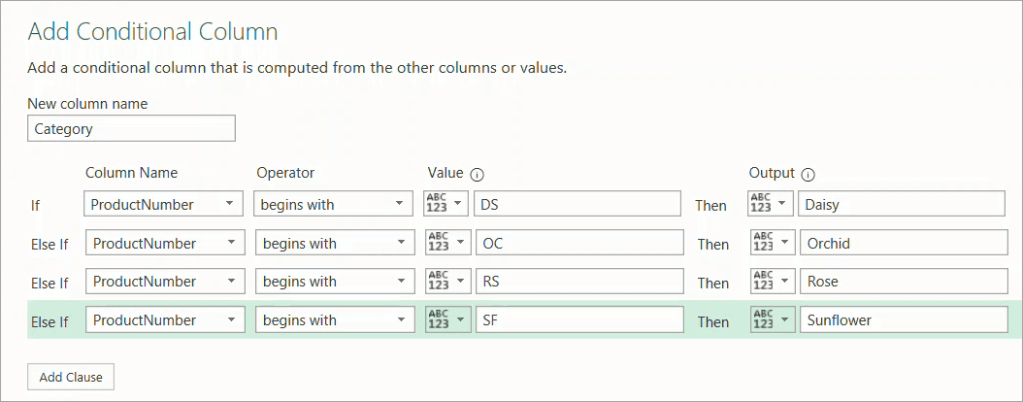
- Click File > Close & Load.
- Notice that your worksheet containing the Products table will have the new Category column, as shown below:

Excel Power Query: Drill-down to create parameters from cell
Suppose you want to be able to filter products by category from a cell as shown in the below image:

To pass the value from cell B3 to the query and use it to filter the products, follow the steps below:
- Create a new worksheet, e.g. Sheet4, then add the following details:
- Cell B2: A text “Category”.
- Cell B3: A dropdown containing a list of product categories: Daisy, Orchid, Rose, and Sunflower. You can create the dropdown using Data > Data Validation with details as follows:

- Click Data > From Table/Range.
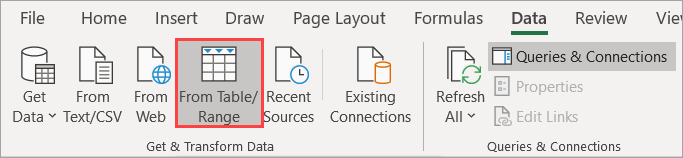
- In the “Create Table” dialog, enter the following details, then click OK.
- Table range:
=$B$2:$B$3 - My table has headers:
✔
- Table range:

- In the Power Query Editor that opens, rename the new query to CategoryFromCell.

- Right-click on the data and select Drill Down.
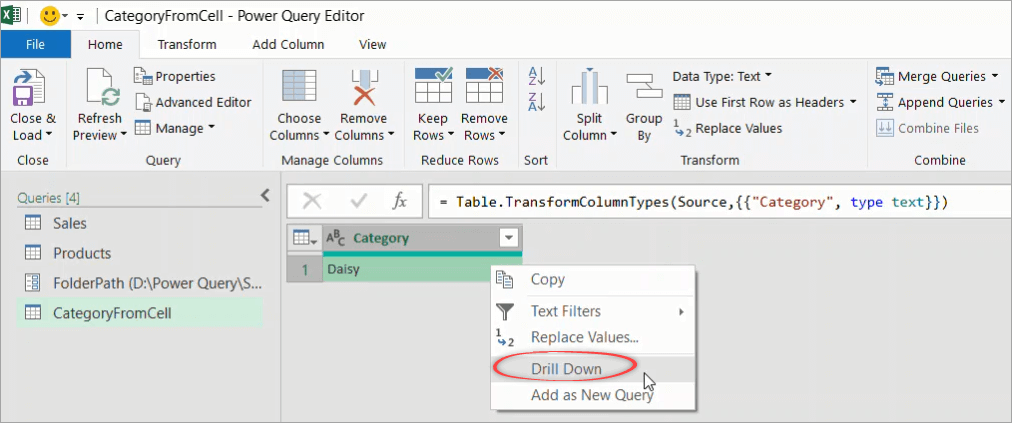
- Click File > Close & Load To…
- In the “Import Data” dialog, select Only Create Connection.
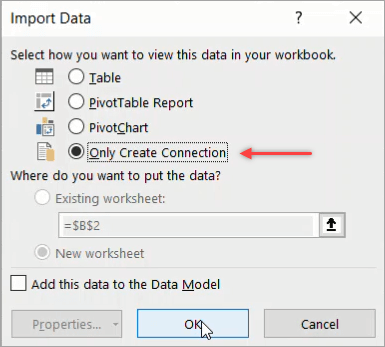
- Reopen the Power Query Editor.
- Right-click on the Products query and select Duplicate. Rename the new query as ProductsByCategory.

- Add a filter by category by selecting the small triangle icon in the Category column, then choose Text Filters > Equals.
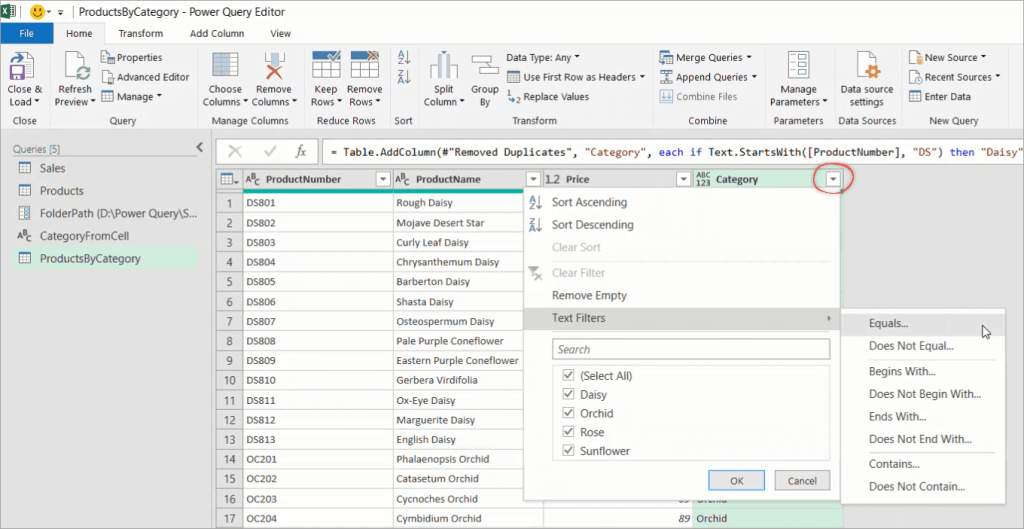
- In the Filter Rows dialog, type “Daisy”, then click OK.

- In the Formula Bar, change the text “Daisy” to use the CategoryFromCell parameter.

- Click File > Close & Load To… Then, in the “Import Data” dialog, select to load to the existing worksheet Sheet4!$B$5 and click OK when done.

Your final worksheet will look like this below. Test by changing the dropdown value to “Rose”, then click the Refresh All button.
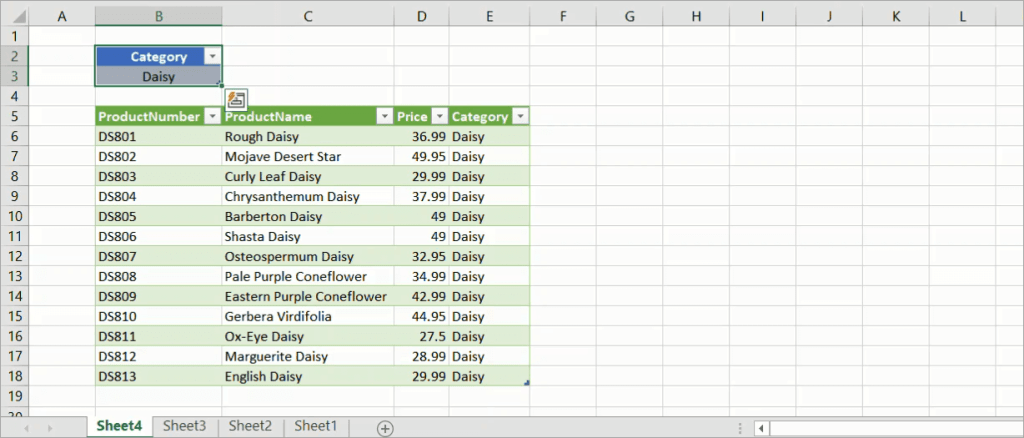
Excel Power Query: Merge tables
Merging queries allows you to join tables based on a key column. This is like using VLOOKUP Excel. For example, here we’re going to merge the Sales and Products queries into one. We will retrieve columns from the Products table (the lookup table) and pull them into the Sales table.
Here are the steps:
- Launch the Power Query Editor and select the Sales query.
- Click Merge Queries in the Home tab, then select Merge Queries as New.

Note: As you can see, you have two options for merging. You can either overwrite the current Sales query with additional columns or merge two queries as a new one to keep your current Sales table unchanged.
- In the “Merge” dialog box, select Products as the second table. Then, select the ProductNumber column for both tables and click OK.

- If you want, rename the new query as ProductSales_Merge by changing the query name in the Properties pane.
- Expand the Products table and select ProductName, Price, and Category columns to include in the query.

- If you want, reorder the columns by moving them to the position you want, the same way you move columns in Excel.
Here’s an example after we moved the ProductNumber, Category, and Price columns before the Quantity and Discount columns.
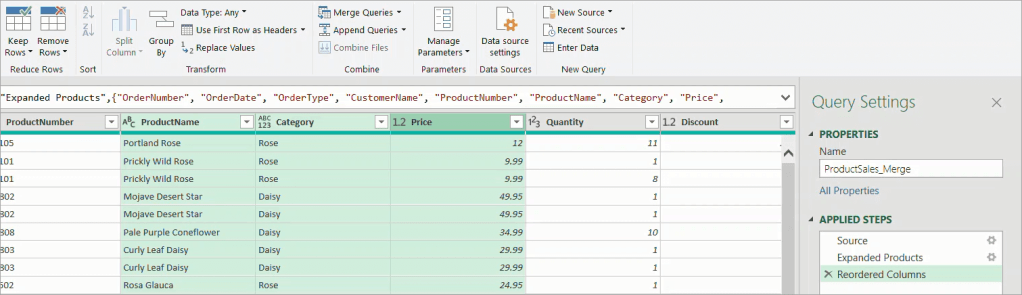
- Click File > Close & Load to load the query into a new worksheet.
Excel Power Query: Using formulas
Suppose that in the ProductSales_Merge query, we want to add a new column OrderTotal which is calculated from other columns using this formula:
OrderTotal = Price * Quantity - DiscountTo do that, follow the steps below:
- Launch the Power Query Editor and select the ProductSales_Merge query.
- In the Add Column tab, click Custom Column.
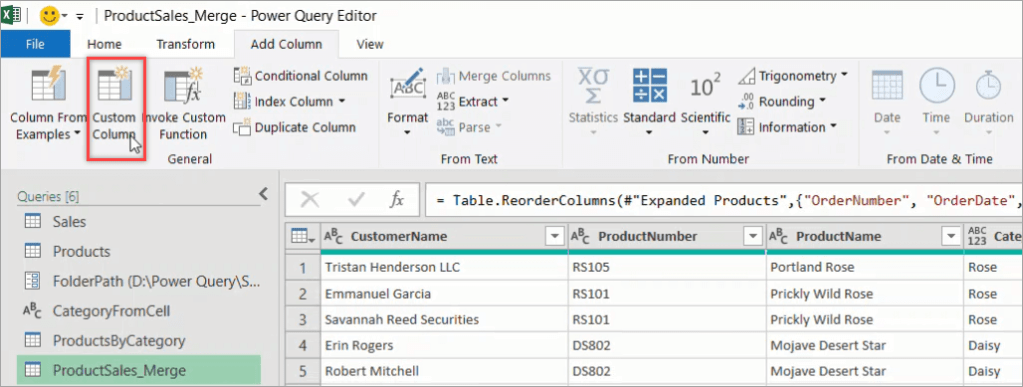
- In the “Custom Column” dialog that appears, enter the following details then click OK.
- New column name:
OrderTotal - Custom column formula: =
[Price] * [Quantity] - [Discount]
- New column name:
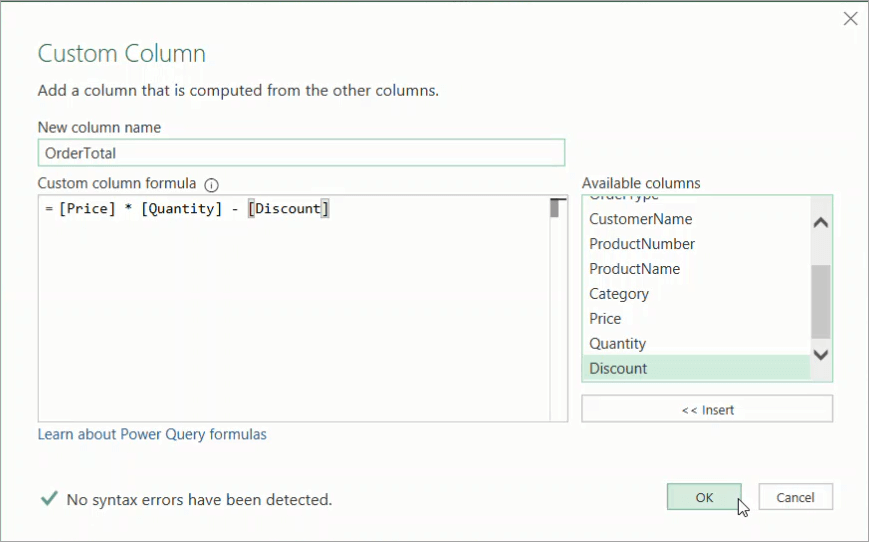
- Notice that a new column OrderTotal was added:

- Click File > Close & Load.
Excel Power Query: Using functions
In this last example, we’ll show you how to use functions in Power Query. We’ll add a new column Quarter that represents the number of the quarter from the order dates.
- Launch the Power Query Editor and select the ProductSales_Merge query.
- In the Add Column tab, click Custom Column.
- In the “Custom Column” dialog that appears, enter the following details, then click OK.
- New column name:
Quarter - Custom column formula:
= "Q"&Number.ToText(Date.QuarterOfYear([OrderDate]))
- New column name:

Explanation:
The Date.QuarterOfYear() function returns the number of the quarter (1-4) from a date, while the Number.ToText() function converts a number to text format.
- Notice that a new column Quarter was added.

- Click File > Close & Load to refresh your worksheet.
What’s next?
We’ve covered the basics of how you can use Excel Power Query to get, transform, and load data in Excel. We hope this tutorial has given you a great starting point working with Excel Power Query. Be sure to continue learning about Excel’s Data Model and Power Pivot if you want to master Business Intelligence using Excel.
In addition to importing your data into Excel, take a look at Coupler.io. This excellent integration tool may be a great solution you need if your data source is not among those currently available in Power Query. With this tool, you can import data from different apps into Excel — no coding required. You can also automate the import process on the schedule you want!
-

Senior analyst programmer

Back to Blog
Focus on your business
goals while we take care of your data!
Try Coupler.io
Постановка задачи
Давайте разберем красивое решение для одной из весьма стандартных ситуаций, с которой рано или поздно сталкивается большинство пользователей Excel: нужно быстро и автоматически собрать данные из большого количества файлов в одну итоговую таблицу.
Предположим, что у нас есть вот такая папка, в которой содержится несколько файлов с данными из филиалов-городов:

Количество файлов роли не играет и может меняться в будущем. В каждом файле есть лист с именем Продажи, где расположена таблица с данными:

Количество строк (заказов) в таблицах, само-собой, разное, но набор столбцов везде стандартный.
Задача: собрать данные из всех файлов в одну книгу с последующим автоматическим обновлением при добавлении-удалении файлов-городов или строк в таблицах. По итоговой консолидированной таблице затем можно будет строить любые отчеты, сводные таблицы, фильтровать-сортировать данные и т.д. Главное — суметь собрать.
Подбираем оружие
Для решения нам потребуется последняя версия Excel 2016 (в нее нужный функционал уже встроен по умолчанию) или предыдущие версии Excel 2010-2013 с установленной бесплатной надстройкой Power Query от Microsoft (скачать ее можно здесь). Power Query — это супергибкий и супермощный инструмент для загрузки в Excel данных из внешнего мира с последующей их зачисткой и обработкой. Power Query поддерживает практически все существующие источники данных — от текстовых файлов до SQL и даже Facebook 
Если у вас нет Excel 2013 или 2016, то дальше можно не читать (шучу). В более древних версиях Excel подобную задачу можно реализовать только программированием макроса на Visual Basic (что весьма непросто для начинающих) или монотонным ручным копированием (что долго и порождает ошибки).
Шаг 1. Импортируем один файл как образец
Для начала давайте импортируем данные из одной книги в качестве примера, чтобы Excel «подхватил идею». Для этого создайте новую пустую книгу и…
- если у вас Excel 2016, то откройте вкладку Данные и выберите Создать запрос — Из файла — Из книги (Data — New Query- From file — From Excel)
- если у вас Excel 2010-2013 с установленной надстройкой Power Query, то откройте вкладку Power Query и выберите на ней Из файла — Из книги (From file — From Excel)
Затем в открывшемся окне переходим в нашу папку с отчетами и выбираем любой из файлов-городов (не играет роли какой именно, т.к. они все типовые). Через пару секунд должно появиться окно Навигатор, где нужно в левой части выбрать требуемый нам лист (Продажи), а в правой отобразится его содержимое:

Если нажать в правом нижнем углу этого окна кнопку Загрузить (Load), то таблица будет сразу импортирована на лист в исходном виде. Для одиночного файла — это хорошо, но нам нужно загрузить много таких файлов, поэтому мы пойдем немного другим путем и жмем кнопку Правка (Edit). После этого должен в отдельном окне отобразиться редактор запросов Power Query с нашими данными из книги:

Это очень мощный инструмент, позволяющий «допилить» таблицу под нужный нам вид. Даже поверхностное описание всех его функций заняло бы под сотню страниц, но, если совсем кратко, то с помощью этого окна можно:
- отфильтровывать ненужные данные, пустые строки, строки с ошибками
- сортировать данные по одному или нескольким столбцам
- избавляться от повторов
- делить слипшийся текст по столбцам (по разделителям, количеству символов и т.д.)
- приводить текст в порядок (удалять лишние пробелы, исправлять регистр и т.д.)
- всячески преобразовывать типы данных (превращать числа как текст в нормальные числа и наоборот)
- транспонировать (поворачивать) таблицы и разворачивать двумерные кросс-таблицы в плоские
- добавлять к таблице дополнительные столбцы и использовать в них формулы и функции на встроенном в Power Query языке М.
- …
Для примера, давайте добавим к нашей таблице столбец с текстовым названием месяца, чтобы потом проще было строить отчеты сводных таблиц. Для этого щелкните правой кнопкой мыши по заголовку столбца Дата и выберите команду Дублировать столбец (Duplicate Column), а затем щелкните правой кнопкой мыши по заголовку появившегося столбца-дубликата и выберите команды Преобразование — Месяц — Название месяца:

Должен образоваться новый столбец с текстовыми названиями месяца для каждой строки. Дважды щелкнув по заголовку столбца, его можно переименовать из Копия Дата в более удобное Месяц, например.

Если в каких-то столбцах программа не совсем корректно распознала тип данных, то ей можно помочь, щелкнув по значку формата в левой части каждого столбца:

Исключить строки с ошибками или пустые строки, а также ненужных менеджеров или заказчиков можно с помощью простого фильтра:

Причем все выполненные преобразования фиксируются в правой панели, где их всегда можно откатить (крестик) или изменить их параметры (шестеренка):

Легко и изящно, не правда ли?
Шаг 2. Преобразуем наш запрос в функцию
Чтобы впоследствии повторить все сделанные преобразования данных для каждой импортируемой книги, нужно преобразовать наш созданный запрос в функцию, которая затем будет применяться, по очереди, ко всем нашим файлам. Сделать это, на самом деле, очень просто.
В редакторе запросов перейдите на вкладку Просмотр и нажмите кнопку Расширенный редактор (View — Advanced Editor). Должно открыться окно, где все наши предыдущие действия будут записаны в виде кода на языке М. Обратите внимание, что в коде жестко прописан путь к файлу, который мы импортировали для примера:

Теперь аккуратно вносим пару правок:

Смысл их прост: первая строка (filepath)=> превращает нашу процедуру в функцию с аргументом filepath, а ниже мы меняем фиксированный путь на значение этой переменной.
Все. Жмем на Готово и должны увидеть вот это:

Не пугайтесь, что пропали данные — на самом деле все ОК, все так и должно выглядеть Мы успешно создали нашу пользовательскую функцию, где запомнился весь алгоритм импорта и обработки данных без привязки к конкретному файлу. Осталось дать ей более понятное имя (например getData) на панели справа в поле Имя и можно жать Главная — Закрыть и загрузить (Home — Close and Load). Обратите внимание, что в коде жестко прописан путь к файлу, который мы импортировали для примера.. Вы вернетесь в основное окно Microsoft Excel, но справа должна появиться панель с созданным подключением к нашей функции:

Шаг 3. Собираем все файлы
Все самое сложное — позади, осталась приятная и легкая часть. Идем на вкладку Данные — Создать запрос — Из файла — Из папки (Data — New Query — From file — From folder) или, если у вас Excel 2010-2013, аналогично на вкладку Power Query. В появившемся окне указываем папку, где лежат все наши исходные файлы-города и жмем ОК. Следующим шагом должно открыться окно, где будут перечислены все найденные в этой папке (и ее подпапках) файлы Excel и детализация по каждому из них:

Жмем Изменить (Edit) и опять попадаем в знакомое окно редактора запросов.
Теперь нужно добавить к нашей таблице еще один столбец с нашей созданной функцией, которая «вытянет» данные из каждого файла. Для этого идем на вкладку Добавить столбец — Пользовательский столбец (Add Column — Add Custom Column) и в появившемся окне вводим нашу функцию getData, указав для ее в качестве аргумента полный путь к каждому файлу:

После нажатия на ОК созданный столбец должен добавиться к нашей таблице справа.
Теперь удалим все ненужные столбцы (как в Excel, с помощью правой кнопки мыши — Удалить), оставив только добавленный столбец и столбец с именем файла, т.к. это имя (а точнее — город) будет полезно иметь в итоговых данных для каждой строки.
А теперь «вау-момент» — щелкнем мышью по значку со своенным стрелками в правом верхнем углу добавленного столбца с нашей функцией:

… снимаем флажок Использовать исходное имя столбца как префикс (Use original column name as prefix)и жмем ОК. И наша функция подгрузит и обработает данные из каждого файла, следуя записанному алгоритму и собрав все в общую таблицу:

Для полной красоты можно еще убрать расширения .xlsx из первого столбца с именами файлов — стандартной заменой на «ничего» (правой кнопкой мыши по заголовку столбца — Заменить) и переименовать этот столбец в Город. А также подправить формат данных в столбце с датой.
Все! Жмем на Главной — Закрыть и загрузить (Home — Close & Load). Все собранные запросом данные по всем городам будут выгружены на текущий лист Excel в формате «умной таблицы»:

Созданное подключение и нашу функцию сборки не нужно никак отдельно сохранять — они сохраняются вместе с текущим файлом обычным образом.
В будущем, при любых изменениях в папке (добавлении-удалении городов) или в файлах (изменение количества строк) достаточно будет щелкнуть правой кнопкой мыши прямо по таблице или по запросу в правой панели и выбрать команду Обновить (Refresh) — Power Query «пересоберет» все данные заново за несколько секунд.
P.S.
Поправка. После январских обновлений 2017 года Power Query научился собирать Excel’евские книги сам, т.е. не нужно больше делать отдельную функцию — это происходит автоматически. Таким образом второй шаг из этой статьи уже не нужен и весь процесс становится заметно проще:
- Выбрать Создать запрос — Из файла — Из папки — Выбрать папку — ОК
- После появления списка файлов нажать Изменить
- В окне редактора запросов развернуть двойной стрелкой столбец Binary и выбрать имя листа, который нужно взять из каждого файла
И все! Песня!
Ссылки по теме
- Редизайн кросс-таблицы в плоскую, подходящую для построения сводных таблиц
- Построение анимированной пузырьковой диаграммы в Power View
- Макрос для сборки листов из разных файлов Excel в один
Previously, we looked at how to import data from various file formats and load it into Excel using Power Query. In this post, we move on to consider how to refresh that data. Refreshing data is important as it enables us to build a query once and use it over and over (that is automation in action).
Download the example file
I recommend you download the example file for this post. Then you’ll be able to work along with examples and see the solution in action, plus the file will be useful for future reference.
![]()
Download the file: 0090 – Refresh Power Query.zip
The download includes 2 files:
- Example 6 – Data Refresh 1.csv
- Example 6 – Data Refresh 2.csv
Unlike Excel’s calculation engine, which by default re-calculates with every worksheet change, Power Query only recalculates when specifically told to.
The basic refresh process is straightforward, click Data > Refresh All. However, there are lots of options to customize the refresh, and optimize it for your scenario. We look at the refresh options later in this post also.
The following examples, use Example 6 – Data Refresh 1.csv and Example 6 – Data Refresh 2.csv from the downloads.
Create a basic query
To demonstrate the data refresh capabilities of Power Query we first need to create a query.
To work along with the example, open a new workbook and click Data > From Text/CSV (also available under Data> Get Data > From File > From Text/CSV).
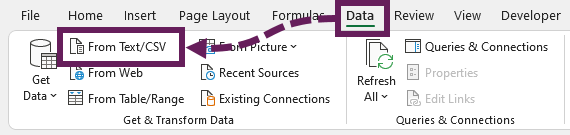
The Import Data window opens. Navigate to Example 6 – Data Refresh 1.csv, select it and click Import.
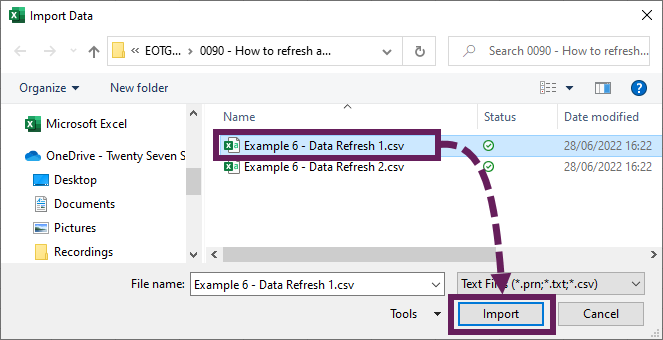
A new dialog box opens and displays a sample of the data. Click Transform Data.
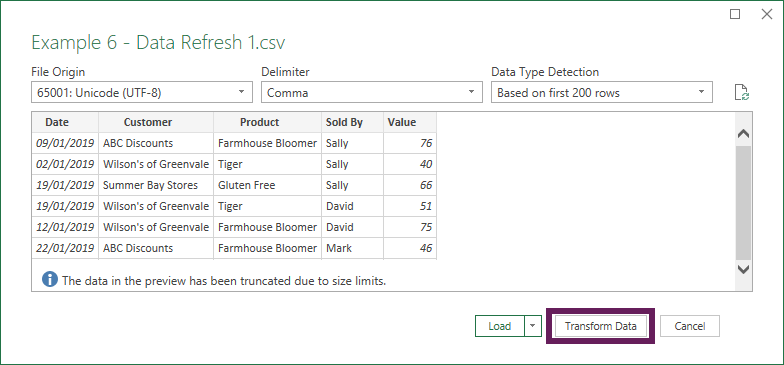
This loads the sample data into the preview window.
Simple transformations
We will now make some simply data transformations to shape the CSV into useful information. This is the first time in this series we are performing some of these transformations, so it’s a good idea to follow along and get an understanding of the user interface. We will definitely be using these transformations again in the future.
Delete the Changed Type step
The first step to undertake is deleting the Changed Type step by clicking on the cross next to the step.
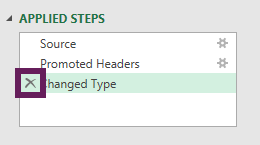
There are specific issues with dates in Power Query. The CSV file has UK date format of dd/mm/yyyy, but if your region does not accept that date format it may result in errors for you. Therefore, we delet the auto applied Changed Type step which may cause this issue.
Apply date based on Locale
To get a valid date format for your region:
- Click on the ABC icon in the header of the Date column
- From the menu select Using Locale….
- In the Change Type with local dialog box apply the following:
- Data Type: Date
- Locale: English (United Kingdom)
Click OK.
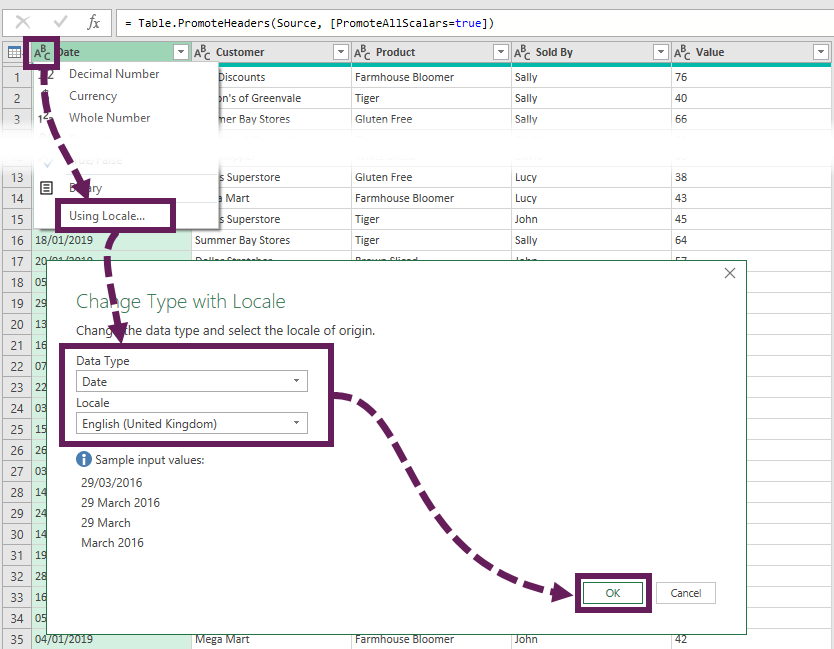
This tells Power Query that the column contains a UK date format.
Change data types
Now, let’s re-apply the default data type for the remaining columns. Click Customer, hold the Shift key and click Value. Then, click Transform > Detect Data Type from the ribbon.
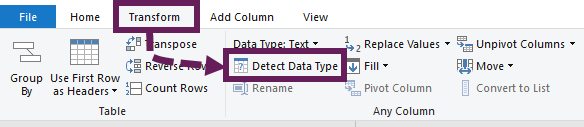
Power Query should now have the correct data types for every column.
Change date to month end date
We are creating a report based on month-end dates, so let’s change the date. Click on the Date column. From the ribbon, click Transform > Date > Month > End of Month (this will change the Date column to the last day in the calendar month).
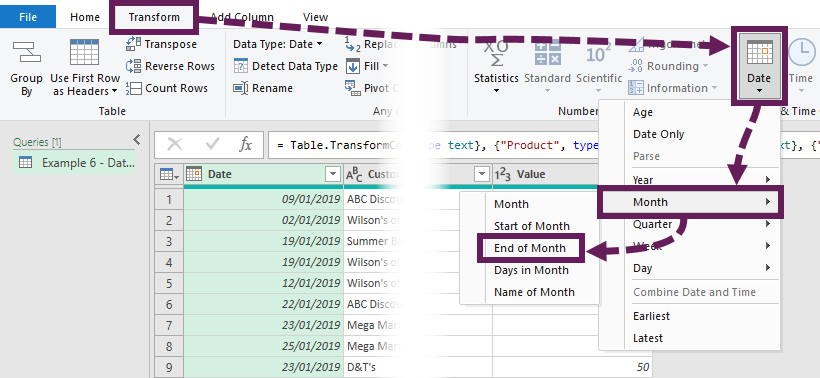
Remove columns
There are two columns we don’t need for our example. Select the Product and Sold By columns. From the ribbon click Home > Remove Columns (this removes the selected columns).
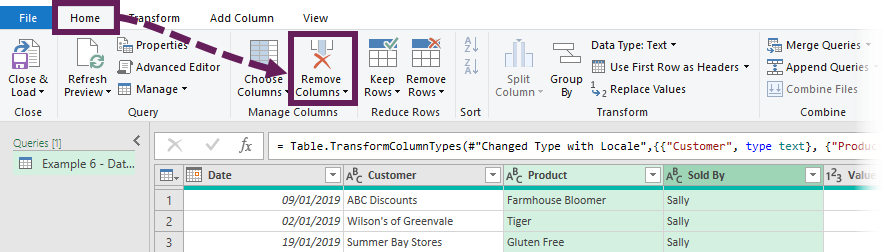
Pivot the data
Now let’s pivot on the data. Select the Date column and click Transform > Pivot Column.
The Pivot Column dialog opens. Apply the following settings:
- Change the Values Column to Value (this is column to be aggregated)
- In the advanced options section set the Aggregate Value Function to Sum
- Click OK
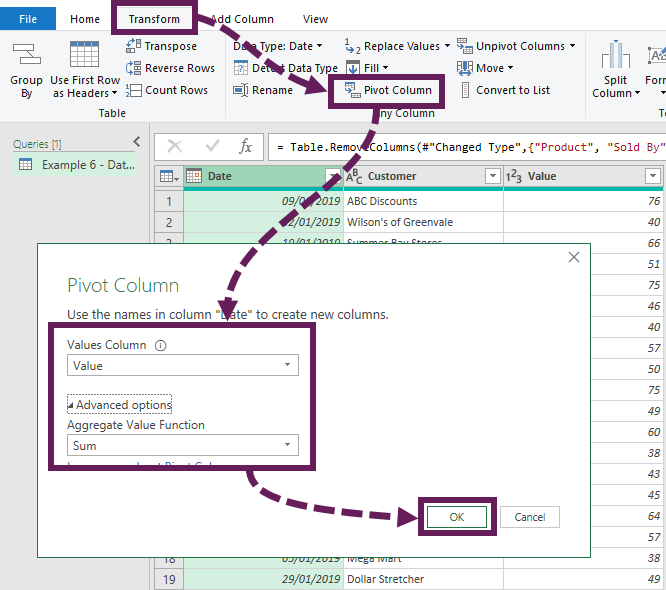
Finally, click Home > Close & Load (drop-down) > Close & Load To…
Then, in the Import Data dialog box select a Table on a new worksheet, click OK.
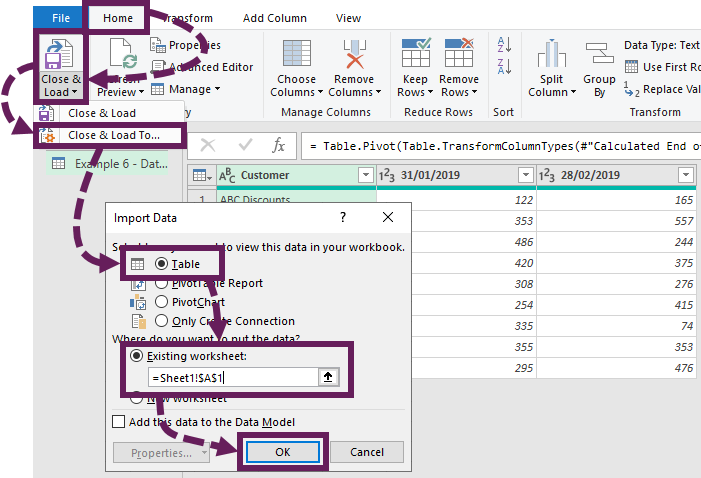
Excel creates a new worksheet with a report containing the customer sales for January and February. This table contains the data from the CSV, which has been transformed. It should look like the screenshot below.
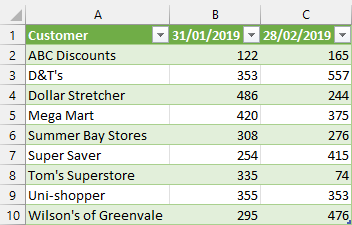
Refresh the query
To demonstrate the refresh process, we are simulating where a user might receive a new file on a daily, weekly, or monthly basis.
- Delete the Example 6 – Data Refresh 1.csv file
- Rename the Example 6 – Data Refresh 2.csv file to Example 6 – Data Refresh 1.csv
When we refresh, Power Query looks for a file called Example 6 – Data Refresh 1.csv. It doesn’t know it is a different file. In fact, we don’t want Power Query to know it’s been replaced, we just want it to process what is there.
Click Data > Refresh All.
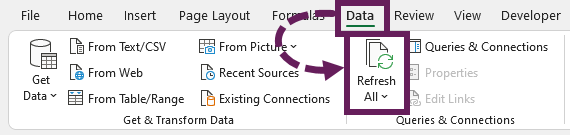
In the background, Excel imports the data from the CSV file, the same transformations are applied, and the data is loaded into the worksheet as a Table.
The new data should appear automatically on the worksheet.
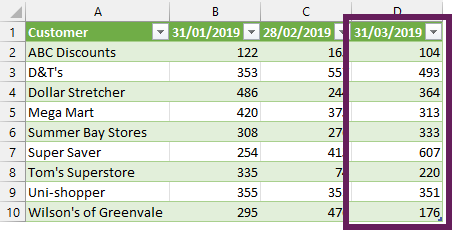
Did you notice the March data appeared with a single click, that is amazing!
Each time there is a change to the existing data, or when a new file is received, it is only necessary to save the file with the same file path, then click one button. That is powerful stuff… right?
In a future post, we will look at linking the file path to a cell, so you can import without having to rename any files.
Using VBA for refresh all
The VBA code to refresh all queries is the same as refreshing all PivotTables. Enter the code snippet below into a standard VBA code module.
Sub RefreshAll()
ActiveWorkbook.RefreshAll
End Sub
If we attach this macro to a shape or form control button, we create a simple user interface for anybody using our workbook to refresh queries.
Refresh specific queries
When we have lots of queries within a workbook, it can take a while to refresh them all. In these circumstances, it may useful to refresh only the queries we need. There are a few ways to achieve this.
Refresh button
If you click on a Table, which comes from a query, we can click Data > Refresh All (drop-down) > Refresh to refresh only that specific query.
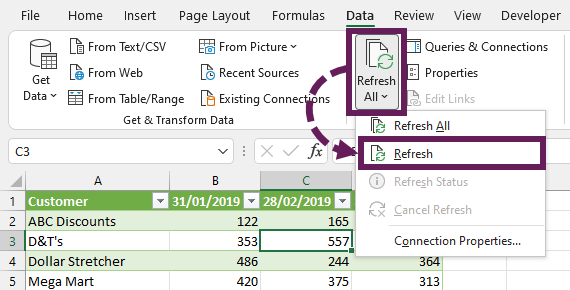
Queries & connections menus
When loading the data from Power Query into Excel, the Queries and Connections menu opened. This window shows all the queries created in the workbook. If that menu is not open, click Data > Queries and Connections
Each query listed in Queries and Connection has a refresh icon. Simply click the icon to refresh the data for that query. Alternatively, we can right-click on the query and select Refresh from the menu.
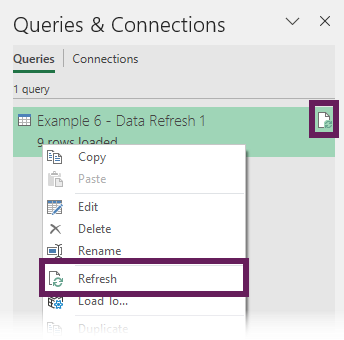
VBA refresh
With a VBA macro, we can refresh individual queries. The code snippet below refreshes the Example 6 – Data Refresh 1 query.
Sub RefreshQuery()
ActiveWorkbook.Connections("Query - Example 6 - Data Refresh 1").Refresh
End Sub
This is a useful technique when:
- we want to provide an easy-to-use interface for the user
- we want to control the query refresh order
Advanced refresh options
As more queries are added to a workbook, it can soon become time-consuming to refresh individual queries, or too slow to refresh them all. The good news is that Excel already has advanced options to control refresh.
Select a cell within a query Table, then click Data > Refresh All (Drop Down) > Connection Properties. Or right-click on the query in the Queries and Connections pane and click Properties…
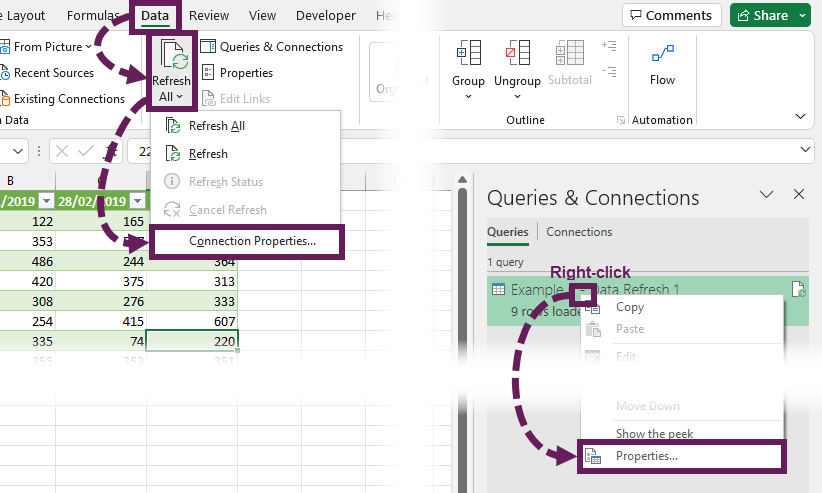
The Query Properties window opens.
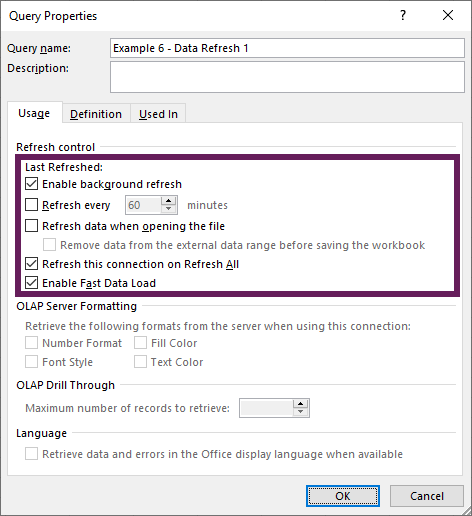
The important refresh options available in this window are:
Background refresh – This allows us to keep working while the data refreshes in the background. It is turned on by default. If we remove this option, we are unable to use Excel until the refresh process completes.
This option has bigger consequences though. If we have background refresh enabled:
- PivotTables refresh before Power Query. This is a problem if our PivotTable is based on a query; it means we must click refresh twice.
- Macros may execute before the query refresh has completed.
If background refresh is disabled, the refresh occurs in the correct order; PivotTables update and VBA macros execute after the query has refreshed. While it might lock up Excel for a short period of time, it is better to know the data is correct. Generally, I recommend disabling background refresh for all queries.
Refresh every x minutes – This option controls how often a query is refreshed. This only operates if the workbook is open. It is useful when the source data is regularly changing. It is probably a good idea only to use this option with the background refresh enabled, or it could become very annoying for users to wait for Excel to update on a regular basis.
Refresh when opening the file – Automatically refreshing data when opening the file is a useful feature as you know the data is up-to-date whenever you open the file.
Refresh this connection on Refresh All – Where a query contains static data, there is no need to refresh it every time. By disabling the Refresh this connection on Refresh All option, it removes these queries from the Refresh All process, which in turn, reduces the refresh time.
Enable Fast Data Load – We all want data to load faster, right? So why would you not click the Enable Fast Data Load option? Well… it may make Excel lockup for periods of time on loading, but it will make the data load faster. A study by Andrew Moss indicated that time savings for Fast Data load were 18%-33%. Personally, I always want the most up-to-date data, so recommend having this checked.
Power Query refresh in Excel Online
At the time of writing, Microsoft has started making progress with bringing Power Query to Excel Online. At present we can only refresh a small number of data sources:
- From Table/Range
- From Anonymous OData Feeds
There is still a long way to go before Power Query is fully available in Excel online.
Find more info here: https://techcommunity.microsoft.com/t5/excel-blog/new-in-excel-for-the-web-power-query-refresh-is-now-generally/ba-p/3300369
Wrap-up
This post shows us how to refresh Power Query. When refreshing, data is re-imported and follows the same transformation steps. Through this, Power query enables us to automate all of these steps down to a single click.
Read more posts in the Introduction to Power Query series
- Introduction to Power Query
- Get data into Power Query – 5 common data sources
- DataRefresh Power Query in Excel: 4 ways & advanced options
- Use the Power Query editor to update queries
- Get to know Power Query Close & Load options
- Power Query Parameters: 3 methods
- Common Power Query transformations (50+ powerful transformations explained)
- Power Query Append: Quickly combine many queries into 1
- Get data from folder in Power Query: combine files quickly
- List files in a folder & subfolders with Power Query
- How to get data from the Current Workbook with Power Query
- How to unpivot in Excel using Power Query (3 ways)
- Power Query: Lookup value in another table with merge
- How to change source data location in Power Query (7 ways)
- Power Query formulas (how to use them and pitfalls to avoid)
- Power Query If statement: nested ifs & multiple conditions
- How to use Power Query Group By to summarize data
- How to use Power Query Custom Functions
- Power Query – Common Errors & How to Fix Them
- Power Query – Tips and Tricks

About the author
Hey, I’m Mark, and I run Excel Off The Grid.
My parents tell me that at the age of 7 I declared I was going to become a qualified accountant. I was either psychic or had no imagination, as that is exactly what happened. However, it wasn’t until I was 35 that my journey really began.
In 2015, I started a new job, for which I was regularly working after 10pm. As a result, I rarely saw my children during the week. So, I started searching for the secrets to automating Excel. I discovered that by building a small number of simple tools, I could combine them together in different ways to automate nearly all my regular tasks. This meant I could work less hours (and I got pay raises!). Today, I teach these techniques to other professionals in our training program so they too can spend less time at work (and more time with their children and doing the things they love).
Do you need help adapting this post to your needs?
I’m guessing the examples in this post don’t exactly match your situation. We all use Excel differently, so it’s impossible to write a post that will meet everybody’s needs. By taking the time to understand the techniques and principles in this post (and elsewhere on this site), you should be able to adapt it to your needs.
But, if you’re still struggling you should:
- Read other blogs, or watch YouTube videos on the same topic. You will benefit much more by discovering your own solutions.
- Ask the ‘Excel Ninja’ in your office. It’s amazing what things other people know.
- Ask a question in a forum like Mr Excel, or the Microsoft Answers Community. Remember, the people on these forums are generally giving their time for free. So take care to craft your question, make sure it’s clear and concise. List all the things you’ve tried, and provide screenshots, code segments and example workbooks.
- Use Excel Rescue, who are my consultancy partner. They help by providing solutions to smaller Excel problems.
What next?
Don’t go yet, there is plenty more to learn on Excel Off The Grid. Check out the latest posts:
Power Query — это инструмент для продвинутого бизнес-анализа, предназначенный для подключения к источникам данных и их преобразования.
Несмотря на то, что данные в Excel можно загружать с помощью инструментов Power Pivot, возможностей для преобразования и доступных источников данных в Power Query намного больше и работа с ними проще. Итак, теперь для обработки таблиц и подключения к данным больше не нужны сложные формулы и макросы.

Power Query в меню Excel
В зависимости от того, какая у вас версия Excel, вид надстройки Power Query может выглядеть по-разному. В Excel 2010 и 2013 надстройка появляется в виде отдельной вкладки «Power Query» (если у вас такой вкладки нет, прочитайте, как ее установить).
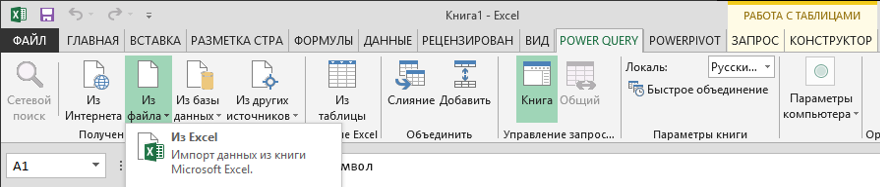
В Excel после 2016 года Power Query уже встроен по умолчанию и находится в меню Данные → раздел Получить и преобразовать данные (в некоторых версиях Excel этот раздел называется Скачать & преобразовать).

Работа с данными в Power Query
Power Query умеет:
- напрямую подключаться к данным в различных источниках;
- очищать данные и выполнять преобразования;
- подготовленные данные выгружать на лист, в сводную таблицу или добавлять в модель данных Excel.
Таким образом, Power Query – это полноценный ETL-инструмент (Extract, Transform, Load).
Подключение к данным в Power Query
В Power Query можно подключать данные из самых разных источников: таблицы в самом файле и других Excel-файлах, текстовые/csv файлы, папки, базы данных, источники в интернете, файлы xml и json, pdf-файлы, данные из канала OData и так далее. А также загрузить данные из Power BI и написать запрос с нуля – Пустой запрос.
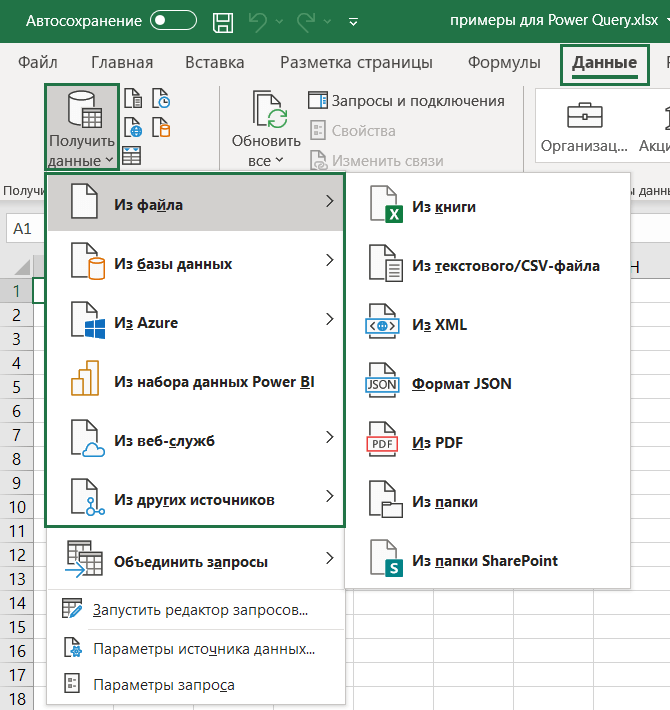
Чтобы посмотреть, какие именно источники данных доступны в Excel, перейдите на вкладку Данные → Получить данные (или Создать запрос, если у вас не новая версия Excel).
Для примера добавим в Power Query данные из таблицы.
- Выделите любую таблицу на листе Excel и перейдите в меню:
— в Excel 2010 и 2013: вкладка Power Query → Из таблицы (или С листа).
— для Excel после 2016: меню Данные → Из таблицы (Из таблицы/диапазона).
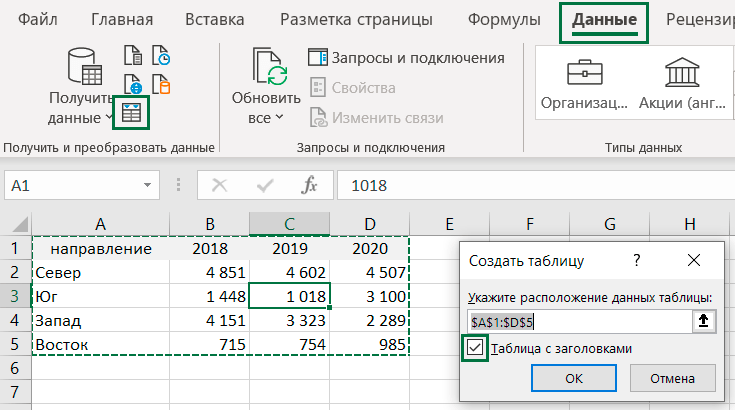
В открывшемся окне поставьте галочку «Таблица с заголовками».
Таблица с данными при этом превратится в «умную» smart-таблицу.
- Откроется окно редактора запросов, в котором будет наша таблица. Нажимаем кнопку в меню Главная → Закрыть и загрузить. Готово!
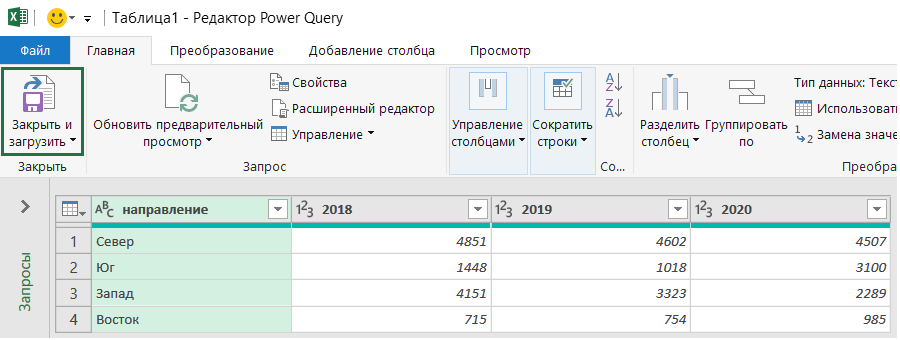
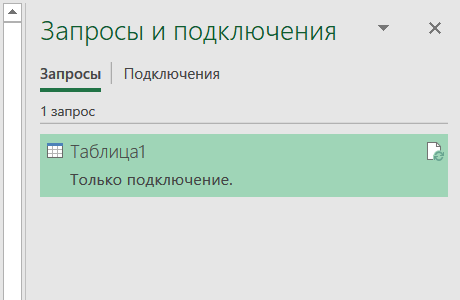 Чтобы открыть список запросов, нажмите в меню Данные → Запросы и подключения. В открывшейся вкладке «Запросы и подключения» отобразится список всех запросов, созданных в файле.
Редактор запросов Power Query
Разберем подробнее интерфейс редактора запросов Power Query.
Если окно редактора у вас закрыто, откройте его в меню Данные → Получить данные → Запустить редактор запросов. Или щелкните 2 раза мышкой по названию запроса на вкладке Запросы и подключения.
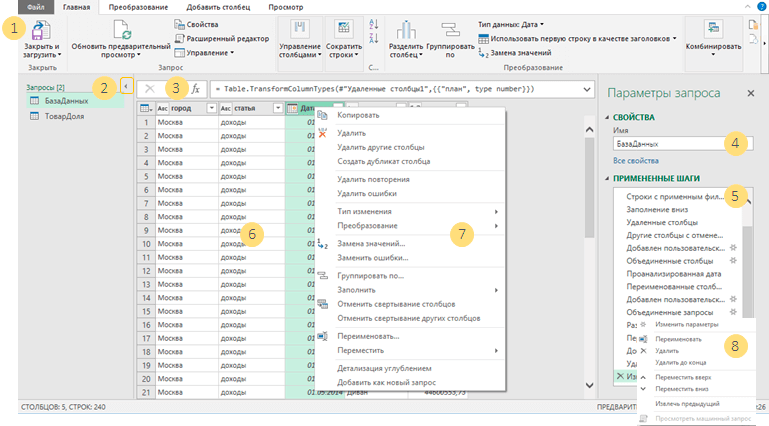
Итак, в редакторе Power Query есть:
- Лента редактора запросов для вкладок меню: Главная, Преобразование, Добавить столбец, Просмотр.
- Перечень созданных запросов, который можно свернуть / развернуть.
- Строка формул.
- Название самого запроса.
- Примененные шаги запроса: записанные шаги получения или преобразования данных. Их можно редактировать, выбирая в списке, изменять последовательность шагов, добавлять новые или удалять.
- Область предварительного просмотра, в которой выводится результат преобразования данных для каждого шага.
- Меню для данных, которое открывается при нажатии правой кнопкой мышки.
- При выборе правой кнопкой мыши названия шага появляется его контекстное меню.
Преобразование данных
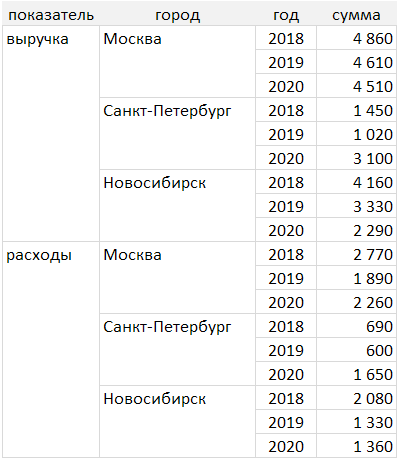 Посмотрим на простом примере, как преобразовать данные в Power Query.
Допустим, у нас есть таблица с выручкой и расходами по городам за несколько лет. В таблице эти показатели разделены на две группы. Столбец с городами тоже имеет группировки (смотрите рисунок).
Если вы знакомы со сводными таблицами, то знаете, что построить сводную на основе таких данных не получится. Привести их в «нужный вид» можно в Power Query буквально за несколько щелчков мышкой:
- выделите таблицу (можно выделить таблицу целиком или одну из ячеек);
- выберите в меню Данные → Из таблицы (Из таблицы/диапазона);
- в появившемся окне поставьте галочку рядом с «Таблица с заголовками» → ОК;
- в открывшемся редакторе запросов выделите столбцы «показатель» и «город», нажав мышкой на названия столбцов с зажатым Ctrl;
- в меню нажмите Преобразование → Заполнить → Вниз.

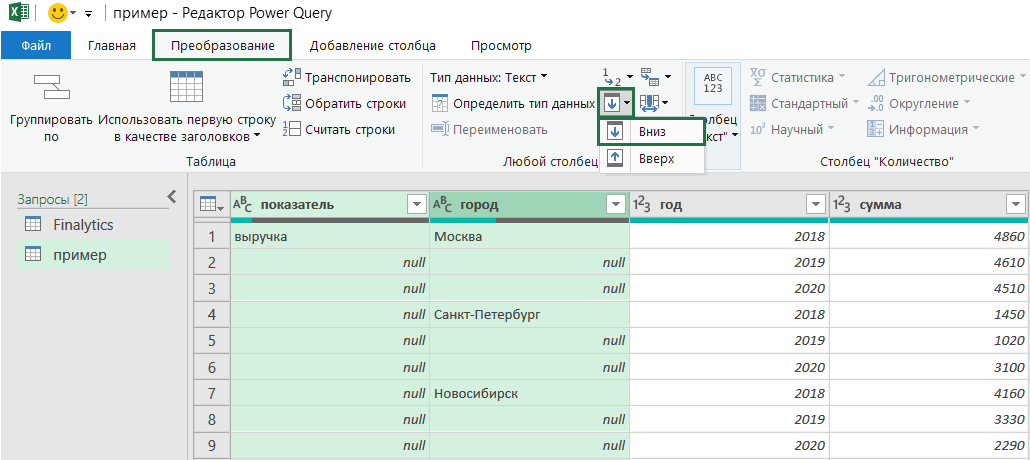
- Готово! Пустые строки заполнены значениями из ячеек сверху.

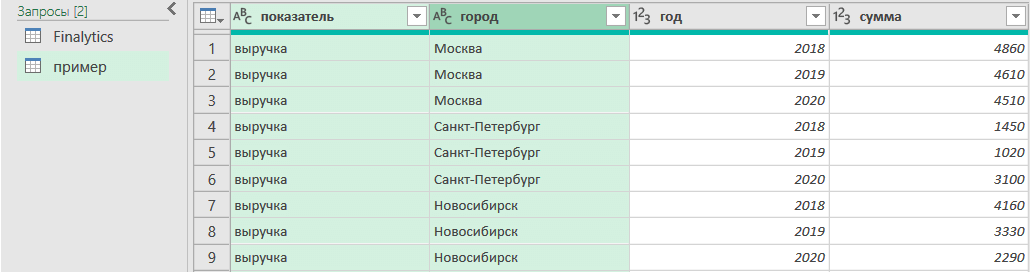
 При создании запроса Power Query сам автоматически записывает его шаги. Их можно увидеть в области справа Параметры запроса → Примененные шаги.
Шаги запроса можно редактировать, выбирая мышкой (таблица в области предварительного просмотра при этом тоже изменится). Ненужные шаги удаляются при нажатии на «крестик». Можно добавлять новые шаги в середину запроса или менять их местами, перемещая мышкой.
Обработка данных в Power Query выполняется последовательно, шаг за шагом, и каждое последующее действие использует результаты предыдущего. Поэтому при добавлении новых шагов или изменении их последовательности обязательно проверьте, все ли в порядке со следующими операциями. Проверить, все ли в порядке, можно, нажав на самый нижний шаг.
Кроме простых операций с данными, Power Query умеет выполнять и другие действия: сортировать, фильтровать, заменять, группировать, заполнять пустые значения, удалять дубликаты, работать с текстом и числами, выполнять простые вычисления, транспонировать таблицы и разворачивать их столбцы, объединять данные и многое-многое другое.
Строка формул и расширенный редактор
Код запроса, который вы создаете в Power Query, автоматически записывается на языке M. Это не значит, что обязательно потребуется писать код – большинство операций по преобразованию данных можно выполнить только с помощью кнопок меню.
Формулы Power Query выводятся в строке формул. По умолчанию эта строка скрыта, ее включают на вкладке Просмотр → Строка формул.

Чтобы посмотреть все формулы, здесь же на вкладке Просмотр нажмите на кнопку Расширенный редактор. В открывшемся окне появится полный текст запроса.
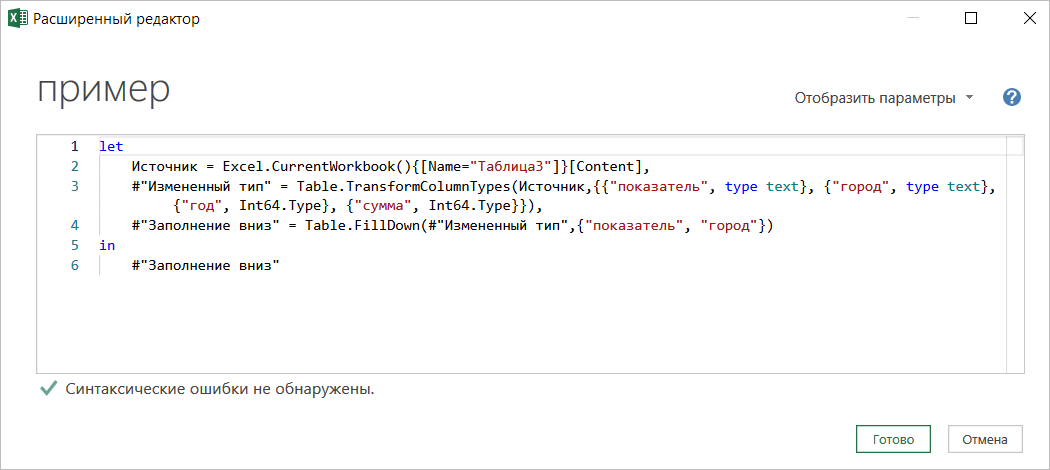
Типы данных Power Query
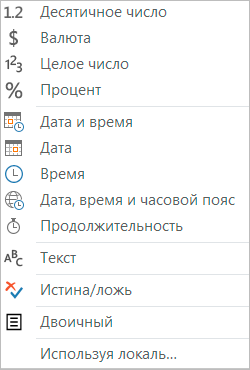 Определение типов данных – важная часть каждого запроса Power Query. Обычно типы данных задают в конце запроса после всех преобразований:
- в меню Главная → Тип данных или Преобразование → Определить тип данных;
- нажать мышкой по значку типа данных в названии столбца;
- определить тип даты на вкладке Преобразование → Дата → Выполнить анализ.
Перед сохранением запроса проверьте, все ли типы данных заданы правильно. Это сэкономит время на поиск ошибок. А вот шаг «Измененный тип», который автоматически проставляется в середине запроса, лучше удалить.
Импорт данных из Power Query
Итак, данные преобразованы. Что делать с ними дальше? В Power Query доступно несколько вариантов импорта данных.
Способы импорта можно задать при сохранении запроса Главная → Закрыть и загрузить в…
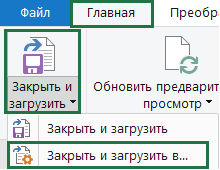
… А если запрос уже сохранен – в списке на вкладке Запросы и подключения. Щелкните по названию запроса правой кнопкой мышки и выберите в меню Загрузить в
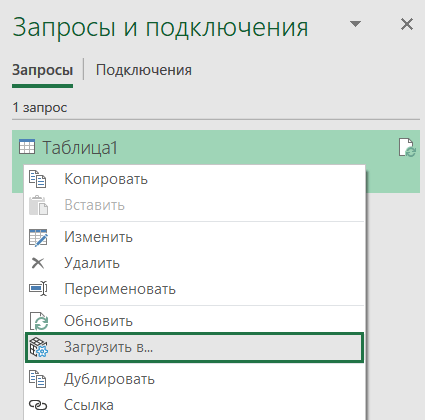
Excel предлагает пользователям на выбор несколько вариантов импорта данных (вид окна импорта может отличаться в зависимости от версии Excel):
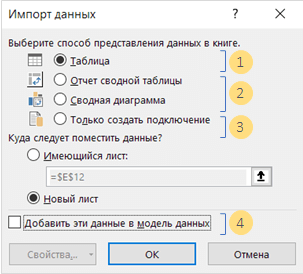
- Выгрузка на лист: выберите способ представления данных → Таблица, поместить данные на лист. На листе будет создана «умная» smart-таблица с данными из Power Query.
- Сводная таблица или сводная диаграмма: способ представления → Отчет сводной таблицы или Сводная диаграмма. Данные будут импортированы в виде сводной таблицы.
- Только подключение: выберите Только создать подключение. Запрос будет сохранен.
- Добавить данные в модель данных: при нажатии галочки «Добавить эти данные в модель данных» результаты выполнения запроса будут добавлены в модель Power Pivot.
Skip to content

-
View Larger Image


How to Copy a Power Query query from one Excel workbook to another one
Have you ever wanted to repeat in another workbook a query that you already built in one Excel workbook? Have you worried that you would have to recreate all the query steps again? Or maybe you managed to copy the M code, but you had to repeat that process as many times as queries you had to transfer.
In this post, I will share with you an awesome tip on how to easily copy queries from one workbook to another one without having to recreate every step manually!
Finding the queries to copy and checking if the query we want to copy depends of other queries
Open the two workbooks side by side and open the Queries and Connections pane in each workbook.
For that, go to the Data tab, and then click the button Queries and Connections.
On this pane, you can see the Power Query queries available in each workbook.

We can check how many data sources each one of the queries has, and how the queries relate to each other by going to the Data tab, and then Get Data> Launch Power Query Editor.

Once into the Power Query Editor, o to the View tab, click on the button Query Dependencies.

A new window will open, presenting us with a diagram with all the queries that we have on the workbook and the dependency between them.

In the example shown in the picture above, we can see that query Stores (query #3) comes from one external file only; in this case, an Excel file. Also, the Stores query “feeds” the SalesFinal query (query #4).

In the same example, we also have the query Sales Report Data (query #5). By clicking on the query #5 shape, Power Query highlights all the queries that come before and after the Sales Report Data query. We can see that this query is reading data from a folder of files.

When we build a query for which the data source is a folder of files, Power Query creates helper queries (queries 6, 7, 8 and 9). For query Sales Report Data (5) to work, it needs the queries Sample File (7) and Transform File (6). Queries (8) and (9) are not needed because query Transform File (6) is, in fact, a copy of the query Transform Sample File (9) converted into a Power Query function. Therefore, query Sales Report Data (5) only needs the queries Sample File (7) and Transform File (6) to work.
The Sales Report Data (5) also feeds Sales Final (4) query. So ultimately, query Sales Final (4) depends on all the queries highlighted in light green (1, 2, 3, 5, 6 and 7) to work properly (see picture below.)

Copying a query that does not depend on other queries
The most simple case is when we want to copy a query that does not depend on other queries, like query Products (2) in the example.
By double-clicking in query Products to edit it, we can see that it has 4 steps. However, the process that I am going to show you, will work for queries with any number of steps.

These are the steps that we need to follow to copy a query:
On the Queries and Connections pane of the workbook that has the query that we want to copy, let’s right-click on top of that query and select Copy. Then, go to the Queries and Connections pane in the second workbook, right-click on the pane and choose Paste. And that is it!
If we open the new query, we will see that it has the same steps as the original query. Everything was copied and we don’t need to waste time recreating all the steps from scratch.

It is very important to point out that if this query that we copied needed a table that existed on workbook one and we do not have the same table in the second workbook, we will receive an error alert notification on the second workbook saying that something is missing. To fix that error, we can recreate the table on the second workbook, or point the query on the second workbook to the table in the first workbook.
Copying a query that brings data from a folder or depends on other queries
In the example shown in the picture, query Sales Report Data (5) reads data from a folder of files and, therefore, depends on the helper queries.
To copy the query Sales Report Data, we click on top of it in the Queries and Connections pane in the first workbook, right-click, and select Copy.
Then, we go to the Queries and Connections pane in the second workbook, right-click, and select paste. And that’s it!
Since the query Sales Report Data (5) depends on the queries Transform File (6) and Sample File (7), when we pasted the query #5 on the second workbook, Power Query, not only copied query #5 but also all the other queries that it needs to work properly (queries #6 and #7.)

What happens when we copy a query that depends on all the other queries to work?
On the example presented, the query Sales Final (4) depends on queries numbers Employees(1), Products(2) and Stores(3.)
The procedure to copy query #4 is the same. On the Queries and Connections pane in the first workbook, right-click on query Sales Final (4), select Copy, go to the second workbook and paste in on the Queries and Connections pane. It brings with it all the queries that the Sales Final (4) report needs to work.

We can confirm that all the relationships between the different queries were preserved by going to the Query Dependencies window on the second workbook using the steps explained above. In summary, all the work done in the queries in the first workbook was copied into the second workbook and we don’t need to spend time recreating all the queries.
Copying the queries M code
If we just need to work with the M code of the queries that we have on the first workbook, we can have it all copied at once without needing to copy the M code from the advanced editor window, query by query.
To achieve this, on the Queries and Connections pane select the query that you want to copy, right-click on it and choose Copy.
Then, open your Notepad app or your any other text editor program, right-click on the text editor area and select Paste.

Watch the explanation in video here:
Share This Post

Related Posts
2 Comments
-
 Allie
Allie
August 31, 2022 at 3:57 AM — ReplyHi! This was really useful, but I’m really struggling. How do I point the query to a new file (not folder) and have it apply all steps to that new workbook? I have tried changing the datasource, but it gives me errors because the new workbook doesn’t have the new columns that I had the query itself create the first time! So frustrating because i want the query to clean the data in the same way on a new sheet every time (including adding or deleting columns).
-
Hi, Allie. It seems there are a couple of things that may be interfering in getting the query to work all the time properly. If your query includes a step to navigate to a certain sheet in the data source workbook, and the sheet changes each time, you would have to create a way to make the query know which sheet to pick. The column names in your data with which the query starts, need to be the same all the time to avoid you extra work with M code.
I recommend you this video, which I hope may bring you some ideas of how you can improve your solution: https://youtu.be/cUyx7CuXqQc
Good luck!
-


Page load link
Go to Top