
To copy data from Excel to a Word file using VBA we need to access the word application using Excel VBA. In this tutorial we will learn how to open a word application, add a document and copy-paste data from excel to it.
In this article, we will use the Early Binding method to create an object of word application instead of using the late binding. You can read about it here in detail.
The Process Of Copying Excel Data To A Word File Using Excel VBA
To copy data from excel to a word file using VBA, we first need to open the Word Application of course. Then add a document to it (if you want a new document). Copy data from excel file. Select the paragraph on the doc and paste on it.Finally save and close the document. Each of these steps can be done easily from Excel. You will not need to interact with the Word Document.
Let’s get started with an example without getting any further into theory. Because Iron Man said, «Sometimes you gotta run before you can walk».
Example : Paste Excel Data To Word Using VBA
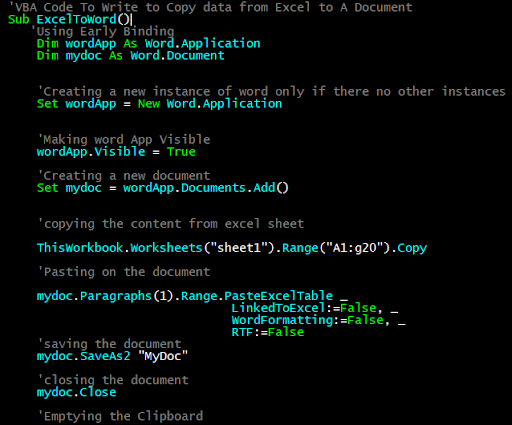
The below code is an example of how you can copy some range of excel and paste it into a new word document and save it on the drive to use later
'VBA Code To Write to Copy data from Excel to A Document

Sub ExcelToWord()

   'Using Early Binding

    Dim wordApp As Word.Application

    Dim mydoc As Word.Document


    'Creating a new instance of word only if there no other instances

    Set wordApp = New Word.Application


    'Making word App Visible

    wordApp.Visible = True


    'Creating a new document

    Set mydoc = wordApp.Documents.Add()


    'copying the content from excel sheet


    ThisWorkbook.Worksheets("sheet1").Range("A1:g20").Copy


    'Pasting on the document


    mydoc.Paragraphs(1).Range.PasteExcelTable _

                               LinkedToExcel:=False, _

                               WordFormatting:=False,

                               RTF:=False

    'saving the document

    mydoc.SaveAs2 "MyDoc"


    'closing the document

    mydoc.Close


    'Emptying the Clipboard

    CutCopyMode = False


End Sub
Explanation of the Code:
Well I have explained each step in the code itself using comments but let’s have some word about the lines we have used in this sub.
‘Created variables of word application and document type
Dim wordApp As Word.Application
Dim mydoc As Word.Document
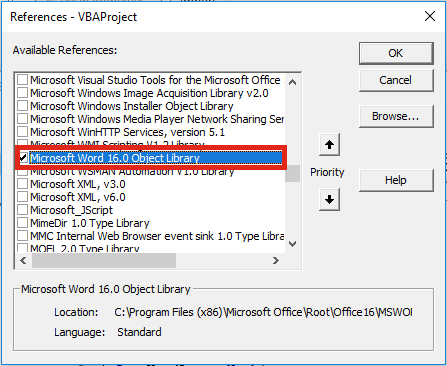
Here we have declared two variables of the required types. We can do this because we have already added the reference to the word application. You can do this by going to tools in menu. Find references option and then look for the word reference.

‘Creating a new instance of word only if there no other instances
Set wordApp = New Word.Application
‘Making word App Visible
wordApp.Visible = True
‘Creating a new document
Set mydoc = wordApp.Documents.Add()
In the first line above, we are intentiating the wordApp variable with an object of type Word.App using the New keyword. This will open the Word Application.
In the second line we are making the word application visible so that we can work with it.
In the next line, we add a new document to the word application using Word.Documents.Add() function. This is stored in the mydoc variable.
‘copying the content from excel sheet
ThisWorkbook.Worksheets(«sheet1»).Range(«A1:G20»).Copy
Here we are simply copying a range from excel. You must have done it before. It is stored on the clipboard.
‘Pasting on the document
mydoc.Paragraphs(1).Range.PasteExcelTable _
LinkedToExcel:=False, _
WordFormatting:=False,
RTF:=False
We are using the PasteExcelTable method of Paragraph.Range class of mydoc to paste data from clipboard.
‘saving the document
mydoc.SaveAs2 «MyDoc»
‘closing the document
mydoc.Close
‘Emptying the Clipboard
CutCopyMode = False
We are saving the document with the name MyDoc. Then we close the document using the Close function. Finally we release the clipboard to be used by others.
So yeah guys, this is how you can create a new Word document and copy Excel data to it using VBA. I have not gone into details as it would make the article exhaustingly long. This was only to learn how you can paste to a word document through Excel. I hope it helped you understand the process. If you have any questions regarding this article, you can contact me through the comments section below.
Related Articles:
Getting Started With Excel VBA UserForms| I will explain how to create a form in excel, how to use VBA toolbox, how to handle user inputs and finally how to store the user inputs. We will go through these topics using one example and step by step guide.
VBA variables in Excel| VBA stands for Visual Basic for Applications. It is a programming language from Microsoft. It is used with Microsoft Office applications such as MSExcel, MS-Word and MS-Access whereas VBA variables are specific keywords.
Excel VBA Variable Scope| In all the programming languages, we have variable access specifiers that define from where a defined variable can be accessed. Excel VBA is no Exception. VBA too has scope specifiers.
ByRef and ByVal Arguments | When an argument is passed as a ByRef argument to a different sub or function, the reference of the actual variable is sent. Any changes made into the copy of the variable, will reflect in the original argument.
Delete sheets without confirmation prompts using VBA in Microsoft Excel | Since you are deleting sheets using VBA, you know what you are doing. You would like to tell Excel not to show this warning and delete the damn sheet.
Add And Save New Workbook Using VBA In Microsoft Excel 2016| In this code, we first created a reference to a workbook object. And then we initialized it with a new workbook object. The benefit of this approach is that you can do operations on this new workbook easily. Like saving, closing, deleting, etc
Display A Message On The Excel VBA Status Bar| The status bar in excel can be used as a code monitor. When your VBA code is lengthy and you do several tasks using VBA, you often disable the screen update so that you don’t see that screen flickering.
Turn Off Warning Messages Using VBA In Microsoft Excel 2016| This code not only disables VBA alerts but also increases the time efficiency of the code. Let’s see how.
Popular Articles:
50 Excel Shortcuts to Increase Your Productivity | Get faster at your task. These 50 shortcuts will make you work even faster on Excel.
The VLOOKUP Function in Excel | This is one of the most used and popular functions of excel that is used to lookup value from different ranges and sheets.
COUNTIF in Excel 2016 | Count values with conditions using this amazing function. You don’t need to filter your data to count specific values. Countif function is essential to prepare your dashboard.
How to use SUMIF Function in Excel | This is another dashboard essential function. This helps you sum up values on specific conditions.
This post is the second in a series about controlling other applications from Excel using VBA. In the first part we looked at the basics of how to reference other applications using Early Binding or Late Binding. In this post, we will look at how we can automate Word from Excel even though we don’t know any VBA code for Word… yet. The process we will use for this is as follows:
- Enable the Word Developer menu
- Record a Word macro
- Add the code to Excel VBA and amend
- Record macros in Excel if necessary
- Repeat the previous steps until macro complete
I am not an Excel VBA expert (I’m more of an Excel VBA tinkerer), and I am certainly not a Word VBA expert. The process I am about to show you may not create the most efficient code, but I know this process works, because I have used it myself to automate lots tasks using Microsoft Word.
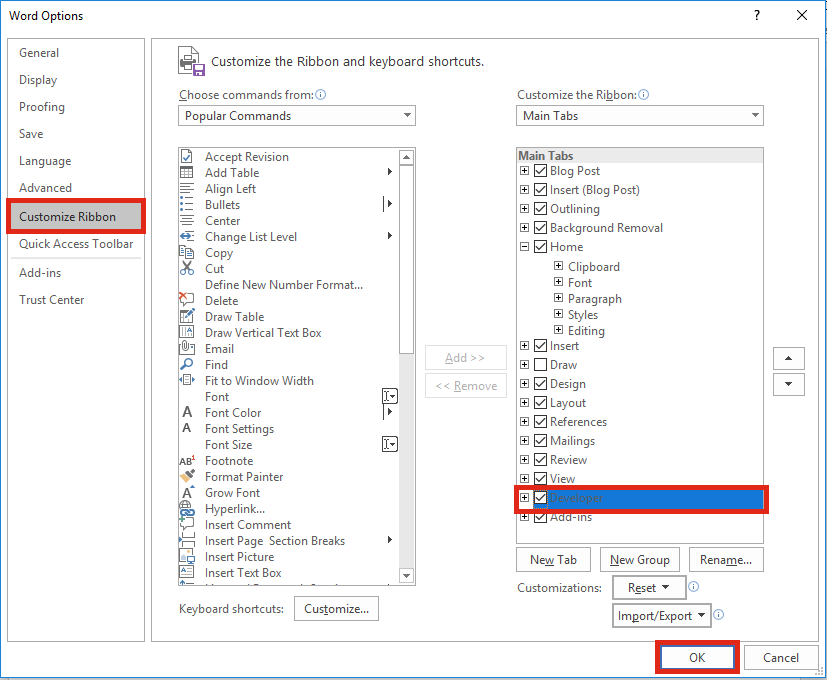
Enable the Word Developer menu
If you have enabled the Excel Developer menu it is the same process in Word.
In Word: File -> Options -> Customize Ribbon
Then tick the Developer Ribbon option, OK.
Record a Word Macro
The key to the success of this method is taking small sections of code and building up a complex macro bit by bit. Using the Word Macro Recorder is again, similar to the Excel Macro recorder.
Click on: Developer -> Record Macro

For the example in this post, we will create a macro which will open a new Word document, then copy a chart from Excel and paste it into that Word document. We will tackle this one stage at a time. Firstly, lets create the macro to open a new word document.
Click – Developer -> Record Macro. The Record Macro window will open.
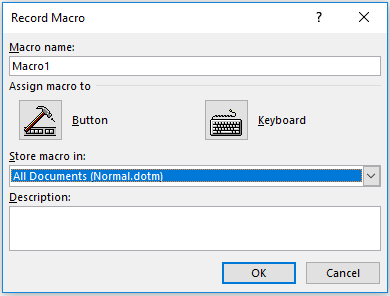
Make a note of the “Store macro in” option, as we will need to know where to find the recorded code later. Normal.dotm is fine for now. Click OK – the Macro Recorder is now running.
Open a new Word Document – File -> New -> Blank Document
Stop the Macro from recording – Developer -> Stop Recording

We can now view the code for opening a new Word Document in the Visual Basic Editor. Click: Developer -> Visual Basic.

Find the location of your recorded code in the Visual Basic Editor. In this example: Normal -> Modules -> NewMacros.
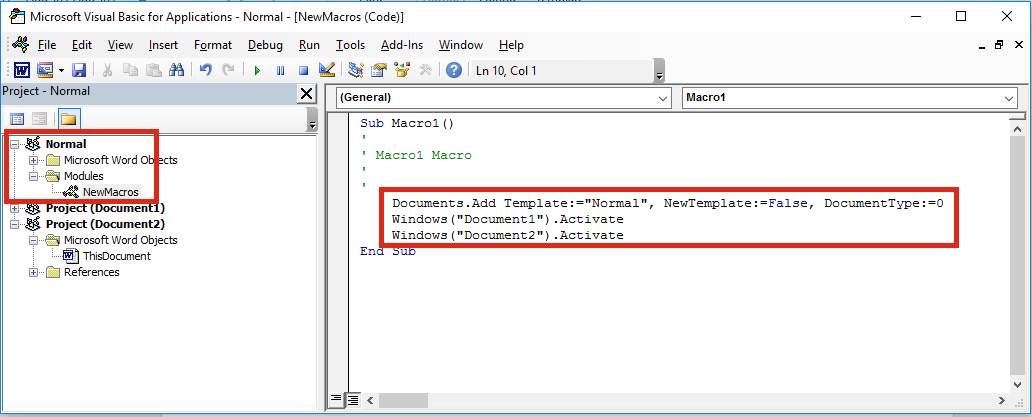
Your code should look like the following. It may be slightly different, but not significantly.
Sub Macro1()
'
' Macro1 Macro
'
'
    Documents.Add Template:="Normal", NewTemplate:=False, DocumentType:=0
    Windows("Document1").Activate
    Windows("Document2").Activate
End Sub
Add the code to Excel VBA and amend
Let’s head back to the Excel VBA Editor and use the Early Binding method to control to Microsoft Word. In the Visual Basic Editor click Tools -> References select Microsoft Word x.xx Object Library. Then click OK.
As we are using Early Binding we need to declare the Application as a variable as follows:
Dim WordApp As Word.Application
Set WordApp = New Word.Application
Now copy and paste the code from the Word VBA Editor into the Excel VBA Editor.
The Word VBA code started with Documents.Add, all we have to do is add our application variable to the front of that line of code. Now becomes WordApp.Documents.Add . . .
Often, Selecting and Activating Objects is not required in VBA code, so I have not copied those statements into the code below.
Sub CreateWordDocument()

'Connect using Early Binding.
'Remember to set the reference to the Word Object Library
'In VBE Editor Tools -> References -> Microsoft Word x.xx Object Library
Dim WordApp As Word.Application
Set WordApp = New Word.Application

WordApp.Documents.Add Template:="Normal", NewTemplate:=False, DocumentType:=0
WordApp.Visible = True 'New Apps will be hidden by default, so make visible

Set WordApp = Nothing 'release the memory

End Sub
A point to note, when an application is opened with VBA, it is normally opened in the background. To make the Word document visible I have added the following code:
WordApp.Visible = True
Record macros in Excel (if necessary)
If we want to copy Excel content into a Word document, we will need to copy that content using Excel VBA. We can use the Macro Recorder in Excel to obtain the VBA code for copying, then we can use the Word Macro Recorder to obtain the VBA code for pasting.
Macro Recording from Excel – selecting a worksheet and copying chart
Sheets("Sheet1").Select
ActiveSheet.ChartObjects("Chart 1").Activate
ActiveChart.ChartArea.Copy
Macro Recording from Word – pasting a chart into a document
Selection.PasteSpecial Link:=False, DataType:=wdPasteEnhancedMetafile, _
        Placement:=wdInLine, DisplayAsIcon:=False
We can add both Macro recordings into our Excel macro. Remember to add WordApp. at the start of each statement of Word VBA code.
Sub CreateWordDocument()

'Connect using Early Binding.
'Remember to set the reference to the Word Object Library
'In VBE Editor Tools -> References -> Microsoft Word x.xx Object Library
Dim WordApp As Word.Application
Set WordApp = New Word.Application

WordApp.Documents.Add Template:="Normal", NewTemplate:=False, DocumentType:=0
WordApp.Visible = True 'New Apps will be hidden by default, so make visible

'code copied from Excel Macro recorder
Sheets("Sheet1").Select
Selection.ChartObjects("Chart 1").ChartArea.Copy

'code copied from Word Macro recorder with WordApp. added to the front.
WordApp.Selection.PasteSpecial Link:=False, DataType:=wdPasteEnhancedMetafile, _
        Placement:=wdInLine, DisplayAsIcon:=False

Set WordApp = Nothing 'release the memory

End Sub
This code is not particularly efficient; it contains a few unnecessary sections code. However… it works!
Repeat the previous steps until macro complete
By repeating the same steps above; recording short actions, then transferring the code into Excel, we can slowly build up much more complex Macros. The key is to keep the actions short, if you do too many actions with the Macro Recorder, code starts to look long and scary.
If you’ve you tried to use the Macro Recorder before you will know that this is not as easy as it seems. And this simple tutorial may make you think it is easy, when it’s not. Sometimes, it can be quite frustrating trying to find out where the issues and errors are. The key to success is recording very short actions, such as those below and copying them into the Visual Basic Editor.
'Pressing the Enter Key to move to a new line in Word
WordApp.Selection.TypeParagraph

'Turn on/off Bold Text
WordApp.Selection.Font.Bold = wdToggle

'Change Font Size
WordApp.Selection.Font.Size = 16

'Type some text
WordApp.Selection.TypeText Text:="Here is some text"
You will soon build up a standard library of code that you can use to control Word for most basic tasks.
In recorded VBA code from Word, the word “Selection” in the code often refers to the document itself. It is possible to make the code a little bit more efficient by declaring the document as a variable. If we were opening a specific document, we could include this at the start, just below the declaration of the application.
'Declare a specific document as a variable
Dim WordDocument As Object
Set WordDocument = WordApp.Documents.Open(sourceFileName)
Or, if we created a new document we could include the following below the declaration of the application variable.
'Delcare a new document as a variable
Dim WordDocument As Object
Set WordDocument = WordApp.Documents.Add Template:="Normal", _
NewTemplate:=False, DocumentType:=0
If we have created the document as a variable we can then reference the specific document. This code:
WordApp.Selection.TypeParagraph
Would become this code:
WordDocument.TypeParagraph
Or this code:
WordApp.Selection.TypeText Text:="Here is some text"
Would become this code:
WordDocument.TypeText Text:="Here is some text"
This method is much better, as it doesn’t rely on the Selection of the user being in the right place.
Conclusion
We have seen in this post that it is possible to create complex Macros to automate Word from Excel using VBA. By understanding how to declare variables for the application and documents we can create much more robust macros, even without knowing a lot of VBA code.
Related Posts:
- 5 quick ways to embed a Word document in Excel
- Controlling Powerpoint from Excel using VBA
- Edit links in Word using VBA
- How to link Excel to Word

About the author
Hey, I’m Mark, and I run Excel Off The Grid.
My parents tell me that at the age of 7 I declared I was going to become a qualified accountant. I was either psychic or had no imagination, as that is exactly what happened. However, it wasn’t until I was 35 that my journey really began.
In 2015, I started a new job, for which I was regularly working after 10pm. As a result, I rarely saw my children during the week. So, I started searching for the secrets to automating Excel. I discovered that by building a small number of simple tools, I could combine them together in different ways to automate nearly all my regular tasks. This meant I could work less hours (and I got pay raises!). Today, I teach these techniques to other professionals in our training program so they too can spend less time at work (and more time with their children and doing the things they love).
Do you need help adapting this post to your needs?
I’m guessing the examples in this post don’t exactly match your situation. We all use Excel differently, so it’s impossible to write a post that will meet everybody’s needs. By taking the time to understand the techniques and principles in this post (and elsewhere on this site), you should be able to adapt it to your needs.
But, if you’re still struggling you should:
- Read other blogs, or watch YouTube videos on the same topic. You will benefit much more by discovering your own solutions.
- Ask the ‘Excel Ninja’ in your office. It’s amazing what things other people know.
- Ask a question in a forum like Mr Excel, or the Microsoft Answers Community. Remember, the people on these forums are generally giving their time for free. So take care to craft your question, make sure it’s clear and concise. List all the things you’ve tried, and provide screenshots, code segments and example workbooks.
- Use Excel Rescue, who are my consultancy partner. They help by providing solutions to smaller Excel problems.
What next?
Don’t go yet, there is plenty more to learn on Excel Off The Grid. Check out the latest posts:
This Excel VBA tutorial explains how to export Excel to Word.
You may also want to read:
Export Excel to PDF
In the previous post, I demonstrated how to export Excel to PDF, which is very easy because there is already a built in function to do that (using Save As and choose PDF). However, there is no built in function to export Excel to Word. Fortunately Excel cell is actually a table in Word, we can simply copy the cells and paste to Word. This tutorial explains how to do it automatically using Excel VBA to export Excel to Word.
Excel VBA export Excel to Word (Single Worksheet)
Excel has about 1M rows and 16k columns, we cannot simply export the whole spreadsheet to Word. So the first question to think about is, what Range do we need to export to Word? My recommendation is to export all UsedRange. You may also consider to reset UsedRange before copy as explained in my previous post.
Insert the following Procedure in Excel Module
Sub export_excel_to_word()
    Set obj = CreateObject("Word.Application")
    obj.Visible = True
    Set newObj = obj.Documents.Add
    ActiveSheet.UsedRange.Copy
    newObj.Range.Paste
    Application.CutCopyMode = False
    obj.Activate
    newObj.SaveAs Filename:=Application.ActiveWorkbook.Path & "" & ActiveSheet.Name
End Sub
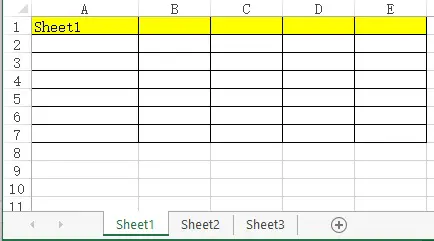
For example, we have the below worksheet
Run the Macro, and the below new Word document will pop up. The Word document is automatically saved as the Worksheet name under the same folder of the Workbook.

It is possible that the imported table length is too wide to display in Word, you can also use Word VBA Table.AutoFitBehavior Method to auto fit the table, which has the same effect of AutoFit in Word as below.
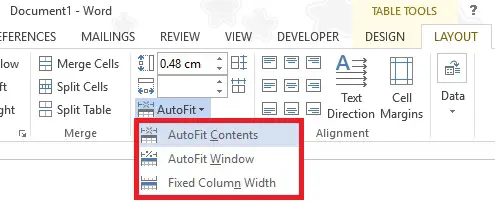
Run the below macro in Word VBA to loop through all tables in Word document to autosize.
Sub autoSizeTbl()
    For Each tbl In ActiveDocument.Tables
        tbl.AutoFitBehavior wdAutoFitContent
    Next
End Sub
Ideally this Macro can be run from Excel VBA, unfortunately I can’t get it work properly.
Excel VBA export Excel to Word (Multiple Worksheets)
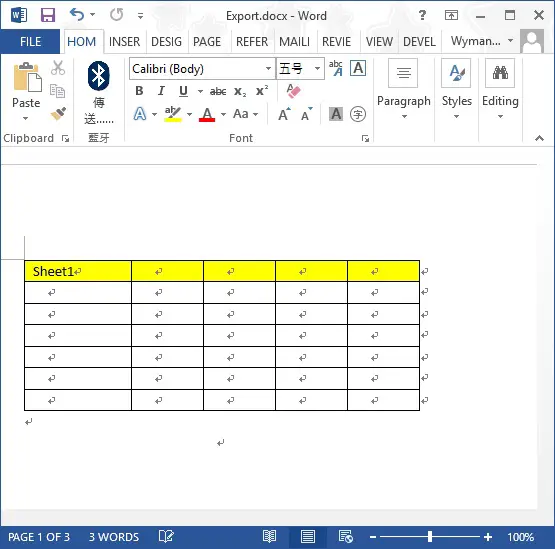
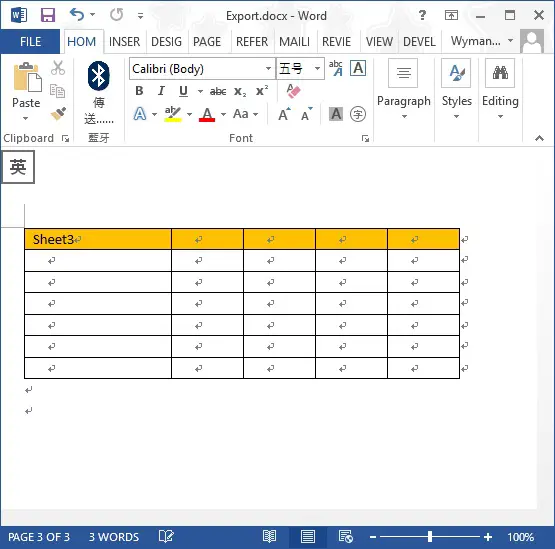
Assume that we have Sheet1, Sheet2, Sheet3 in a Workbook “Export.xlsm”, we want to export all three worksheets to a single workbook.
Insert a Excel Module and paste the below Procedure.
The below Procedure will copy usedRange of each Worksheet to Word and page break by each Worksheet. Finally save and name the Word document as the Workbook name.
Sub export_workbook_to_word()
    Set obj = CreateObject("Word.Application")
    obj.Visible = True
    Set newobj = obj.Documents.Add

    For Each ws In ActiveWorkbook.Sheets
        ws.UsedRange.Copy
        newobj.ActiveWindow.Selection.PasteExcelTable False, False, False
        newobj.ActiveWindow.Selection.InsertBreak Type:=7
    Next
        newobj.ActiveWindow.Selection.TypeBackspace
        newobj.ActiveWindow.Selection.TypeBackspace

    obj.Activate
    newobj.SaveAs Filename:=Application.ActiveWorkbook.Path & "" & Split(ActiveWorkbook.Name, ".")(0)

End Sub
Run the Macro, a Word document called “Export.docx” pops up. Worksheet1 is pasted in page 1, Worksheet2 is pasted in page 2, Worksheet3 is pasted in page 3.

Вставка таблицы Excel в документ Word с помощью кода VBA Excel. Метод Selection.PasteExcelTable: синтаксис, параметры, пример использования.
Работа с Word из кода VBA Excel
Часть 6. Вставка таблицы Excel в документ Word
[Часть 1] [Часть 2] [Часть 3] [Часть 4] [Часть 5] [Часть 6]
Метод Selection.PasteExcelTable
Метод Range.Paste, использующийся в VBA Word для вставки в документ таблиц, скопированных в буфер обмена из другого документа Word, не применим для вставки в документ таблиц, скопированных из книги Excel. Для этих целей используется метод Selection.PasteExcelTable.
Selection.PasteExcelTable — это метод, предназначенный для вставки Excel-таблицы из буфера обмена в документ Word и ее форматирования в соответствии с заданными параметрами.
Синтаксис
|
Expression.PasteExcelTable(LinkedToExcel, WordFormatting, RTF) |
Expression — переменная, представляющая объект Selection. В том числе, это может быть курсор или закладка.
Параметры
Все параметры метода Selection.PasteExcelTable логического типа и являются обязательными.
| Параметр | Описание |
|---|---|
| LinkedToExcel | True — вставленная таблица связывается с исходным файлом Excel, чтобы изменения, внесенные в файл Excel, отображались в Microsoft Word. False — связь между вставленной таблицей и таблицей в исходном файле не устанавливается. |
| WordFormatting | True — вставленная таблица будет отформатирована как таблица документа Word. False — вставленная таблица будет отформатирована в соответствии с исходным файлом Excel. |
| RTF | True — Excel-таблица будет вставлена в расширенном текстовом формате (RTF). False — Excel-таблица будет вставлена в формате HTML-таблицы. |
Допустим, у нас есть таблица Excel, начинающаяся с ячейки A1 (или с любой другой), и нам необходимо скопировать эту таблицу в существующий документ Word, вставив ее на место закладки «Закладка1».
Решение:
|
Sub Primer() Dim myWord As New Word.Application, myDoc As Word.Document ‘Открываем существующий документ Word Set myDoc = myWord.Documents.Open(«C:ТестоваяДокумент1.docx») ‘Копируем таблицу на активном листе в буфер обмена ‘Вместо ячейки Range(«A1») можно указать любую другую, расположенную внутри таблицы Range(«A1»).CurrentRegion.Copy ‘Вставляем таблицу из буфера обмена на место закладки myDoc.Bookmarks(«Закладка1»).Range.PasteExcelTable False, False, False ‘Отображаем программу Word myWord.Visible = True ‘Очищаем переменные Set myWord = Nothing Set myDoc = Nothing End Sub |
Если необходимо таблицу вставить в конец документа, строку
|
myDoc.Bookmarks(«Закладка1»).Range.PasteExcelTable False, False, False |
следует заменить на
|
With myDoc ‘Переводим курсор в конец документа .Range(.Range.Characters.Count — 1, .Range.Characters.Count — 1).Select ‘Добавляем перенос строки, если необходимо .ActiveWindow.Selection.InsertAfter vbCr ‘Переводим курсор в конец документа .Range(.Range.Characters.Count — 1, .Range.Characters.Count — 1).Select ‘Вставляем таблицу из буфера обмена .ActiveWindow.Selection.PasteExcelTable False, False, False End With |
Sub ExcelRangeToWord()
‘PURPOSE: Copy/Paste An Excel Table Into a New Word Document
‘NOTE: Must have Word Object Library Active in Order to Run _
(VBE > Tools > References > Microsoft Word 12.0 Object Library)
‘SOURCE: www.TheSpreadsheetGuru.com
Dim tbl As Excel.Range
Dim WordApp As Word.Application
Dim myDoc As Word.Document
Dim WordTable As Word.Table
‘Optimize Code
Application.ScreenUpdating = False
Application.EnableEvents = False
‘Copy Range from Excel
Set tbl = ThisWorkbook.Worksheets(Sheet1.Name).ListObjects(«Table1»).Range
‘Create an Instance of MS Word
On Error Resume Next
‘Is MS Word already opened?
Set WordApp = GetObject(class:=»Word.Application»)
‘Clear the error between errors
Err.Clear
‘If MS Word is not already open then open MS Word
If WordApp Is Nothing Then Set WordApp = CreateObject(class:=»Word.Application»)
‘Handle if the Word Application is not found
If Err.Number = 429 Then
MsgBox «Microsoft Word could not be found, aborting.»
GoTo EndRoutine
End If
On Error GoTo 0
‘Make MS Word Visible and Active
WordApp.Visible = True
WordApp.Activate
‘Create a New Document
Set myDoc = WordApp.Documents.Add
‘Copy Excel Table Range
tbl.Copy
‘Paste Table into MS Word
myDoc.Paragraphs(1).Range.PasteExcelTable _
LinkedToExcel:=False, _
WordFormatting:=False, _
RTF:=False
‘Autofit Table so it fits inside Word Document
Set WordTable = myDoc.Tables(1)
WordTable.AutoFitBehavior (wdAutoFitWindow)
EndRoutine:
‘Optimize Code
Application.ScreenUpdating = True
Application.EnableEvents = True
‘Clear The Clipboard
Application.CutCopyMode = False
End Sub
In this part of the code we are determining if Microsoft Word is open or not. If Word is already open, we can set a variable equal to the entire program by using GetObject. If MS Word is not currently running we can use CreateObject to run an instance of Word and then set a variable equal to that specific instance of MS Word.
When using CreateObject, the target application will start running but it is not visible on screen. Therefore we need to turn the Visible setting on (equal to true). Also, VBA with Word is a little bit different than with Excel in that it is much more dependent on its window showing on screen. Therefore a second command must be written to Activate Microsoft Word.
Copy From Excel, Paste Onto Document
Now that you have a new document created, you can command Excel to paste your table into MS Word. Near the beginning of the code, there was a line that allowed you to specify the exact table you wanted to copy. The variable tbl was used to remember this table range and to allow you to reference the range later on in the code.
Guru Tip: It is a good idea to place code that may need to be manually changed at some point in the future near the beginning of the subroutine. This prevents you from having to scroll through your code and pinpoint the exact place where you spelled out which range you wanted to copy or which worksheet you wanted to pull data from. This can save you a bunch of time and prevent confusion!
Word has a special method called PasteExcelTable, which (as you can guess) allows you paste in an Excel table. There are three variables you can tweak to get you table looking and functioning just the way you want.
-
LinkedToExcel — True links the pasted table to the original Excel file so that changes made to the Excel file are reflected in Microsoft Word.
-
WordFormatting — True formats the table using the formatting in the Word document. False formats the table according to the original Excel file.
-
RTF — True pastes the Excel table using Rich Text Format (RTF). False pastes the Excel table as HTML.
Now for the last step! Depending on how large your table is, it may be spilling outside of your document page. In order to prevent this from happening you can go ahead and use AutoFitBehavior to resize the table to fit perfectly inside your Word document.
About The Author
Hey there! I’m Chris and I run TheSpreadsheetGuru website in my spare time. By day, I’m actually a finance professional who relies on Microsoft Excel quite heavily in the corporate world. I love taking the things I learn in the “real world” and sharing them with everyone here on this site so that you too can become a spreadsheet guru at your company.
Through my years in the corporate world, I’ve been able to pick up on opportunities to make working with Excel better and have built a variety of Excel add-ins, from inserting tickmark symbols to automating copy/pasting from Excel to PowerPoint. If you’d like to keep up to date with the latest Excel news and directly get emailed the most meaningful Excel tips I’ve learned over the years, you can sign up for my free newsletters. I hope I was able to provide you with some value today and I hope to see you back here soon!
— Chris
Founder, TheSpreadsheetGuru.com
In this article I will explain how you can write data from an excel workbook to a word document. The first step in doing this is to determine where the code is going to be written. There are 3 options:
- In the excel workbook
- In the word document
- In a 3rd file
I will only consider the first two cases in this article.
–
Example 1, Excel VBA:
Lets assume we have an excel workbook with the following data:

Lets assume we are going to write the code in the excel workbook.
Step 1:
The first step would be to automate a word document. In the article below I’ve explained there are 2 methods for this.
- Early binding
- Late binding
To prevent compatibility issues I will be using late binding in this example:
- VBA, Automating Word From Excel
The function below will automate a word document and make it visible:
Sub  main()

Dim  objWord As  Object

Dim  objDoc As  Object

Set  objWord = CreateObject("Word.Application")

objWord.Visible = True

Set  objDoc = objWord.documents.Add()

End  Sub
Step 2:
The code below will write data from the excel sheet to the word document:
Dim  i As  Integer

Dim  strValue As  String

For  i = 1 To 5

    'bring focus to the document created

    objDoc.Activate

    'read the value from the cell

    strValue = Cells(i + 1, 1)

    'write the value to the document

    objWord.Selection.TypeText Text:=strValue

    'move to the next line

    objWord.Selection.TypeParagraph

Next  i
Complete Version:
Below you can see the complete code. It automates a word document and writes the values from the cells B2:B6 to it:
Option  Explicit

Sub  main()

Dim  objWord As  Object

Dim  objDoc As  Object

Set  objWord = CreateObject("Word.Application")

objWord.Visible = True

Set  objDoc = objWord.documents.Add


Dim  i As  Integer

Dim  strValue As  String

For  i = 1 To 5

    'bring focus to the document created

    objDoc.Activate

    'read the value from the cell

    strValue = Cells(i + 1, 1)

    'write the value to the document

    objWord.Selection.TypeText Text:=strValue

    'move to the next line

    objWord.Selection.TypeParagraph

Next  i

End  Sub
Result:

–
Example 2, Word VBA:
In this example the code will be written inside a word document. Therefore the excel workbook will be automated.
Step 1:
The first step would be to get the path of the excel workbook from the user. This can be done using an open file dialog. I have covered this topic in the article below:
- Excel VBA, Open File Dialog
Although the article was written for excel, the concept can be used in VBA for Word too. The code below will display an open file dialog and ask the user to select the path of the file to open. The path will be stored in the variable strPath:
Sub  Example2()

Dim  intChoice As  Integer

Dim  strPath As  String


'only allow the user to select one file

Application.FileDialog(msoFileDialogOpen).AllowMultiSelect = False

'make the file dialog visible to the user

intChoice = Application.FileDialog(msoFileDialogOpen).Show

'determine what choice the user made

If  intChoice <> 0 Then

    'get the file path selected by the user

    strPath = Application.FileDialog( _

        msoFileDialogOpen).SelectedItems(1)

End If

End  Sub
Result:

Step 2:
The function below receives as input a file path and automates that excel workbook:
Private  Sub  AutomateExcel(ByVal  strPath As  String)

Dim  objExcel As  Object

Dim  objWorkbook As  Object


Set  objExcel = CreateObject("Excel.Application")

objExcel.Visible = True

Set  objWorkbook = objExcel.workbooks.Open(strPath)

End  Sub
Step 3:
The function below receives as input an reference to the excel workbook. It clears all the data in the current word document and it reads the values from the workbook:
Private  Sub  ReadData(ByRef objWorkbook As  Object)

Dim  i As  Integer


Selection.WholeStory

Selection.Delete Unit:=wdCharacter, Count:=1

For  i = 1 To  5

    Selection.TypeText Text:= _

        objWorkbook.sheets(1).Cells(i + 1, 1)

    'move to the next line

    Selection.TypeParagraph

Next  i

End  Sub
Complete Version:
By putting it all together we end up with the code below:
Option  Explicit


Sub  Example2()

Dim  intChoice As  Integer

Dim  strPath As  String


'only allow the user to select one file

Application.FileDialog(msoFileDialogOpen).AllowMultiSelect = False

'make the file dialog visible to the user

intChoice = Application.FileDialog(msoFileDialogOpen).Show

'determine what choice the user made

If  intChoice <> 0 Then

    'get the file path selected by the user

    strPath = Application.FileDialog( _

        msoFileDialogOpen).SelectedItems(1)

    Call  AutomateExcel(strPath)

End If

End  Sub
Private  Sub  AutomateExcel(ByVal  strPath As  String)

Dim  objExcel As  Object

Dim  objWorkbook As  Object


Set  objExcel = CreateObject("Excel.Application")

objExcel.Visible = True

Set  objWorkbook = objExcel.workbooks.Open(strPath)

Call  ReadData(objWorkbook)

End  Sub
Private  Sub  ReadData(ByRef objWorkbook As  Object)

Dim  i As  Integer

Selection.WholeStory

Selection.Delete Unit:=wdCharacter, Count:=1

For  i = 1 To  5

    Selection.TypeText Text:= _

        objWorkbook.sheets(1).Cells(i + 1, 1)

    'move to the next line

    Selection.TypeParagraph

Next  i

End  Sub
Result:
You can download the file and code related to this article from the links below:
- Excel to Word.docm
- Excel to Word.xlsm
See also:
- Word VBA, Open Document
- Word Automation VBA, Common Errors
- Word VBA, Apply Macro to Multiple Files
- Word VBA, Modify Header For Multiple Files
- Word Automation VBA, Common Errors
- VBA, Automating Word From Excel
If you need assistance with your code, or you are looking for a VBA programmer to hire feel free to contact me. Also please visit my website www.software-solutions-online.com
With the current article I will show you how to transfer data from Excel to Word. I will use Office 2010 and windows 7.

In the first code snippet, I declare 2 objects and a range. The first Object is the Word Application object (oWord) and the second one is the document itself. As far as the code is ran from an Excel file, no object for the file is needed. The copied used range is simply pasted in the word file. Here is the code:
|
1 2 3 4 5 6 7 8 9 10 11 12 13 14 15 16 17 18 19 20 21 22 23 24 25 26 |
Option Explicit Sub ExcelToWord() Dim oWord As Object Dim oWordDoc As Object Dim rRange As Range On Error GoTo myOpen Set oWord = GetObject(, «Word.application.14») GoTo further myOpen: Set oWord = CreateObject(«Word.application.14») further: oWord.Visible = True Set oWordDoc = oWord.Documents.Add Set rRange = ActiveSheet.UsedRange Range(rRange.Address).Copy oWord.Selection.Paste Application.CutCopyMode = False Set oWord = Nothing Set oWordDoc = Nothing End Sub |
In the second snippet, I will do the same, but I will use the function Selection.TypeText, in which one may type whatever he wants. With this function, I will write the name of the Excel file and the current date.
This is done with the following:
|
With oWord.Selection .TypeText Text:=«File name: « & ActiveWorkbook.Name .TypeParagraph .TypeText Text:=«from « & Format(Now(), «dd-mmm-yyyy») .TypeParagraph End With |
The whole code goes here:
|
1 2 3 4 5 6 7 8 9 10 11 12 13 14 15 16 17 18 19 20 21 22 23 24 25 26 27 28 29 30 31 32 33 34 35 |
Sub FurtherExcelToWord() Dim oWord As Object Dim oWordDoc As Object Dim i As Integer Sheets(«Sheet1»).Activate i = ActiveSheet.UsedRange.Rows.Count Range(«A1:D» & i).Copy On Error GoTo myOpen Set oWord = GetObject(, «Word.application.14») GoTo further myOpen: Set oWord = CreateObject(«Word.application.14») further: oWord.Visible = True Set oWordDoc = oWord.Documents.Add With oWord.Selection .TypeText Text:=«File name: « & ActiveWorkbook.Name .TypeParagraph .TypeText Text:=«from « & Format(Now(), «dd-mmm-yyyy») .TypeParagraph End With oWord.Selection.PasteSpecial link:=True Application.CutCopyMode = False Set oWord = Nothing Set oWordDoc = Nothing End Sub |
🙂
Enjoy it!
i am copying cells from excel into an open word document. the way i am doing this is just copying the contents of a cell into the clipboard and REPLACING a specific KEYWORD in the word document like so:
if cell A1 = "some word" i need too replace the string «QUERYA1» in the word document
i am doing it like this:
Sub NoFormatPaste()

    wdFind.Replacement.Text = ""
    wdFind.Forward = True
    wdFind.Wrap = wdFindContinue
    wdFind.Execute
    If IsEmpty(Selection.Text) And Len(Selection.Text) = 0 Then
    ClipEmpty.PutInClipboard
    appWd.Selection.PasteSpecial DataType:=wdPasteText
    End
    Else
    appWd.Selection.PasteSpecial DataType:=wdPasteText
    End If
    CutCopyMode = False

End Sub
when this sub runs, it works on every field except it gives an error if the cell is empty. i have this formula in the cell: =+IF(K10="XXX","",K10)
when this formula yields NOTHING or a blank, and i run my macro, i get an error on PASTING this into word. i am getting an error called 4168 command failed/command execution on this line:
appWd.Selection.PasteSpecial DataType:=wdPasteText
here is my complete code:
Dim appWd As Word.Application
Dim wdFind As Object
Dim ClipEmpty As New MSForms.DataObject
Dim ClipT As String

Sub FormatPaste()

    wdFind.Replacement.Text = ""
    wdFind.Forward = True
    wdFind.Wrap = wdFindContinue
    wdFind.Execute
    If IsEmpty(Selection.Text) And Len(Selection.Text) = 0 Then
    ClipEmpty.PutInClipboard
    appWd.Selection.Paste
    End
    Else
    appWd.Selection.Paste
    End If
    CutCopyMode = False

End Sub

Sub NoFormatPaste()

    wdFind.Replacement.Text = ""
    wdFind.Forward = True
    wdFind.Wrap = wdFindContinue
    wdFind.Execute
    If IsEmpty(Selection.Text) And Len(Selection.Text) = 0 Then
    ClipEmpty.PutInClipboard
    appWd.Selection.PasteSpecial DataType:=wdPasteText
    End
    Else
    appWd.Selection.PasteSpecial DataType:=wdPasteText
    End If
    CutCopyMode = False

End Sub

Sub CopyDatatoWord()

Dim docWD As Word.Document
Dim sheet1 As Object
Dim sheet2 As Object
Dim SaveCell1 As String
Dim SaveCell2 As String
Dim SaveCell3 As String
Dim Dir1 As String
Dim Dir2 As String


    Set appWd = CreateObject("Word.Application")
    appWd.Visible = True
    'Set docWD = appWD.Documents.Open("S:Practice Quarterly Reports2011 Q1 - V5Practice Profile Template 2011.docx")
    Set docWD = appWd.Documents.Open("C:Documents and SettingsjhillDesktopPractice Profile Template 2011.docx")

    'Select Sheet where copying from in excel
    Set sheet1 = Sheets("TABLES")
    Set sheet2 = Sheets("REPORT INFO")
    Set wdFind = appWd.Selection.Find
    ClipT = "  "
    ClipEmpty.SetText ClipT

    sheet1.Range("B3:B6").Copy
    wdFind.Text = "Qwerty01"
    Call FormatPaste

    sheet1.Range("B10:B15").Copy
    wdFind.Text = "Qwerty02"
    Call FormatPaste

    sheet1.Range("C21:D28").Copy
    wdFind.Text = "Qwerty03"
    Call FormatPaste

    sheet1.Range("B32:F42").Copy
    wdFind.Text = "Qwerty04"
    Call FormatPaste

    sheet1.Range("B46:D52").Copy
    wdFind.Text = "Qwerty05"
    Call FormatPaste

    sheet1.Range("B58:F68").Copy
    wdFind.Text = "Qwerty06"
    Call FormatPaste

    sheet1.Range("B74:G84").Copy
    wdFind.Text = "Qwerty07"
    Call FormatPaste

    sheet1.Range("B87").Copy
    wdFind.Text = "Qwerty08"
    Call NoFormatPaste

    sheet1.Range("B88").Copy
    wdFind.Text = "Qwerty09"
    Call NoFormatPaste

    sheet1.Range("B89").Copy
    wdFind.Text = "Qwerty10"
    Call NoFormatPaste

    sheet1.Range("B90").Copy
    wdFind.Text = "Qwerty11"
    Call NoFormatPaste

    sheet1.Range("B91").Copy
    wdFind.Text = "Qwerty12"
    Call NoFormatPaste

    sheet1.Range("B92").Copy
    wdFind.Text = "Qwerty13"
    Call NoFormatPaste

    sheet1.Range("B93").Copy
    wdFind.Text = "Qwerty14"
    Call NoFormatPaste

    sheet1.Range("B94").Copy
    wdFind.Text = "Qwerty15"
    Call NoFormatPaste

    sheet2.Range("D4").Copy
    wdFind.Text = "Qwerty16"
    Call NoFormatPaste

    sheet2.Range("B5").Copy
    wdFind.Text = "Qwerty17"
    Call NoFormatPaste


    sheet2.Range("D4").Copy
    wdFind.Text = "Qwerty18"
    Call NoFormatPaste

    sheet2.Range("B8").Copy
    wdFind.Text = "Qwerty19"
    Call NoFormatPaste

    sheet2.Range("B9").Copy
    wdFind.Text = "Qwerty20"
    Call NoFormatPaste

    sheet2.Range("B10").Copy
    wdFind.Text = "Qwerty21"
    Call NoFormatPaste

    sheet2.Range("B11").Copy
    wdFind.Text = "Qwerty22"
    Call NoFormatPaste

    sheet2.Range("B12").Copy
    wdFind.Text = "Qwerty23"
    Call NoFormatPaste

    sheet2.Range("B13").Copy
    wdFind.Text = "Qwerty24"
    Call NoFormatPaste

    sheet2.Range("B14").Copy
    wdFind.Text = "Qwerty25"
    Call NoFormatPaste

    sheet2.Range("B15").Copy
    wdFind.Text = "Qwerty26"
    Call NoFormatPaste

    sheet2.Range("B16").Copy
    wdFind.Text = "Qwerty27"
    Call NoFormatPaste

    sheet2.Range("B17").Copy
    wdFind.Text = "Qwerty28"
    Call NoFormatPaste

    sheet2.Range("B5").Copy
    wdFind.Text = "Qwerty29"
    Call NoFormatPaste

    sheet2.Range("B5").Copy
    wdFind.Text = "Qwerty30"
    Call NoFormatPaste

    sheet2.Range("B5").Copy
    wdFind.Text = "Qwerty31"
    Call NoFormatPaste

    SaveCell1 = sheet2.Range("D3").Text
    SaveCell2 = sheet2.Range("B6").Text
    SaveCell3 = SaveCell2 & "" & SaveCell1

    Dir1 = "\annapurnaSharedPractice Quarterly Reports2011 Q1 - V5 & SaveCell2"
    Dir2 = "\annapurnaSharedPractice Quarterly Reports2011 Q1 - V5 & SaveCell3"


    If Len(Dir1) = False Then
    MkDir Dir1
    End If


    'docWD.SaveAs (Dir2 & ".docx")
    docWD.SaveAs ("\annapurnaSharedPractice Quarterly ReportsQ1_2011Test.docx")

    'appWD.Quit

Set appWd = Nothing
Set docWD = Nothing
Set appXL = Nothing
Set wbXL = Nothing

End Sub
what am i doing wrong? what is the reason i get an error only on the paste of a blank